

Stevinne
-
Posts
305 -
Joined
-
Last visited
Reputation Activity
-

 Stevinne got a reaction from lmagna in WRITER’S BOAT MODELS
There's the boat by Canadian author Farley Mowat who wrote about her in "The Boat Who Wouldn't Float." It's been a long time since I read it, but I remember it was enjoyable.
-
 Stevinne got a reaction from mtaylor in WRITER’S BOAT MODELS
Going to have to read that. I've read a lot of his books, I didn't know he's a sailor and I don't think I've ever read anything about sunfish, though I've had one in some driveway or the other since I was a kid.
-
 Stevinne got a reaction from Roger Pellett in WRITER’S BOAT MODELS
Going to have to read that. I've read a lot of his books, I didn't know he's a sailor and I don't think I've ever read anything about sunfish, though I've had one in some driveway or the other since I was a kid.
-
 Stevinne reacted to Roger Pellett in WRITER’S BOAT MODELS
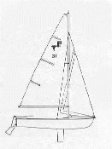
How about a model of a Sunfish sailboat?
Last night I finished reading SECOND WIND by historian Nathanael Philbrick, a quick read about his quest after a lapse of 17 years to compete in the North American Sunfish Class Sailboat Regatta.
Mr Philbrick a noted American historical writer was a champion Sunfish sailor as a teenager in the 1970’s who went on to become a College All American Sailor.
I bought the book because my father and I built a Sunfish from a kit back in the 50’s before they went over to the dark side (fiberglass). They were and still are great little boats- pure sailing fun.
Roger
-
Stevinne got a reaction from mtaylor in WRITER’S BOAT MODELS
There's the boat by Canadian author Farley Mowat who wrote about her in "The Boat Who Wouldn't Float." It's been a long time since I read it, but I remember it was enjoyable.
-
 Stevinne got a reaction from Scottish Guy in For Beginners -- A Cautionary Tale
I wonder how many uncompleted build logs are actually completed ships. I build very slowly, so never started a build log because I will start, work like crazy for a couple of weeks, put the model aside when another hobby project catches my fancy, and maybe not return to the build for a year.If I had a build log, I might be embarrassed to come back and suddenly start posting again. I also start my build with a clean work bench, but about halfway through I have toy soldiers, model airplanes and whatever stuff my wife gets tired of looking at in other rooms stacked sort of haphazardly on my work bench. I'm not taking and posting any pictures of that mess.
Just because someone has lost interest in a build log doesn't mean they've lost interest in the build.
-
Stevinne reacted to Vegaskip in Ship paintings
Two Fairmile 'D' class MTBs returning from a cross channel sortie w/c 13.5” X 11.75”
-
Stevinne reacted to Rick01 in Le Renard by Gaffrig - FINISHED - Artesania Latina - Scale 1:50
Love the dinghy, particularly the rope bumper. I chose to provide two seats rather than the single that you've provided.
I've finished mine after a reasonable tussle with the rigging, eventually examining photos of the replica, models of le Cerf and various American cutters of that period as the French rigging seemed to compare with the American style rather than British navy. Anyway here are a few (bad) shots of the finished product.
Rick
-
Stevinne reacted to ChrisSC in RMS Lusitania by ChrisSC - FINISHED - Gunze Sangyo - 1/350 - PLASTIC
Some progress on my Lusitania. That big deck is giving me lots of trouble to install as the hull is a bit warped. Just making things worse trying to fix it after it's glued. Best to just leave it be.
-
Stevinne reacted to Danstream in Mayflower by Danstream - Artesania Latina - 1:64
Soon after opening the box, I realized that A.L. took several obvious artistic licenses in the design of the model. I could not really understand the reason for that and I found that a bit disappointing. If I can, I will try to correct at least some of these inaccuracies to bring the look of the ship more in line with the existing pictures of her replica available on the web.
After assembling the basic structure, I started fairing the frames. In doing that, I found that I needed to shim the top of frame #6 in order to get the main deck to lie on top of the frames making a regular and not too sharp curvature.
I also added a shim on the contour of frame #5 to avoid a local depression of the planks. I also added the bottom to the openings of the decks which I painted black and glued the main deck.
At this point, I tackled the window openings on the transom that are obviously inaccurate. This how they look out of the box:
And this is how they look after my correction:
Finally, I put on the first two planks of the hull. It took me quite some time to shape the planks reasonably and at the end, this was the result:
It is not perfect, but as a first attempt I cannot complain too hard. The plank bends quite regularly around the bow and the sides of the ship.
This is all for now, any comment is welcome.
Thanks for looking and best regards,
D.
-
Stevinne reacted to allanyed in Boothbay 65 by allanyed - FINISHED - Schooner
Bristol Marine has designed a new schooner, a Boothbay Harbor 65 that is yet to be built. They asked that I build a model which will be based on their detailed set of plans and their input on details as the build progresses. The vessel is unusual in that it is specifically designed with handicap access and is planned to be used for day sailing trips. They gave me permission to do a build log of the model and I will be starting the build shortly and hopefully will have updates on a regular basis. For now, I am posting below, with their permission, a drawing of the 65. Bristol Marine is the company which is restoring the Effie M. Morrisey (aka Ernestina). This opportunity to build the model came up as the result of an introduction to Bristol Marine by a very kind member here at MSW.
Allan
-
Stevinne got a reaction from lmagna in AIRBRUSH OPINIONS PLEASE...
I use acrylics, too, and what rcweir said about cleaning is very true. When I have problems with my airbrush, it's usually because I got lazy and didn't clean enough. Whenever I'm done, I'll run straight water through the airbrush to clear out the paint and then disconnect the supply, turn it upside down, and blow out whatever water remains. That's usually good enough when working with multiple colors, but when I start a new project, I usually take mine apart, clean it pretty thoroughly and start anew.
-
Stevinne got a reaction from lmagna in AIRBRUSH OPINIONS PLEASE...
I've had a Badger for about 20 years now, I believe it's a Model 155. The thing is well made, is easy to clean and usually allows me to do whatever it is I want to do with it. It's also easy to take apart and reassemble when I want to give it a really good cleaning. I think it's one of Badger's relatively inexpensive models. Got mine, along with a compressor, from Model Expo. Both have held up very well. I would recommend getting a compressor. Prior to getting the Badger I'd tried using an inexpensive plastic airbrush with cans of air and didn't have much luck and really couldn't figure out how to clean it.
-
Stevinne reacted to Vegaskip in Ship paintings
Hot off the Brush. Thames Estuary on a blustery day. w/c 14” X 10”
-
 Stevinne got a reaction from Ryland Craze in AIRBRUSH OPINIONS PLEASE...
I use acrylics, too, and what rcweir said about cleaning is very true. When I have problems with my airbrush, it's usually because I got lazy and didn't clean enough. Whenever I'm done, I'll run straight water through the airbrush to clear out the paint and then disconnect the supply, turn it upside down, and blow out whatever water remains. That's usually good enough when working with multiple colors, but when I start a new project, I usually take mine apart, clean it pretty thoroughly and start anew.
-
 Stevinne got a reaction from Canute in AIRBRUSH OPINIONS PLEASE...
I use acrylics, too, and what rcweir said about cleaning is very true. When I have problems with my airbrush, it's usually because I got lazy and didn't clean enough. Whenever I'm done, I'll run straight water through the airbrush to clear out the paint and then disconnect the supply, turn it upside down, and blow out whatever water remains. That's usually good enough when working with multiple colors, but when I start a new project, I usually take mine apart, clean it pretty thoroughly and start anew.
-
 Stevinne got a reaction from MadDogMcQ in AIRBRUSH OPINIONS PLEASE...
I use acrylics, too, and what rcweir said about cleaning is very true. When I have problems with my airbrush, it's usually because I got lazy and didn't clean enough. Whenever I'm done, I'll run straight water through the airbrush to clear out the paint and then disconnect the supply, turn it upside down, and blow out whatever water remains. That's usually good enough when working with multiple colors, but when I start a new project, I usually take mine apart, clean it pretty thoroughly and start anew.
-
Stevinne reacted to rcweir in AIRBRUSH OPINIONS PLEASE...
I have a Badger 150 that has served me well (when I've needed it) for many years. When I got it I was living in an apartment and the noise of a compressor was unacceptable, so I started with CO2 and have stuck with it. CO2 is silent and there are no concerns about moisture in the supply, though I don't think this is the cheapest route for a heavy user. However, since there are often years in between my uses, that hasn't ever mattered much. I hate the racket from compressors!
I use acrylics (Tamiya) exclusively and completely disassemble and clean the brush after every single use. Trying to shortcut cleaning has never worked for me.
-
Stevinne got a reaction from Canute in AIRBRUSH OPINIONS PLEASE...
I've had a Badger for about 20 years now, I believe it's a Model 155. The thing is well made, is easy to clean and usually allows me to do whatever it is I want to do with it. It's also easy to take apart and reassemble when I want to give it a really good cleaning. I think it's one of Badger's relatively inexpensive models. Got mine, along with a compressor, from Model Expo. Both have held up very well. I would recommend getting a compressor. Prior to getting the Badger I'd tried using an inexpensive plastic airbrush with cans of air and didn't have much luck and really couldn't figure out how to clean it.
-
Stevinne got a reaction from MadDogMcQ in AIRBRUSH OPINIONS PLEASE...
I've had a Badger for about 20 years now, I believe it's a Model 155. The thing is well made, is easy to clean and usually allows me to do whatever it is I want to do with it. It's also easy to take apart and reassemble when I want to give it a really good cleaning. I think it's one of Badger's relatively inexpensive models. Got mine, along with a compressor, from Model Expo. Both have held up very well. I would recommend getting a compressor. Prior to getting the Badger I'd tried using an inexpensive plastic airbrush with cans of air and didn't have much luck and really couldn't figure out how to clean it.
-
Stevinne reacted to Glenn-UK in IJN Yamato by Glenn-UK - FINISHED - DeAgostini & Model Space - 1/250 Scale
I have now completed adding the strakes to the starboard side of Yamato's hull framework. It looks rough and uneven at the moment which is to be expected. I should be able to complete adding the remaining strakes to the port side in the next couple of days (or so).
Once I have added all the strakes the hull can then be marked out and sanded (and filled) smooth, using the various templates provided to ensure the correct profile along the length is achieved.
I think the sanding and filling process will take some time to get right.
I have noted the problem strake toward the keel on the following picture, which I have now sorted out due to a bad glue joint.
-
Stevinne got a reaction from Canute in Iron ShipWrights
I just recently ordered one of their small torpedo boats and their PC-461 subchaser. I haven't built either yet, but they came quickly and the quality of the moldings seems good with lots of detail molded on, though there is a little flash. I've never done resin before, and these looked like good places to start. At about $25 for each kit, though they are small, they seem like a good deal, since they do come with the photoetch you need. Let me know if you'd like pictures of the unbuilt kits.
-
Stevinne got a reaction from mtaylor in Iron ShipWrights
I just recently ordered one of their small torpedo boats and their PC-461 subchaser. I haven't built either yet, but they came quickly and the quality of the moldings seems good with lots of detail molded on, though there is a little flash. I've never done resin before, and these looked like good places to start. At about $25 for each kit, though they are small, they seem like a good deal, since they do come with the photoetch you need. Let me know if you'd like pictures of the unbuilt kits.
-
Stevinne reacted to SardonicMeow in Virginia 1819 by SardonicMeow - FINISHED - Artesania Latina - Scale 1:41 - first plank on bulkhead build
Rigging was adjusted and tape was used to apply tension to the lines. With the lines secured in this way, a drop of CA glue was used to hold each line in place, and the excess material was cut off.
Rope bundles were added at various points where lines were secured.
Put a flag on her and she's done.
Some shots of the completed model.
-
 Stevinne got a reaction from BobG in Roter Lowe by Stevinne - Mamoli - 1:55 - Dutch-built Galleon
Going a little covid-stir-crazy, so broke out the Dremel tool today and filed the bulwarks to the curved outline from the plans. Fairly easy to do, though the Dremel quickly takes wood away and I have one divit that I will need to fill when I sandwich it between two layers of second planking.