Paul Le Wol
-
Posts
1,047 -
Joined
-
Last visited
Content Type
Profiles
Forums
Gallery
Events
Everything posted by Paul Le Wol
-
John, beautiful looking planking!
-
Refurbishing an old model ship built from scratch.
Paul Le Wol replied to lawrence101's topic in New member Introductions
The rebuild is looking great Lawrence! -
Nils, happy to see you working on Elbe 1 again. Beautiful work on the railings!
- 307 replies
-
- 2
-

-
- lightship
- Feuerschiff Elbe 1
- (and 1 more)
-
Thank you Lawrence, I’m glad that you are along for the ride!
-
Hi Lawrence, welcome to MSW. I am glad that you were able to take care of this beautiful model until you were ready to give it a new lease on life. Good luck with your restoration!
-
Keith, Billy looks Superb! If you decide to do a new build, I hope you choose to stay on this path. These builds have been very enjoyable
-
Fantastic job on the planking Jacques!.
-
Glenn, I too congratulate you on this commission. The restaurant is indeed fortunate to be able to display one of your masterpieces. Good Luck!
-
Harshil, good to see your Confederacy again. Beautiful!
-
Hi Jacques , the lobster smack is looking great! When I was building a Pinky, I looked at this video a lot. At about 3 minutes in you can see the pumps with the handles in a stored position. Maybe you could present whatever type of pump you decide on in the same manner. Pump handles always look like they’re in the way. https://youtu.be/E0XzgWVNZbU?si=WoRkcoJs2emlj9KV
-
Bob, your Harriet Lane is looking mighty fine! Take care
- 73 replies
-
- 4
-
-

-
- Steam Cutter
- Harriet Lane
- (and 2 more)
-
Cutters, Choppers, Guillotines, Slicers
Paul Le Wol replied to MintGum's topic in Modeling tools and Workshop Equipment
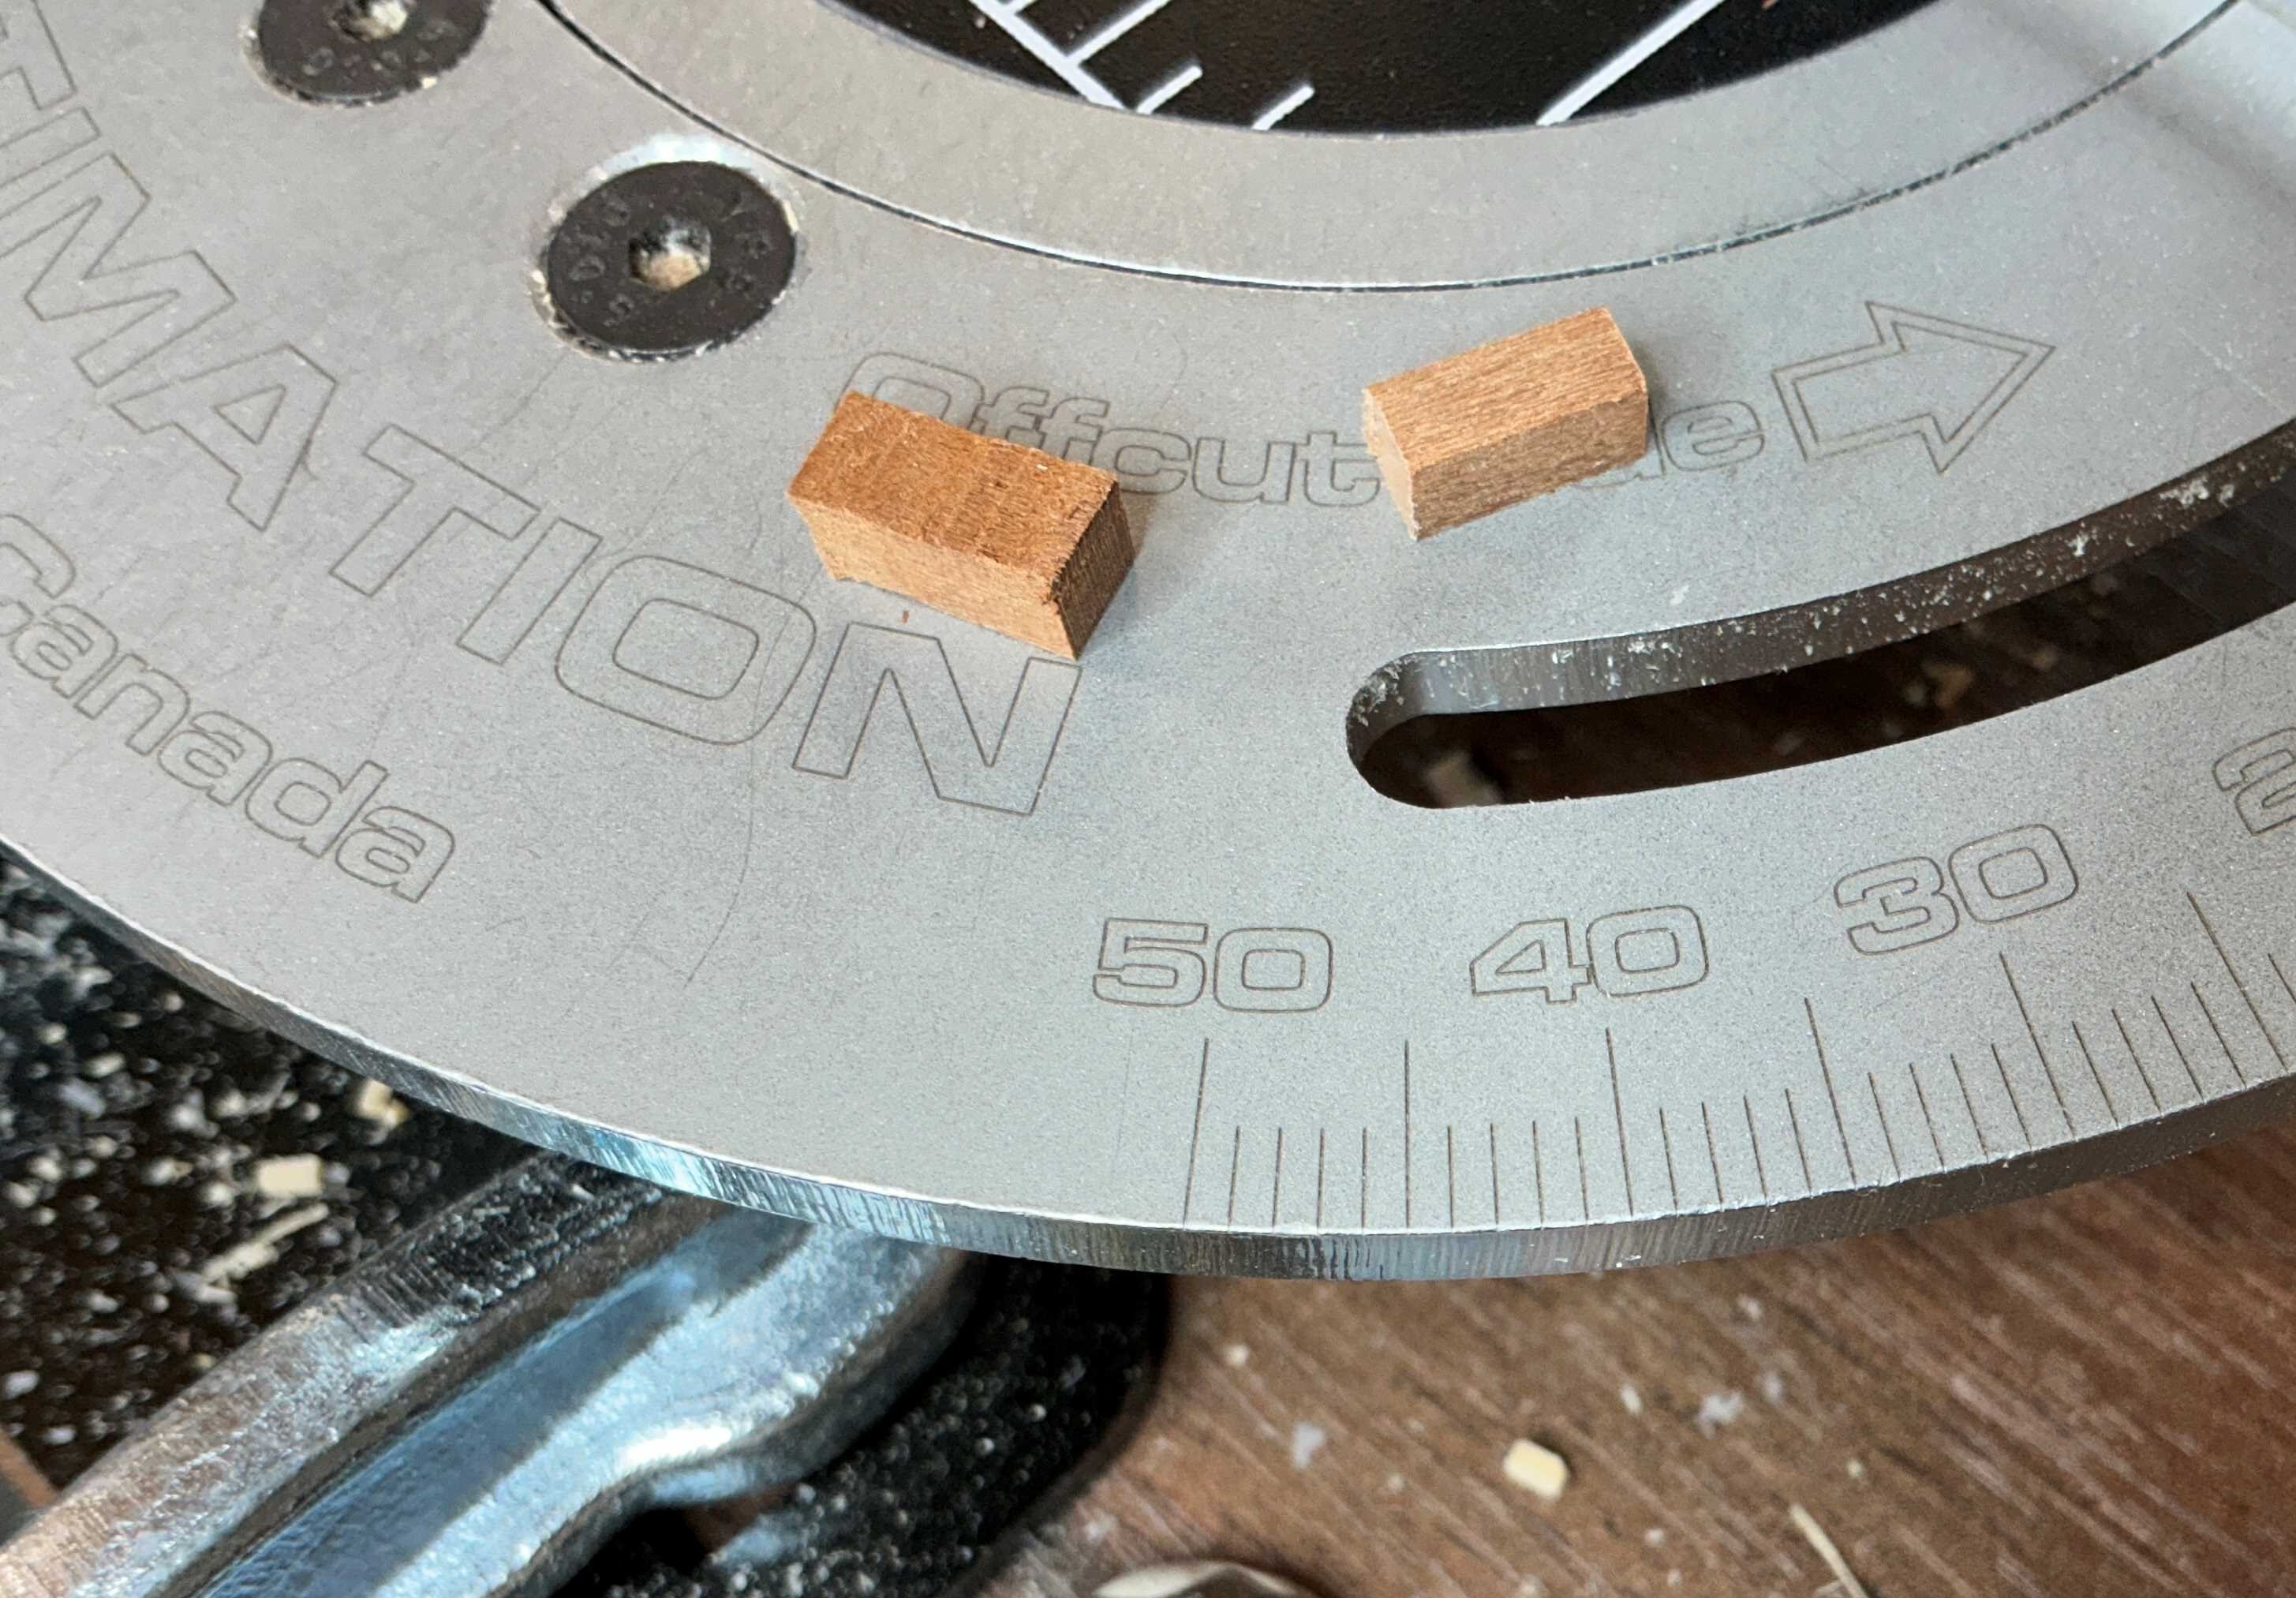
The piece on the left is 5/32"x 5/32" pear and the piece on the right is 1/8"x 1/8" cherry. It cut okay but I wouldn't want to try anything larger. I agree with @RossR's evaluation.
-
Very nice revision Keith!
-
Beautiful work and great photos!
-
Craig, that is some fine looking galley and dinette. Wow!
-
Hi Keith, thank you very much!
-
Hi John, thank you so much!
-
Amazing Keith. The last photo really brings home how close the quarters are that you are working with.
-
Hi Jacques, thank you very much. Good to hear from you
-
Hi Keith, thank you so much. You are very kind!
-
Hi Harvey, thank you very much!
-
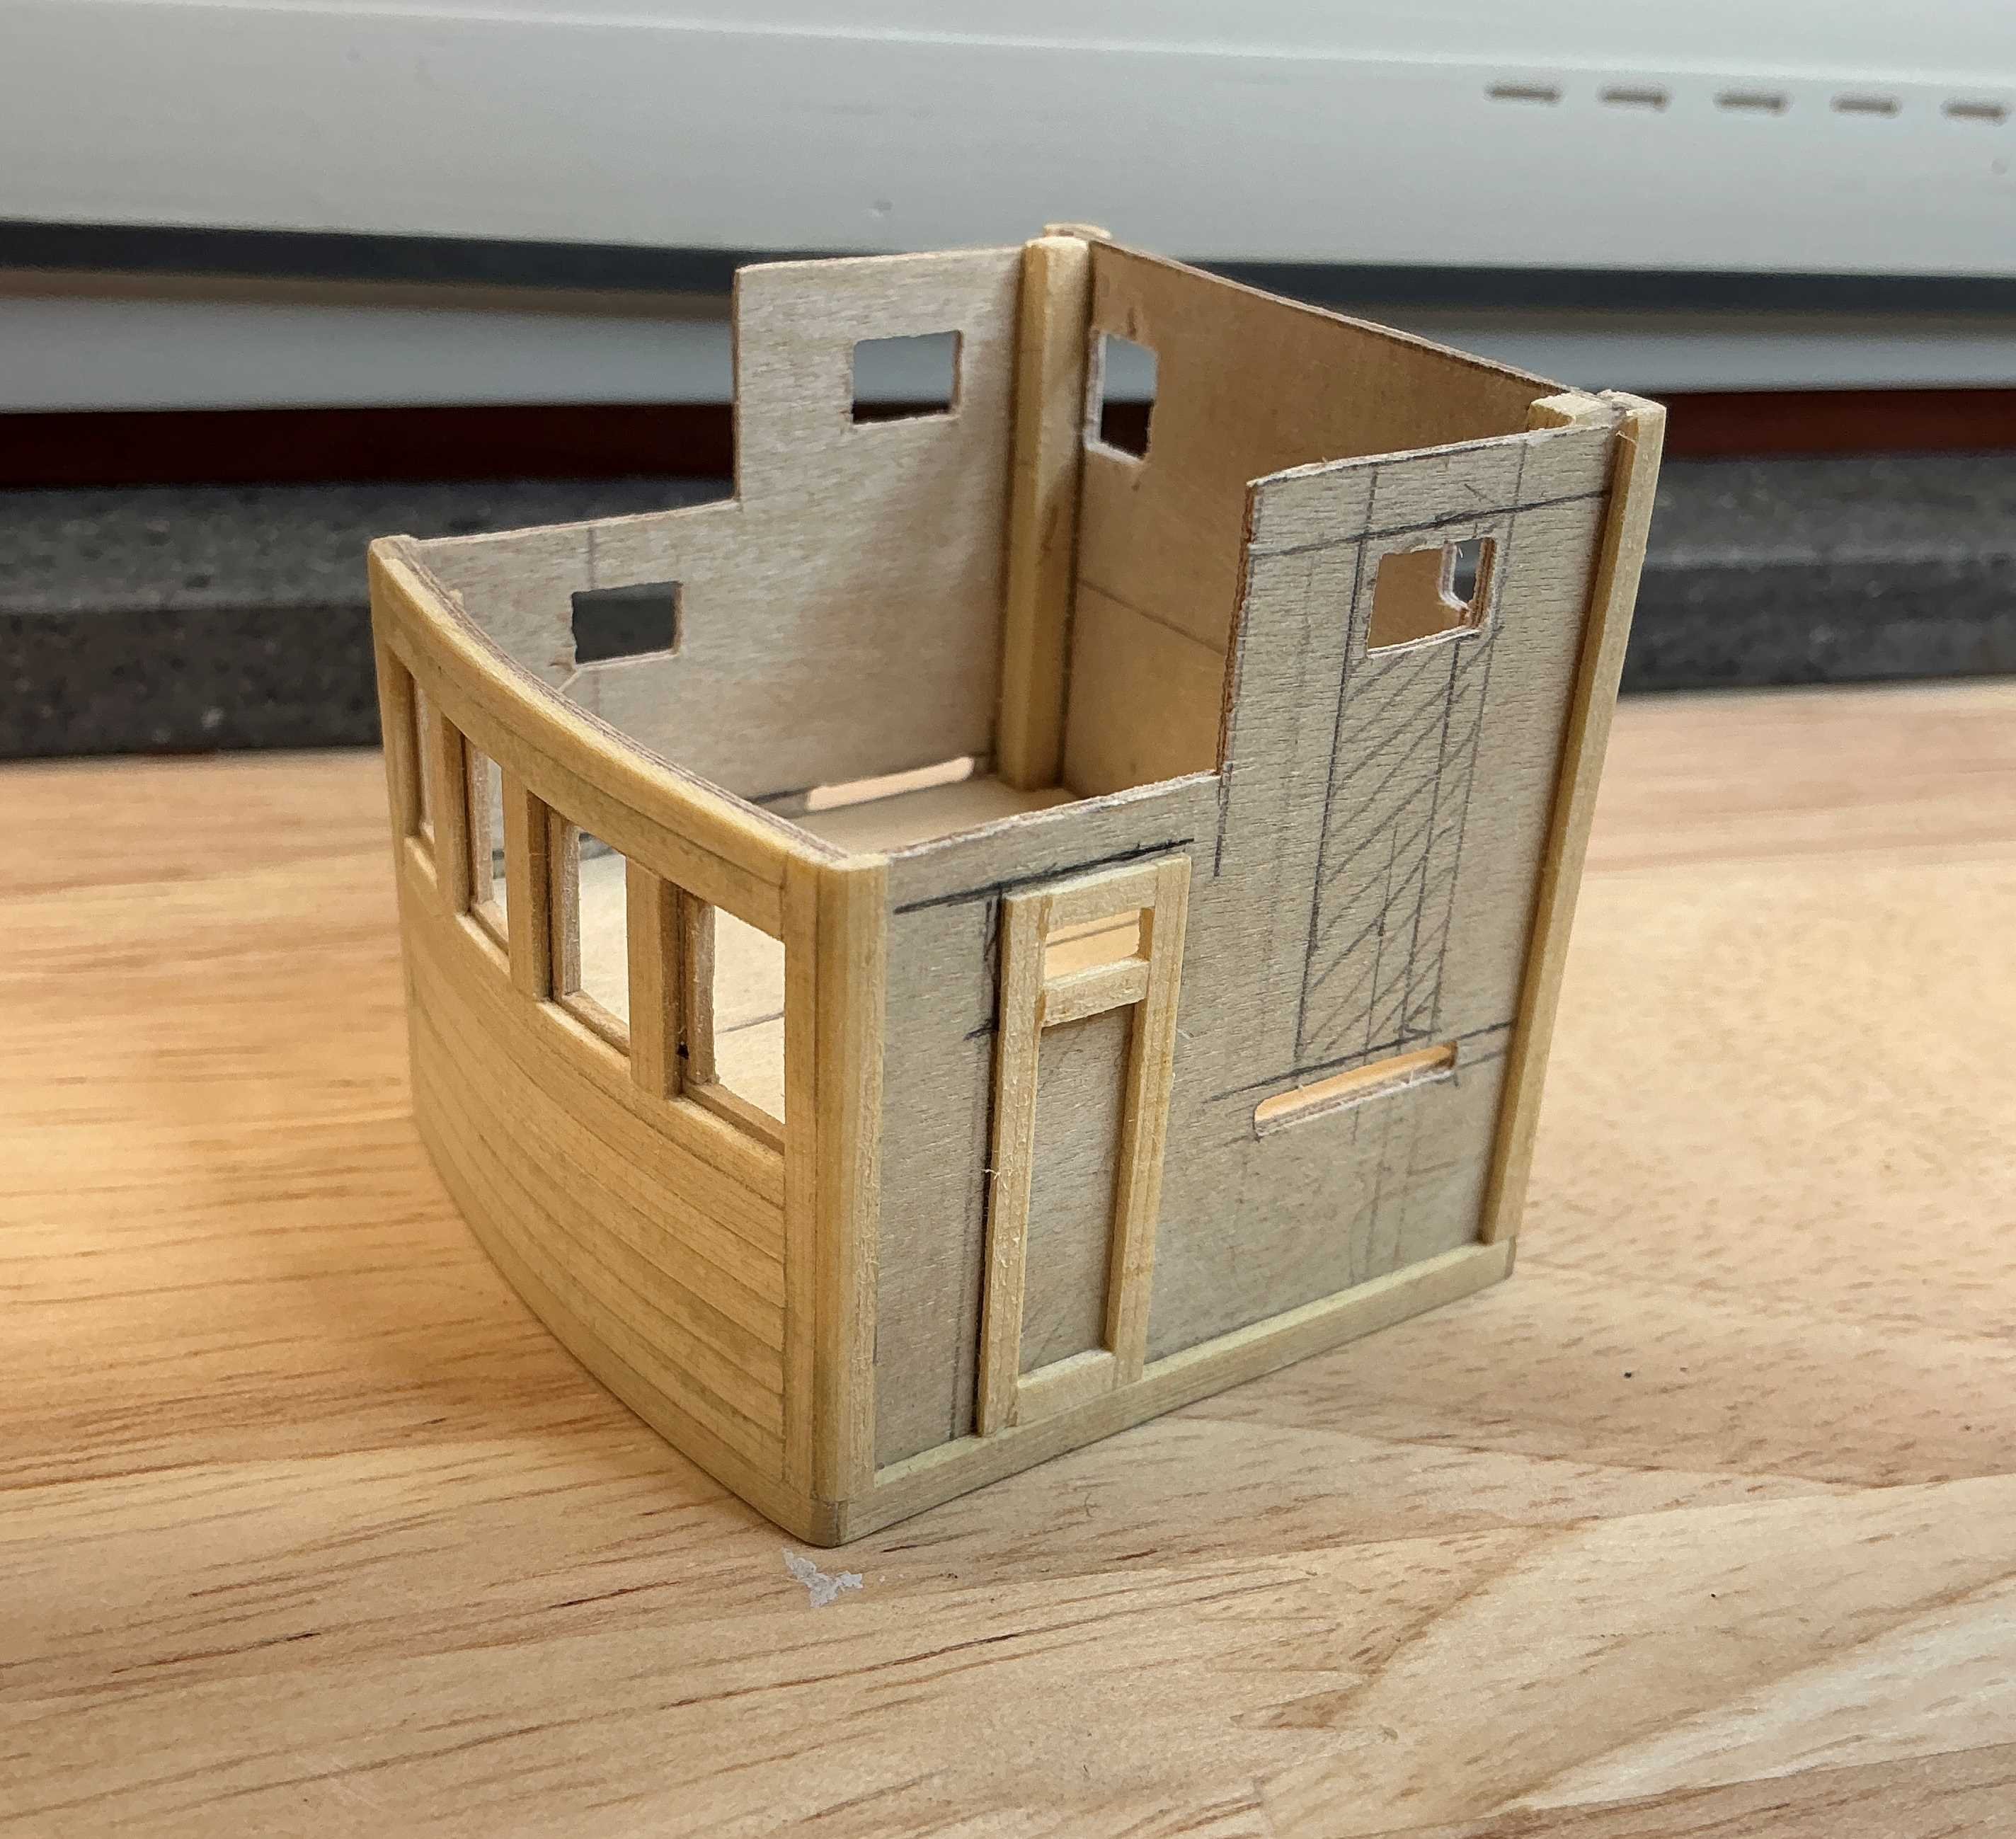
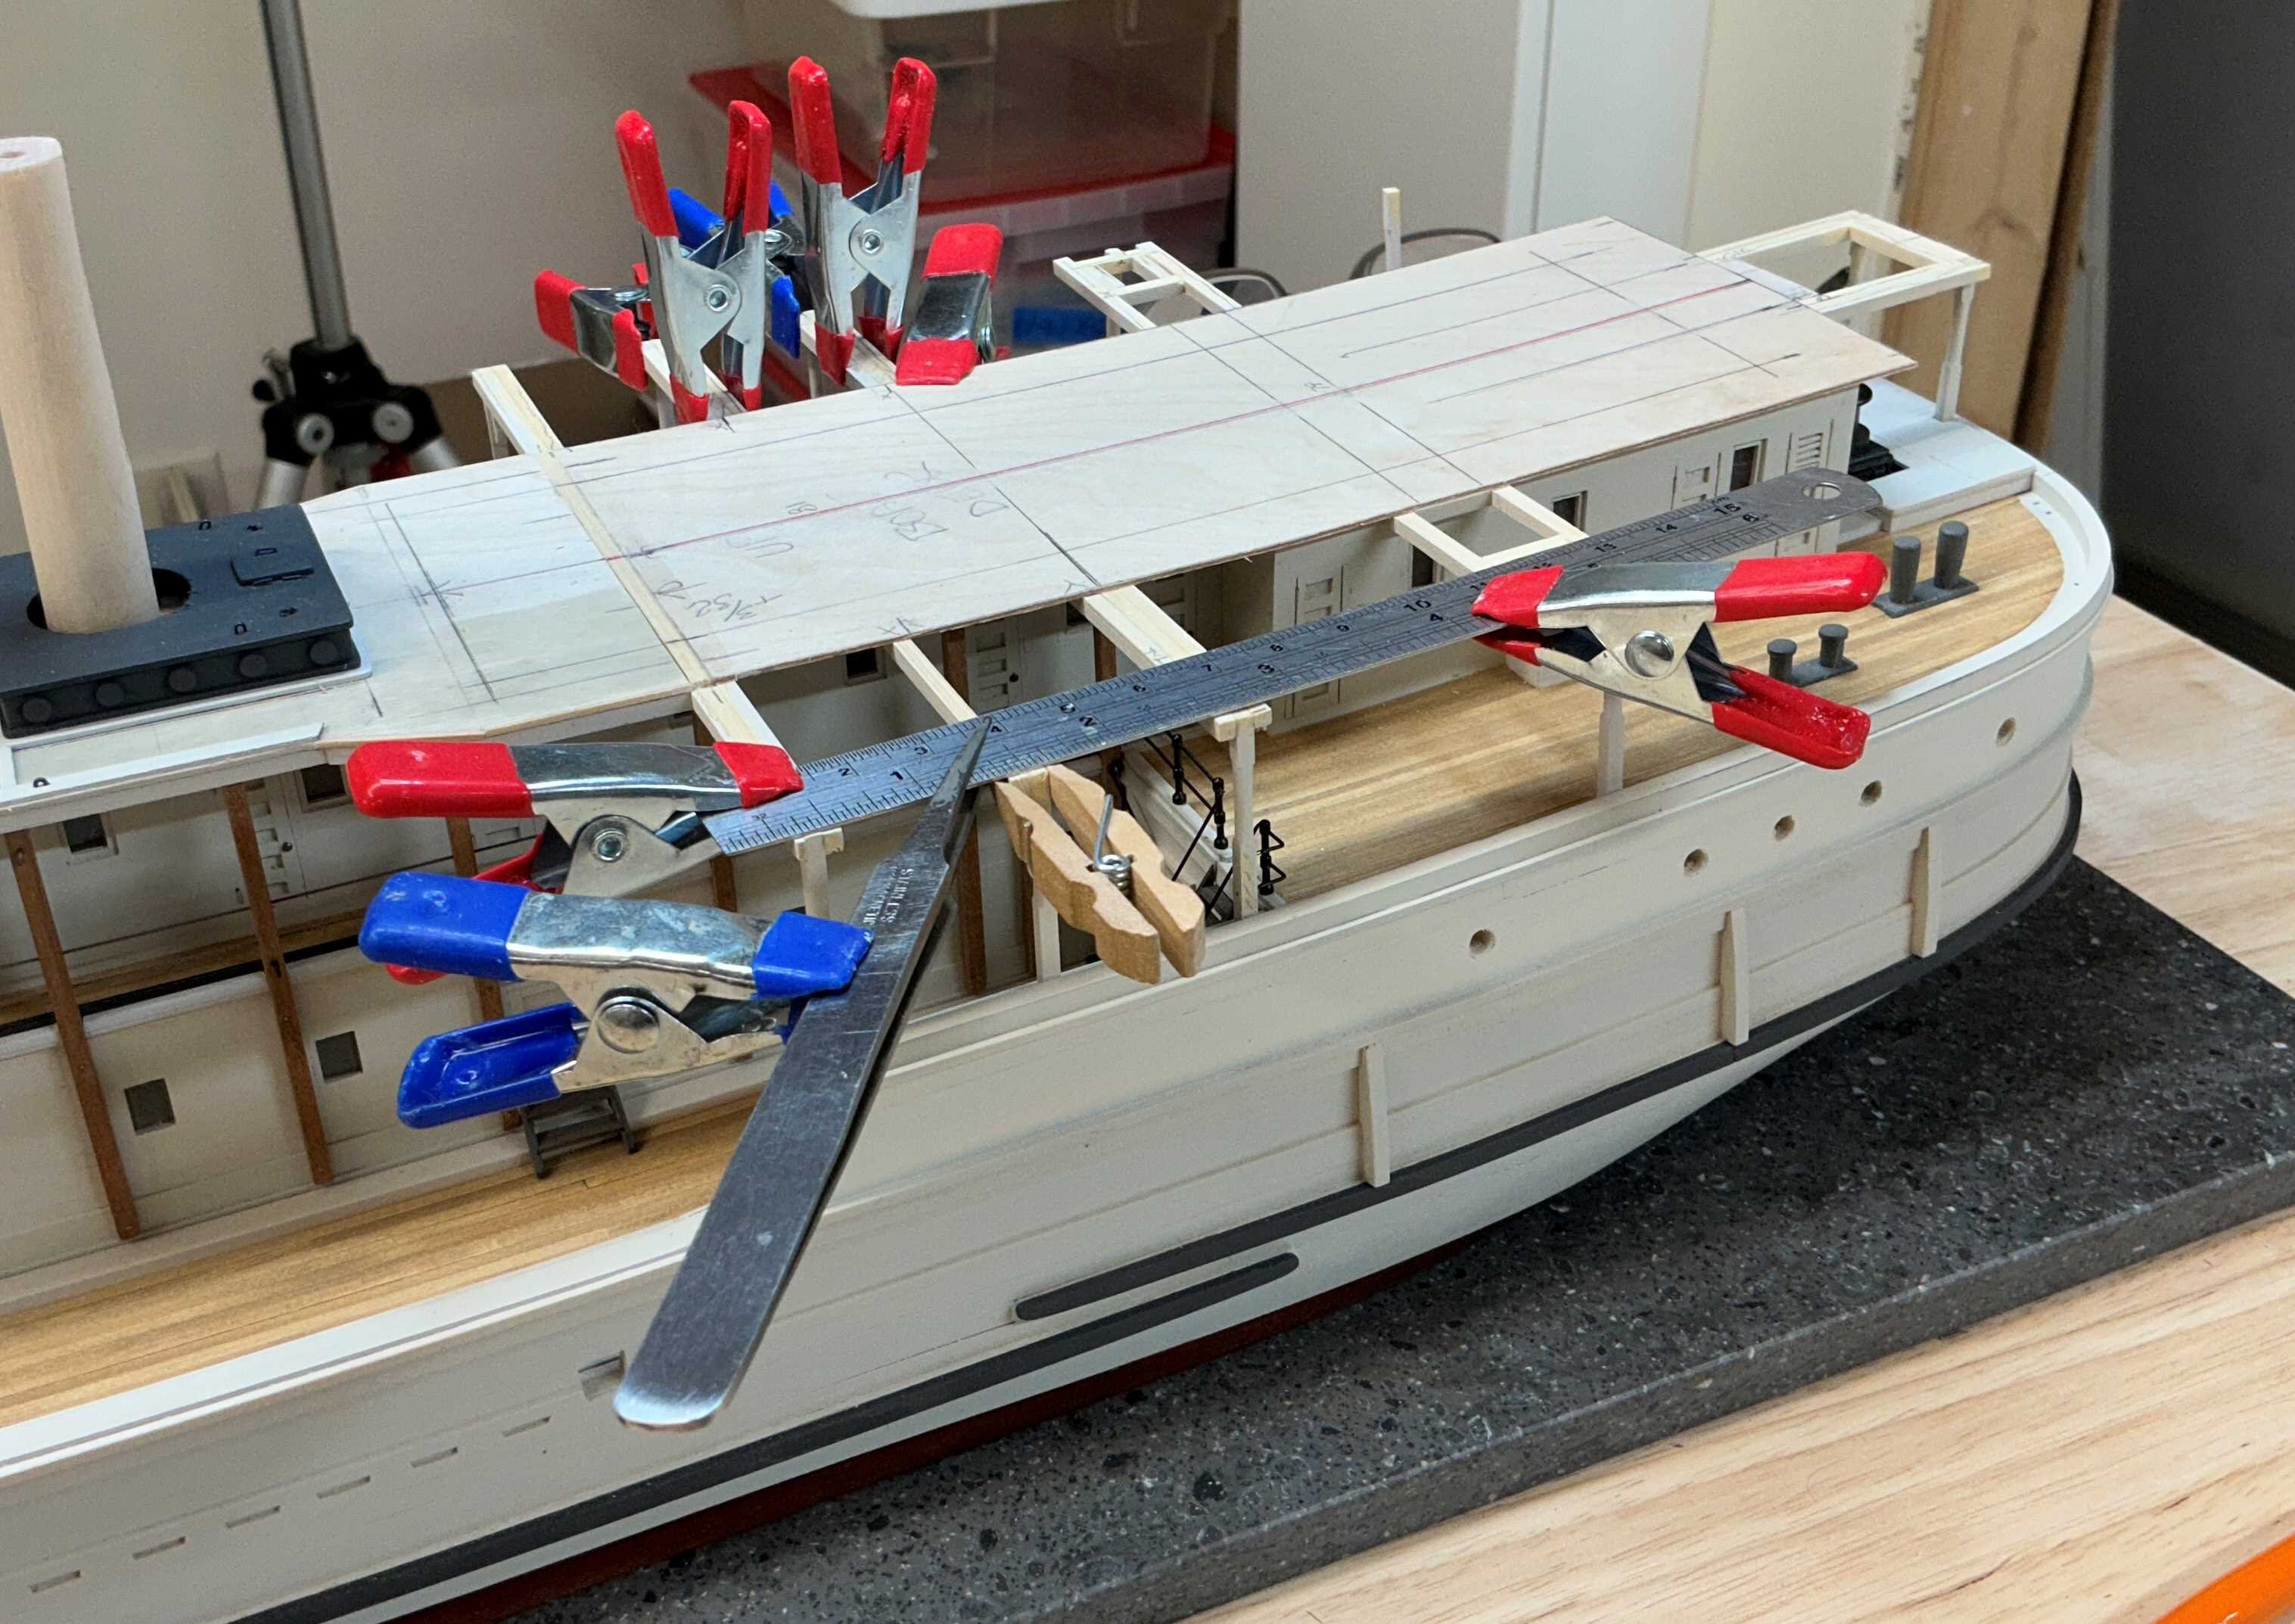
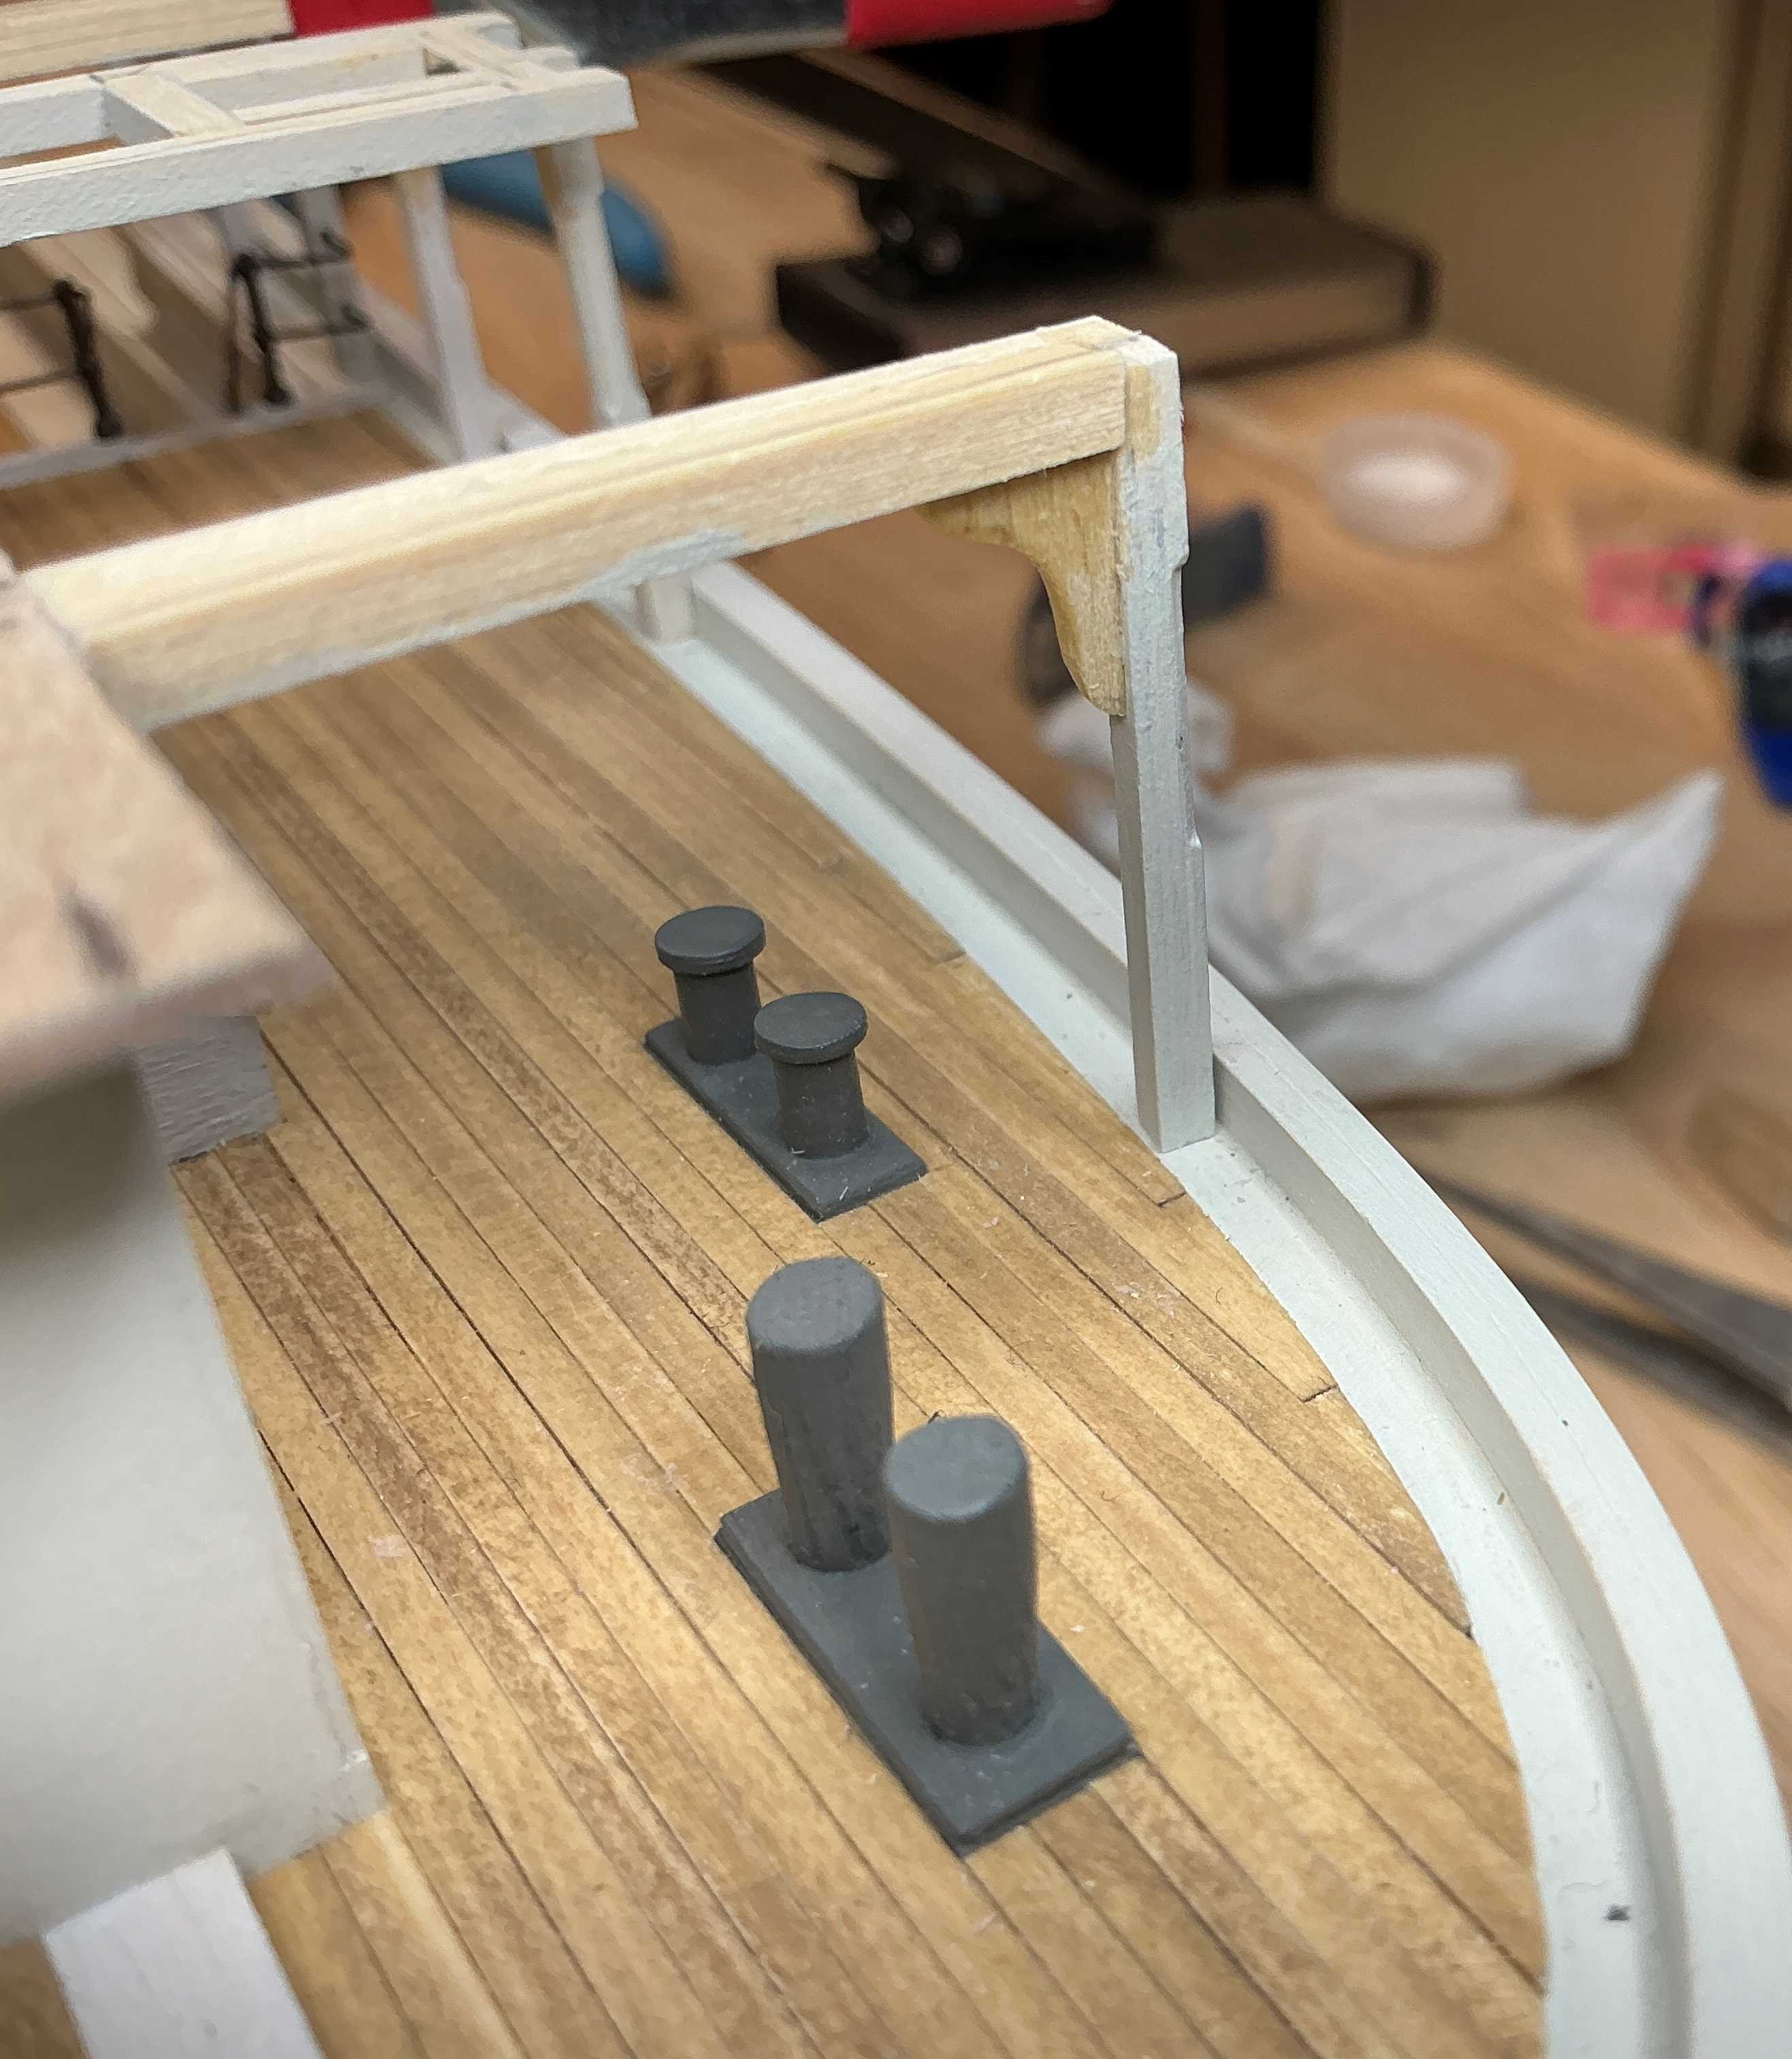
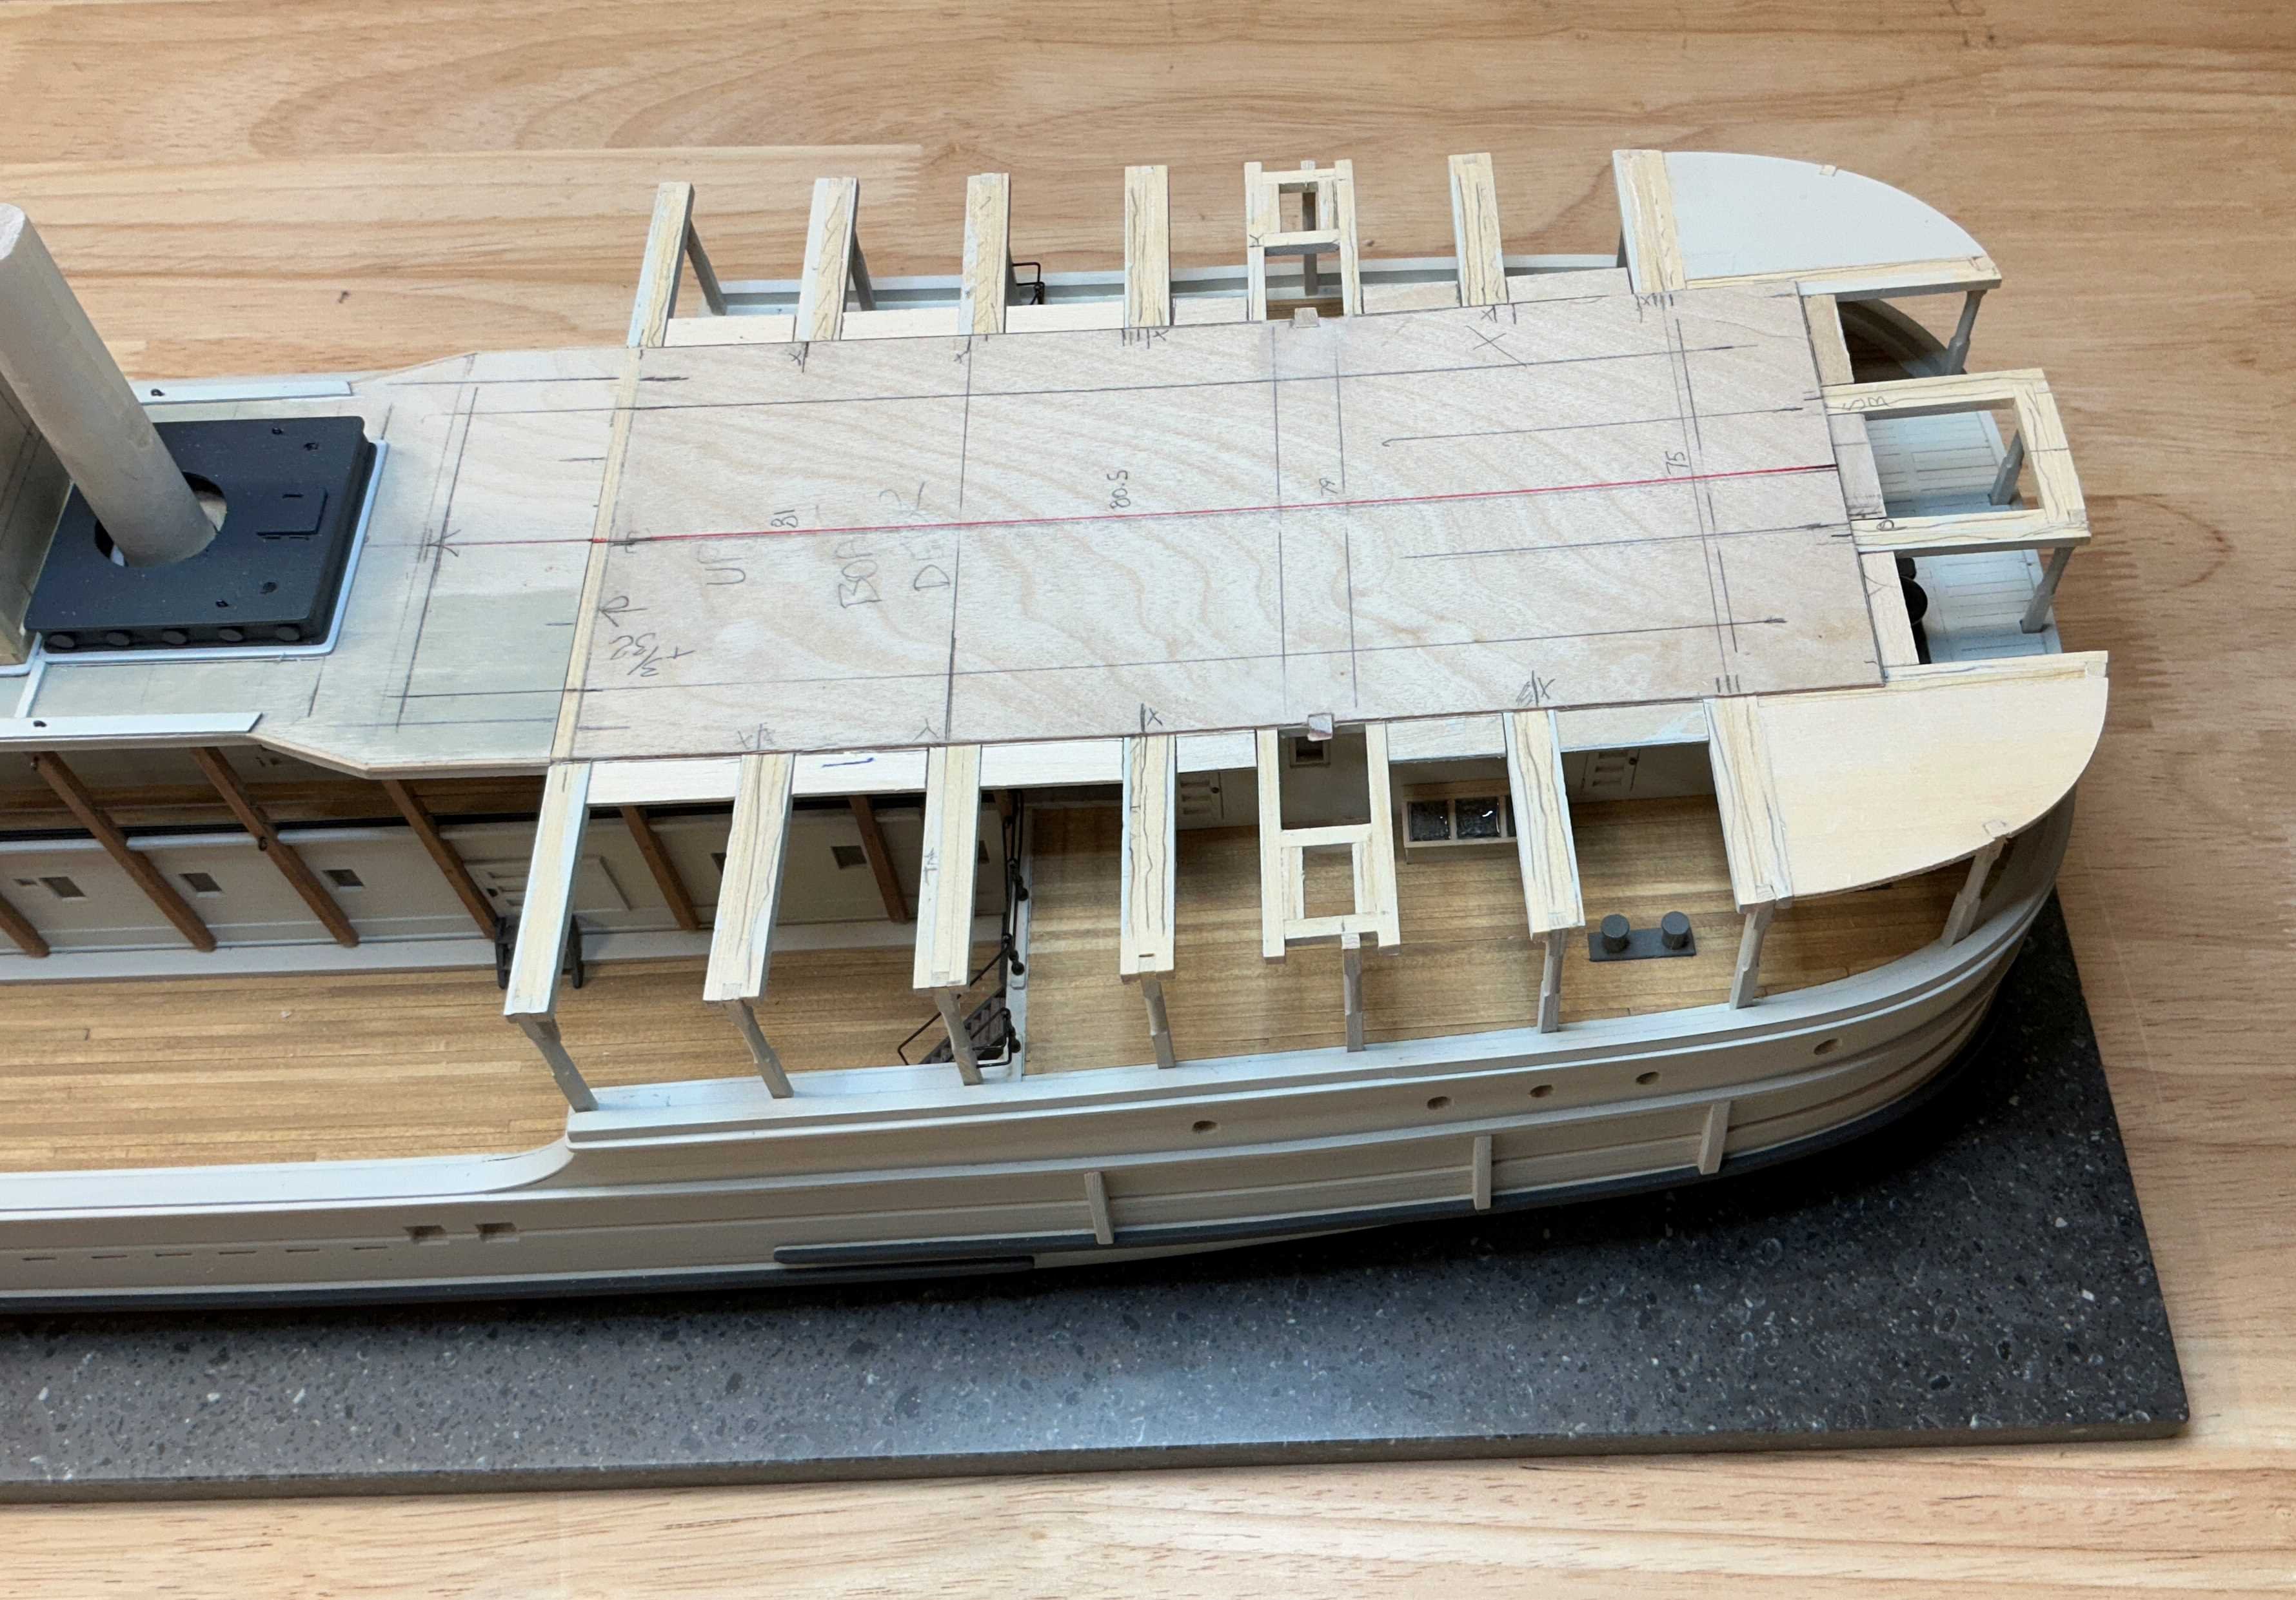
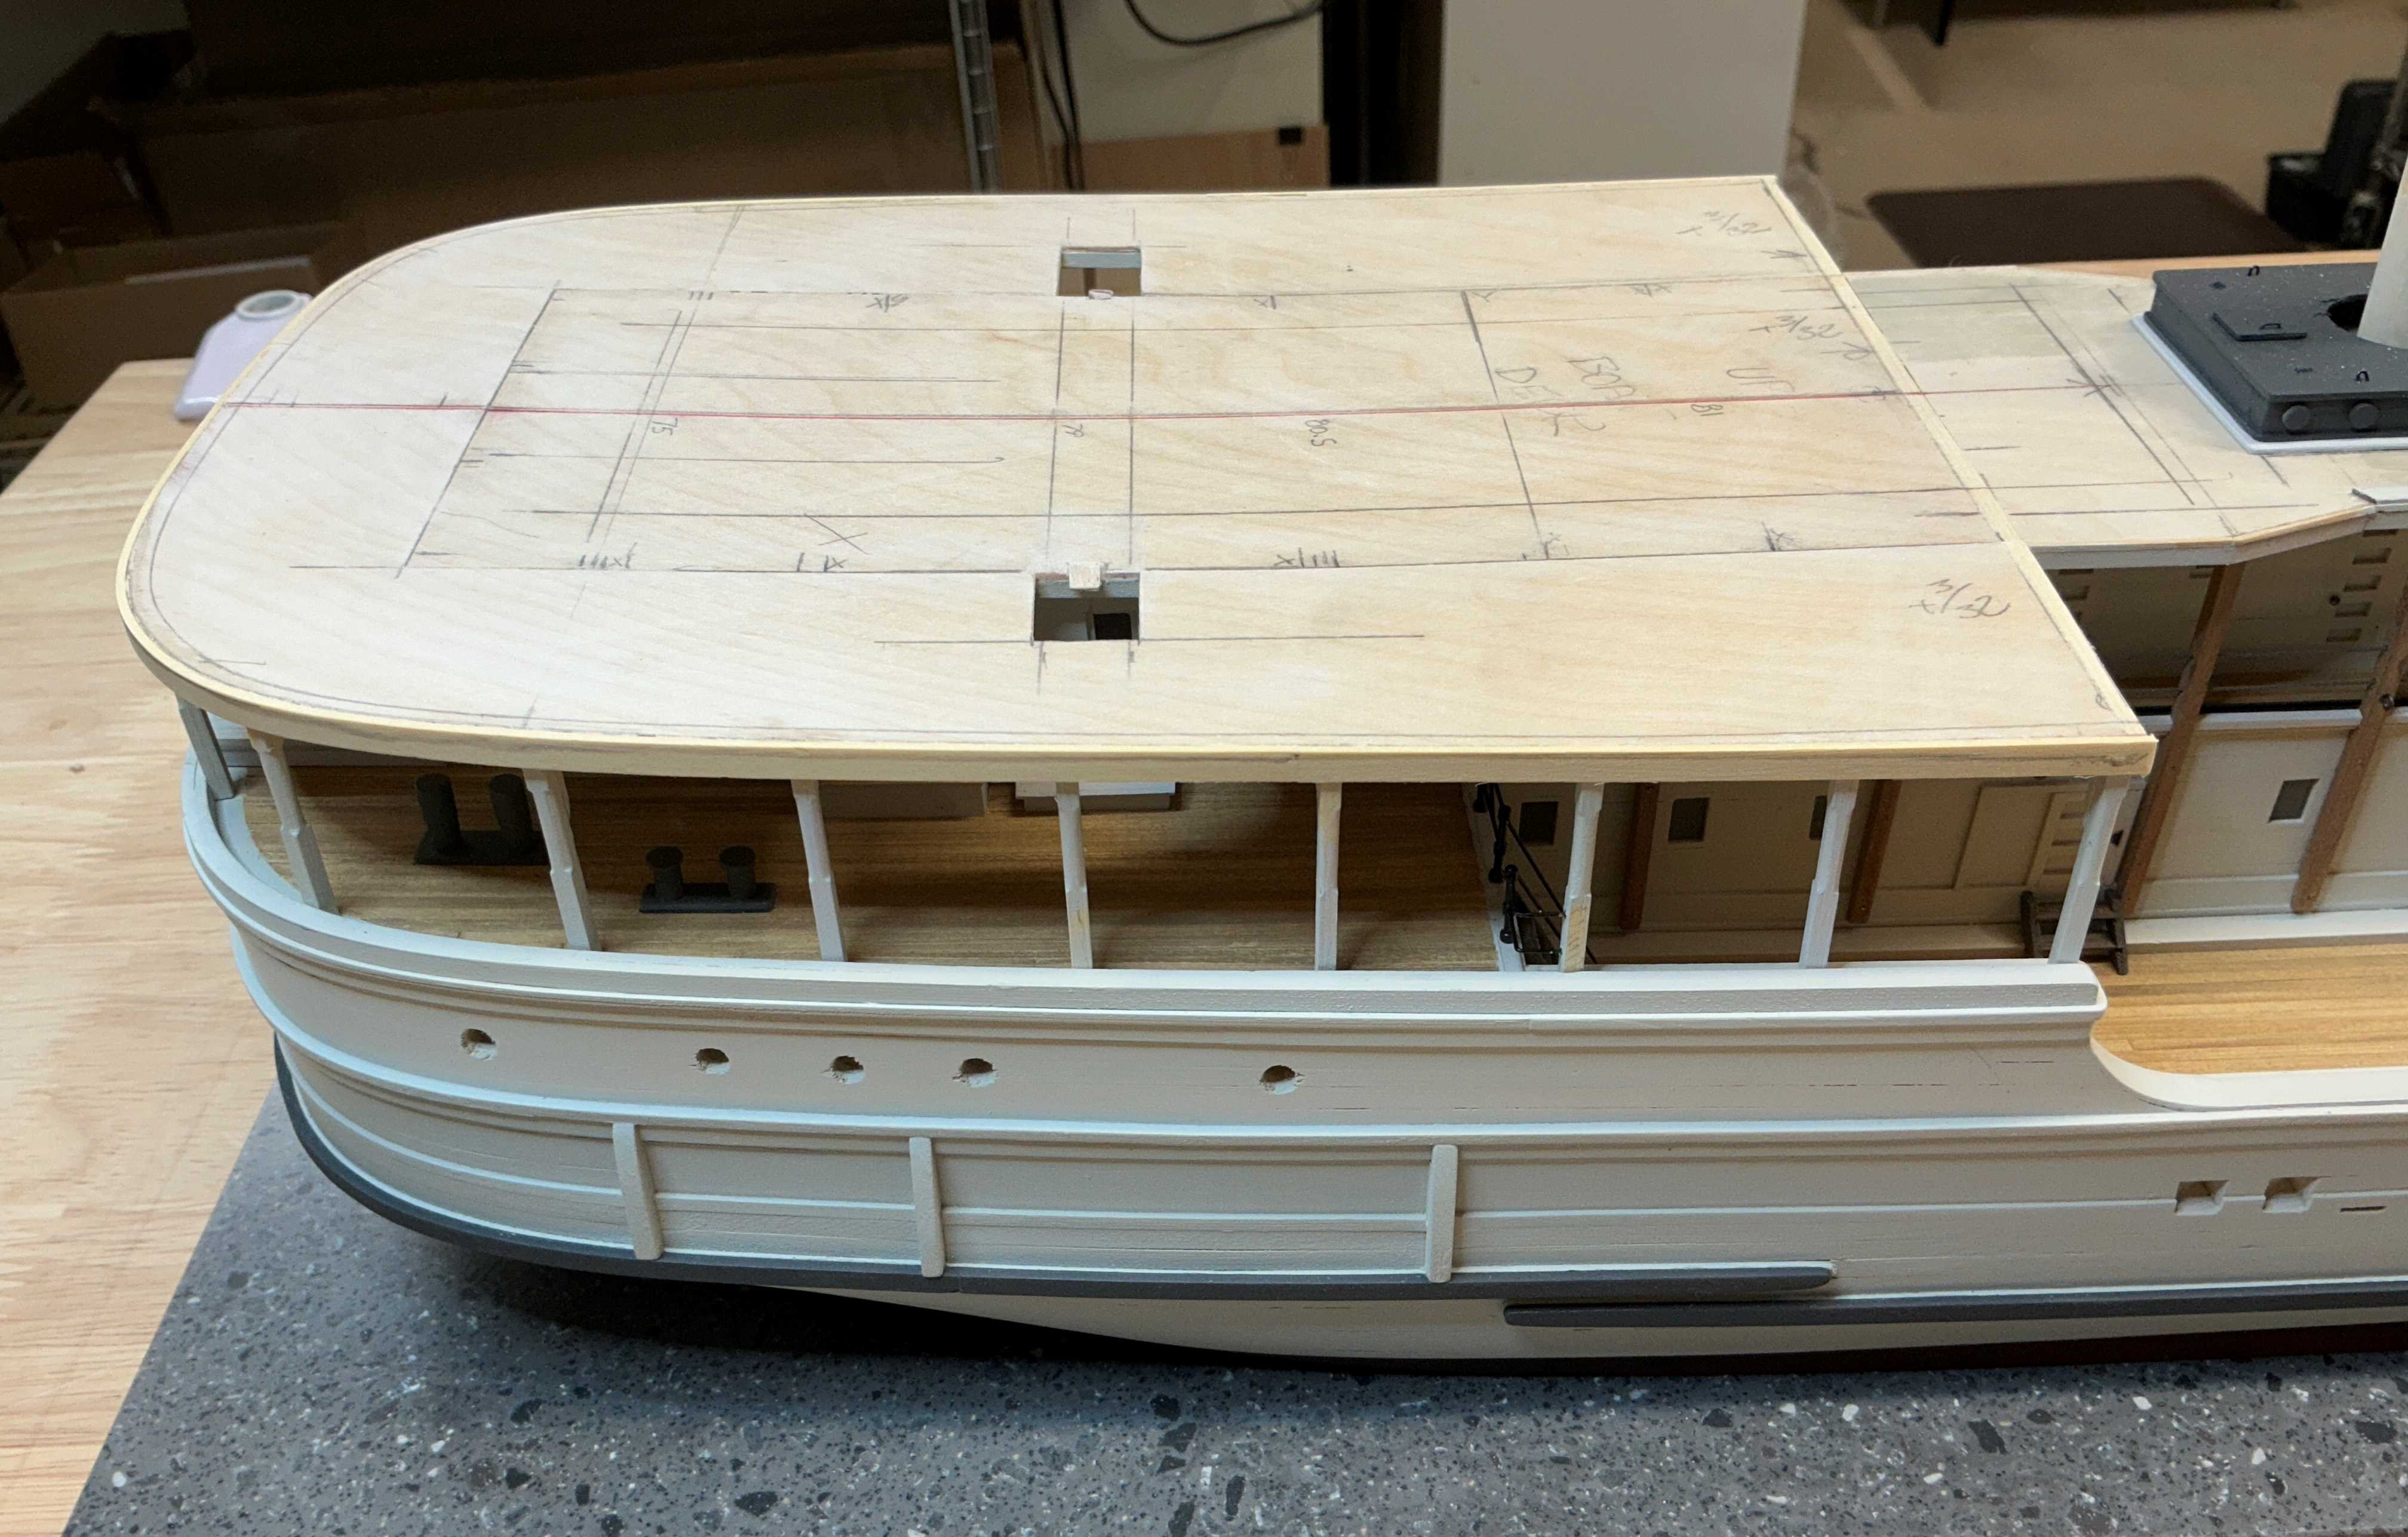
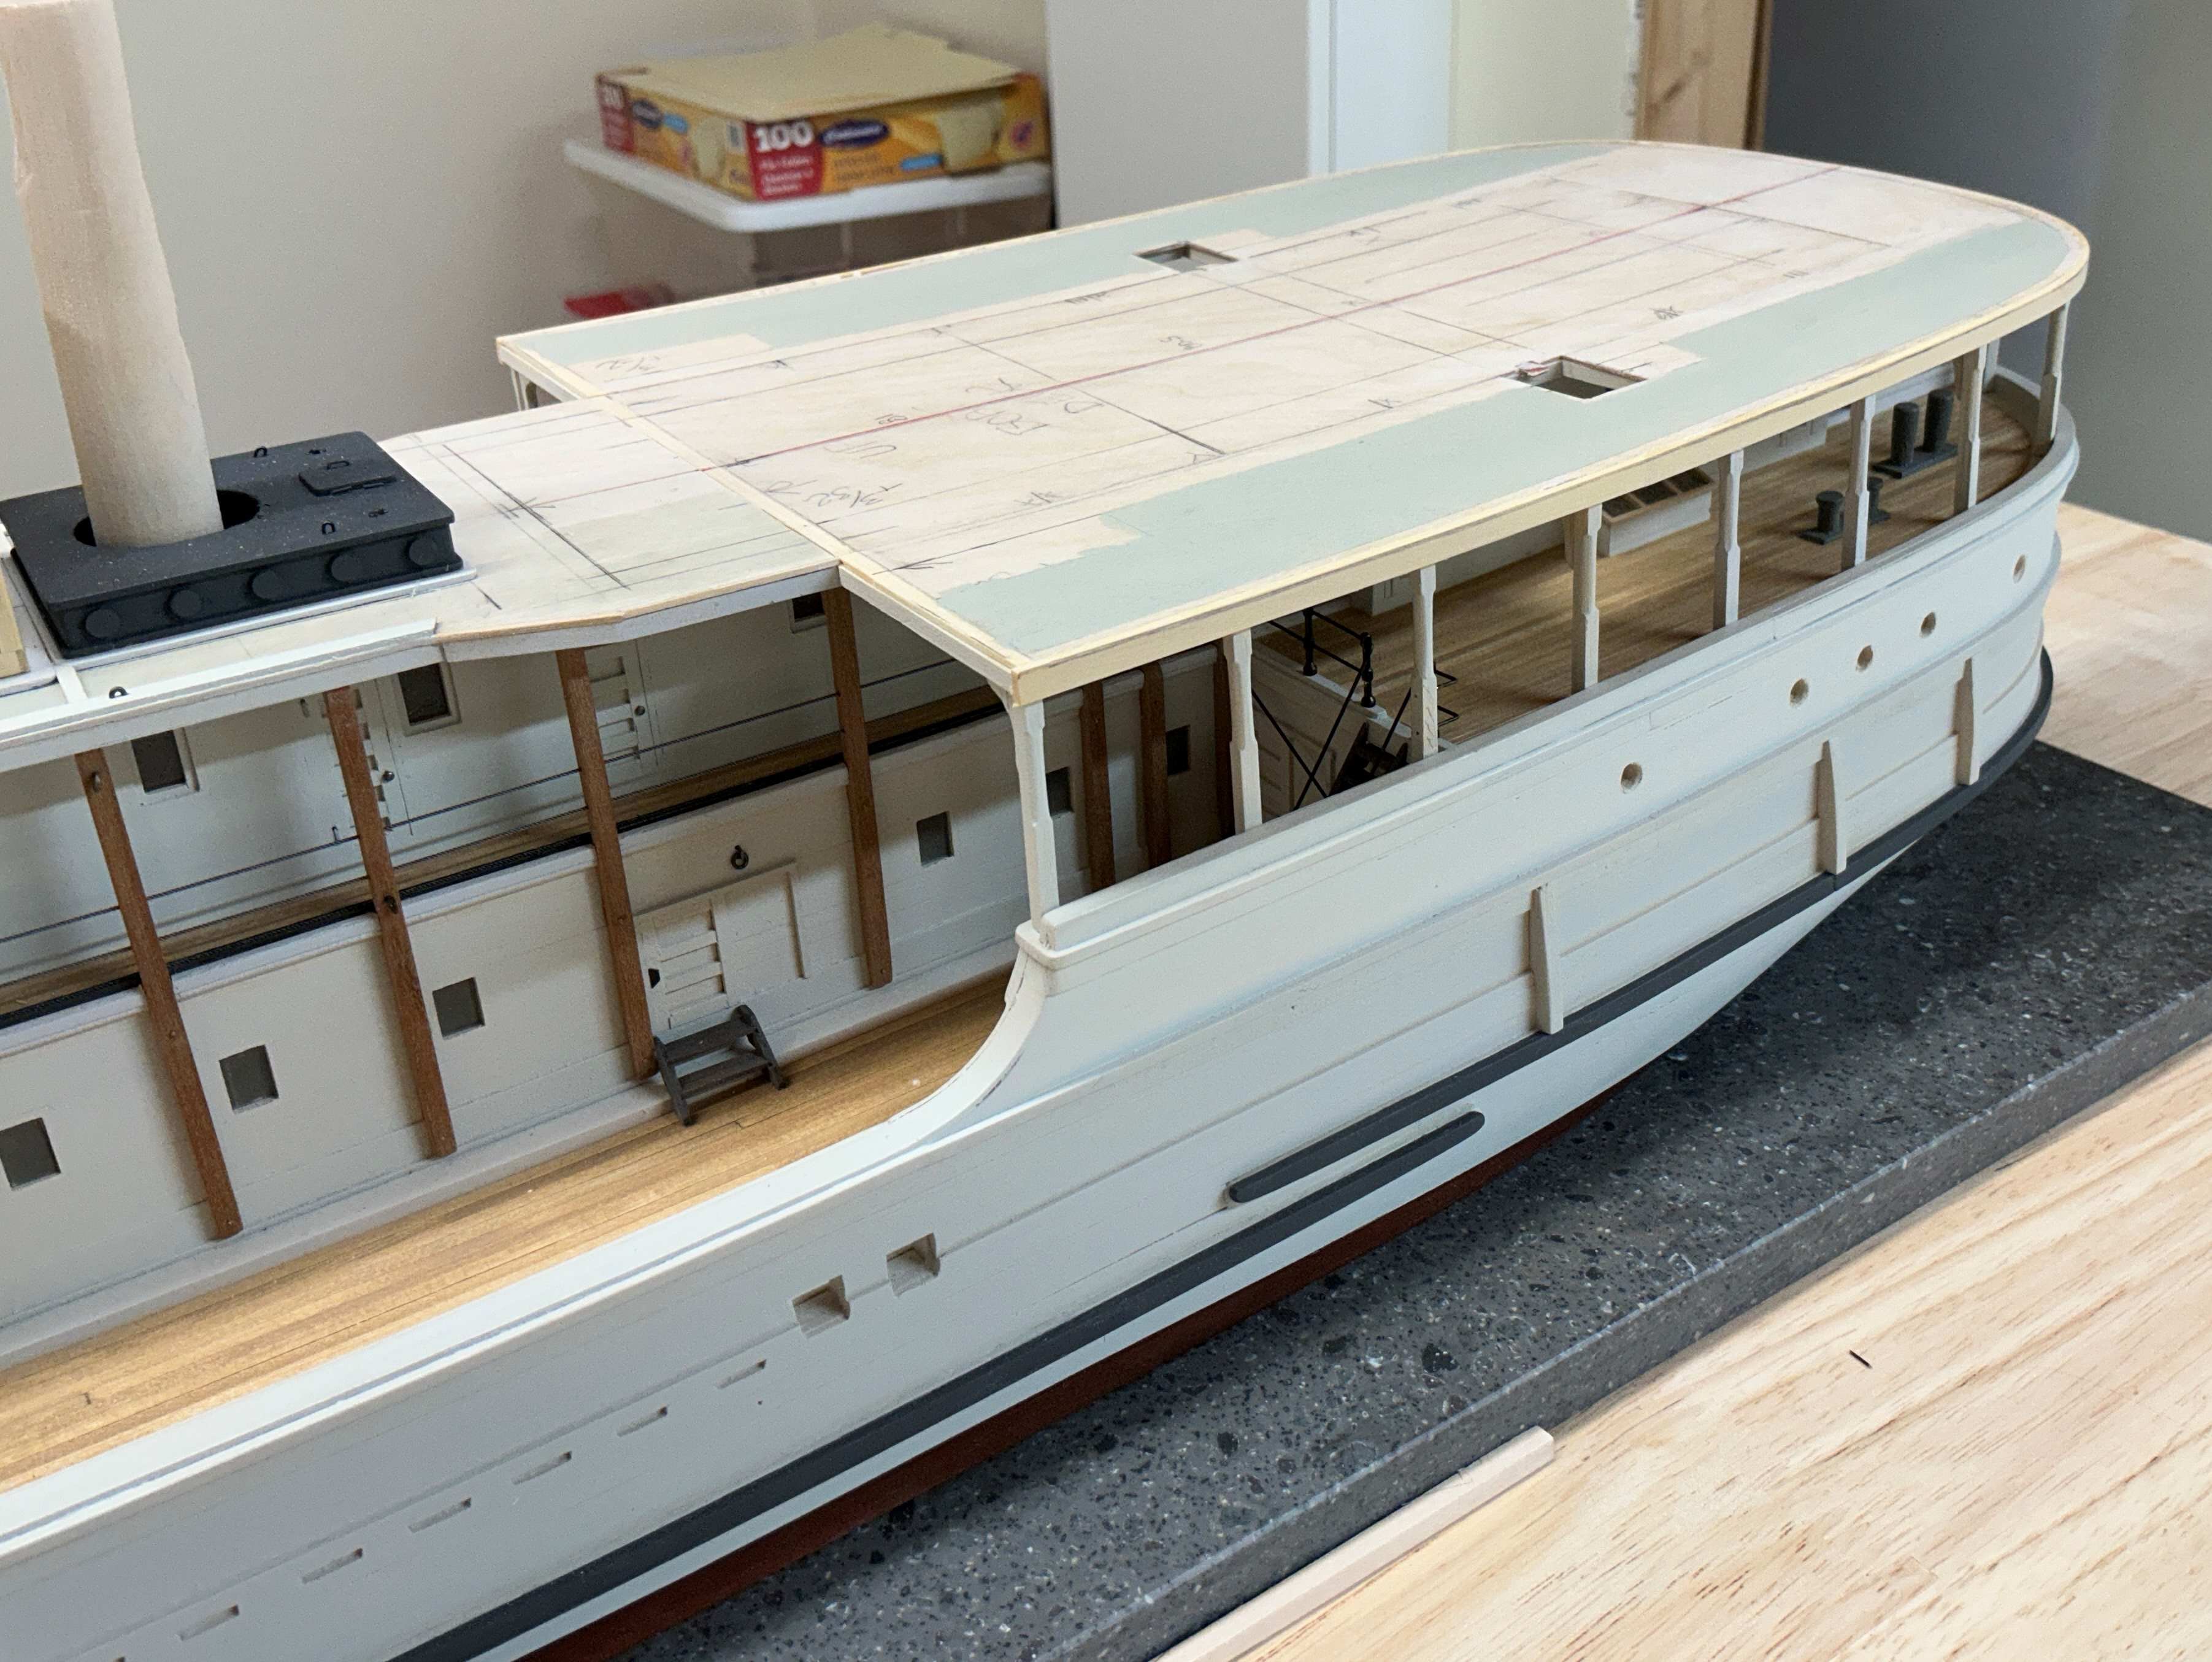
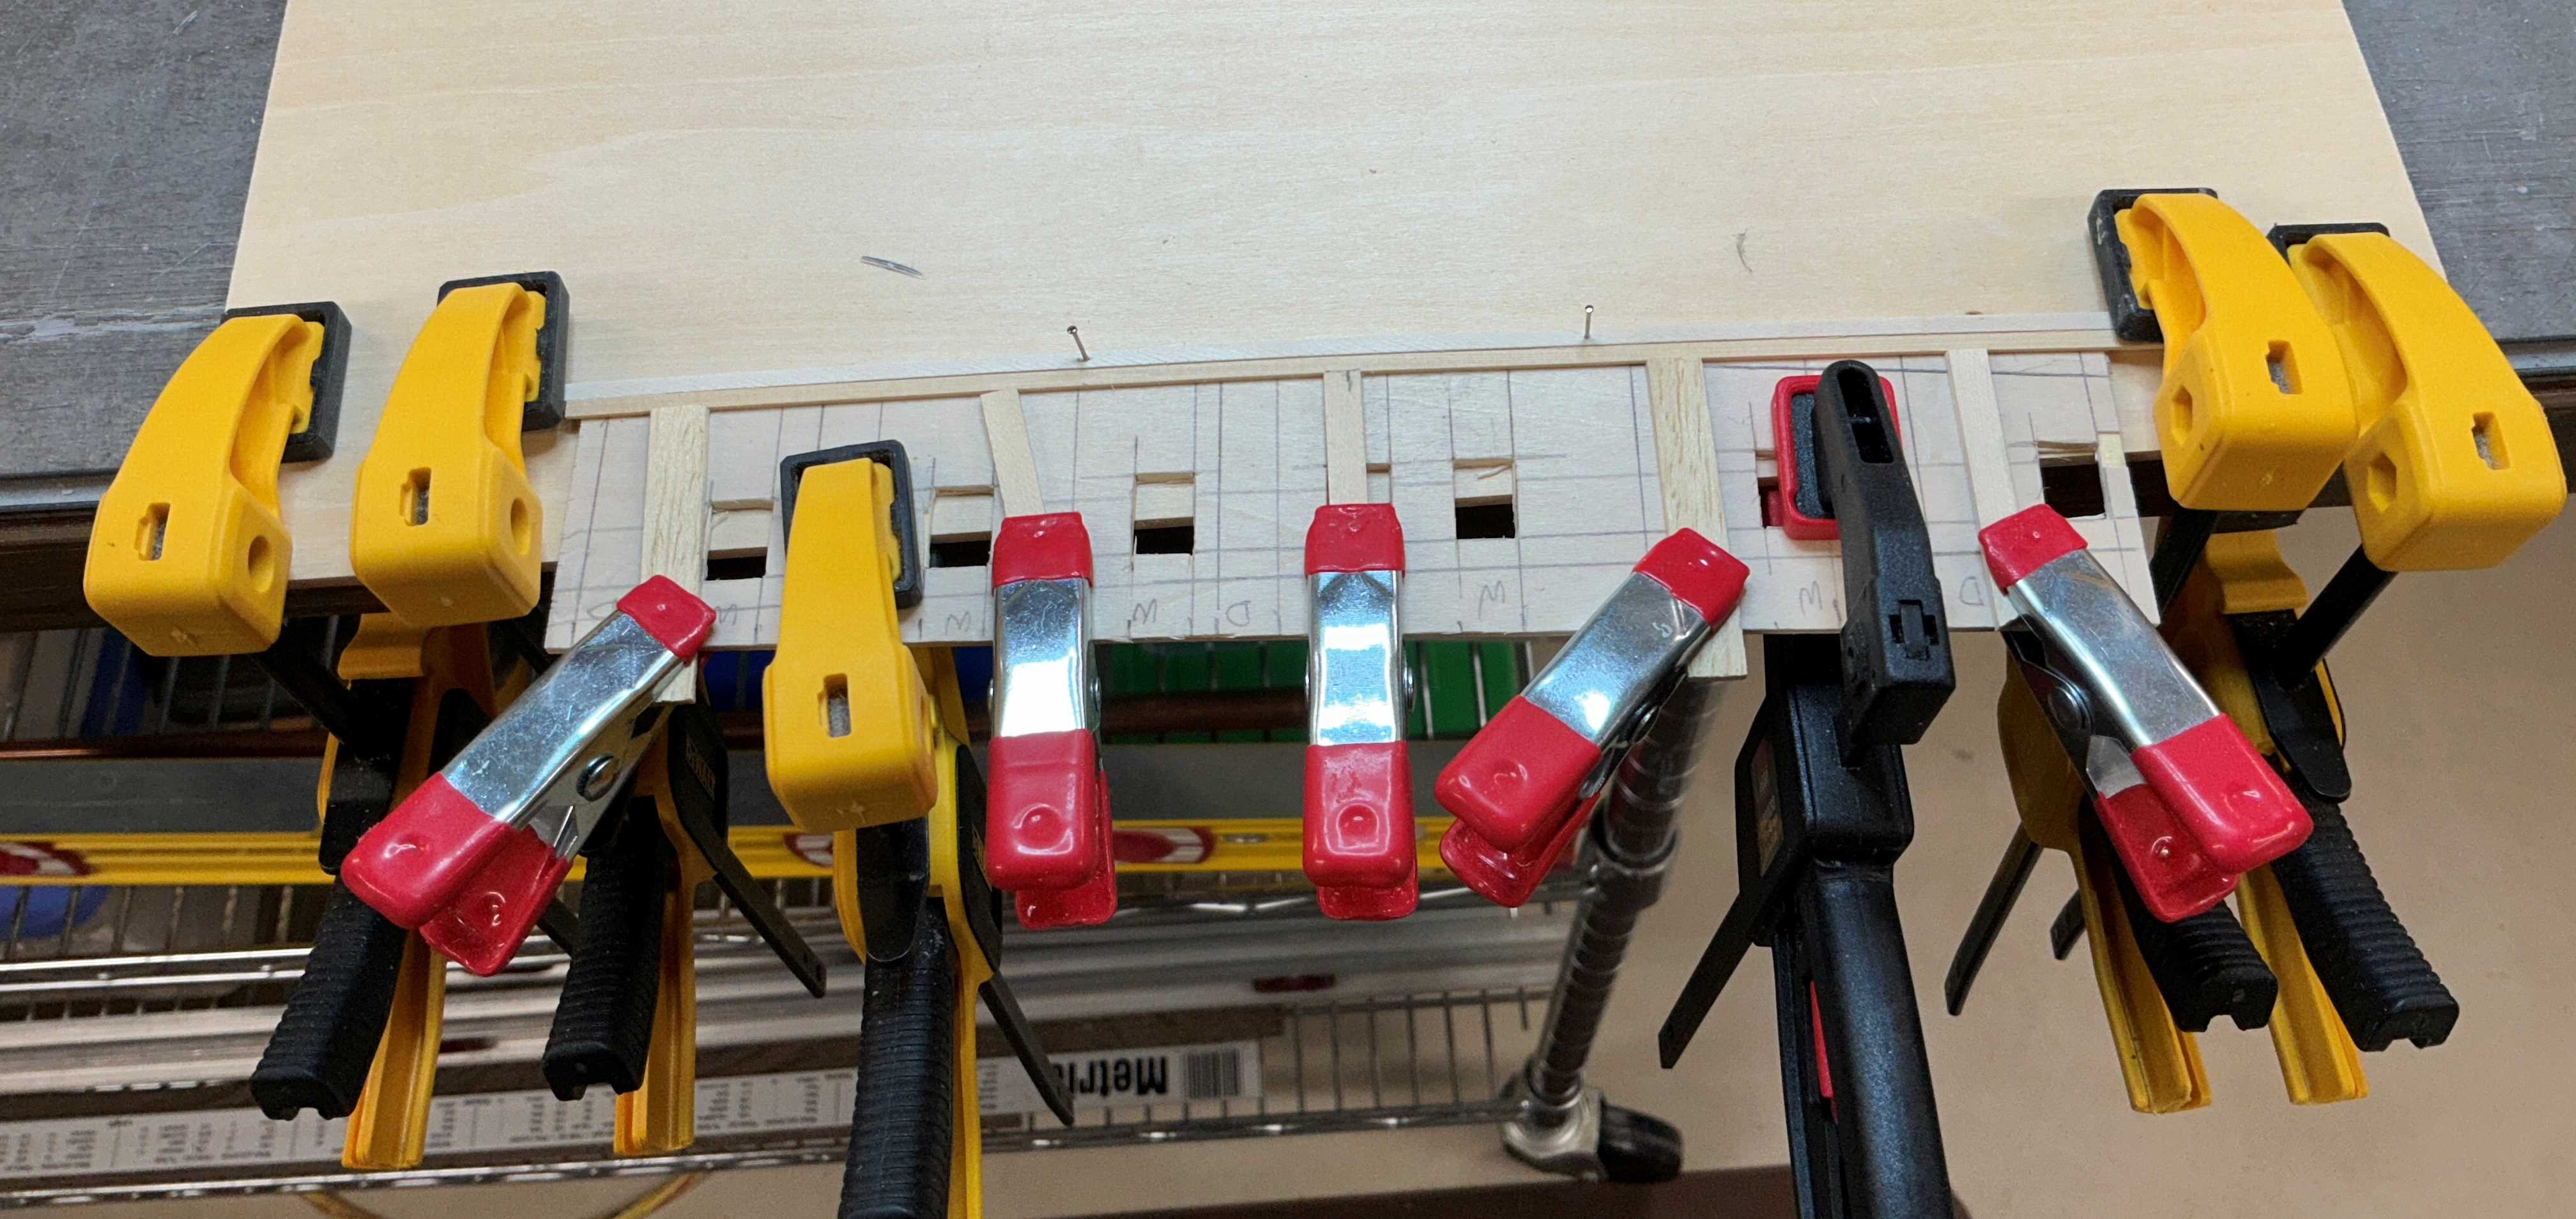
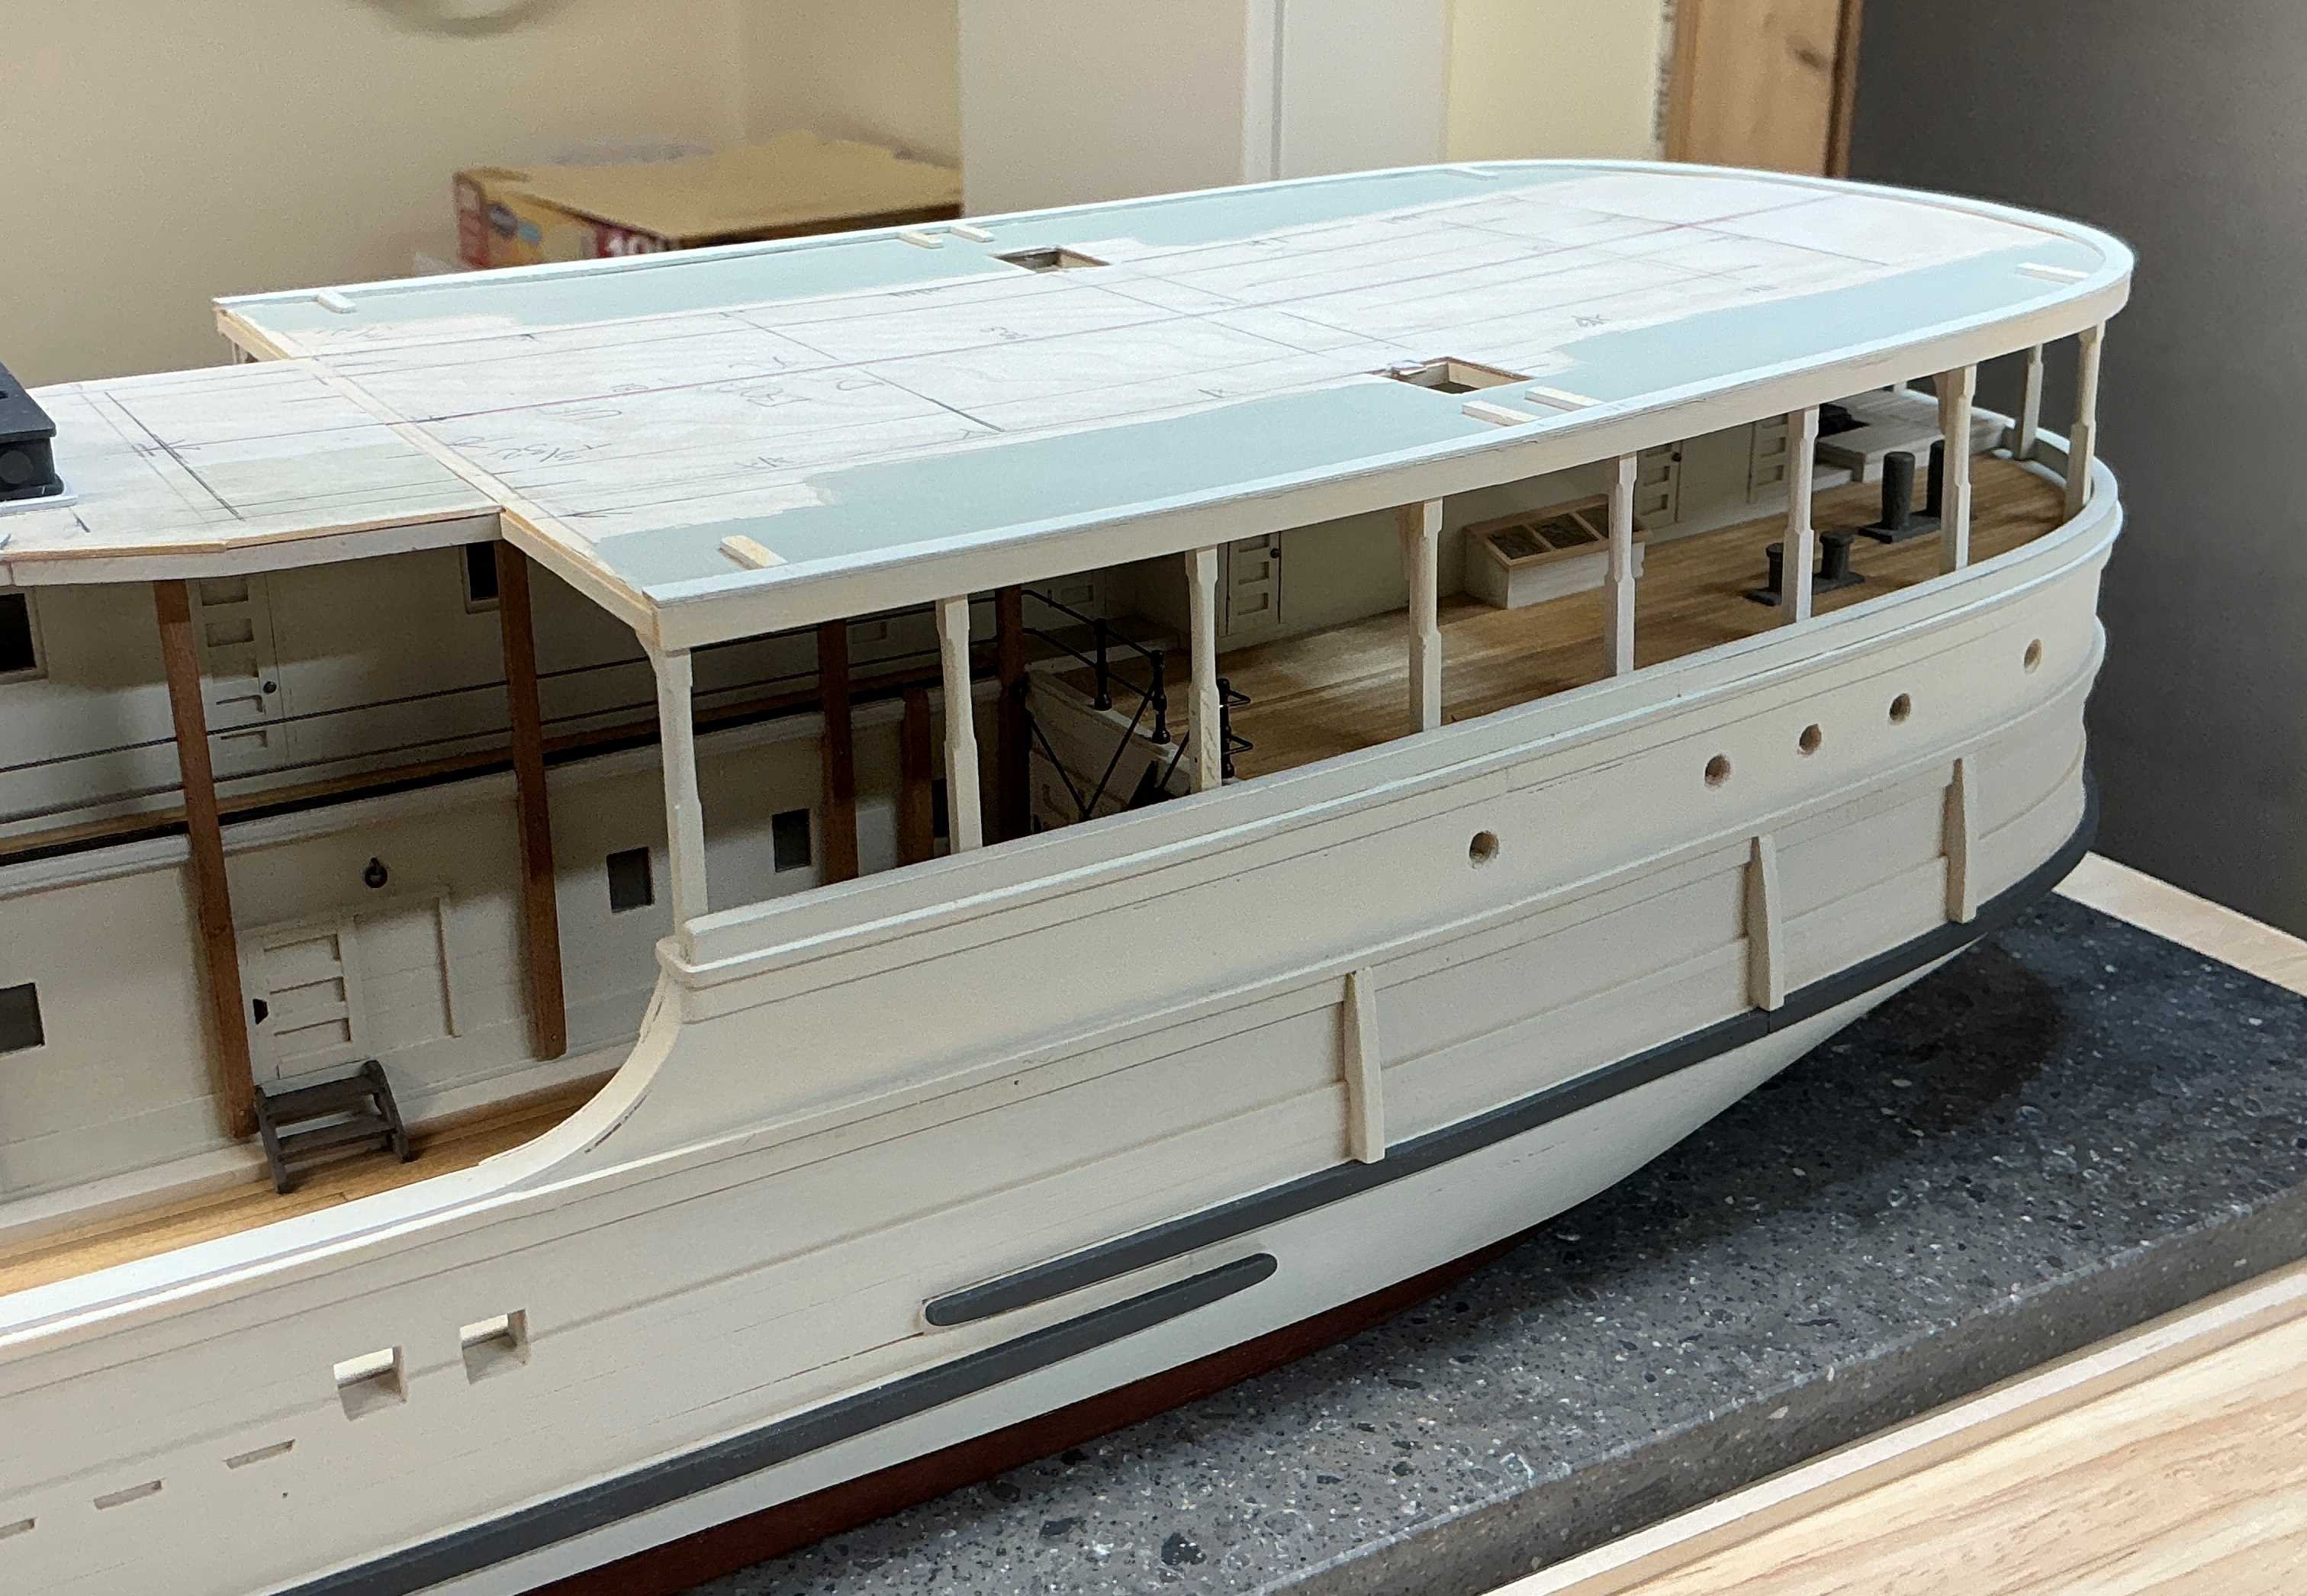
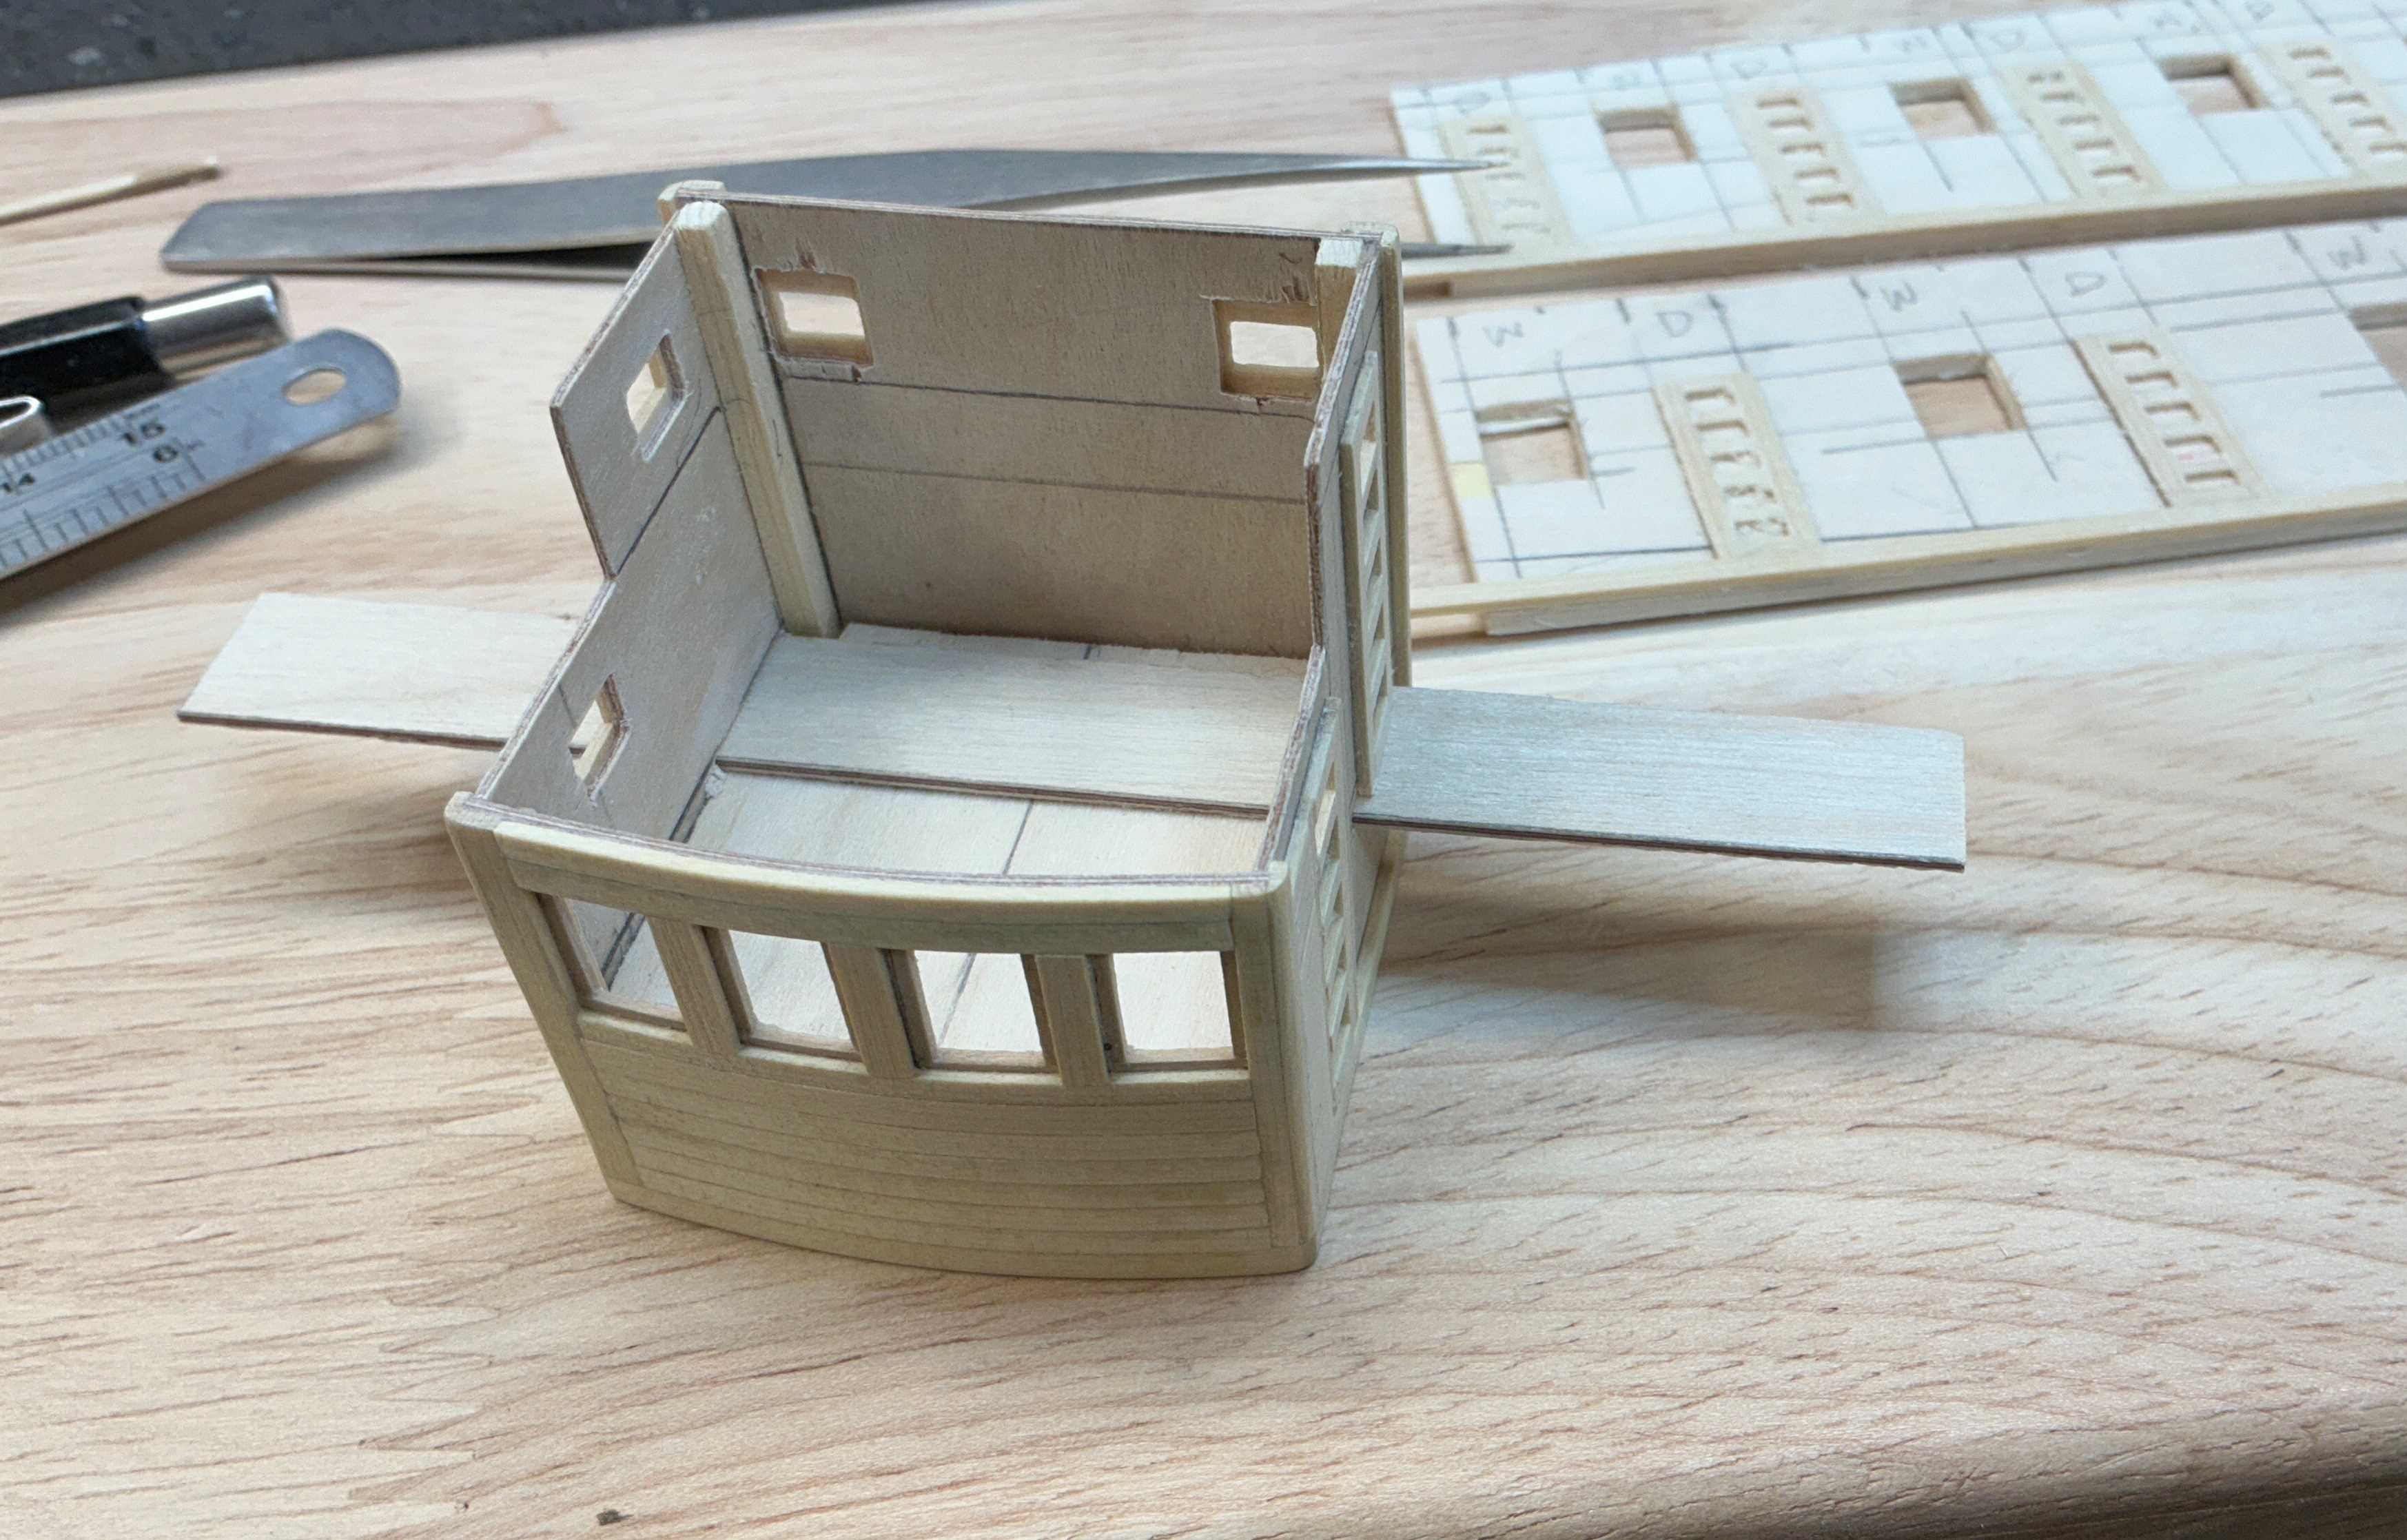
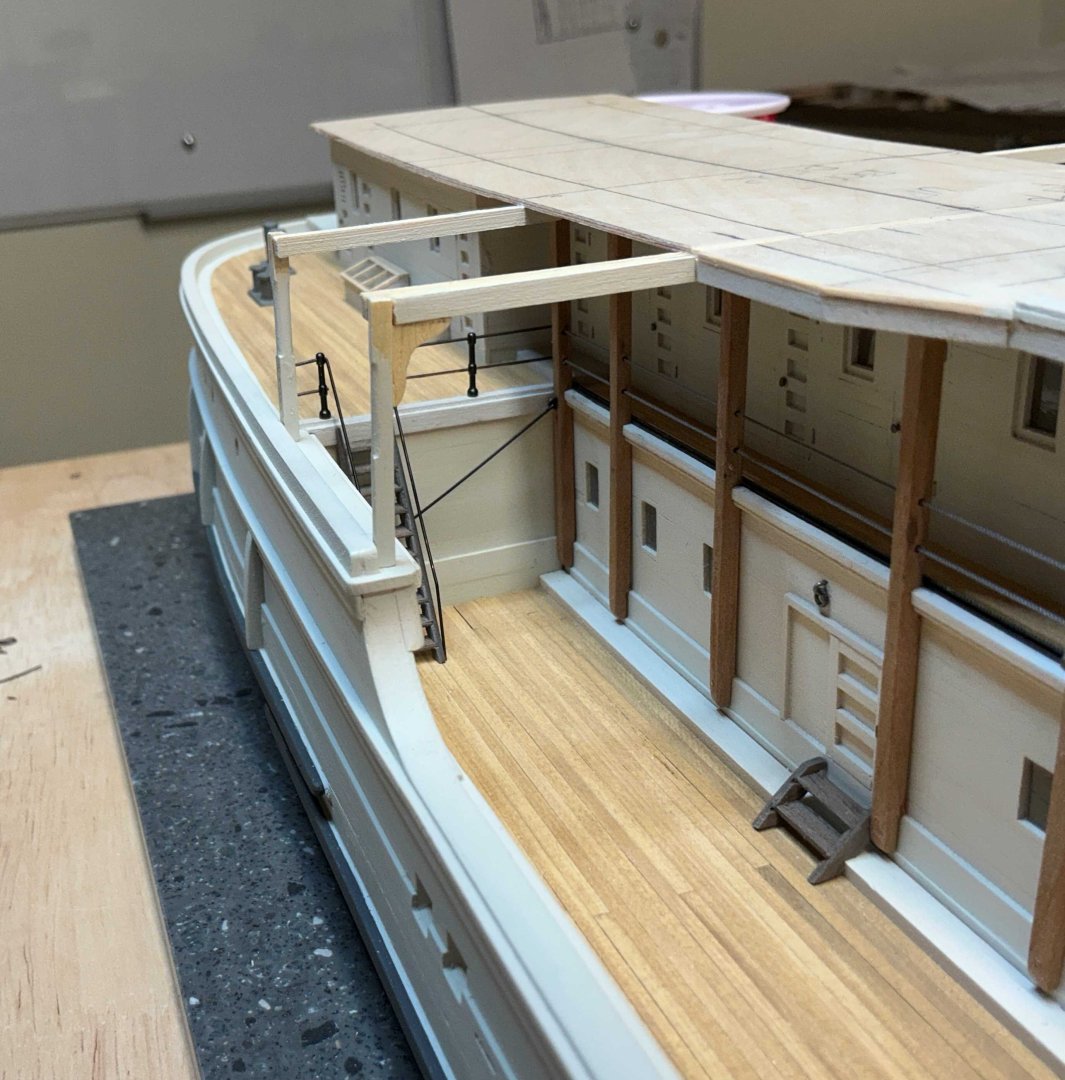
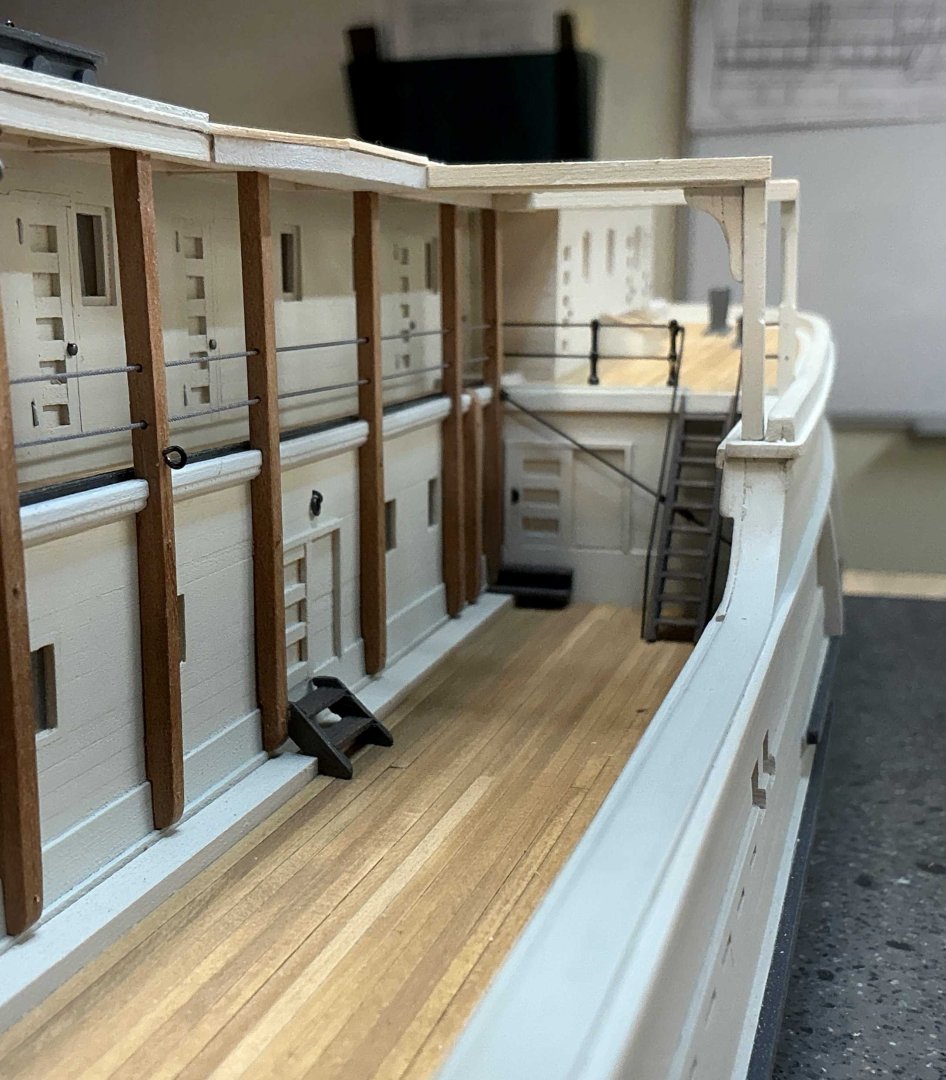
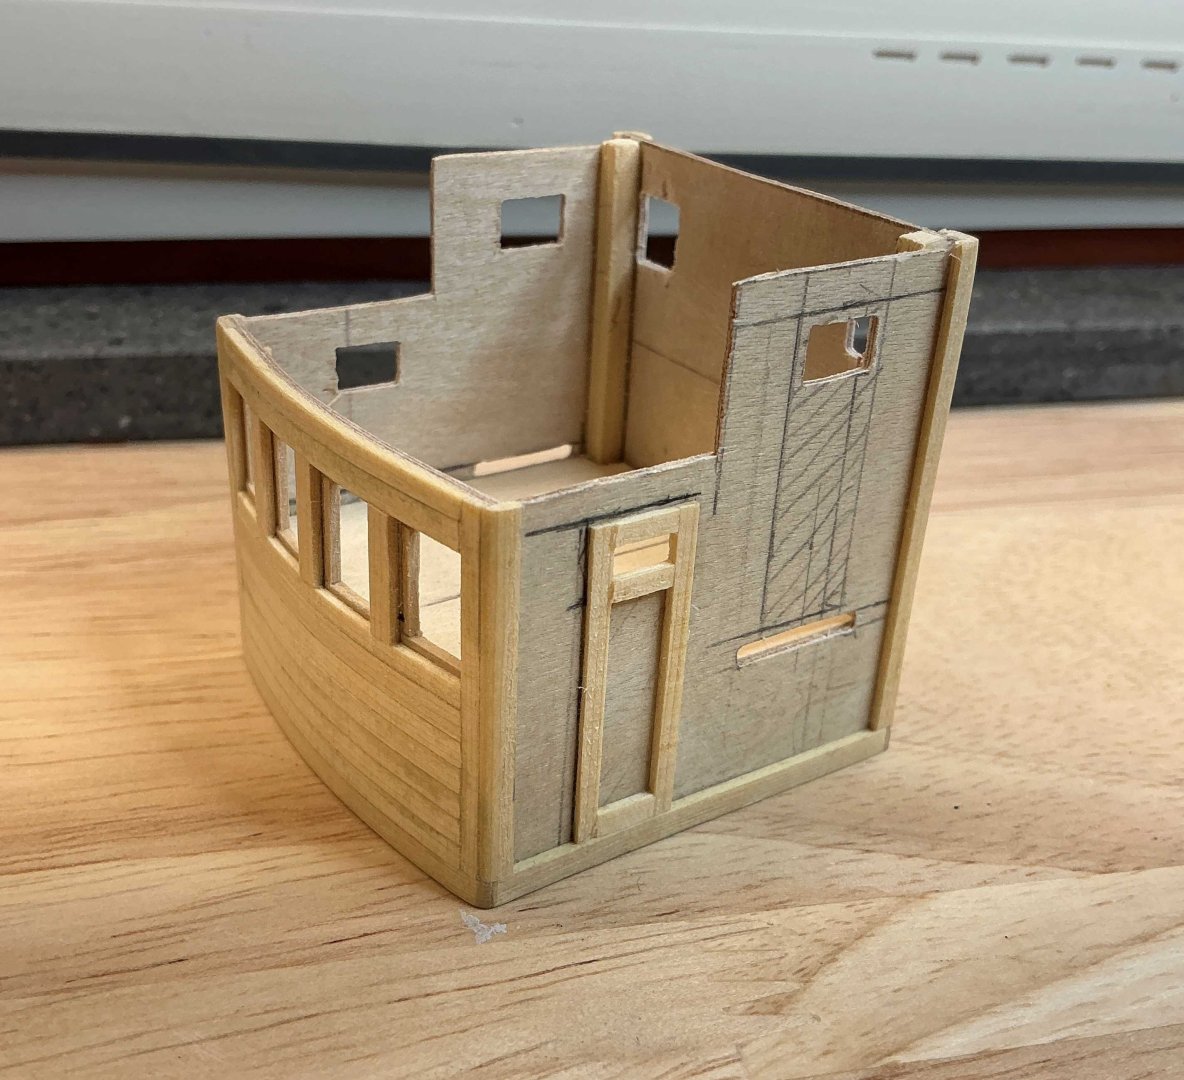
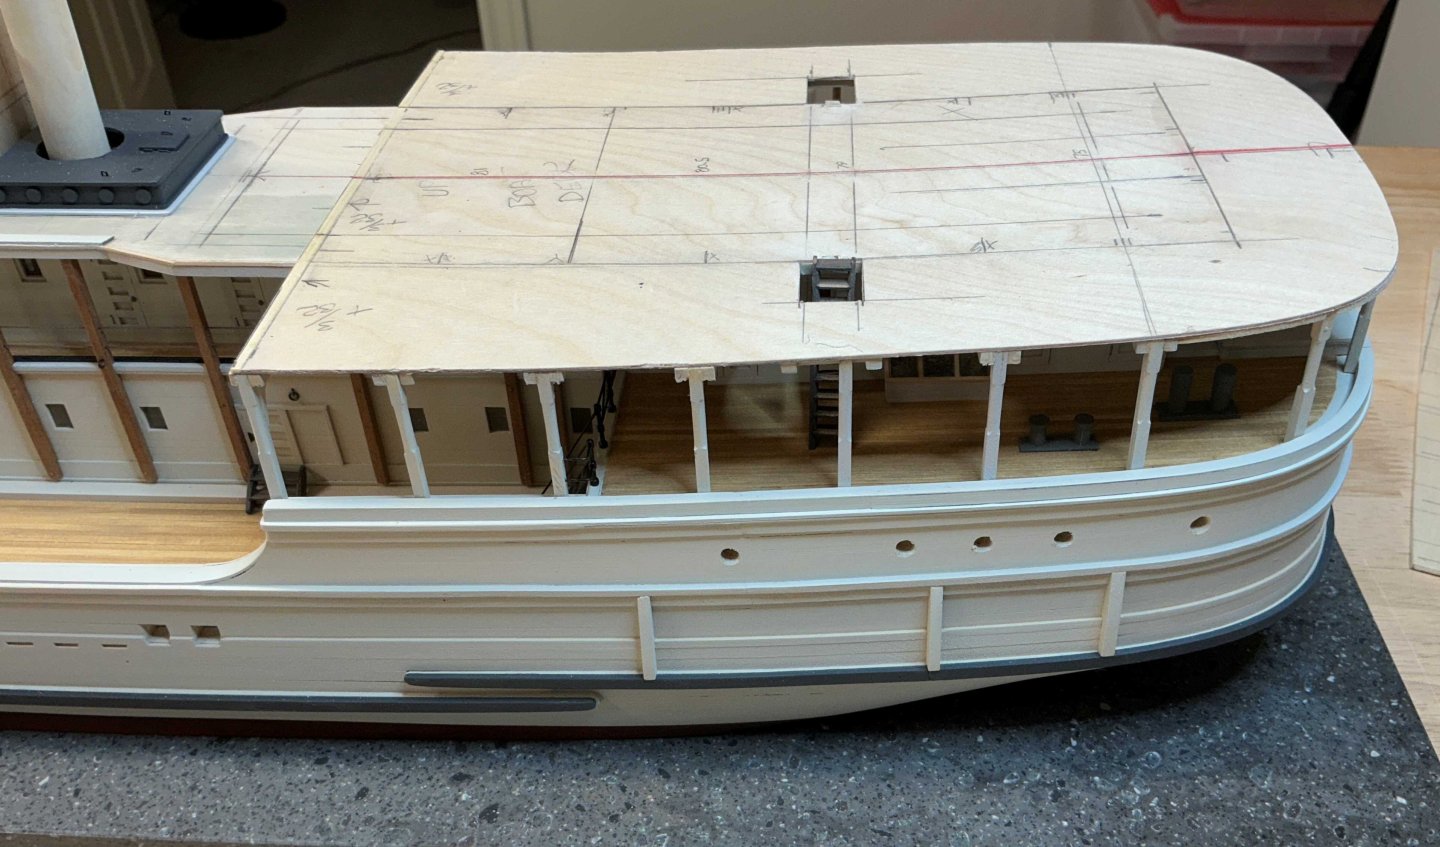
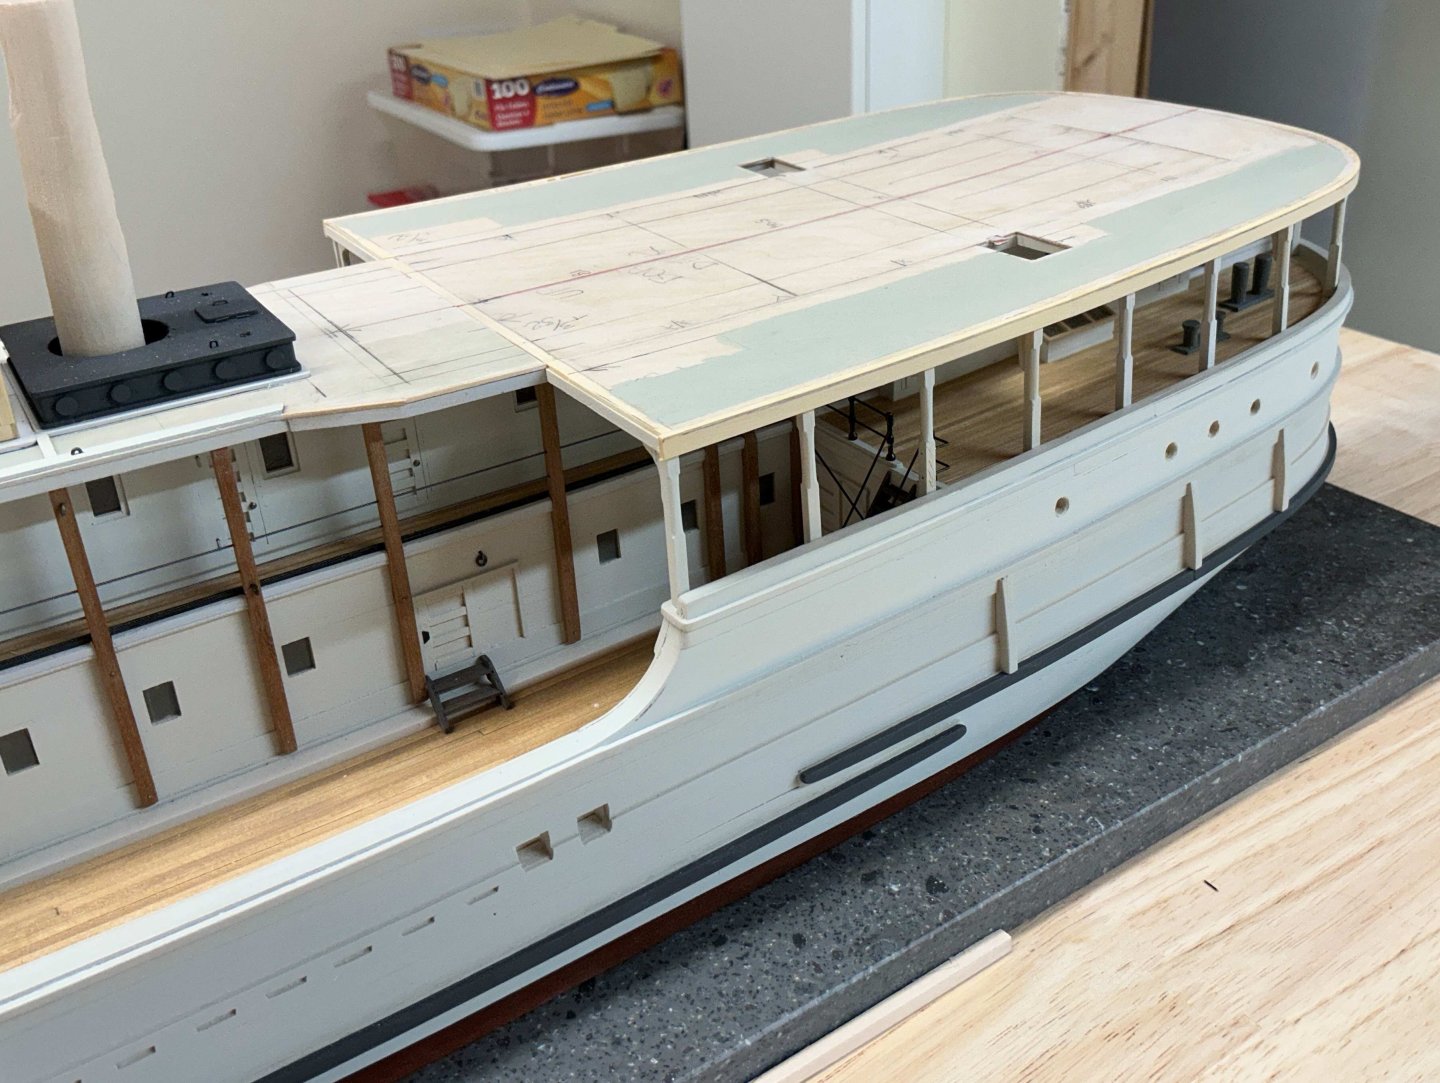
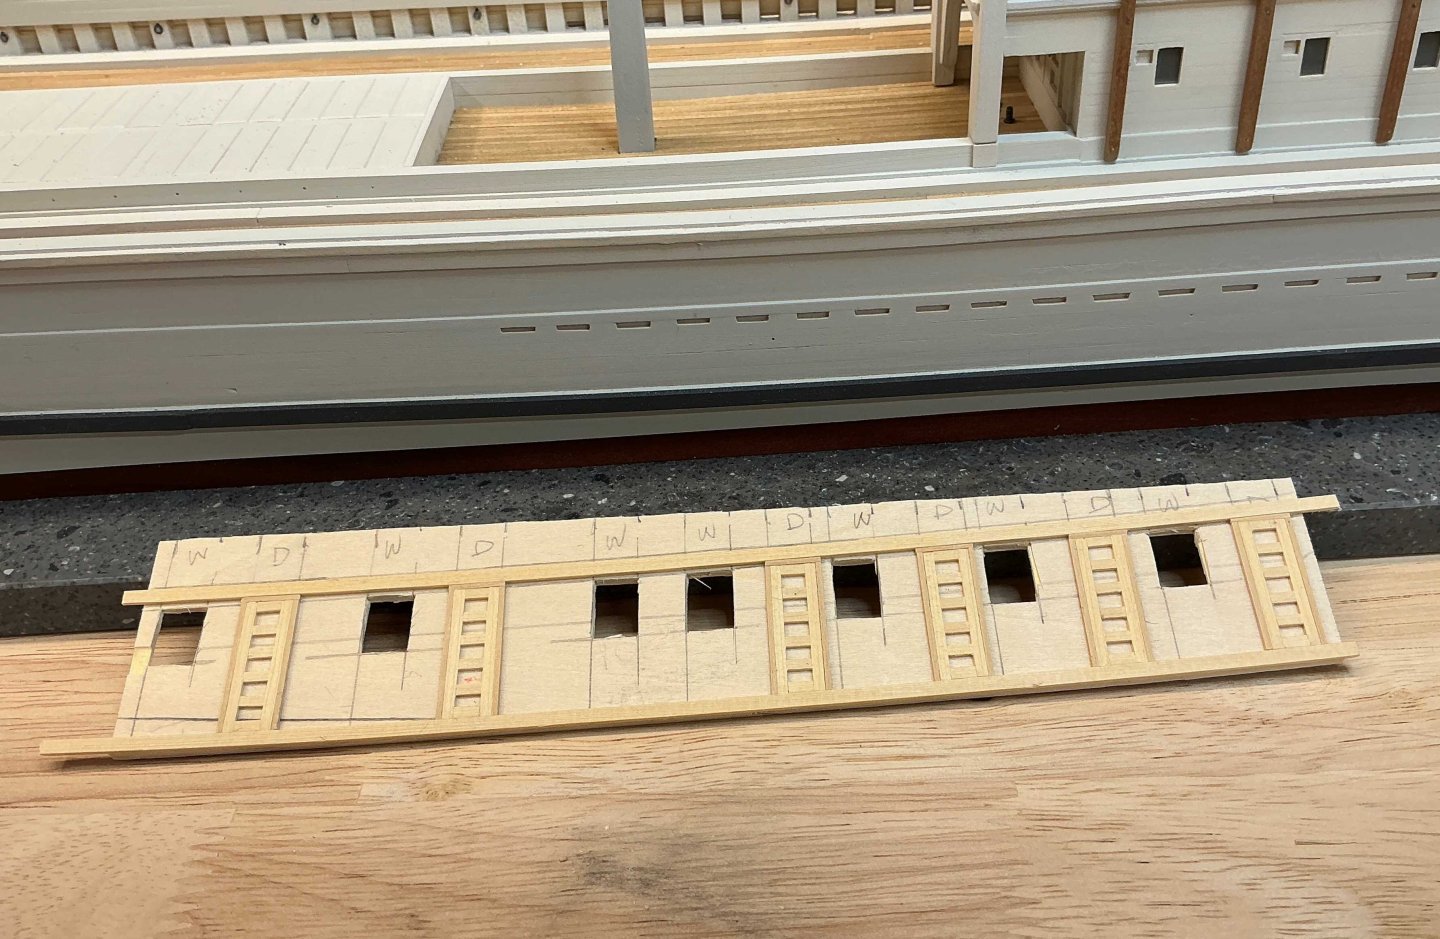
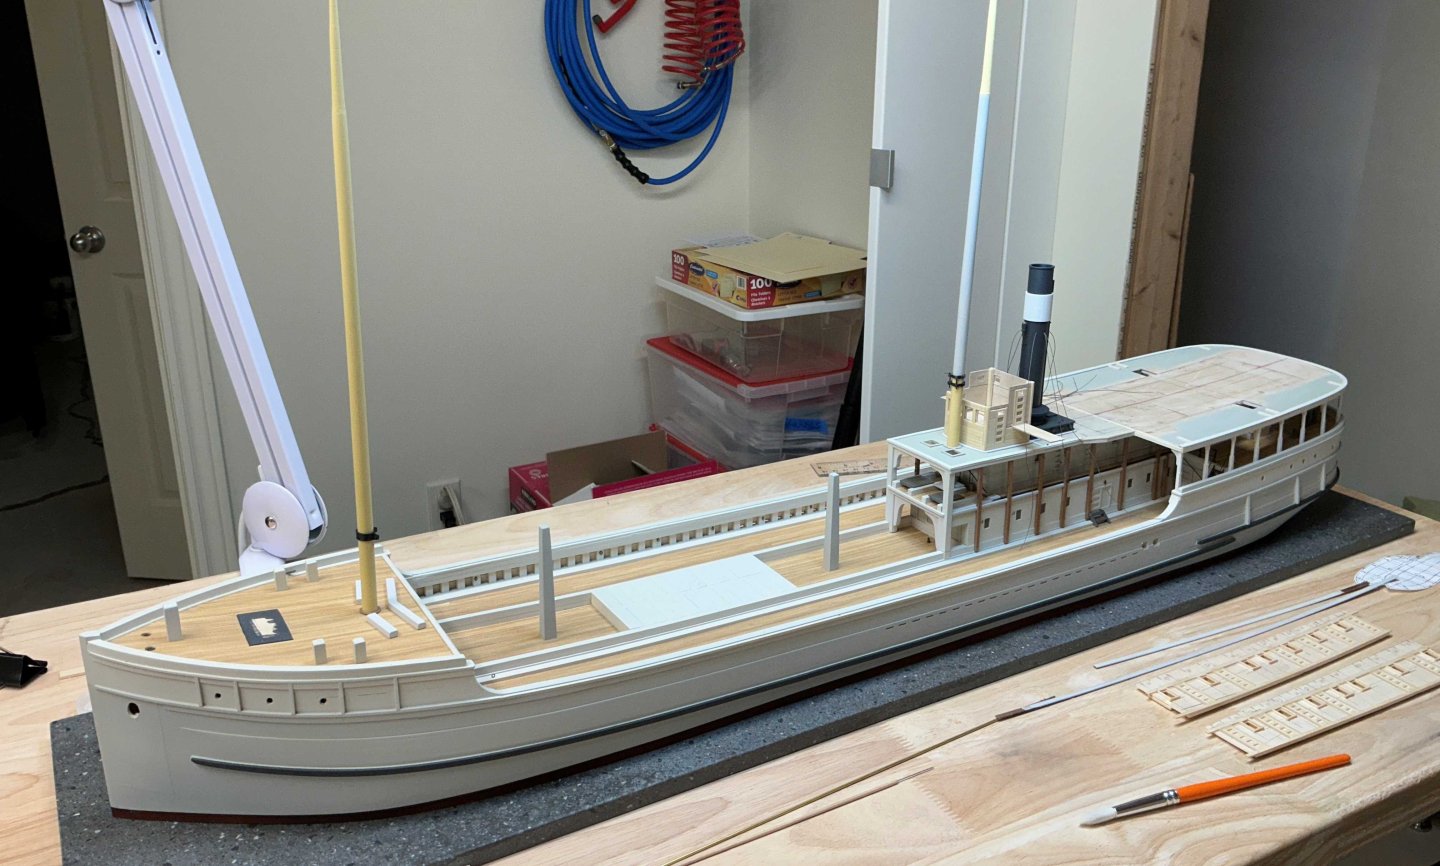
Hi Everyone, I hope your 2026 is going well. Thank you for the Comments, Likes and good wishes. The boat deck has been framed and the subdeck laid. The stanchion positions were laid out and holes were drilled into the waterway inside the coaming. A .020" brass rod was CA'd into the bottom of each stanchion but the pins are not glued into the waterway. The beams are 3/32" x 3/32" and are glued to the underside of the overhang on the cabins. There are three knees Port and Starboard that look to be positioned to add support for the lifeboats. They were made from a strip of wood that measures 1.8mm x 7.2mm. Not sue what type of wood it is but it is from an old Billing Kit. It stayed together well while each one was cut off with the Slicer. To make clamping easier every other stanchion was installed and then I went back and filled in the rest. Pieces Of 1/32" plywood were glued between the beams to add support to the subdeck joints. After some sanding and tweaking the remainder of the subdeck was ready to be glued down. I decided to cut it in half on the center line at the stern. I thought I had a photo of this but I forgot to take one. The fascia board (?) was glued to the perimeter using a combination of PVA and CA. The board is 3/64" x 5/32" AYC that was left over from Cheerful's wales. The area under the lifeboats was canvas over tongue and groove deck planking so it was painted with the Vallejo Deck Tan. The covering boards were cut in one piece from a sheet of 1/32" plywood. I concentrated on getting the inboard edge shaped correctly and then sanded down the outboard edge after it was painted and glued down. The coamings for the davit support brackets were partially painted and glued in place While this was going on I got a bit of work done on the Wheelhouse / Pilot House and the boat deck cabins. The Pilot House bridge wings are a piece of 1/32" plywood that slides through the slot under the doors. And this is what she looks like today. The smoke stack is there just to jazz it up a bit. Now it's back to finishing the siding. Hope to see you soon!
.thumb.jpg.6c632b0906bfb6395254bafb4fb935bd.jpg)


-
Sal, congratulations on completing your Nordkap. Beautifully done!
- 79 replies
-
- 1
-
-
- Nordkap
- Billing Boats
- (and 2 more)
-
Joe, thank you for all that you have done for us. Wishing you the very best!
-
Beautiful deck planking Valeriy . Happy New Year!
.jpg.f35bf82f0457baea2f2836cf7a606e06.jpg)