Barbossa
-
Posts
477 -
Joined
-
Last visited
Content Type
Profiles
Forums
Gallery
Events
Everything posted by Barbossa
-
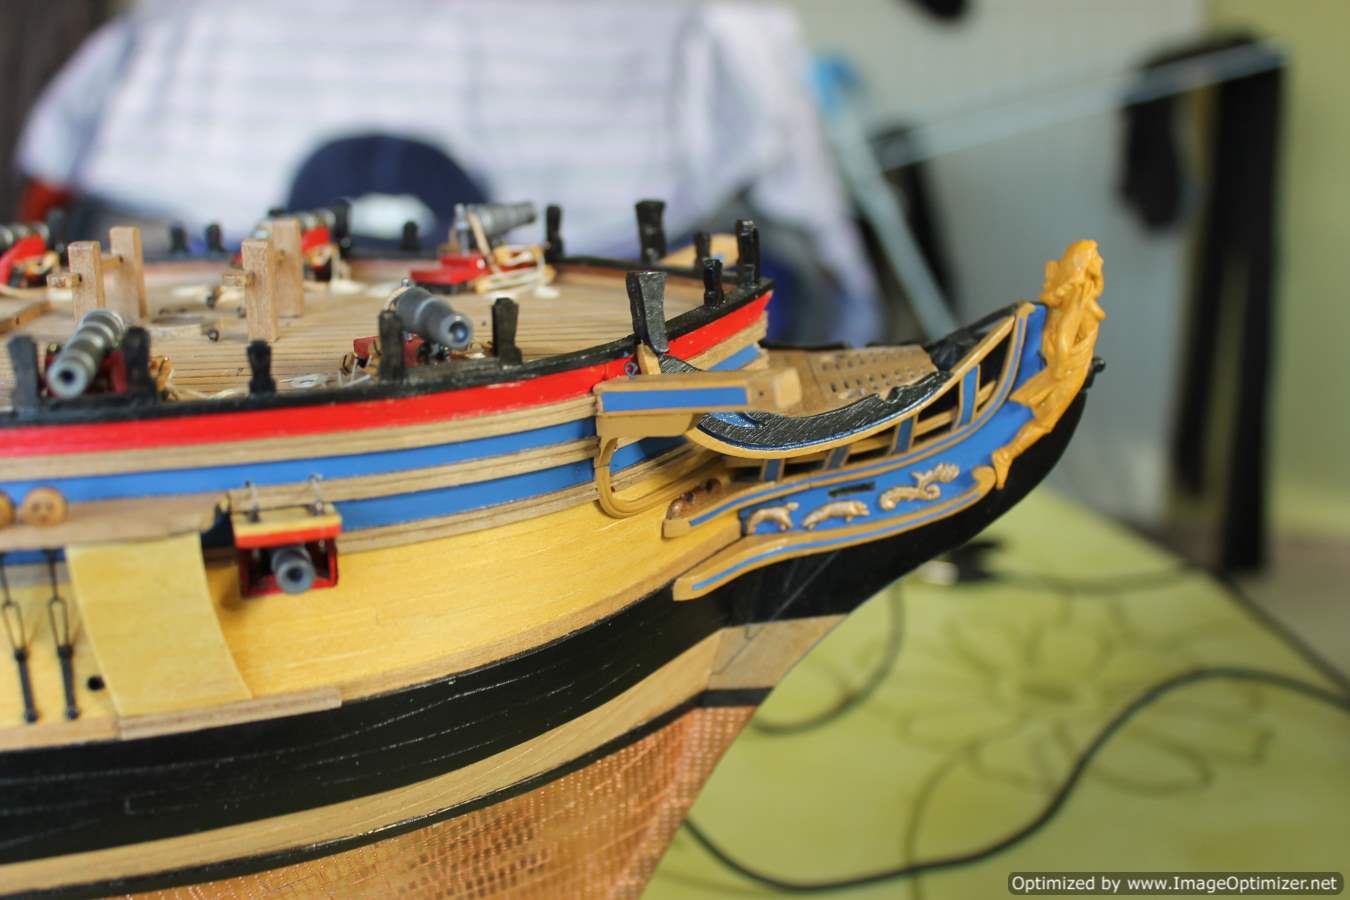
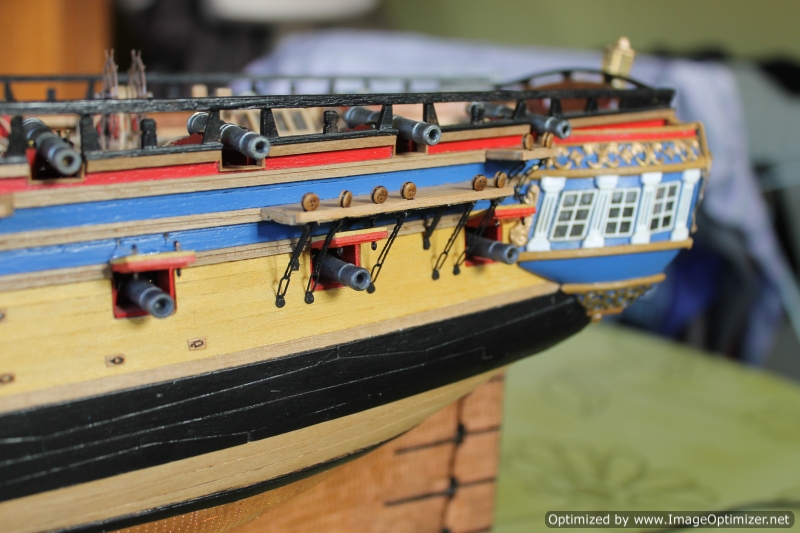
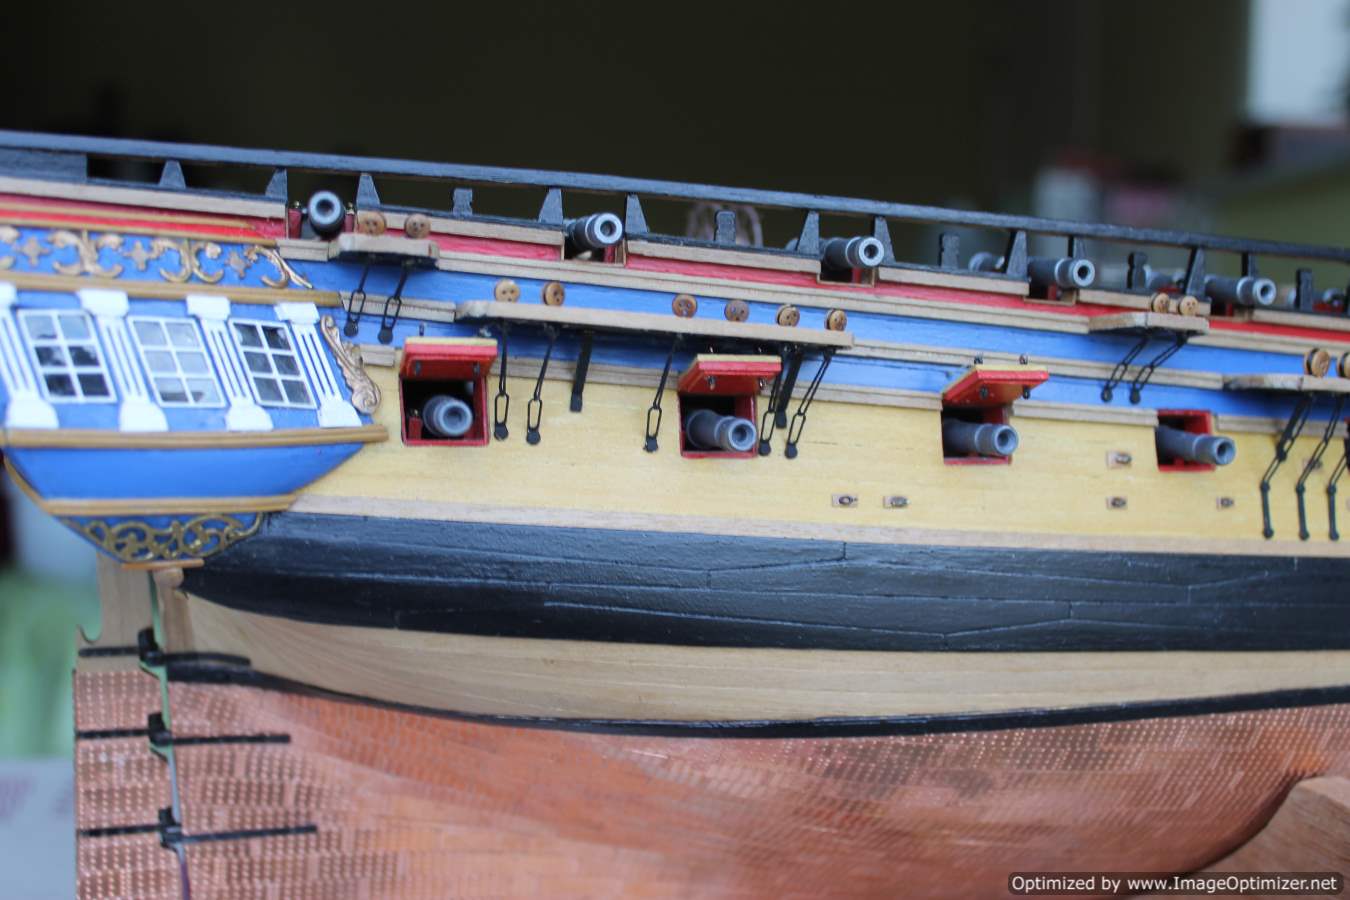
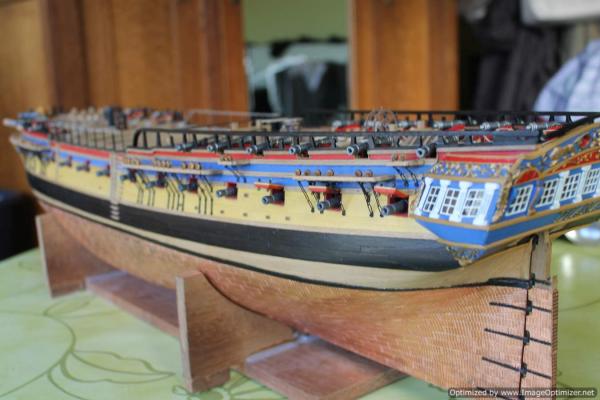
 Hello, One of the last updates regarding the hull fittings : the two lids under the stern gallery. I used other hinges than the ones supplied in the kit. The form and shape seemed a bit more suitable to me (coming from my old San Felipe Mantua kit - pre MSW-period)


-
Hi Richard, What a promising start. I like the planking and the shape of the hull. Just one question: your last pic shows that one of the frames is in opposition with the last (or first) gunport.Of course this part is to be removed later and probably I've got this wrong but this is the first time I notice this in a kit .
- 55 replies
-
- 1
-

-
- mercury
- victory models
- (and 1 more)
-
HMS AGAMEMNON by PMG - Caldercraft
Barbossa replied to PMG's topic in - Kit build logs for subjects built from 1751 - 1800
Thank you very much Pierre. Much appreciated, the more is : I'm more than ever convinced to puchase such a tool. Maybe the dark color will result in a nice contrast with the coming details : strips, ornaments ? -
HMS AGAMEMNON by PMG - Caldercraft
Barbossa replied to PMG's topic in - Kit build logs for subjects built from 1751 - 1800
Hi Pierre I'm really looking forward to the quarter deck galleries. Regarding the aerograph : I must admit I'm as unexperienced as you are. This may sound funny but lately I've purchased some WW II planes on a 1/32 scale in order to acquire some experience regarding that matter. Perhaps Santa Claus will give me a compressor ? I'll post some pics of the unopened boxes in the "shore leave" section the coming W.E. -
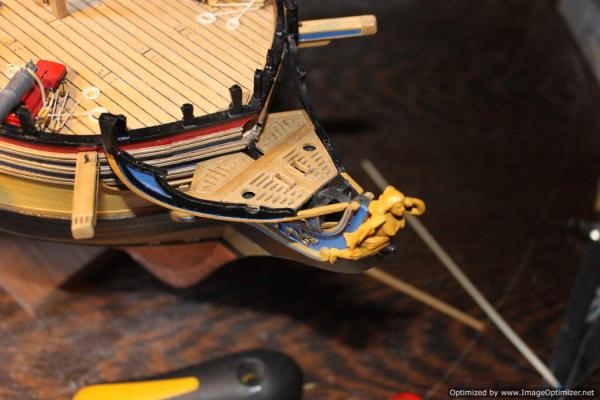
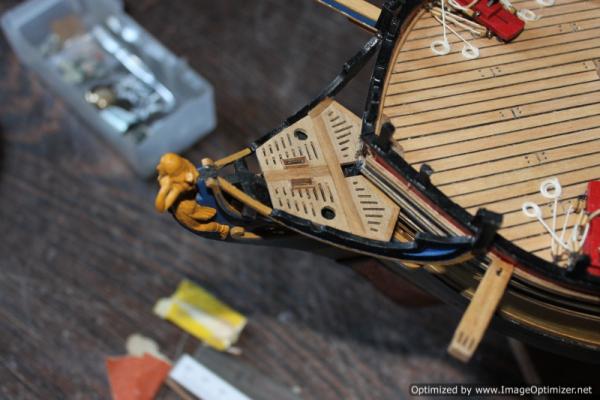
Thanks Sjors, really looking forward to the continuation of San Ildefonso (not to mention HMS Agamemnon) Here's two pics related to the galleon gratings gammoningproblem, in other words I tried to "cover up the mess".
-
Hi Richard, This is a buildlog I'm certain to follow. Mercury was (more or less) released the same moment as HMS Pegasus and I was long in doubt which one to choose. Although I finally settled for the "Peggy", I still might purchase and build Mercury later on and in the meantime learn from you. Good luck and enjoy.
- 55 replies
-
- 1
-
-
- mercury
- victory models
- (and 1 more)
-
continuation

-
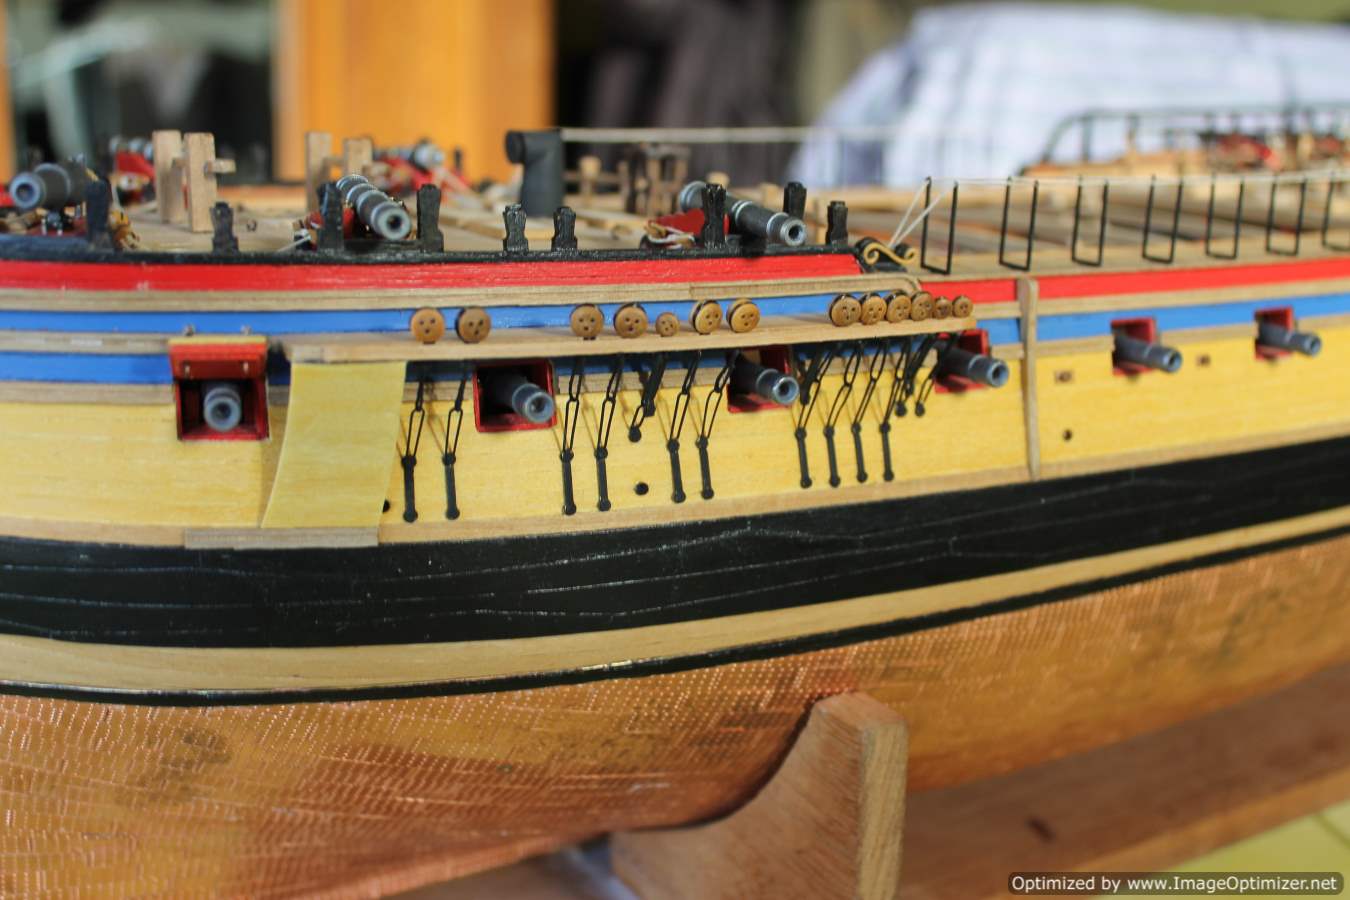
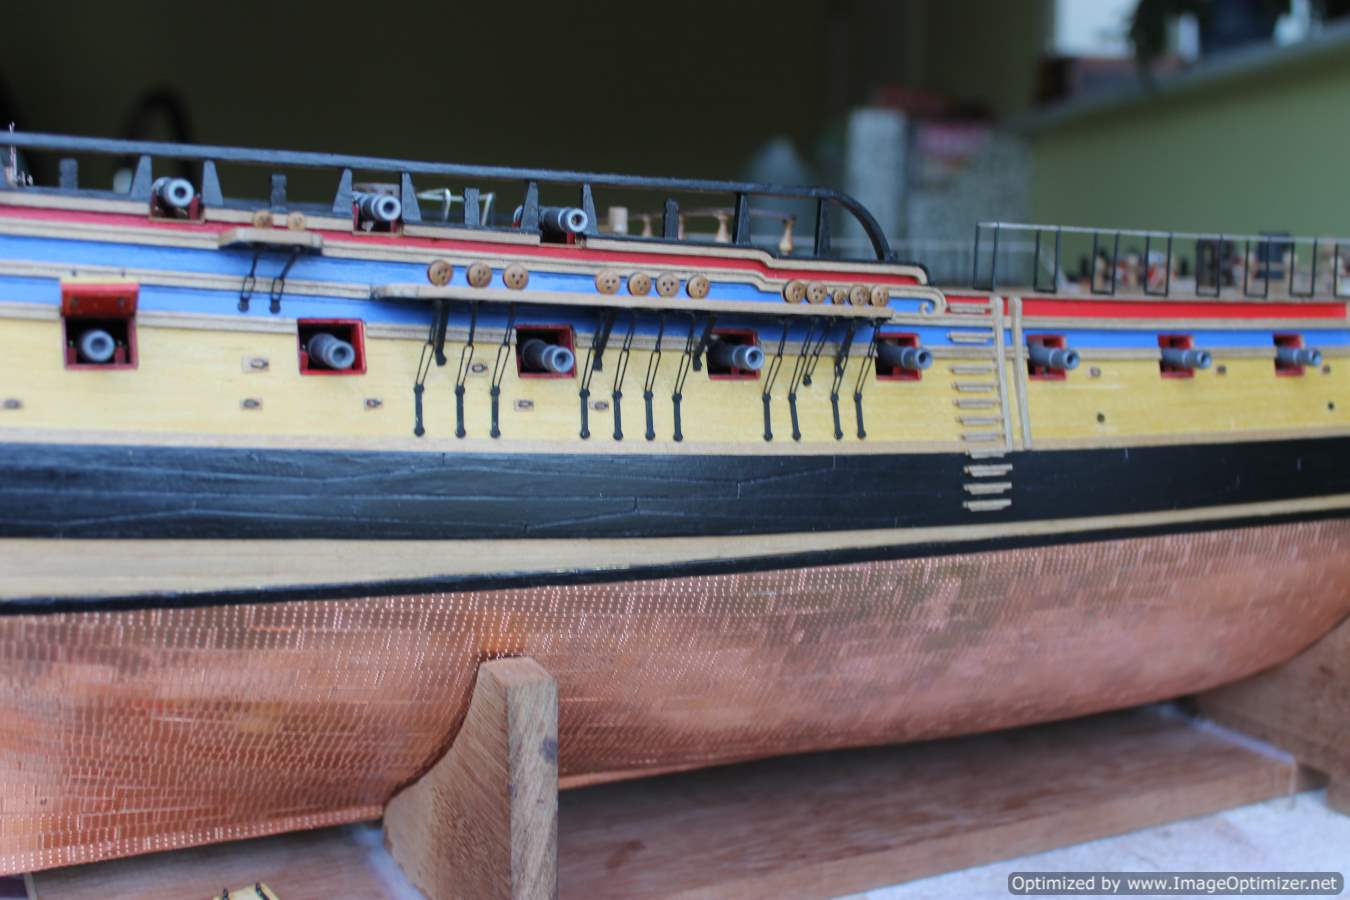
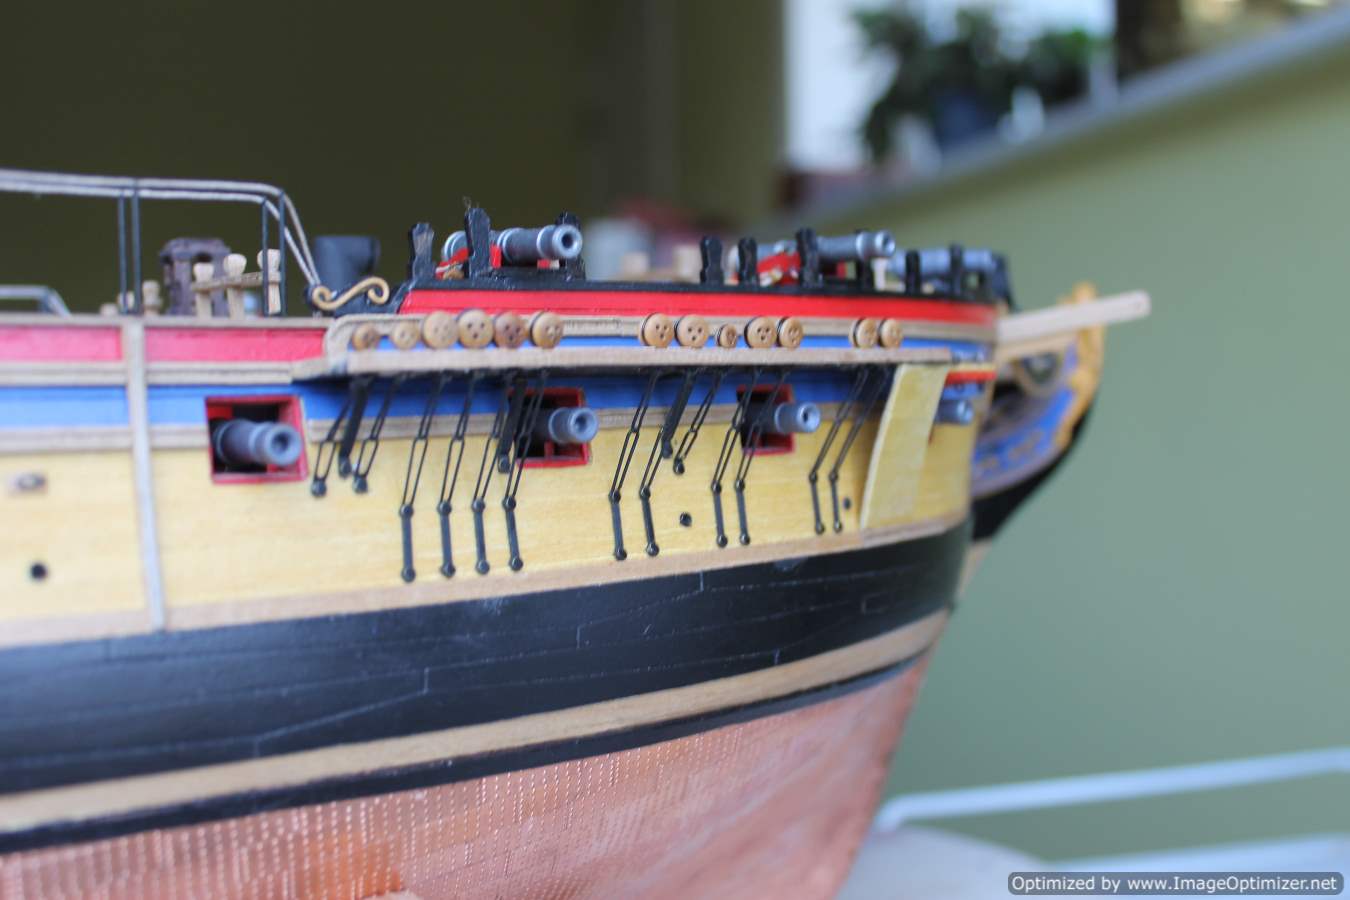
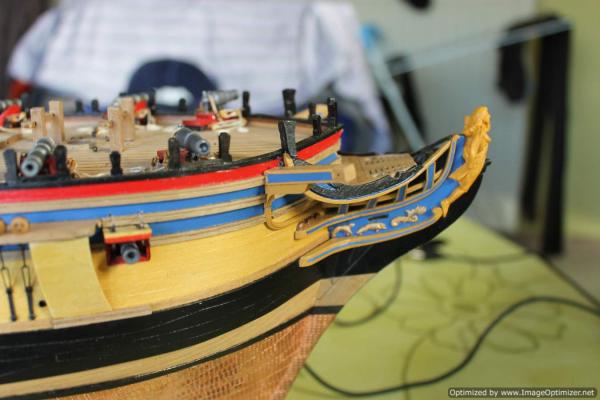
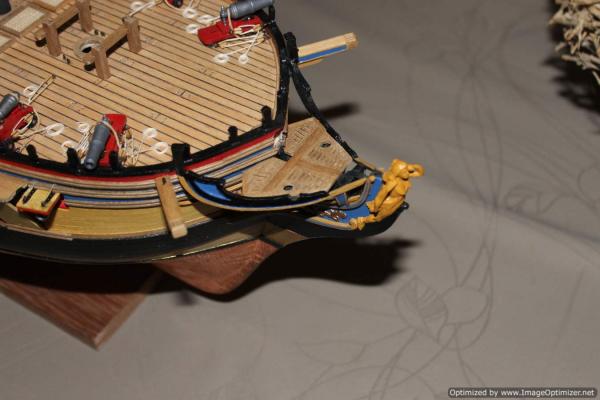
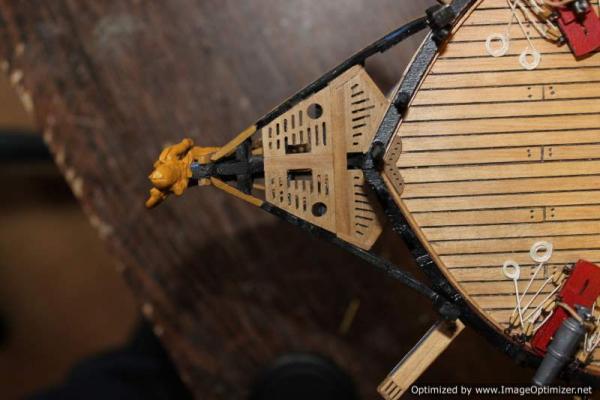
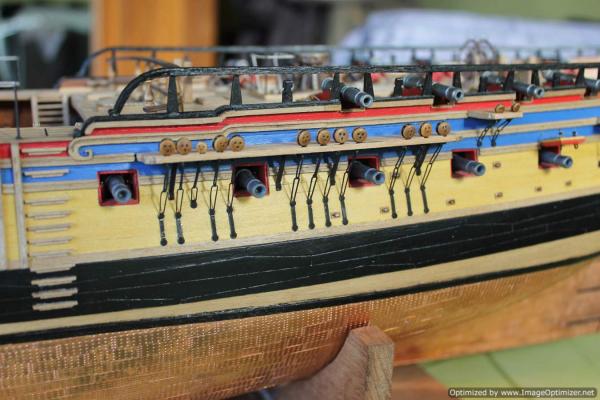
Channels & chainplates (continuation) This week I've completed the port side using the same method (thread instead nof wire) A word about the catheads : I've painted both sides in blue and covered the edges with fine strips of paper painted in ochre. I used paper as I wanted to add as minimum thickness to the catheads as possible. The blue color is still the same : Humbrol n°14; it received one coat of acryl varnish. Now the galleon gratings : just as Ray, due to my misinterpretation of the plans, I've encountered some difficulty so I made some incisions for the gammoning. Around the edges of those rectangular gaps I'll fix later on some 1x 2 mm wooden strips for aesthetical reason. The seats of ease will have to wait after the installation of the boomkins. What a chance that I still can rely upon the shipyard supervisor (last of 9 pics !) for counsel and guidance !


-
many congrats , Sjors We all learn from our mistakes. That's why I'm looking forward to your next build. By submitting those buildlogs-little by little- we improve ourselves and that's what this forum is all about. So you can ask Anja : "Schat, staat de Bokma koud?" ( closest translation = Are the necessary beverages in the fridge ? )
-
Superb work Ray (as always) One question : are you sure about the orientation of part 87 ? (this thing that is to secure the anchor) Enjoy your holiday, you have certainly earned it !
-
HMS AGAMEMNON by PMG - Caldercraft
Barbossa replied to PMG's topic in - Kit build logs for subjects built from 1751 - 1800
Nice work Pierre, the alignment of the gunports is perfect. A very nice sight. Regarding the front fascia, as I see it from the pics hereabove : the first option (Caldercraft French blue ) seems the best. I share your sadness regarding the latest events, however for myself, I always bear in mind that MSM-moderators put a lot of their spare time and effort into this site. So in case of "a debate" they have the final word. -
Nice work Ray, I second B. E. 's opinion regarding the seats of ease, therefore I haven't fixed them yet. At present, Mrs. Barbossa and me are going to spend a few days on the Belgian coast but I'll post some pics about this concern next W.E. on my own log.
-
BE, Sjors and Dafi : Thank you all for the kind words The "likes" are also very much appreciated. Greetings to you all. I sincerely wish I had more time to follow and comment all those interesting buildlogs. it appears there"s always more and more going on at MSW, not to mention what is lately called the Dark Side.... Little by little the hull is developping to its final form. Whenever the rigging will bore me I'll switch over to the life boats. BE : as I have Pegasus laying on the shelf, whenever I start building her, I'll make good use of your recommandations. Although : those "hanging knights in the void" just keep on haunting me
-
Continuation
-
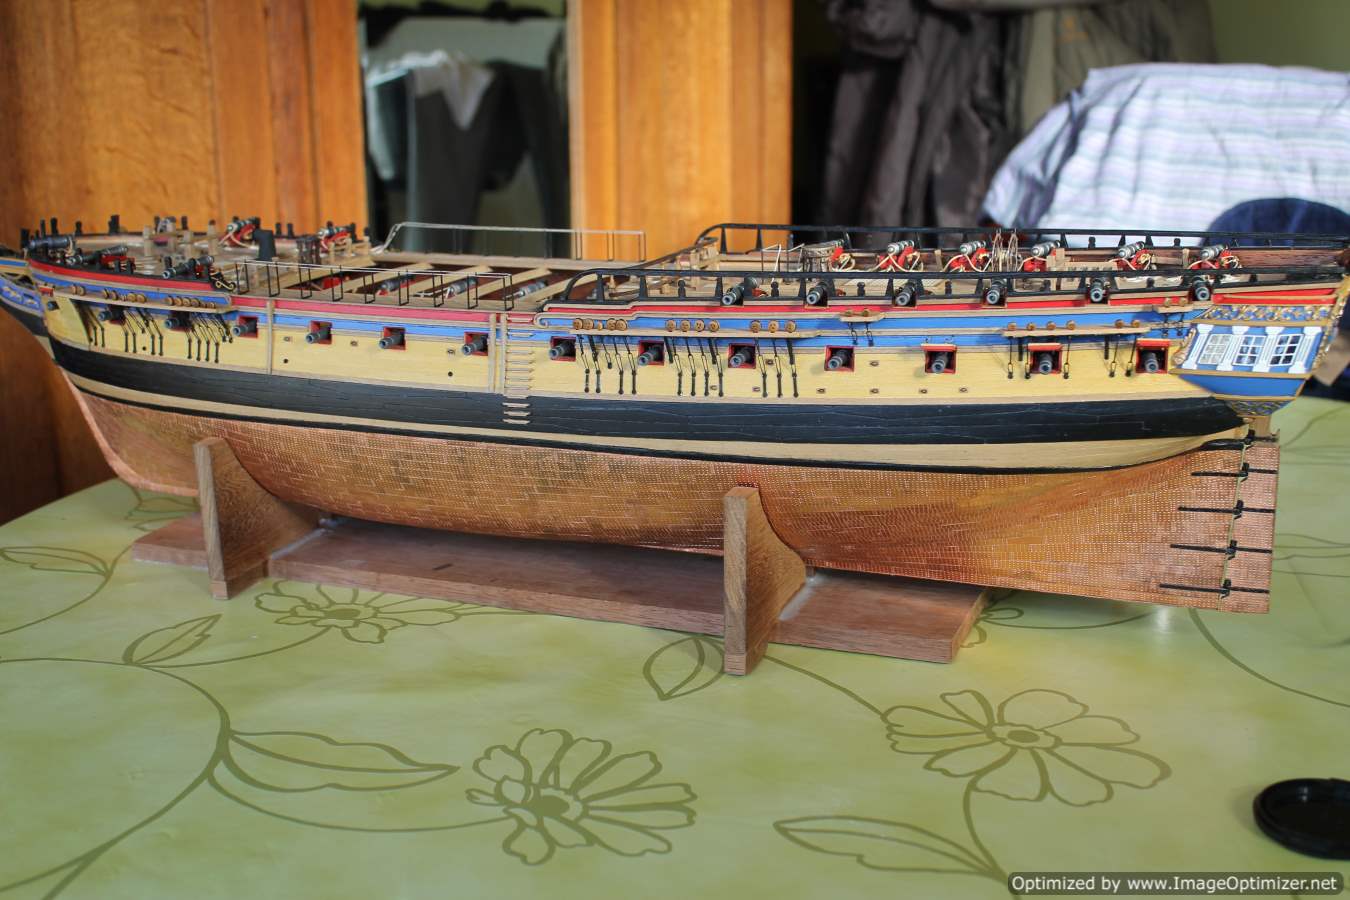
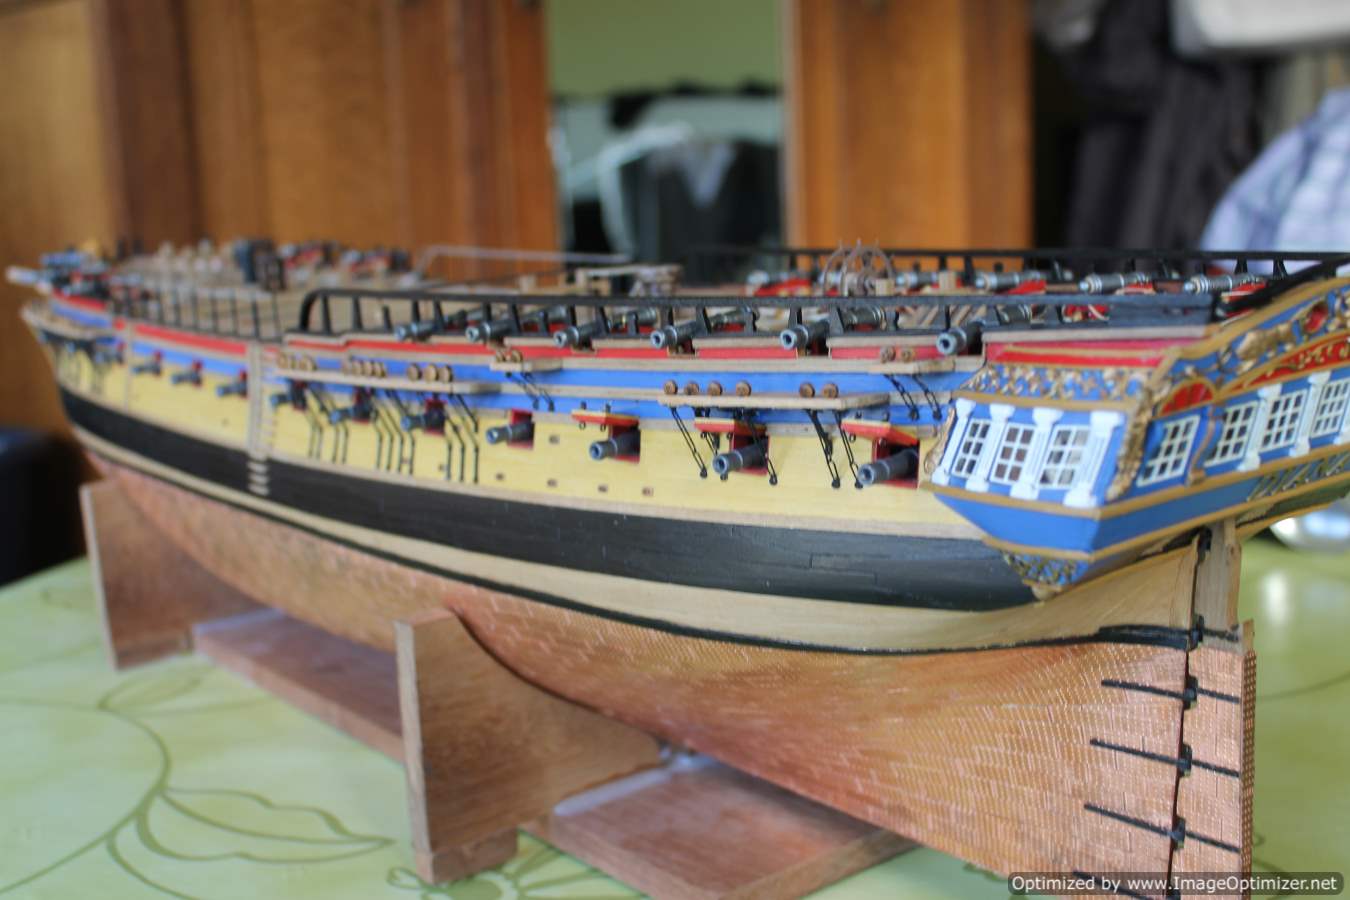
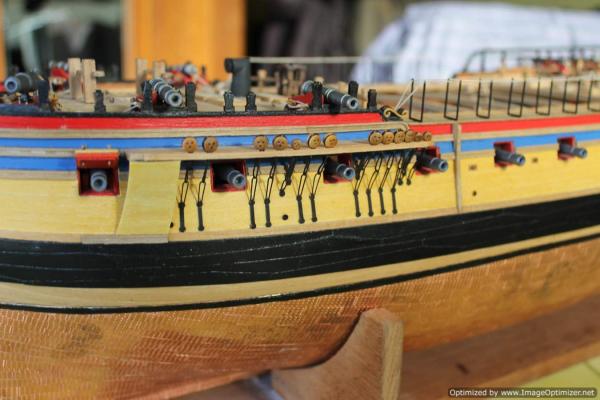
Hello, At last an update. Although the port side isn't finished yet, here's some pics regarding the starboardside (almost) completed with the most of the remaining fittings. Referring to previous post regarding the channels : according to the building instructions the seperate parts are to be connected with some brass wire. As I had some trouble with the dead-eye-strops, I chose for a thread instead. This is a second best choice but I wanted the channels as straight as possible and the thread option allowed me to tighten the wole thing at my convenience. The more is, this thread is not "fluffy" at all: (as you can see on the last pic) and the knot is well hidden behind the loop which was the result of my dead-eye-strop-replacements. Afterwards ,I overpainted the whole thing with Enamel mat black But as I mentioned : this is a second best choice Hello Ray, As you are probaly following this log, please bear in mind that the channels & main plate closest to the stern gallery are partially covering one gun port lid, the channel connection downwards can be a bit narrow. Anyway : here's the first serie of pics


-
HMS AGAMEMNON by PMG - Caldercraft
Barbossa replied to PMG's topic in - Kit build logs for subjects built from 1751 - 1800
Hello Pierre First some congrats regarding your build Secondly : regarding your question .. hmm in my opinion it is difficult to say : at first sight the blue seems a bit too dark indeed and some dillueing seems appropriate however... a picture or a photograph can be deceptive whenever it comes to the light exposure. How does the blue respond in "natural light" ? In addition : I presume some ornaments ( be it in yellow or ochre ) are to complete this specific part. How do you feel about the contrast ? Once completed, is this part to receive some kind of a varnish ? -
hear, hear Hi Ray As been told by so many : great job on those open bulwarks
- 536 replies
-
- 1
-
-
- diana
- caldercraft
- (and 1 more)
-
Great Job , Ray I had some trouble while bending the 5x2 mm strips. As result the curves and even the straight parts are seperate. Because as seen from above this upper rail follows a certain camber or loop, if you like.
-
Hello Sjors, This is a challenging project, I'll be watching your progress. Who knows when CC is to release their 74 gunner at 1/64 ? This is for sure a more than worthy alternative.
-
Thanks for showing interest, Aldo Somewhere on the bookshelves there's a monography of the French frigate La Vénus ( J. Boudriot ) You never know... but on the other hand, building an own ship from scratch is a dream that many of us kitbuilders share, I guess...
-
hi Bruno, It was about time I payed you a visit. I rarely visit the scratchbuilding-side : it is rather confrontational and it clearly shows I still have a lot to learn , if ever I want to build a ship all by myself ( which is a dream many kit builders share, I guess ). Never mind : you're doing a great job on her. What technique did you use for the treenails ?
-
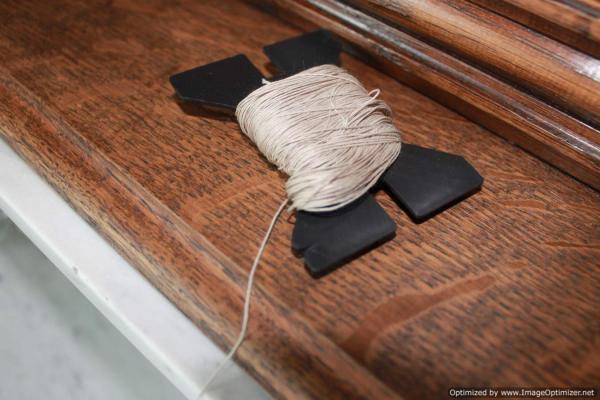
Hi Davyboy, many thanks for your input. I'm a bit late to respond, but family life got a bit between me and shipbuilding. This is probably not by the book, but I'll settle also by bending iron wire around the deadeyes and thus creating a loop. As you can see underneath and refering to previous posts it was only while completing the main channel that I realised the loops were far to big as they are to receive a 0,8 mm wire to connect with the chainplates. See the pic : the left one is OK So very little progress here. Once those channels completed and other hull-side fittings done, I'll post some pics of an (almost) completed hull.
-
Thanks Pierre for your encouraging comments, much appreciated. Back to this channel & chainplate problem. I've decided to go for the "scratch" solution. The first attempt seemed satisfactory (at first sight). But sometimes a helicopter sight might cause you to reconsider. I created those loops by bending the iron wire around a toothpick and only while assembling the deadeyes on the main channel, I realised they were far too big, I obtained a much better result by bending the wire around a large needle. No harm done but back to start and I'll have to remove lots of iron wire from 30 deadeyes. Still I wonder : there are a few Jotika/Caldercraft buildlogs running on this forum. How do you deal with this ? Bonjour Offencer, Just went on the net doing some research regarding "La Recouvrance" This is a wonderful project and now I realise the city of Brest has all reason to be proud to be represented with such a beautiful ambassador. Perhaps you should start a buildlog. I'm looking forward to it.
-
Wonderful work, Andy I'm also more inclined to tackle the shrouds "stage by stage" instead of assembling the masts at first. As I'm a bit anxious that you might tight the ropes as such that the mast might bend in an unappropriate direction. I am aware that many other members have a different opinion about this matter, but I think this approach ables you to "compensate" if necessary.
-
Hi Andy, it appears you were quicker to respond Aftermarket pieces are indeed the safest way to resolve this problem. The more is : when it comes to problemsolving by using the "do-it-yourself-method" for several identical pieces, there is a major requirement : the search uniformity.