HOLIDAY DONATION DRIVE - SUPPORT MSW - DO YOUR PART TO KEEP THIS GREAT FORUM GOING!
×

DB789
-
Posts
427 -
Joined
-
Last visited
Content Type
Profiles
Forums
Gallery
Events
Everything posted by DB789
-
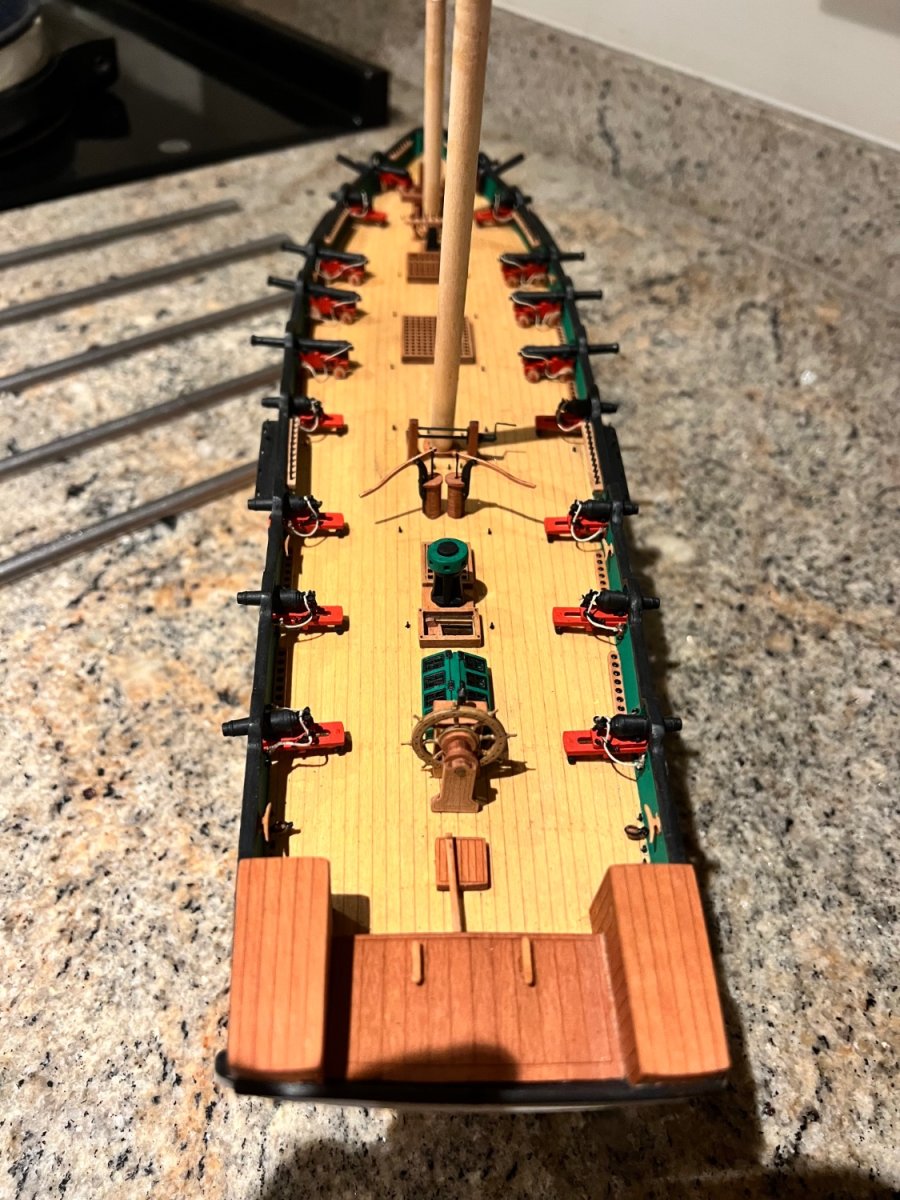
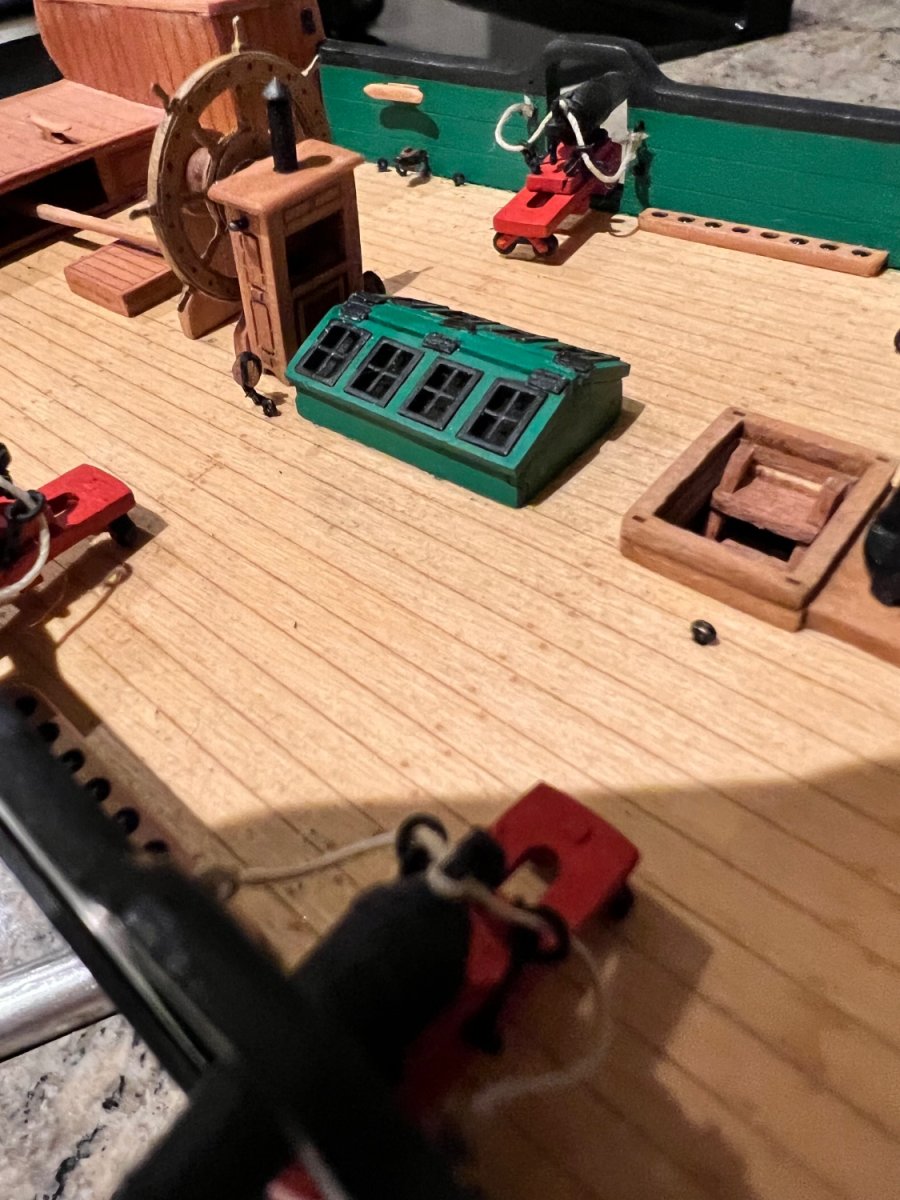
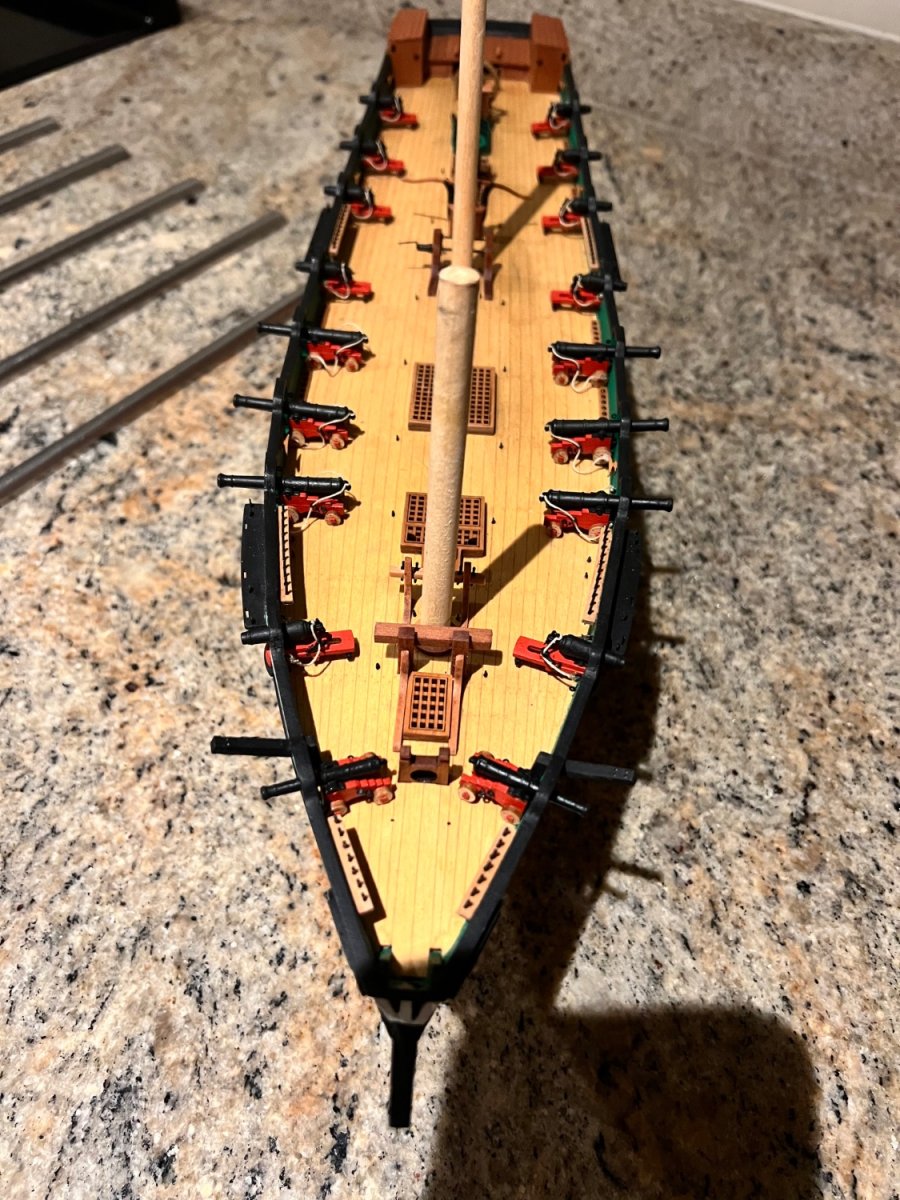
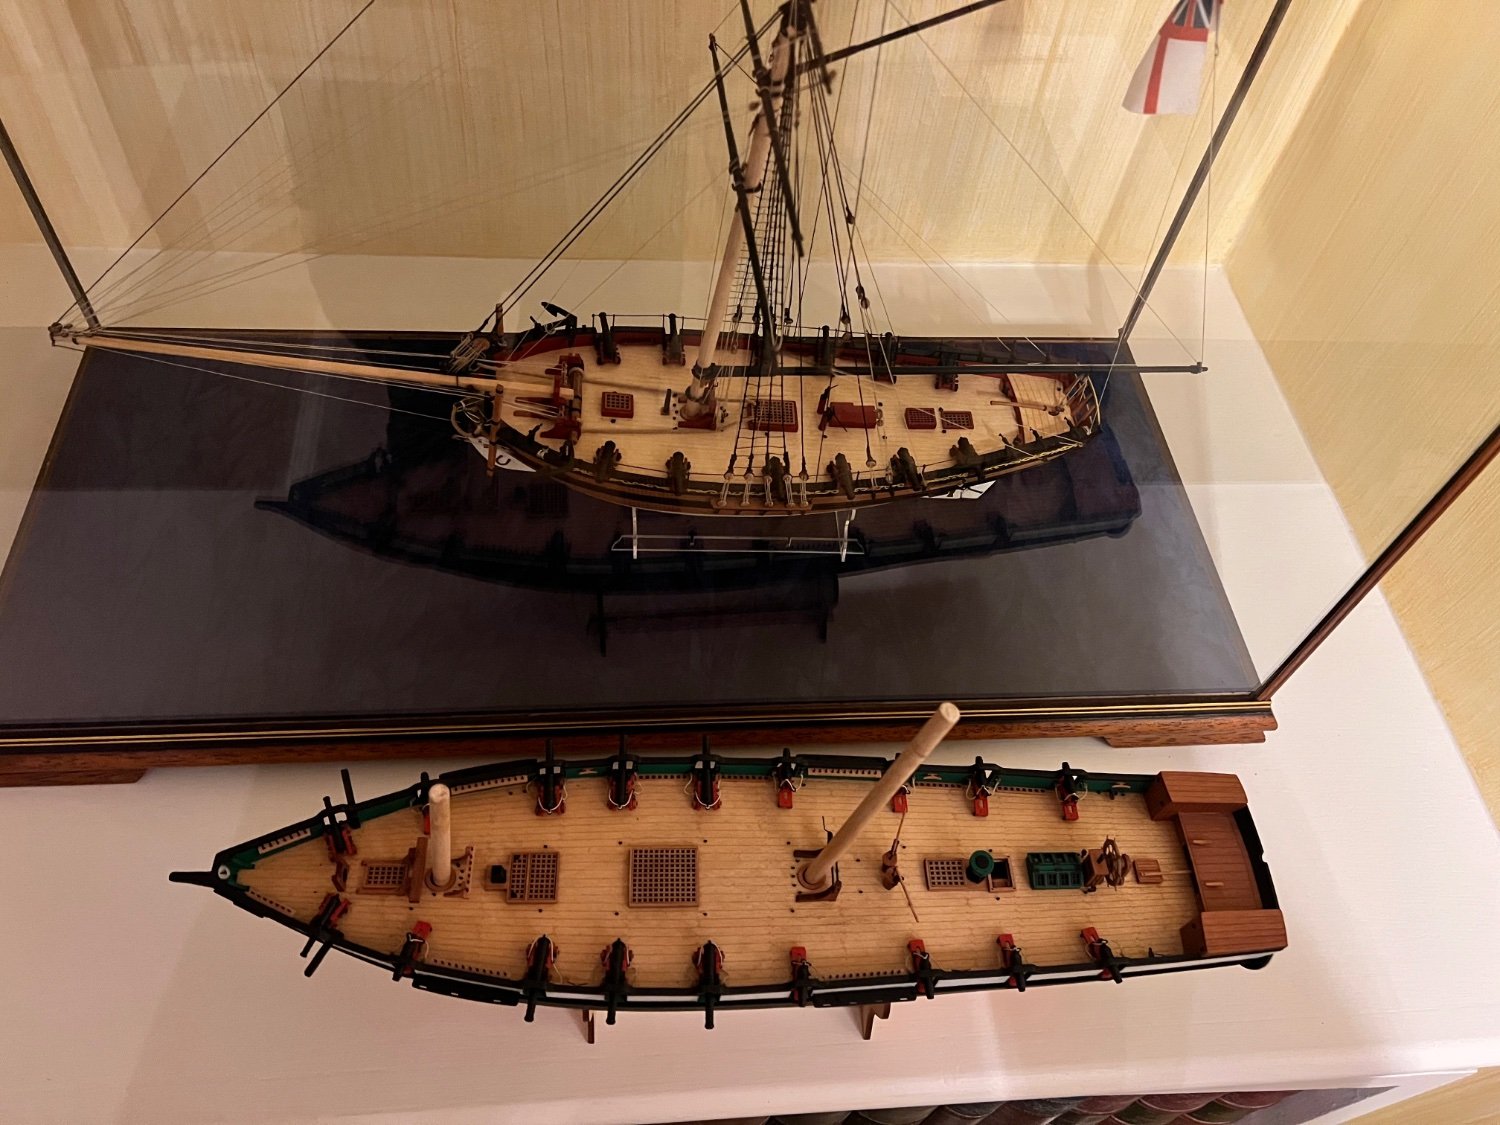
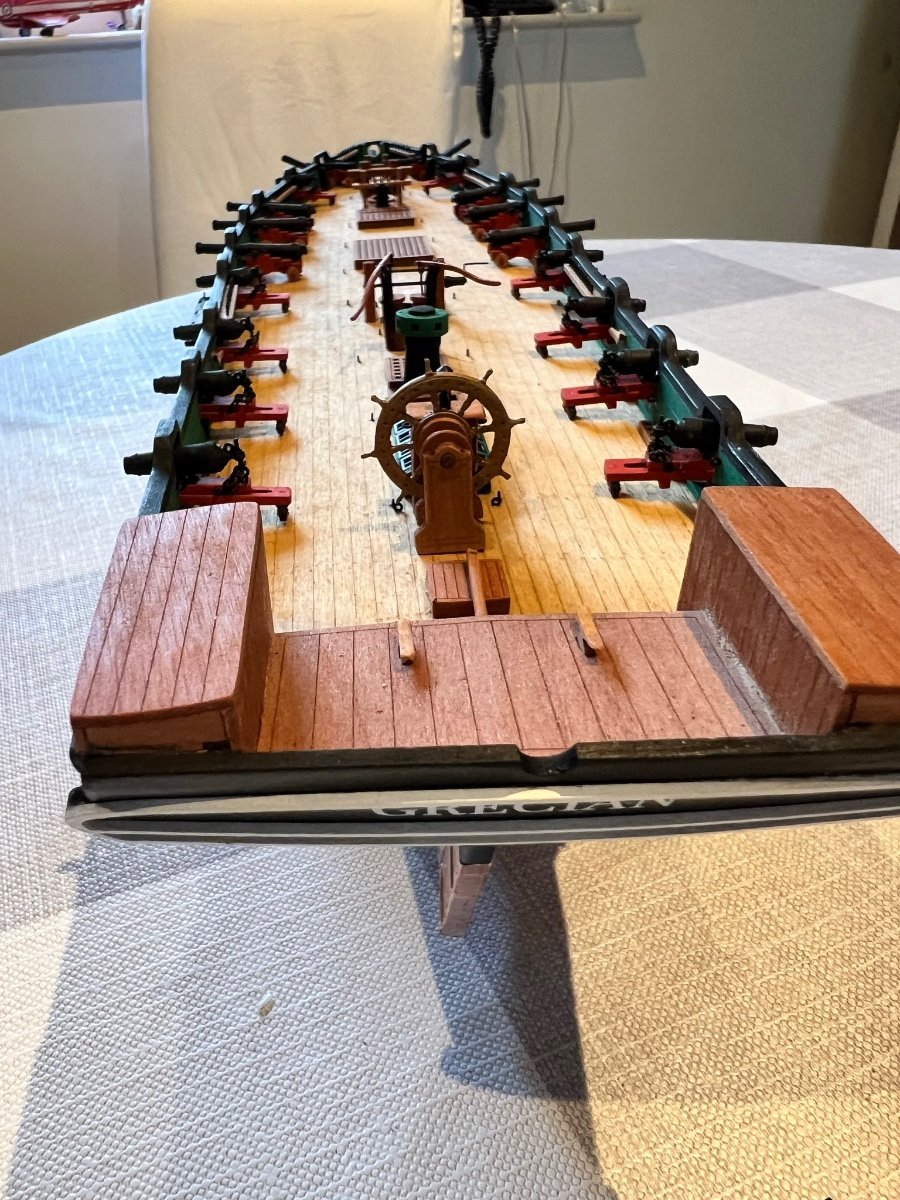
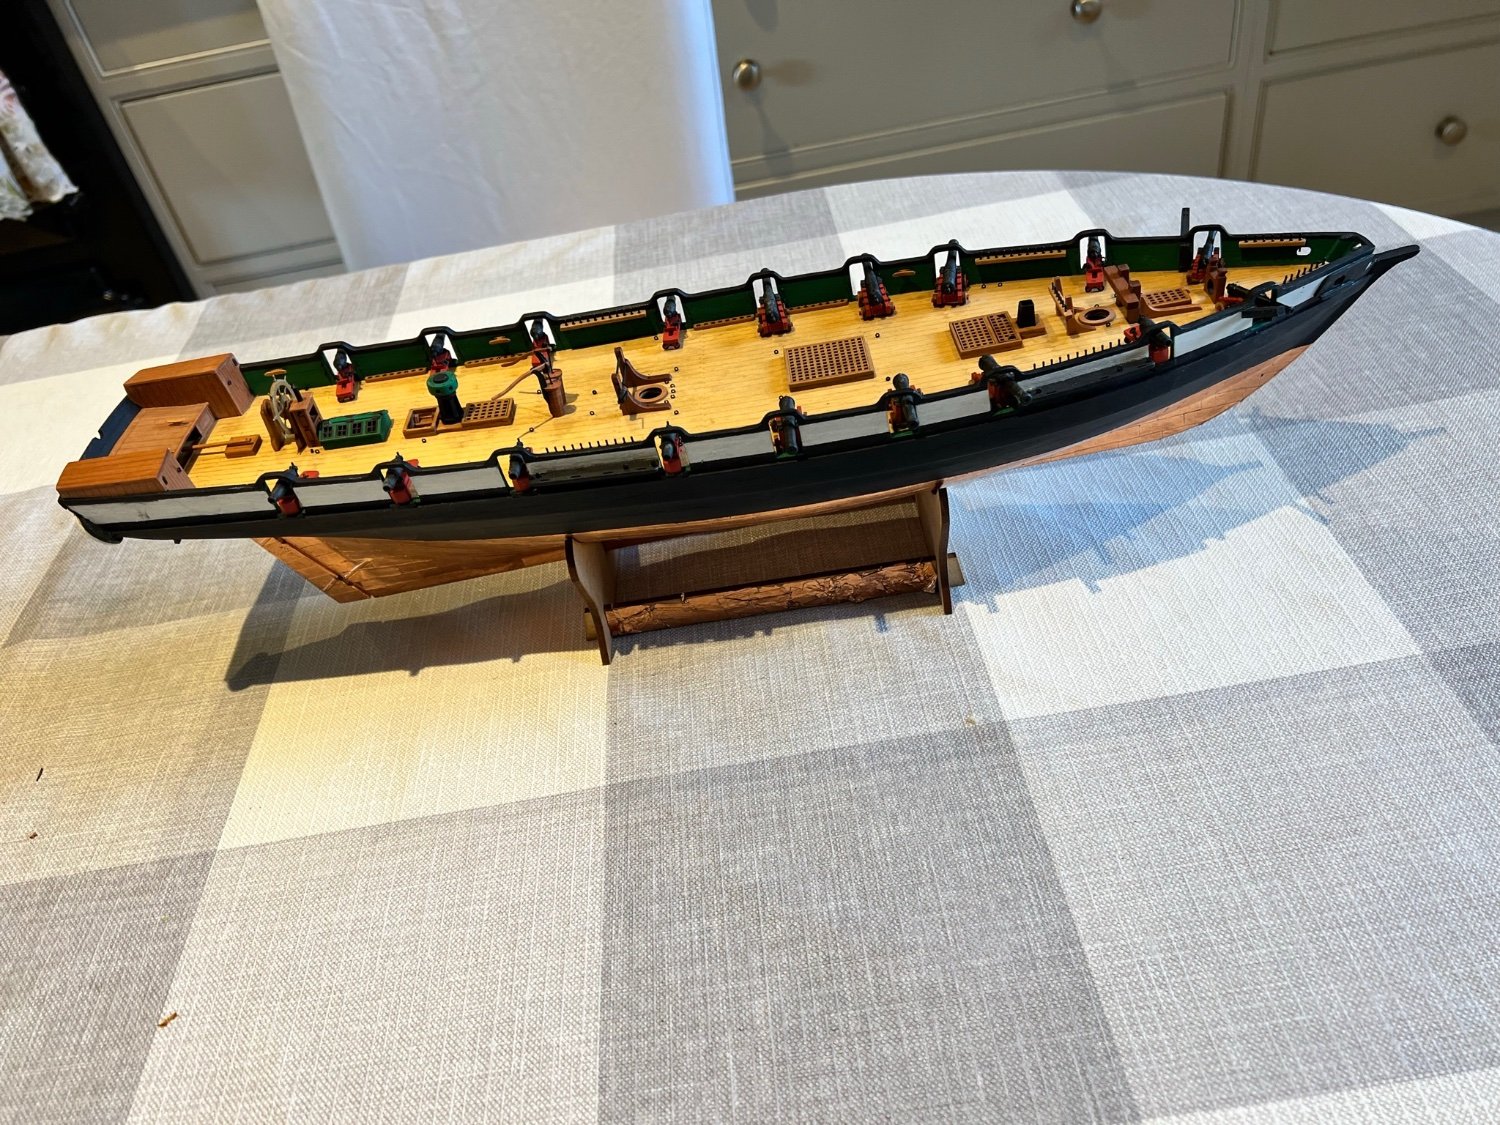
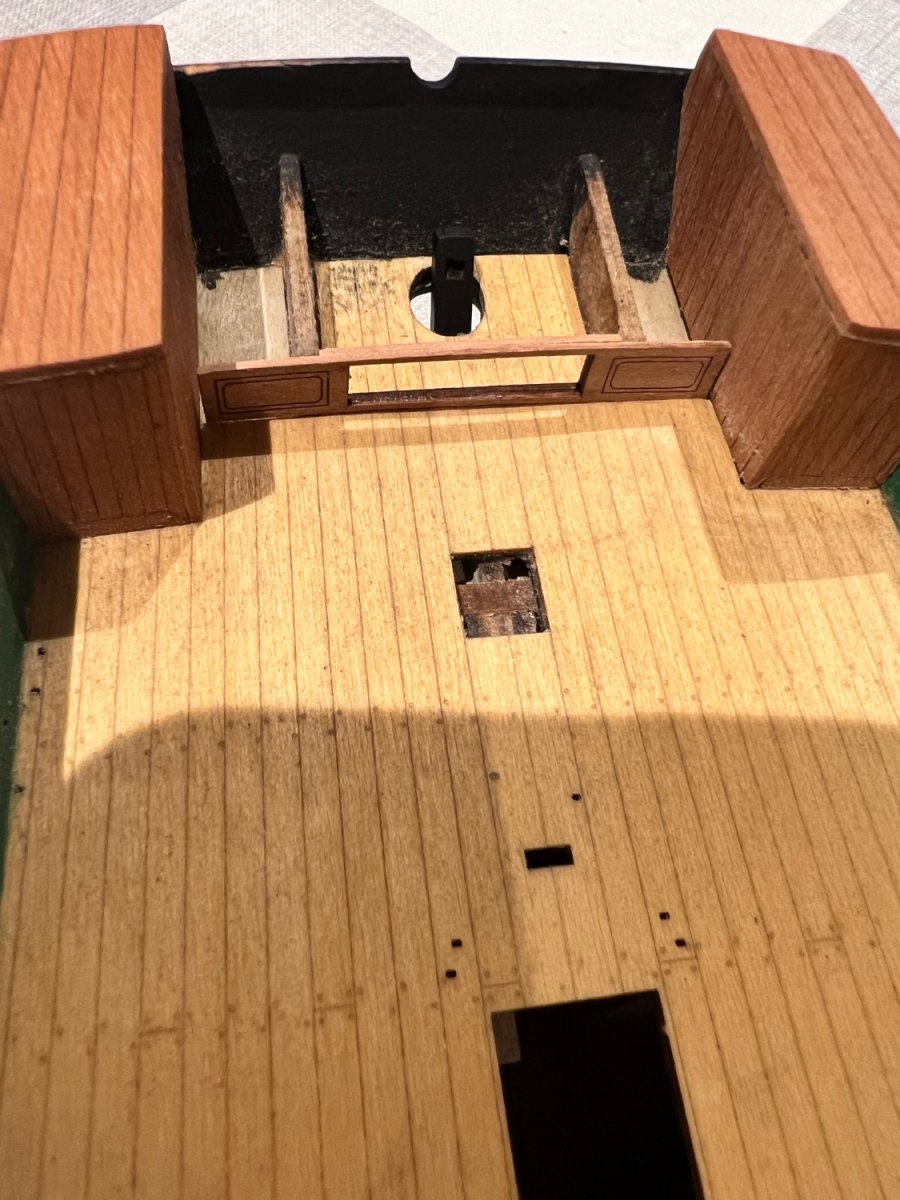
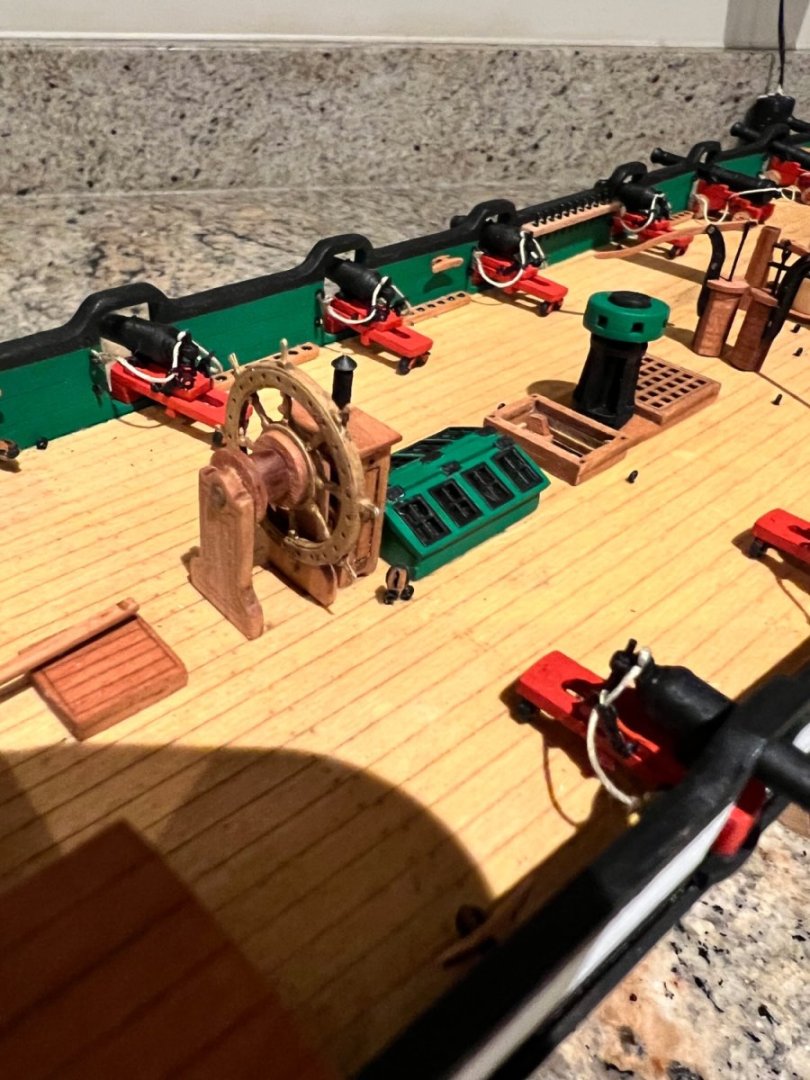
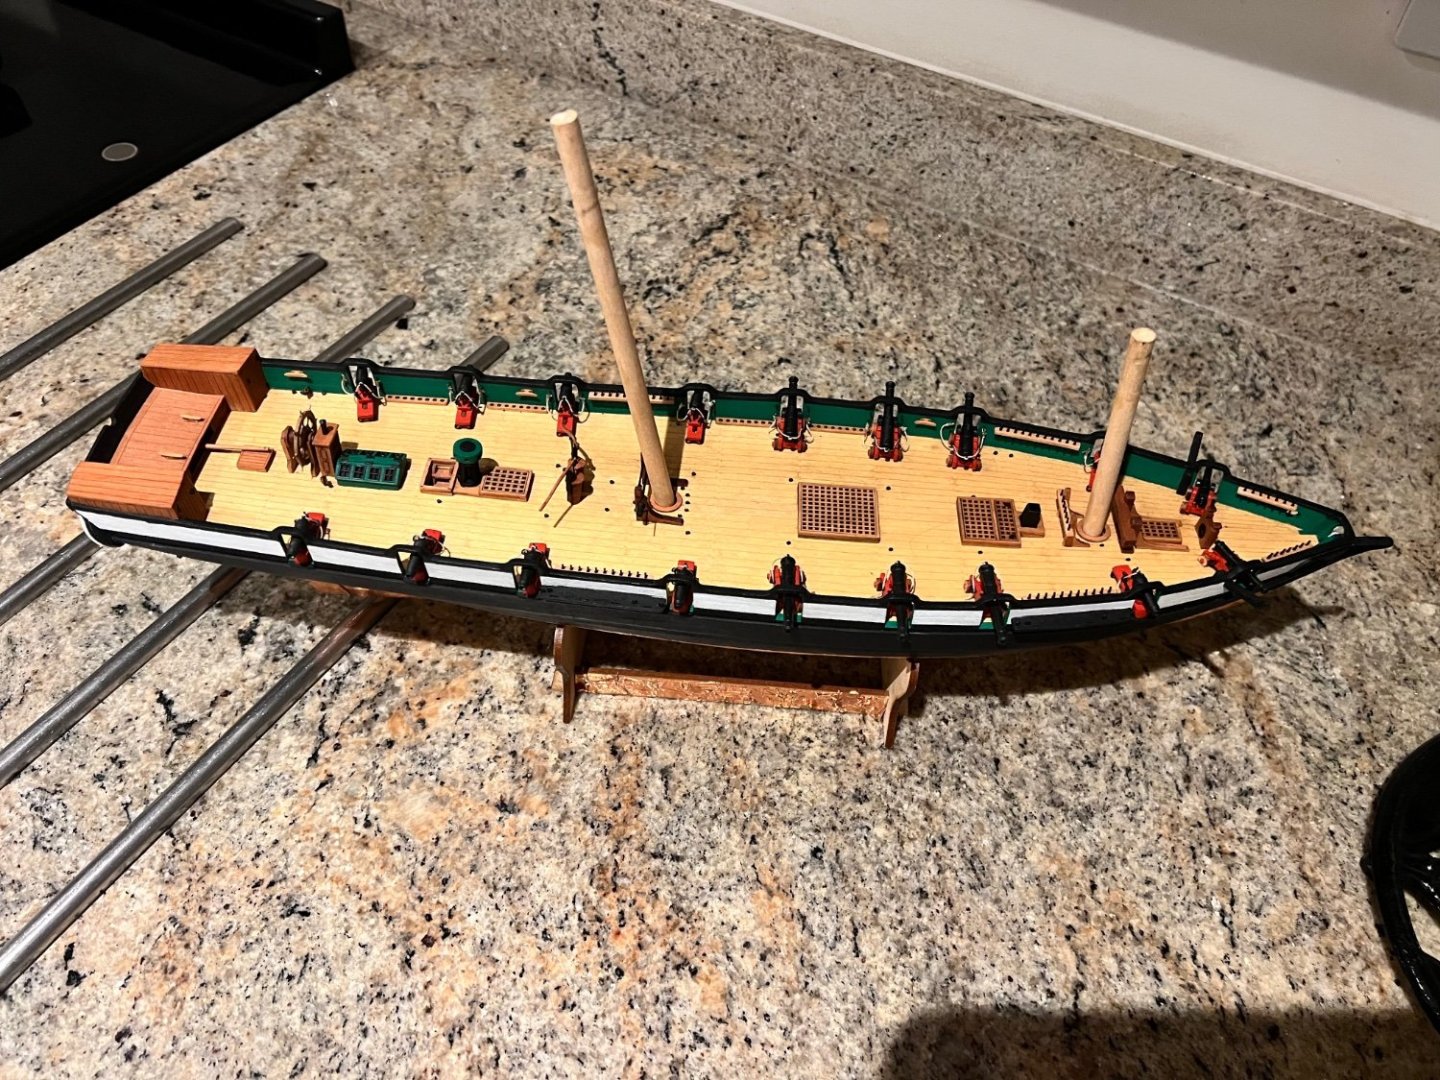
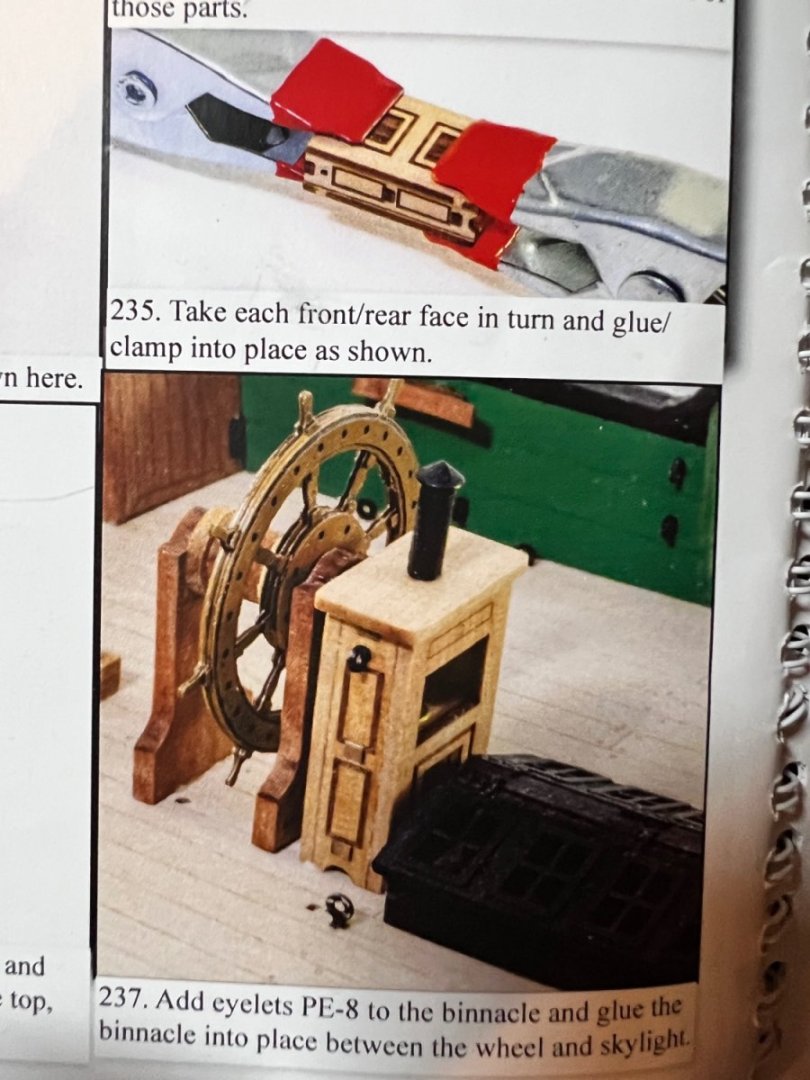
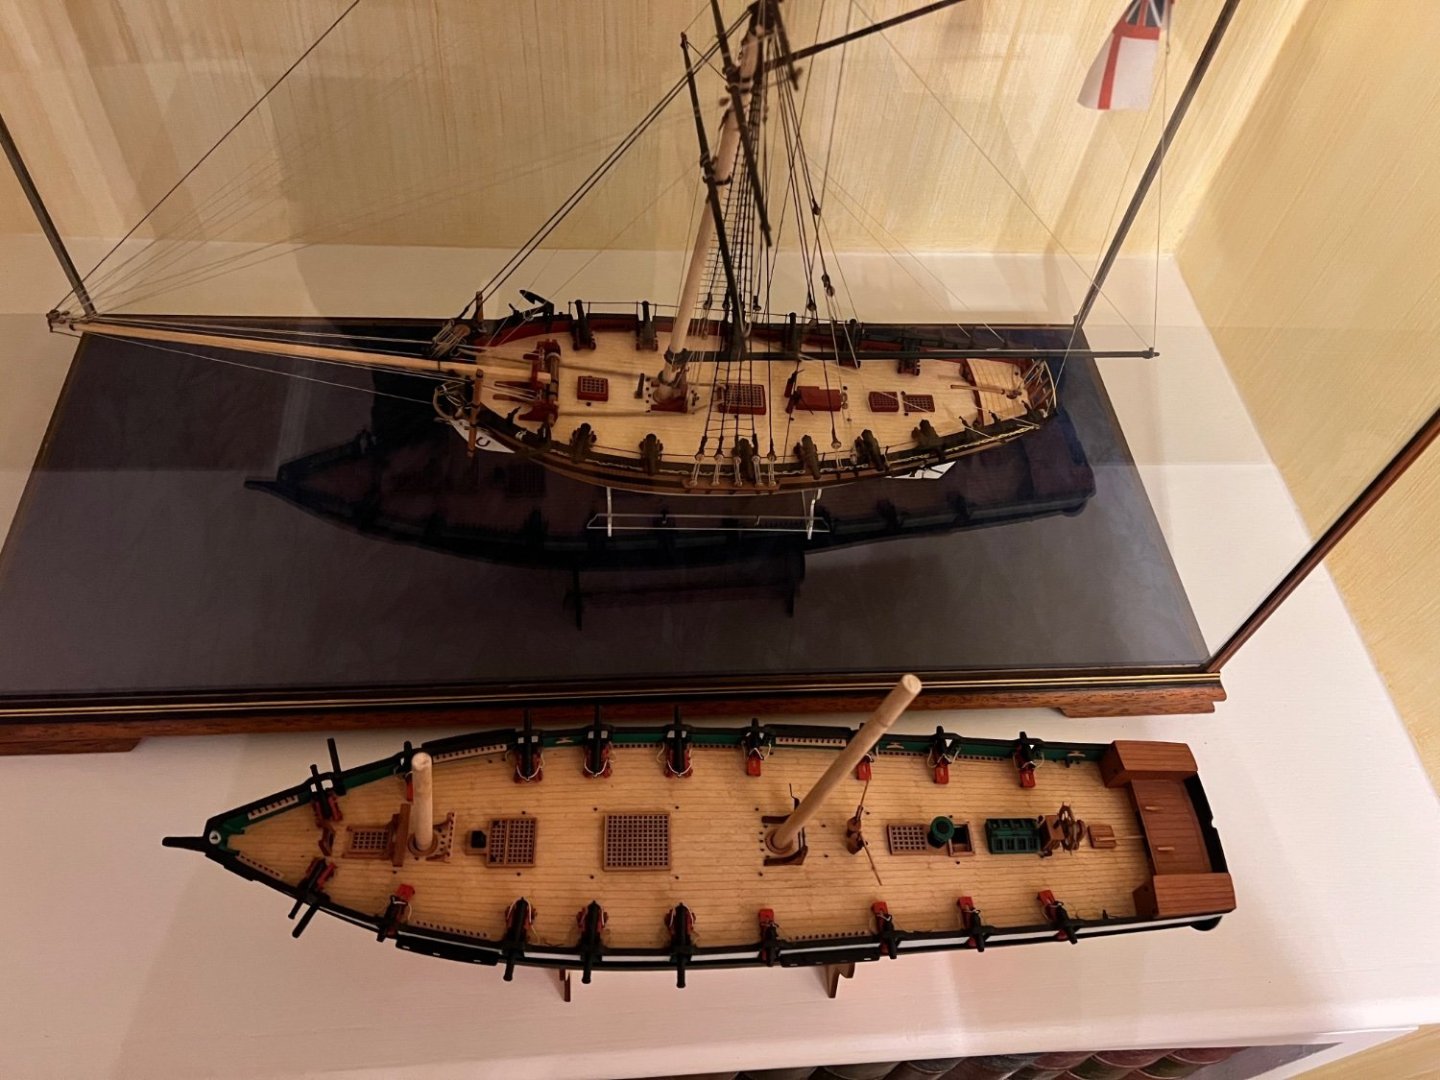
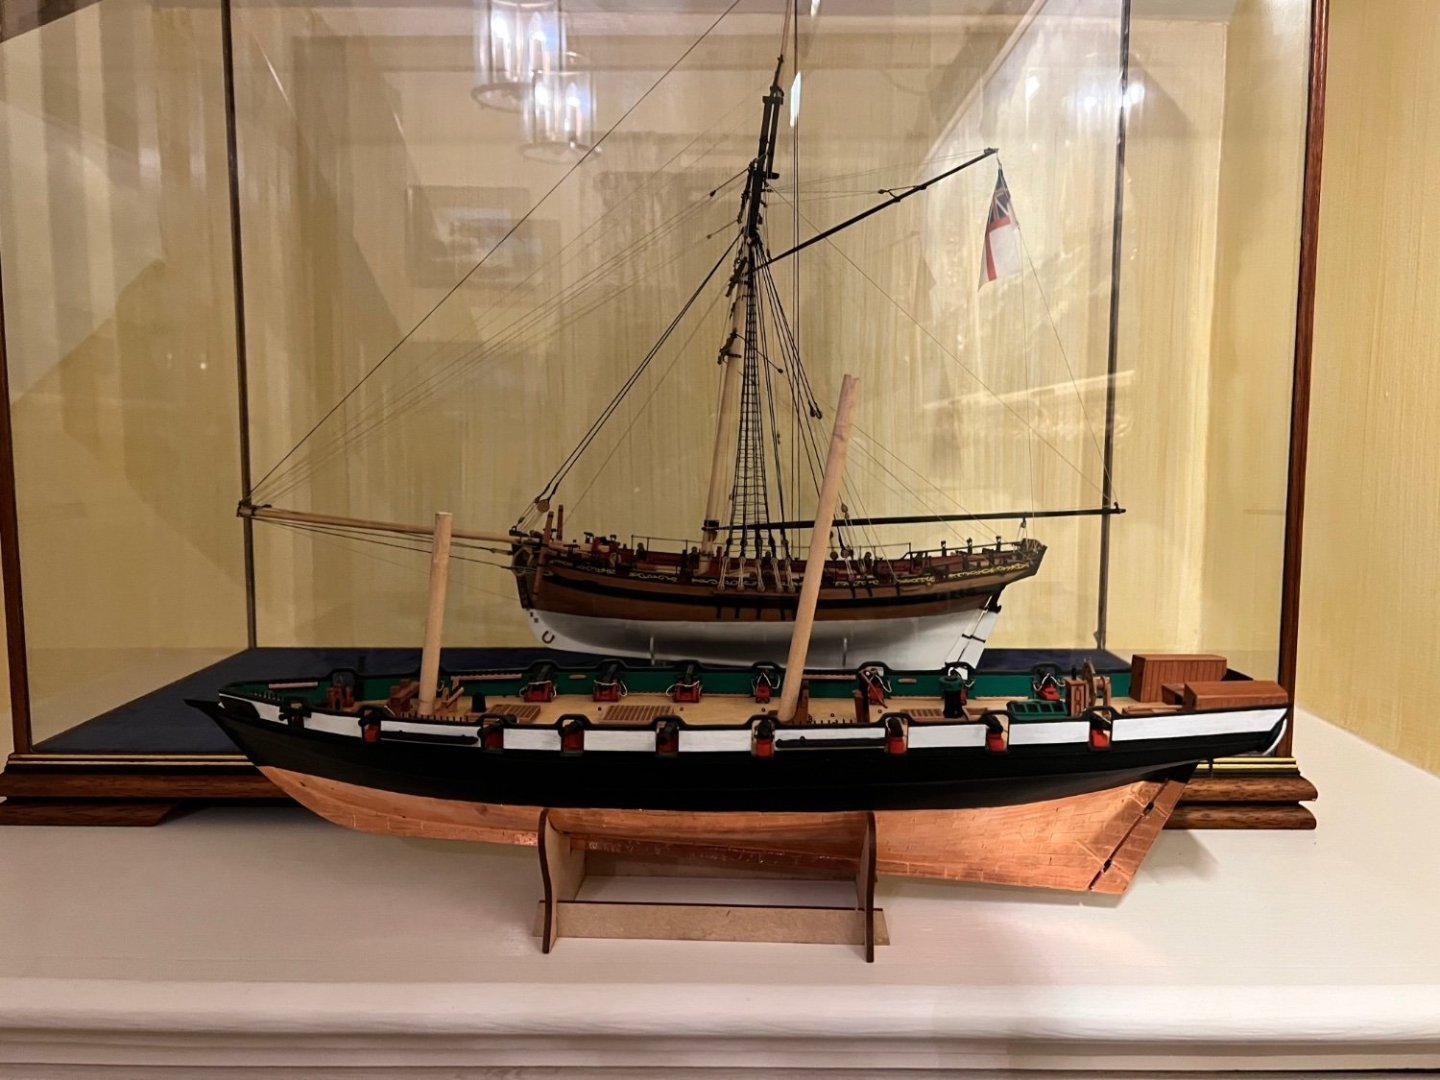
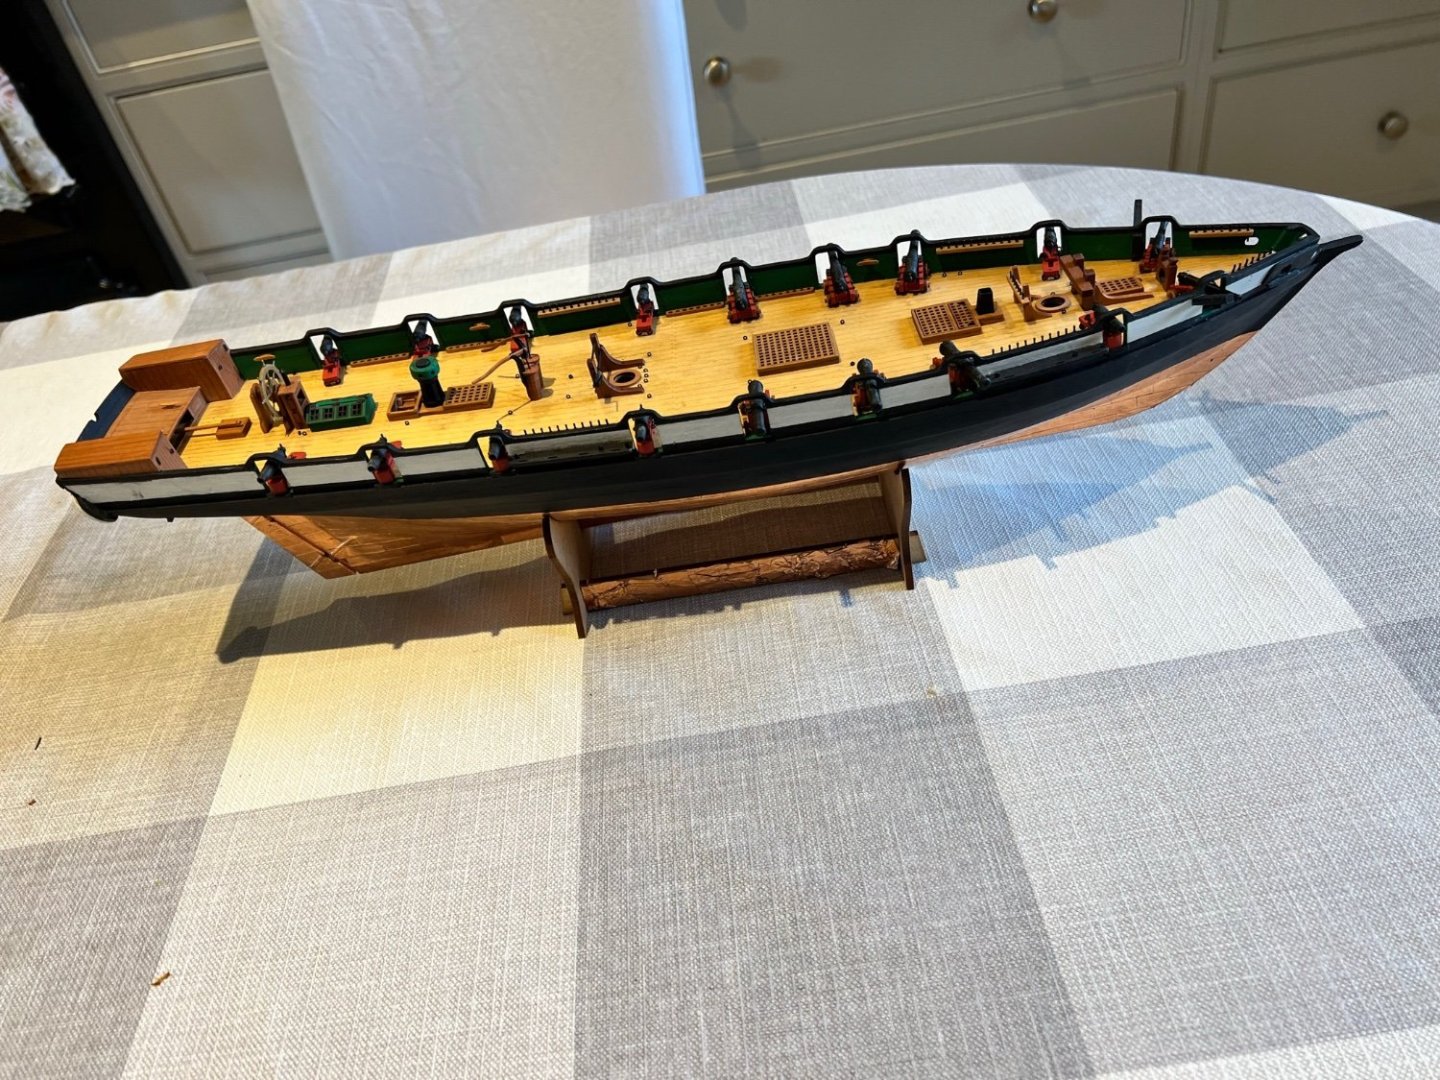
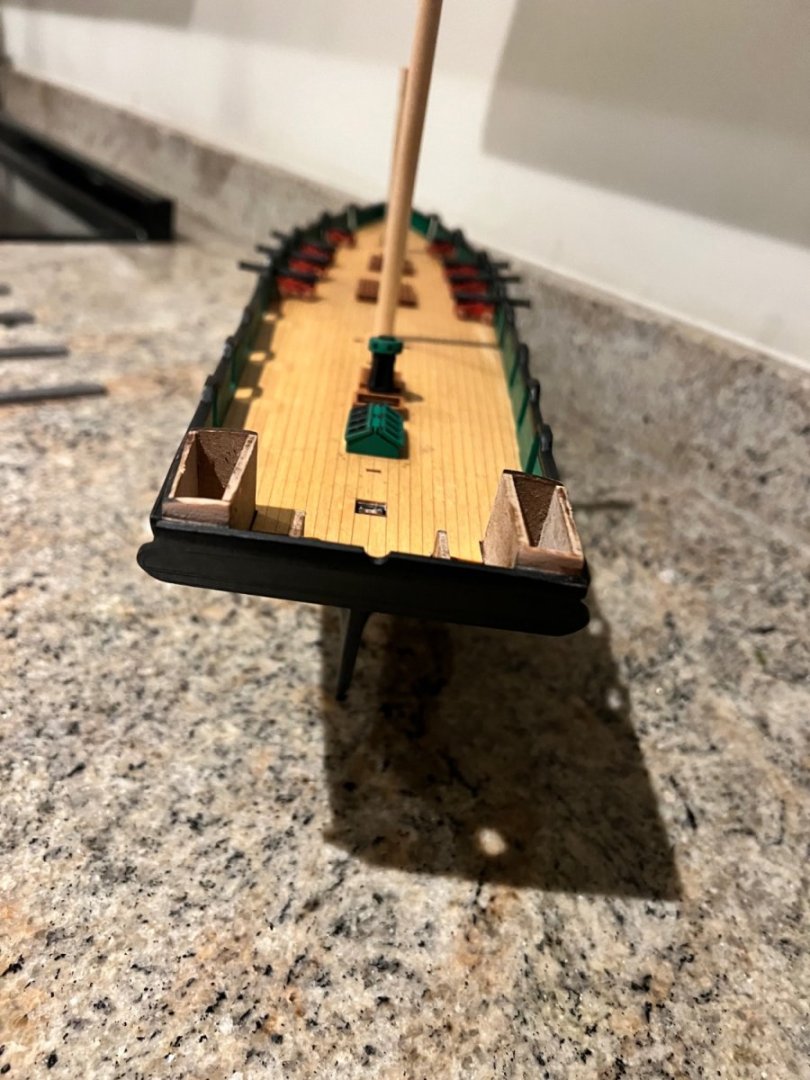
 I’ve added breach ropes to each of the guns and carronades. I don’t plan to add the training tackle as with my rope skills it would just look a mess and wouldn’t improve the model. The ropes need some Matt varnish applied and then to be shaped to hang more naturally. The two four pounder cannon forward don’t have a breach rope as there’s no space for eyebolts on one side of the gunport due to the cat head and also I don’t have enough eyebolts. Unlike the other guns these are not glued to the ship and I may remove them. Rudder chains have also been fitted. I needed to use open eyebolts from Alert to attach the chain to the hull as the individual chain links were too small for me to cut open and then close up again. The PE open rings from the carronades fittings worked to join the chain to the PE fitting on the rudder. The instructions for adding the binnacle show the recessed area with the compass in facing forward. Is that right? I can’t see how the helmsman would see the compass to steer a course. Turning the binnacle round however means that the wheel mounting almost entirely blocks the recess too (see below), although it’s just about possible that the helmsman might be able to see the compass. As you can see I’ve gone for a green and black colour scheme for the skylight which is a mild deviation from the black on the prototype. Any thoughts or advice on this would be greatly appreciated. She’d definitely look more interesting with the binnacle facing forward as per the instructions. Next job is to fit the wheel and binnacle and rig them. Other than that the hull is almost complete. I need to add some blocks to eyebolts, stanchions around the companionway and steel wool the hull before starting masting and rigging proper. The 3D printed cutters that Vanguard include are super for this kit and my skill level where I’d struggle to do a good job planking a wooden cutter. However, they are hostage to being able to paint the interior in a faux wood colour on both the plastic, wooden and any PE parts. Another option I’m considering is whether to paint the inside of the cutter white and green like the outside - would that look odd? I’ll only include the cutter on the finished Grecian if her paint job doesn’t detract from the main vessel. A couple of pics showing how Grecian compares to Alert which is now cased. I still haven’t tidied up the ropes and added coils to Alert so she’s not completely finished yet. Likely I’ll do a job lot and make up rope coils for both boats at the same time.


- 103 replies
-
- 11
-

-
- Grecian
- baltimore clipper
- (and 4 more)
-
2023 Donations drive
DB789 replied to James H's topic in Using the MSW forum - **NO MODELING CONTENT IN THIS SUB-FORUM**
I’ve donated too. This is a fantastic resource and much appreciated. Thank you. Dan -
Cisco, Hal, I think that you’re both right - I am overgunning Grecian for aesthetic purposes, the kit plans do this too but to a lesser degree (16 guns - 12x carronades and 4x cannon). Chris in the instructions is very clear that Grecian only had 4x cannons and no carronades as an American privateer. That’s a choice I could have gone with, but in my opinion the build would have looked incomplete despite being historically accurate. What I couldn’t get my head around was why the privateer captain / owner built a ship with 18 gunports and only mounted 4 guns. I think your explanations of how privateers were used and that looking like having more guns but remaining light to catch prizes makes a great deal of sense. With regard to mixing carronades and cannons I defer again to Chris’s research and knowledge that as a RN 10-gun schooner she would have been fitted with 8x carronades and 2x long six pounder cannons. I suspect that I probably have too many cannons forward which being much heavier than carronades might upset the weight and balance of the schooner. Thank you very much for the advice and info. Dan
- 103 replies
-
- 5
-
-
- Grecian
- baltimore clipper
- (and 4 more)
-
Thanks Alistair, unfortunately iPhone photos do lie and make her look much tidier than she is in reality!
- 103 replies
-
- 1
-
-
- Grecian
- baltimore clipper
- (and 4 more)
-
Thanks Andrew. I do wonder too why the Americans built a privateer with 18 gunports and only put 4 guns on her. I can understand being a few guns short due to cost or availability of cannons, but 14 empty gunports? I note that Alert also has an empty gunport forward that would be difficult to work and is almost covered by the anchor.
- 103 replies
-
- 2
-
-
- Grecian
- baltimore clipper
- (and 4 more)
-
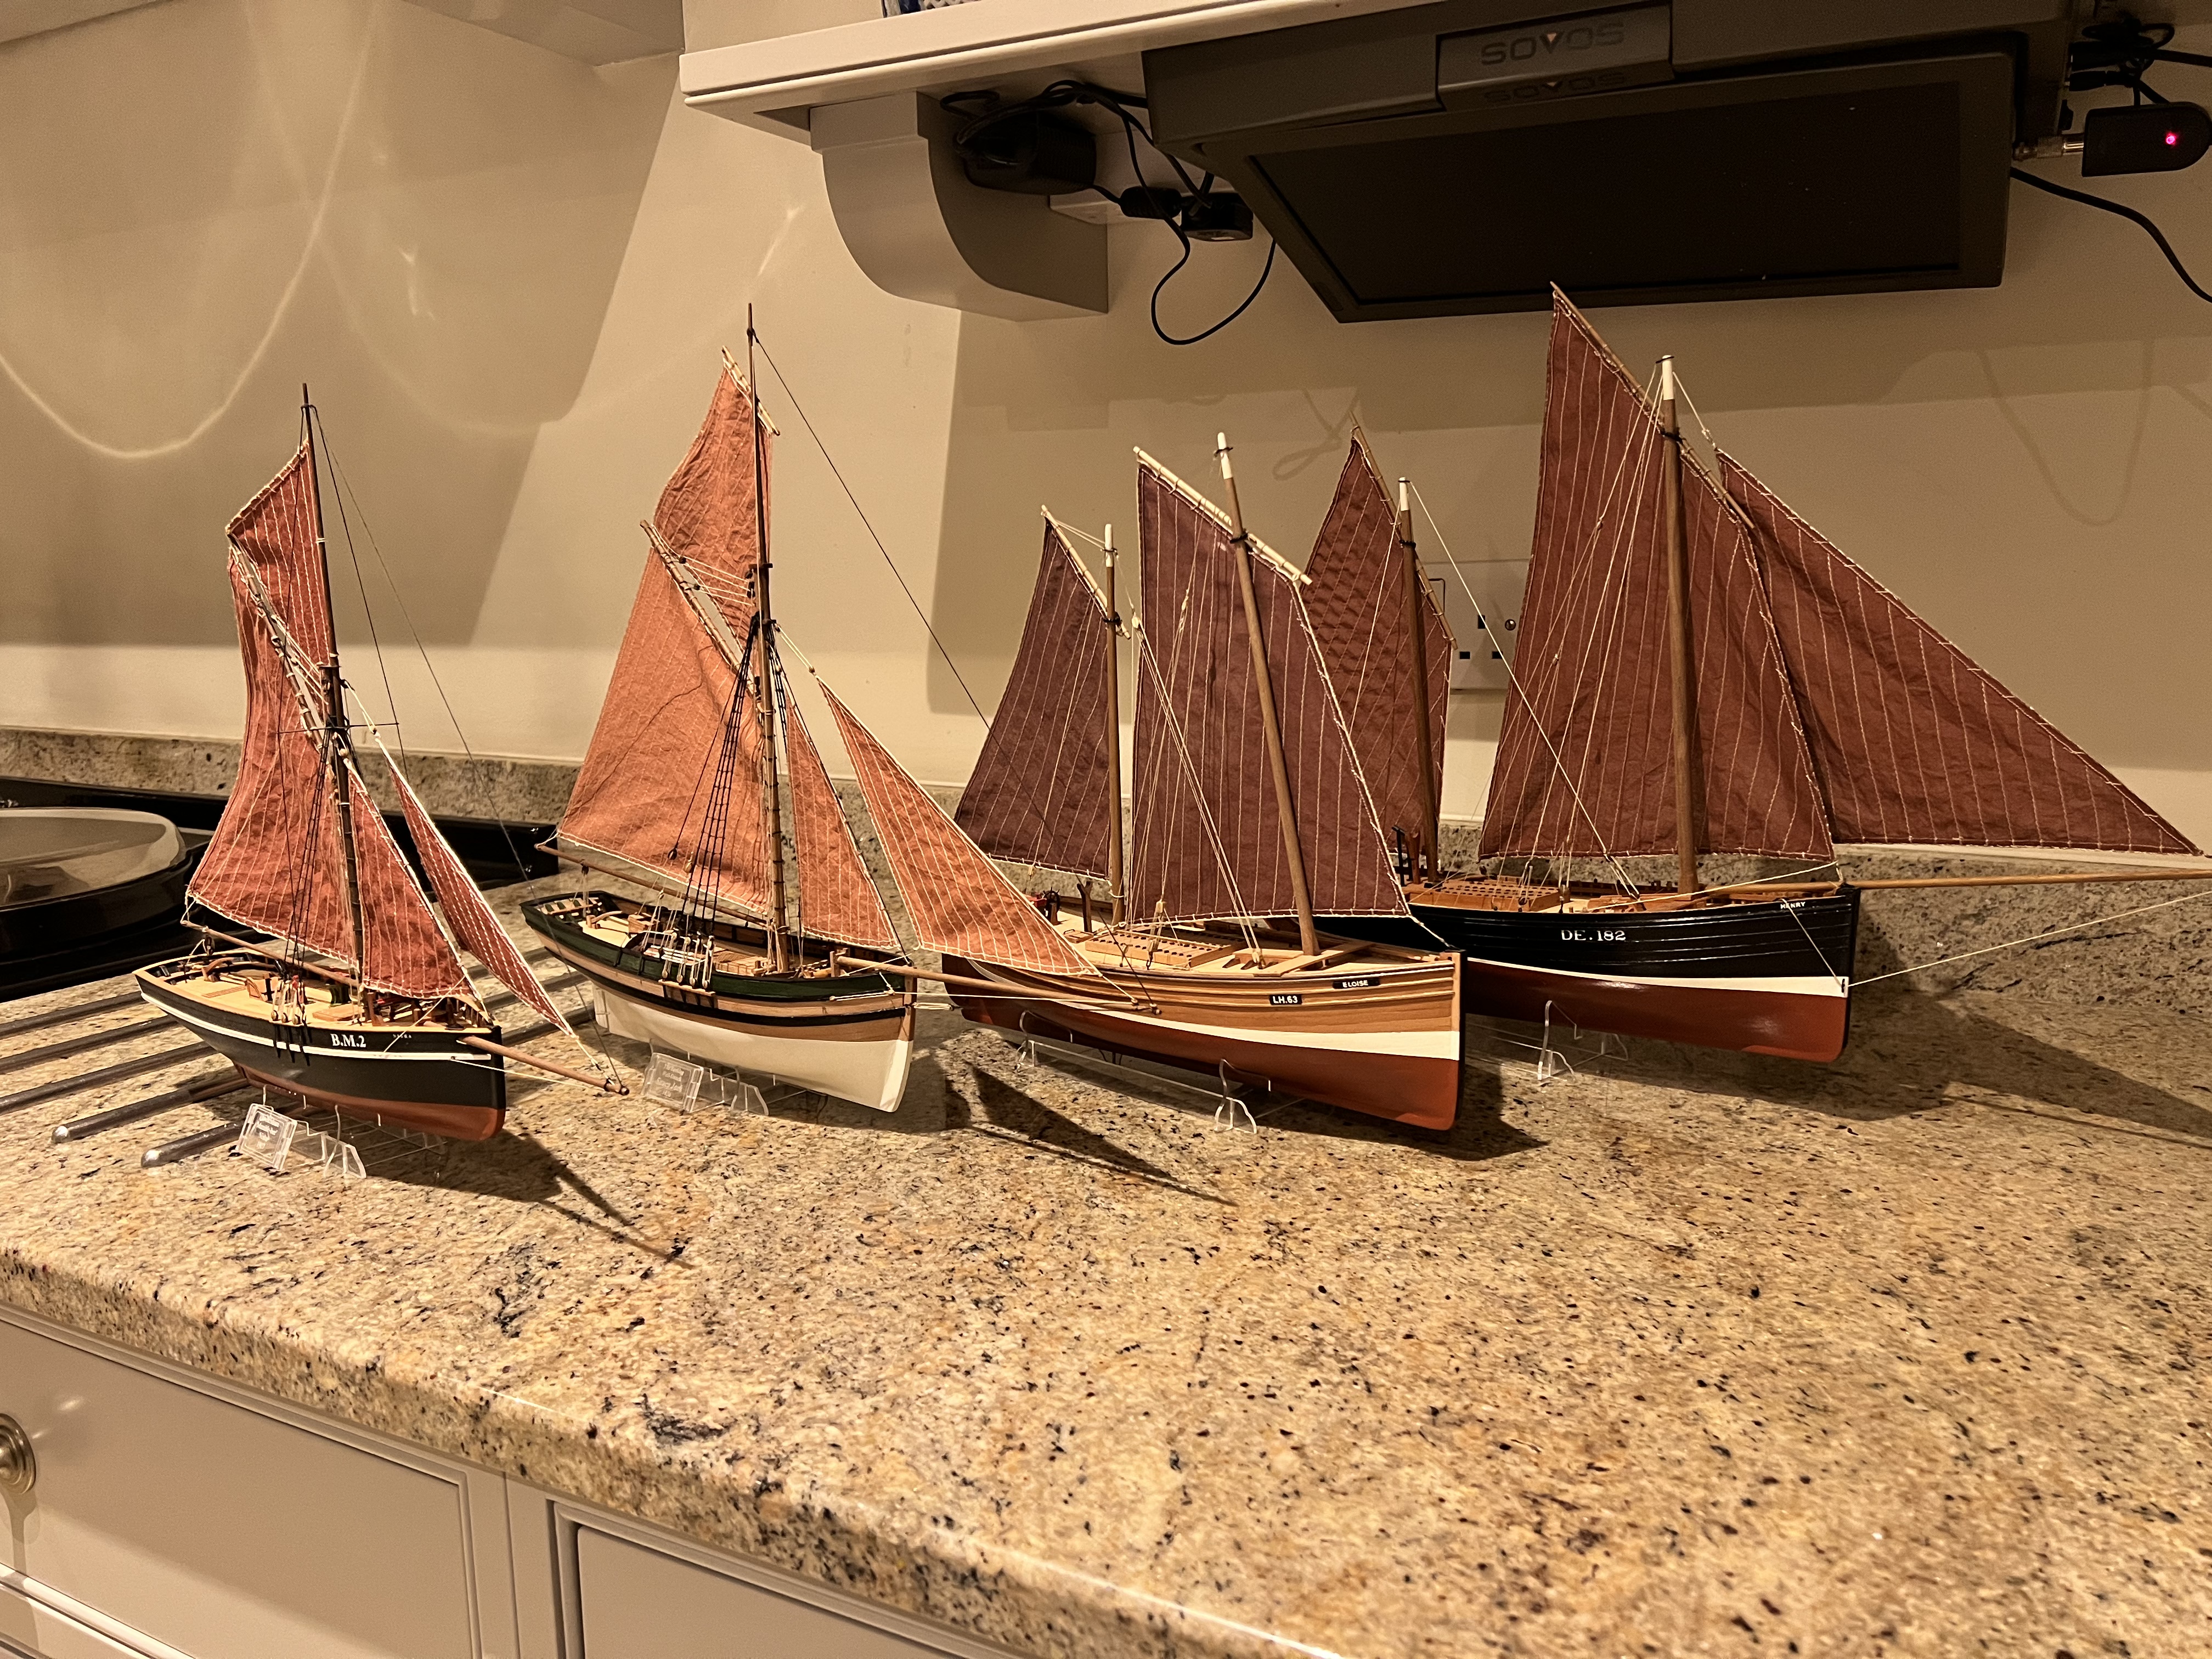
Thanks Chris, as the other Chris mentioned in his model update log, Grecian is not much different to build from the Vanguard fishing boats and I’ve built five of those so well practised! She’s a bit like a bigger Erycina. The planking was actually easier than on most of the fishers, the only harder aspects were not breaking those very fragile gunport arches and first time at coppering the hull (definitely room for improvement on this effort).
- 103 replies
-
- 2
-
-
- Grecian
- baltimore clipper
- (and 4 more)
-
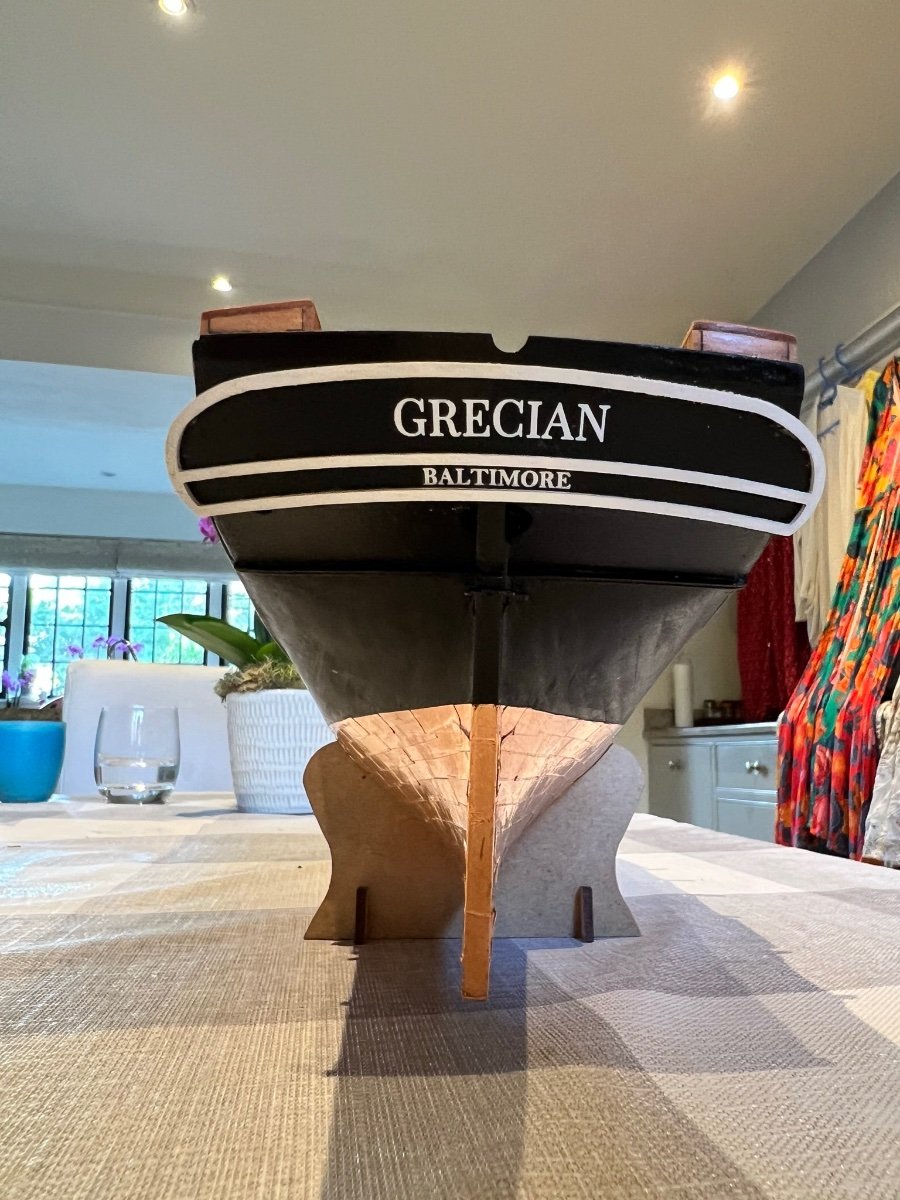
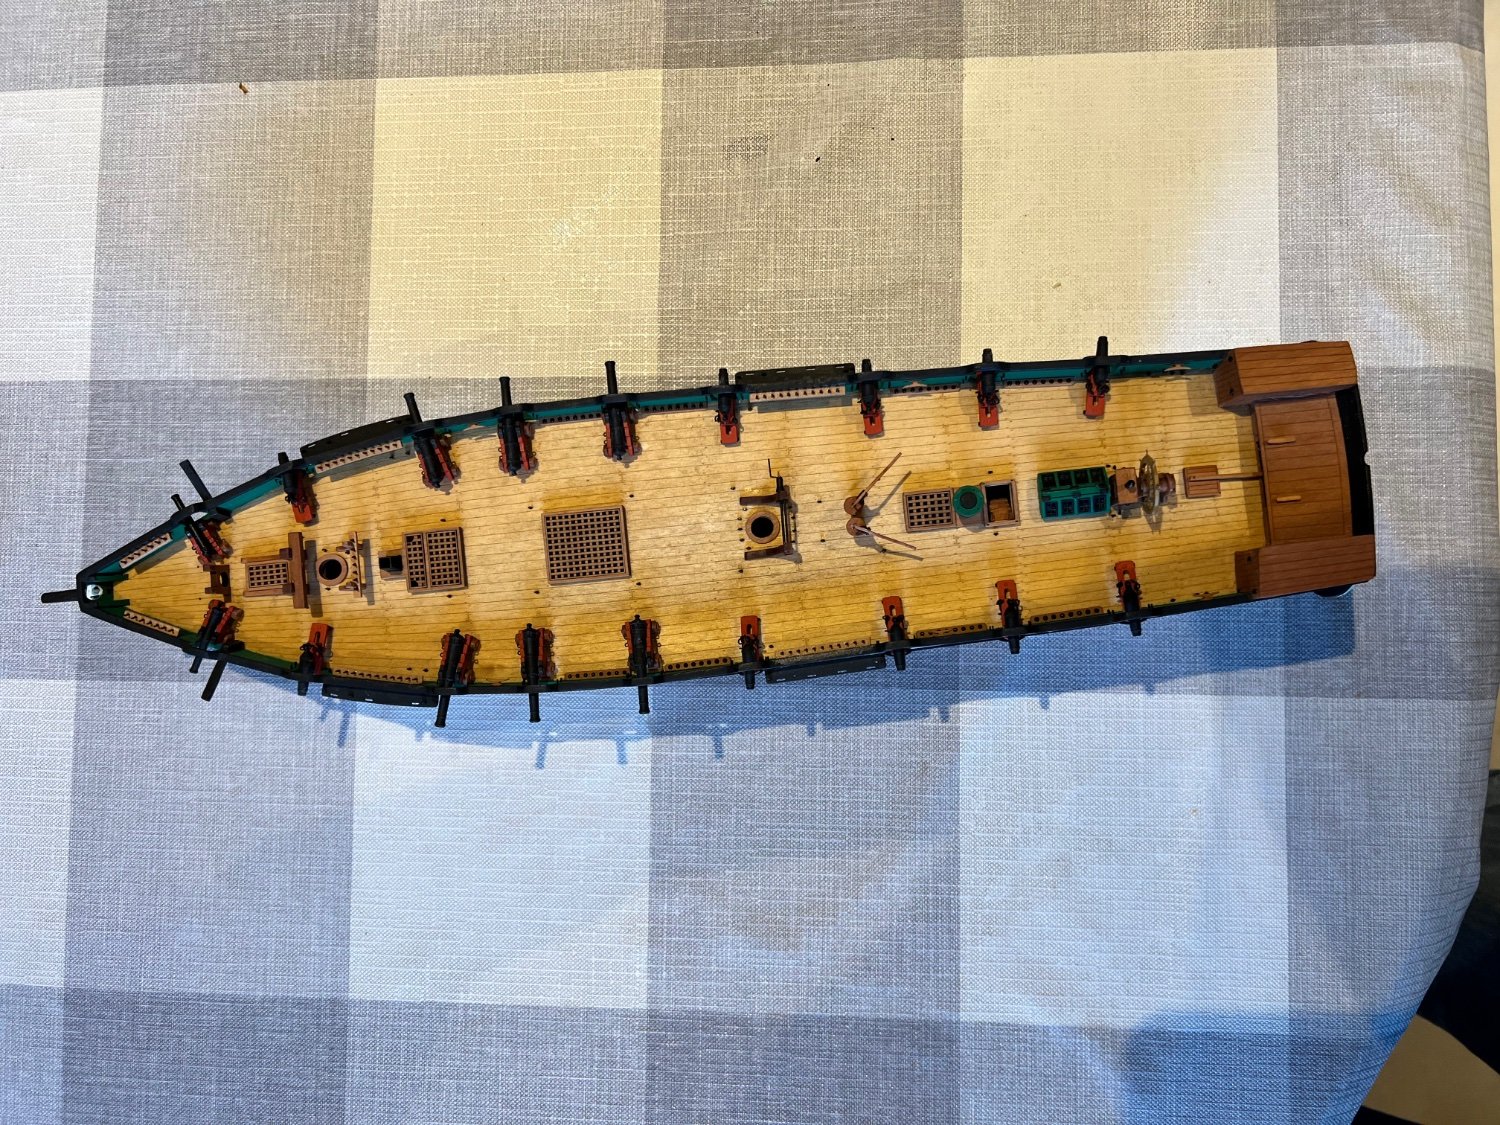
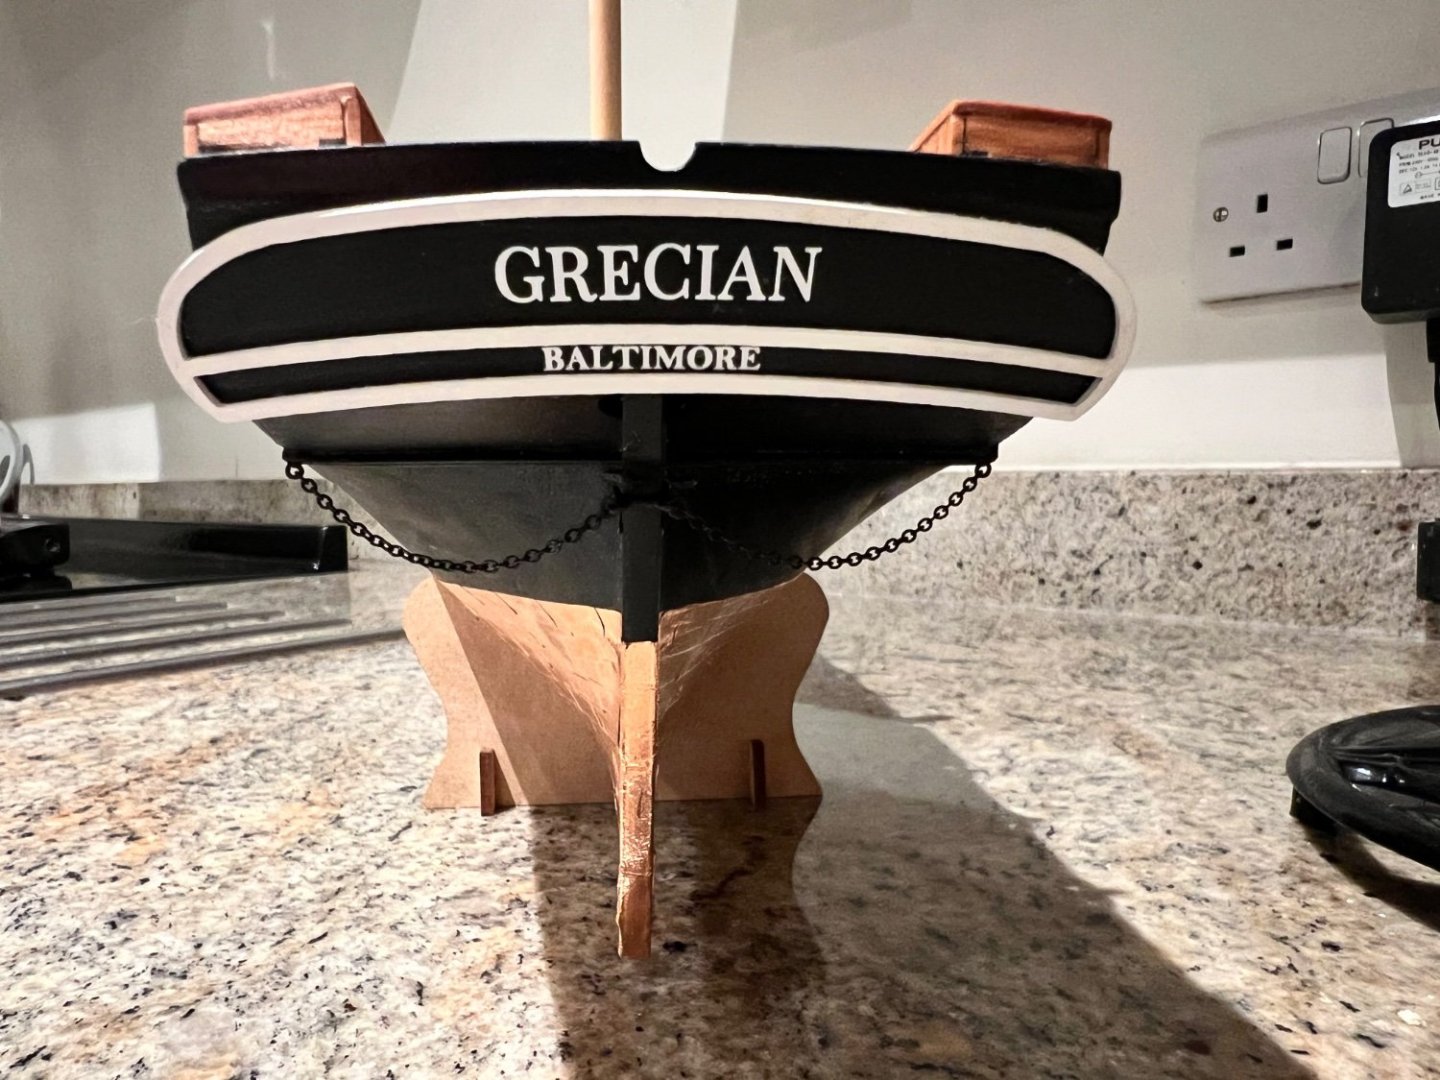
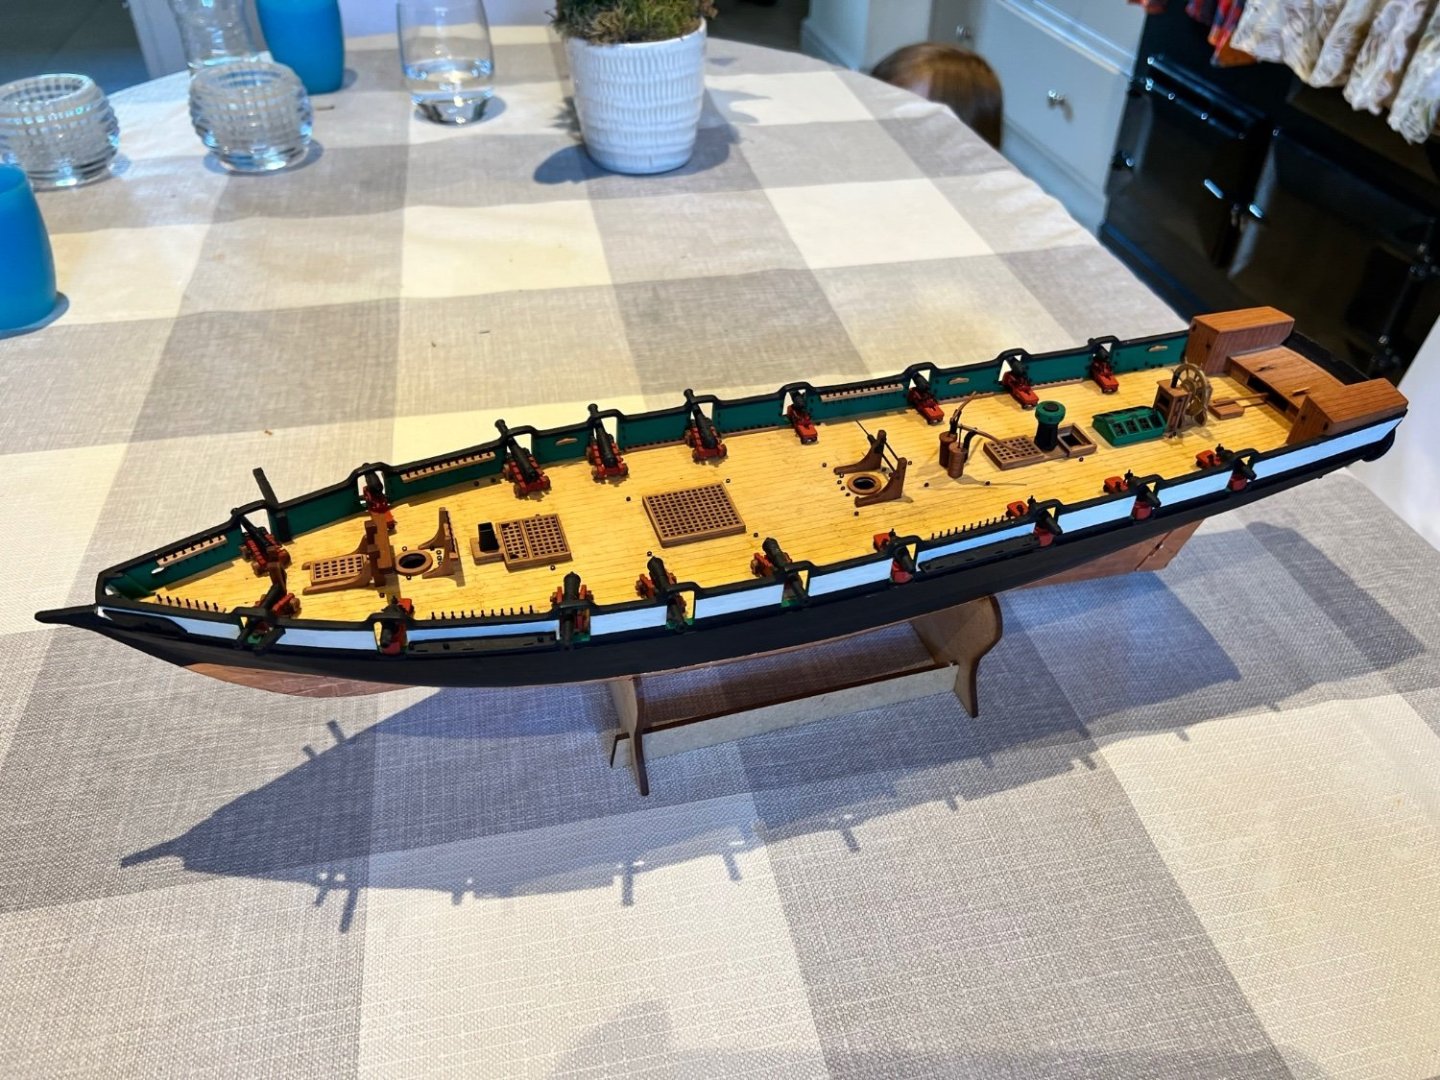
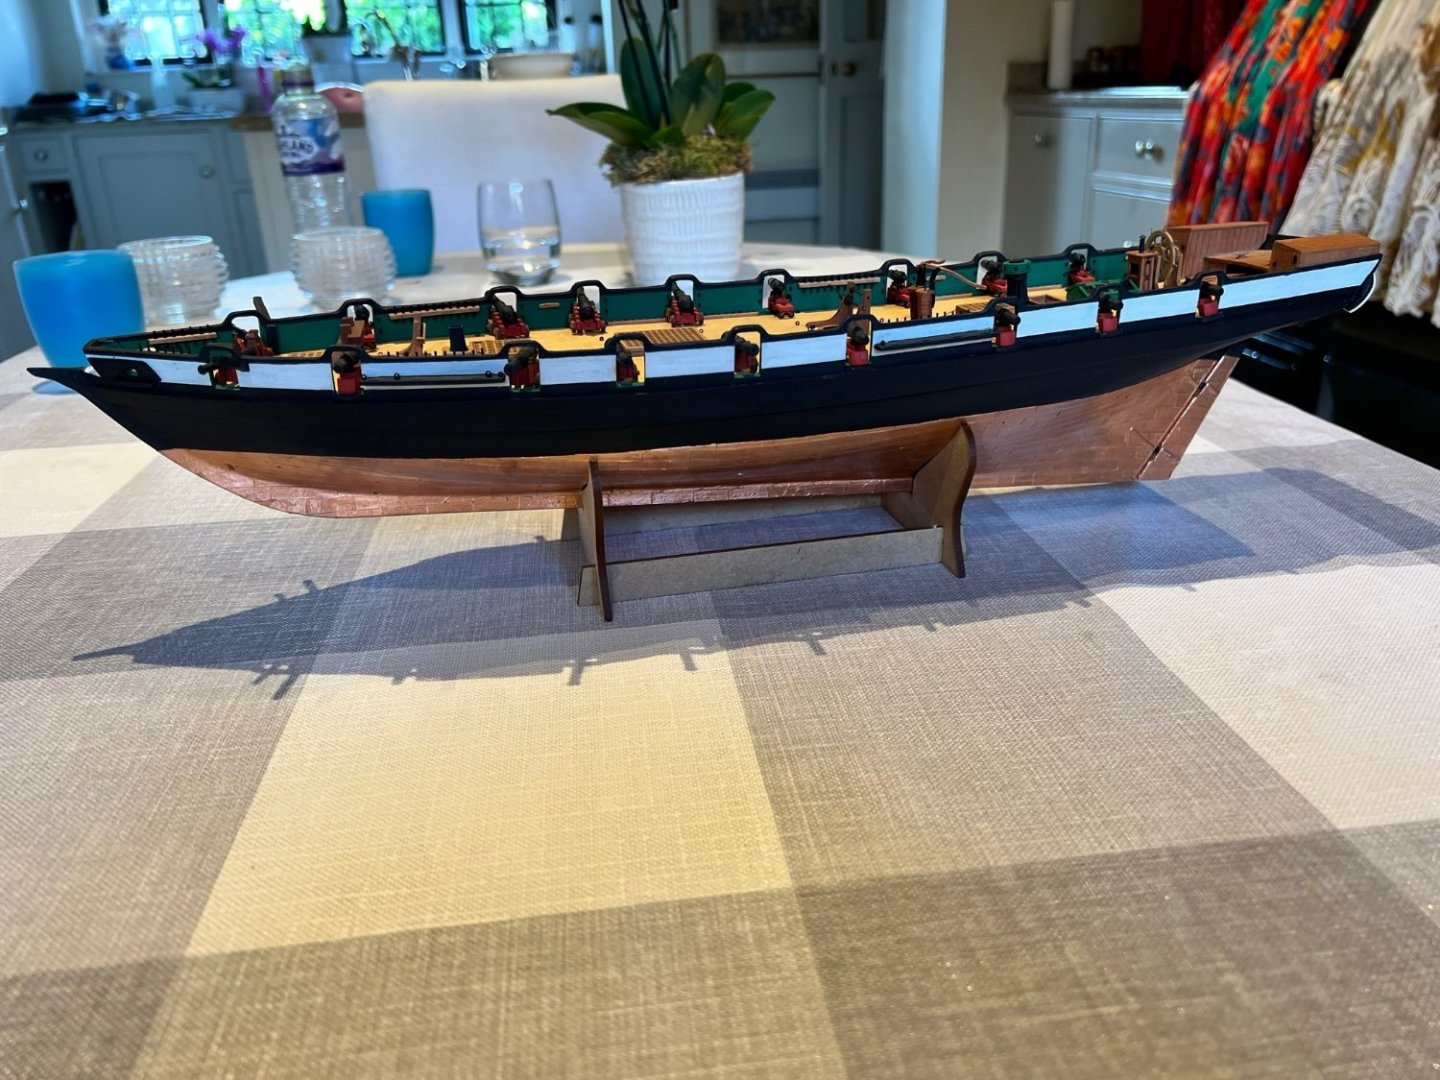
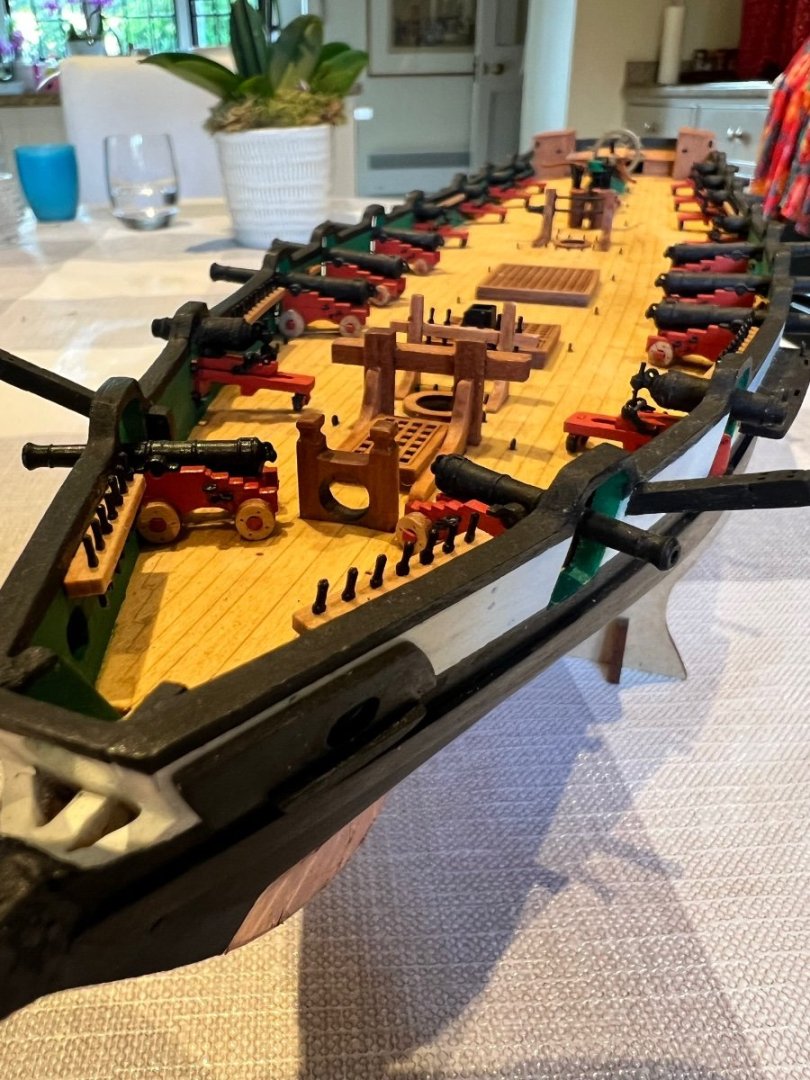
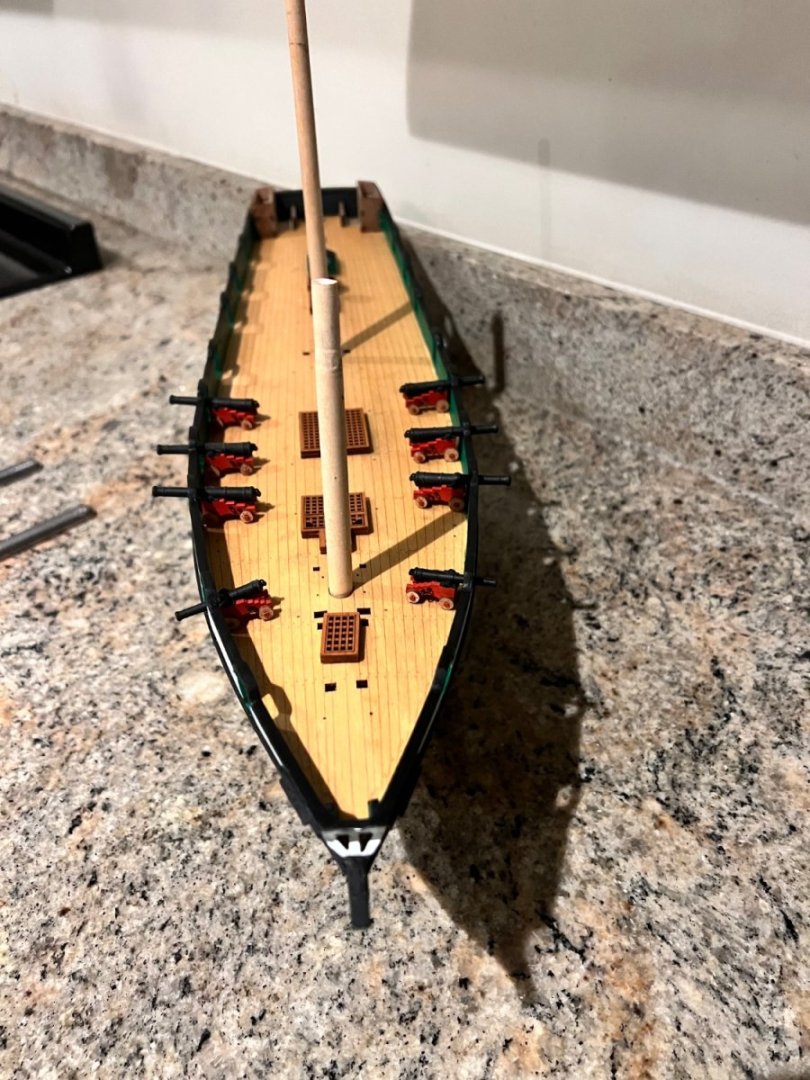
Fitting out Grecian’s hull is nearing completion. A few remaining bits and pieces such as rudder chains and companionway stanchions. Also anything that requires rigging such as the wheel and binnacle (not glued yet) and the cannons / carronades. This is one of my favourite stages in building a model and true to form Vanguard’s fittings are high quality and go together perfectly. I hate applying decals but these went on very cleanly. I sanded the stern with 1000 grade sandpaper and applied gloss varnish first to reduce the risk of silvering. Then Matt varnish over the top to seal them once dry. I need to decide what armament this Grecian will have. I prefer the look of full gunports but as an American privateer she had 4 guns and in RN service was a ‘ten gun schooner’. Both leave a lot of empty gunports. The kit plan of 16 guns looks good, but I’m tempted to fill all 18 gunports, using the little four pounders in the two forward ports. I don’t for a moment doubt Chris’s research and suggestion that these ports weren’t used and don’t leave room to work the guns - but aesthetically I prefer it and as any more than ten guns is departing from historical accuracy (or really four guns as I have her registered in Baltimore and she’ll fly the Stars and Stripes) - so why not? My current plan for each side is as follows: 4 pounder carronade 6 pounder 6 pounder 6 pounder carronade carronade carronade carronade As a pilot thinking in terms of weight and balance - is that just too heavy forward especially given the shape of her hull with most buoyancy aft. I have painted the AK Matt varnish on the forward starboard 4 pounder but not the other guns (photo below). It does make that cannon a little shiny in bright light. On Alert I didn’t varnish the guns and they stayed properly matt. Not sure which is better? Looking at photos of HMS Victory’s cannon suggests that they should have a bit of a shine on them? The only warning I have for other builders of Grecian is that Vanguard supply ~200 PE-8 pieces which are the ubiquitous pin-loops (not sure what the right term is for these). Examining the plans and instructions I counted ~195 of these needed if 16 guns are included. They are used everywhere including the masts, decks, gunports, channels, rudder chains, binnacle, etc. The instructions do warn you not to make all the cannons and carronades as there won’t be enough PE-8. But by my reckoning even making 18 guns (4 loops per cannon or carronades carriage) makes you short and that’s before the carpet monster takes its share. I’m so used to Vanguard kits oversupplying small PE parts in particular that I’ve not searched the floor for every loop that escaped me - I will be crawling around the floor later this evening to see if I can recover any… I’ve plenty of spare quite similar pin-loops from the Vanguard fishing boats and Alert that I can use on Grecian. They’re not identical in size and shape but no one except I will ever know or notice. Vanguard do supply enough PE-8 to complete the kit - but on this build if one escapes, it’s certainly worth tracking it down. I won’t have any time to work on Grecian for the next fortnight. My next job will be attempting to add a breach rope to each of the guns and rigging the wheel.


- 103 replies
-
- 14
-
-
- Grecian
- baltimore clipper
- (and 4 more)
-
Alistair, Thanks so much for the advice. I have found a diagram on how to rig the cannon that Chris had included in the plans as an optional extra which suggests 0.5mm rope so that sounds about right. I’ve been trying to decide what to do regarding the ageing of the copper. I’m not adverse to the “bodily fluid” technique, only that looking at your Fly it fully weathers the copper which might look out of place when Grecian’s upperworks won’t be aged at all. I had been thinking of using some medical saline solution I had lying around instead of urine. Now I’m thinking that I’ll wire wool the hull and allow it to lose some of its shine slowly and naturally. At the point when the model looks like it’s moving from an older model with old copper to a weathered model I’ll then varnish the copper to seal it. Many thanks Dan
- 103 replies
-
- 2
-
-
- Grecian
- baltimore clipper
- (and 4 more)
-
Very much looking forward to seeing you build Trial. I’m toying between her and Speedy for my next build after Grecian. Dan
-
Thanks Jim, I really appreciate your advice. I’ll need to order some steel wool. Once I’ve used it I think I’ll not varnish so the copper tarnishes naturally. I’ll hold off on the steel wool until the hull is fitted out as it’s hard to add the fittings without handling the copper hull.
- 103 replies
-
- 3
-
-
- Grecian
- baltimore clipper
- (and 4 more)
-
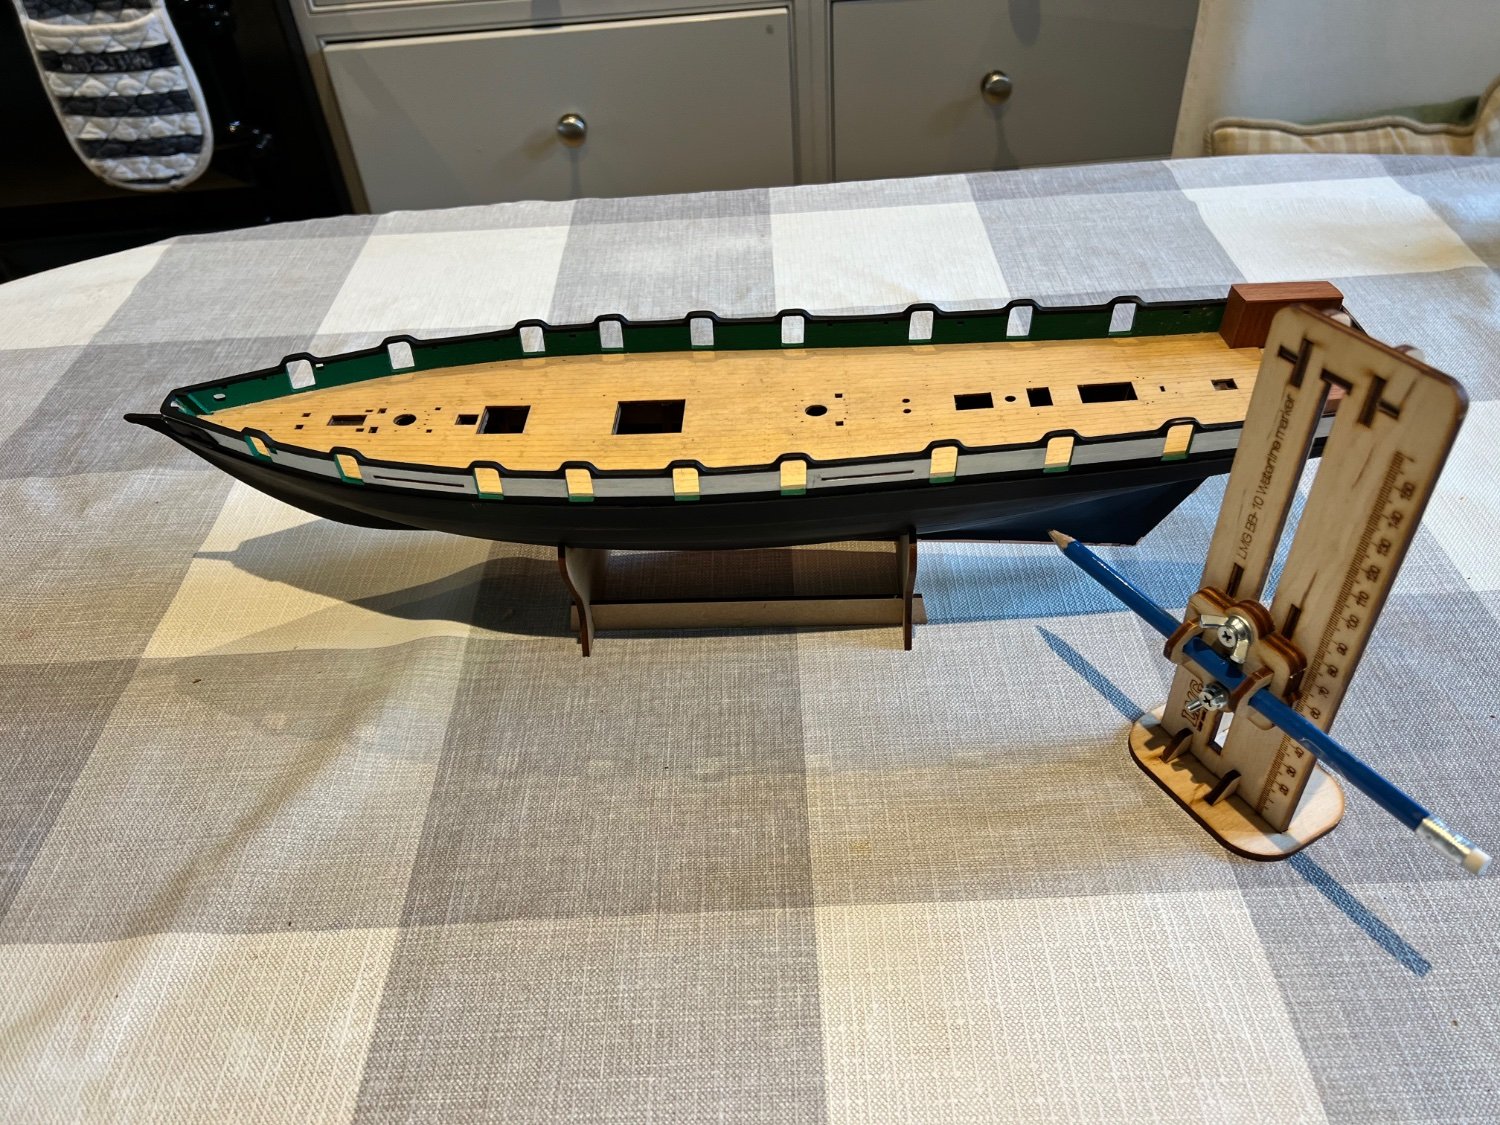
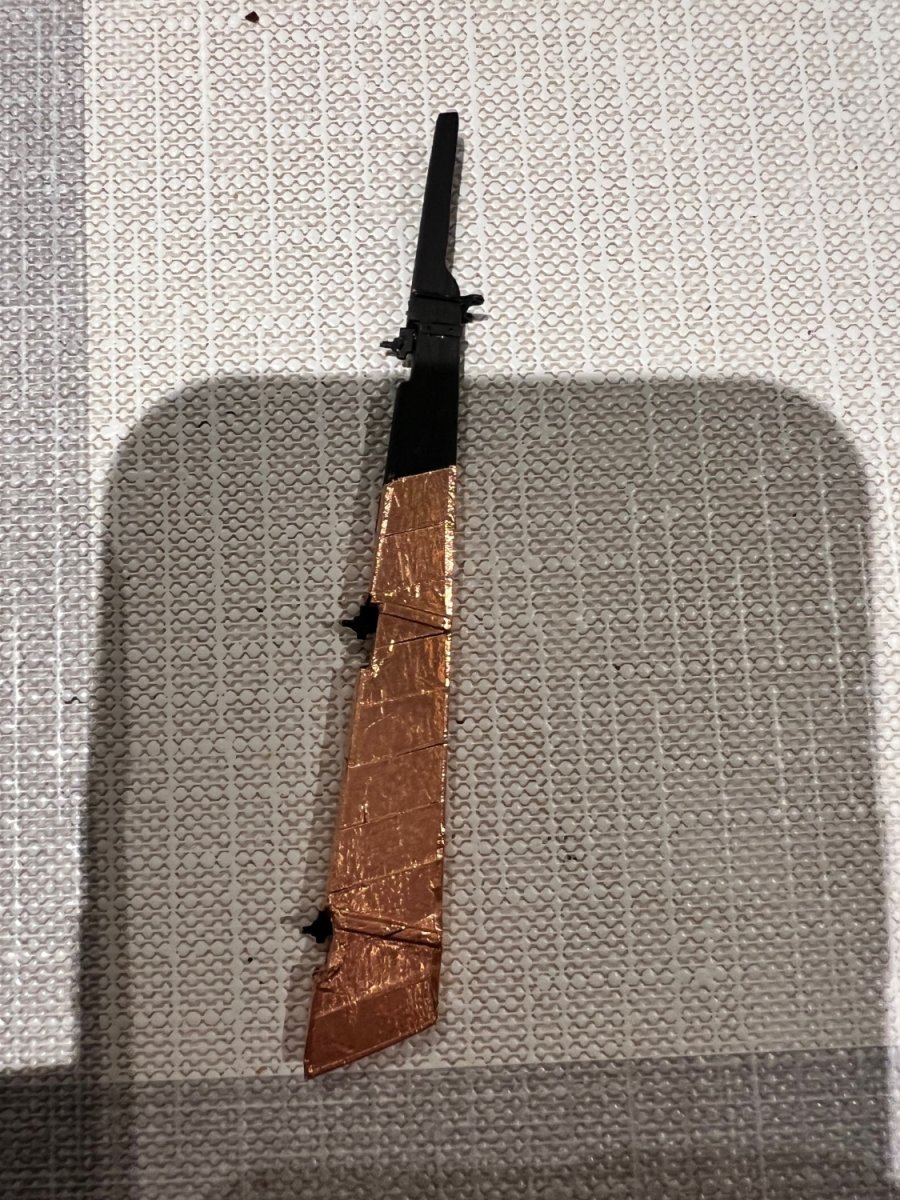
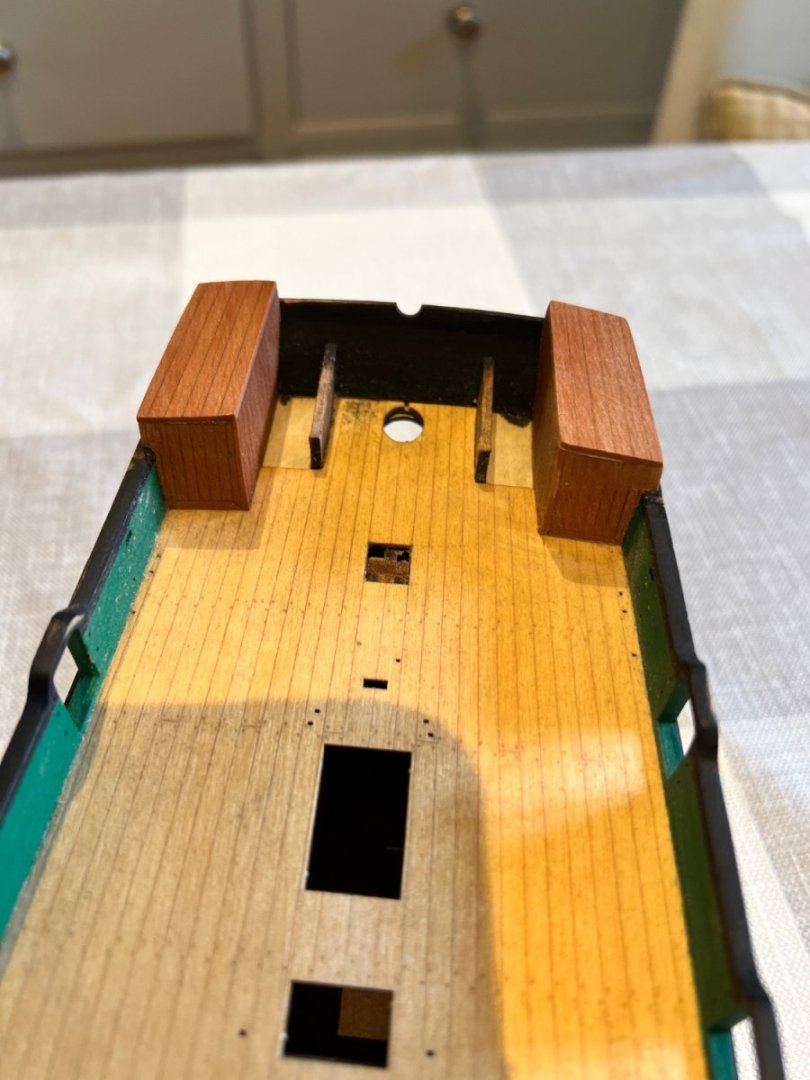
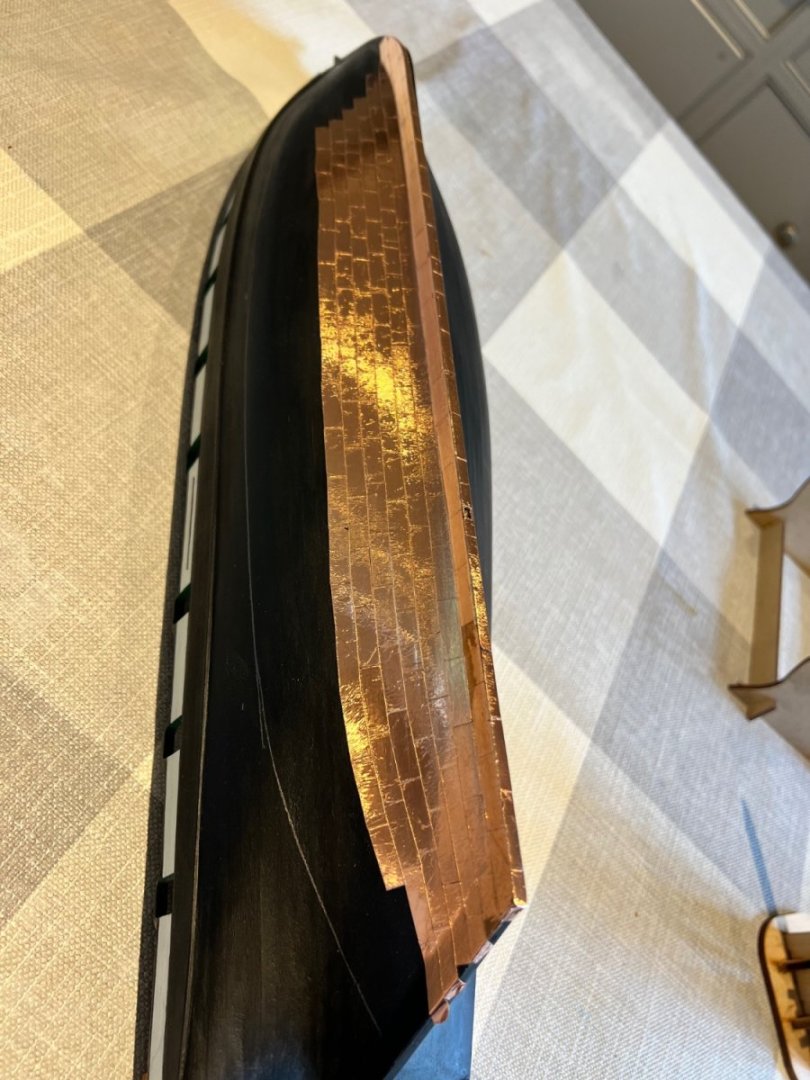
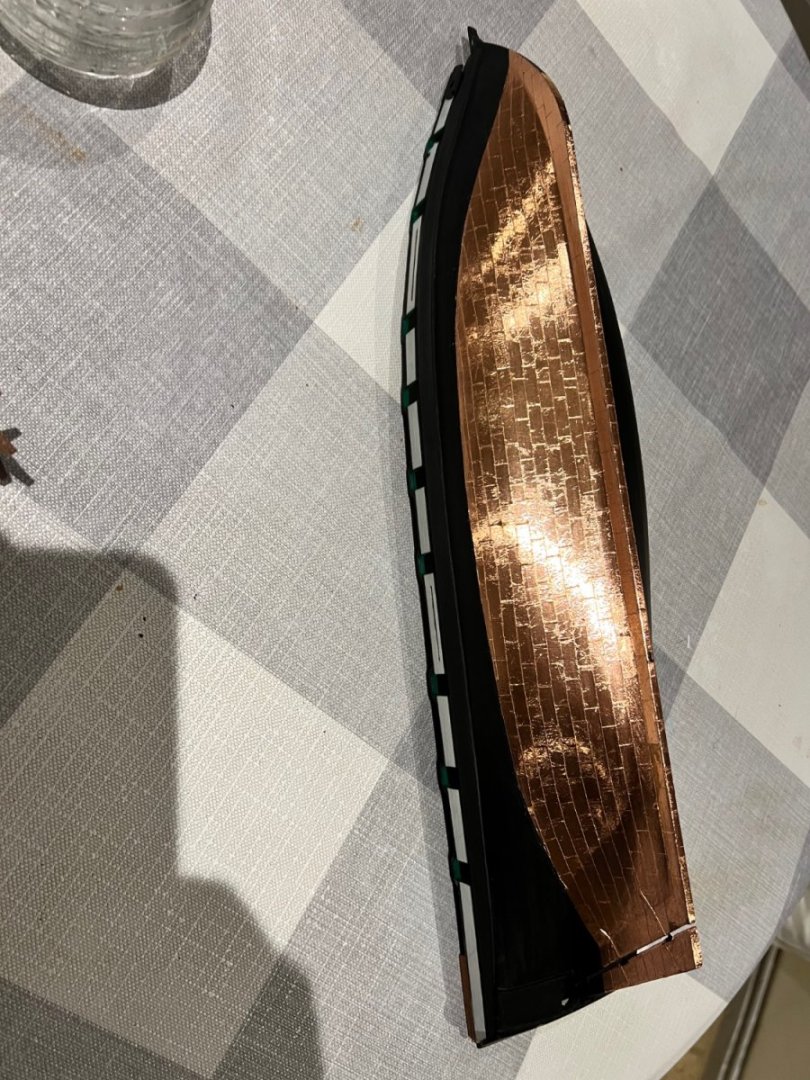
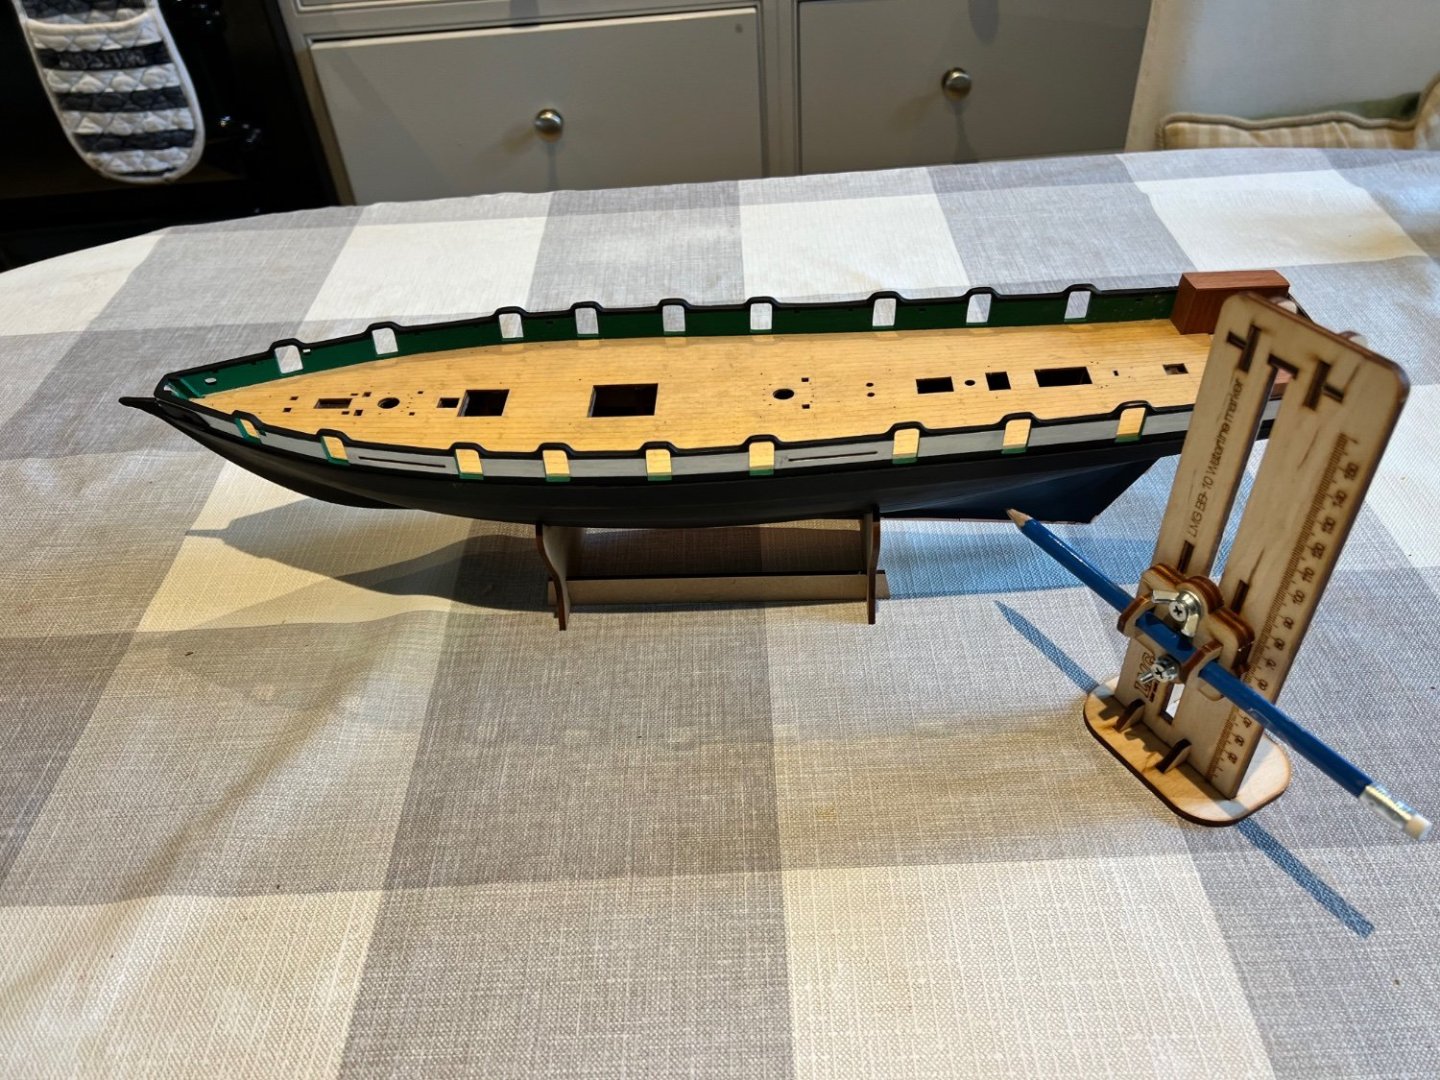
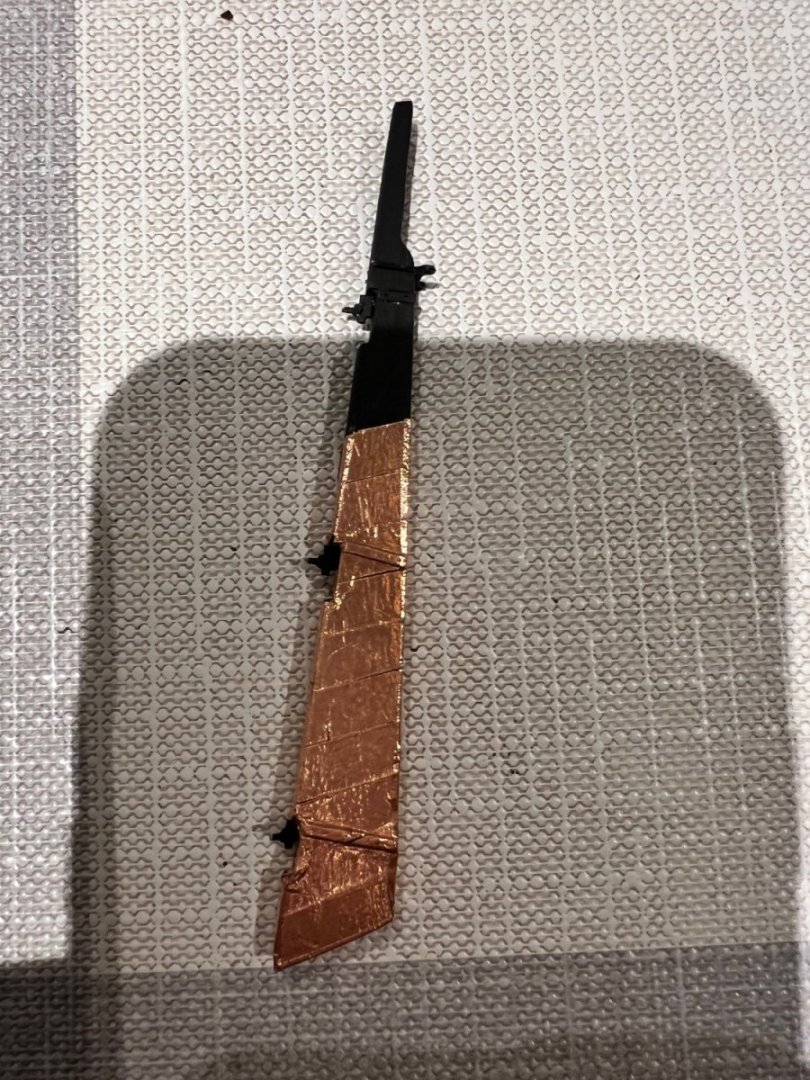
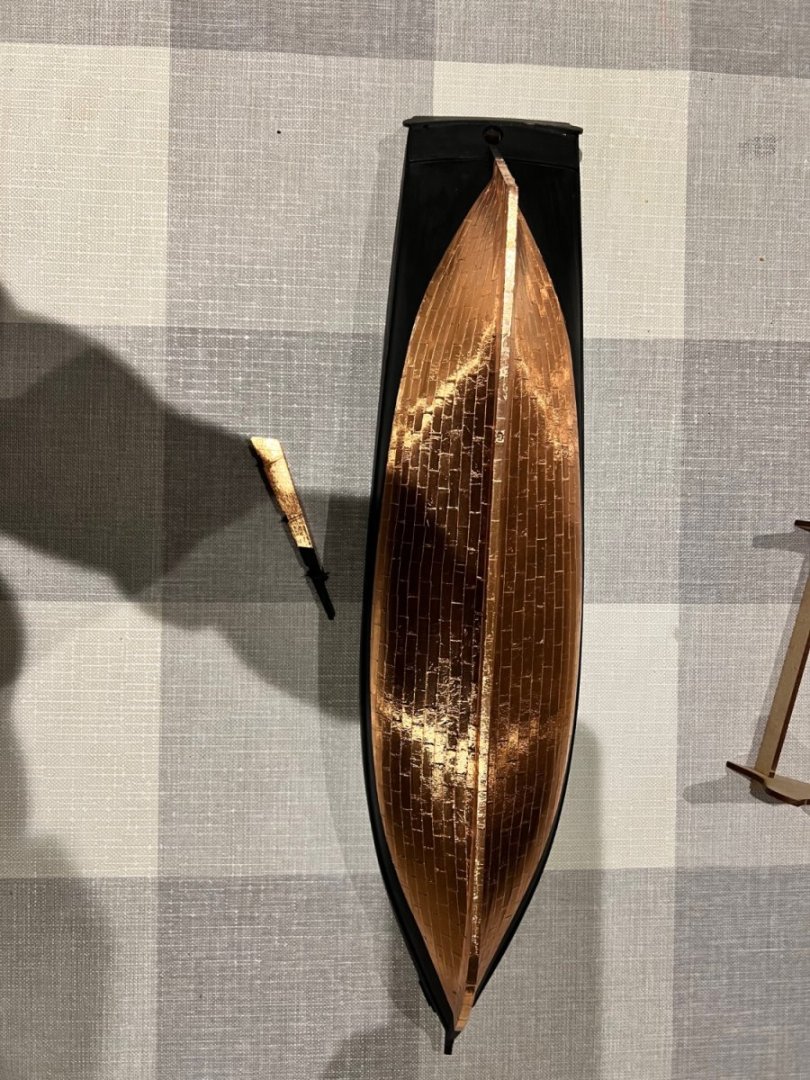
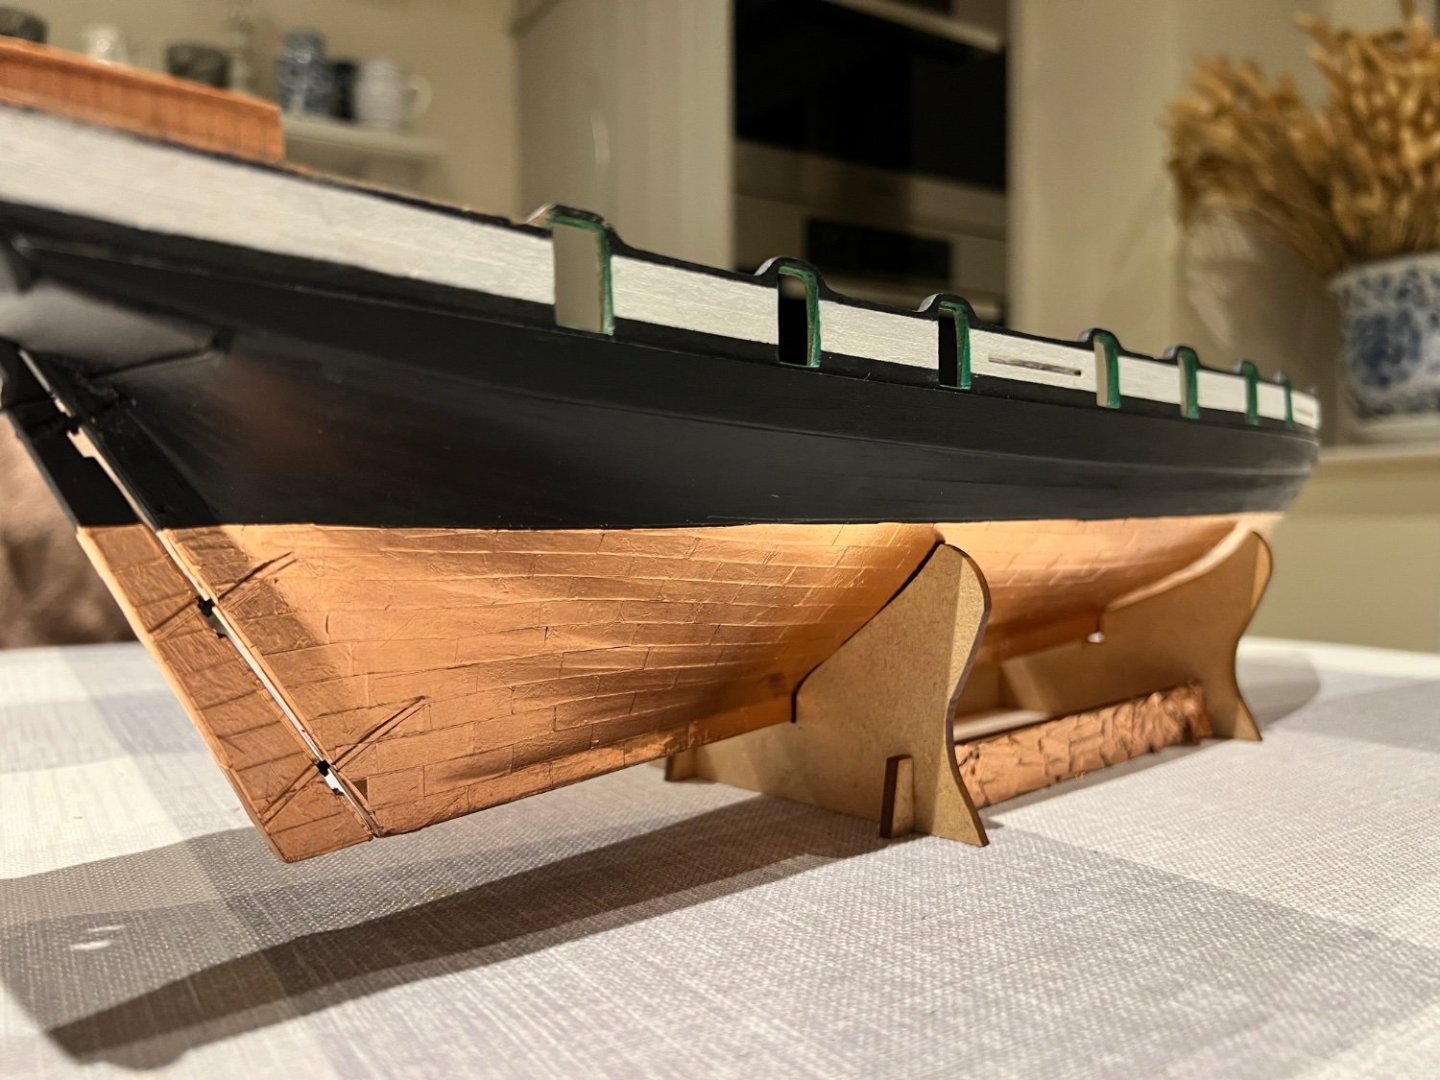
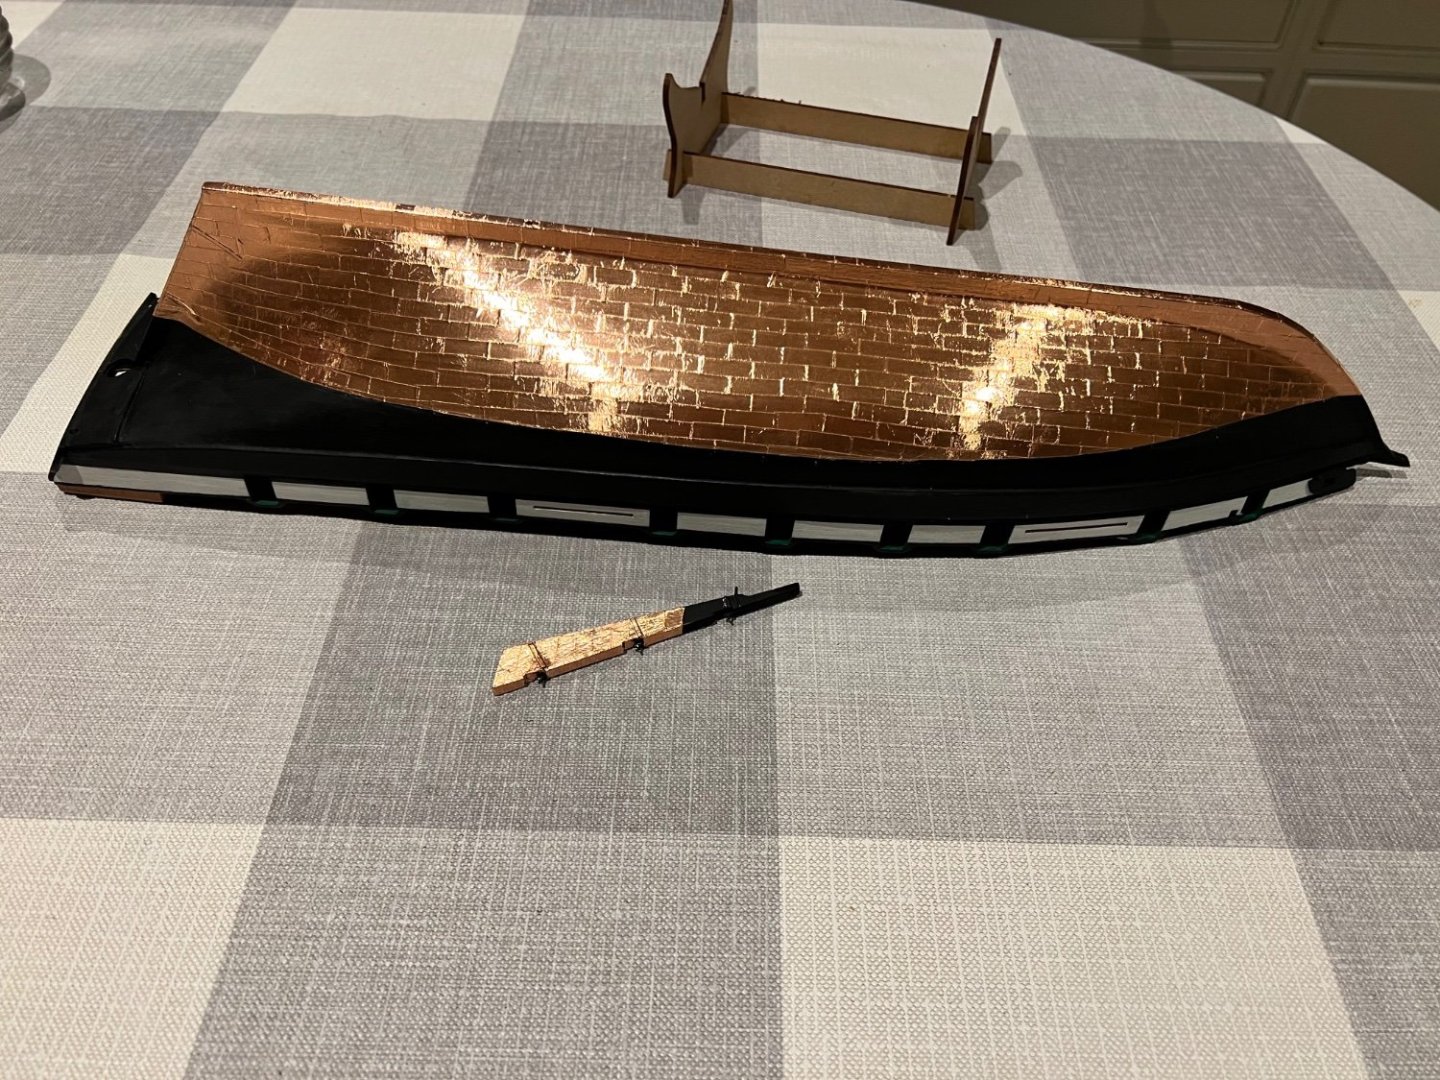
Thanks Craig, I always find the photos very forgiving! Next was cladding the rear deckhouses. The pear cladding needed to be trimmed to fit which was fairly straightforward. I also sanded the underlying MDF to ensure a good fit which seemed a good idea at the time but now there’s a gap each side of the tiller housing and will be in the decking above which I need to fill. Next I marked out the waterline which was easy on this vessel using a waterline marking tool from Vanguard. I bought the PE copper sheets from Vanguard but decided to use the copper tape that came with the kit instead. I was weighing up the merits of the self adhesive copper strip vs. the better looking copper plates but decided that the copper plates looked harder to bend to shape and I’d likely get CA glue everywhere. The copper tape goes on easily but it’s difficult not to let it crinkle. Starboard side first and rudder. Then port side. The copper is very bright and shiny. I’m guessing that it will weather down with time. Is there a way of accelerating this and should I varnish over the top?


- 103 replies
-
- 8
-
-
- Grecian
- baltimore clipper
- (and 4 more)
-
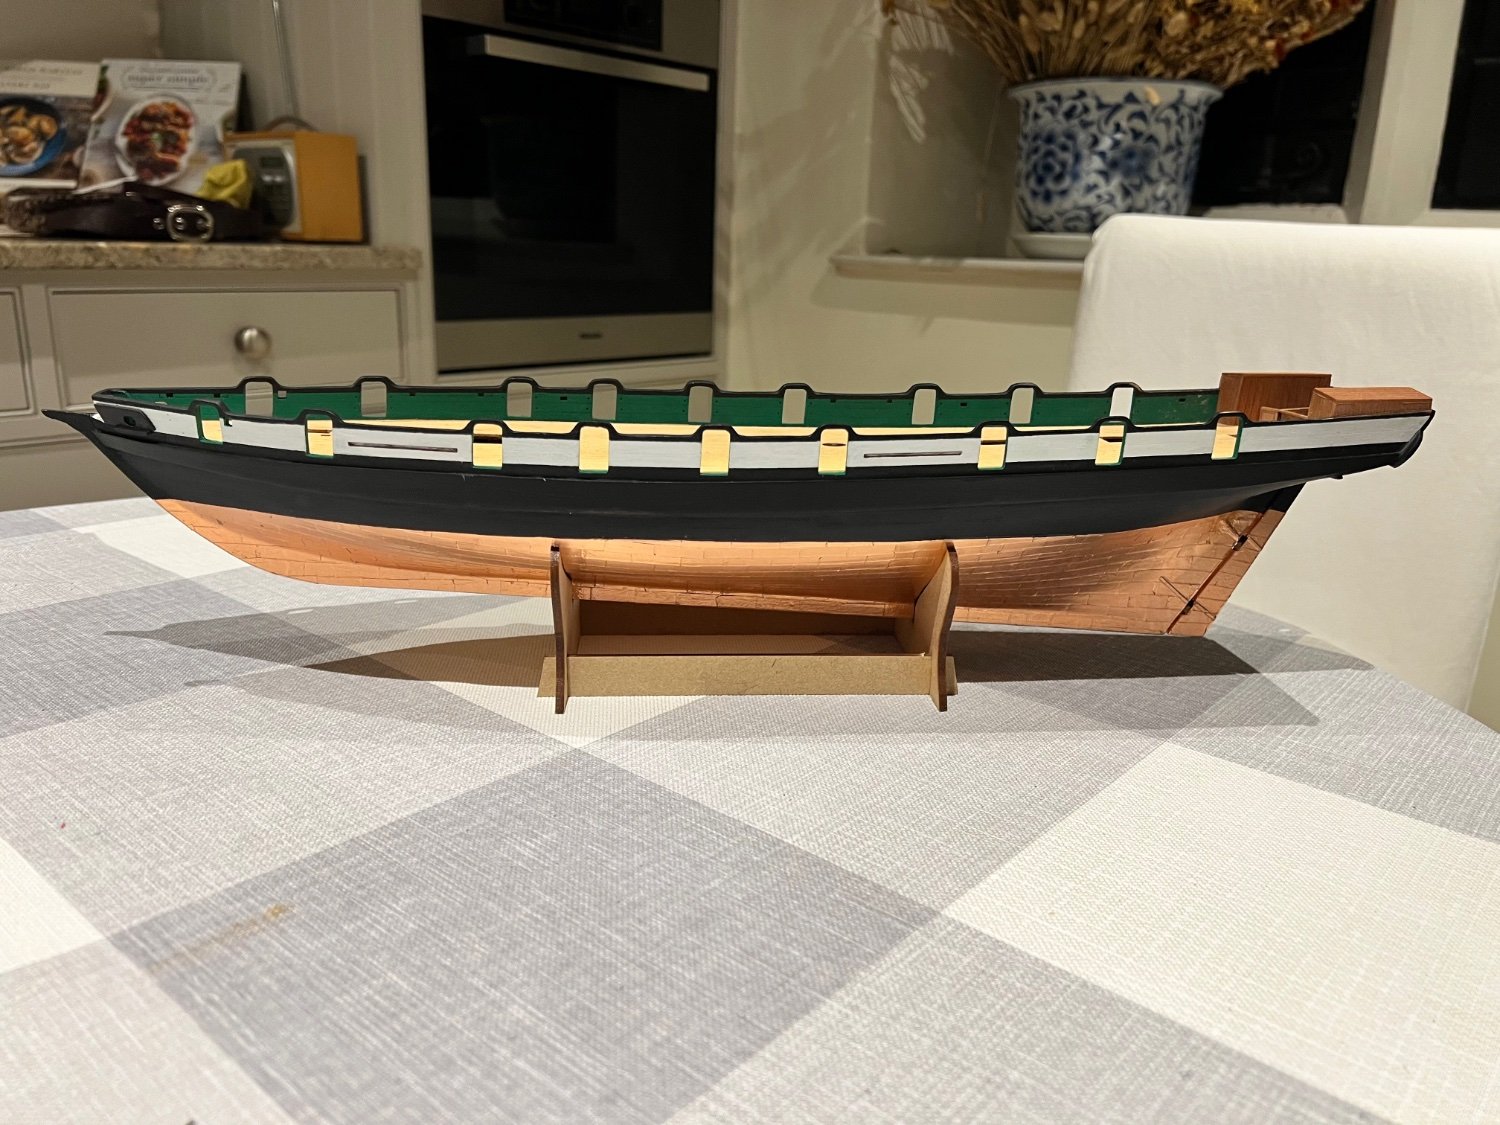
I decided to err from the sequence of the instructions which suggested cladding the two deck house astern before painting the hull. To me this risked getting paint on wood that would not be painted later, so I have left the cladding off for now. I also decided to paint the bottom half of the hull first as that’s where the sanding and filling is required. I diluted the black AK acrylic paint with ~50% water and it seemed to go on much better but needed lots of coats to cover any white filler. Then the inner green bulwarks AK green with a spot or two of black in it. The deck was carefully masked off first. Then finally the white strip on each side of the gunwales. I diluted the white down too as it was too gloopy and sticky undiluted but very weak in colour diluted. I painted throughout with a brush which creates two problems 1) the paint bleeds much more under the Tamiya masking tape, making clean lines hard to achieve and 2) shed brush hairs in the painted surface. Fixing any bleed with the white was very difficult as it needed about five coats of it to cover any black or green paint. Deck furniture is not glued on, nor cannons. I’d like to add a breach rope to the cannons (not full cannon rigging) can anyone advise me what thickness of rope to use? Likewise for the carronades. Many thanks


- 103 replies
-
- 11
-
-
- Grecian
- baltimore clipper
- (and 4 more)
-
Thanks Chris, that’s reassuring to hear! Second planking now complete. A bit more filler on the starboard side. I have clearly positioned the outer counter slightly wrongly, the ablutions hole is much closer to the edge than in the instructions, especially when I sanded the stern ready for the stern board. The ablutions hole is lined up with the hole on the inner lower counter so I suspect that my mistake was there. It won’t be noticeable when Grecian is complete. The stern board is 2mm thick and I soaked it and held it in place with rubber bands whilst it dried to give it the gentle curve required around the stern. After drying for 24 hours it’s now glued in place. I’ve also been filling and tidying up the insides of the gunports where the middle bulwark has changed shape slightly due to soaking. I’m painting Grecian using Vanguard’s Grecian painting set which uses AK paints. I’ll be brush painting the hull rather than using an airbrush. Should I thin the paints and if so with what (water?) and in what proportions? The paint has gone on extremely well unthinned on small parts such as the cannons, but I tried painting a patch of hull and it was quite treacly to apply. Any advice would be greatly appreciated. I usually use a spray can for the hull and then the rest of the painting with Humbrol enamel paints so this is a bit different for me. Thanks!


- 103 replies
-
- 10
-
-

-
- Grecian
- baltimore clipper
- (and 4 more)
-
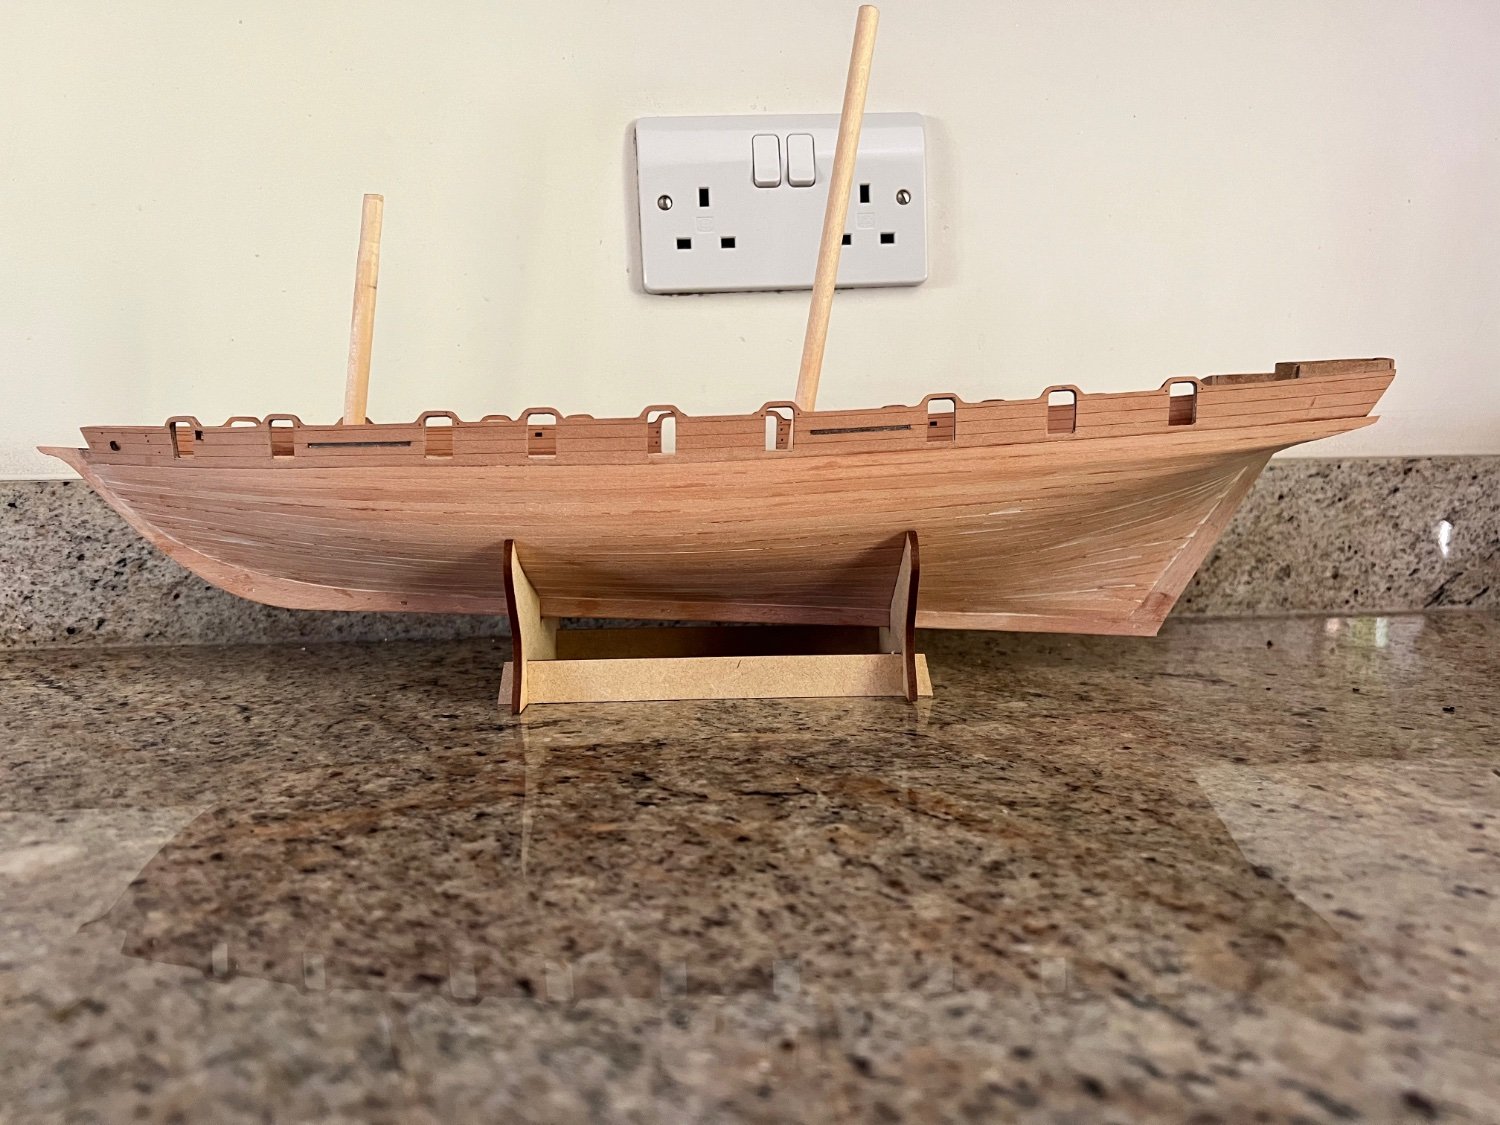
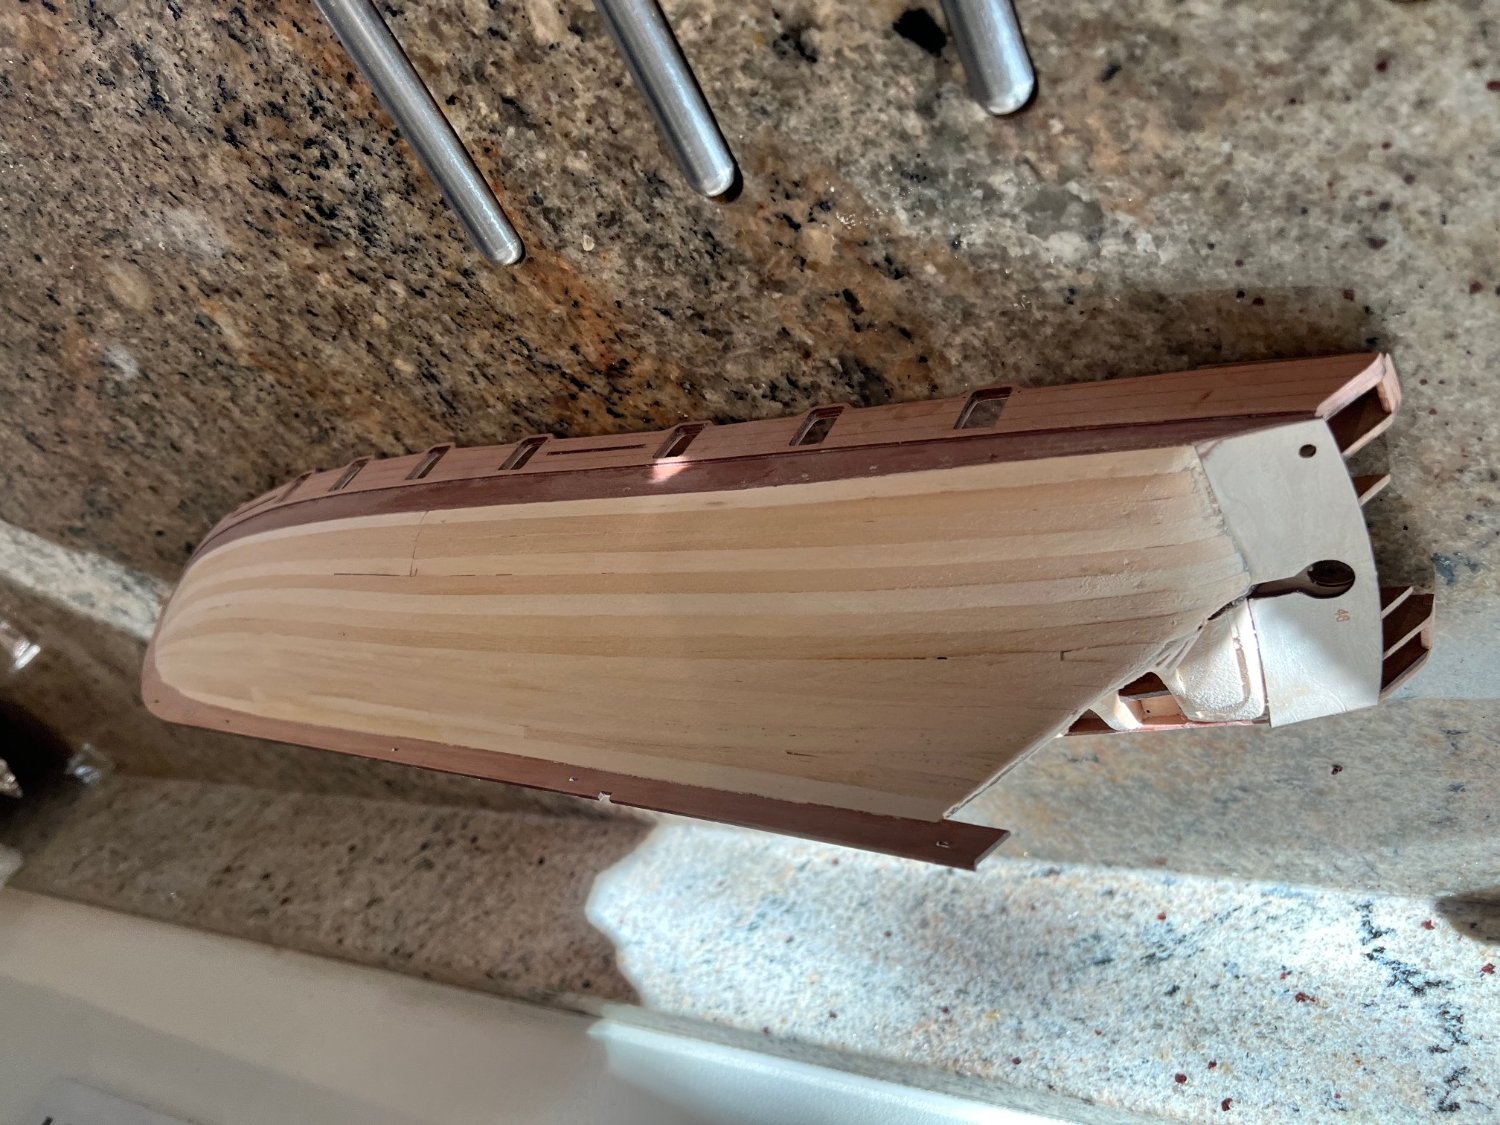
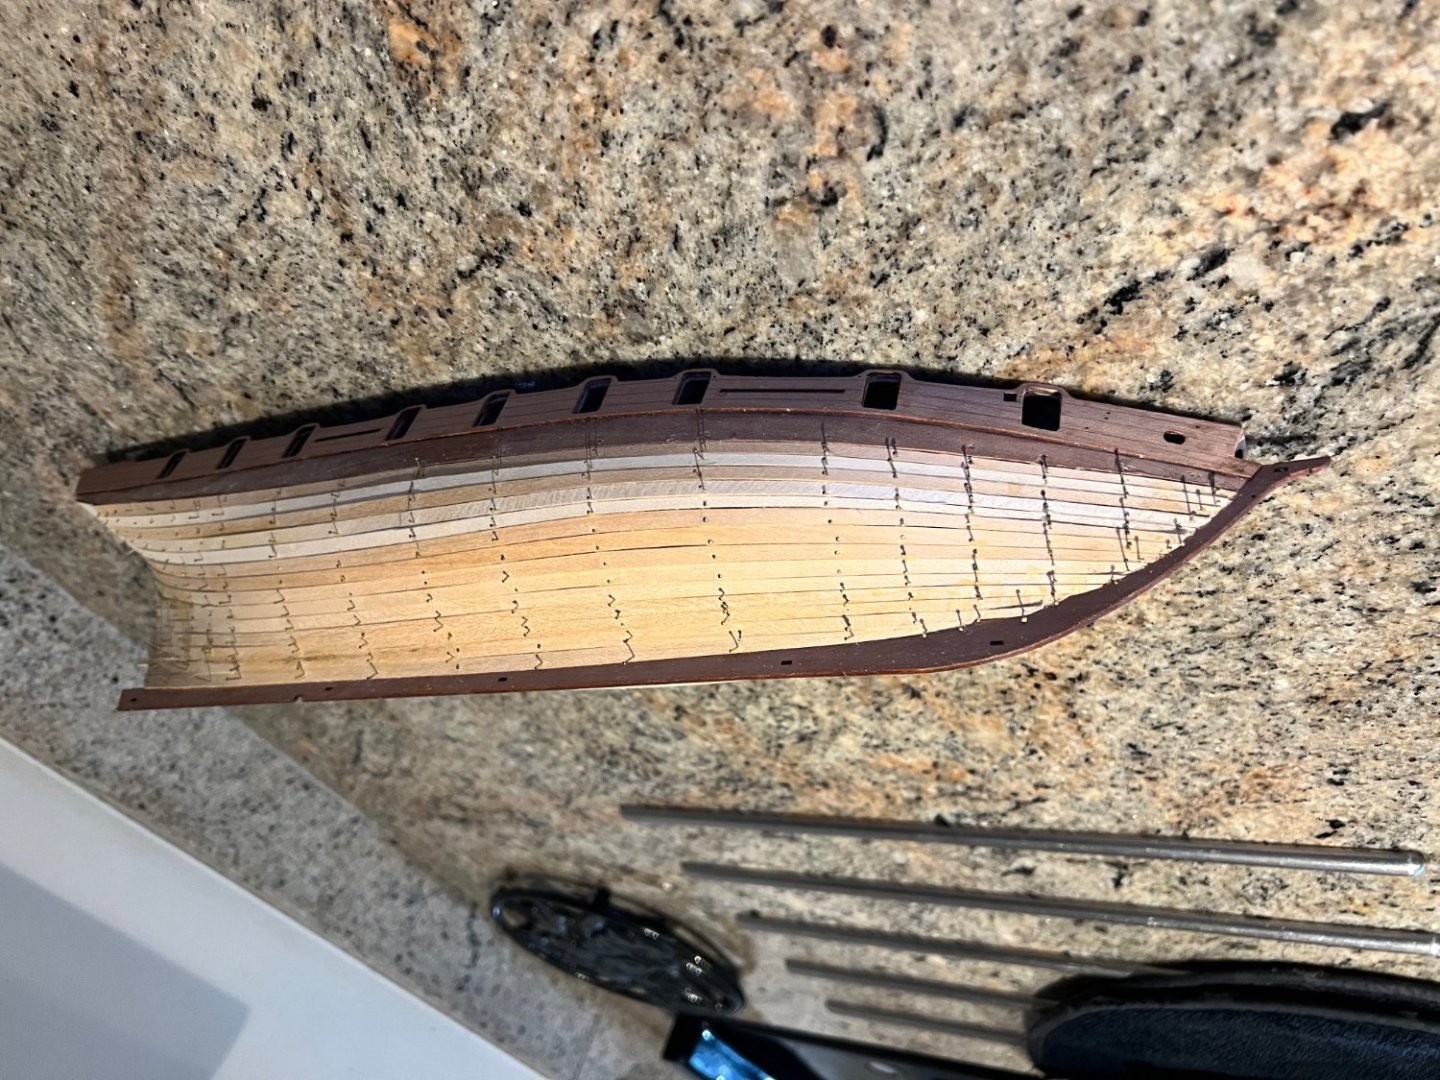
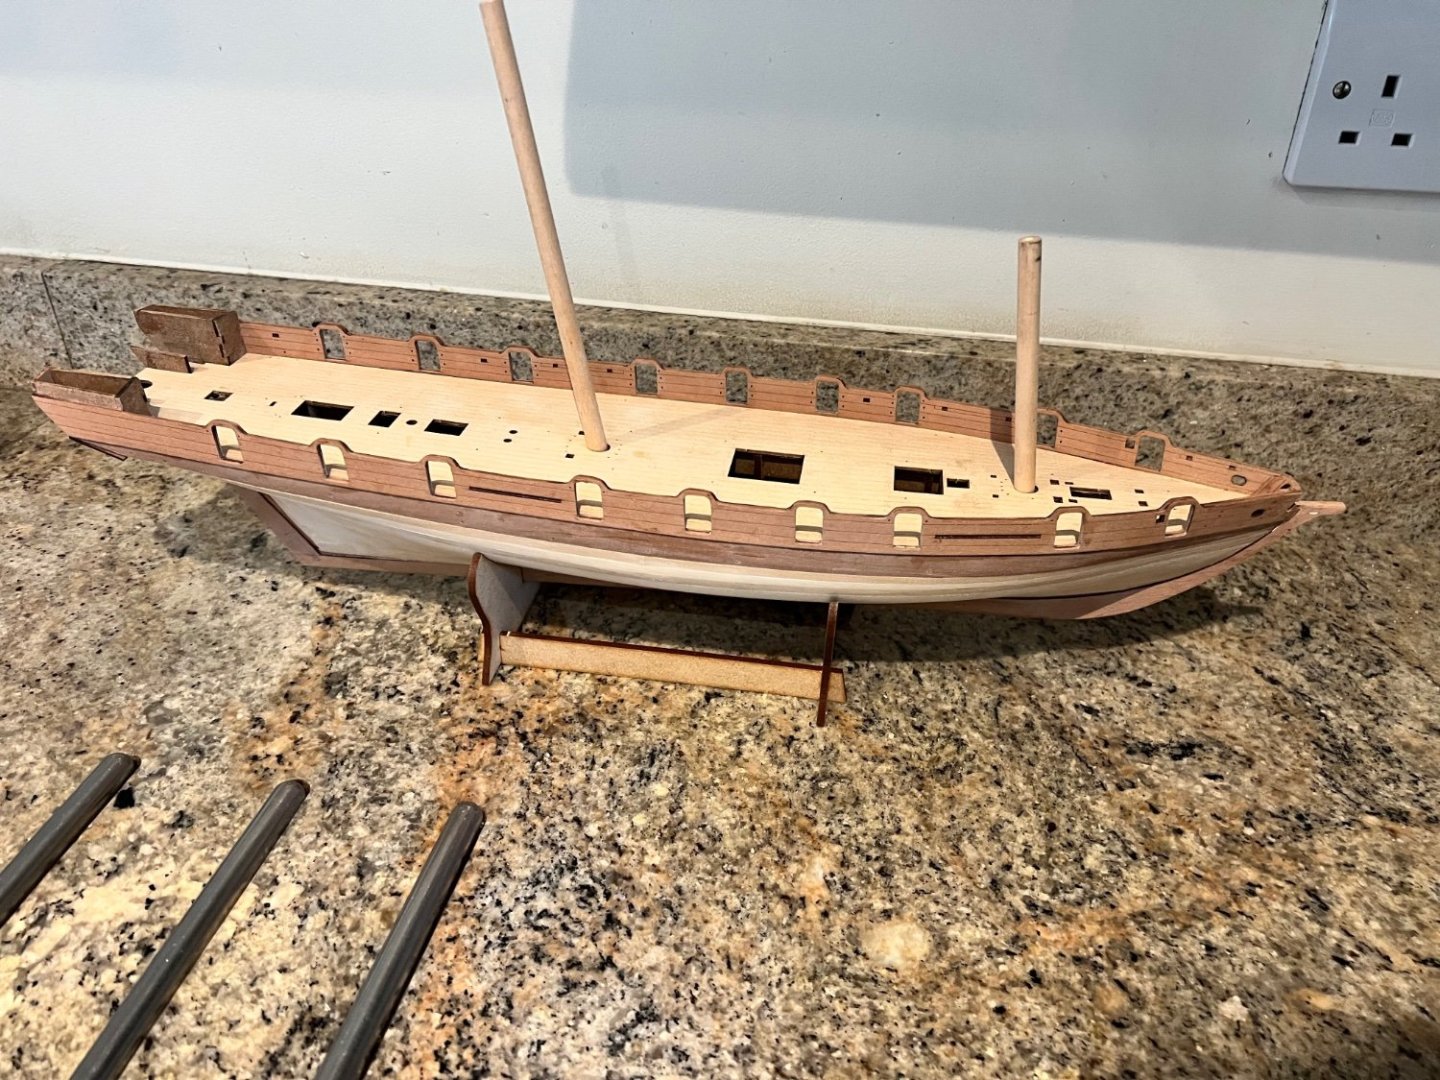
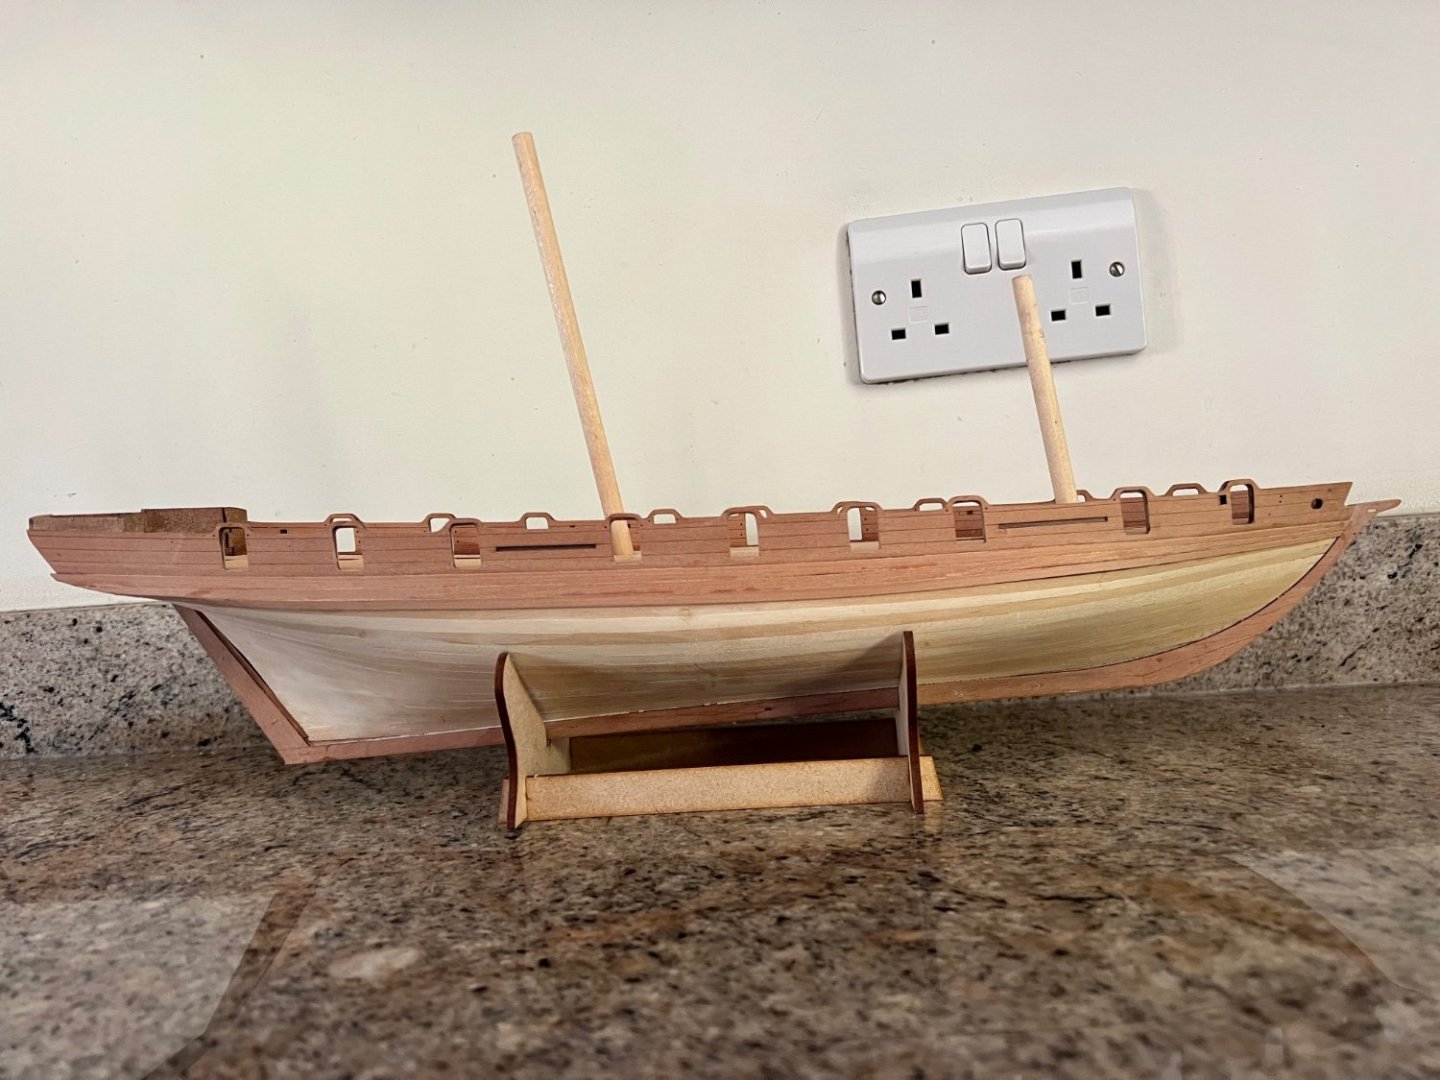
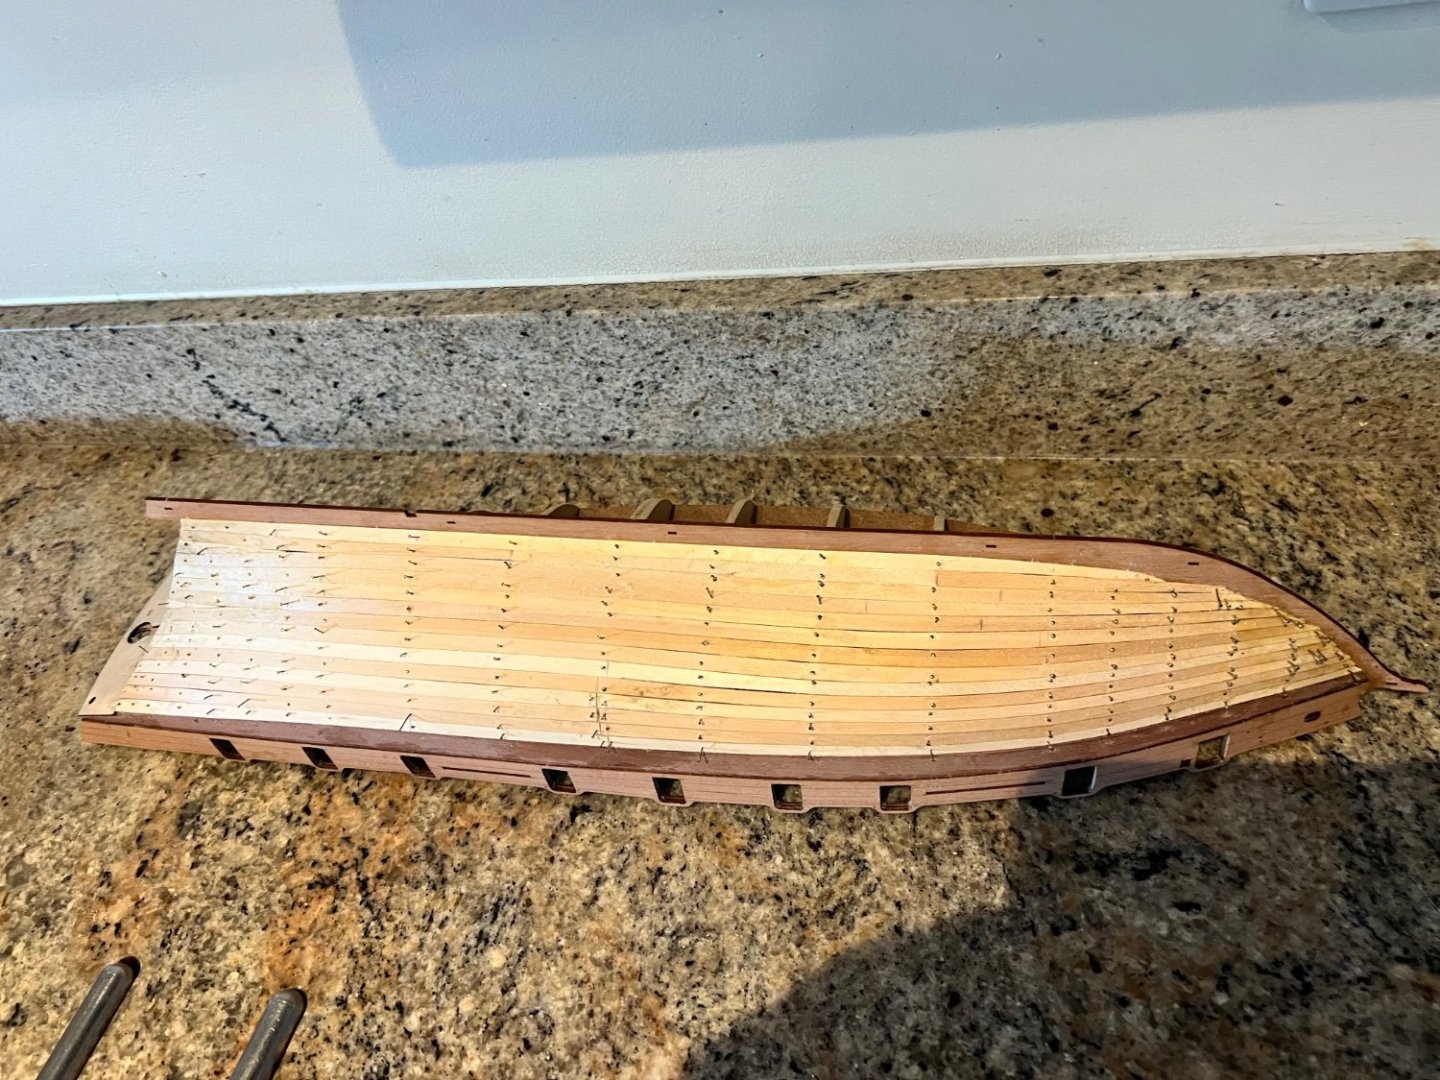
Starboard side first planking went on just as easily. I had some spare stubs of dowel which I stuck in the mast holes, almost an Admiralty style model, these are helping provide some protection to the gun port arches when I’m working on the planking on the upside down hull. After sanding and filling there is a really good firm base now in place for the second planking. Outer lower counter fitted, glued and clamped. Second planking went on well too. Port side complete below. The only area I found at all tricky was the more complex curve around the “Y” of the stern. The white filler lines show a little clinkering. Clearly my edge bending skills need further development! Grecian will have a black painted and coppered hull so I can be liberal with white filler. I also applied some Danish oil to the engraved deck to darken it a little. Usually I leave it until later when I’ve smeared glue in places from deck fittings and it leaves the oil blotchy, applying it early should reduce blotches. I need to start thinking about armament soon. I’ll be fitting her out as an American ship with Vanguard’s period US ensign and green inner bulwarks, but the US privateer armament of 2 x 6-pounders and 2 x 4 pounders is a bit meagre for a ship pierced for 16-18 guns. Even the RN complement of 2 x 6 pounders and 8 x carronades will leave the model looking bare. I suspect I’ll do something more similar to the plans with 12 carronades and 4 cannon.


- 103 replies
-
- 11
-
-
- Grecian
- baltimore clipper
- (and 4 more)
-
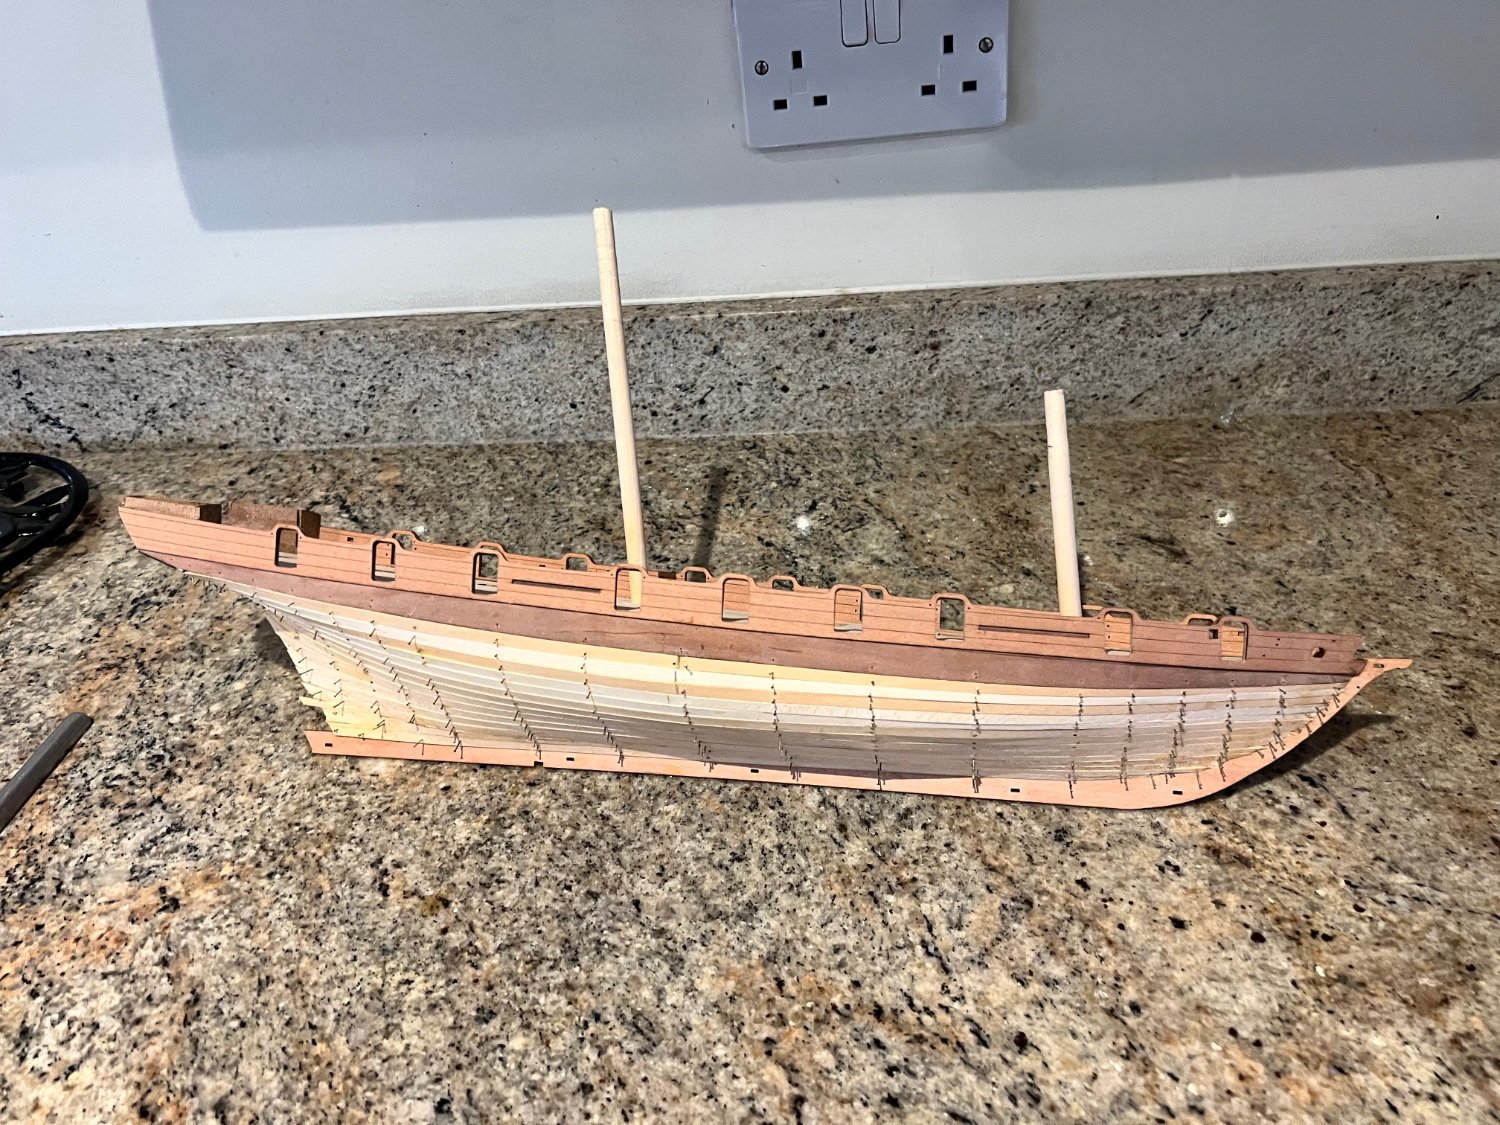
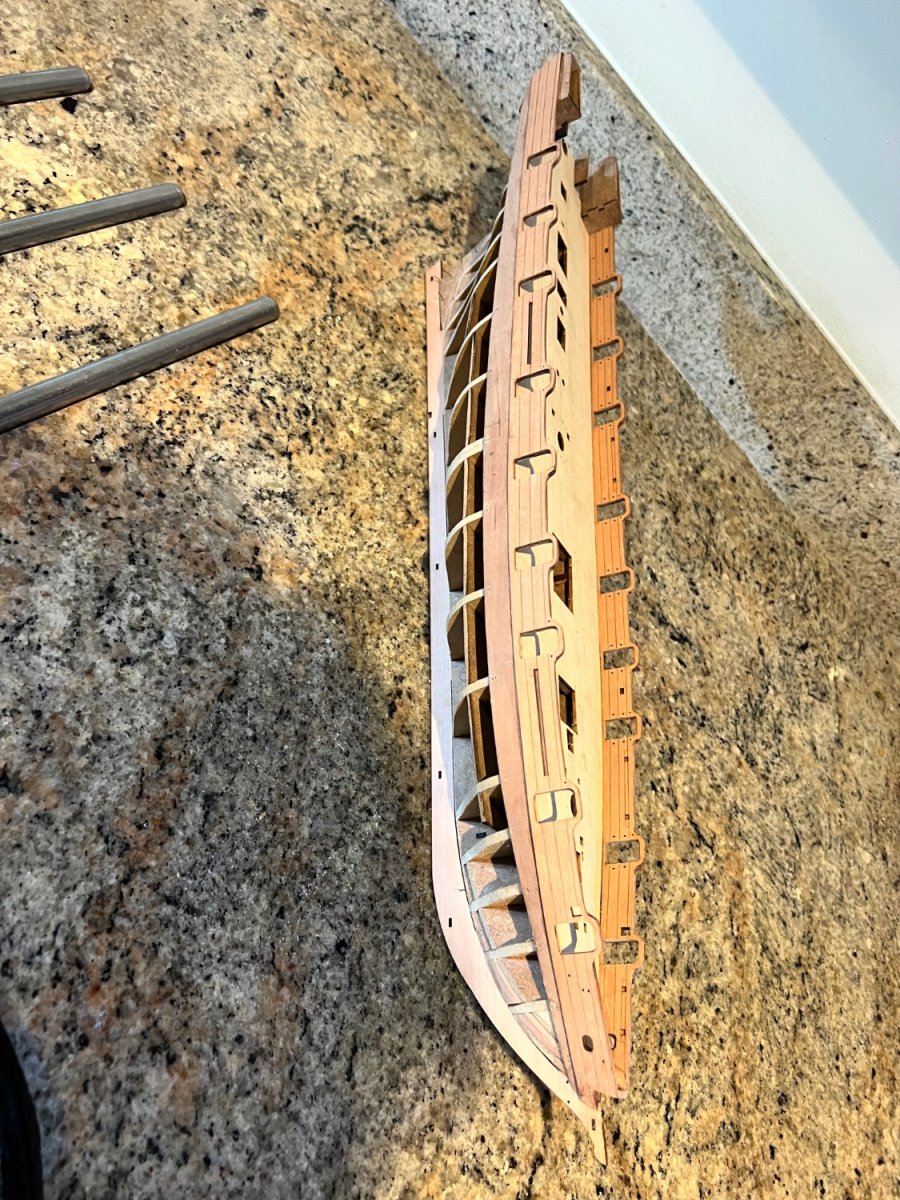
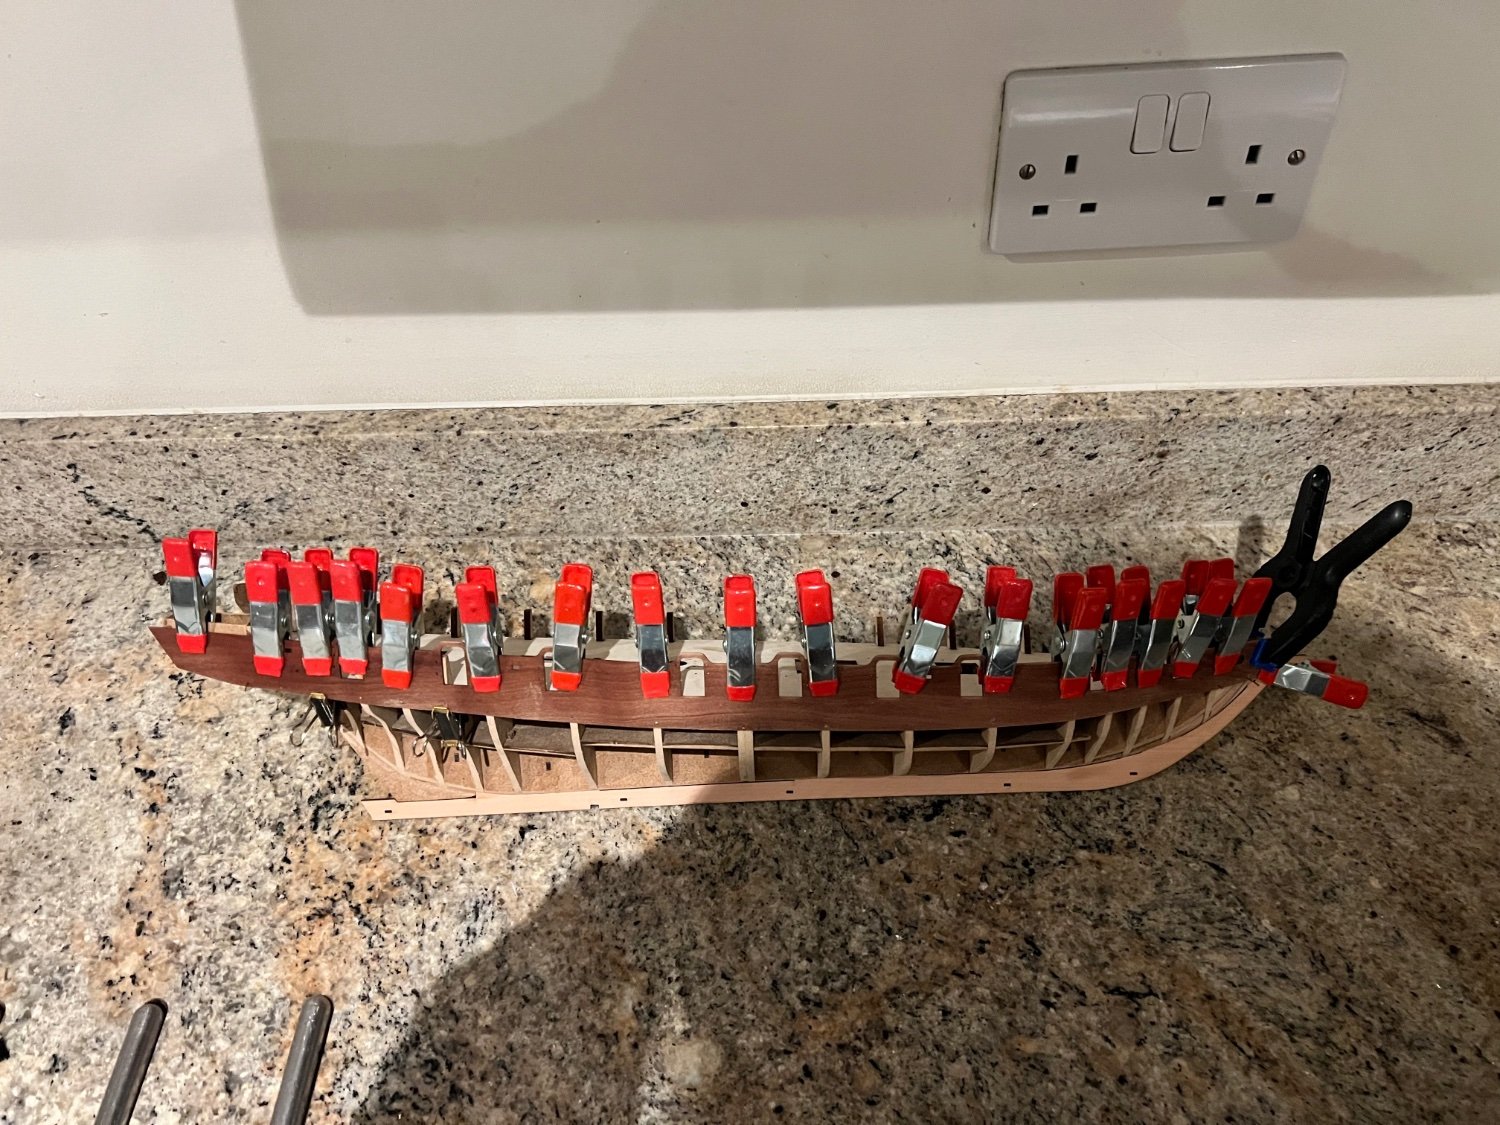
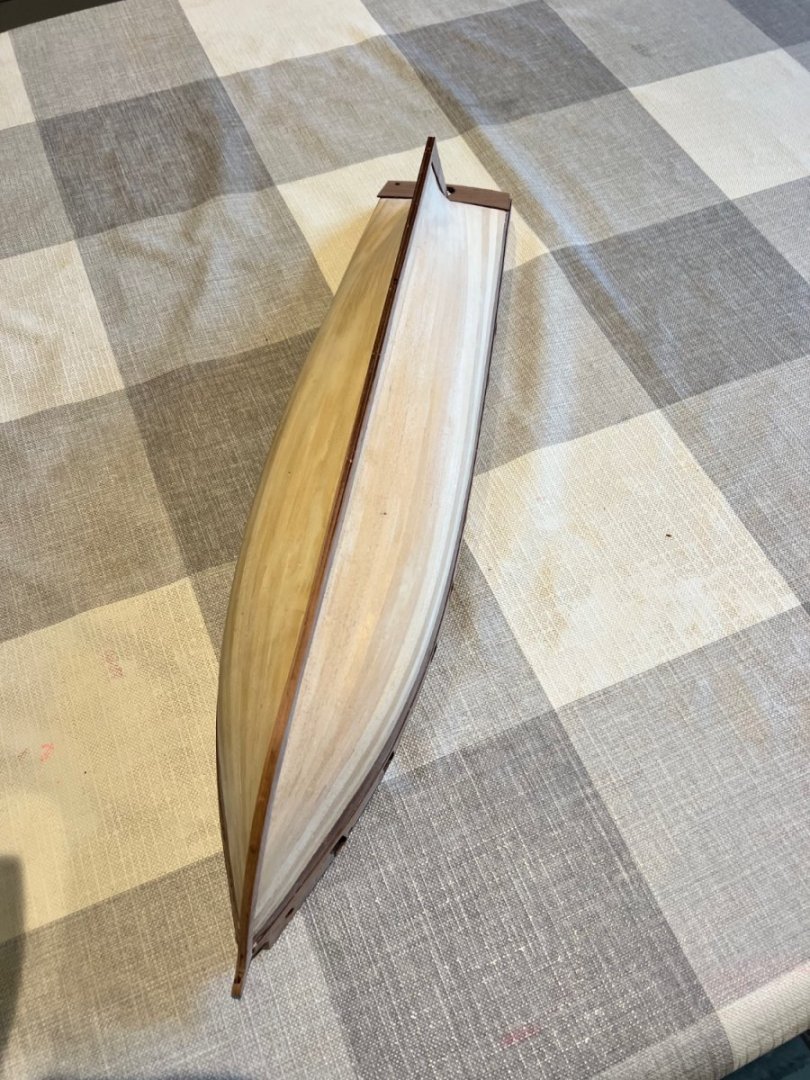
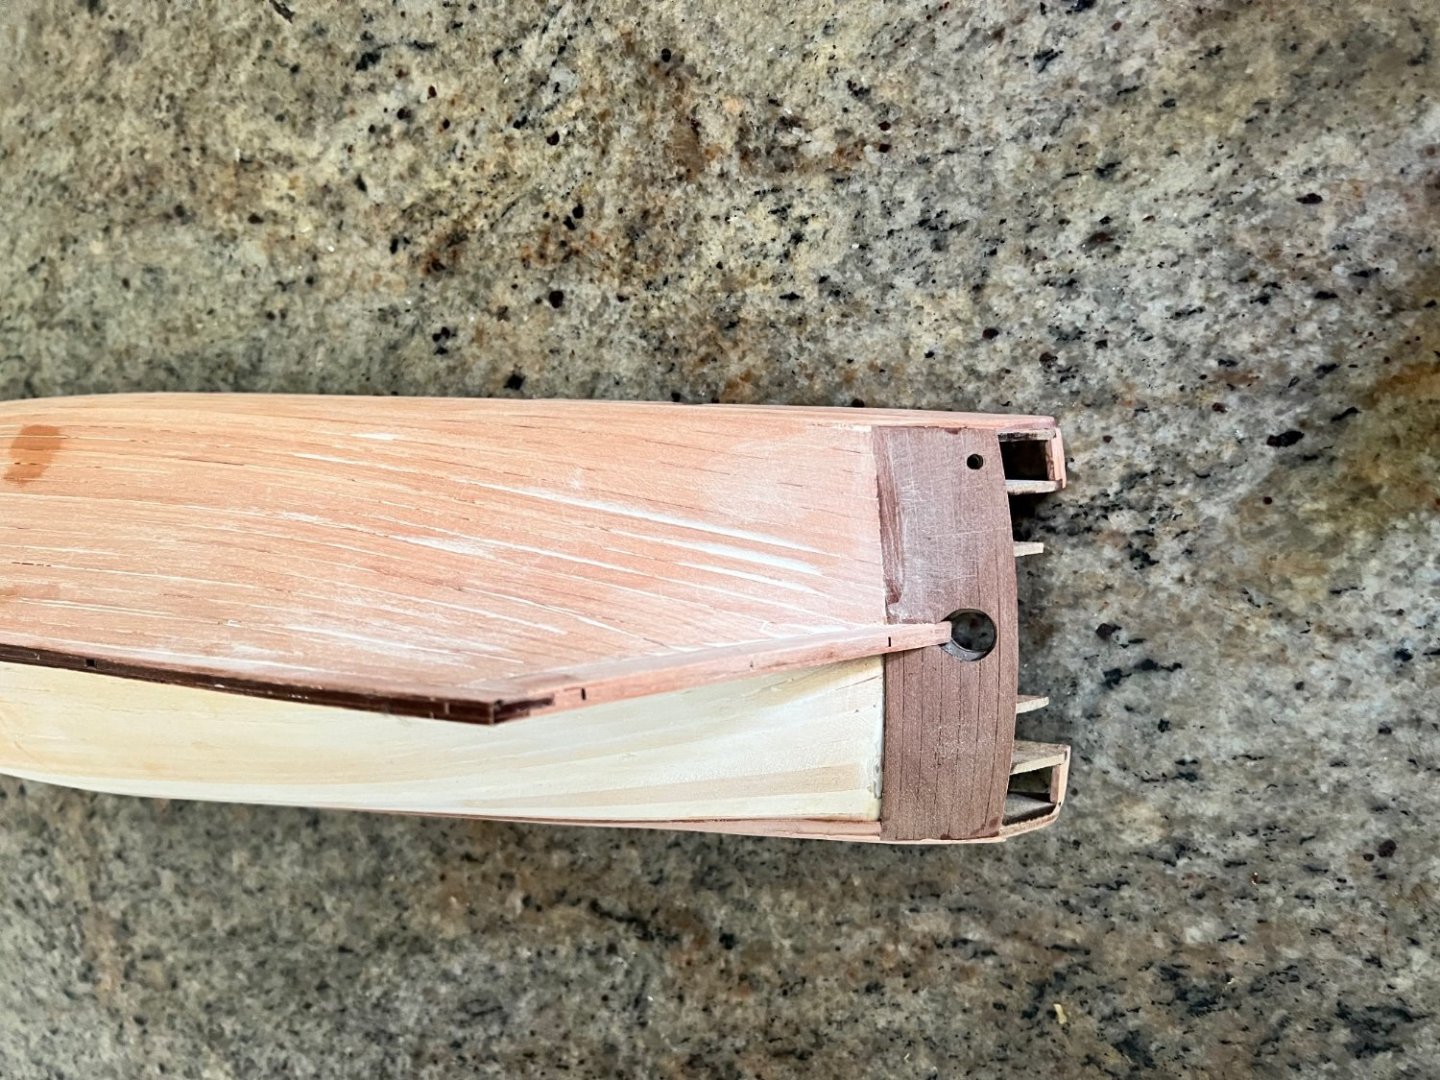
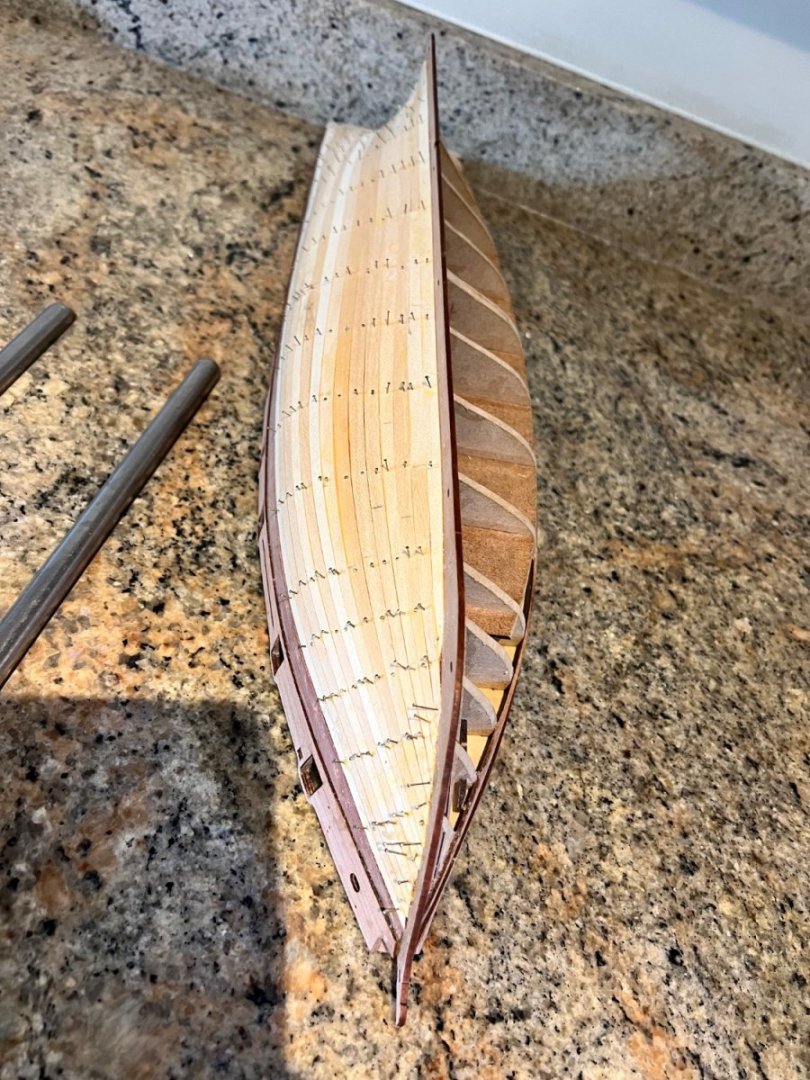
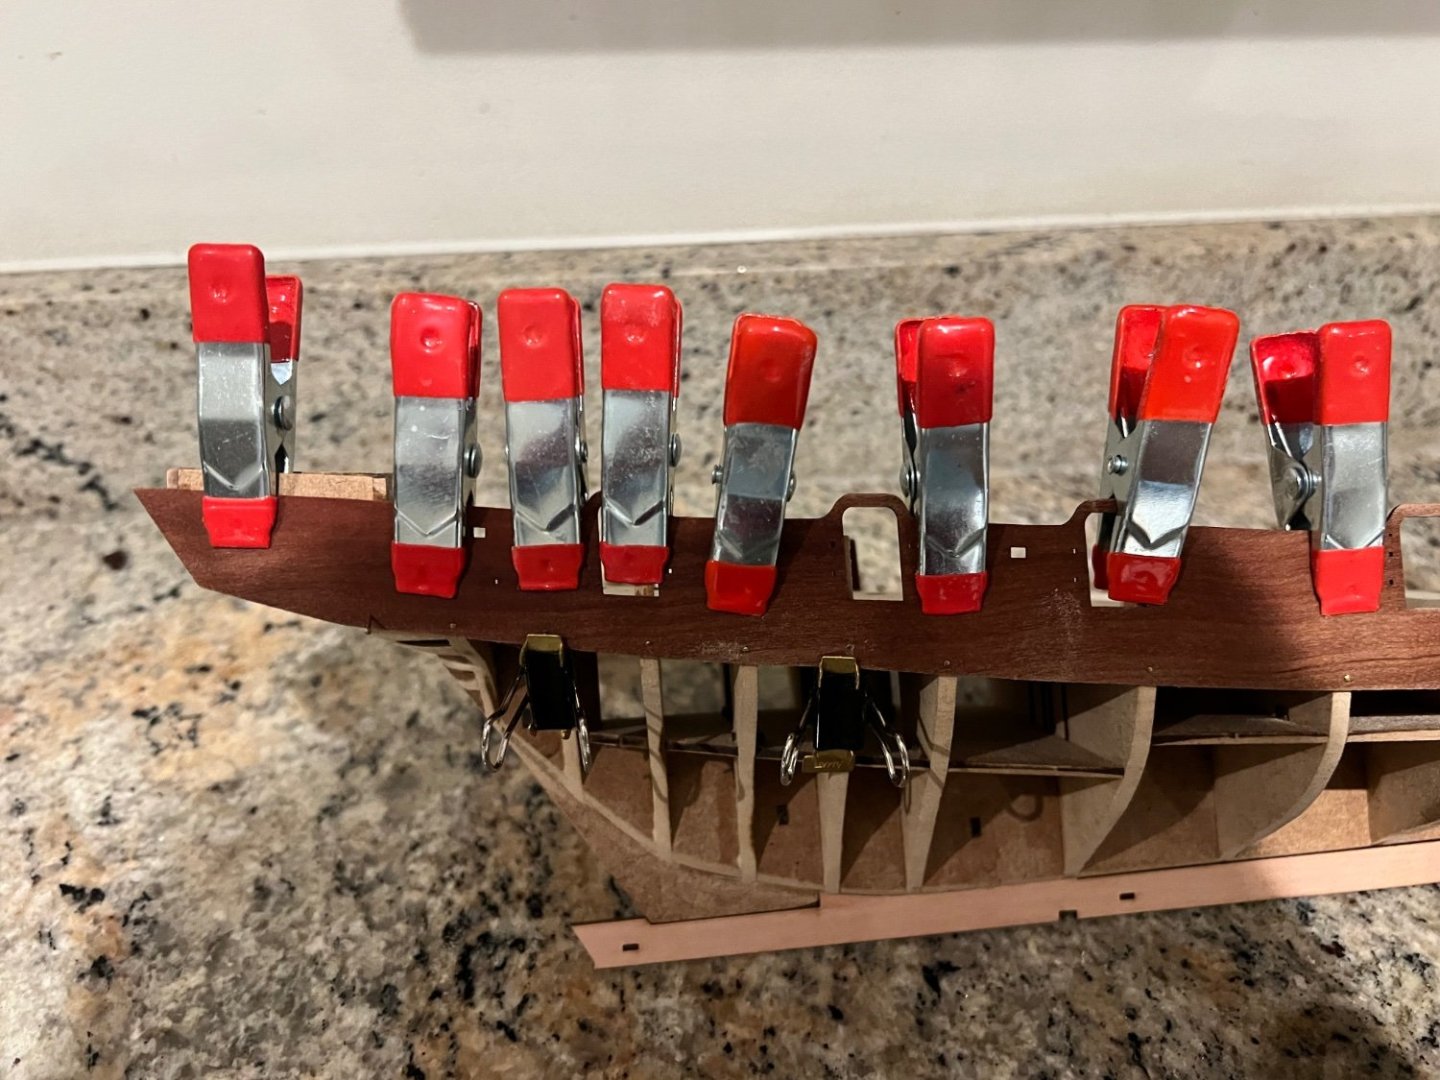
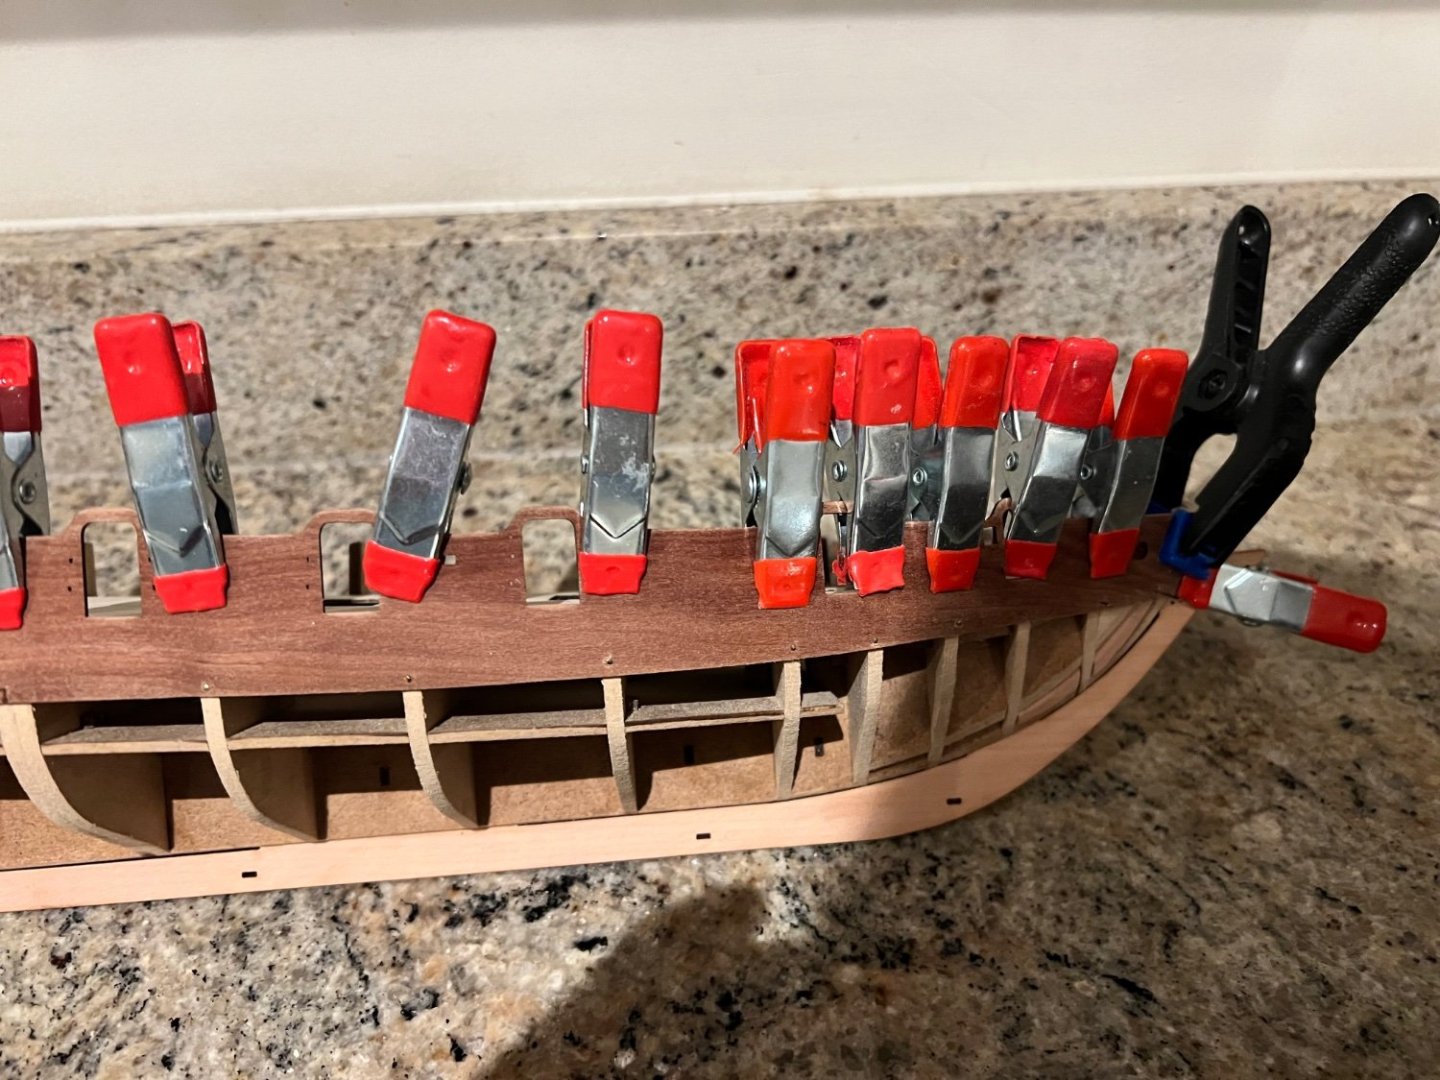
I’ve fitted the outer bulwark, then the engraved deck which goes on very well with a little sanding at the edges and then the inner bulwarks. Soaking, clamping and pinning the middle bulwark has very slightly distorted the middle bulwark meaning that the gunports on the middle bulwark no longer match up exactly with the gunports on the inner and outer bulwarks. The difference isn’t much, but it’s not as exact as it would be if I hadn’t soaked it. I’ve gently sanded the sides and bottom of the gunports and may need a tiny amount of filler to get clean edges for painting. I haven’t sanded the arches yet as I don’t want to weaken them. The inner lower counter is fitted and then first planking starts. Grecian’s lines are very gentle to plank with lots of bulkheads to guide the shape and I barely need to edge bend. Possibly the easiest boat to first plank I’ve built so far - and maybe I’m getting a little better at it. As the instructions say, lots of tapering is essential at the bow and no tapering with some stealers at the stern. I started doing the planks in halves, but it wasn’t really necessary on this boat. The structure is so robust I have no fear of warping the keel by planking one side at a time. I’ve just done the port side so far. After some initial sanding. Apologies for the orientation of some of the photos, I can’t fix them on my iPhone. The only slight concern I have is where the counter meets the planking. I need to sand some more, but with hindsight maybe should have taken more off the underlying stern bulkhead structure when fairing.


- 103 replies
-
- 10
-
-
- Grecian
- baltimore clipper
- (and 4 more)
-
Ken, I had some difficulty shaping those mizzen PE step blocks too and narrowly avoided breaking one. If your Alert is v3 not v2 then you may find that the PE cannon straps are not needed as it is incorporated into the wooden side of cannon’s carriage. Photo below is from Grecian, but it’s the same setup.
- 59 replies
-
- 1
-
-
- Alert
- Vanguard Models
- (and 1 more)
-
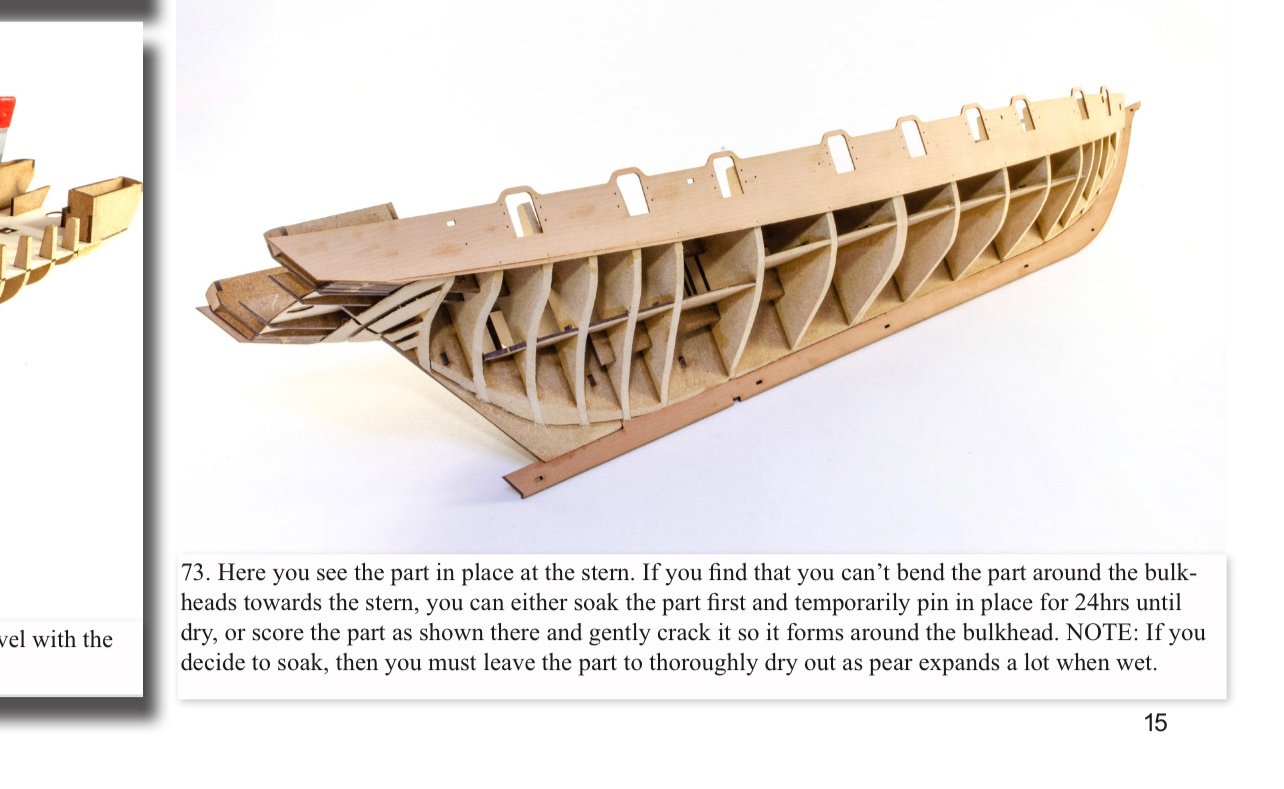
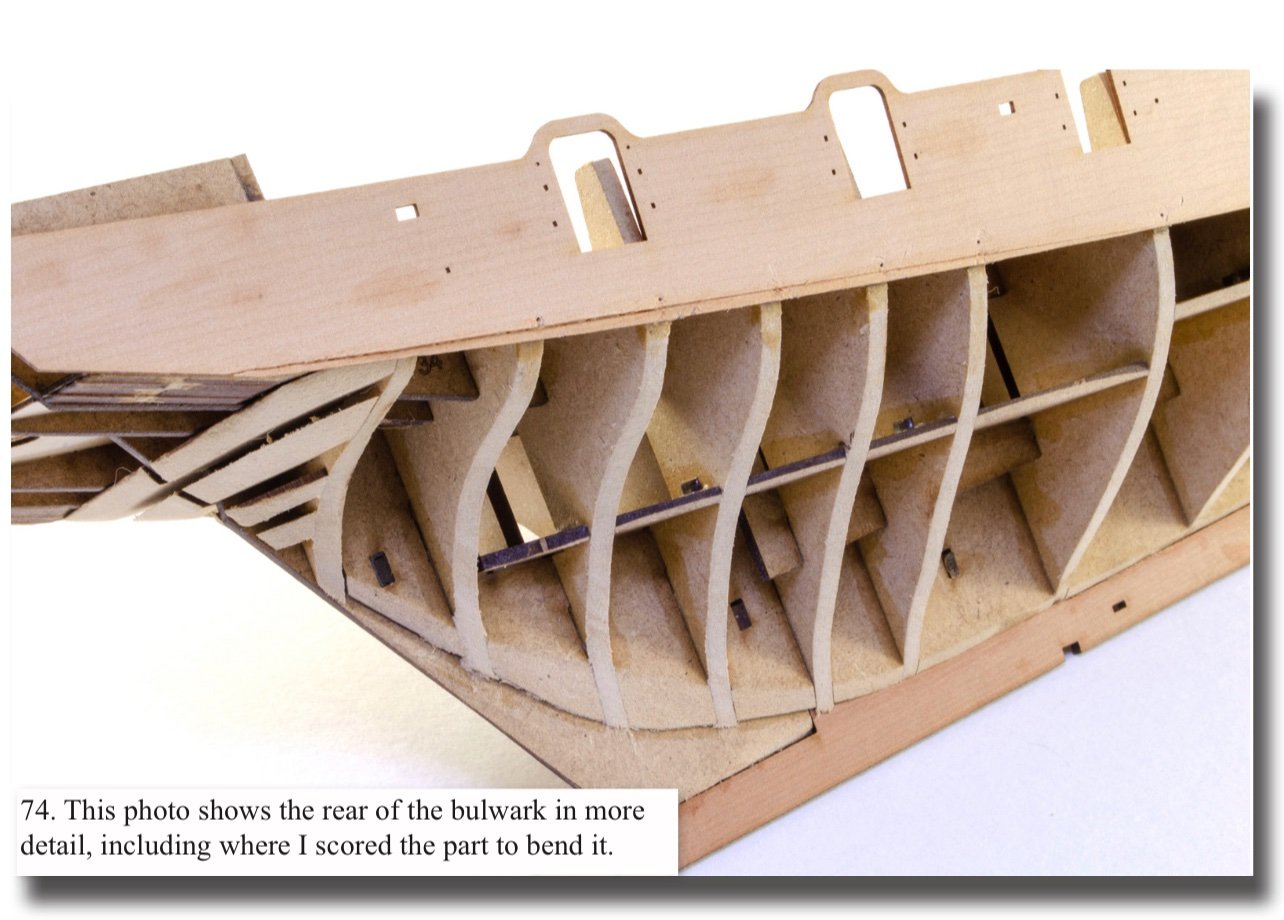
Thanks Chris, The photo was my test fitting - held on by hand and a single pin. I quickly realised that I needed to sand the bowsprit area and did so before any soaking or glueing. It wasn’t my final position for it. Sorry I should have been clearer above. In step 73 the instructions suggest soaking the bulwark as an option instead of scoring the bottom of the bulwark to bend around the bulkheads. I felt more comfortable soaking than scoring and cracking the wood. The rest of the curves are indeed very slight.
- 103 replies
-
- 5
-
-
- Grecian
- baltimore clipper
- (and 4 more)
-
It’s bound to be something I’ve done wrong. Not sure what though, I drew lines marking the bottom of the slot of every bulkhead to ensure they were seated properly. I also checked that the deck was located exactly into each ear. The bowing was only very slight, but I needed to clamp it to ensure that there was contact for the PVA.
- 103 replies
-
- 3
-
-
- Grecian
- baltimore clipper
- (and 4 more)
-
You’re very welcome! I’ll be sticking close to what Jim built in the prototype, but without anything like the same level of experience or skill.
- 103 replies
-
- 1
-
-
- Grecian
- baltimore clipper
- (and 4 more)
-
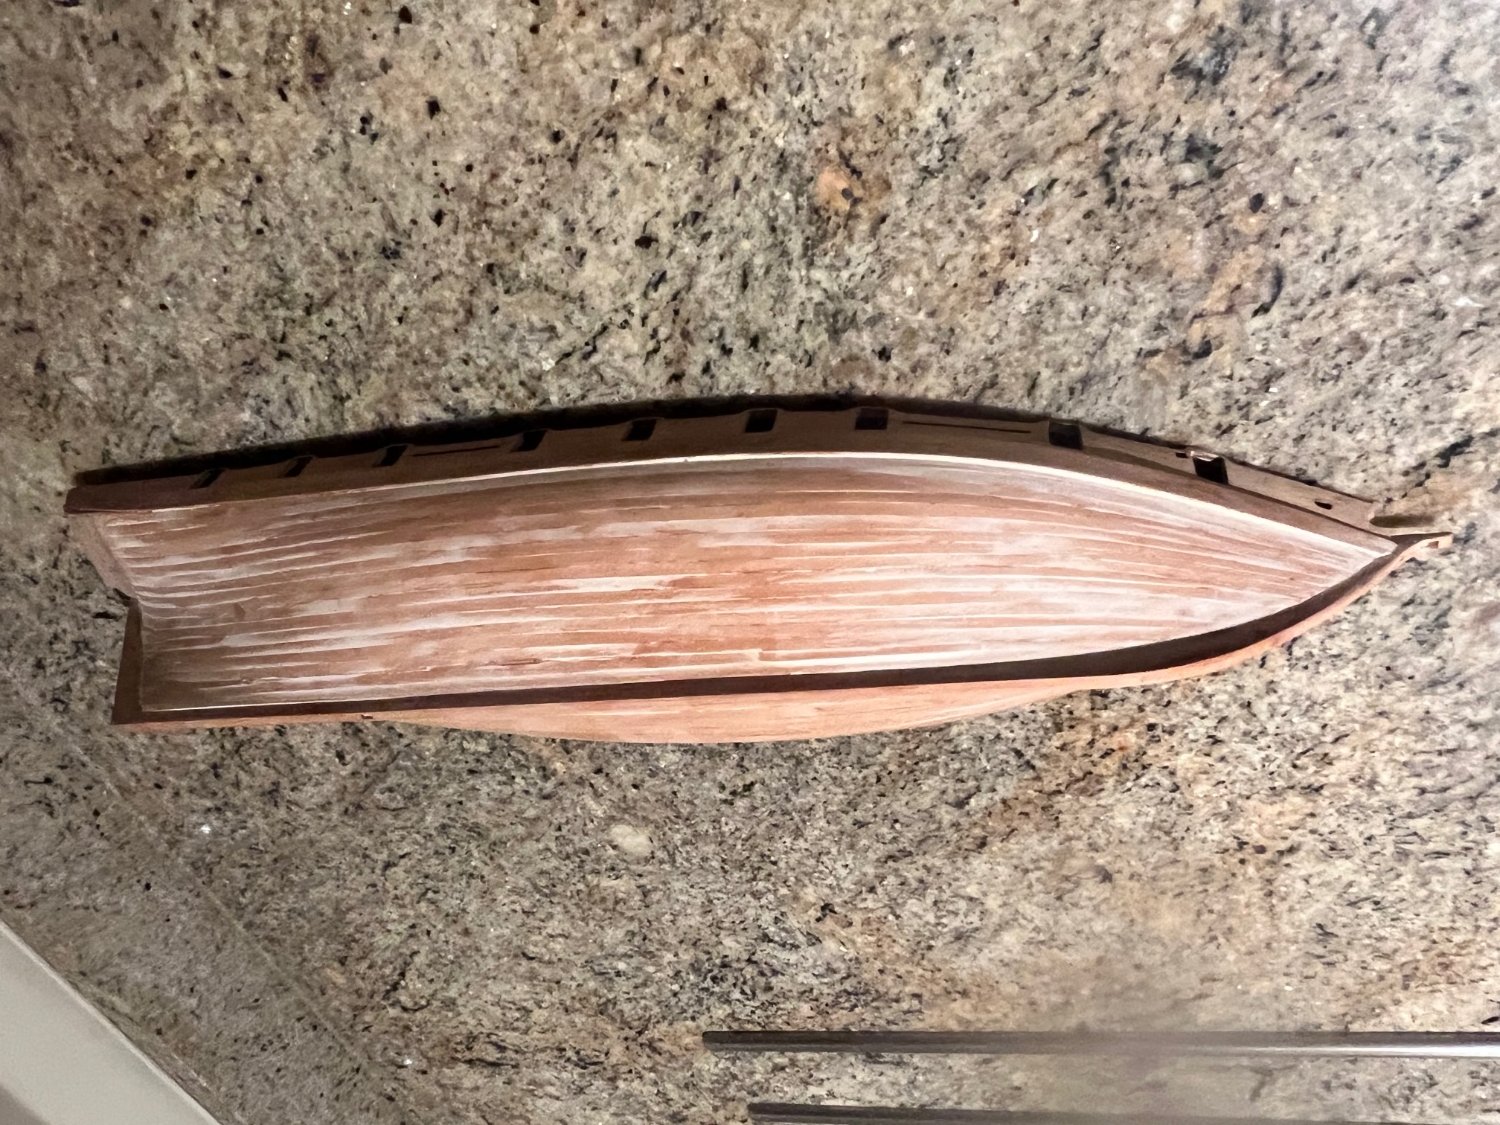
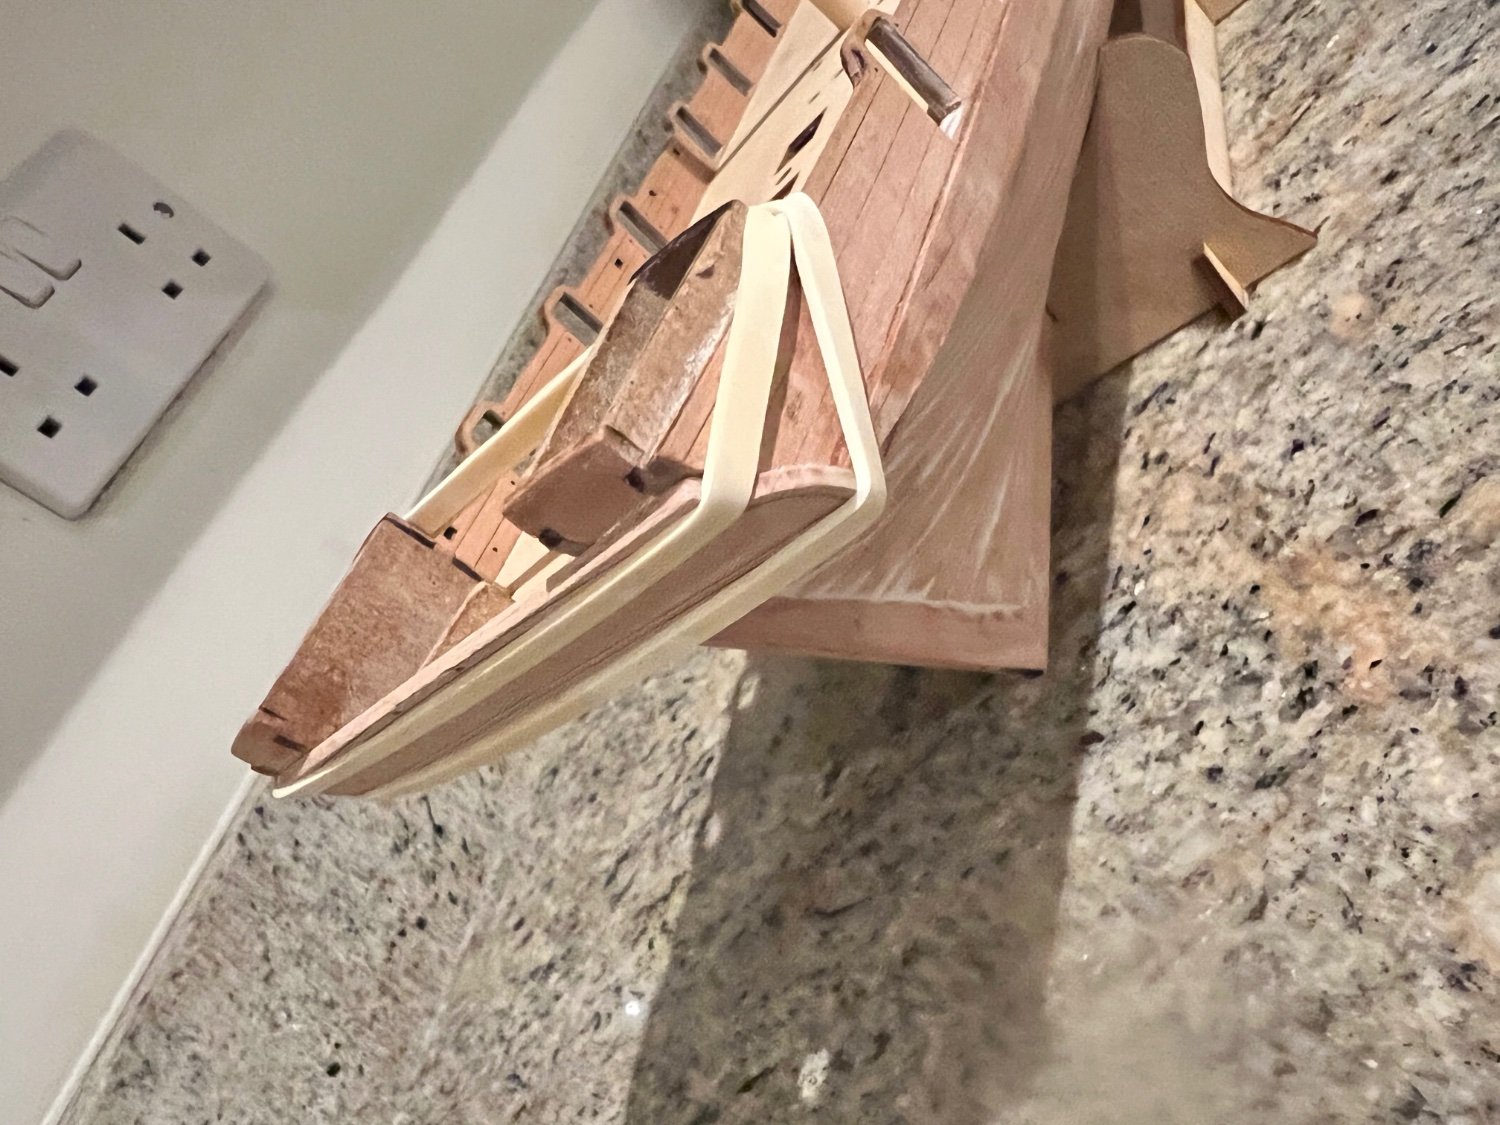
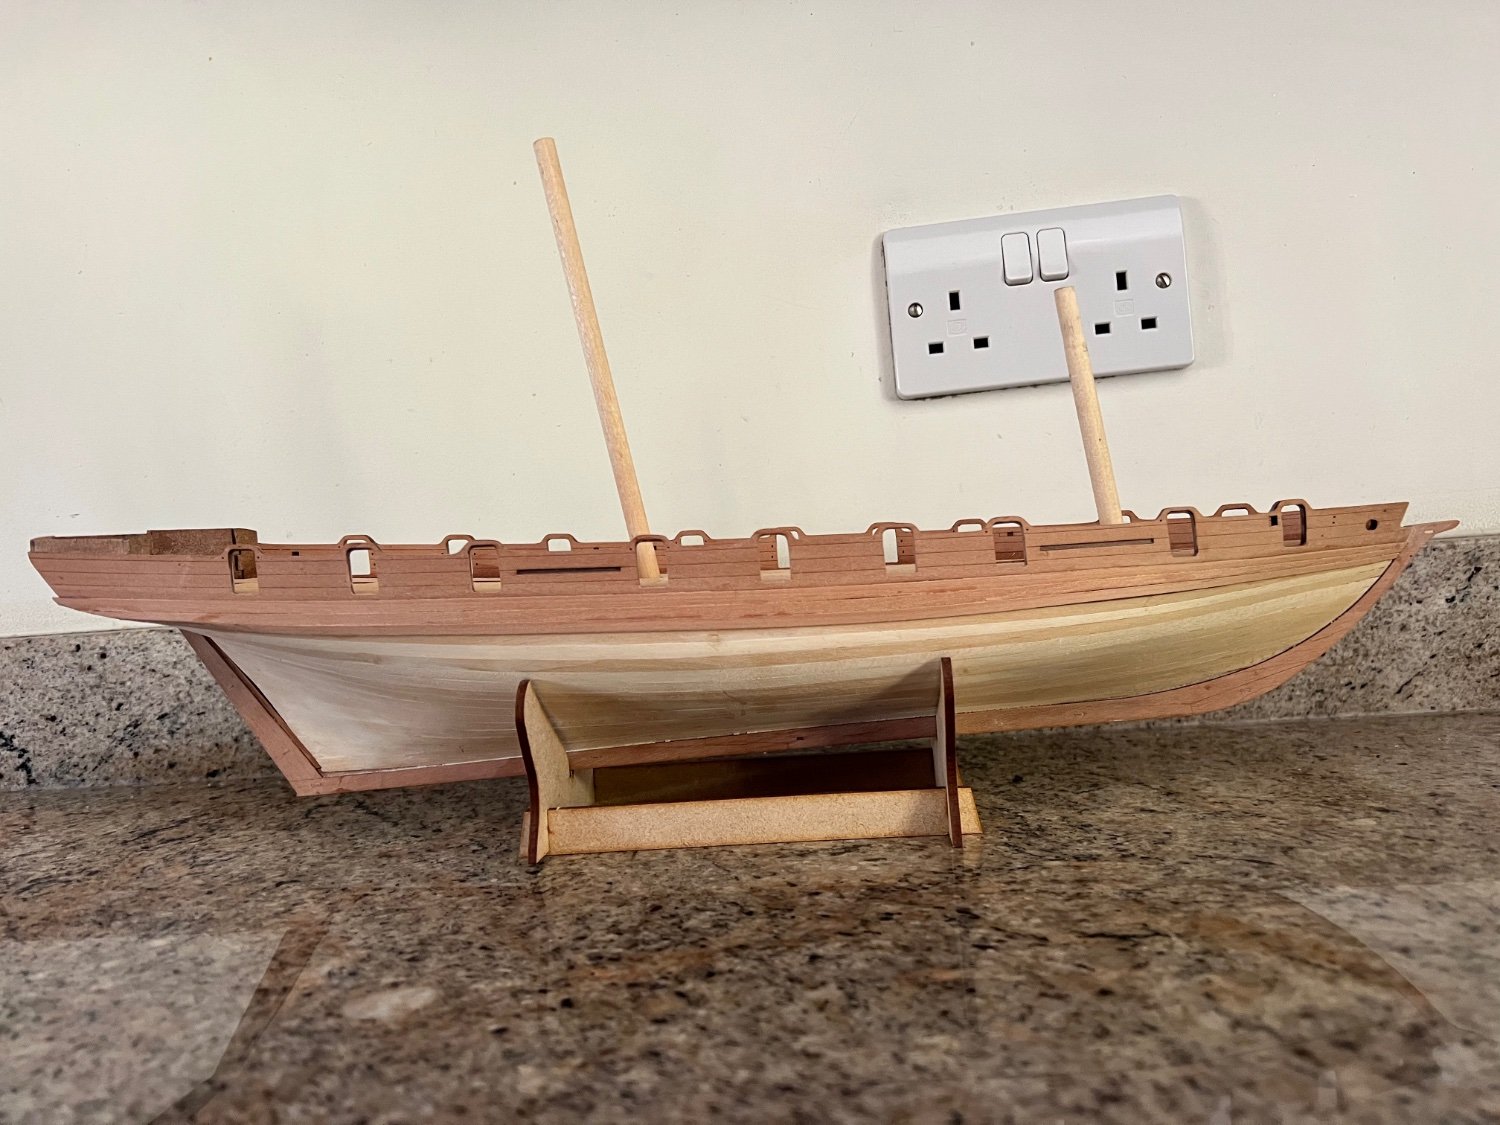
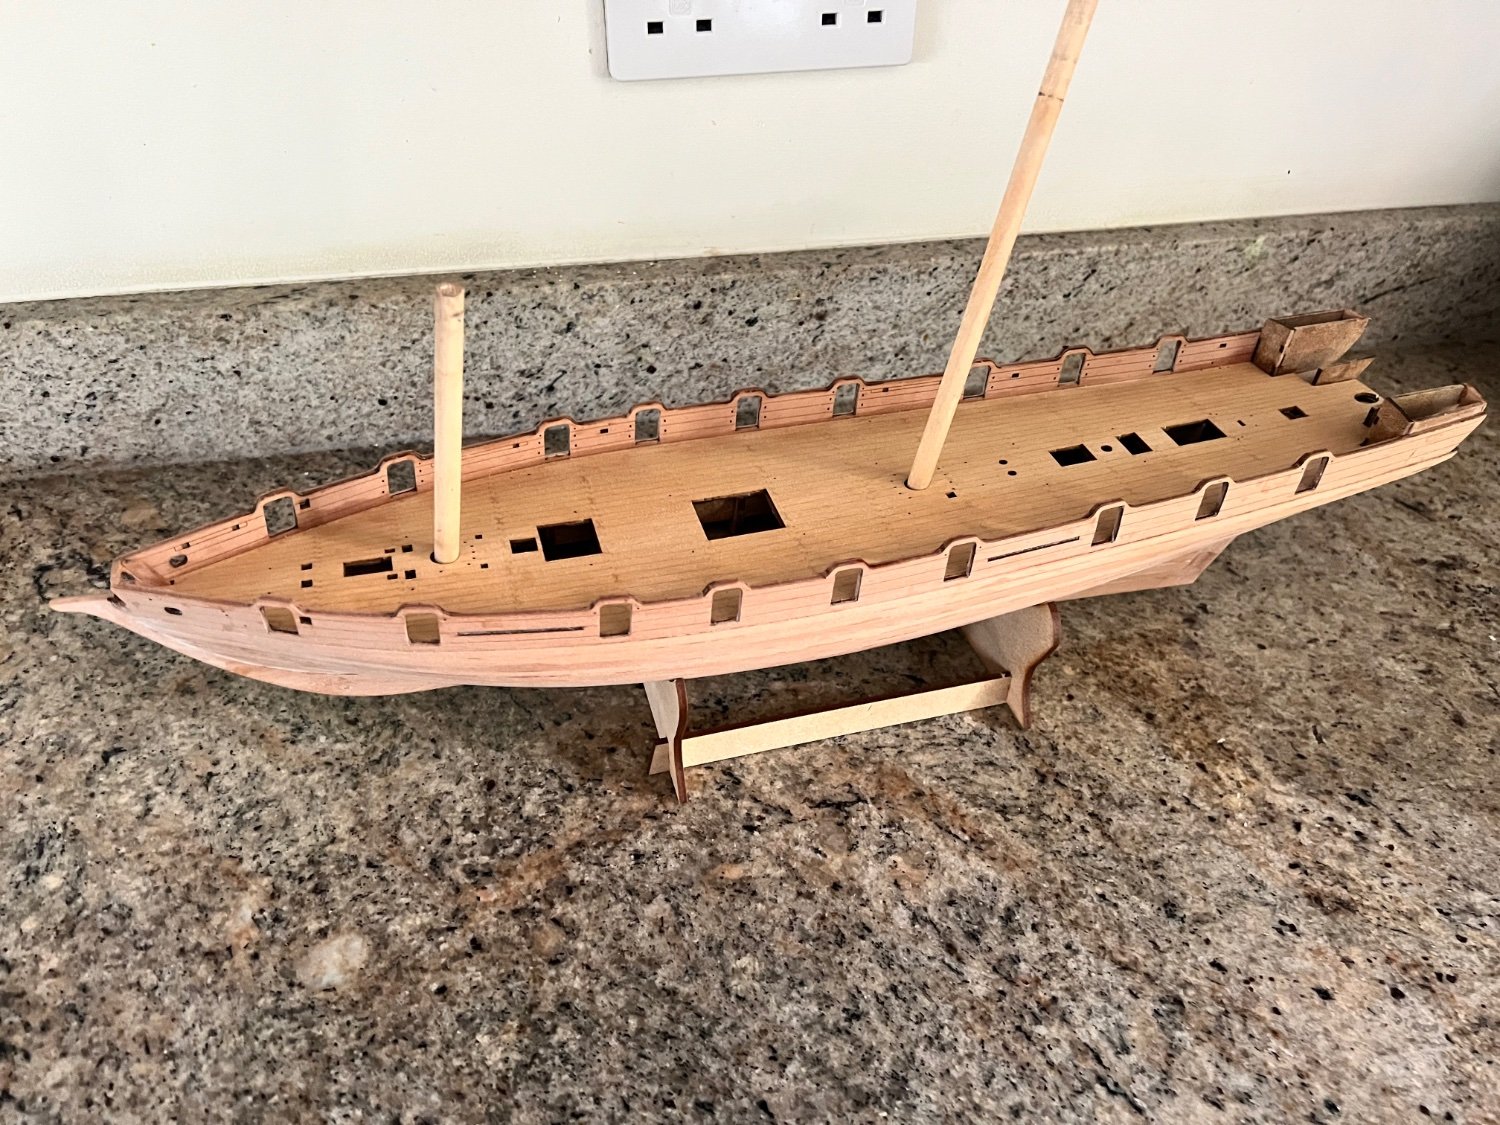
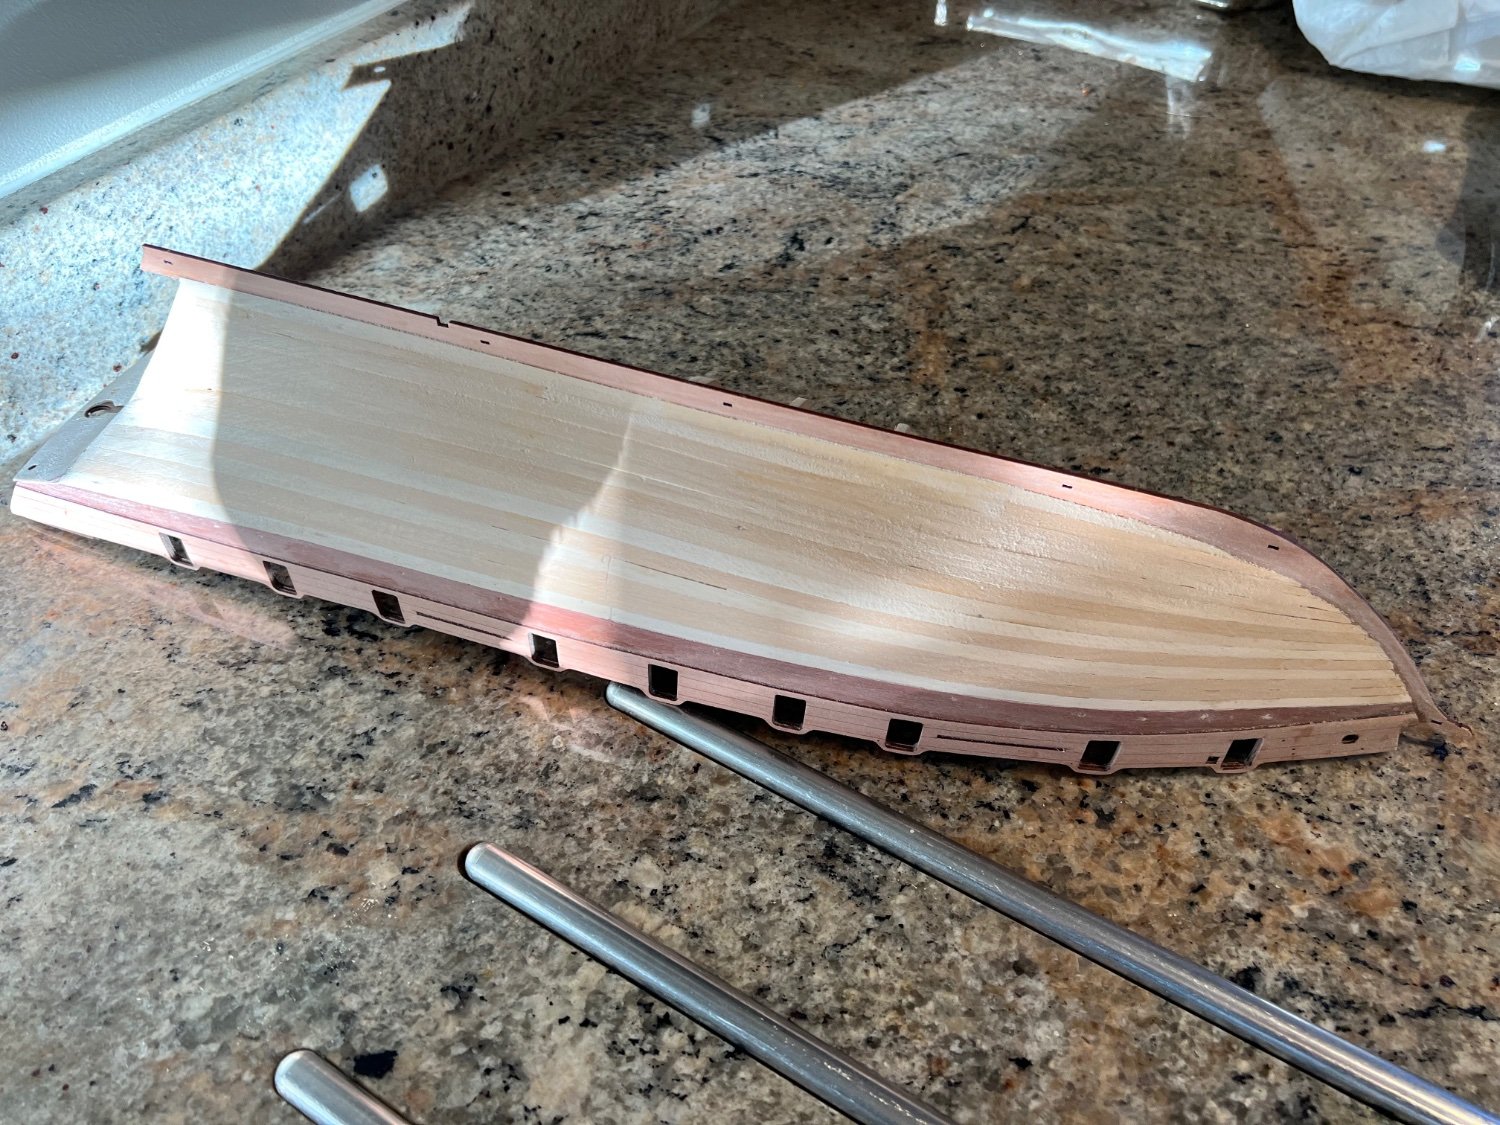
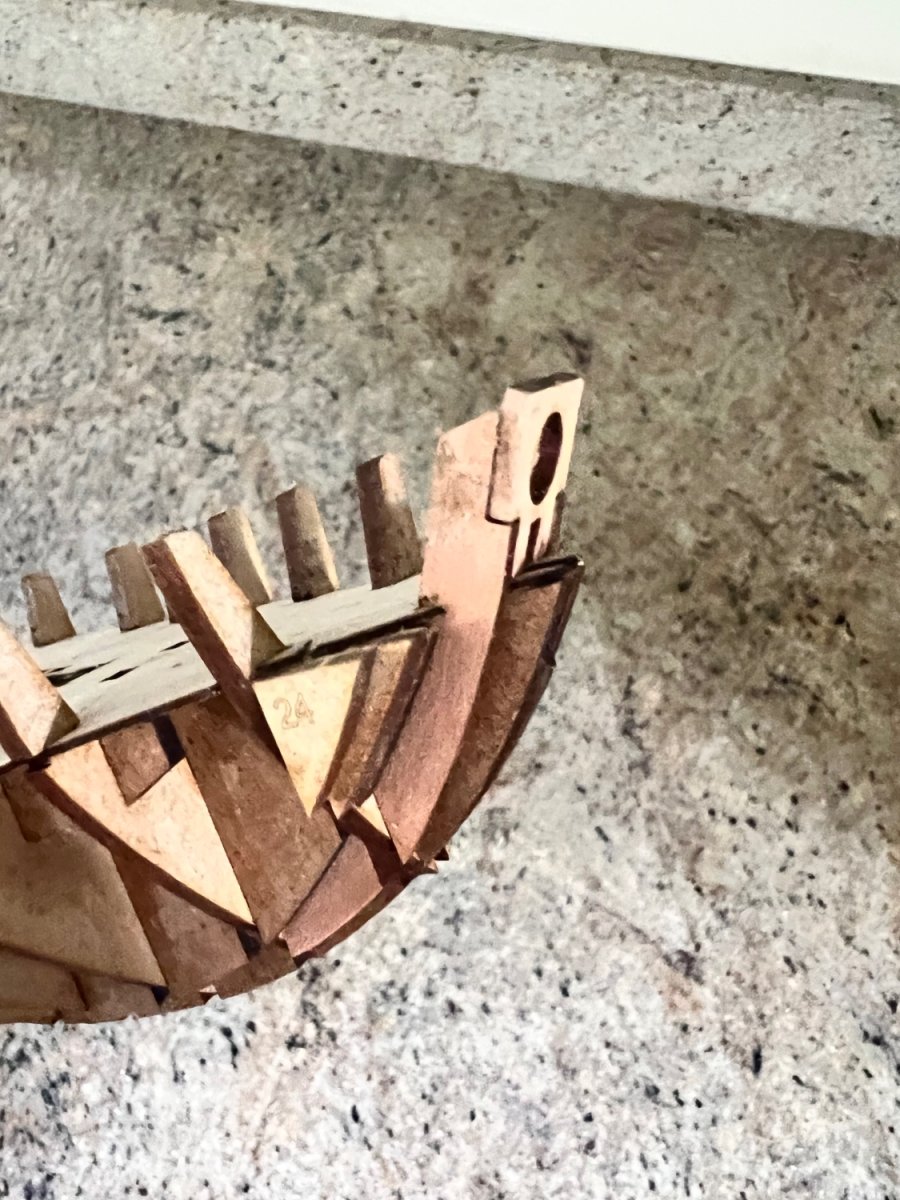
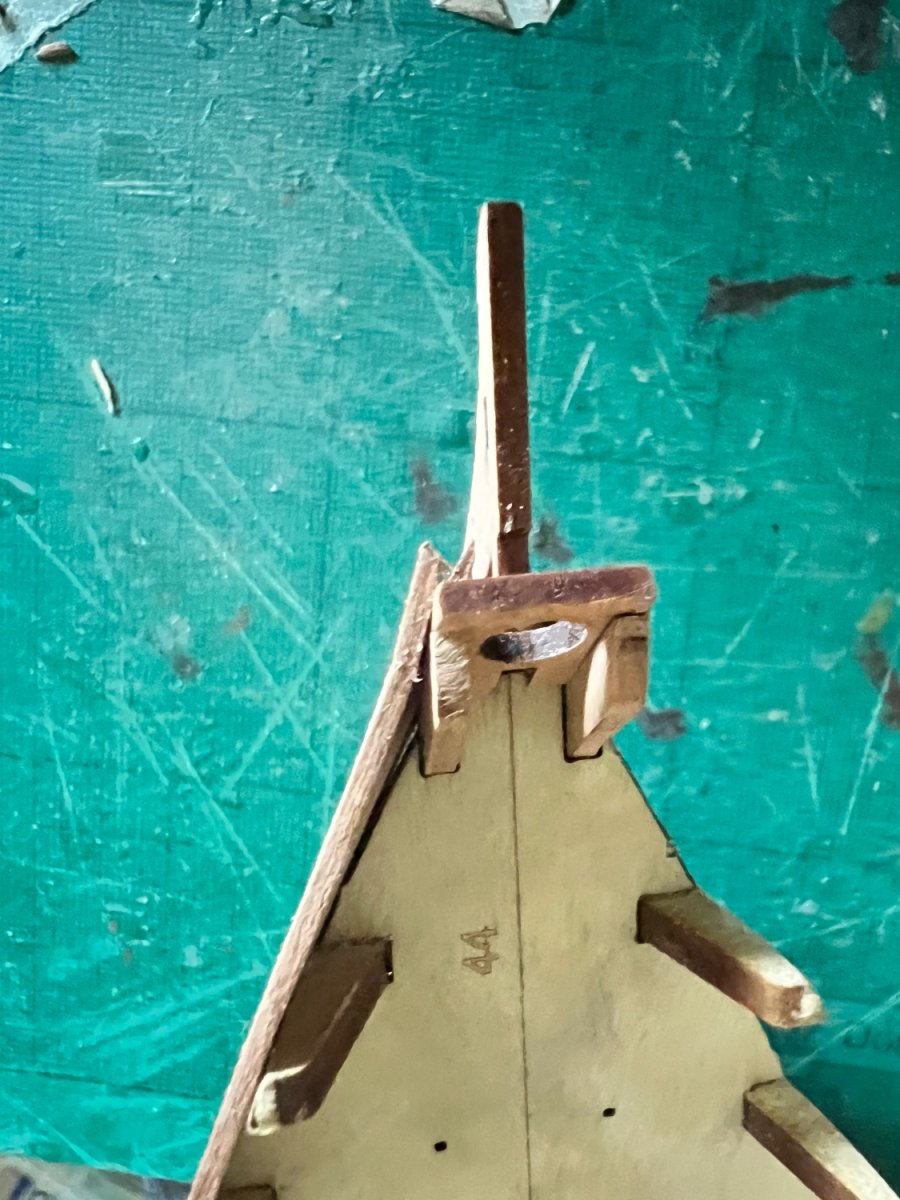
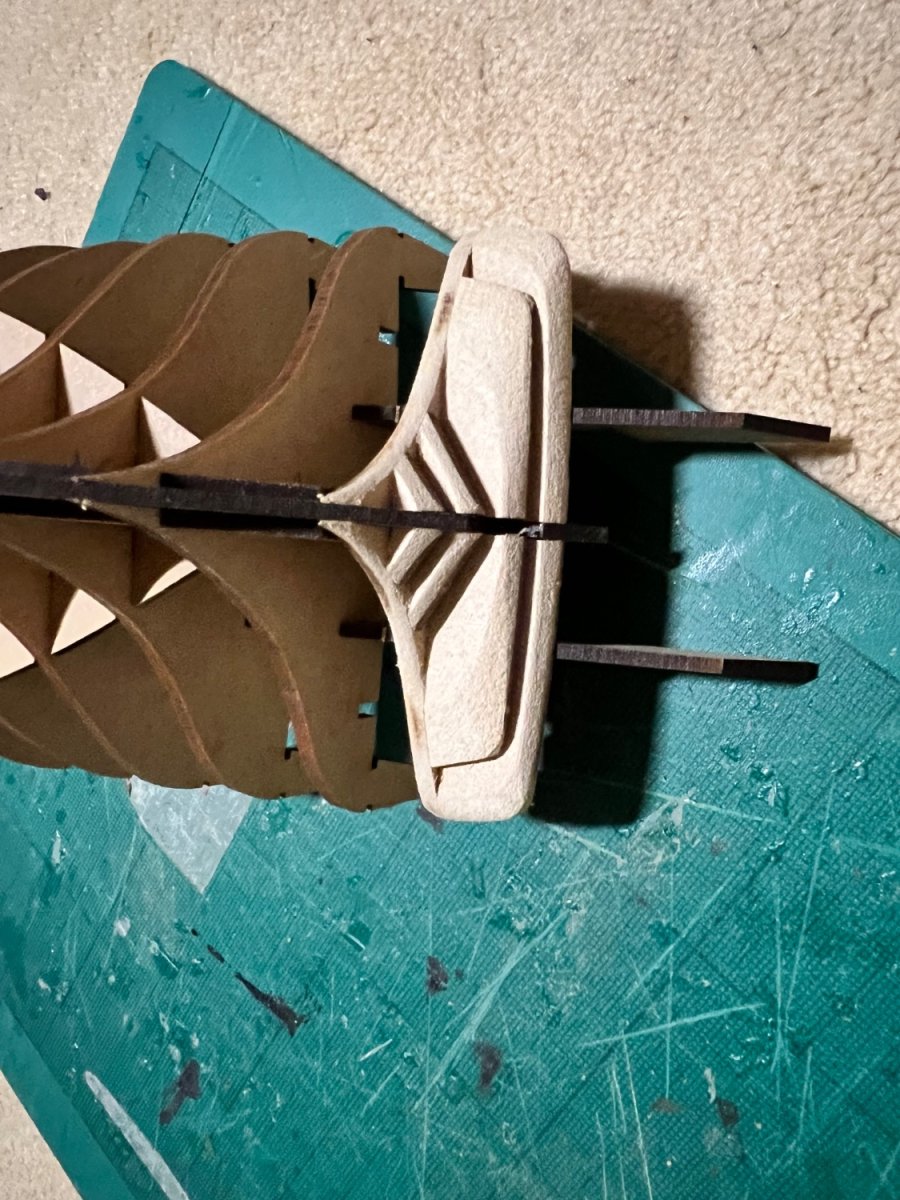
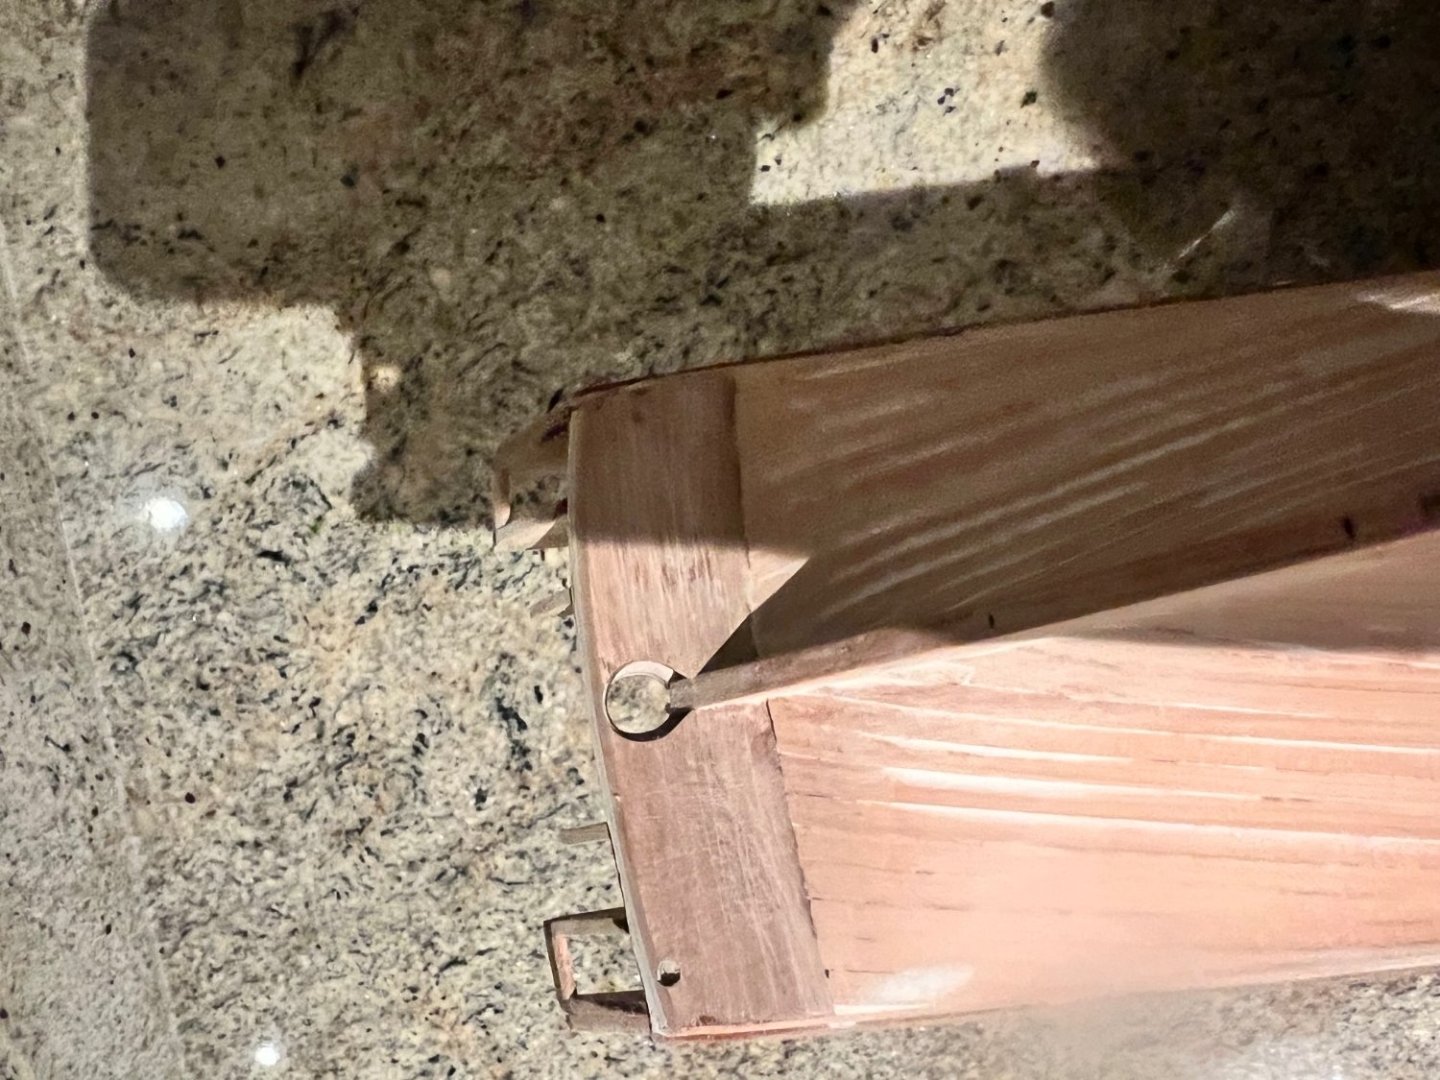
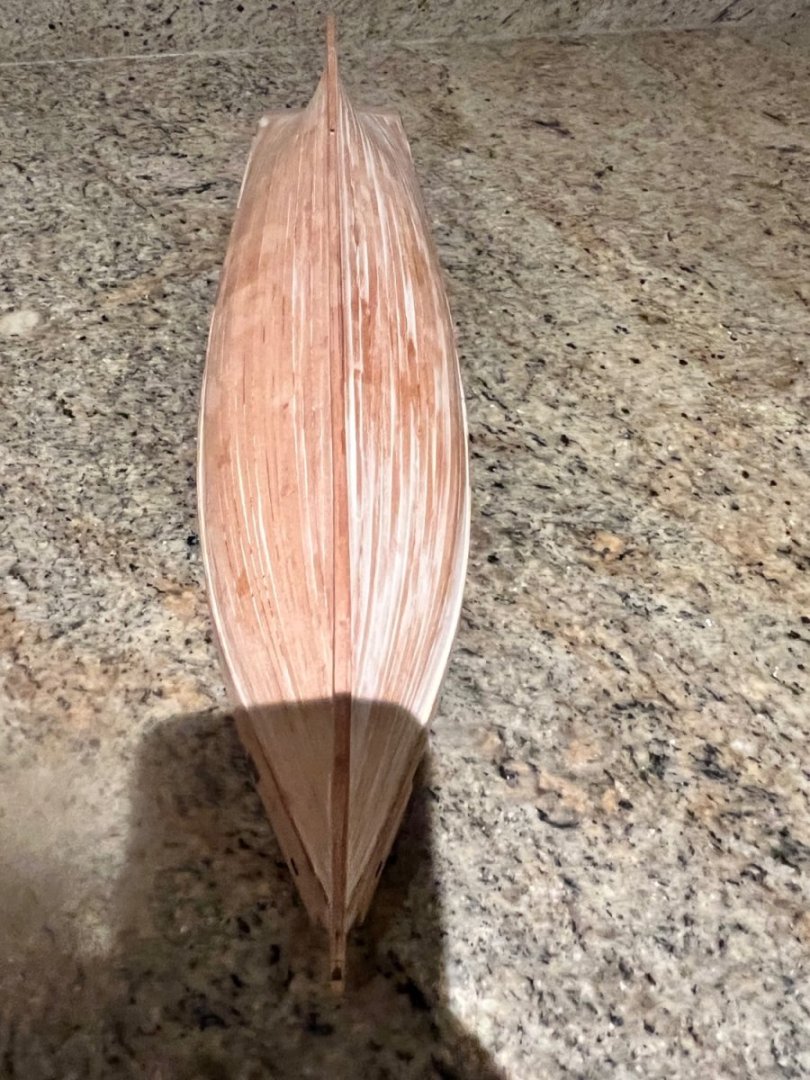
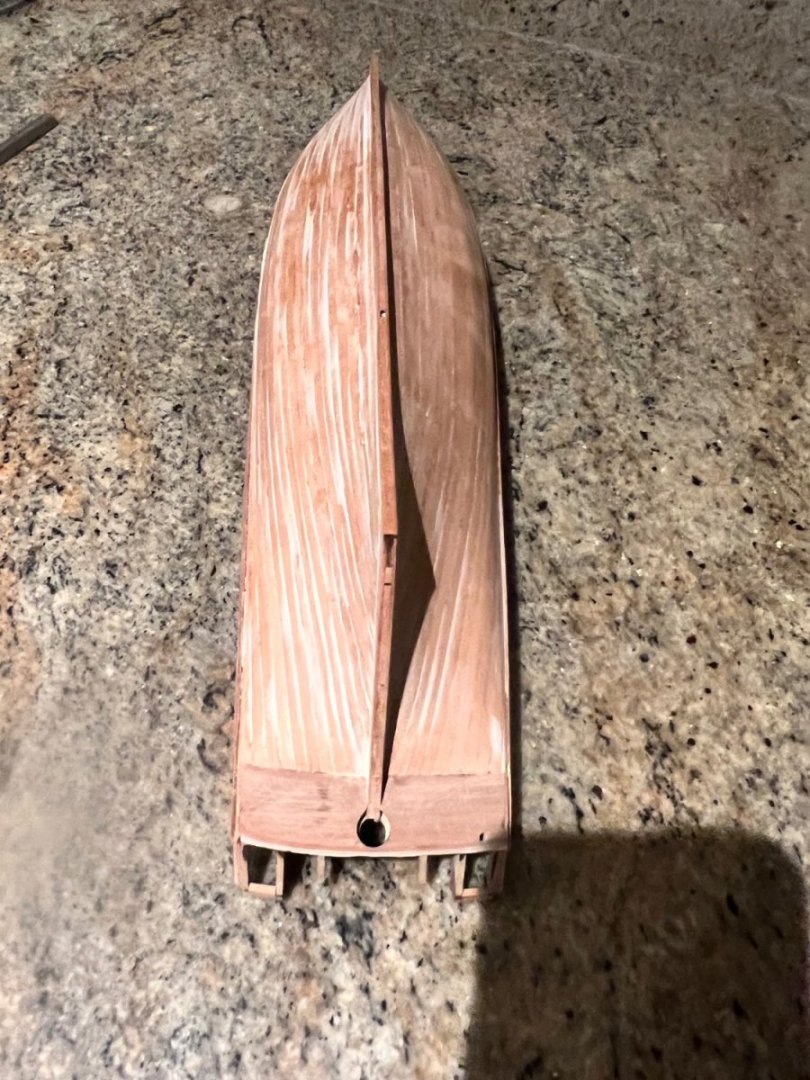
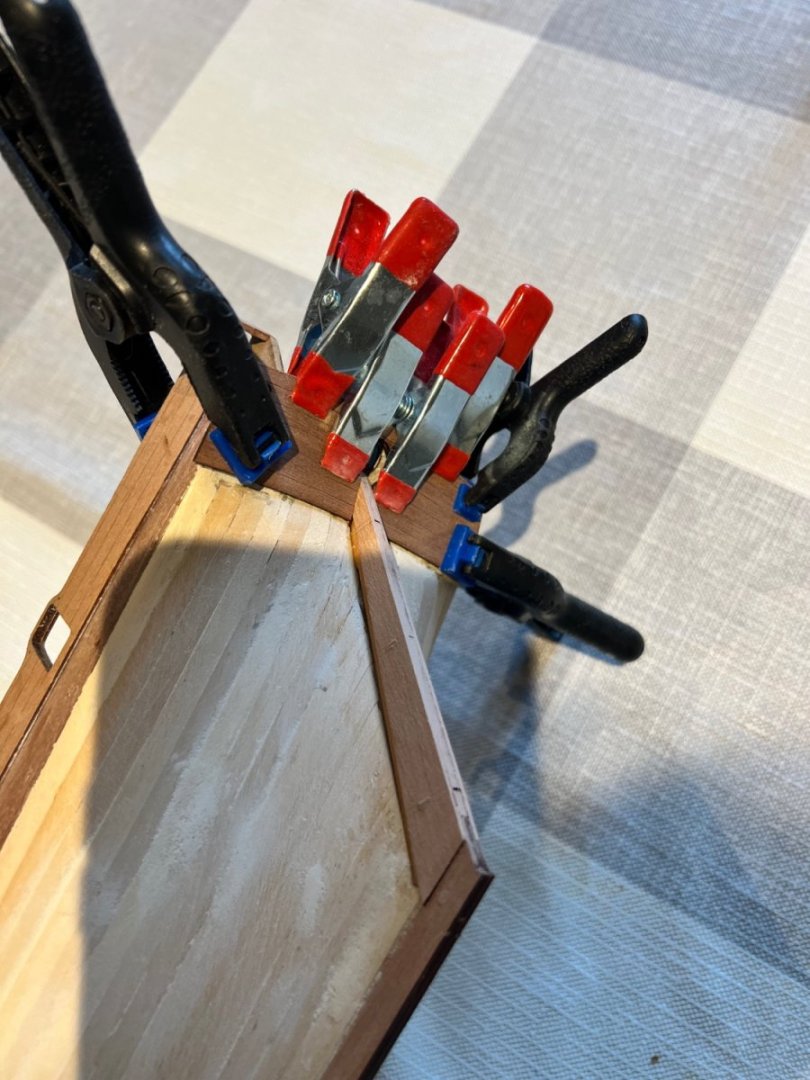
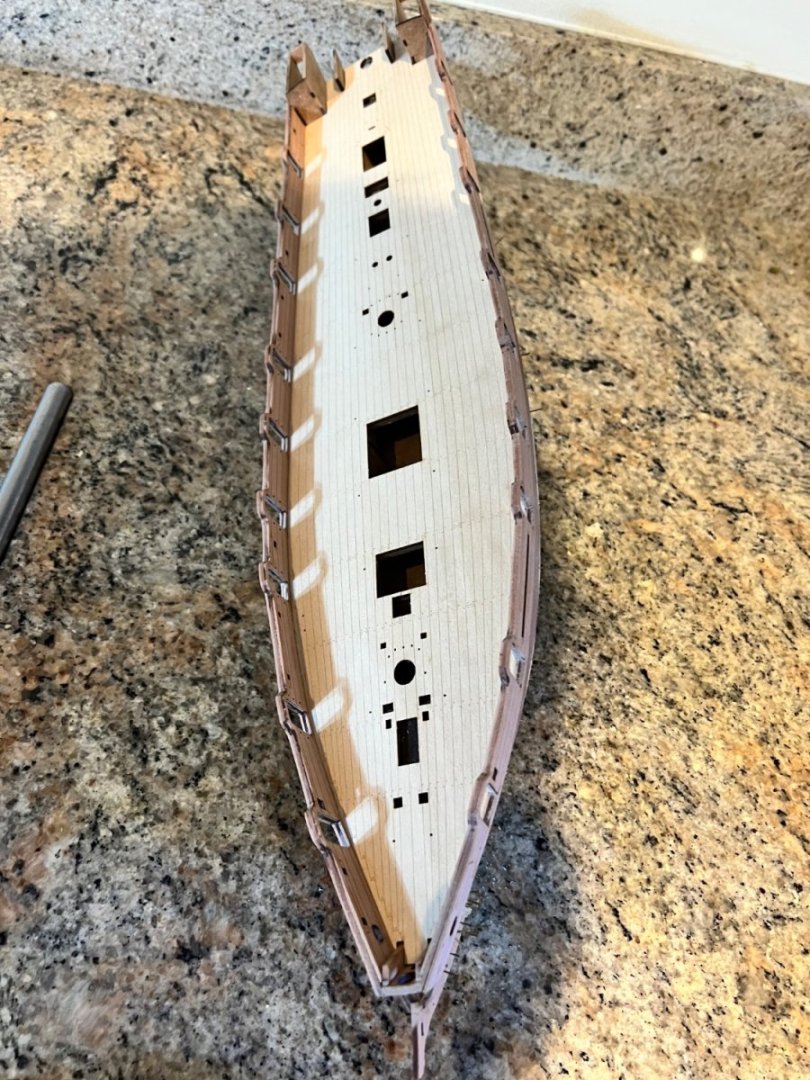
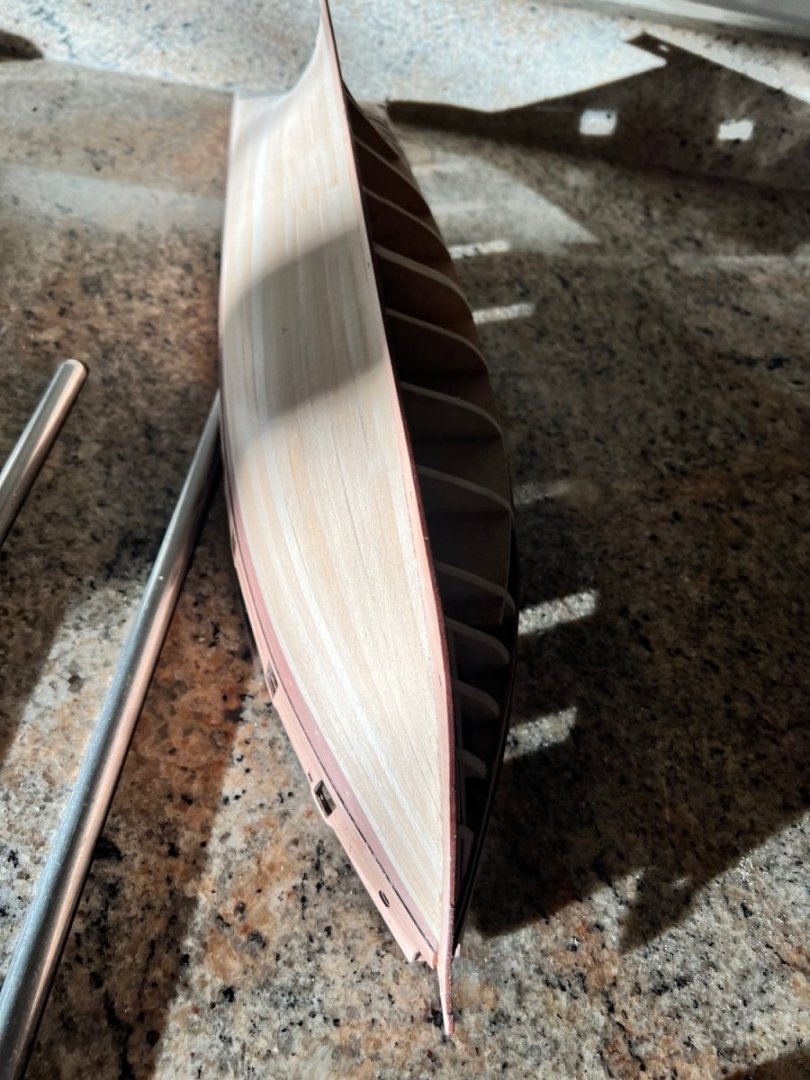
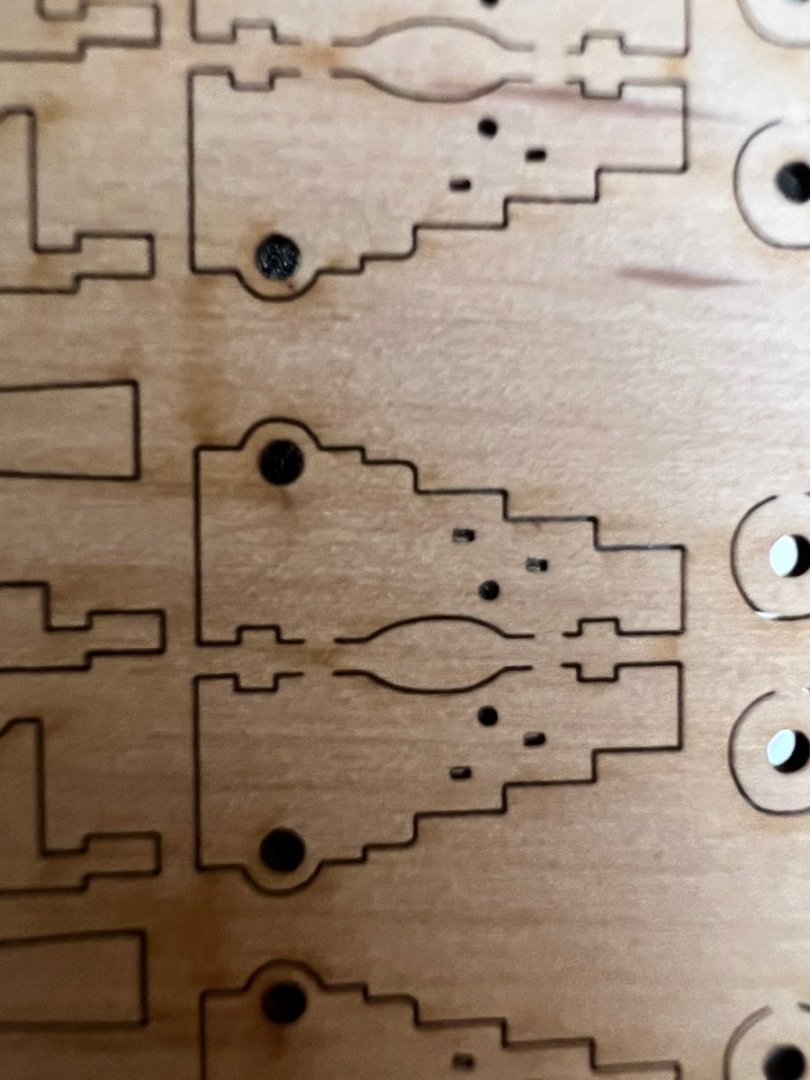
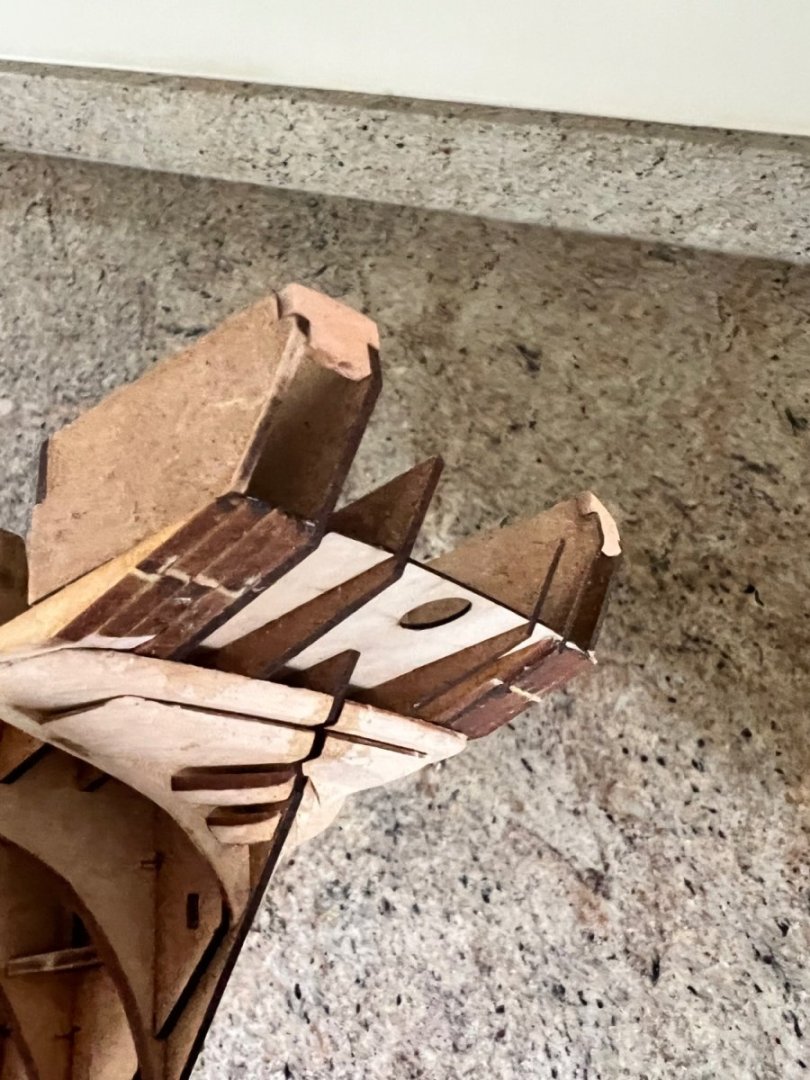
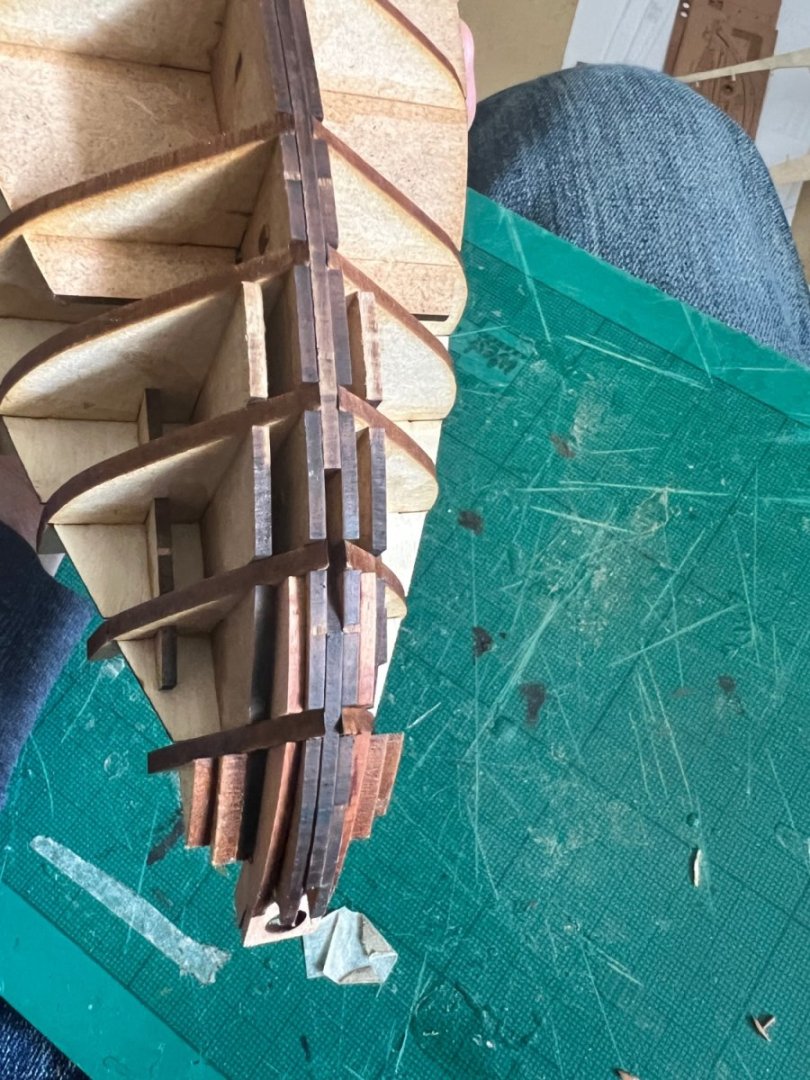
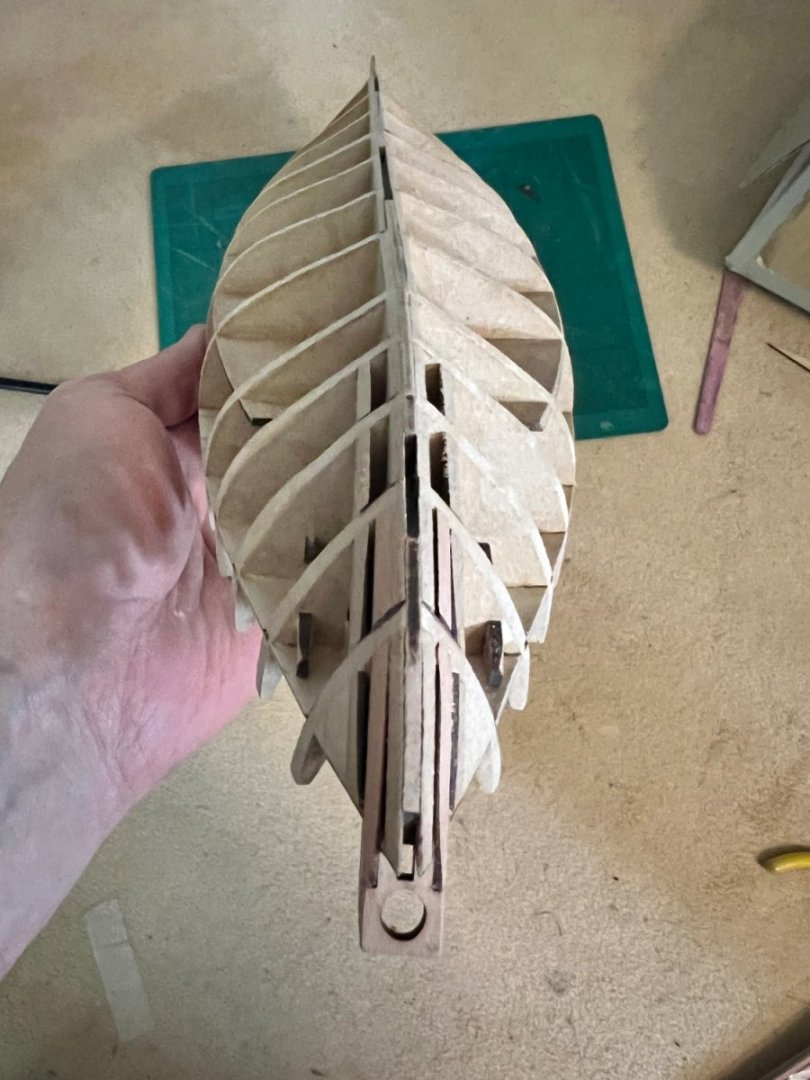
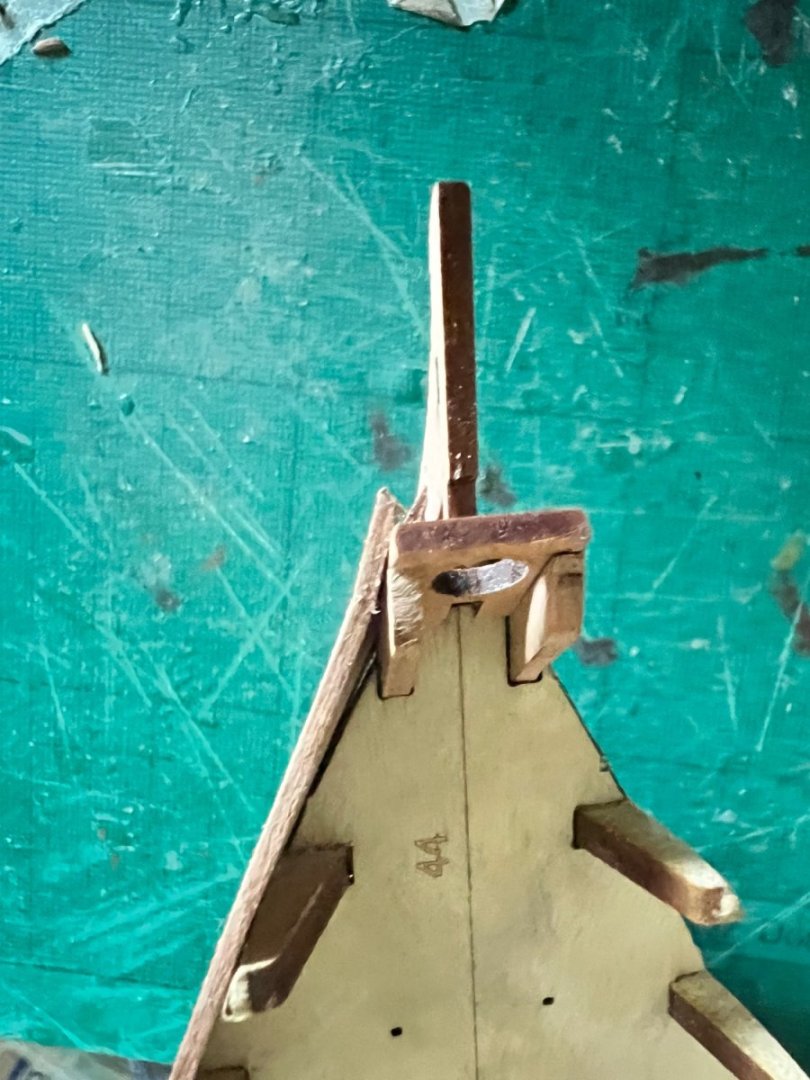
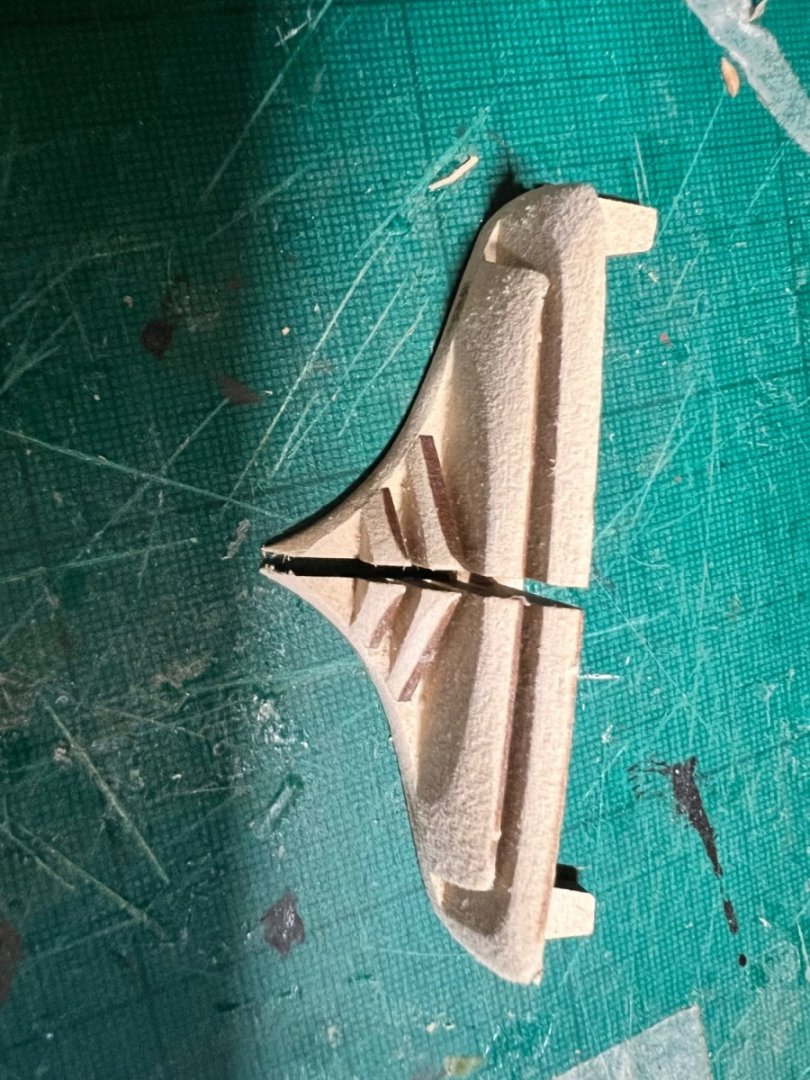
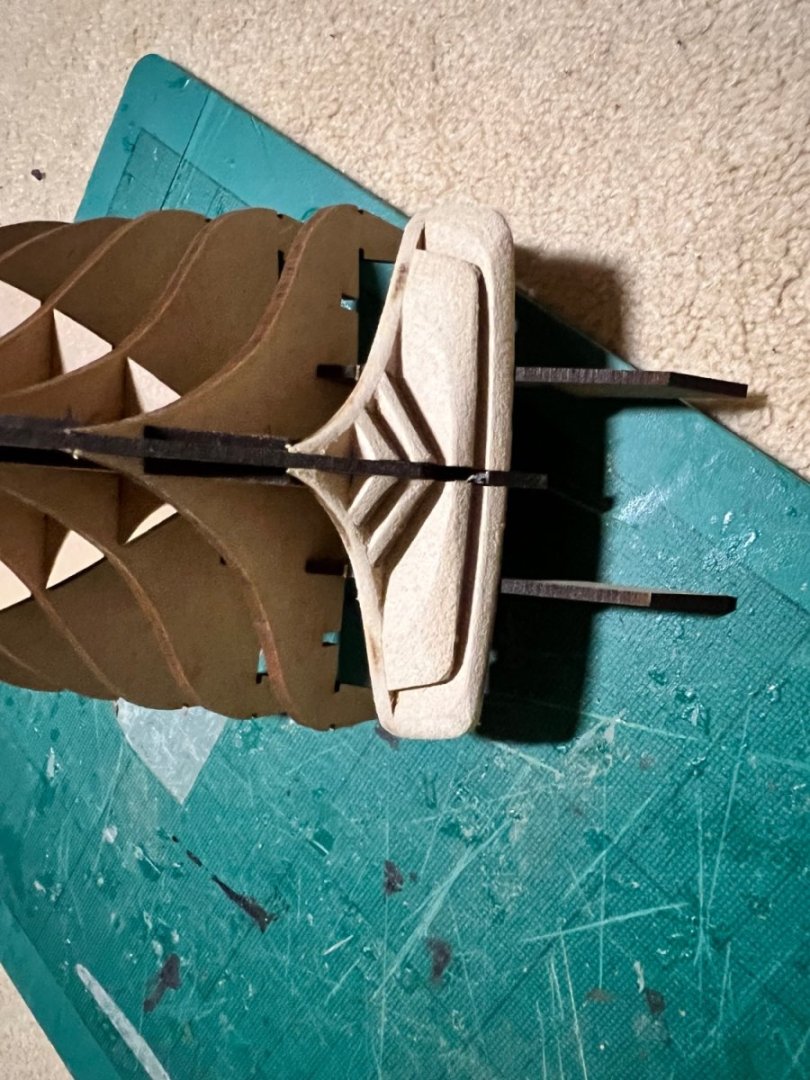
Next, the deck is added. As for the fishing boats it slots nicely into grooves at the base of the bulkhead ears. There’s a separate section of deck at the stern which slots in too. Very neat. This is the point where diluted PVA needs to be added to all the joints in the structure. There’s still a small amount of bowing in the middle of the deck so it needs to be held down whilst the needs to be glue sets. I did this using small clamps through the hatch openings. The structures on the stern are then built up out MDF pieces and further pieces of MDF added under the stern deck to strengthen it and provide a base for the lower counter. At the bow a piece with a hole for the bowsprit is added as are both sets of parts 23 and 24 on the cheeks either side of the bow. Once the glue is set, it’s time to fair the hull. This is pretty straightforward, her lines are sleek and there are no difficult curves. I have tested planks lying across the bulkheads multiple times and looking good. What I don’t do initially is fair the top of the bow where the piece of wood with the bowsprit hole is. Jumping onto step 69 that myxyzptlyk2003 refers to in James H’s blog, there isn’t a photo of this in the instructions - but trial and error (photo below) shows that this needs fairing too and can be seen in the Step 115 as myxyz says. Once faired, I test fit the middle bulwark pattern again and then soak it in hot water so I can bend it around the curve of the hull astern. The bulwark is clamped and pinned and to dry, waiting to be glued once it’s dried out. Jim warns us in the instructions that the gun port arches are not strong. I can confirm that they are not. I broke two of them off the middle bulwark on the starboard side whilst attaching the port bulwark. Once the wood had dried out I glued them back on cleanly using PVA. Furthermore I somehow broke an arch on one of the outer patterns. I didn’t realise this had happened and the part is long gone. I tried to make a replacement archway, but realised my skills aren’t sufficient to make it look good on an outer piece! So I have resorted to ordering a replacement from Chris.


- 103 replies
-
- 8
-
-
- Grecian
- baltimore clipper
- (and 4 more)
-
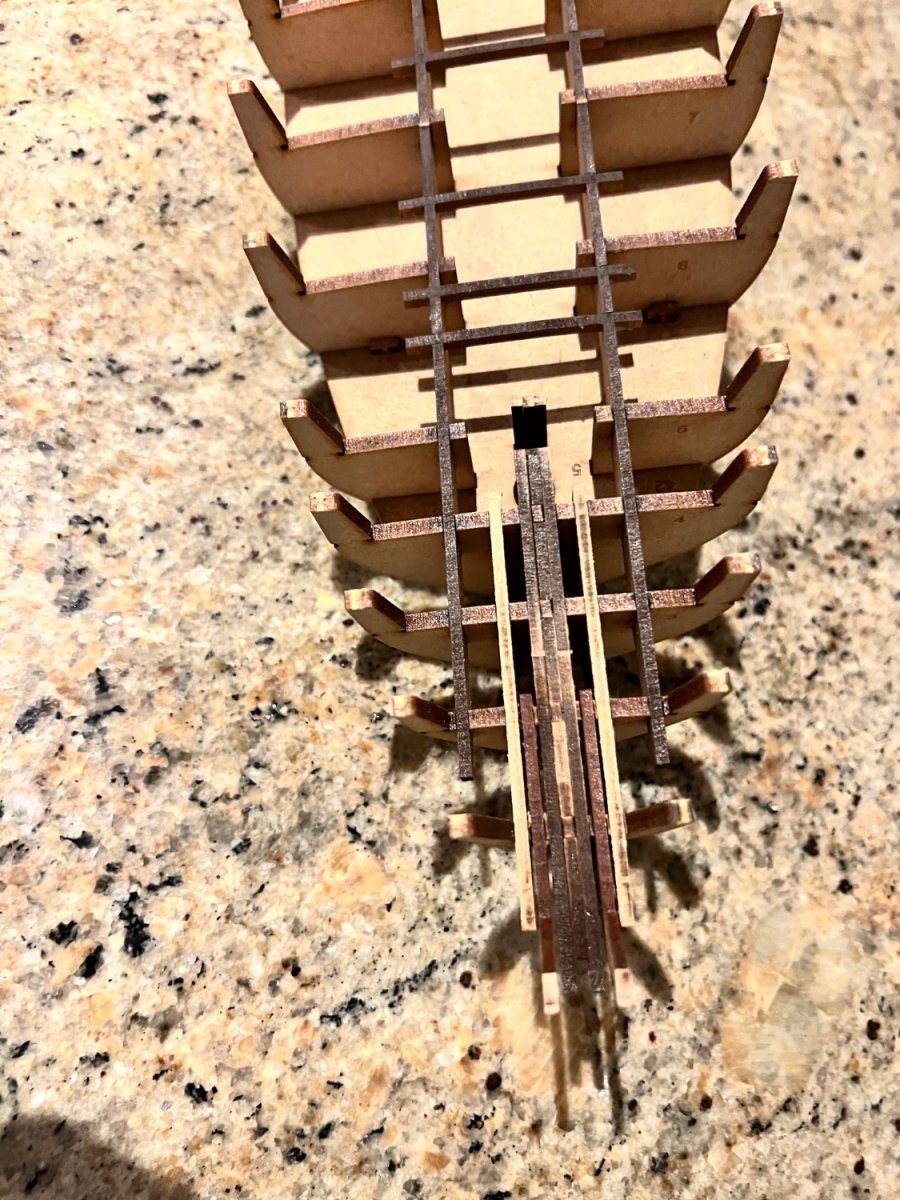
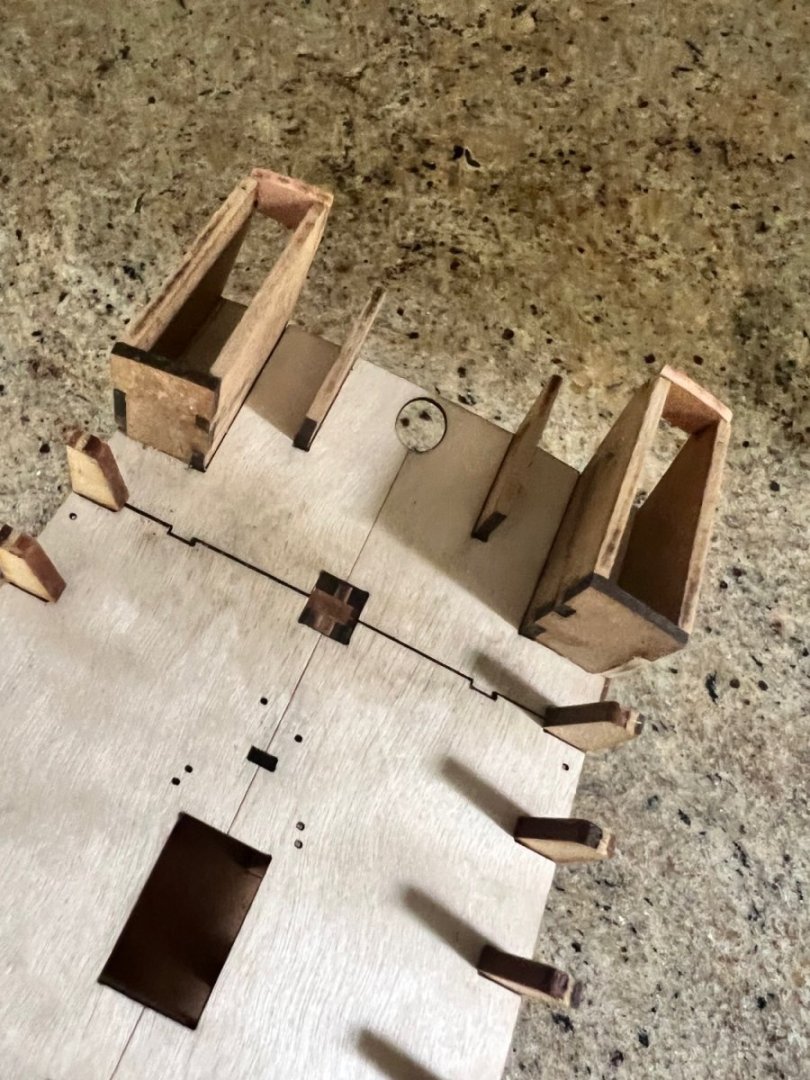
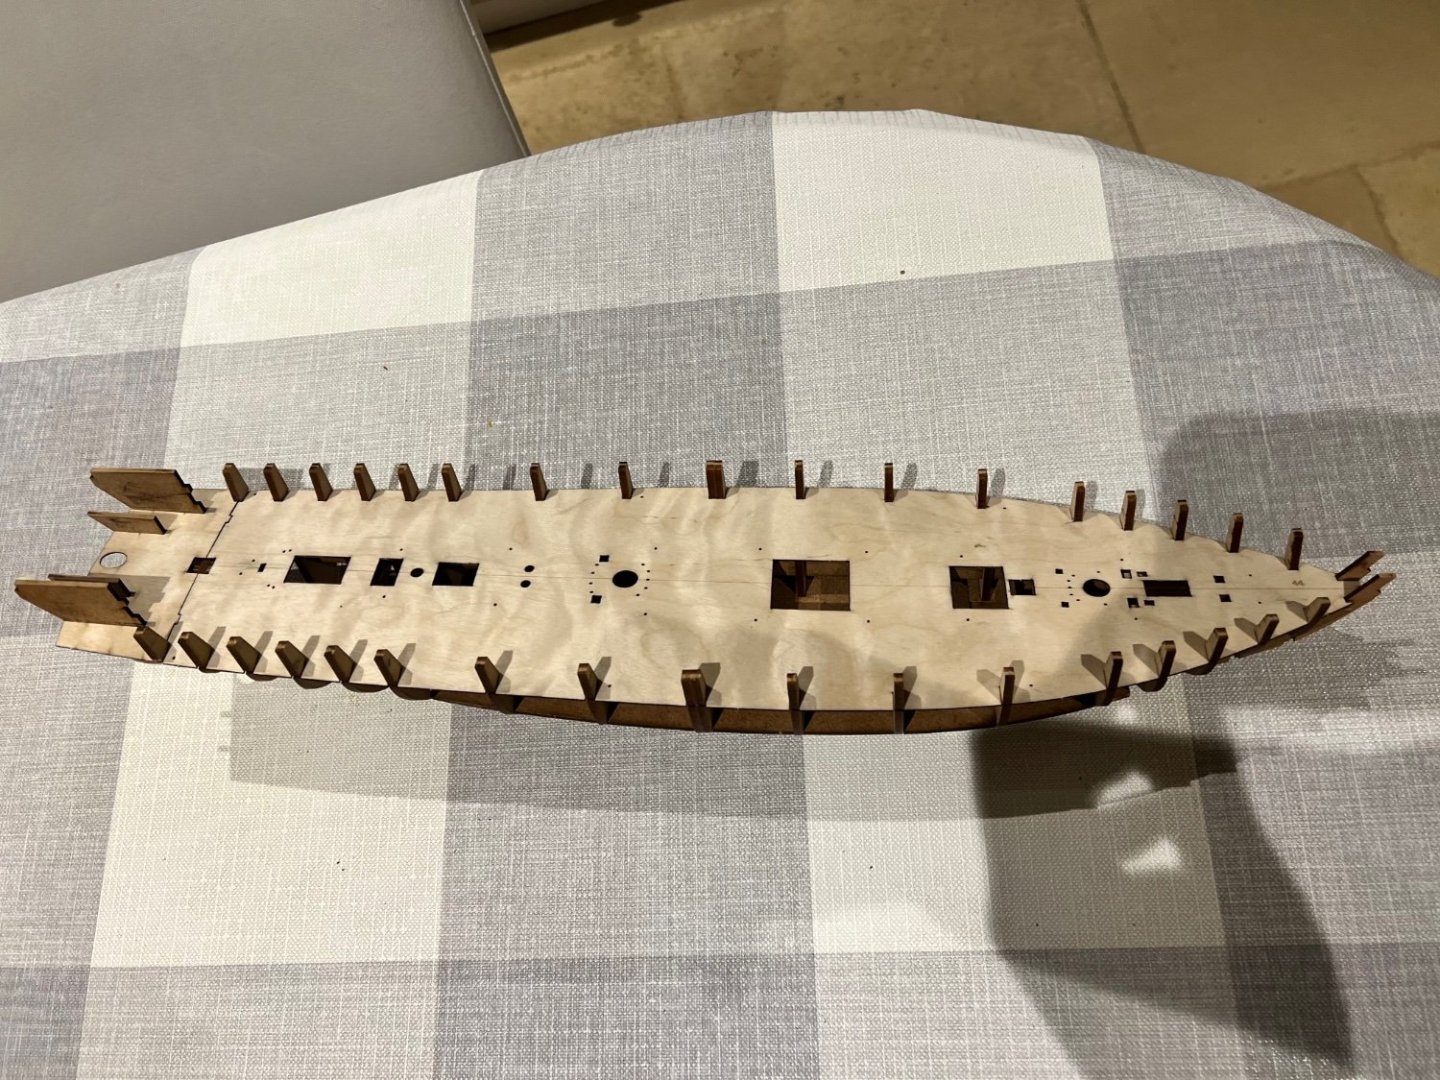
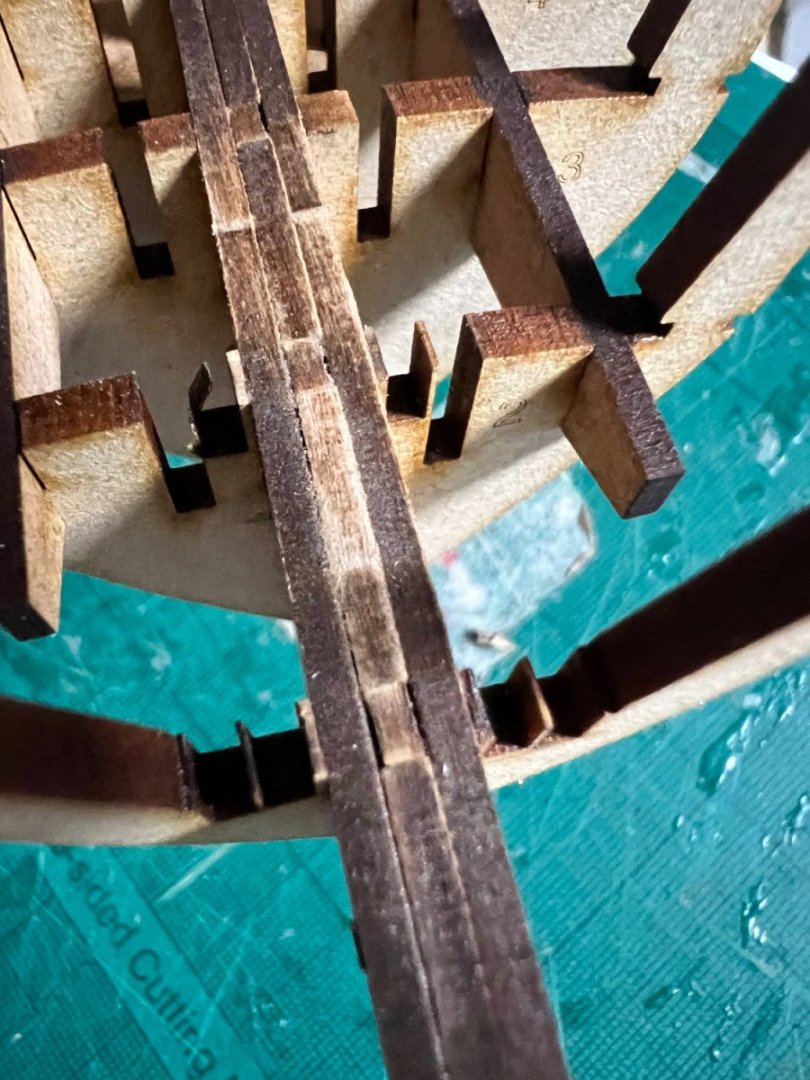
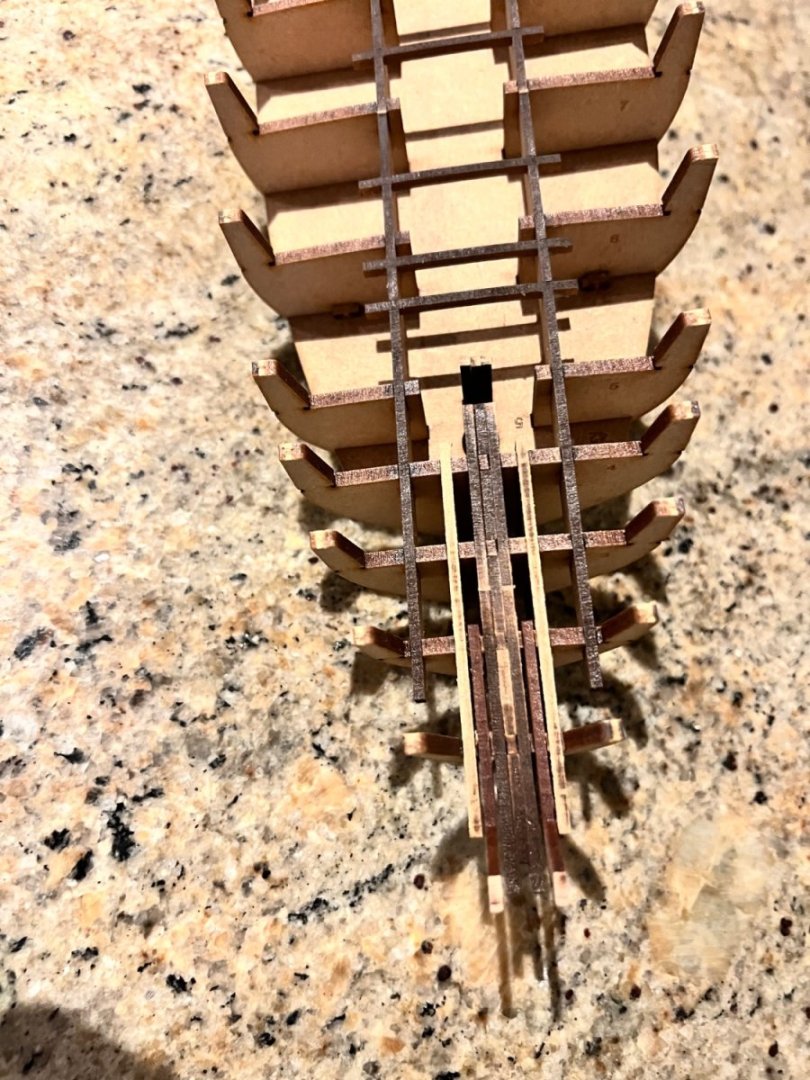
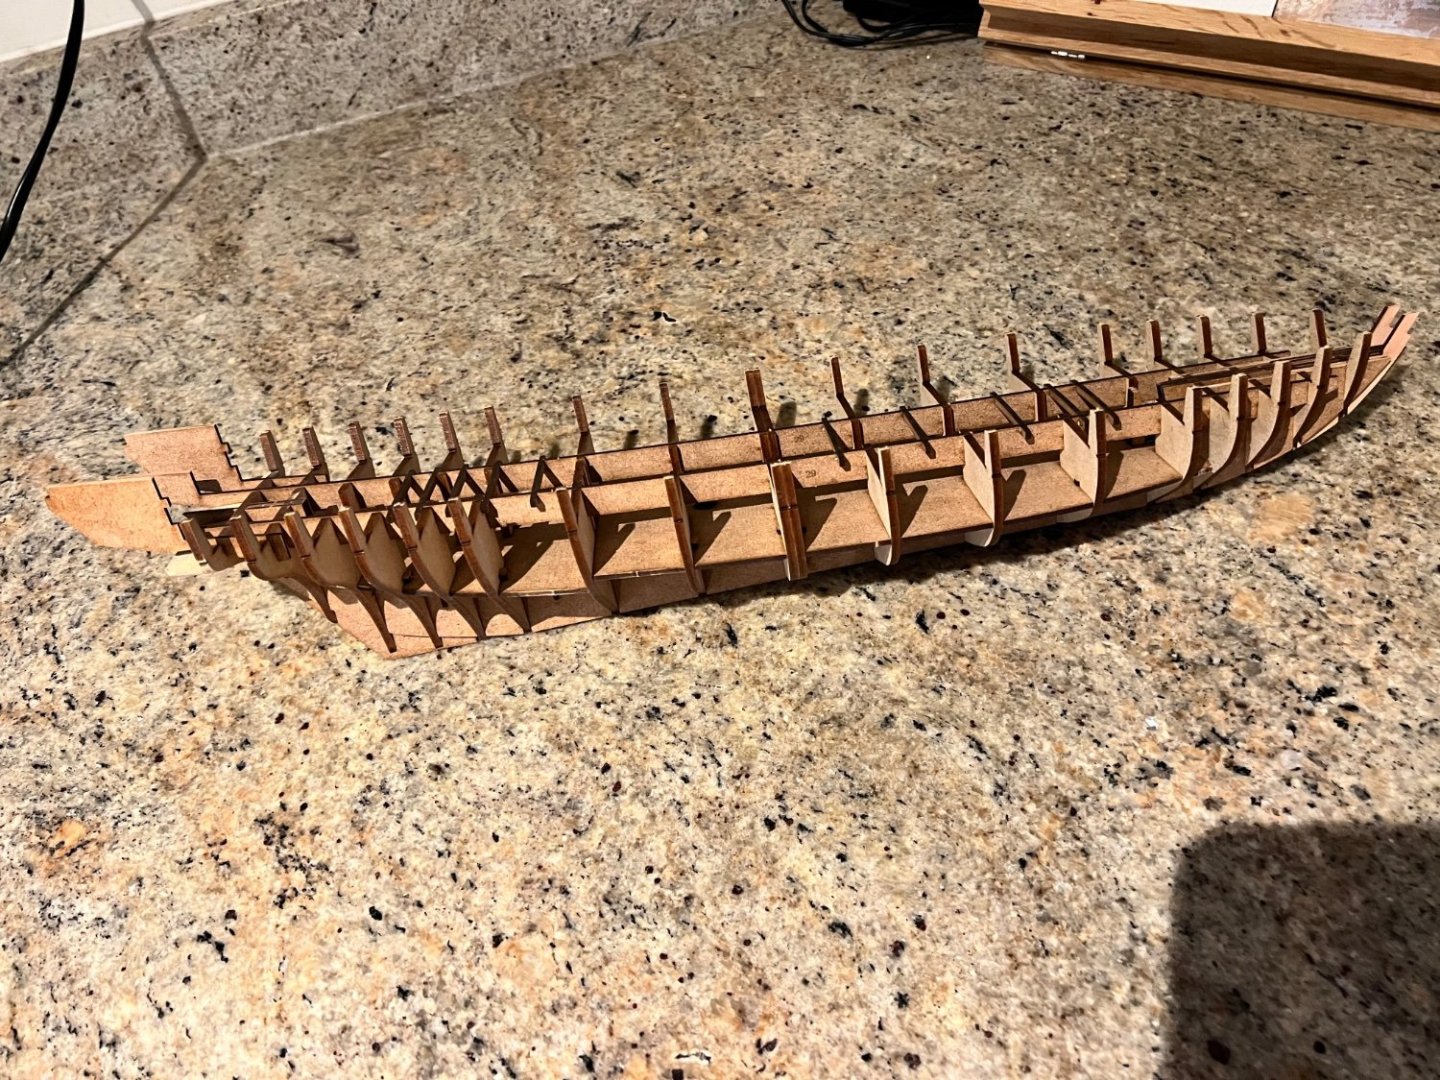
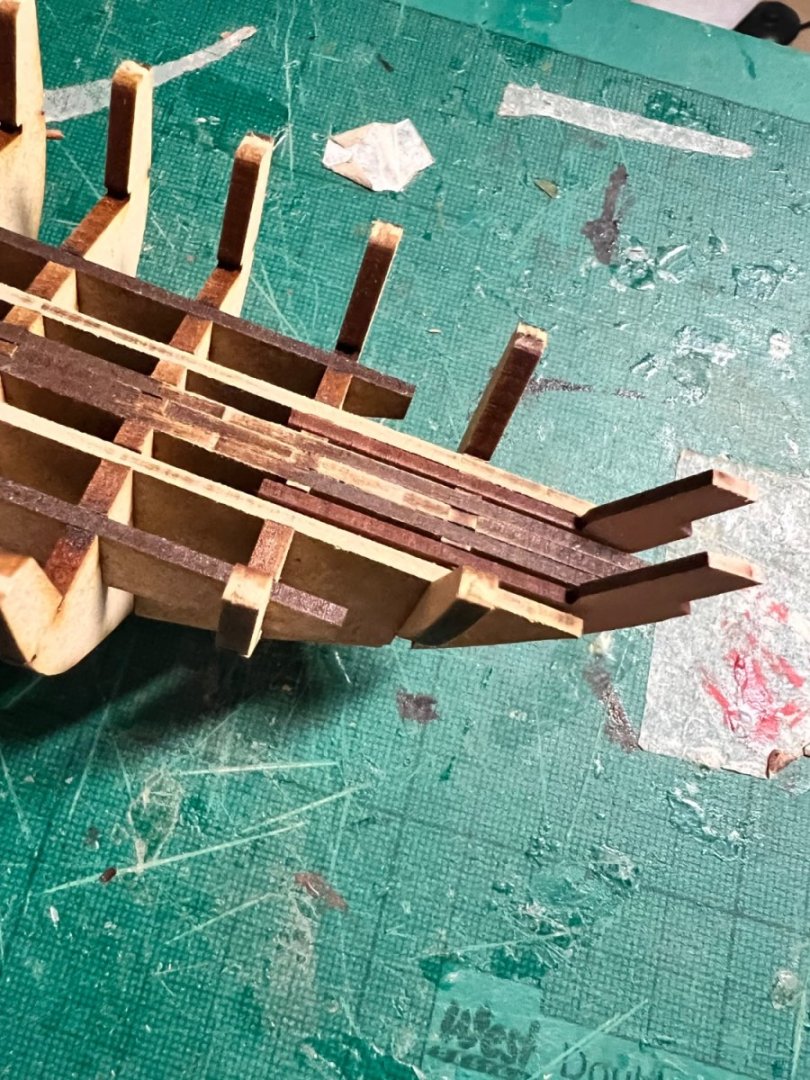
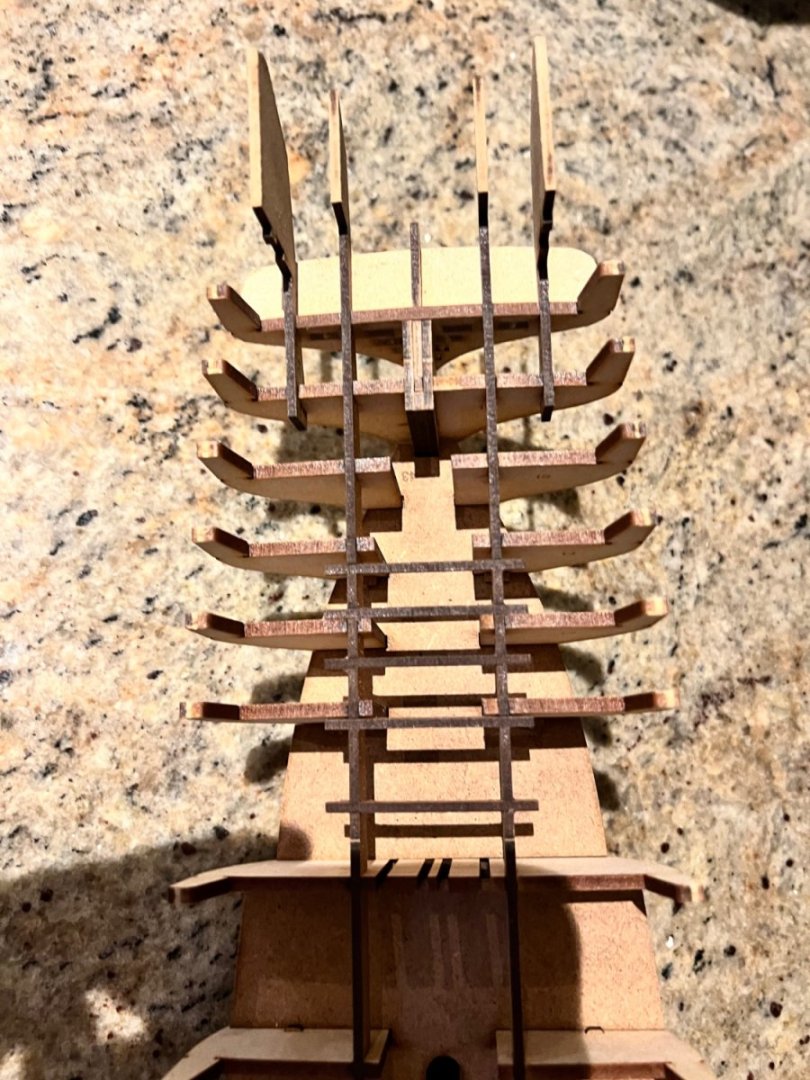
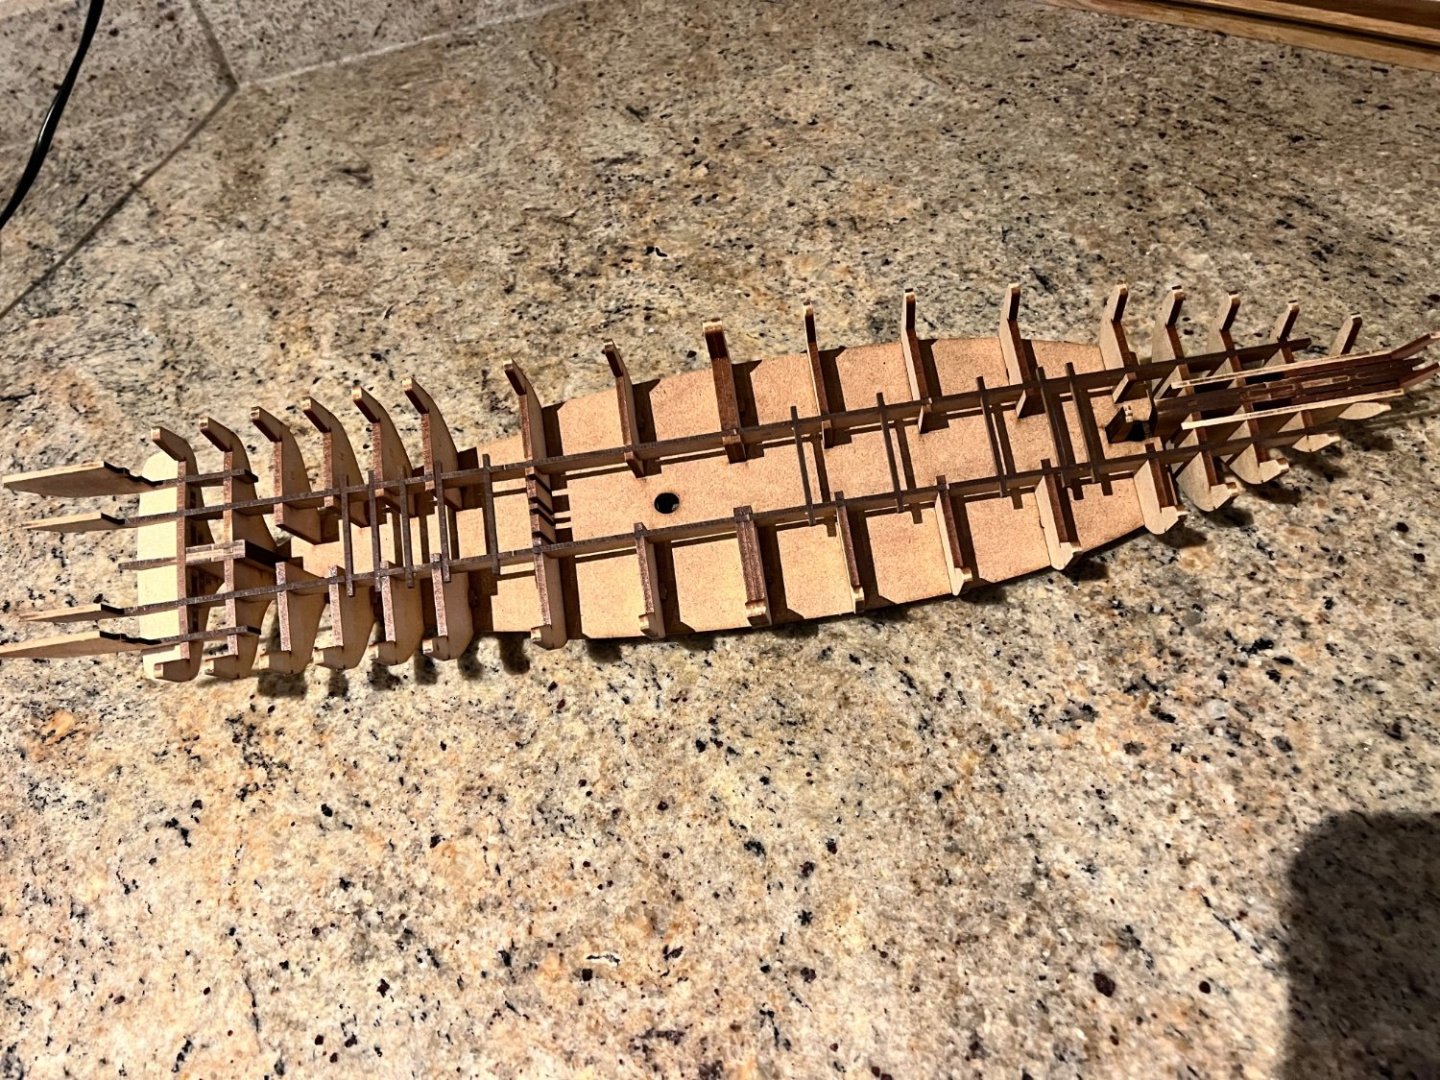
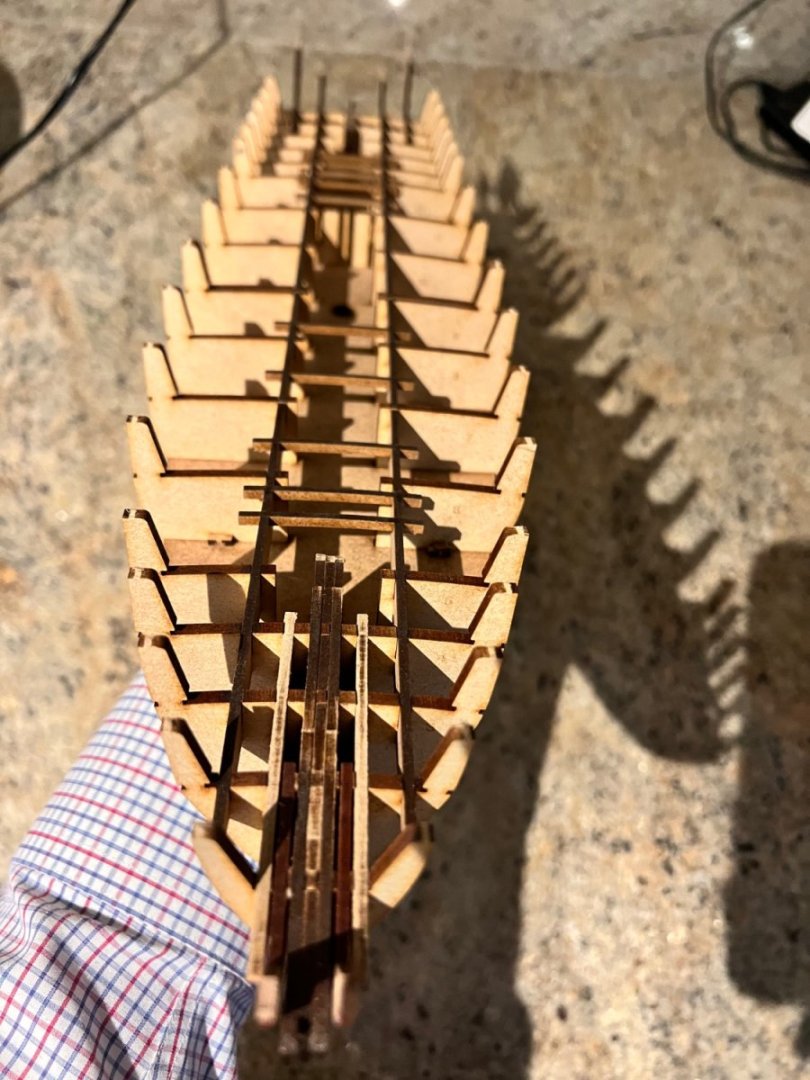
This is the shaped stern bulkhead. Then I make a mistake which I only realise later, but seems inconsequential. I should have added additional longitudinal beams (parts 33) to brace the aft bulkheads but somehow I missed them despite them being clearly there in the instructions. Instead I went straight for the sub-deck which comes in two pieces. The bow is then built up. The laser cutting of the MDF is wafer thin, I didn’t realise you would be able to cut MDF so thin. Yes I broke one of the slots but that’s me being clumsy. Beams are added across the hull, further adding to the strength of the already very strong structure.

- 103 replies
-
- 7
-
-
- Grecian
- baltimore clipper
- (and 4 more)
-
Thanks Jim, I’ll make more effort to get the photos in the correct orientation. I do most, if not all, of my posting on MSW using a work provided iPhone or laptop which I don’t have admin rights to install a programme on - such as the excellent photo resizer you sent me a link to. Wish I could use it.
- 103 replies
-
- 1
-
-
- Grecian
- baltimore clipper
- (and 4 more)