HOLIDAY DONATION DRIVE - SUPPORT MSW - DO YOUR PART TO KEEP THIS GREAT FORUM GOING! (Only 20 donations so far - C'mon guys!)
×


Ferrus Manus
-
Posts
1,391 -
Joined
-
Last visited
Content Type
Profiles
Forums
Gallery
Events
Everything posted by Ferrus Manus
-
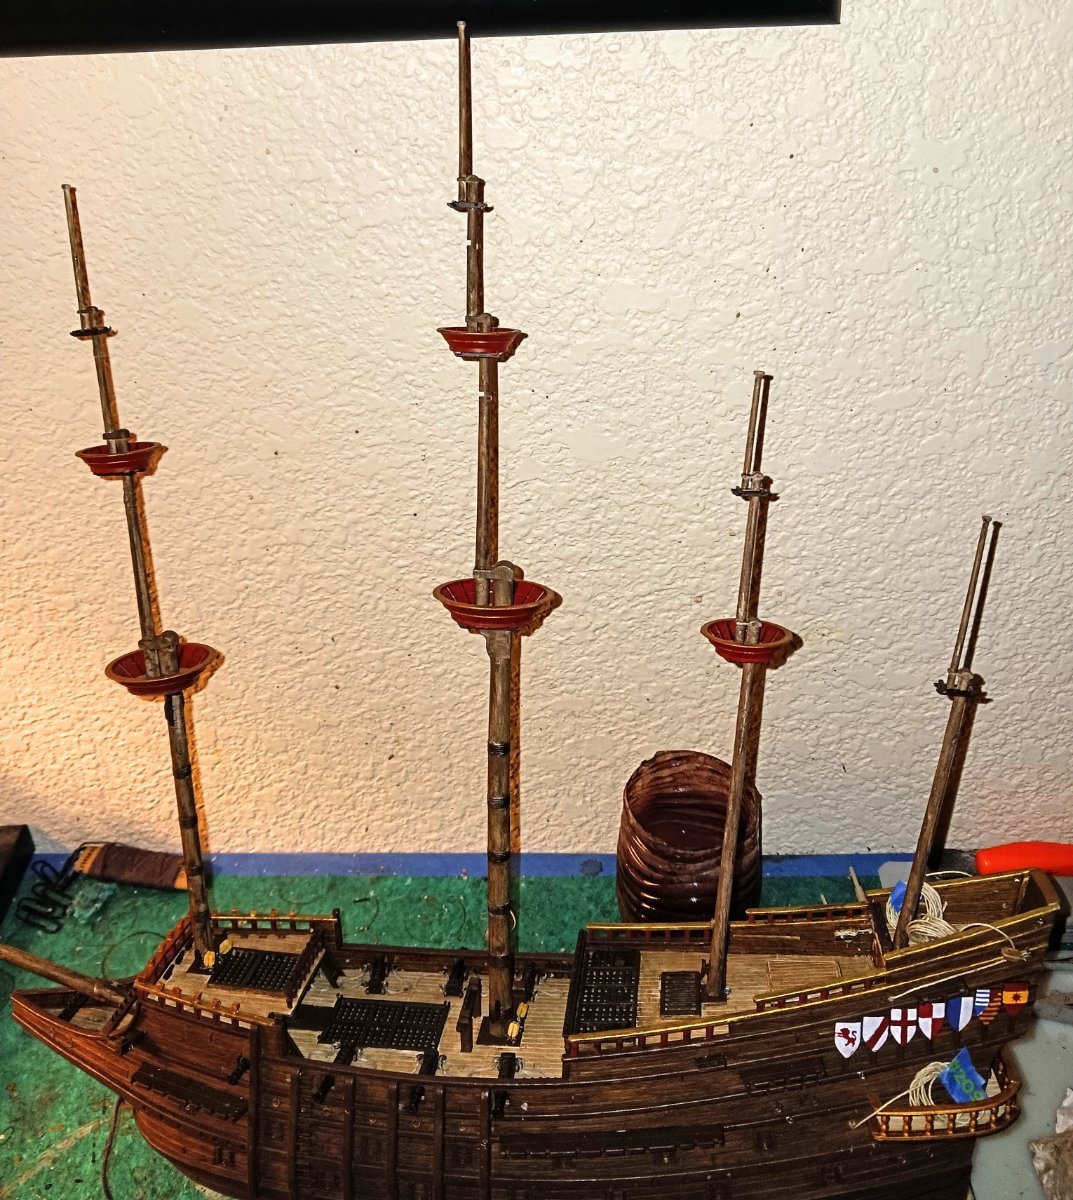
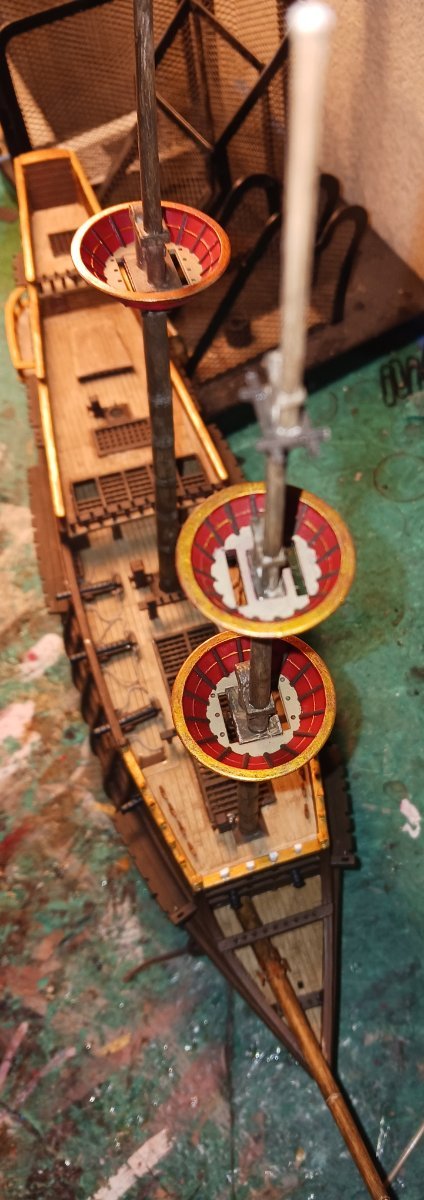
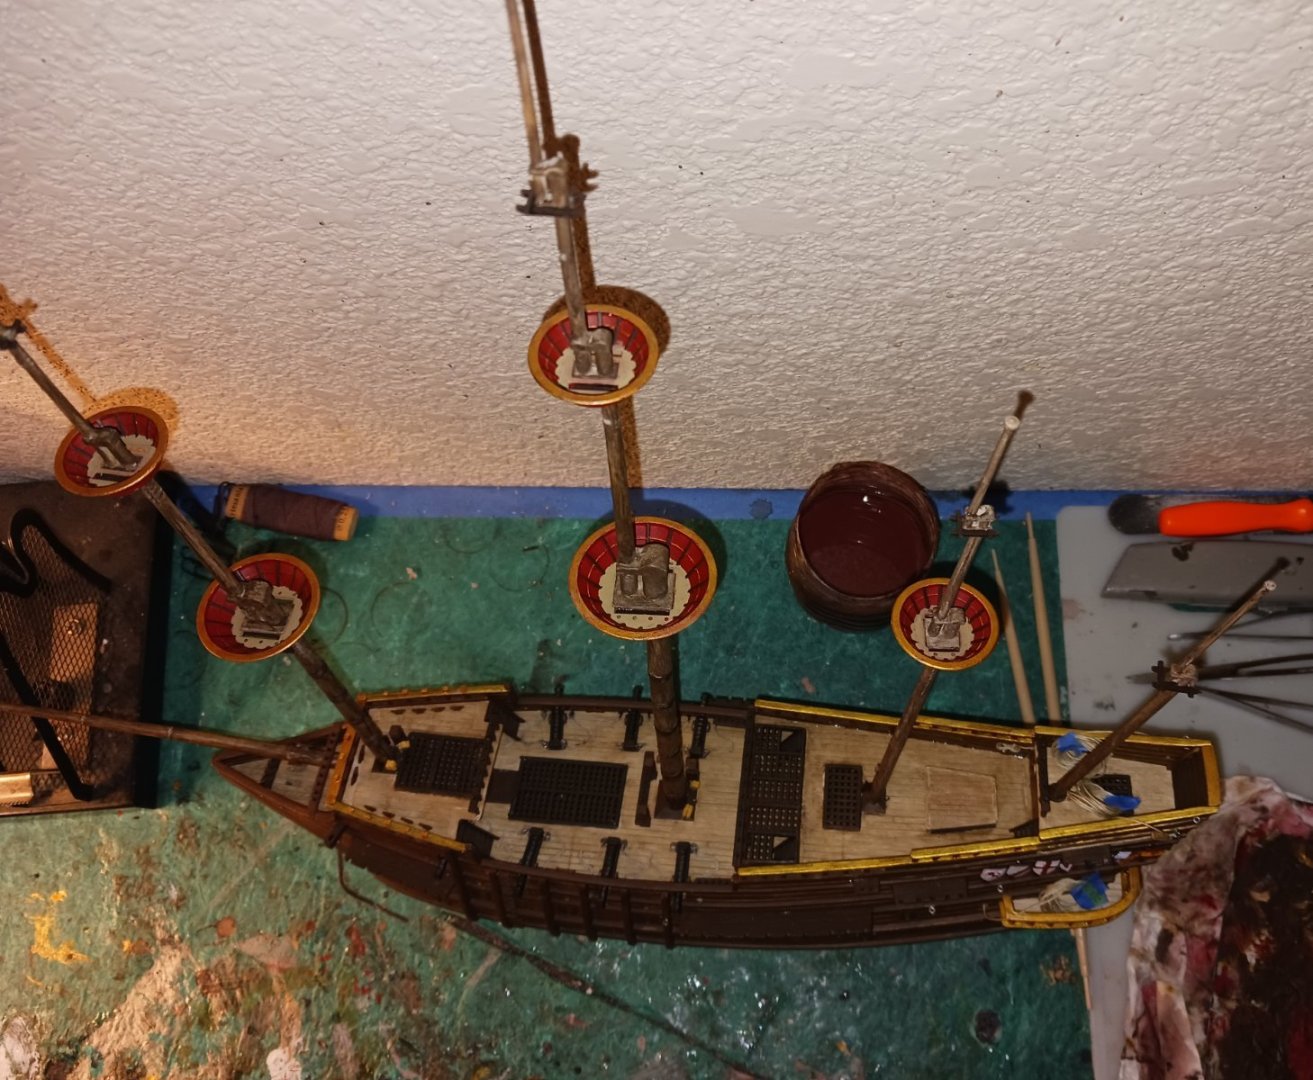
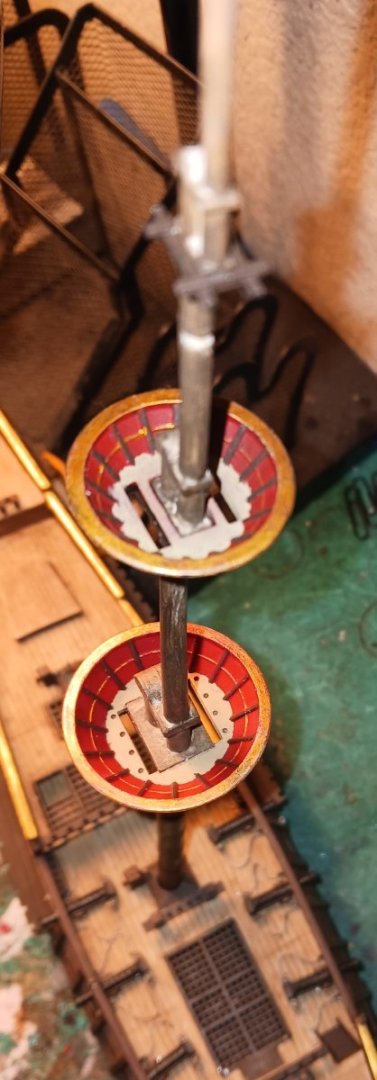
 I got all the masts painted and dry-fitted, and began on the ropework. The fighting tops still need their cleats, there will be either 28 or 32 in total.
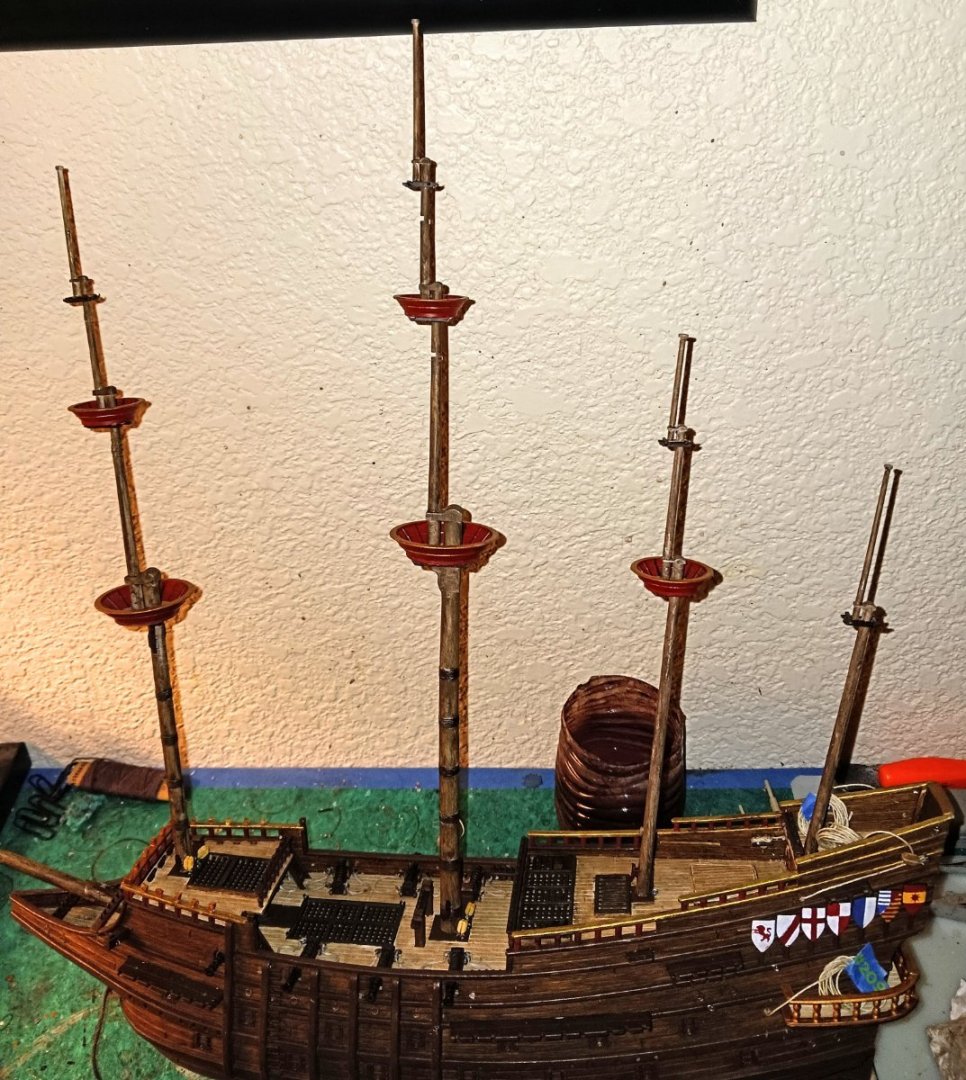
- 279 replies
-
- 7
-

-
- Spanish Galleon
- Imai
- (and 1 more)
-
I absolutely love the shameless self-promo 😂
-
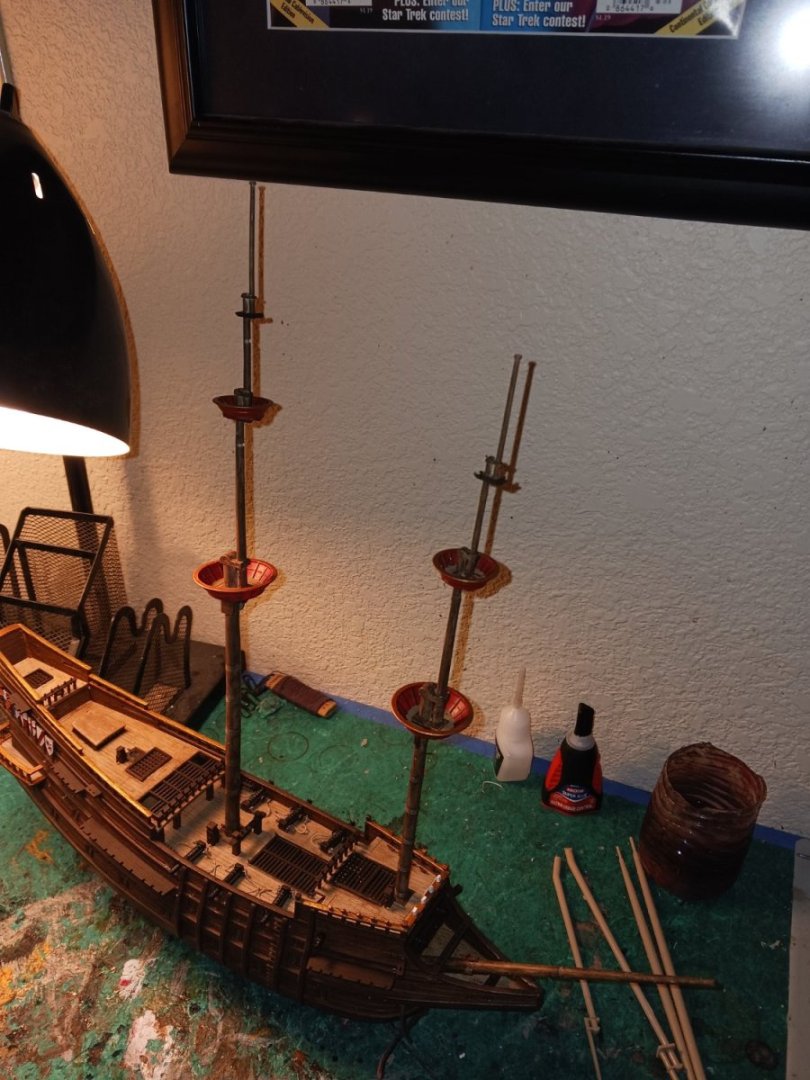
I finished the fore and main masts. Well, technically not finished. They still need their cleats at the fighting tops, and they have yet to be glued in place.

- 279 replies
-
- 4
-
-
- Spanish Galleon
- Imai
- (and 1 more)
-
We ought to throw you a party! I'll make the cake. What kind do you want?
- 740 replies
-
- 4
-
-
- Tudor
- restoration
- (and 4 more)
-
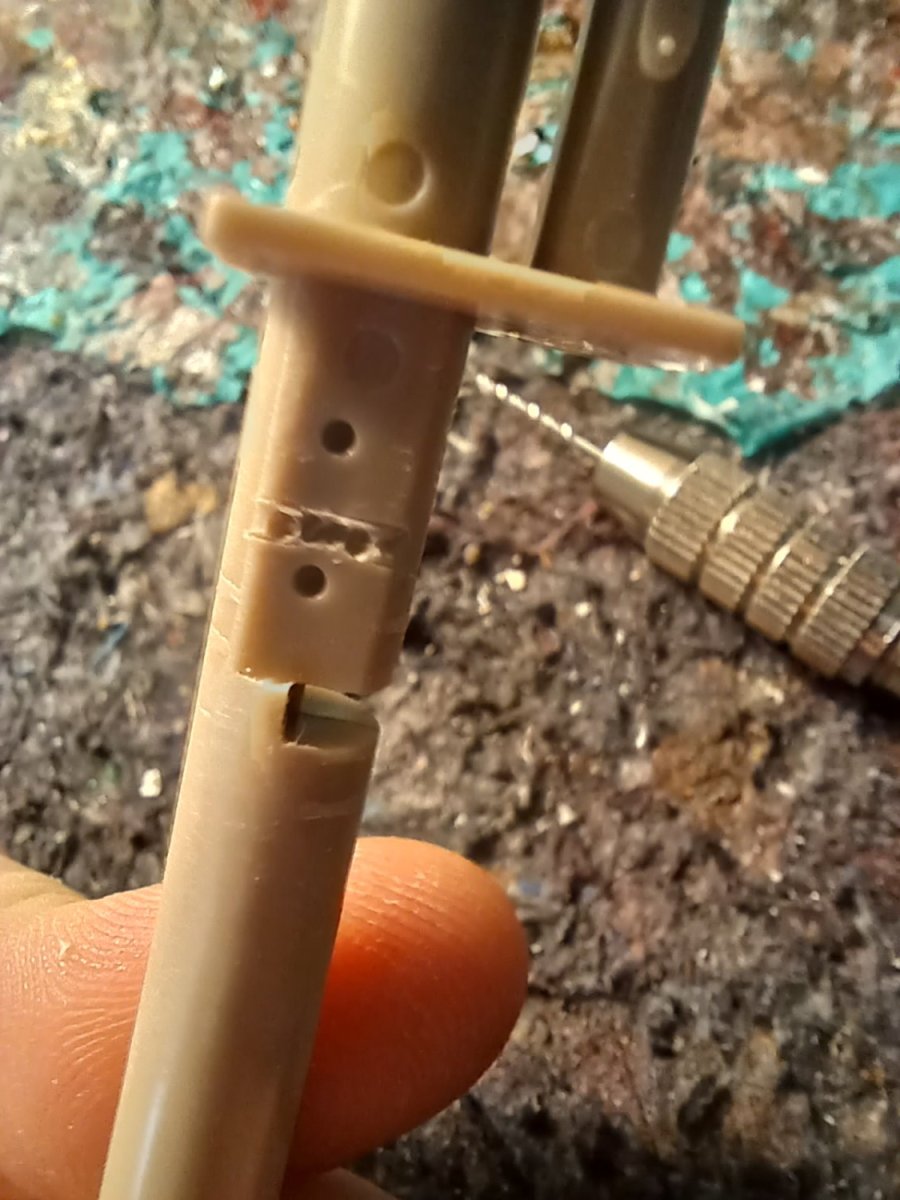
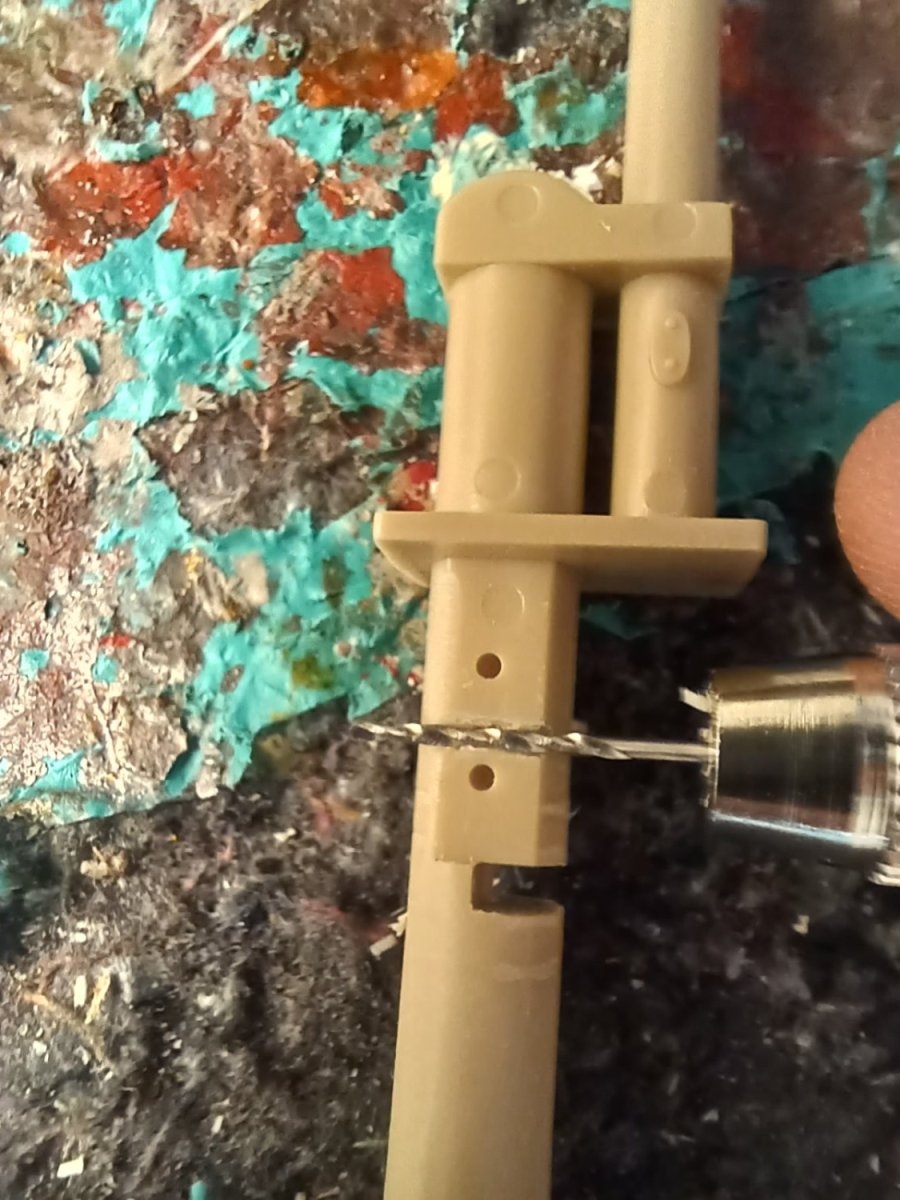
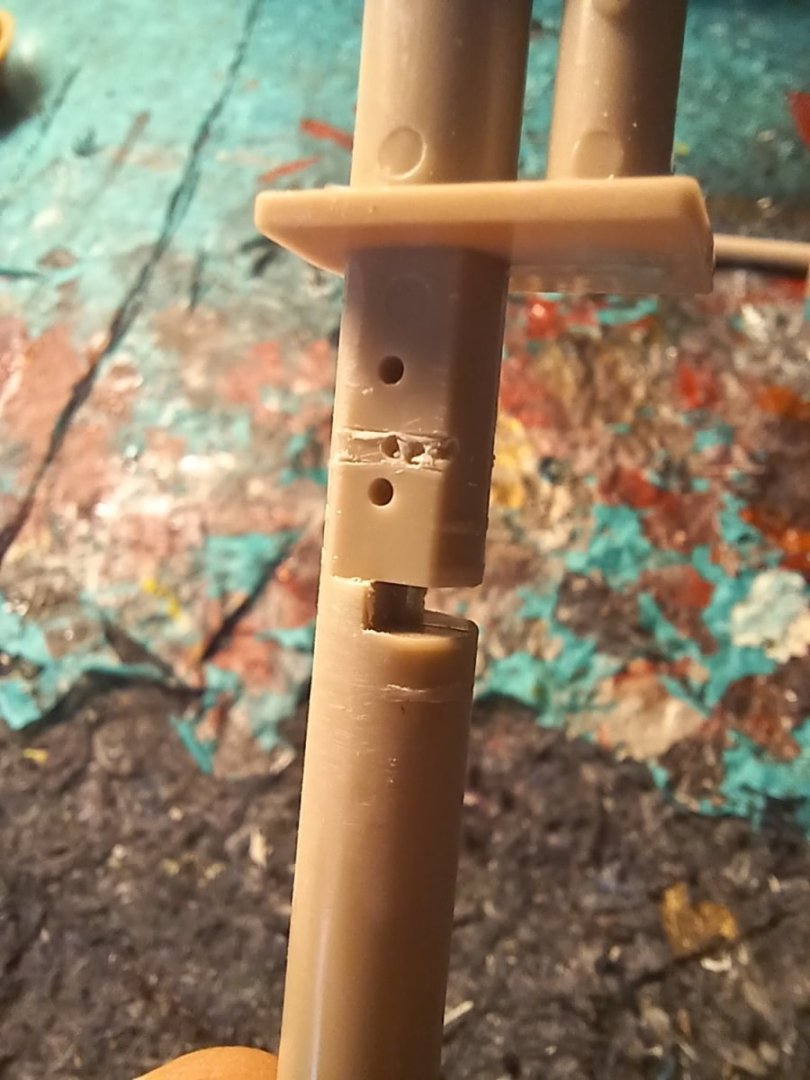
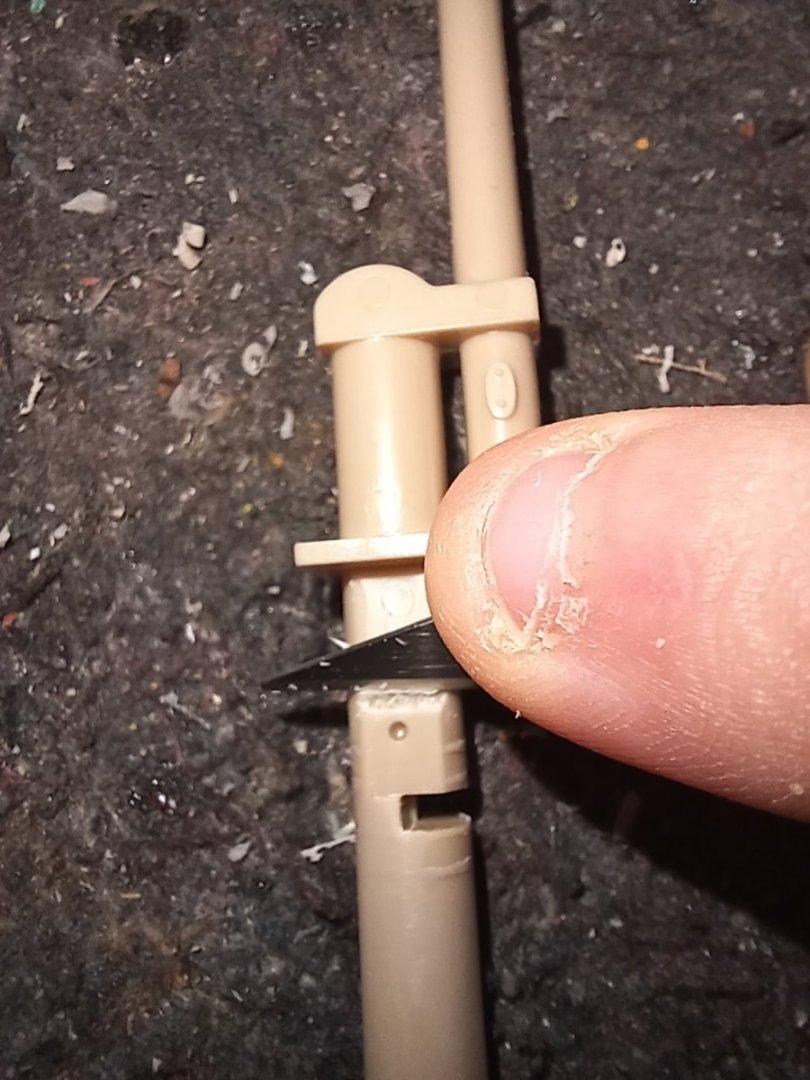
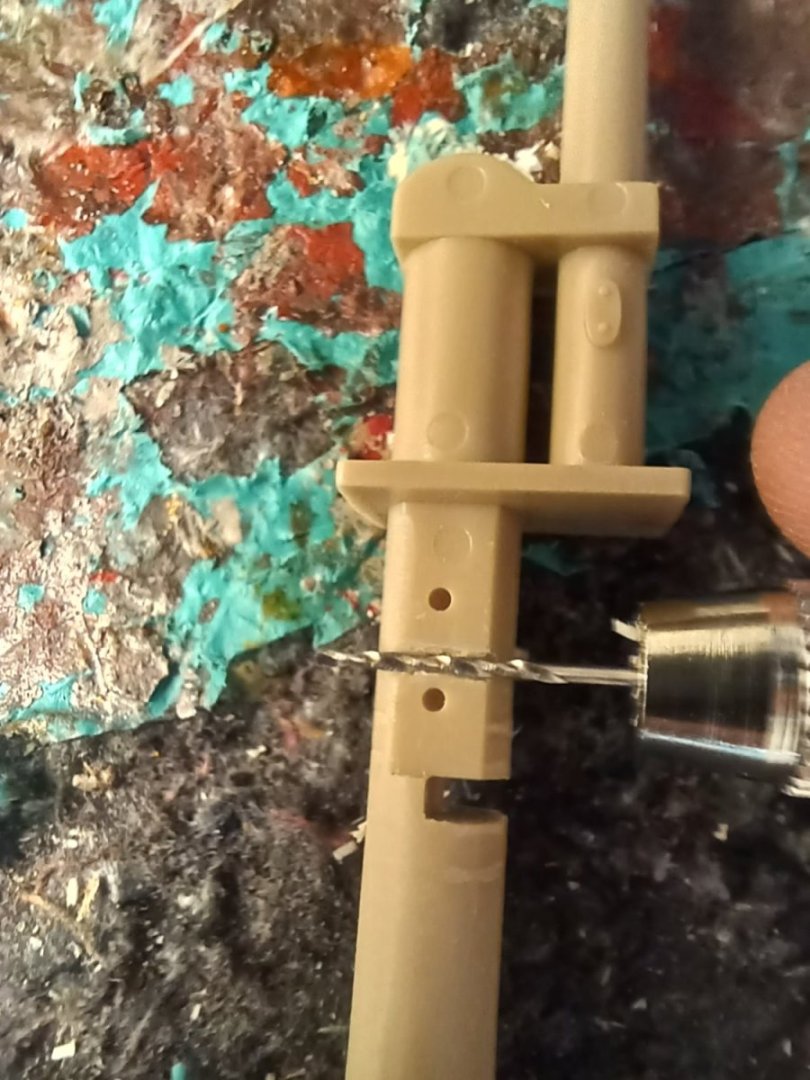
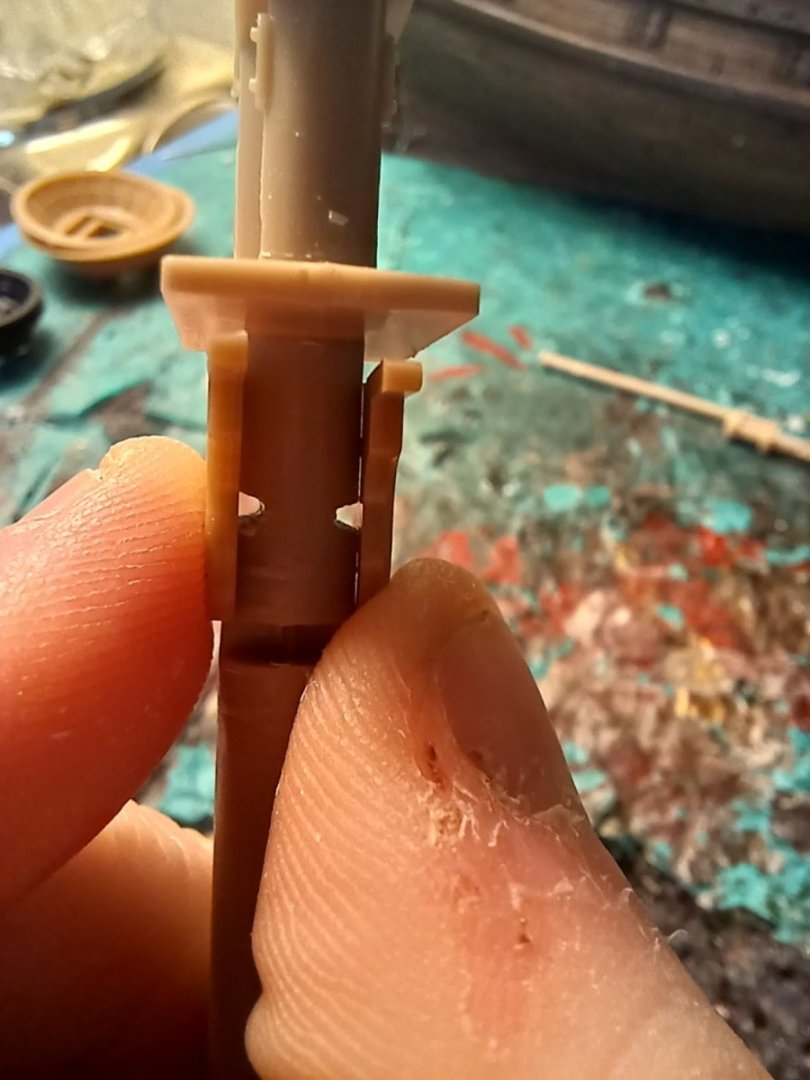
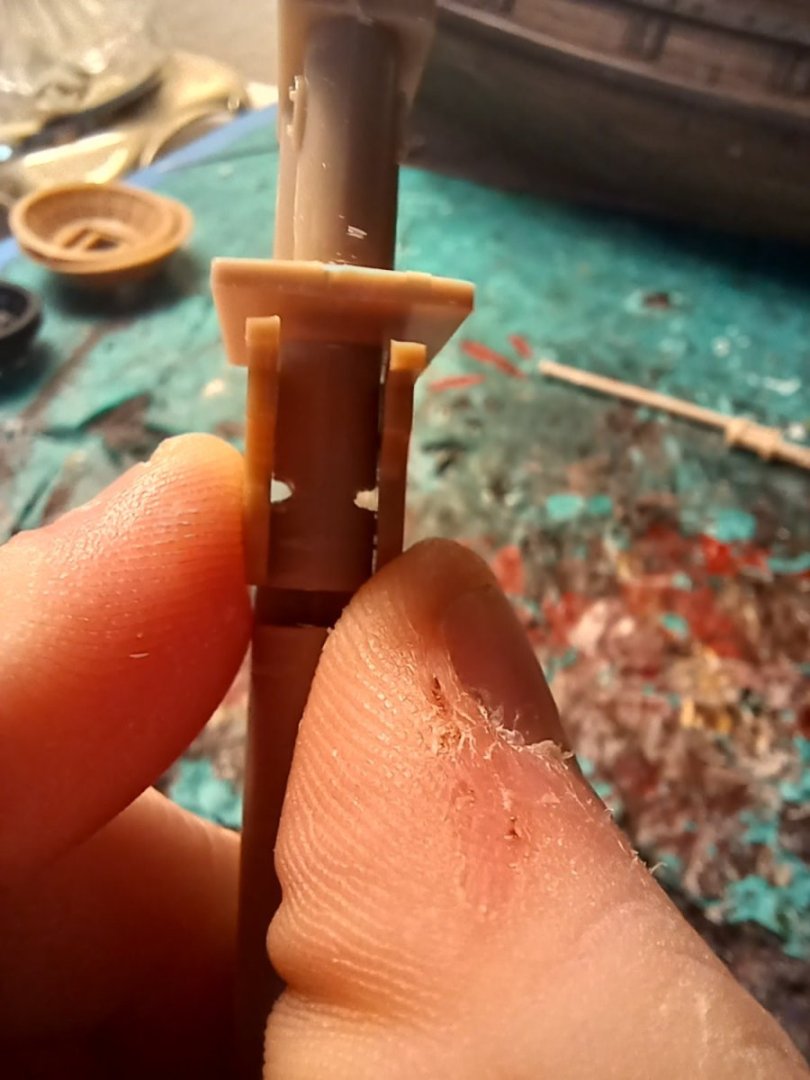
In the next step of the project, i had to make two holes in the mainmast to accept the lift. Here is how i did this: First, i scored two lines in the plastic, which is where the hole will go. Then, i drilled holes at shallow depth between the lines. Then, i trimmed up the holes with an Xacto knife, forming a rough trench in the plastic: After that, i inserted by pin vise into the trench, before vigorously going back and forth with the vise. This removed more material, deepening the trench. This is the final product of such an endeavor: These holes will accept the main lift for the course.

- 279 replies
-
- 3
-
-
- Spanish Galleon
- Imai
- (and 1 more)
-
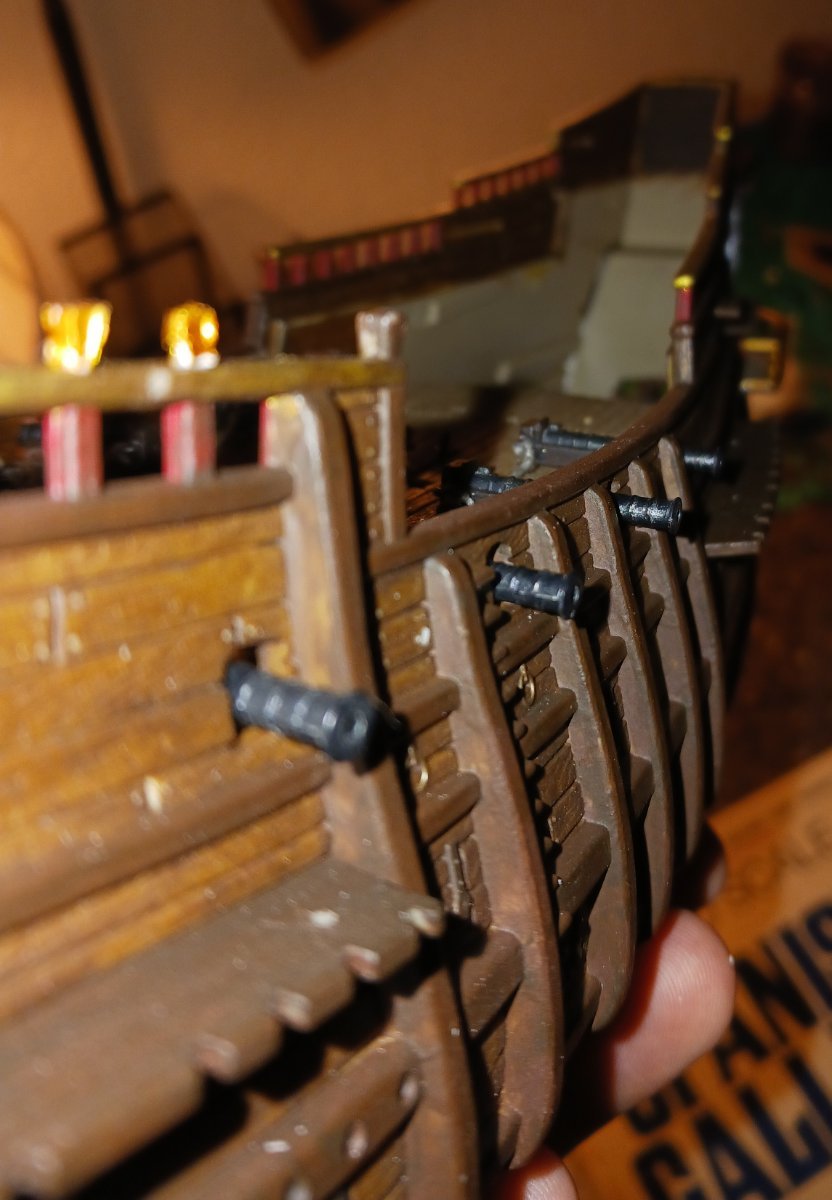
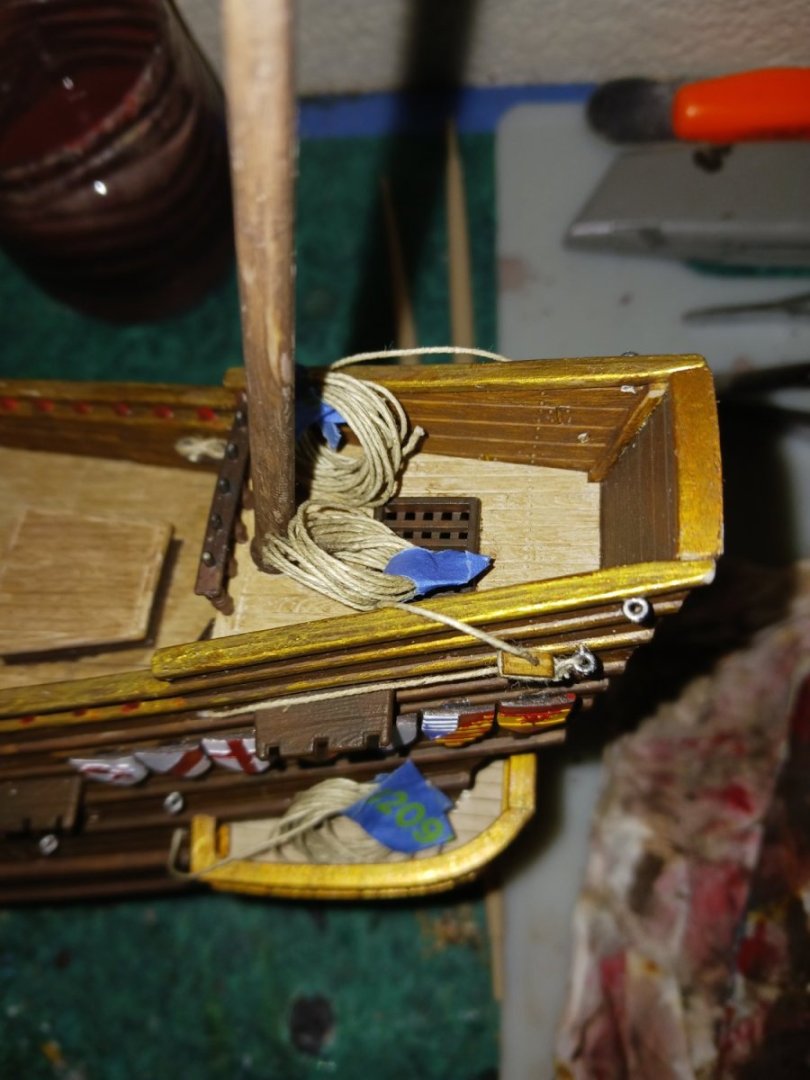
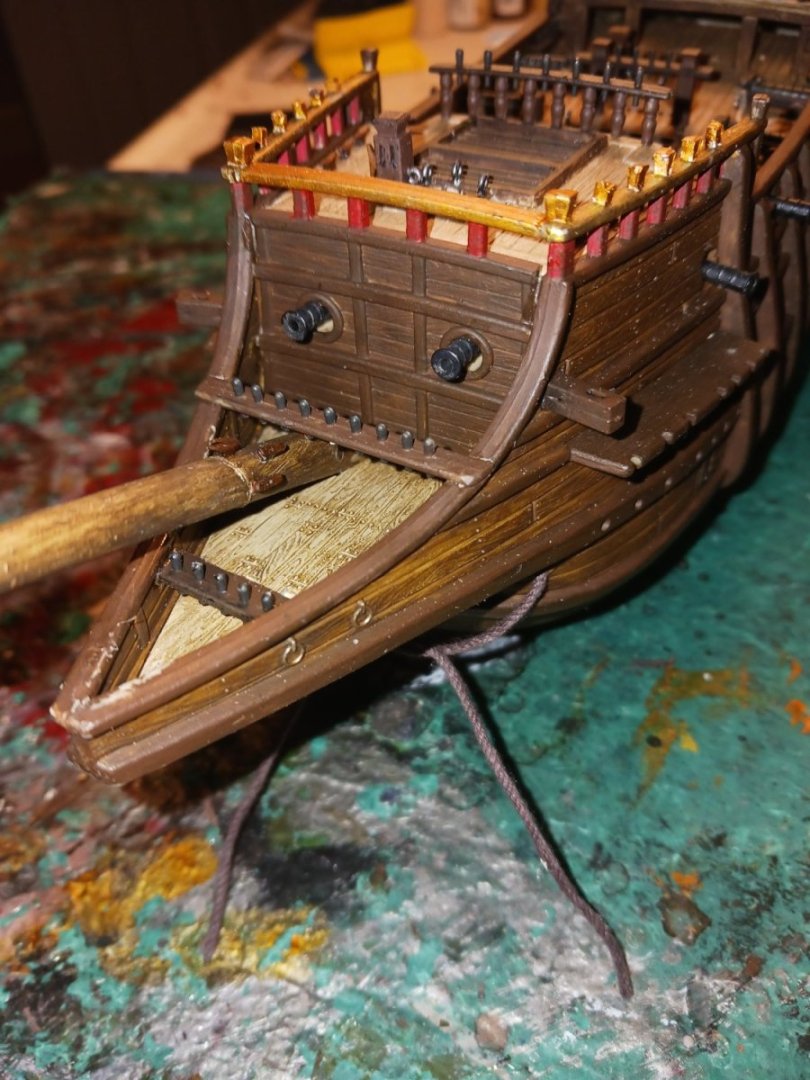
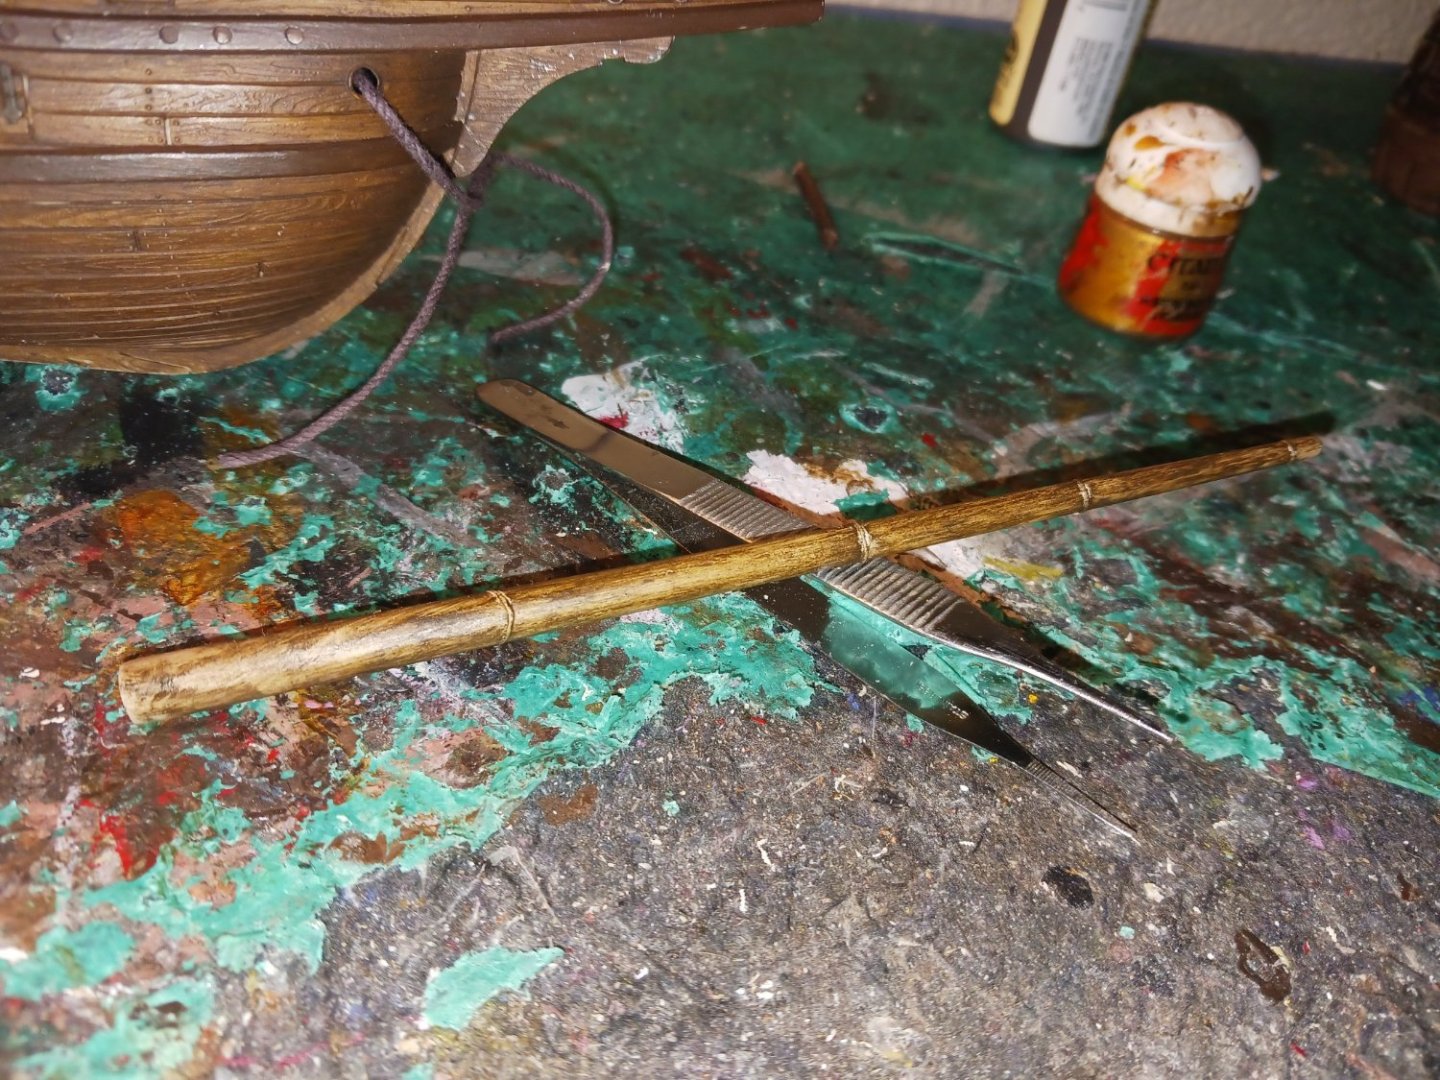
I trimmed a spare pinrail down to size, and inserted it into the forward part of the beakhead. This only took some gentle, but persistent, sanding to achieve. I also drilled two holes in the forward bulkhead for two eyebolts, which will have two double blocks on them, to be used for the topmast and topgallant stays. The running parts of these lines will belay to the two rearmost cleats on the bowsprit.
- 279 replies
-
- 4
-
-
- Spanish Galleon
- Imai
- (and 1 more)
-
@kirill4, i summon thee! I have a small question: how did you deal with the immense amount of rigging on the bow of your galleon? I don't remember a huge amount of pins on the bow of yours.
-
I also glued the cleats onto the bowsprit, and dryfitted it in place. Believe it or not, that still isn't enough belaying points for the rigging at the bow. There will need to be timberheads and cleats at the forward bulkhead, just like what i did on the sides.
- 279 replies
-
- 2
-
-
- Spanish Galleon
- Imai
- (and 1 more)
-
I have the quarter and poop decks sitting in the hull, and have installed most of the kit-provided deck fittings. I have not glued in the two upper decks because i need hull access to fit the running ends of the main course sheets. I also painted the bowsprit. I started with two coats of light tan, and finished with two coats of antiquing medium.

- 279 replies
-
- 3
-
-
- Spanish Galleon
- Imai
- (and 1 more)
-
I have found that if you paint a line, or form it before it goes on the ship, you can simply make the curve by running your finger along the inside of the curve.
- 740 replies
-
- 3
-
-
- Tudor
- restoration
- (and 4 more)
-
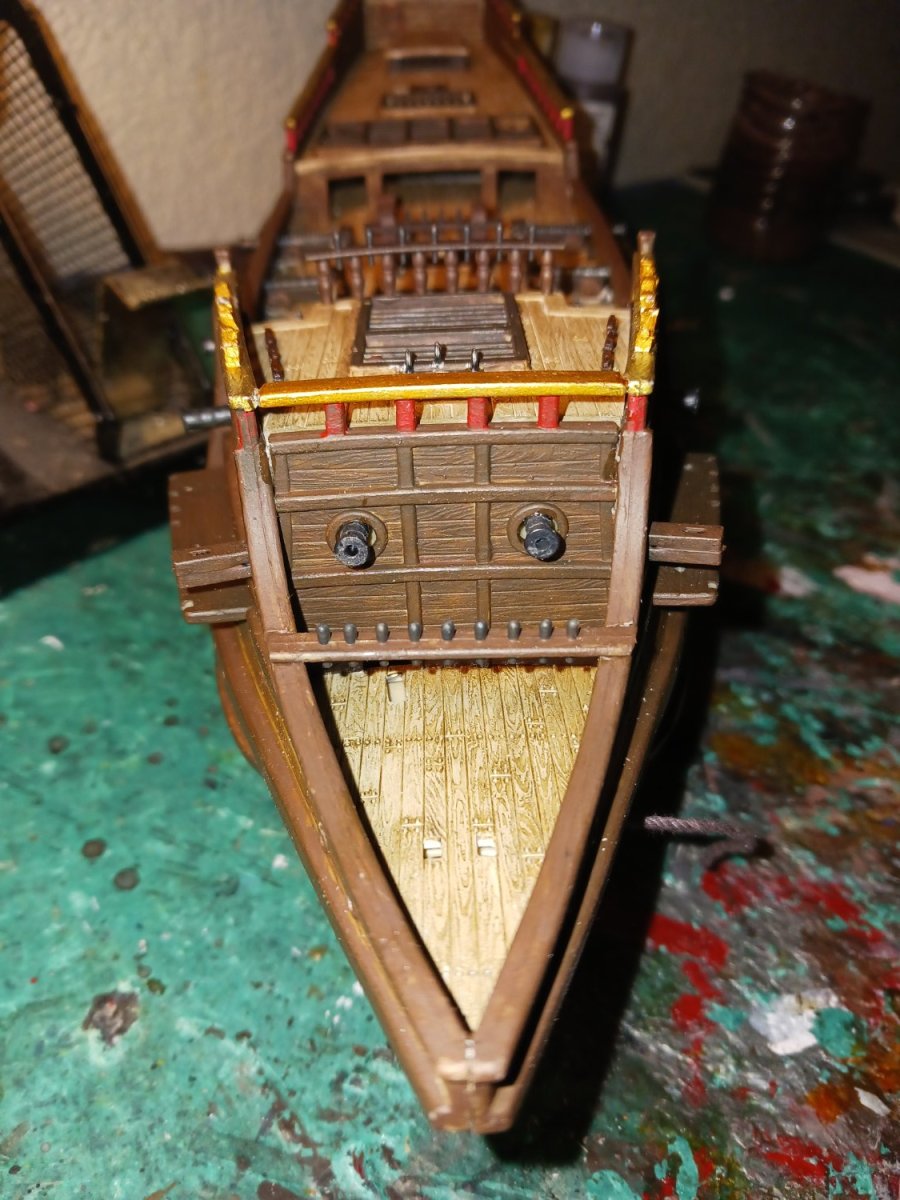
I painted and installed the beakhead pinrail. The rail itself originally extended over the top of the hull. I thought that was a stupid design, so i cut it down to fit the profile of the ship. I will likely install four more timberheads on the foreward bulkhead, because there is a lot of stuff to belay at the fore (spritsail stuff, probably the 3 sets of foremast bowlines, etc) You can also see the catheads, which each have an eyebolt on the back.

- 279 replies
-
- 3
-
-
- Spanish Galleon
- Imai
- (and 1 more)
-
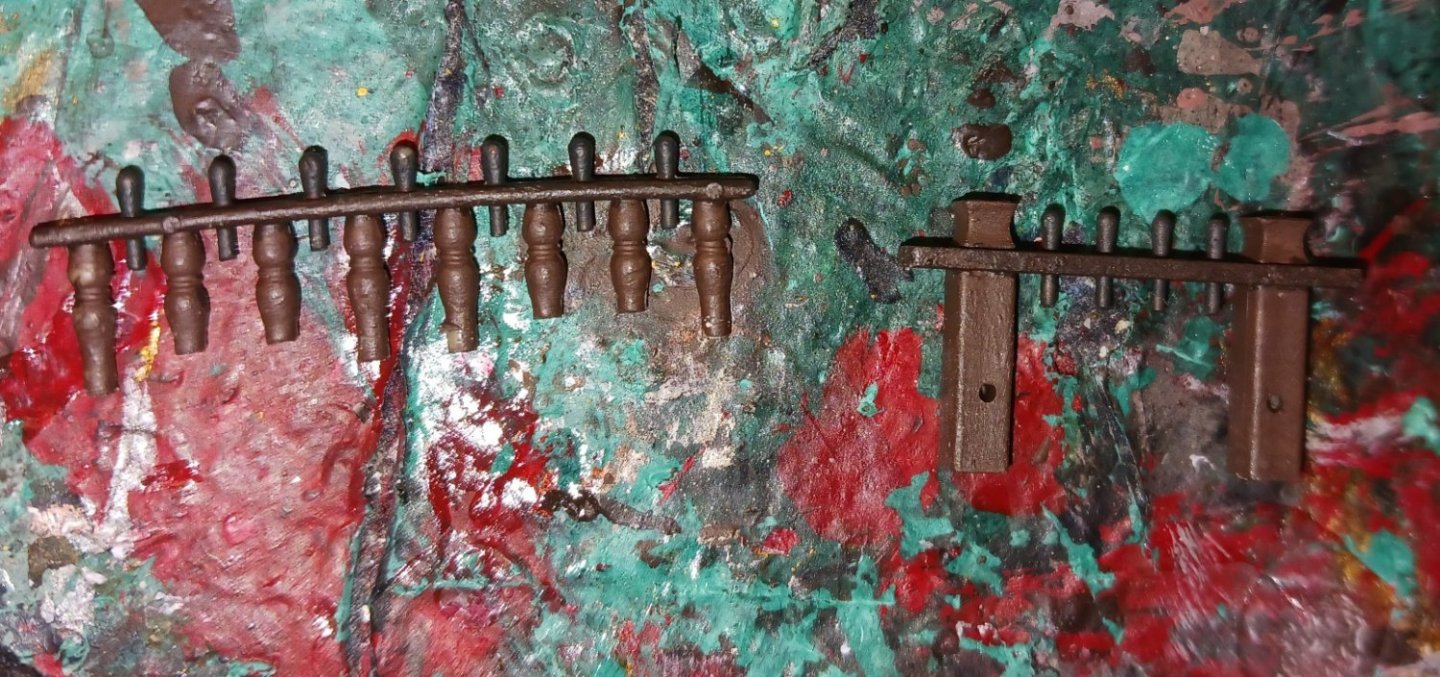
This morning, i worked on some of the deck fittings. I painted and installed things like the forecastle ladders, the forecastle aft rail, and the main fiferail. As it turns out, there were two pinrails for the sides of the forecastle that were supposed to go on. Whoopsies. The timberheads and cleats look better anyway, and are more accurate. So, now i have two spare pinrails with six pins apiece.
- 279 replies
-
- 2
-
-
- Spanish Galleon
- Imai
- (and 1 more)
-
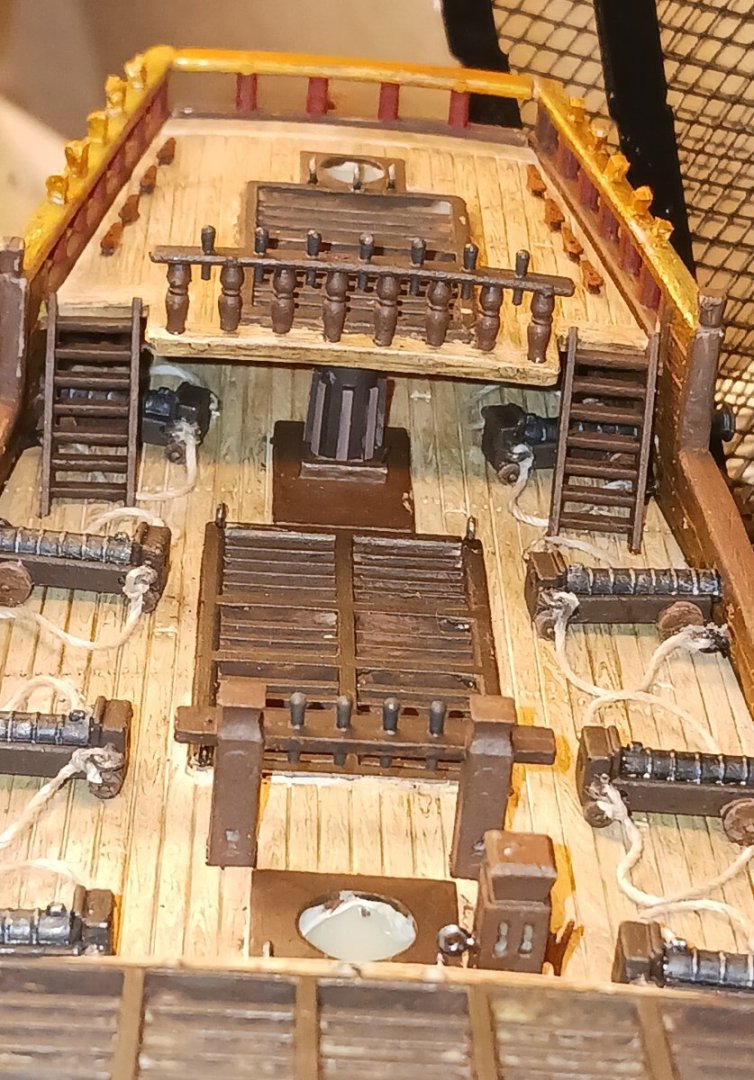
Earlier in the build, i installed some custom timberheads on top of the rail stanchions on the forecastle, for use instead of belaying pins. I promptly realized this wouldn't be enough in the way of belaying points, so i added some cleats on the deck in between. I also installed the painted capstan and glued in the forecastle deck.
- 279 replies
-
- 3
-
-
- Spanish Galleon
- Imai
- (and 1 more)
-
I can see how someone would be able to take a nap in this thing, even in a fierce storm. Experimental archaeology, am i right?
-
Explain to me how anyone would be able to access the capstan, much less heave round it, when the half-deck is like 4 feet tall.
- 59 replies
-
- 1
-
-
- Santa Maria
- Artesania Latina
- (and 1 more)
-
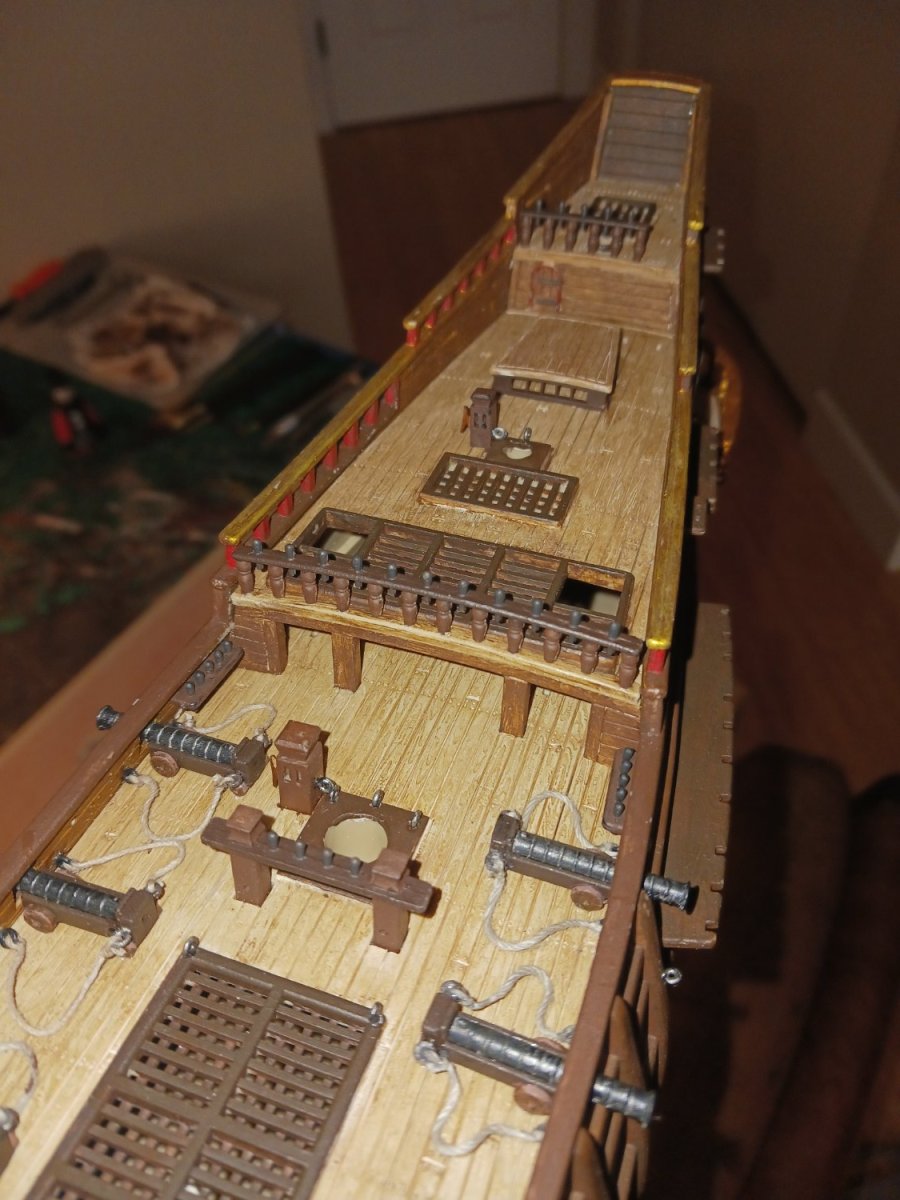
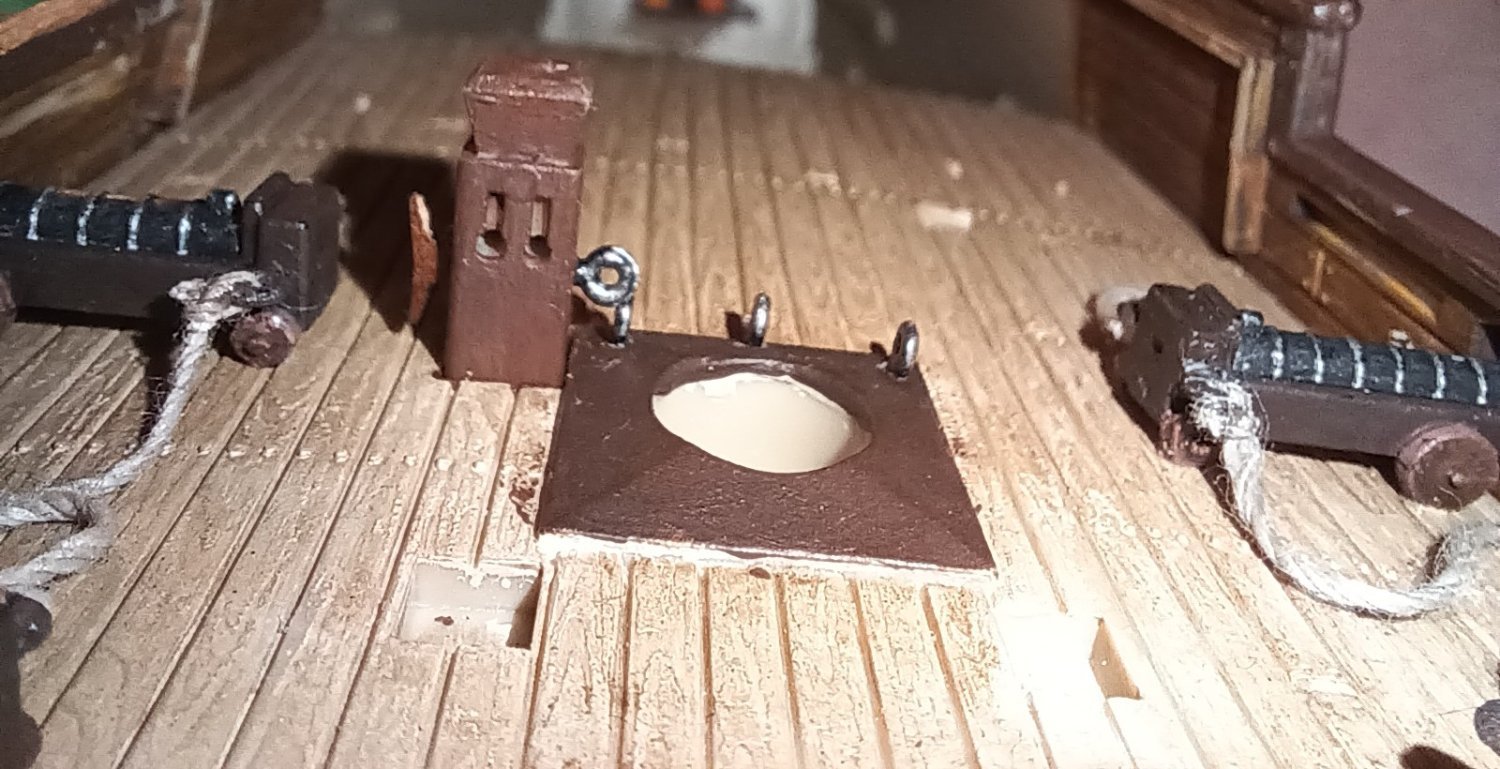
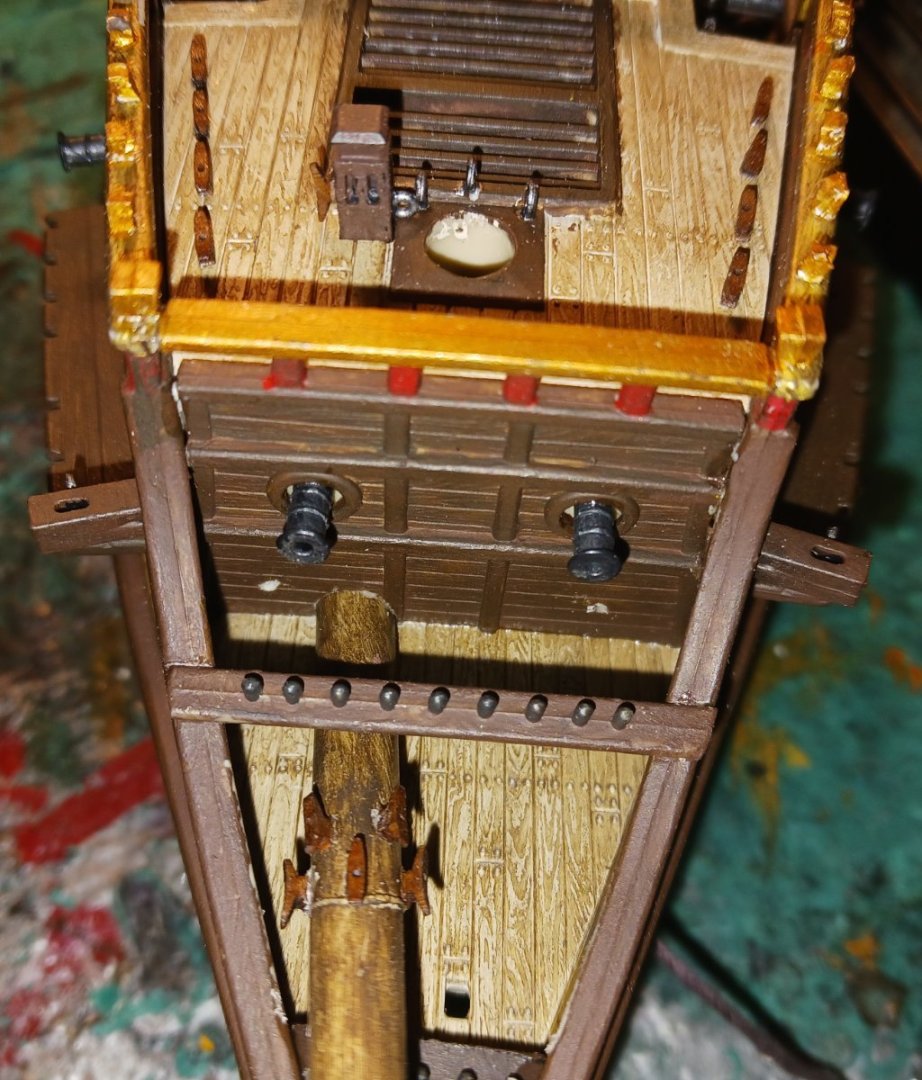
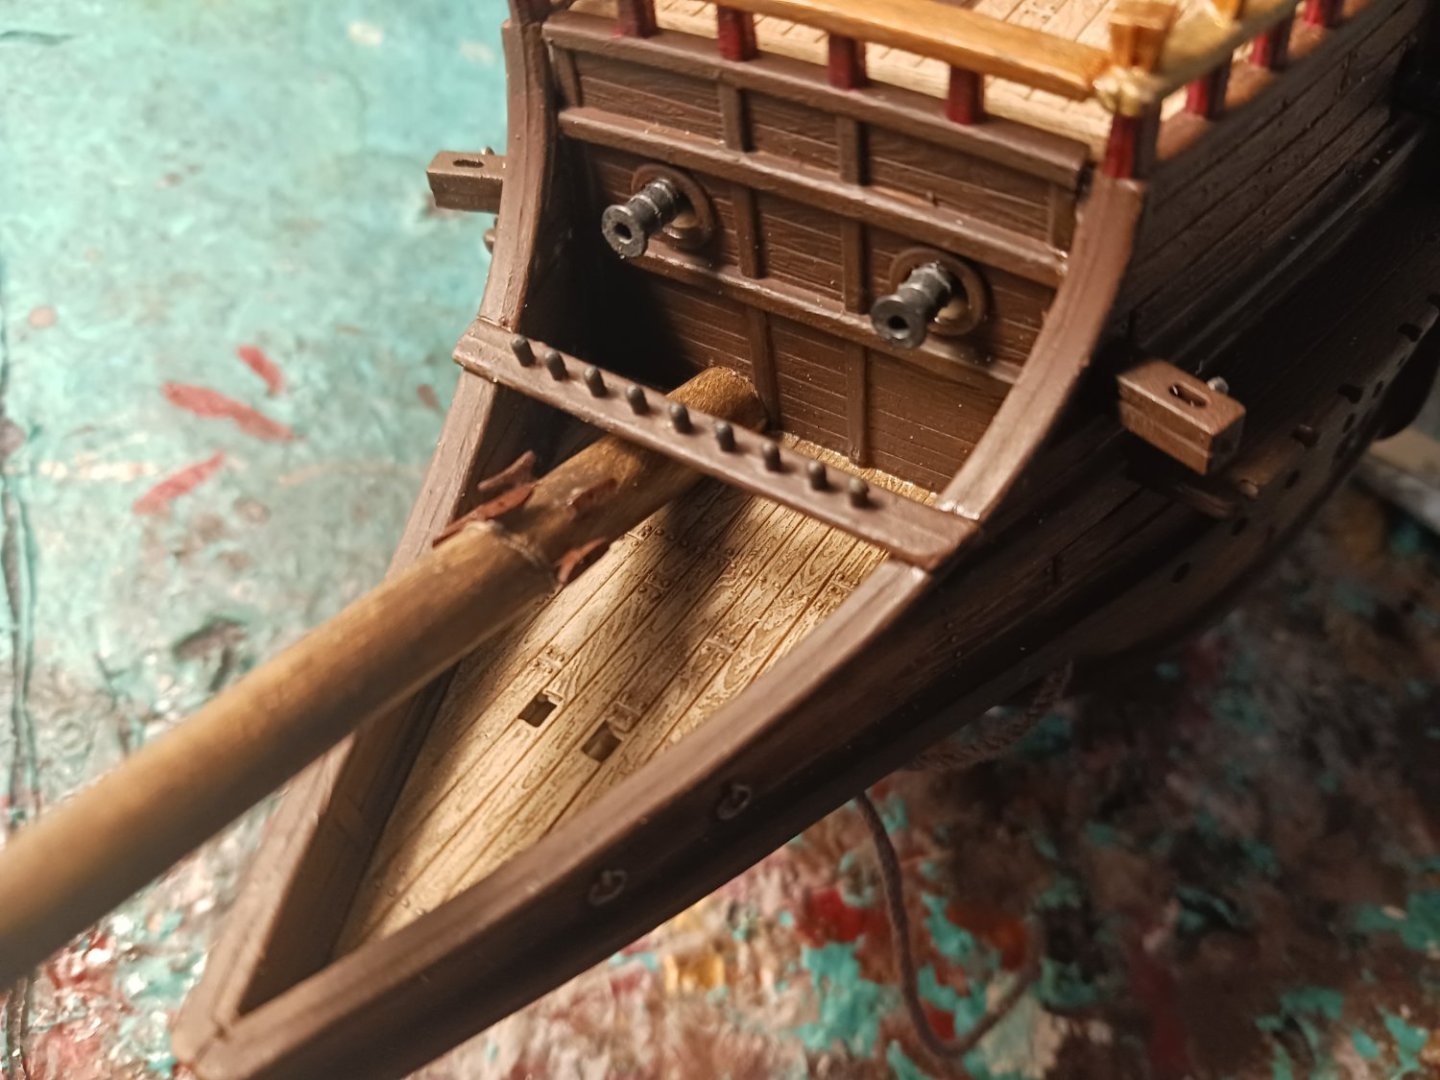
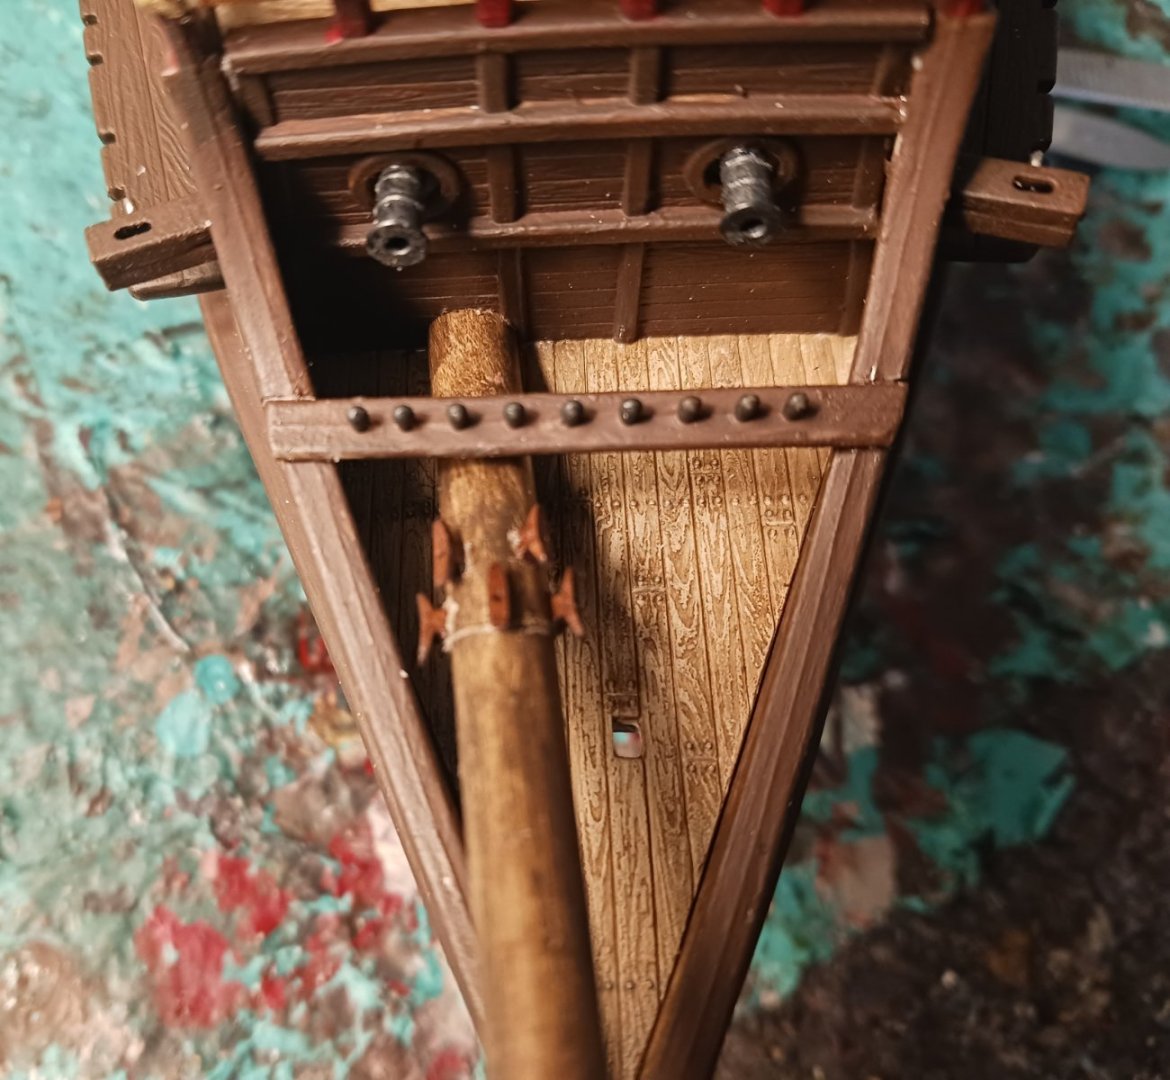
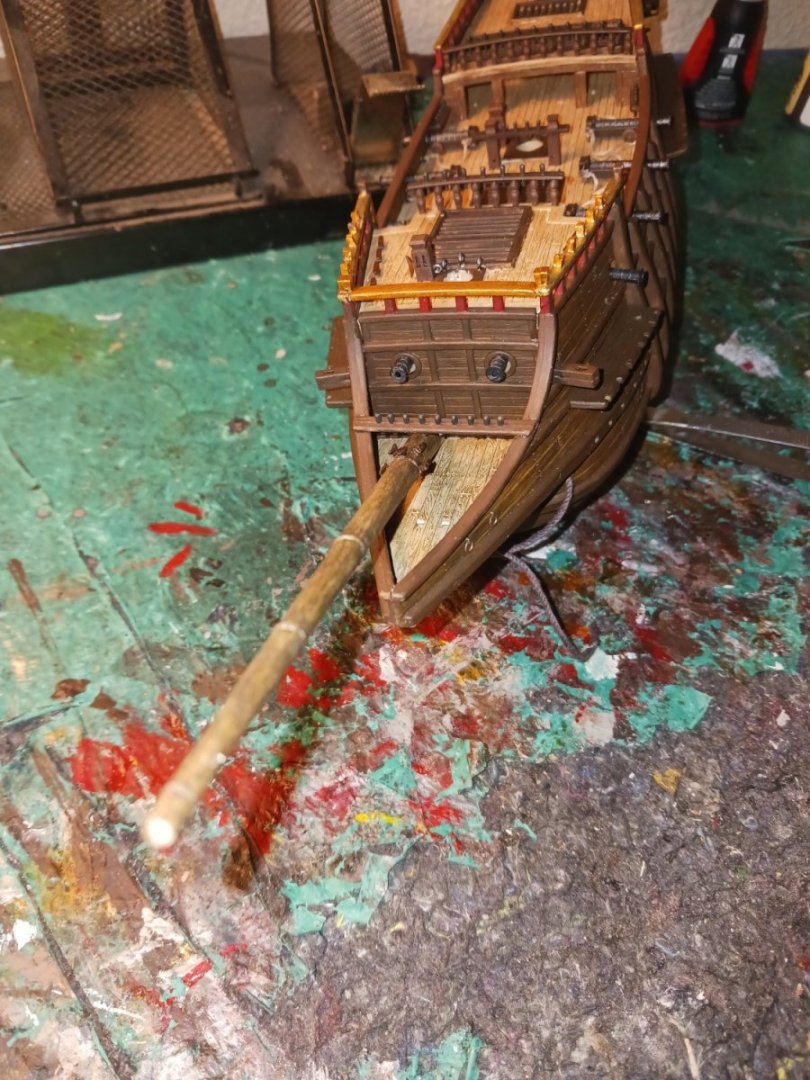
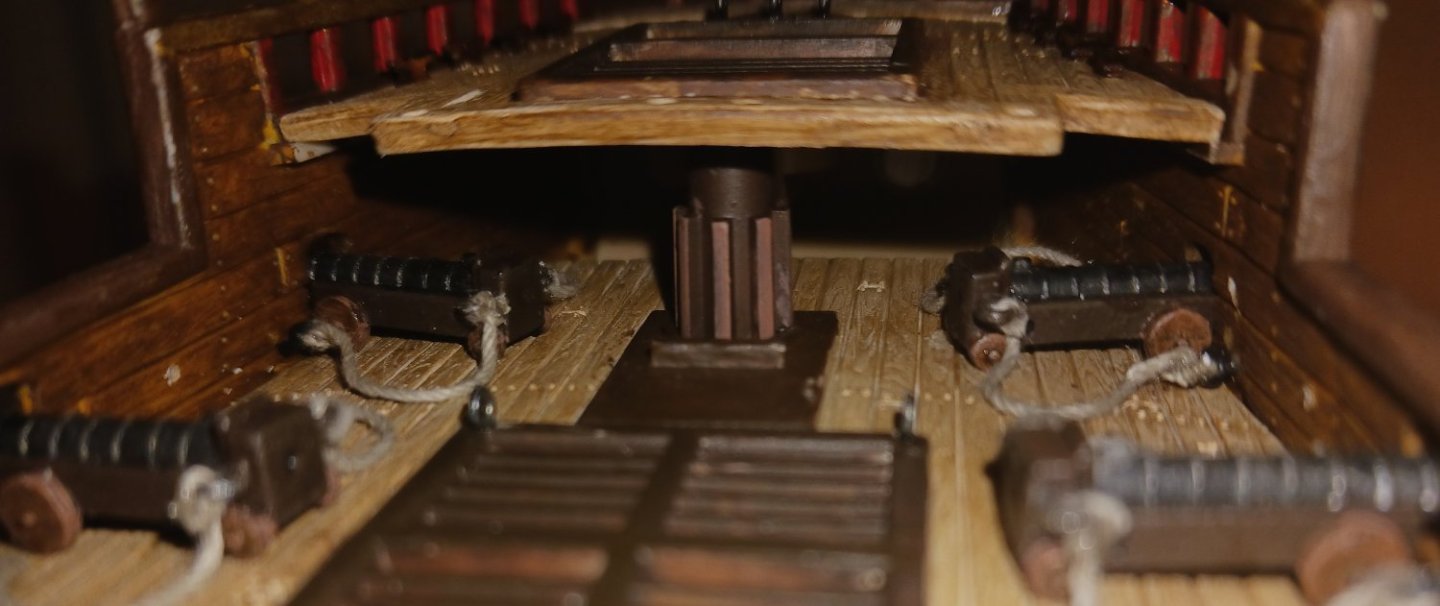
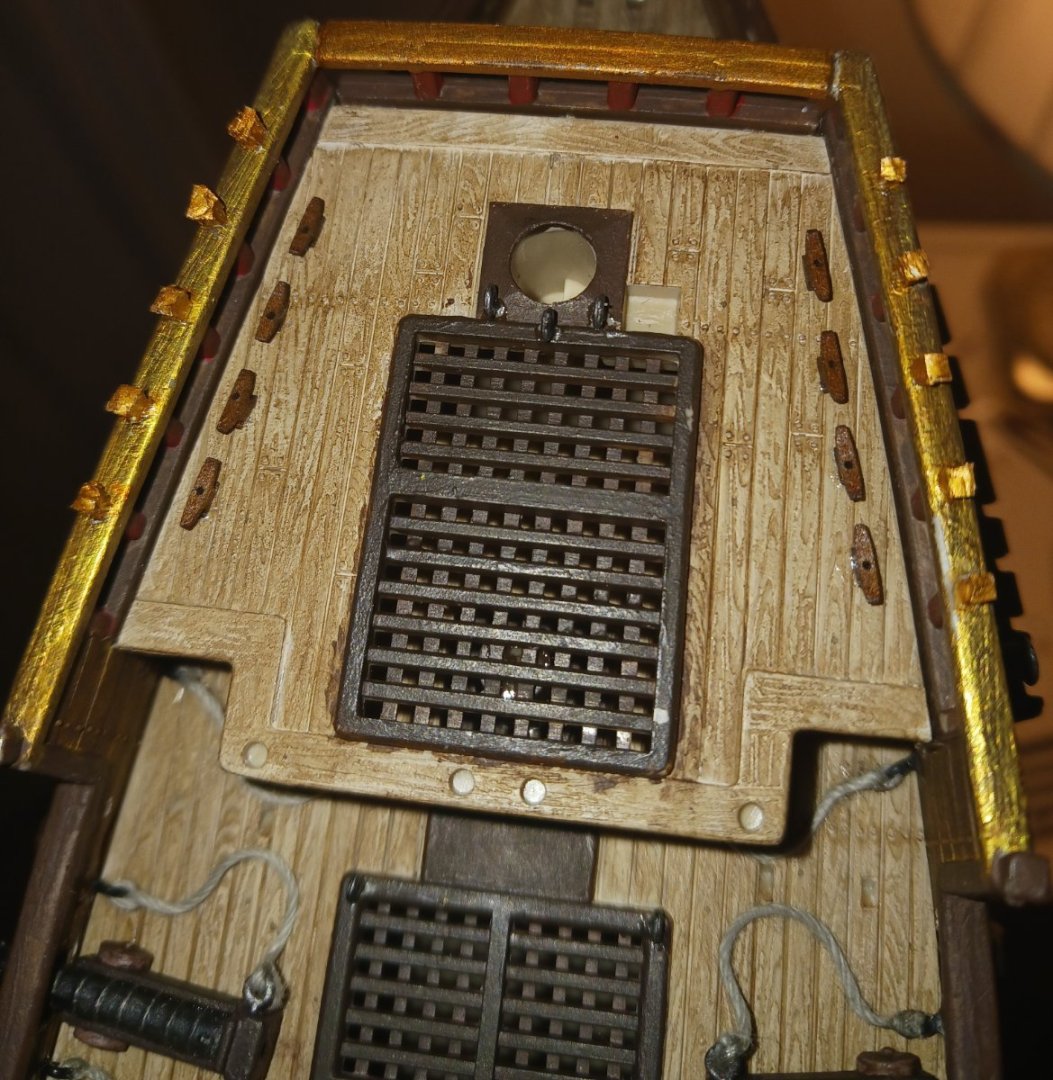
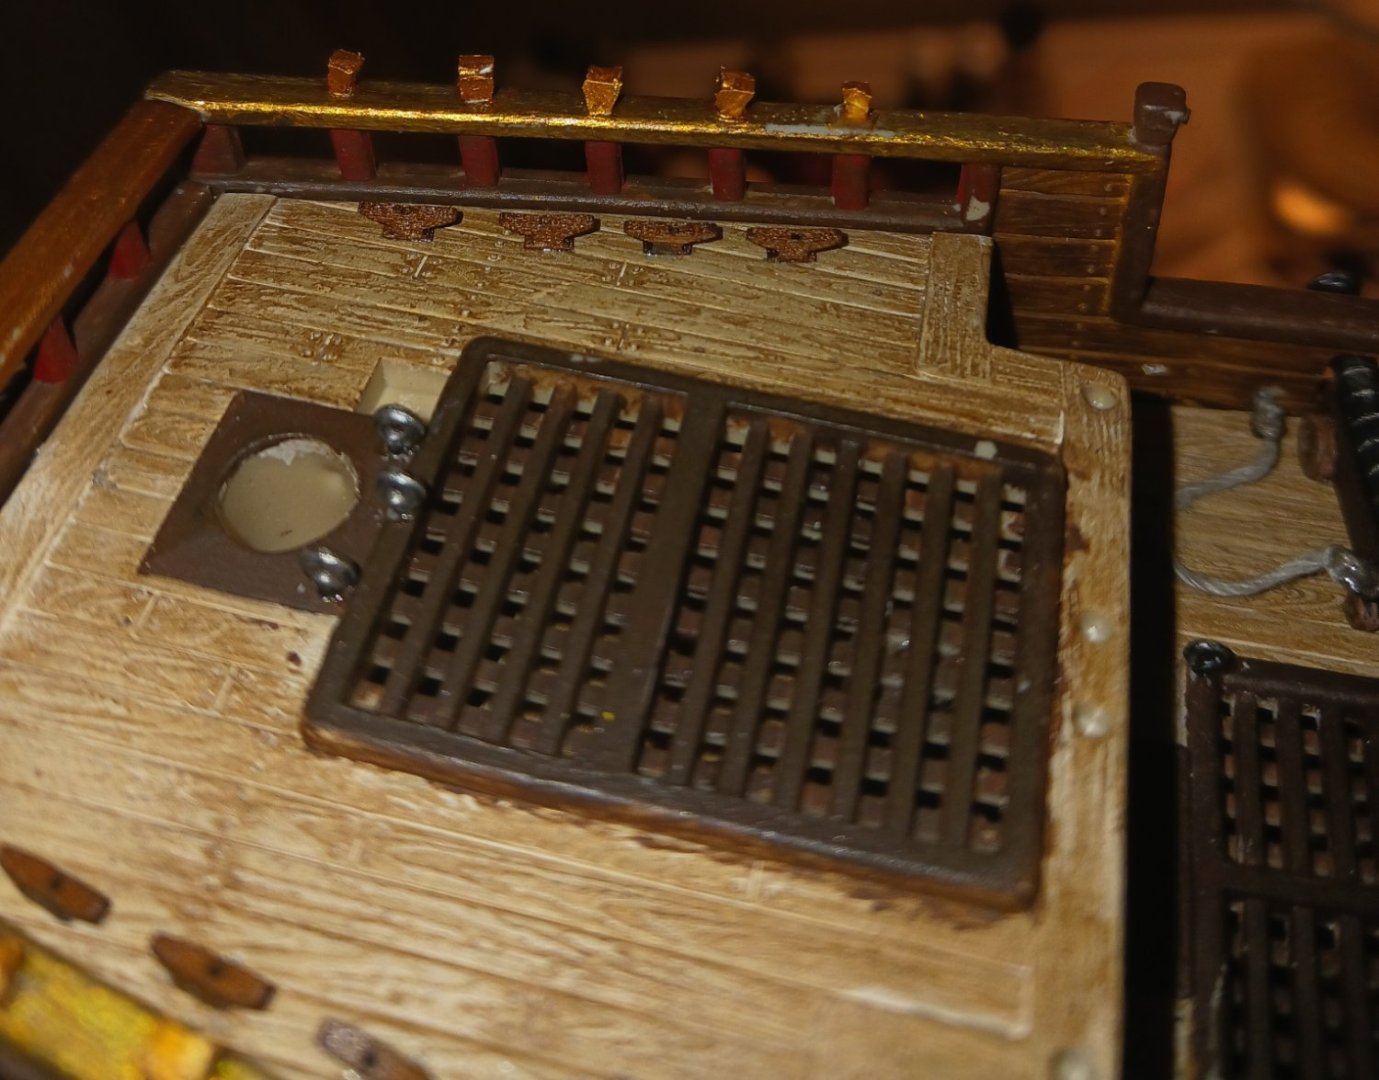
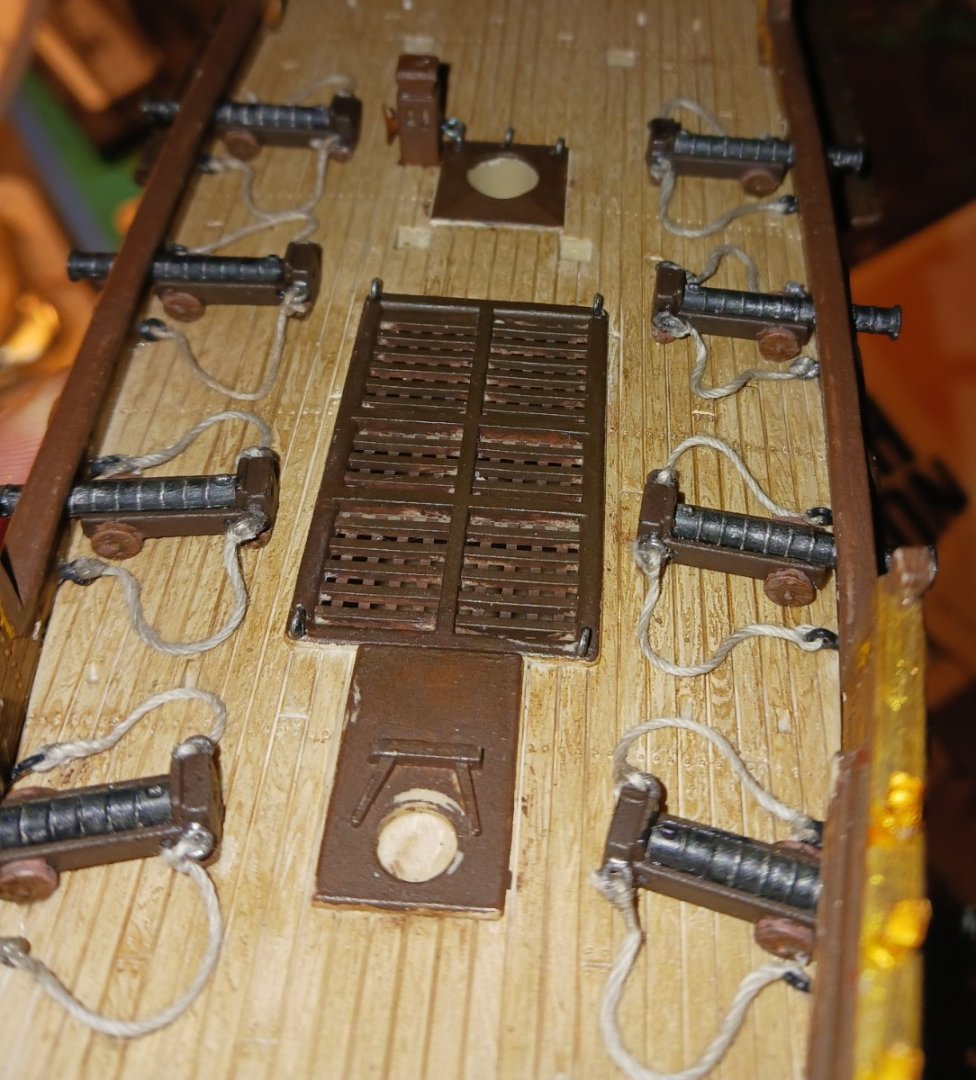
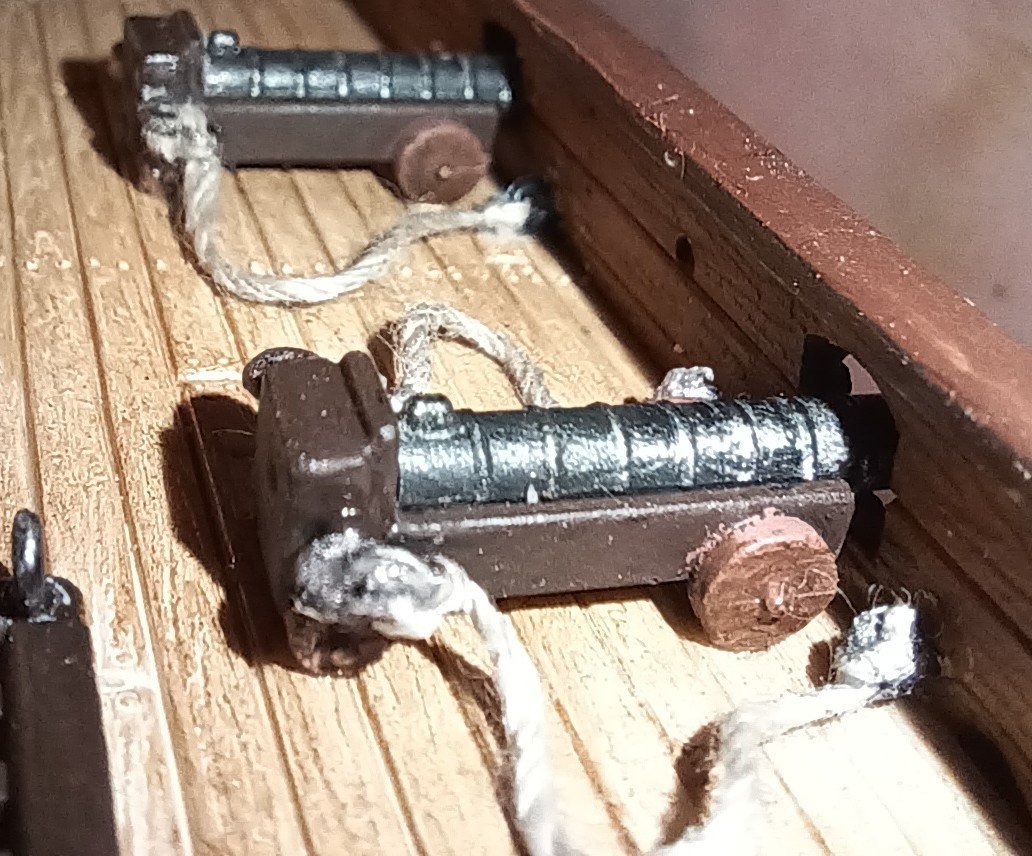
Today, i rigged the guns and put them in their place on the deck. First, i glued the deck in. Then, i glued the guns in as well as the main mast knighthead. And no, you don't see the errors in the grating paintwork when you look at it in real life. One issue with this kit is the positioning of the forward pair of guns on the deck. You can see this issue on Kirill's kit too. Can you guess what it is? ...Correct! Whenever the forward guns fire, they would obliterate the rearmost shroud of the fore mast. So, to avoid that, i positioned the guns angled forward, so they would fire between the two shrouds.


- 279 replies
-
- 4
-
-
- Spanish Galleon
- Imai
- (and 1 more)
-
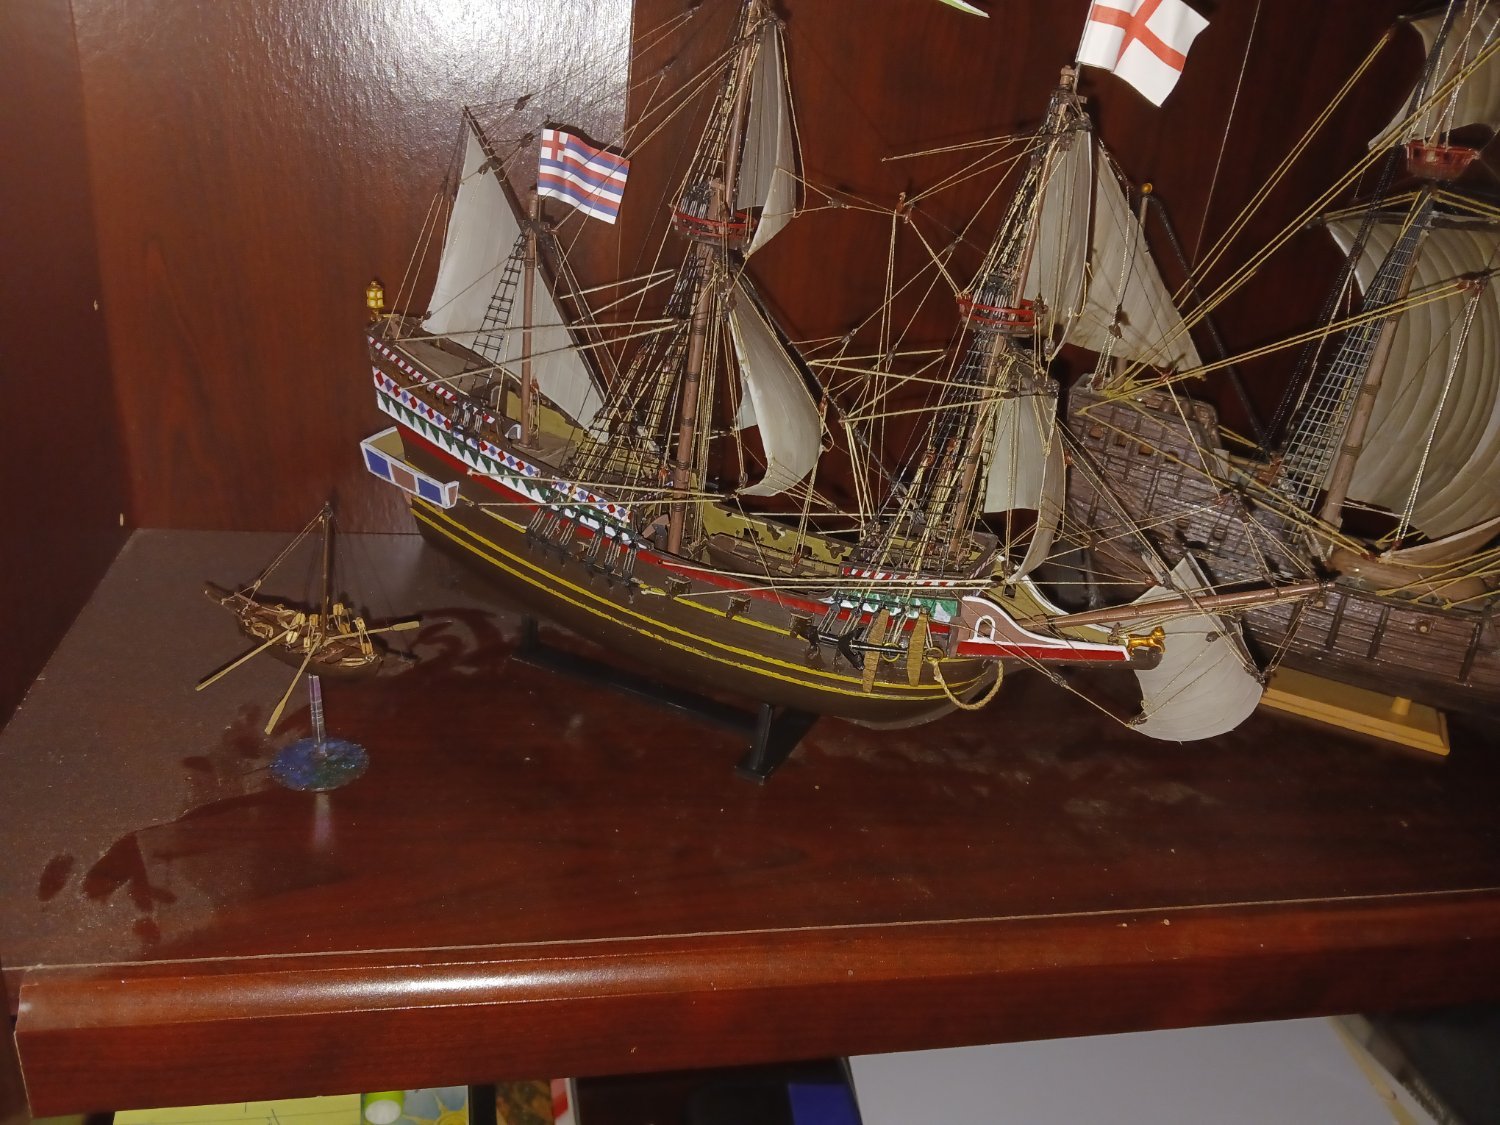
@kirill4 please, get home soon! You need to see the ship's boat. I learned from what you did with yours, and i can't wait to hear your feedback.
-
Here is the galleon's boat next to the Golden Hinde and the San Gabriel.

- 279 replies
-
- 3
-
-
- Spanish Galleon
- Imai
- (and 1 more)
-
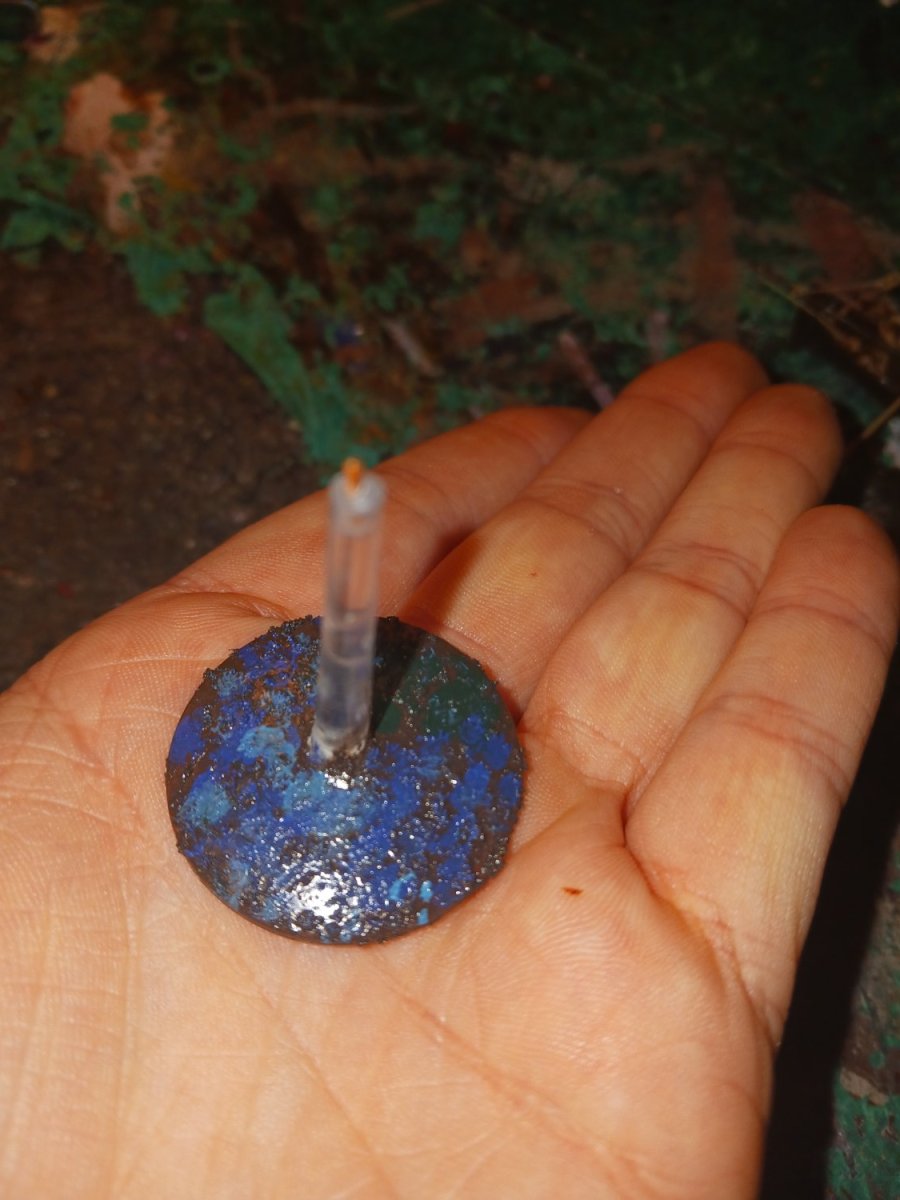
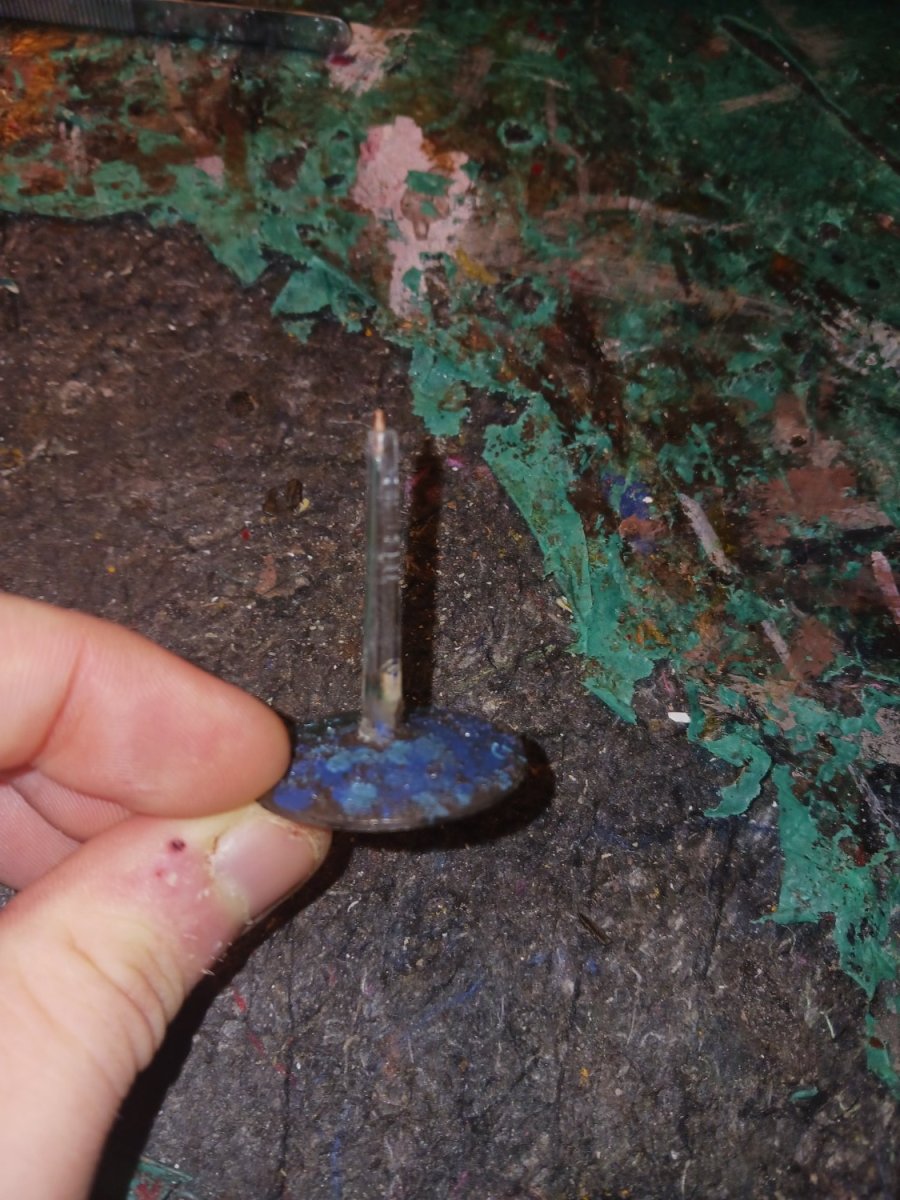
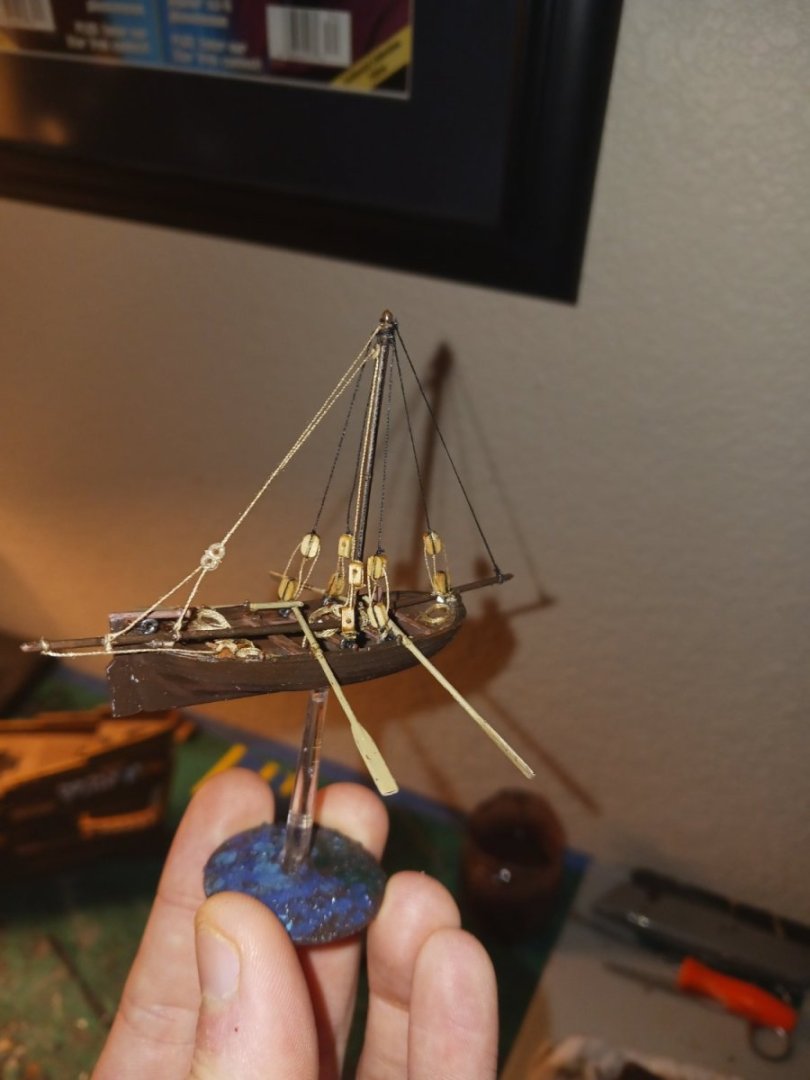
First, i did the final paintwork. As you could probably guess by my MSW handle, i used to build and paint Warhammer minis. So, i pulled a stand out of my stash and put it into use. I painted the bottom of the stand as a shallow sea floor, and drilled into the top, where i added a little peg out of plastic. This is the piece that will fit into the boat's hull: Then, i glued the repainted oars onto the boat, and put it on its stand! my friend wonders how this is even possible. To be honest, i have no clue. Well, that distraction is over. Time to get back to the guns!


- 279 replies
-
- 3
-
-
- Spanish Galleon
- Imai
- (and 1 more)
-
I painted a spare stand, and the glue holding the oars to the boat is currently drying. If i even look at it wrong, i will have to do it all over. So, i have decided to leave the room and not look at it at all! I will not end up gluing the boat to the base, rather, it will stay on via friction.
- 279 replies
-
- 1
-
-
- Spanish Galleon
- Imai
- (and 1 more)
-
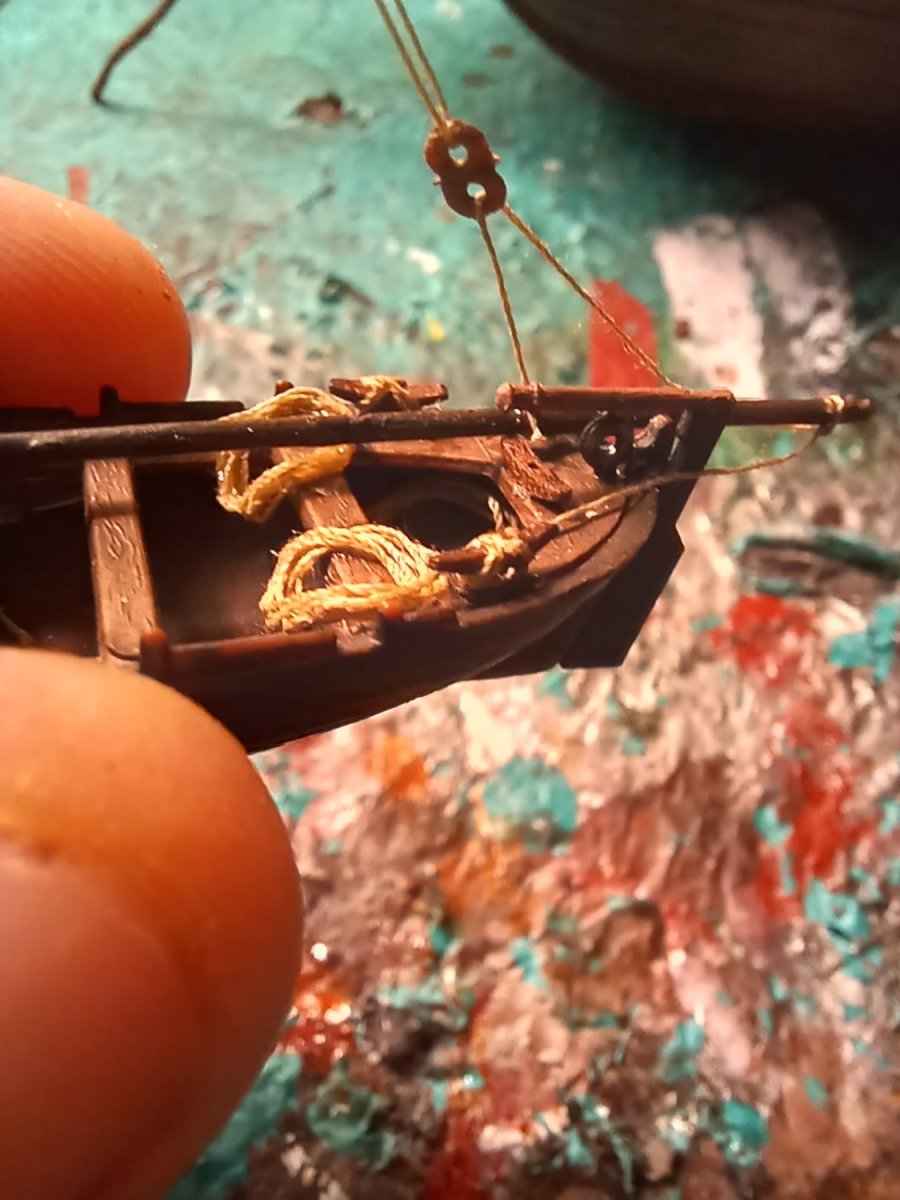
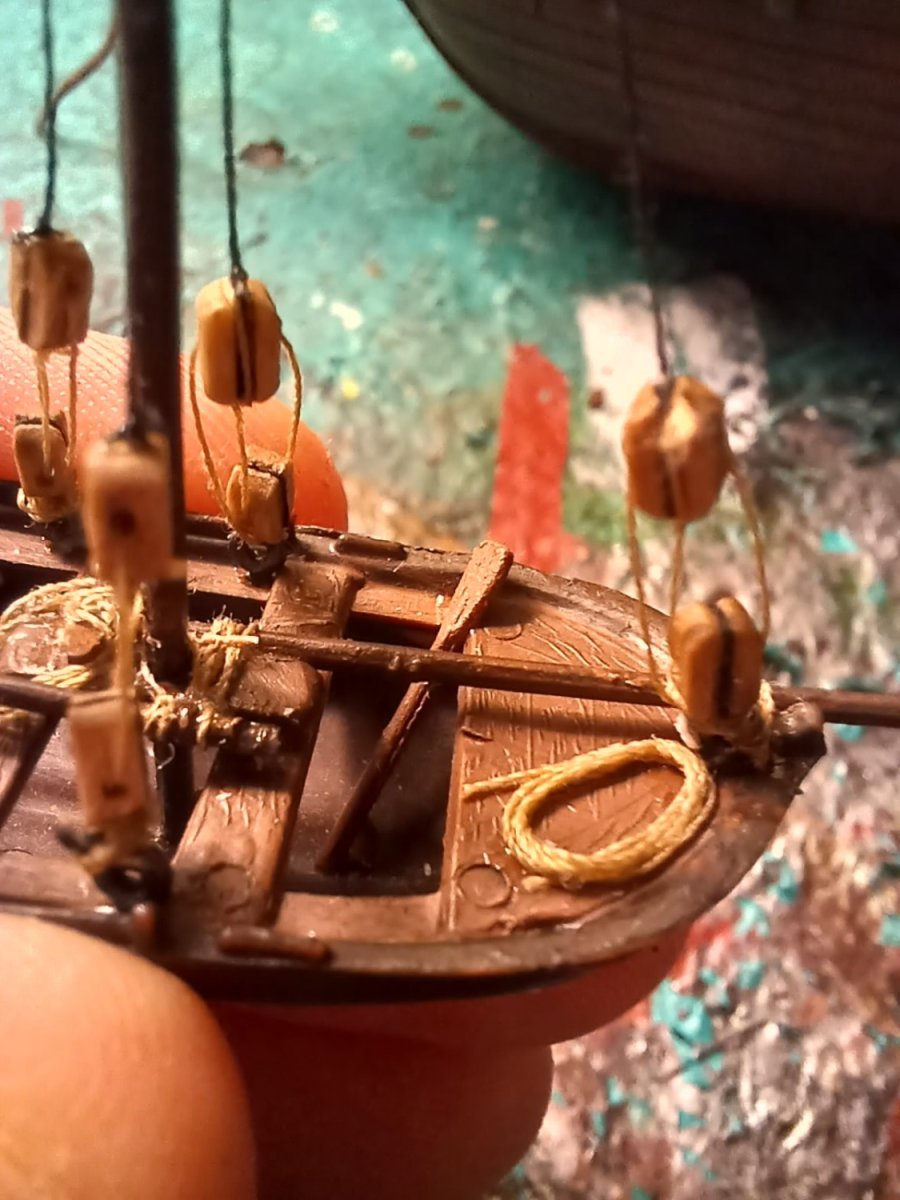
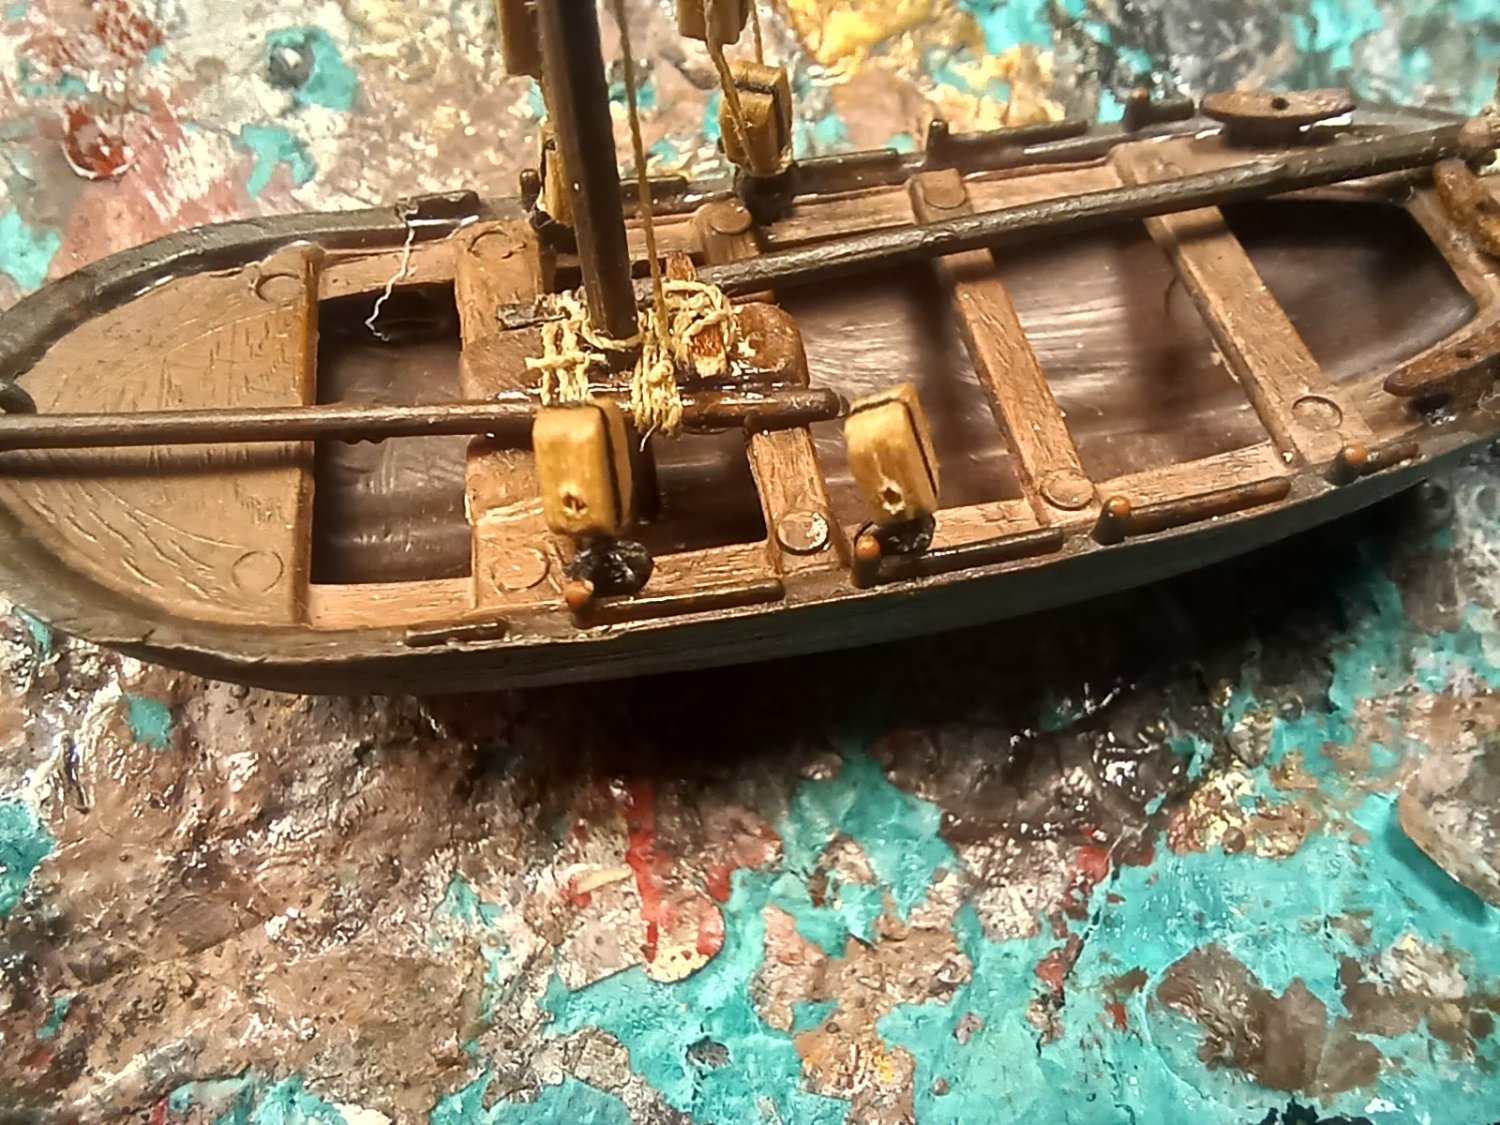
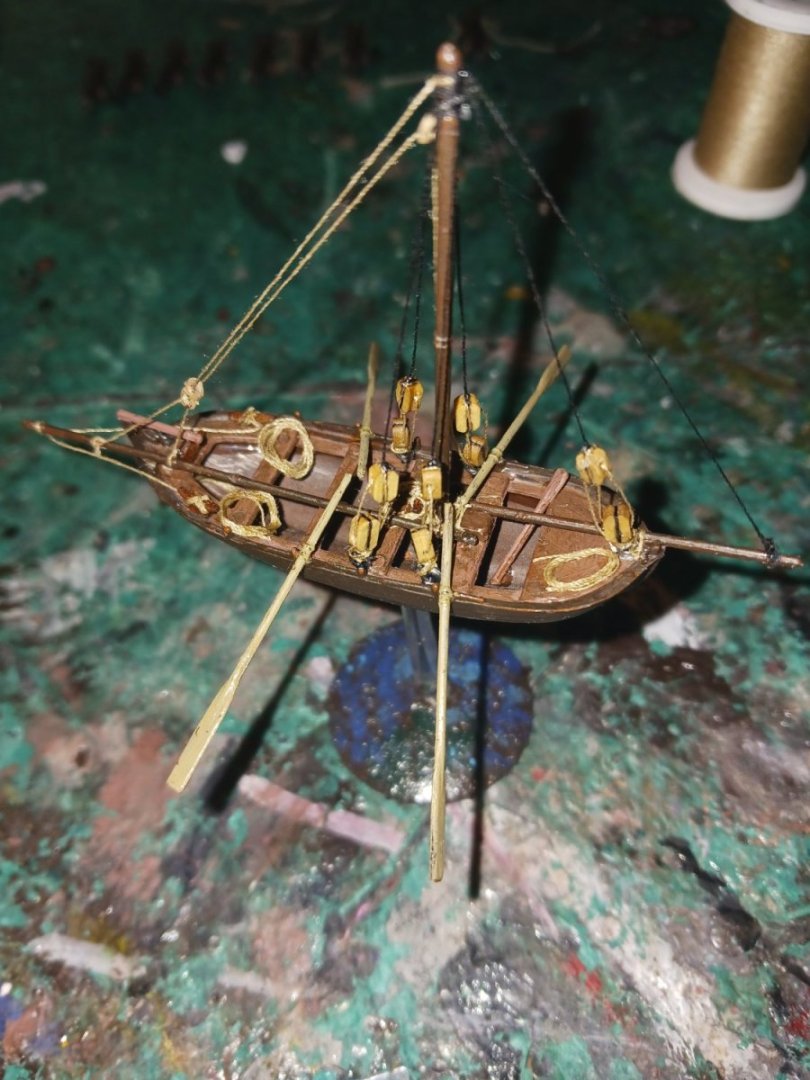
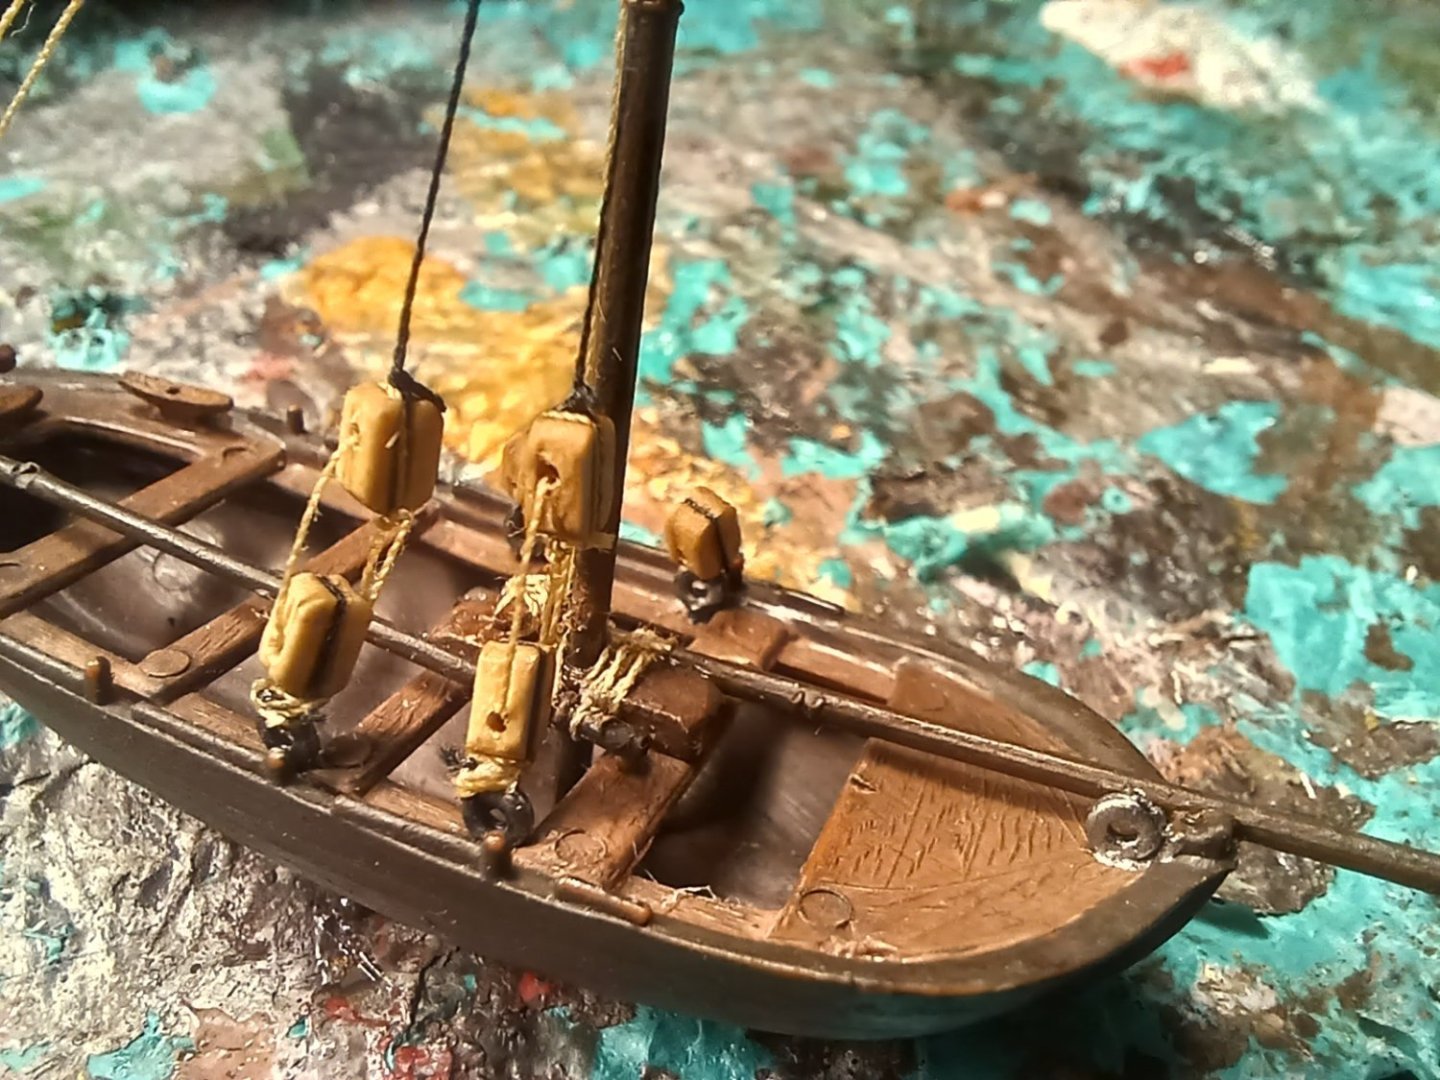
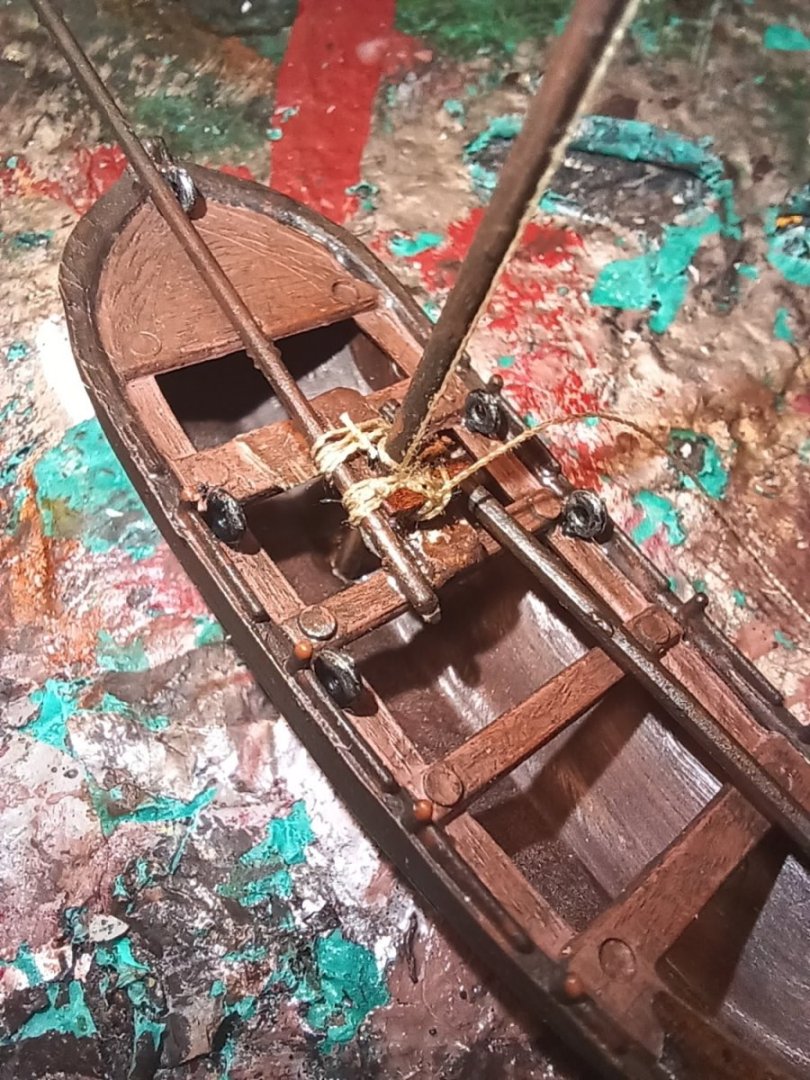
I'm getting only the slightest glimpse into Steven's life for the past few months with his Great Harry. I love how this originally had only two pieces, no rigging, and was intended to be, at most, a 15-minute subassembly, painting and all. Anyways, i added some more glue to the rope hanks in order to get them to sag, as they are partially hanging off one of the boat's seats. My grandpa has a boat (outboard motor, no sail) that has a small paddle that lives up at the bow, and i would always use it to maneuver around at the dock. So, i decided to cut down one of the oars in order to make my own for this boat. As you might have been able to tell, i added more rope hanks, because whoever was using the boat would need them to tie off at dock, as well as perform other tasks that did not require a specialized line. All i have yet to do is add in the oars for the boat. It was suggested that i use smaller rigging blocks. I agree with this assessment, which is why i decided to use thimbles for the running rigging. However, i could not find blocks any smaller than this.


- 279 replies
-
- 3
-
-
- Spanish Galleon
- Imai
- (and 1 more)
-
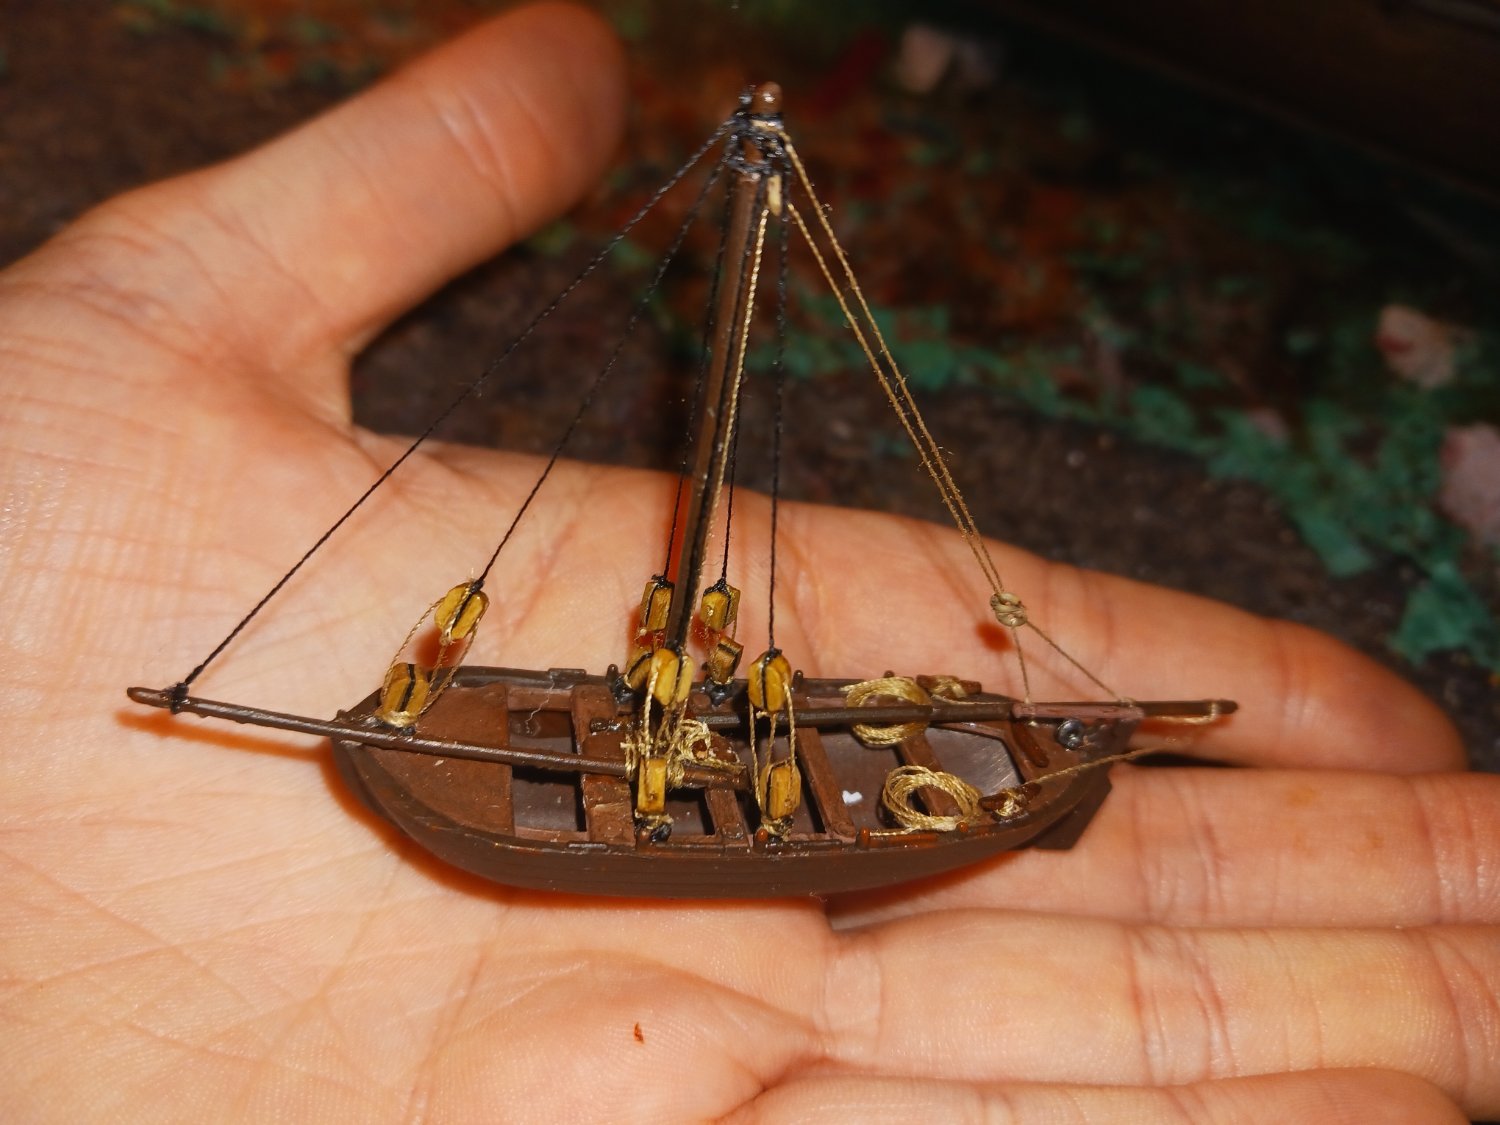
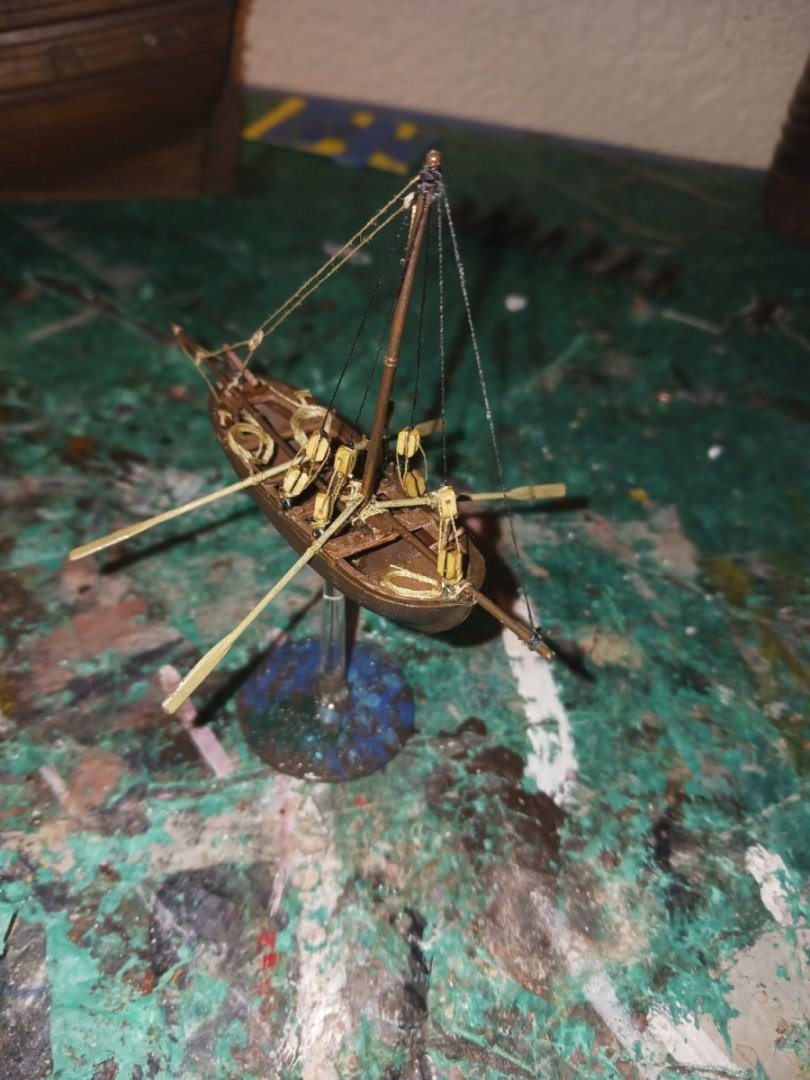
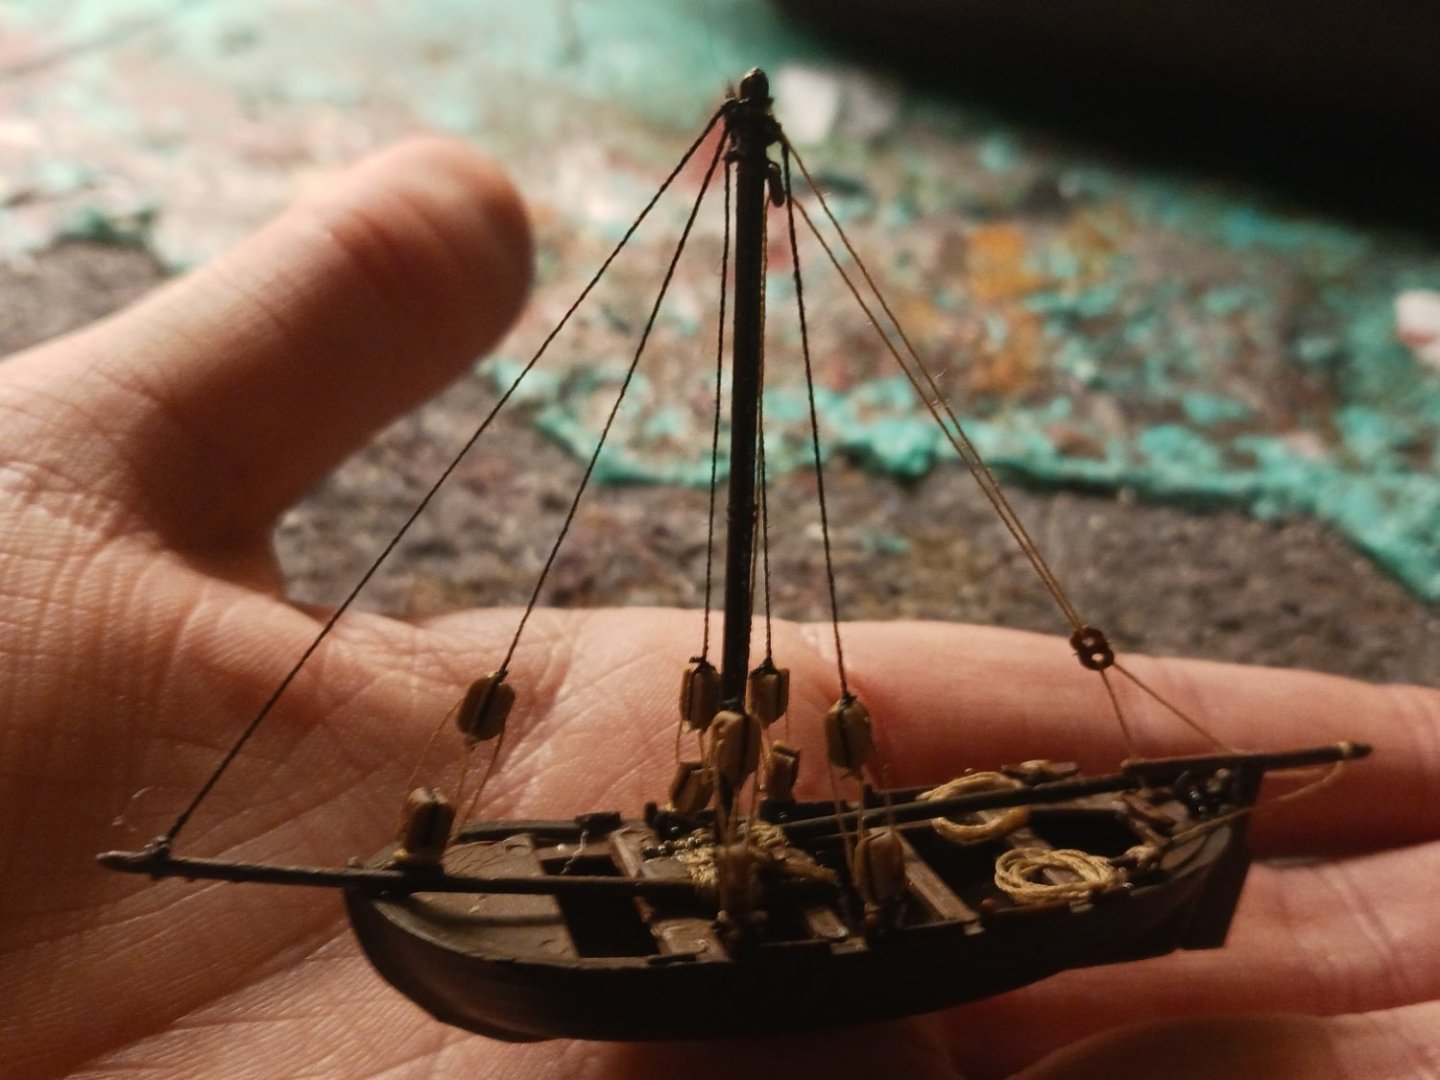
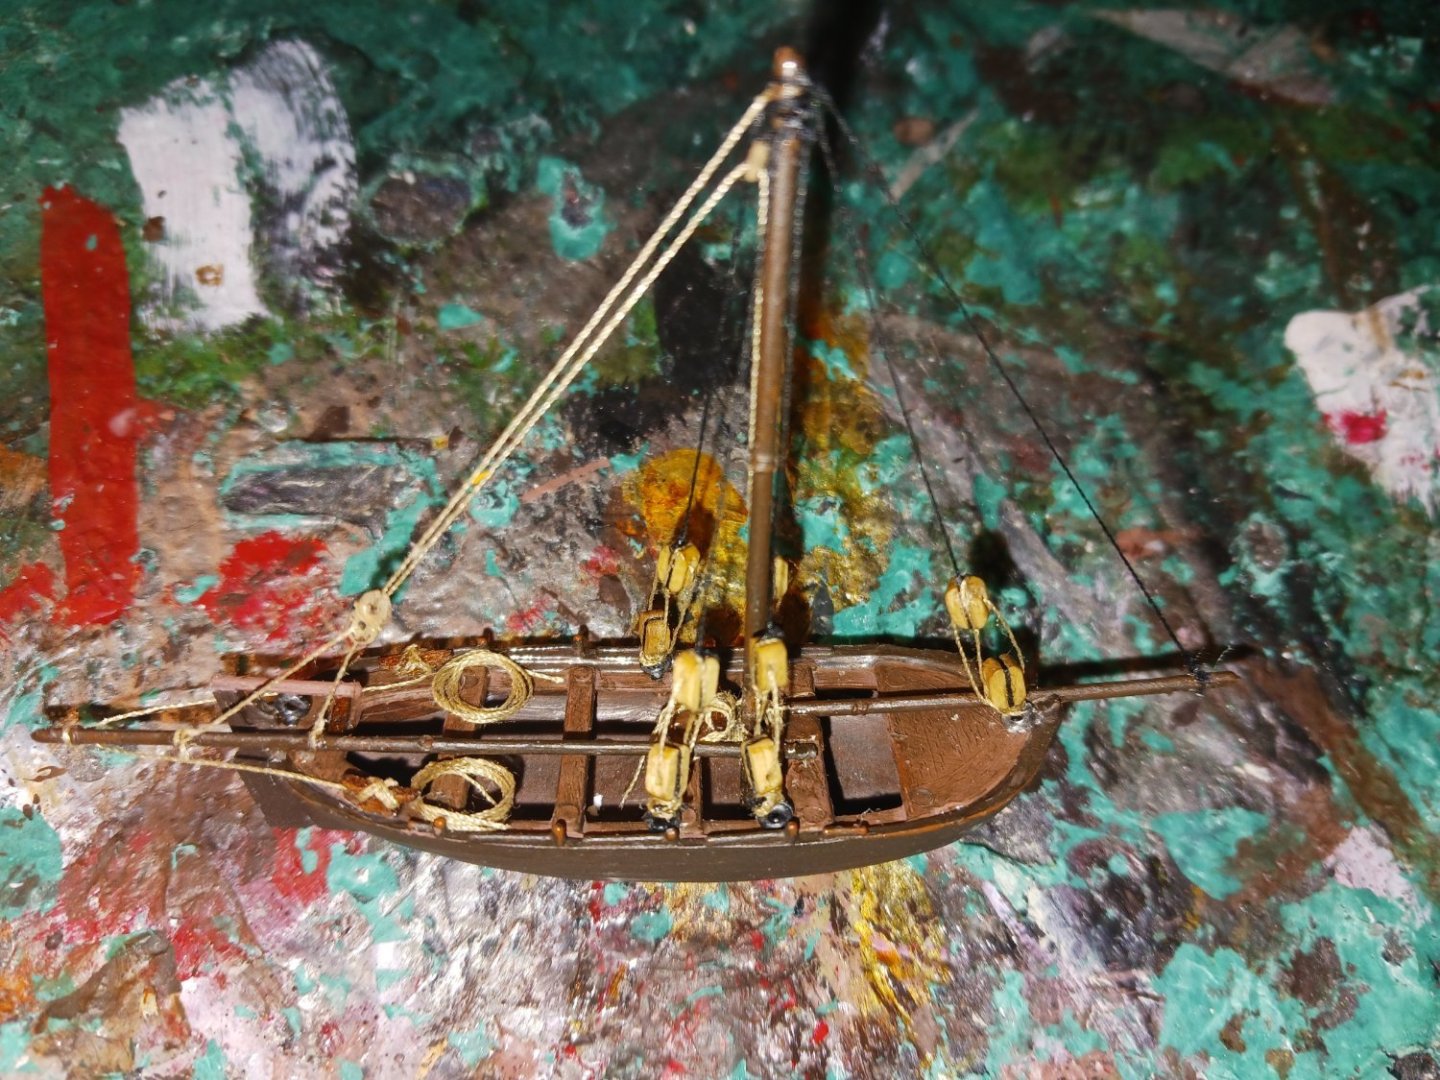
I finally got my super glue, so i went and finished the rigging on the ship's boat. First, i stropped the blocks and made up the shrouds and their lanyards. Then, i did the rest of the rigging. This included the vangs for the yards, the outer stay, and the rope hanks. 2 and a half hours later, the rigging is done. Have a look! This is not only a micromodel, but a model within a model. The interesting thing about this is it is, with the exception of the hull itself, a near-total scratchbuild.


- 279 replies
-
- 4
-
-
- Spanish Galleon
- Imai
- (and 1 more)
-
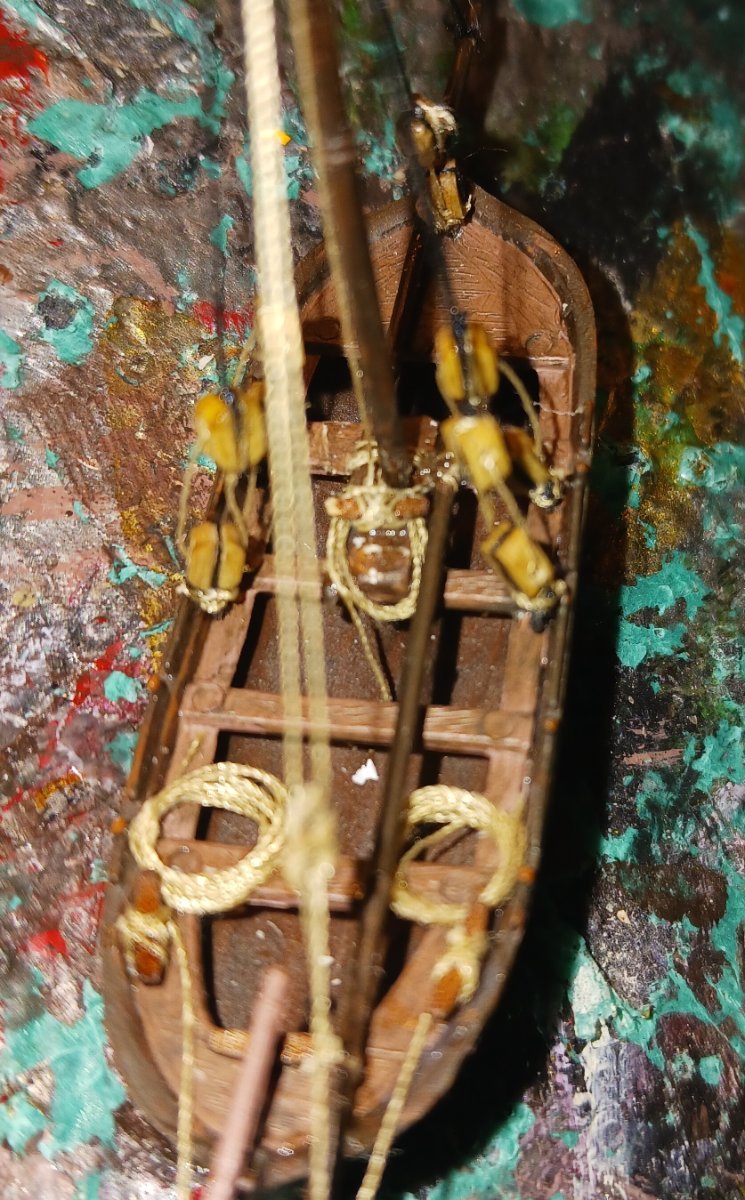
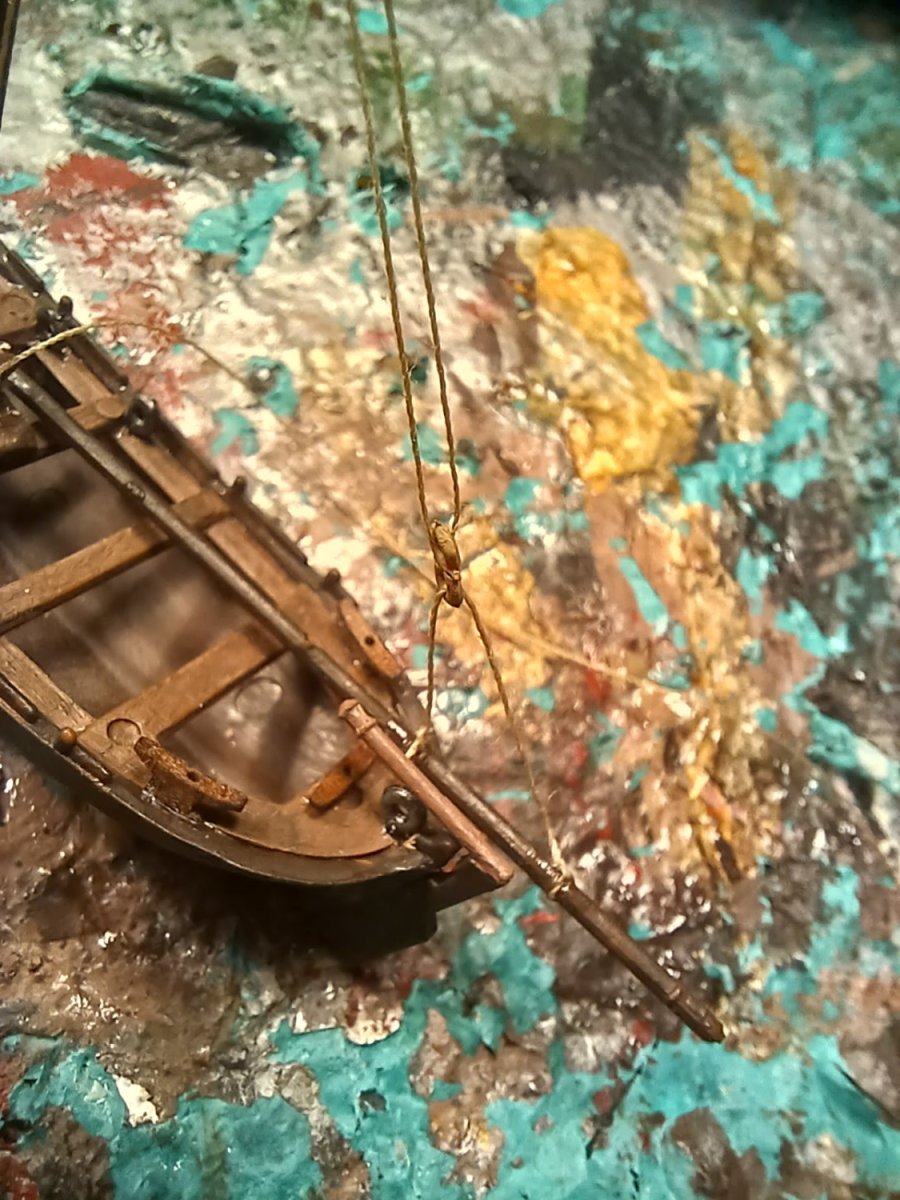
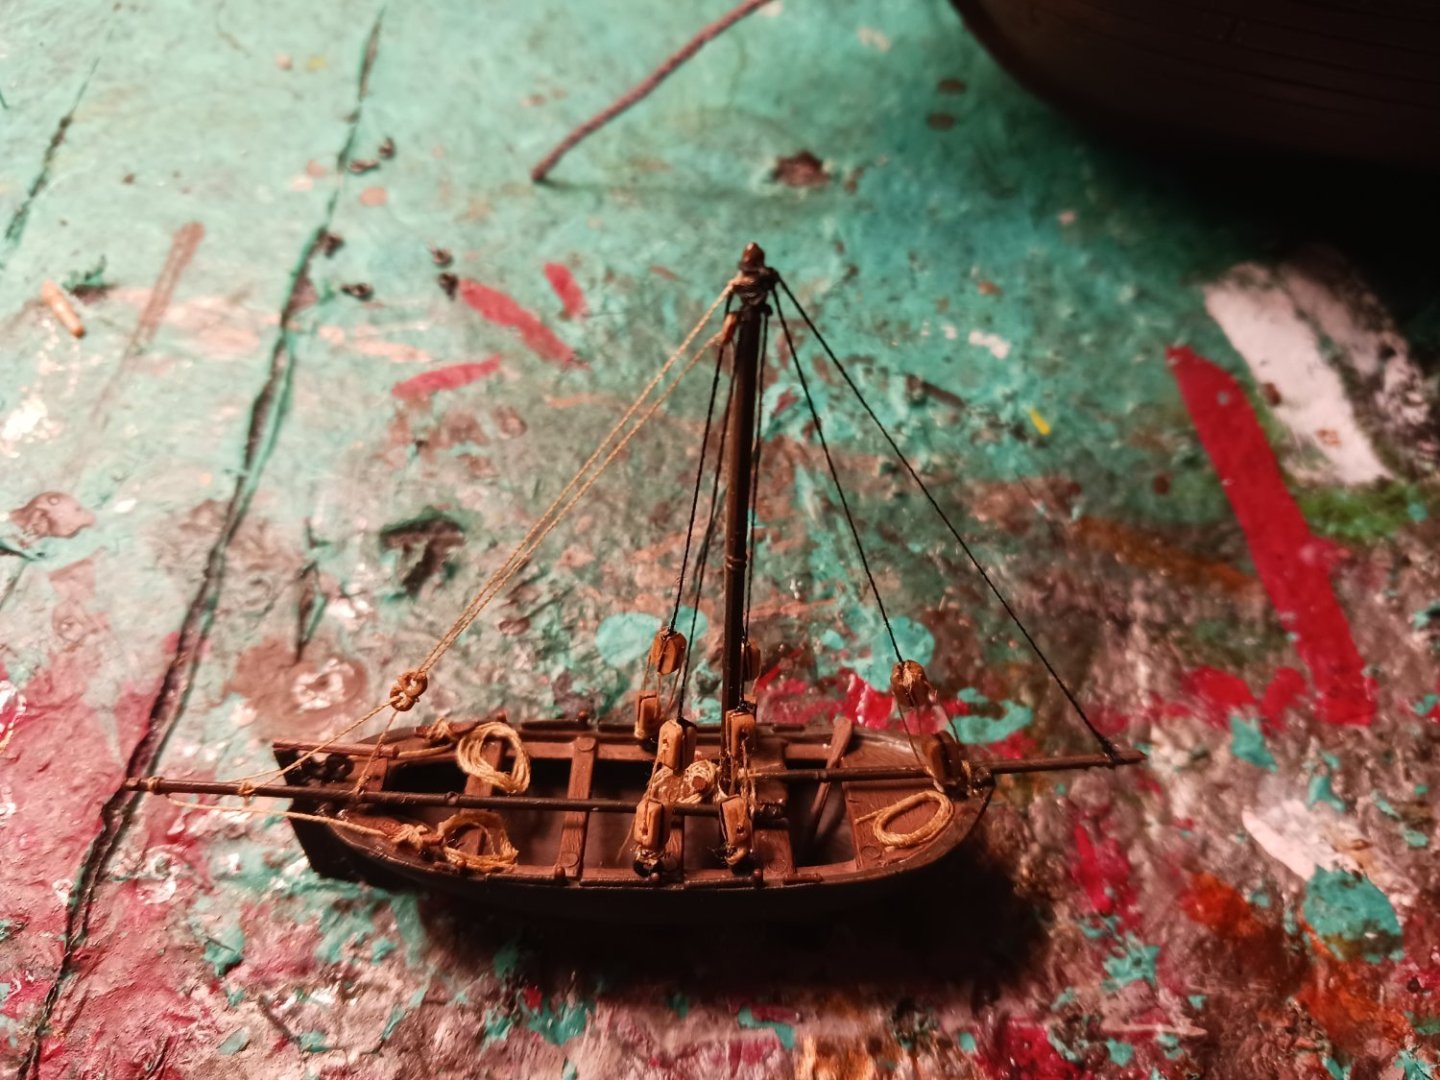
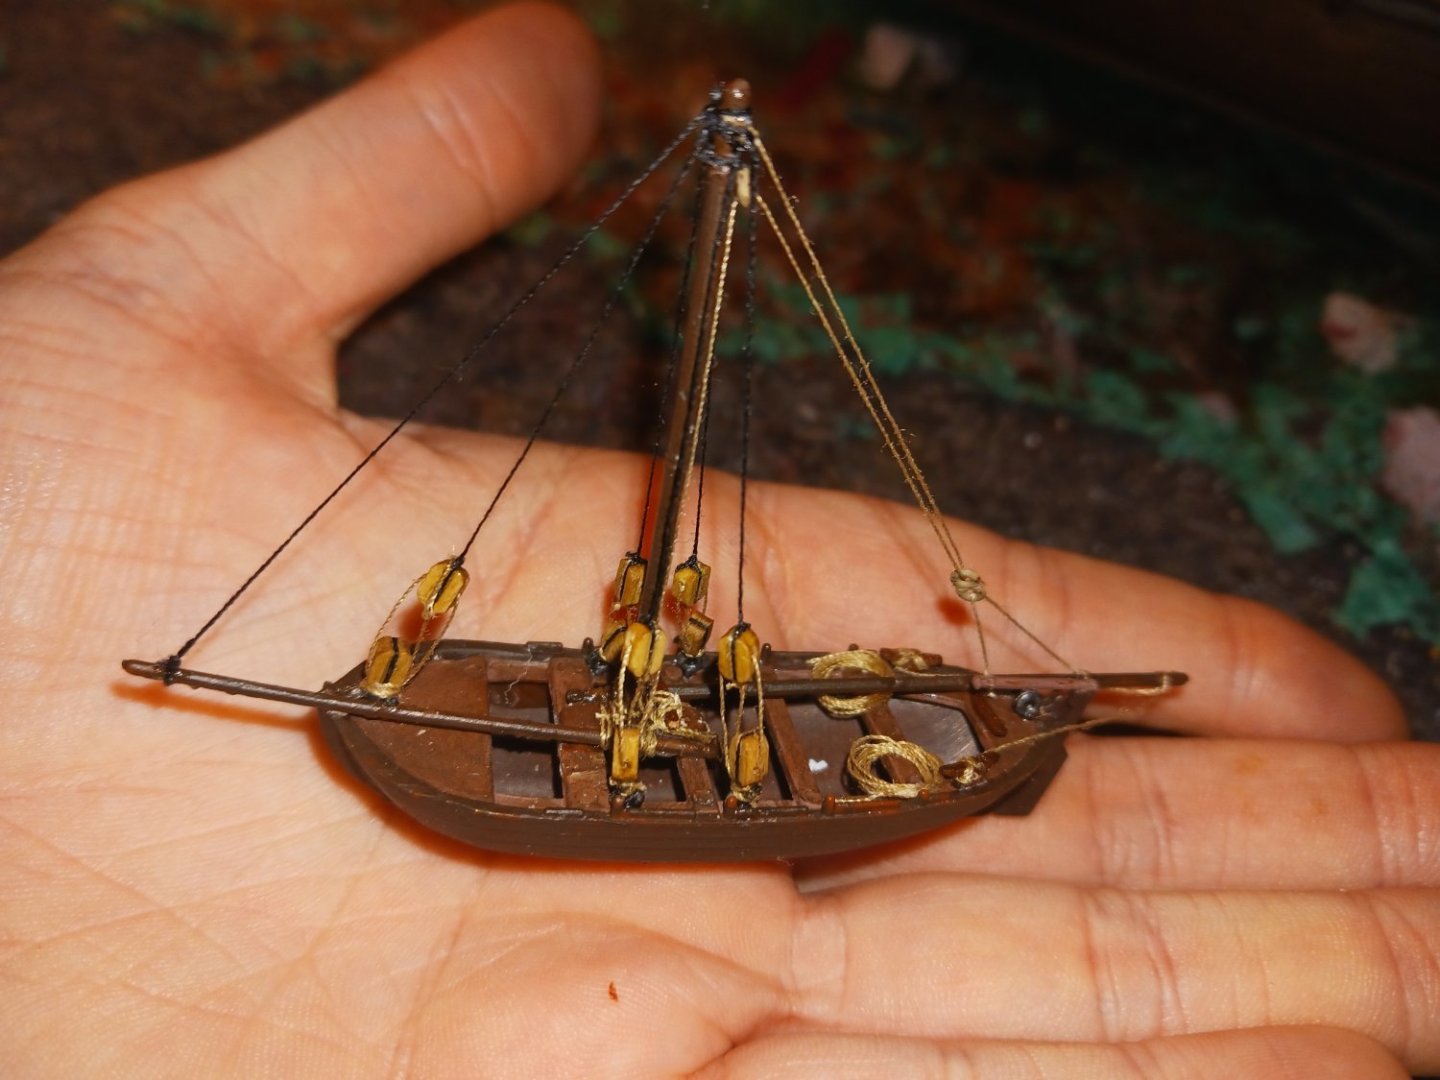
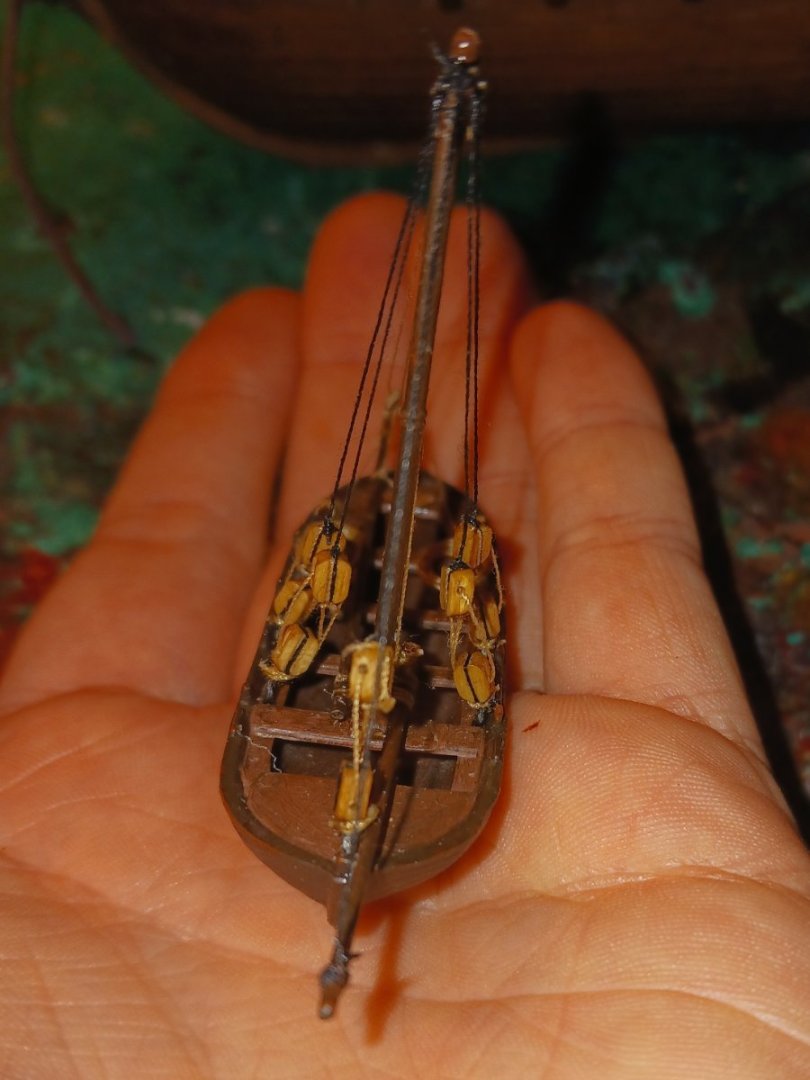
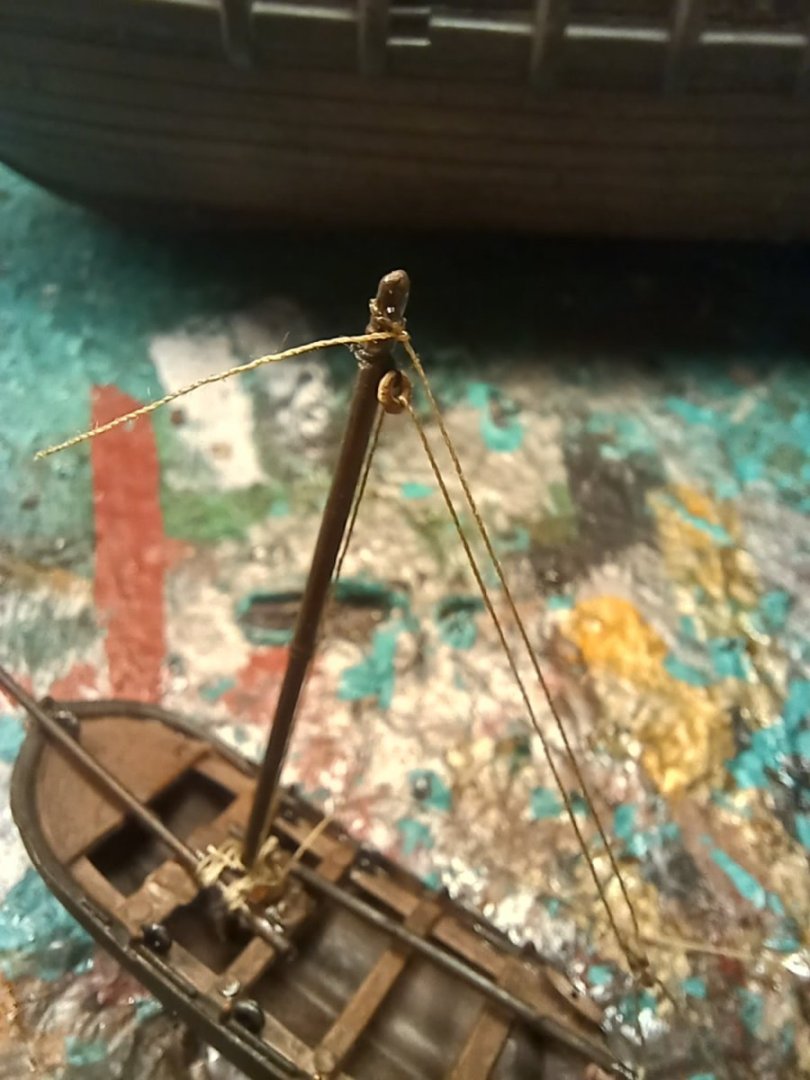
Here we go again! I rigged the halyard on the boat's sprit. I started the tye at the mast top: Then, the halyard went down through the double thimble, and back up to the single thimble at the top: Then, the halyard belayed down to the cleat at the foot of the mast: I will do all the necessary rope hanks at the end of the rigging phase.

- 279 replies
-
- 4
-
-
- Spanish Galleon
- Imai
- (and 1 more)