Wawona59
-
Posts
177 -
Joined
-
Last visited
Content Type
Profiles
Forums
Gallery
Events
Everything posted by Wawona59
-
 Thanks Clipperfan, Thank you for your input. If I understand your drawing correctly, the curved cutwater piece begins about the waterline and moves upward in a sweeping curve. At the top, behind the figurehead I assume that the curved cutwater piece is then sandwiched between the two naval hoods. I think I remember reading something to this effect in one of your posts. I must admit, this addition really enhances the profile of the bow into a more graceful shape.. John
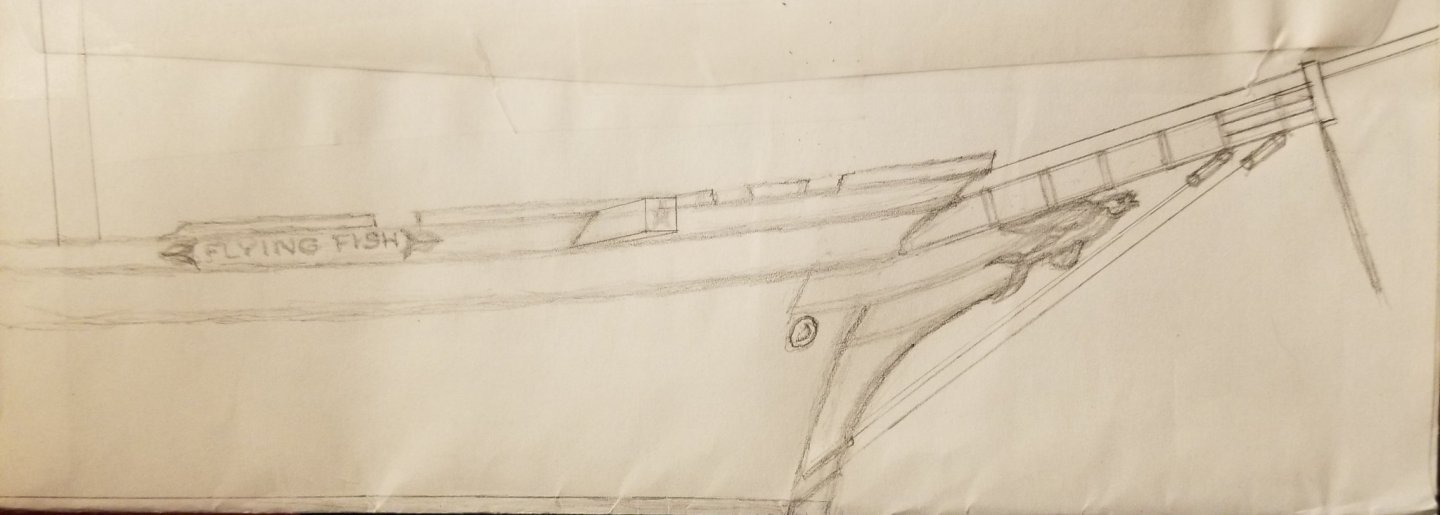
-
Thank you Rob, The nautical terms Naval Hood, Cutwater and Trailboard are new to me. I've learned quite a bit about these features this week. It's clear to me now that I will have to either modify or replace the kit's stem piece. Now, back to fixing my previous 20 year old mistakes. thank you John
-
Clipperfan, Thank you so much for your explanation. Now, I'm starting to understand and will definitely incorporate this detail in the bow of the Flying Fish I'm working on. These have been filed away for future reference. Thank you again for your explanation. Wawona59 (John)
-
Thank you for the clarification George. When I get to that point, I will follow the drawings that Clipperfan posted as well as your Flying Fish build. Thank you Wawona59 (John)
-
Hi Rob, There's a lot of fixing I need to do to make the hull and deck bulkheads true. I really did a crappy job way back when 20+ years ago. LOL Once I get the hull and deck bulkheads true to my satisfaction, I'll start the hull planking. BTW, what is the difference between a naval board and a trail board? The Boston Atlas article by Duncan McLean says that the flying fish did not have any trail boards. What is the difference?? Another topic or a future discussion I think. If anyone else has any insight to the difference, please let me know. ClipperFan, I hope you can enlighten me. Thank you for your post. Greatly appreciated. Wawona59 (John)
-
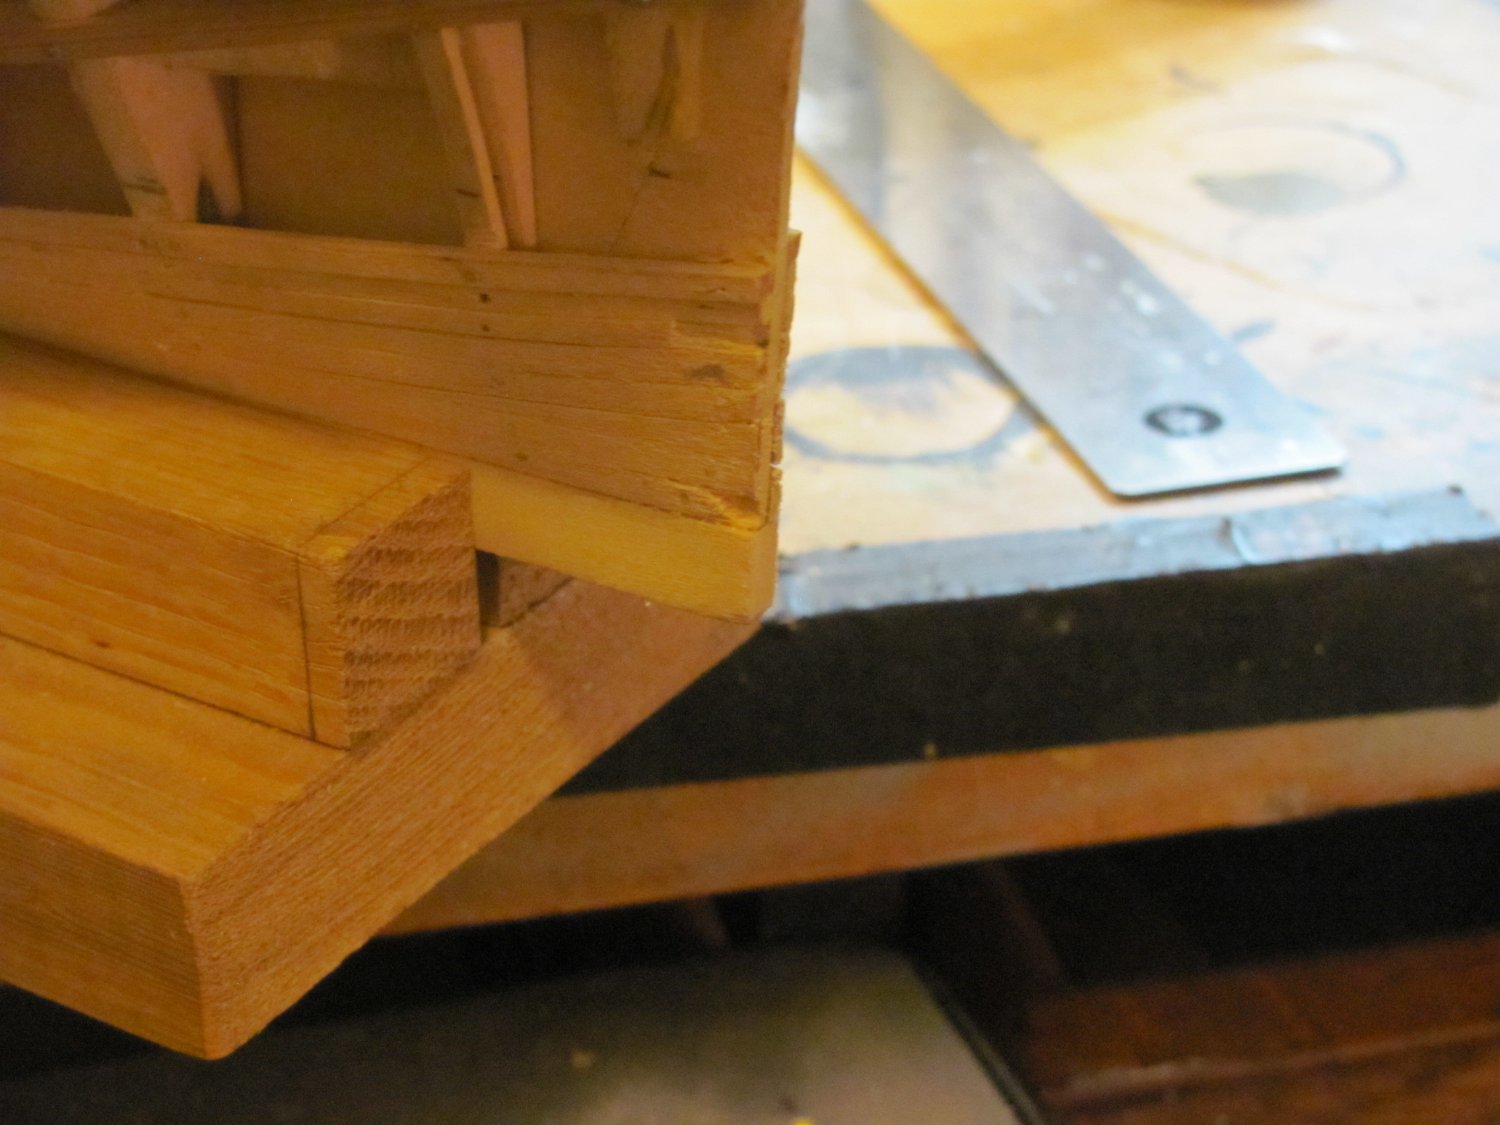
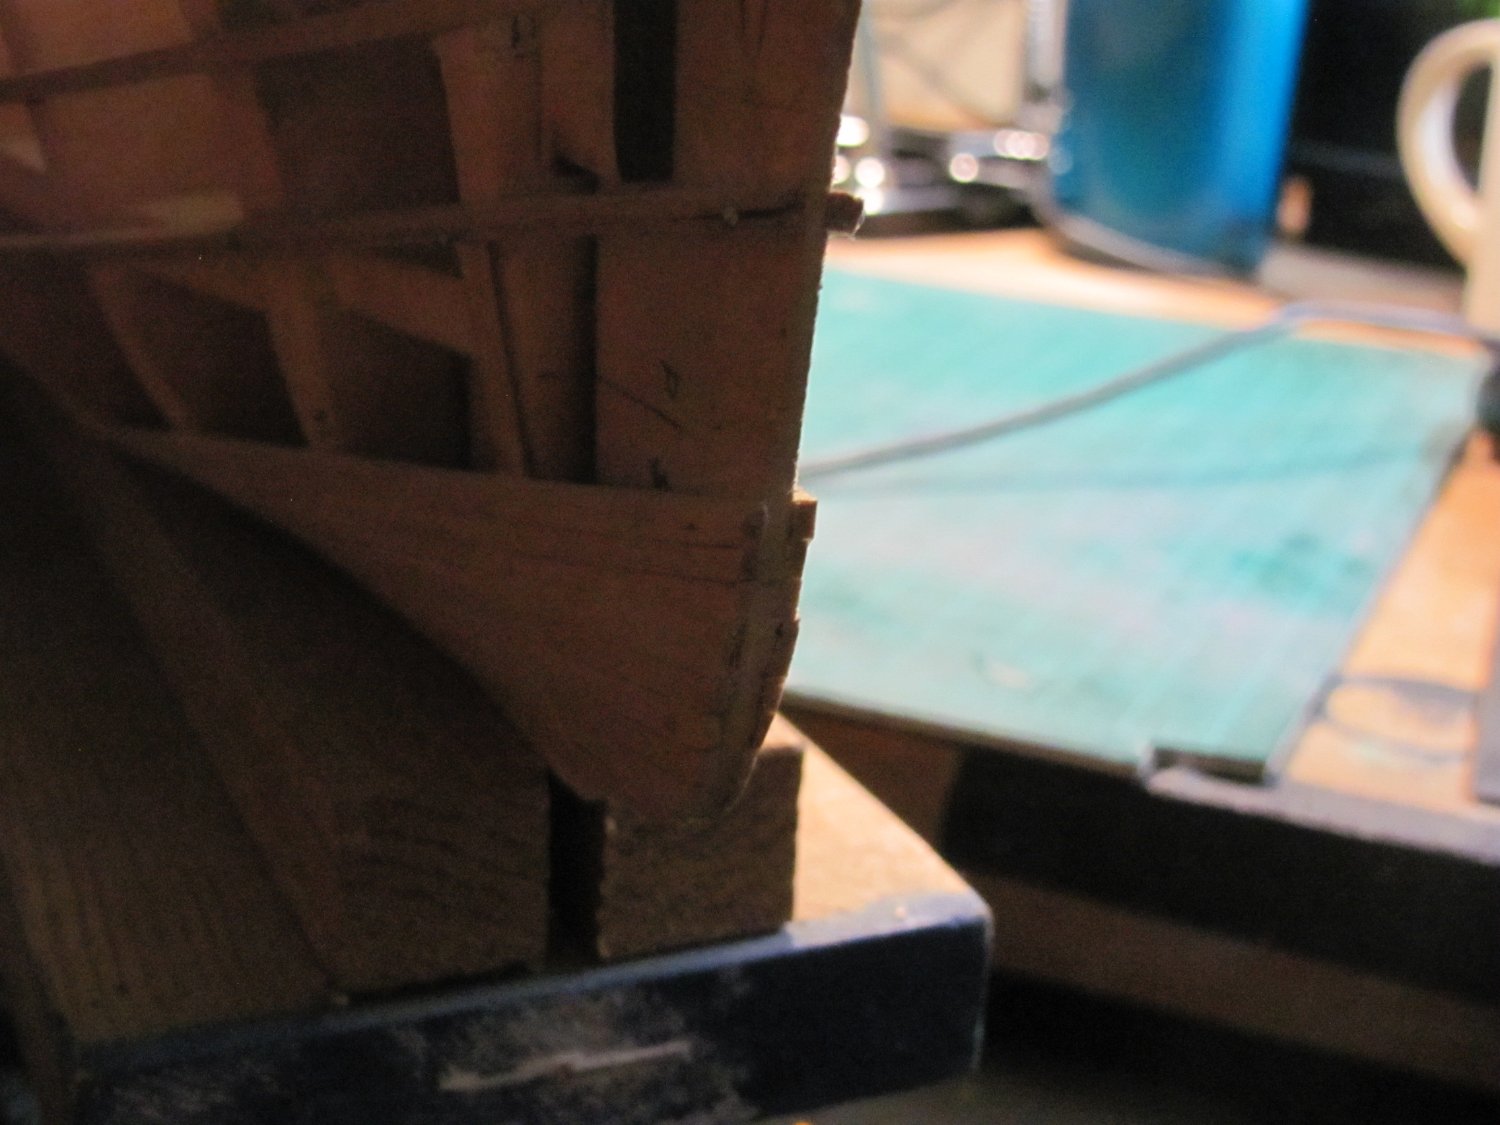
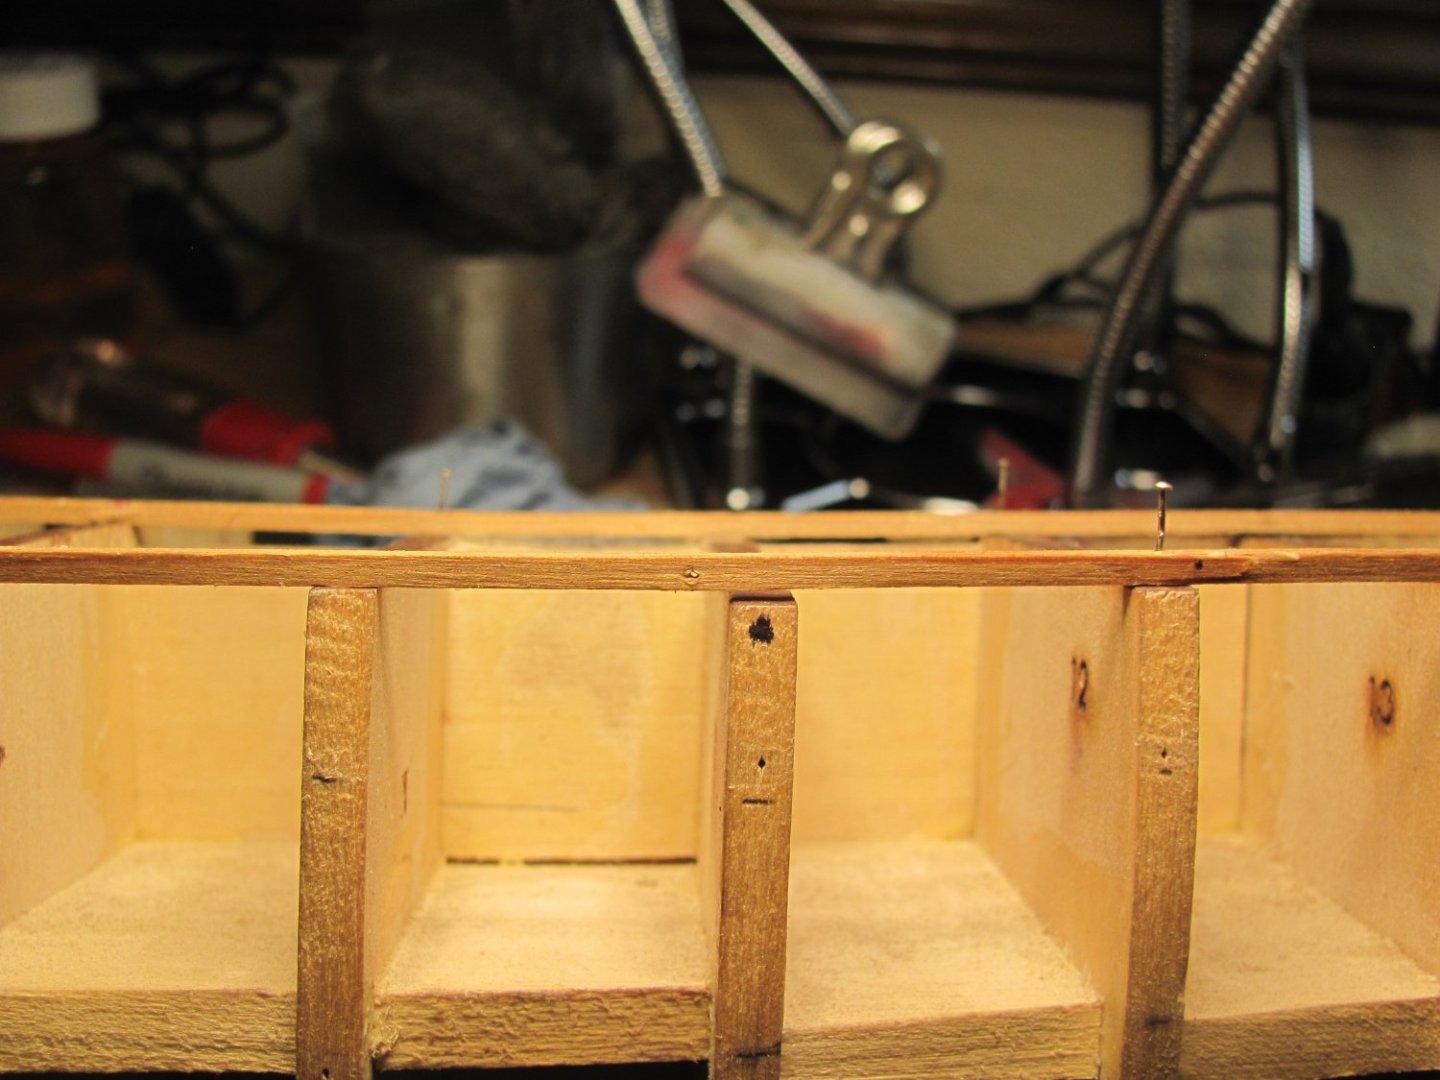
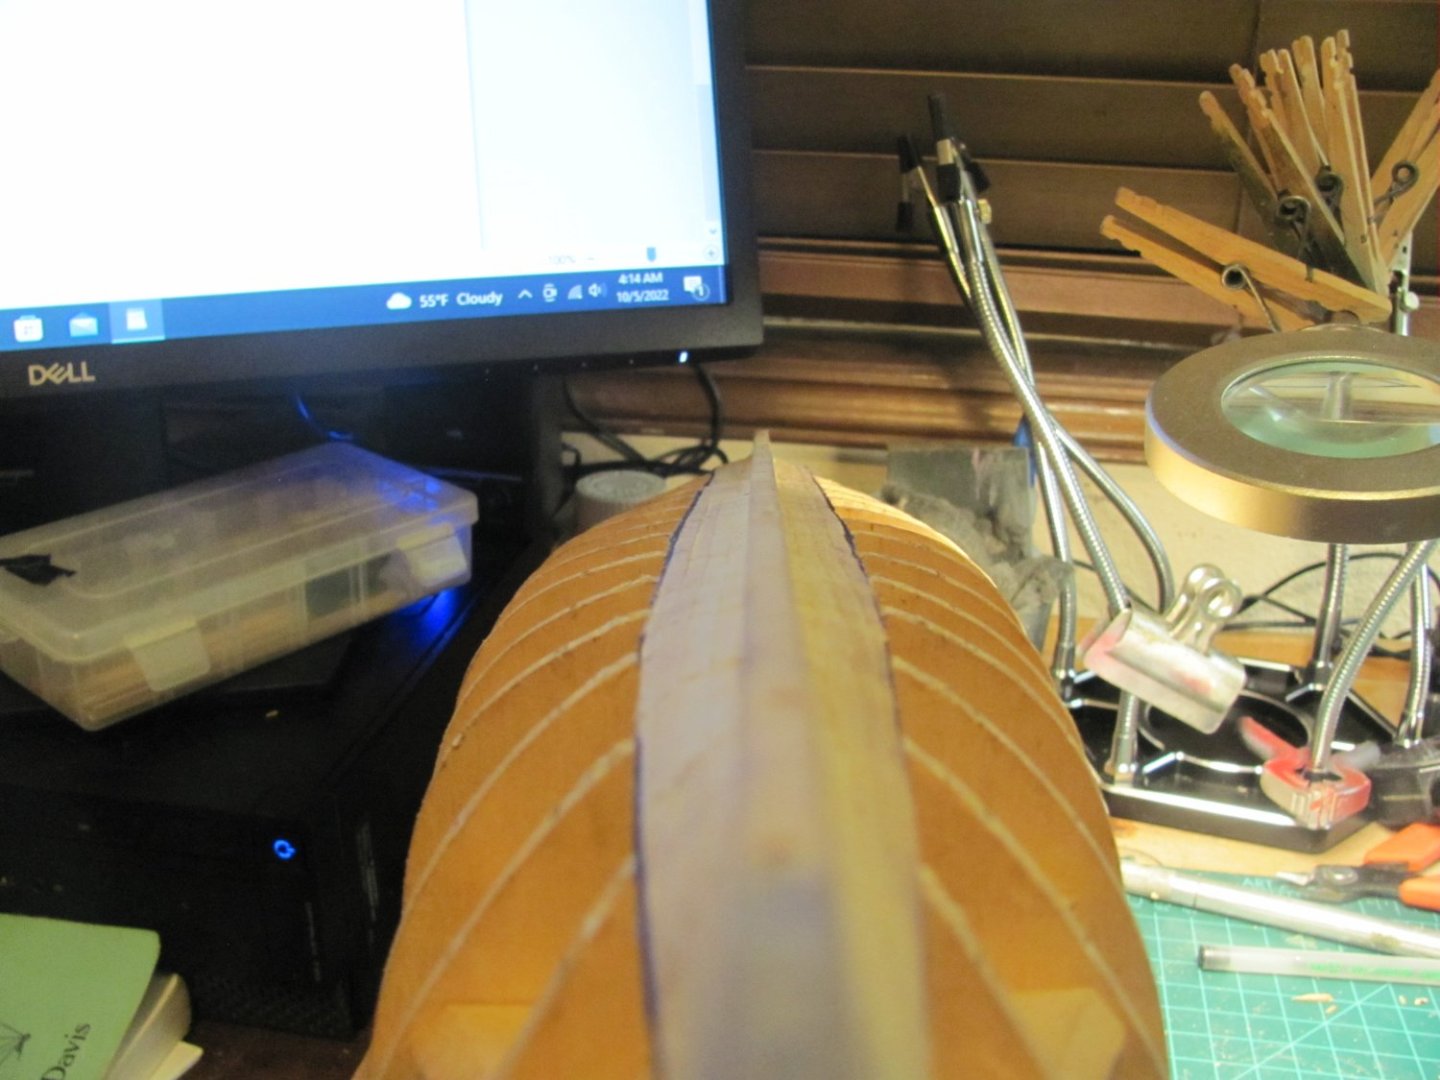
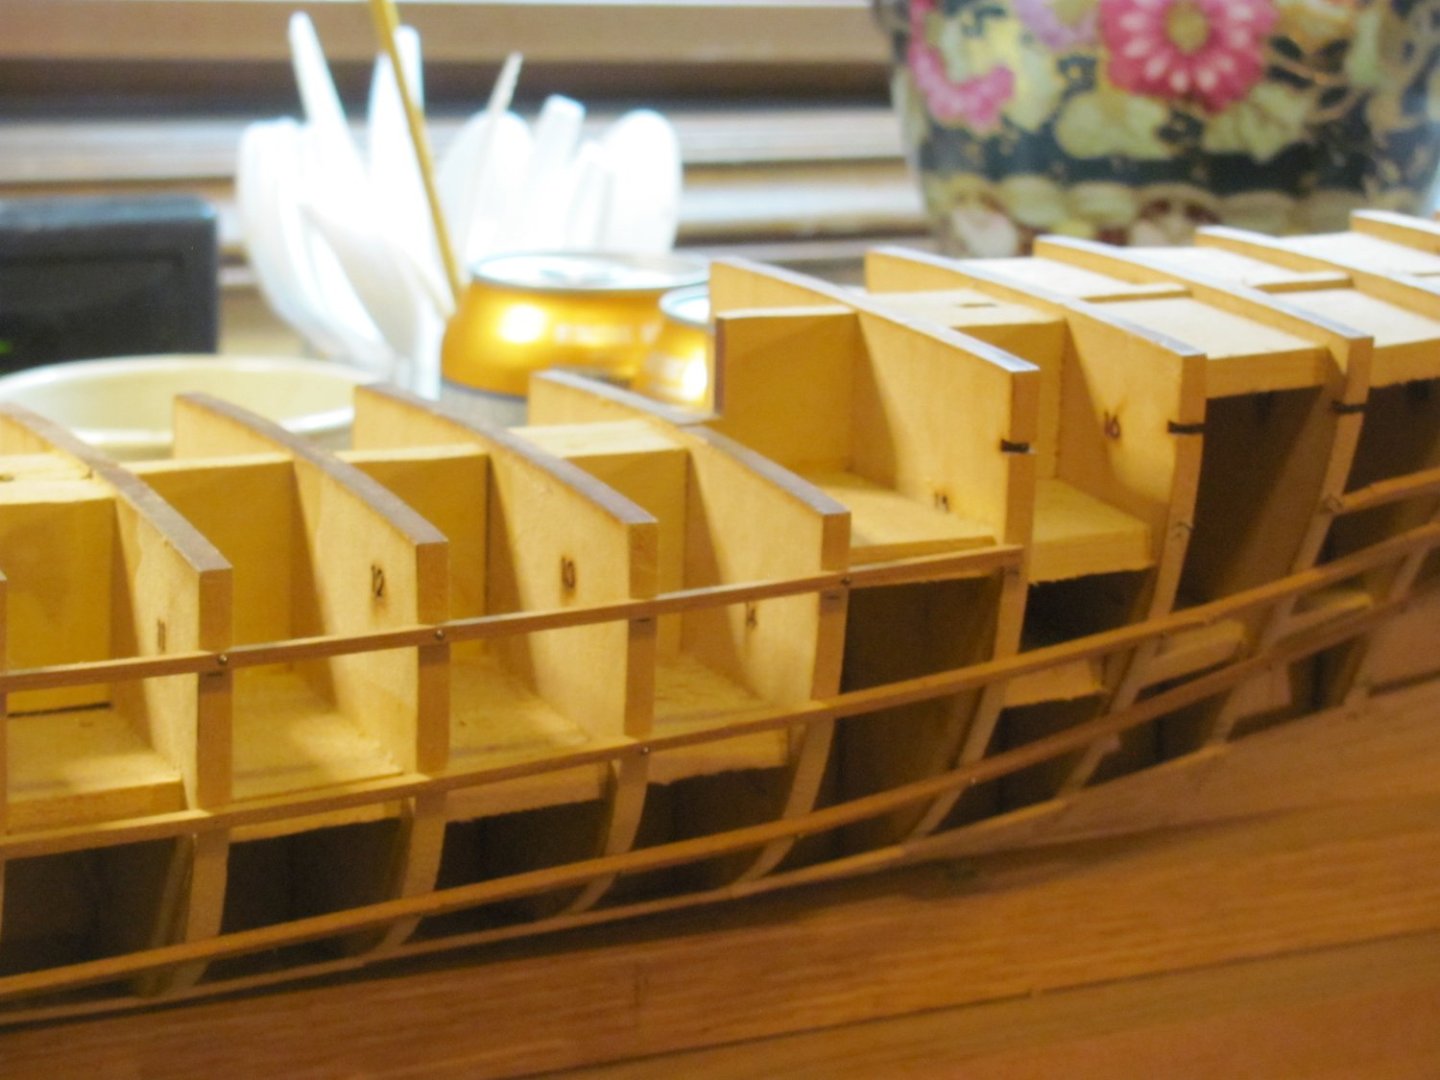
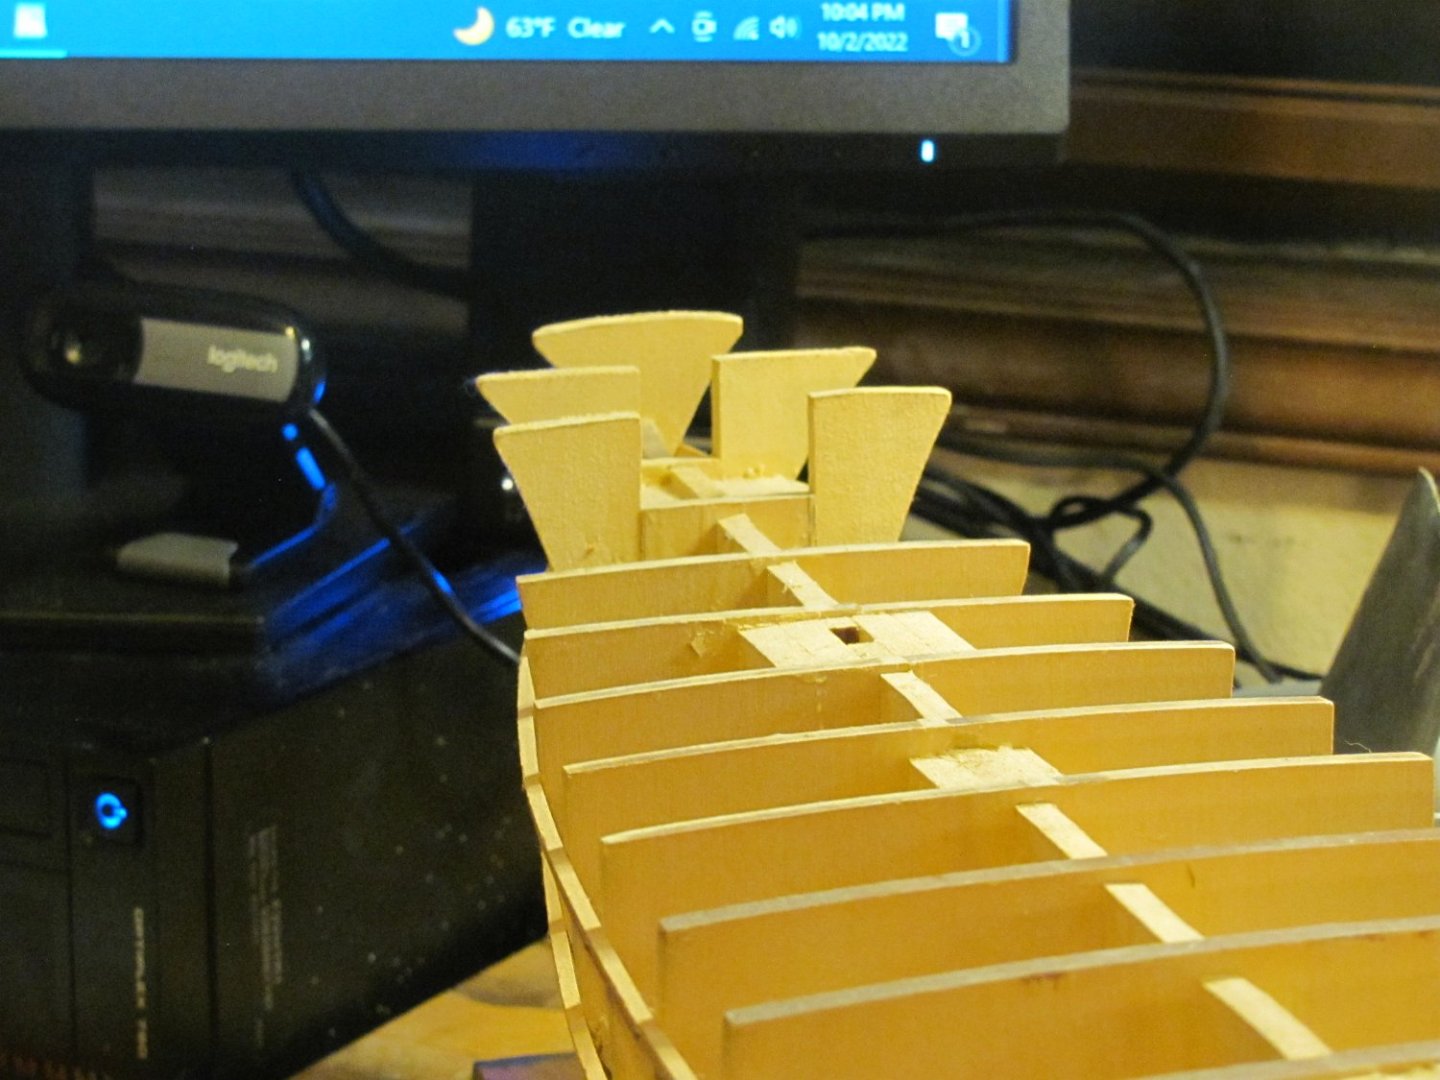
Build Log No. 2 The first task was to remove the battens and the unwanted/incorrect planking. Close examination revealed that things really went south when I started adding stealers. I have no idea of what I was thinking at the time. I also used bamboo dowels made with my drawplate. A sharp chisel was used to cut through the dowels. The garboard strakes seemed okay, so I left them alone plus three strakes from the keel. Using a metal straight edge, I determined that the keel was straight and true although I haven't trued up the remaining planks to make them symmetrical port and stbd. Next, I checked the surface of the deck level bulkheads for proper sheer and camber. Many of the bulkheads were not true with multiple gaps which need to be addressed and fixed. I'm starting to view restoring this hull as working on a piece of miniature furniture rather than a ship model. I hope some of you will stay tuned. My next log will go over truing up the deck bulkheads, fitting the stem, and stern pieces and fixing the bulkheads 1 and 2 forward that I had to replace.
- 34 replies
-
- 1
-

-
- Flying Fish
- Model Shipways
- (and 1 more)
-
sticker, I'm glad you found Tom Lauria's videos. My favorite videos of his are is 1. 1/48 model of the Kate Cory, 2. Creating an Artistic Impression, 3. Blocks Not from Scratch and his latest series, 4. Repairing the Emma C. Berry. Tom actually teaches. His videos along with Chuck Passaro's planking videos are some of the best and most useful I've ever seen. Happy Modeling, Wawona59
-
Thank you so much George for this wonderful build log (practicum). Also a thank you to all of the contributors to this build log including Rob, Clipperfan, Rick310, et al. The tips and photographs you've shared have been filed away and will be invaluable to me as my Fish project progresses. I've just started my build log for the Fish. My first step has been to dust off 20+ years of cobwebs and remove much of my substandard work. You've all given me something to shoot for. I expect to post another build log shortly. Thanks again Wawona59 (John)
- 600 replies
-
- 1
-
-
- Flying Fish
- Model Shipways
- (and 2 more)
-
Thanks George, I've been following your Fish build with great interest. In fact, I've got your build long on my computer screen right now while I'm working on my fish. I'm currently working on removing the messed up parts so I can start building her up again. Wawona59 (John) Current Build: Flying Fish, Model Shipways, 1:96
-
Log entry No. 1 Well, I'm going to take the plunge and start a build log. I could probably name this build log after one of my favorite Dr. Suess books I had as a child; One fish, Two fish, Red fish, Blue fish. There are several Flying Fish builds on MSW, so why not one more. I started this Model Shipways build in 1998 when my kids were small and had grand ideas of building the Fish as a grand piece for my office. Despite working as carefully as I could, I got frustrated with all of the mistakes I was making and put it aside in 2000. This was not the first ship model I've built. I just made a lot of careless mistakes rushing the build. Reading through the Fixing Mistakes thread on MSW gave me the motivation to take on the Fish again. The first order of business will be to fix all of the mistakes I've made. Here's some of the mistakes I will need to fix: 1. Did not fair bulkheads 5 and 6 enough resulting in a kink in the planking rather than a smooth run. I will need to remove the planking I've done and fair the bulkheads properly. 2. Sanded the planks as I went before I attached the stem. This resulted in a misshapen bow and too thin planks. Need to repair and bow and properly fit the stem. 3. Broke bulkheads 1 through 3 in the forecastle. Need to properly trim the replacement bulkheads I made from scrap basswood. 4. Did not properly taper the planks and installed stealers when I didn't need to. I will be removing the incorrect planks and re-installing them. 5. Need to replace the stern part of the planksheer that I ineptly carved. 6. Cut the stern part of the keel off too short so that it doesn't extend below where the rudder will be installed. I work exclusively with hand tools. I do not use so much as a dremel or air brush. One of the reasons is that I like to work at night when it is quiet. I don't want to disturb the admiral with the noise of machinery. The second reason is that I love working with hand tools. Surprisingly, despite sitting in an unheated garage for 20+ years, the hull is still true with no twist. I'll be working slowly and methodically and will post progress periodically. Please wish me luck. Wawona59 (John)


- 34 replies
-
- 3
-
-
- Flying Fish
- Model Shipways
- (and 1 more)
-
Welcome to Model Ship World RH. In response to your question: I have many, many questions but one of the most fundamental ones is, did only the running rigging go to belaying pins with the standing rigging going to the chain plates and Samson posts? Any advice would be most welcome. In my limited experience, I've only seen running rigging go to the belaying pins. On this and many other questions; research is your friend. Welcome aboard! Wawona59
-
I would definitely read jaeger's and ccoles posts again as well has his article. Build a smaller POB model first; preferably one that is not bluff bowed and has a simpler stern. Frank Mastini's Ship Modeling Simplified can give you some ideas on setting up shop and basic POB modeling methods. If you heart is set on building a 50" Victory start compiling your research now. I recommend: Nepean Longridge's: anatomy of Nelson's Ships which is a classic, John McKay's The 100 gun ship Victory from the Anatomy of the Ship Series. This will give you a good start in your research. Have fun! Wawona59
-
Welcome to MSW DanG. If you are into shipmodeling, nautical researching or just BSing about the same, you've found the right place. Although I'm relatively new to MSW, I have learned sooo much about building techniques from the build logs. I hope you enjoy your time here. If you have not already done so, feel free to post to the new member introductions on the home page. Welcome to the group.
-
I Mark, welcome to Model Ship World. I'm relatively new to MSW but I visit the site almost every day for ideas and inspiration. Everyone is GREAT, friendly and helpful. Here is a photo of the Victory Sail from Trafalgar. I assume most of the damages was done by bar shot, chain shot and star shot. I hope this gives you some inspiration for your build. Wawona59
-
Welcome to the MSW forum Tanner. Popsicle sticks can be a good material for modeling. (Especially the ones from Hagen-Daz chocolate fudge ice cream bars LOL) Are you working from plans or is the shrimp boat of your own design? There are many sources of plans available. You can also search the MSW site for shrimp boats. I'm sure that there are a number of models on the site that will inspire you. Welcome to the forum Wawona59 (John)
-
Hello Kristan, Welcome to the MSW forum. I commend you for wanting to build a ship model. I built my first watercraft model when I was about 10 years old. As I recall, it was a canoe where you folded up the sides and sewed the bow and stern together. I also built several plastic ship models like the Wanderer whaling ship and the 1:96 scale Constitution, Cutty Sark and Thermopylae. I recommend that you start small and build a kit from a reputable manufacturer. You cannot go wrong with Bluejacket Shipcrafters or Model Shipways. Both companies are based in the USA and have been producing ship model kits for decades. A good first project would be a Grand Banks Dory. This is a fishing craft that was featured in the Book Captains Courageous by Rudyard Kipling as well as the 1937 movie of the same name. Both Bluejacket and Model Shipways produce a Grand Banks Dory kit. You can download the instruction booklet for Model Shipways kit from their website. This will give you an idea of what is involved in building a wooden watercraft model. You will also learn some nautical terminology such as abaft, thwarts, gunnels, port, starboard, etc. Good luck with your first project. Save the 104 gun ship of the line model for later. Welcome to the MSW group. I'm sure you will enjoy yourself. Wawona59 (John)
-
Hello everyone who is following this outstanding build of the Glory of the Seas. I used to live in West Seattle and am very familiar with the Fauntleroy-Brace Point area where the remains of Glory of the Seas are. Here's a local blog I came across which I thought you might be interested in. Here's the link: https://batgurrl.net/2021/07/03/demise-of-a-clipper-ship-on-endolyne-beach/ I'm really enjoying following this build. Wawona59
- 3,515 replies
-
- 1
-
-
- clipper
- hull model
- (and 2 more)
-
Greeting from Pennsylvania
Wawona59 replied to New England Captain's topic in New member Introductions
Welcome to MSW Andrew. You are in good company if you love ships. This is THE place. I am relatively new to MSW and I have found everyone welcoming and friendly. I'm currently working on the USS Olympia named after the state capital where I live, Washington. As soon as I get a decent camera I'll be posting pictures and starting a build long on my Olympia project. Welcome Aboard!! John Newcome -
Hello Chriss, Welcome to Model Ship World. I'm a new member to this group. Everyone I've met has been very encouraging and friendly. This is a great group. Wawona59 - John
-
Hello Robp1025,
I have just started working on the Encore 1/232 USS Olympia kit Premium Edition. The kit has photo-etch, resin parts and a wooden deck veneer. I haven't gotten very far. I've got the hull halves together with a base coat of white and mounted on the pedestals.
If you are unable to find an Encore kit, I'm willing to sell you my Olympia kit that I've started.
Wawona59 - John Newcome
If you are unable to find a kit,
-
Interesting. I've built a few card stock model aircraft that I downloaded off of the internet. I was never satisfied with my meager results. Your ship is really coming along and better than I could ever do. Nice work!
-
Welcome aboard AL. Thank you for your support of MSW.
-
Hello Steve, Welcome to the MSW forum. I hope you don't stress too much on the Victory project. Modeling isn't about stress or building to another person's deadline. It's about enjoying the building process and sharing with other like-minded modelers. Enjoy your build.
-
Hello Seahorse, My name is John Newcome, (Wawona59). I'm a newbie to the MSW group. Like many, I'm re-discovering ship modeling now that I'm approaching retirement. I really like the work that you have done so far on the Victory cross section. With all of the references you have, you could have some fun filling up the interior. You could install hammocks, cannons and equipment, lowered sailor's mess tables, half-eaten meals, battle remnants, etc. etc. This could be very interesting. While not my primary interest, I could consider building one of these cross sections as a lamp with the center tube representing a mast. I really like what you've started! Have fun and be creative. Most importantly, enjoy yourself. I will be following this build. May you have fair winds and a calm sea , John (Wawona59)
-
Welcome to the MSW forum Ferrus. I'm a new member of MSW as well. this is a great place to share ideas and advice. When I was a kid over 50 years ago I built several of the Revel 1/96 ship kits; Constitution, Cutty Sark and Thermopylae. These models were my introduction to rigging my own ratlines and also taught me the nautical names of many of the lines; halyards, braces, clew lines shrouds, etc. etc. You made a good choice in model subject. Good luck with your build and enjoy the journey. Hope to see some in progress shots of the United States build in the future. I should be posting my first build log on the forum later this year. John