Azzoun
-
Posts
327 -
Joined
-
Last visited
Content Type
Profiles
Forums
Gallery
Events
Everything posted by Azzoun
-
 Wow- that didn't last long!
 -
Wow! Think she'll make the trip to New London? or ModelCon? I'd love to see it in person! Joshua
-
Pulled the Trigger == Lathe coming
Azzoun replied to kgstakes's topic in Modeling tools and Workshop Equipment
Hi, Congrats on the purchase! Just curious, do you have any machining background? If not, do you have a strategy for teaching yourself? I ask because I own a lathe but have little experience. Joshua -
Hello & HNY on 123123 from Philadelphia
Azzoun replied to ChiefScienceOfficerDrew's topic in New member Introductions
Hi Drew, welcome to Model Ship World! This is a great community and very active forum. I'd like to also offer if you're interested in some in person comradery with ship modeling, the Philadelphia Ship Model Society meets at 1pm on the third Sunday of the month at the Coast Guard Station. Happy to fill you in on any details if you're interested, just send me a message. Good luck on your Lightening build! Joshua Fichmann https://www.philadelphiashipmodelsociety.com/- 11 replies
-
- 4
-

-
- racing sailboats
- commercial ships
- (and 1 more)
-
Good luck with the build George, I own this kit and will be following with interest.
-
Check out this video discussion on making sails by NRG Director, Ron Neilson.
-
Little late to the game but your planking is top notch!
-
Well, any updates going forward, try to start on the starboard side, you're bound to do it better by the time you get to the port side. Port side looks great!
-
Well, were you planning on copper plating her? that'd cover up any kind of rough patch work right smartly. I'll be re-joining the PDN building event early 2024 as I wrap up the Mogami - mine's been languishing on the shelf for 7 years! We may be in tandem then!
-
acrylic matte medium works pretty well too on ropes
- 166 replies
-
- 5
-
-
- Maine
- BlueJacket Shipcrafters
- (and 1 more)
-
I don't know how you're supposed to be able to sand those Shipways blocks into something passable?
-
It'd be helpful if you posted photos of the kit so people can see how intact it is considering you're already disclosing damage to the product. GLWS
-
Ha.. Rigging is my fav. part! Looking good!
-
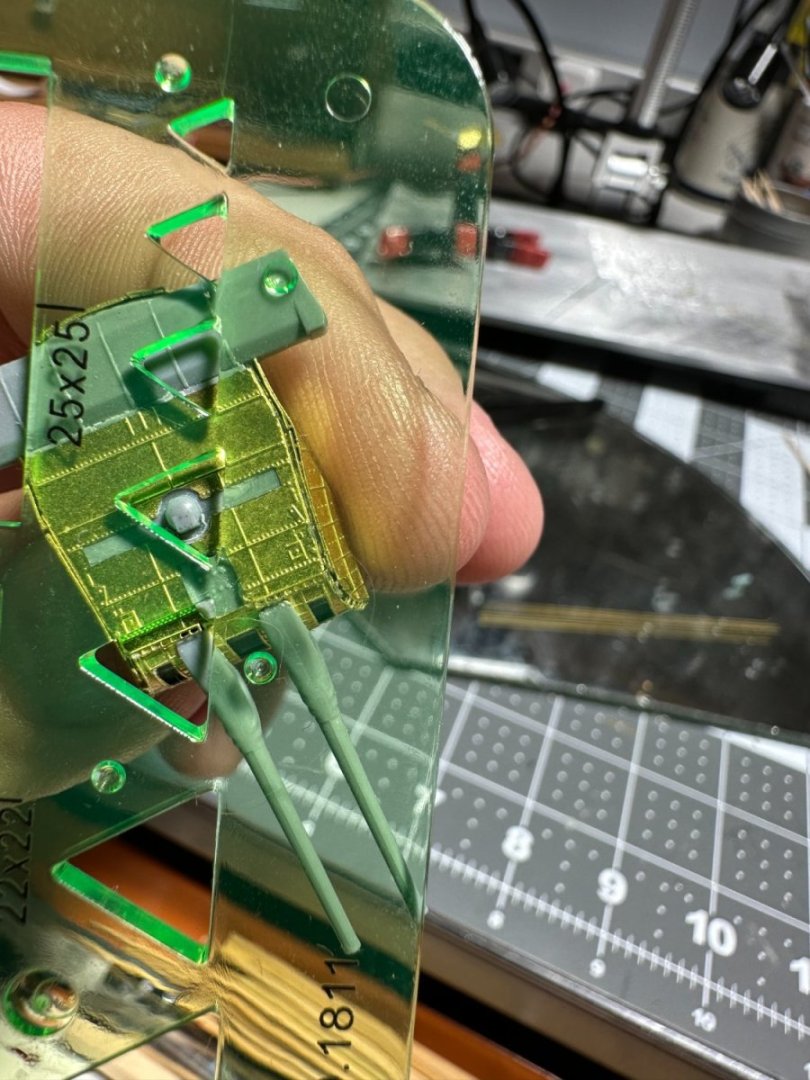
Thanks! The Mogami has been keeping me busy but I've been itching to get back into the wood. I have all the deck furniture assembled and prepared, just need to apply to the model. Did your kit come with those carronade sleds? Mine came with brass guns that looked over scale to be placed on gun trucks. I casted new gun in resin and scratch built some sleds out of wood. I don't know.. talking about it makes me want to dig into this weekend! Joshua
-
I'm excited to see your progress on this, the PDN has been a shelf queen of mine that I plan to return to soon!
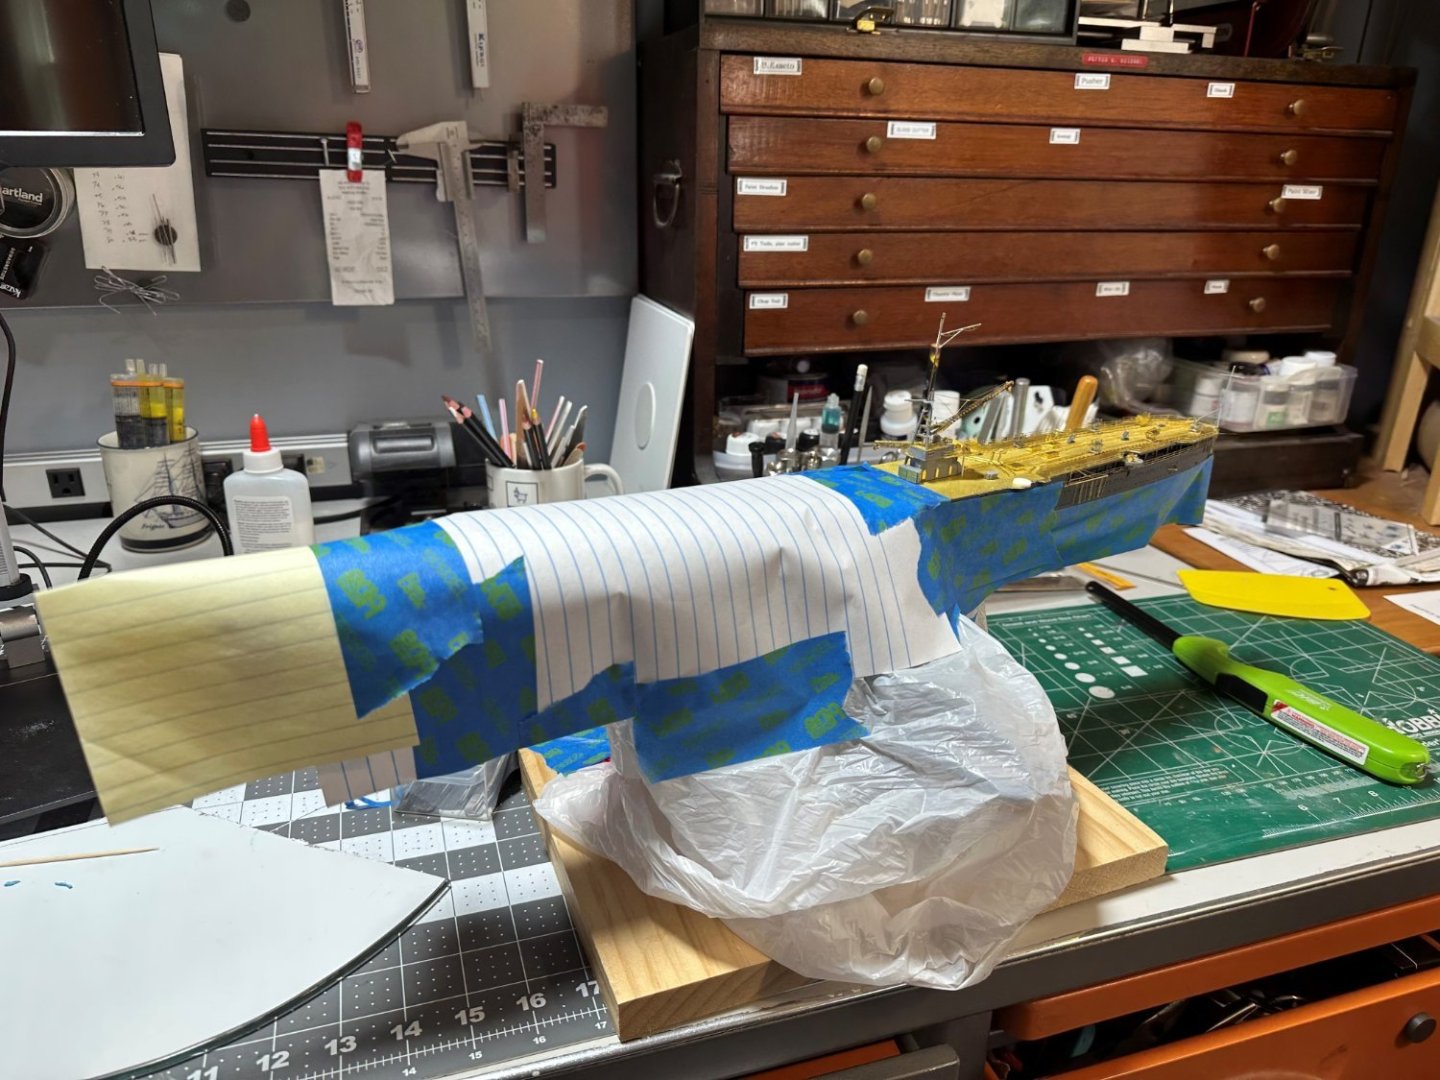
-
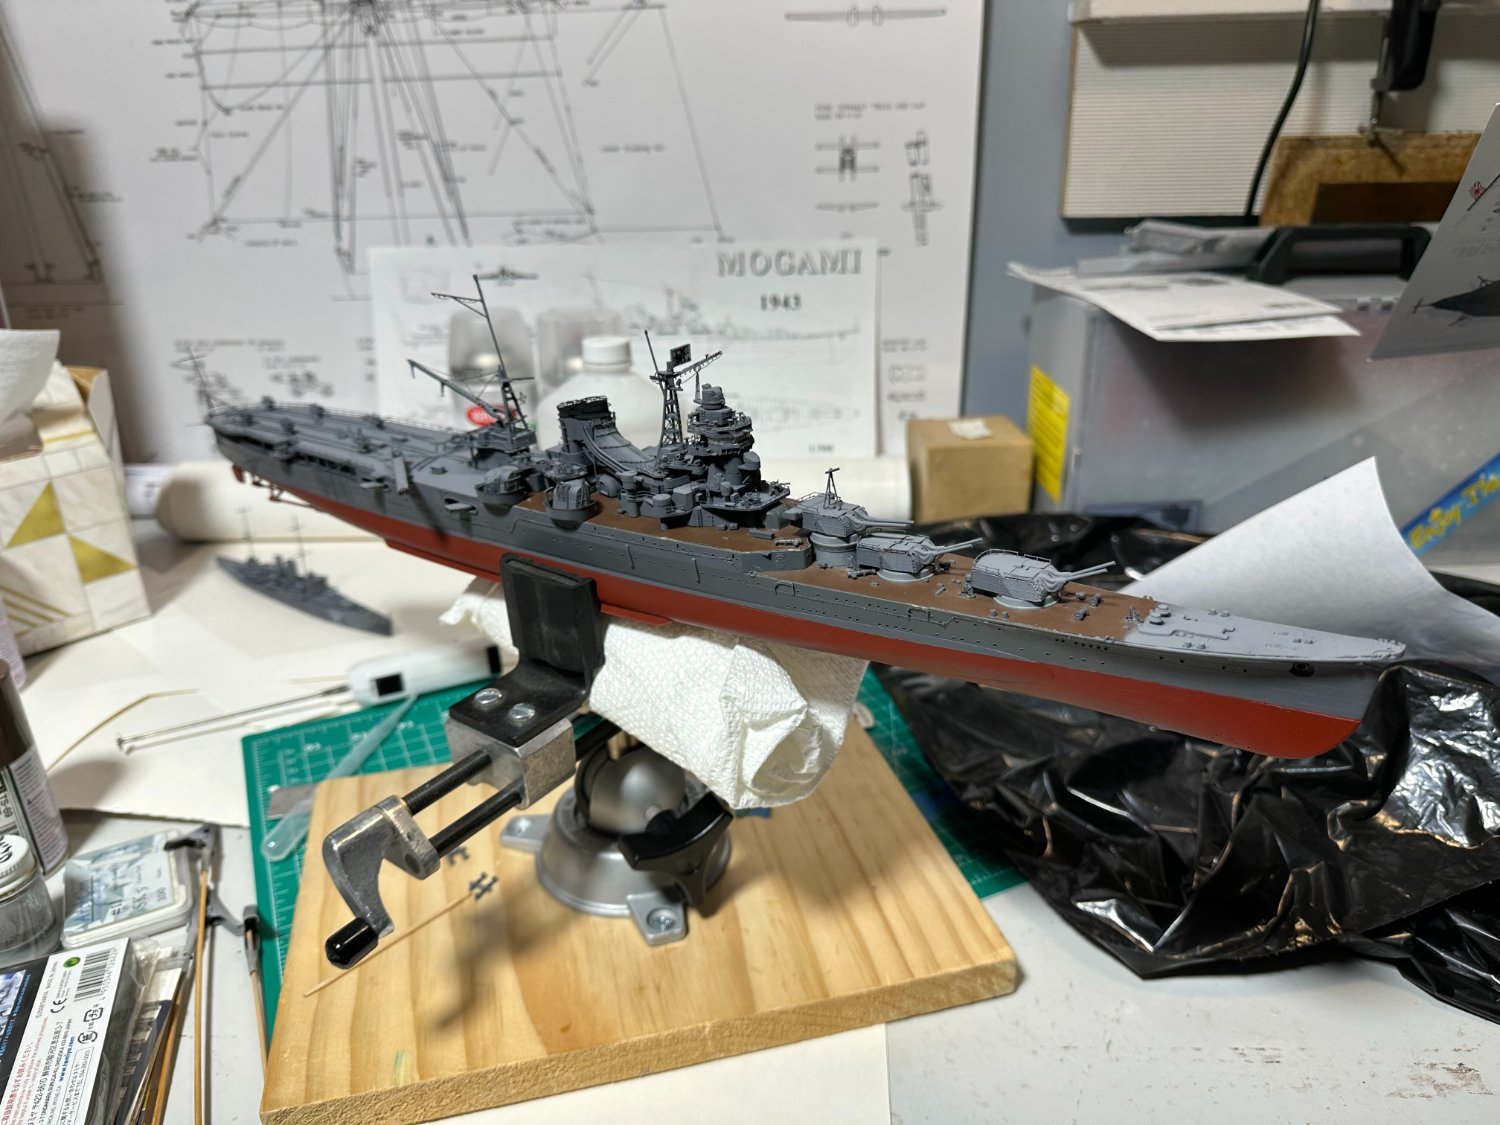
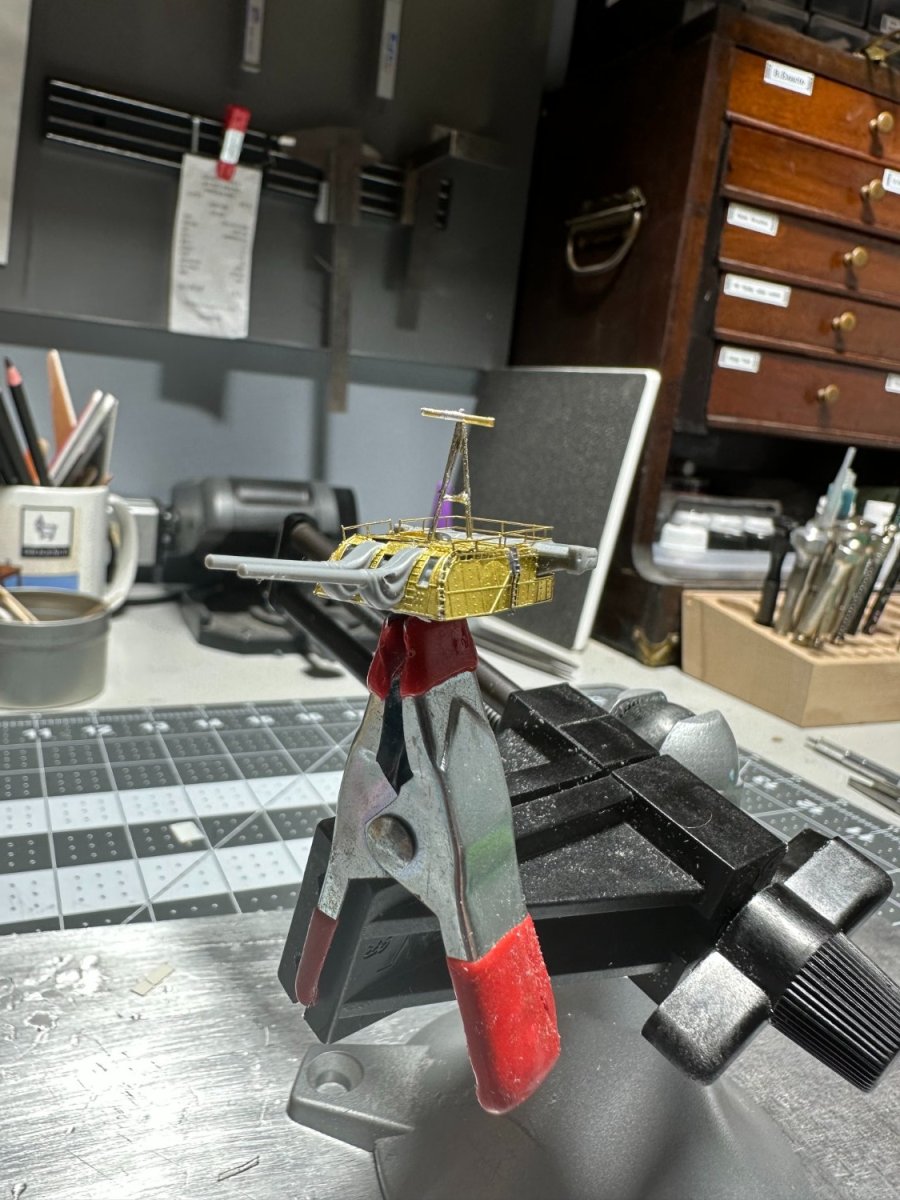
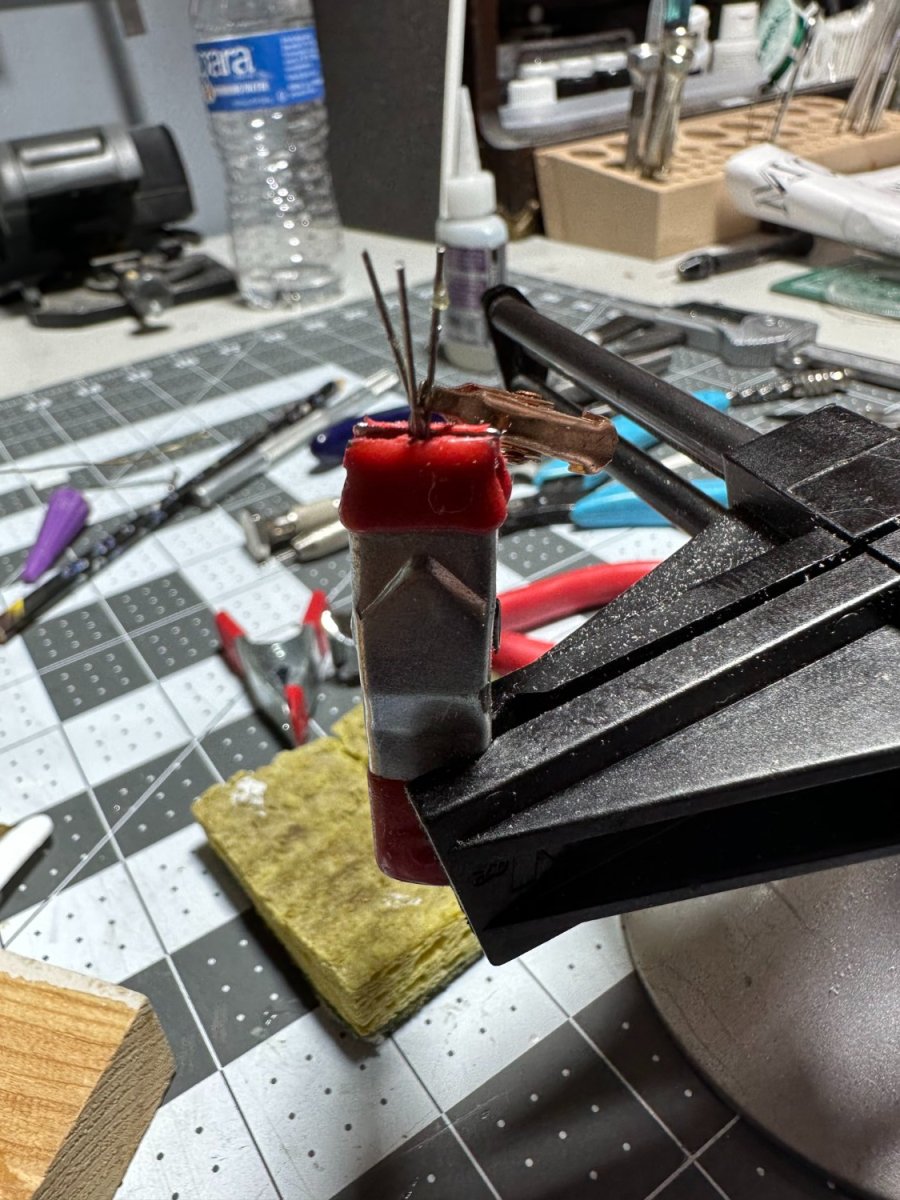
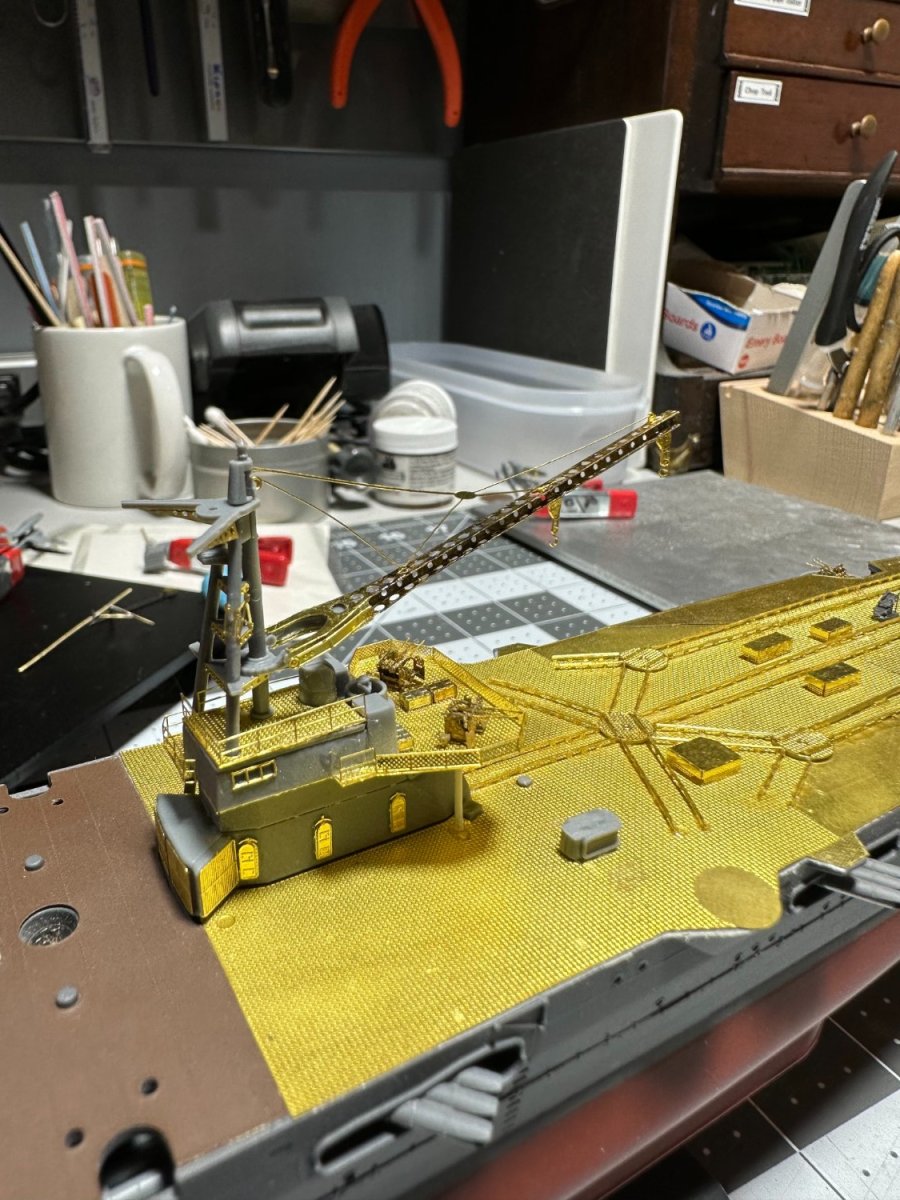
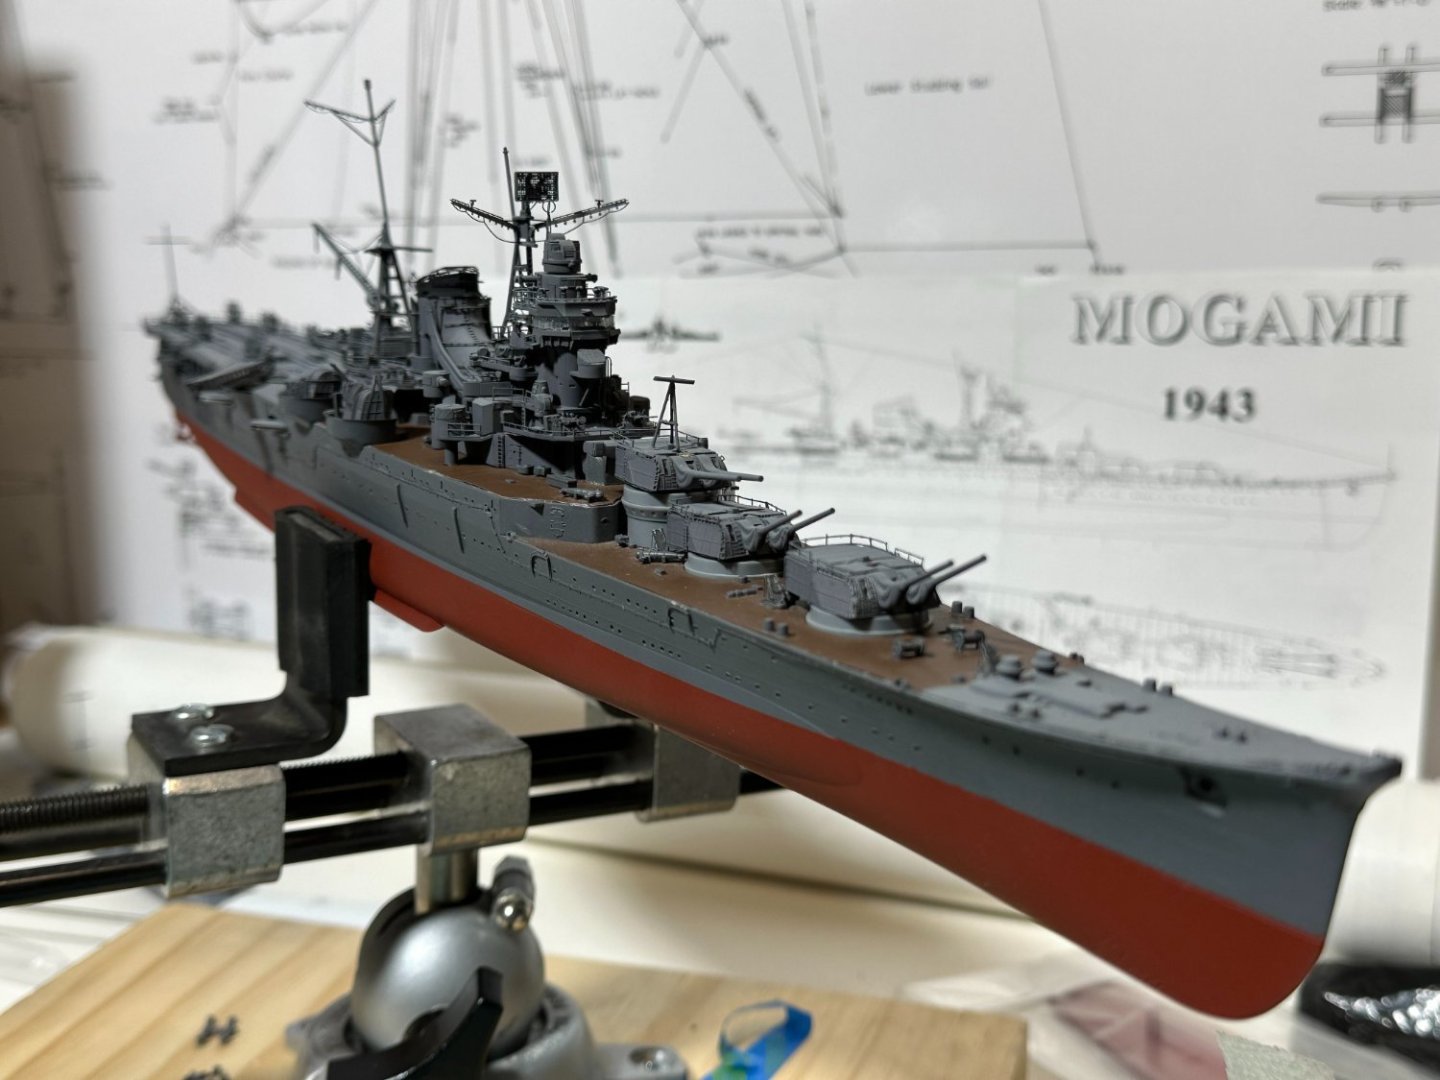
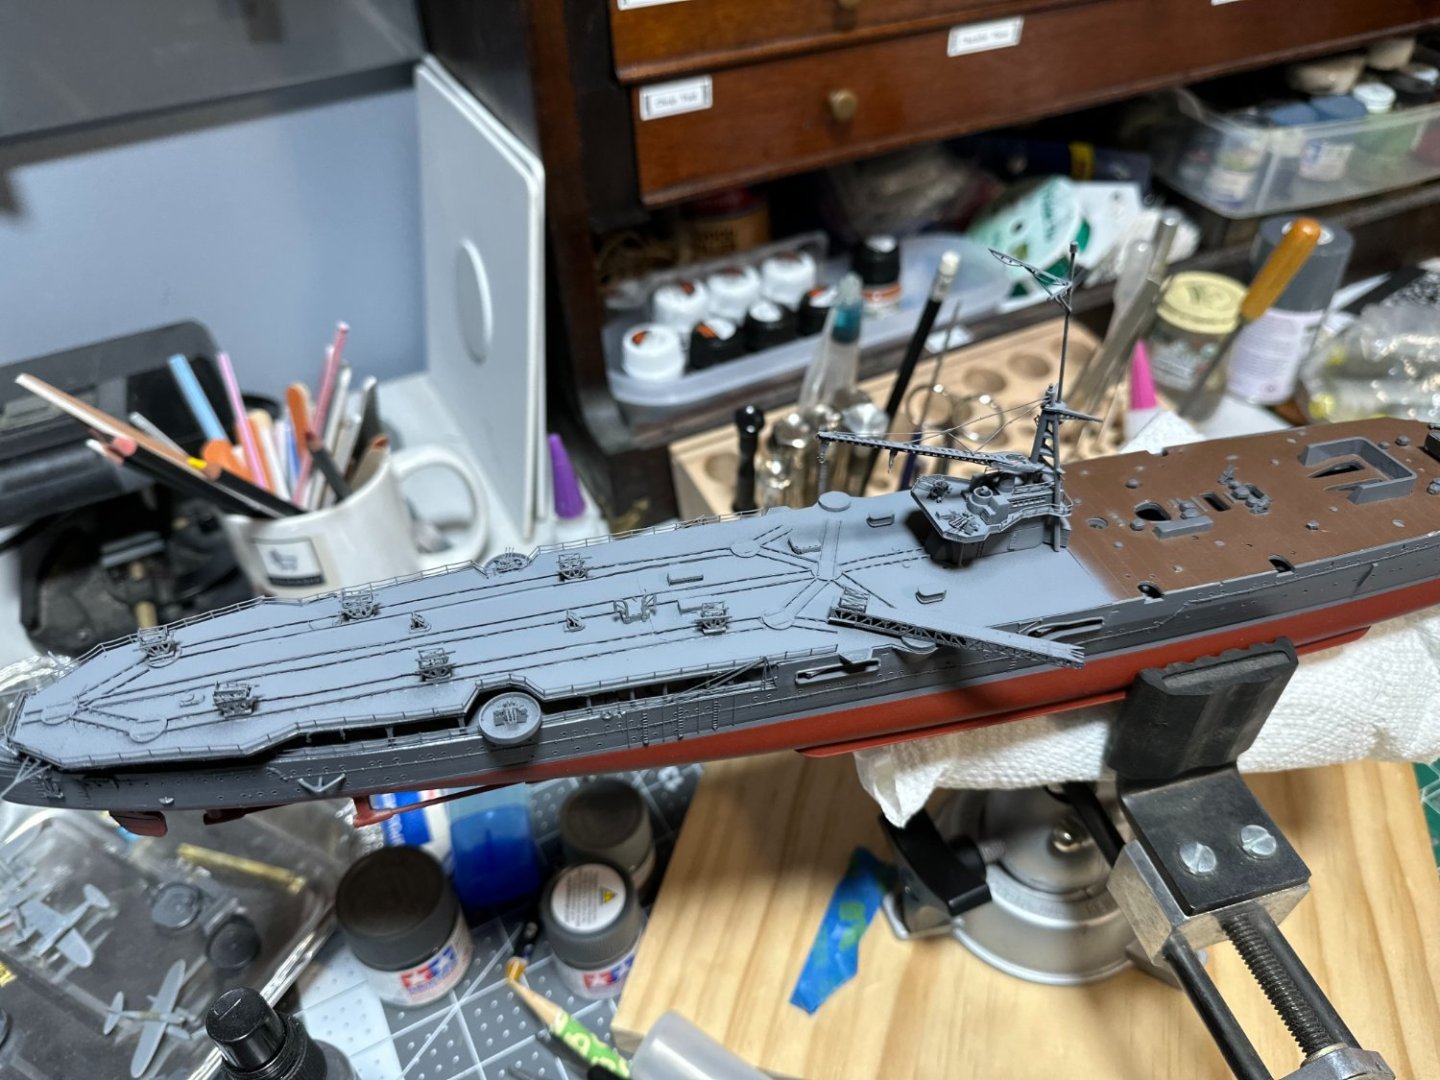
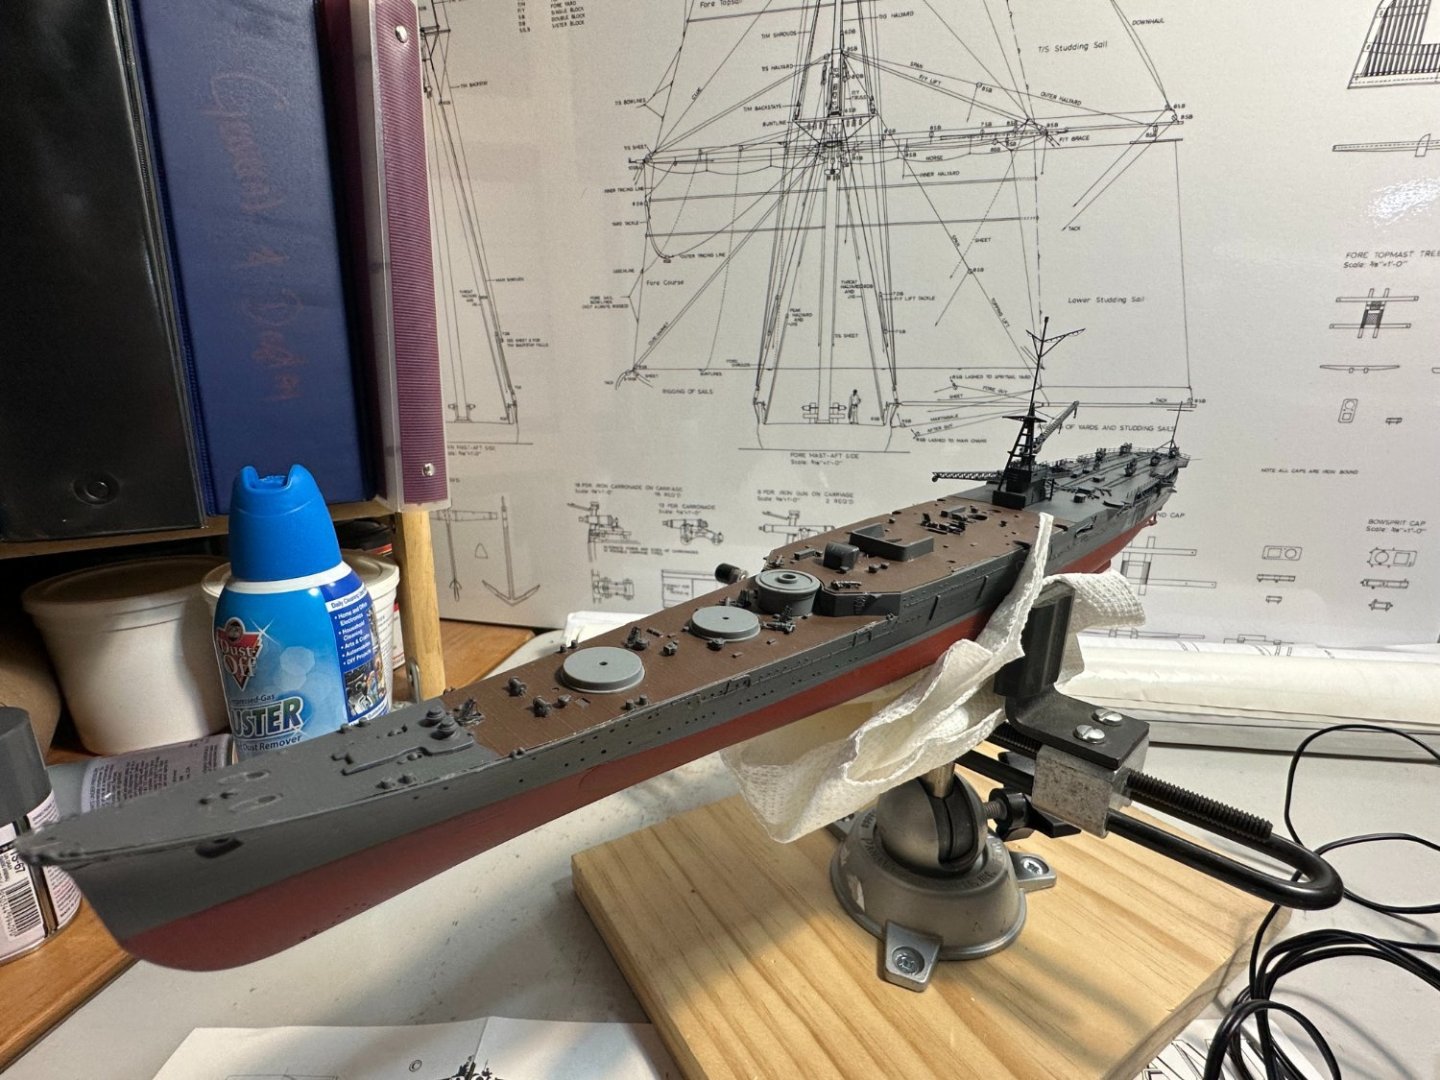
Taping off this funnel was interesting, I attempted it with blue painters tape and it was going horribly. The blue tape is what happened below where the zenithal highlighting overshot on to the brown linoleum decking. Of course, I taped it off and reshot that section! No.. I really did though, this time with Tamiya tape. But with the smokestack, the Tamiya tape was light enough to hang onto the small surface area of the funnel. Here’s the ship’s currently most assembled-so-far status. I’m going to have to work out painting those turret bases. Not sure how I missed painting those yet and then I was hoping the turrets would mostly cover them. They’ll have to be carefully brush painted now!


-
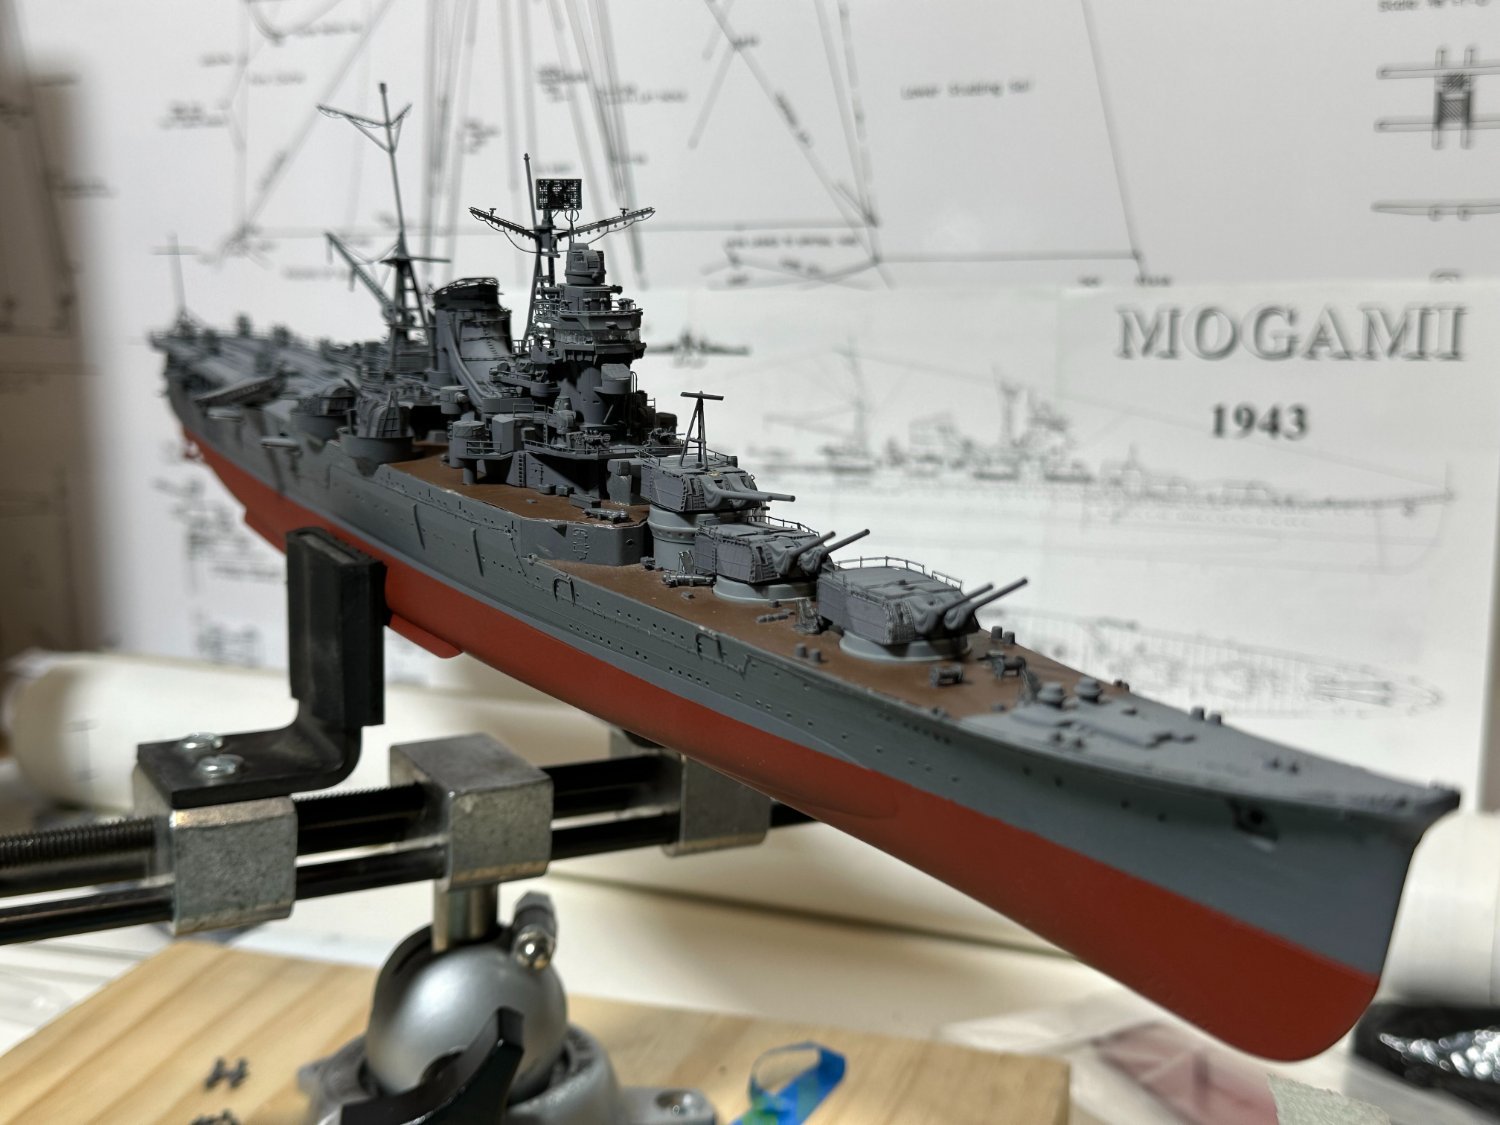
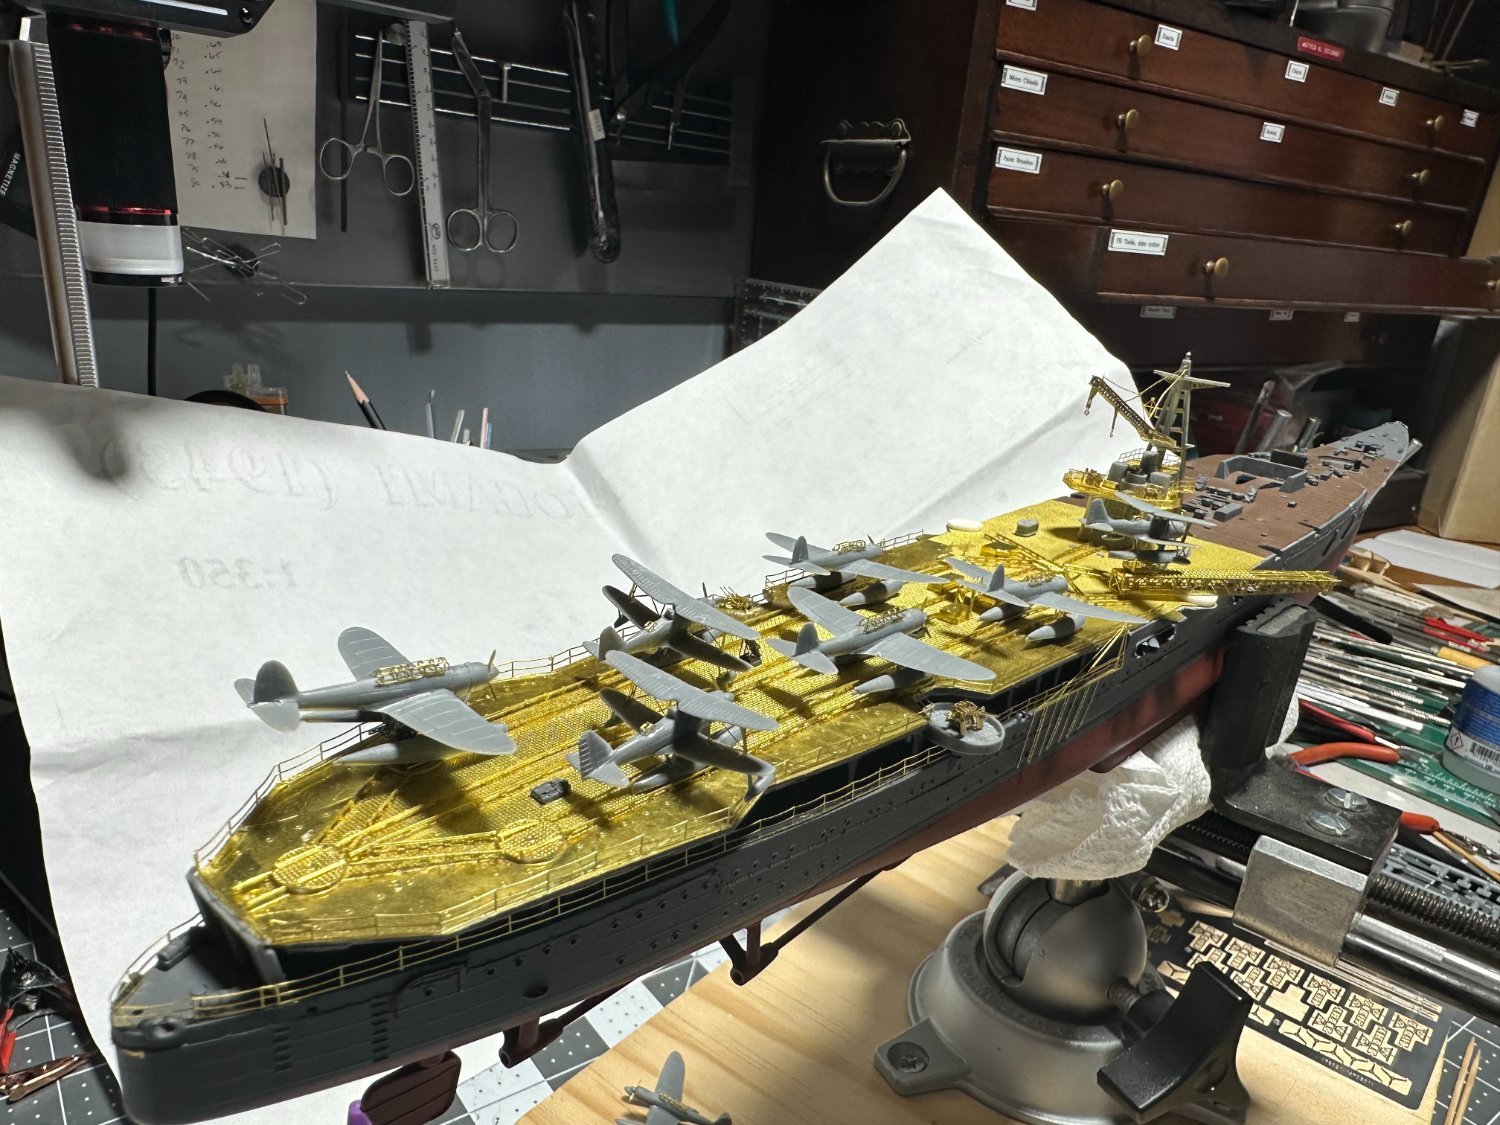
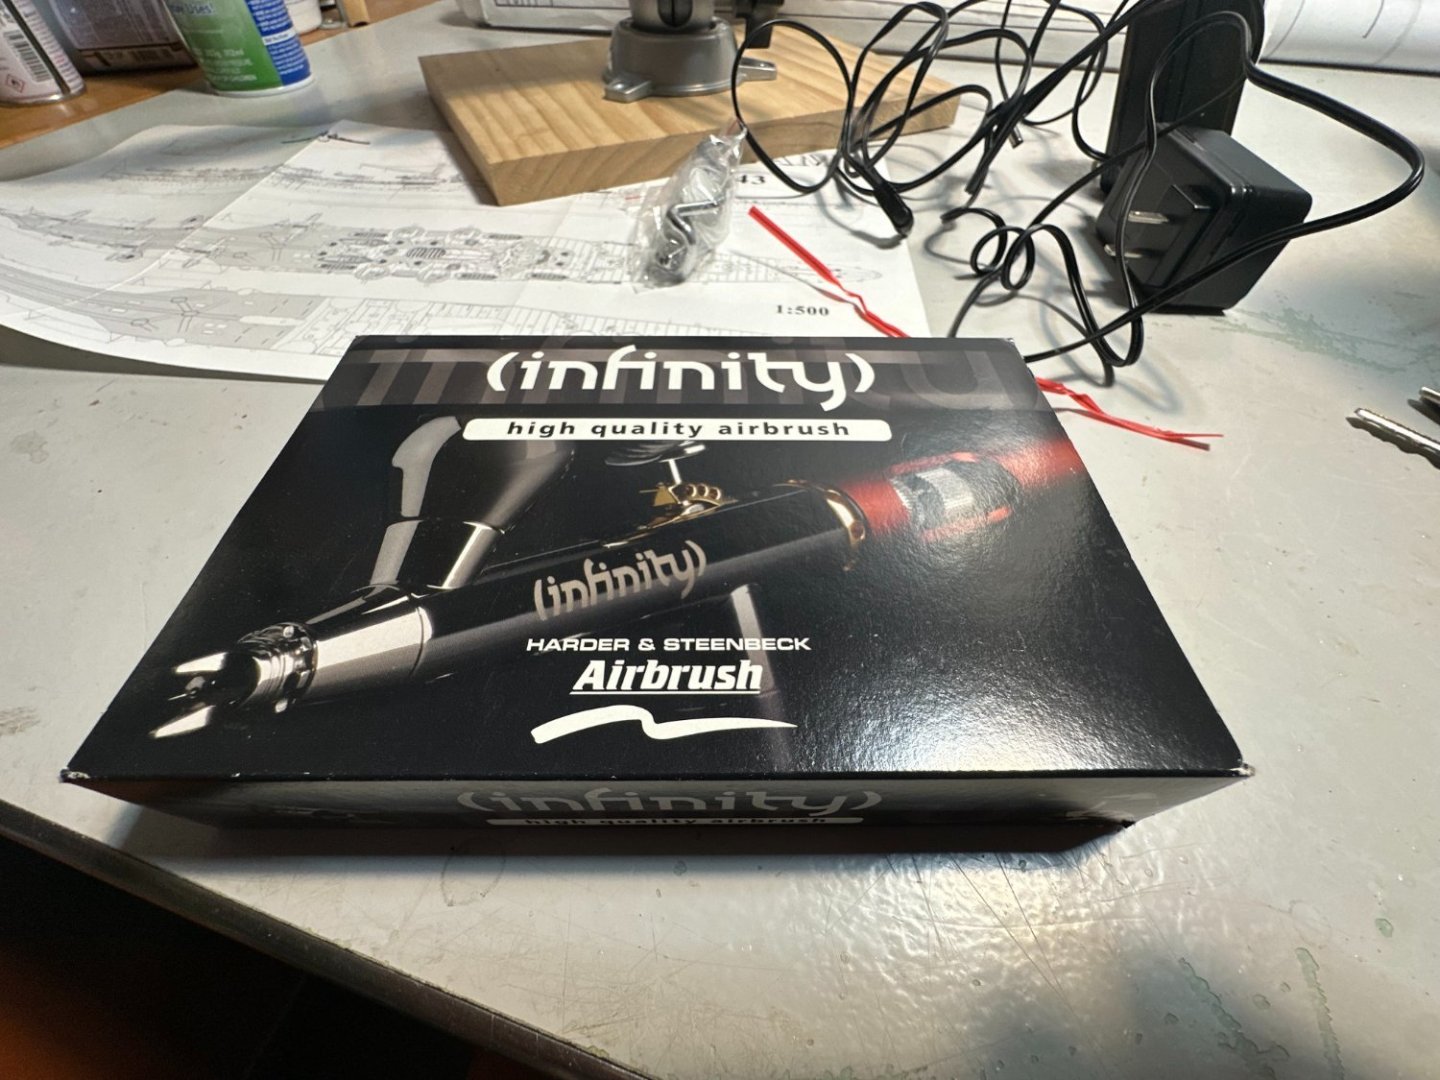
I obtained the Tamiya Acrylic Flat IJN Gray paint pot equivalent to the T-69 which is…XF-77. Why couldn’t it be the same number?? I rattle can primed the subassemblies with Tamiya white primer for fine detail which does a nice job. I thought the lacquer rattle can laid paint too thick, too fast so I became determined to use a newish tool for me, the airbrush. I picked up the flag ship, Harder and Steinbeck, because part of the fun of this hobby is spending money on it. That was my victim some fateful Friday two some years ago. It is a fine tool that I have no business owning because it’s for an expert that I aspire to be. I diluted the Tamiya paint with 91% alcohol using the bottle top-off technique and it sprayed very nicely, dried quickly, and provided a very nice fine matte finish. I then attempted a zenithal technique to highlight the horizontal upward facing surfaces and got a bit carried away. The deck ended up lighter than I was hoping for but believe some weathering will tone it down. Plus, it’ll be well covered with planes at some point, a lot of the deck stays in shadow, probably want it a bit lighter? Happy Accident?
-
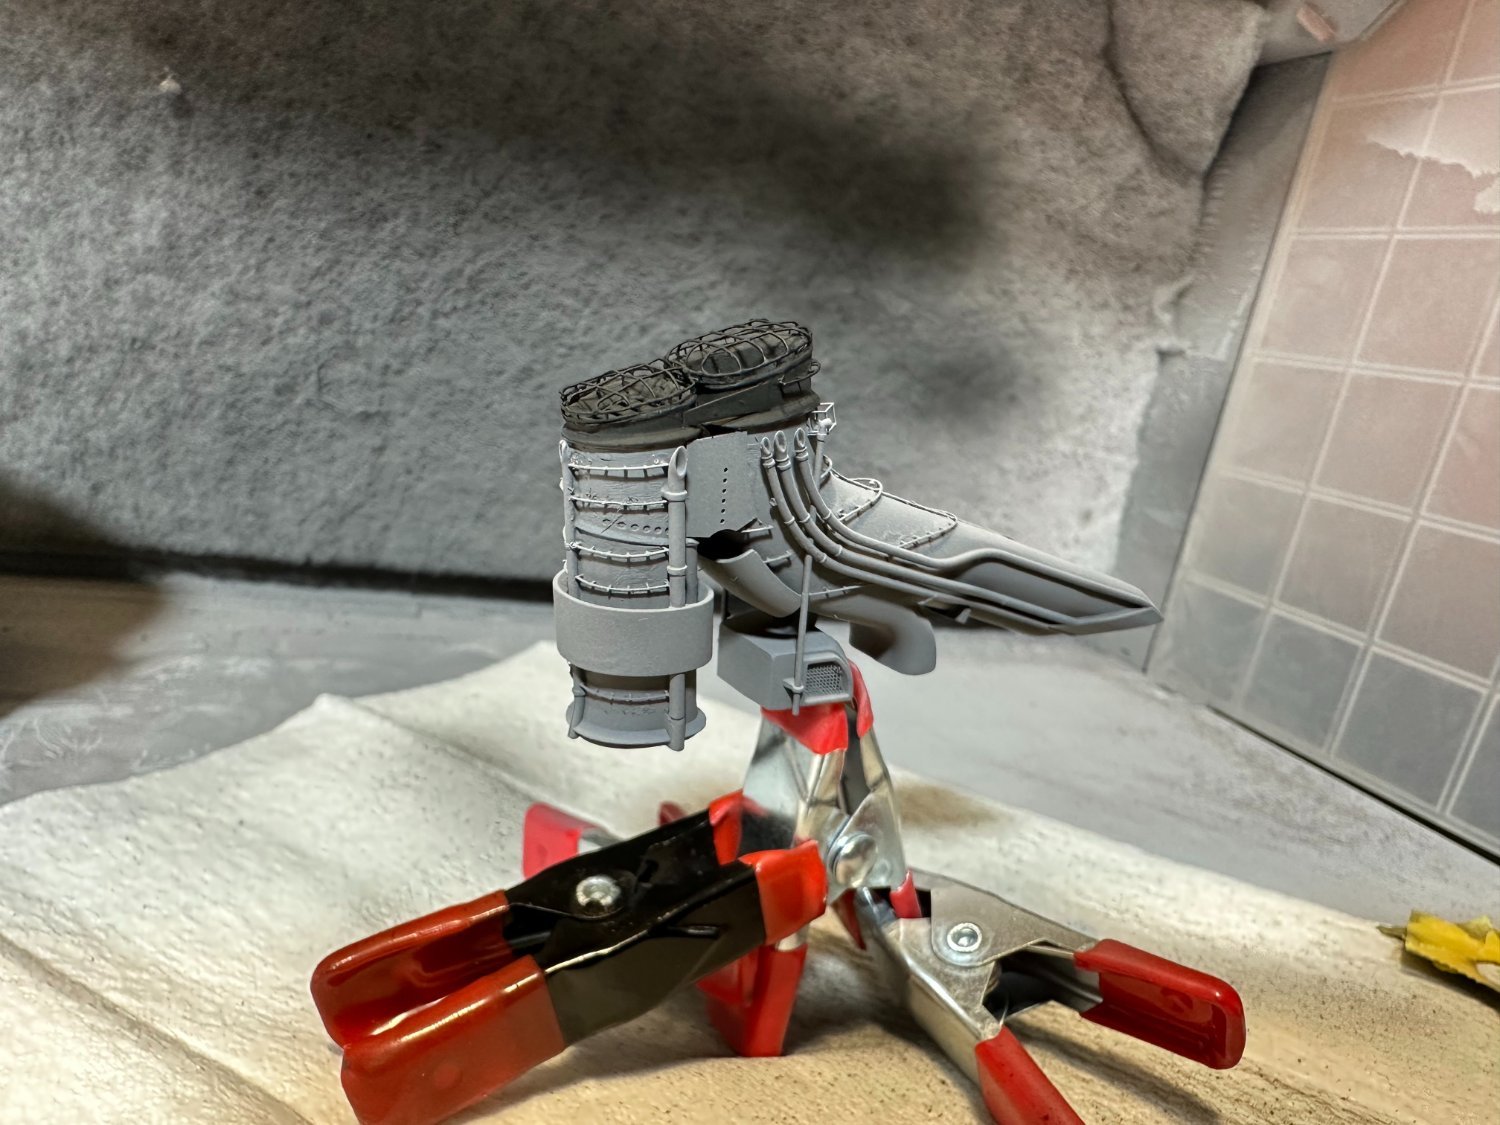
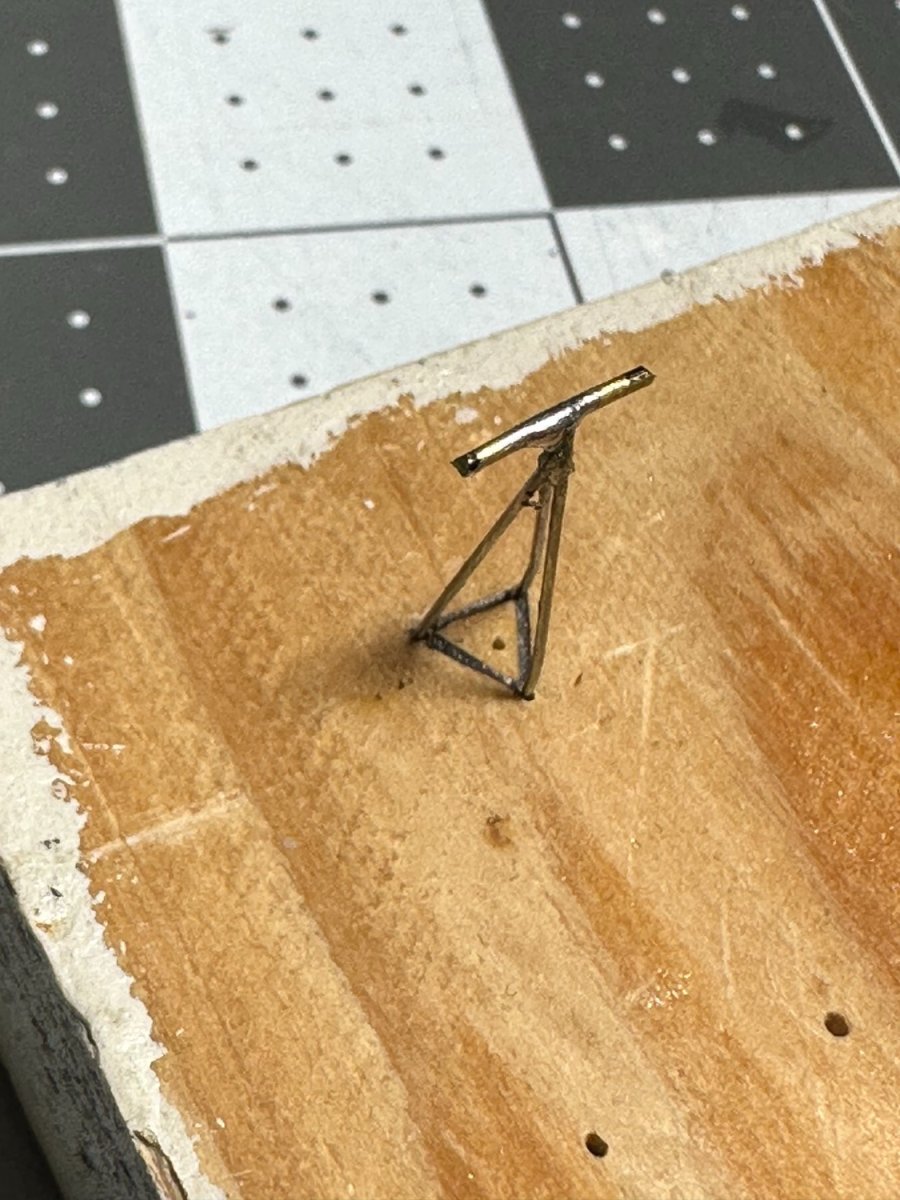
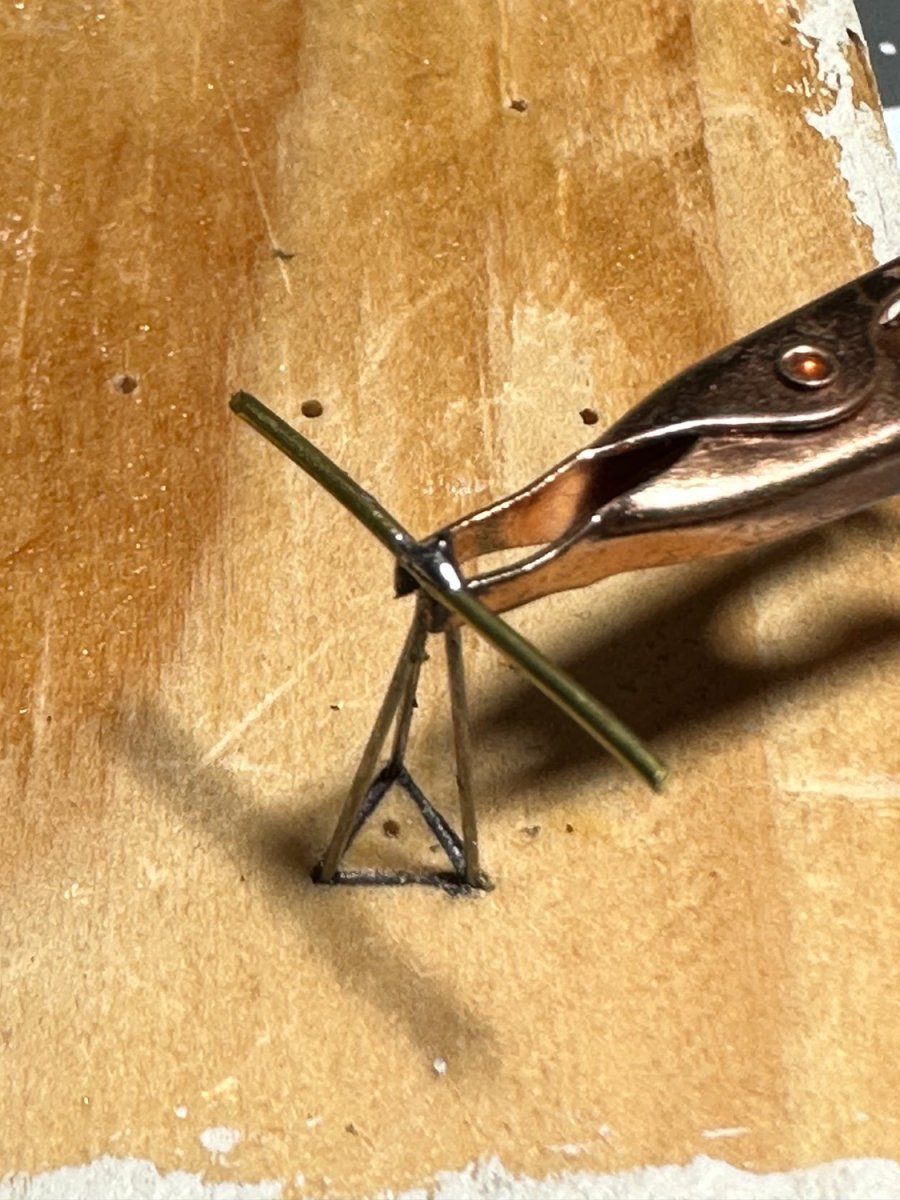
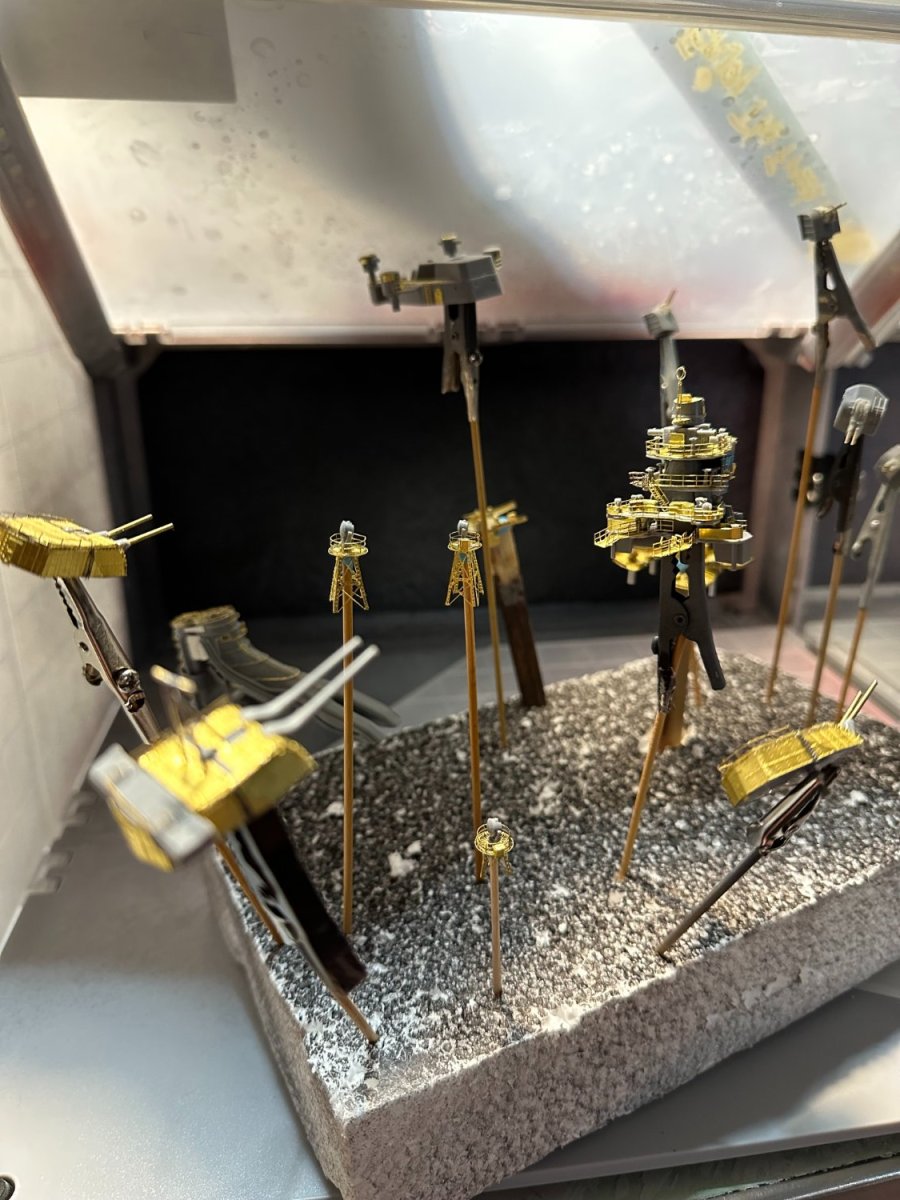
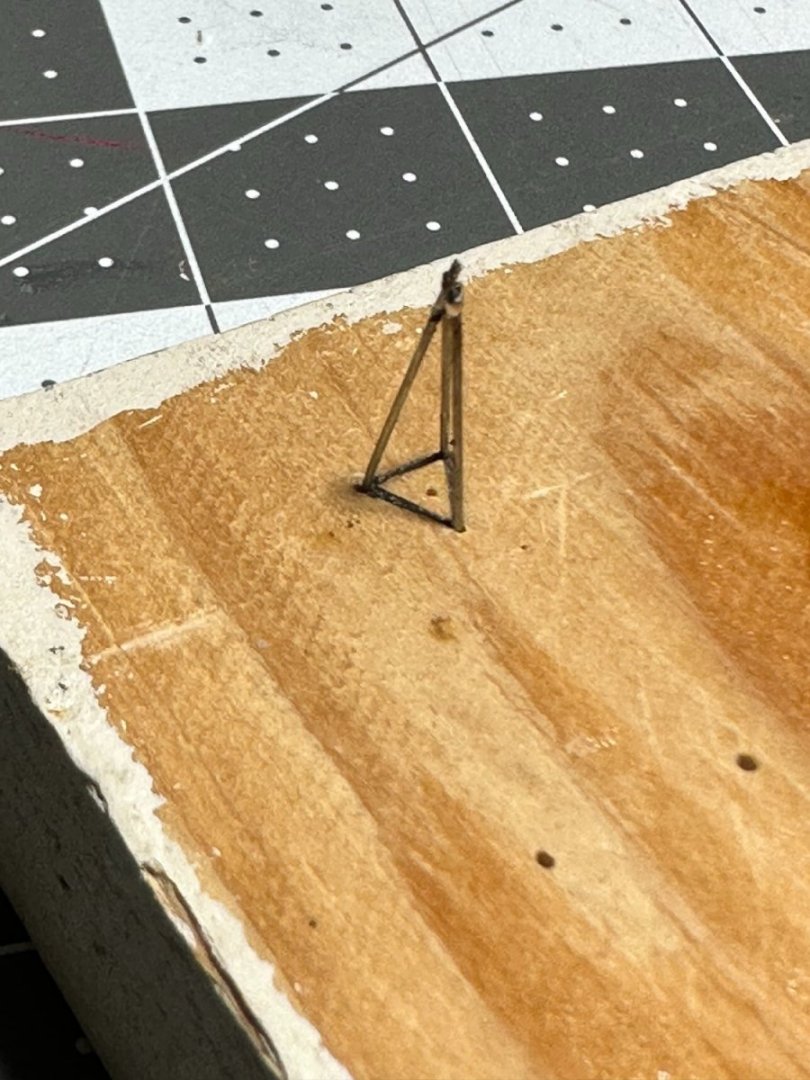
Then I focused on adding some details to the gun turrets including ladders, arial tower, and railings. The arial tower was scratch made from available brass. Using a stencil, I determined a proper shape of the base pattern, marked them in piece of wood and then drilled holes in each angle to hold the legs. Then soldered the legs together at the top, soldered the cross member and trimmed that to the proper length. Using heat sinking clamps, I then soldered the inner support trusses. I’ll admit that it’s a bit overscale in terms of leg thickness. Then I mounted all the subassemblies to holders for airbrushing.


-
Hello! Been pushing steady on this Mogami the past 9 months, starting to feel like a need a break. When I start feeling impatient, it’s better to put it down for a bit, so I’ve been messing with a side paper model of the Koln. I intend to create a build log for that soon. Since our last discussion, I focused on finishing all photo etching details on the aft deck to be painted the spray can lacquer IJN Gray I’ve been using on the rest of the hull (Tamiya T-69). I started by determining the placement of the plane carrying carts by modeling out the configuration. It was neat to see all the planes on the model, it was a feature that initially attracted me to this subject. Then I taped off the aft deck and hull portions to be painted, shot that section.


-
Ever use sand sealer? Apply, sand then one more, and fine sand should get you there.. Joshua

-
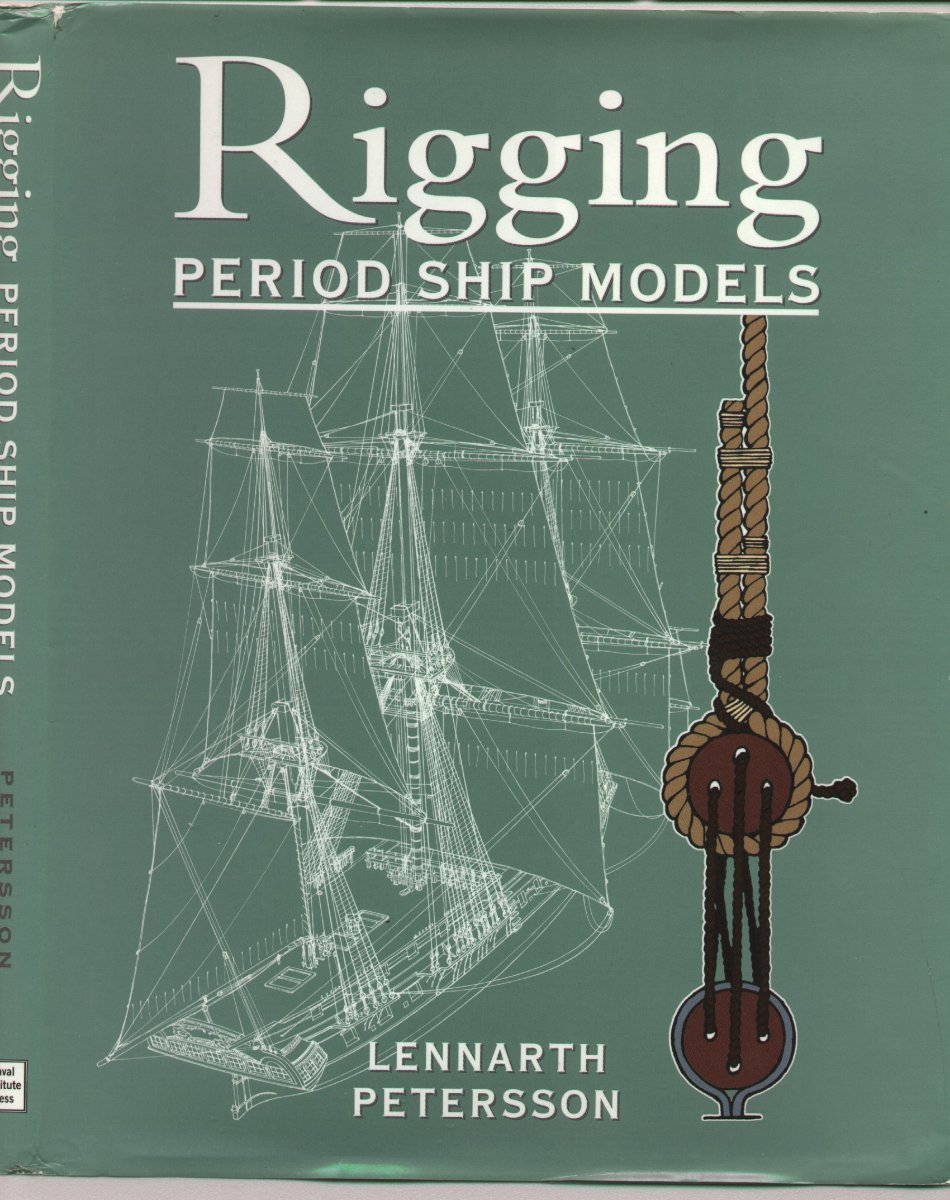
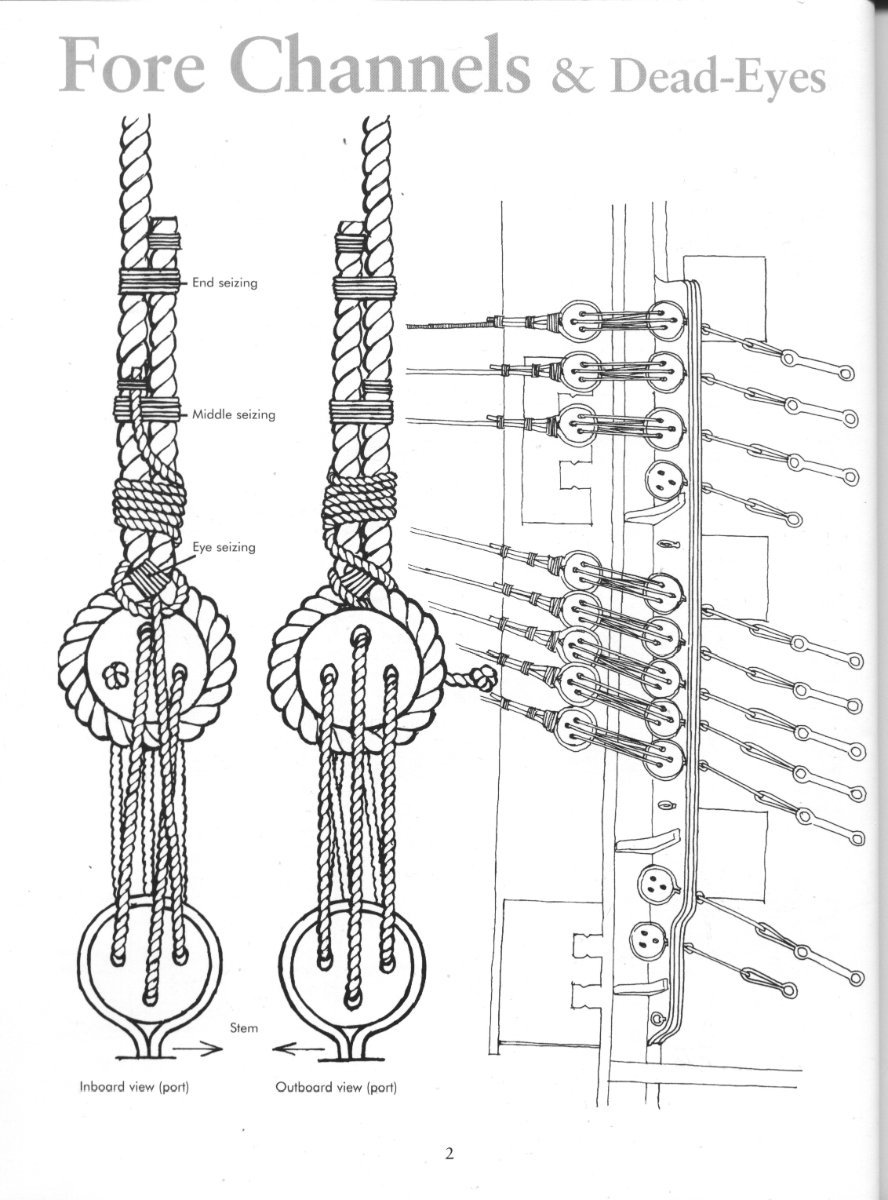
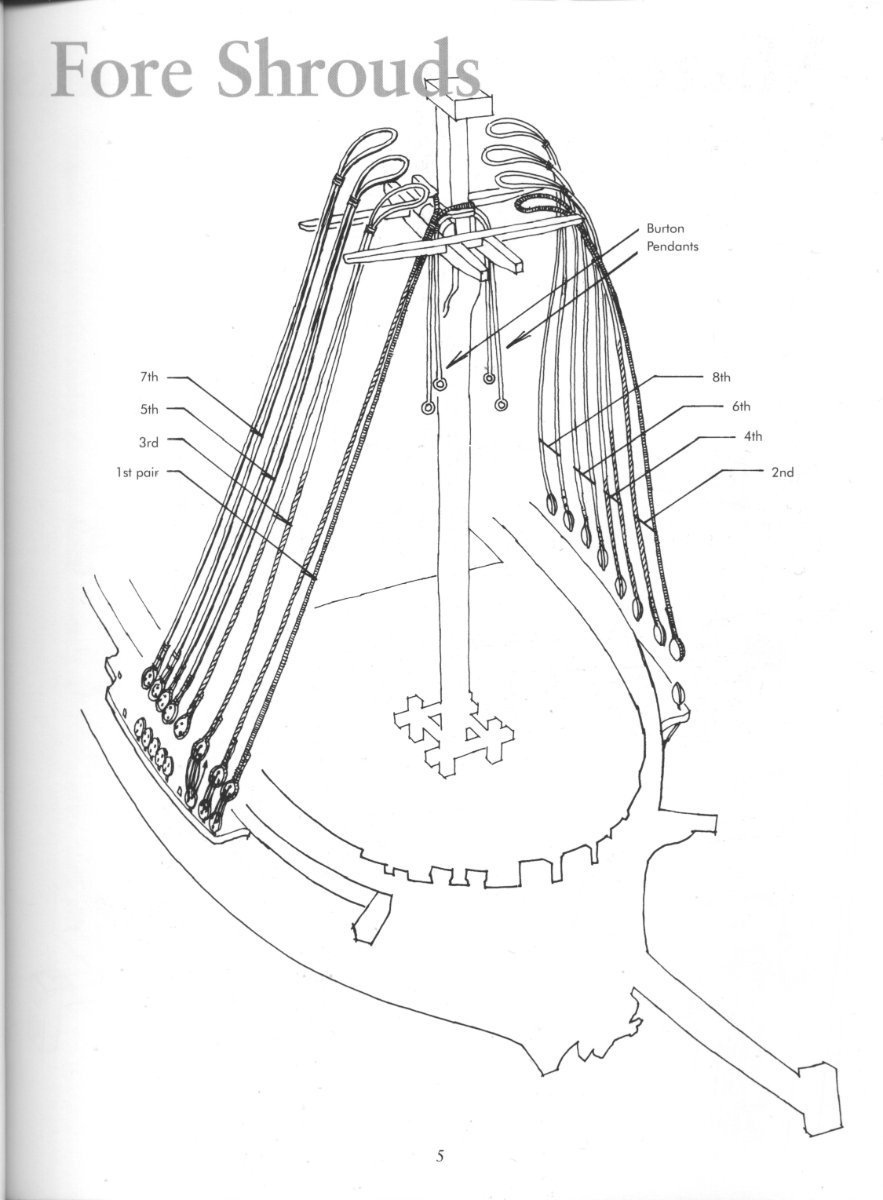
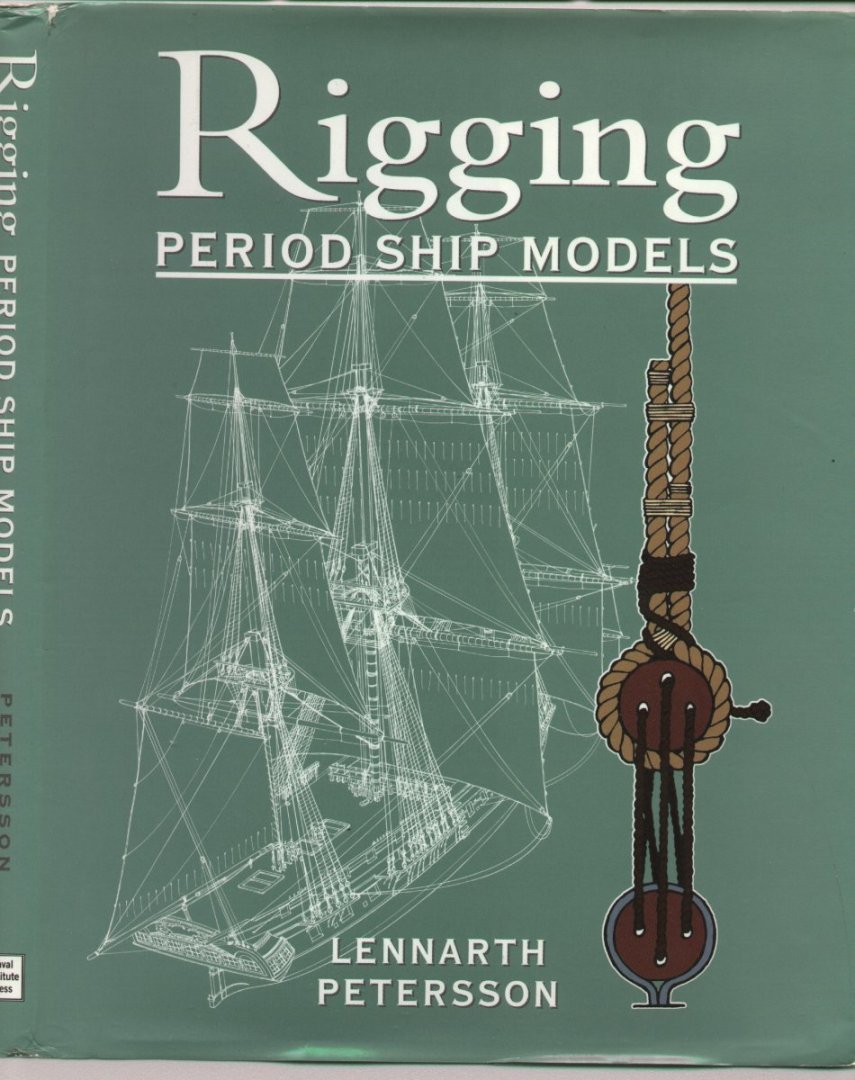
By the way, all those references came from a book you should get if you're going to continue rigging ships. Excellent reference. here's the cover
-
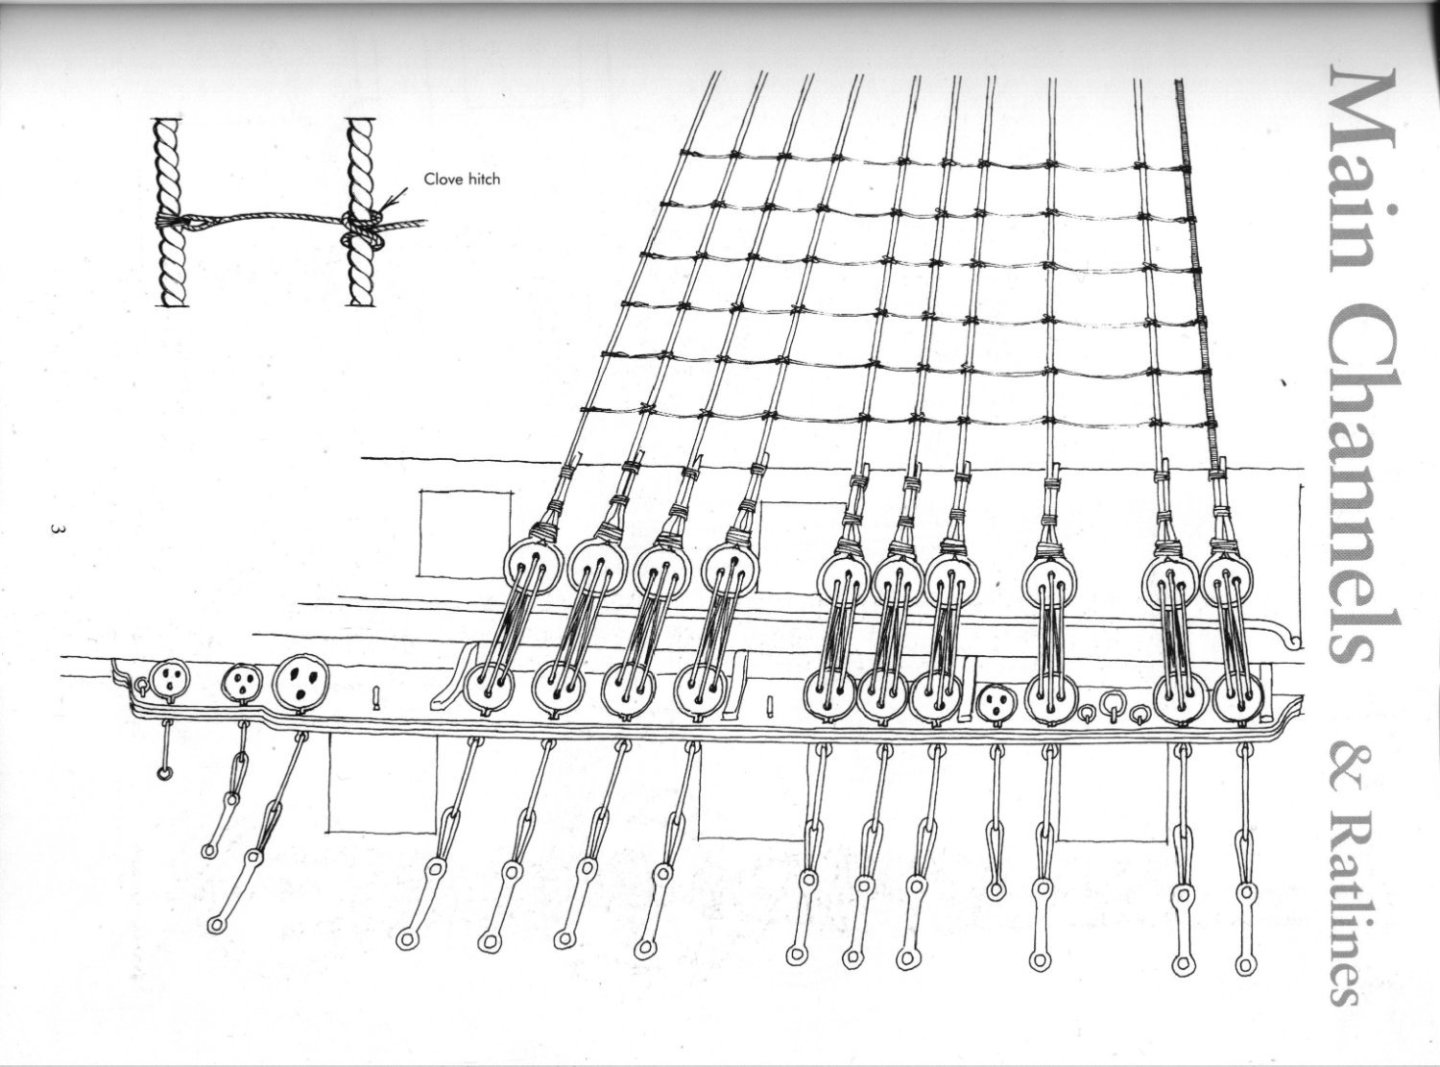
So. The portion you're starting with there is rigging the shrouds to the dead eyes. Generally would be dark dark brown or black to show that they were tarred. You're best bet is to attach the shrouds at the top of the mast first, then using a spacer that holds the top deadeye at a certain distance, wrap and secure the shroud to the deadeye. Then rig the deadeyes together like you're doing but use some thread/rope about 1/3 of the thickness of the rope you're using there.. here are some pics that may help Joshua