


NavyShooter
-
Posts
440 -
Joined
-
Last visited
Content Type
Profiles
Forums
Gallery
Events
Posts posted by NavyShooter
-
-
Here are some more of them.
- Keith Black, mtaylor, yvesvidal and 4 others
-
 7
7
-
-
Interesting...are the pictures missing for other folks as well? I have been pasting them as 'inline' images rather than attaching them. Should I be attaching them instead?

- Keith Black, Canute, yvesvidal and 3 others
-
6
-
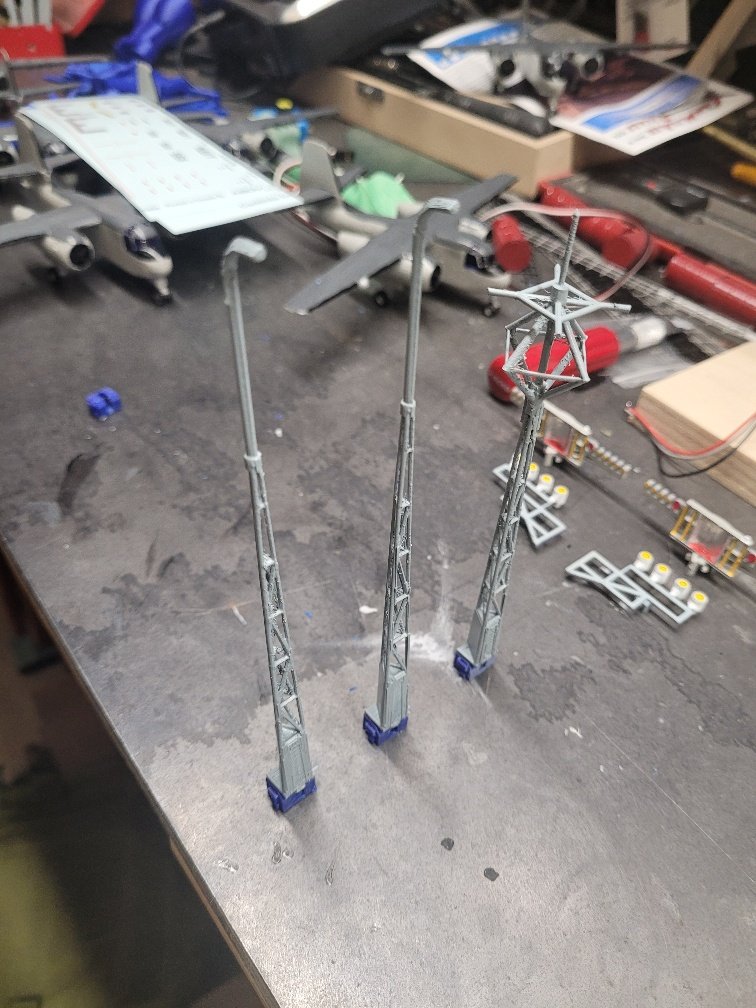
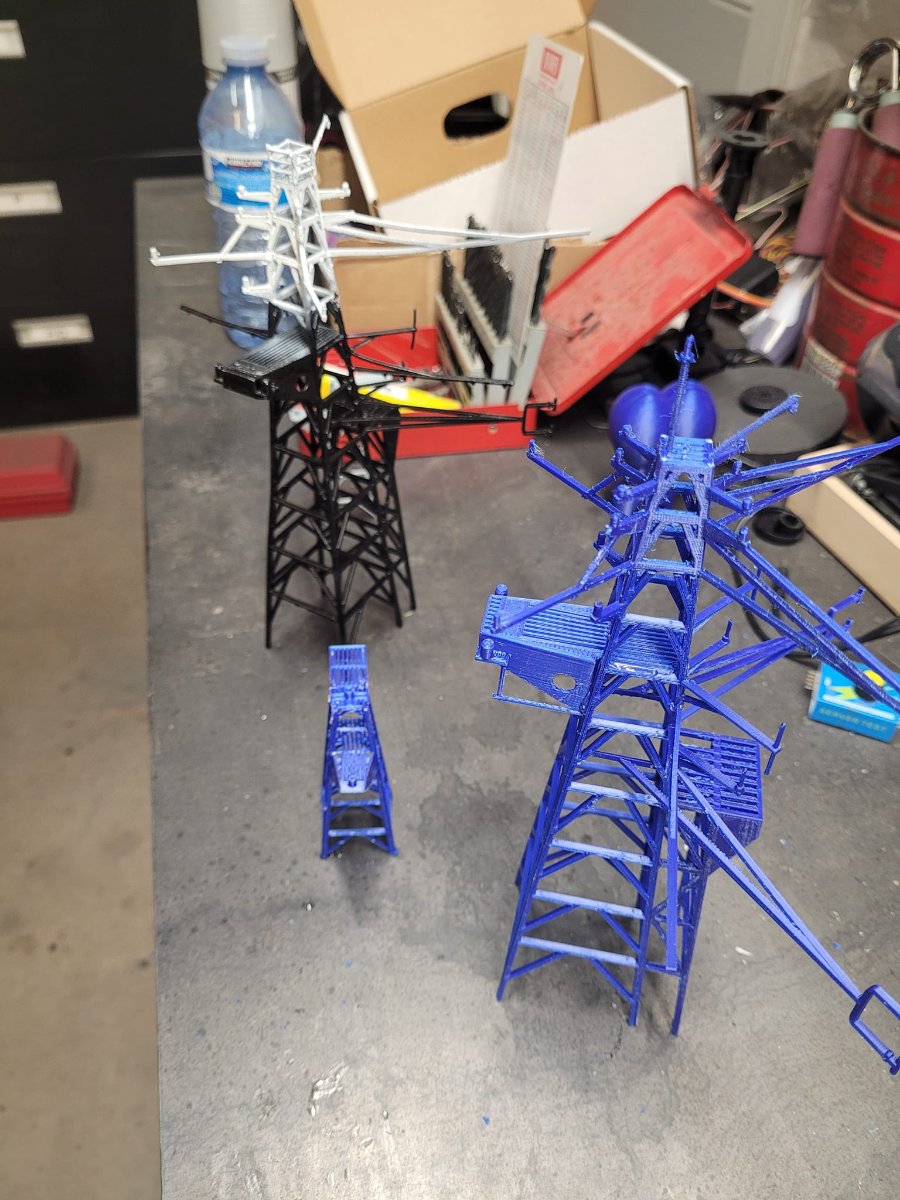
Helos are getting a bit closer:

And the new mast is nowprinted and assembled. You can see the bends in the painted one. This is why they had to go!

And here's the helos after a bit of sanding and another layer of primer.

- Keith Black, Canute, AON and 3 others
-
6
-
Oh, and here's a snap of the main mast - looks OK...though the bent bits bother me, so it won't stay.

- AON, yvesvidal, Keith Black and 3 others
-
6
-
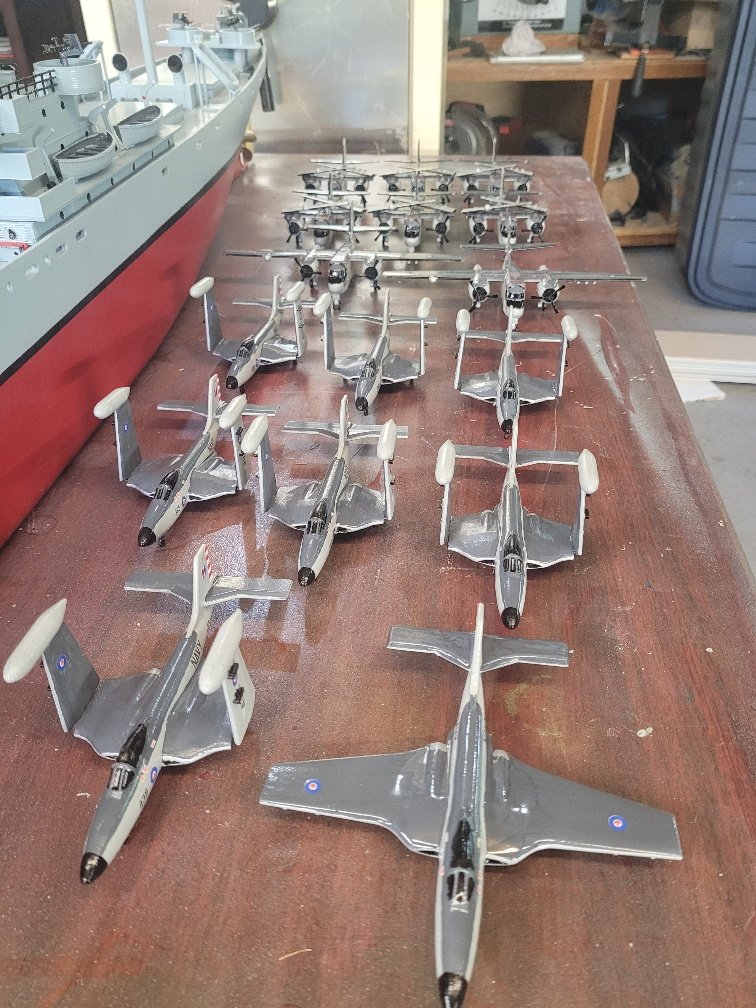
And...while waiting for the new mast to print, I decided to switch over to Sea King production...

- mtaylor, GrandpaPhil, yvesvidal and 3 others
-
6
-
Here's what all the parts look like before printing.
- Prowler901, GrandpaPhil, mtaylor and 4 others
-
7
-
I added some additional detail to the mast this evening. Various yardarms, antenna supports, etc.
Looked good - but I could still see some tiny hairs from the filament printing process...so...I took someone's advise and grabbed a torch to quickly singe them away and make 'em go away.
That worked well...until I noticed that the heat of the torch had also caused some of the yardarms and antenna supports to droop.So. The next version is headed to the printer over the next couple of days....I've got a few print jobs that are already in the queue.


-
-
-
-
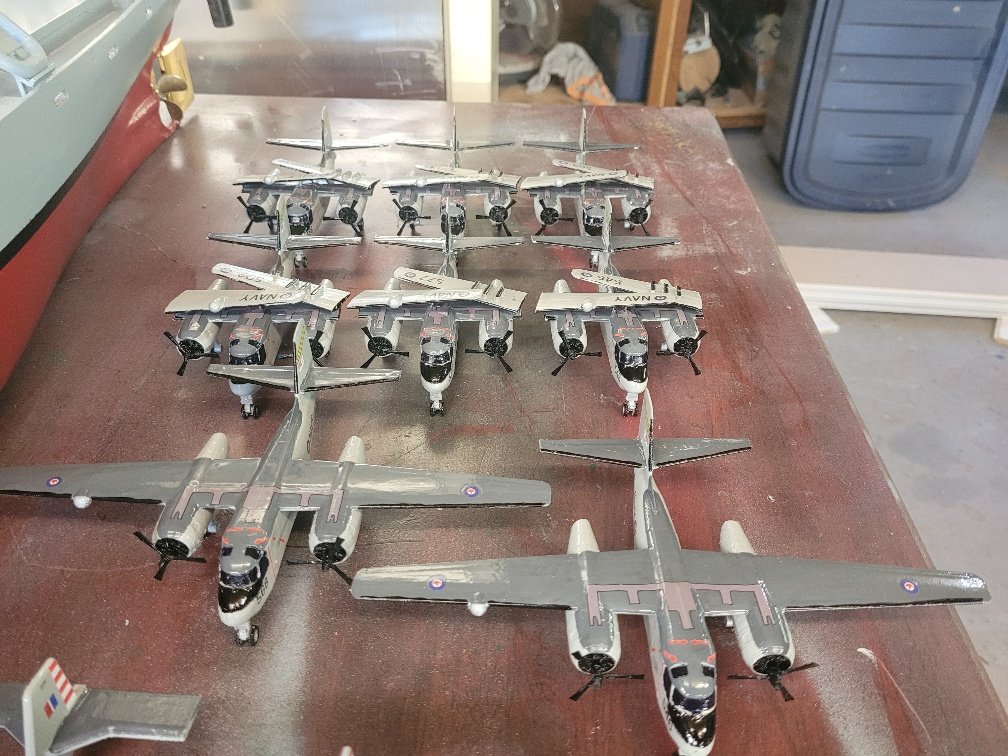
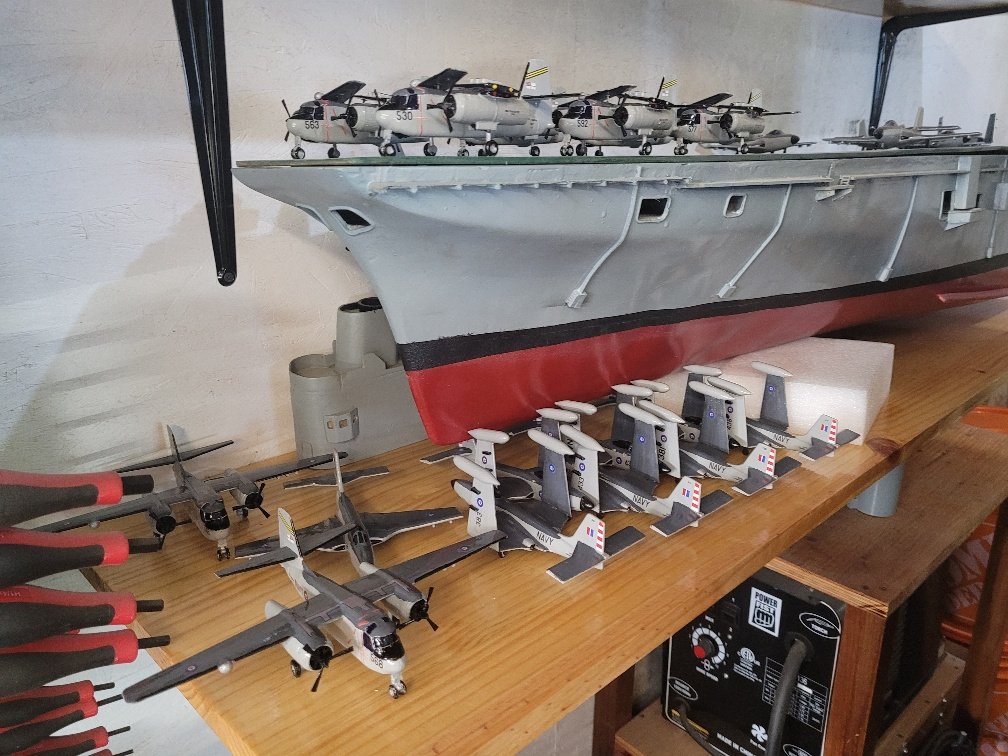
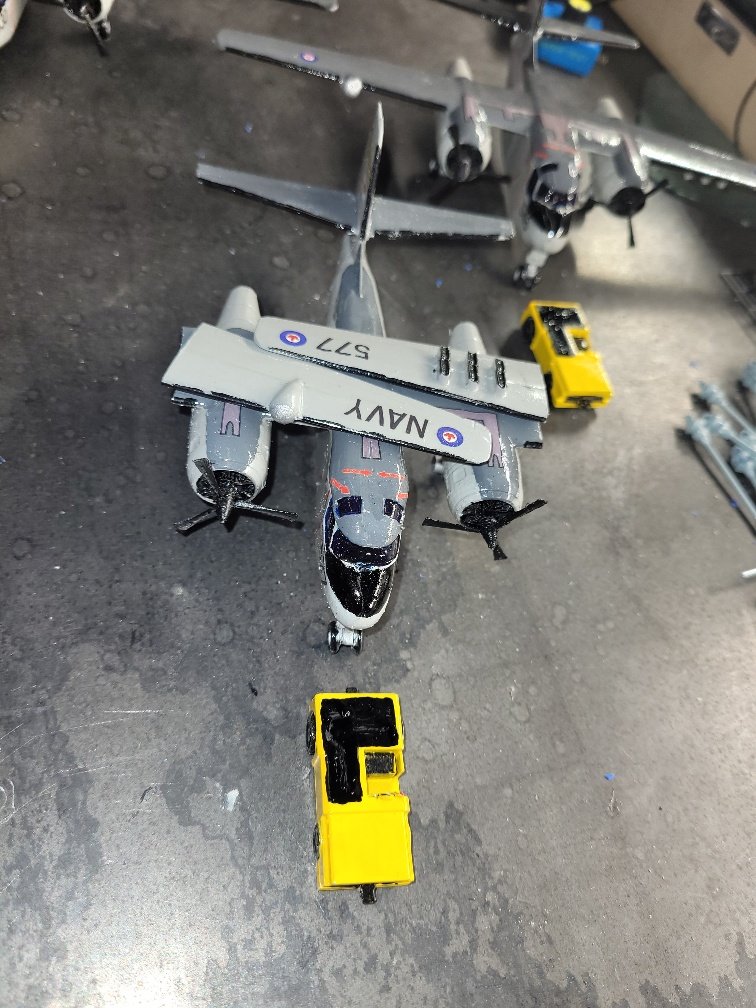
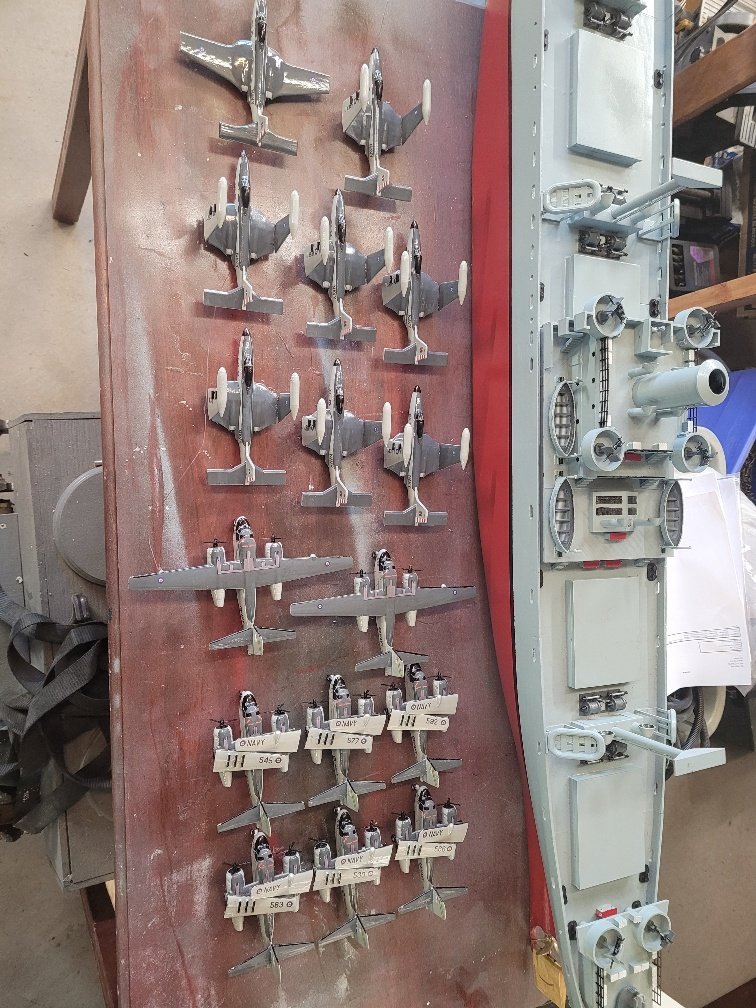
Trackers are 100% complete.


- Keith Black, Canute, Prowler901 and 3 others
-
6
-
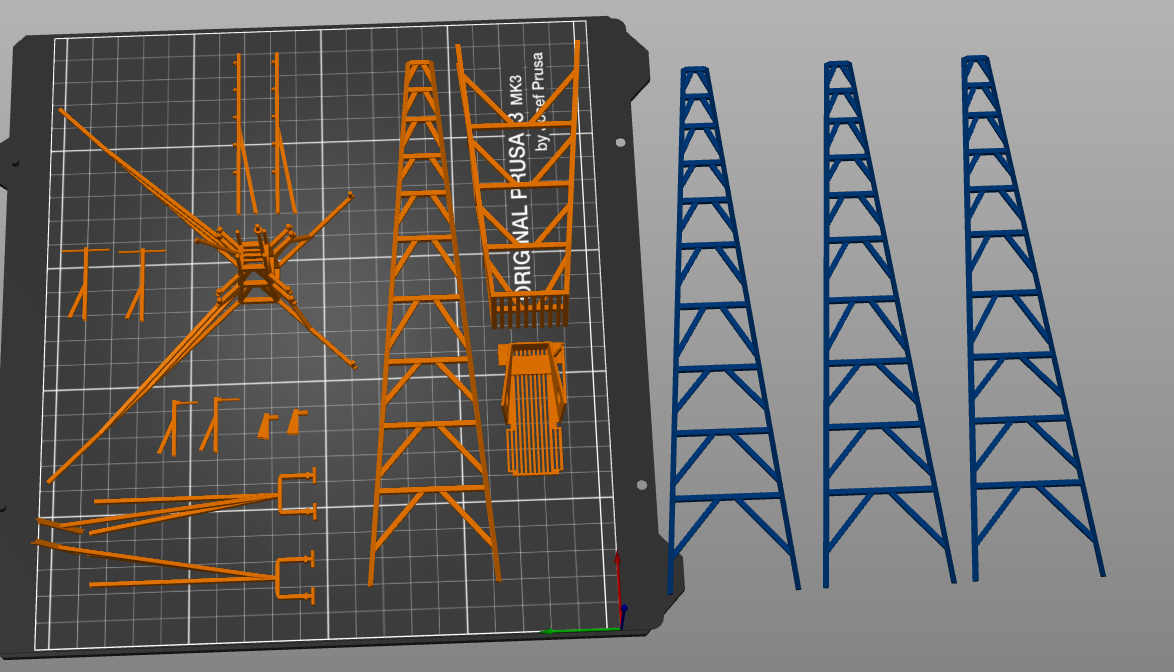
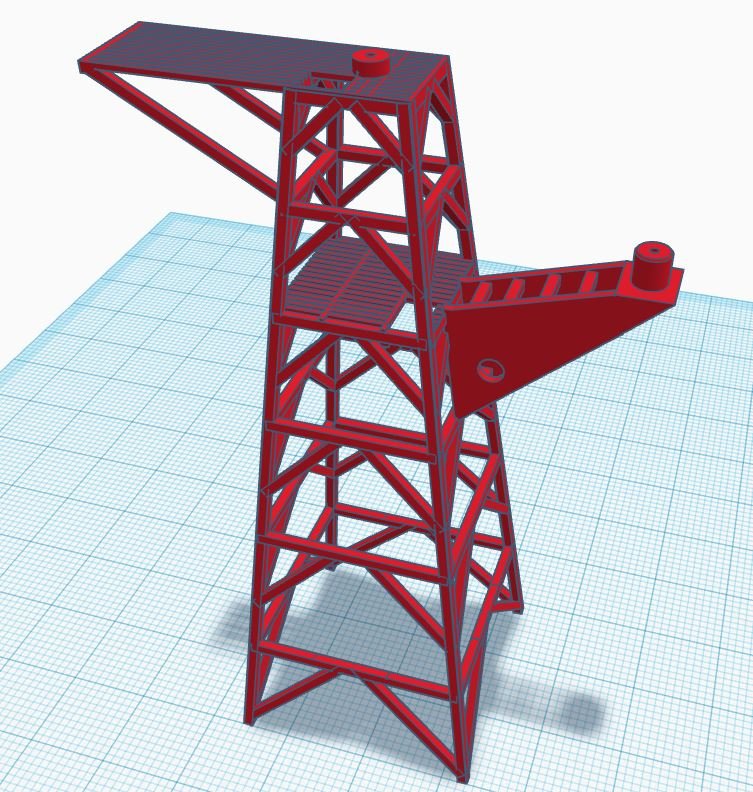
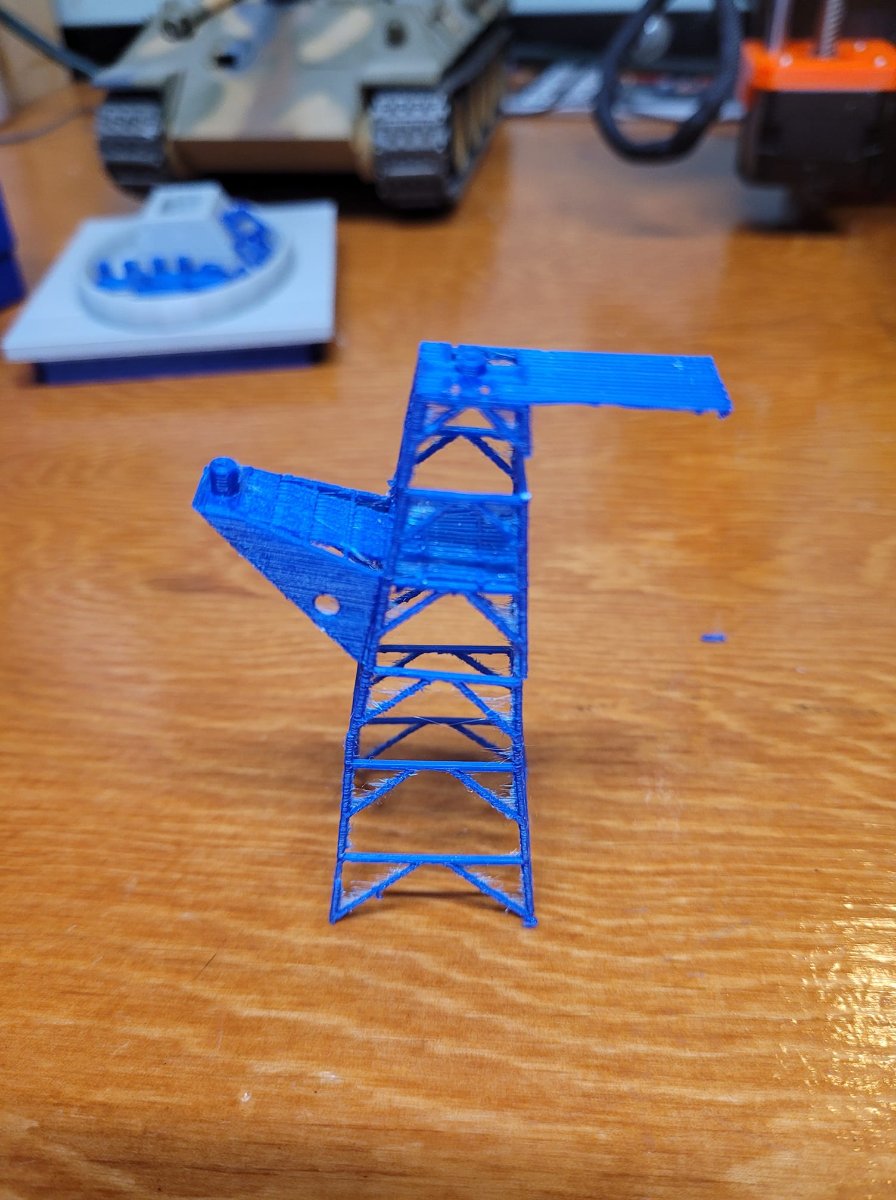
As a slow-time background activity, I've been puttering away at the 3D design of the main mast.
It's most definitely still a work in progress, but I'm adding bits of detail slowly. Here's what it looks like right now. (Of note, at this point, I'm planning to chop off the top 3 sections and replace with the piece on the left that will simply glue straight on top.) There' still a bunch of work to do and add detail at the lower levels, but it's getting there.
On the right we have the 'solid frame' that will be glued together. The small platform is for the SPS-10 Radar and sits at Level 6, and the large frame section in the middle goes between the main mast and the funnel, attached to the rear of the mast.
I think I have to print this and assemble it to see what detail gets added next.
-
-
All 8 Trackers complete!

- AON, Keith Black, Canute and 3 others
-
6
-
-
5 Trackers done....and I got a test module printed for my Anchor system. We'll see how that works later this week.
- Canute, mtaylor and Keith Black
-
3
-
-
One of the running jokes we had in the Navy was that any ship can be a minesweeper.
Once.
Of note, my thanks for the earlier demo on how to make port holes higher up in the thread. I'm ordering some of the Canopy glue now and will see if I can use it to make windows for my HMCS Bonaventure aircraft carrier island.
-
Antennas...just about done.

They fold down as well.

- GrandpaPhil, ccoyle, Keith Black and 5 others
-
8
-
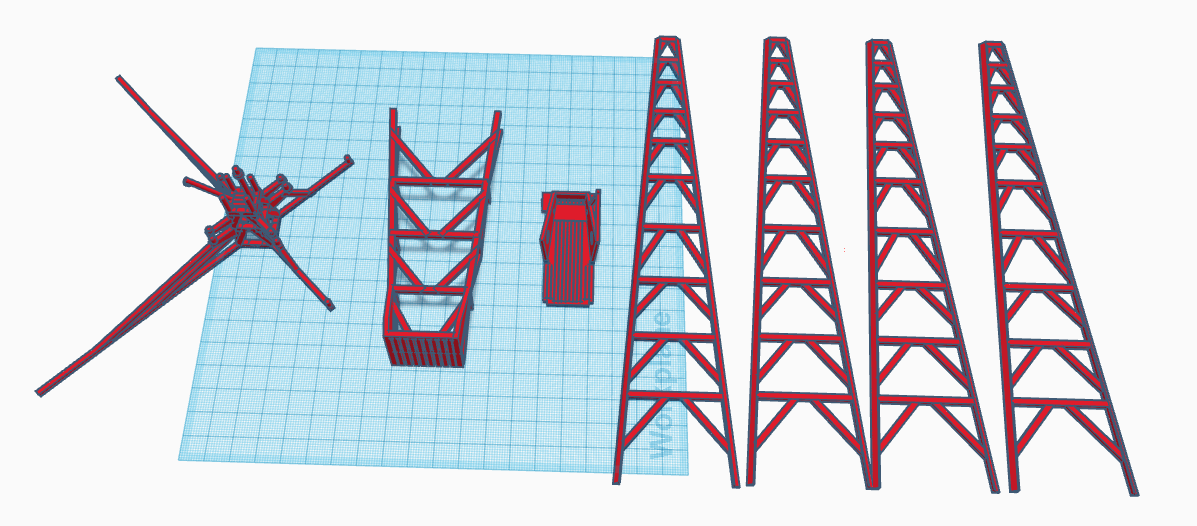
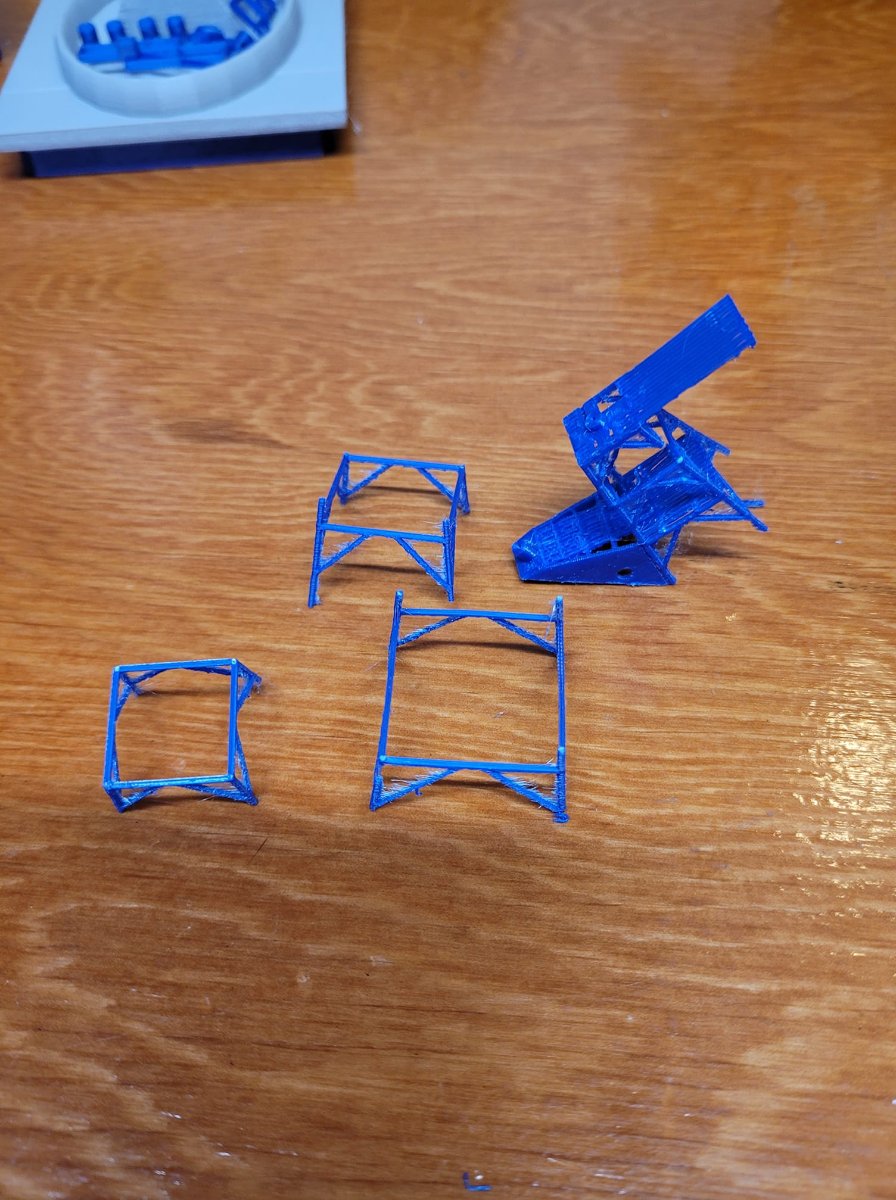
OK, so version 2 doesn't look very good even with a layer of paint on it...so we're on to version 3.
For this one, I sliced the model up so that it could be printed and assembled.
I'm much more pleased with the results. No cleaning off parts, no whisps of plastic, no support material to remove.
It's got a layer of paint on it...more pictures another day!


-
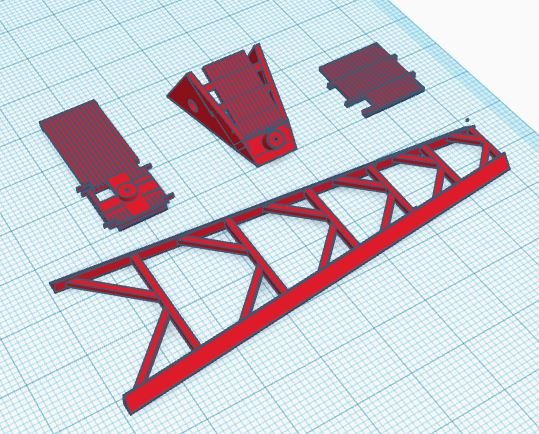
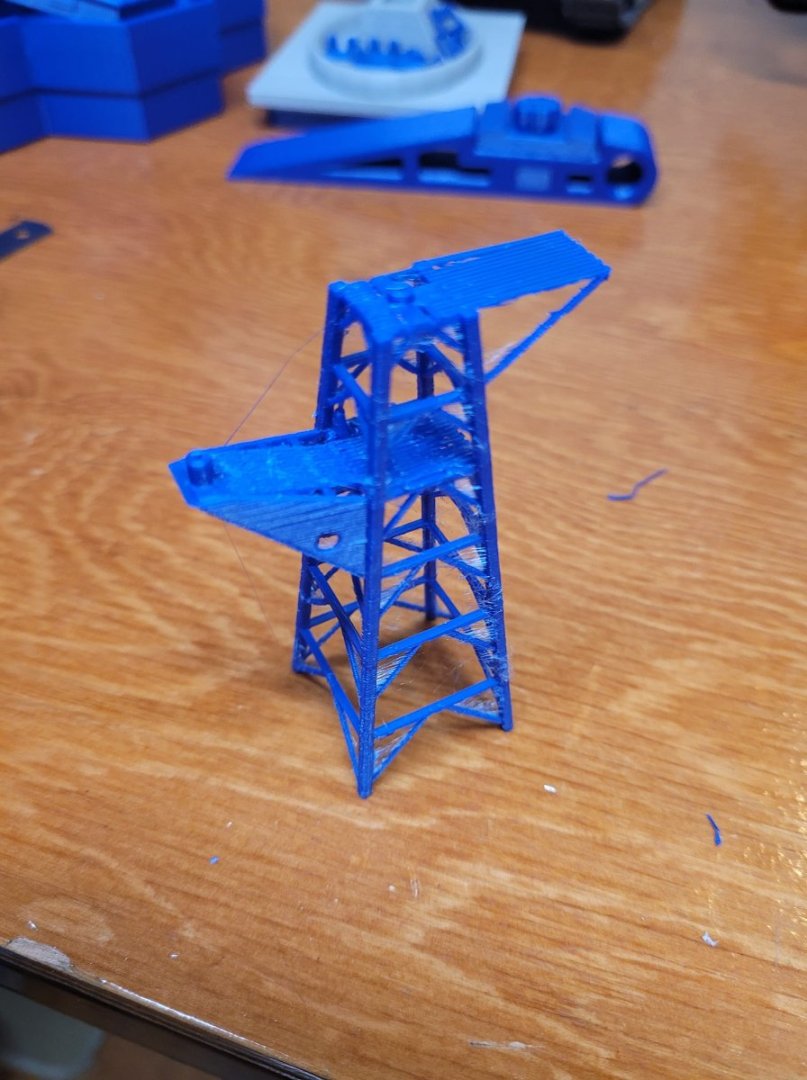
Printed 2 versions of the Radar Mast last night - still not quite right, so I've 'chopped up' the mast into parts, and will try to print the pieces to glue together.
We'll see how it goes.
I can probably clean up Version 2 and use it. Version 1 is already in the garbage.


- mtaylor, GrandpaPhil, ccoyle and 5 others
-
8
-
-
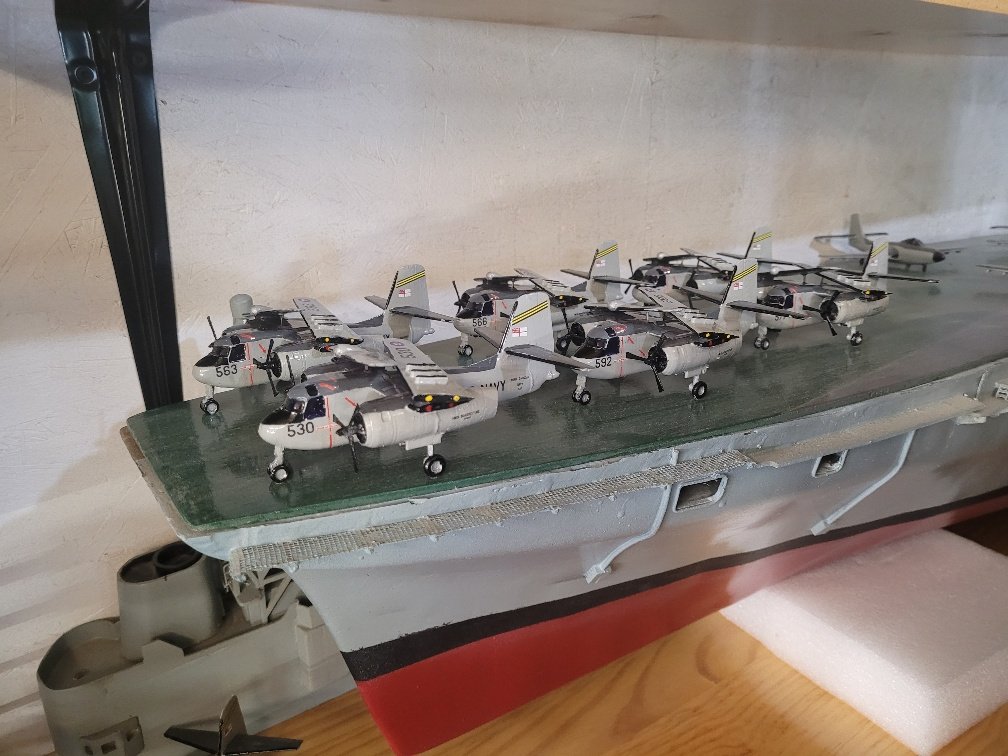
So...more progress...we have 2 Trackers with decals complete now. It's taking about an hour and a half per aircraft to do the decals. There's about 25 per plane to apply. It's...challenging...but rewarding when they're done.
I got a layer of paint on the hockey sticks and the HF/DF antenna last evening, and retreated into the A/C for the night.
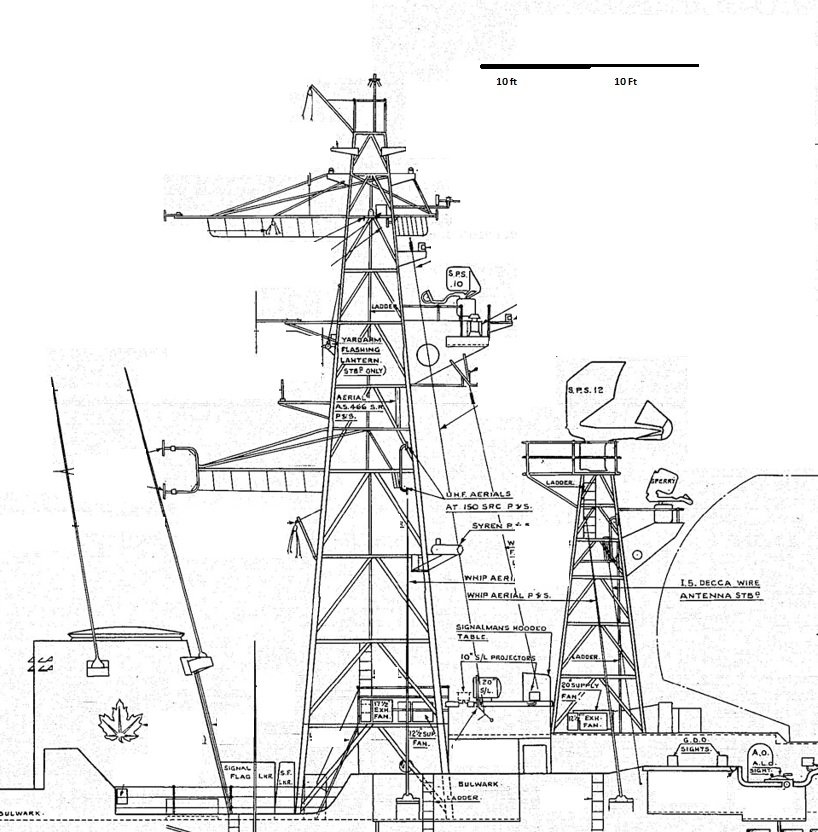
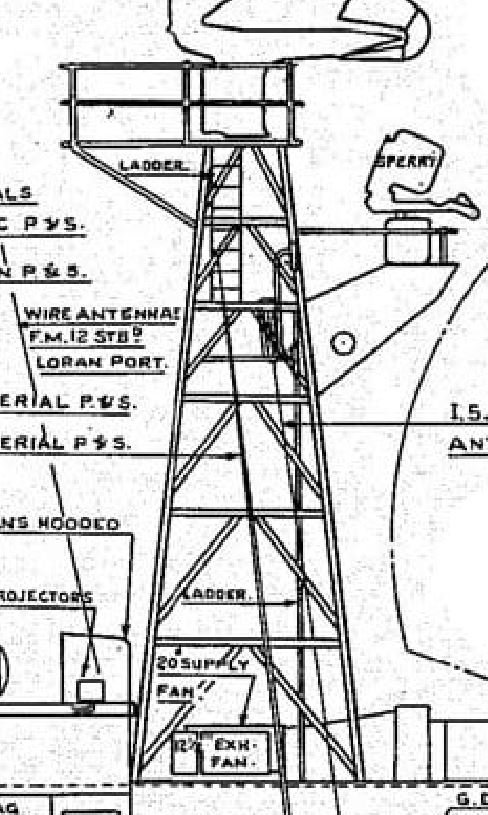
Today, I had some time so I got some 3D work done on the RADAR mast on top of the island. I had previously attempted to use DSM to create the main mast, and that attempt failed rather miserably. So...today...I tried the 'simple' Tinkercad program and had some good success.
Here's the plan view I worked from, and the 3D result ready to head to my printer tonight.
We'll see how it goes.
- mtaylor, GrandpaPhil, lmagna and 3 others
-
6


HMCS Bonaventure by NavyShooter - 1/96 scale - an RCN fitting out
in - Build logs for subjects built 1901 - Present Day
Posted
Here is the Mast.