


NavyShooter
-
Posts
589 -
Joined
-
Last visited
Content Type
Profiles
Forums
Gallery
Events
Posts posted by NavyShooter
-
-
OK, getting down to the details - I knocked off a few things from the 'to do' list.
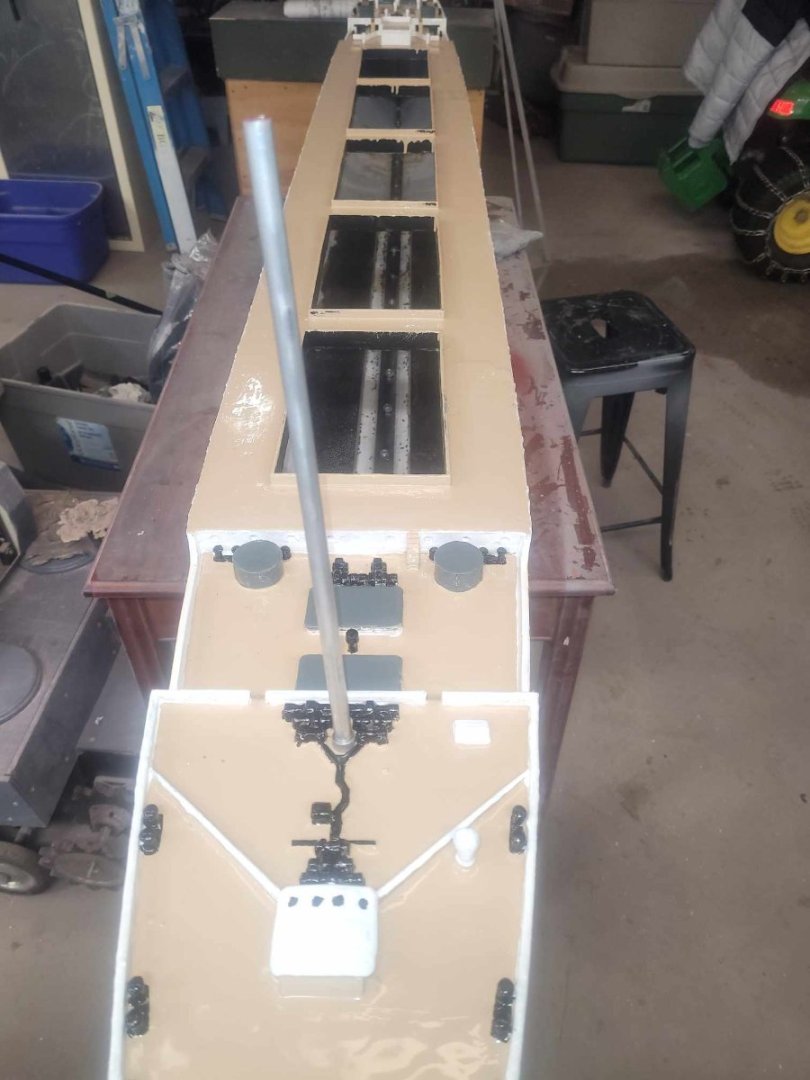
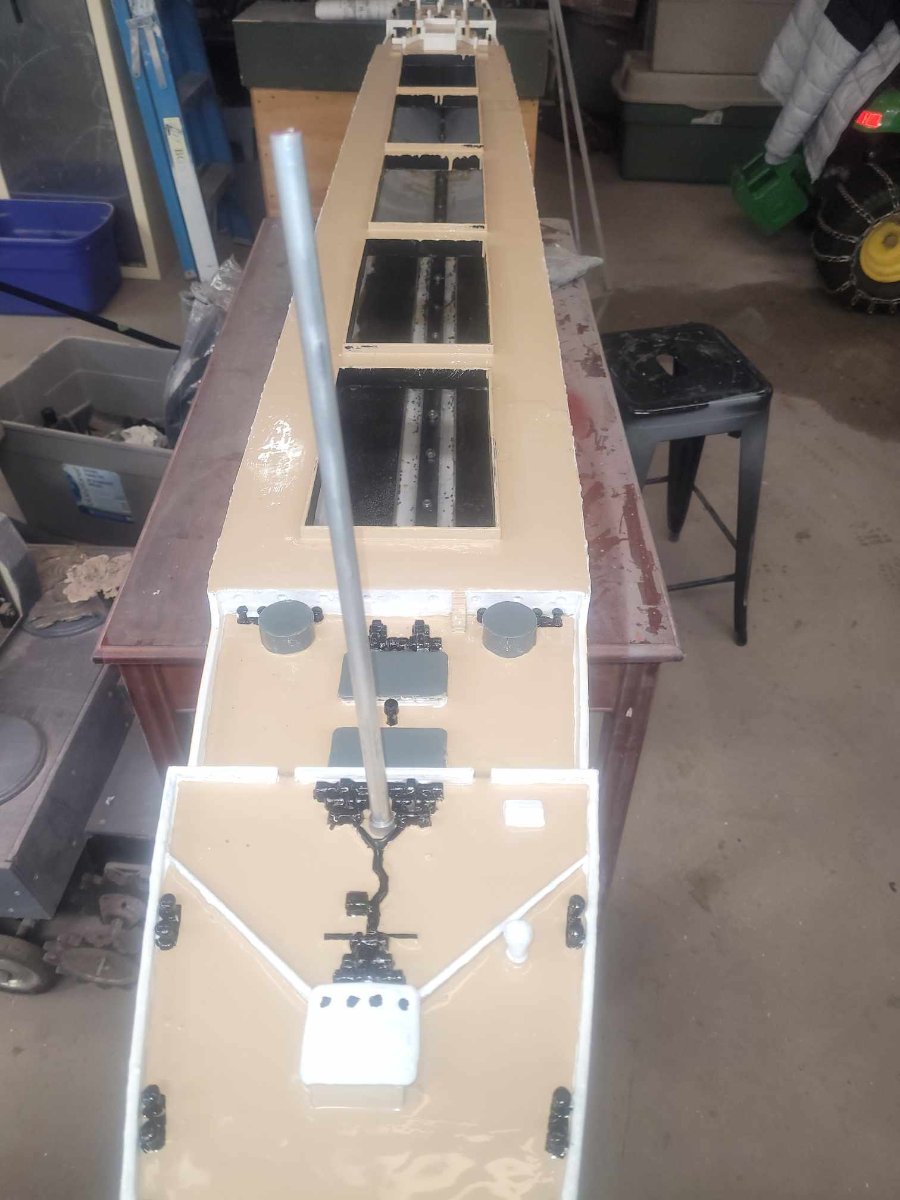
Mast bases installed in the hull tonight (2x4 blocks epoxied in place)
Masts installed in bases (epoxied into the wooden block)
Upper decks of hull given first layer of epoxy sealant
Upper deck air vents painted
Skylights painted
I have to do some touch-up on the skylights tomorrow - there was some paint bleed unfortunately.
No pictures - nothing really major to show....
-
Here's the lifeboats and Davits laid out in place on the upper decks just aft of the bridge. I decided to see how they'd look.
The superstructure now has a base layer of epoxy sealant on it, it'll get another once I get the funnels, davits and lifeboats installed. These are just sitting there for looks.
I made myself a 'to do' list of items that I have to get to on this project, and the list is getting short. Only a bit of painting left (the windows in the skylights for the staircases) and I can almost see the end of this. I'll be happy to have this off the bench and get back to my Bonnie project.
- GrandpaPhil, Canute, Ian_Grant and 2 others
-
 5
5
-
Not much to report - I got a new can of epoxy and have put the 2nd coat on the hull. I'll let that dry for a couple of days to fully set then flip the hull over and get the upper decks coated too.
- Canute and Haliburton
-
2
-
This week we've got a layer of epoxy clear coat applied to the hull.
I put a test-shot on part of the stern, then tonight we got the whole outer layer covered.
Planning on a second coat, just for certainty.

- Haliburton, Canute, ccoyle and 3 others
-
6
-
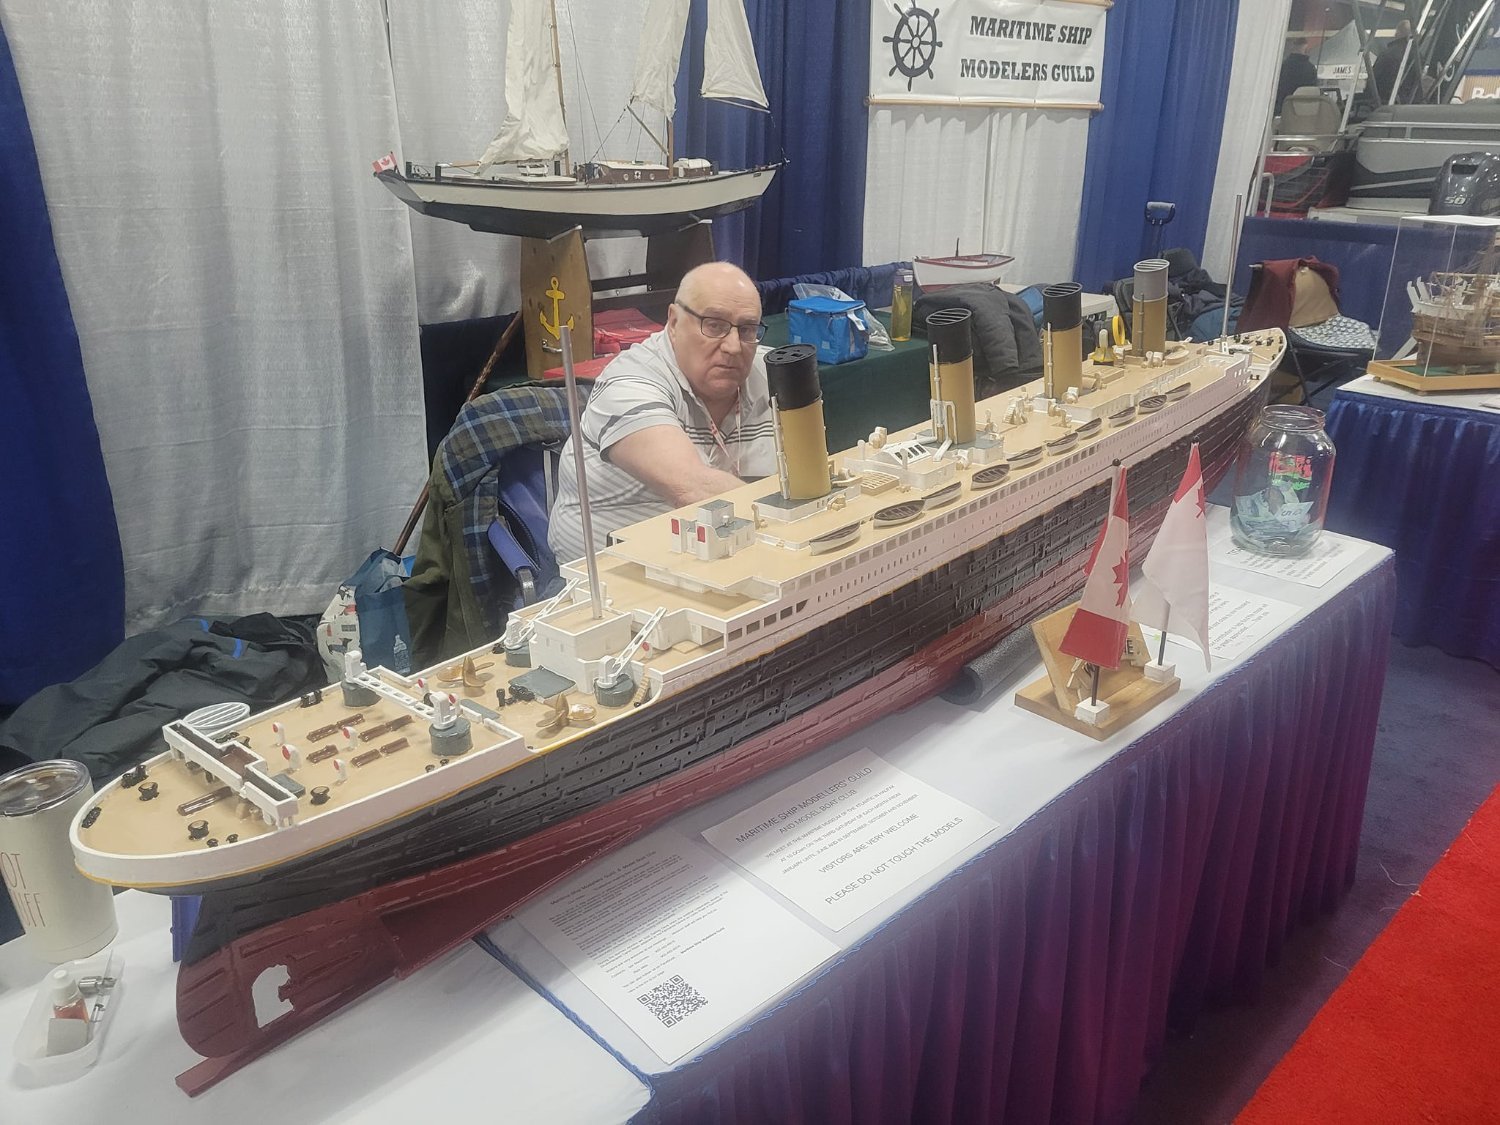
One of our Guild Members spent the weekend puttering about with some paint behind the table, and we have our Funnels painted now!
A great show, some interest and a few minor donations to the cause.The only problem was the weather....we had a full blown snow-storm most of the weekend. At one point I had a 3 foot drift of snow behind my truck!


- WizardOfOs, scrubbyj427, GrandpaPhil and 9 others
-
10
-
 2
2
-
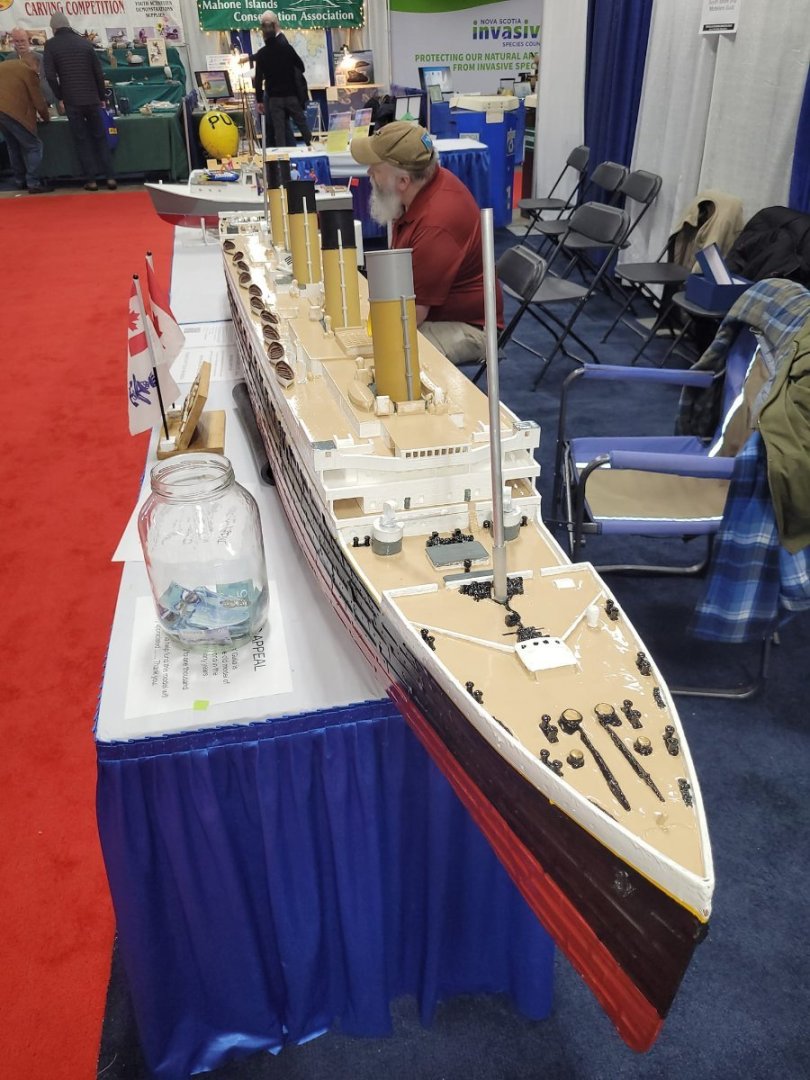
All set up at the boat show! Here's some of the Guild's other work on display!
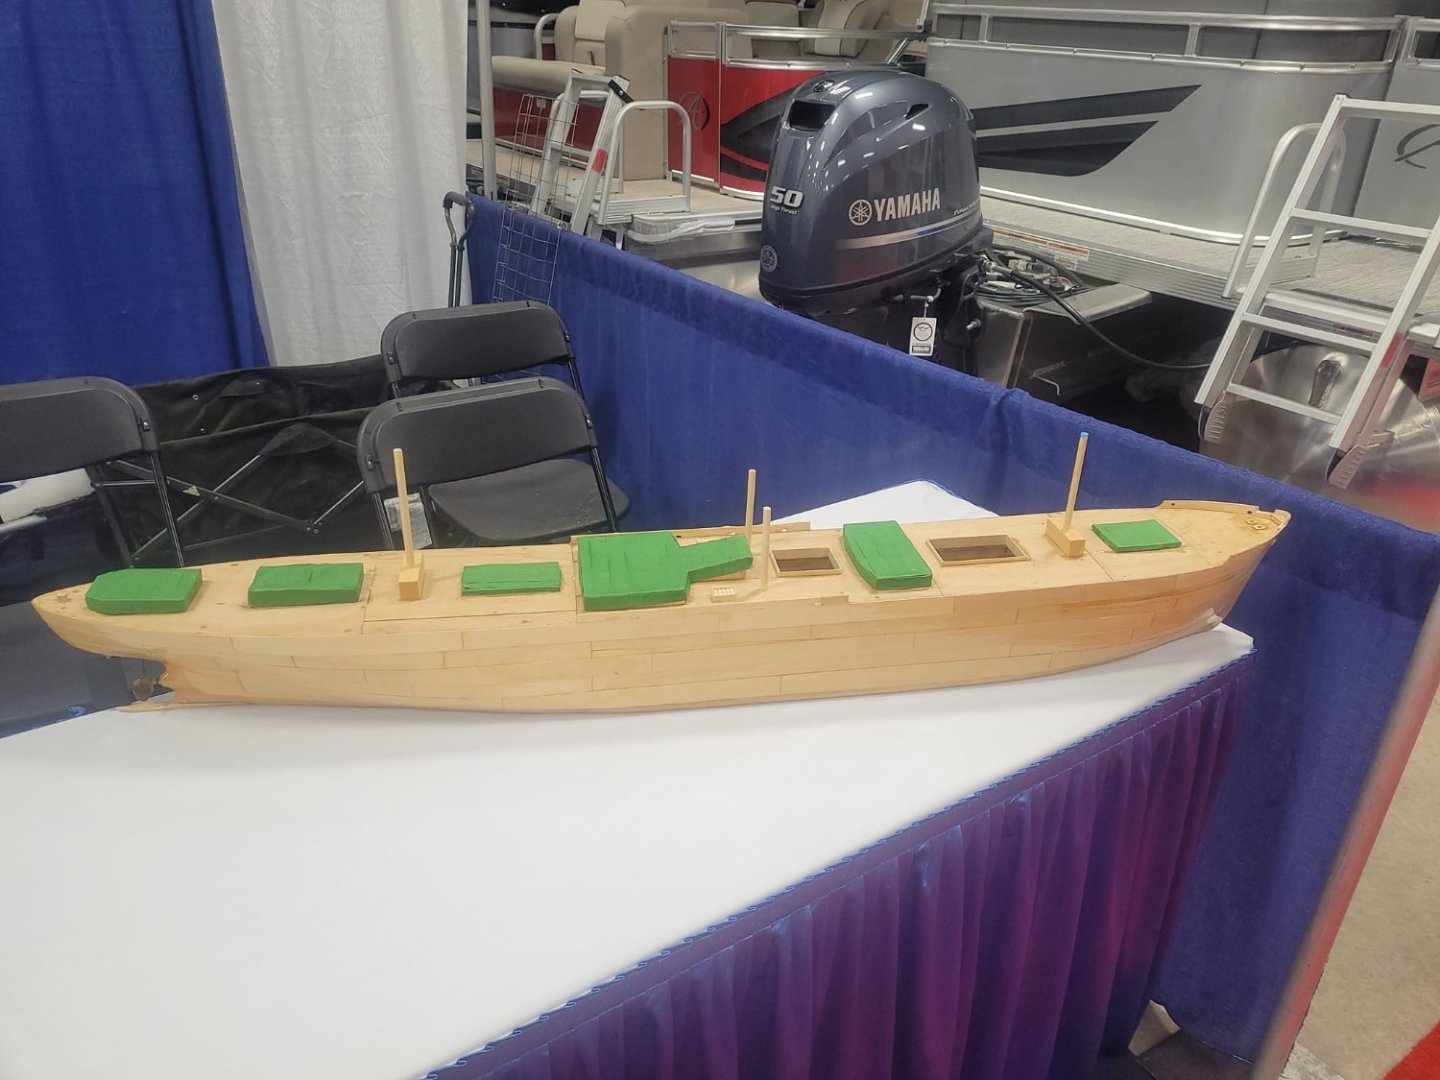
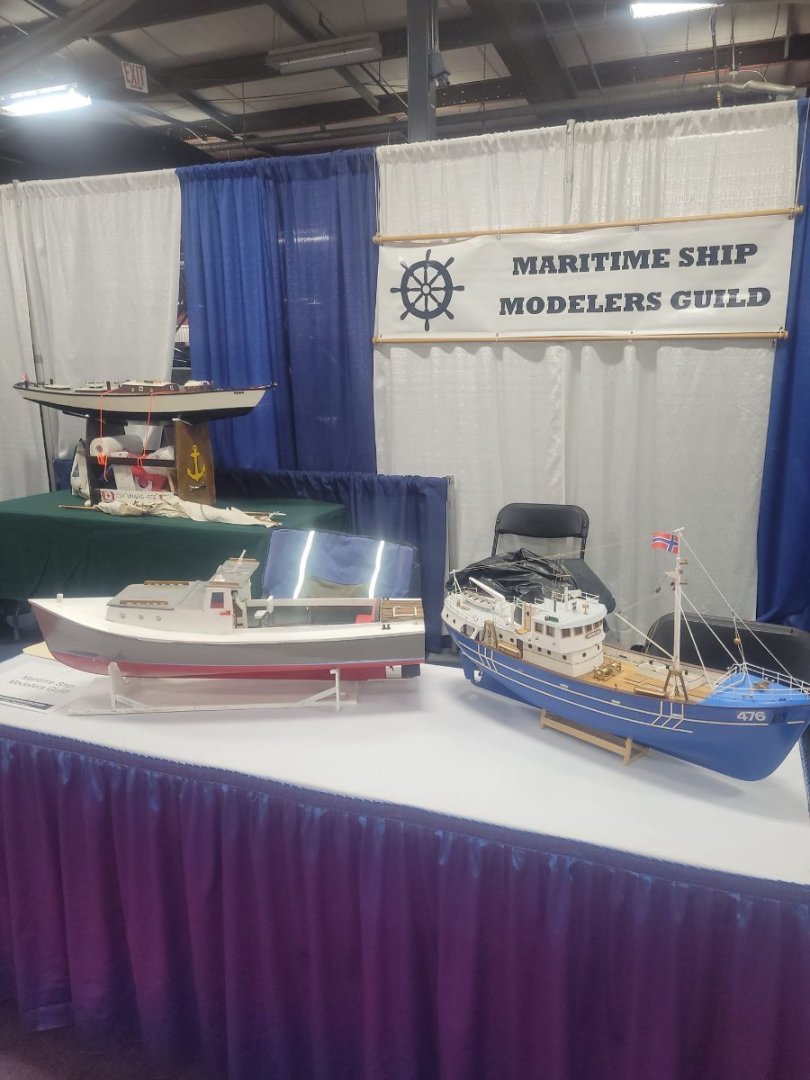
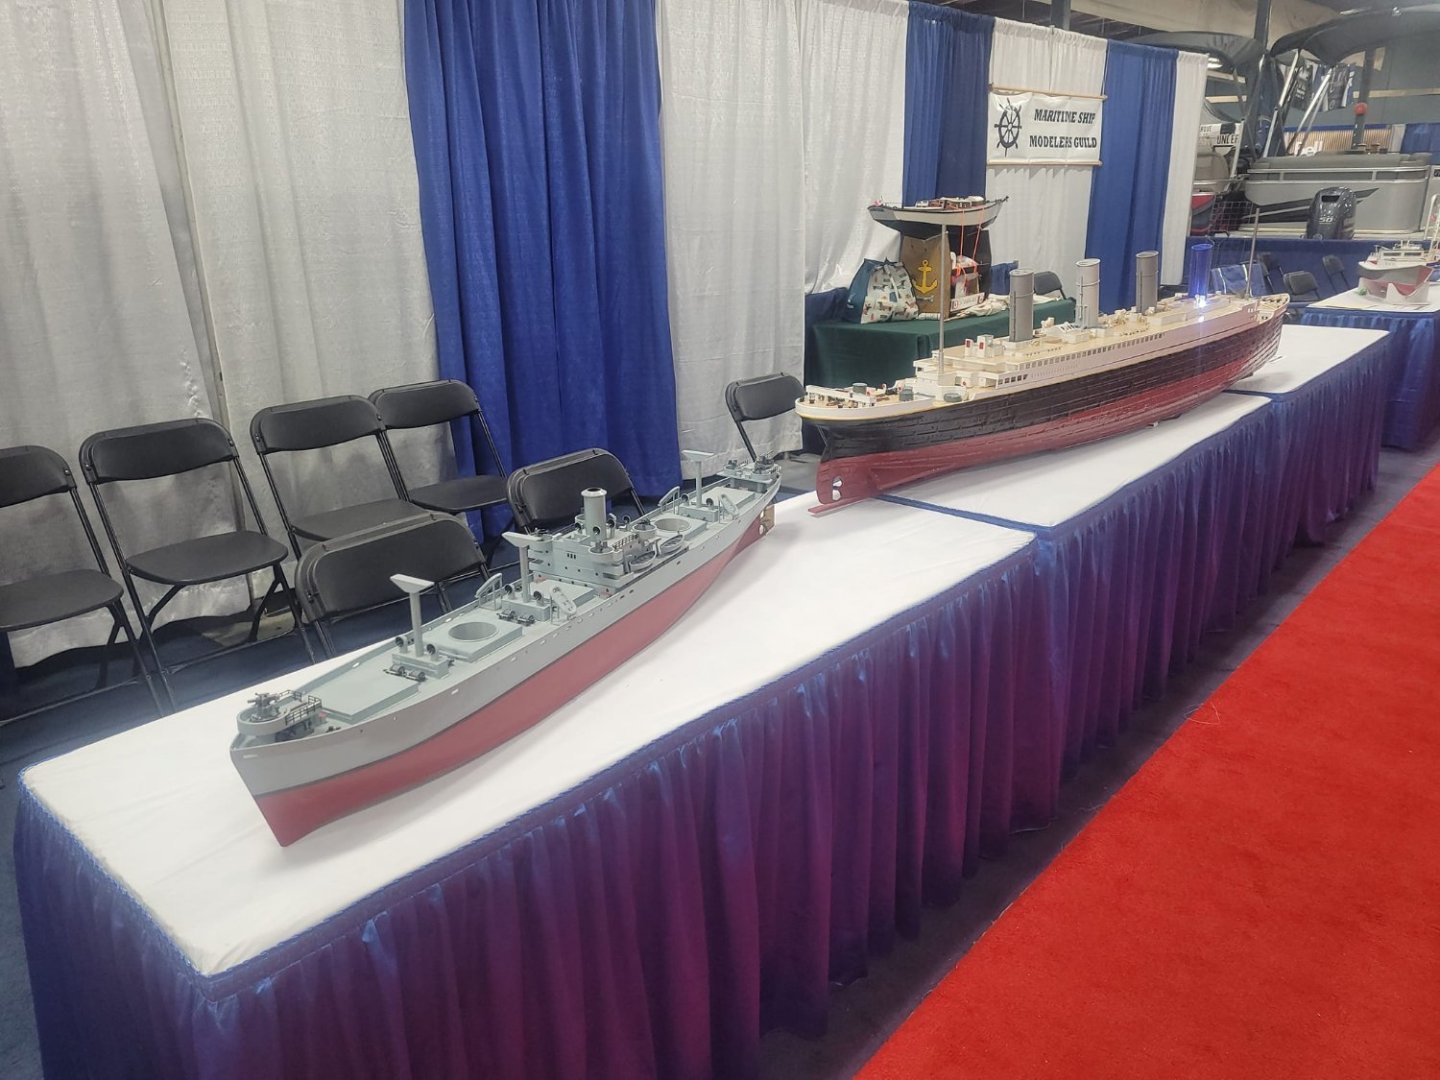
- GrandpaPhil, Haliburton, Canute and 5 others
-
8
-
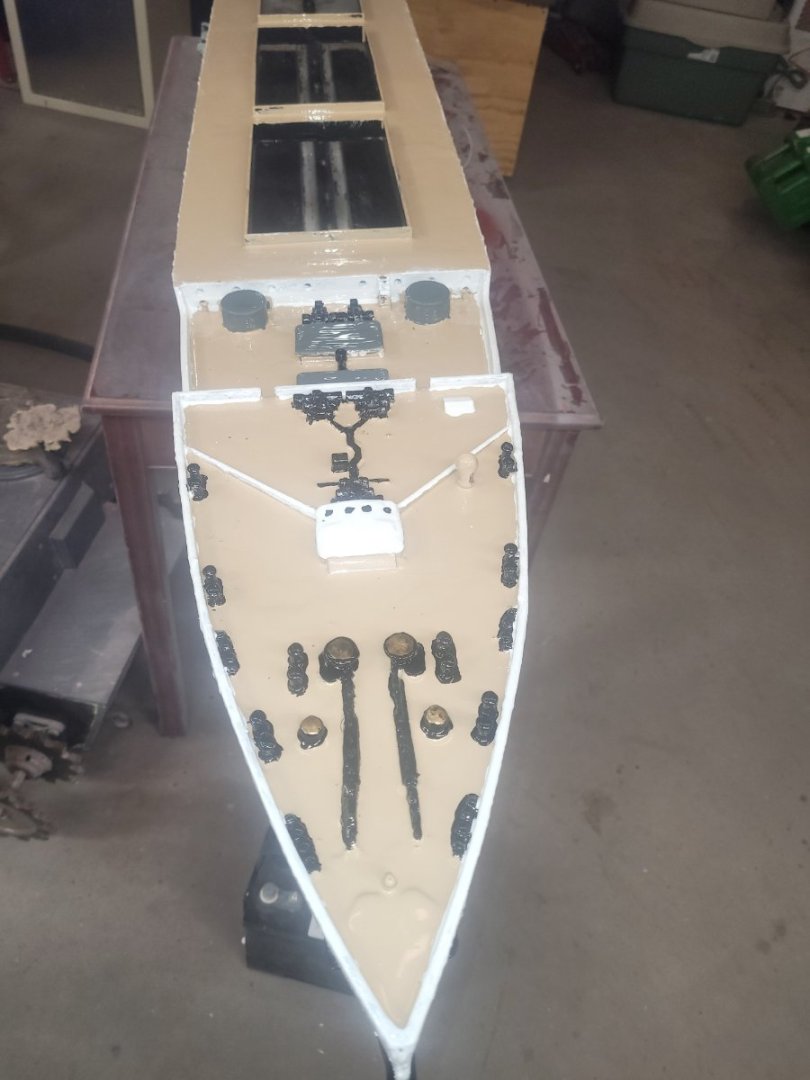
The 2nd Mast has been started - and that's as far as I'm getting this week.
Tonight the ship gets loaded into the truck and I head into the Halifax International Boat Show with her (and a couple of others) for the weekend!
If you're in Halifax (Nova Scotia) this weekend, feel free to drop in and see her in person!
NS
- mtaylor, Haliburton, Canute and 1 other
-
4
-
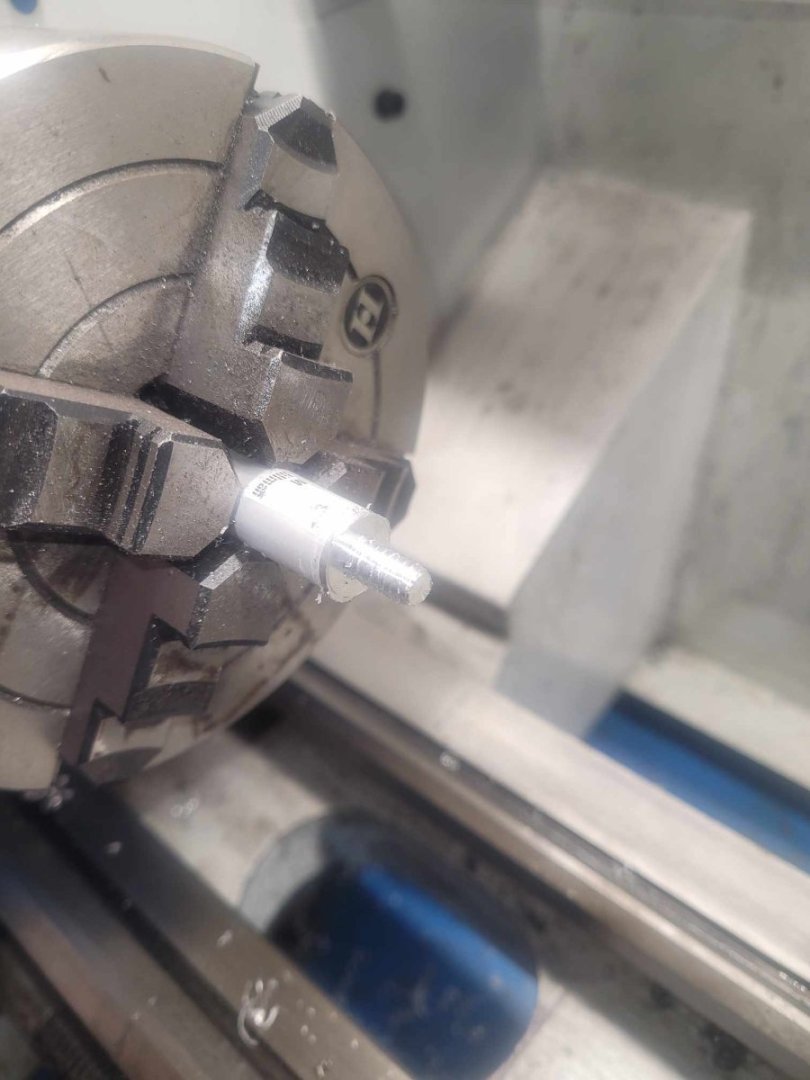
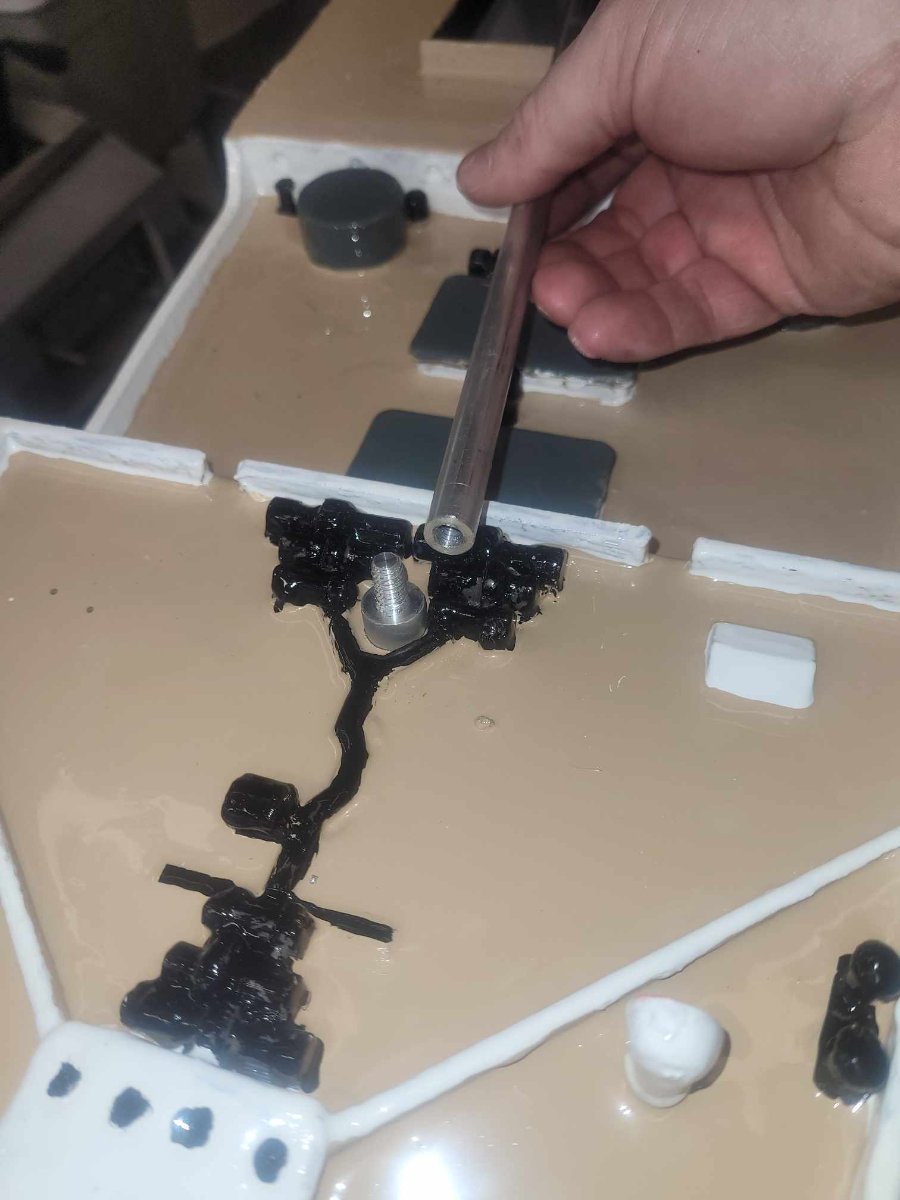
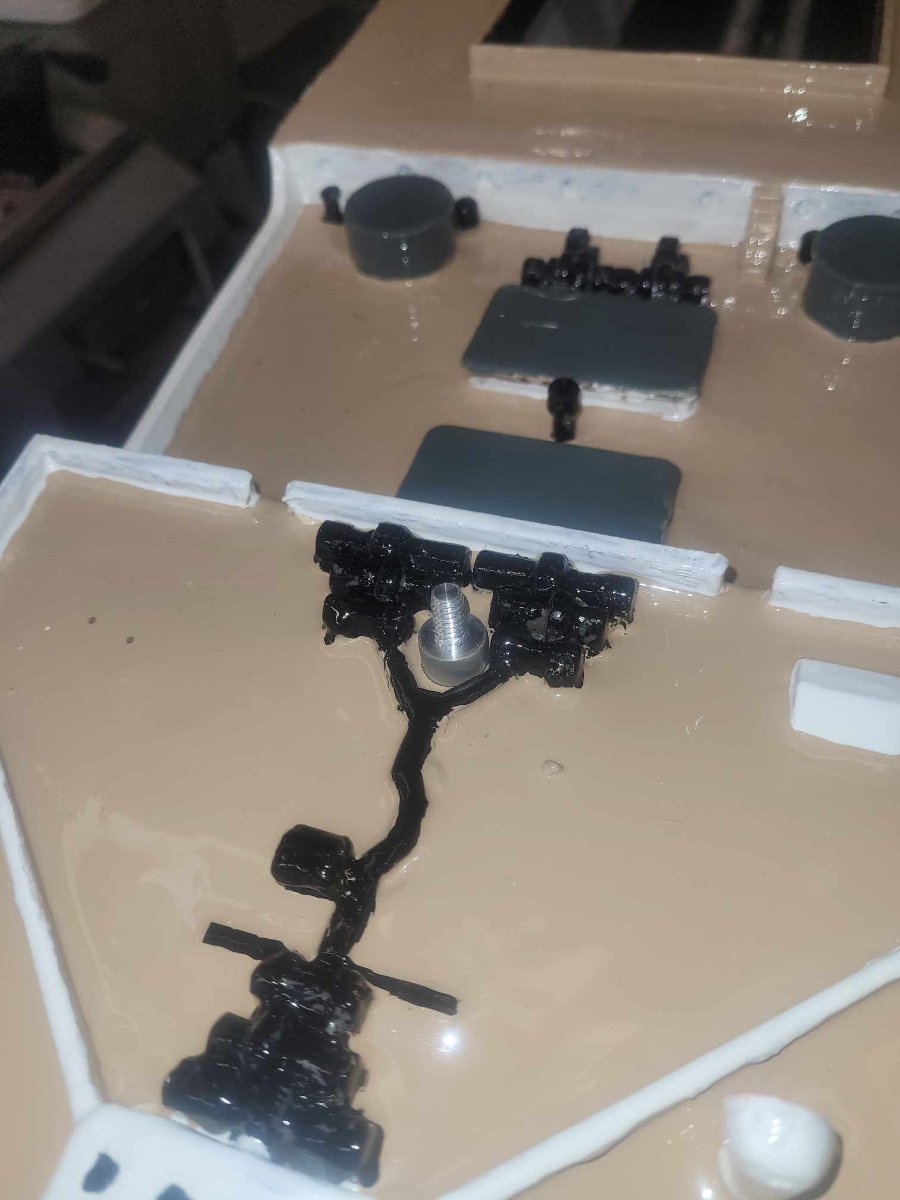
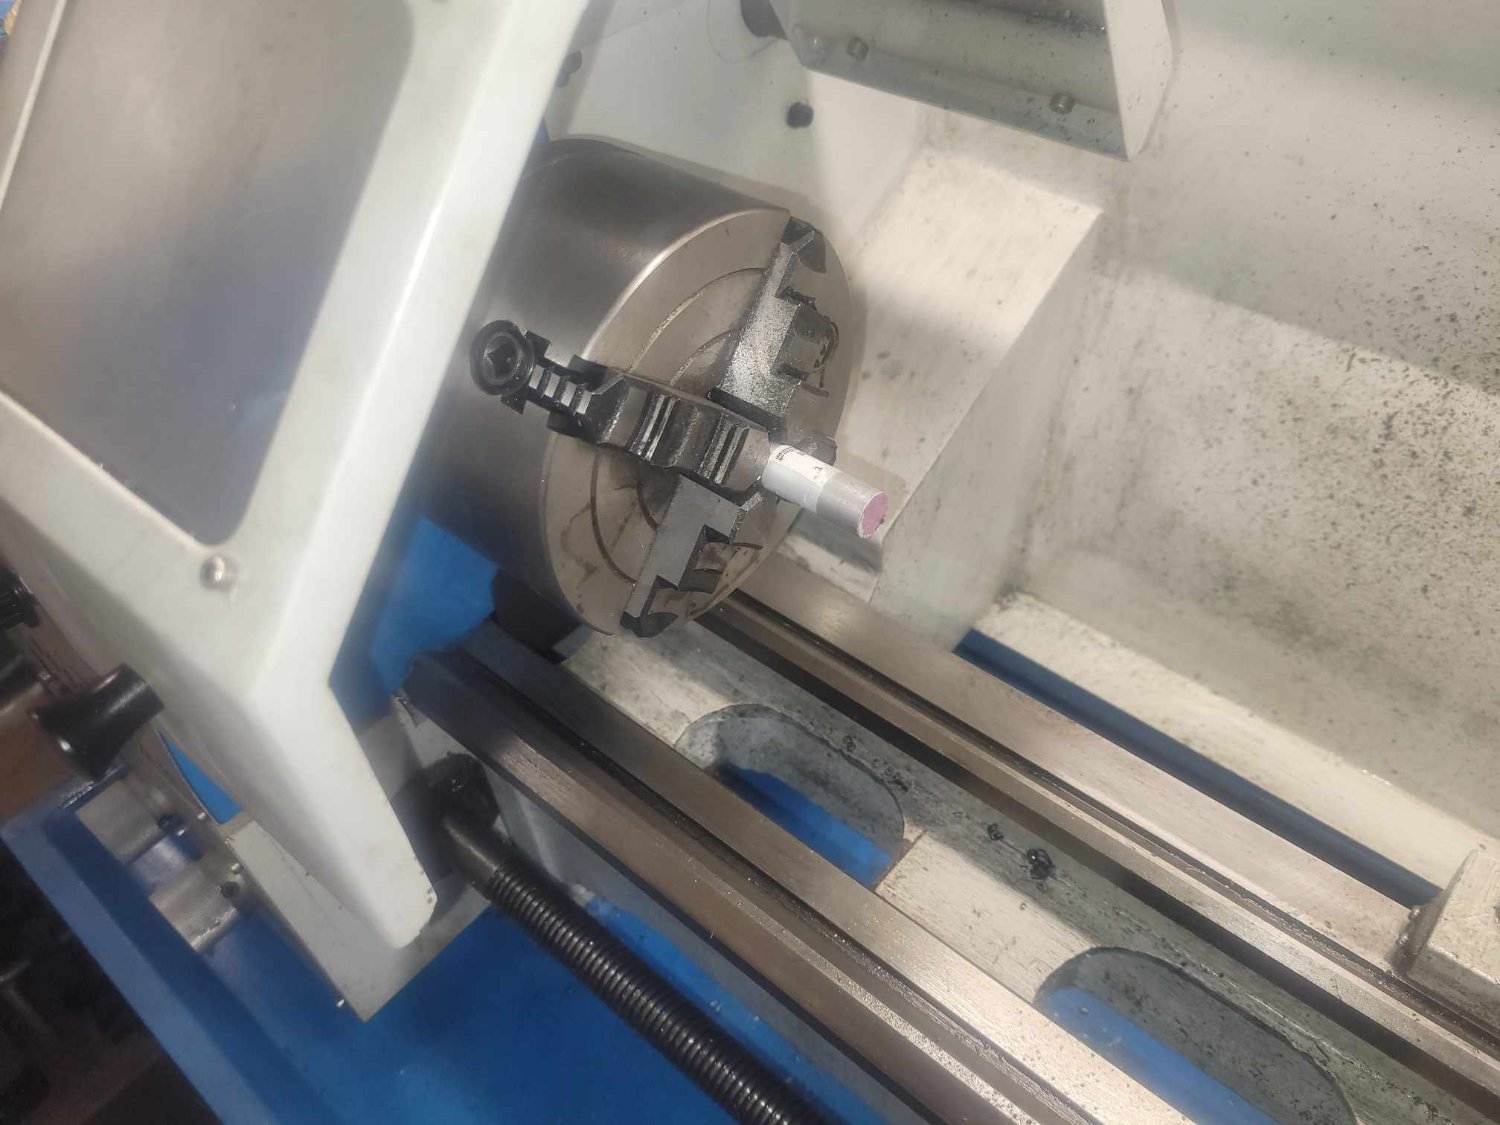
Here's how the base of the mast mount will work.
I have to spin a taper onto the mast itself, but it's a good starting point!

- yvesvidal, scrubbyj427, KeithAug and 5 others
-
8
-
The masts are going to be aluminum rods, and here are the bases for them. I have to make cross-bars that will go in the hull, drill the holes in the deck, tap the cross-bars, then epoxy the bars into place.


- Haliburton, mtaylor, GrandpaPhil and 1 other
-
4
-
Here's the stern....getting there!
- mtaylor, Haliburton, Canute and 2 others
-
5
-
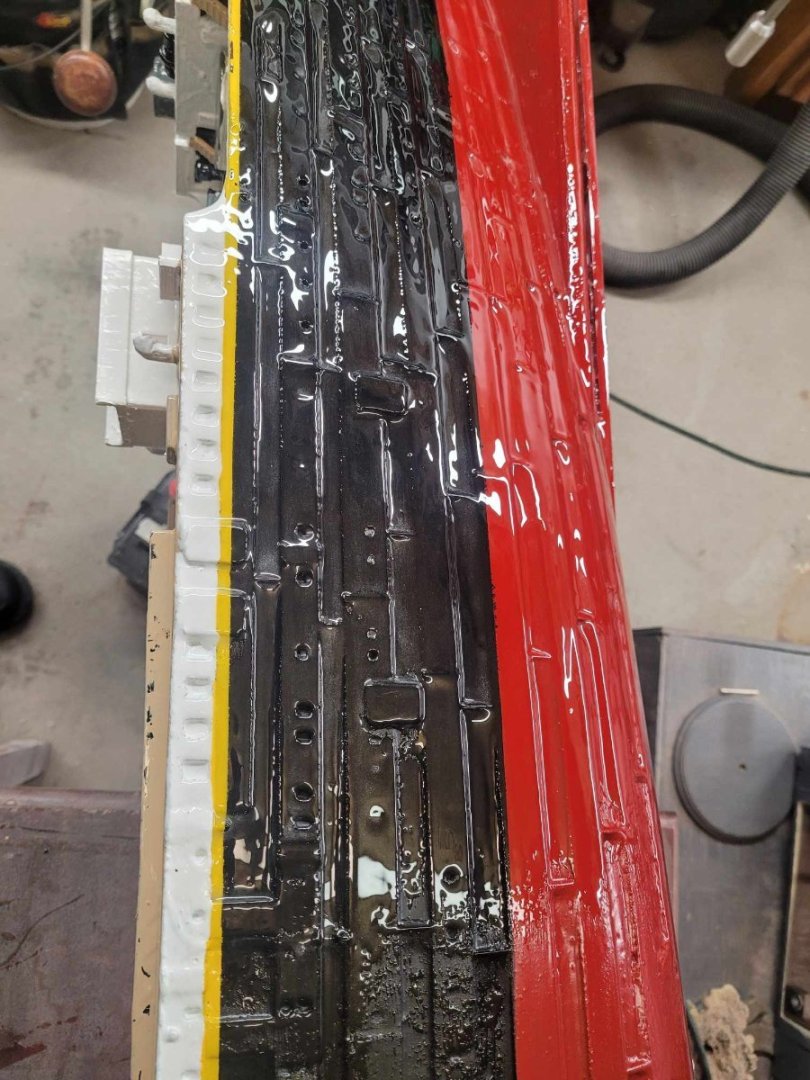
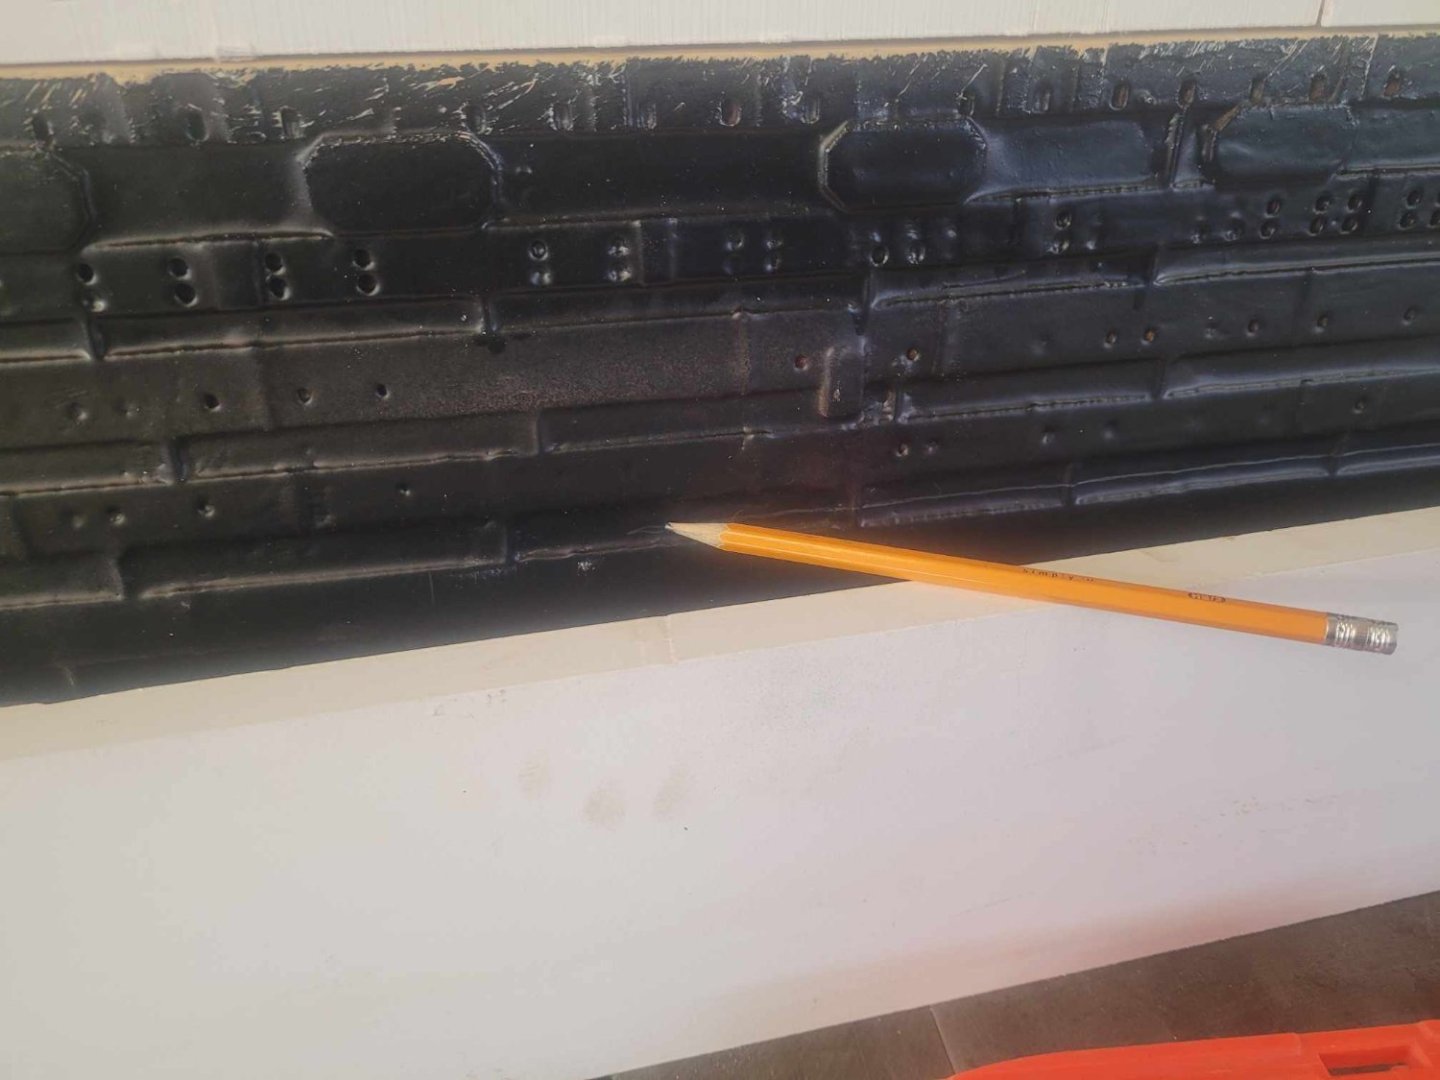
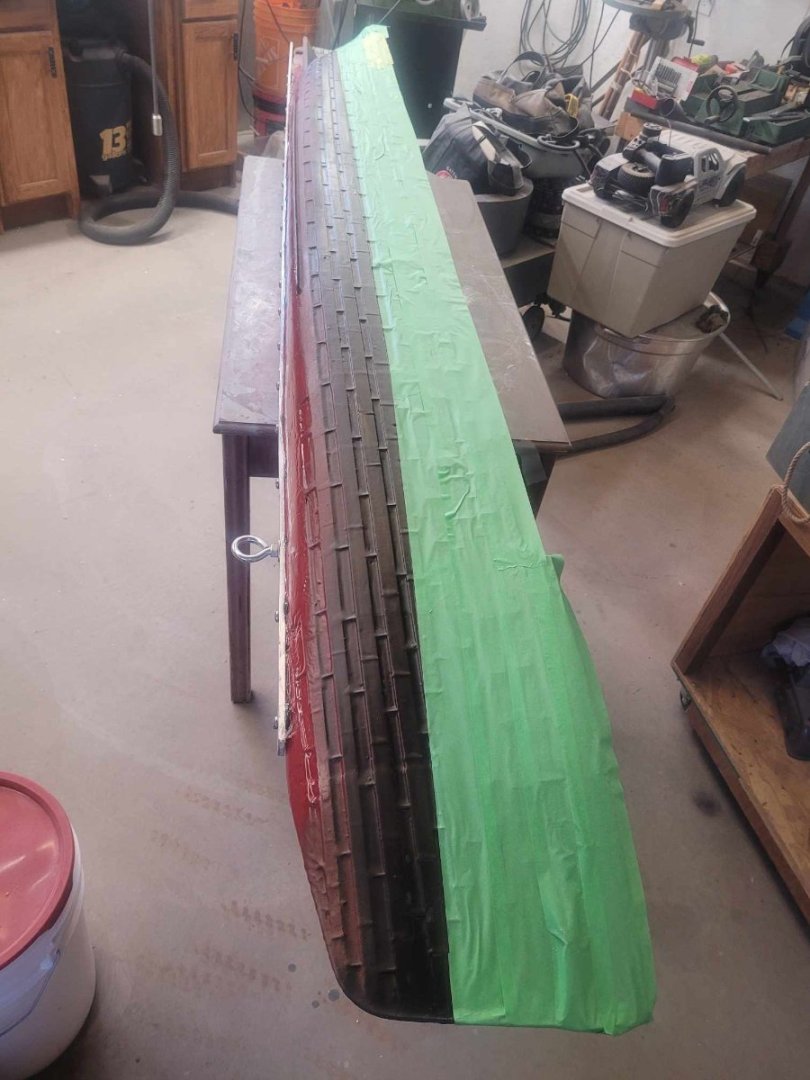
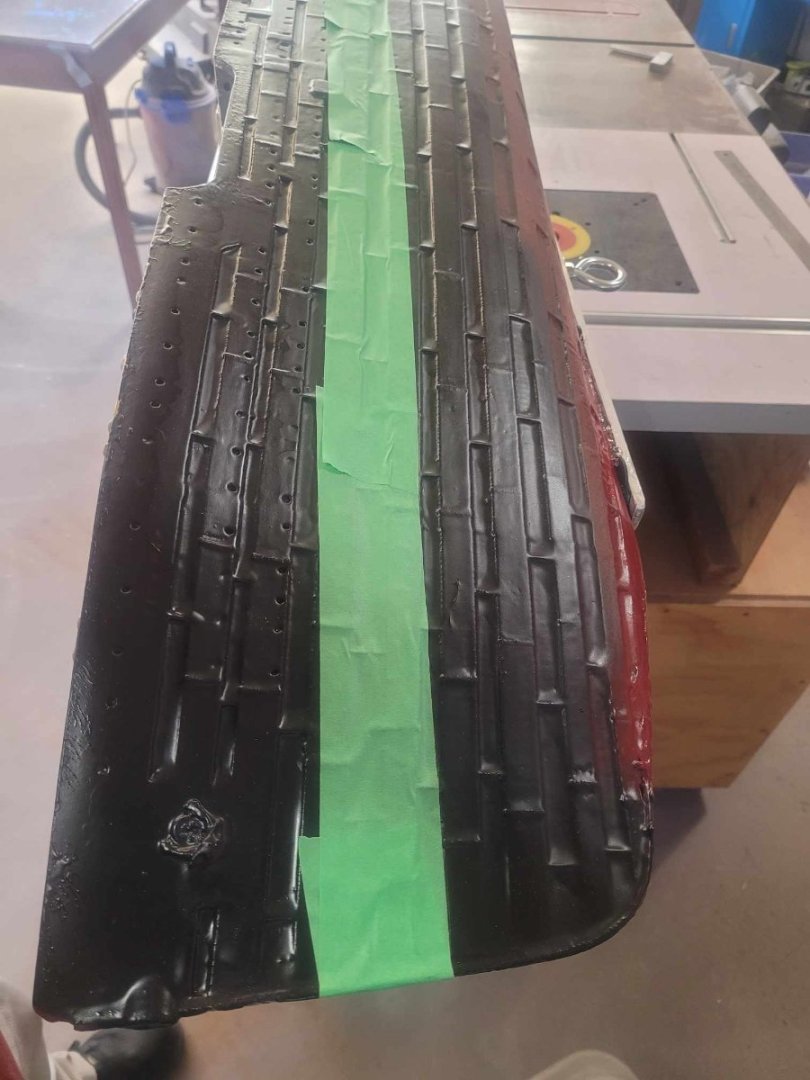
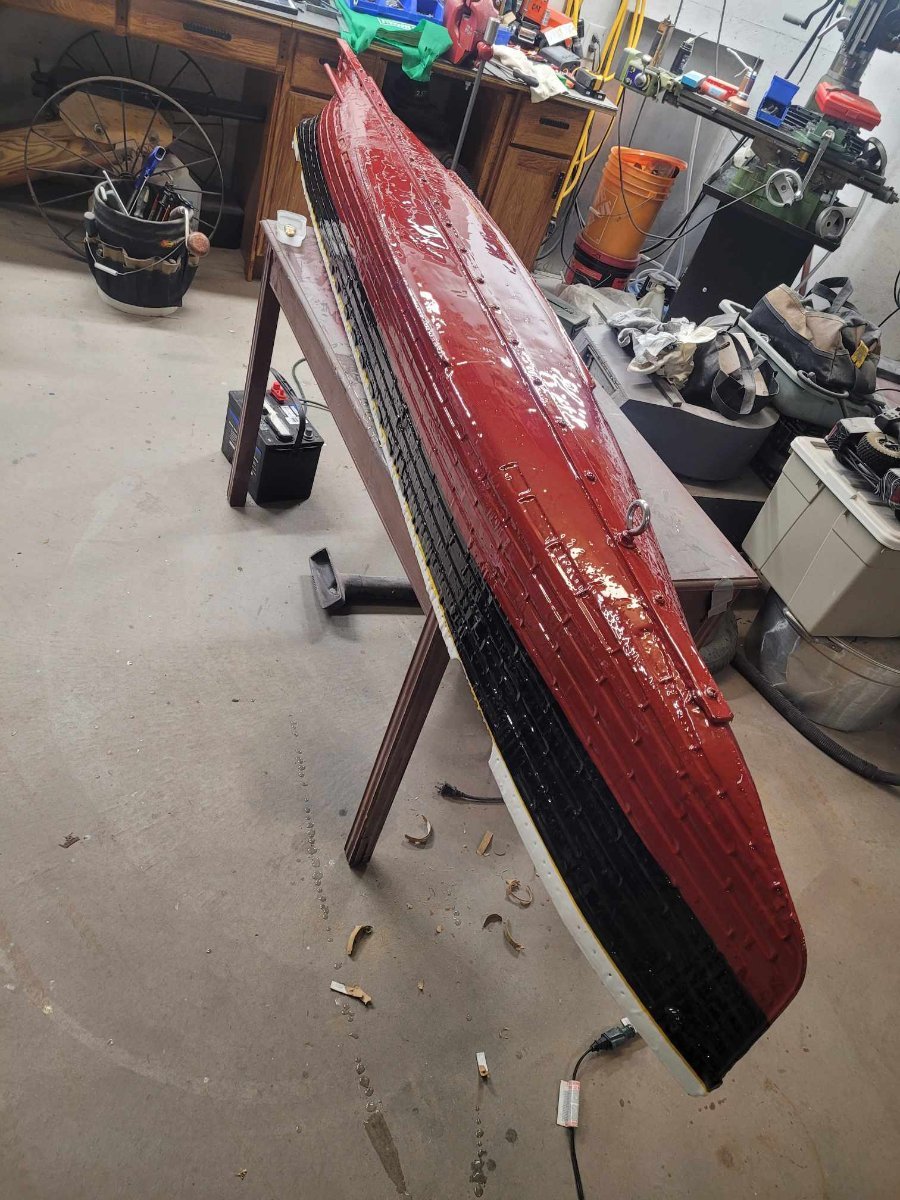
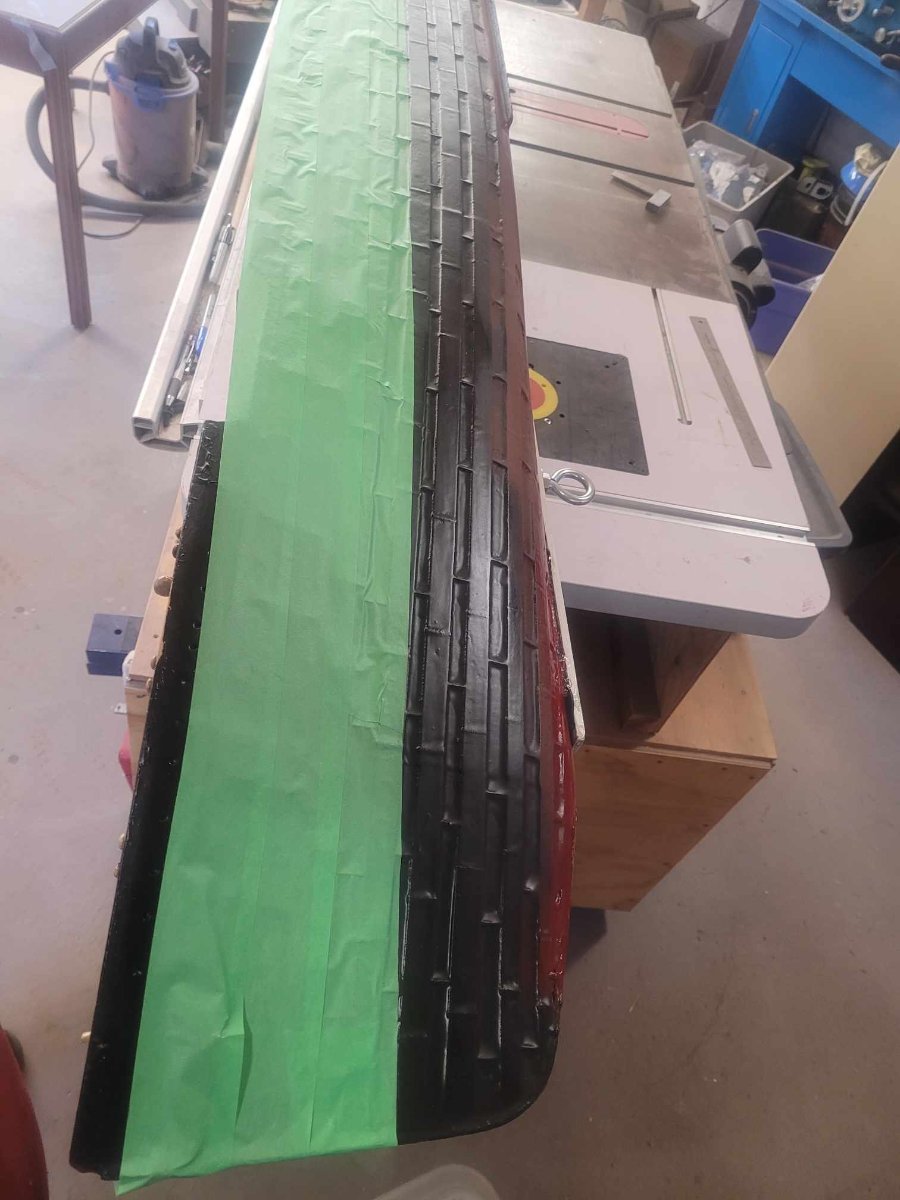
Alrighty...I did some minor touch-up work tonight on the hull, some drips and over-runs were repainted, so now there's basically very little left to do on the hull...so I rolled it onto its side, got out a roll of painters tape, and put a yellow stripe down the port side. I'll put a second coat on tomorrow and then do the Starboard side.
Things left to do with the hull:
- Yellow Stripe (Stbd) - 2 coats
- Yellow Strip (Port) - 1 coat
- Drill holes for mast supports
- manufacture mast supports
- install mast supports and interior hull brackets for them
I'm intending to make the mast supports out of aluminum rod, and will chock/block them into place in the hull with a pile of resin and cloth.
Pictures will follow!

-
OK,
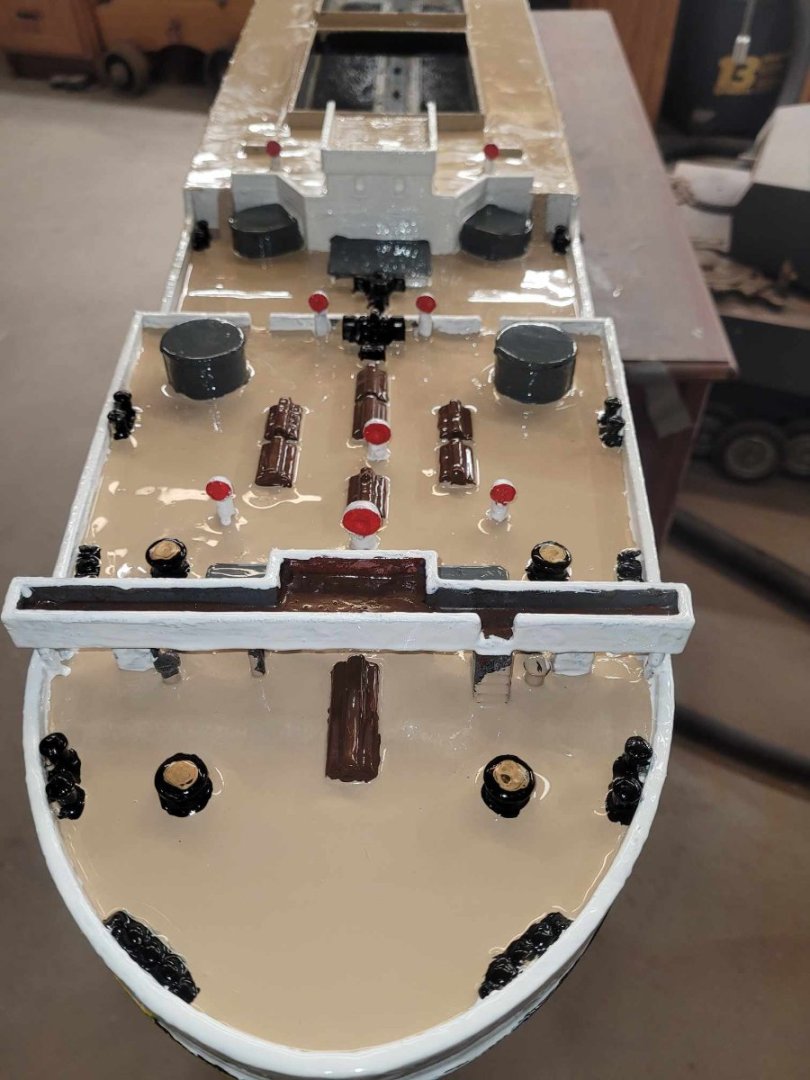
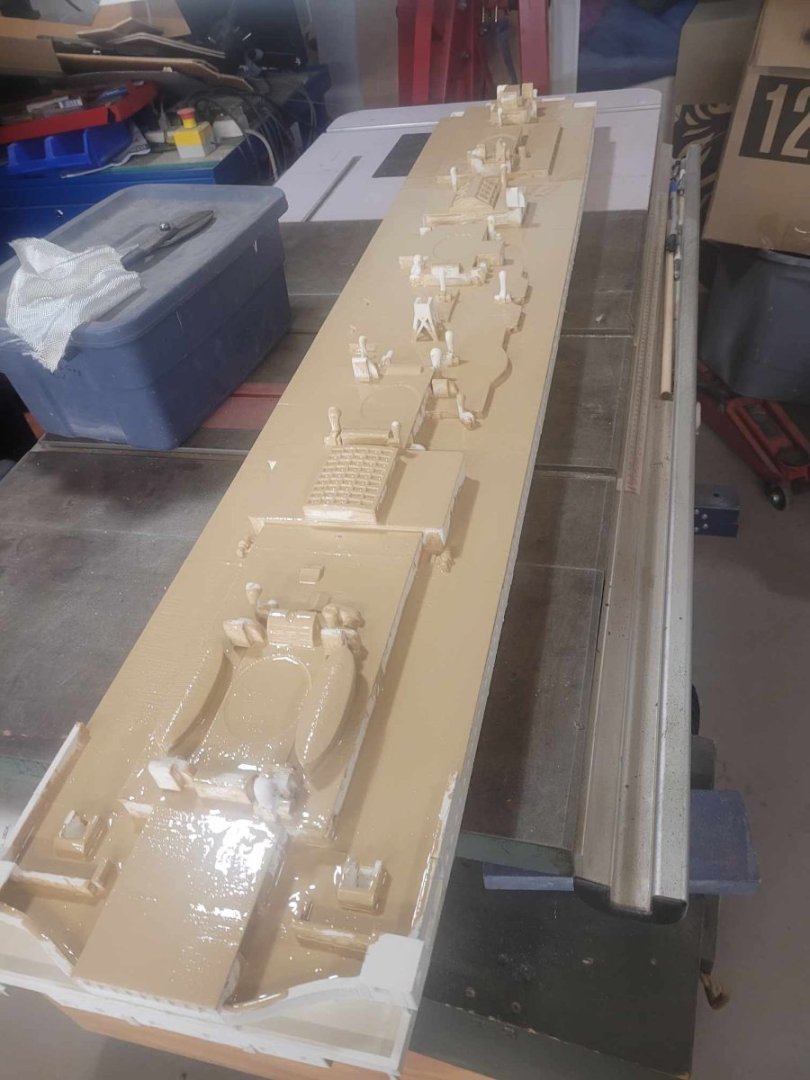
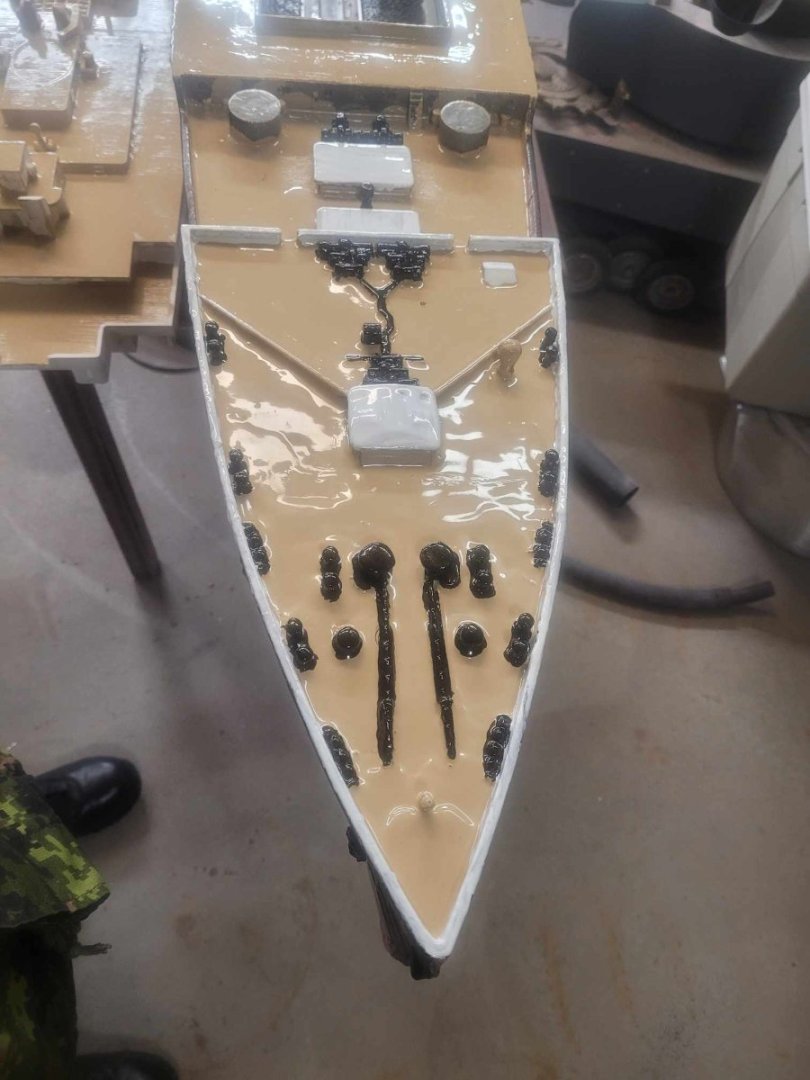
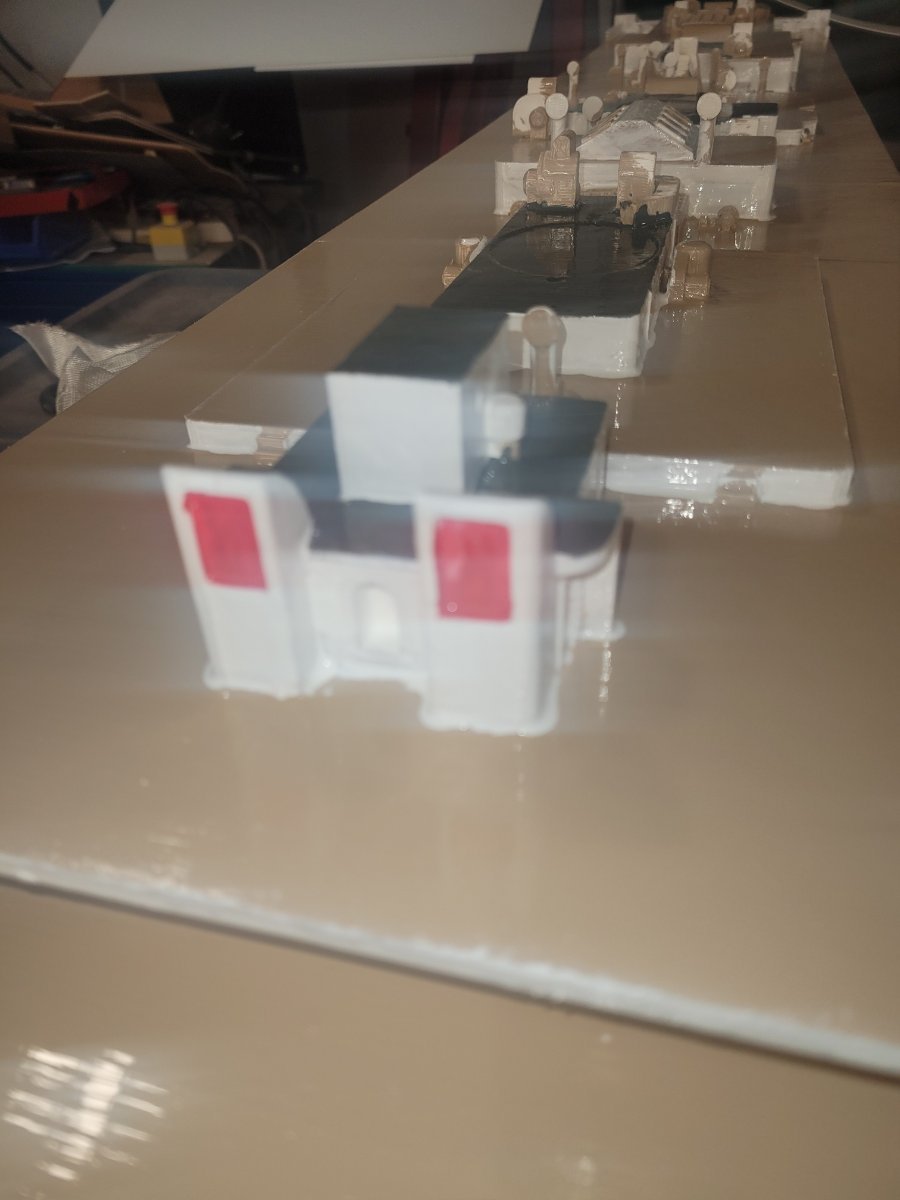
Had some time out in the garage last evening and got the rest of the 'details' painted on the Focs'le. All that's left is a bit of touch-up with the tan for a couple of over-runs, and the stairs/ladders.
I also have some paint work done on the upper decks, and the red vent interiors really make them pop!
I think I have some white-bleeding issues with my cell phone camera that I have to figure out as well...sorry gents.


- Canute, GrandpaPhil, KeithAug and 4 others
-
7
-
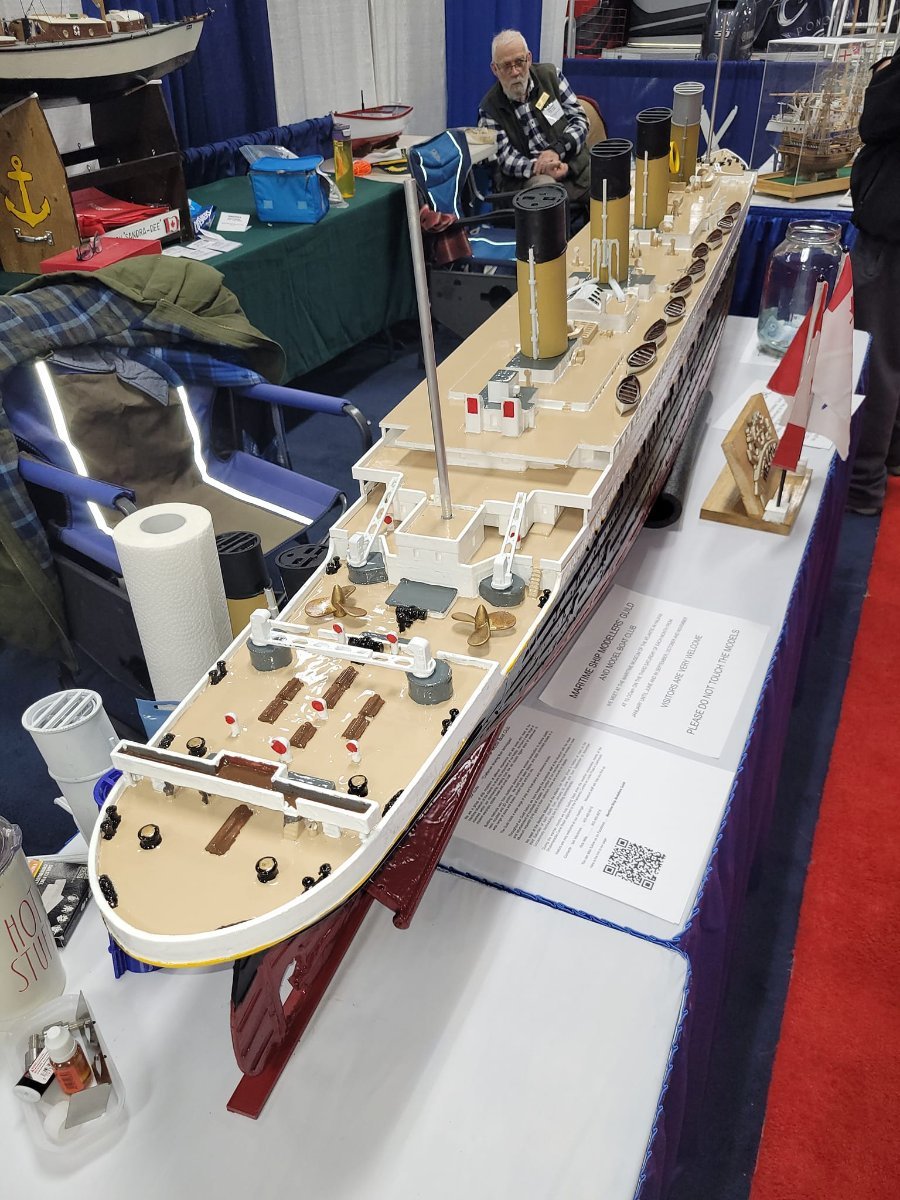
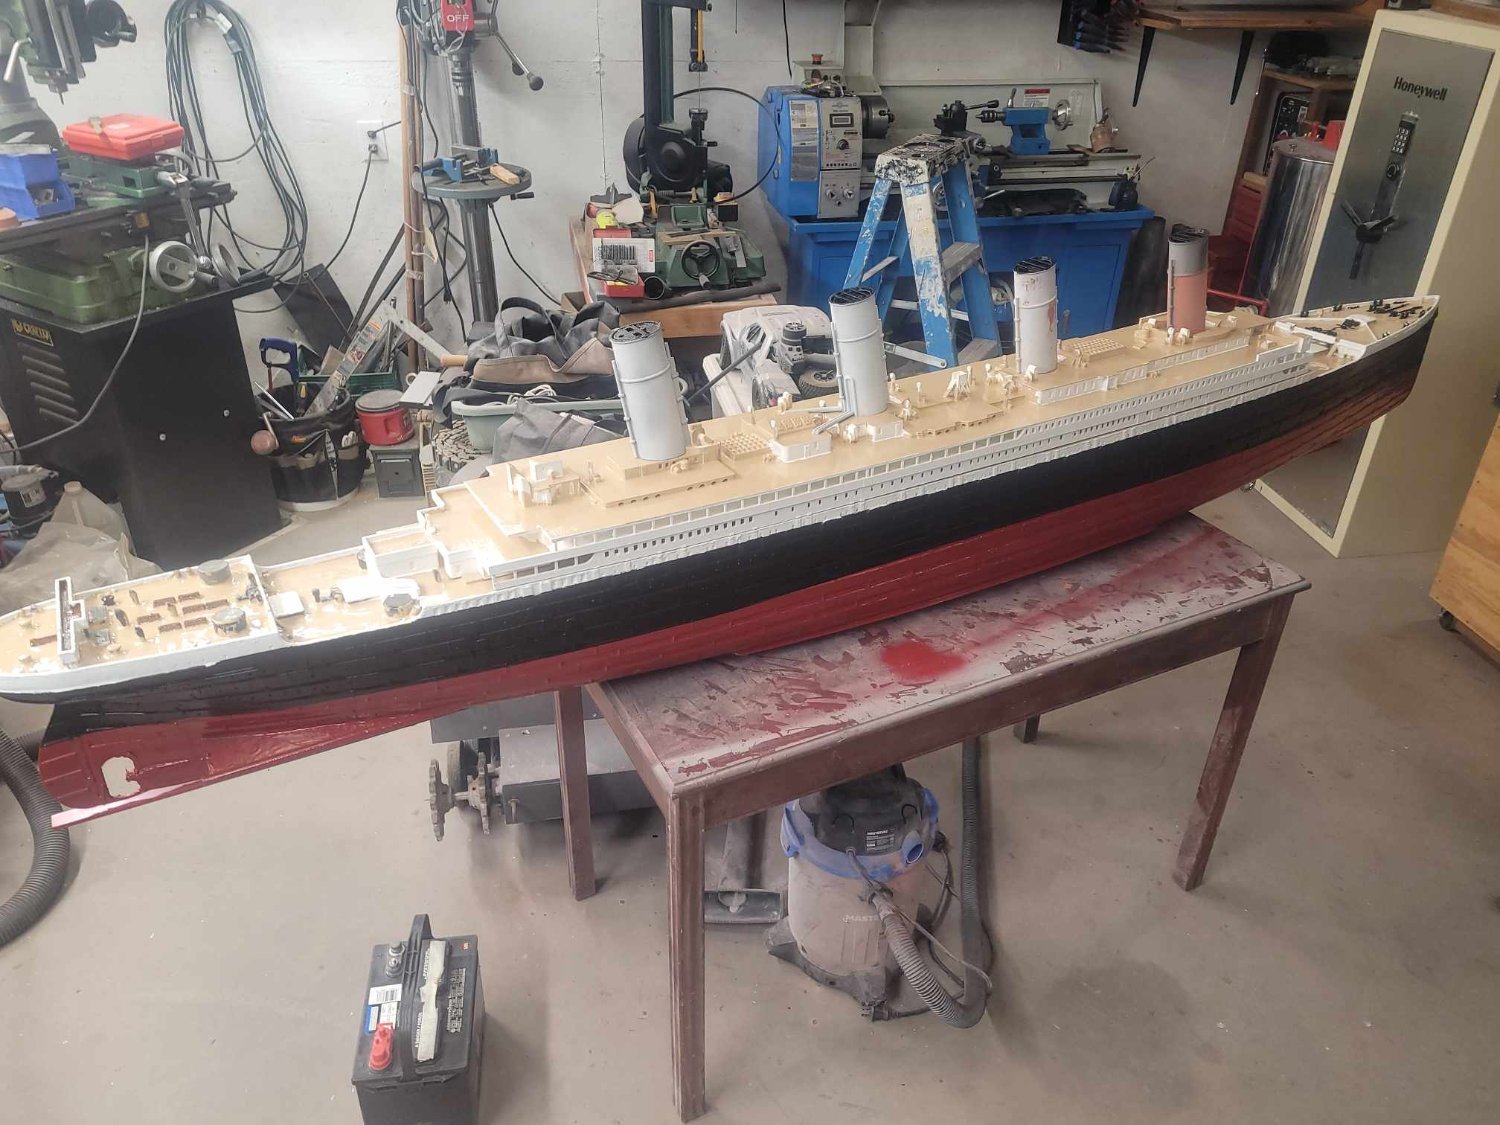
We had our monthly Guild meeting yesterday, and I wheeled the model into the museum to let the group have a look at the progress. She's huge...and starting to look more complete.
(Yes, I do use a lightly modified baby stroller for moving the ship. Our Guild President uses a 4 wheel camping dolly thing, but I found it very unstable when he top-loads it. This thing folds up small, and with a wide wheel-base, it works well for stability.)
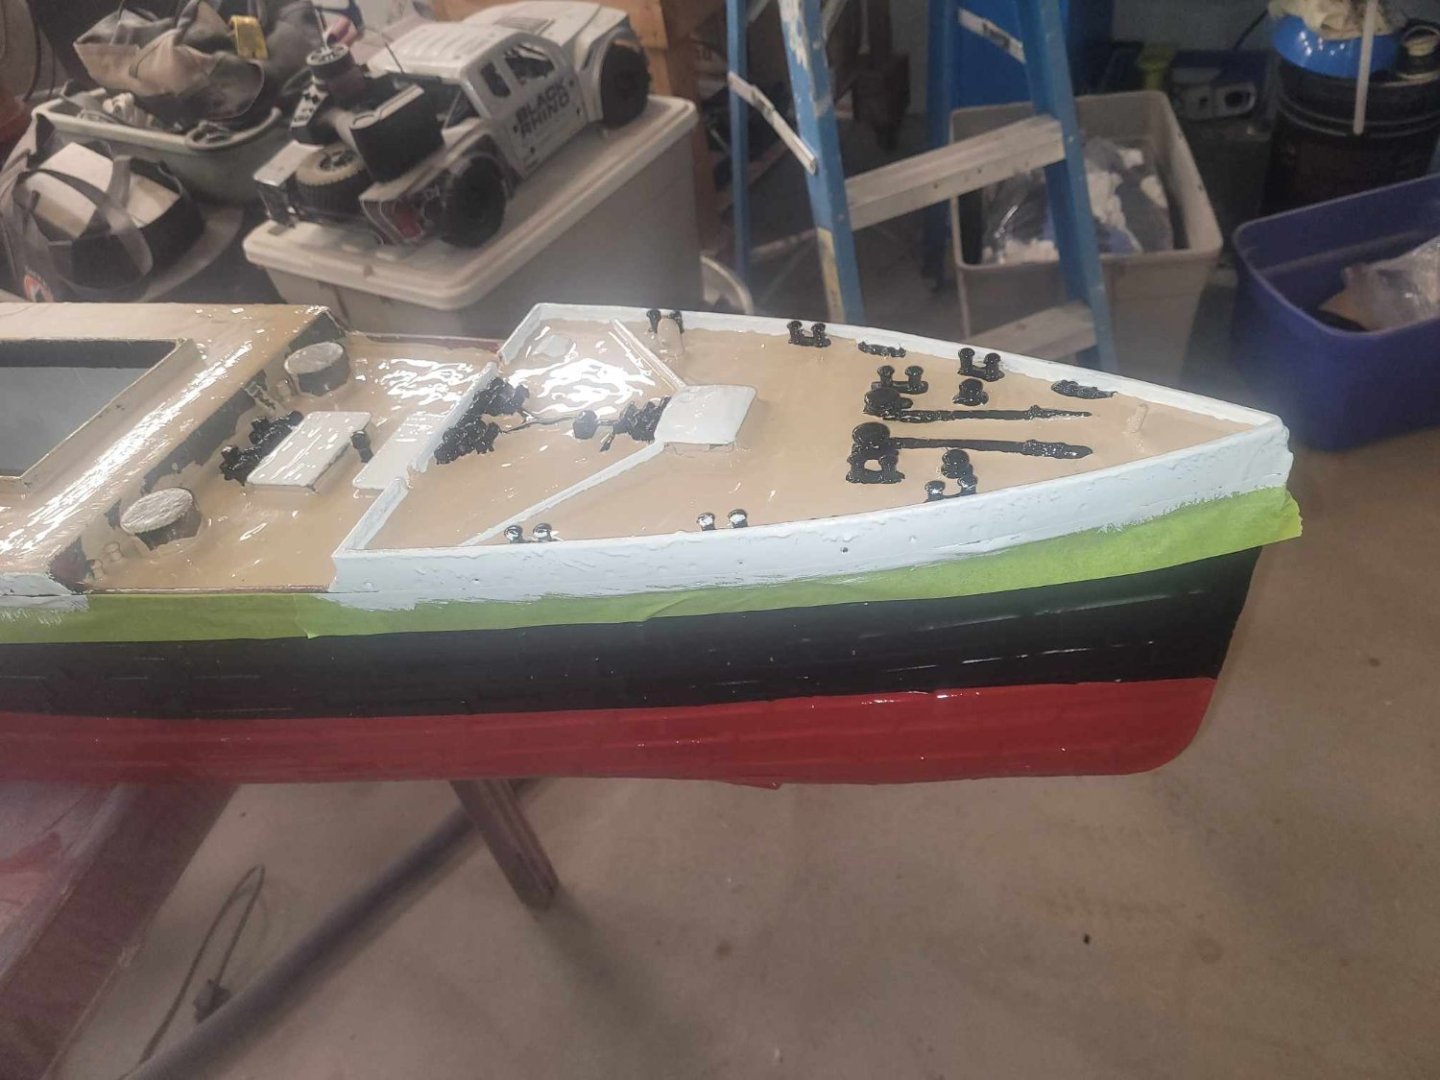
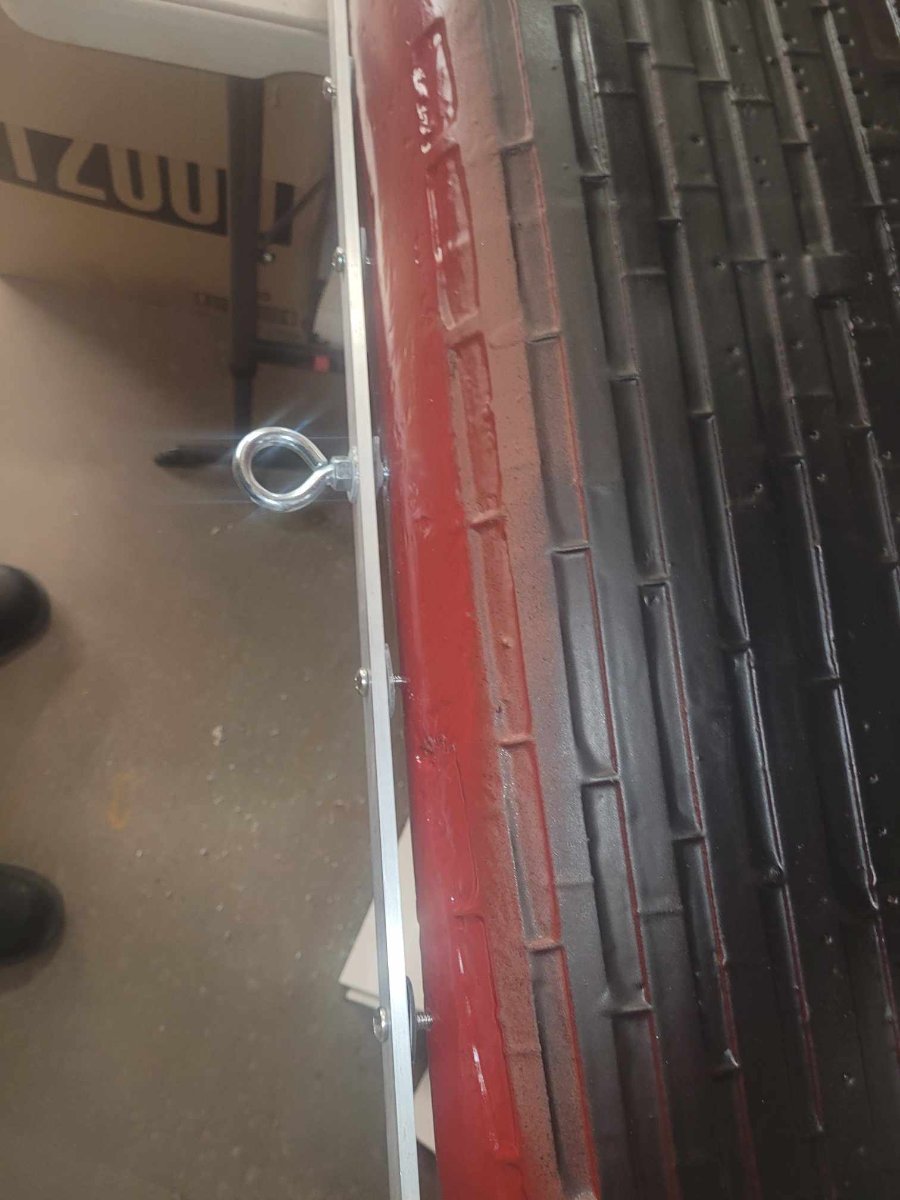
After I got her home, I started doing a bit more tidy-up painting. There was a bit of red that overlapped the black on the hull, so a bit of tidying and spraying there to get sorted out. Then I looked at the superstructure, and decided to get some more white and some gray on around the funnel bases.
Good news is that the gent from the Guild that's working on the lifeboats and davits took on the task of tidying up and painting the funnels for me as well, so he has those in hand now. I'll see what I can get done over the next few weeks.
NS


- Valeriy V, GrandpaPhil, Haliburton and 4 others
-
7
-
-
Some work on the Focs'le and the superstructure.
- scrubbyj427, KeithAug, Canute and 2 others
-
5
-
-
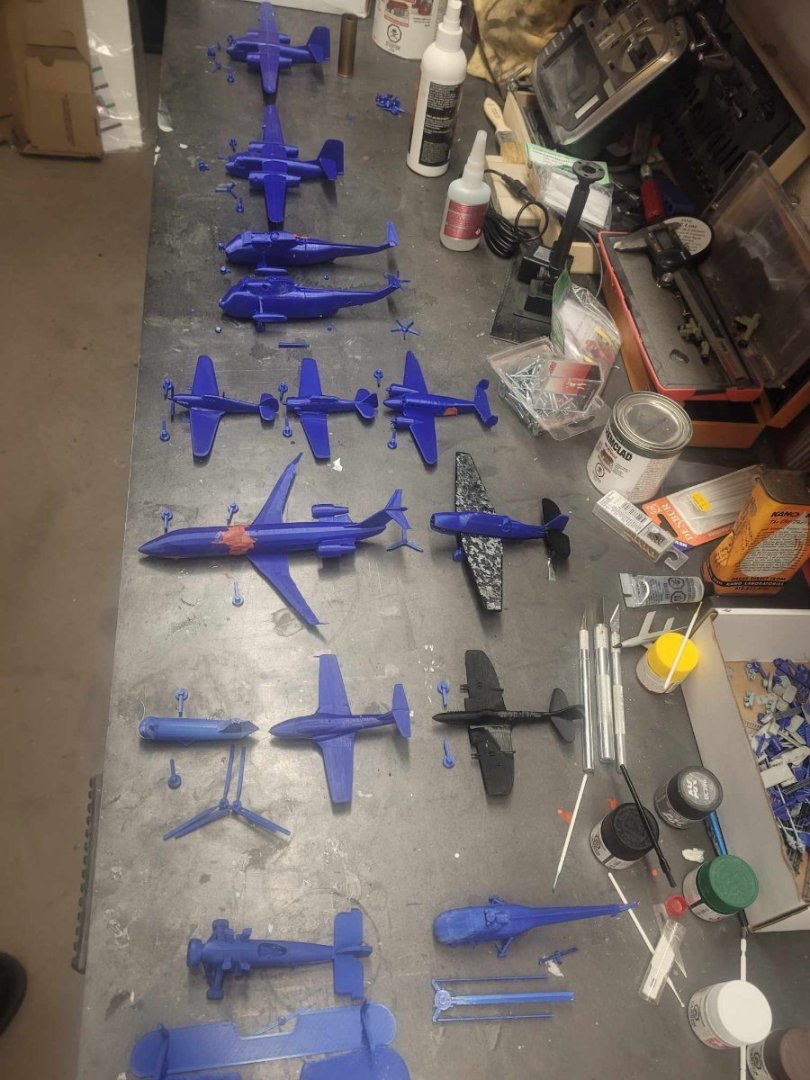
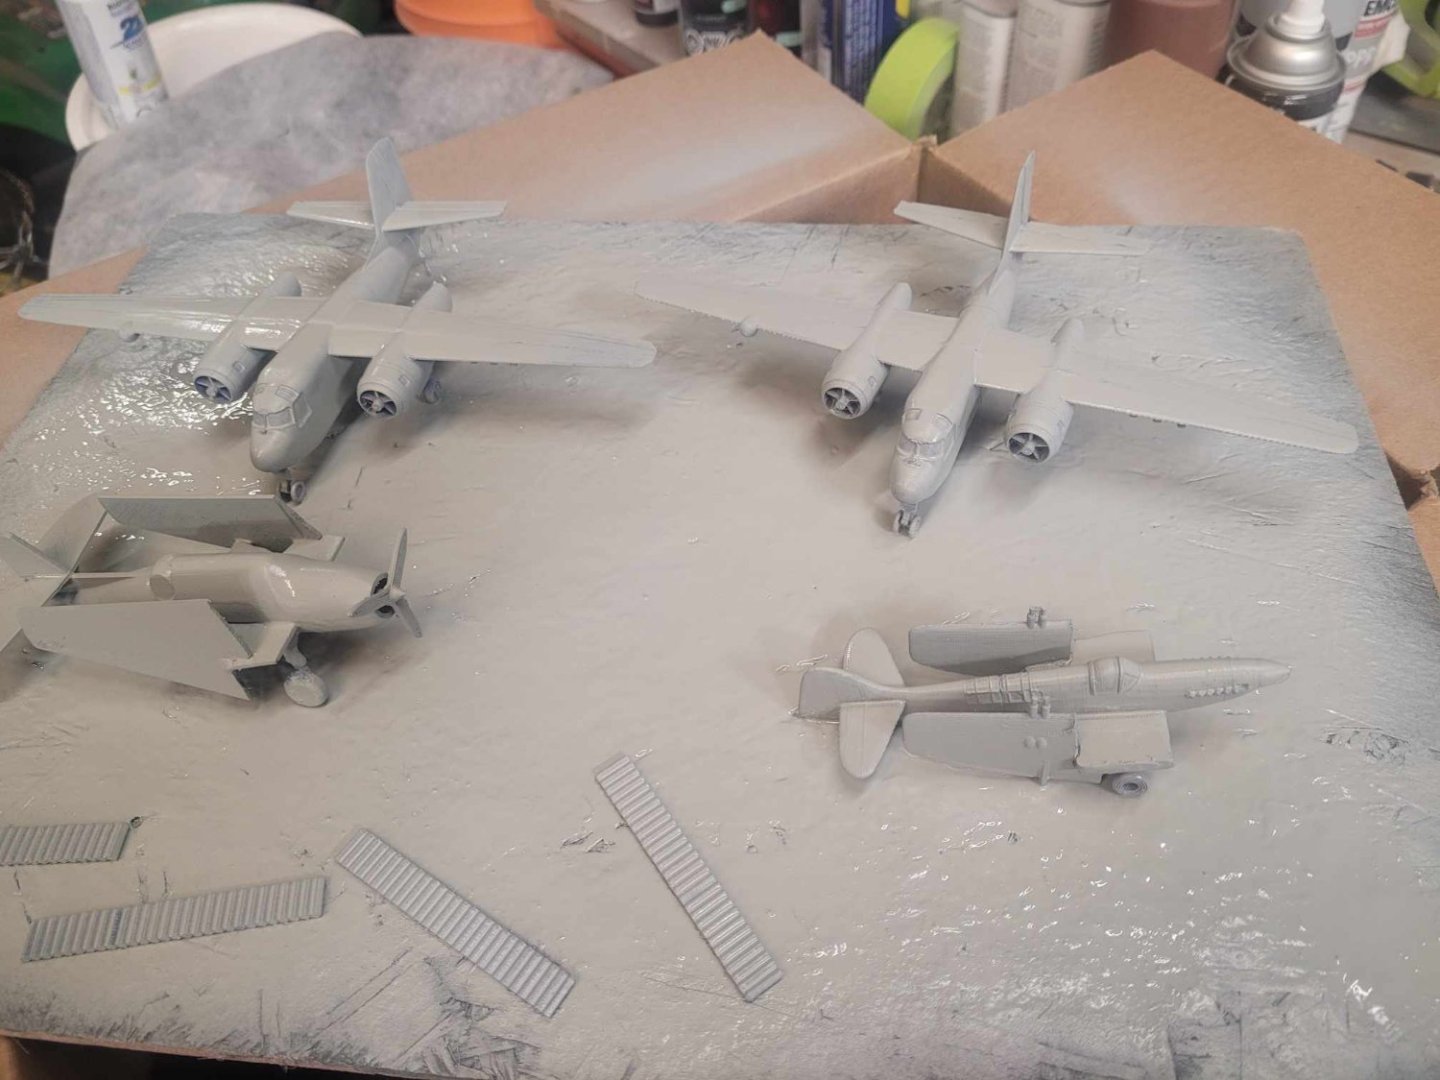
OK, so, sometimes one thing leads to another....and I got a request for assistance from staff at a local museum. They're having to adjust their internal aircraft layout, and I have offered them a complete set of the aircraft they have in their collection 3D printed in 1/96 scale, assembled, wings folded as necessary, and primed with a layer of grey paint.
I'm almost half done - I expect I'll probably have them ready to drop off to the museum later in the week.
This is related to the Bonnie because they're mostly aircraft that flew from Bonnie in the museum.

-
A comment - I recall that in advance of the invasion, many of the road signs were said to have been torn down. This was an attempt by the Germans to prevent easy navigation by the allies if there was a landing.
Can I suggest - take a few of the signs, paint them up, and put them in a messy pile beside the road with some broken up concrete bits/bases and such? Then there's an obvious reason for the tank commander to be seeking directions from the soldier on the ground?NS
-
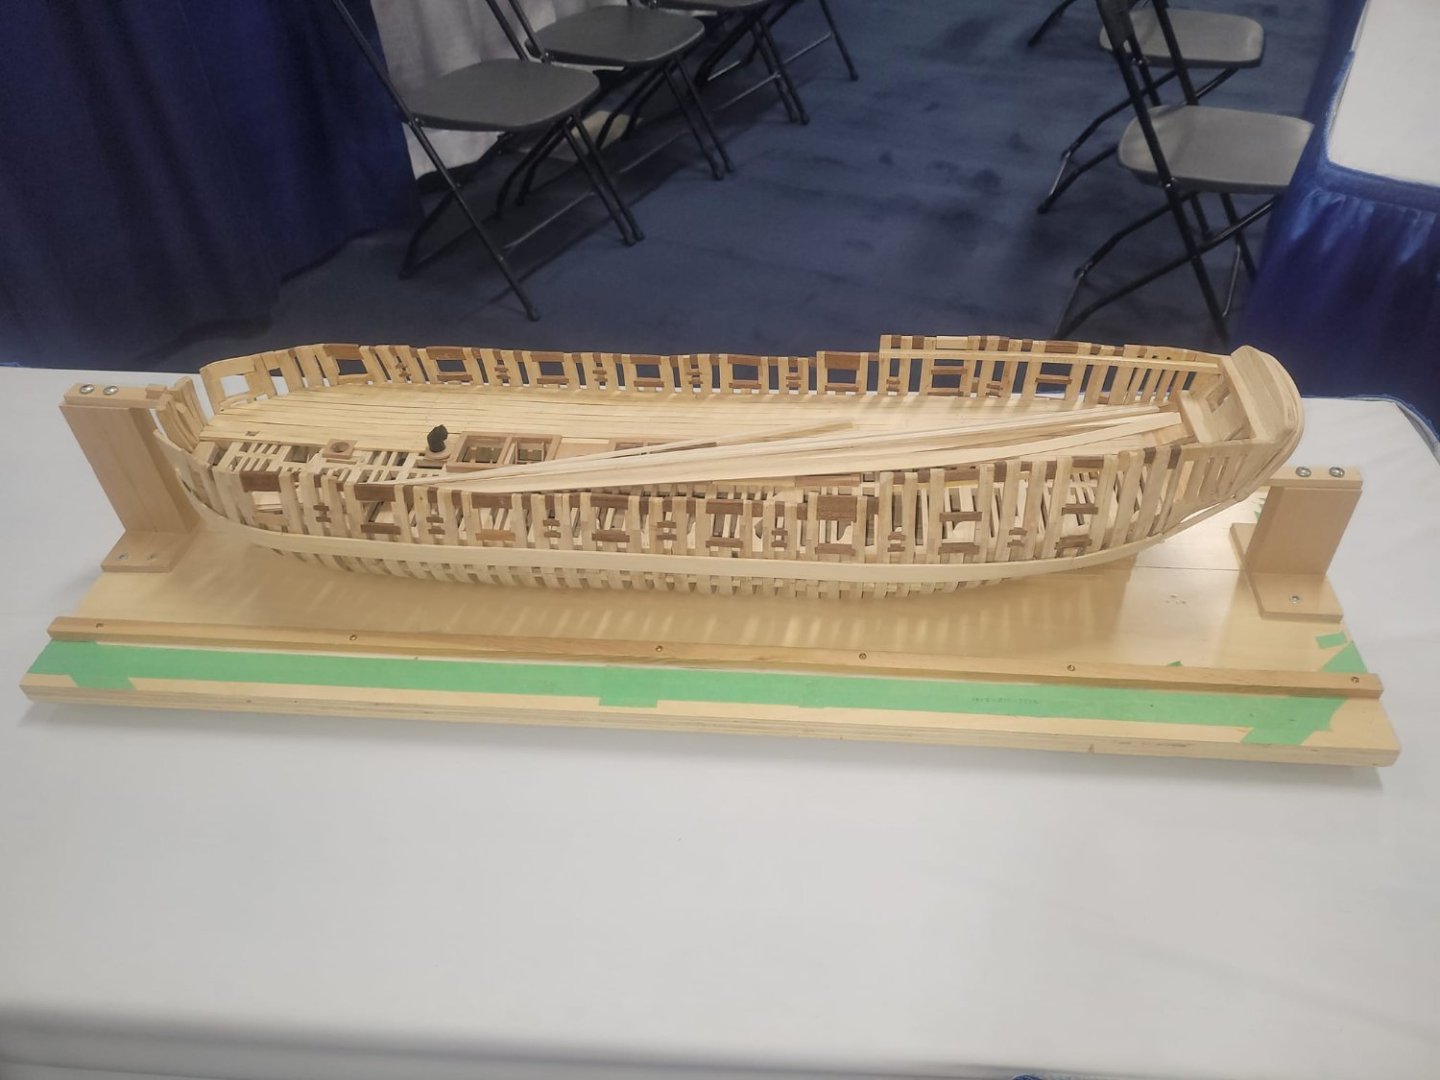
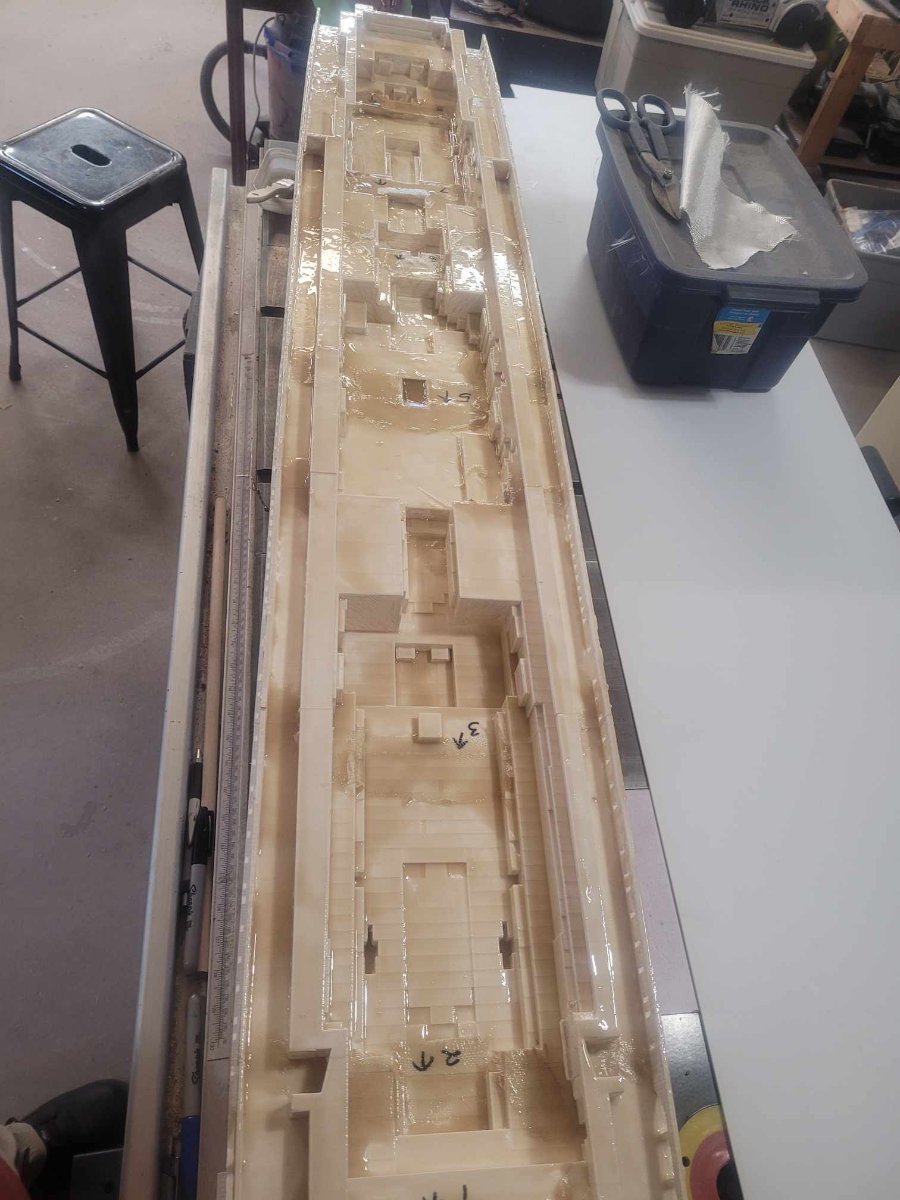
And, whilst I was waiting for the paint on the hull to dry, I glued together the remaining parts of the superstructure, and put a layer of resin and some strengthening swaths of fiberglass on the joints on the inside.
- GrandpaPhil, mtaylor, scrubbyj427 and 3 others
-
6
-
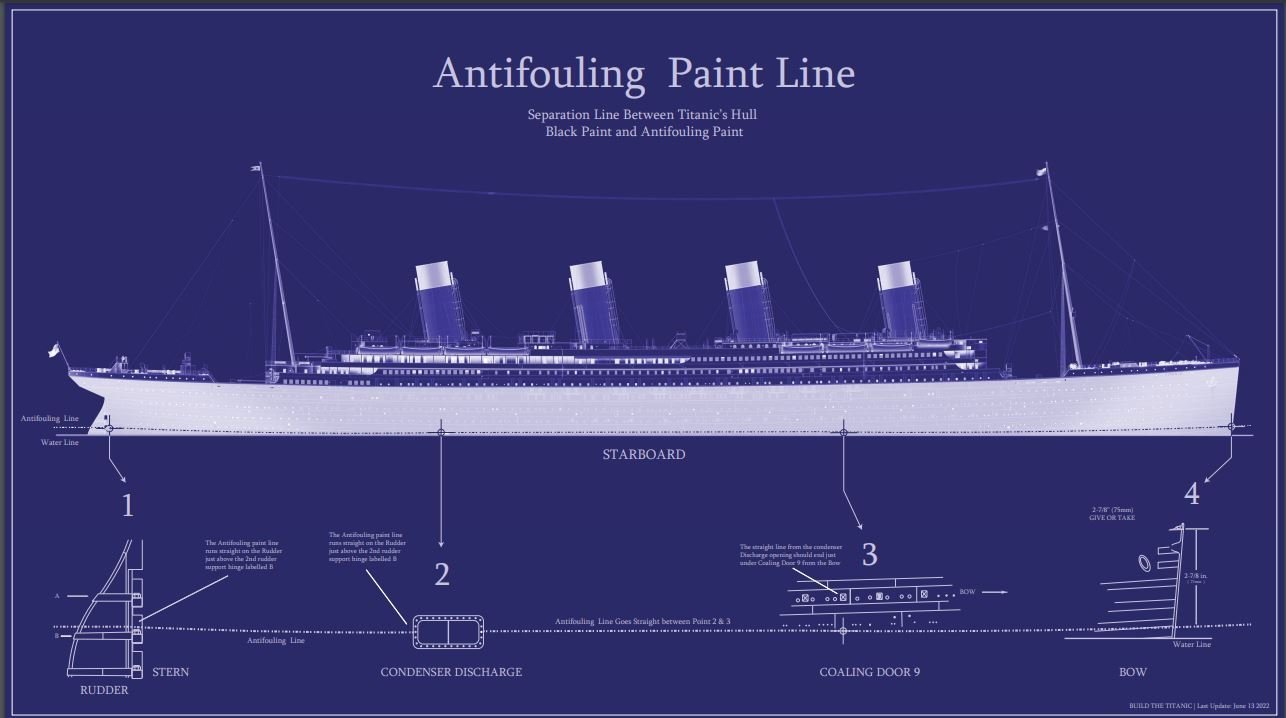
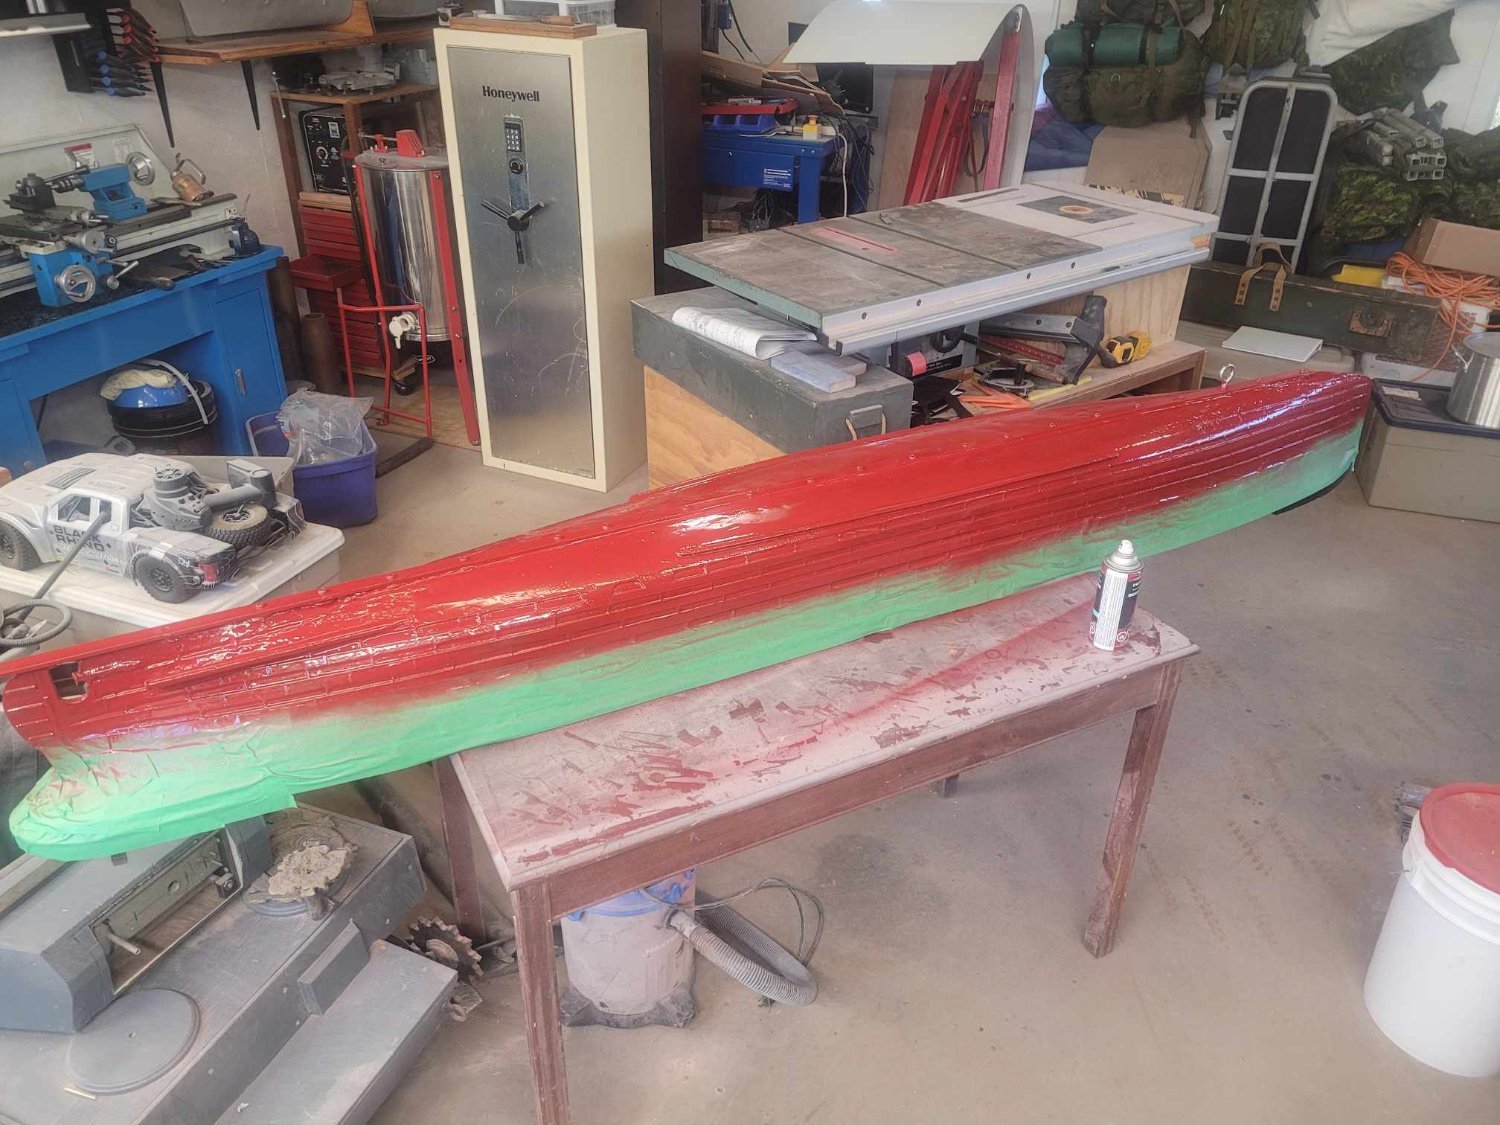
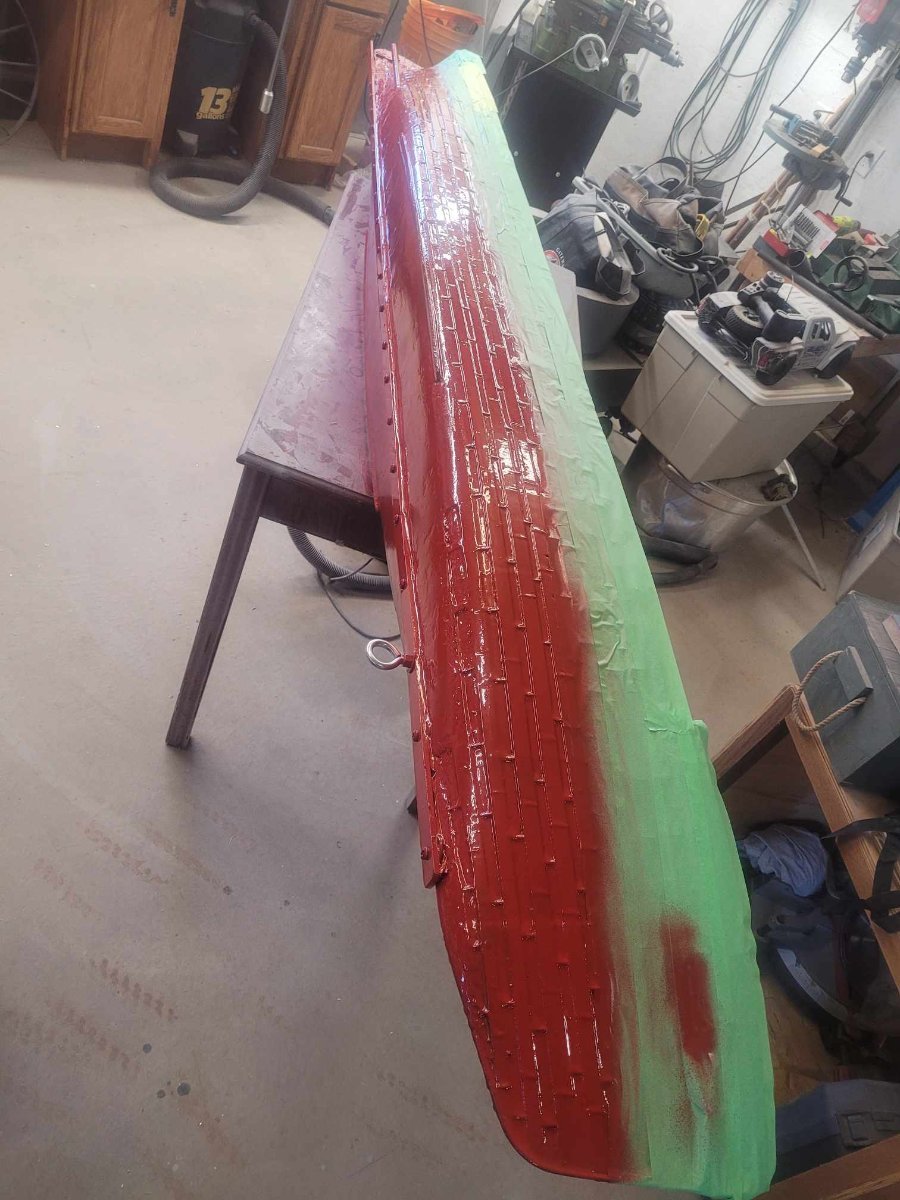
OK, so, a bit of puttering around over the weekend, and the hull is now masked and painted.
I learned that her 'waterline' is not actually flat - as can be seen from the attached "Antifouling" attachment, it angles up to the bow and stern.
That has been replicated to the best of my ability.


-
BTW, here's a great little video about using a miniature lathe for parts cleanup:
- Twokidsnosleep, Canute, kgstakes and 1 other
-
4
-
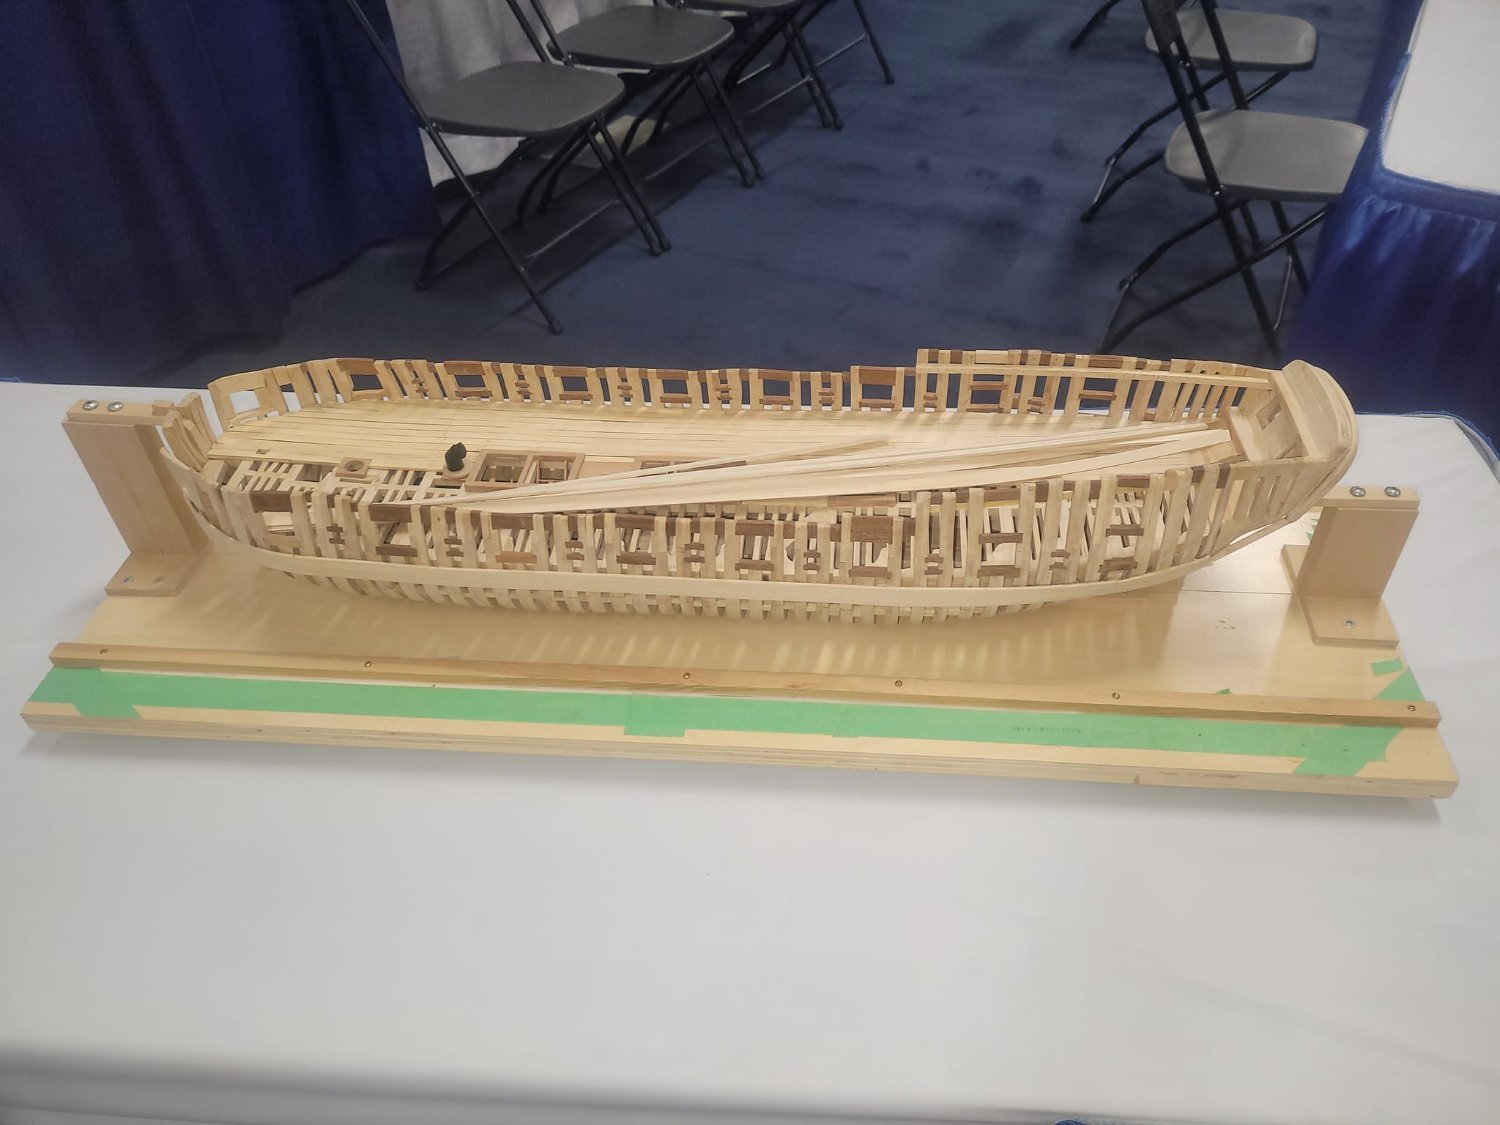
I've owned a number of lathes over the years. Unimat, Sherline, South Bend, Precision Matthews. I've used Standard Modern at work.
There is the basic underlying question for you to consider here.
Are you planning to work on your lathe, or do work with your lathe?I built a functional firearm with my Sherline a few years ago. (3 meetings with the Chief Provincial Firearms Officer, registrations, license checks, etc. LEGALLY DONE.)
It took me almost 50 hours of machine time to make the bolt with the Sherline. I bought that lathe for probably $500 off e-pay, ordered new parts to expand the capability and size, make it capable of milling, drilling, and so on. And it was still a tiny little lathe/mill combo that while modular, was not rigid enough to do actual machine work effectively.
So. I upgraded from that to a SB 10K lathe that I bought out of an old technical high school. It was great - but it needed a lot of work. It came with a 3 jaw chuck and after 35 years in a school, it was worn beyond repair in the first 6 inches of the bed. I put a lot of work into trying to fix it up, new parts, repairs, etc, but in the end, the bed wear and damage was impacting my tolerances too much.
I have since upgraded from that to a newer Precision Matthews of similar footprint. (10x30)
I haven't had to make a single part for the PM. I have used it to MAKE parts for other projects.
I will suggest that the lathe you have (Atlas/Craftsman) is great for you to repurpose into a wood working lathe. But, if you find yourself needing to do actual precision machining, you might find yourself having to throw a lot of money at repairs, particularly if you have issues in the headstock or bed wear.
Do a cost analysis of what you're going to spend to get this one running and doing what you want with it before you get yourself too deep.
I will observe that when threading, I do miss the Quick Change gear box on my SB. My PM does not have that. I have to deal with manual change gears.
Last observation - what is the largest size item you are considering working on with your lathe? Are you going to do a prop shaft? Are you going to do a rifle barrel? Are you going to be doing a ship's mast? How big a lathe do you NEED to have for your planned projects. That's a big factor. I got a lathe a bit bigger than the maximum I thought I'd go, and I'm happy I did. It's let me do slightly larger projects (Tripod legs, etc) that I hadn't considered in my original planning stages.
NS
-
-
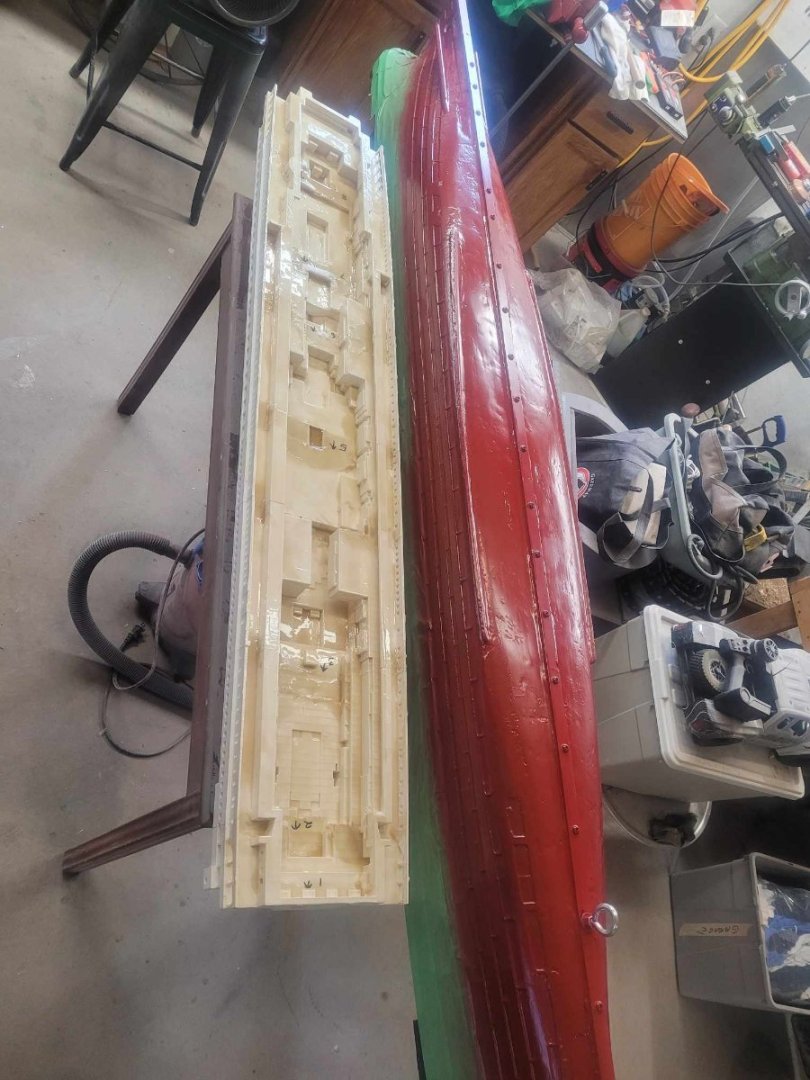
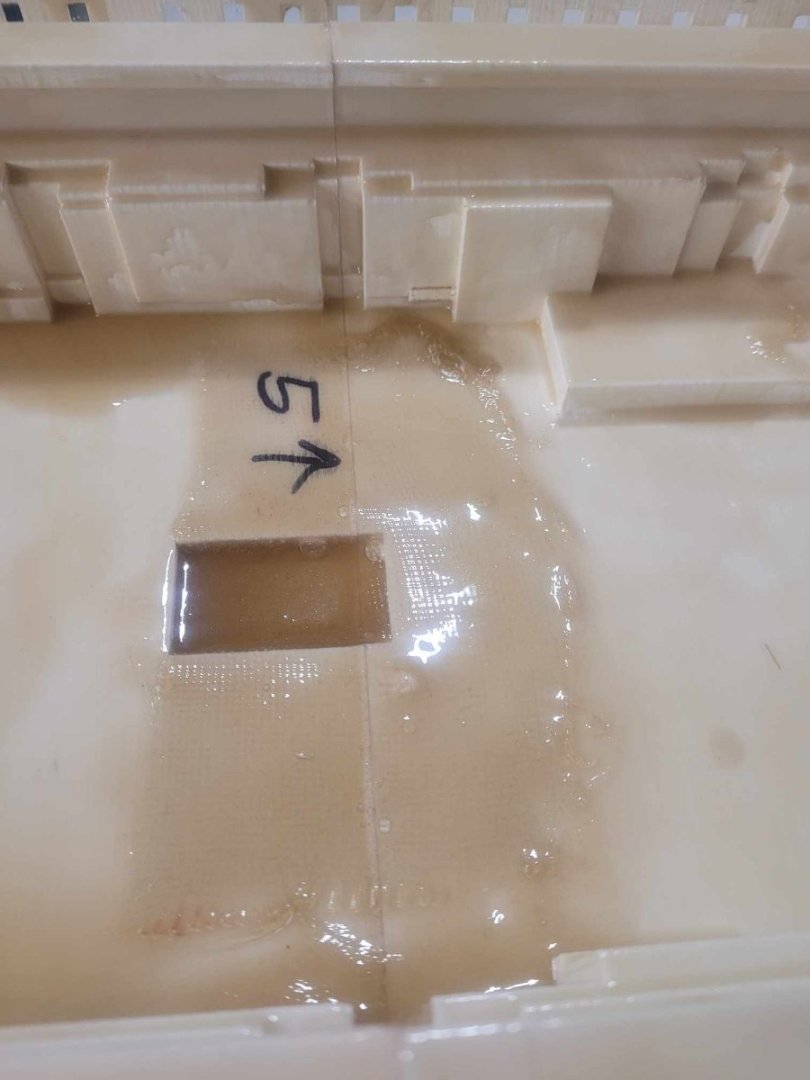
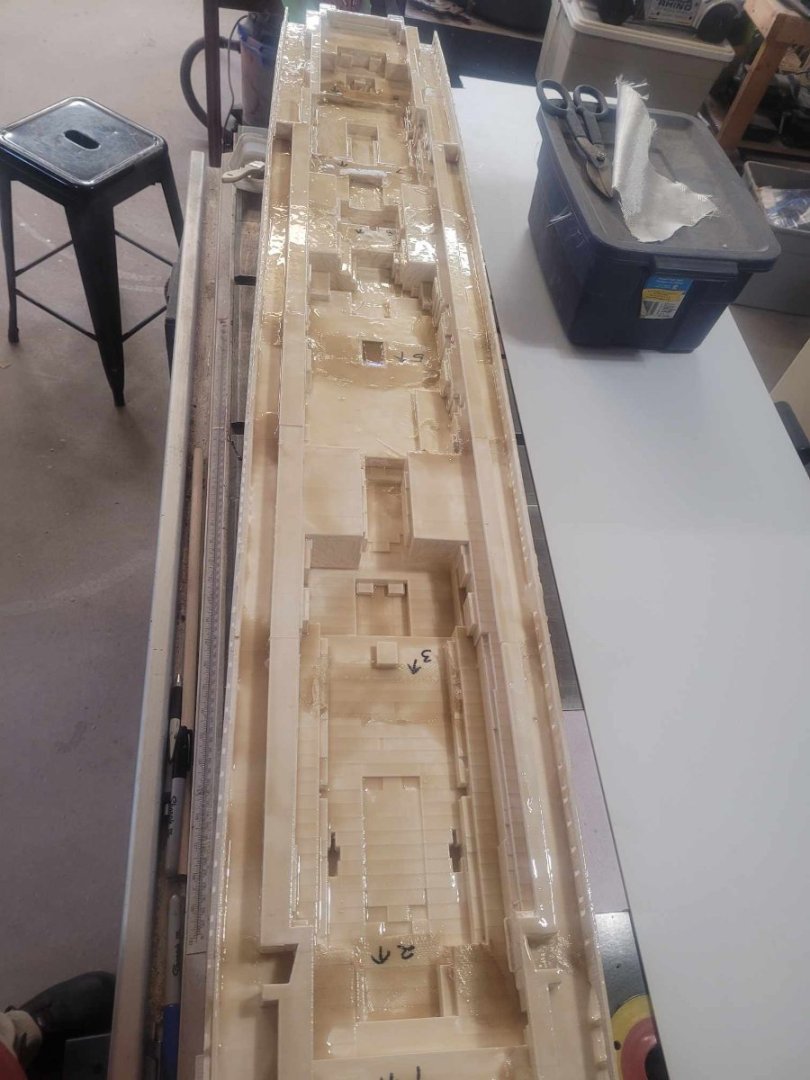
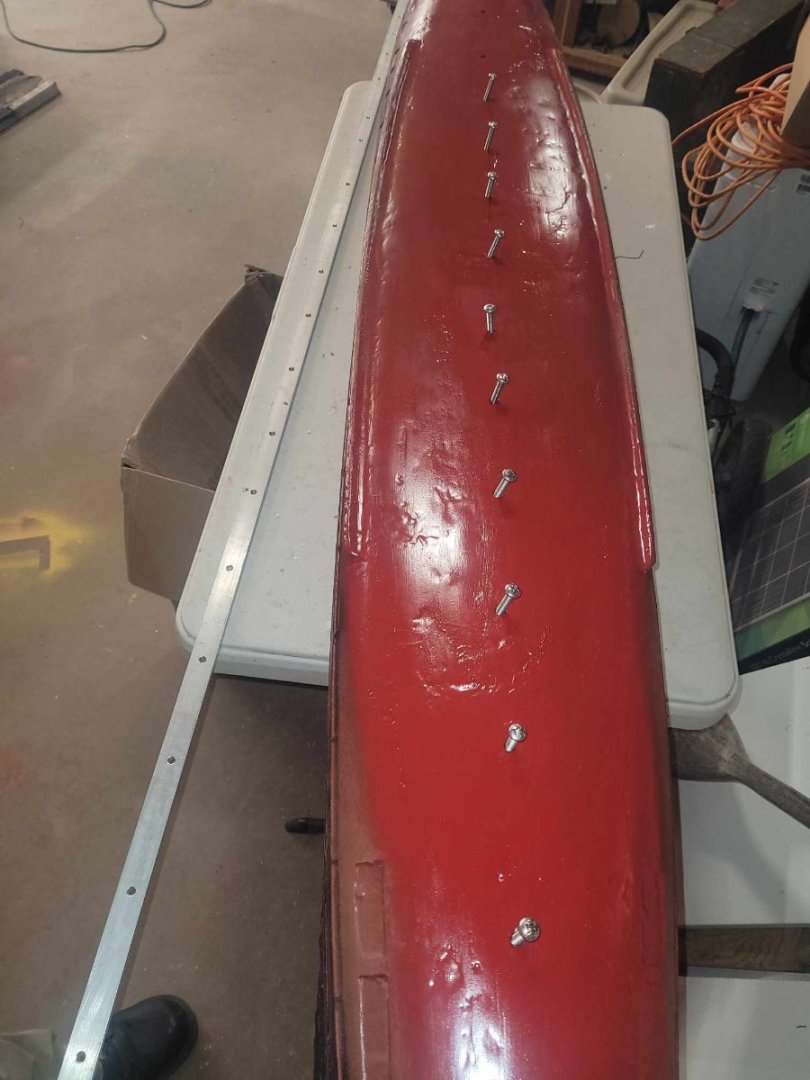
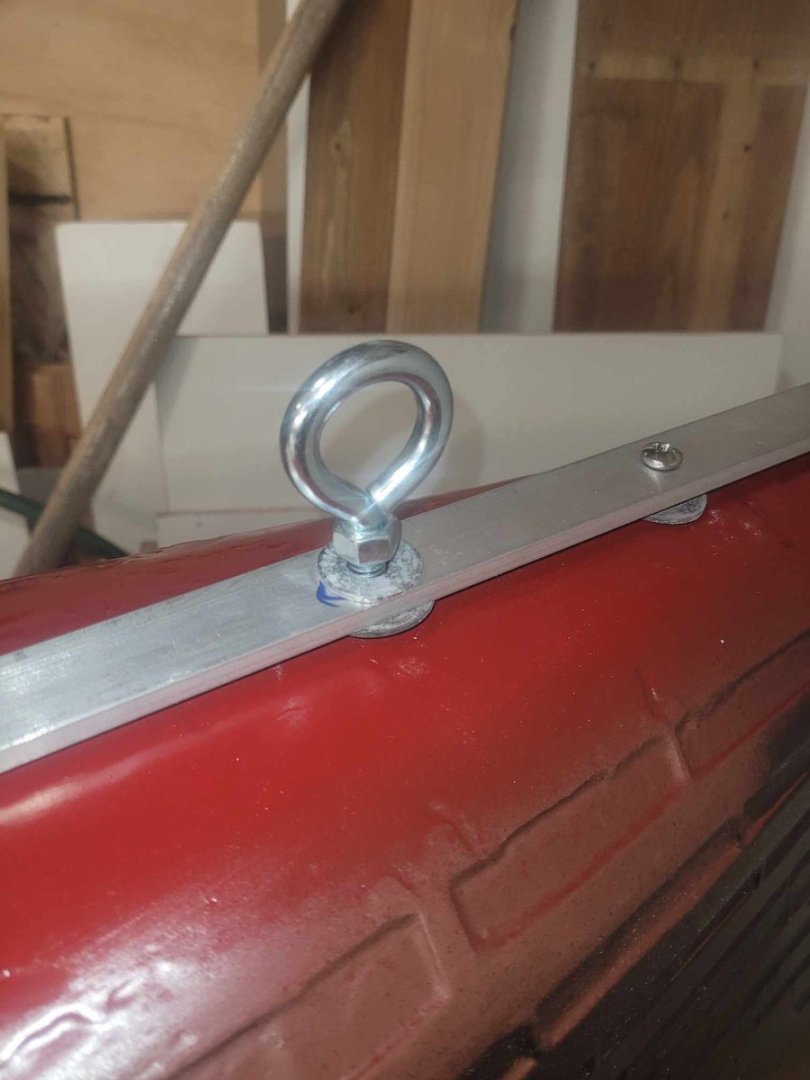
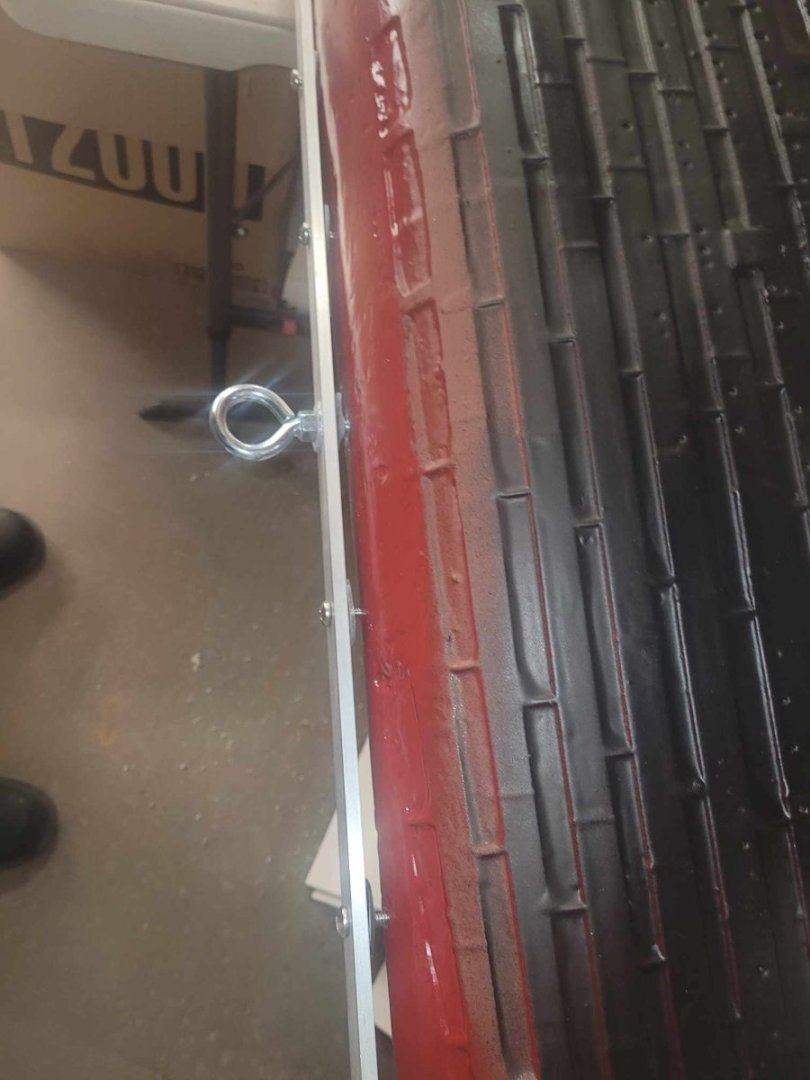
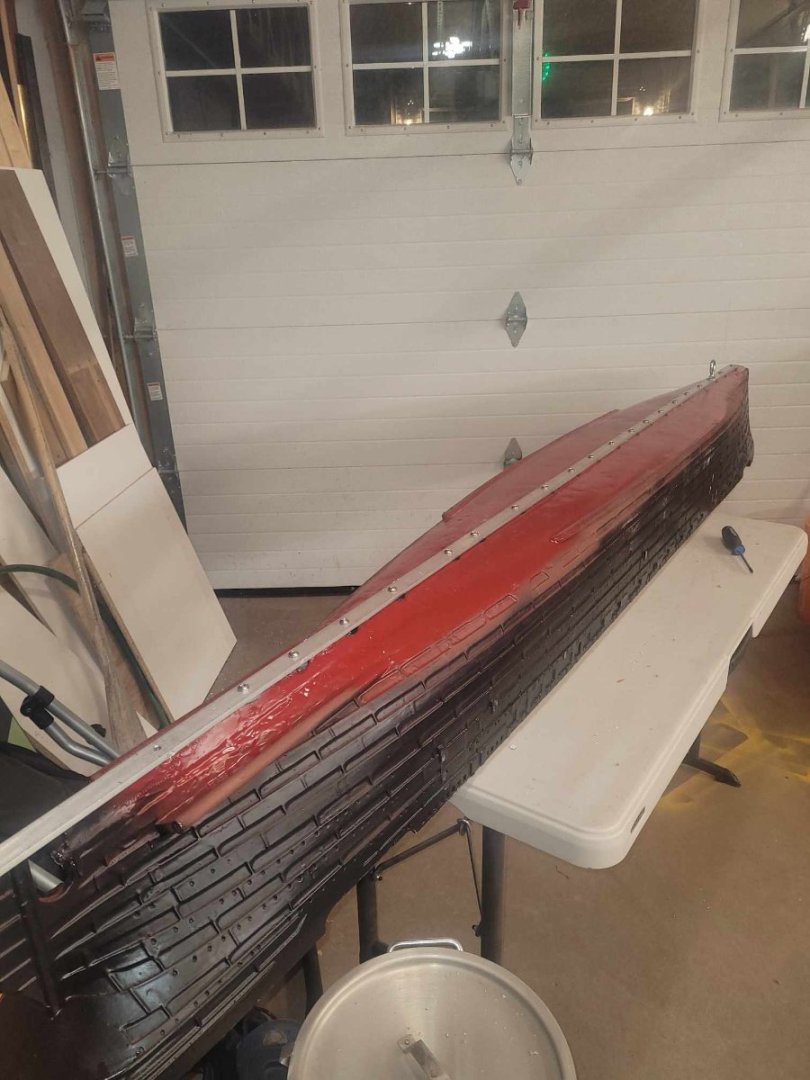
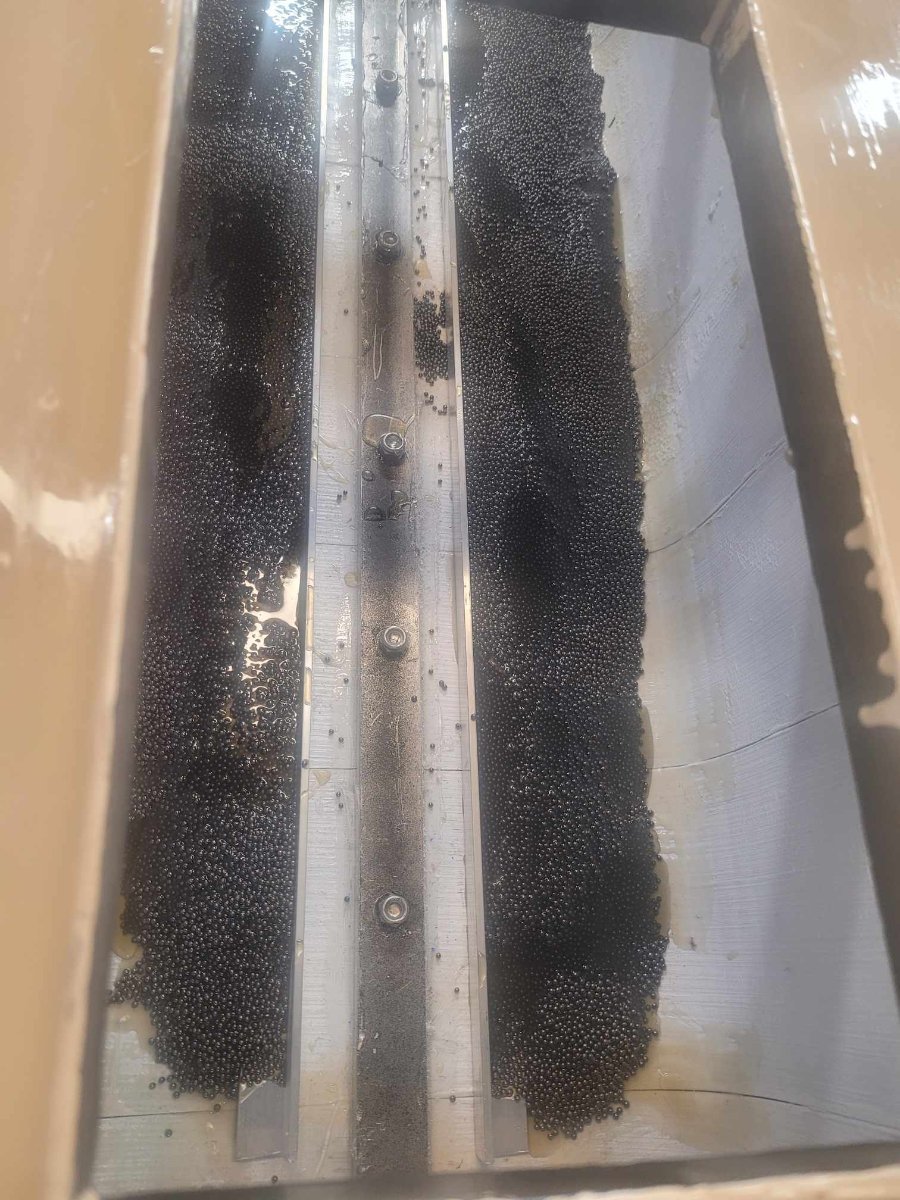
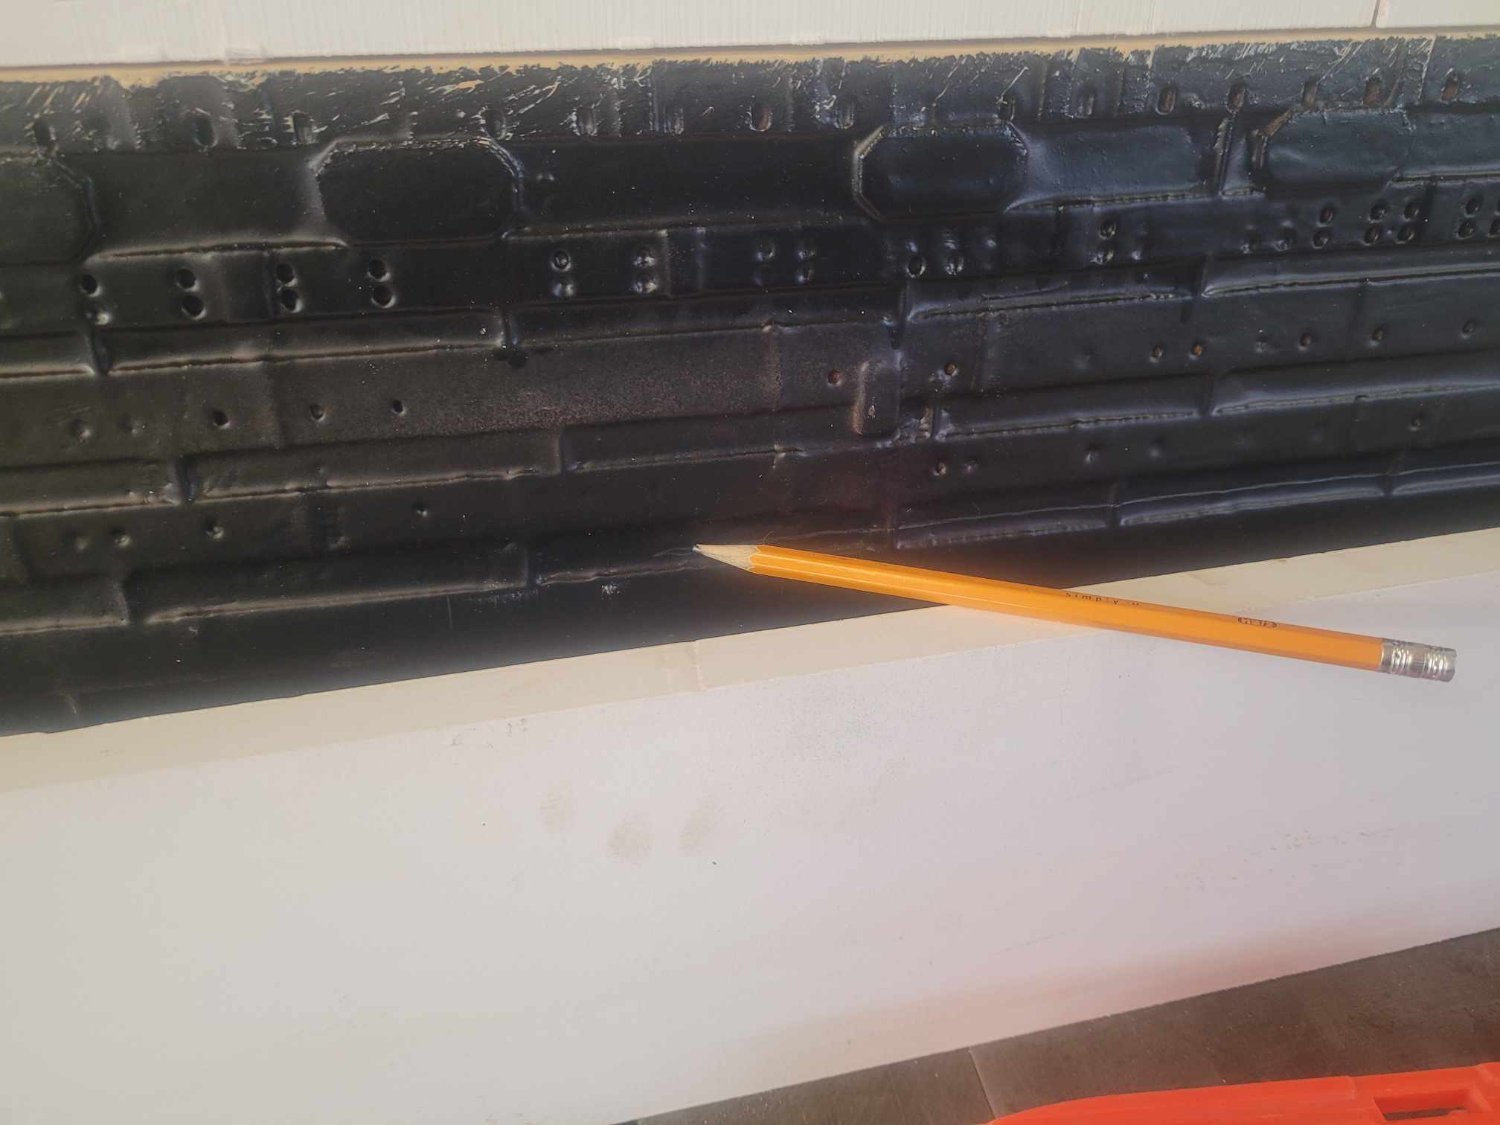
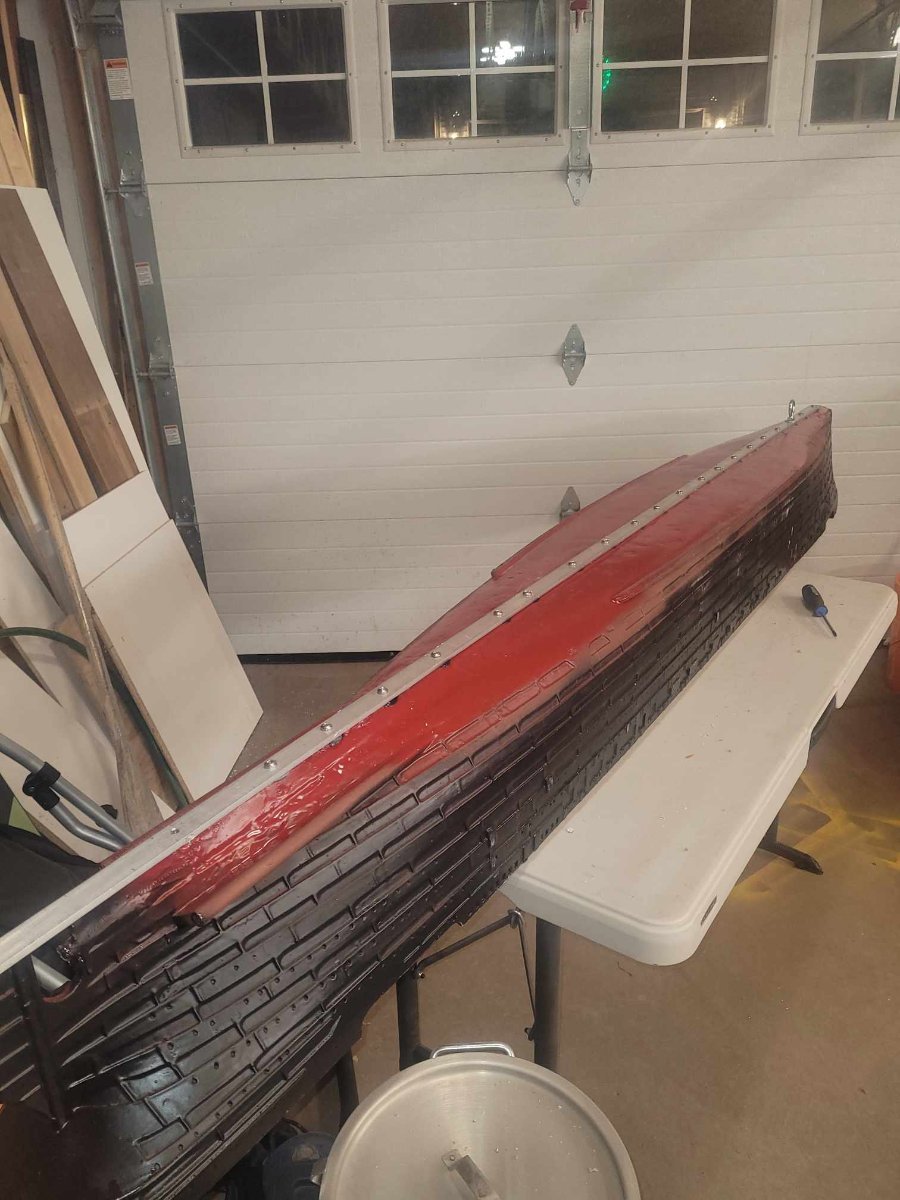
Here you can see the bolt holes - somewhat irregularly spaced, but one per 3D printed segment.
You can also see the eye bolt that I installed that we will attach the anchor to.
There is a rubber washer/spacer between the strip and the keel, with a dollop of silicone sealant applied underneath the spacer/washers.
Lastly you see the whole external keel strip in place - I ended up running a bead of sealant down each side of the aluminum strip as well. Every little bit helps I guess.


RMS Titanic by NavyShooter - 1/100 - 3D Print - Pond Float display - Halifax Public Gardens
in - Build logs for subjects built 1901 - Present Day
Posted
OK,
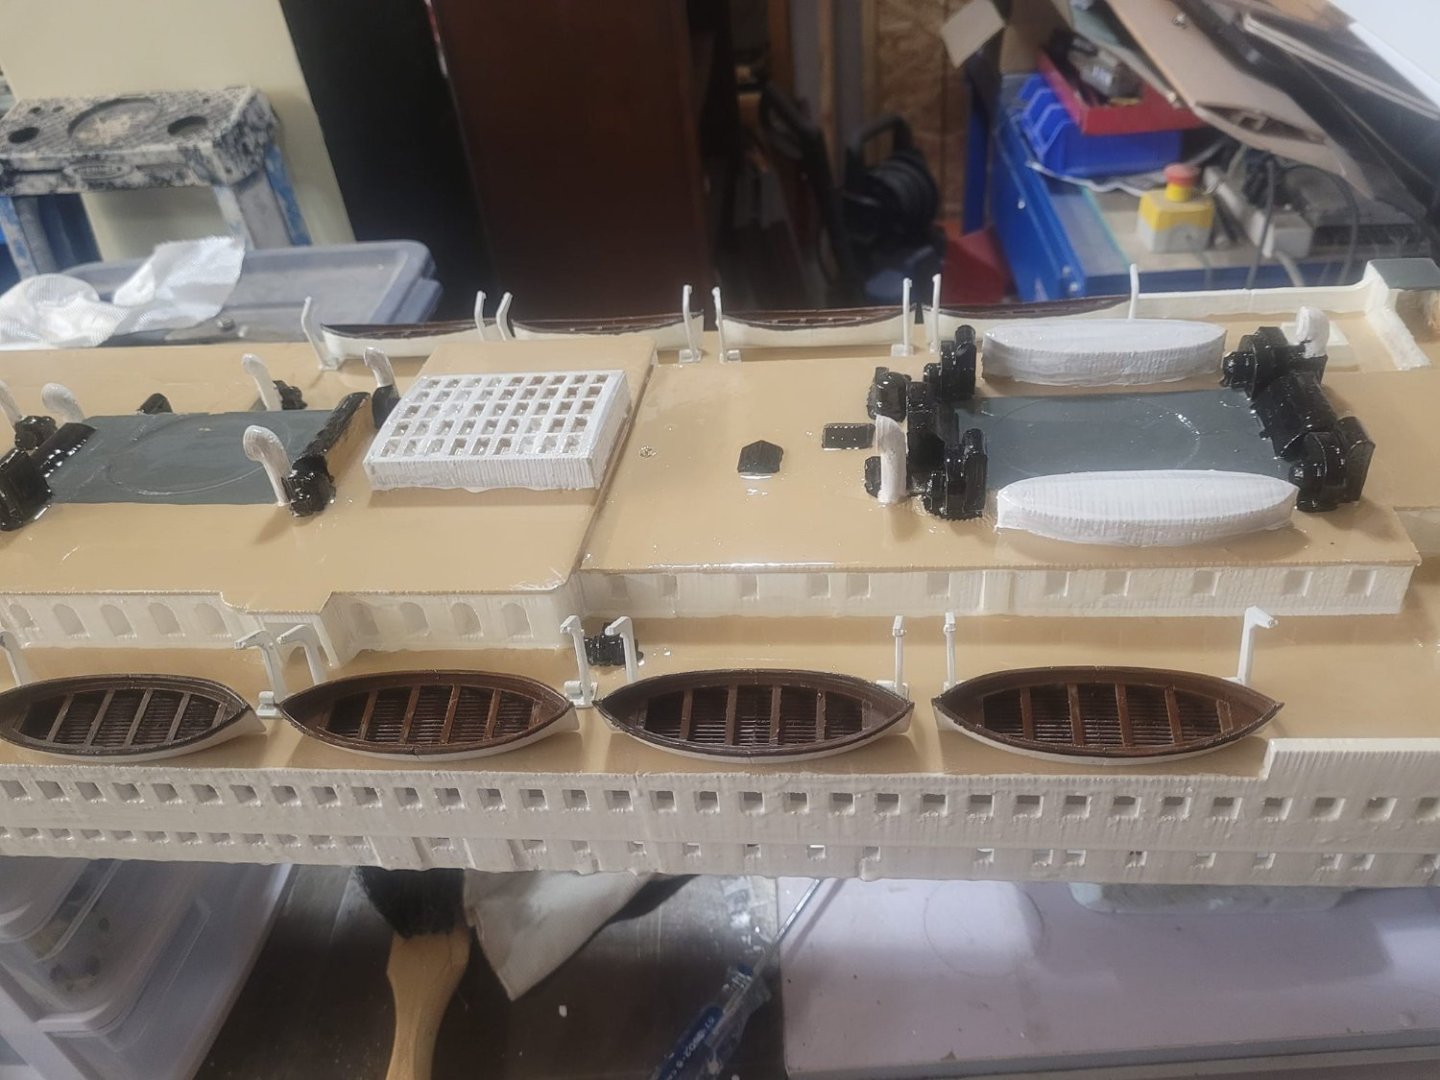
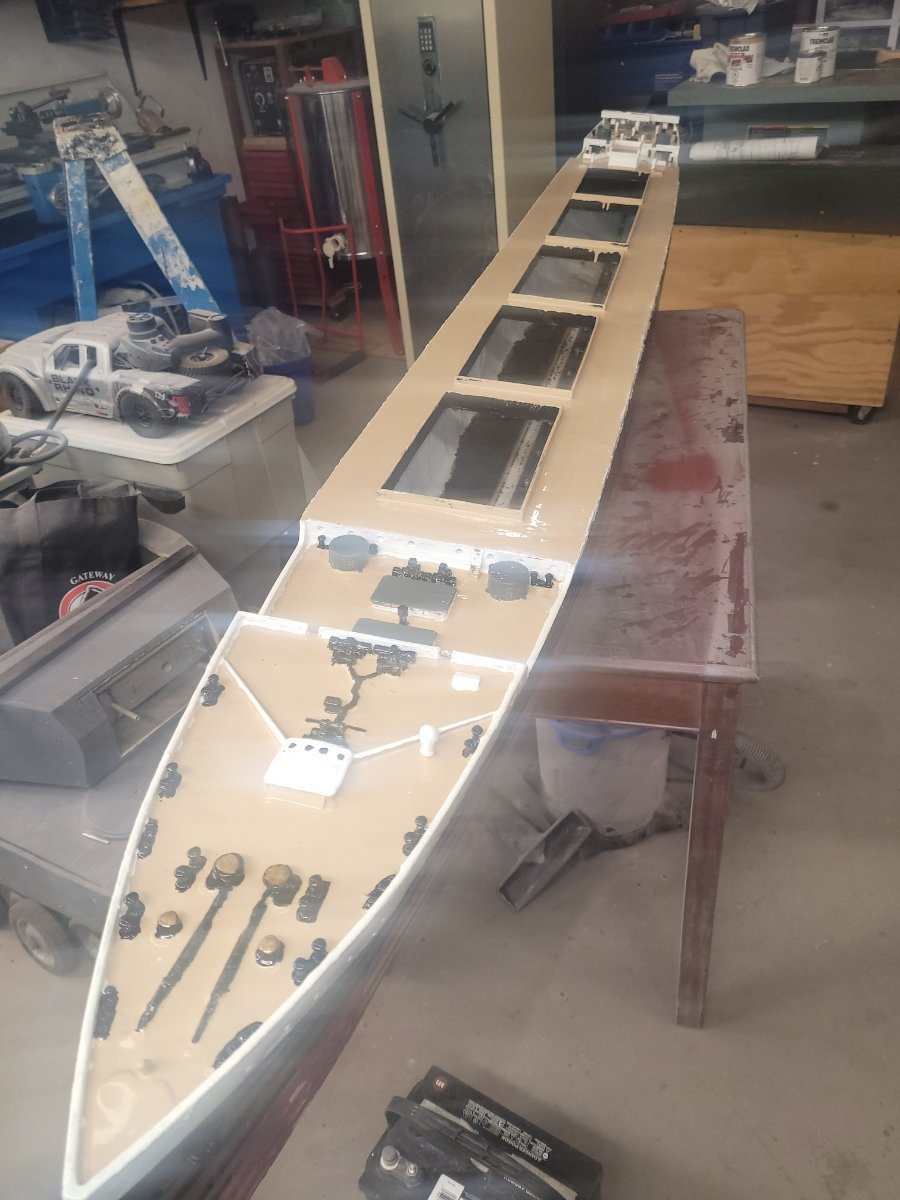
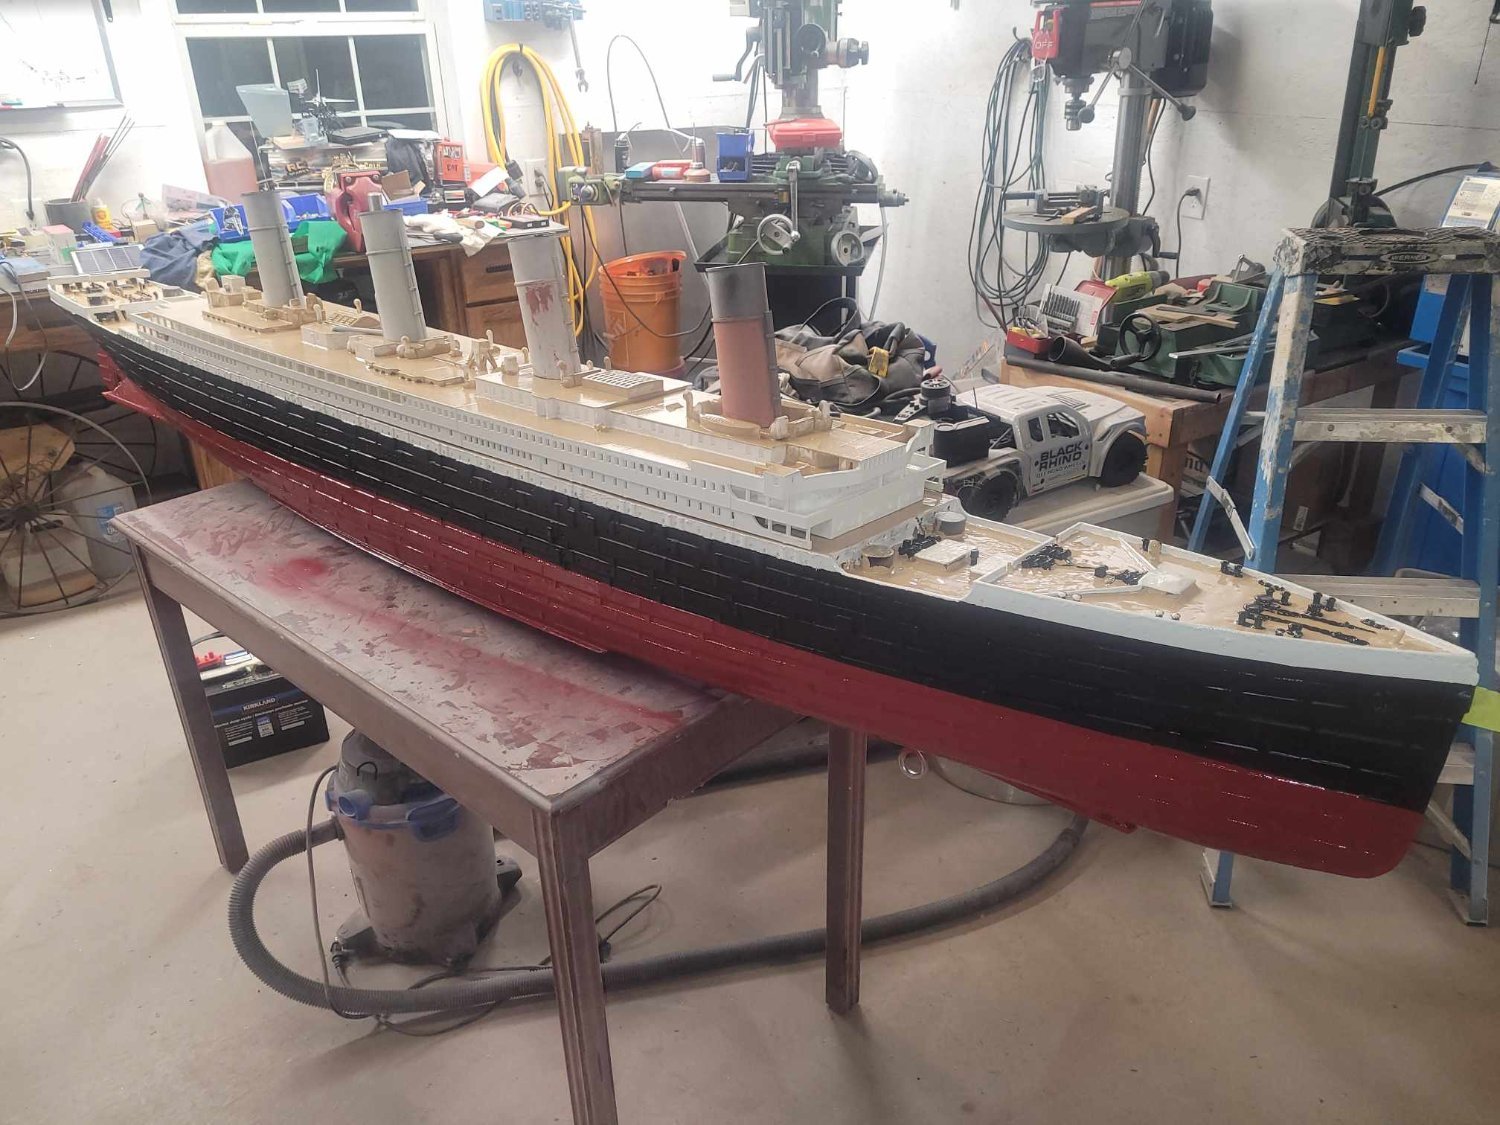
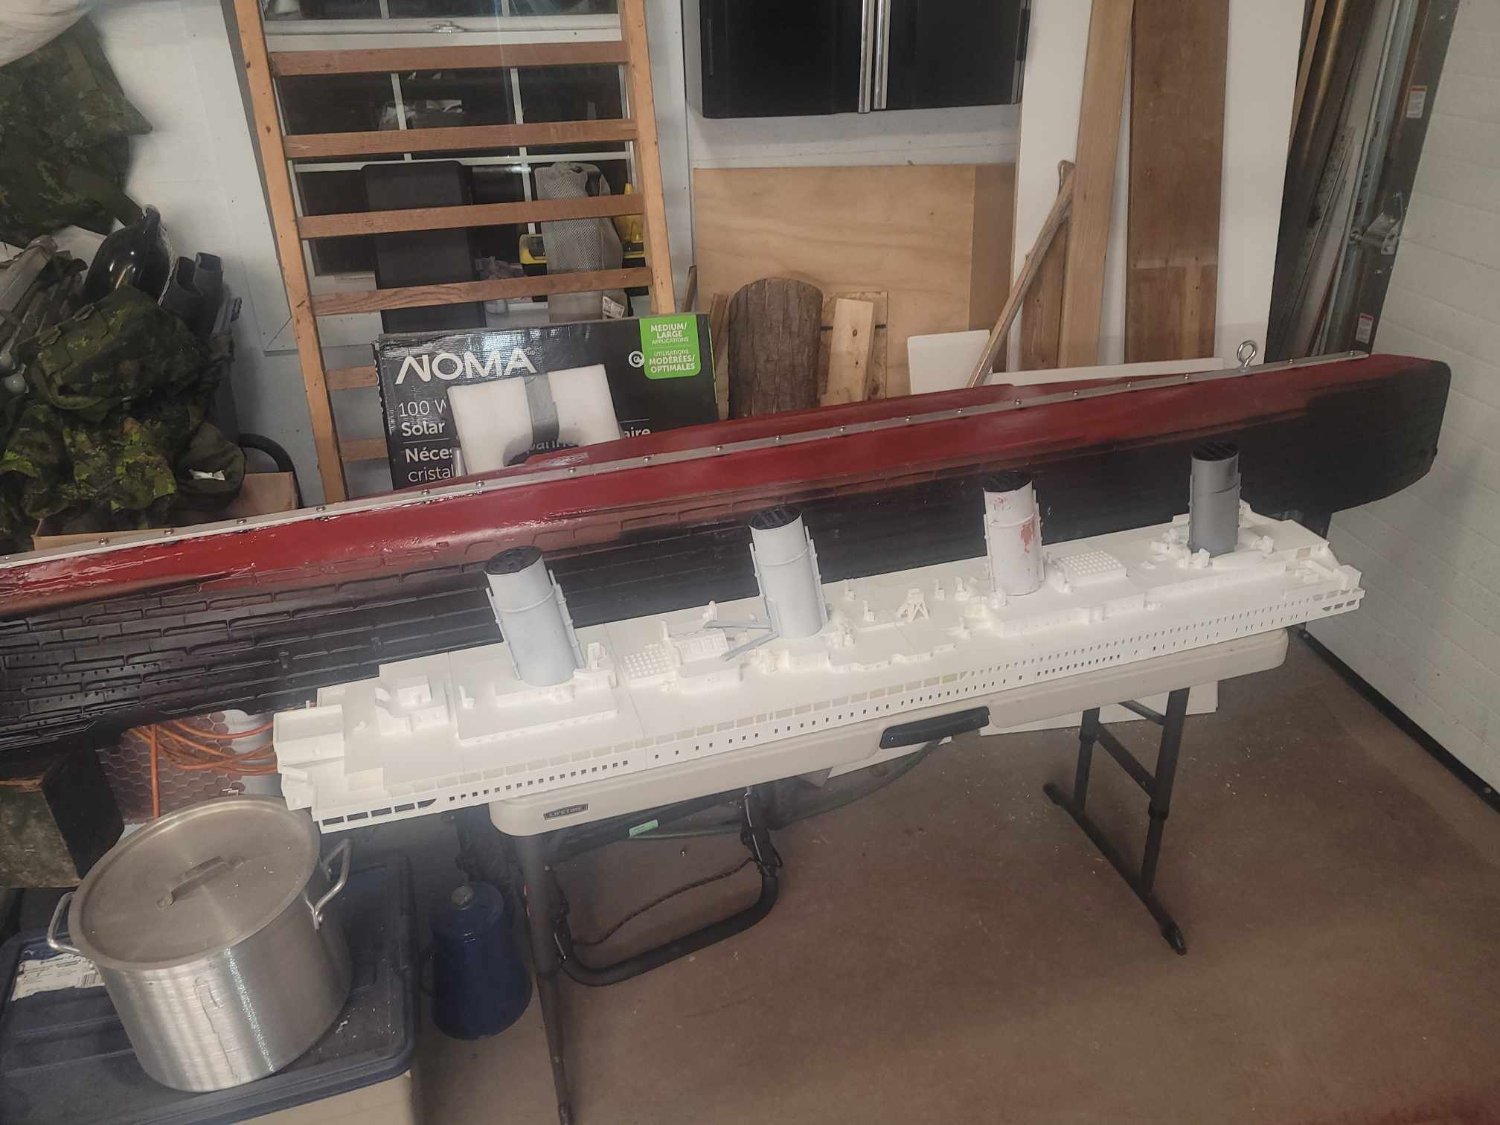
Some pictures - here we go. I got the funnels back from the Guild Member who was painting them for me on the way home from work, and I decided to get them installed tonight. Each of them is both epoxied into place, and bolted into place with a stainless steel threaded rod.
Then I lined up the Davits (YES, I KNOW THEY ARE NOT WELIN DAVITS, I DO NOT CARE AT THIS POINT) and glued them in place.
Here's my 'to do' list:
-Glue down lifeboats
-Seal Funnel tops
-Epoxy 2nd layer on superstructure
-rigging
-LED solar light SOS
I'm almost ready for a test float as well. I've been collecting some scrap steel to use as ballast.