chris watton
-
Posts
2,339 -
Joined
-
Last visited
Content Type
Profiles
Forums
Gallery
Events
Everything posted by chris watton
-
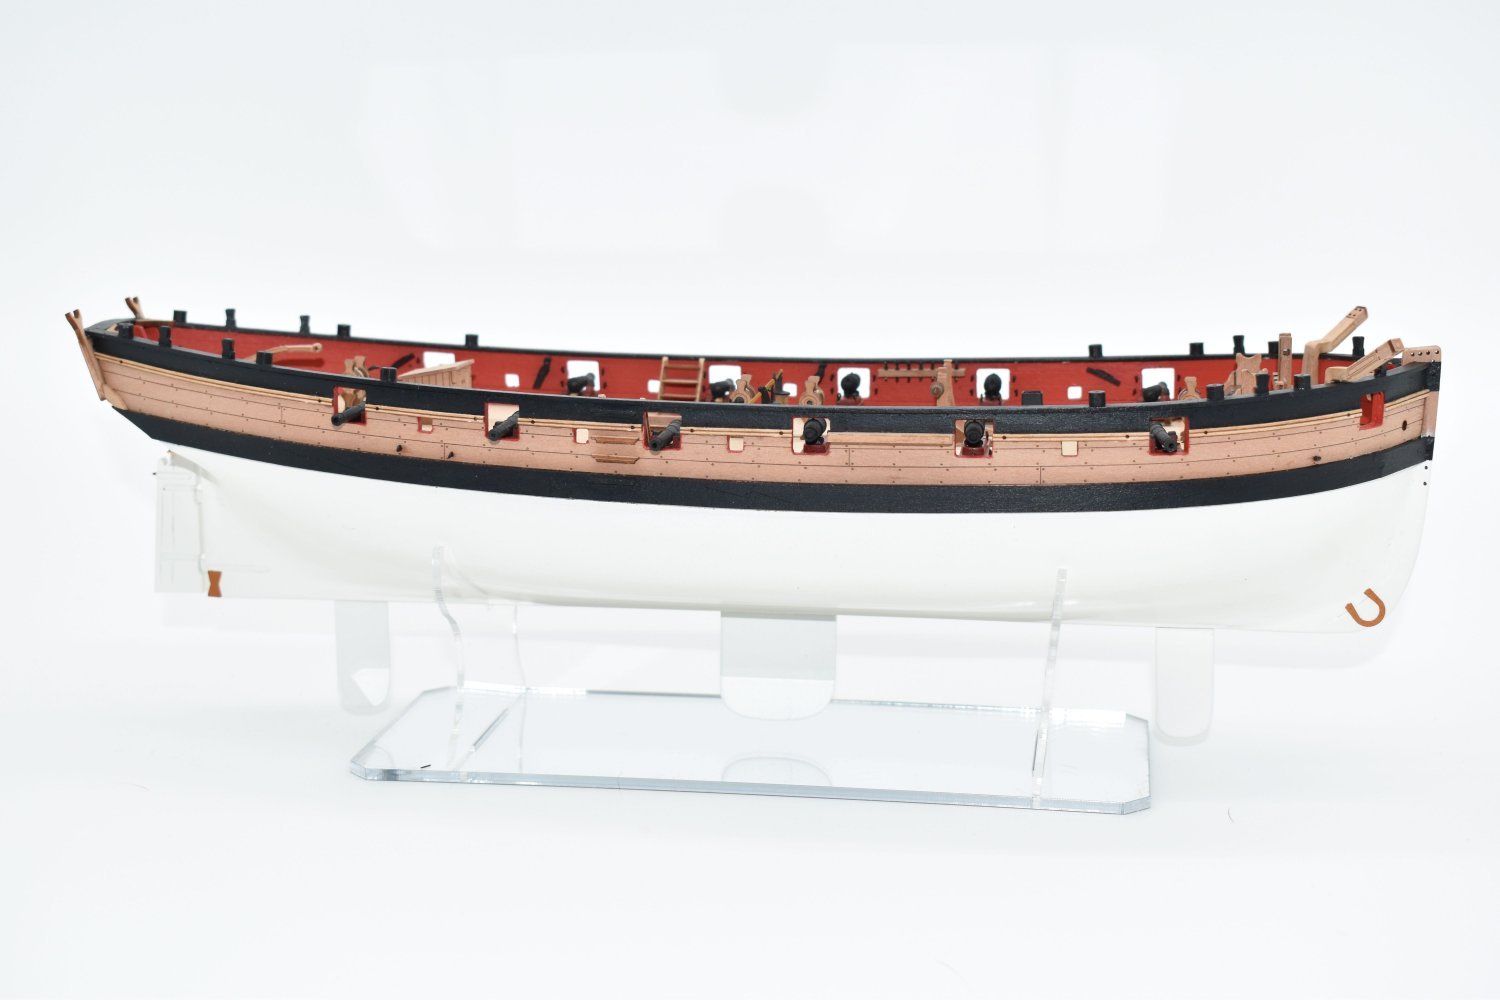
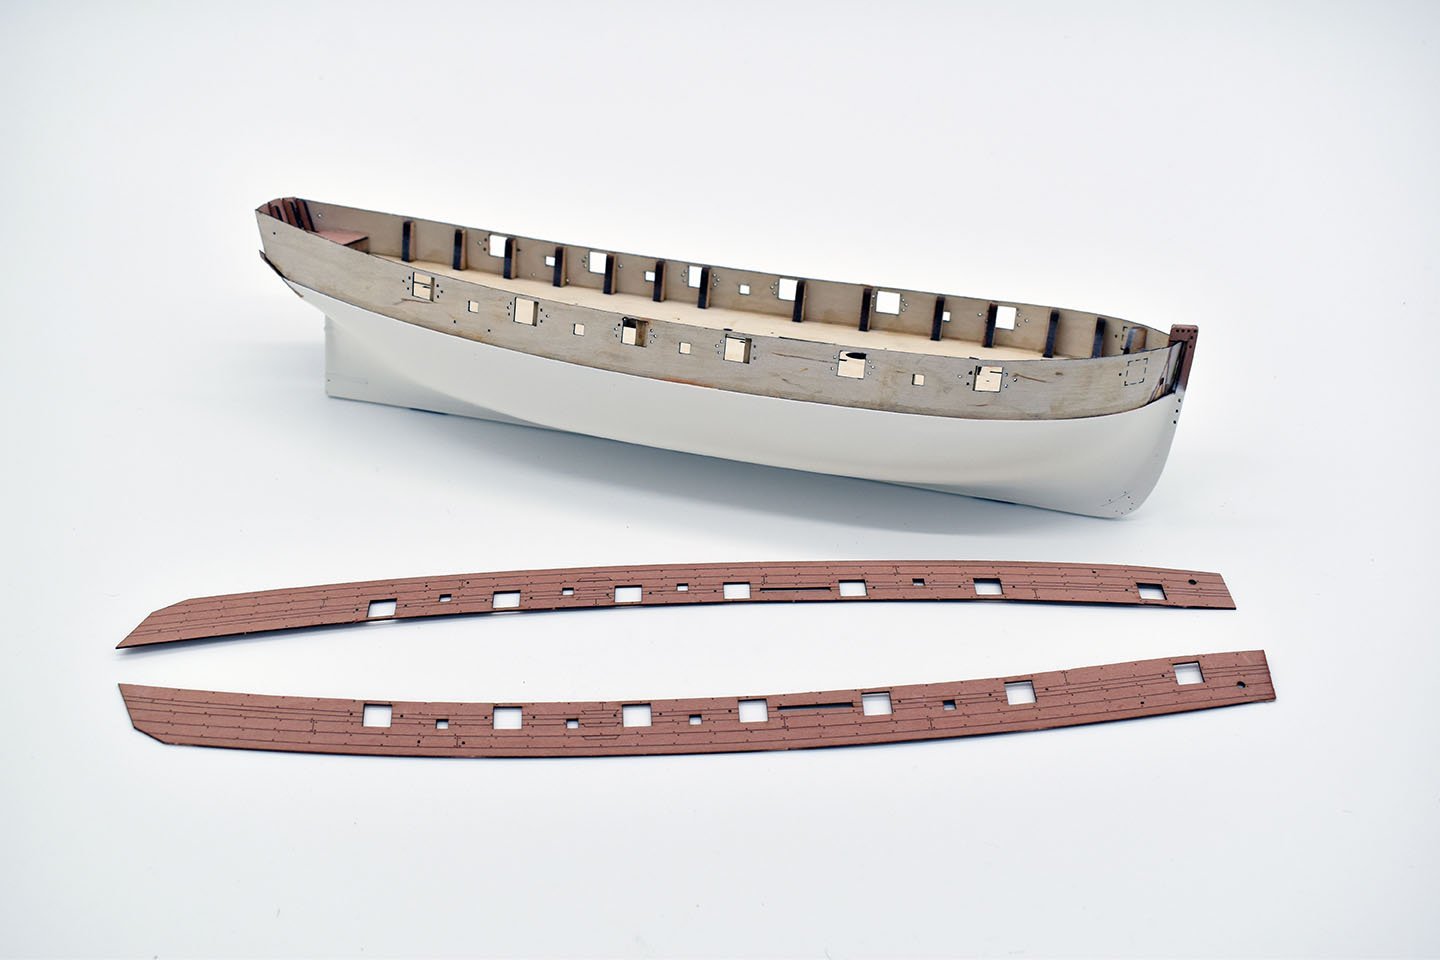
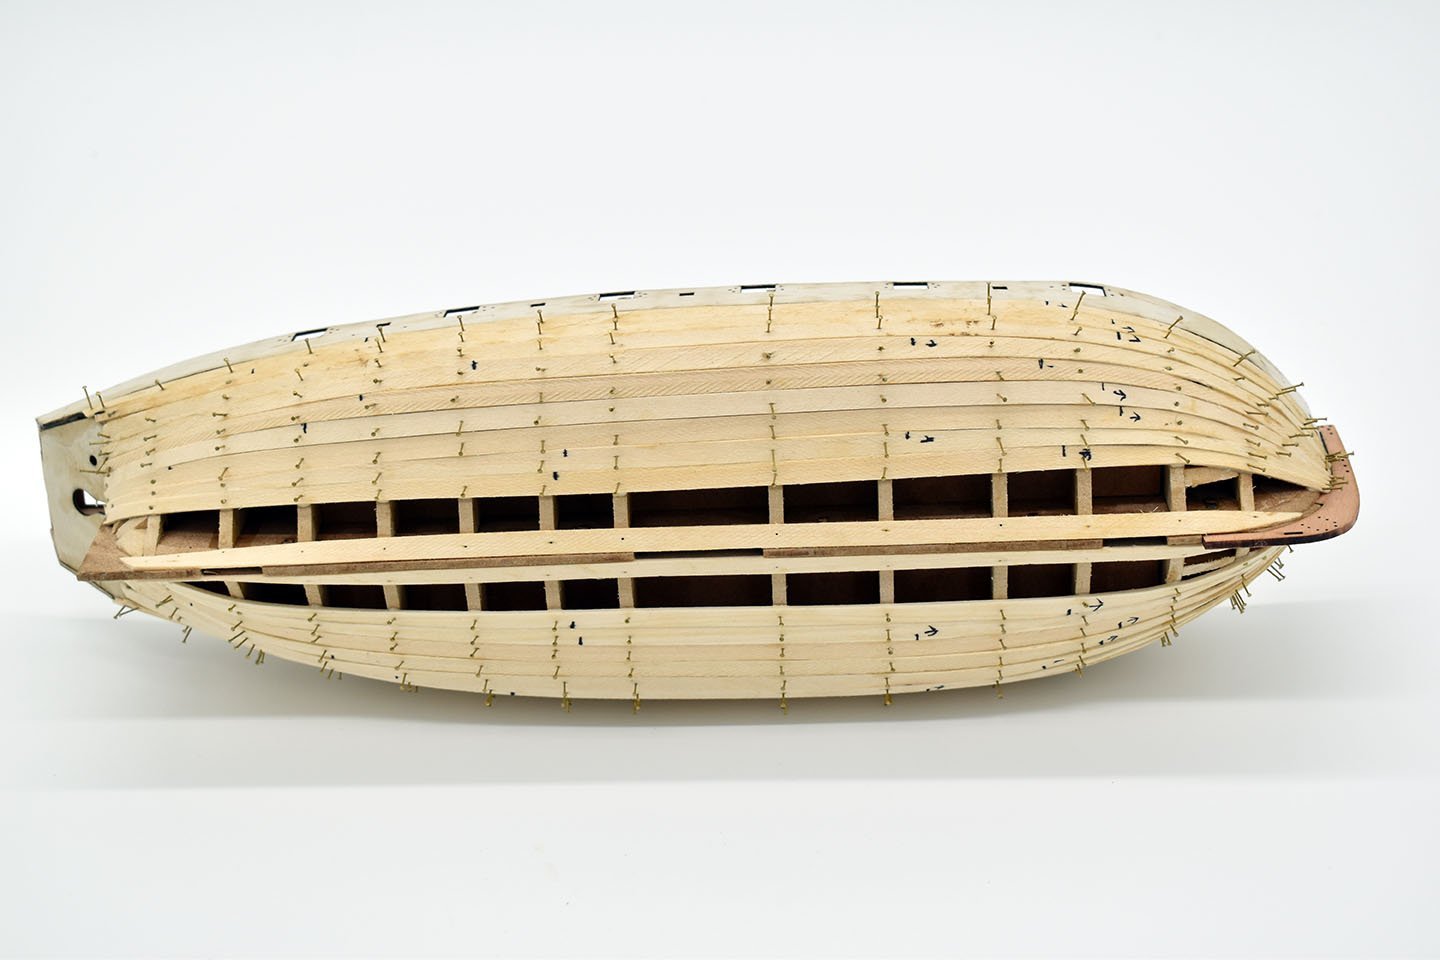
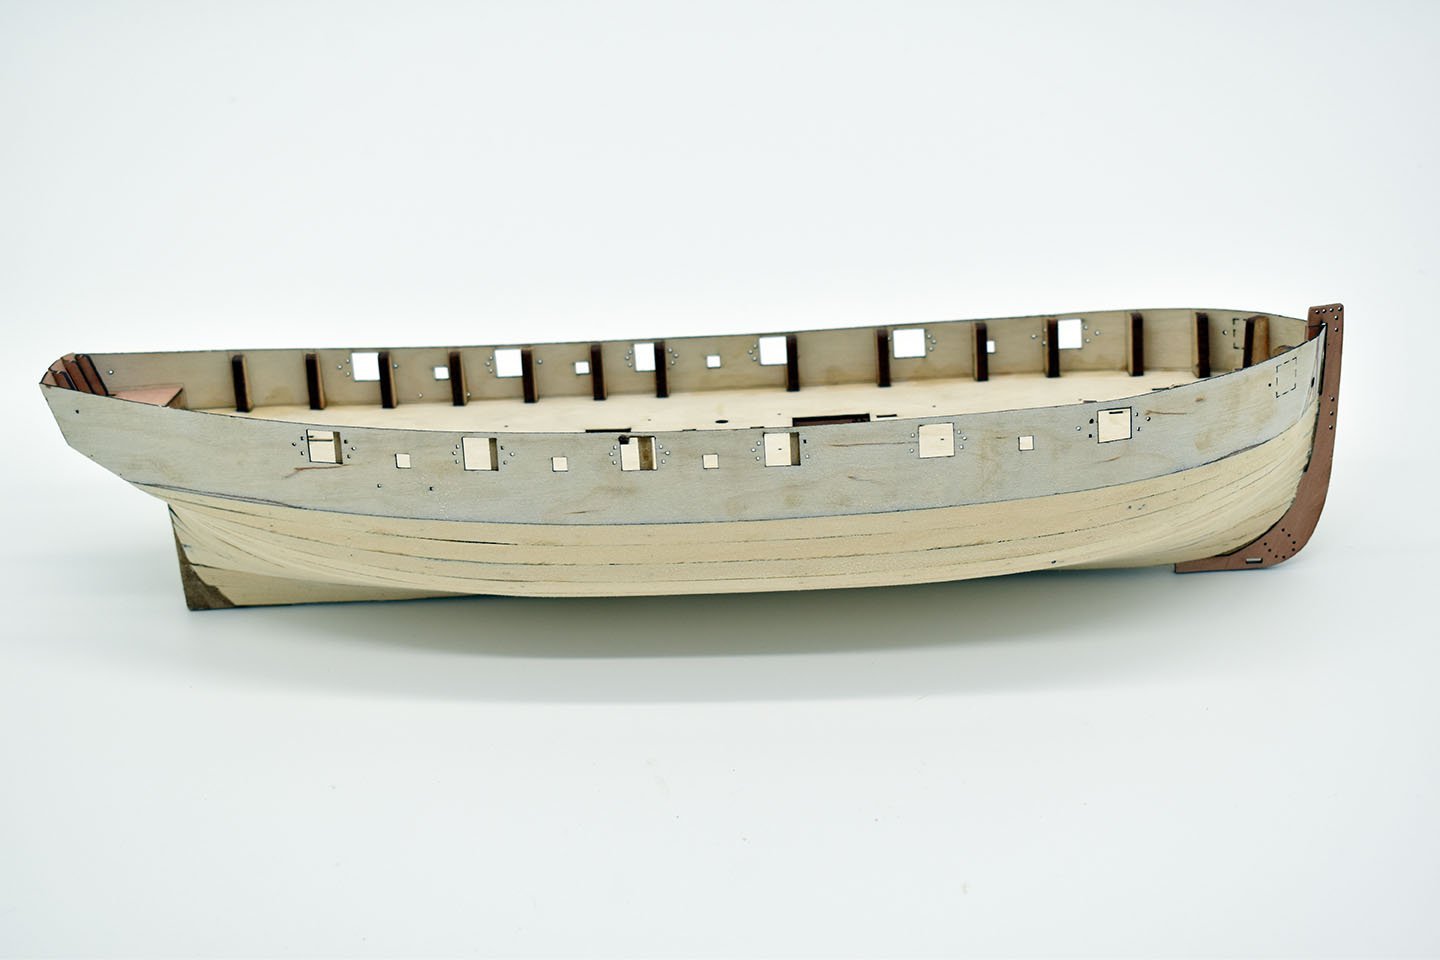
 Around 8 weeks, I should think I have been taking pics during the build for the manual, and most of the hull is now done. Like Grecian, the channels are slotted and glued into place, as are the inner bulwark fittings like the pin rail and cleats - no need for drilling and pinning in place on this one.
- 57 replies
-
- 9
-

-
- Trial
- Vanguard Models
- (and 1 more)
-
I think the best thing to do, if you are undecided, is to buy both! lol
- 57 replies
-
- 8
-
-

-
- Trial
- Vanguard Models
- (and 1 more)
-
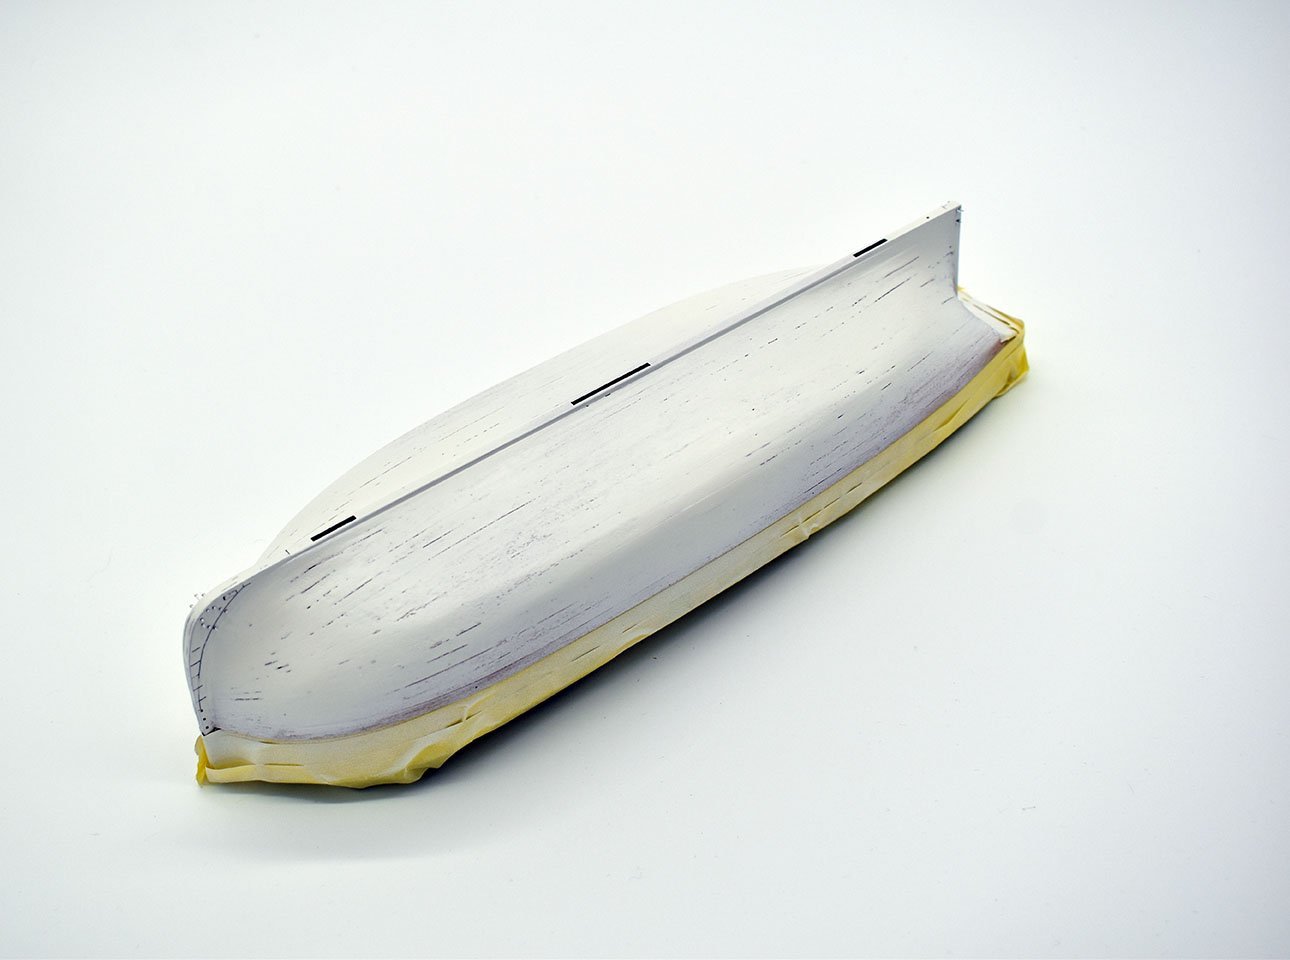
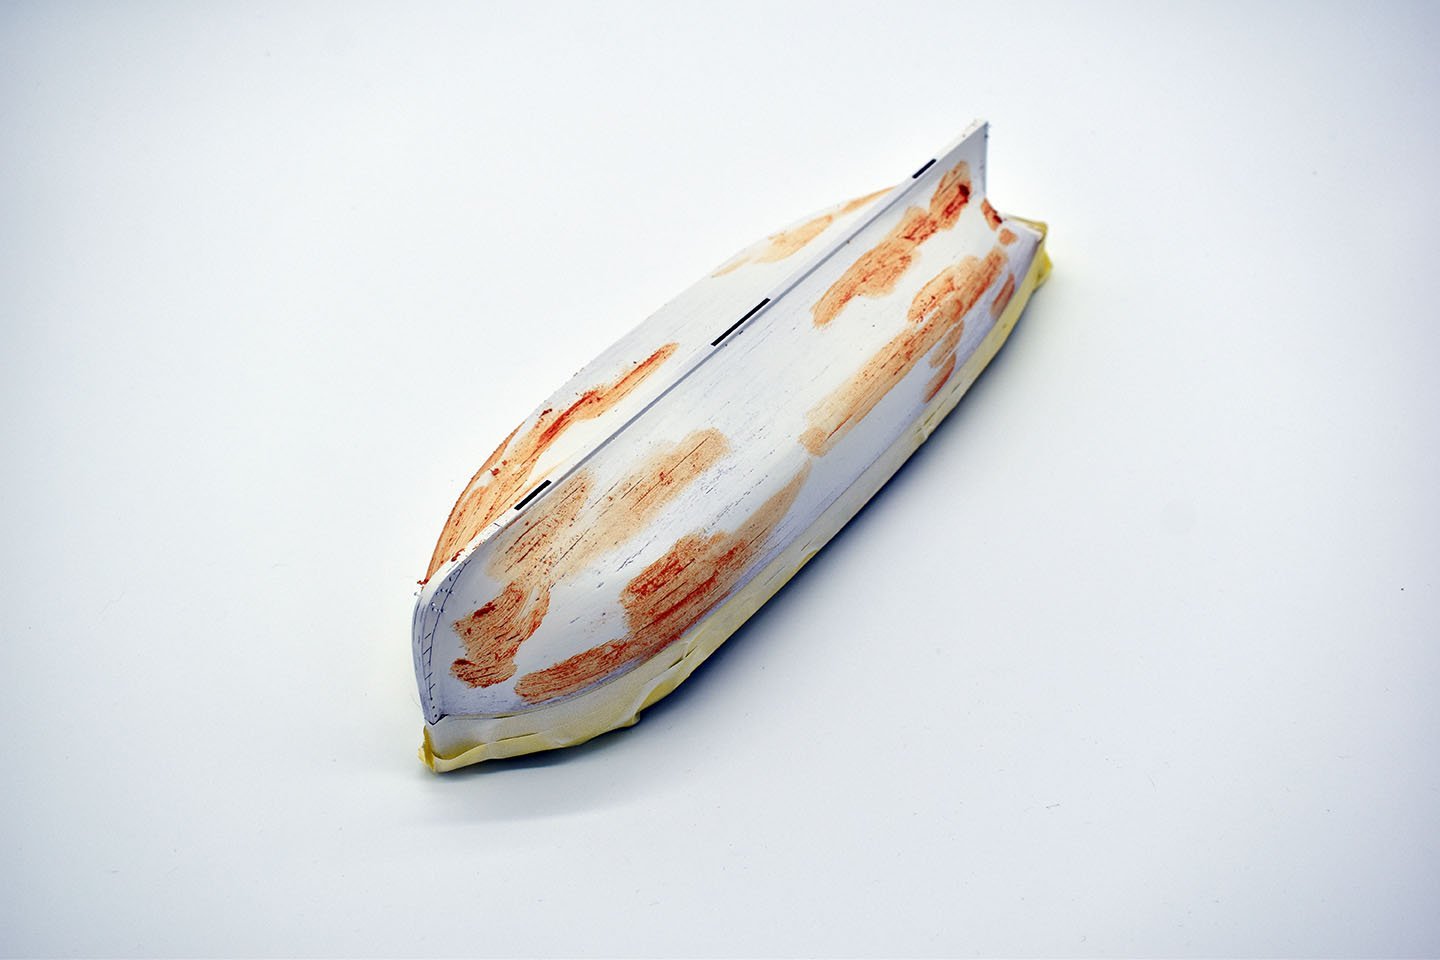
Cheers! I am a little rusty when it came to doing a nicer model, rather than speed built just for pics for jim. The designs are 100% done. I have changed a few things whilst building this. For example, I felt the 1mm pear was just ever so slightly too thick, so have put them on a 0.8mm pear file (inner/outer bulwarks, main wale, upper rails and gunwale) All of the planking is very easy, and all is painted. All above the white painted area are pre cut.
- 57 replies
-
- 10
-
-
- Trial
- Vanguard Models
- (and 1 more)
-
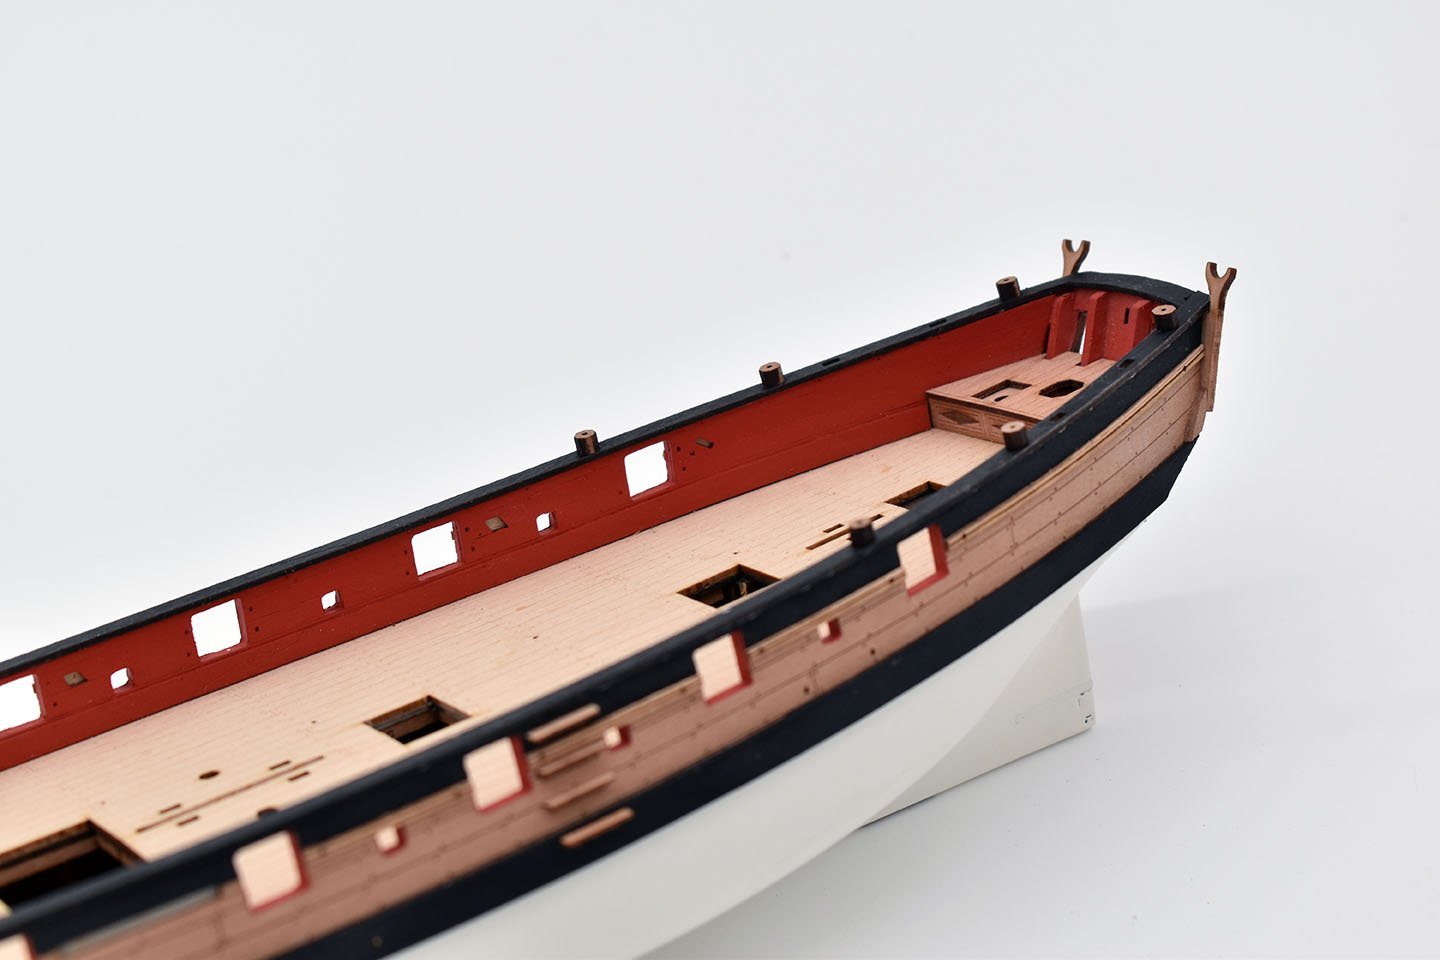
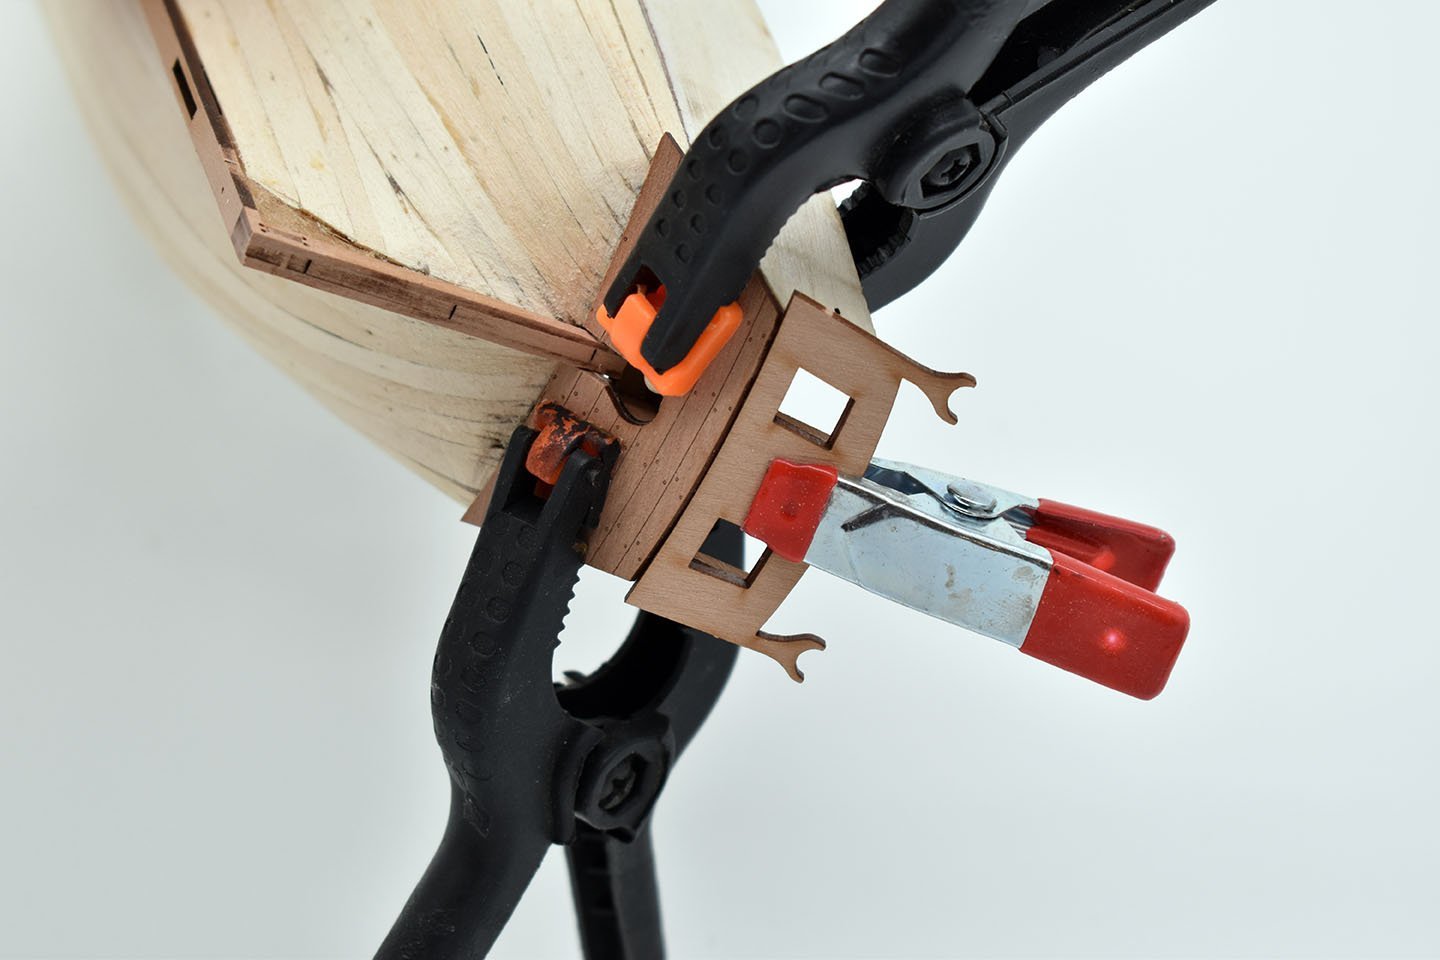
Not sure about the inner bulwark ladders, may delete those.... I have opted for a mirrored base for this one. And I just realised I left off the hatch for the toilet at the stern..
- 57 replies
-
- 10
-
-
- Trial
- Vanguard Models
- (and 1 more)
-
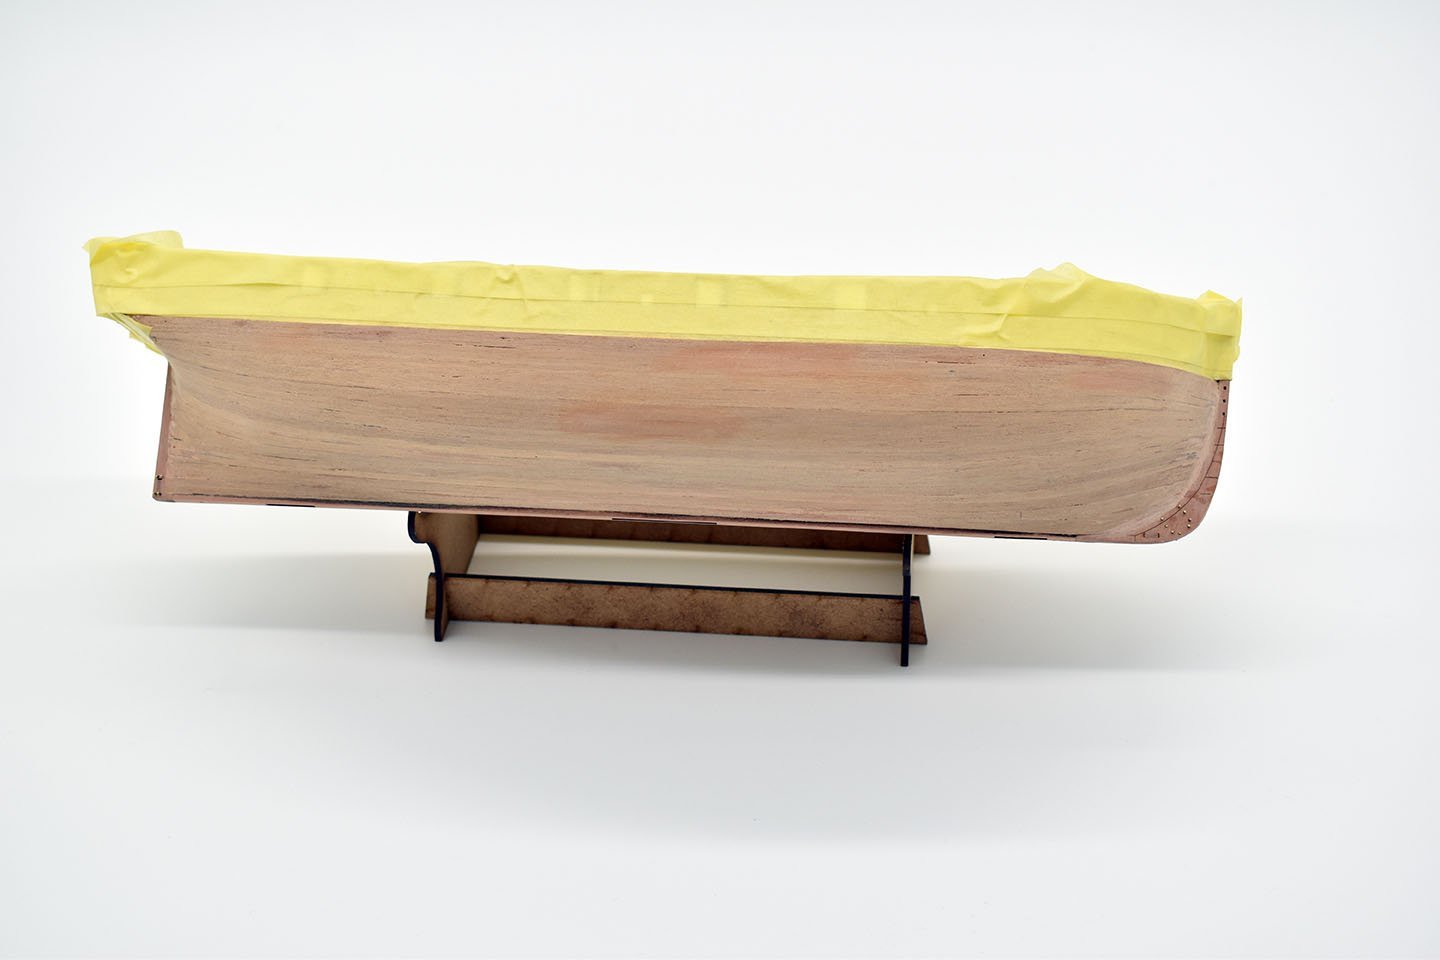
And this is where I am with the model now, waiting for my PE...

- 57 replies
-
- 37
-
-

-
- Trial
- Vanguard Models
- (and 1 more)
-
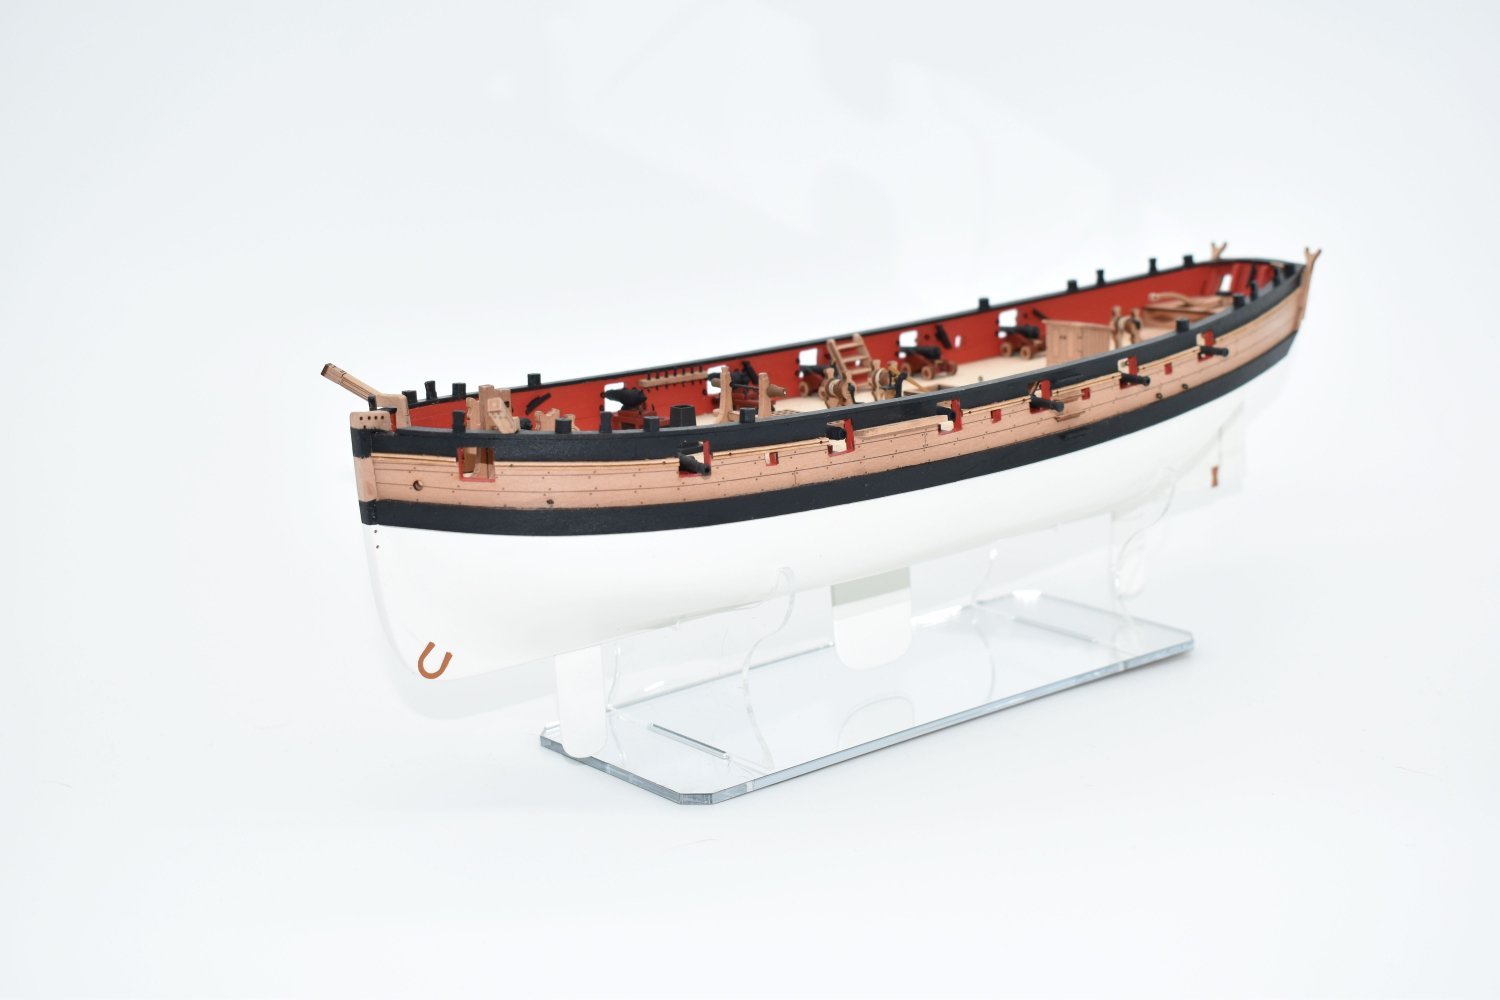
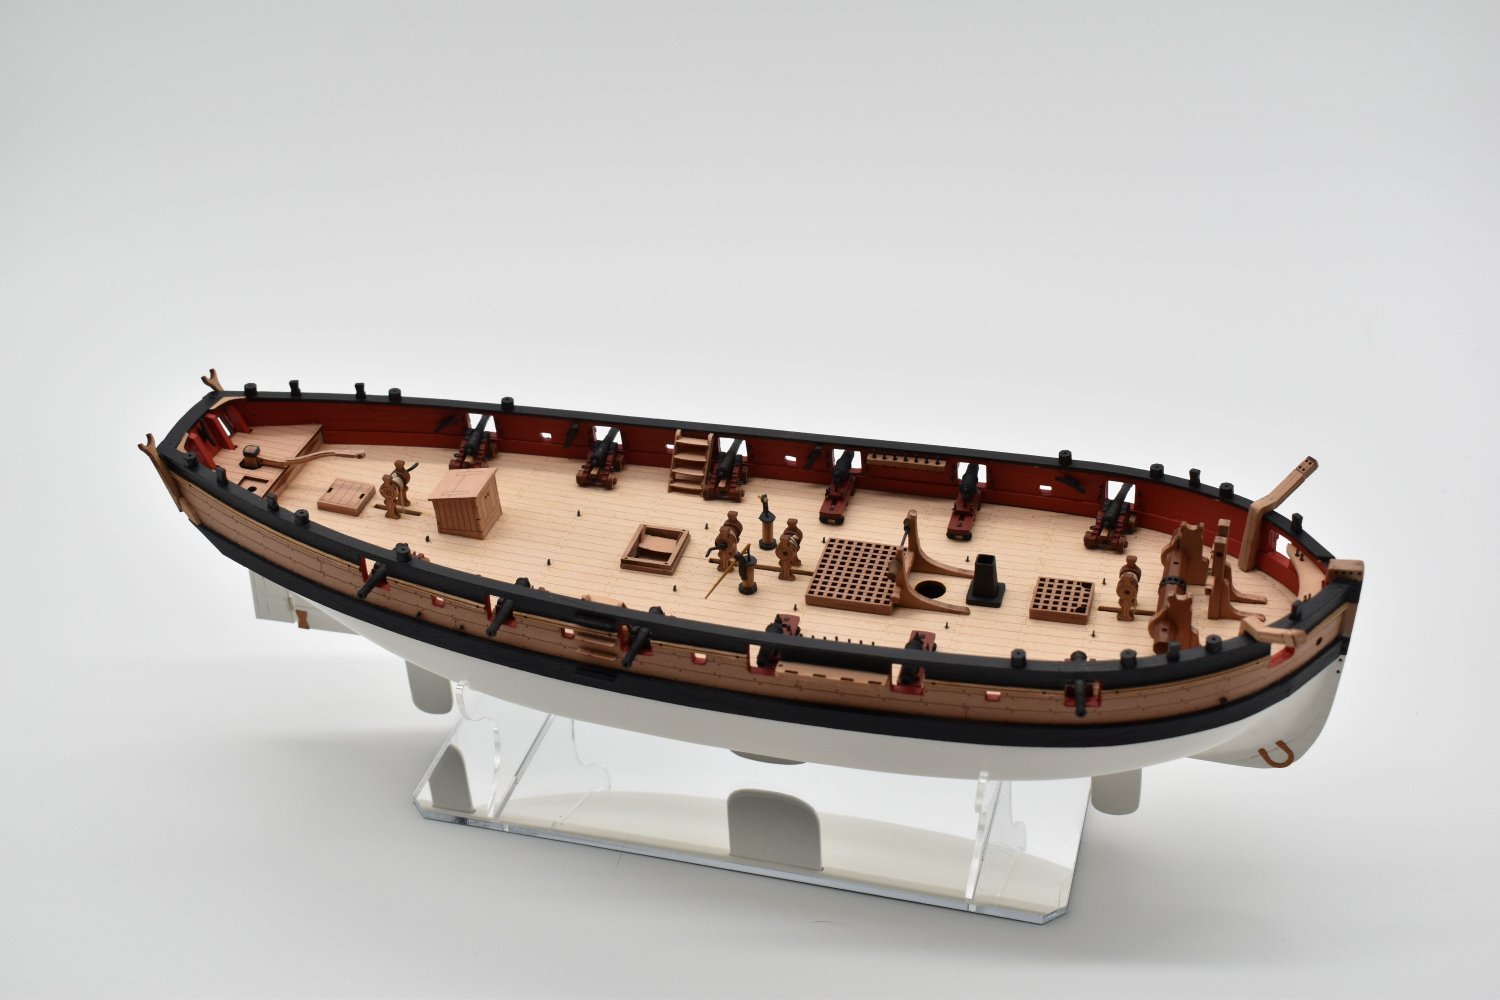
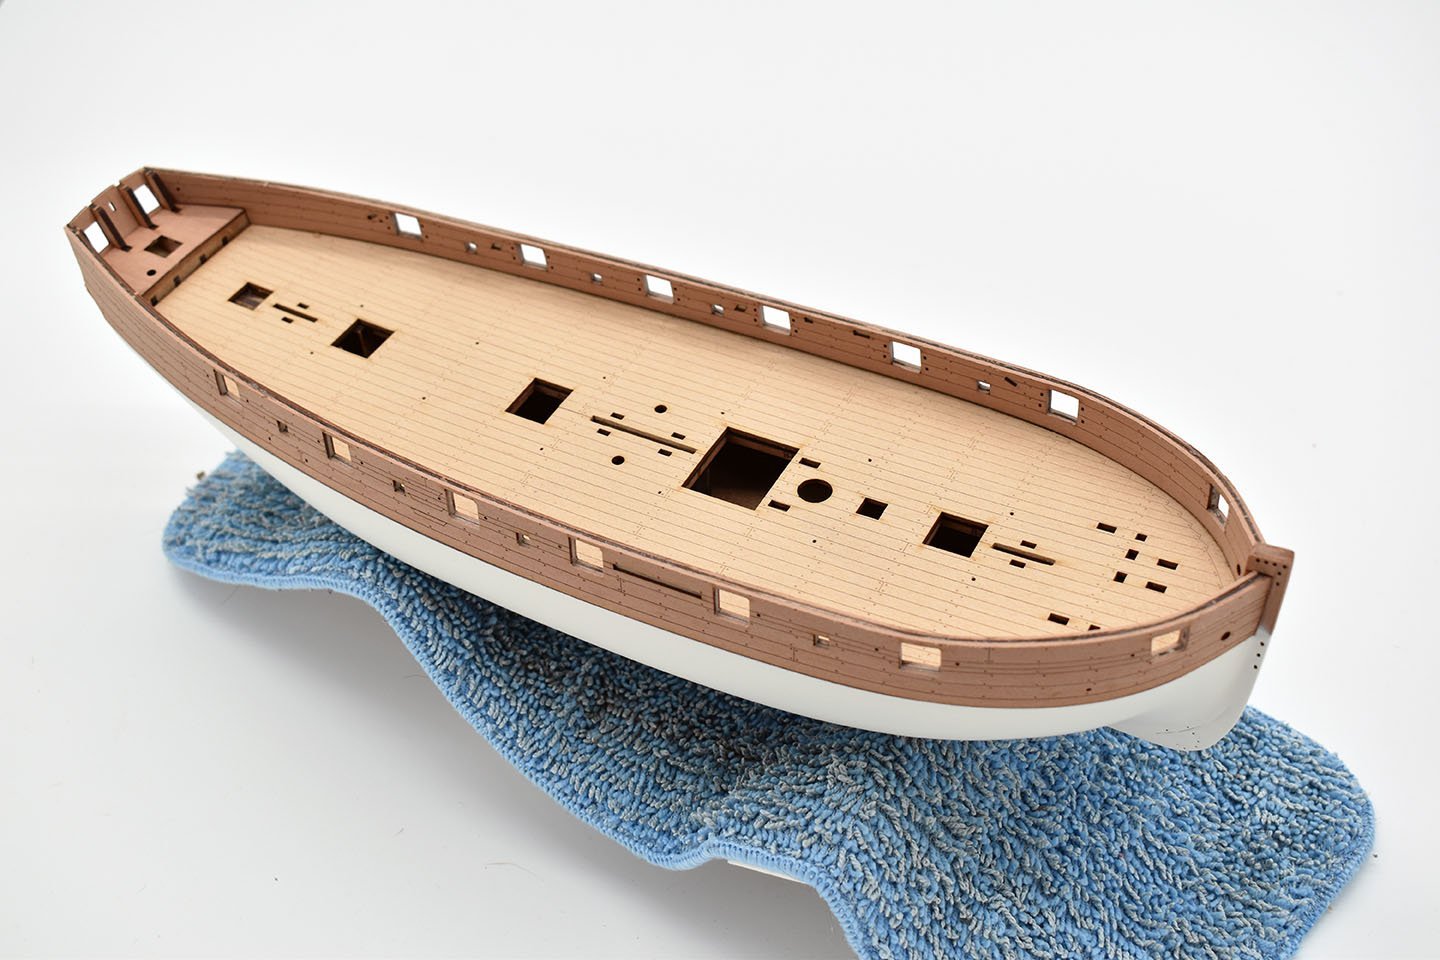
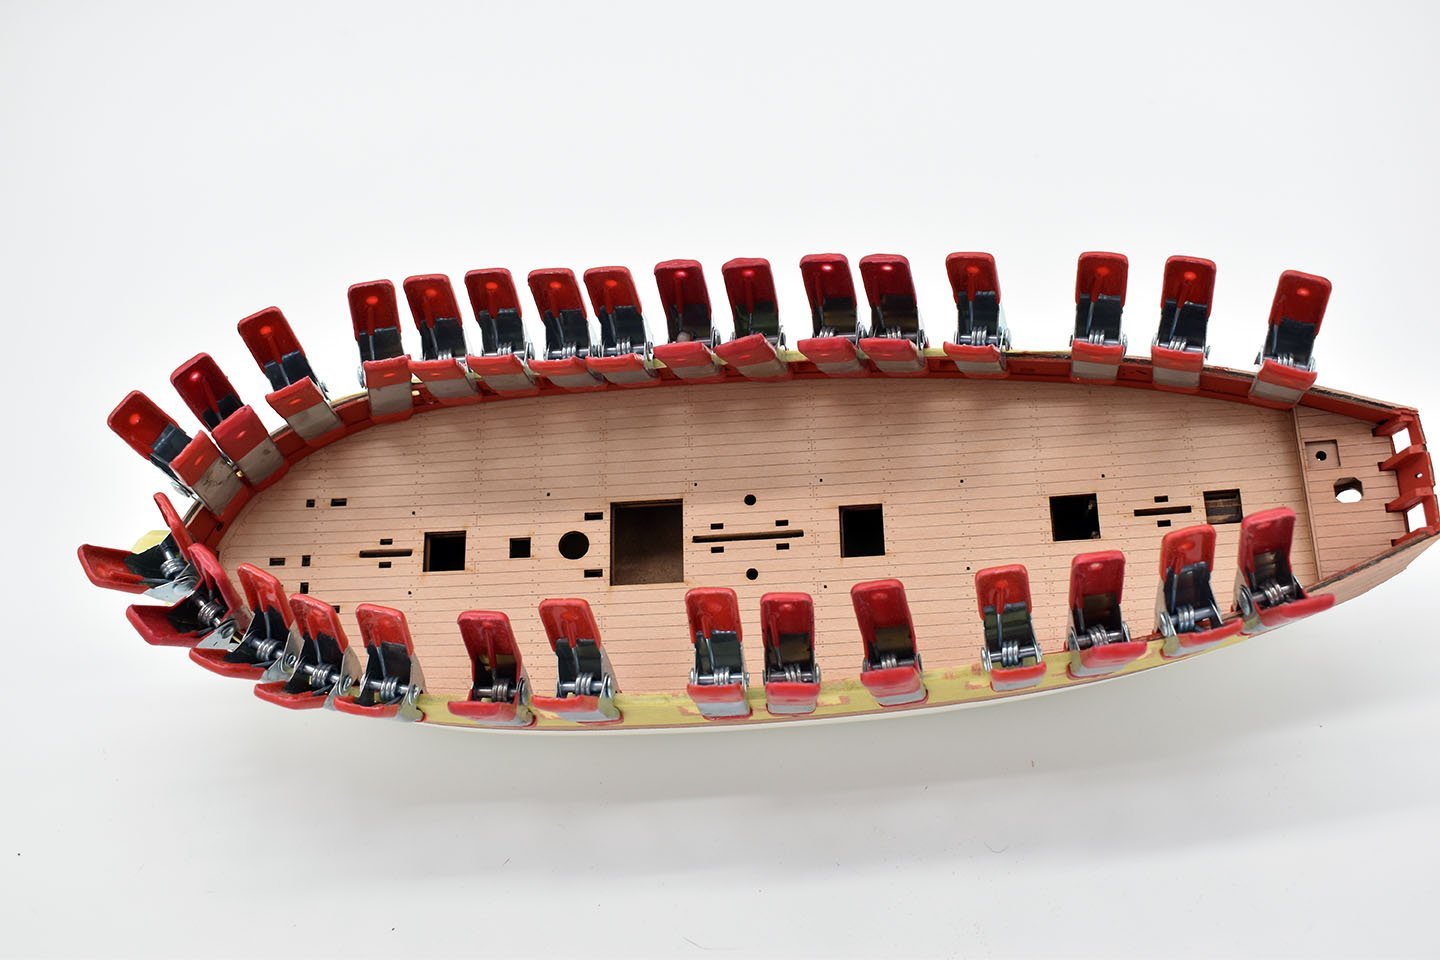
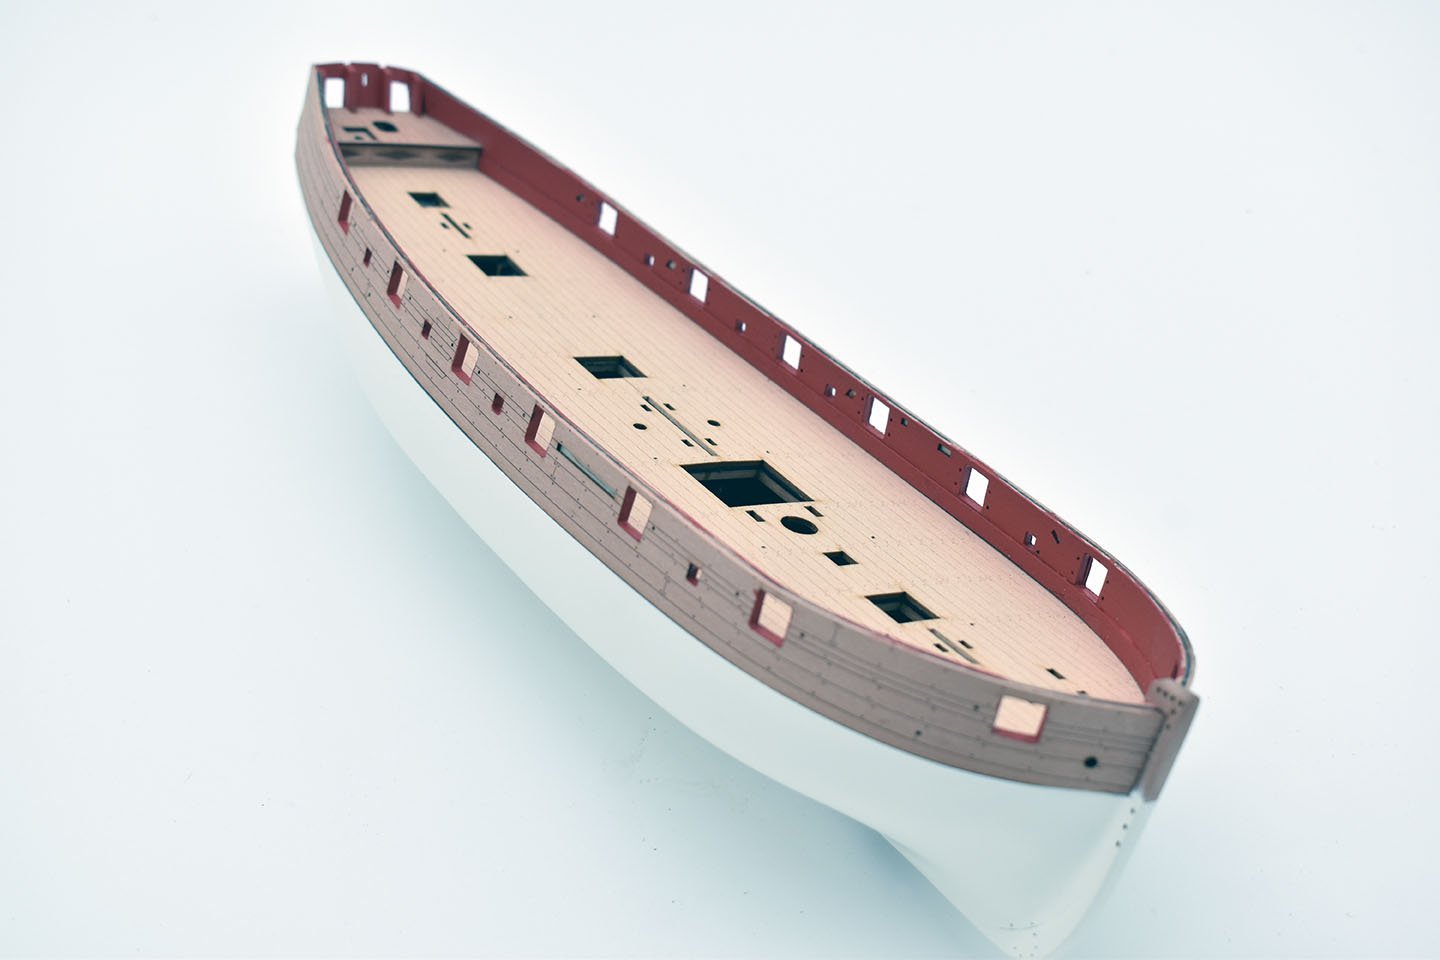
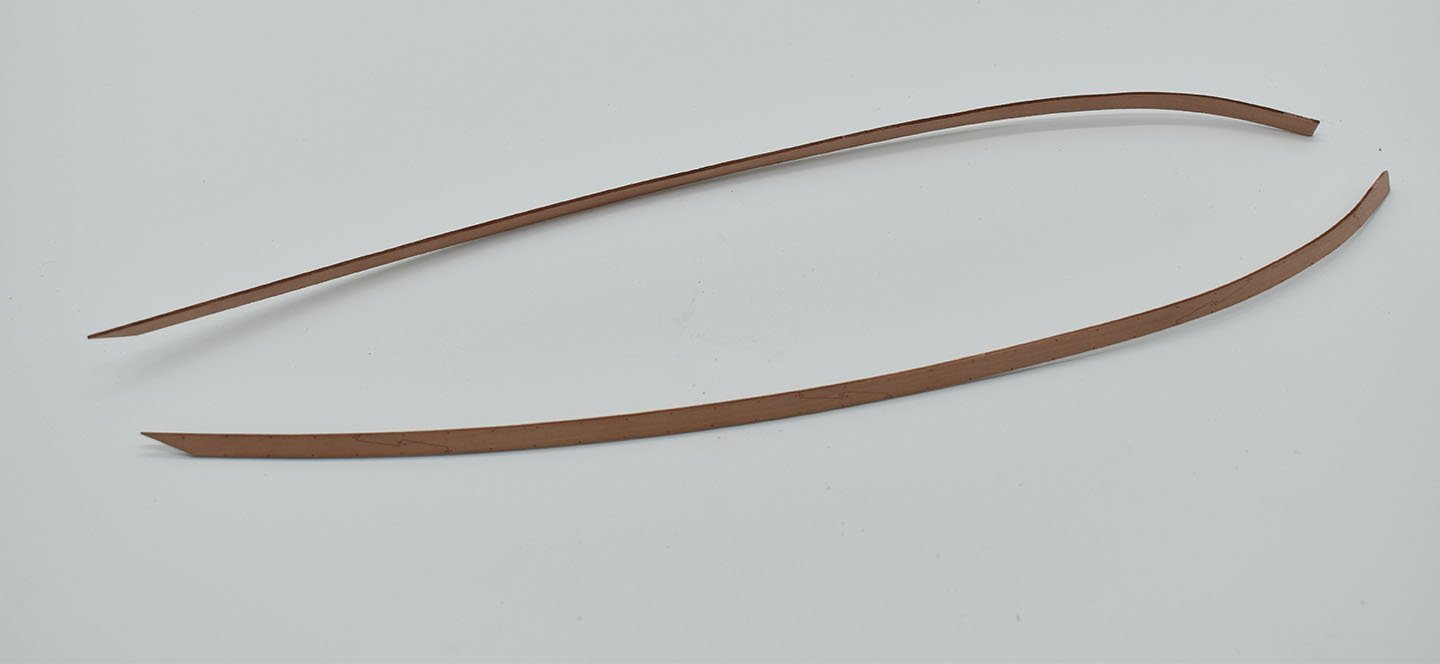
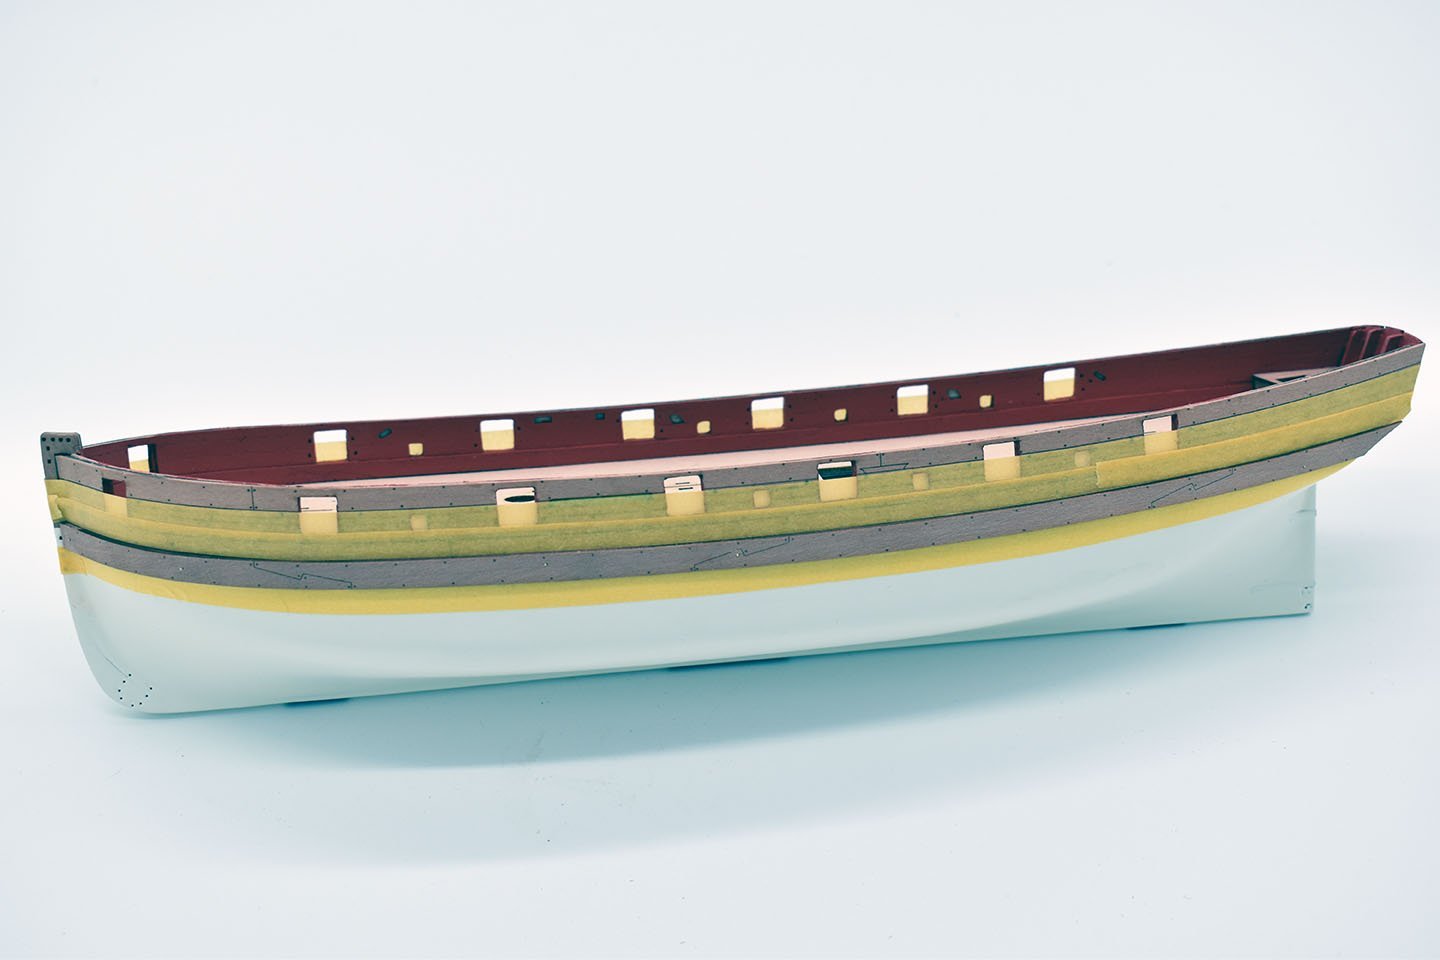
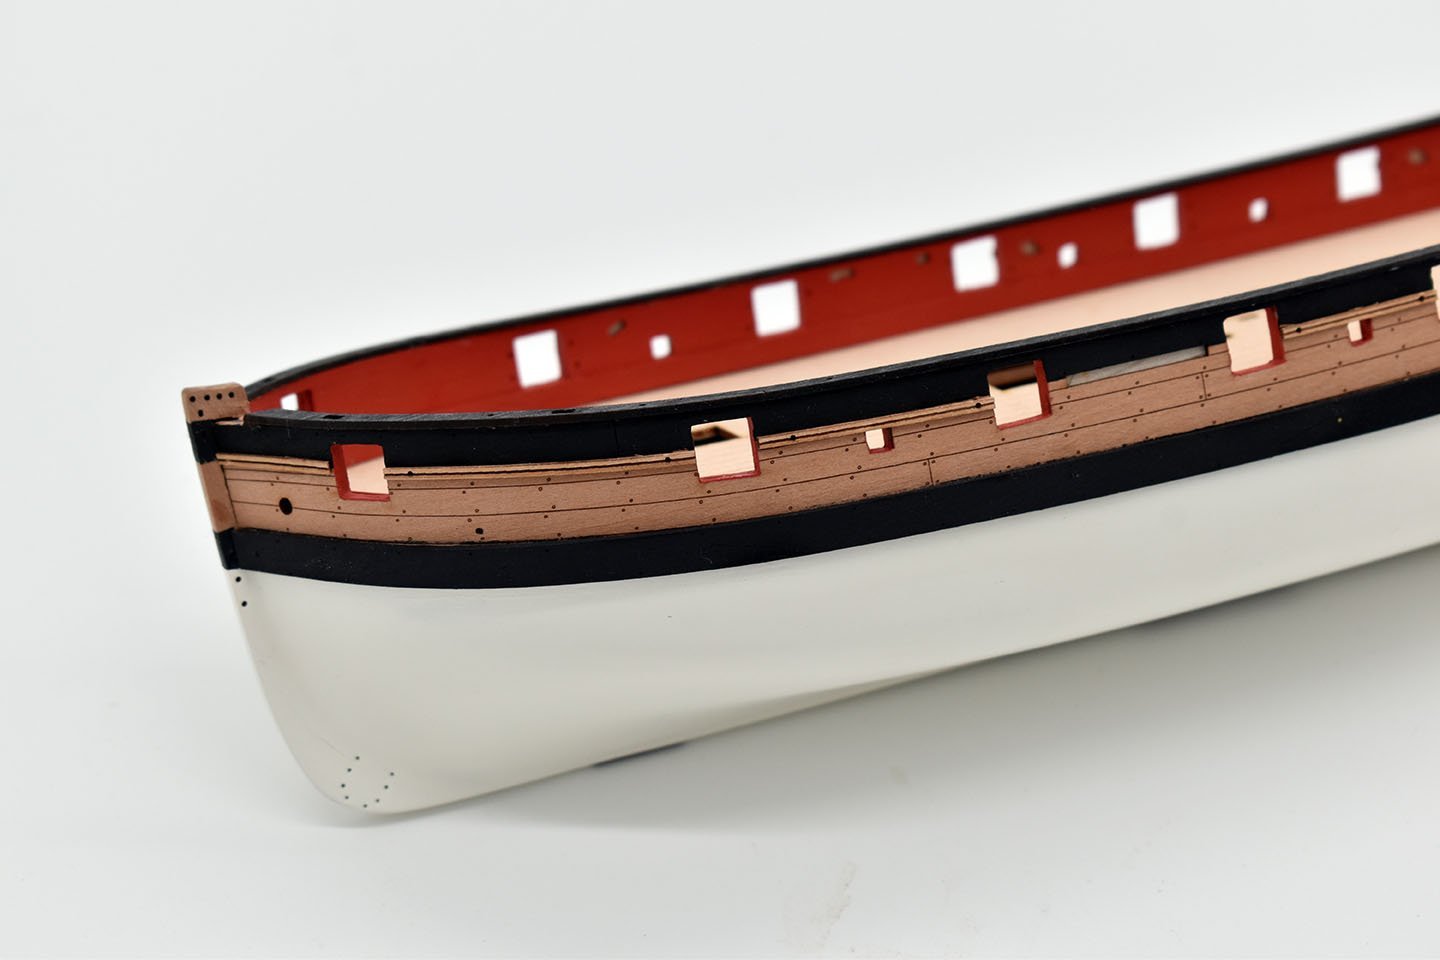
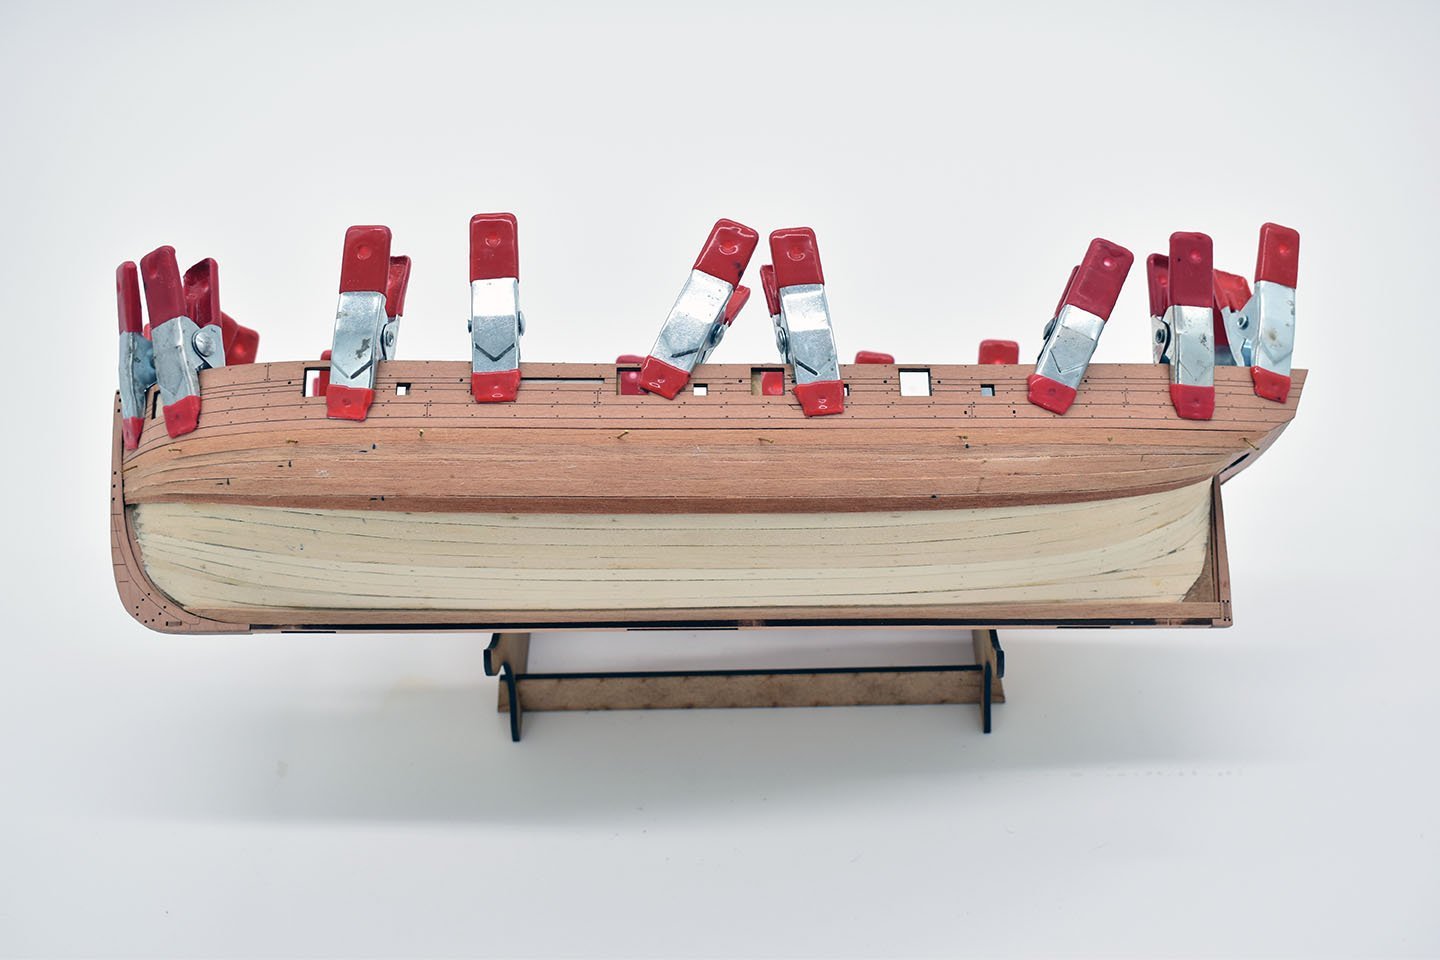
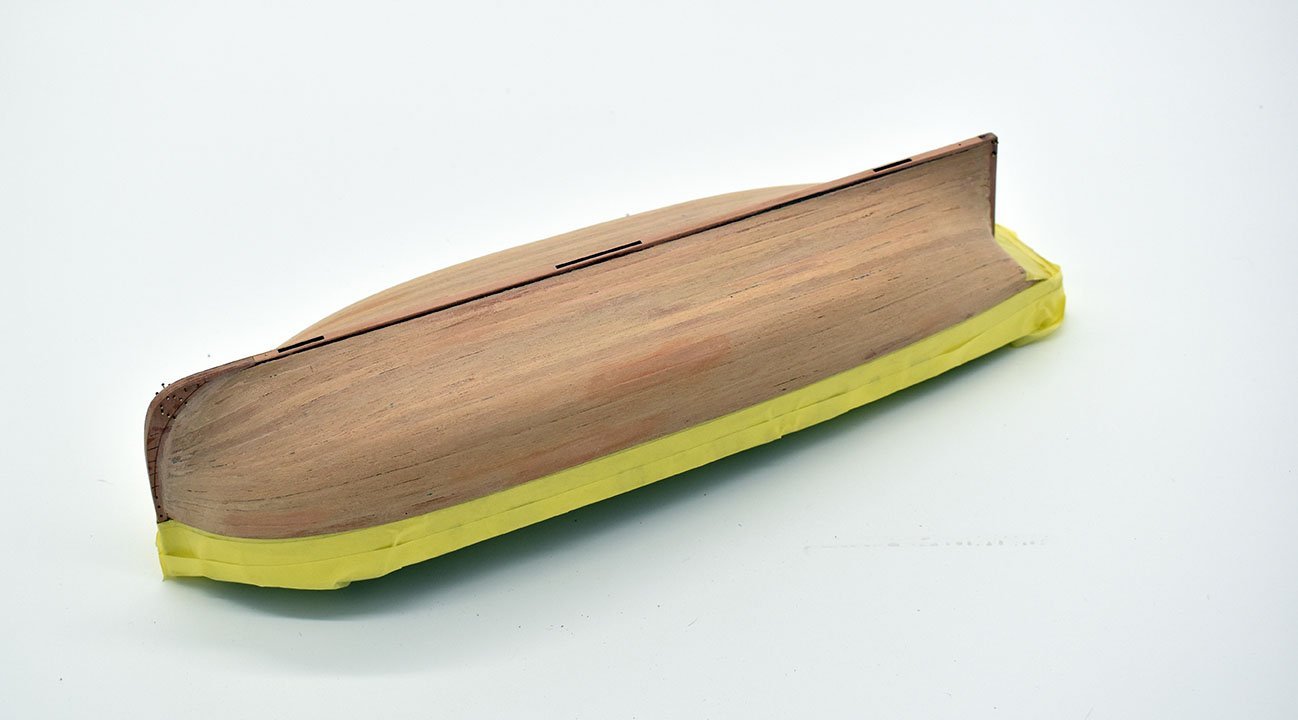
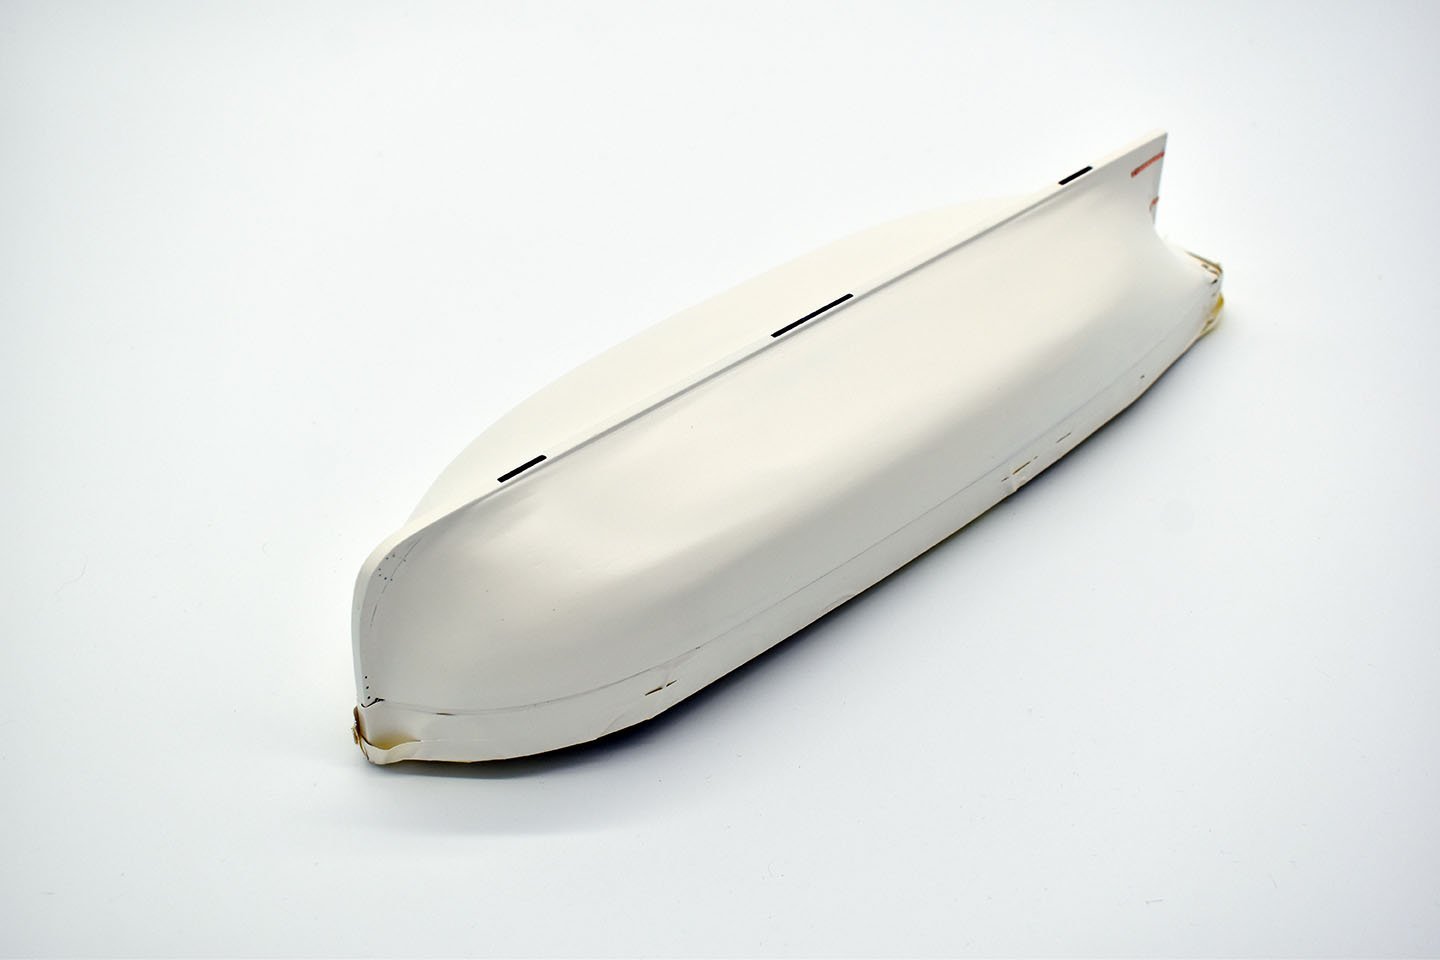
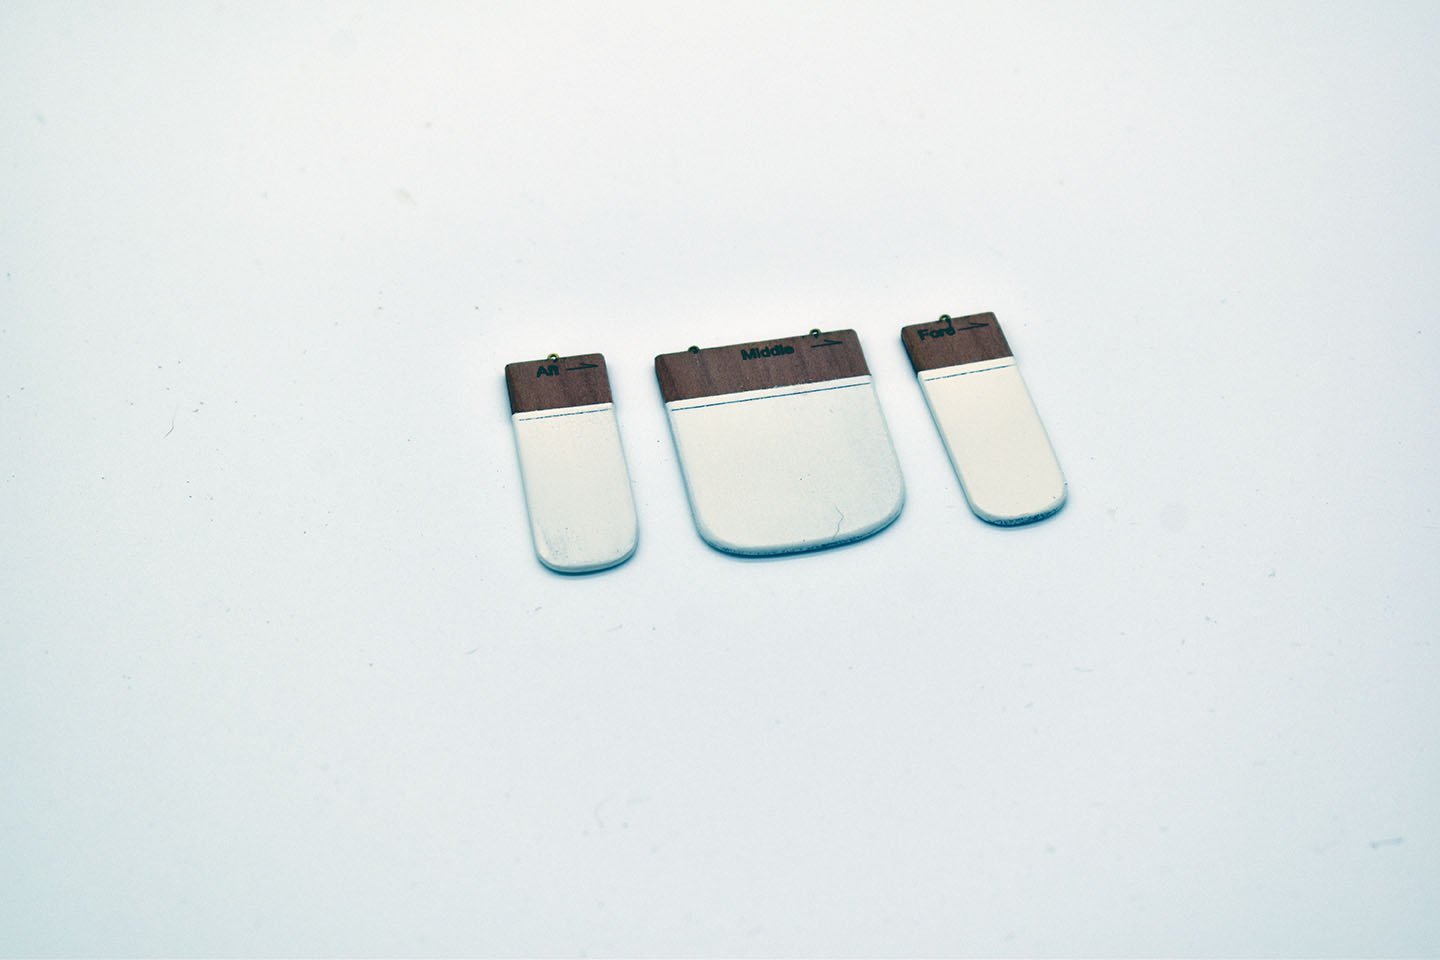
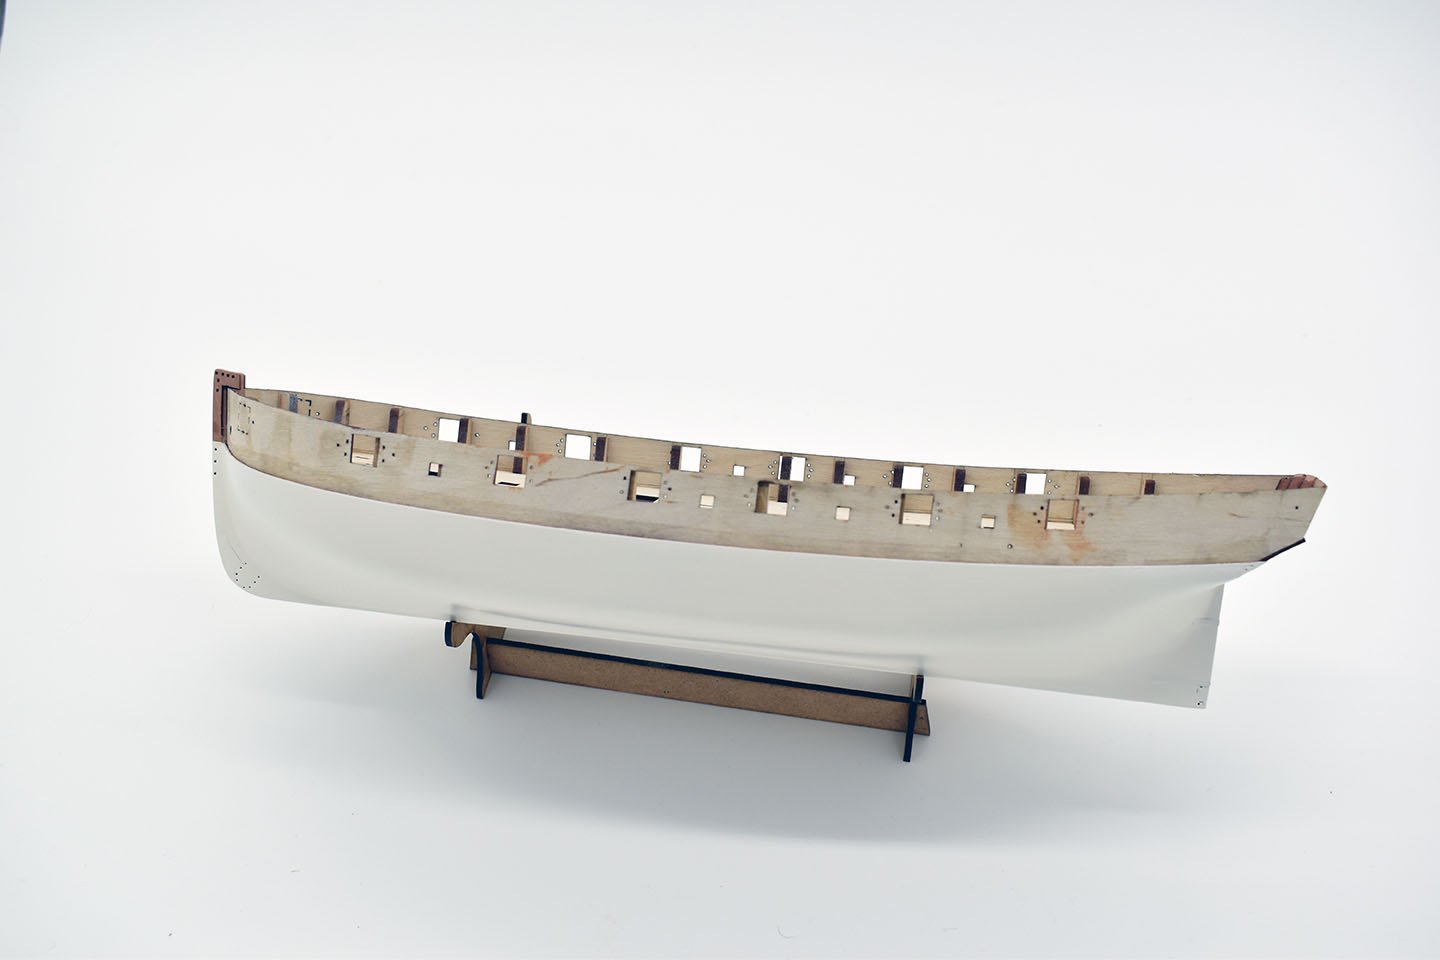
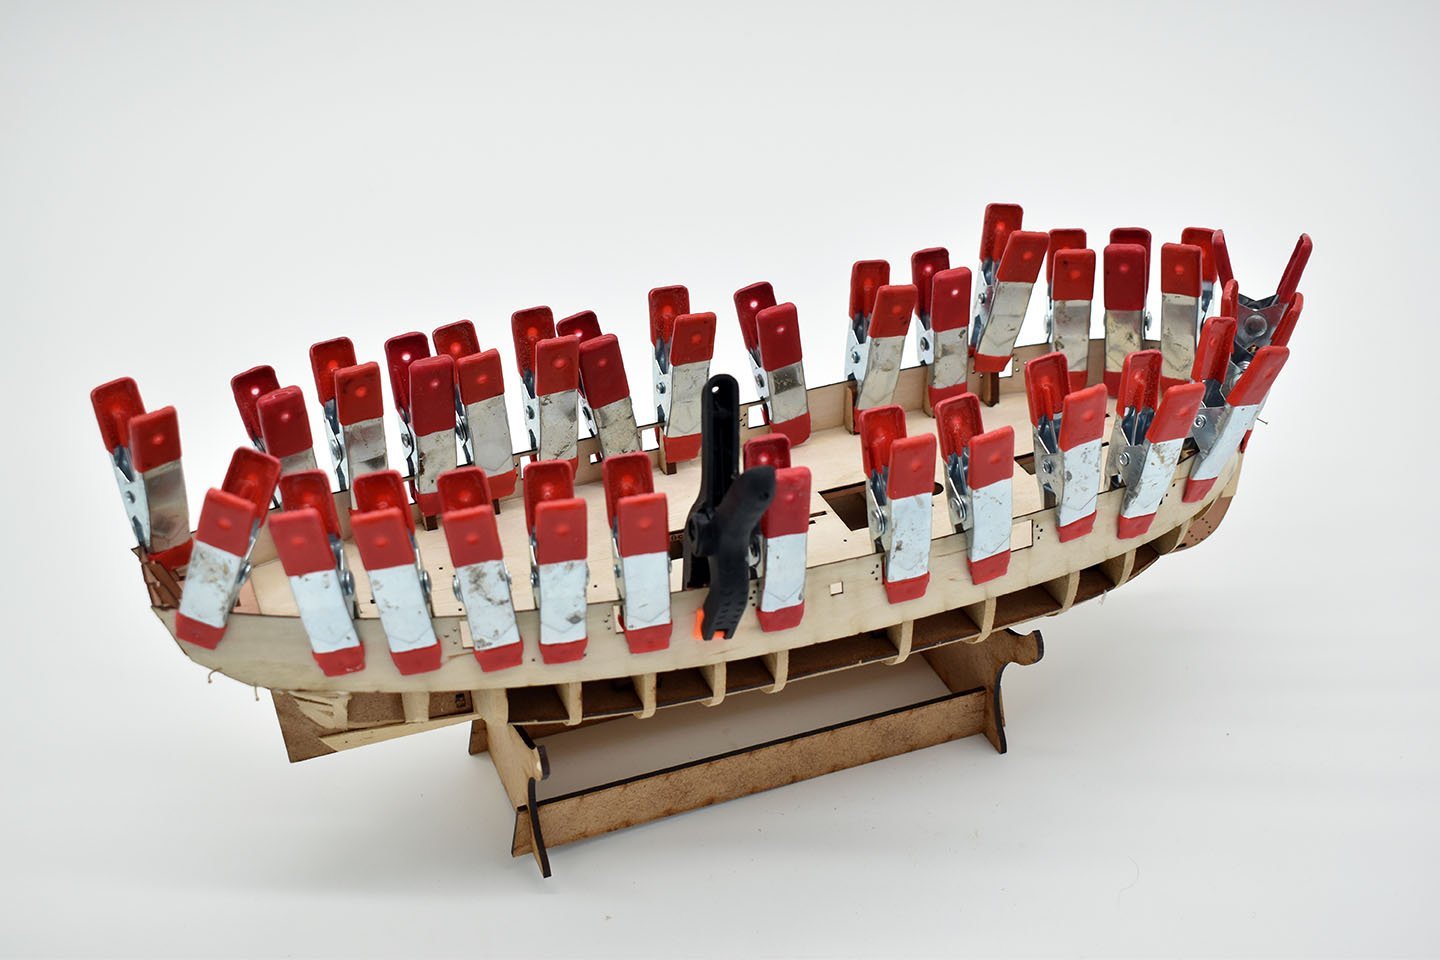
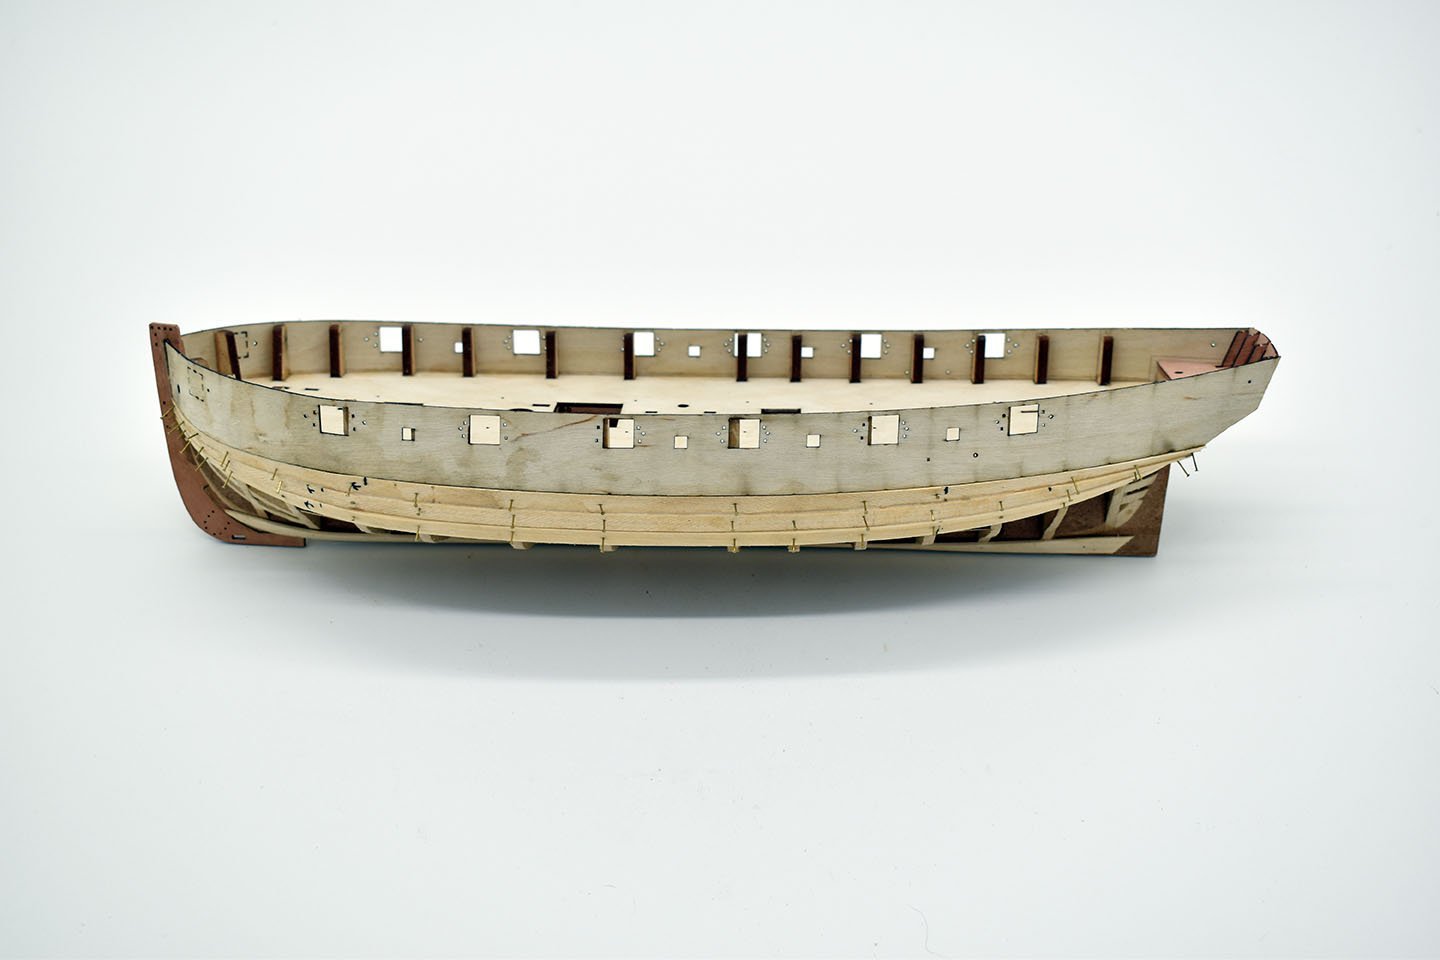
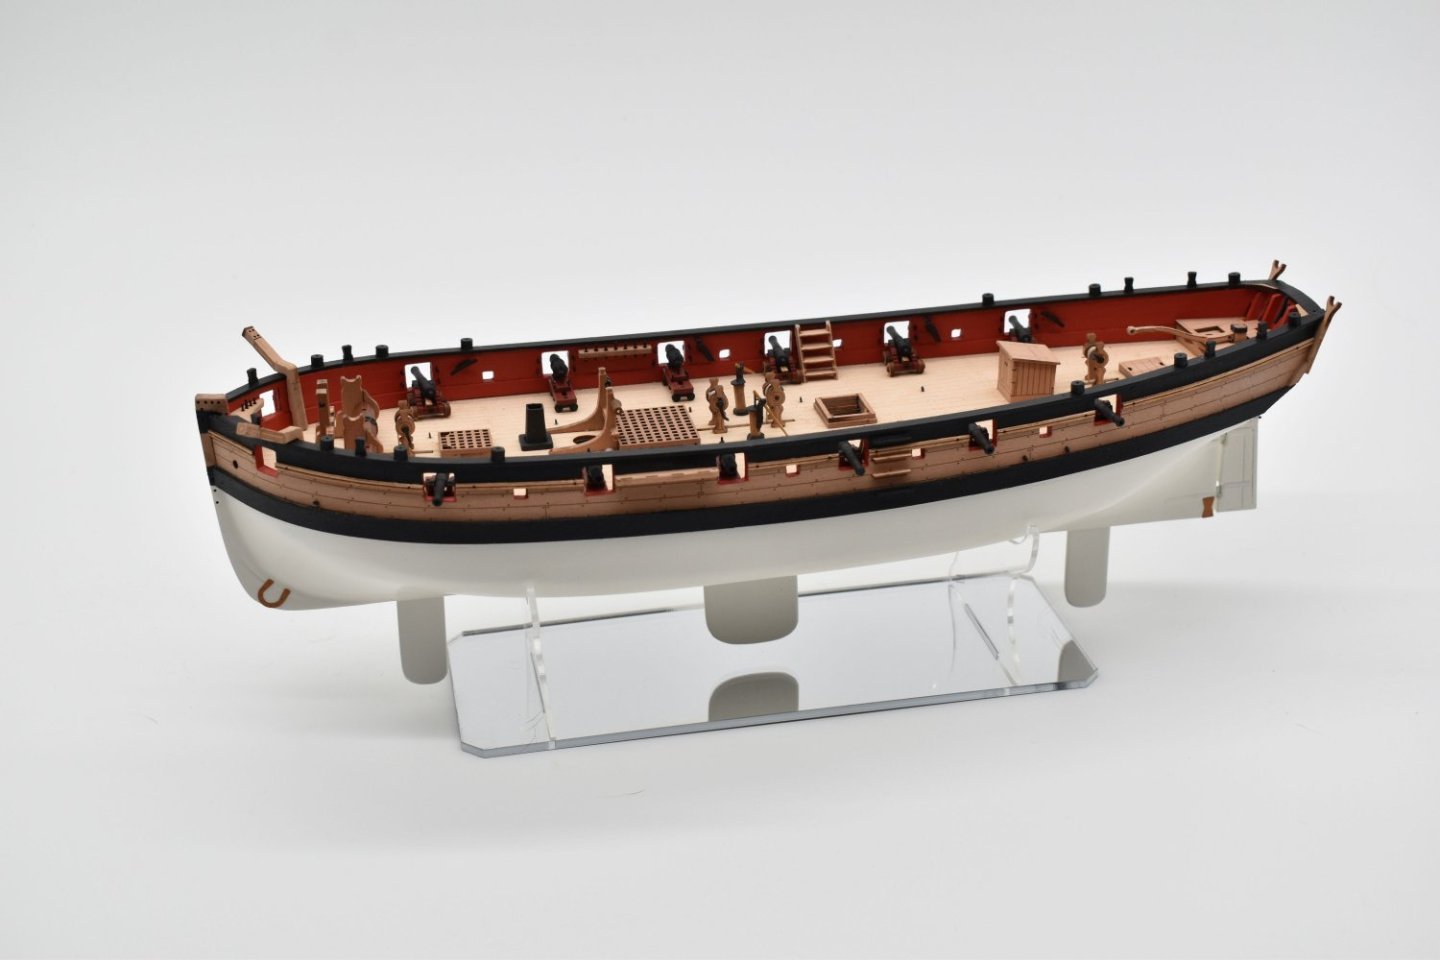
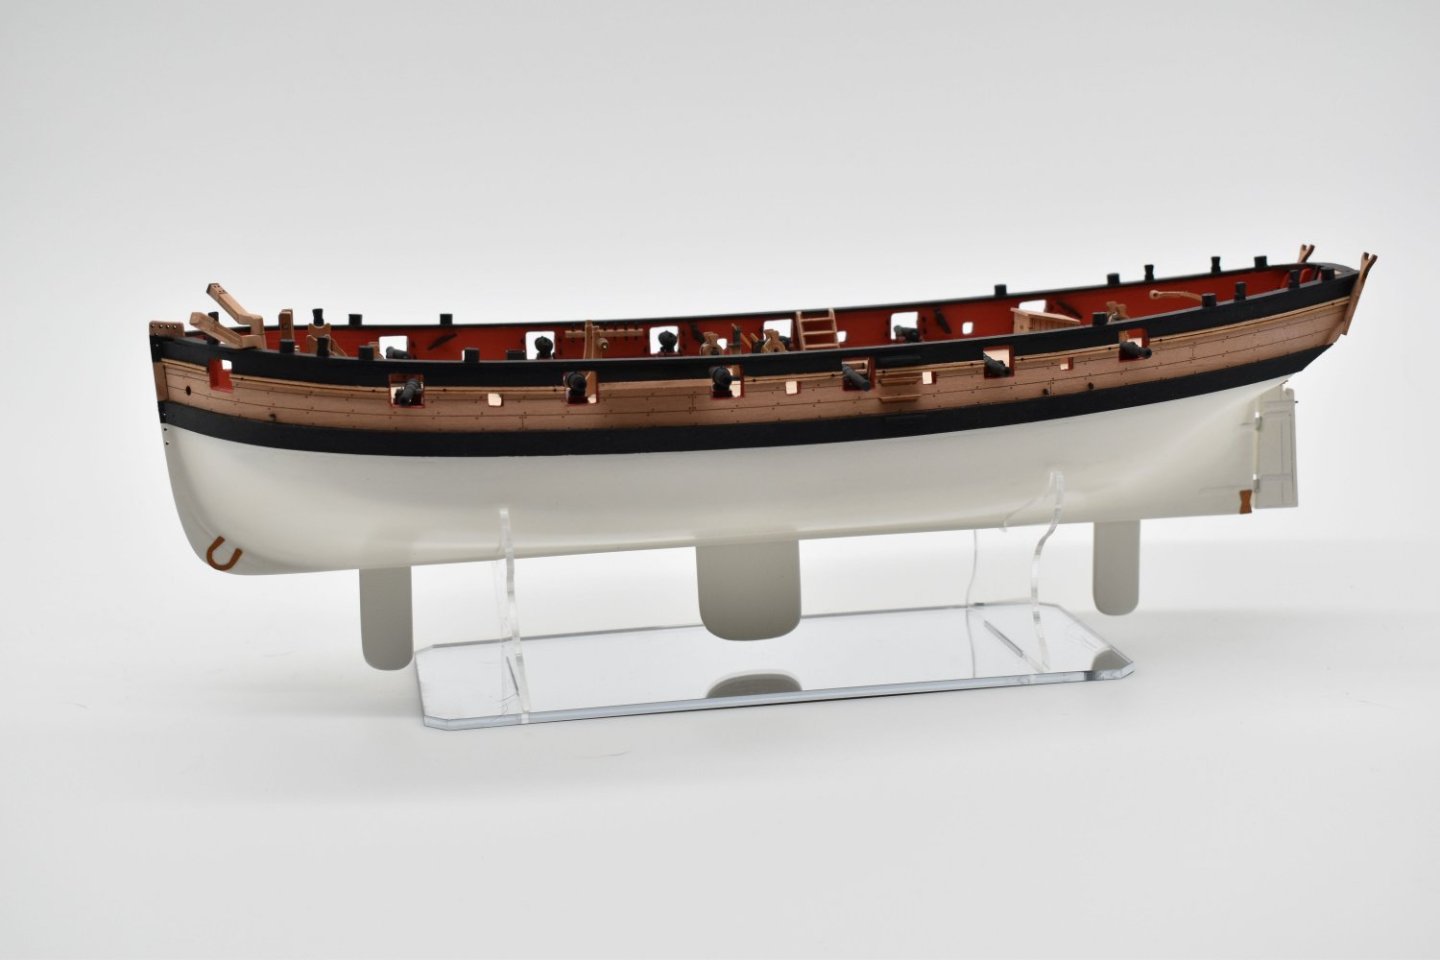
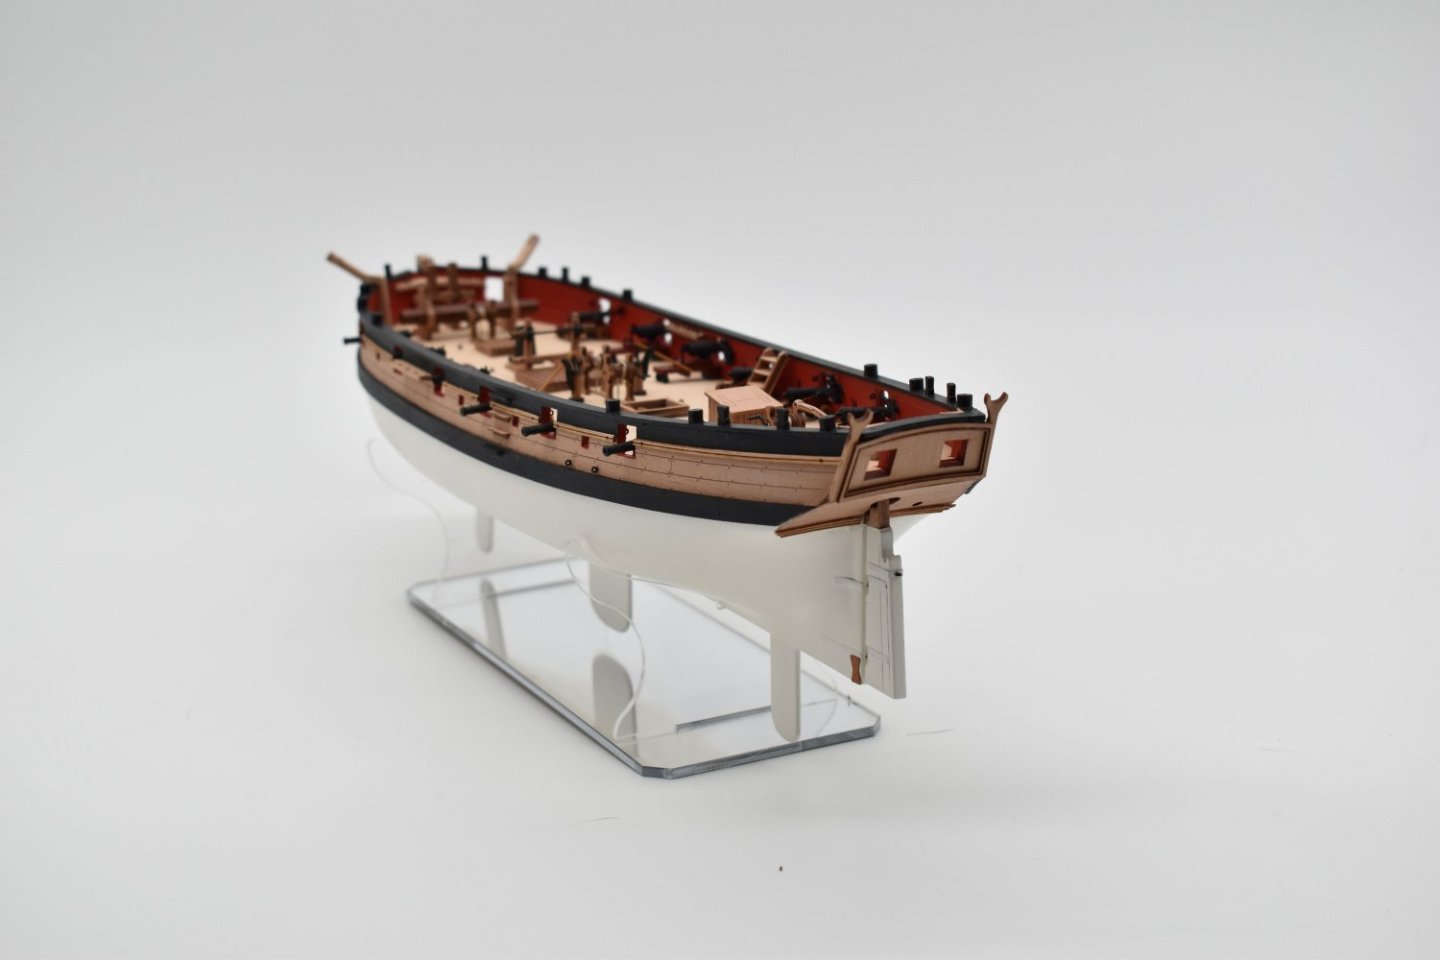
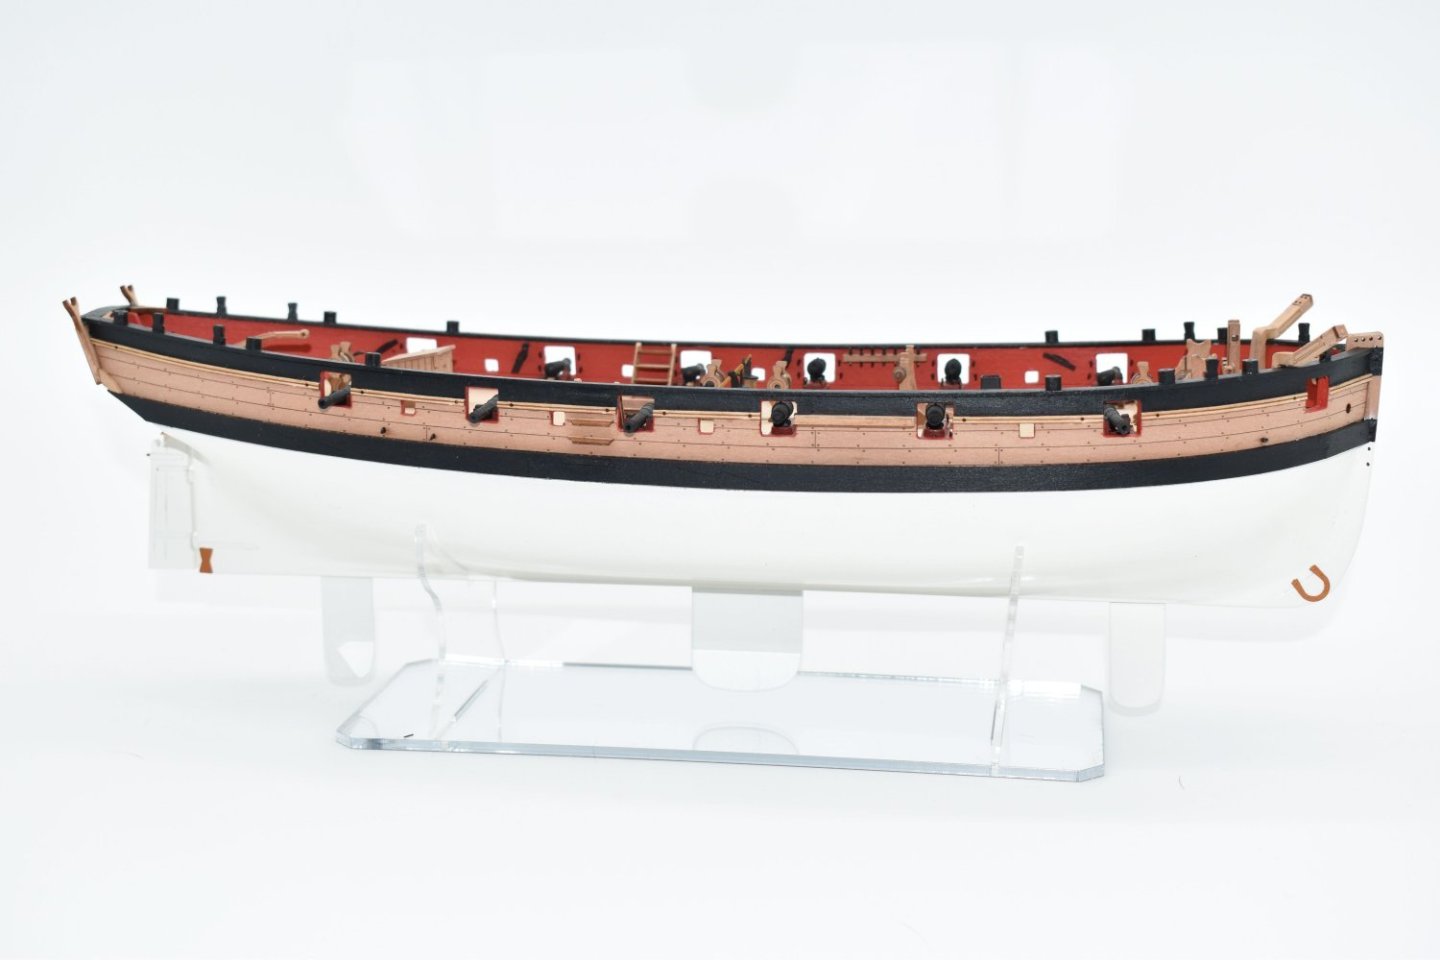
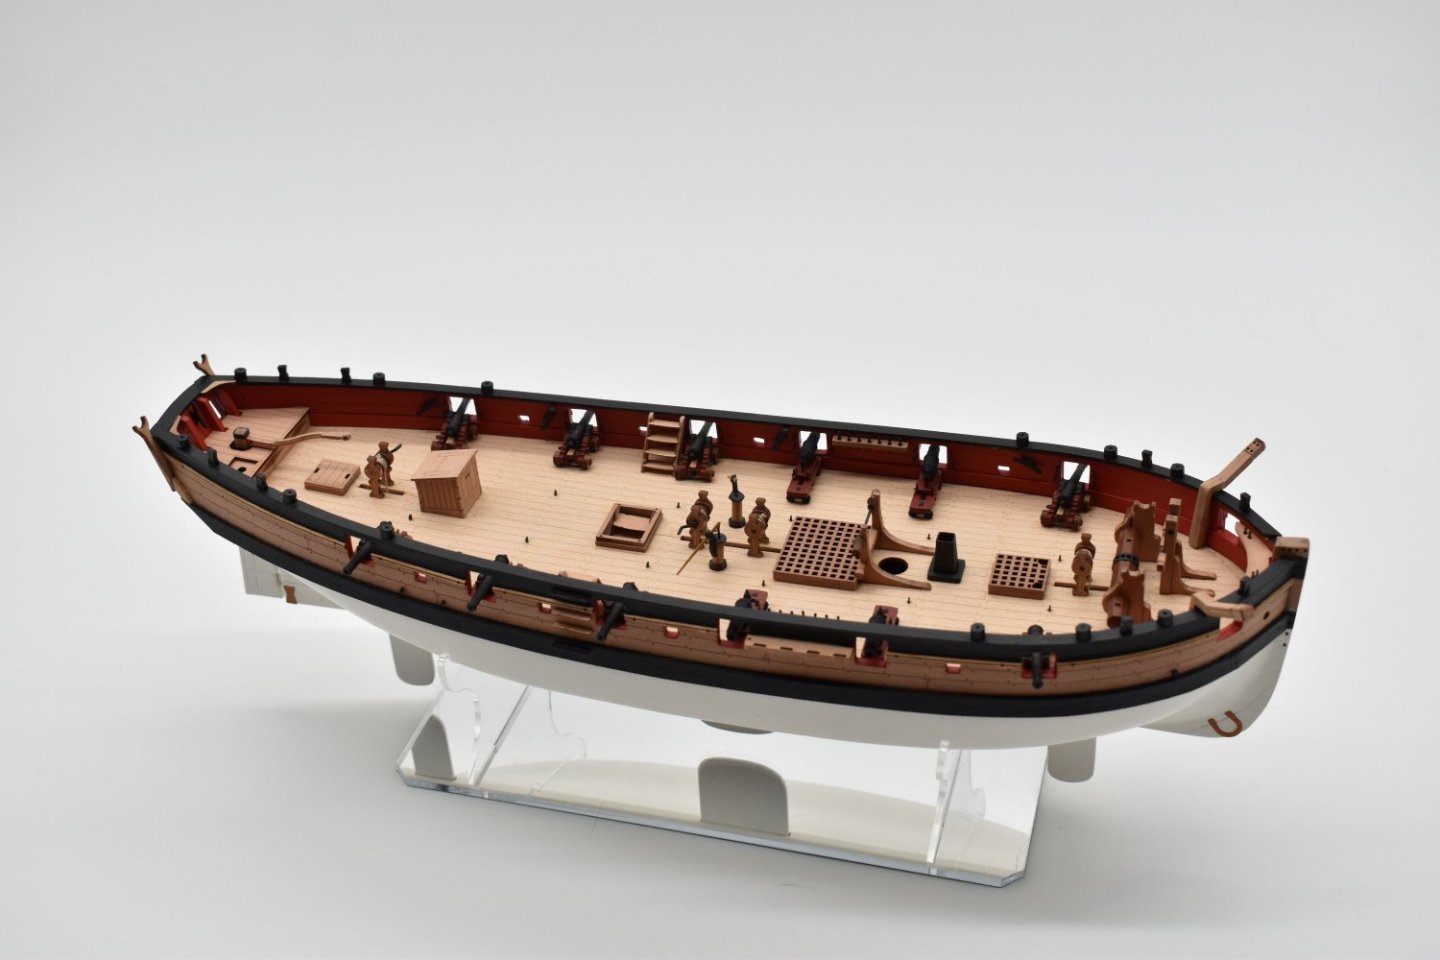
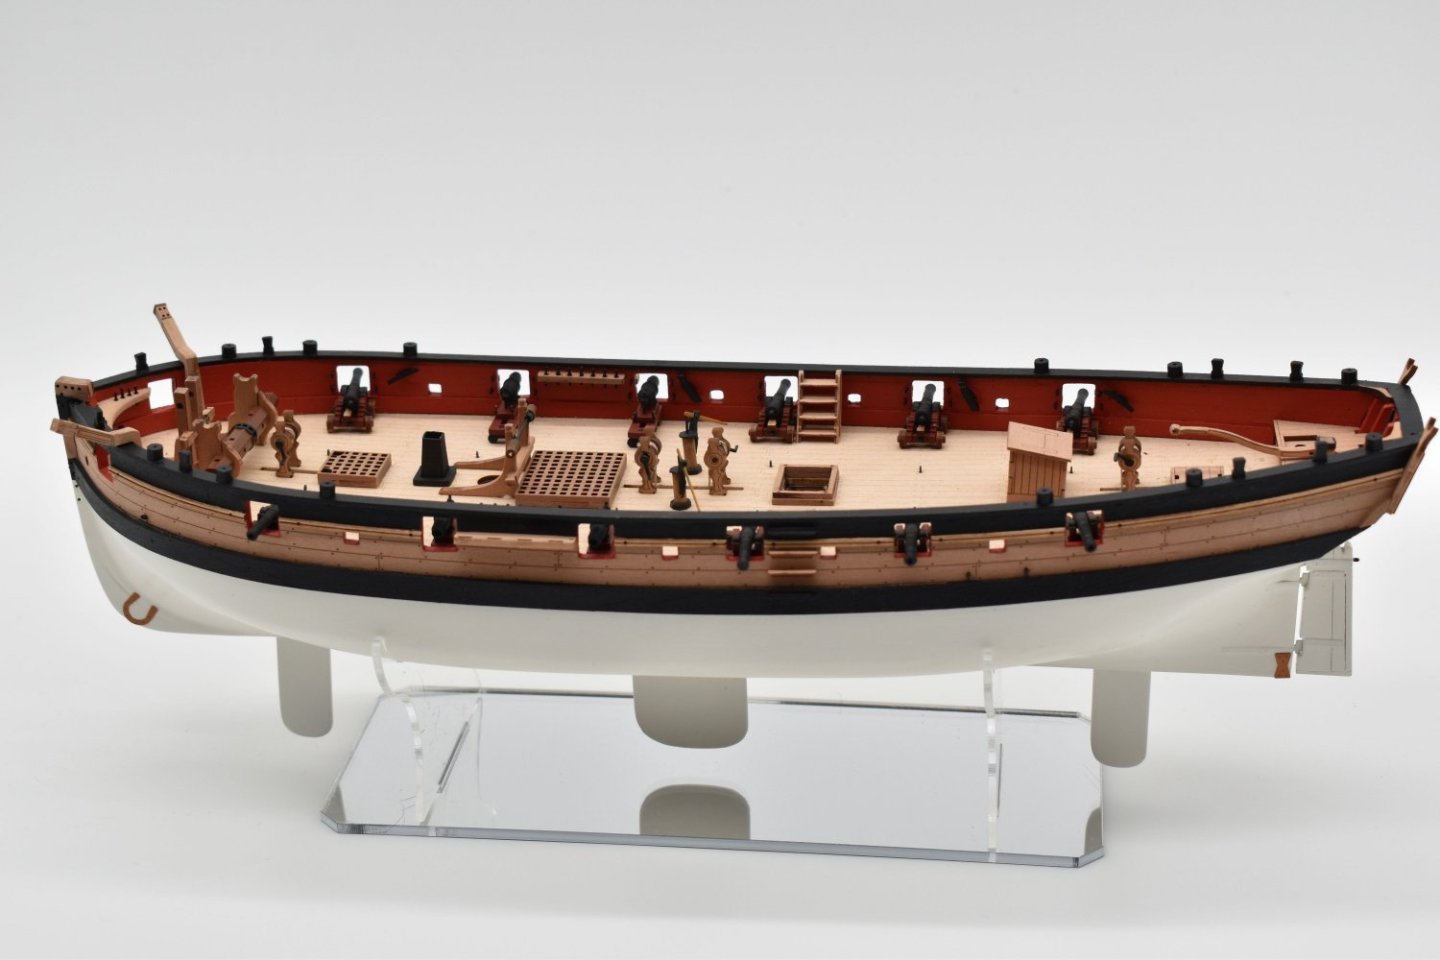
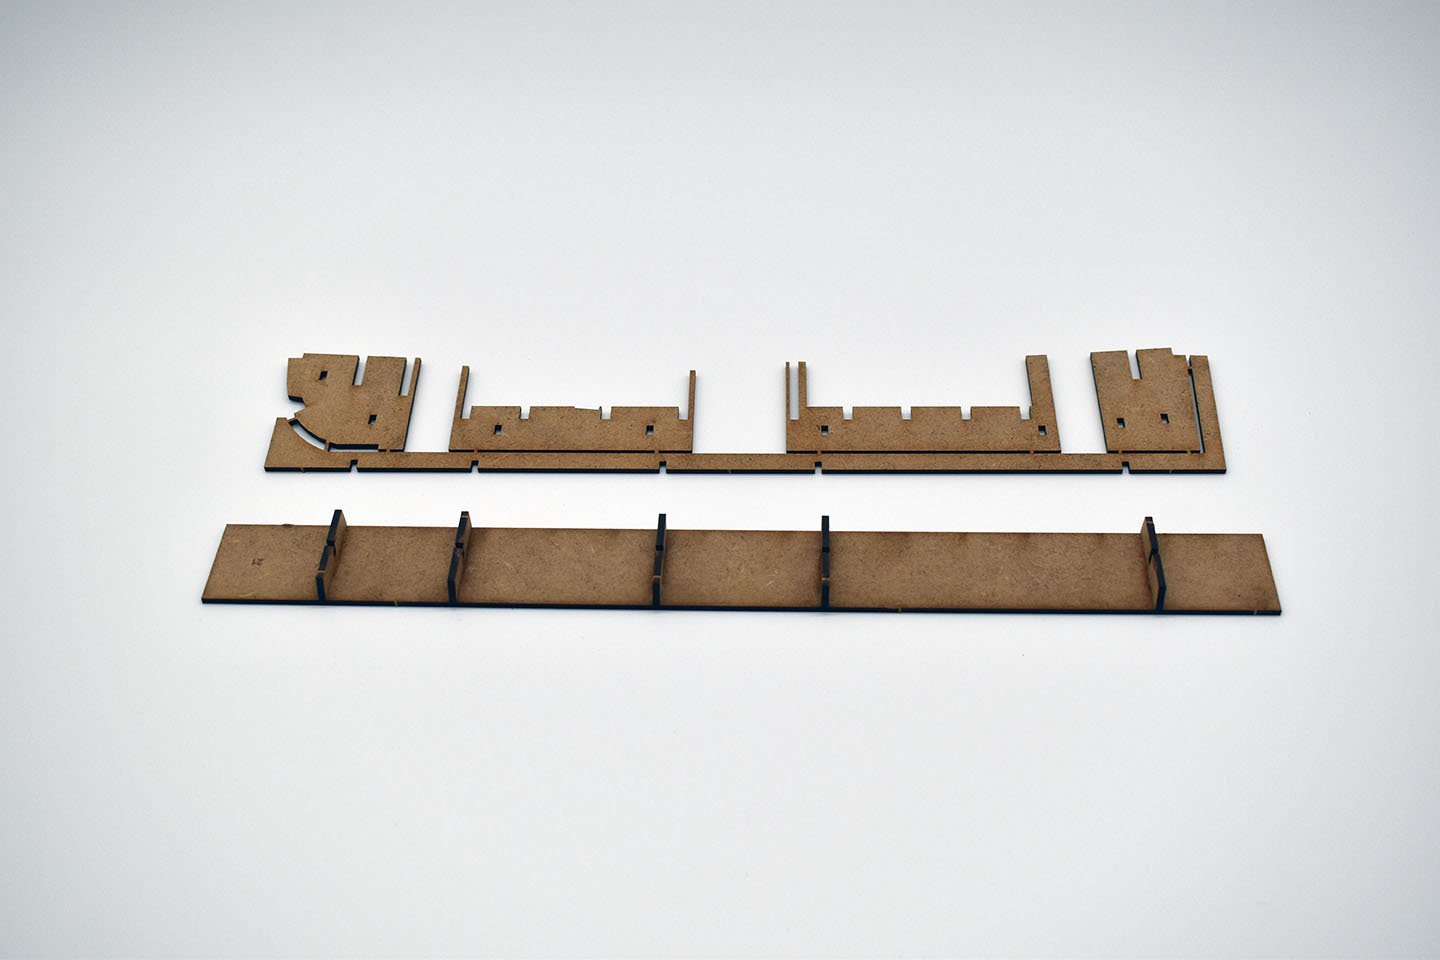
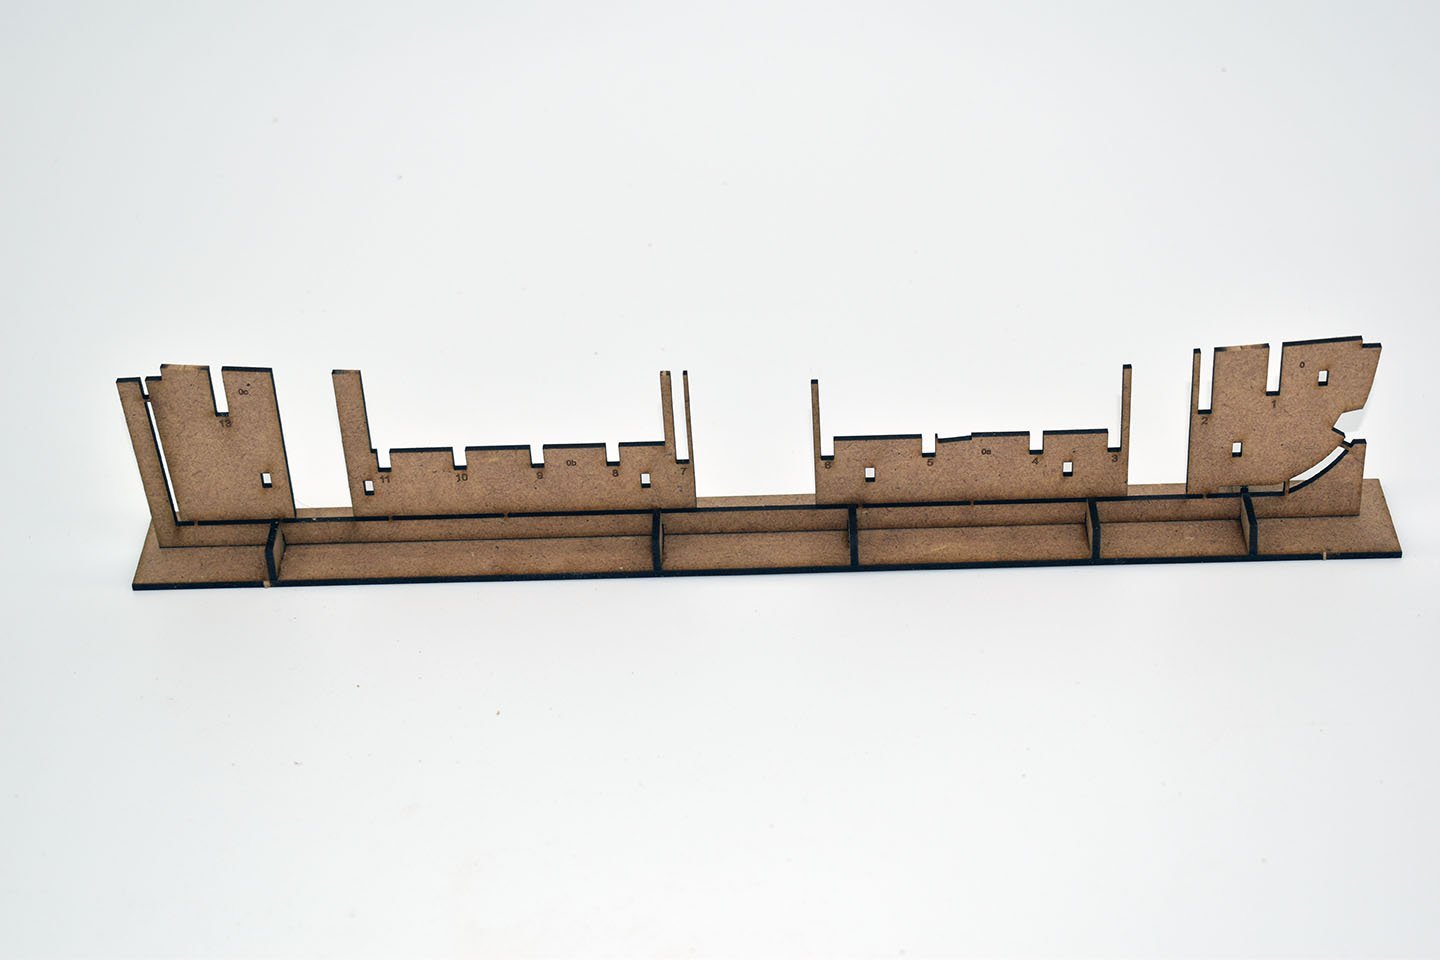
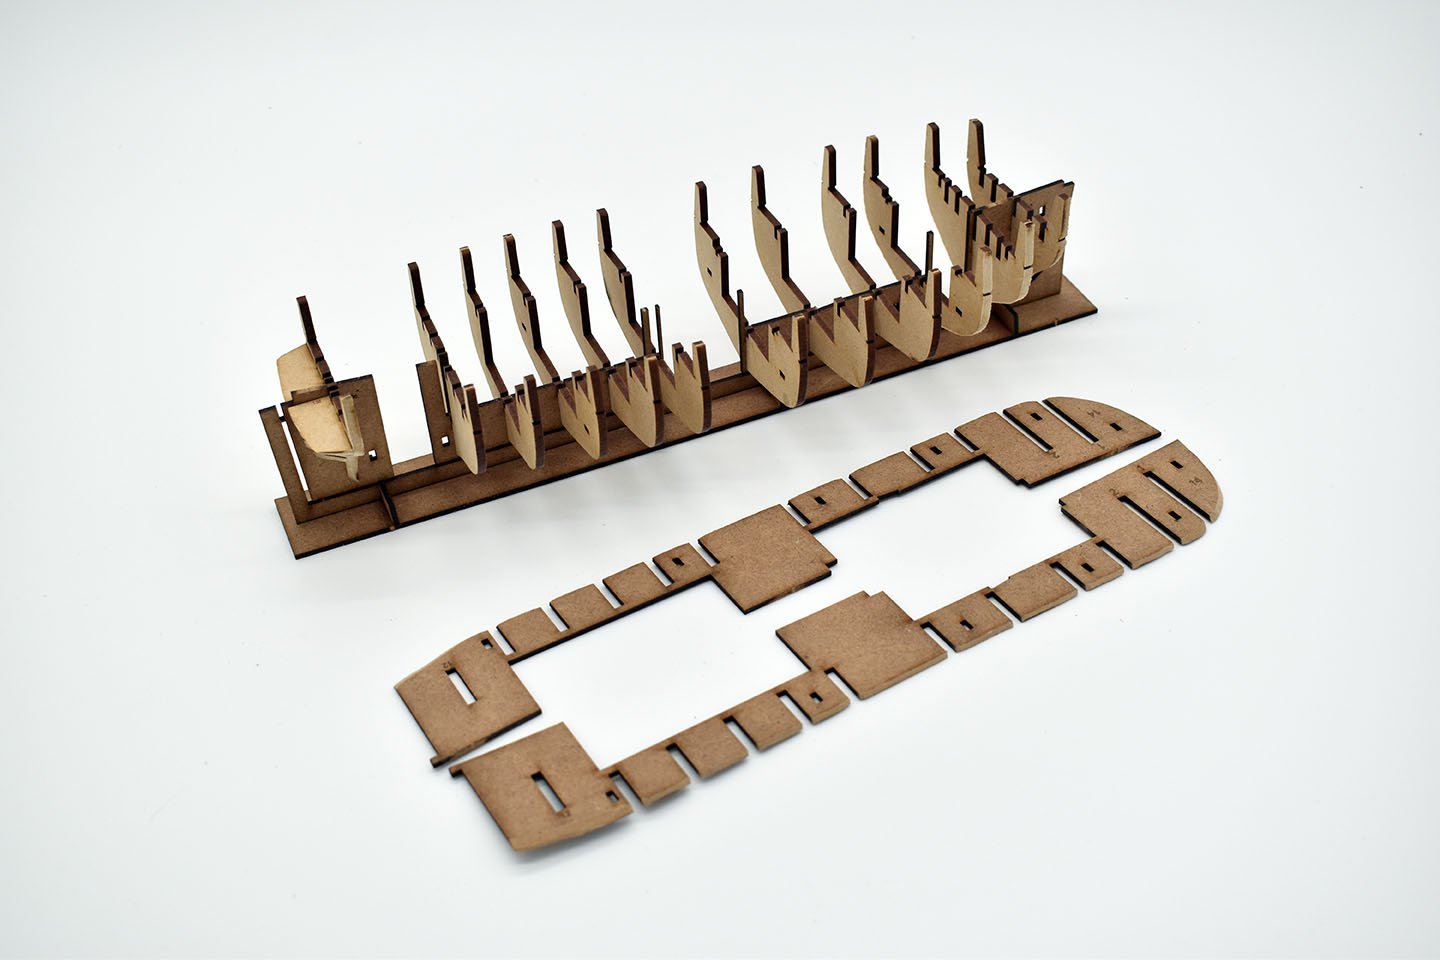
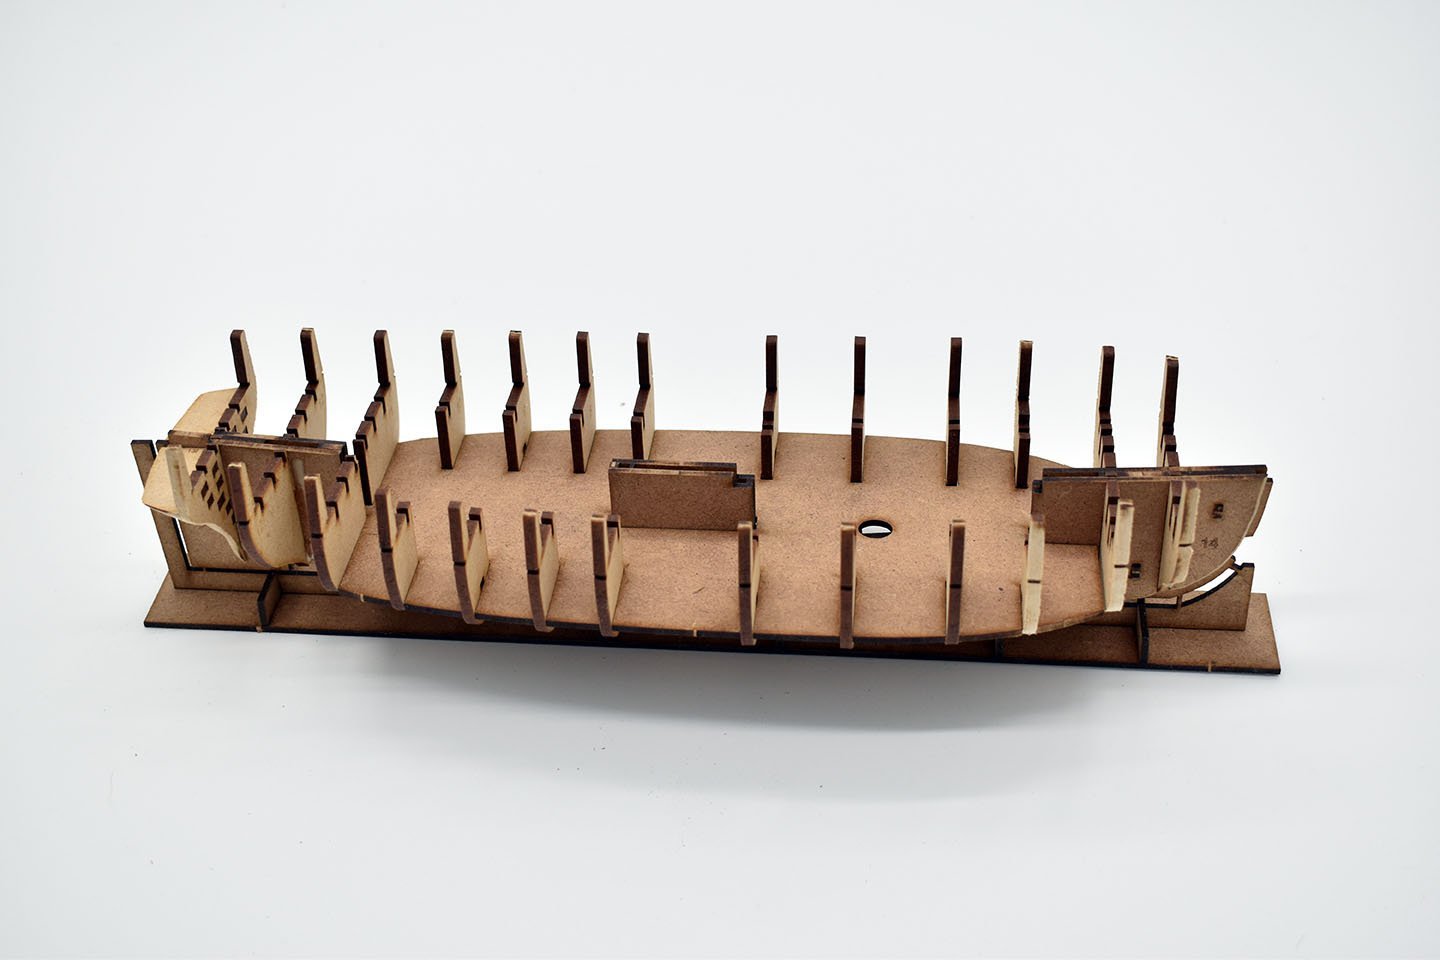
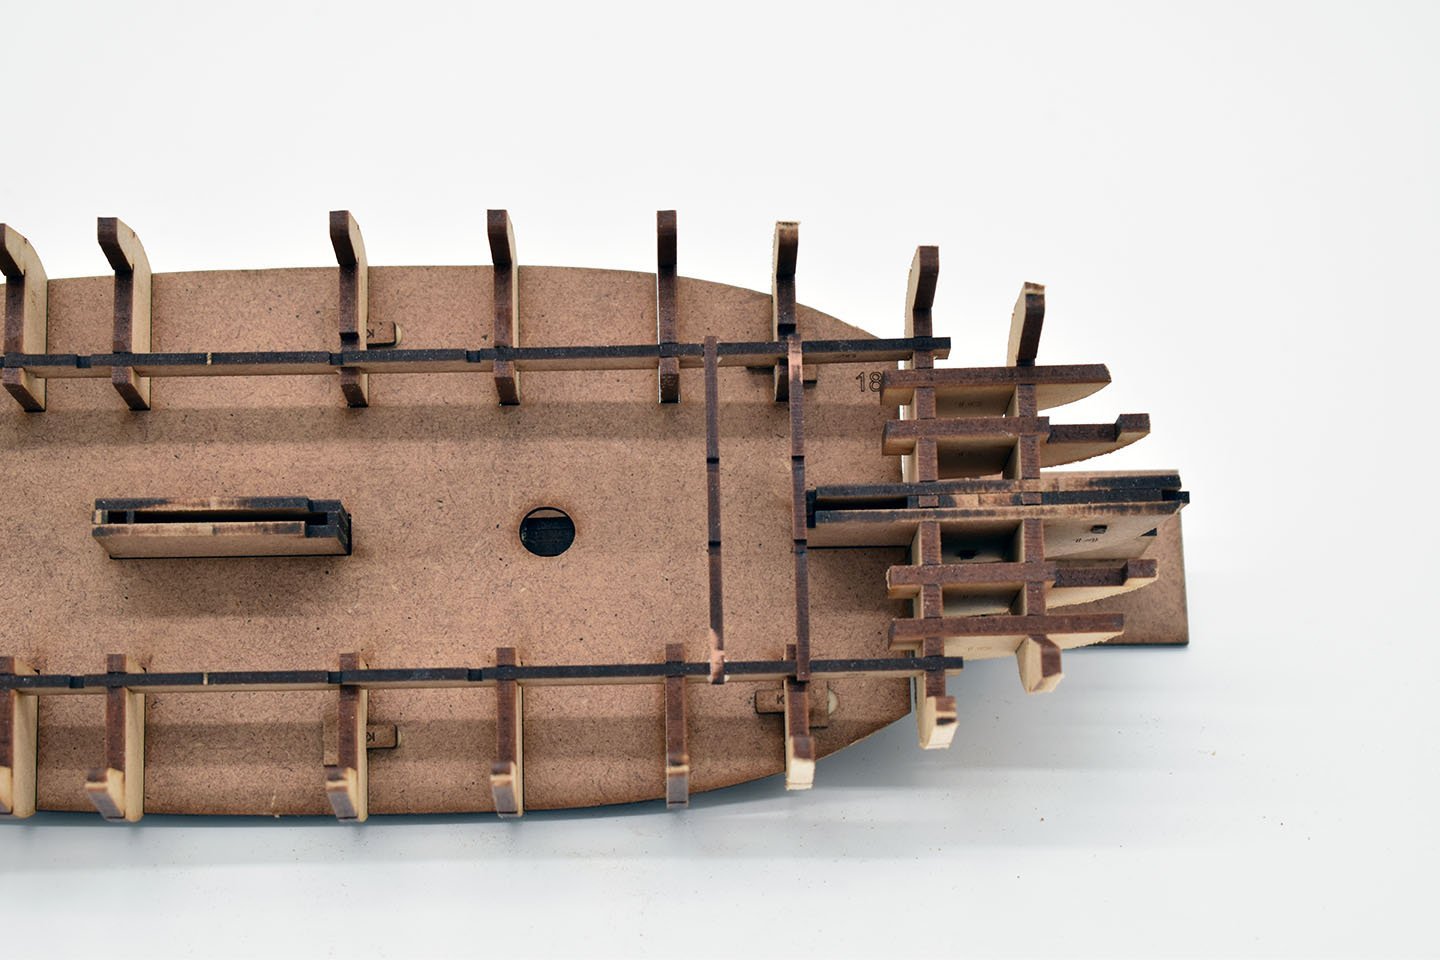
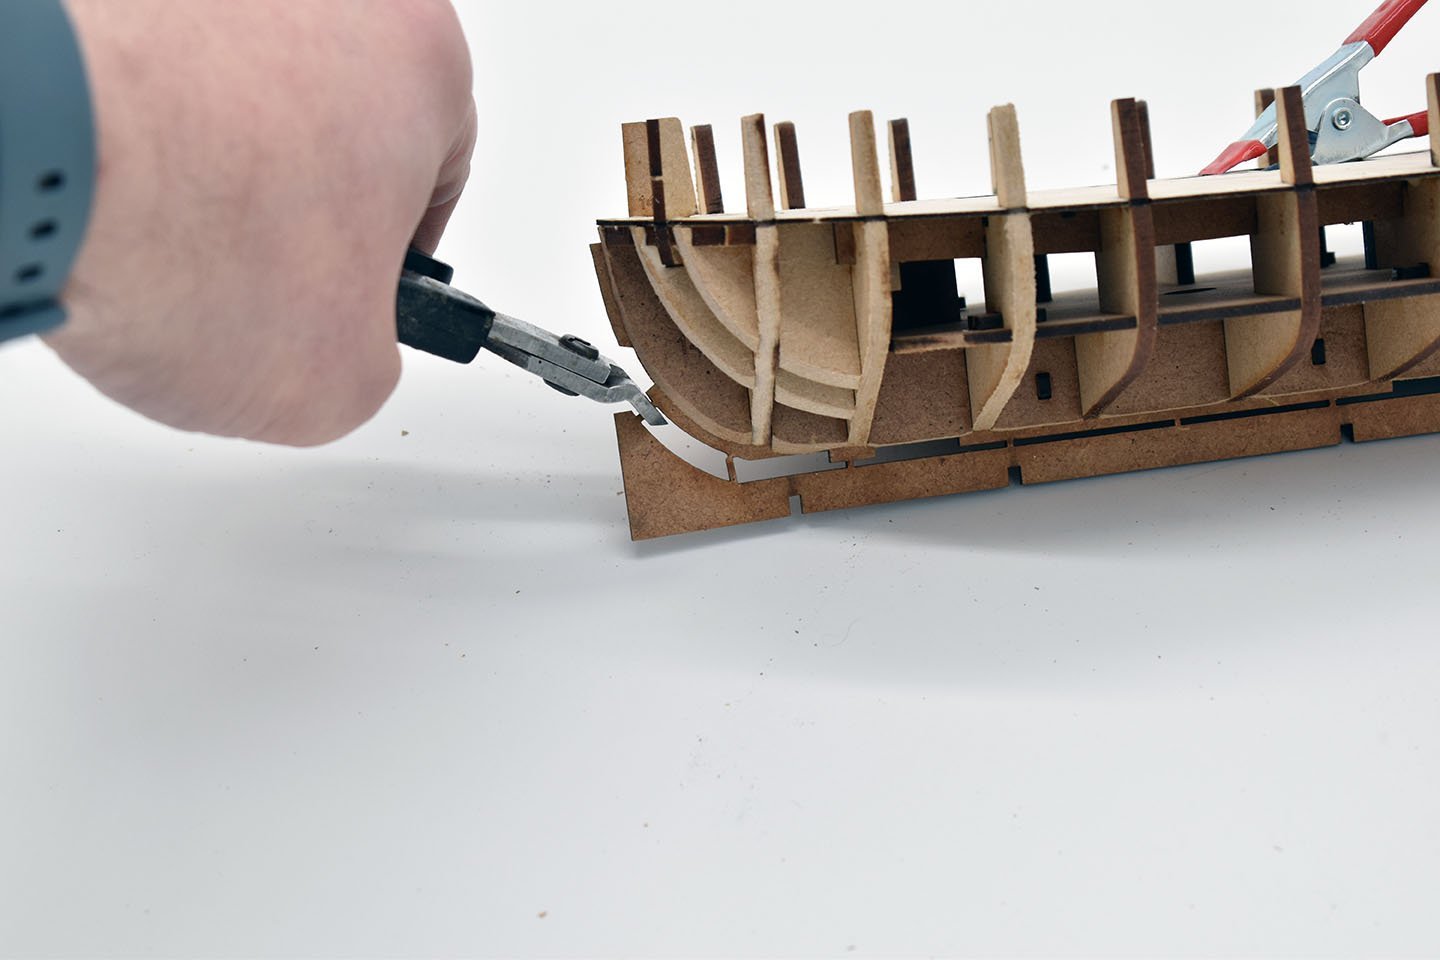
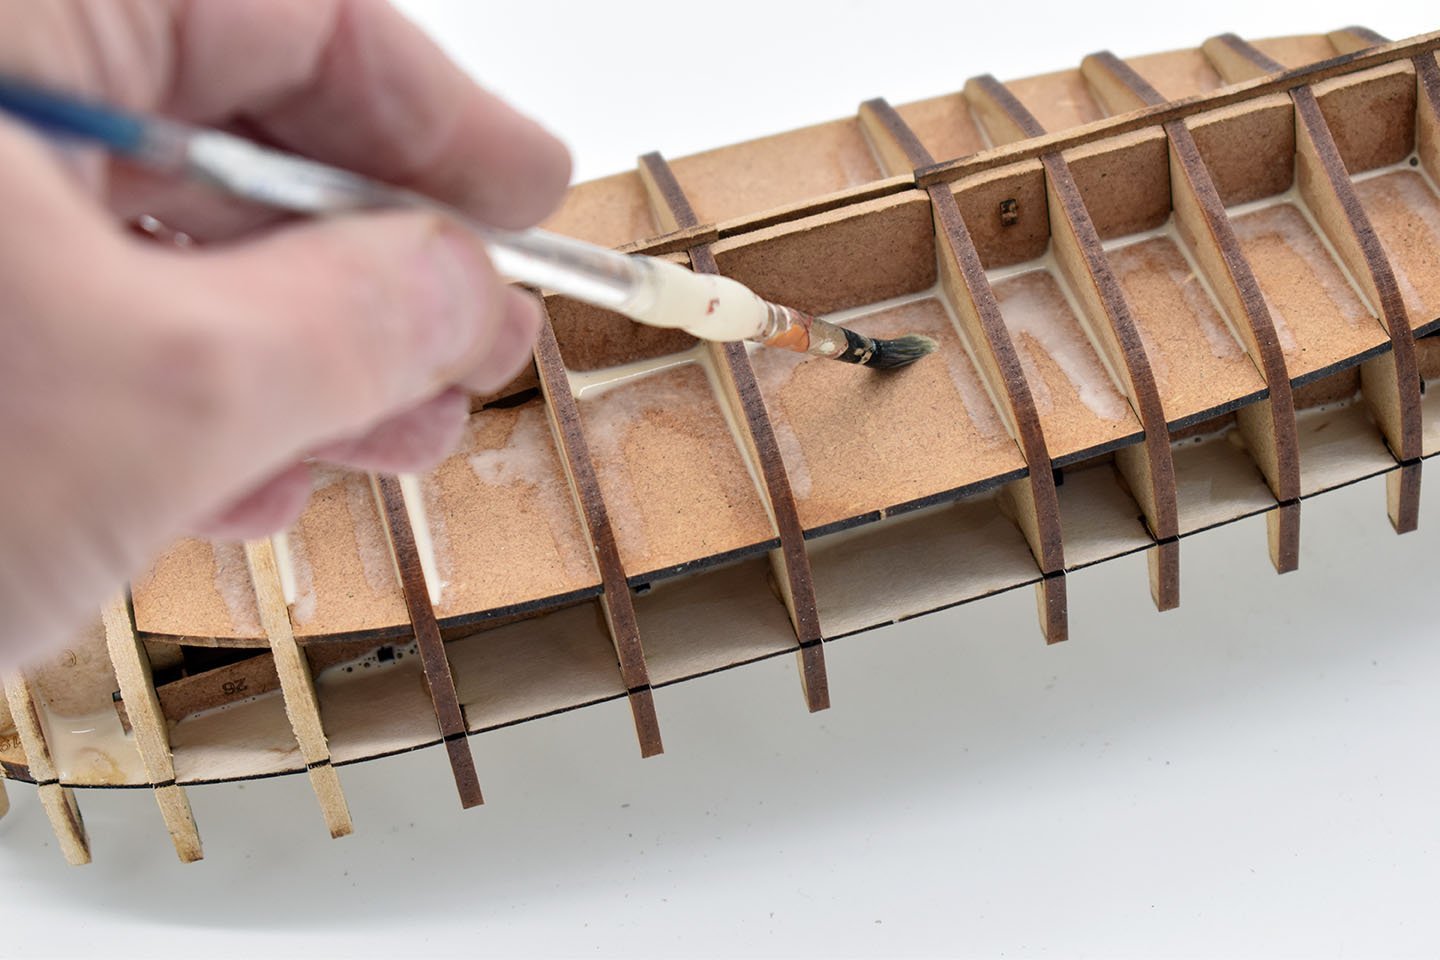
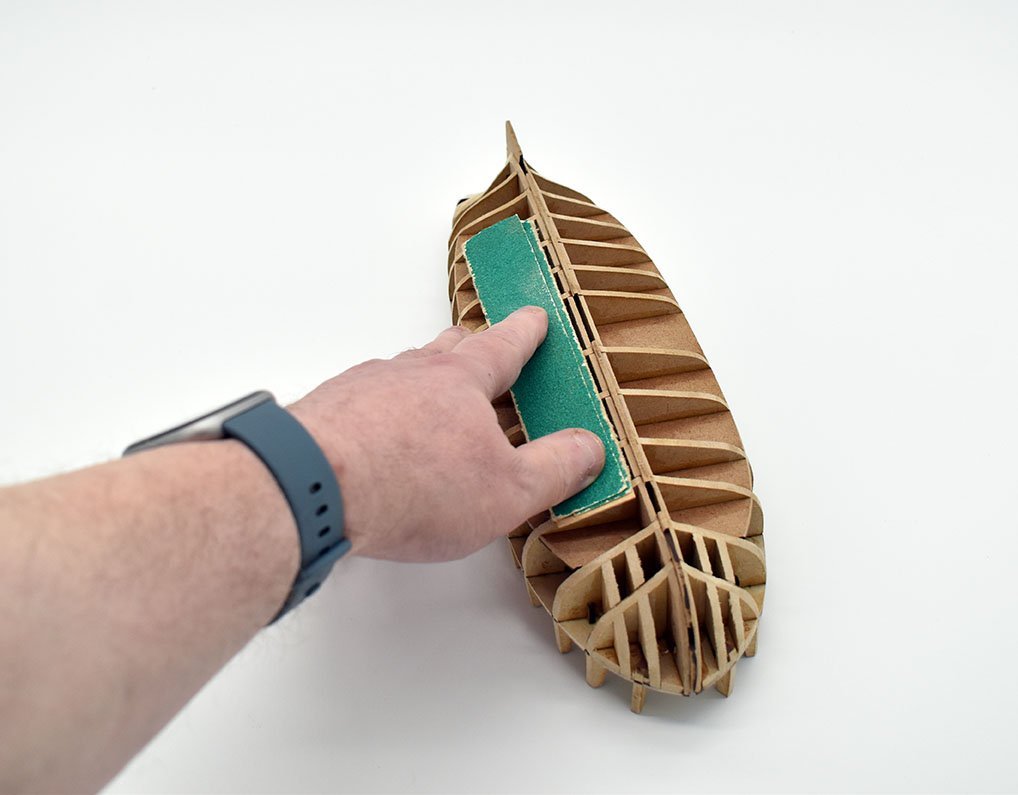
The Trial Class Cutter (1788) was a vessel with three sliding keels' Agreeable to a plan suggested by Captain Schank, She was just over 65 feet along the main deck and 121 tons. She was initially armed with 8 x 3 pounder cannon, but in 1793, 4 x 12 pounder carronades were added, bringing he armament up to 12 guns. She was launched in 1790, and hulked in 1810. She became a depot ship at Waterford; by the 1840's to Callao in Peru as a coal depot, being finally sold in 1848, after well over half a century in service. (Sailing Navy List - David Lyon) I wanted to develop a smaller cutter. I even thought about doing a much improved Sherbourne. However, I have little stomach for treading old ground when there are still so many wonderful subjects that have not been tackled. One such subject was the Trial Cutter (quite a bit larger than Sherbourne), and I thought it would be more of a challenge and more unusual, due to the three drop keels. For the designs, I have utilised both the original plans and the contemporary model. I wanted to develop not a simple beginners kit, but a nicely detailed smaller kit, with etched planking and treenail detail on the inner and outer hull, just to see how that kind of detail would work out. So, I started designs way back at the end of February. I had three stabs at the hull design before I settled on the forth. The original designs were to have the drop keels fitted very early in the build, and they dropped down to a pre determined level. That was pretty cool, but it would have meant adding the rope to the tops of the keels and keeping them free of glue and paint and whatever else throughout the hull build. I ditched that idea and came up with a simpler solution, where the keels are added only after most of the hull is complete. So here is where I am up to. I cannot do much more until I have my photo etched samples arrive, but I did manage to cannibalise some parts from scrap sheets, like eyebolts, winch handles, belaying pins etc. Here are some pics!


- 57 replies
-
- 26
-
-
-
- Trial
- Vanguard Models
- (and 1 more)
-
I am working on making all carronade kits the same way with the new wheels, 12, 18, 24 and 36 pounder carronades. Indy already has them for her 42 pounders, now Grecian with the 18 pounders. I am thinking of offering an 18 gun brig armament set, with 16 x 32 pounder carronades and 2 x 6 pounder long Blomefield cannon. The wheels are 3-d printed and are much better than the PE type.
- 80 replies
-
- 13
-
-

-
- Grecian
- Vanguard Models
- (and 3 more)
-
Colour schemes for the smaller vessels are usually speculative. This gives the modeller a few options to go their own way. Something like Grecian would look just as nice with no paint whatsoever, just varnished. Or you could use the black and yellow/ochre scheme for the outer hull and all red for the inner, and it would still look great. I just wanted to depict Grecian as she may have appeared when in American service (although in reality, her armament was miserly compared to what I have given her), and using typical colours for that period. But this scheme is by no means set in stone, and you do not have to follow it, it is just one possible option of many.
- 80 replies
-
- 14
-
-
-
- Grecian
- Vanguard Models
- (and 3 more)
-
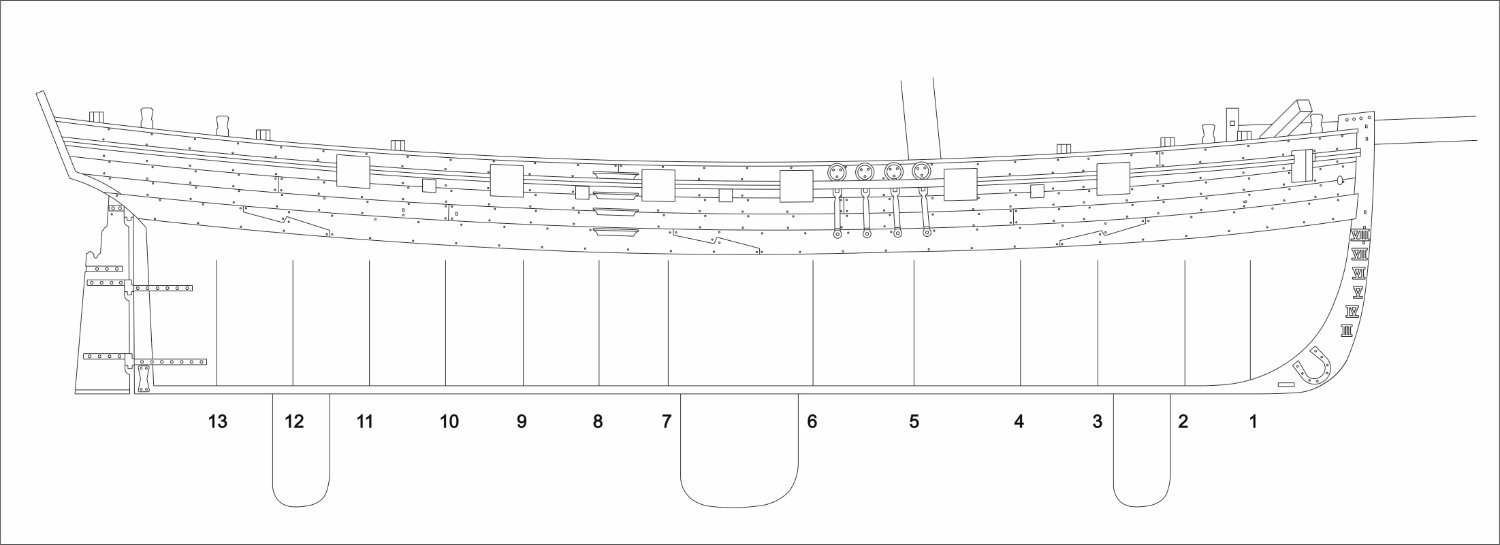
Do not trust the flat line drawings too much, as the actual model has curves, so when you lay the part on the flat drawing, it will not align due to the drawing being flat.
- 488 replies
-
- 4
-
-
- Indefatigable
- Vanguard Models
- (and 1 more)
-
Sergal and Panart were/are part of the Mantua group, from what I understand
-
I will add a sentence in the manual when ready for reprint, stating that you can add the cannon barrels any time you like once the hull has been painted and you no longer have to lay the hull on its side or upside down. For gluing them in place, you can use superglue or epoxy resin. Regarding rigging plans for cannon, I have never designed a kit and made the model showing this, except perhaps breech ropes on the odd occasion. This is because I do not like to add this detail, as unless they are done very very well using very small blocks and hairless thread, they never stand up to close photographic scrutiny. In fact, I have seen many very well made models almost ruined by the inclusion of fully rigged cannon. But this is entirely my preference, and each modeller is different.
- 488 replies
-
- 13
-
-
- Indefatigable
- Vanguard Models
- (and 1 more)
-
That is a very neat job!
-
Most late 18th Century Admiralty Board Models were/are fully planked, the models with frames showing is more of a 17th Century practice - but did extend well into the 18th Century. But overall, a model at the time of Indy would most probably have had a fully planked hull - but still full internal detail.
- 648 replies
-
- 7
-
-
- Indefatigable
- Vanguard Models
- (and 1 more)
-
They are simply alignment holes, for you to pin in place to help keep all aligned. After the glue has set, you can either remove the pins or cut them so they're flush with the surface. They probably aren't really needed, but there if you want to use them. I have a lot of small holes like that for when I am first developing the prototype, and usually removed for the production version. This time, I decided to leave in place, thinking they may be useful for some modellers.
-
I think I will put this one just one above the fishing boat kits. It builds up almost like the Erycina/Ranger, except the bulwarks are triple layered instead of double, it has plenty of guns and, of course, it is a lot larger. But design principles are more or less identical to my beginner kits.
- 80 replies
-
- 17
-
-
-
- Grecian
- Vanguard Models
- (and 3 more)
-
I do believe that as a privateer, she had 9 pounders, and quite a lot of them too, with almost all the gun ports being populated. At least, if memory serves...
-
I would put shot garlands in between the gun ports, either on the bulwark (in line or just below the lower gun port edge) or on the deck, up against the bulwark.
-
Indy kits are being completed with plans and manual. The boxes are 175mm deep (7 inches), and near full to the top, with just a tad over 15kg total weight, so care needs to be taken when handling this behemoth...
-
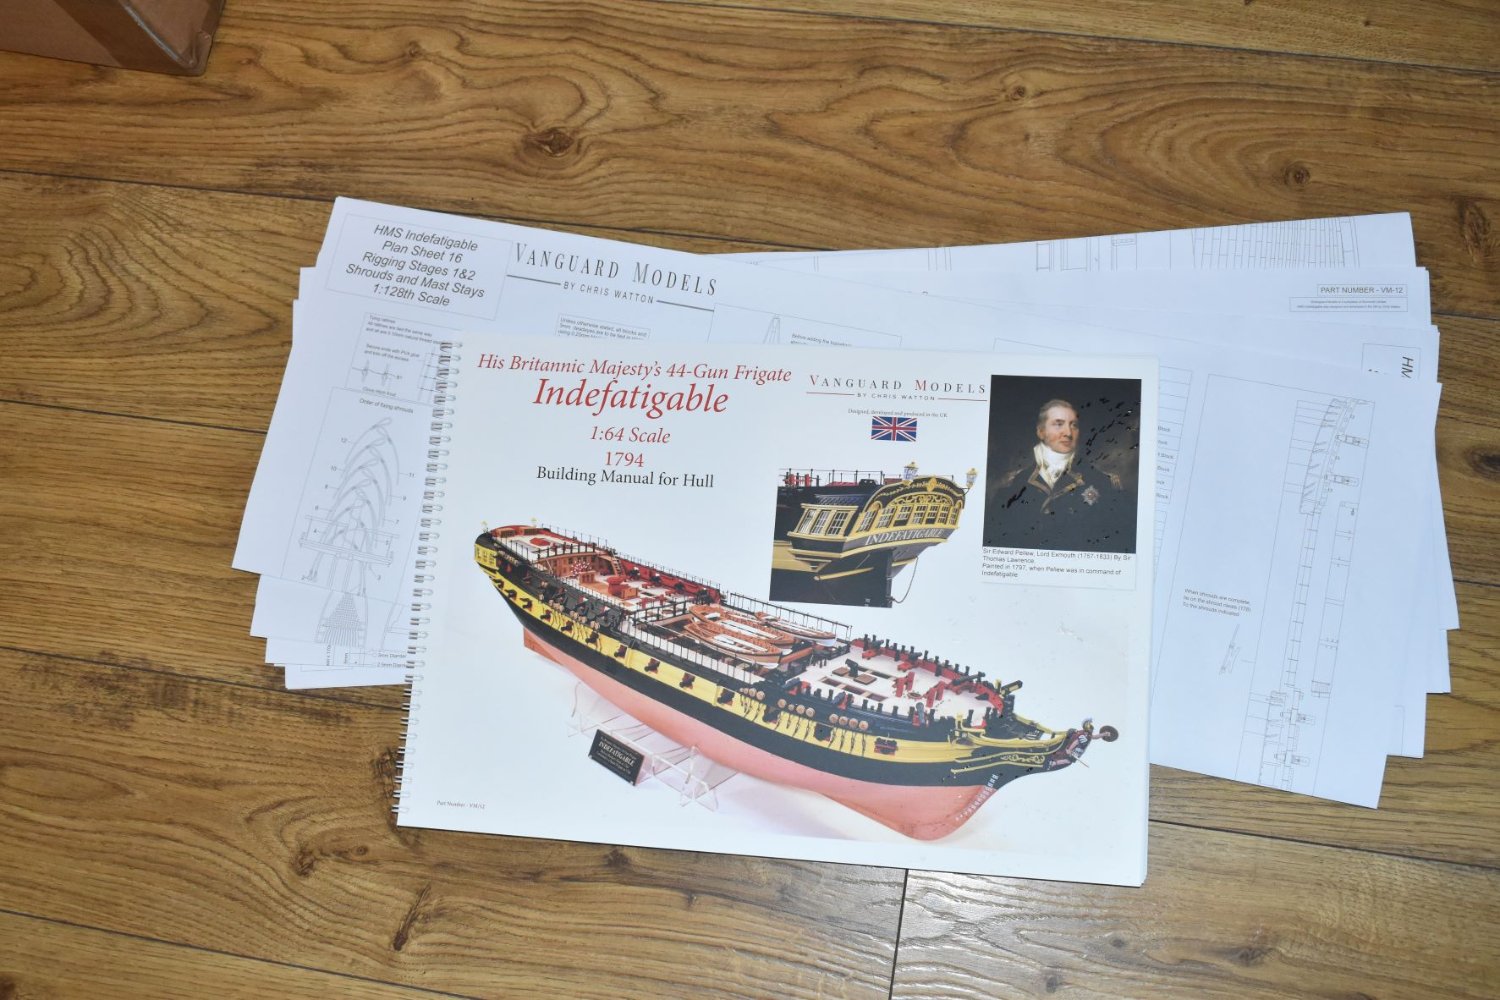
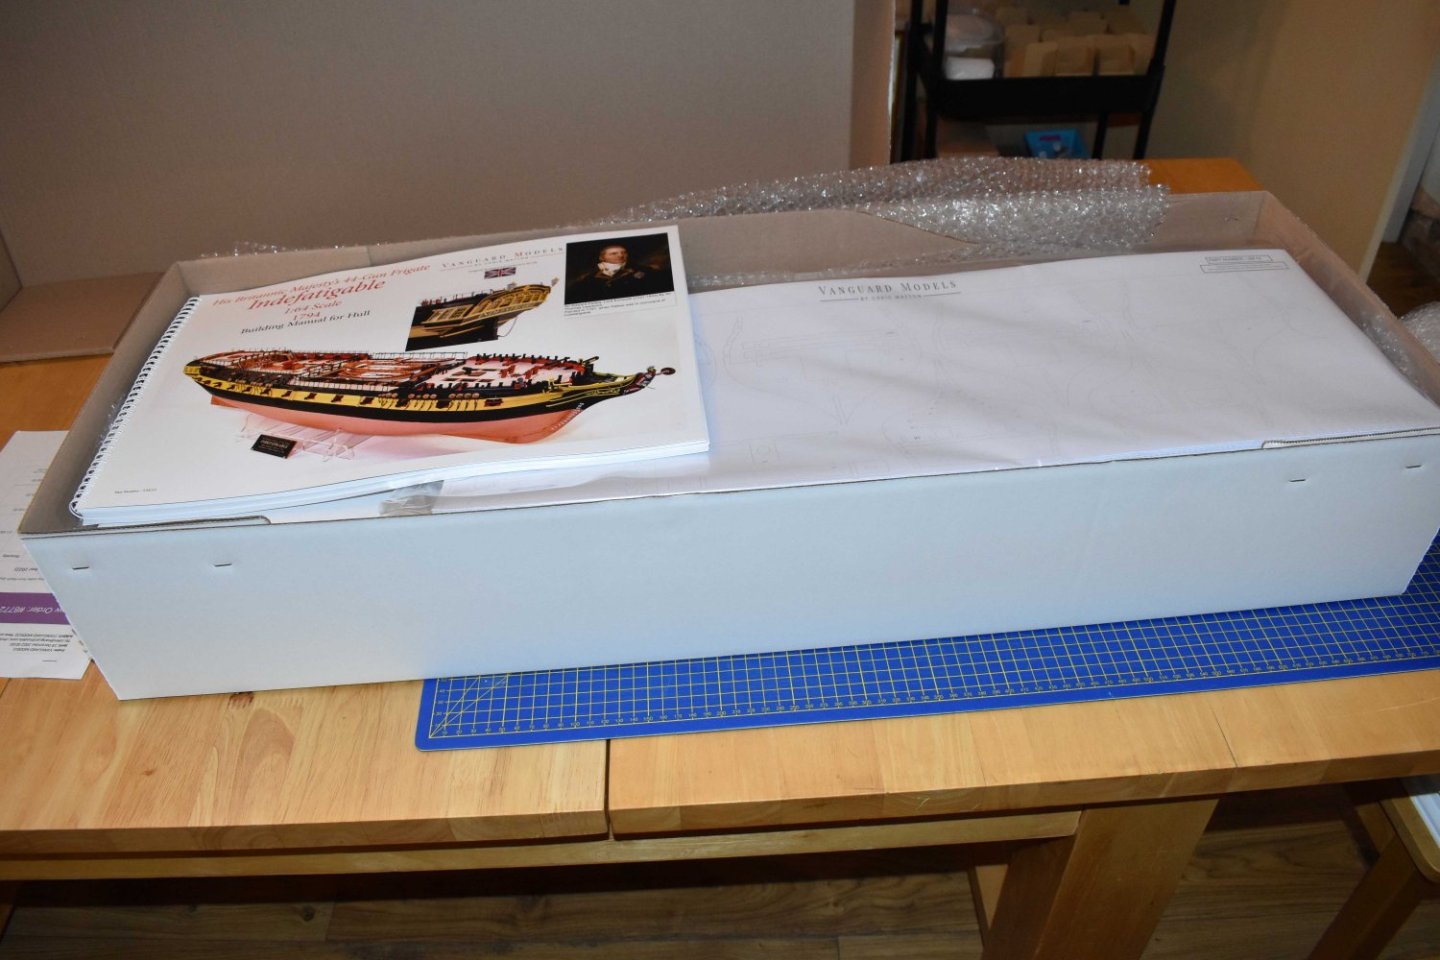
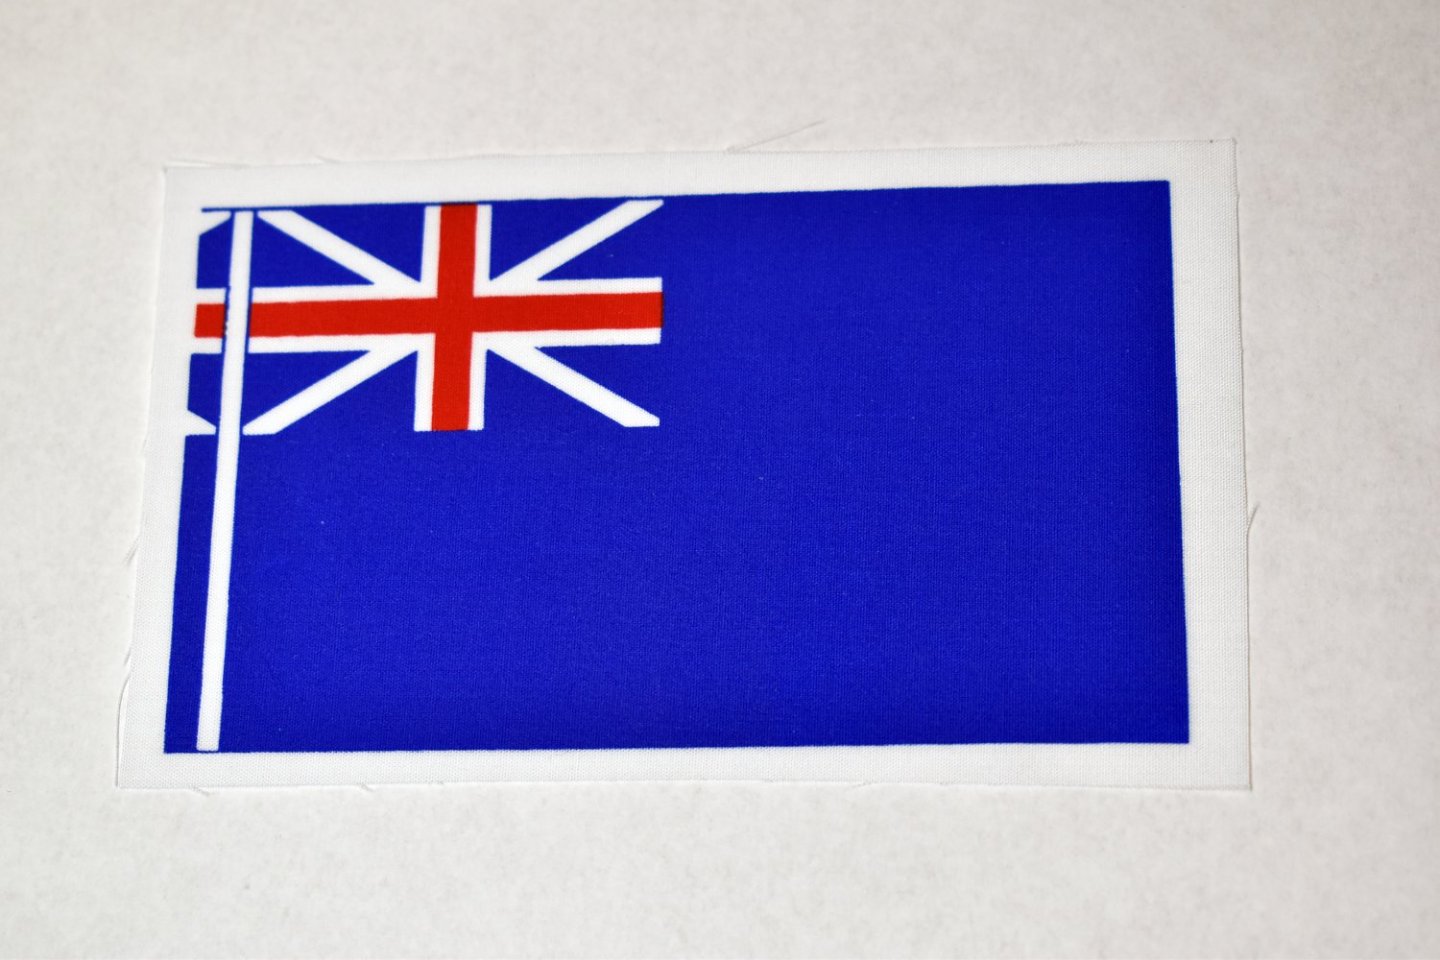
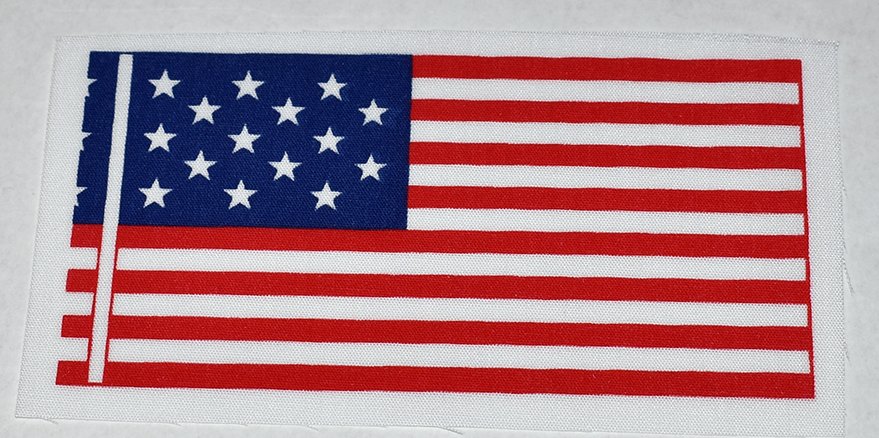
OK, I have just received my shipment of Indy plans, manual and box label (I took a pic of the manual and a few plans, but not all of them, as we need to lay them all out in order later). The manual is very nice quality, very big (A3) and very heavy! This means Indy is officially on sale now, and as I mentioned in my previous post, all pre orders will be booked to ship next week. I have also attached a couple of pics of new flags that came this week - a Blue Ensign, so I now have the complete set of Red, White and Blue sets. Also, I had some US flags made, in keeping with the correct period for Grecian (I hope)!

-
What I have sent Jim is essentially a complete kit for Grecian, with the USB stick with my assembly pics instead of the manual. He will have all laser cut parts, photo etched sheets (which arrived this morning)! fittings, wood strip and dowel and a set of full size plans - all in a box custom sized for this kit. Almost forgot, also a Grecian paint set!
- 80 replies
-
- 9
-
-
- Grecian
- Vanguard Models
- (and 3 more)