


The Sailor
-
Posts
298 -
Joined
-
Last visited
Content Type
Profiles
Forums
Gallery
Events
Posts posted by The Sailor
-
-
-
Thanks Erik and Floyd.

Erik, the 2x2mm stripes are quite soft, so no soaking was required.
Floyd, the stripes for the second planking are slightly longer than the stripes I used for the first planking. I don't worry about the pattern because the hull will be painted later. That means, you don't see any planks after the hull is being painted. I will plank the deck when the hull planking is done, but before painting the hull.
-
Thank you very much for your kind comments, guys.
Nils, i can imagine it's not easy to scratch build a RC sailingboat. But I'm not familar with RC.
Hi Erik, thanks for your interest. Yes, I started with the A-planks because I followed the instruction. It's very much easier planking such an area with small stripes and the 2x2mm stripes are kit supplied. Next were the C-planks. For closing the gap I used the B-planks. At last I planked the rest by using the D-planks. Well, that was my method planking the keel but I think, there are some other ways to get the same result.
The second planking should be a lot easier because the vaneer stripes can be bend around the radius very well.
-
Thank you very much Jeff, Nils and Mark.
Well, I think I was just lucky with the first planking. Believe me, the kit supplied walnut stripes for the second planking are of very good quality. Besides the bulwark area needs a stronger planking.
And here are the first pictures:
Look at this:
This is a very remarkable stern design for a ship of the 19th century.
-
-
-
-
-
Thanks for the nice comments, guys.
Are you planning to use the decks as supplied, or use traditional planking following the marked template?
That's a very good question, Jason. I think, she deserves a nice deck, but on the other hand that means a lot of work.

-
Thank you very much, B.E.
Well, the main problem with the gunport patterns provided with my kit was the grain of the plywood. It was easy to bend the patterns horizontally, but imposible bending them vertically. My method was much more easy but a little more time consuming. But don‘t get me wrong, there were no problems at all glueing the gunport patterns of my Pickle. Next time I‘ll try it again with the provided patterns first.
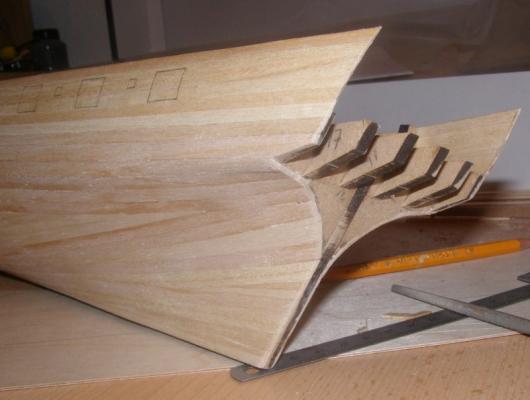
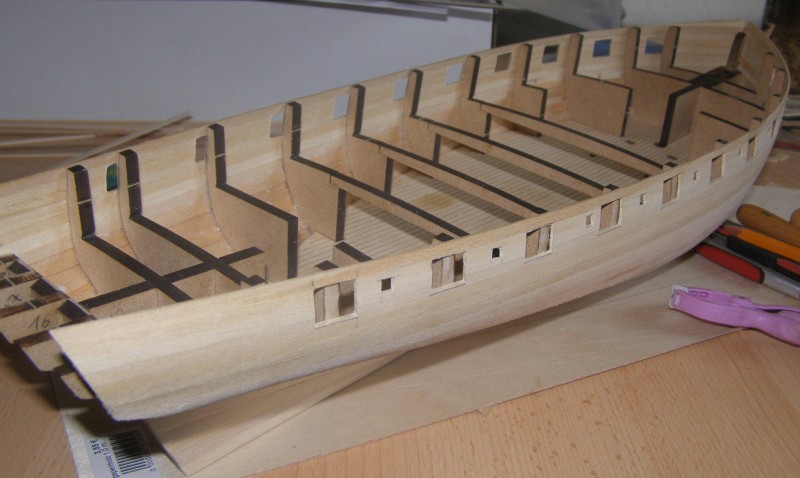
Anyway, the cutting is done and she looks like a warship now.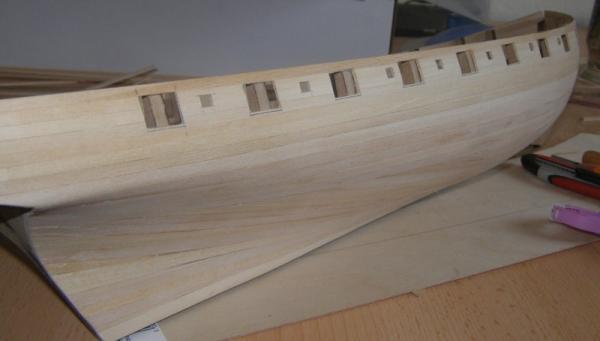
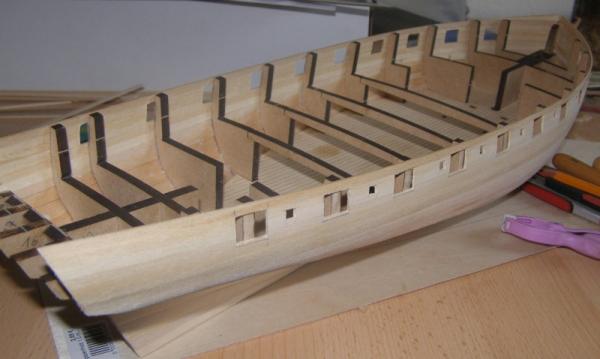
After cutting the oar ports on portside I can start with the second planking.
- ZyXuz, clearway, Blue Ensign and 7 others
-
 10
10
-
Hi Tim, the reason is, the kit provided stripes are not long enough to plank the hull from bow to stern.
Hi malmoerik, your model looks very nice. At this time I don't worry about the thin line. But I think, I'll use the good old Tamiya tape for marking and painting.
Please don't get me wrong, Mamoli kits are not bad, I just don't like the huge number of metal parts. That's the only reason why I'm not happy with those kits.
-
Thank you very much for your kind comments Ron and Christian.
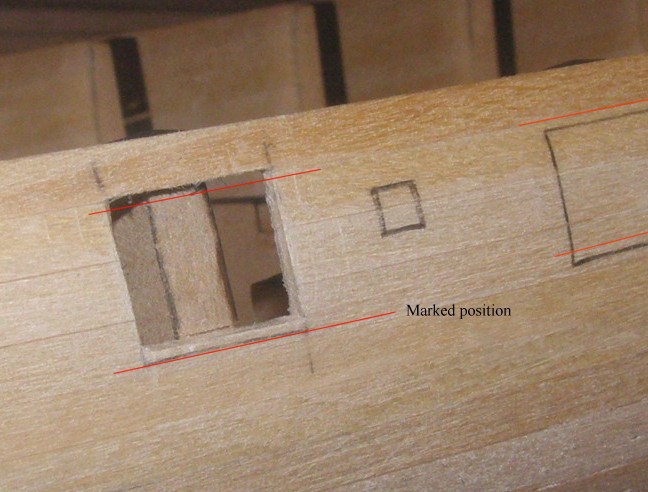
Christian, it's indeed strange. The plan shows no frame at this position, but everything else seems to be correct. I think, I have to re-measure the position of the gunports. Fortunately i've cut the gunport with a knife so I can close it again very quickly. But don't worry, this is still the first planking.
-
Thank you very much Alistair, Hamilton and Jeff.
And thank you very much for the hint, Alistair. Believe it or not, there is a different of approximately 1mm in height and width between the size of the pre-cutted gunports and the plotted gunports.
 My marked gunports have the size of the plotted ones. Well, you can't measure enough.
And here we have gunport zero:
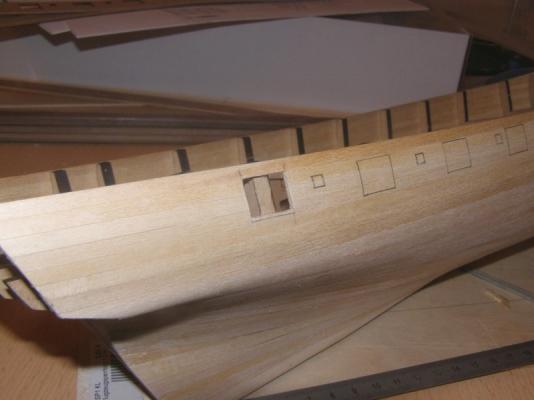
Of course the whole gunports have to be placed higher. My fault...

The position of this one should be correct now.
-
Thank you Joe and Pete.
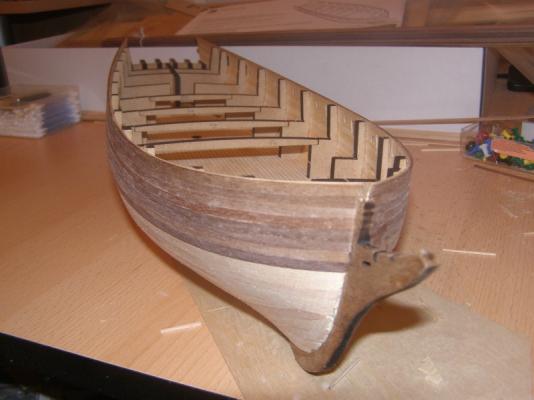
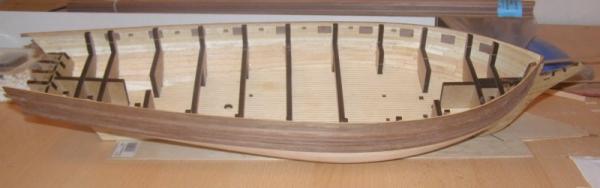
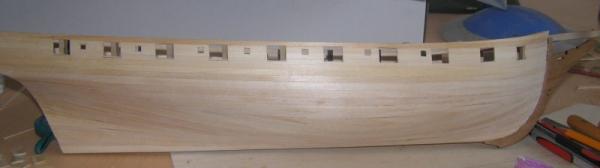
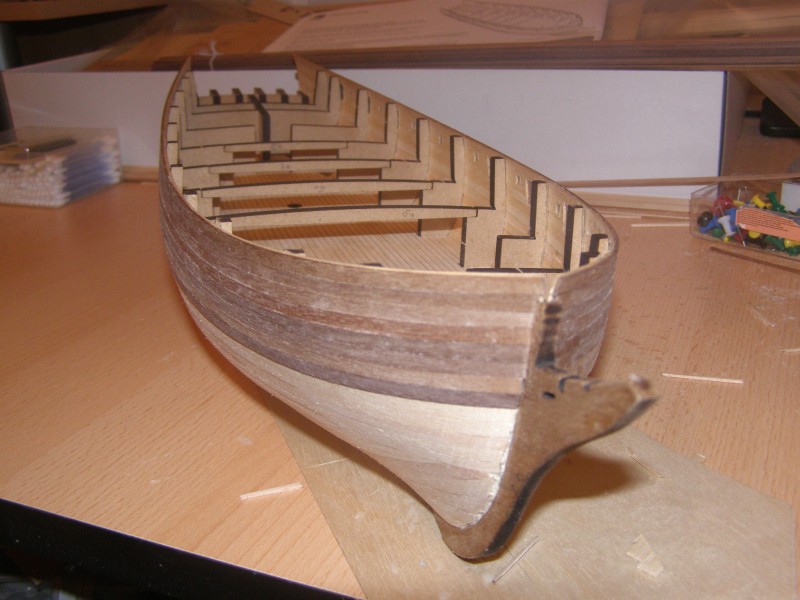
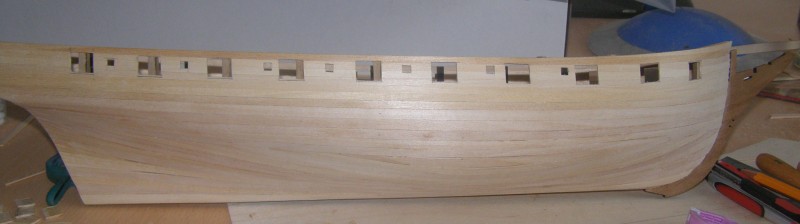
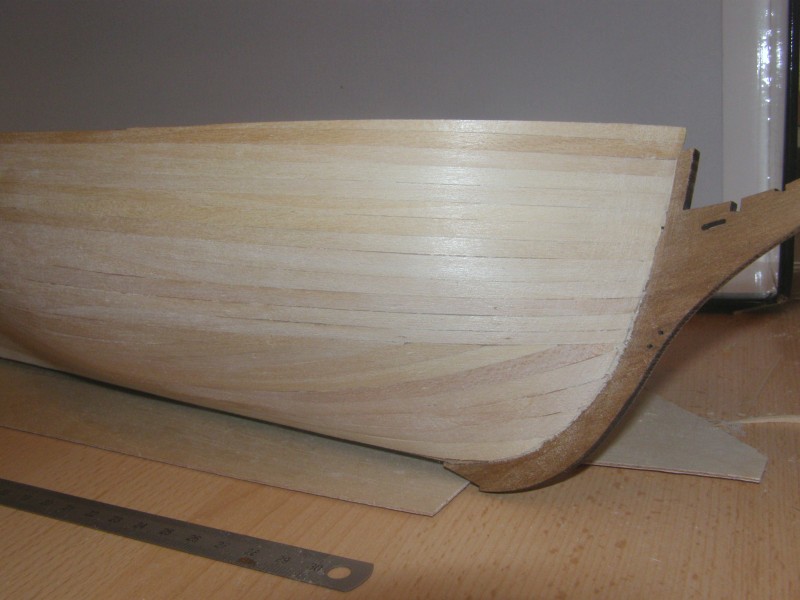
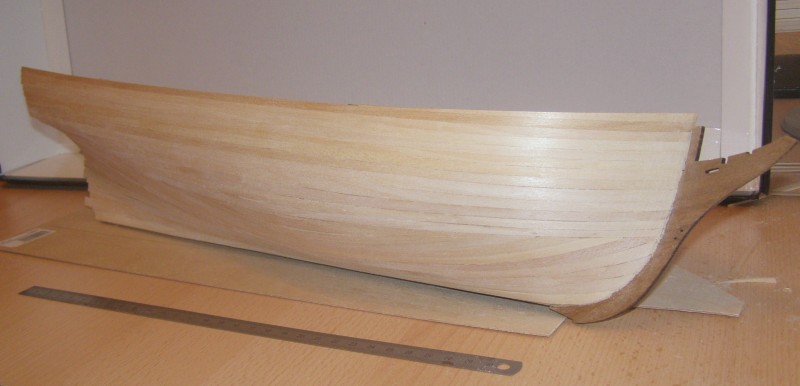
Well, the first planking is done now. After sanding the hull I've marked the gunports by using the gunport pattern.
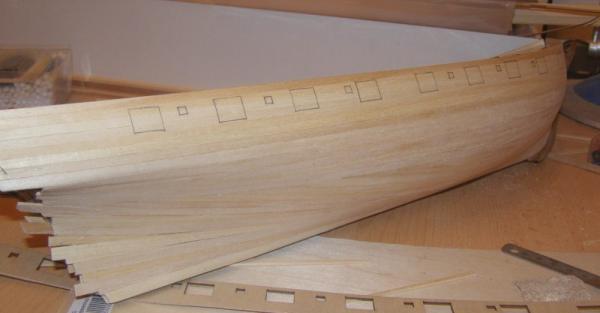
And some more pictures of the hull as of today:


-
-
-
-
Thanks for stopping by Lou and Stan.
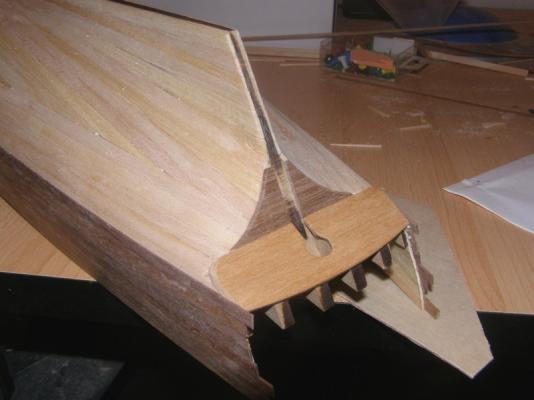
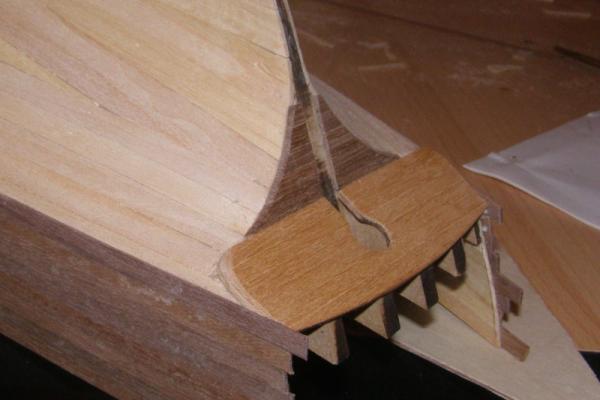
Lou, the sternpost should be tapered and I did it. I hope, I can show some pictures the next days.
Jeff, it seems that everybody want's to build British ships.
-
Hi Gary, the instructions are in English, Italian and French. Be careful with the big Endeavour, you'll need a lot of space in your house.
-
-
-
Thank you very much for your kind comments and your interest, Christian, demonborger, B.E., Alister, Hamilton, ZyXuz, Mark and Pete.
I agree with demonborger and Hamilton. Some some ships/kits are more favoured then other.
Cristian
Well, the decision was not easy for me because I also like Pegasus, Fly, Badger and many other of those 'handy‘ ships.
demonborger
Sure, I‘ll show the components throughout my build log.
Alister
I‘m glad I didn‘t use the patterns. I‘m pretty happy with my conventional planking.
Hamilton
Don‘t worry about my Endeavour. She‘s not forgotten.
-
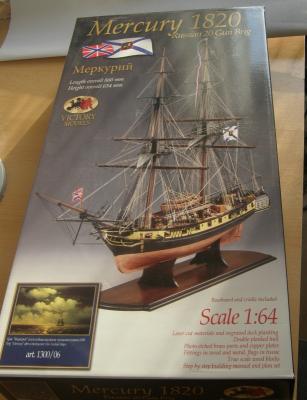
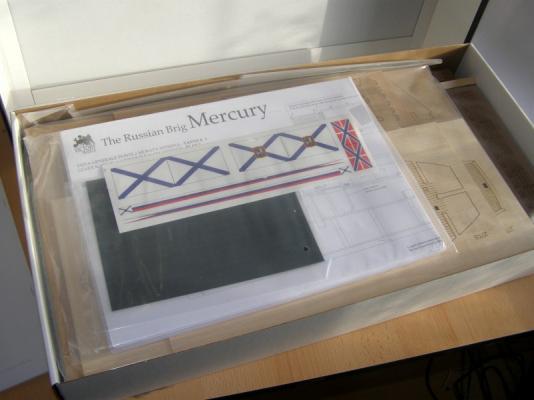
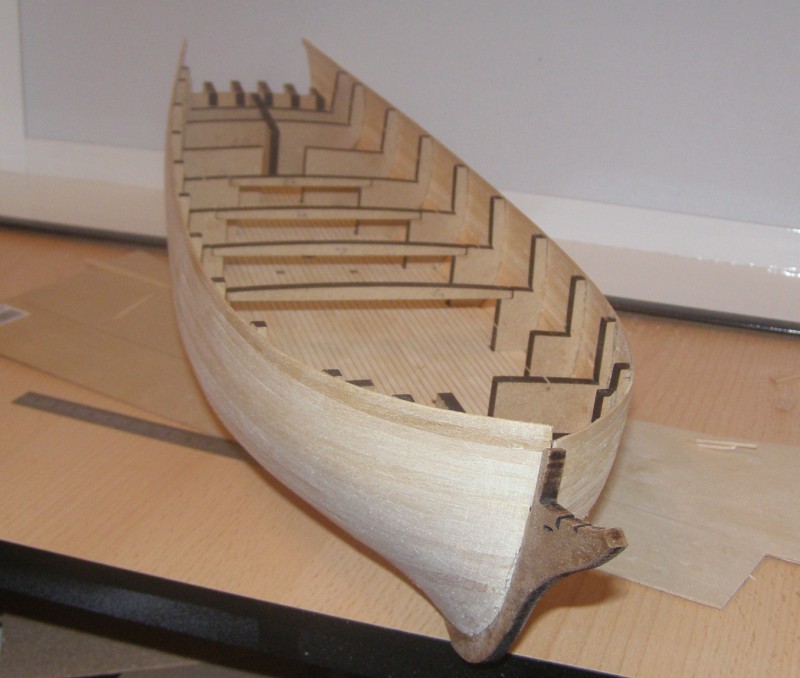
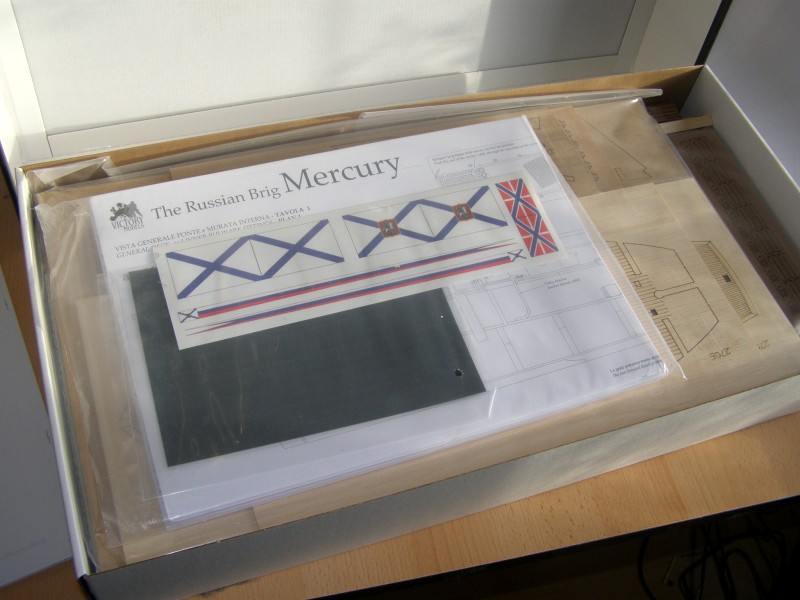
Hello, a few days ago I started a second project: The Russian brig Mercury.
The original
The Russian 20 gun brig Mercury (Меркурий) was laid down in Sevastopol on January 28, 1819 and launched on 7 May 1820. She was designed as a patrol ship to guard the Nothern Caucasus coast. The Mercury fought in many important naval battles during her career.
The kit
The weight of the box is really notable. The shipping details showing the kit weighed 6 kg. No wonder, the 5 mm MDF for keel and frames weighs more than plywood. Furthermore the kit contains many brass etched parts, 17 plan sheets, a flag set, a 20-page step-by-step instuction (hull assembly only) and much more.
Scale: 1:64
Length overall: 860mm
Height overall: 654mm
I wonder why there are no building logs. In fact I found only one in a Russian forum. Is there something wrong with this kit? Or with the ship?
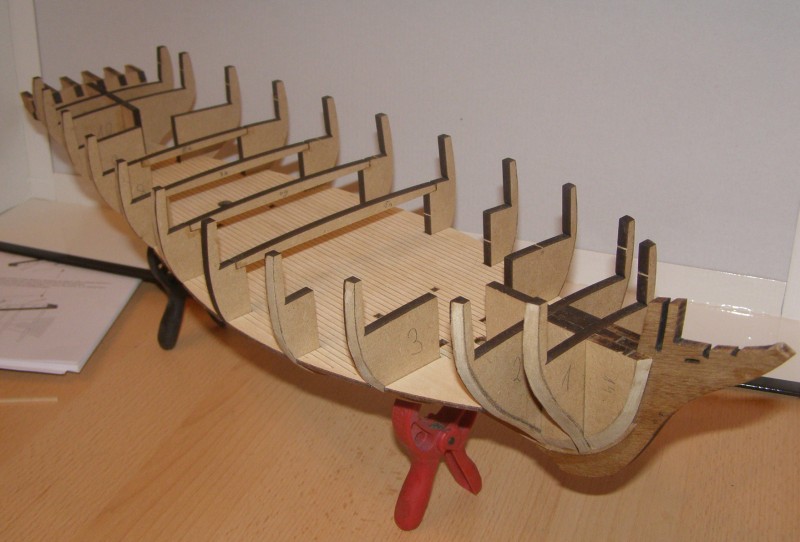
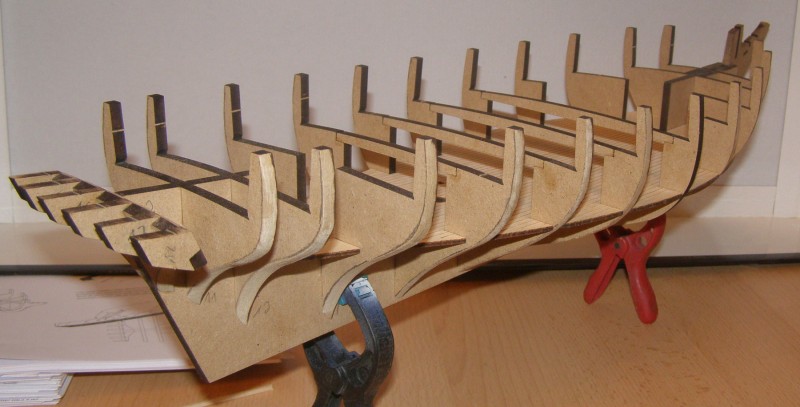
Anyway, let‘s start!
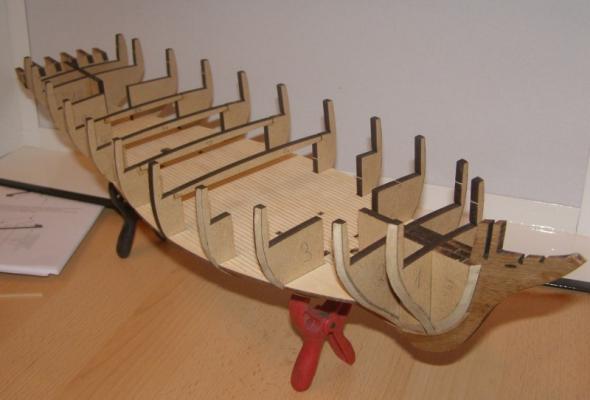

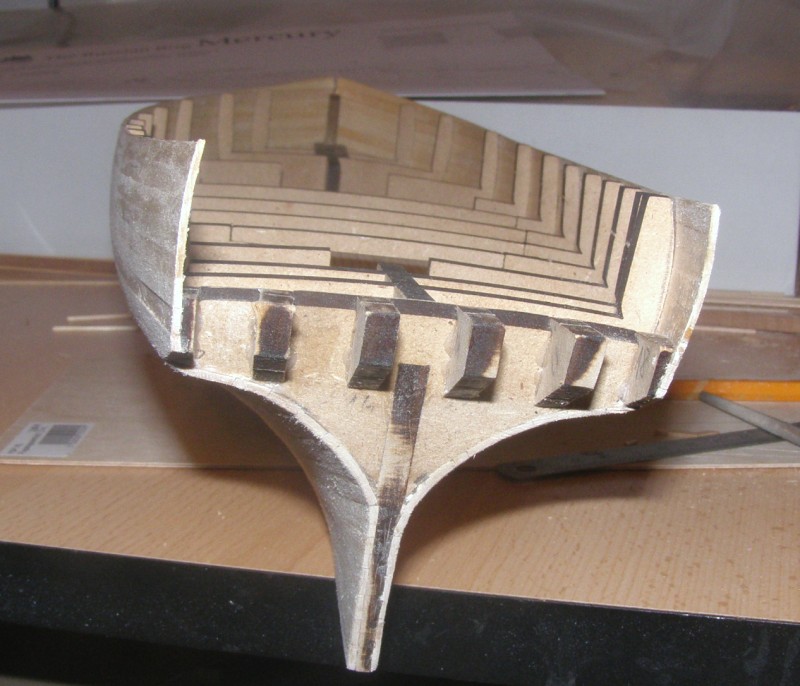
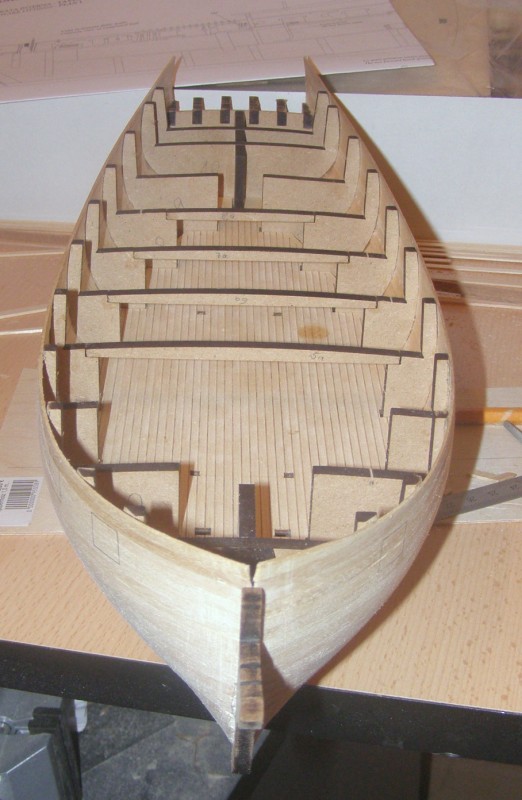
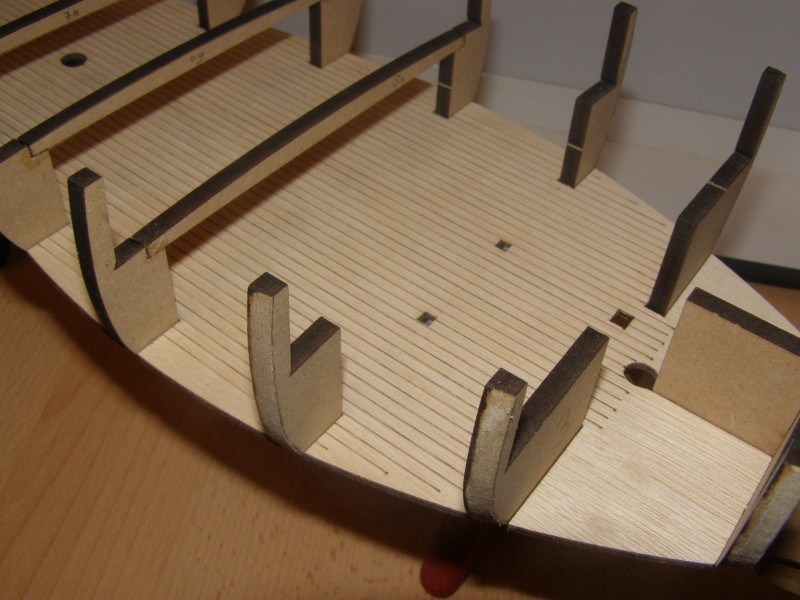
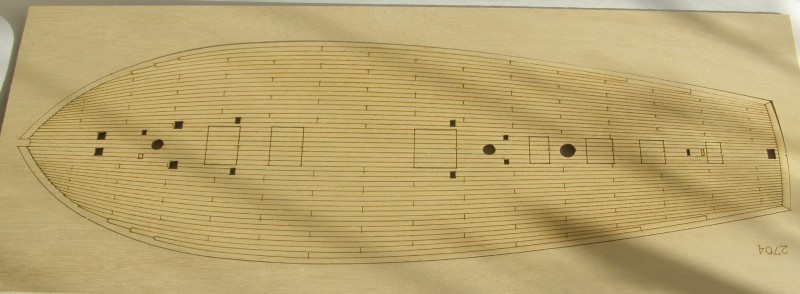
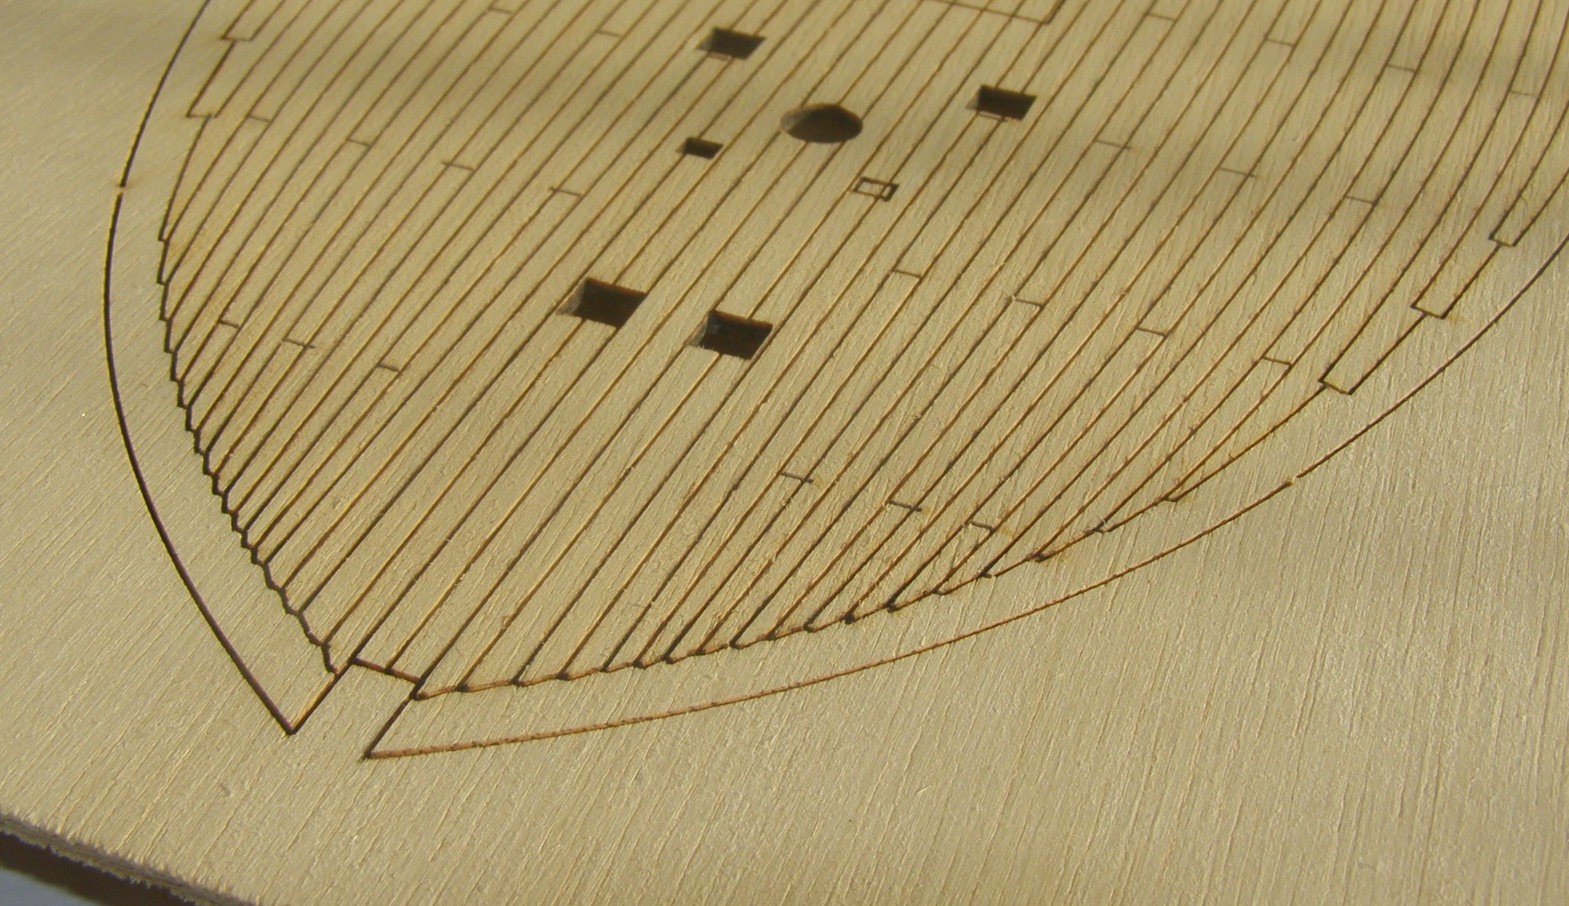
The false deck and the gundeck are a special feature of the kit. The planks are laser-engraved.
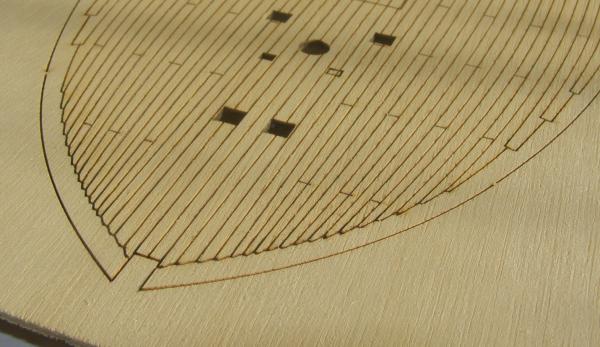
It looks pretty nice. Unfortunately it‘s plywood.
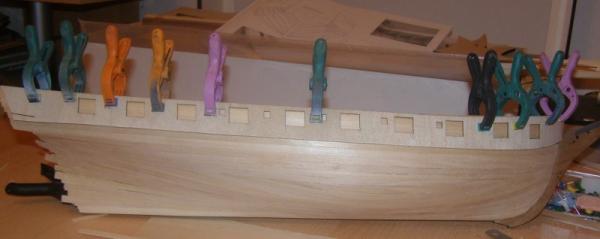
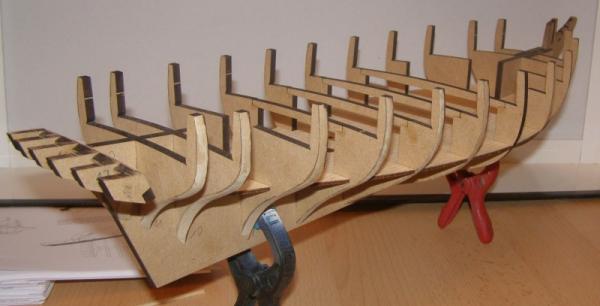
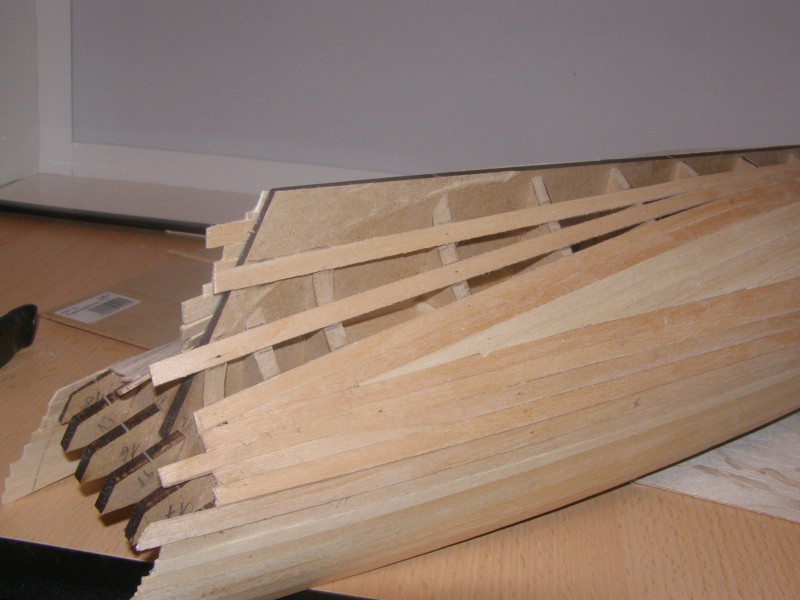
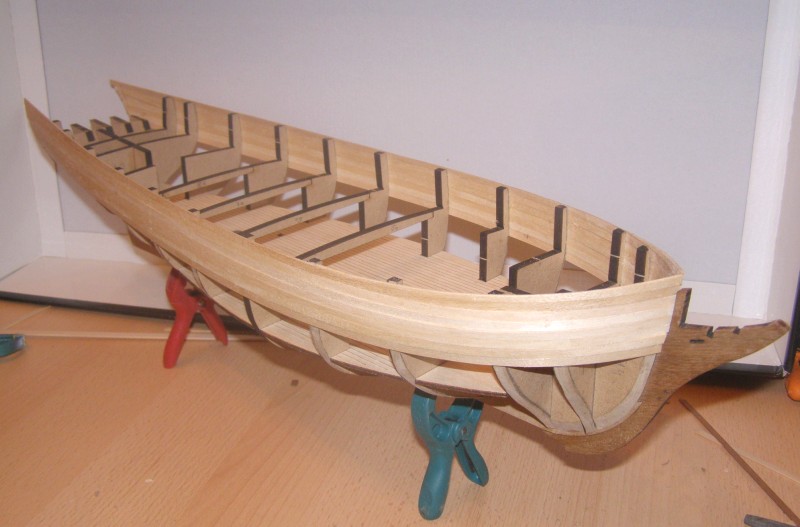
Next stage and the first problem was to fit the plywood gun port patterns. I‘ve soaked the parts for one hour, but for all that it wasn‘t possible for me bending the patterns vertically. So I planked the bulwark with 1x4 mm stripes. That means a little more work but much more easy on the nerves. Later on I can use the gun port pattern for marking the gunports.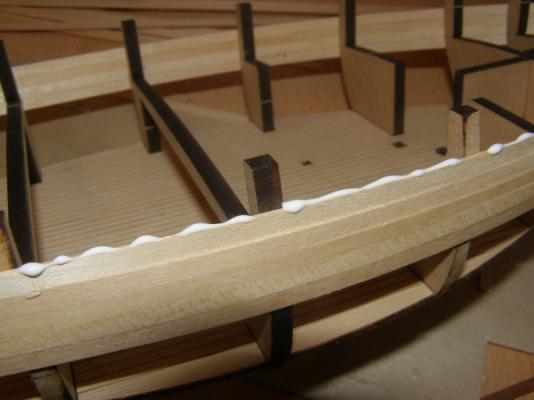
The planks are only glued among each other, not to the frames.And here we have the bulwark; still without the gunports:

-


Elsie by 4whelr - Model Shipways
in - Kit build logs for subjects built from 1901 - Present Day
Posted
May you take comfort in knowing an angel is watching over you.
Rest in peace, Eddie.