SiriusVoyager
-
Posts
502 -
Joined
-
Last visited
Content Type
Profiles
Forums
Gallery
Events
Everything posted by SiriusVoyager
-
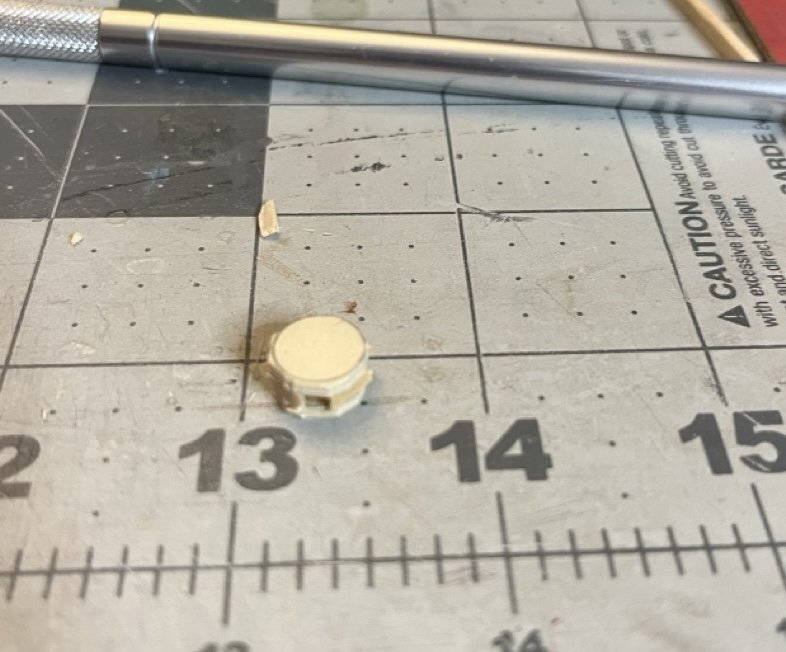
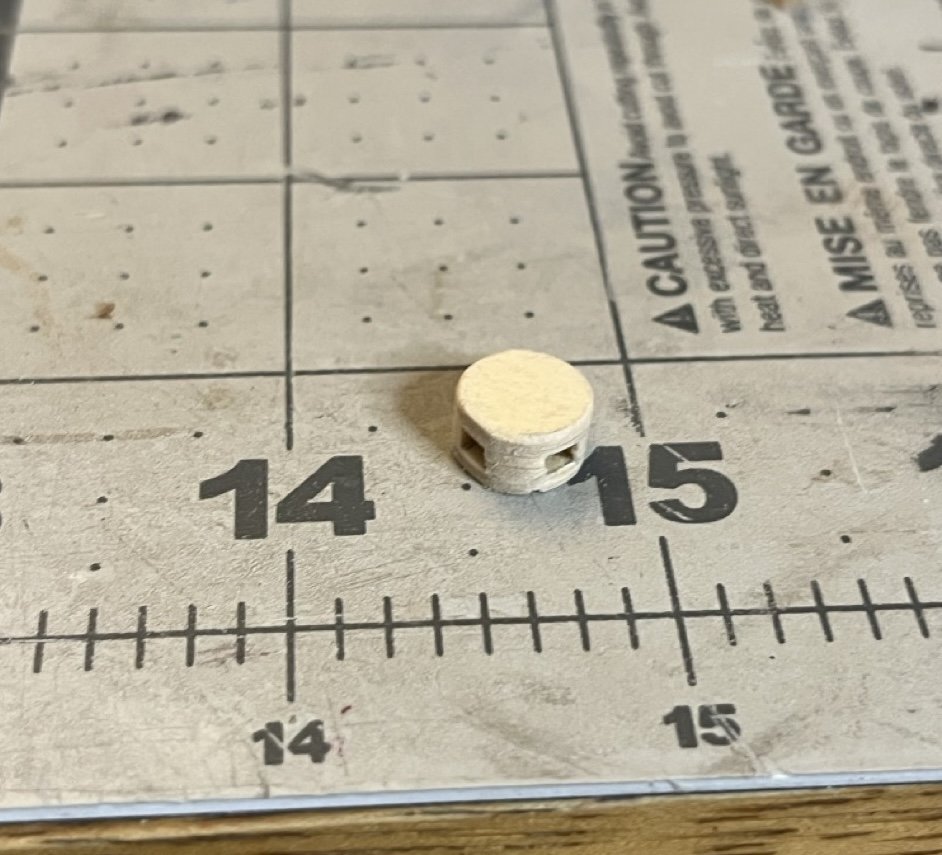
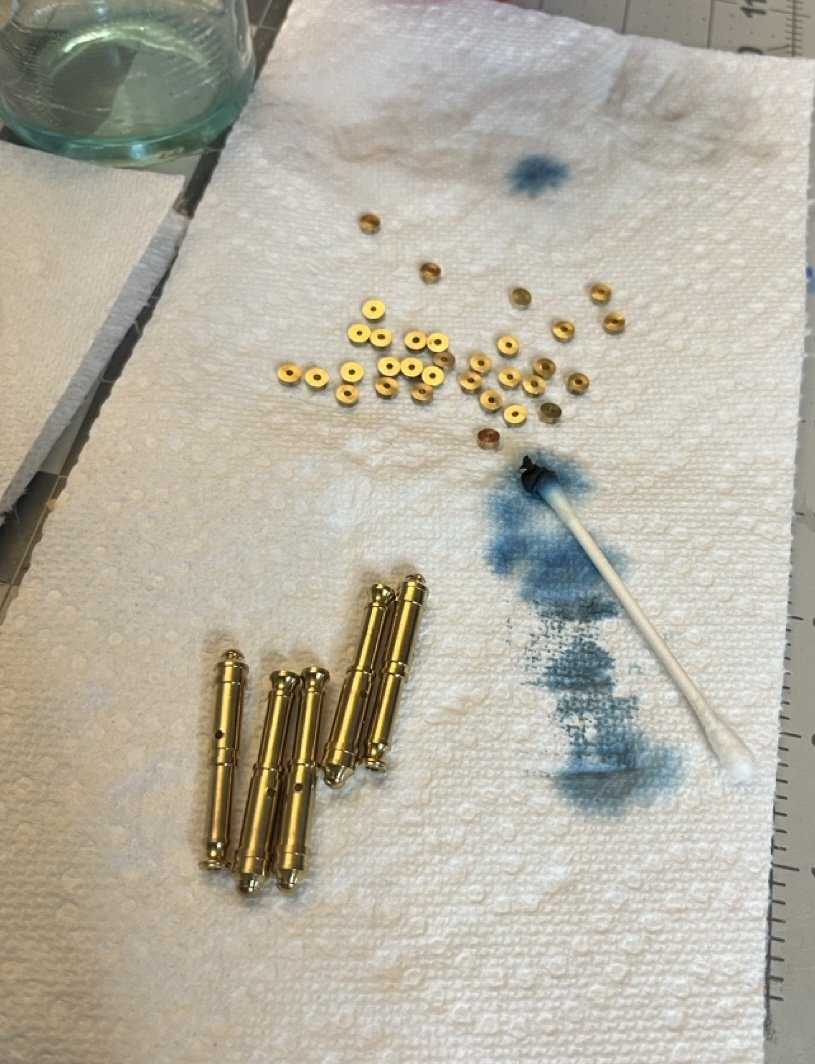
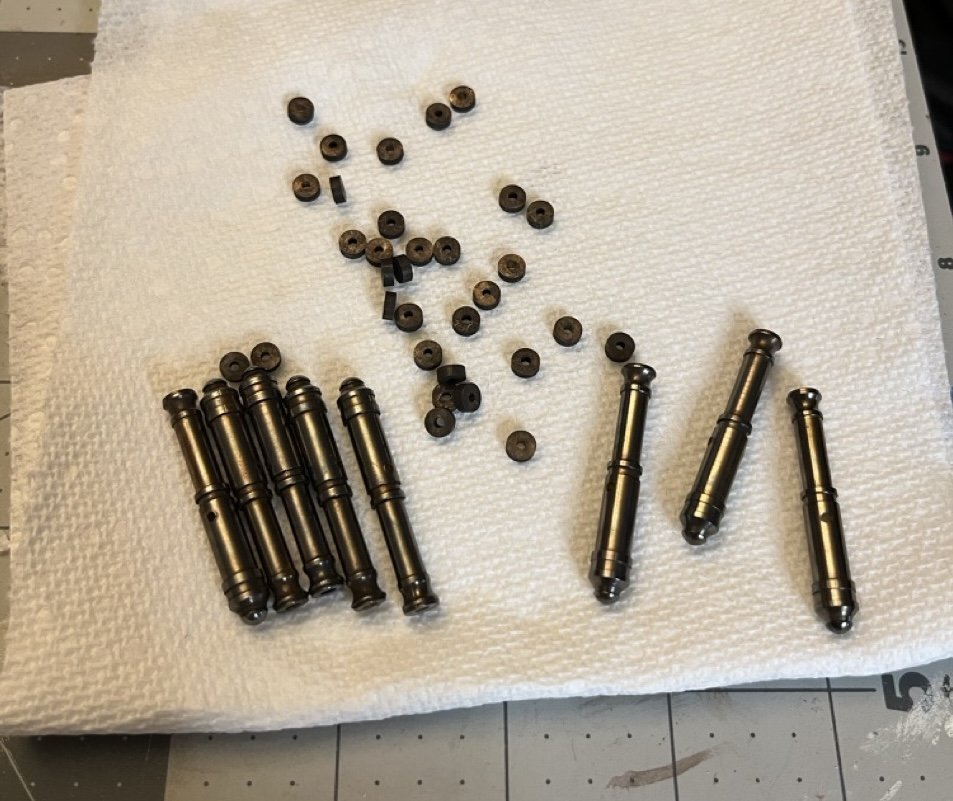
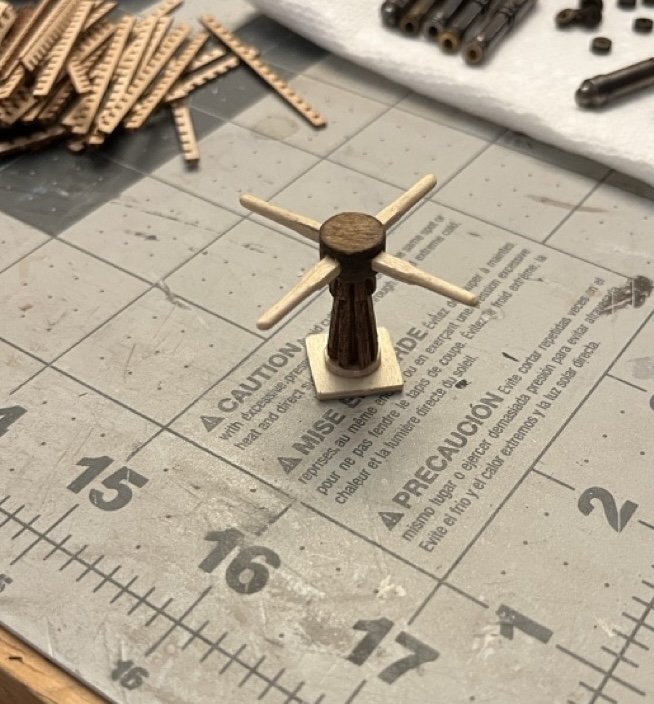
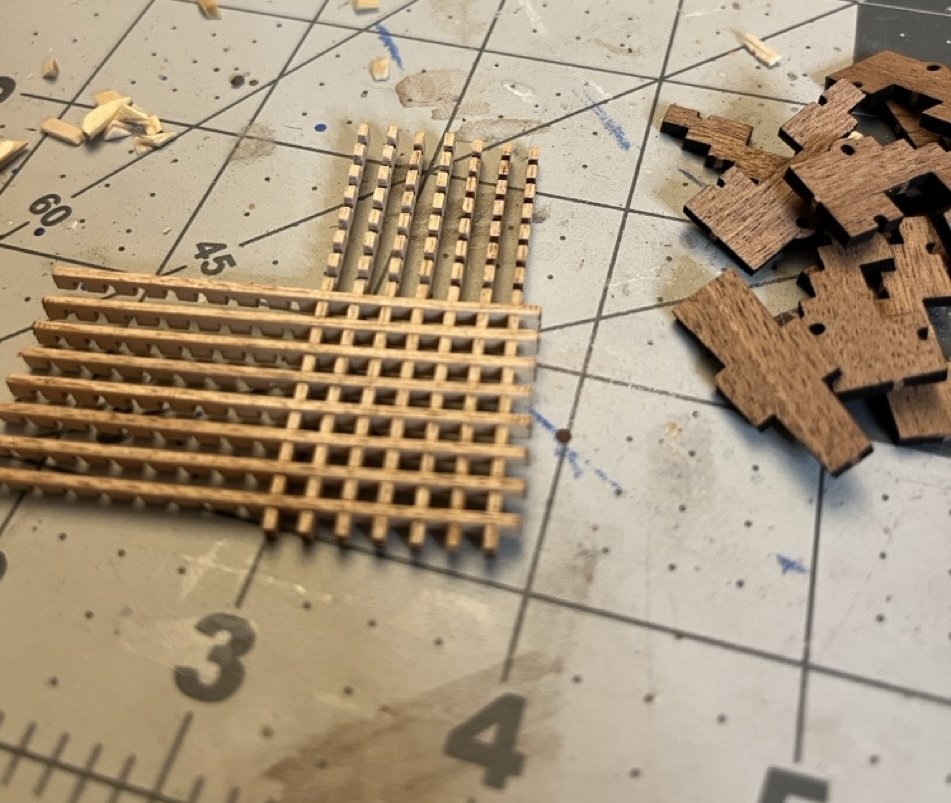
 I have been jumping around the instructions at this point. The capstan in the instructions didn't resemble any capstan I had ever seen. I am pretty sure they didn't use metal handles at the time either, so I modified it a bit. I cut out two circles and 4 wedges, glued them together and sanded them into shape. I also made 4 wooden handles. The caps were scrap pieces of laser cut sheets. The wedges and the handles are two pieces of scrap planking glued together and cut, carved and sanded into shape. I used "special" walnut stain to color it. I think I am slowly getting better at this. The capstan is simple and may not be totally accurate, but I think it looks better than how the kit designed it. I also started working on the hatch grating. I was hoping the piece would all simply fit together, but they do not. The space between the teeth is just a bit too narrow. I used a piece of 150 grit sand paper folded four times to floss between the teeth. It seemed to make the spacing just wide enough. I also attempted to blacken brass for the first time. I was a bit intimidated at first because I was worried about messing it up. First I cleaned the brass parts with a wire brush attachment on a dremel. I then soaked the pieces in isopropyl alcohol for a few minutes to clean off any contaminates. Next I used cotton swabs to apply Brass Black to the cannons. After about 20-40 seconds when they started to look black I dipped them in distilled water then let them dry on paper towels. For the wheels I placed them all in diluted Brass Black and then rinsed. I was pleasantly surprised that the blackening worked out pretty well, and was pretty easy.
- 86 replies
-
- 3
-

-
- San Francisco
- Artesania Latina
- (and 2 more)
-
Great looking ship you made there Olli! I would never guess that was a first model.
- 34 replies
-
- 1
-
-
- lady nelson
- amati
- (and 1 more)
-
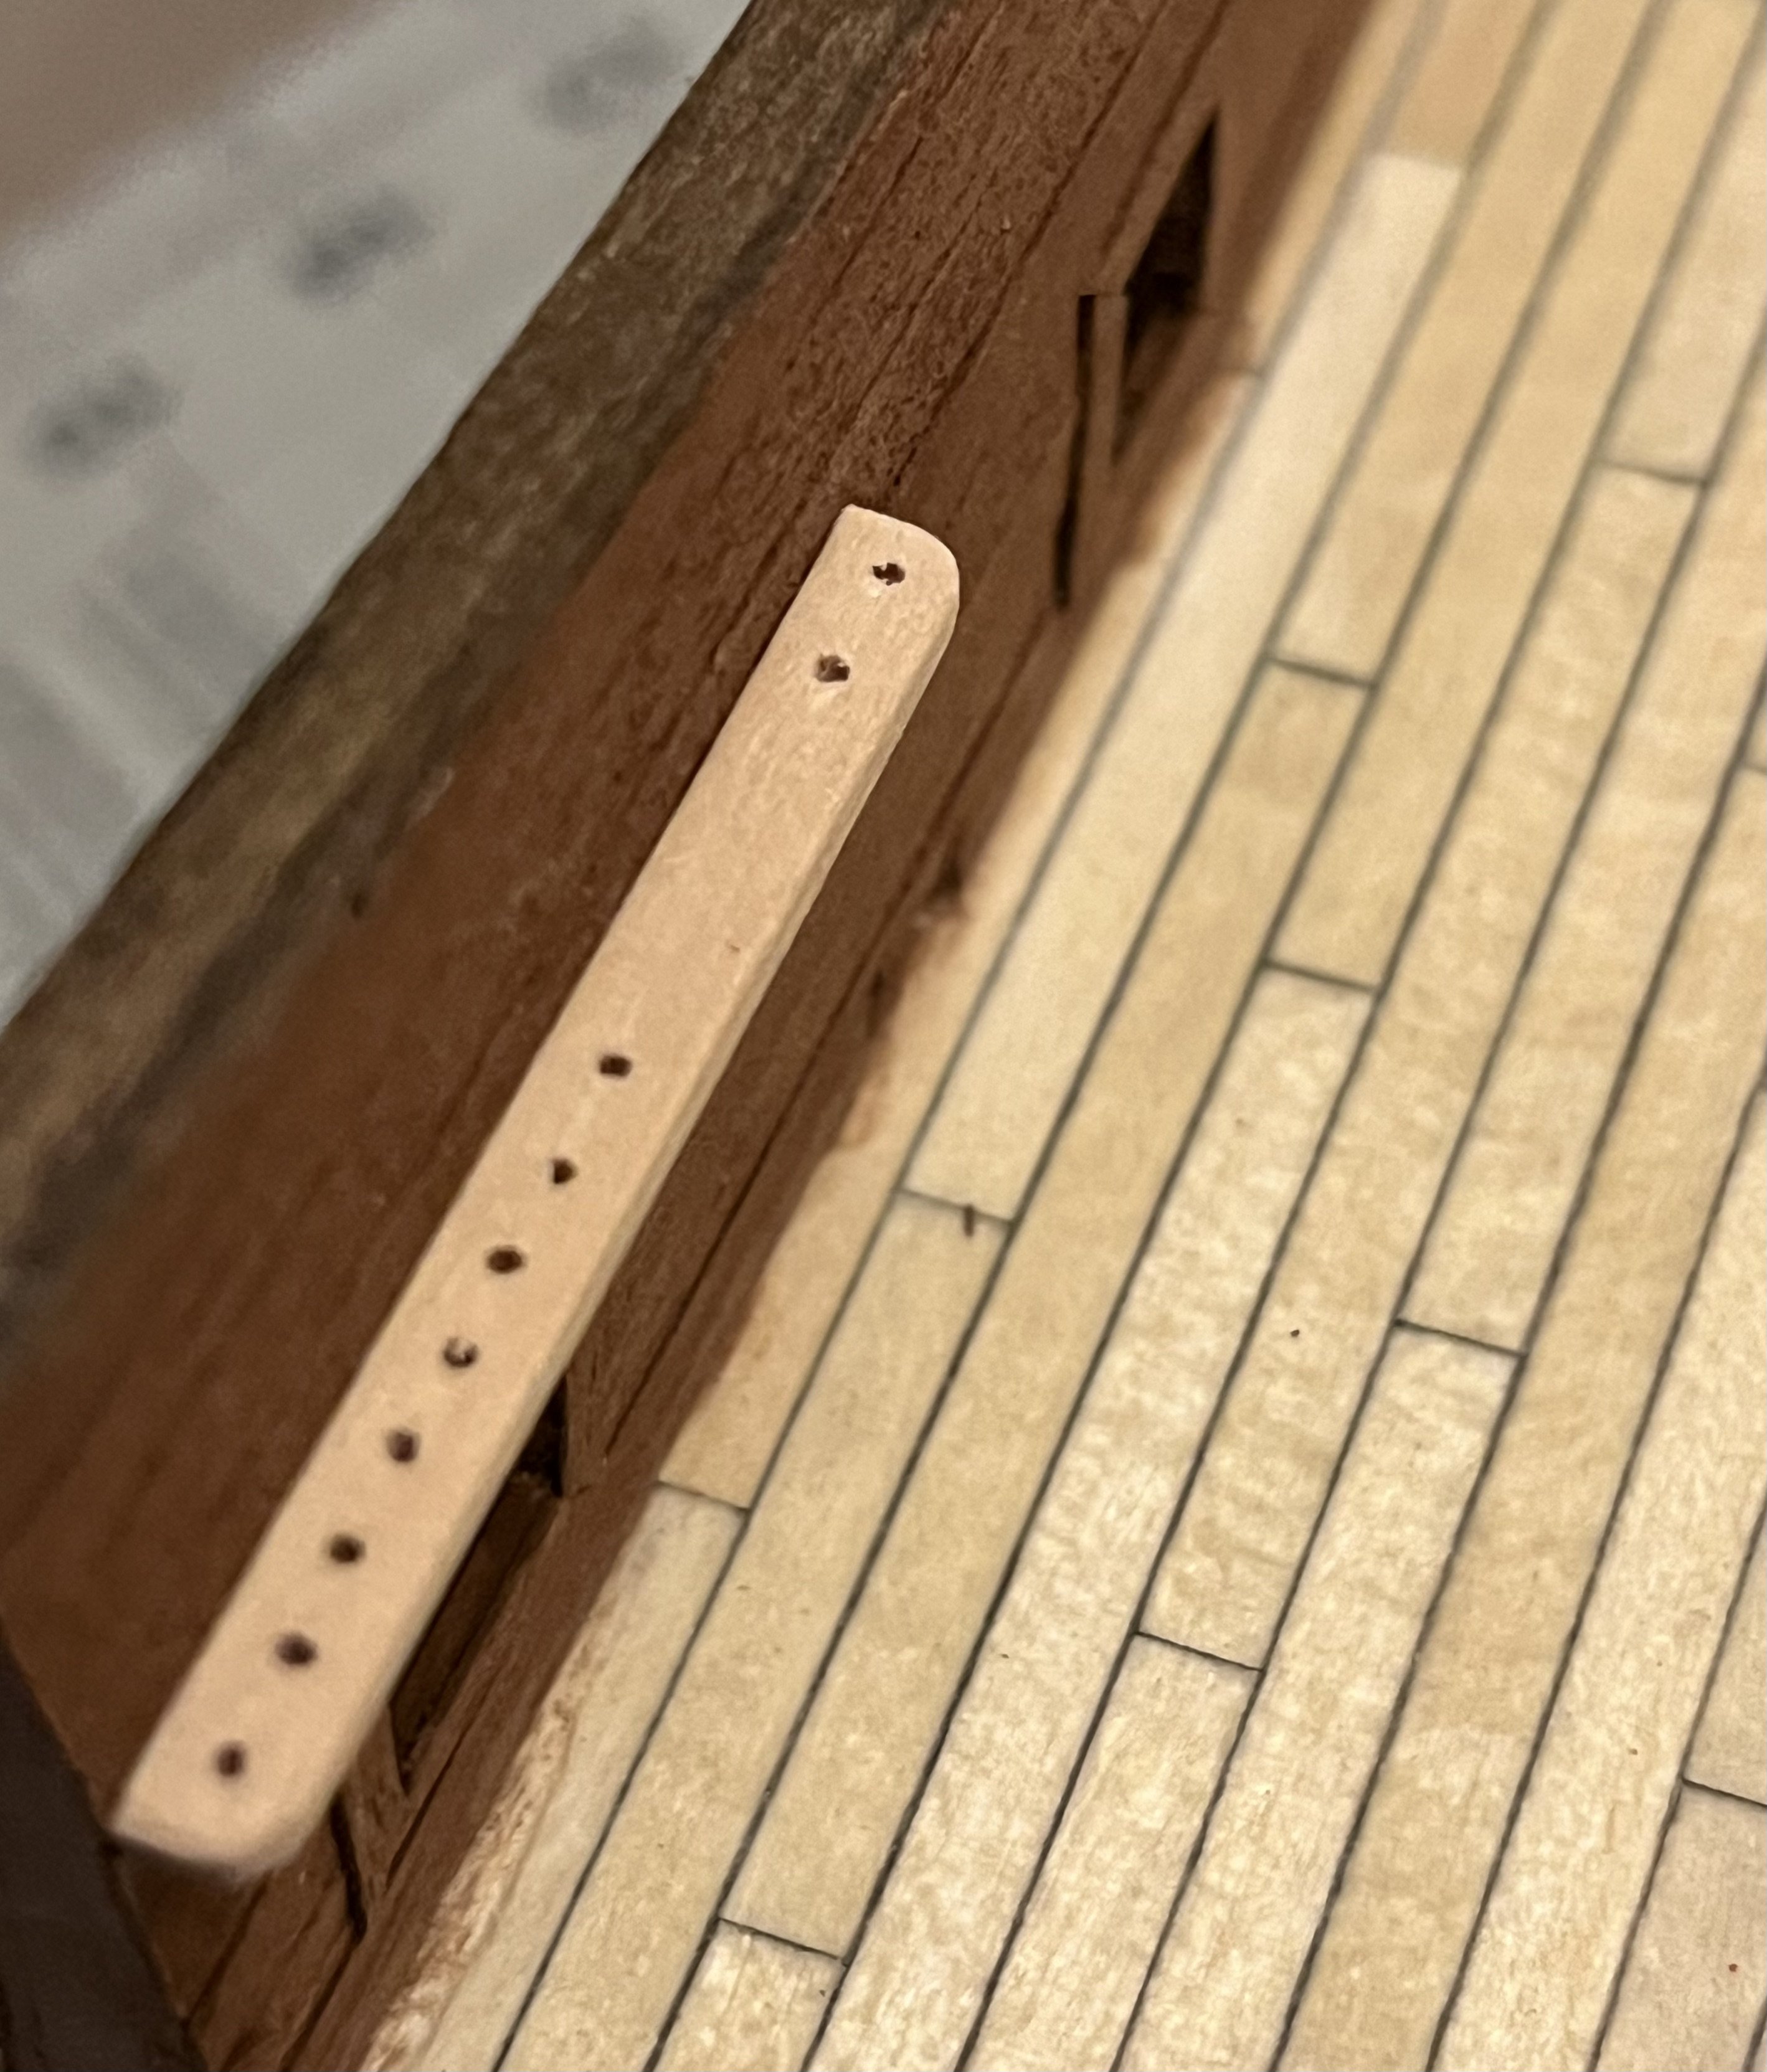
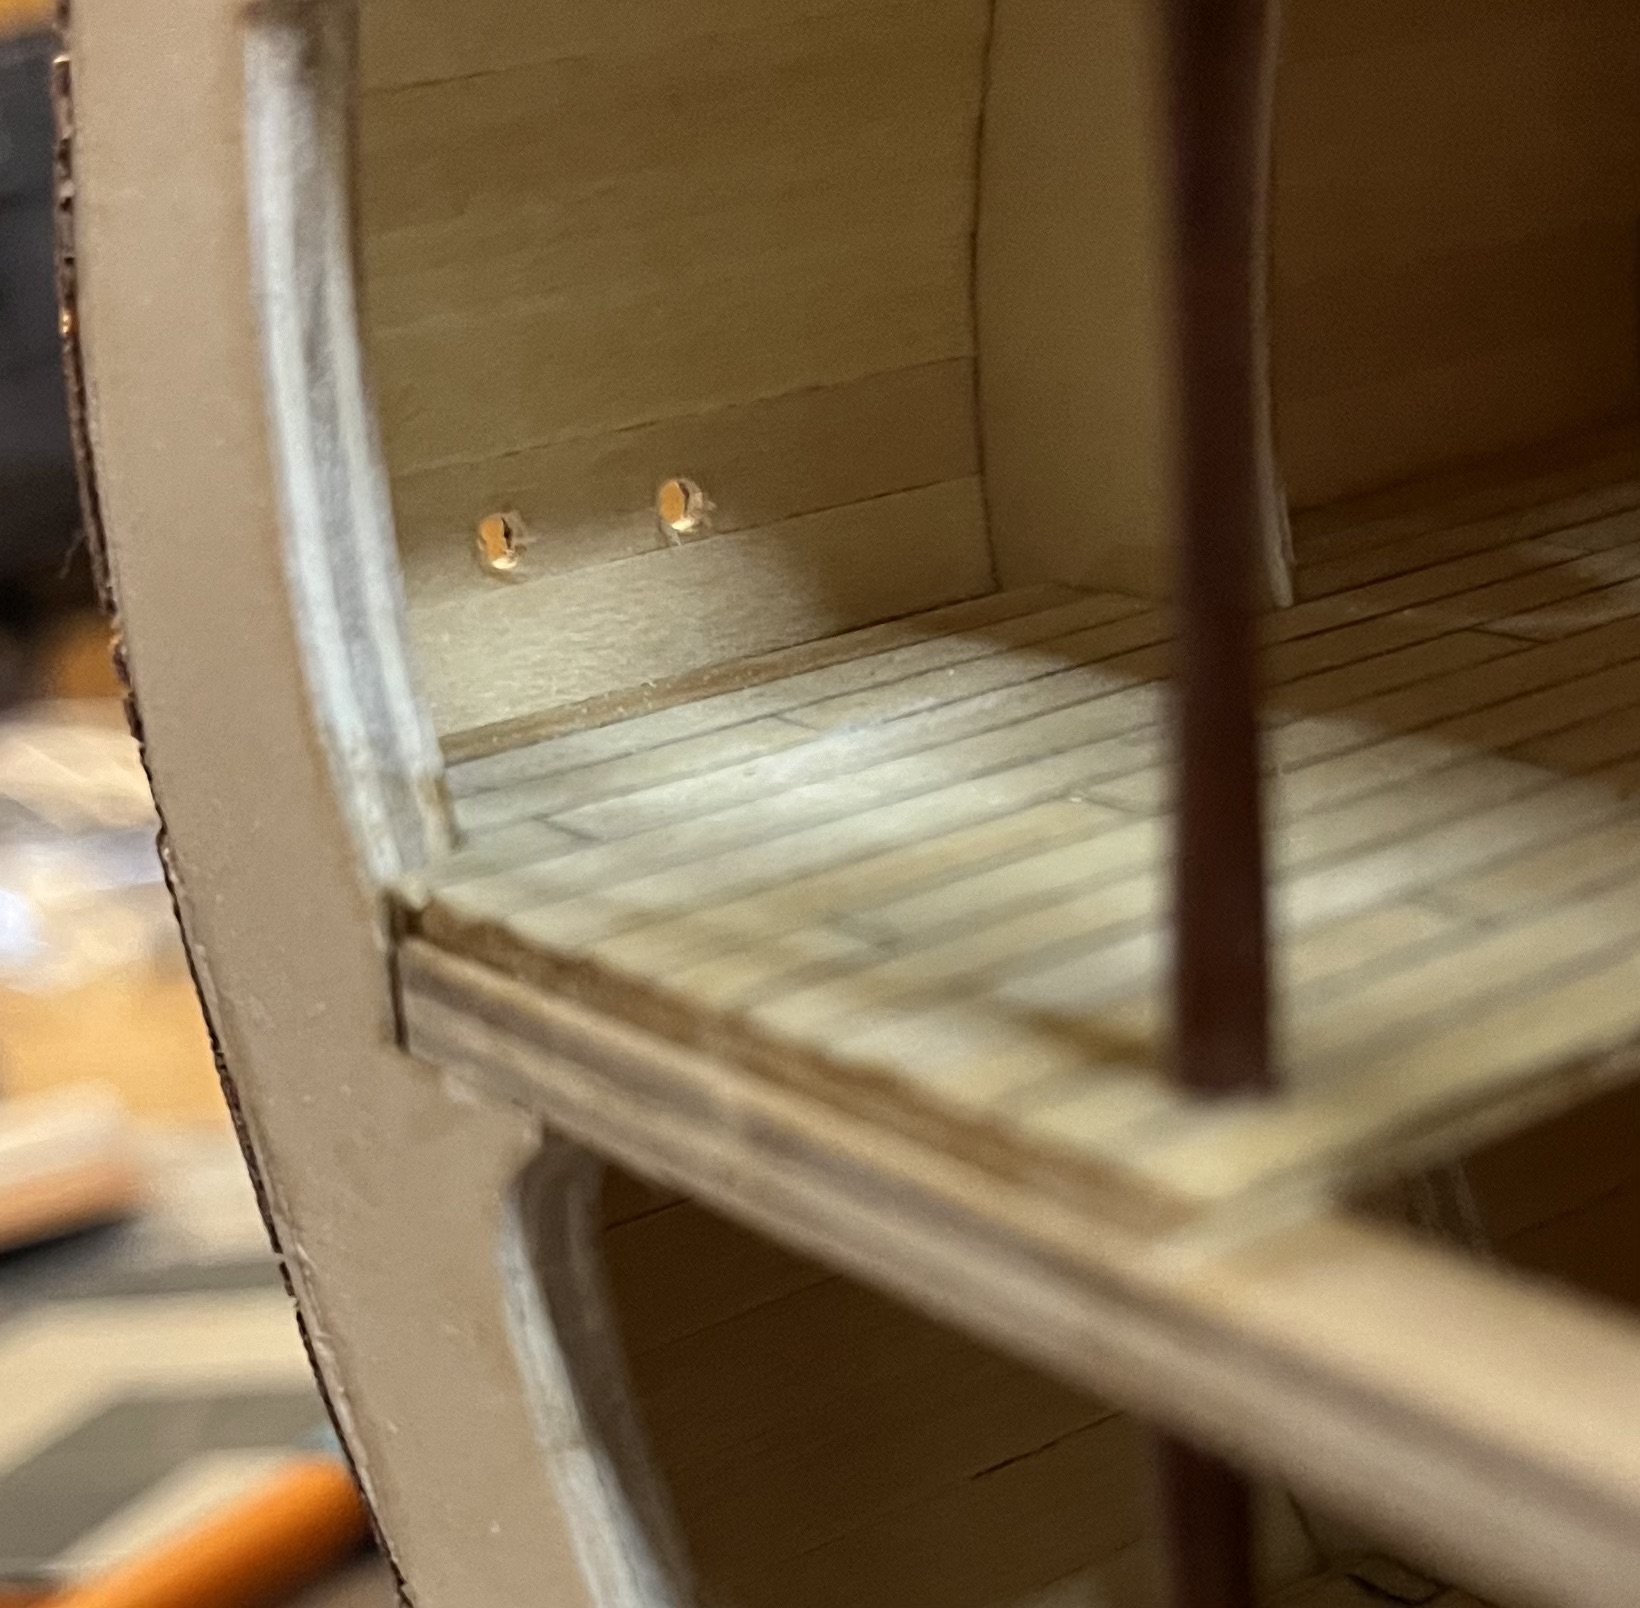
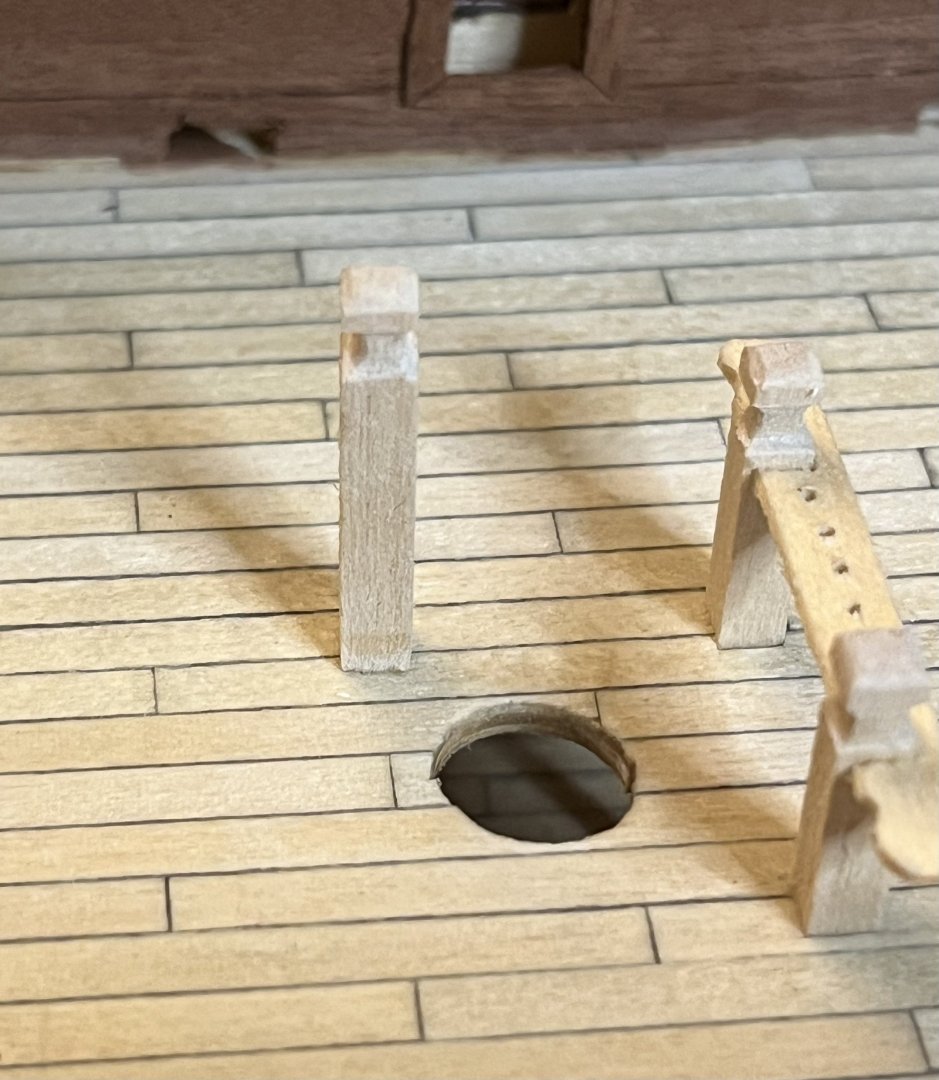
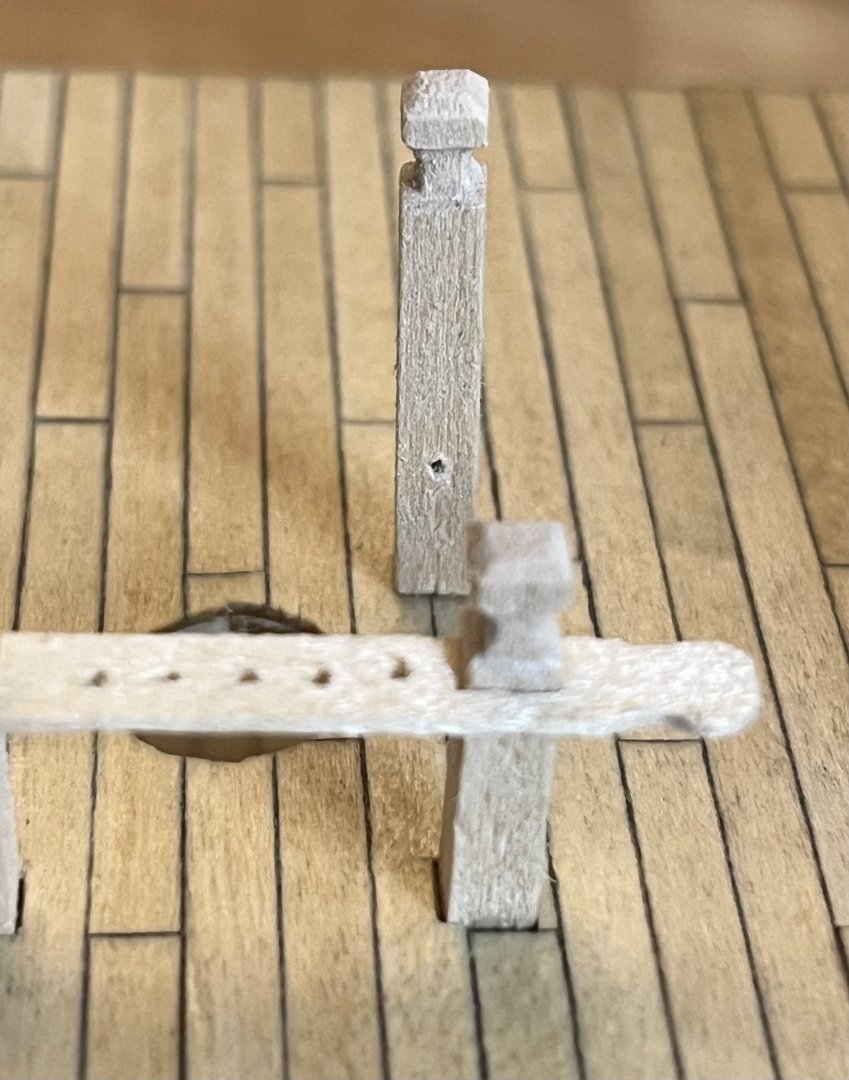
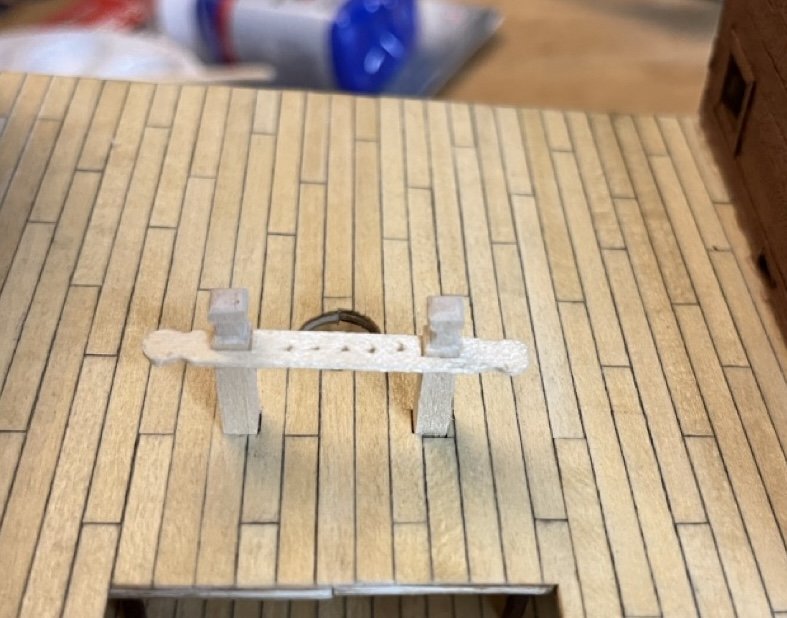
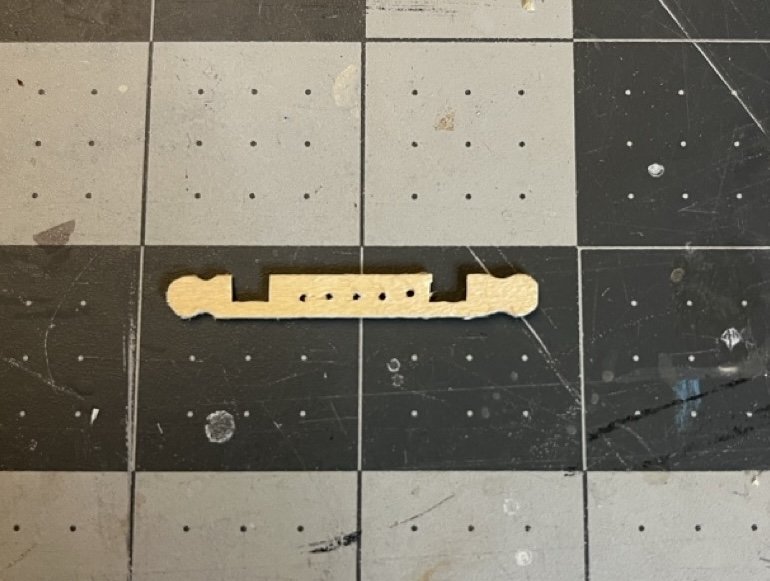
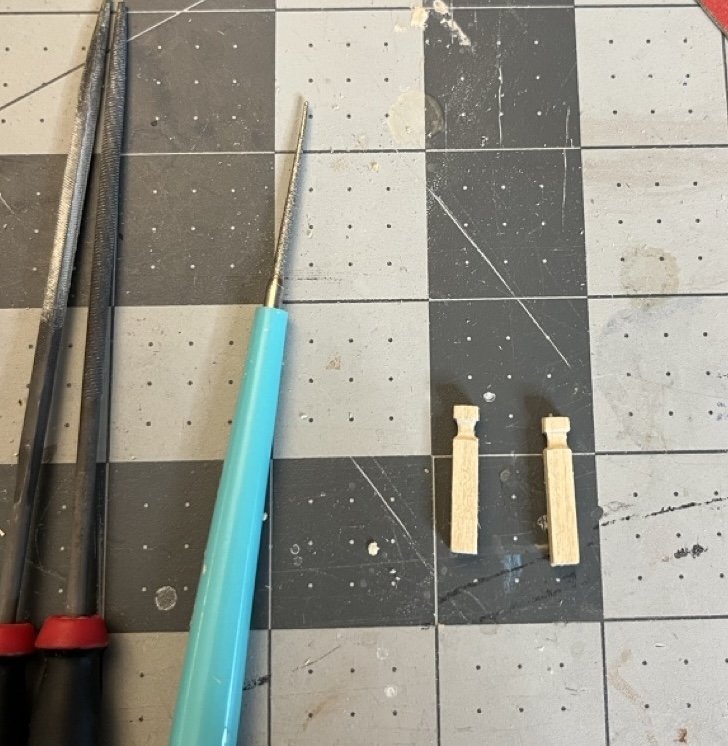
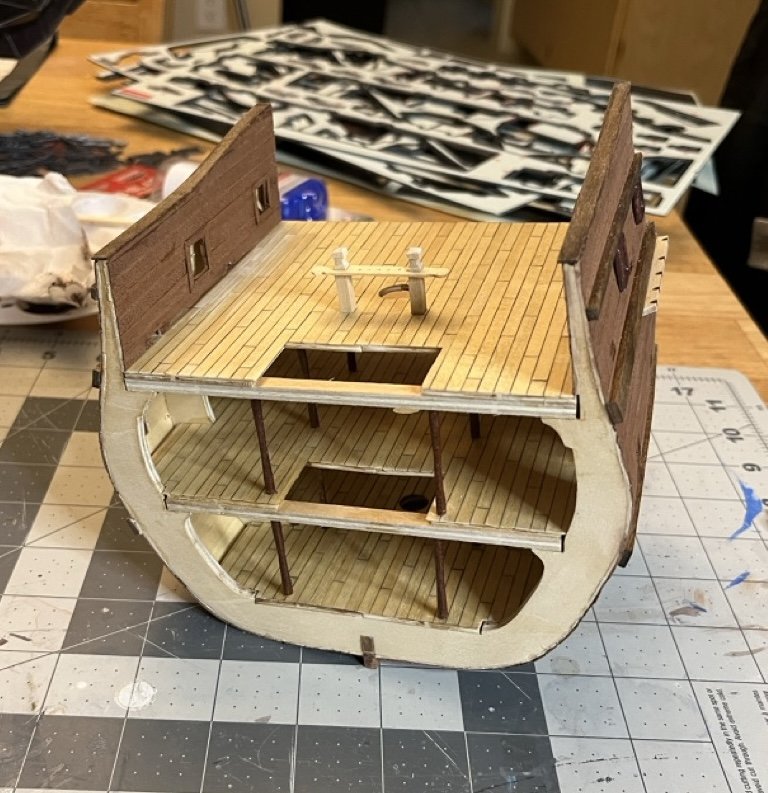
The instructions call this the main yard support. I am pretty sure there is a better term, but I couldn't find it. I made this the same way as the stanchions for the fife rail. I enjoyed carving these out. Belaying pin rails made and installed.
- 86 replies
-
- 2
-
-
- San Francisco
- Artesania Latina
- (and 2 more)
-
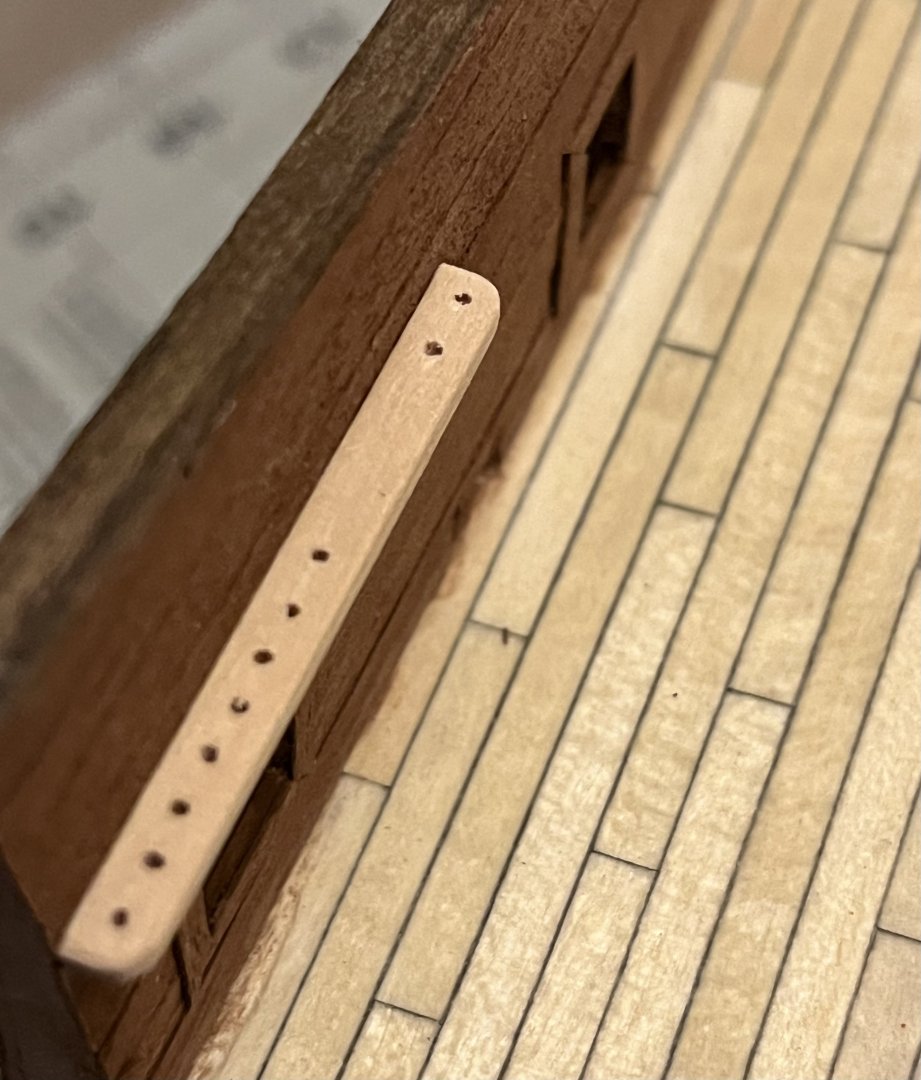
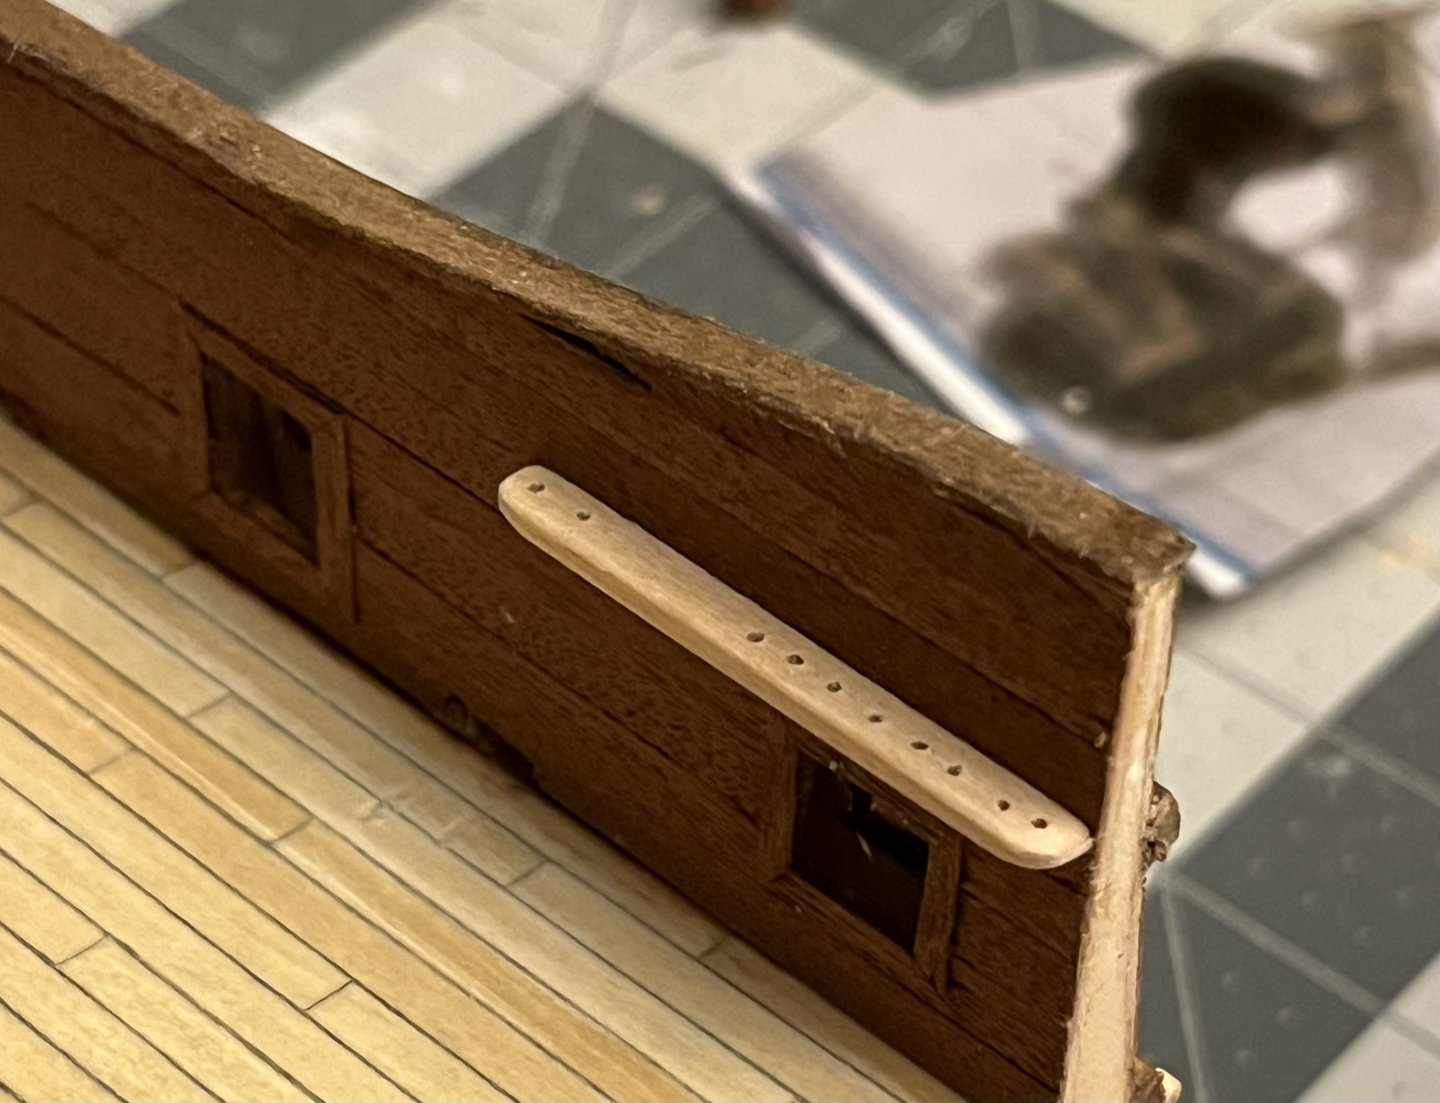
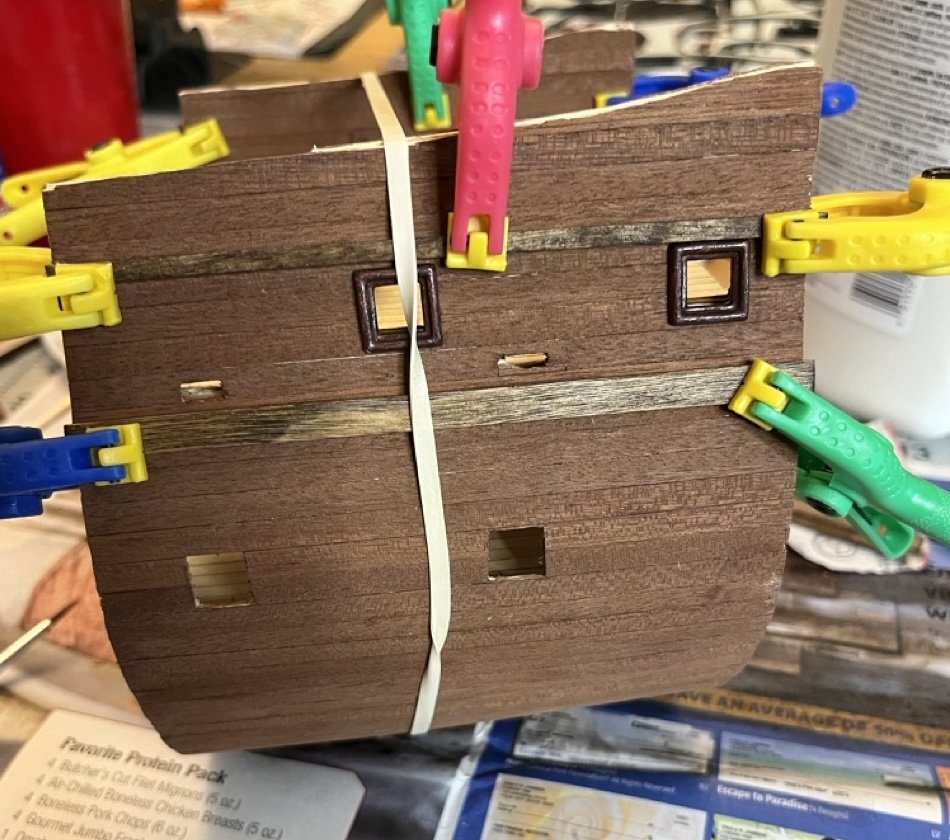
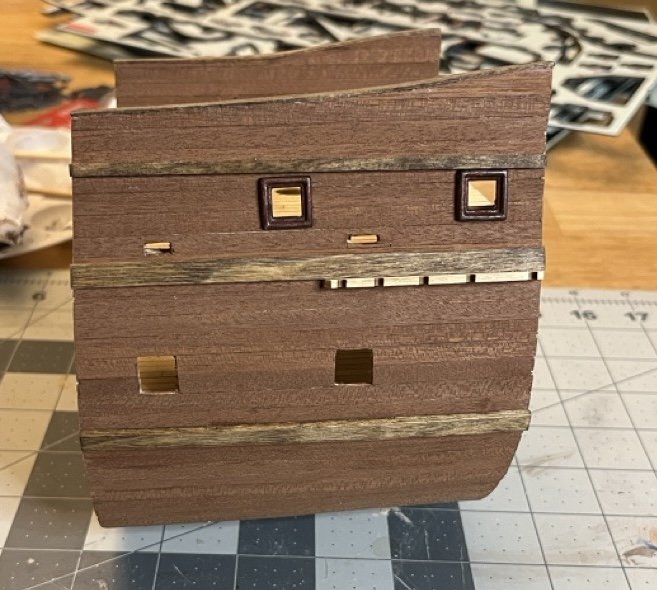
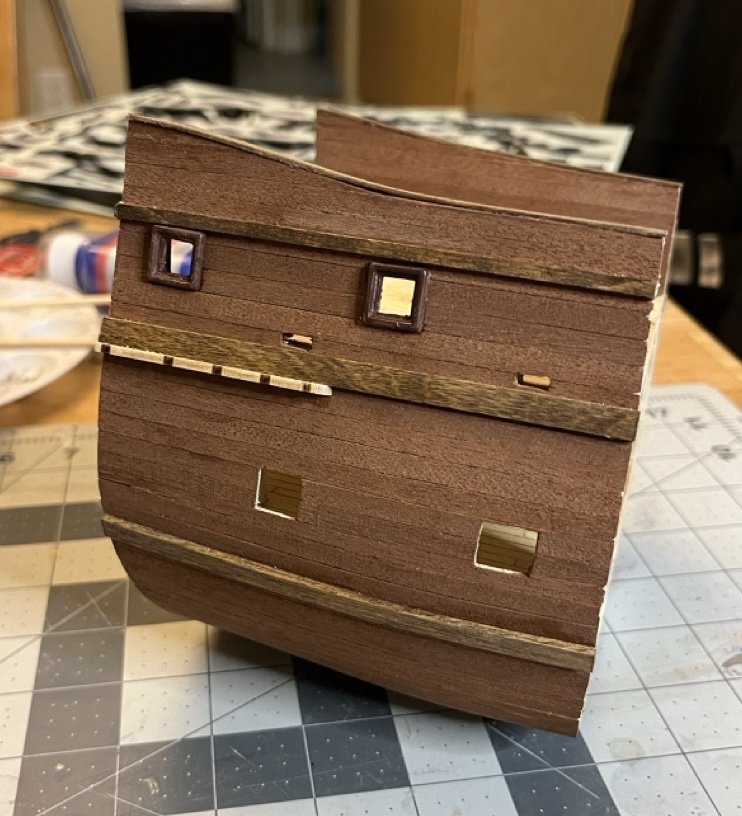
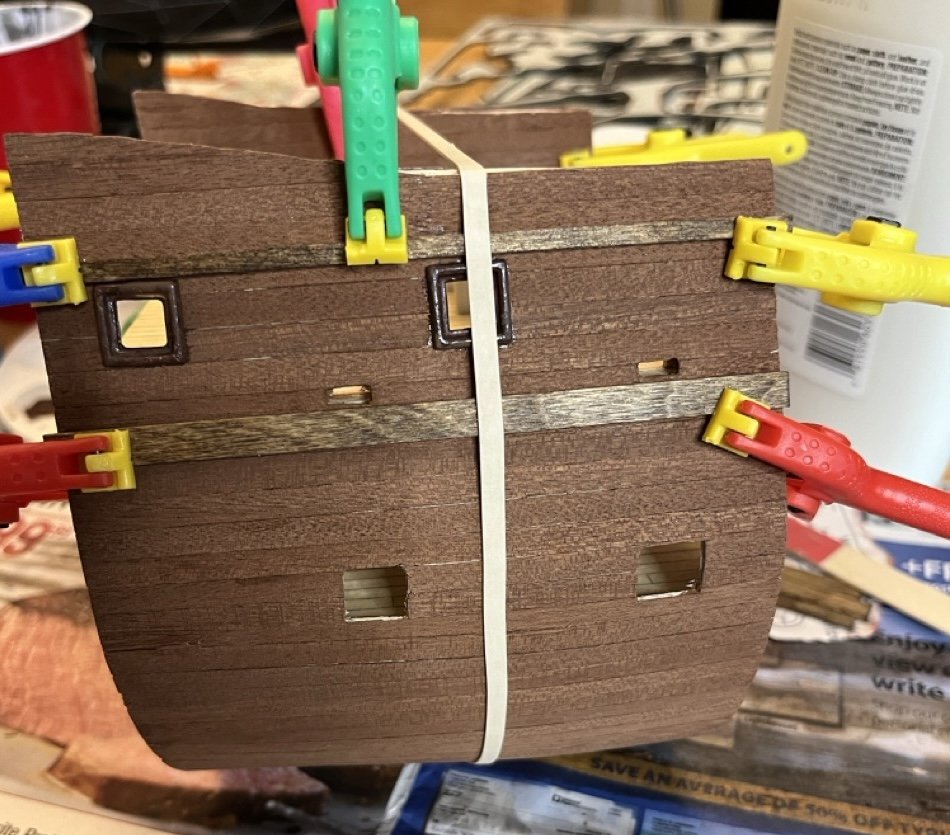
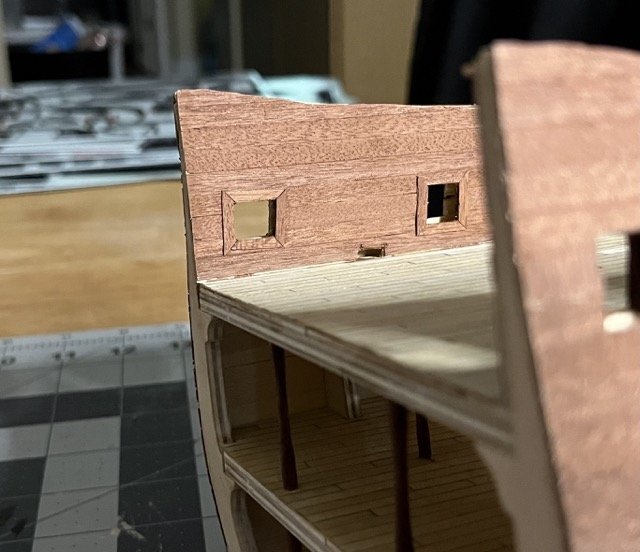
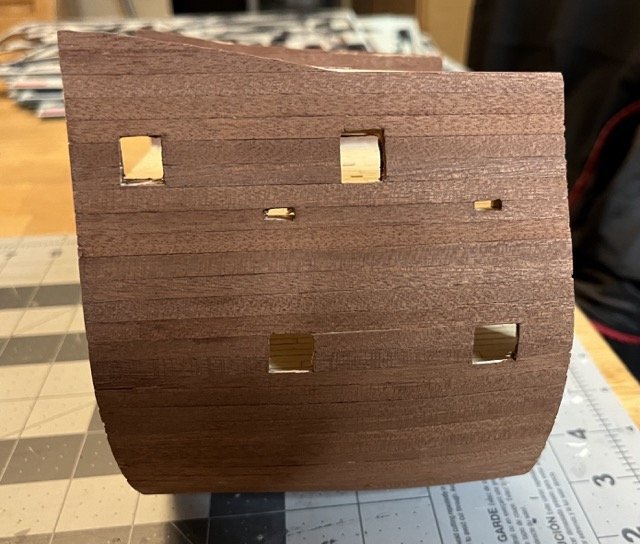
Four gun port frames glued in. There were also some wales attached which were stained with a walnut stain. The gunwale was also put in place as well as the chainwales. The mast fife pin rail also needed to be made. There was no laser cut puts here. They had to be carved and drilled. They came out better than I expected.
- 86 replies
-
- 1
-
-
- San Francisco
- Artesania Latina
- (and 2 more)
-
Ahoy from Southwest Arizona
SiriusVoyager replied to CaptainBlackbeard's topic in New member Introductions
Welcome to MSW! -
I believe you have to have a minimum number of posts (not sure on the number) before you are allowed to add a signature. Before you reach that number, the option will not even appear in your profile to edit.
-
Very nice carrack you have there. Welcome to MSW!
-
This was an entertaining log to follow and the riverboat looks great! Nice job.
- 87 replies
-
- 3
-
-

-
- King of the Mississippi
- Artesania Latina
- (and 2 more)
-
Great job on completing the pram. That was a good fix on the rudder. The brass fittings are definitely too small. Looking forward to the smack!
- 33 replies
-
- 1
-
-
- Model Shipways
- Norwegian Sailing Pram
- (and 1 more)
-
In your iphone settings at the top, search "camera format" and it should take you right to it.
-
Welcome to MSW! Looking forward to the build. Your photos aren't showing up because they are in a format that only iphones use. If you change the format to jpeg they should show up properly.
- 46 replies
-
- 1
-
-
- Mayflower
- Artesania Latina
- (and 1 more)
-
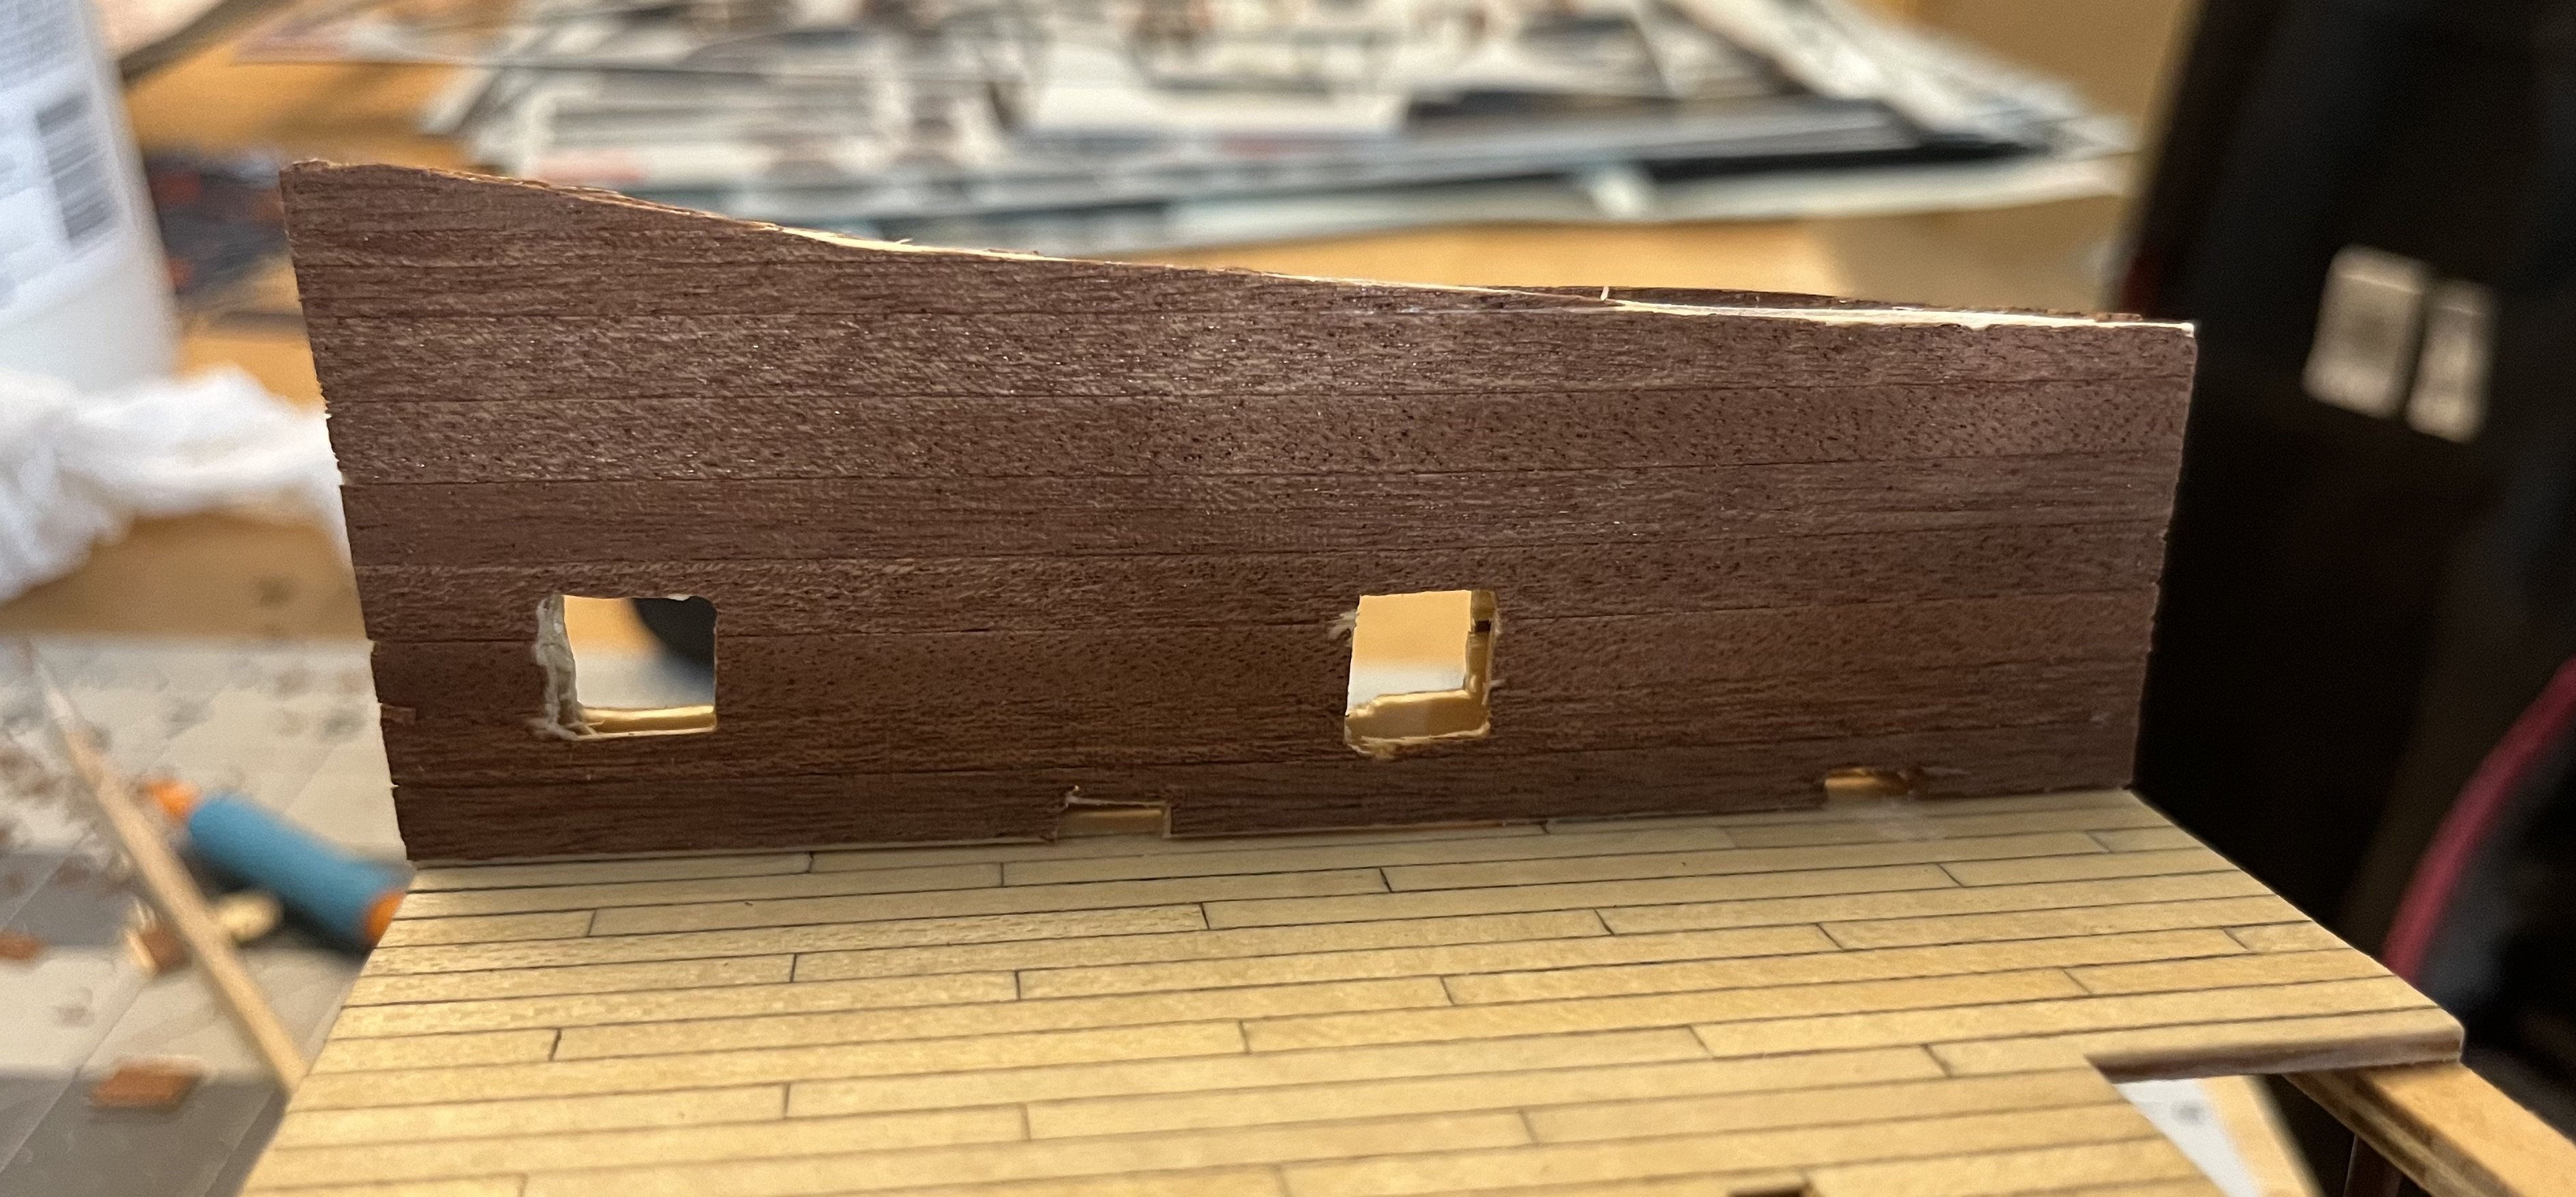
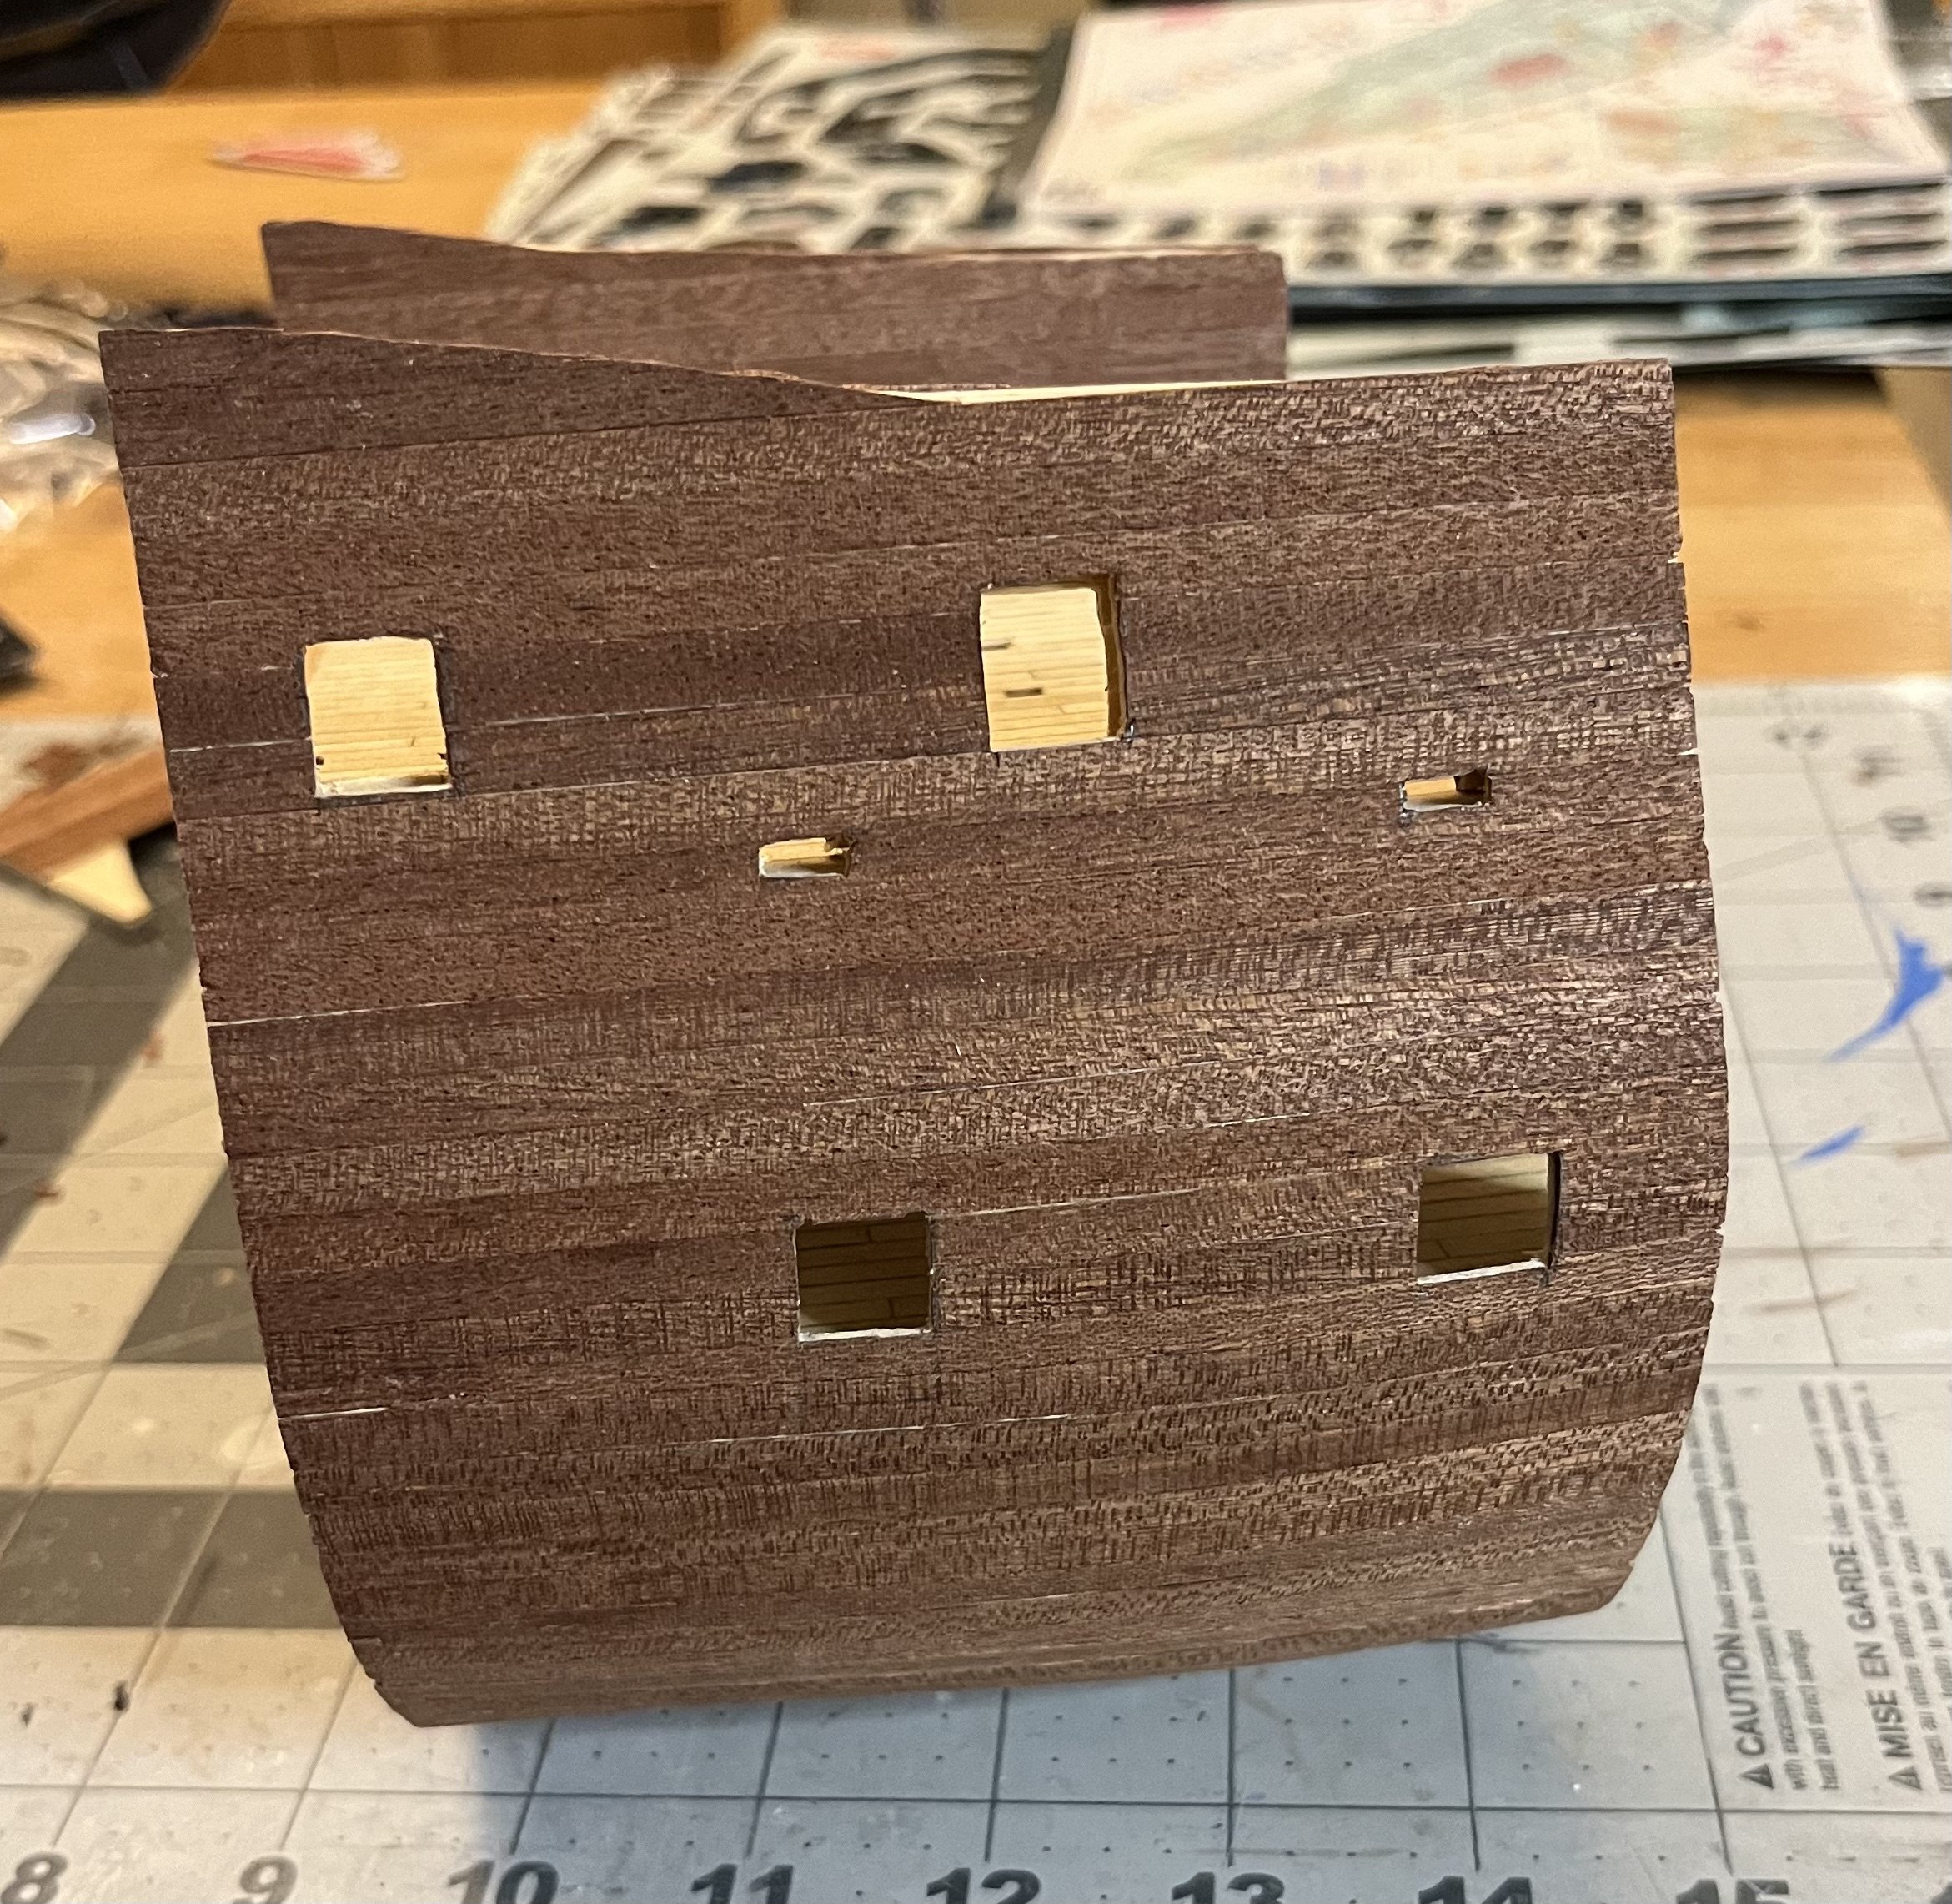
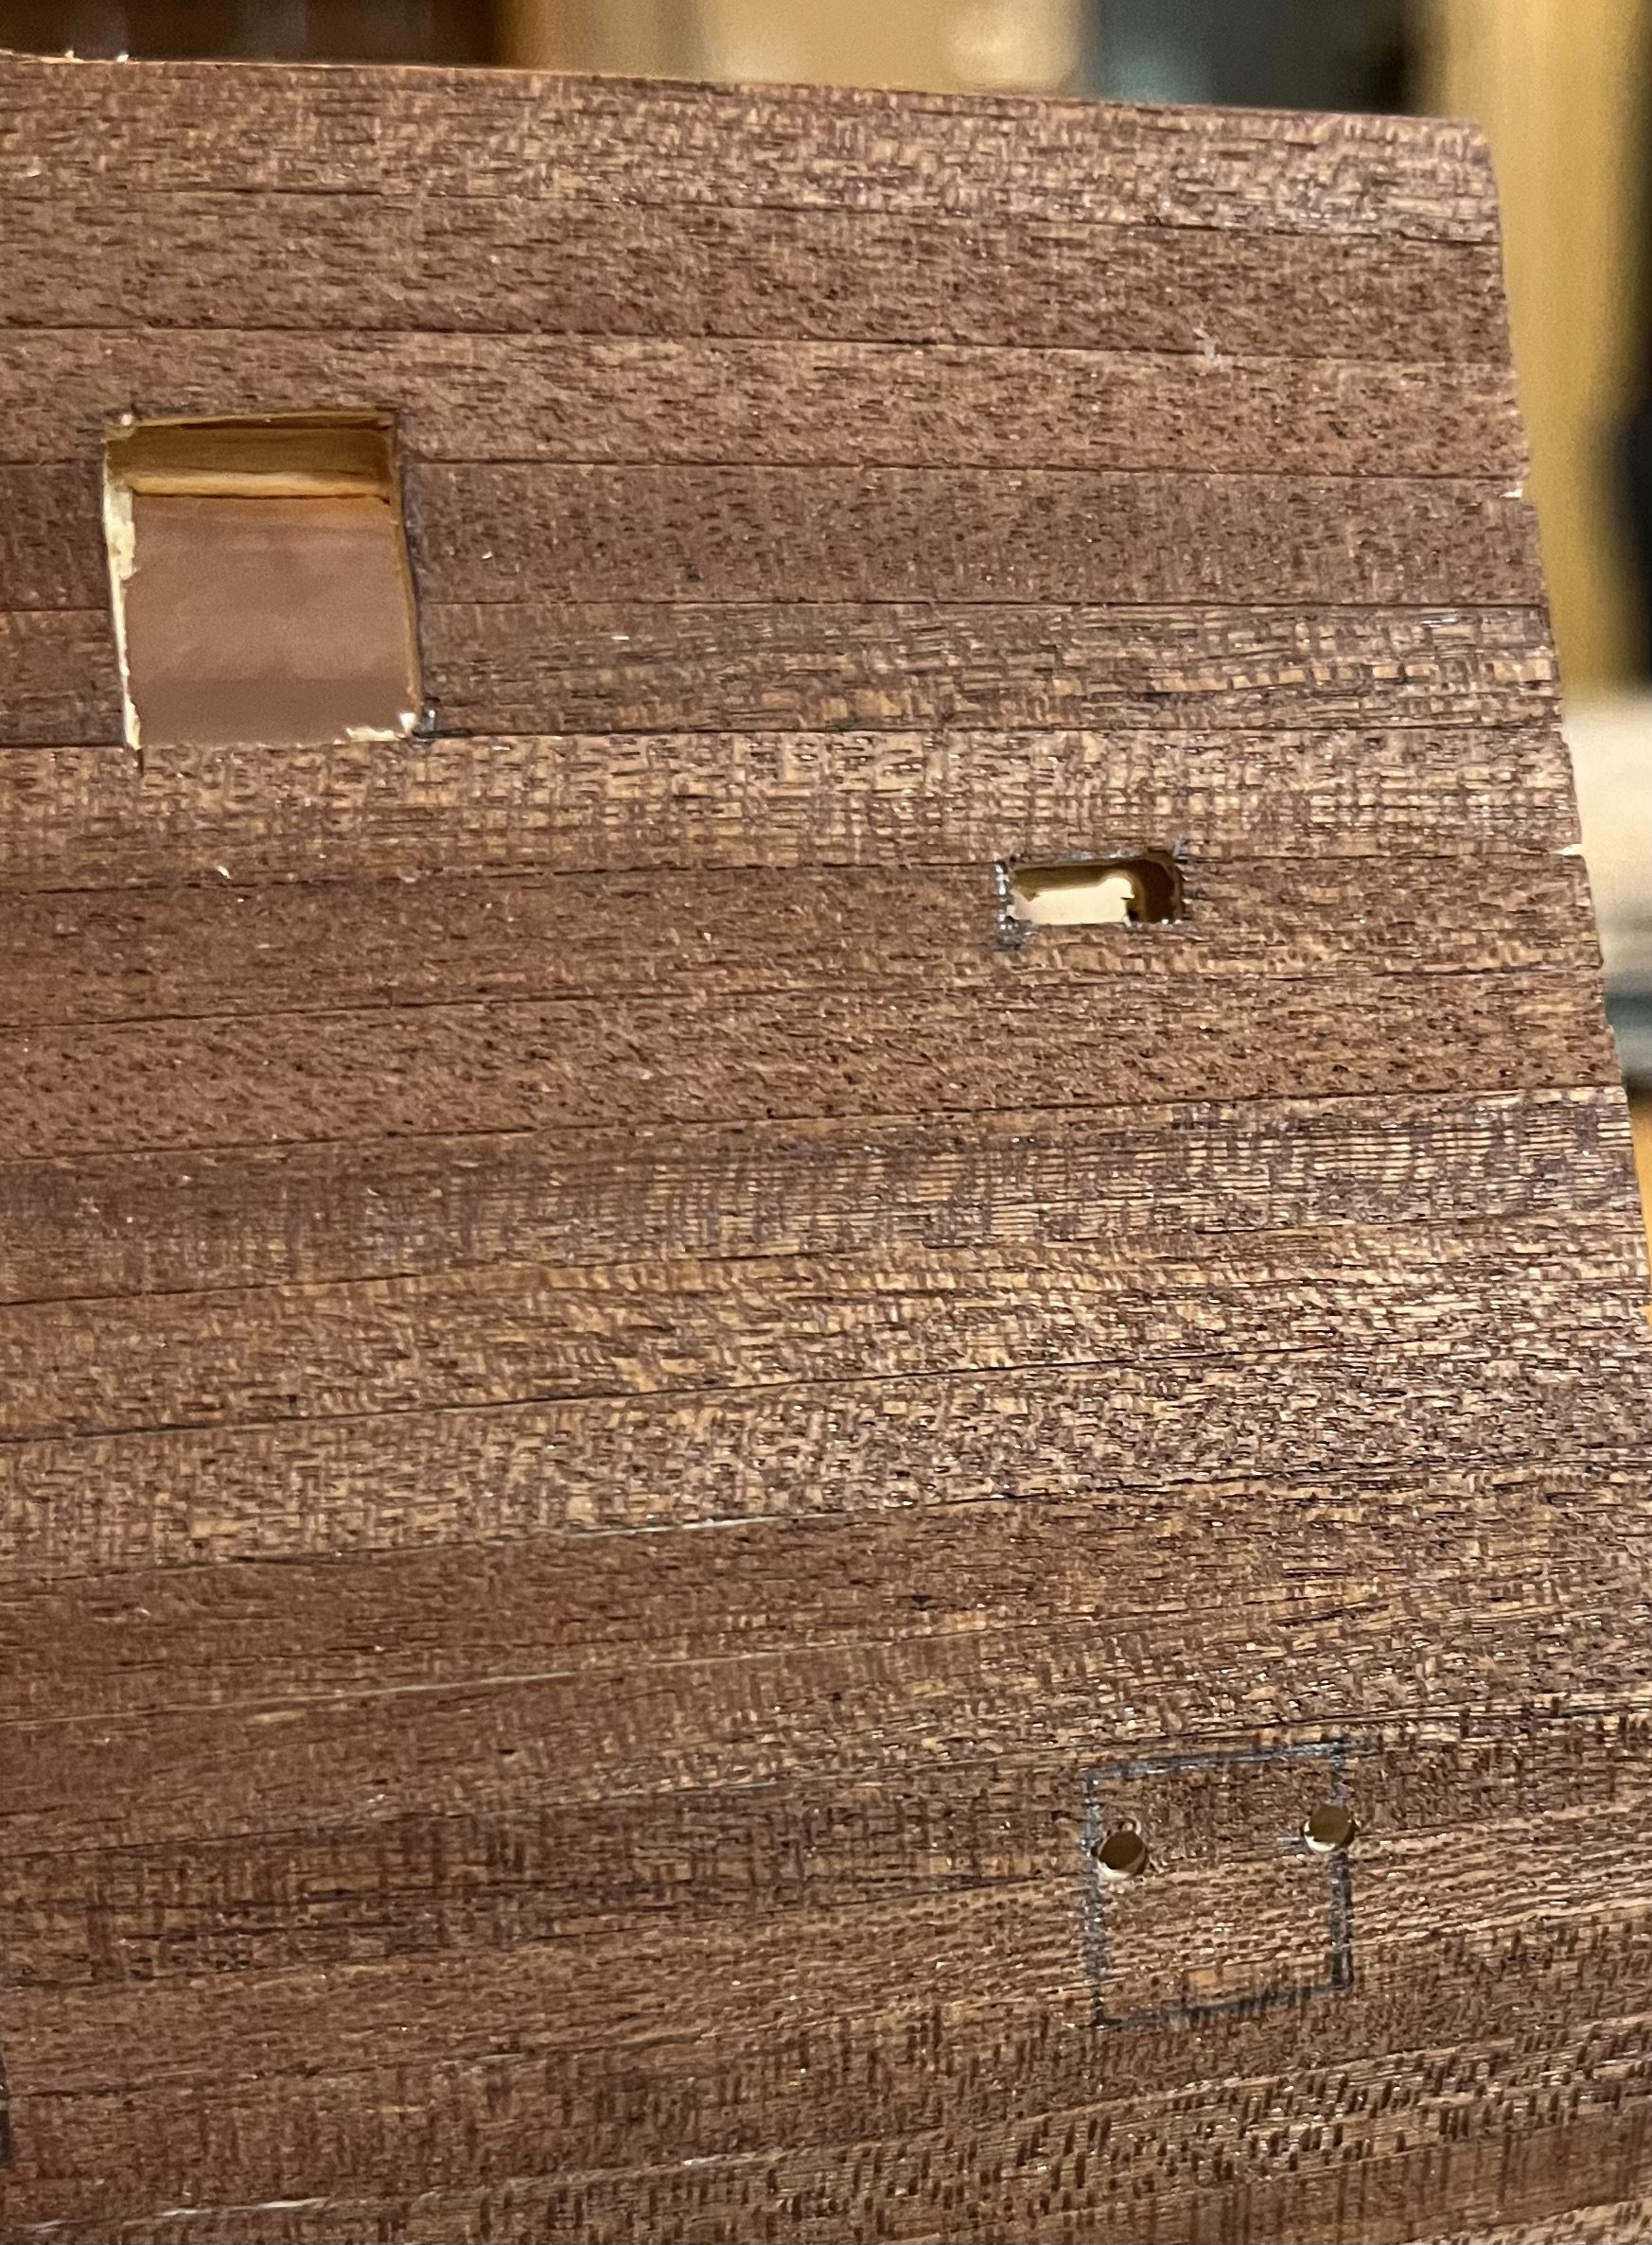
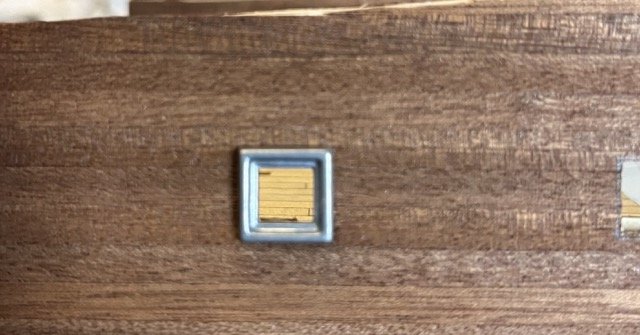
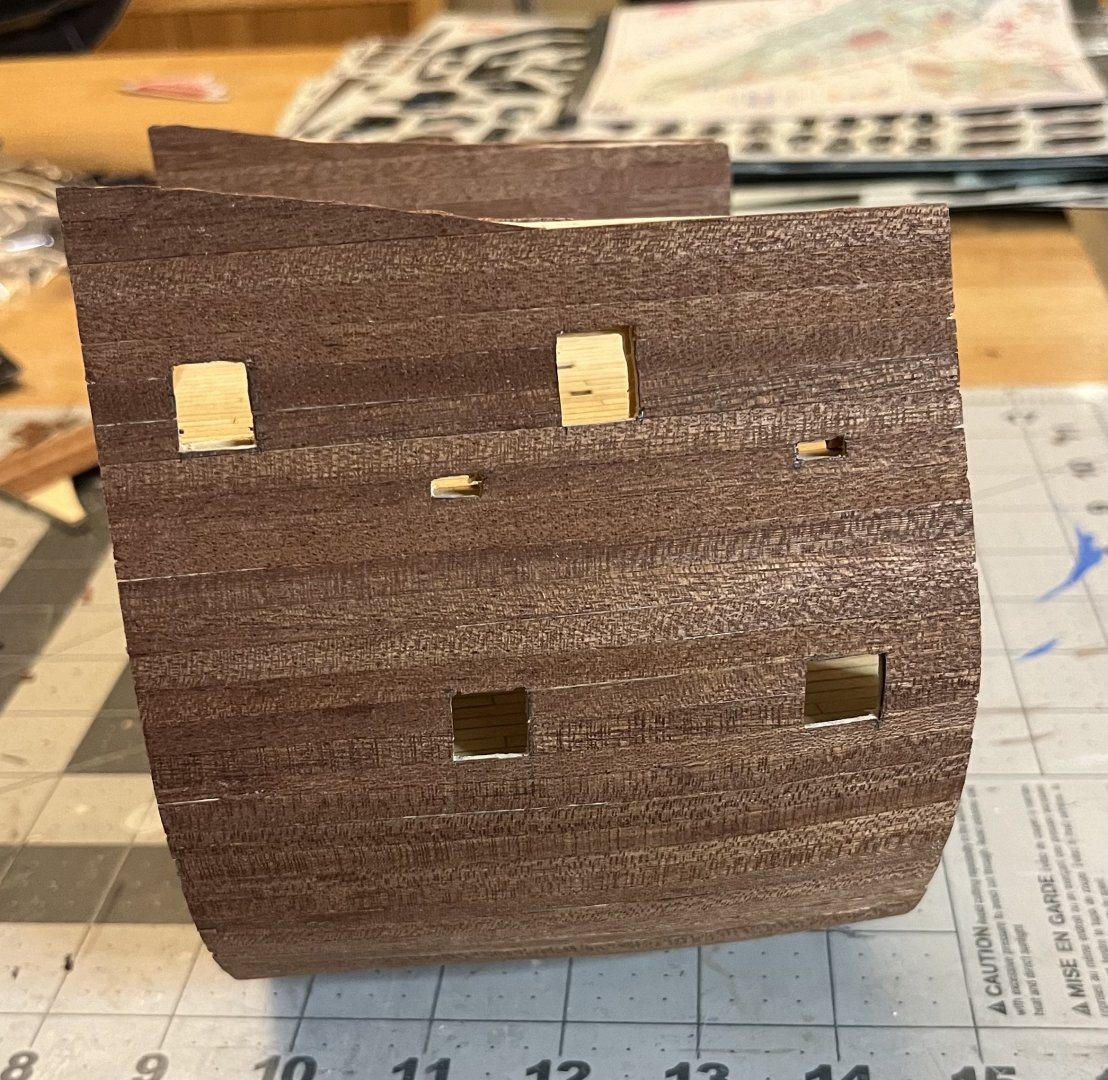
Continuing the work on the hull on the other side. Drilling pilot holes to cut out the gun ports seemed to work ok some times and not so good other times. I switched to a finger drill which was a better option than the dremel. As can be seen in the photos below, most of the holes were fine, but one caused some damage. Fortunately the frame seems to cover it all up, which I didn't expect. There isn't enough room to cut out the gun ports from inboard side because the knife handle is too long, so it must be cut through form the outboard side. This wasn't an easy task and caused some damage. I decided to build some frames to make it look cleaner. I tried to find images of gun ports from the inside of real and recreated ships and had a hard time finding any could be seen well. I only noticed one with a frame and couldn't really find anything on Spanish galleons. The inboard frames may not be historically accurate, but they look better. I don't like the shiny iridescence of the sapele decking and also wanted it just a bit darker so I experimented with some acrylic paint stains. I found that I liked plain ole brown the best. It is a subtle difference but I think it looks a lot better. Hopefully in the next update or two, once the cap rails are in place and the outboard gun port frames are in place it will start to look better.

-
Nice work on your first planking. You will definitely want the hull as smooth as possible so that the second layer of planking fits on nice and flat. Using some wood filler and sanding it down again will help with that. The gaps between the hull and the keel are exactly why I say to lay the keel first. You can use the second layer of planking to cover up those gaps. Had the second layer of planking be placed first, that wouldn’t have been possible. Again, a little wood filler in those gaps can provide a bit of structure for the second layer of planking. A small rabbet along the keel, especially on the bow and stern will help hold those second planks in place.
-
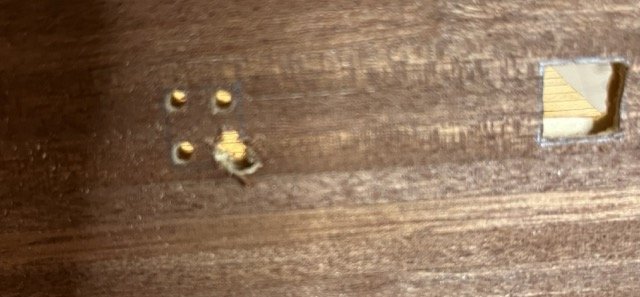
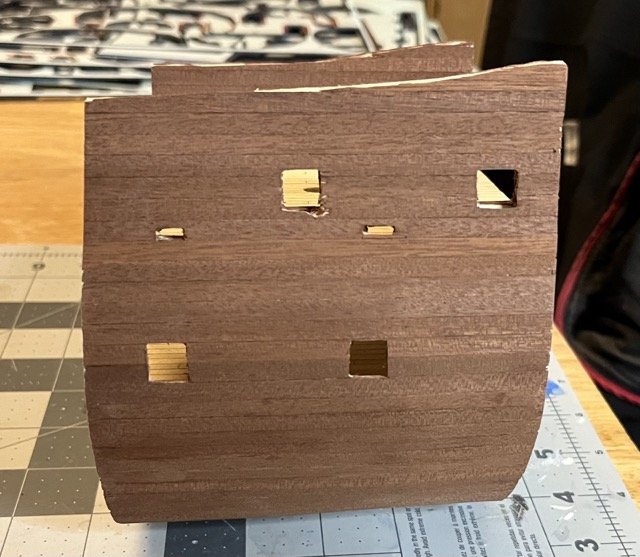
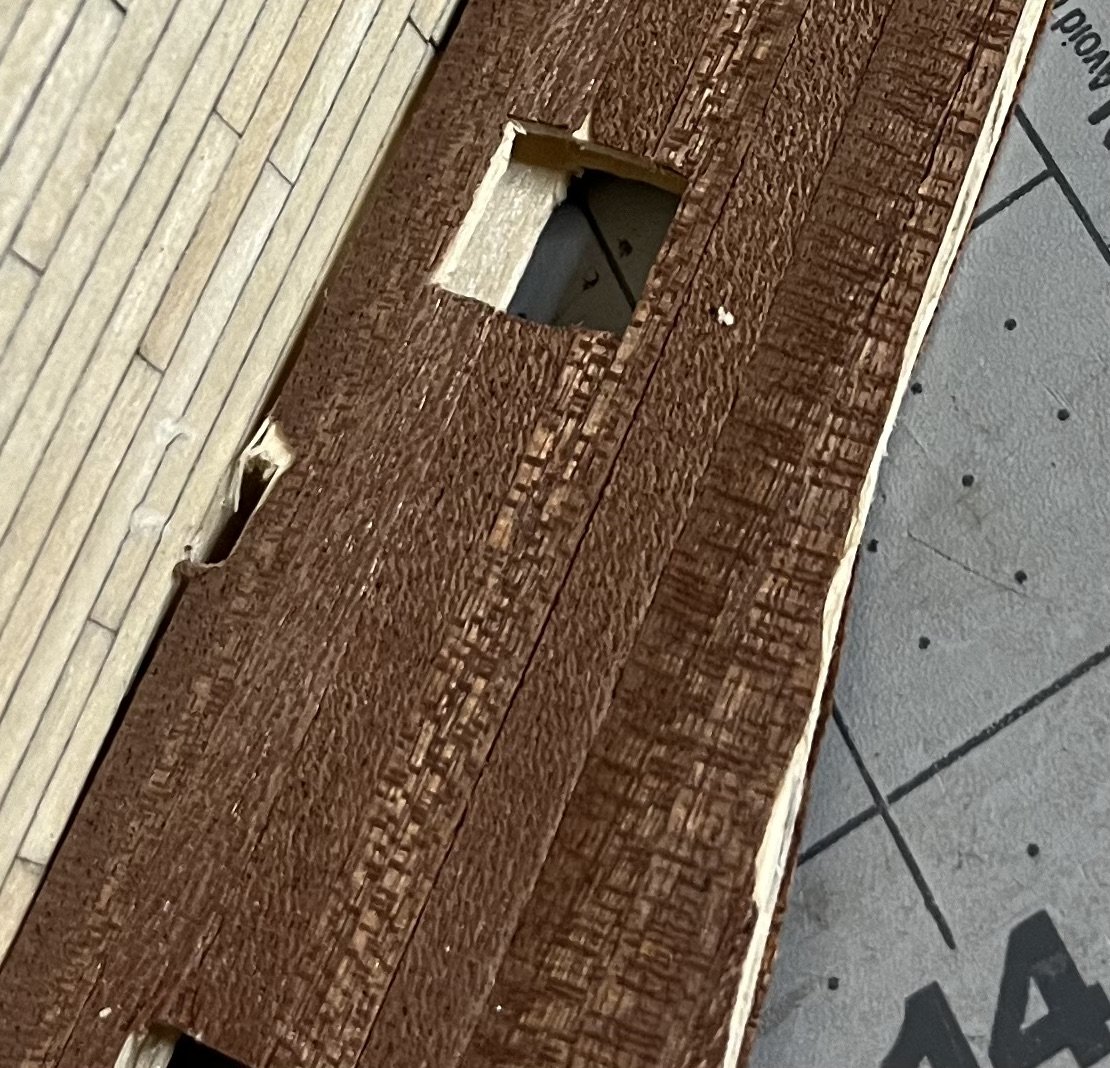
Cutting the Freeing ports and gun ports on the starboard side is a little tricky through the sapele since it is so brittle. In the future I will cut the holes before placing any sort of veneer to avoid breakage like this. Measuring the gun ports and freeing ports on the weather deck seemed to match with the instructions almost exactly, but on the gun deck, I didn't think they looked right. The line is based on the measurements in the instructions. The two drill holes are where I estimated where they should be after doing some measurements of my own. I think the drill holes are right where the bottom of the gun ports should be. All six holes cut, sanded and filed down. There will need to be a little more fine tuning after the planking patch work dries, which I will do when I add the frames to the gun ports. I may make small frames for inboard sides of the gun ports on the weather deck to make sure everything looks nice and square. I would definitely suggest to anyone else building this model to cut the gun ports and freeing ports out prior to placing the second layer of planking. Also carefully drill a couple of pilot holes in each corner of the gun ports to make cutting them out easier. The freeing ports are too close to the deck so I wouldn't recommend drilling there.

-
Aloha from North Carolina
SiriusVoyager replied to Charles Roseberry's topic in New member Introductions
Welcome to MSW! -
I have always loved Arleigh Burk class destroyers and you have definitely done her justice. Great model!
- 97 replies
-
- 3
-
-
- Curtis Wilbur
- I Love Kit
- (and 2 more)
-
@tmj that is some great info! I will definitely be using this info in the future! I plan finishing the wood with shellac. I’ll definitely be trying a few things on scrap to see what I like. Thanks again!
-
Thanks. I will keep that in mind. I hadn’t thought that that could make a difference in appearance.
-
Thanks for the heads up. I had a similar problem with the Palamos now that you mention it. I have some brass tape that should work in a pinch.
-
Thanks! I will give that a try
-
Thank you @tmj. I am specifically talking about the really thin strips used as a veneer over the first level of planking. Looking at it more, I think it is the iridescence that doesn’t look quite right to me. Darkening it just a bit with a stain may be enough to cover that iridescence. I’ll look into the veneers on eBay for future models as I have at least one in my stash with those strips.