SiriusVoyager
-
Posts
502 -
Joined
-
Last visited
Content Type
Profiles
Forums
Gallery
Events
Everything posted by SiriusVoyager
-
 Just thought that I would share that Rigging Period Ship Models by Lennarth Petersson is on sale for $2.99 right now. The only catch is that it is an ebook for the Nook. If you don't have a Nook Barns & Noble have free Nook apps for phones and tablets.
 -
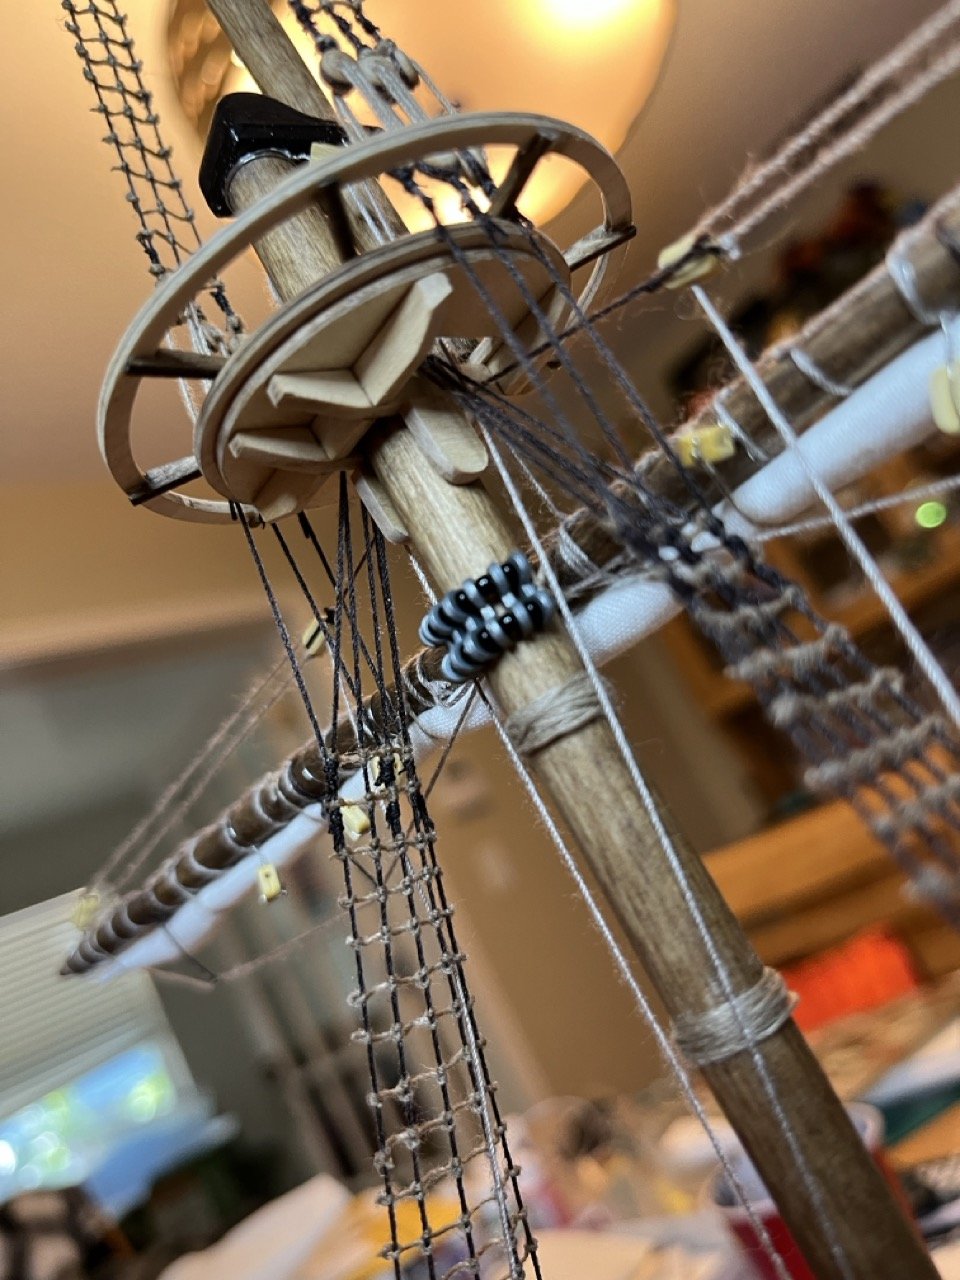
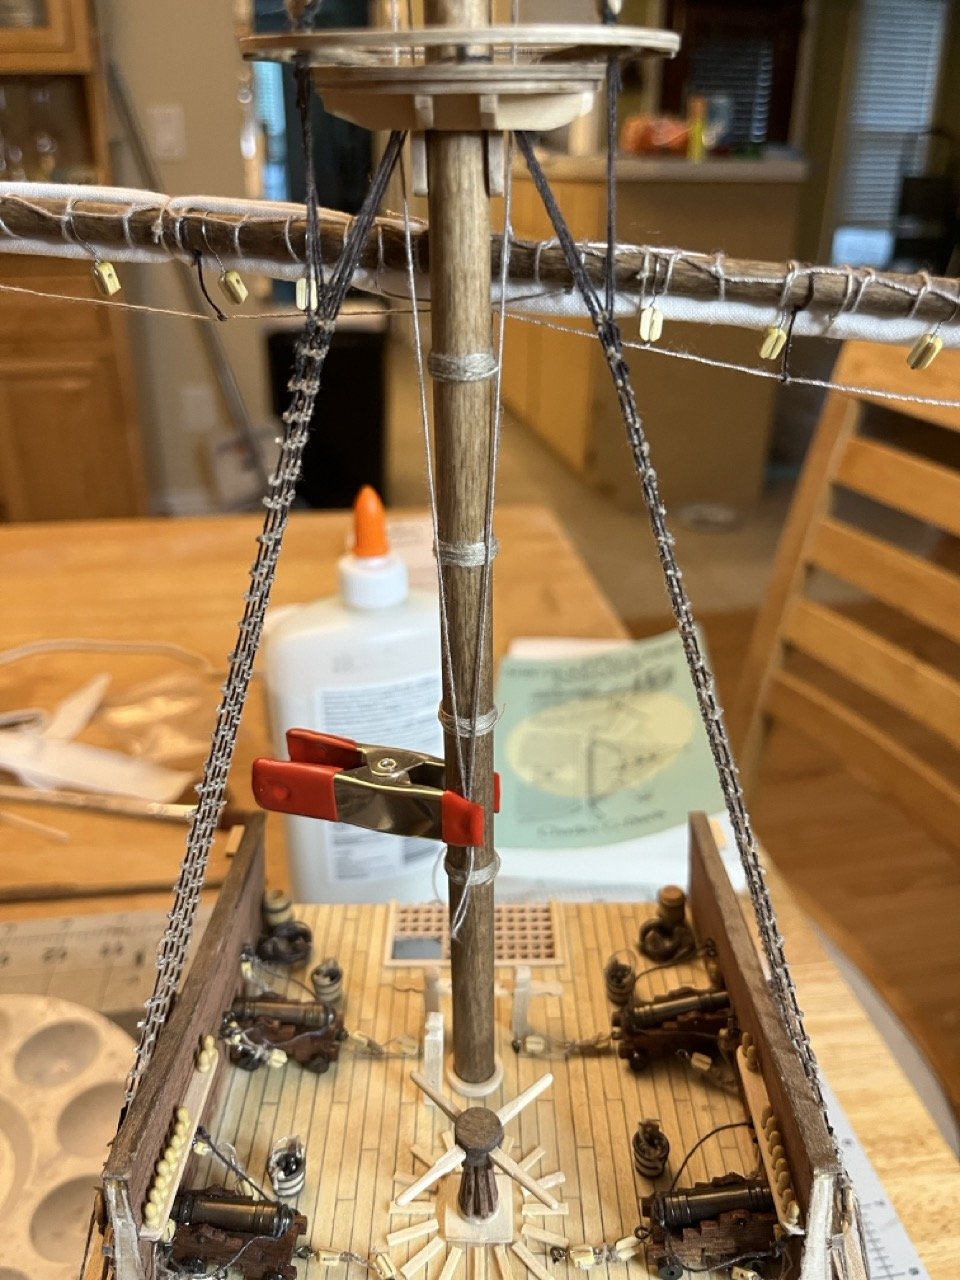
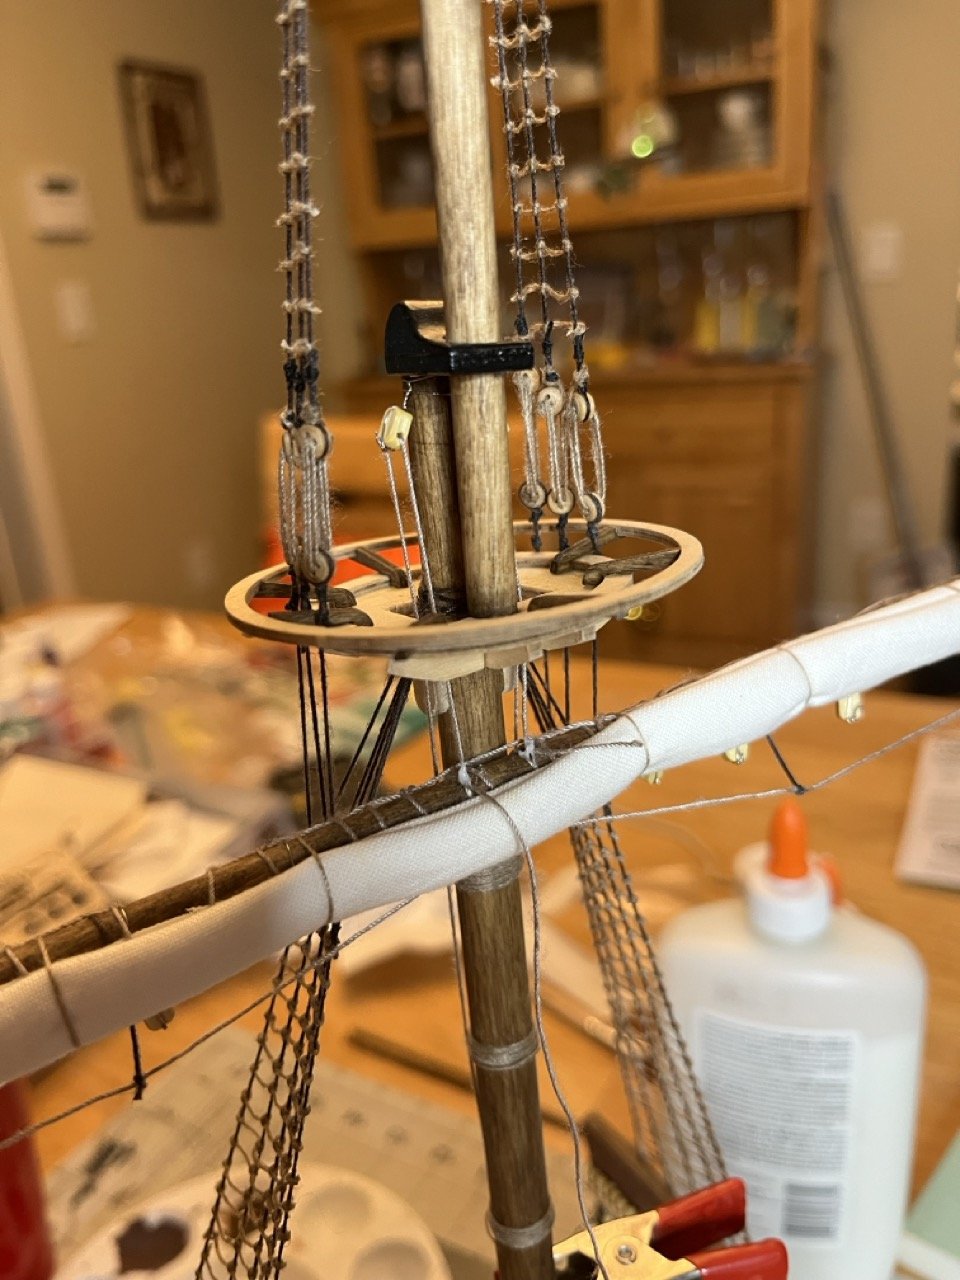
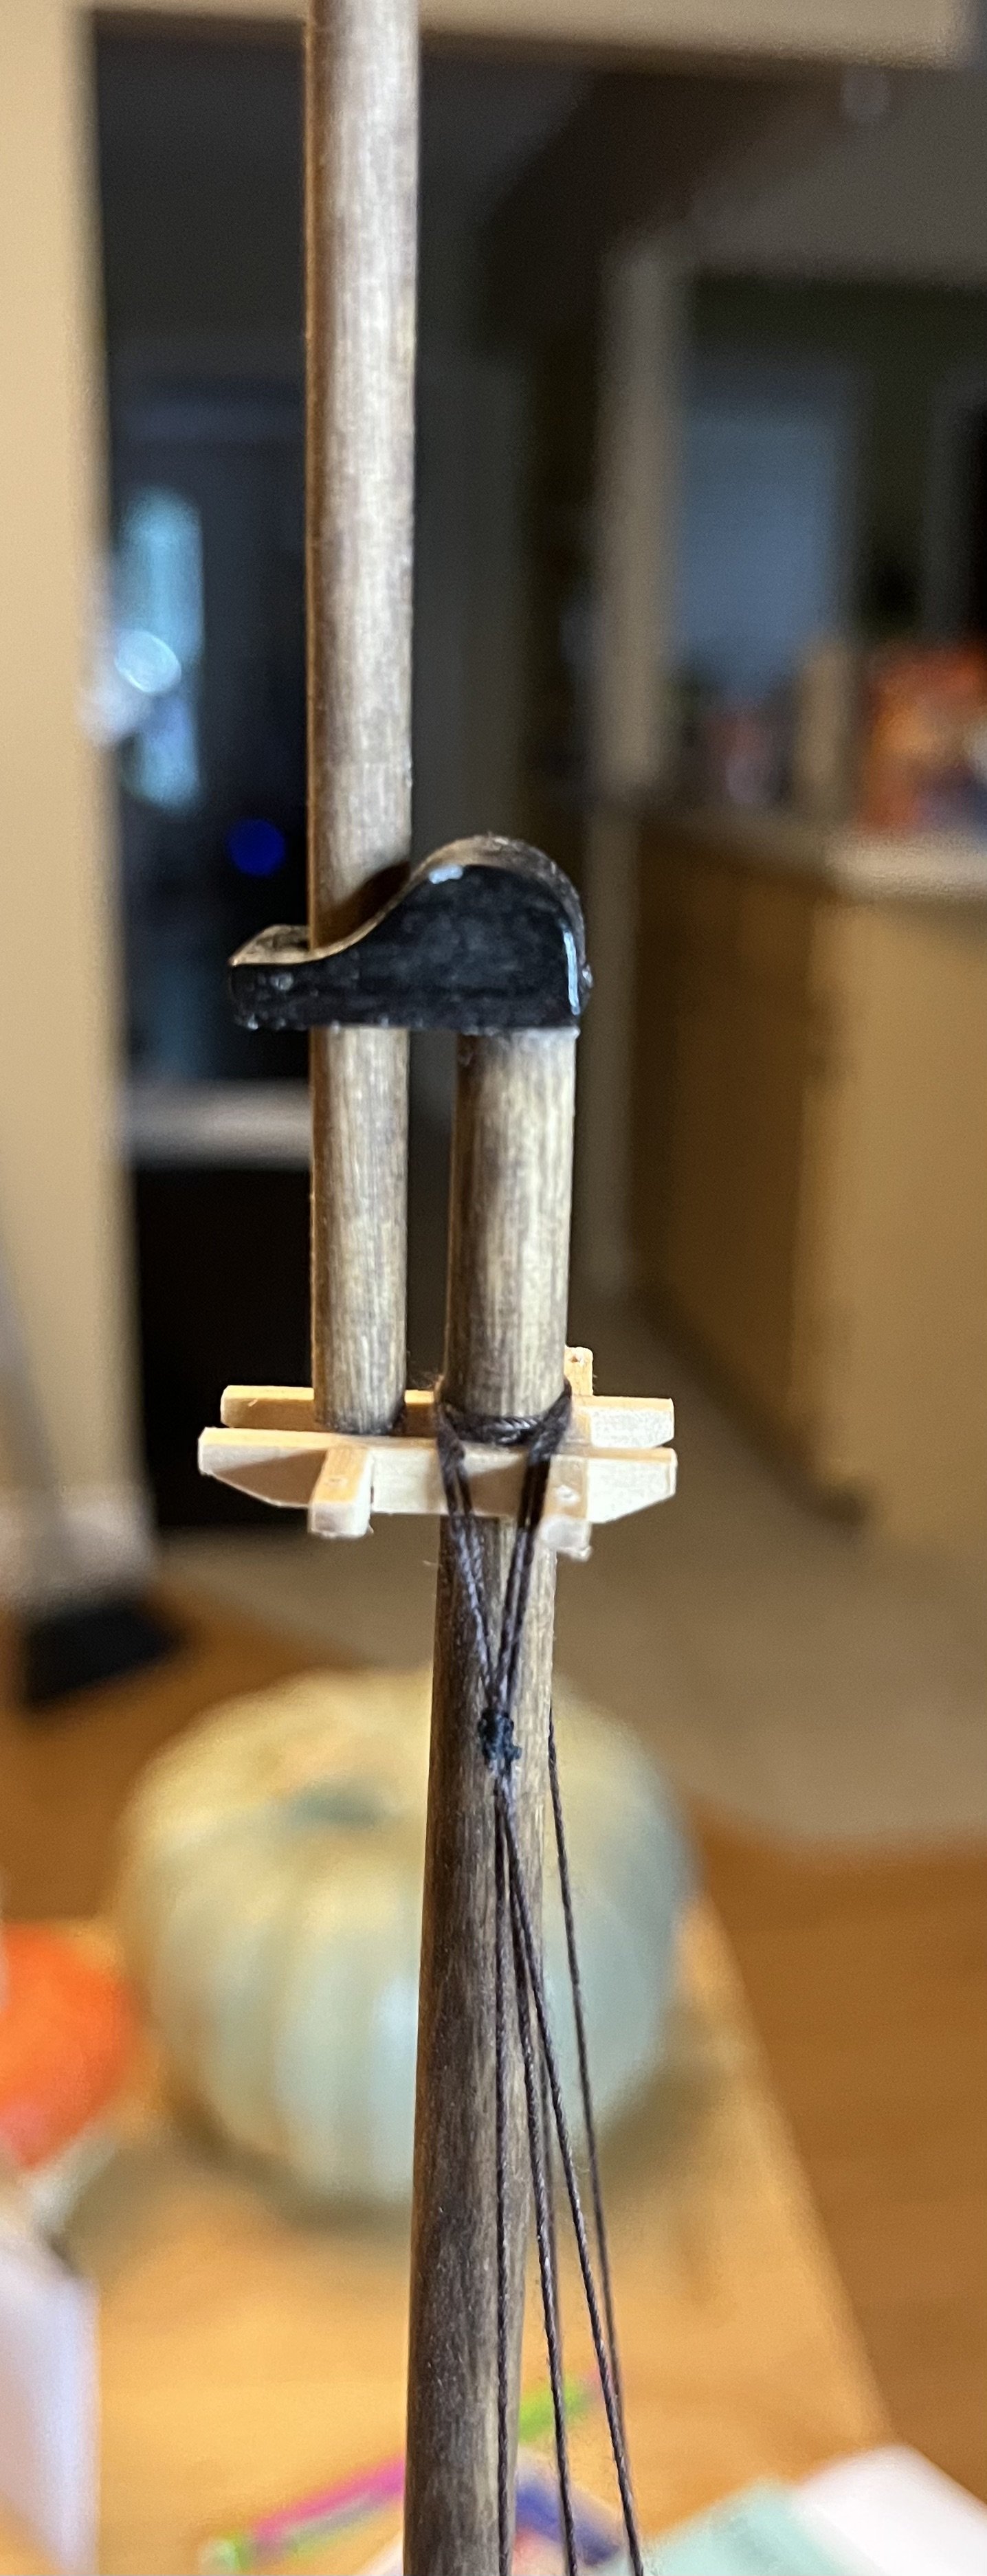
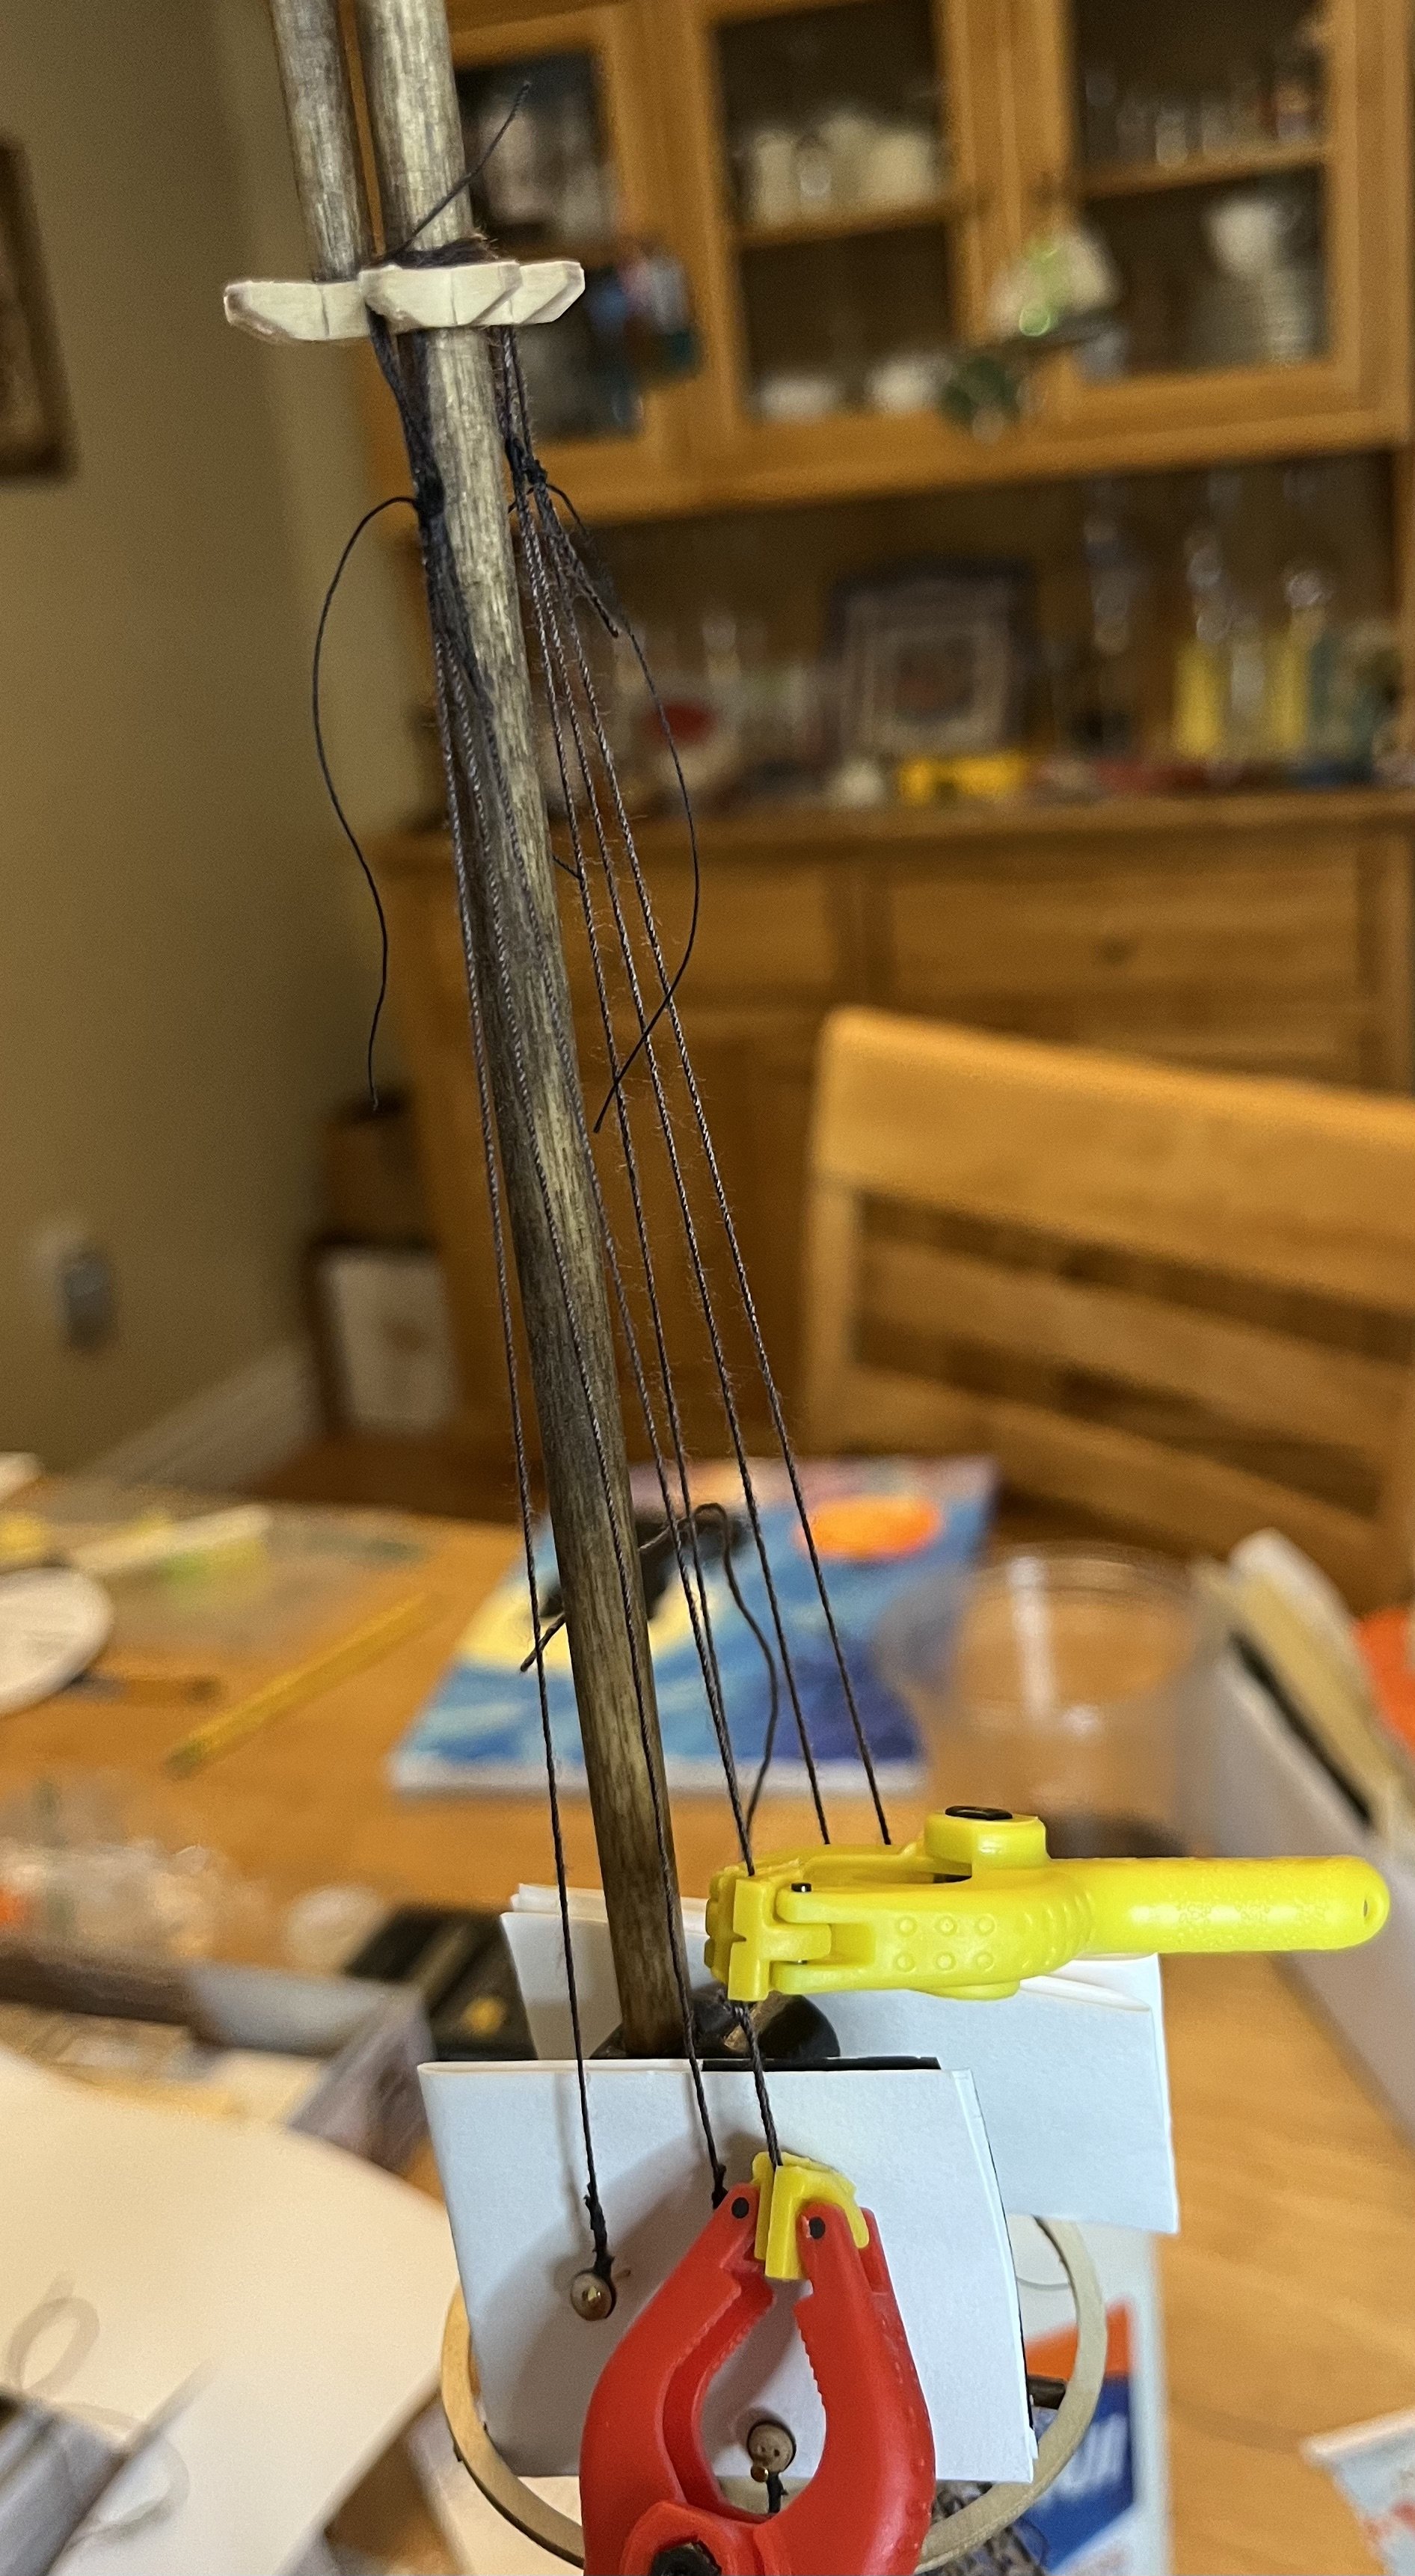
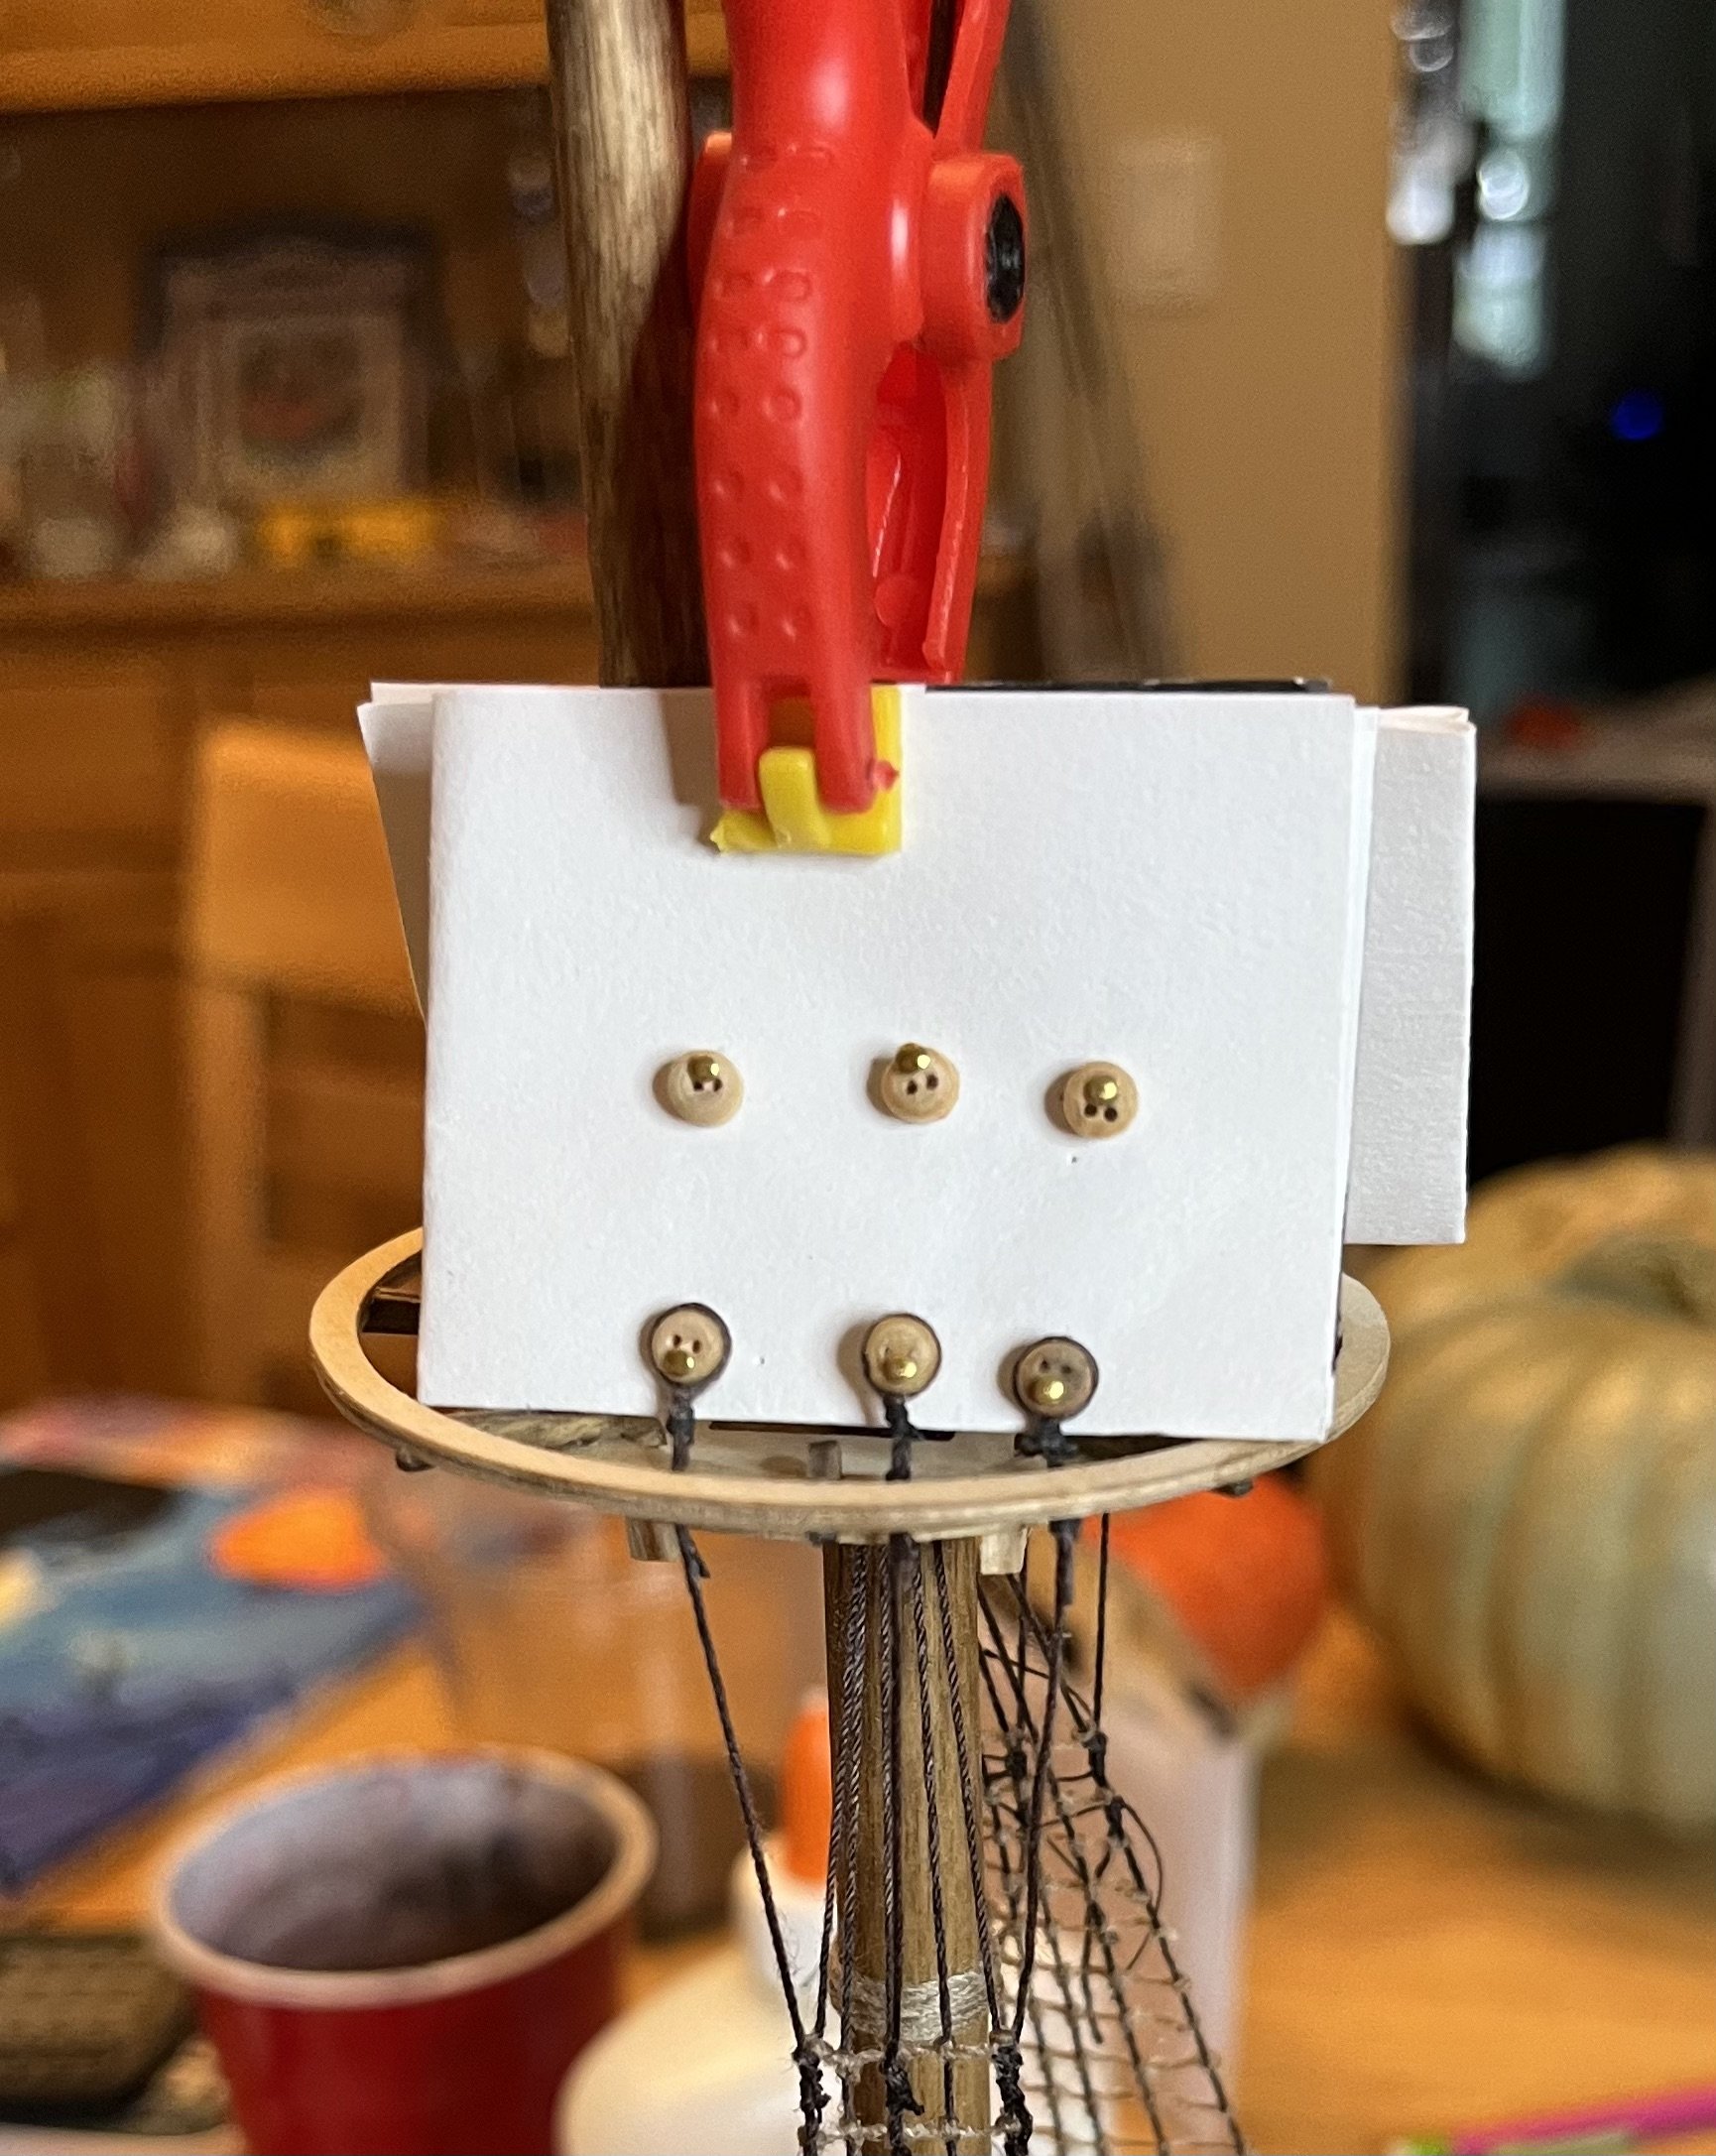
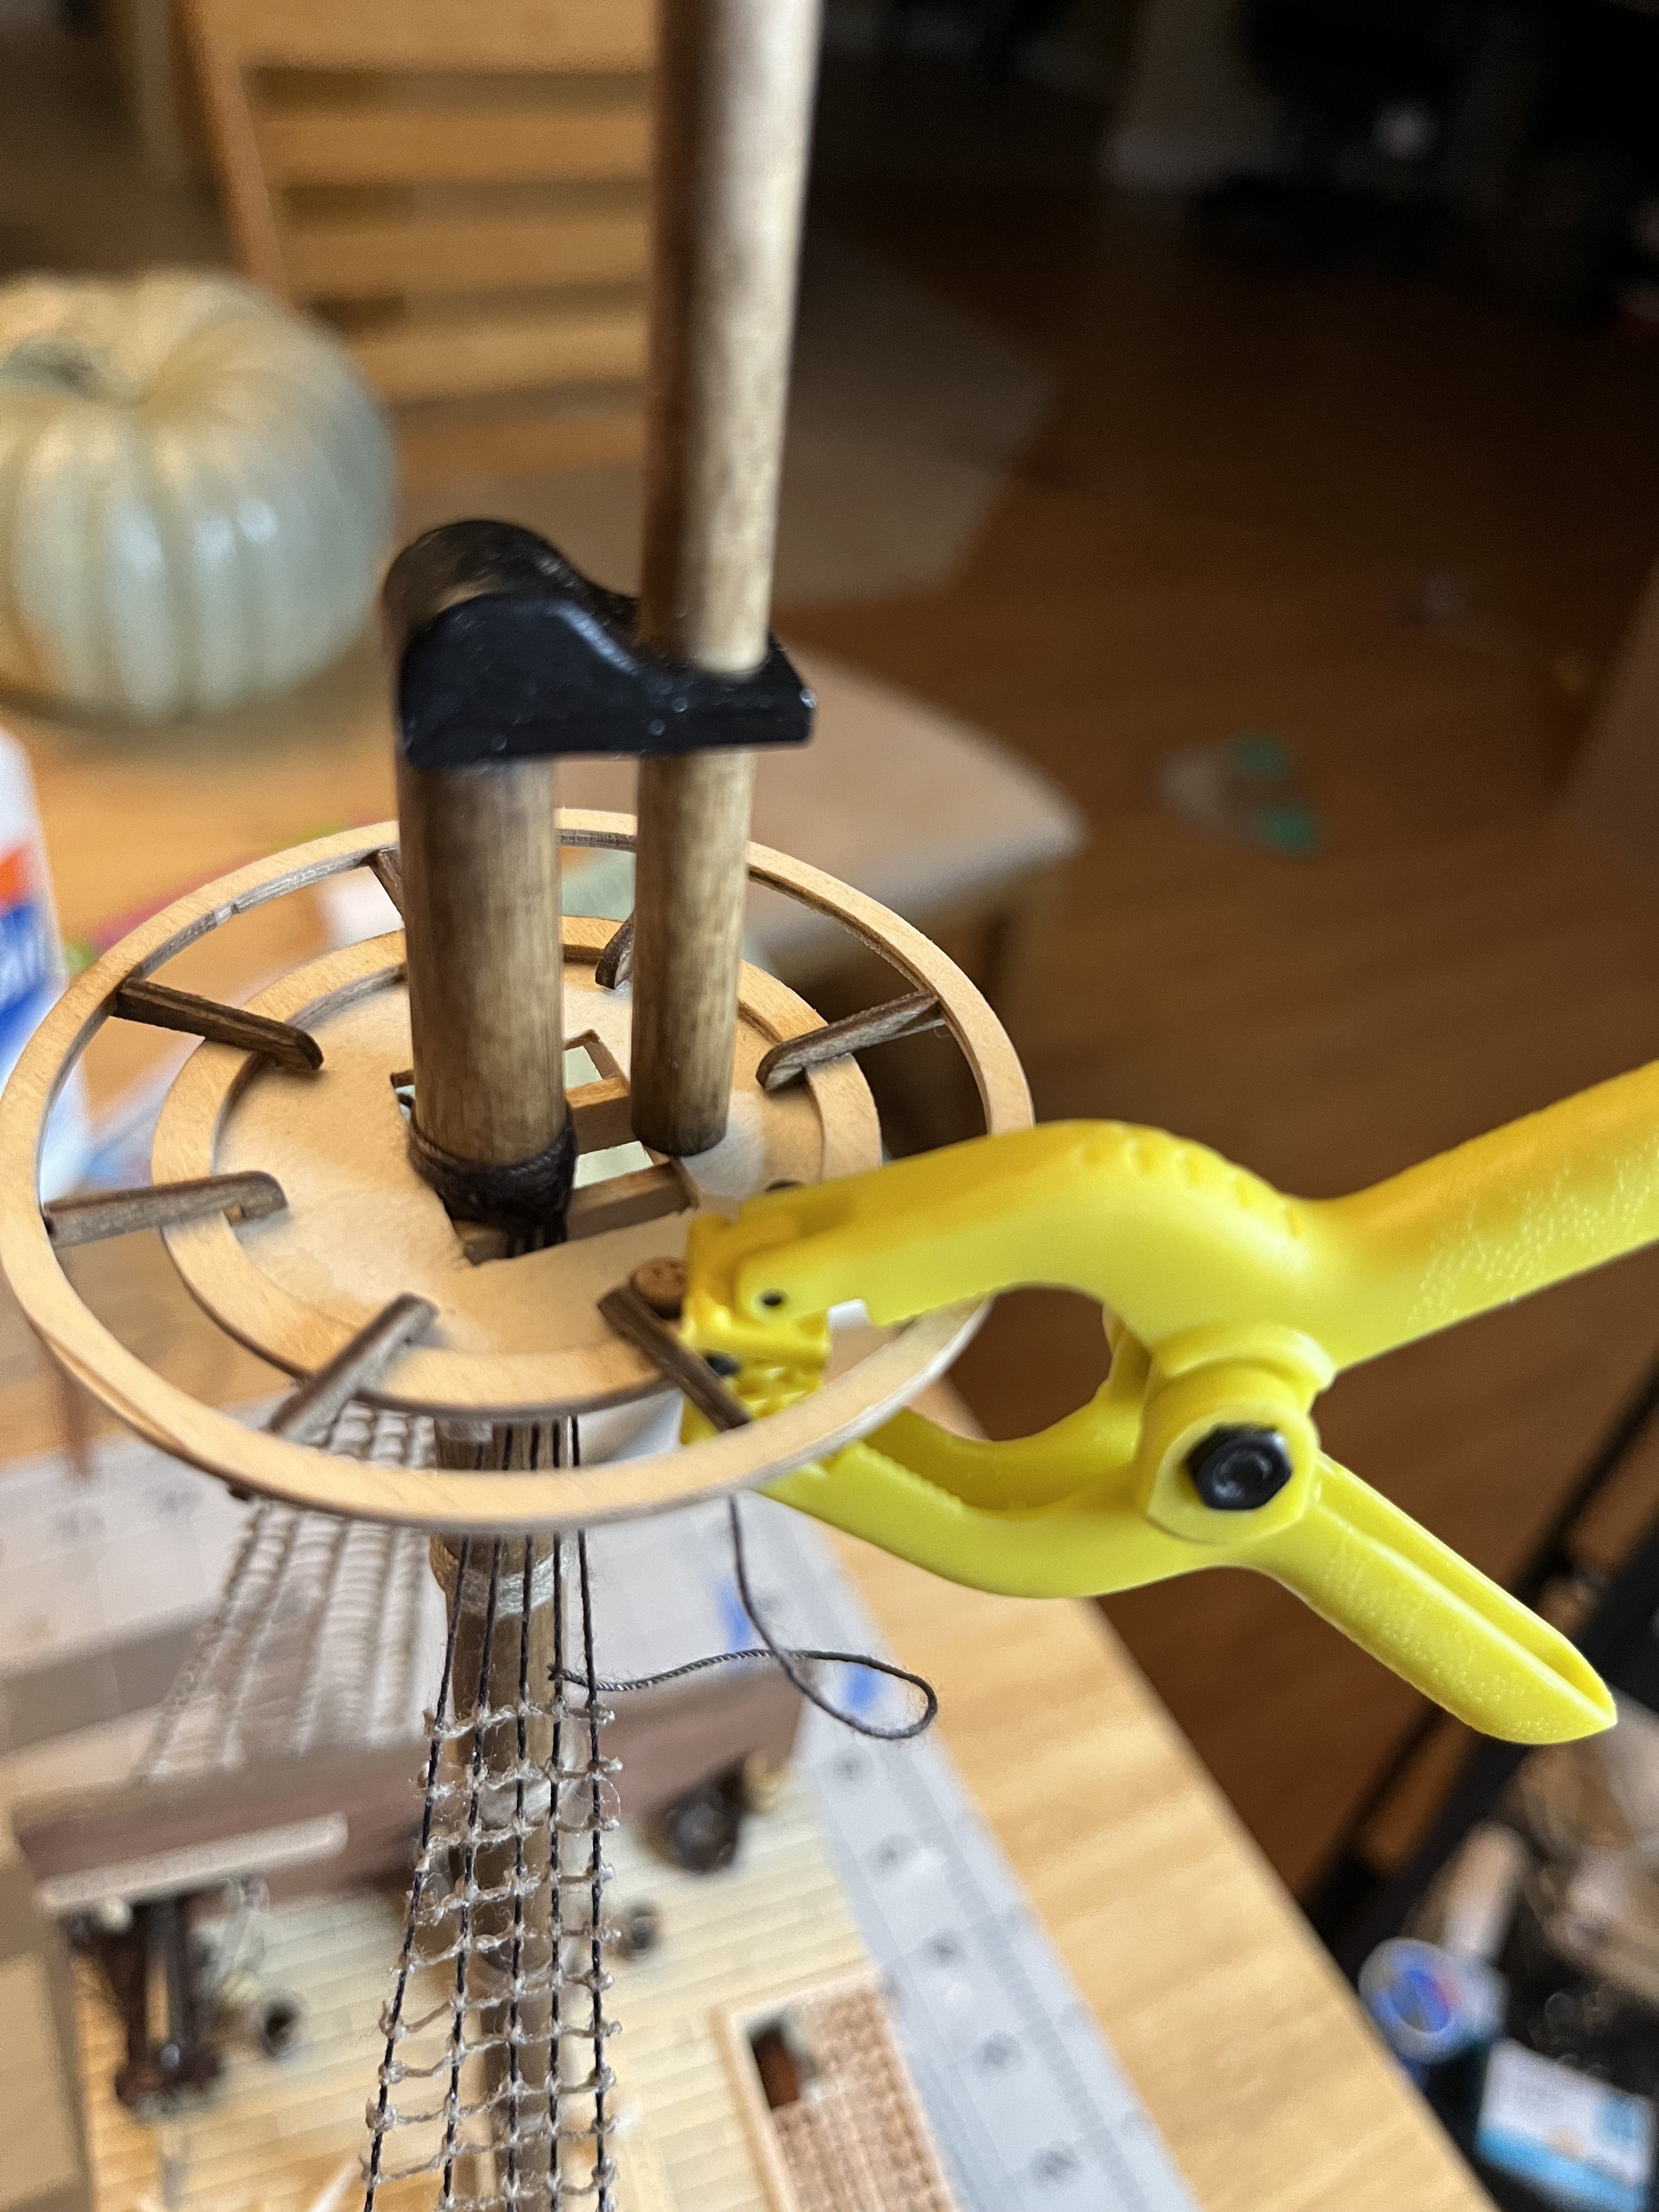
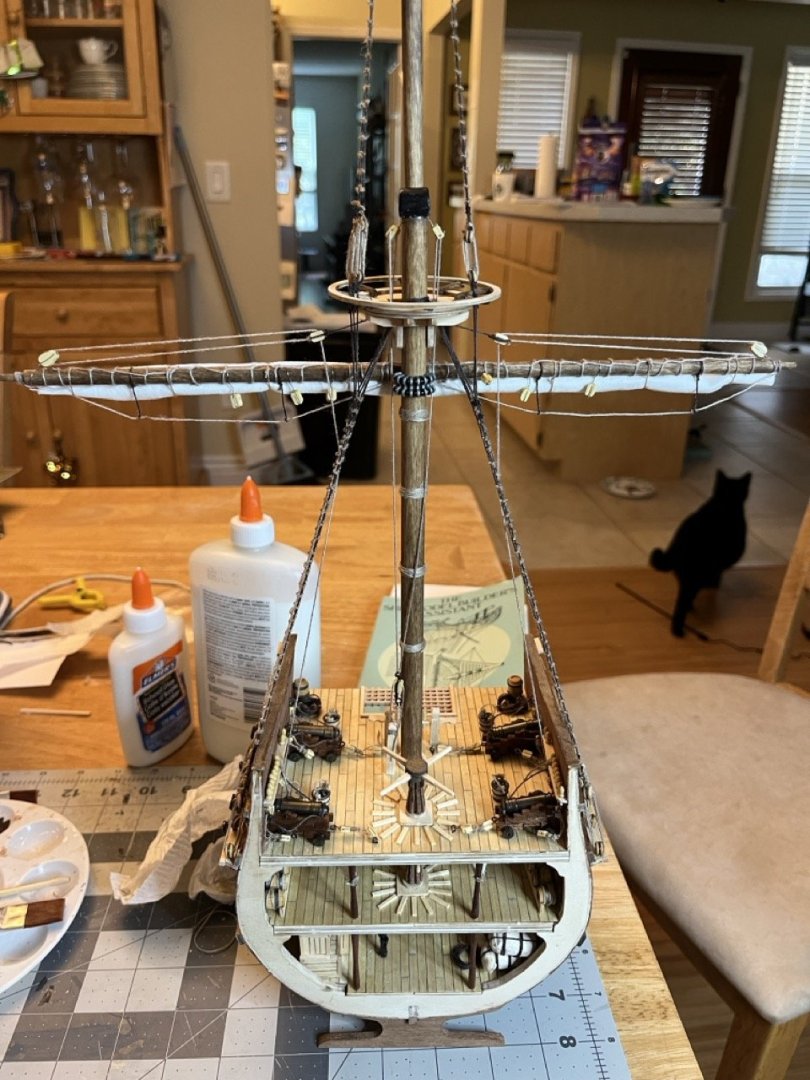
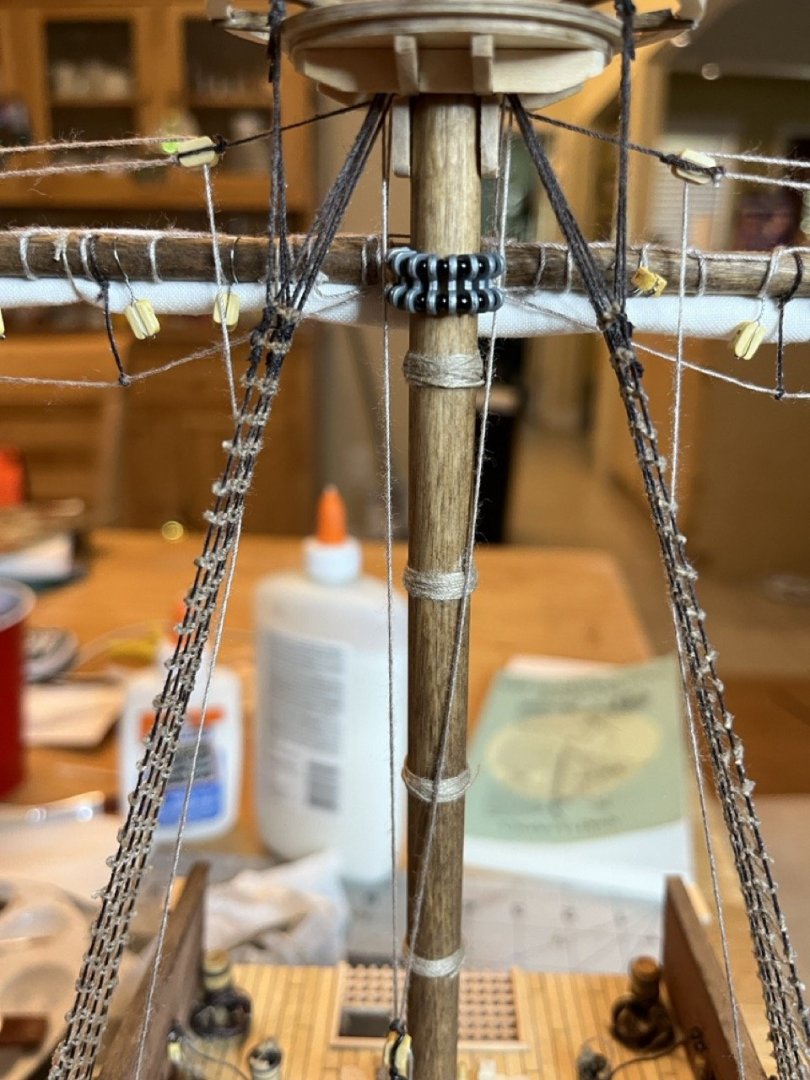
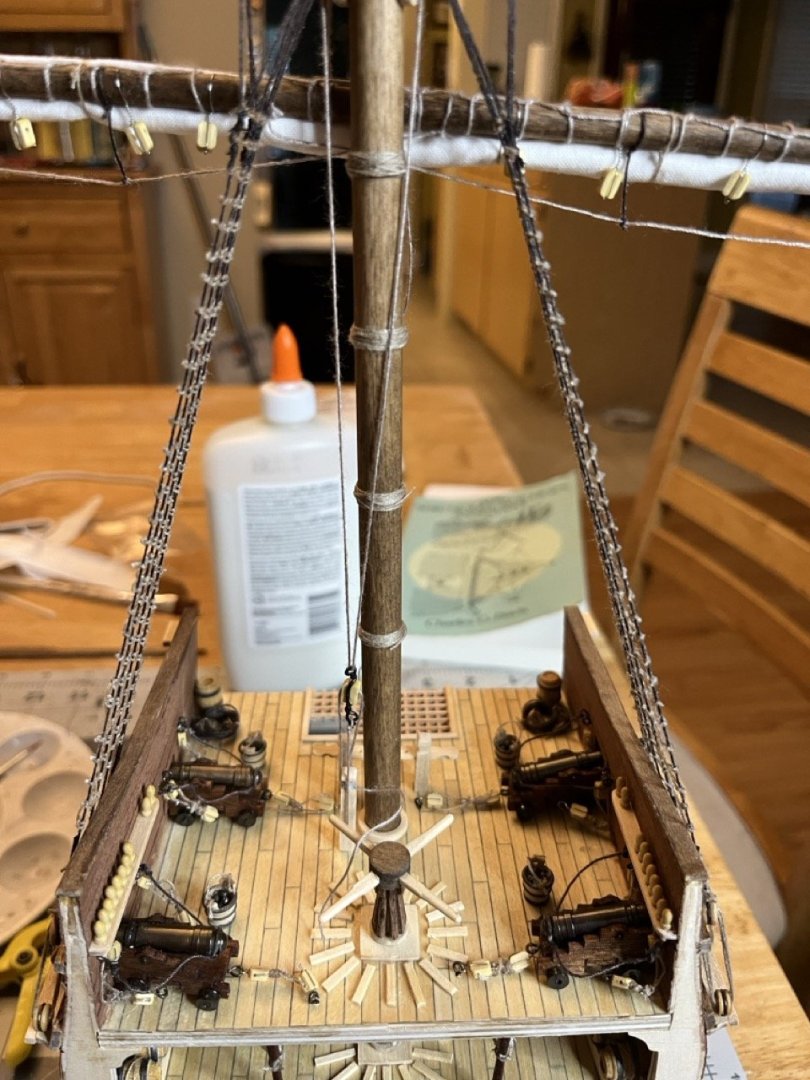
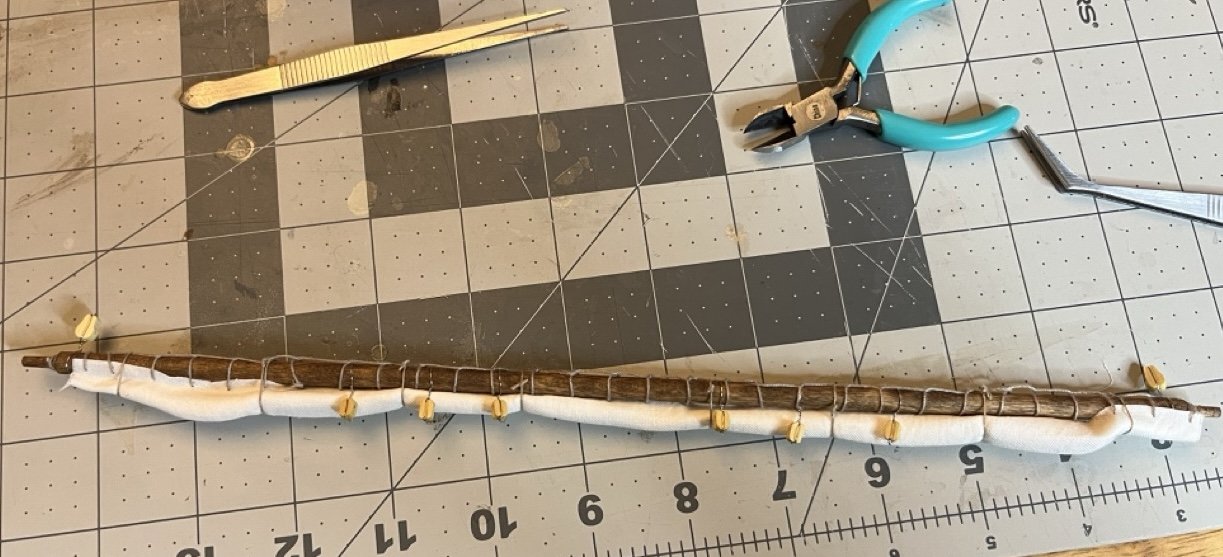
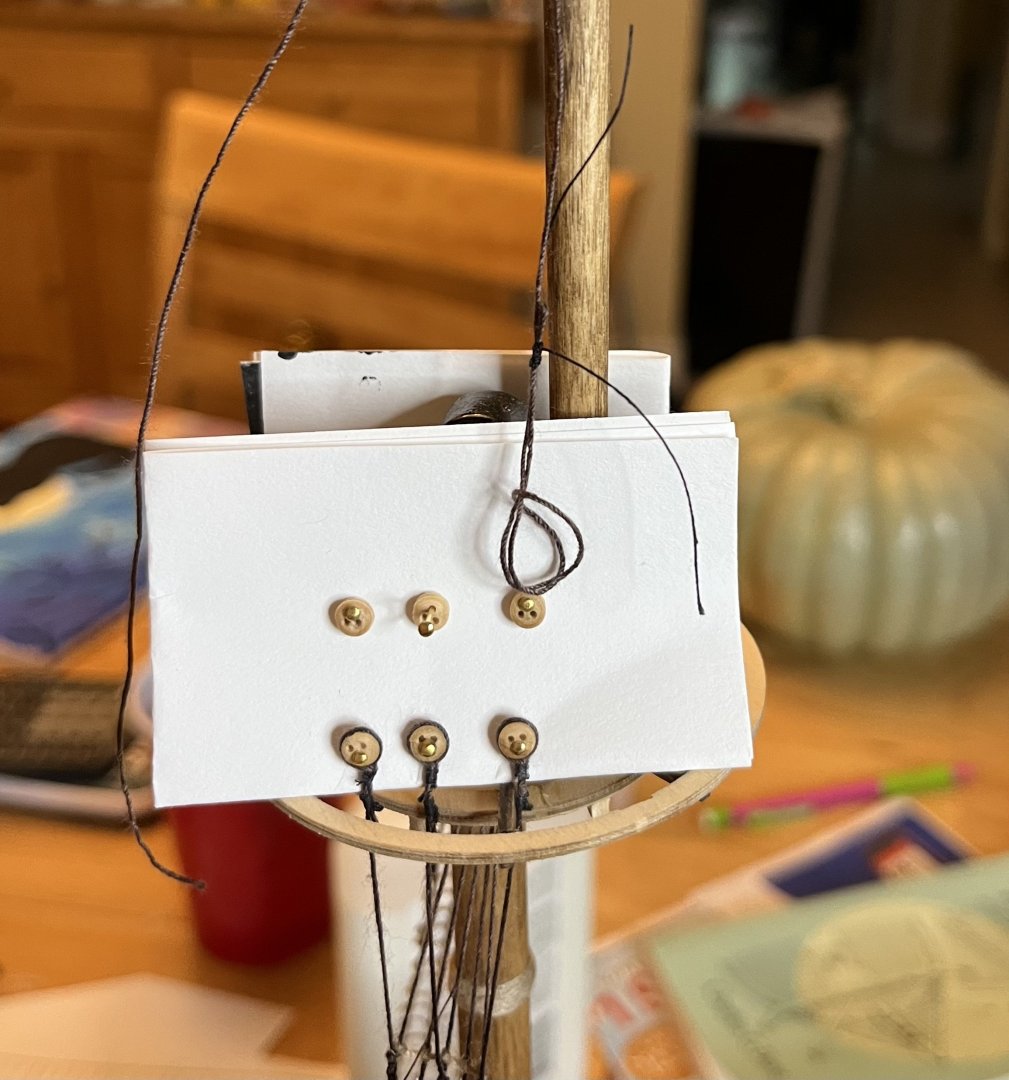
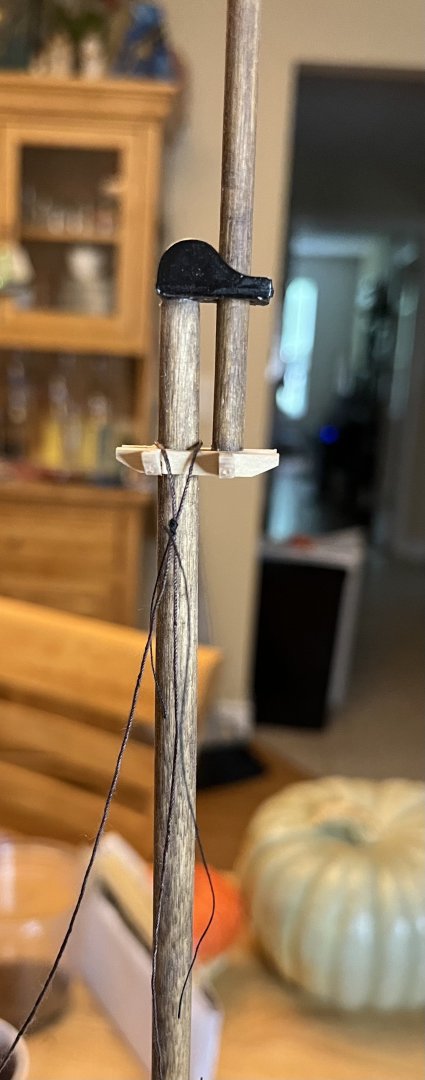
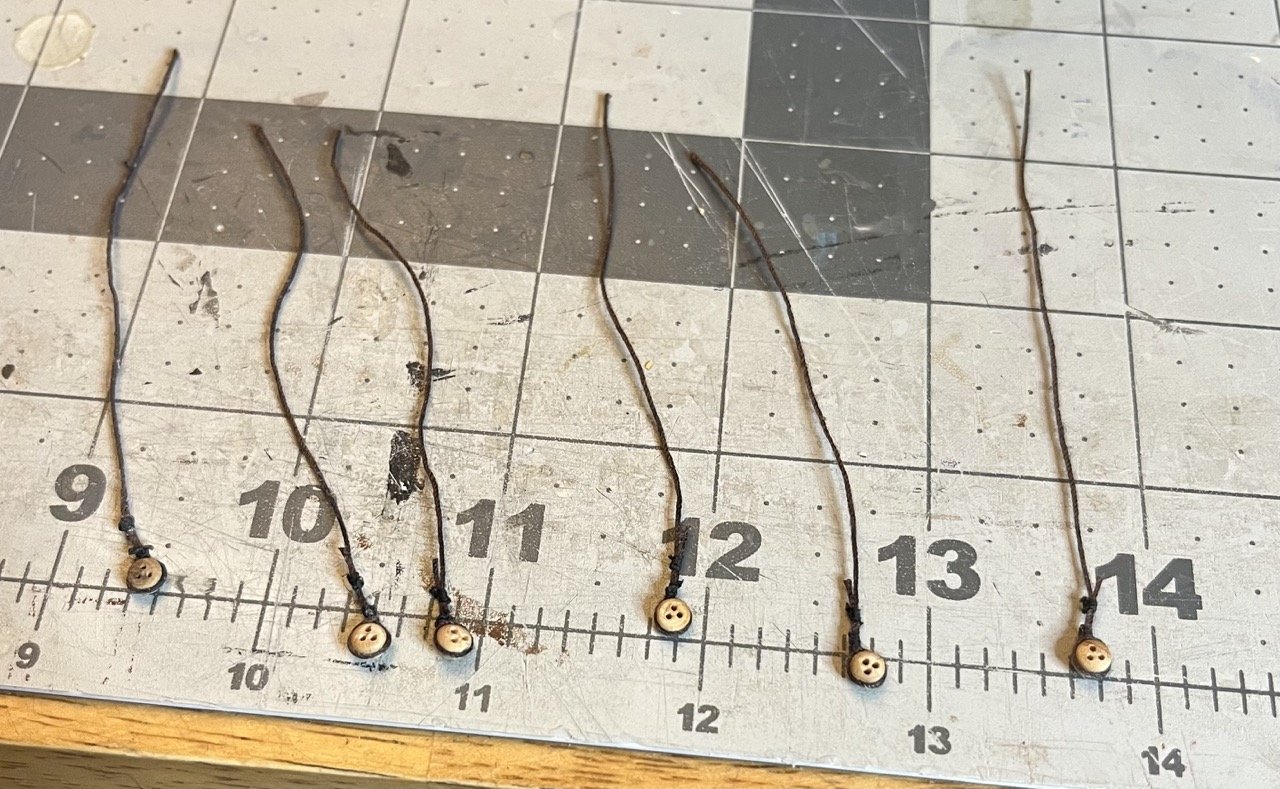
It is finally time to raise the main mast. The halyard blocks are held up by wire, which I am pretty sure is not historically accurate. I am not even sure if a halyard on the main mast is historically accurate. I have seen conflicting information on that. I was concerned that the blocks would slide down the mast, but they actually seem to be holding up ok. Trying to hold the mast up while adjusting the length of the halyard was a bit tricky, but clips helped. The cross jack lifts are next. There is little guidance from the instructions on how tie off the blocks or how to attach them to the mast. I ended up tying them to the trees. The lighter colored line coming off of the end of the block is tied to the darker line that is tied around the block. The instructions make it look like the two lines might be joined somehow on each end of the block, but it is hard to tell in the low resolution photo. I couldn't position the camera to see the lines tied to the tree. Lines tied down to the belaying pins. I think I should have used more string to have large amounts of coiled line. The mast couldn't realistically be lowered with that little line. The parrel beads were tricky since there wasn't an easy way to hold them tight to the mast. I essentially had to barely clip them onto the side and tie off each end loosely, then tighten each side up. I am pretty sure that they aren't rigged realistically and the instructions give no guidance on how to rig them, so I simply tied them to the mast. The cat is not impressed.


- 86 replies
-
- 2
-

-

-
- San Francisco
- Artesania Latina
- (and 2 more)
-
Greetings from a clueless Patrick O'Brian fan
SiriusVoyager replied to Galkar's topic in New member Introductions
Welcome to MSW! The amount to learn can be overwhelming. I find that the best bet is to learn as you go. I found that trying to learn too much too quickly just meant that I was taking in a lot of info that was meaningless to me at the time, and thus not retained. -
Welcome to MSW! I started modeling as an adult and still have questionable results but don't let any that stand in your way. Just enjoy what you are doing!
-
This is by far the most simple way. If you save the photos to files rather than the camera roll, the iphone can quickly convert them to jpg. It takes a few steps though and may be more trouble than you want to deal with. As a side note, apple uses HEIC files because they take up less space, so by saving photos as jpg you will fill up your memory more quickly.
-
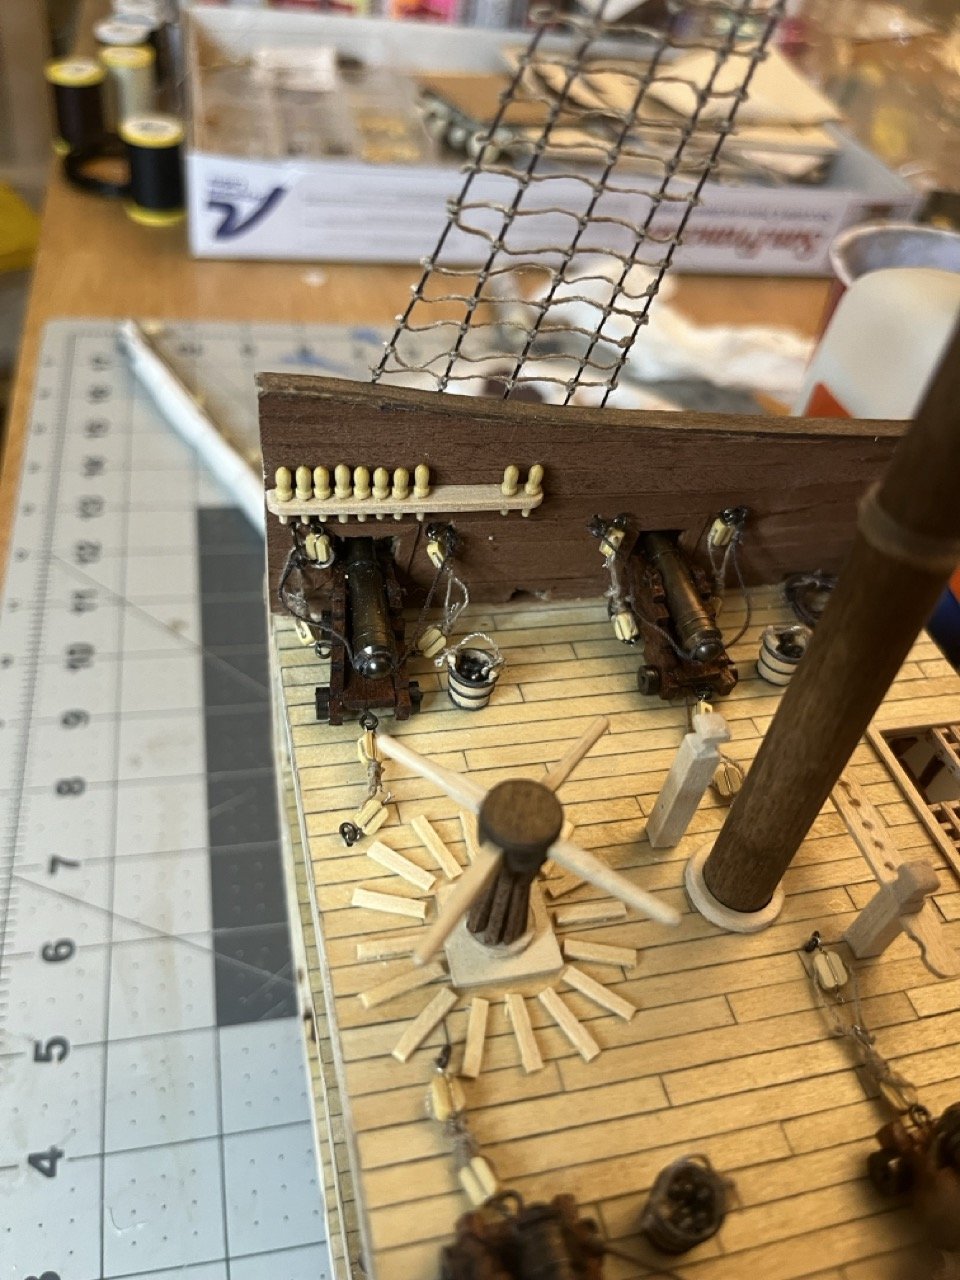
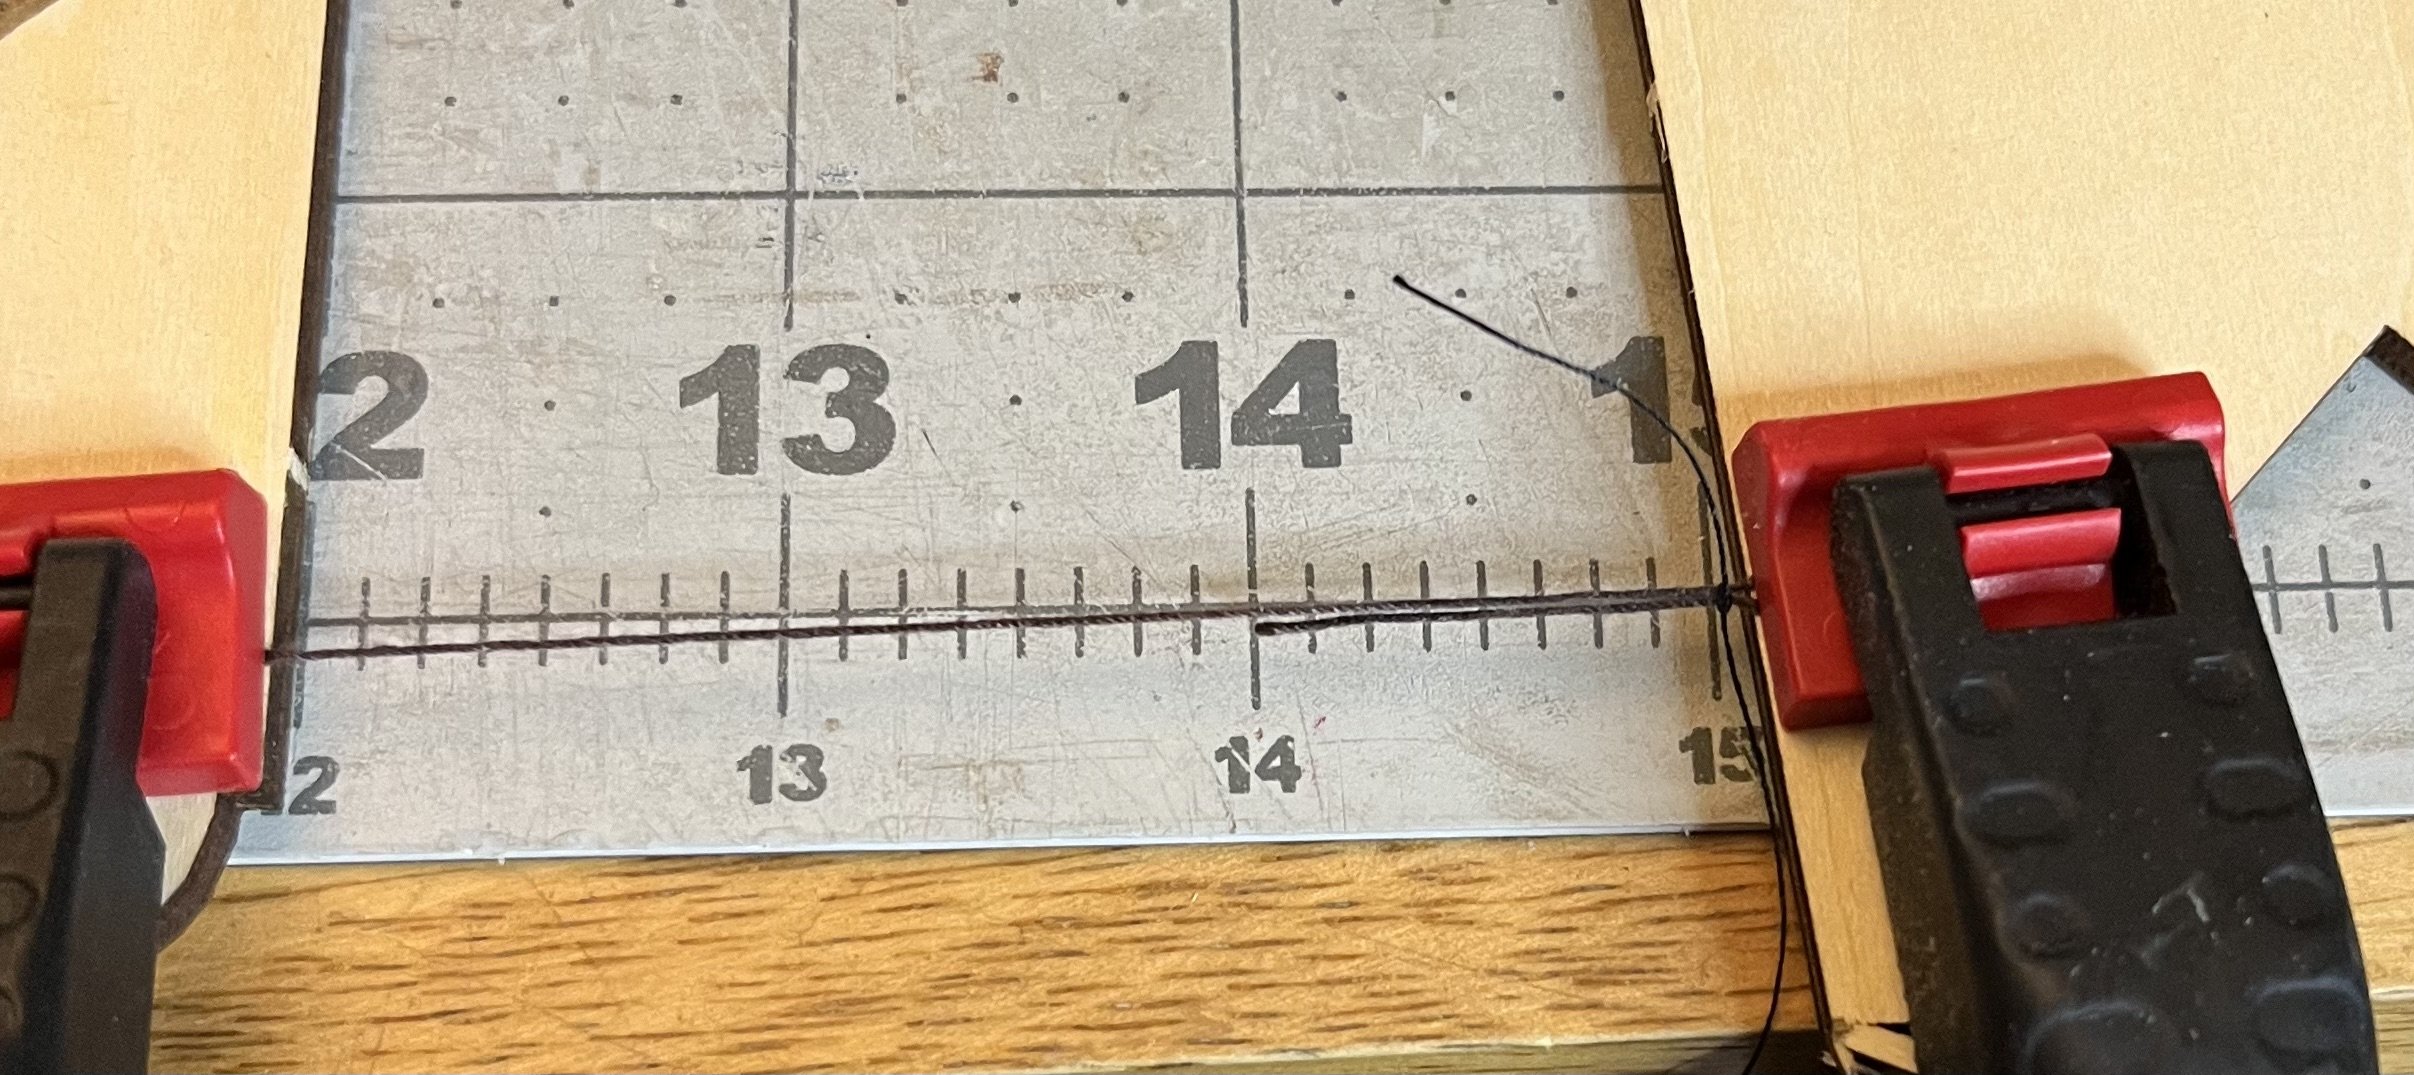
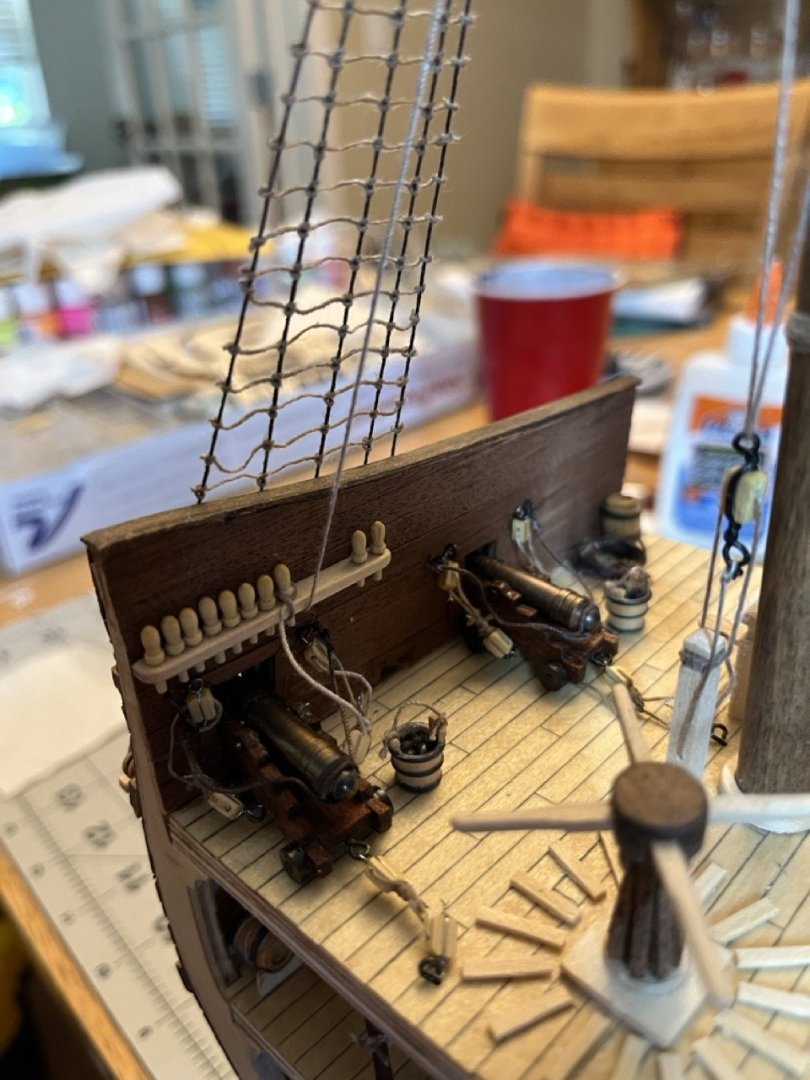
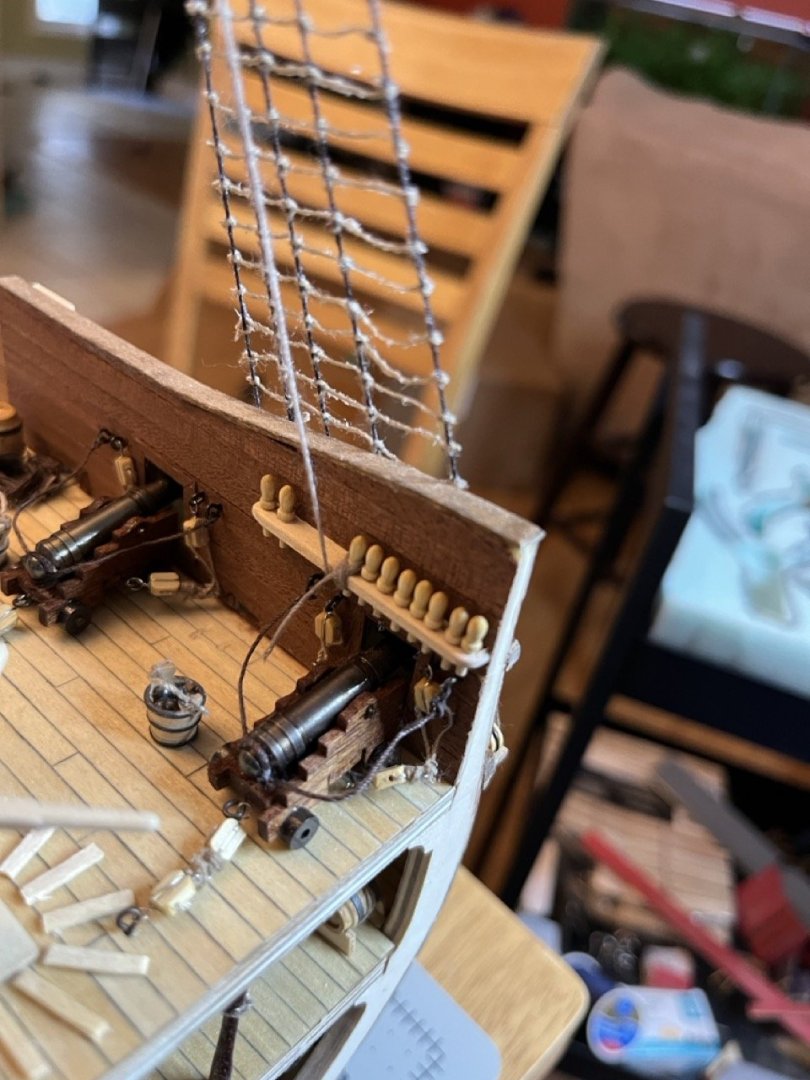
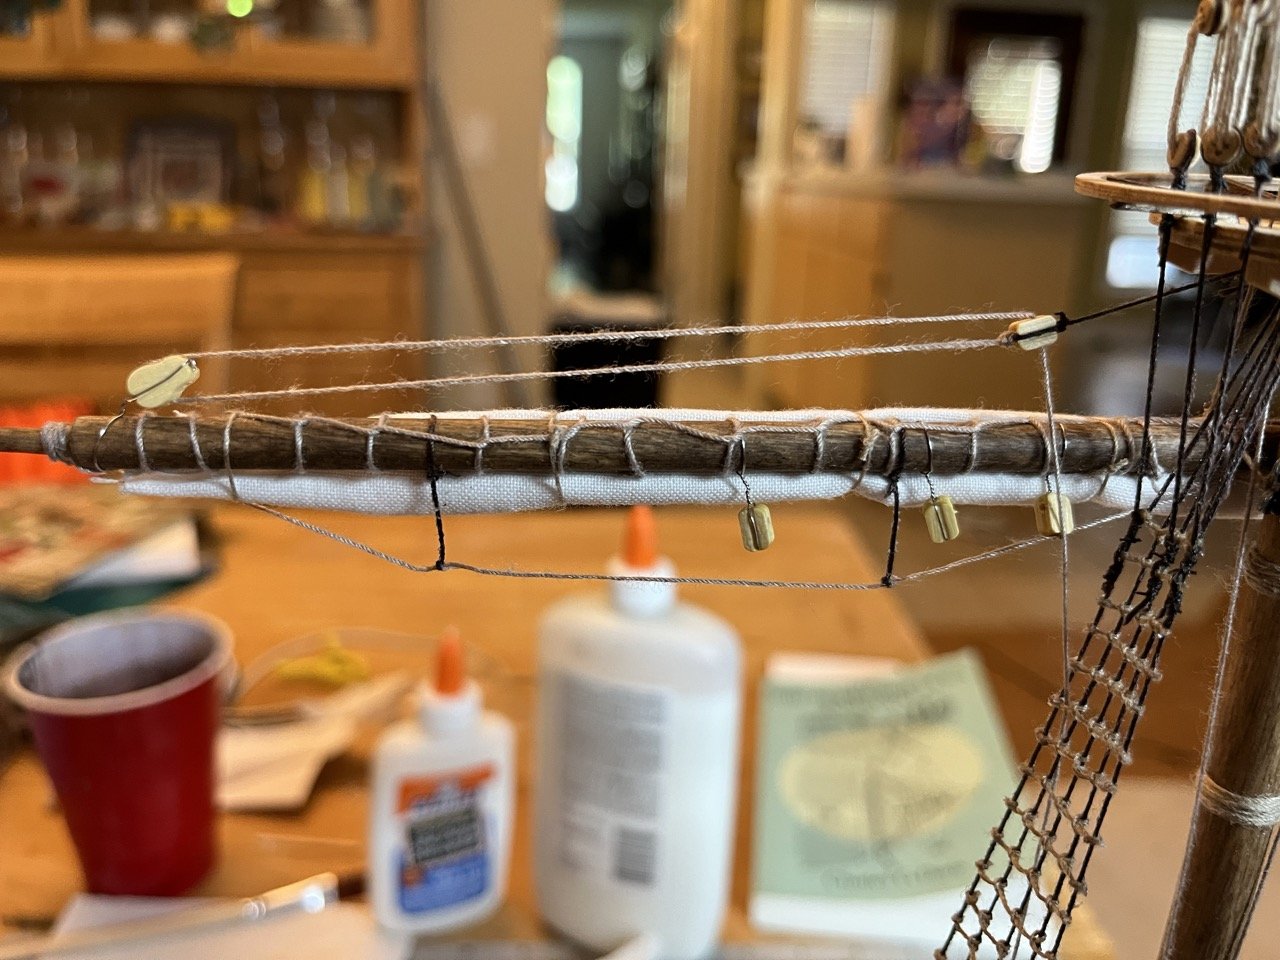
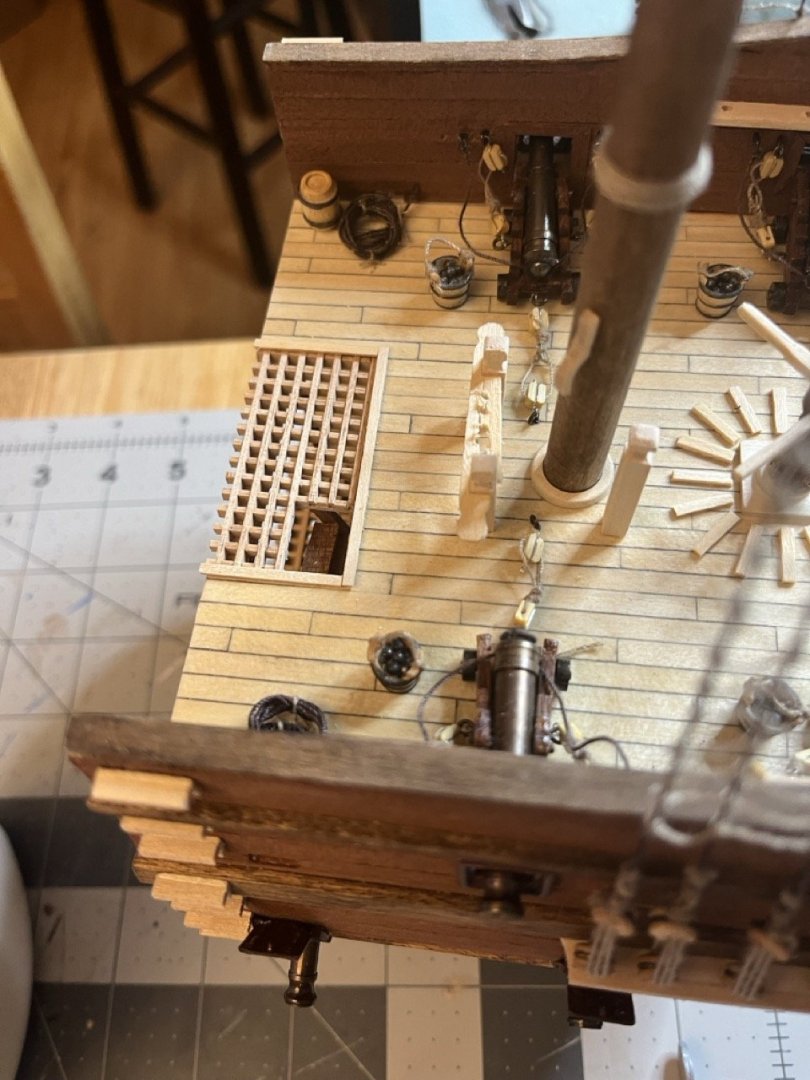
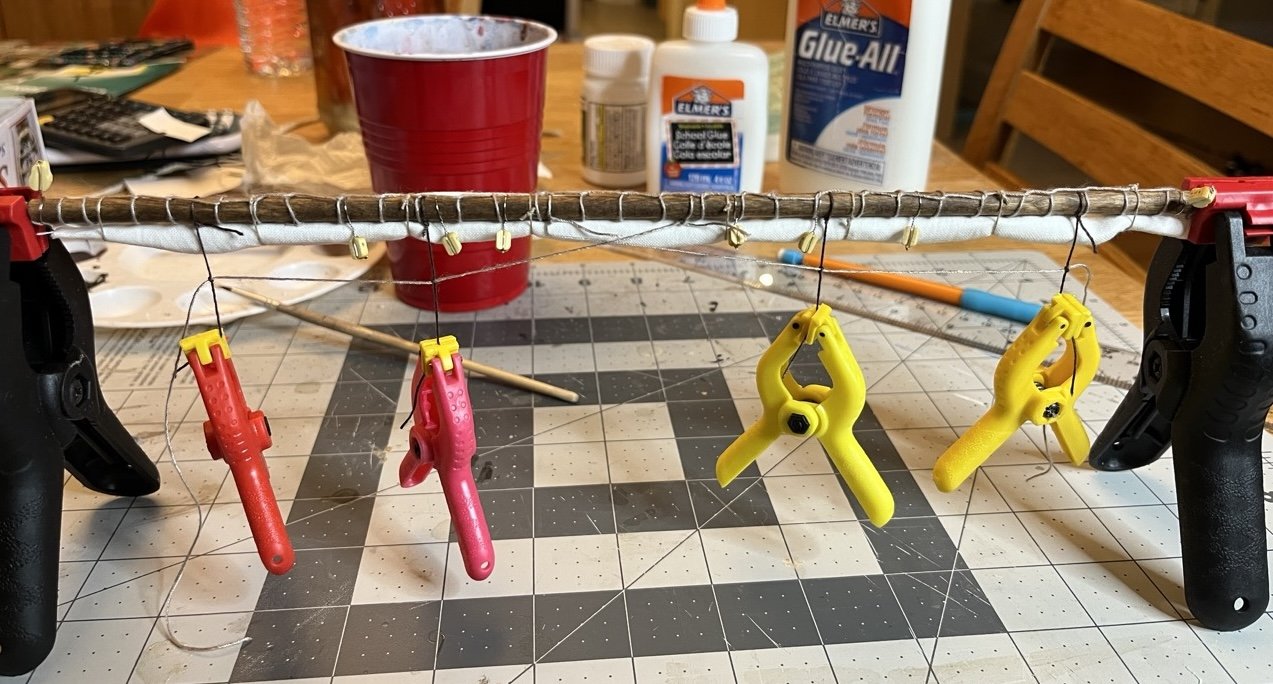
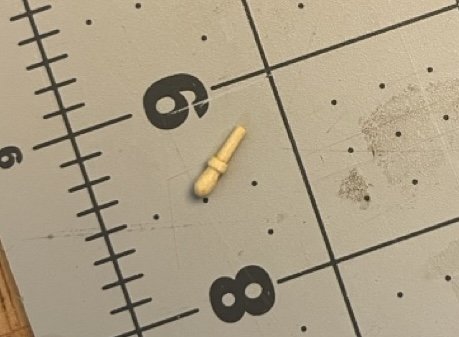
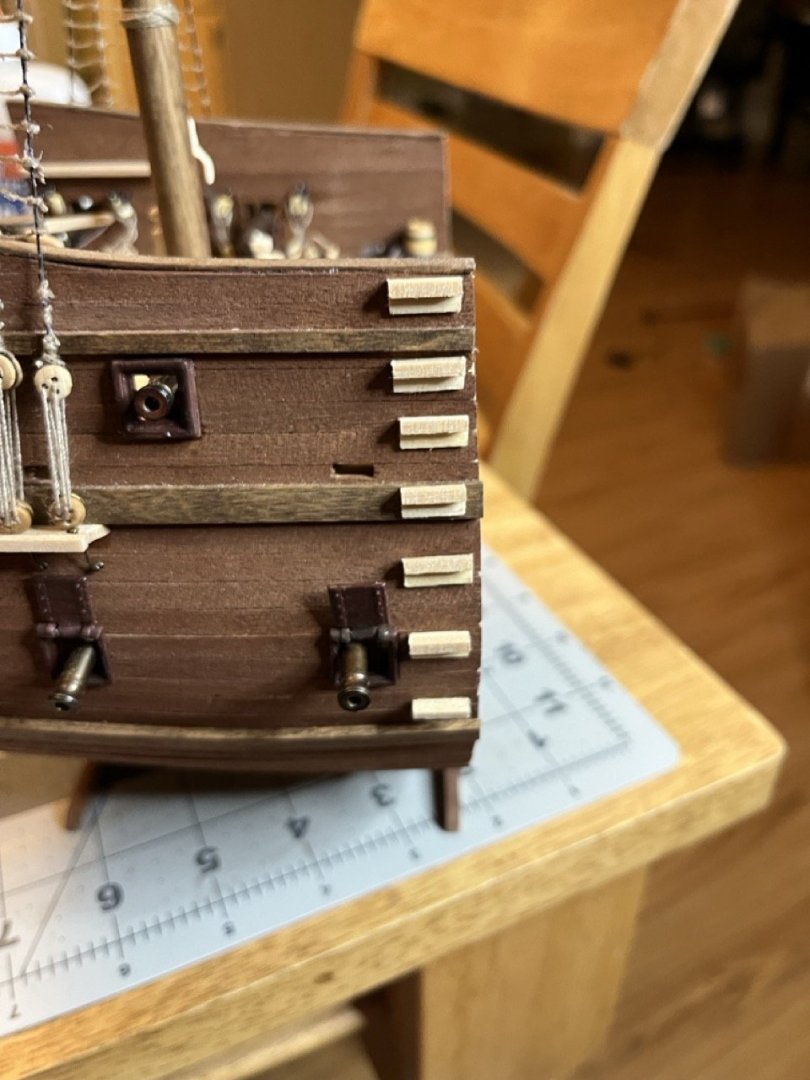
The top step on the port hull ladder wasn't lined up right which is now fixed. A little IPA and careful use of a hobby knife separated it fairly easily. The soft wood didn't stand up well, so another step was cut. Blocks placed on the yard. Fortunately it wasn't a problem having the sail furled to the yard. For the footrope, the instructions call to use metal wire for the strop to hold the shape. I understand why since the lightweight string may not hang properly, but I didn't want to use wire, so I used the dark brown thread. Care must be taken to ensure they are the same length. As far as holding the shape, I used some clamps to provide tension and use PVA to stiffen the strops. Once that dries the ends will be tied to the yard arms. The next step will be to hoist the yard up to the mast so I figured now would be a good time to put the belaying pins in. When I first made the rails, I suspected that the holes for the pins would be much too small. They were. I wish I would have checked this sooner so I could widen the holes without the shrouds being in the way. I'm not sure why the instructions don't have you install the pins when making the rails. While working on the fife rail, the soft wood basically disintegrated. It took two attempts to make a new fife rail. The stem of the belaying pins has a slight taper to it which resulted in them not sliding all the way into the rail. I filed them down to fit as well. I didn't want to make the holes in the rails too large and split the wood. Starboard belaying pins installed.


- 86 replies
-
- 2
-
-
- San Francisco
- Artesania Latina
- (and 2 more)
-
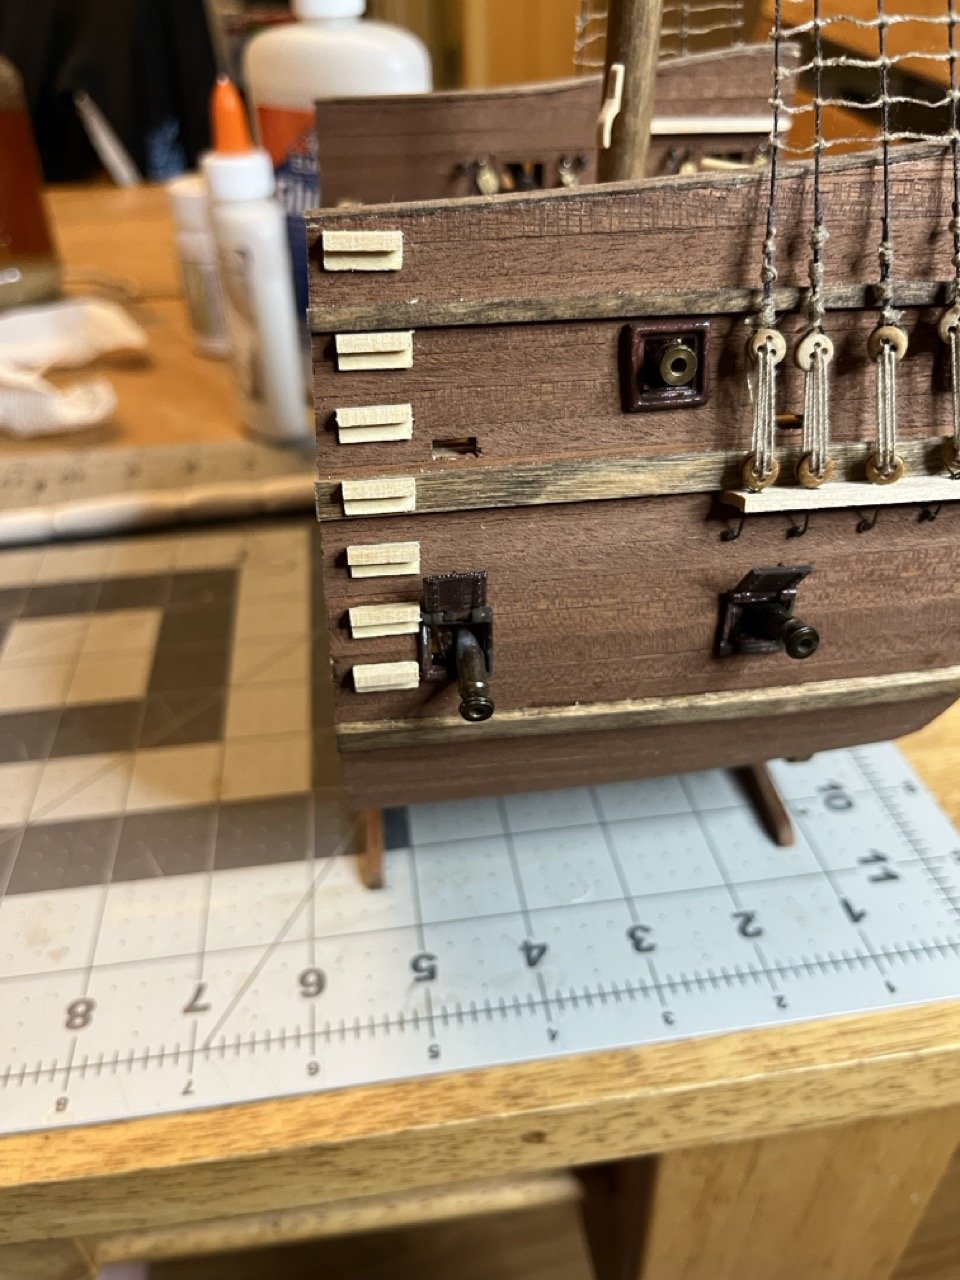
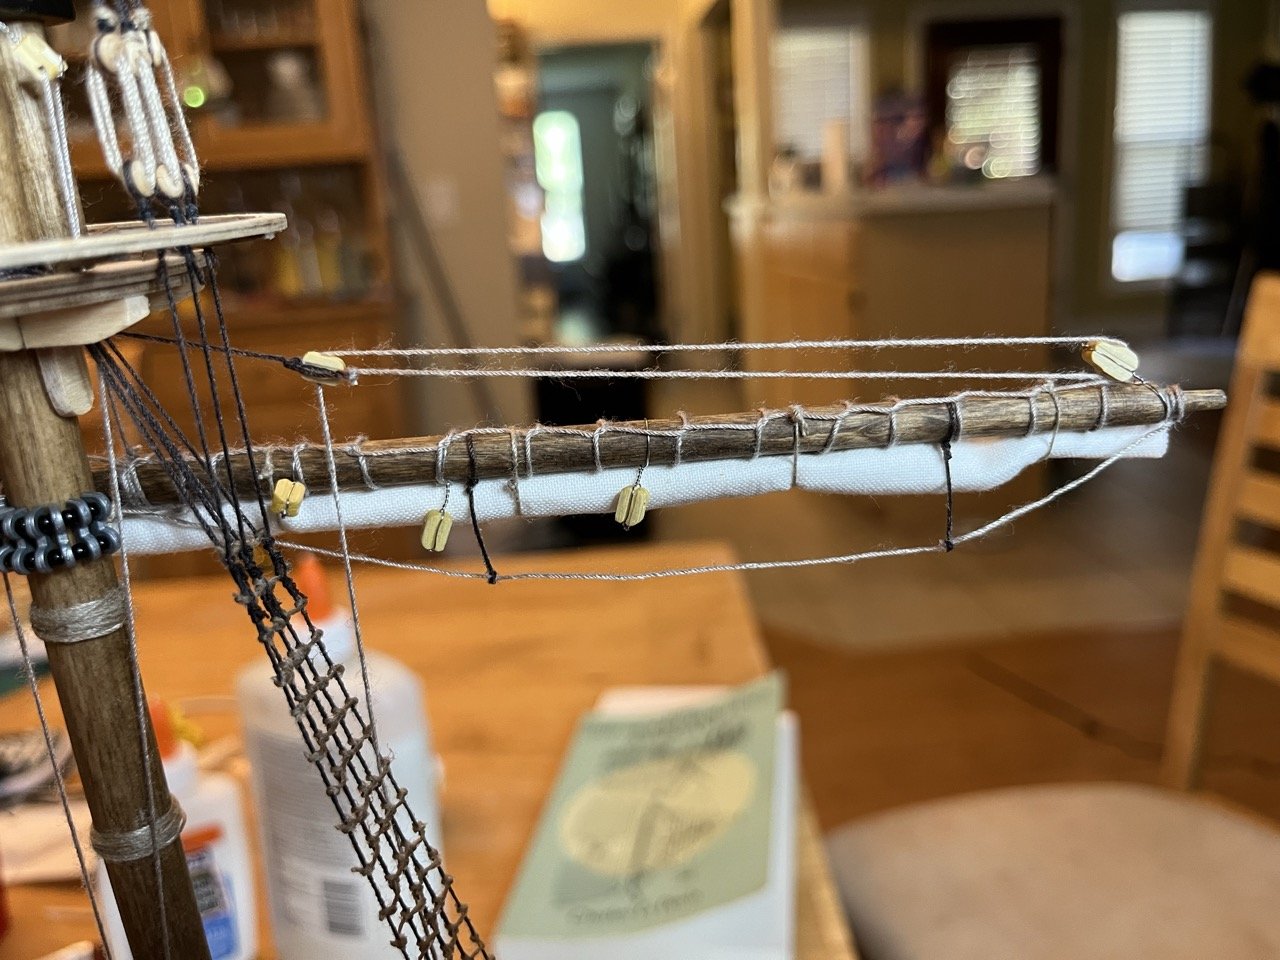
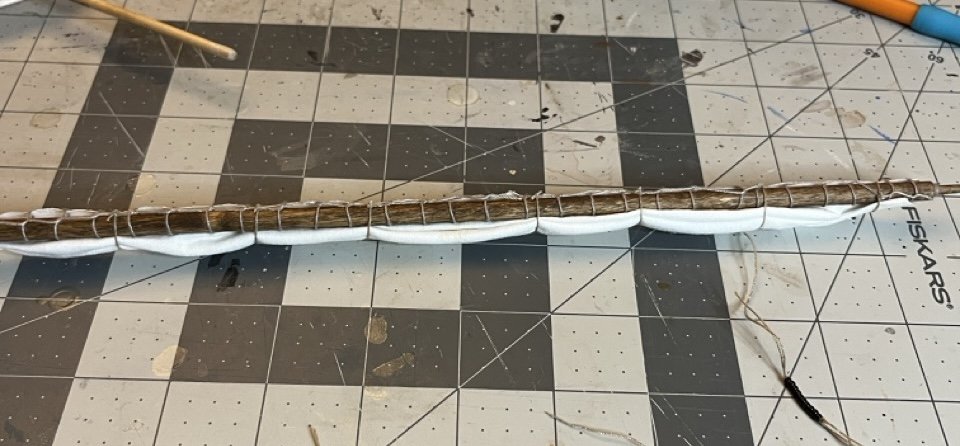
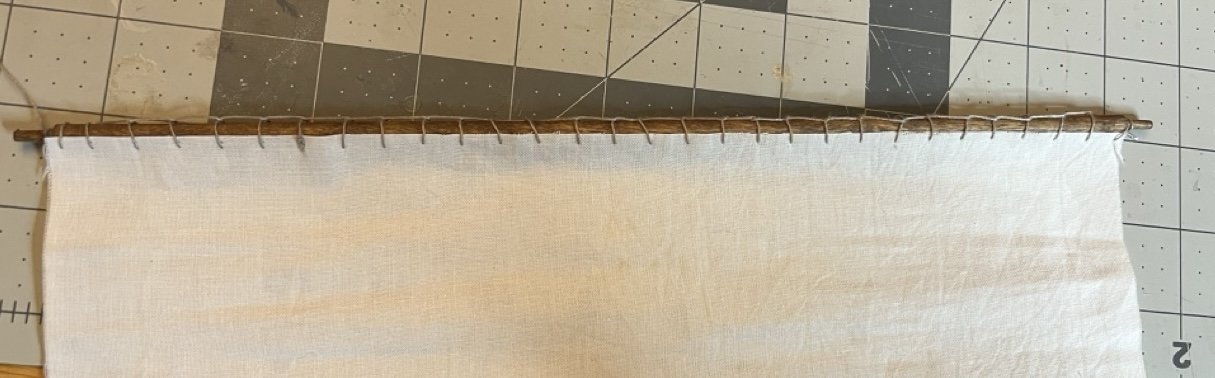
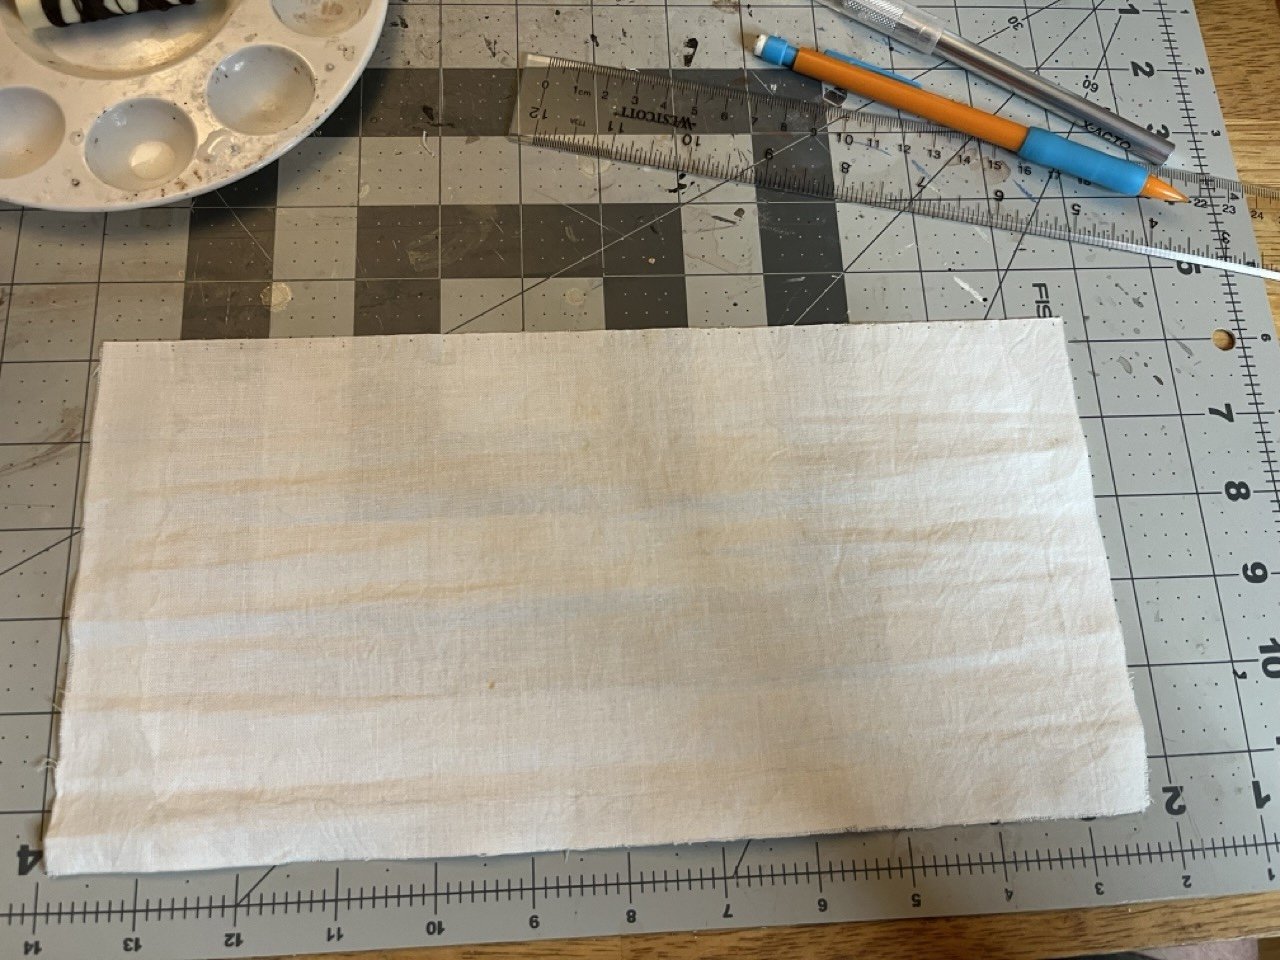
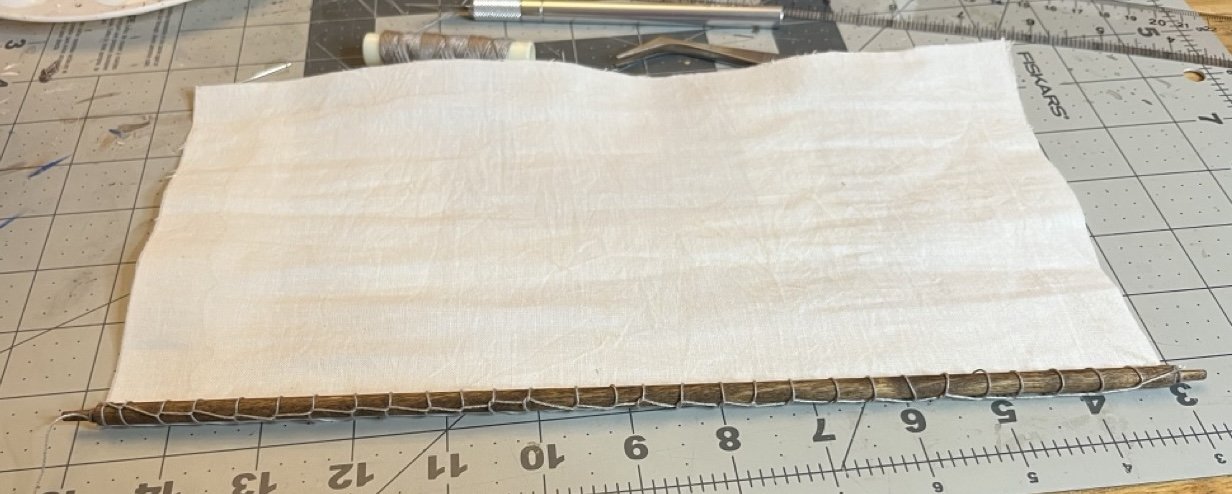
Ladders on each side of the hull installed. The instructions called for the inboard pieces to be made from a 4 mm x 2 mm strip. I could not find a full one in the box, only scraps. According to the parts list there should be one included with the kit. It looks like there is an earlier step that calls for the same part number. Either there is an error in the parts list and instructions or I messed something up. I had a 4 mm x 1 mm strip so I used that instead, a relatively minor change. P Parrel beads for the three yards. I started working on first yard. The kit doesn't include sails, but I wanted to add furled sails. After studying the instructions and doing some research I had second thoughts since rigging such as the clew lines were also not included. Ultimately I decided to add some furled sails anyway. I started out cutting some fabric, gluing the edges to prevent fraying and marking where the bends will go. It seemed like the sail should be bent on to the mast prior to the rigging. This was way too much fabric so I trimmed it down to keep the furled sails from being too bulky. I had a heck of a time trying to furl the sails in a way that looked sort of natural. Here is the end result. Hopefully it wasn't a mistake furling the sail prior to attaching the rest of the gear.

- 86 replies
-
- 3
-
-
- San Francisco
- Artesania Latina
- (and 2 more)
-
Bulwarks It looks like your beveling is probably pretty close to where it needs to be. You can lay a plank across all of the bulk heads and see if the plank touches the full width of each bulkhead.
-
Hey Chris, unfortunately I am not well versed enough in rope making to offer reliable information. These were literally the first two ropes I have made and that was simply to try out the rope walk. This section of the forums has a lot of good info however including a lot of the info you are looking for.
-
Here is a link to my first attempt at rope making.
-
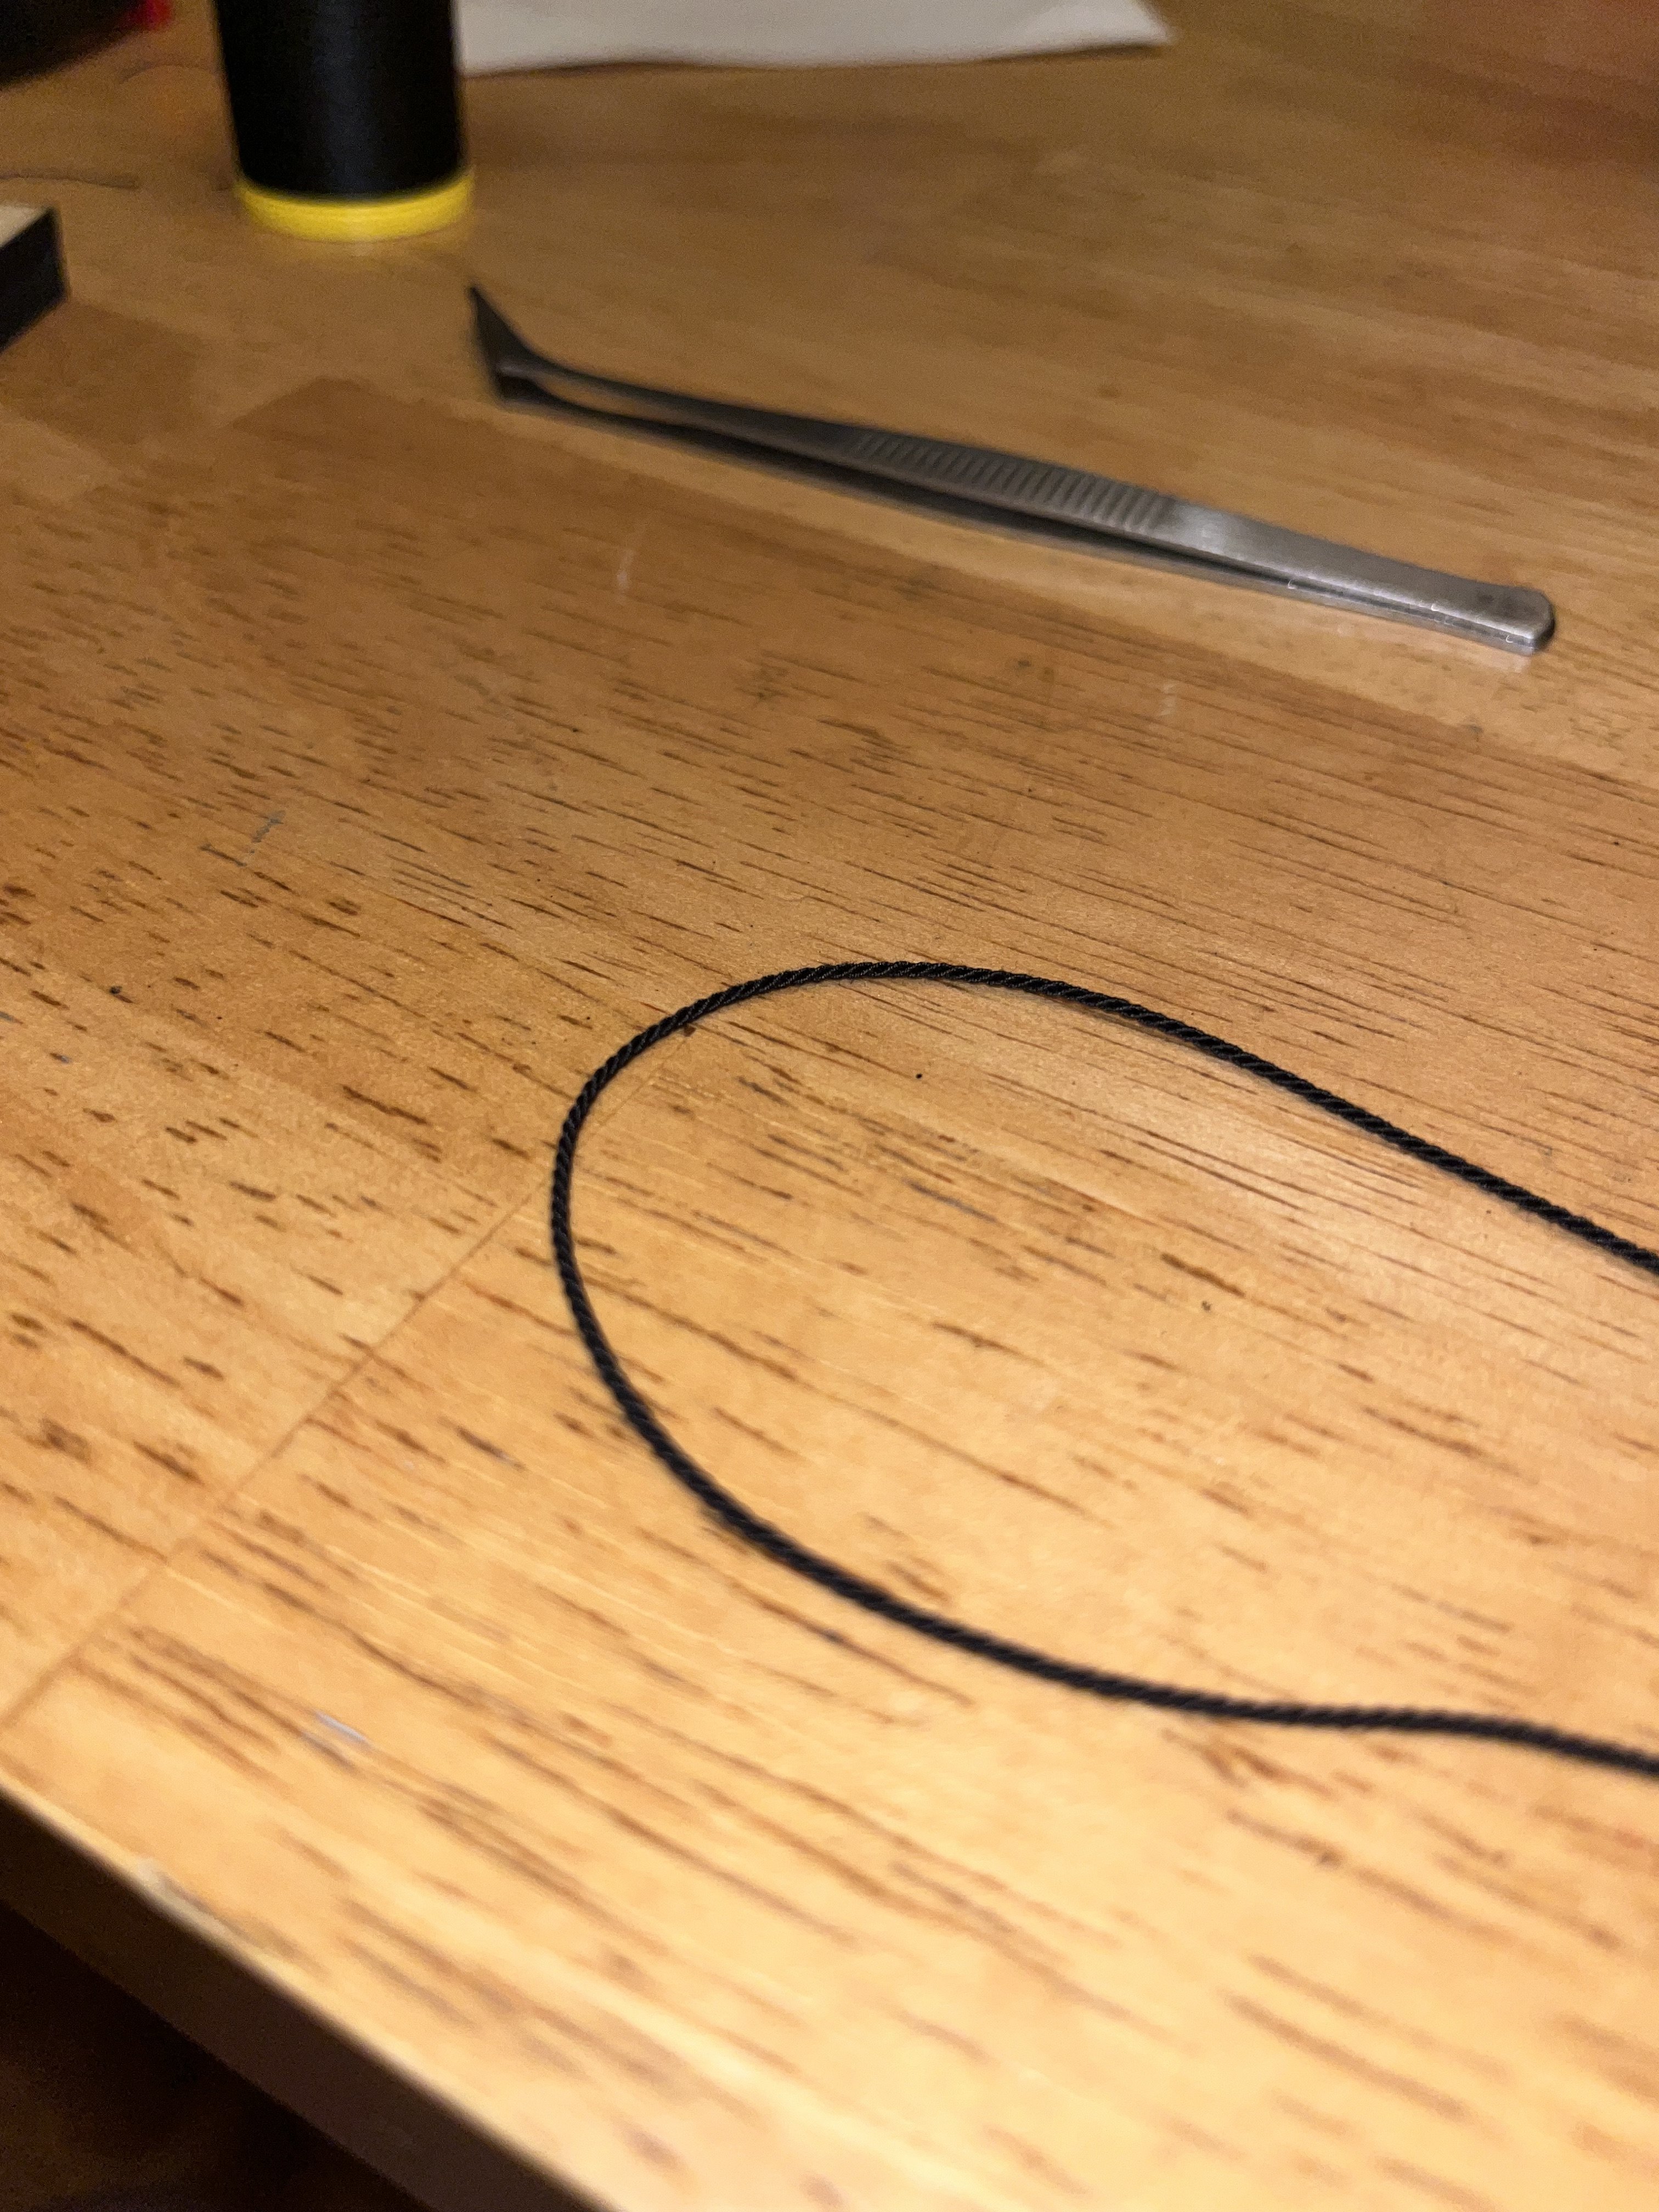
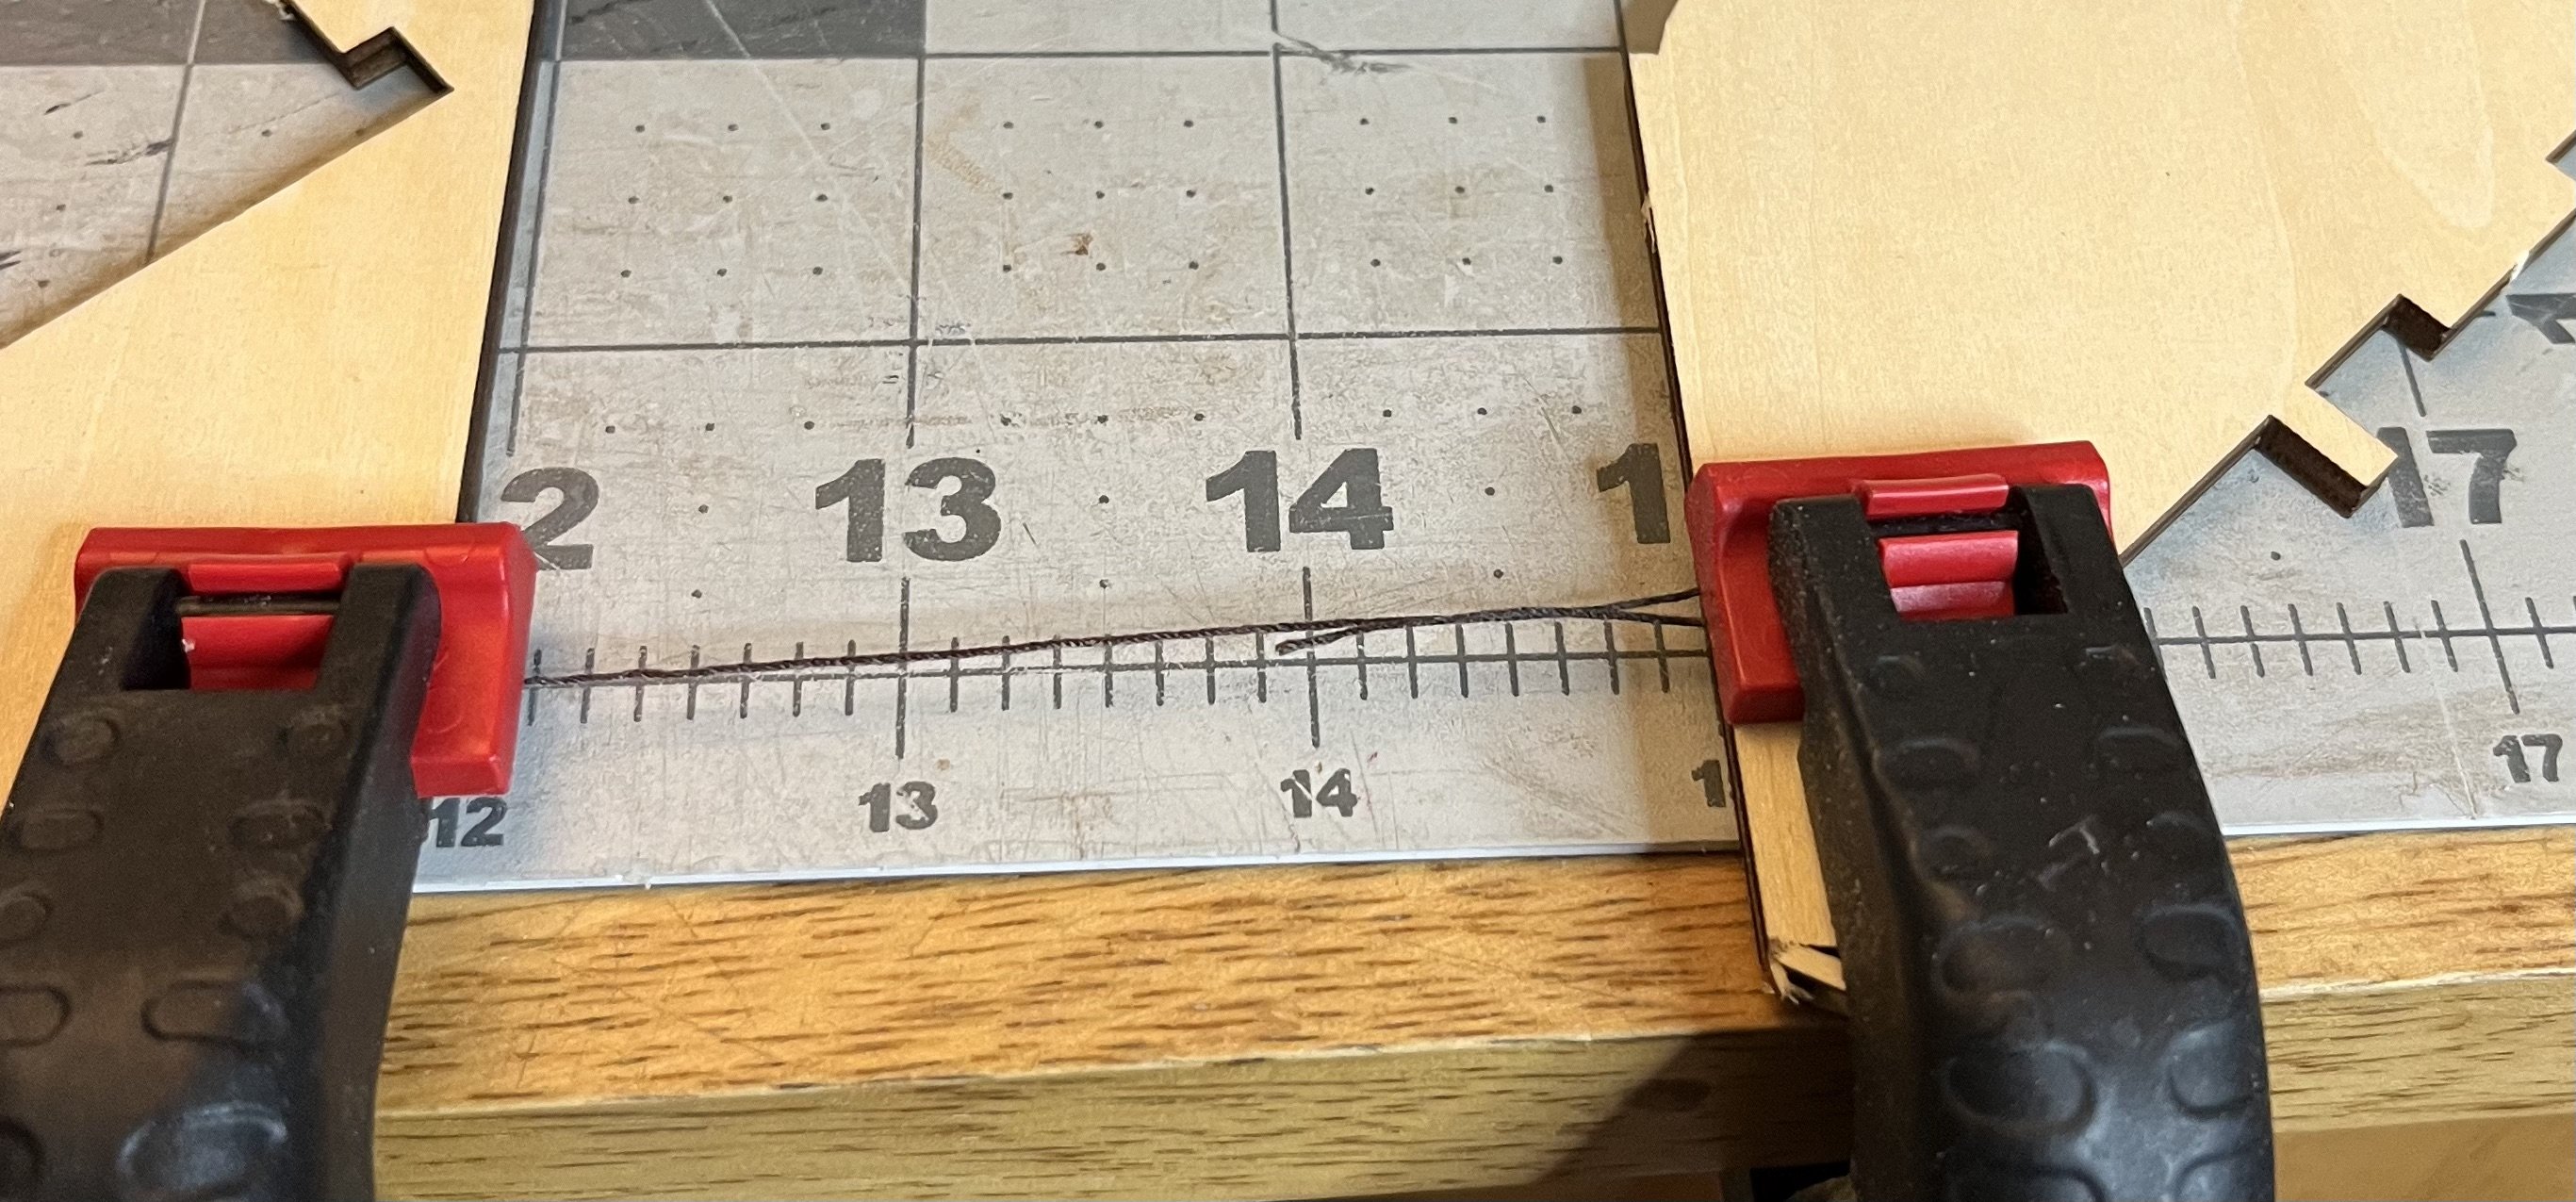
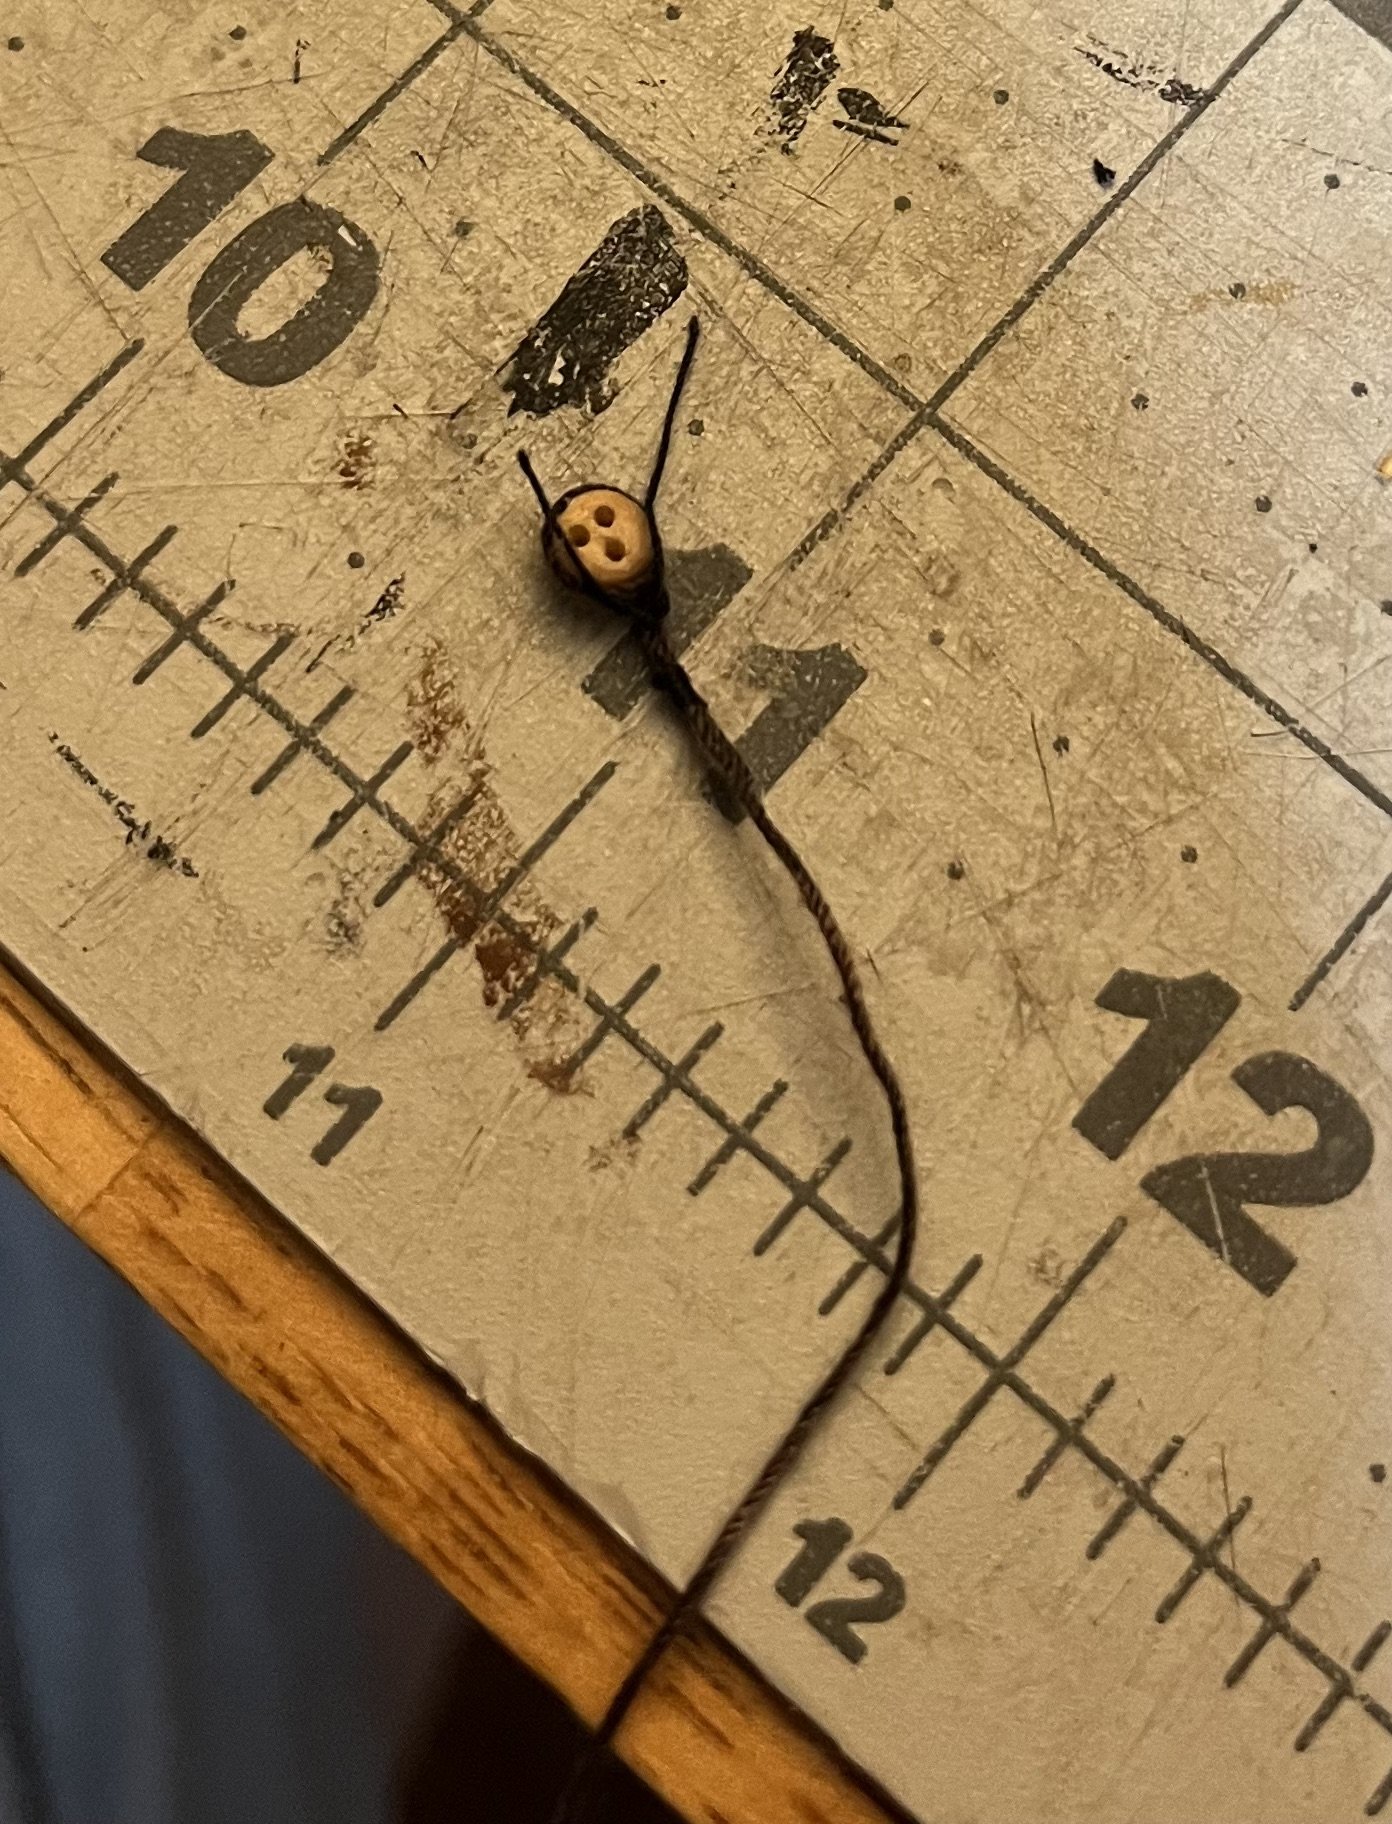
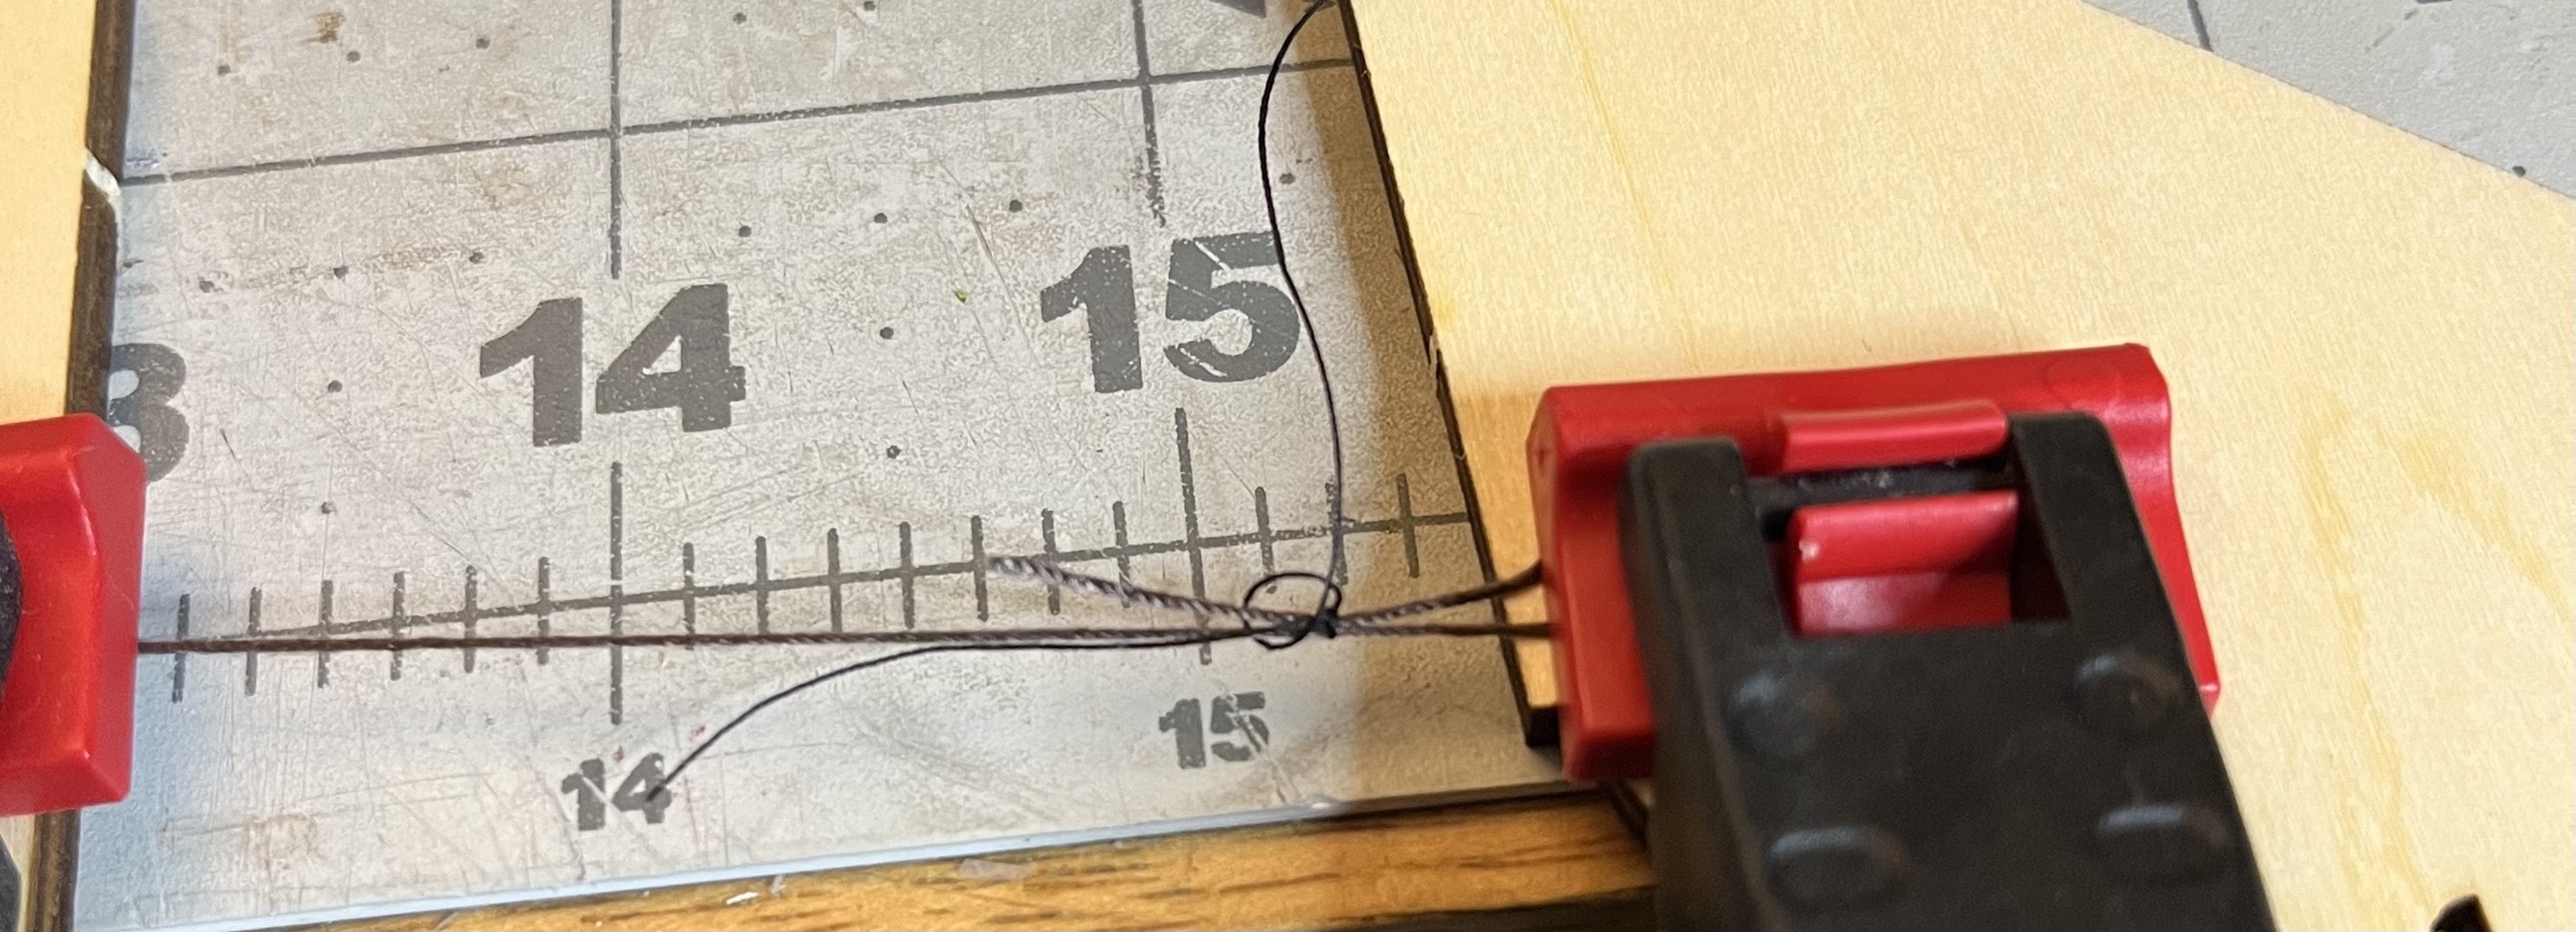
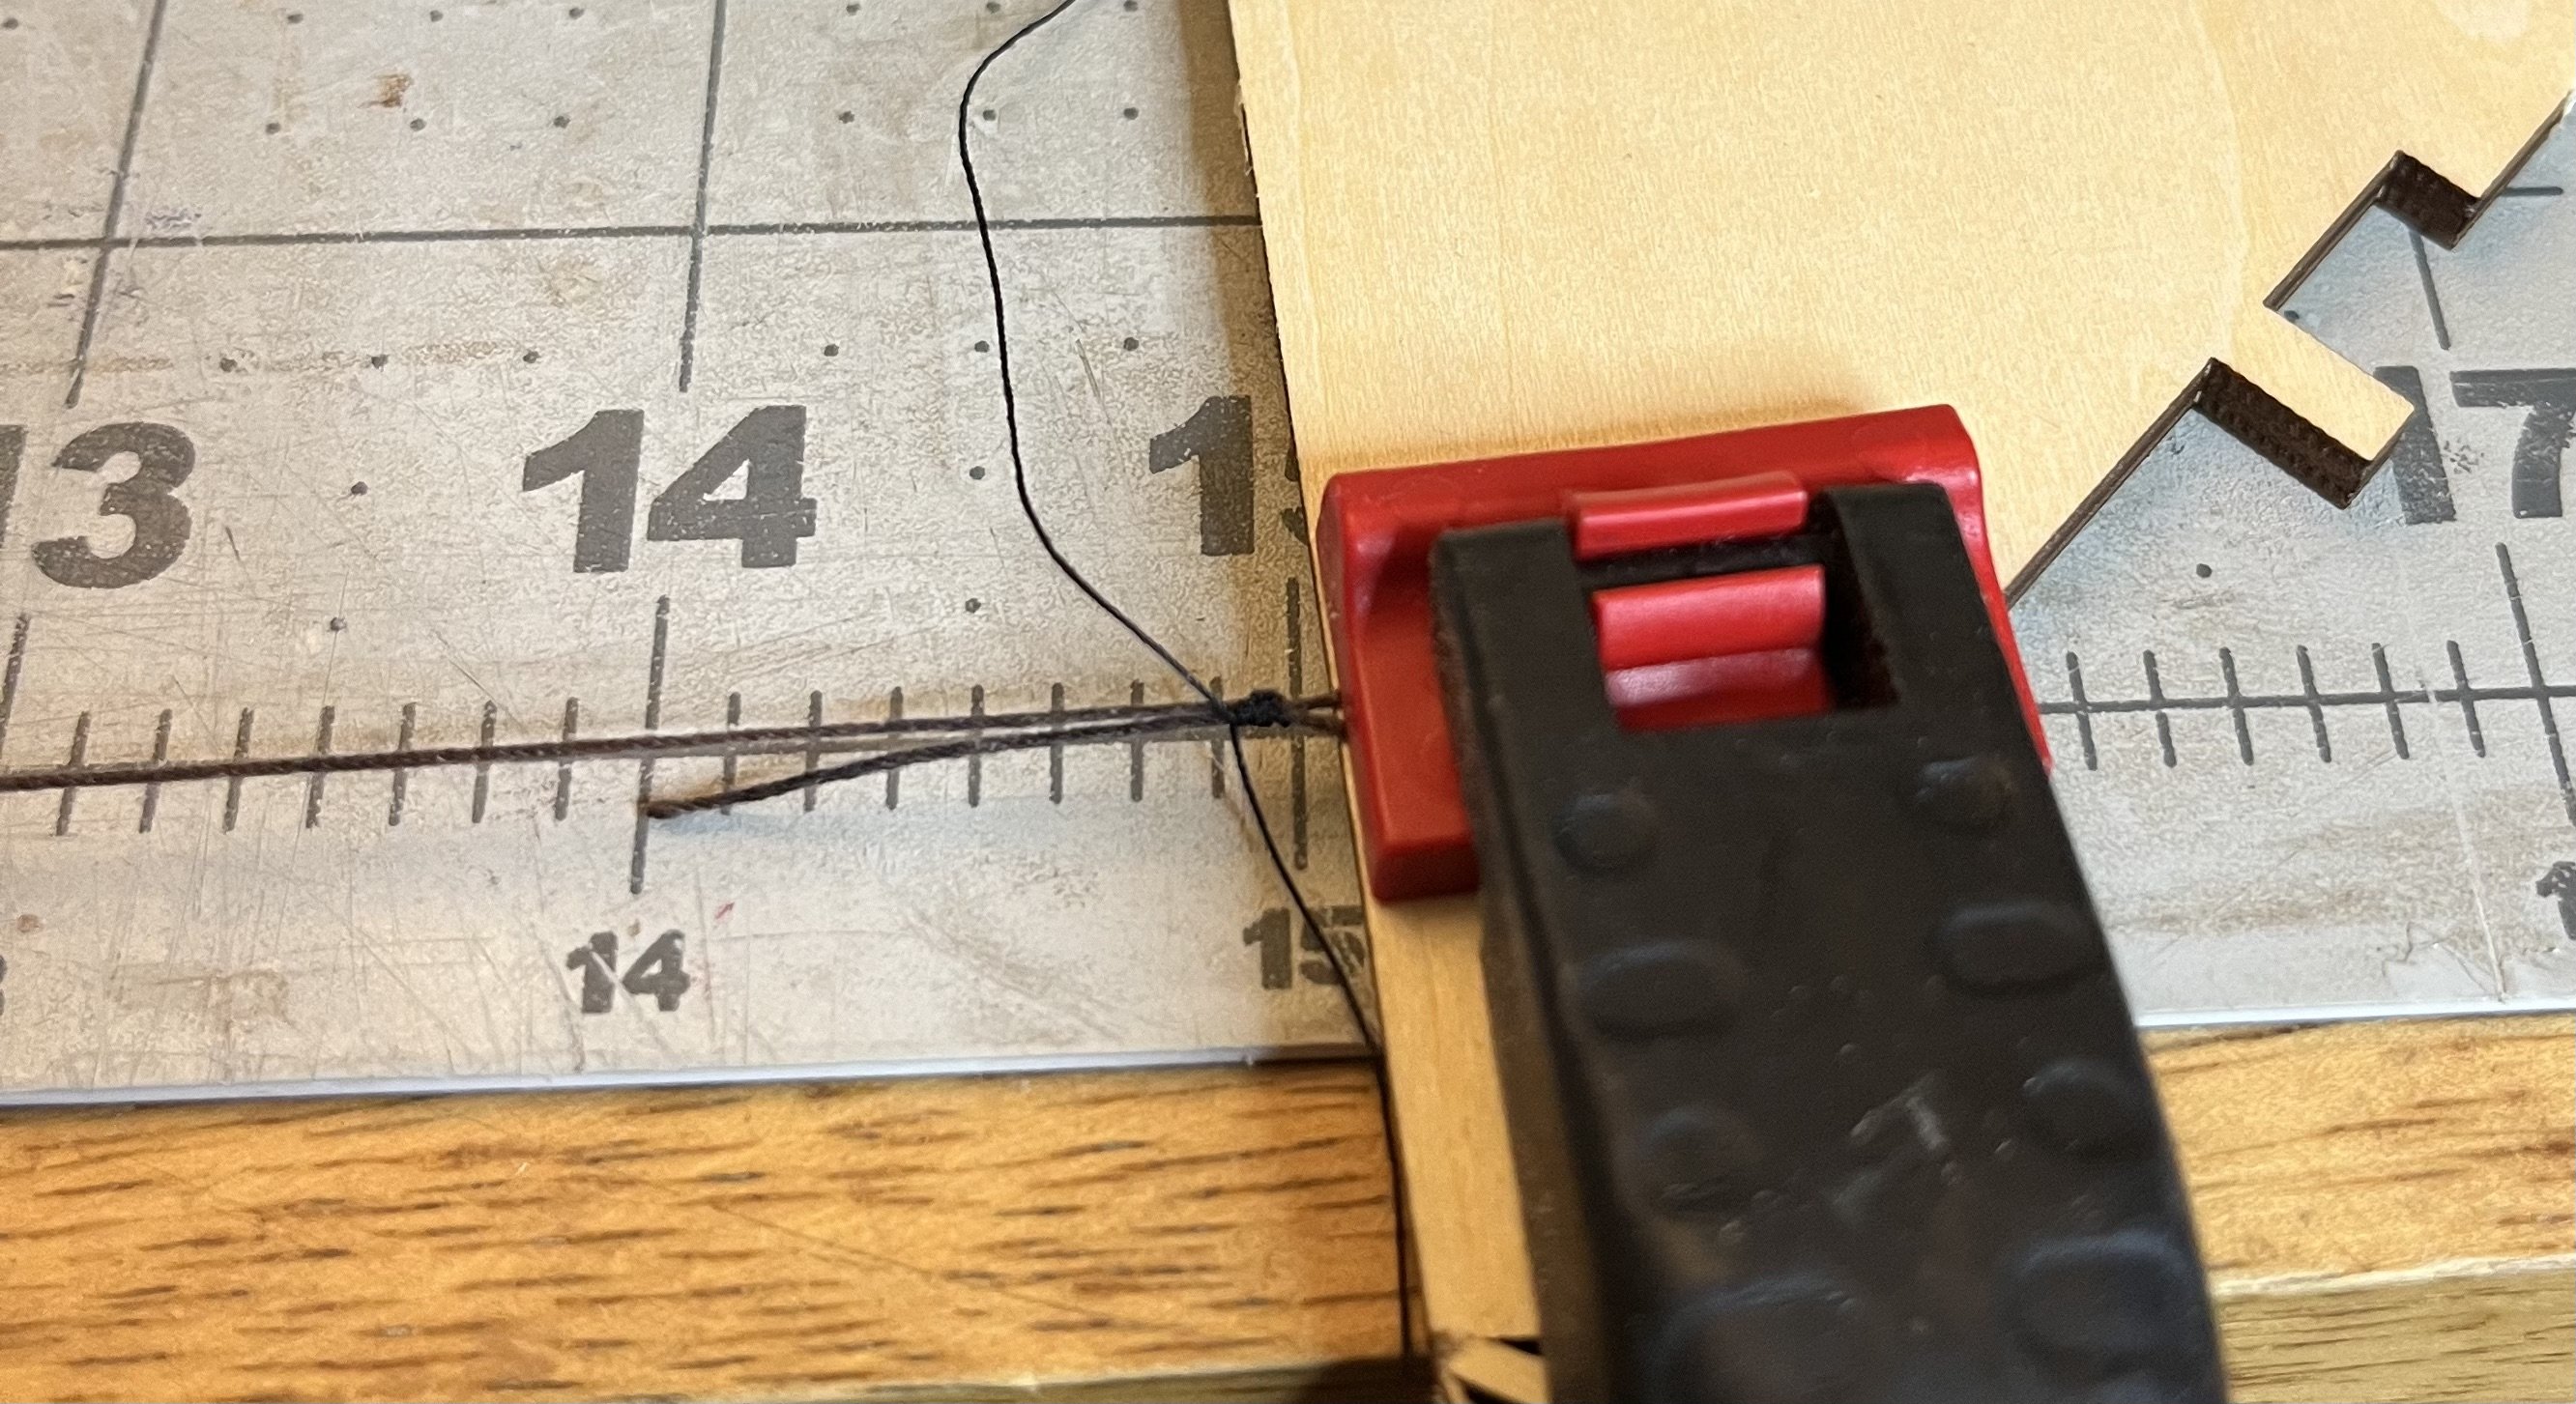
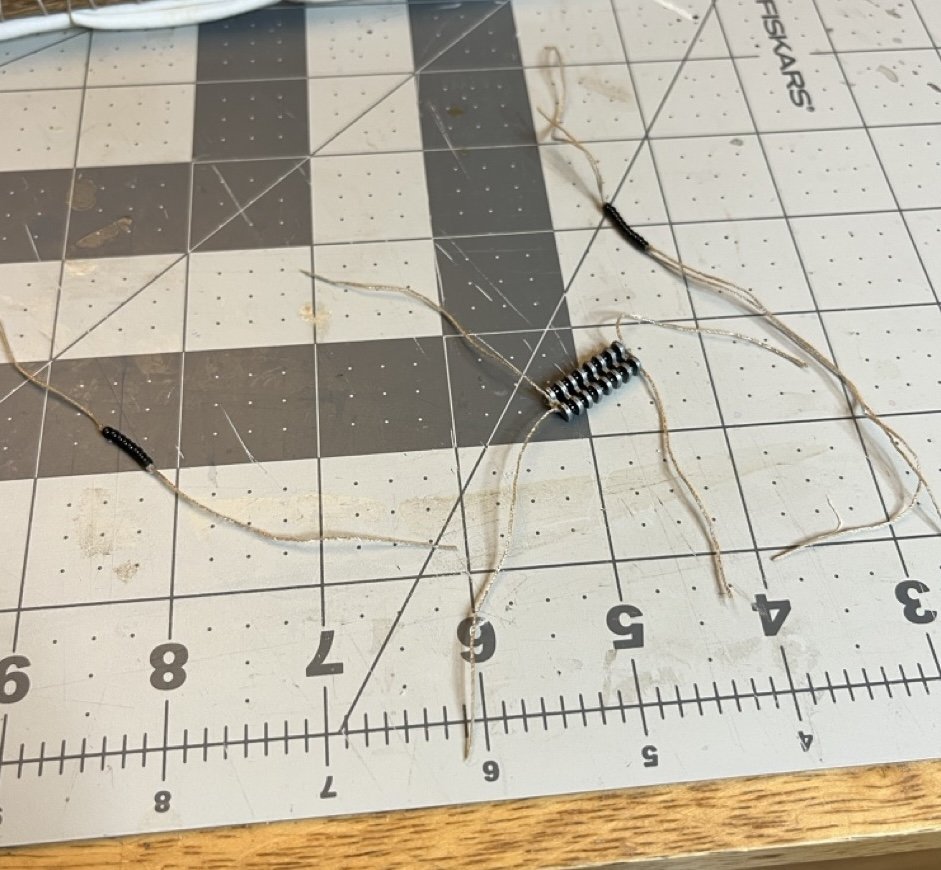
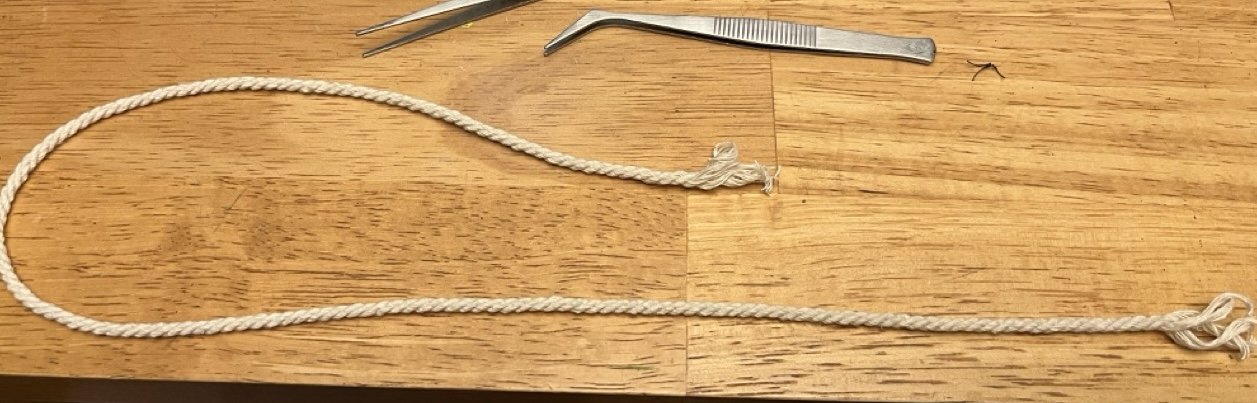
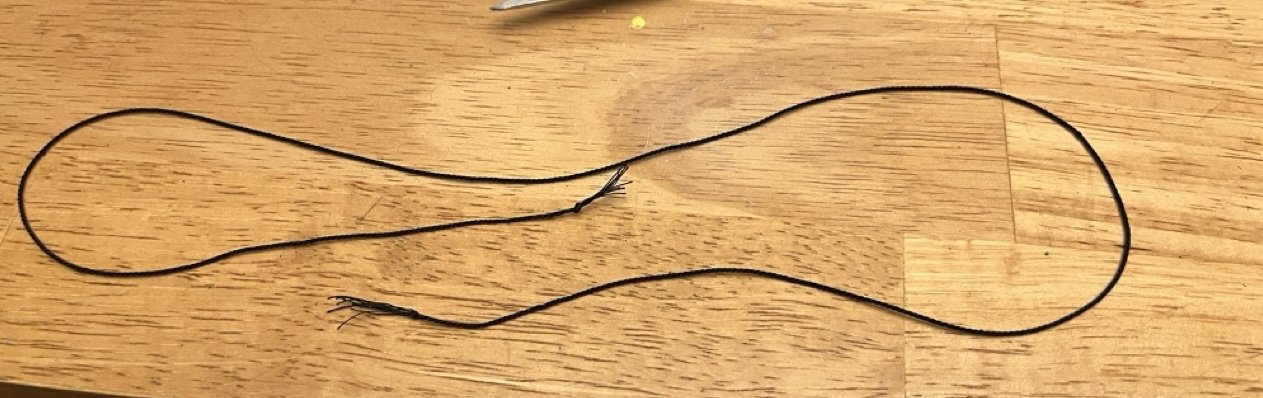
I recently purchased and assembled the Model shipways rope walk and wanted to try it out. I'm in the middle of rigging the San Francisco Cross Section at the time of posting so I will likely wait until the next model to make the rope. I did however want to try it out. For initial trial I am just using cotton string that I have lying around, but won't use it for models due to the fuzziness. The first attempt was with some thin black string, three strands per chord. I have rope! I didn't give it a chance to see how it would lay up so I quickly tied it off, but it seemed to come out ok. There are a couple of spots that that aren't quite right and there is less fuzz than I expected. The second attempt was with some thicker cotton twin and as can be seen, no unraveling! I'm pretty excited that I was able to do this adequately on a first attempt. This process seems pretty easy, at least on a small scale, so I will be looking forward to making ropes for my future models.

-
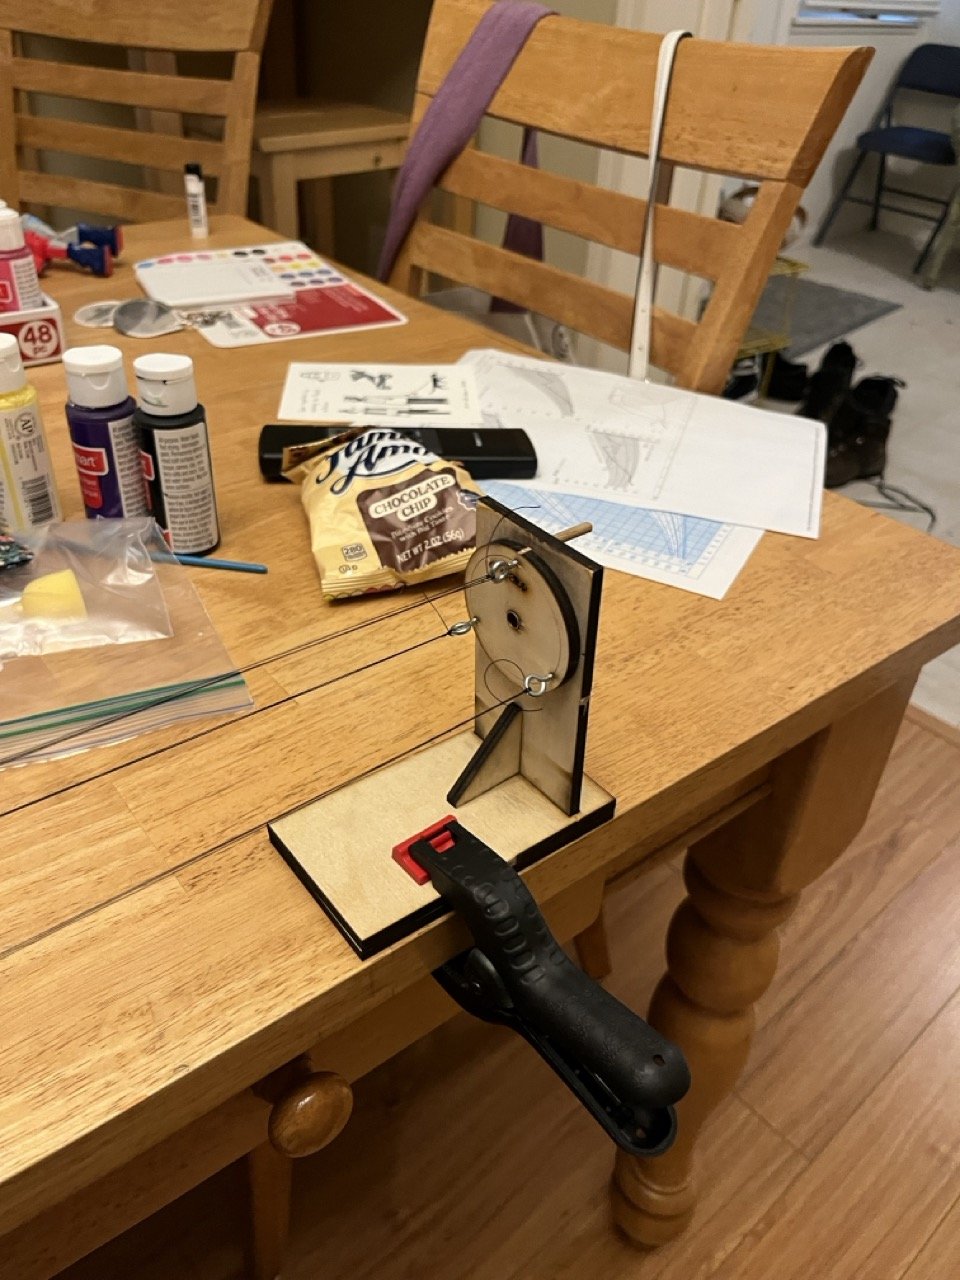
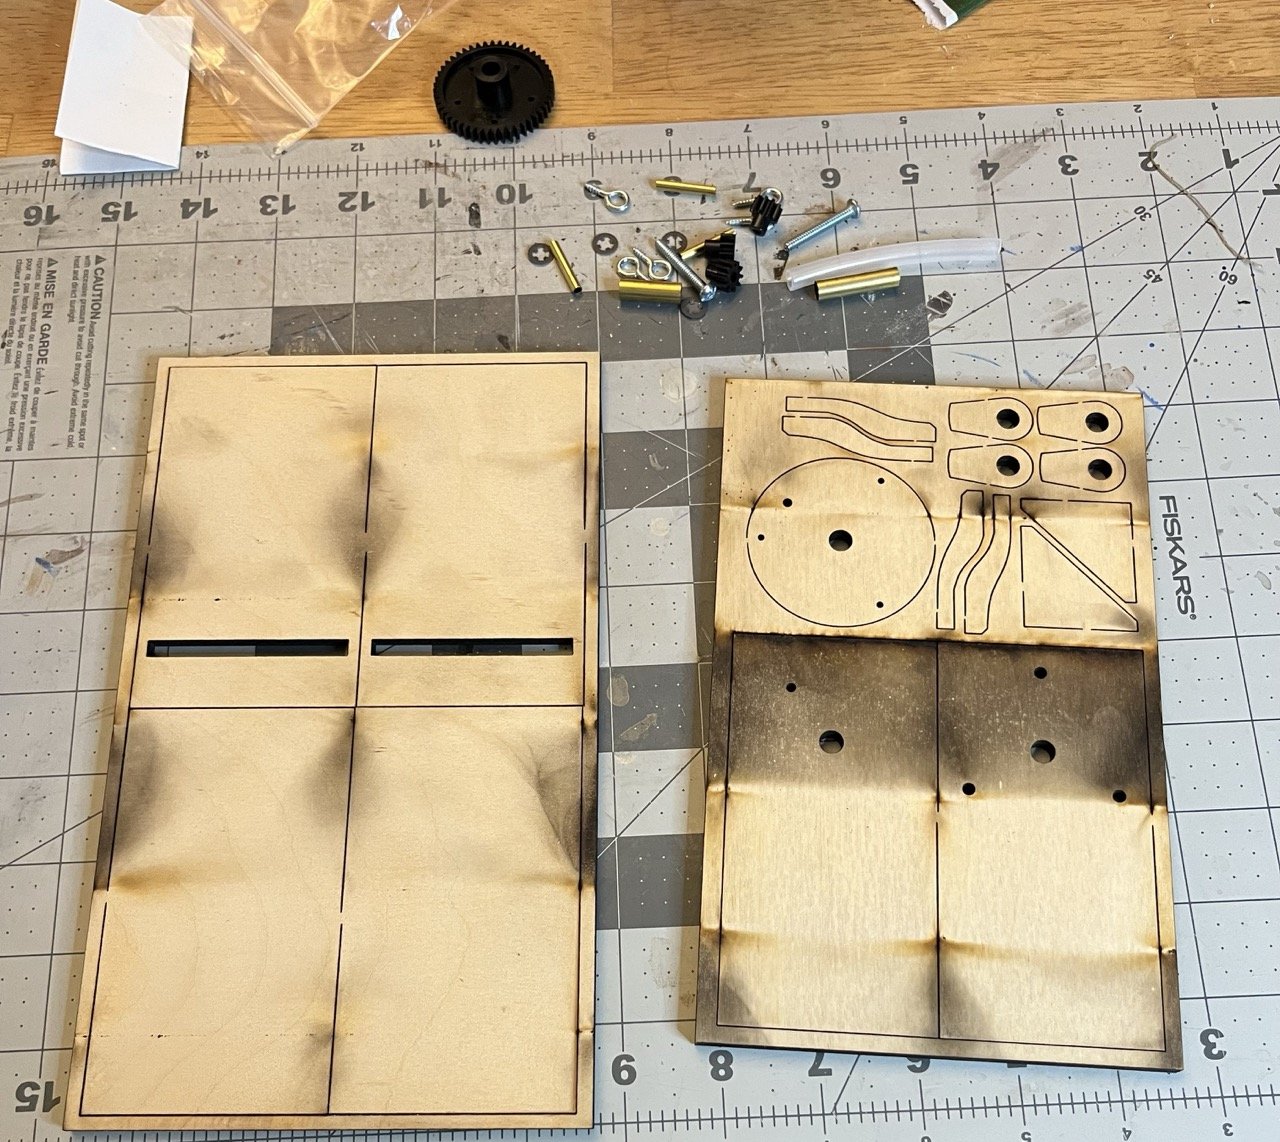
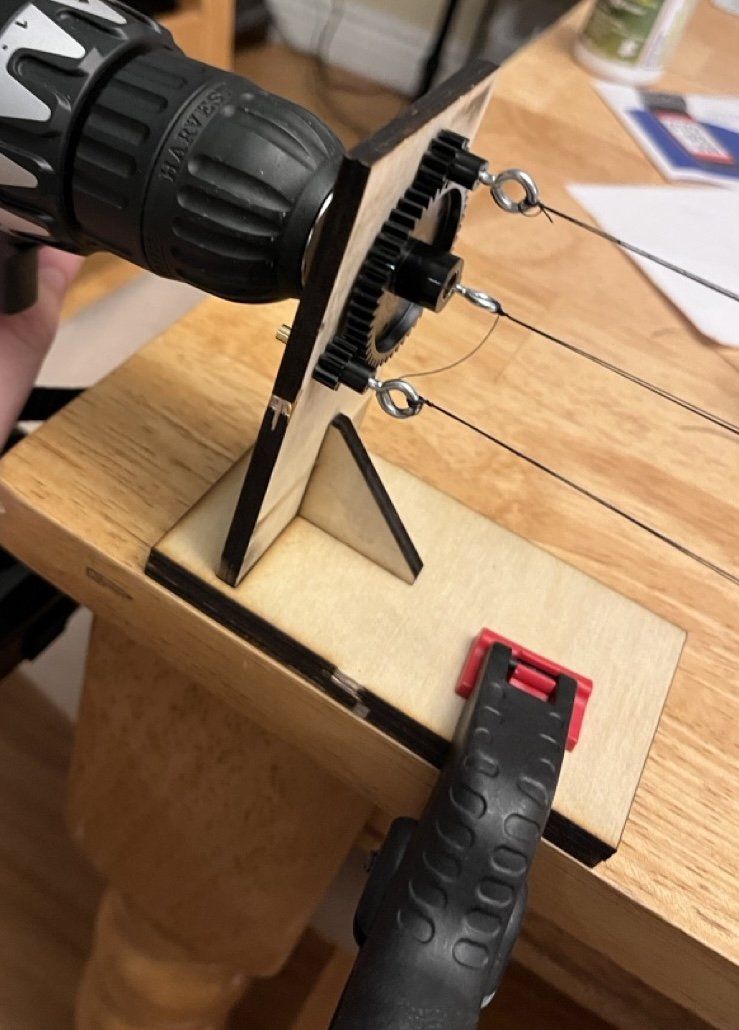
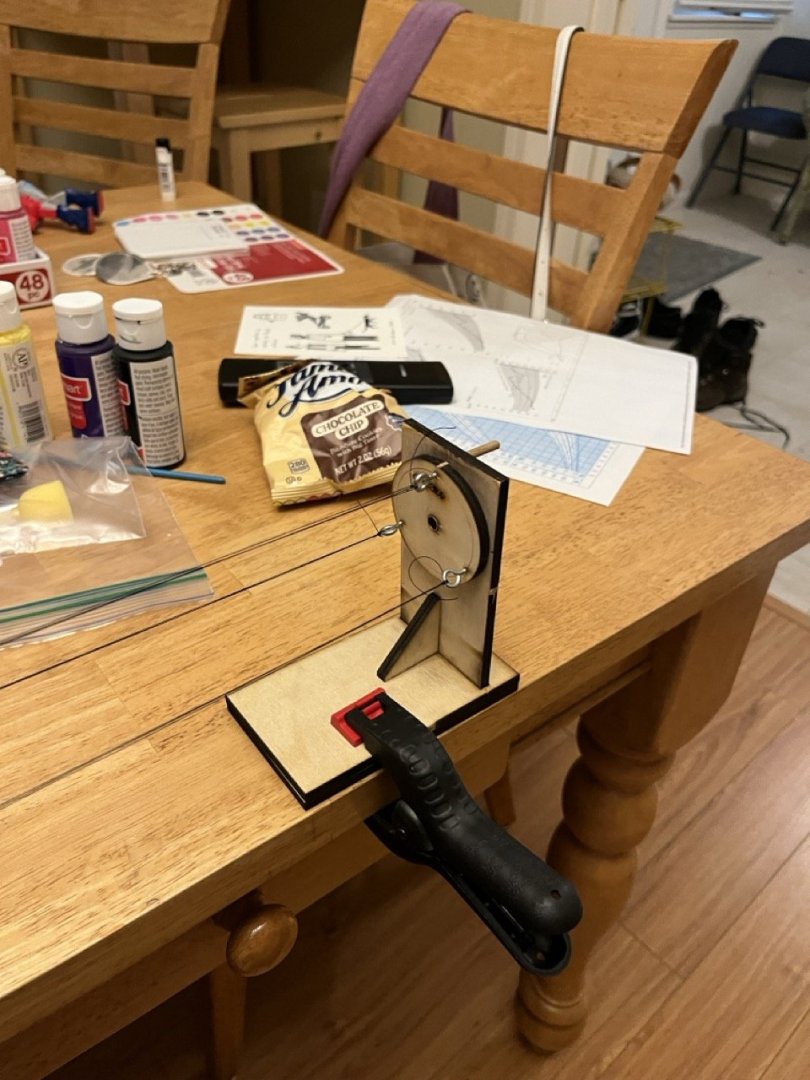
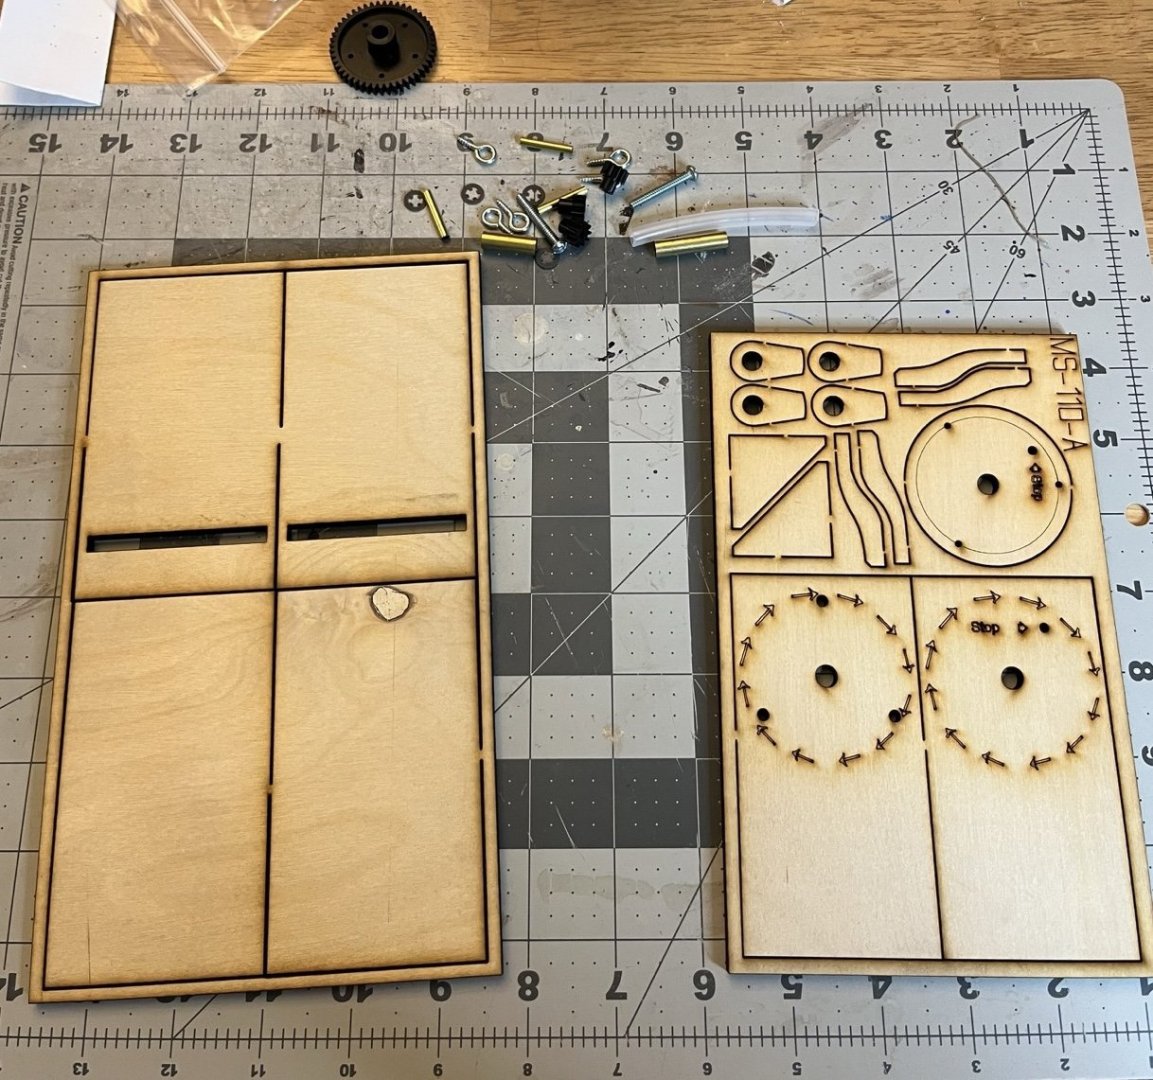
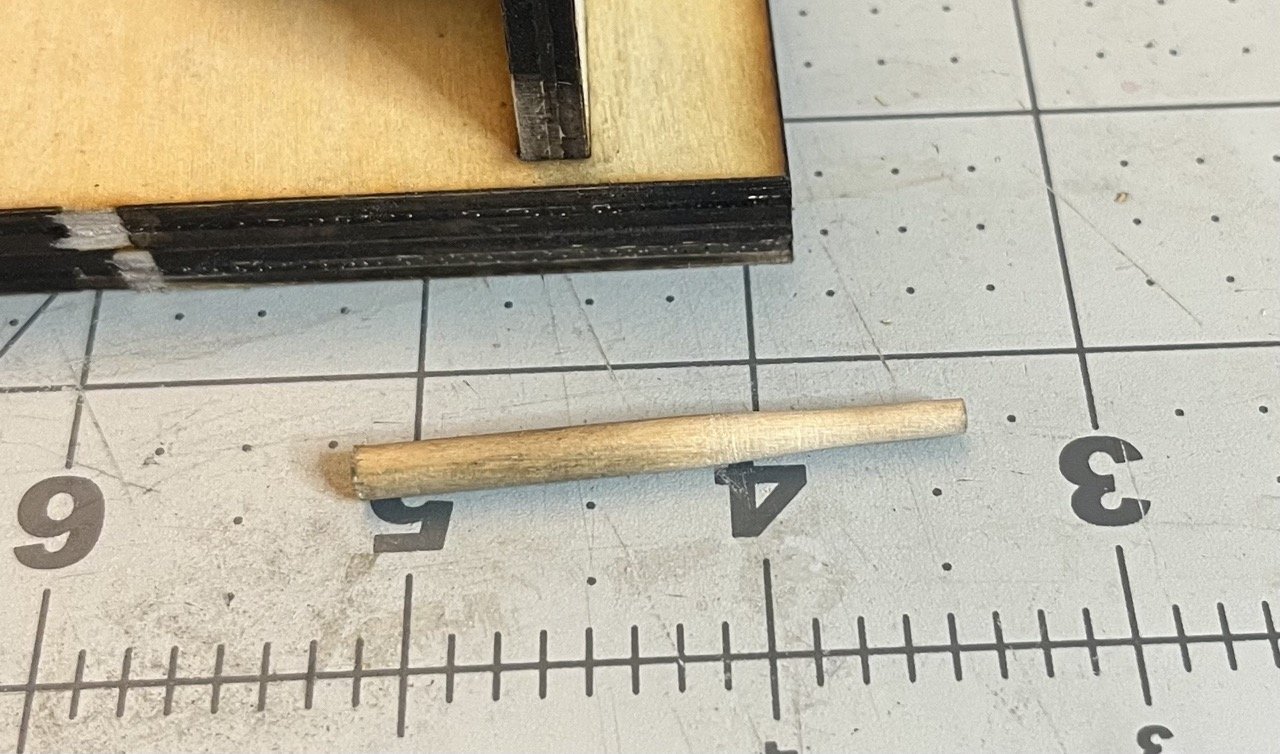
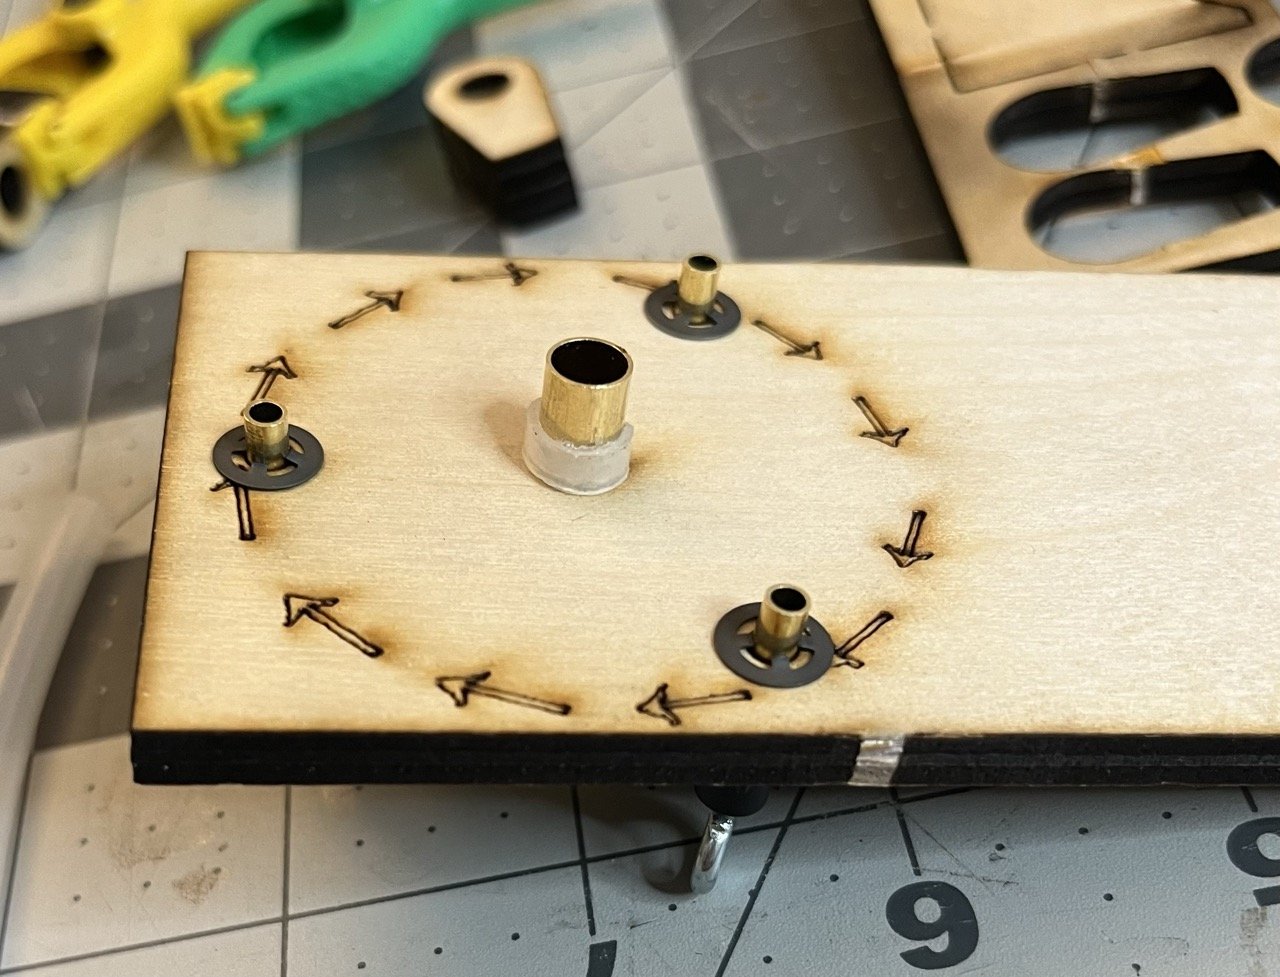
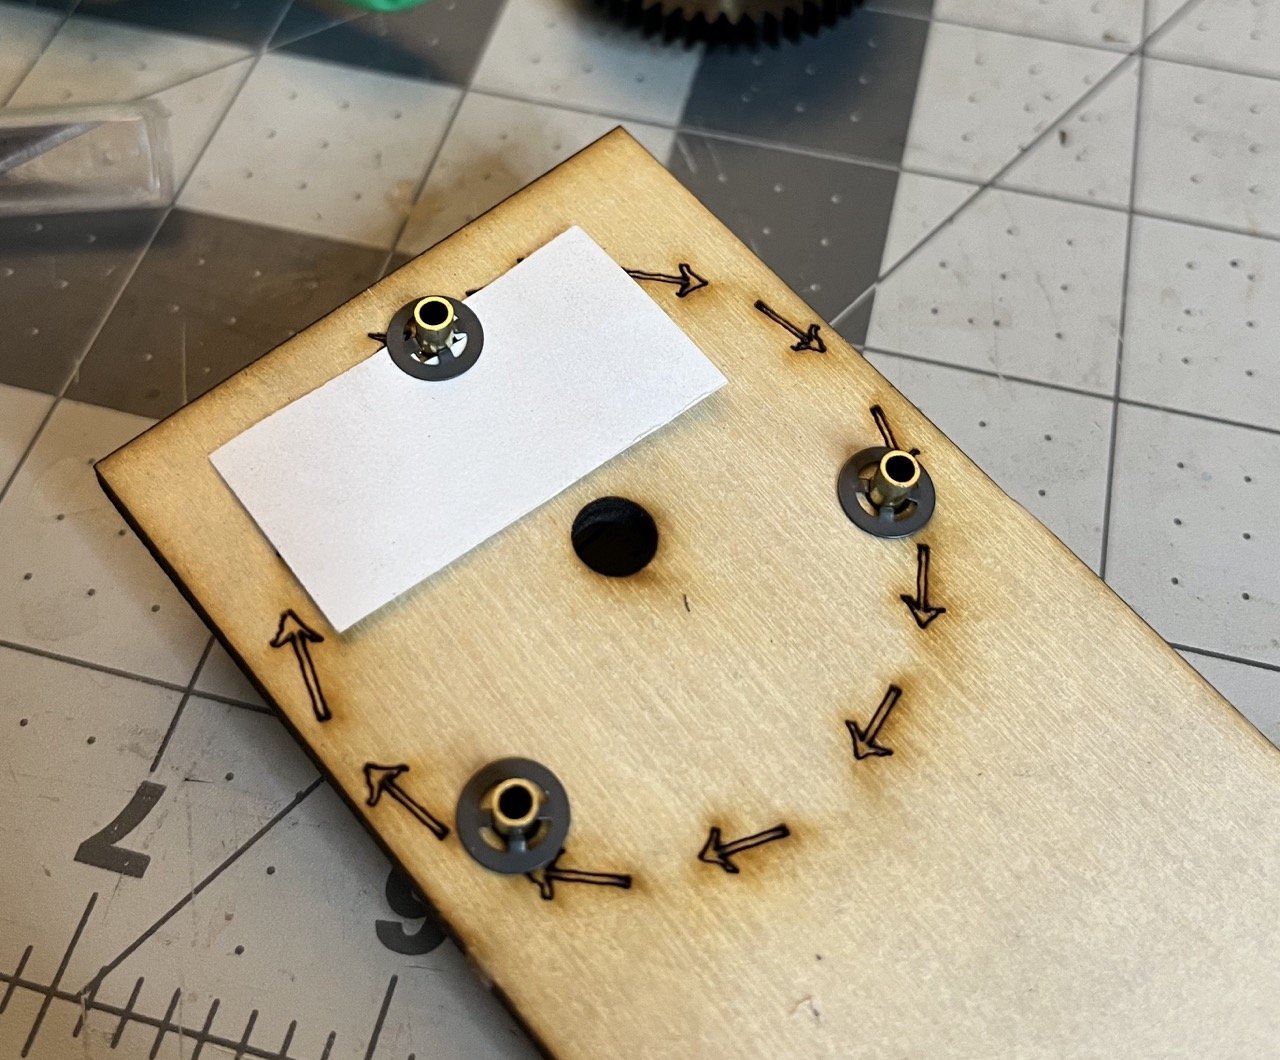
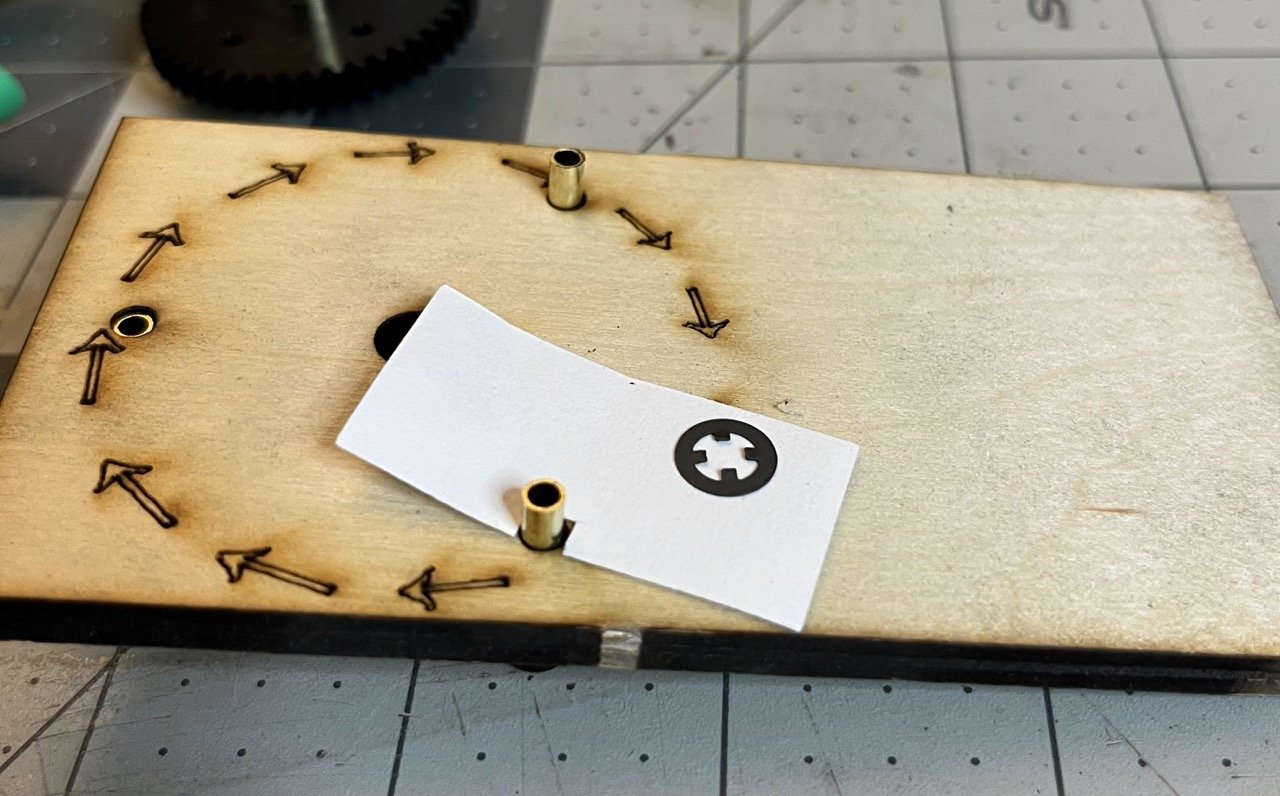
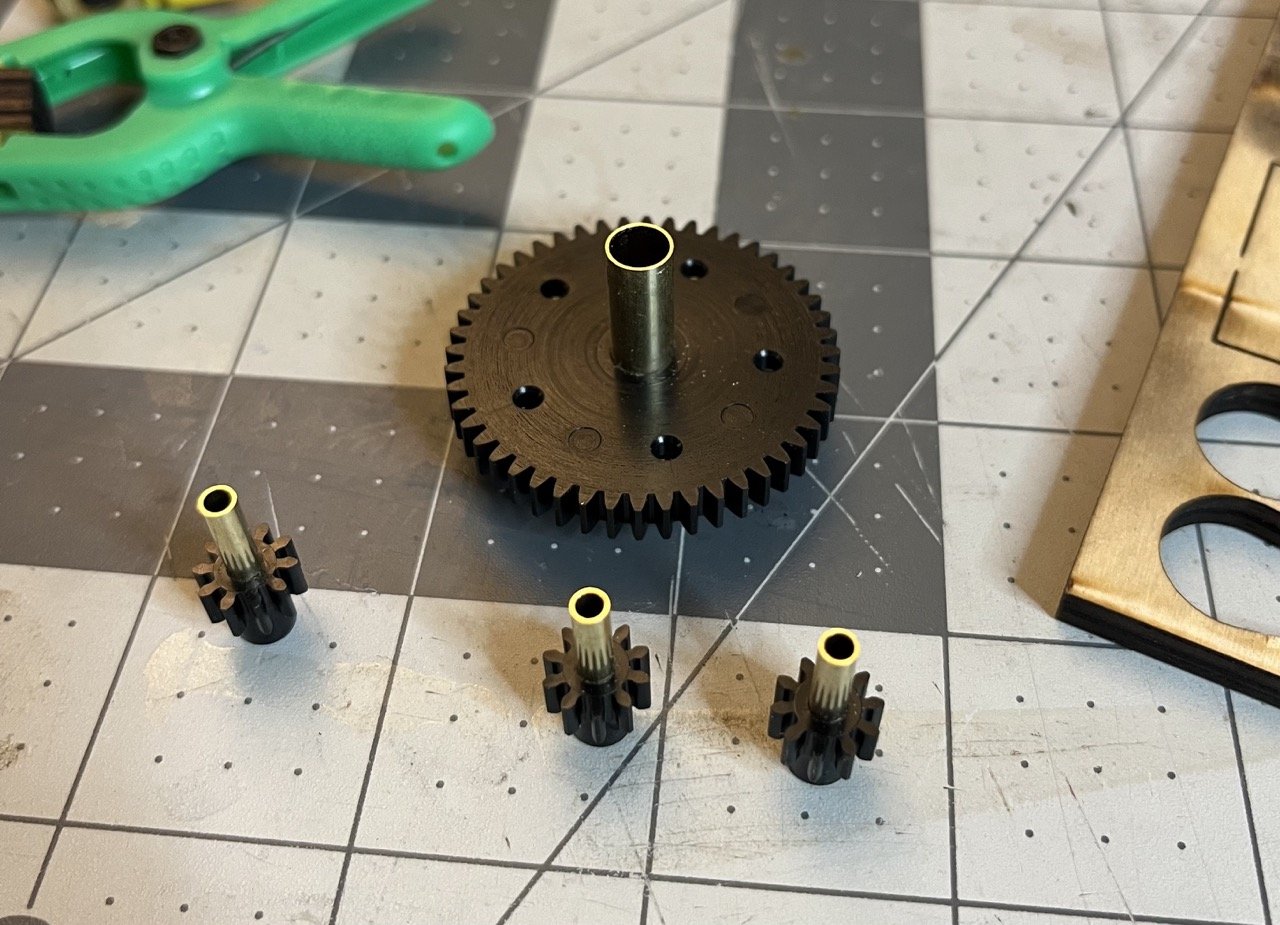
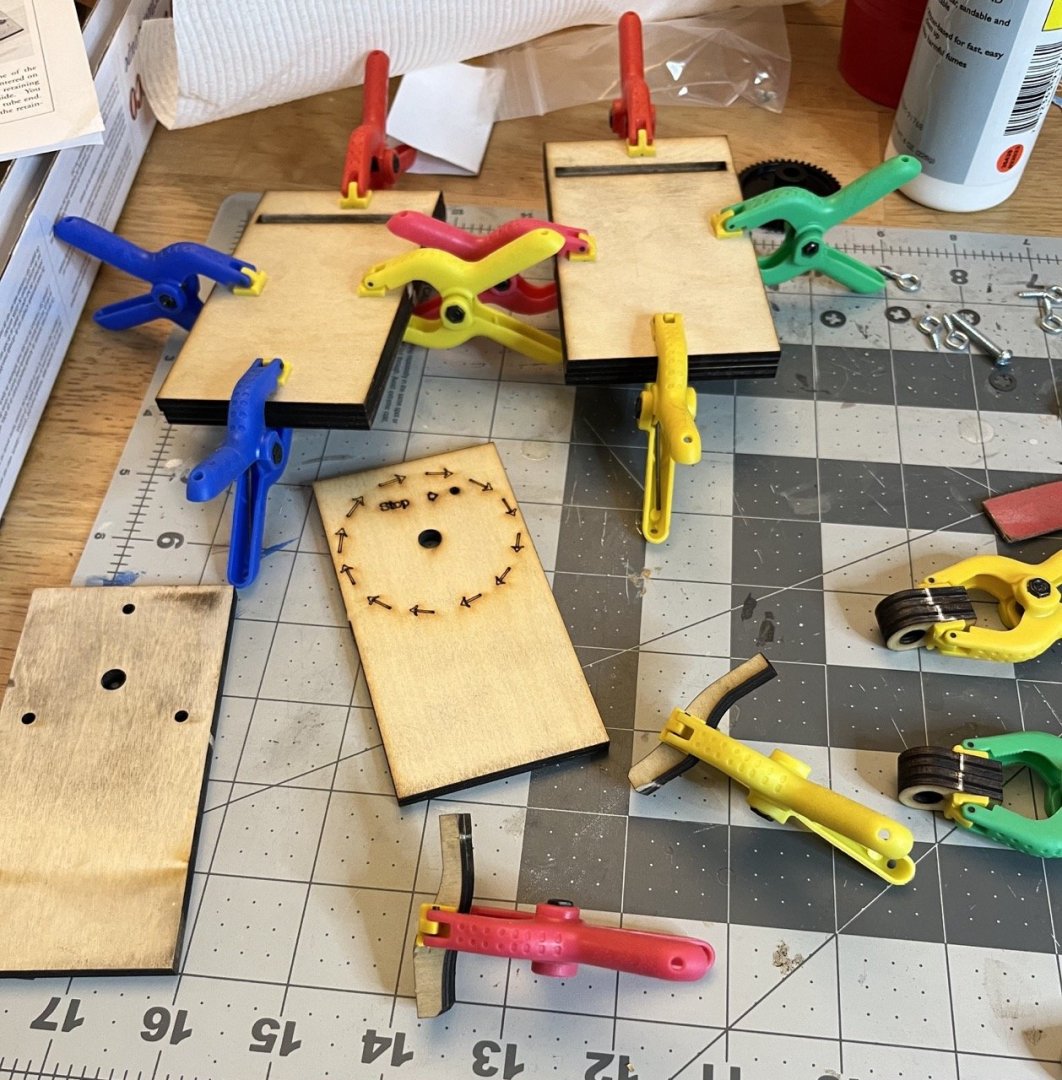
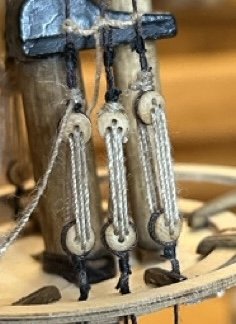
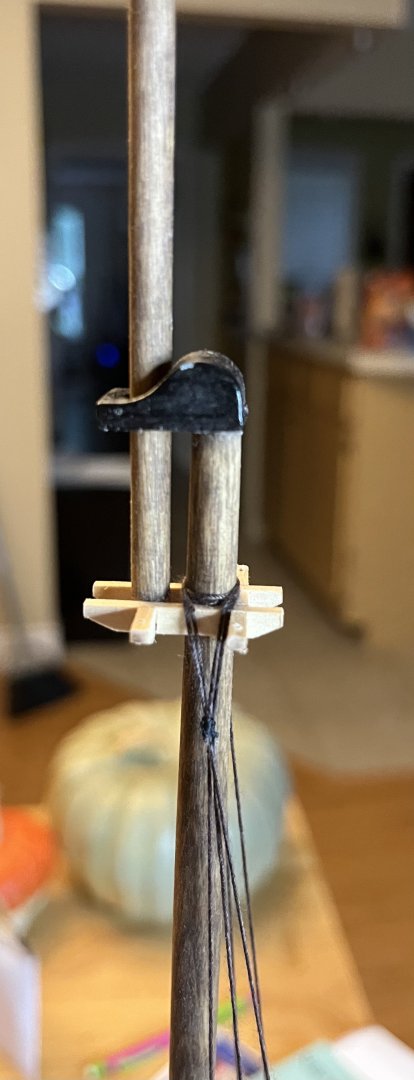
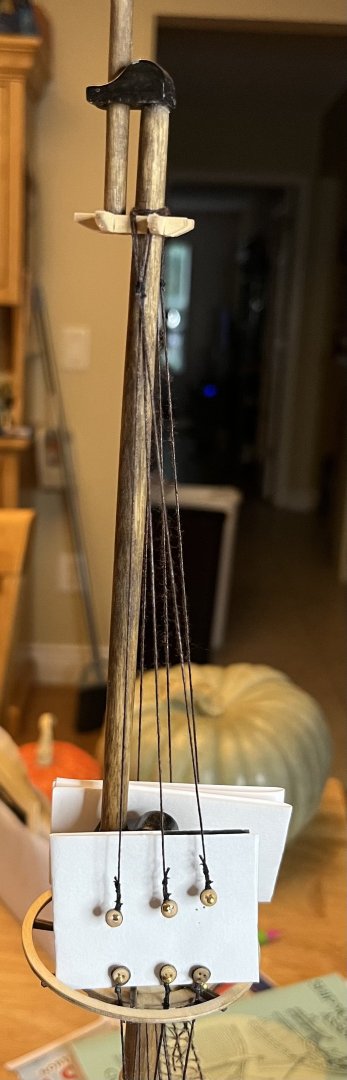
As I continue to learn more about ships, modeling and general nautical history, one thing I have noticed is how good models look with actual scale rope. The cotton string that comes with some kits just doesn't look all that good in comparison so I had considered getting a rope walk. I came across the Model ship ways scale rope making too on sale for about $19 so I decided to try it out. The contents of the kit came packed in bubble wrap lined manila envelope and consists of two laser cut basswood sheets (3/16 in thick) and the hardware. Upon doing an inventory there appears to be two missing pieces. A brass rod (the stopper) and two pieces of copper tube that appear to have been replaced by a nylon tube to use as handles. As can be seen, there is a knot in the basswood, but this ended up not really being a problem. The back side of the sheets are a bit charred. Was this why it was marked down? Since I didn't pay full price and it is only cosmetic I cleaned it up a bit and carried on with building. The base and handle pieces are glued together to form form 3/8 inch pieces. The slots in the bases are slightly too small so sanding is needed which gives a tight fit. The instructions call for tapering the ends of the copper tubes to help fit them into the gears. This is helpful as it is a very snug fit that required a bit of hammering to insert. The tubes then go into the corresponding holes and the three smaller gears are held in place with lock washers (concave facing in). An index card is used to provide a tiny bit of space to eliminate friction with the wood. At this point is where I decided to not build the rope walk as designed. I decided to go against using the hand crank as it seems like it would be very slow. I used the nylon tube and cut some rubber washers to hold the larger gear/wheel in place. My plan is to use a drill to turn the rope walk. I will definitely get an appropriately sized lock washer as the nylon tends to slide more easily that I anticipated, but it works in a pinch. The eye bolts simply screw into place. I didn't take many photos of building the other side because it is incredibly straight forward after building the geared side. The last thing to do was to make a stopper since the kit was missing one. I made it by sanding down scrap dowel. I think this will actually be better because it is less likely to get lost. The finished rope walk sans handles. The stopper being wedged in back should stay put while not in use. It seems to work ok with a drill, but it would be a better if the tubes were just a bit longer. That isn't a failing of the kit though since it wasn't designed for such usage. Overall, I would say that it is reasonably good simple kit for what I paid for it. At full price however, I try to get something higher quality (even if it costs a bit more) or DIY.


-
Added the ratlines to the port side. I then noticed that the dead eye on the left had twisted around and the knots were in the front. Fortunately this was a simple fix as redoing the lanyard only took a couple of minutes.


- 86 replies
-
- 2
-
-
- San Francisco
- Artesania Latina
- (and 2 more)
-
Good luck on the build! Welcome to MSW!
-
The port side is a bit more even. The next step is to add the ratlines to the top shrouds. I think I need to work on removing the fuzz off of the cotton threads.

- 86 replies
-
- 2
-
-
- San Francisco
- Artesania Latina
- (and 2 more)
-
Very nice Dory! Looking forward to watching the pram be built.
- 39 replies
-
- 2
-
-
- Norwegian Sailing Pram
- Model Shipways
- (and 1 more)
-
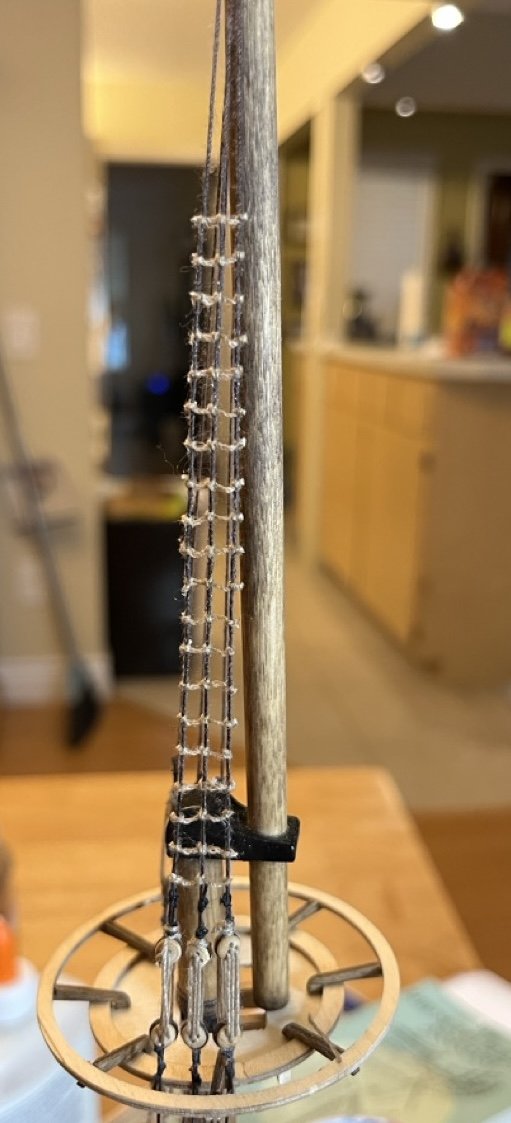
To install the futtock shrouds, I clamped the eye of the first shroud to the top, the tied the futtock shroud near the highest ratline, then lashed it. For the next two I pinned them to an index card to get the heights right. I messed up a little by pulling the shroud a bit too much when tying off the futtocks which helped caused the dead eyes to not be quite even. The next step was to create the top shrouds. These were pretty straight forward. Rather than tying the lines to the topmast head, I looped and lashed them. Attaching them to the bottom, I made a loop and clamped the loop down to add weight for tension and to free up my hands to do the first lashing. I used the loop to rig the dead eyes. I was able to do this on the futtock shroud dead eyes without much of a problem, but for some reason the dead eyes on the top shrouds didn't want to cooperate. Once the loop was around the dead eye the lashing could be slid down and the rigging tightened. The three dead eyes attached. They are a little uneven, but I thought it would correct for the futtock shroud being a bit off. lanyards were rigged next. As can be seen, not quite level. As a side note, this little threading tool was the best dollar ever spent.


- 86 replies
-
- 5
-
-
- San Francisco
- Artesania Latina
- (and 2 more)
-
HMS Sherborne - Caldercraft vs Vanguard
SiriusVoyager replied to nheather's topic in Wood ship model kits
You could always be ambitious and build both simultaneously and let us know the differences 😃 -
I wish I could say those were all original ideas but I am not that clever. I wish I could remember where I came across both ideas so I could give proper credit. In any event, I’m happy to see that something I posted was helpful. Thanks you for taking the time to check out and comment on my build log!
- 86 replies
-
- 1
-
-
- San Francisco
- Artesania Latina
- (and 2 more)
-
I think the simplest solution (though maybe not the most elegant) is this: If it is already fuzzy, lightly sand with 220 grit sand paper. If not, then skip that step. Paint a thin layer. When dry, lightly sand again with 220 grit sand paper. Repeat once or twice more until you can paint with no fuzz.
-
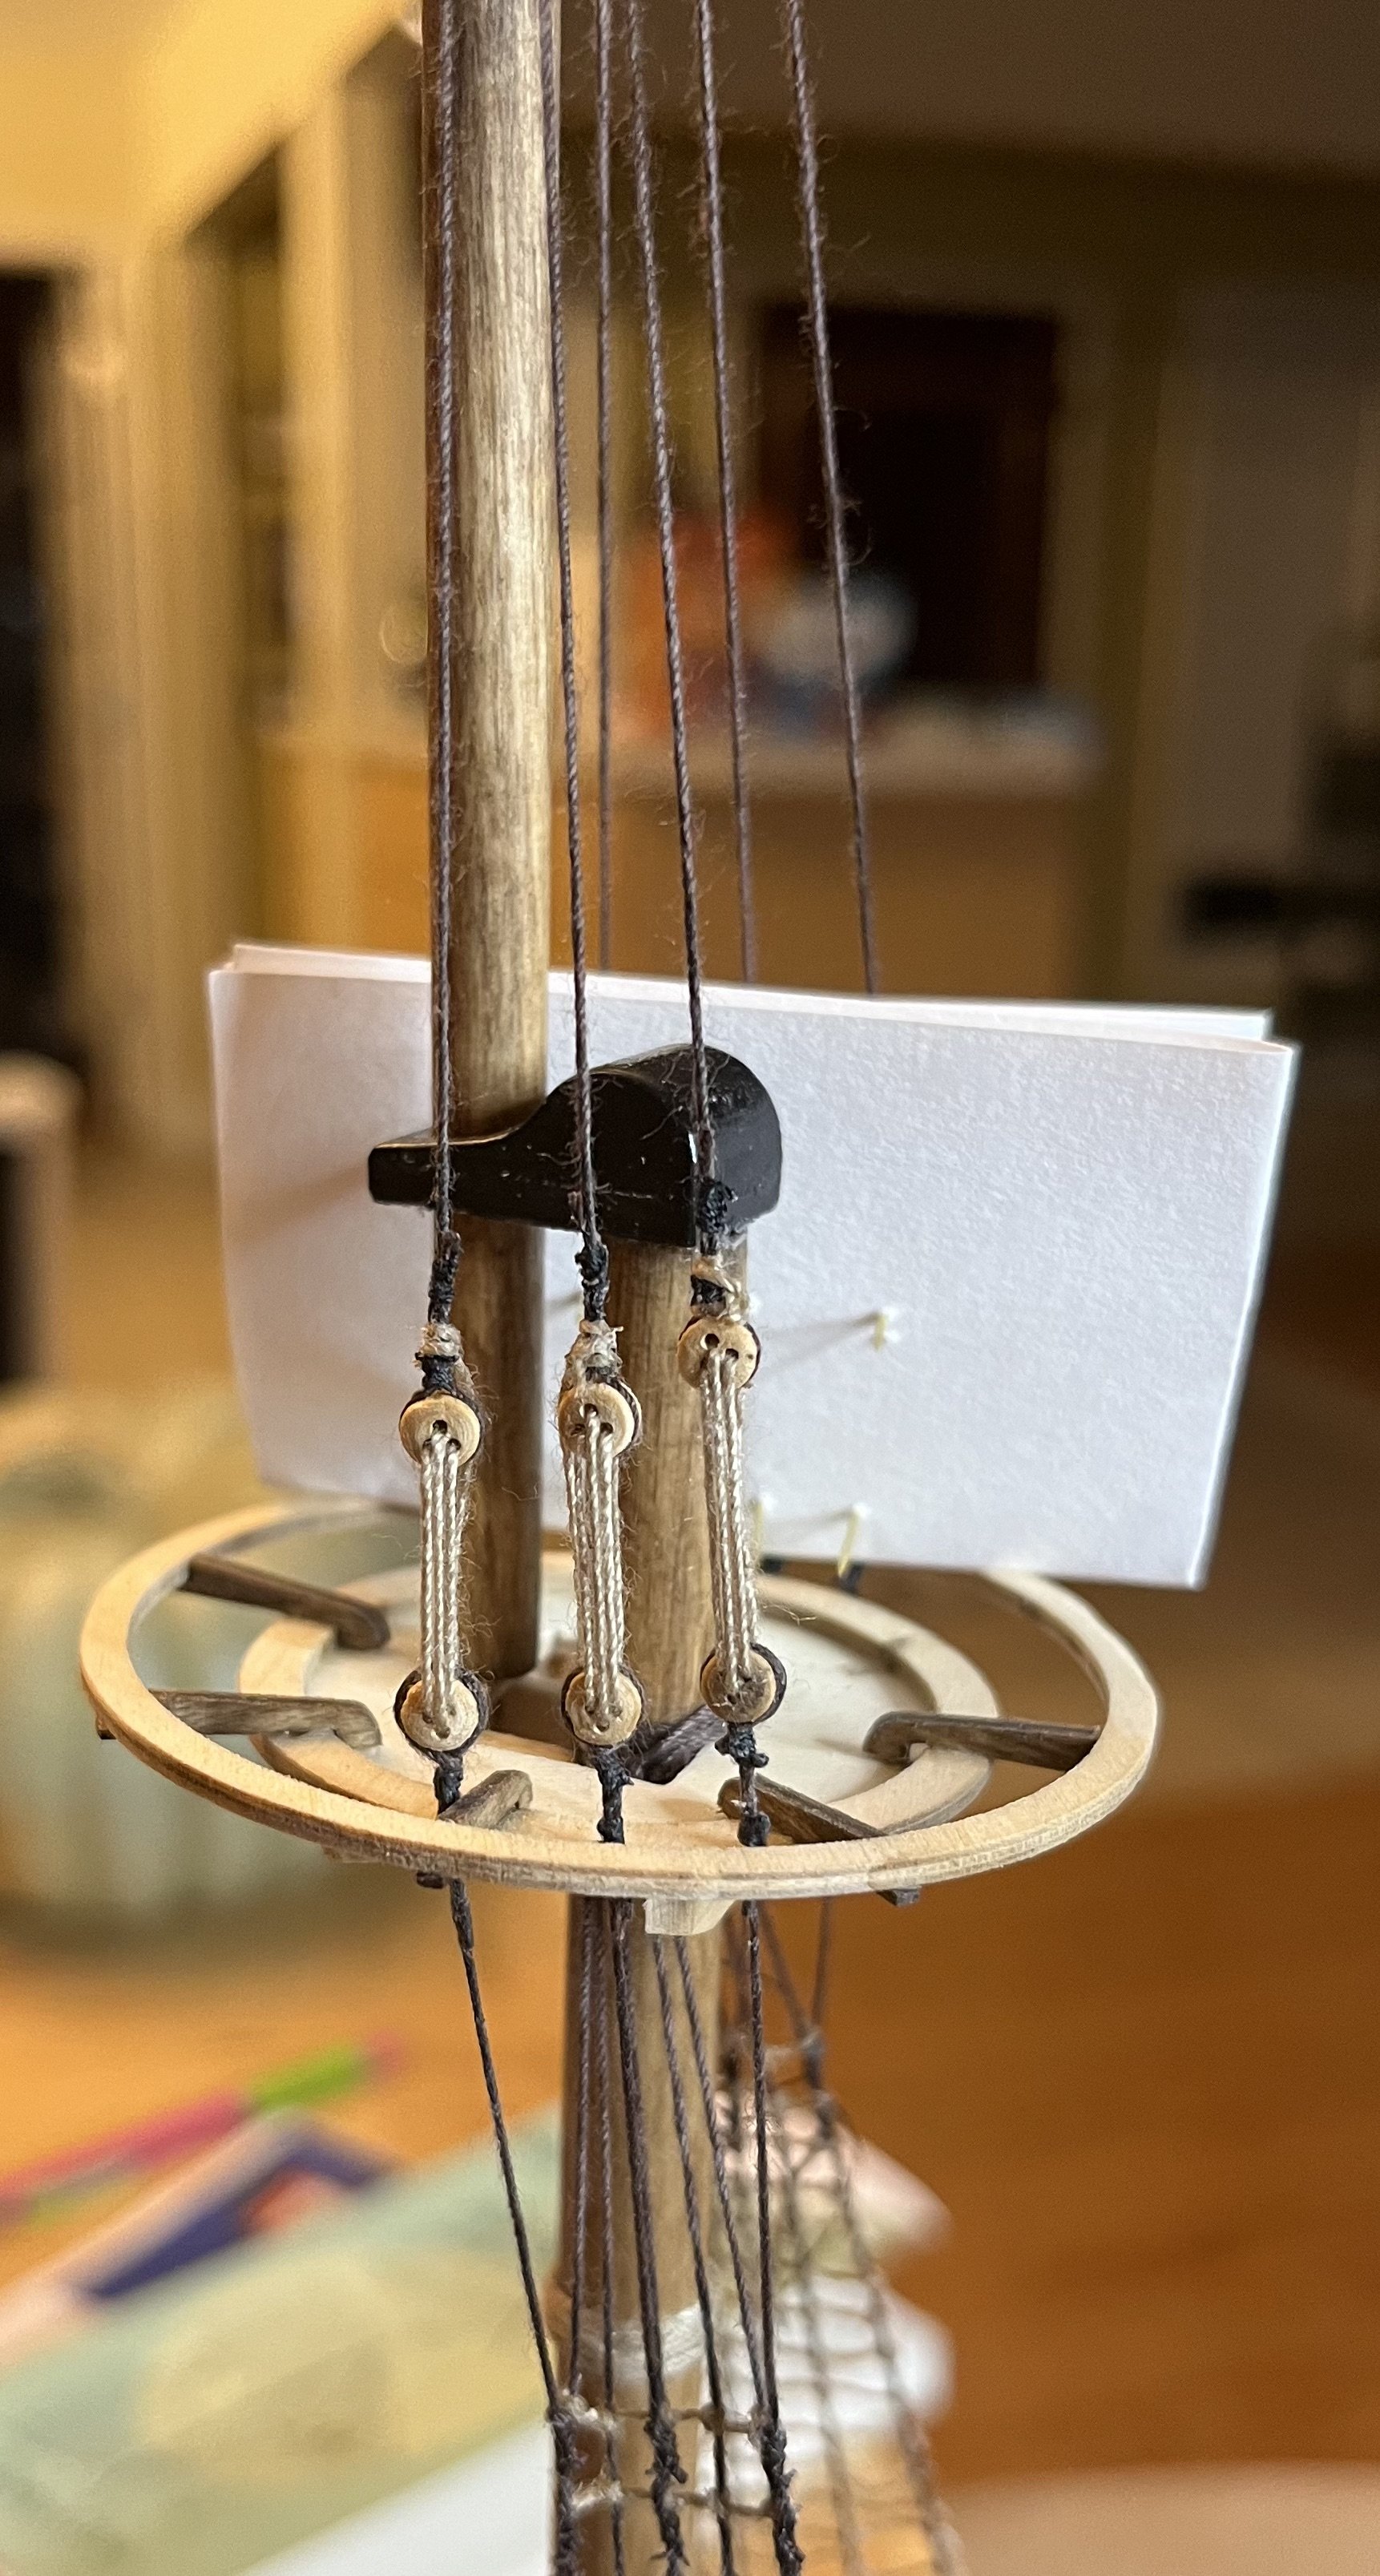
Thanks Chuck! Next was the futtock shrouds. Lashing these at first was difficult, but once I got going it wasn't so bad. I decided I didn't want to lash them with the thread provided in the kit. It is just too thick, so I used sewing thread which was much easier to use. I clamped the shroud on two pieces of scrap wood to elevate it above the table. The loop is to pass the shroud through itself when it goes around the dead eye. I started the lashing by tying it down to the shrouds to hold it in place, then used cow hitches to pull each loop tight to each other. I am sure this is not how it is done on a real ship, but it works on with the thin thread. I am not sure if the cow hitch is easy to see here. Basically it is just a loop, but pulled through itself. The thread loops around the two pieces of the shroud and the other end of the lashing thread. This is so there is a way to tie it off at the top. There is the Lashing above. I continued with a second lashing on each shroud. The first three I made, I made the mistake of gluing the lashing with diluted PVA once they were tied off. This was a mistake because it wasn't properly fitted for when the shroud is looped around the dead eye. The next three I didn't glue until the dead eye was inserted. The lashings could easily be slid down the shroud then glued. OH NO! DON'T CUT MY ARMS OFF!! AAAHHH! The finished futtock shrouds.


- 86 replies
-
- 2
-
-
- San Francisco
- Artesania Latina
- (and 2 more)
-
Great looking Dory!
-
That is a very professional looking half hull. Great job!
- 82 replies
-
- 3
-

-
-
- half hull planking project
- half hull
- (and 2 more)