westwood
-
Posts
278 -
Joined
-
Last visited
Content Type
Profiles
Forums
Gallery
Events
Everything posted by westwood
-
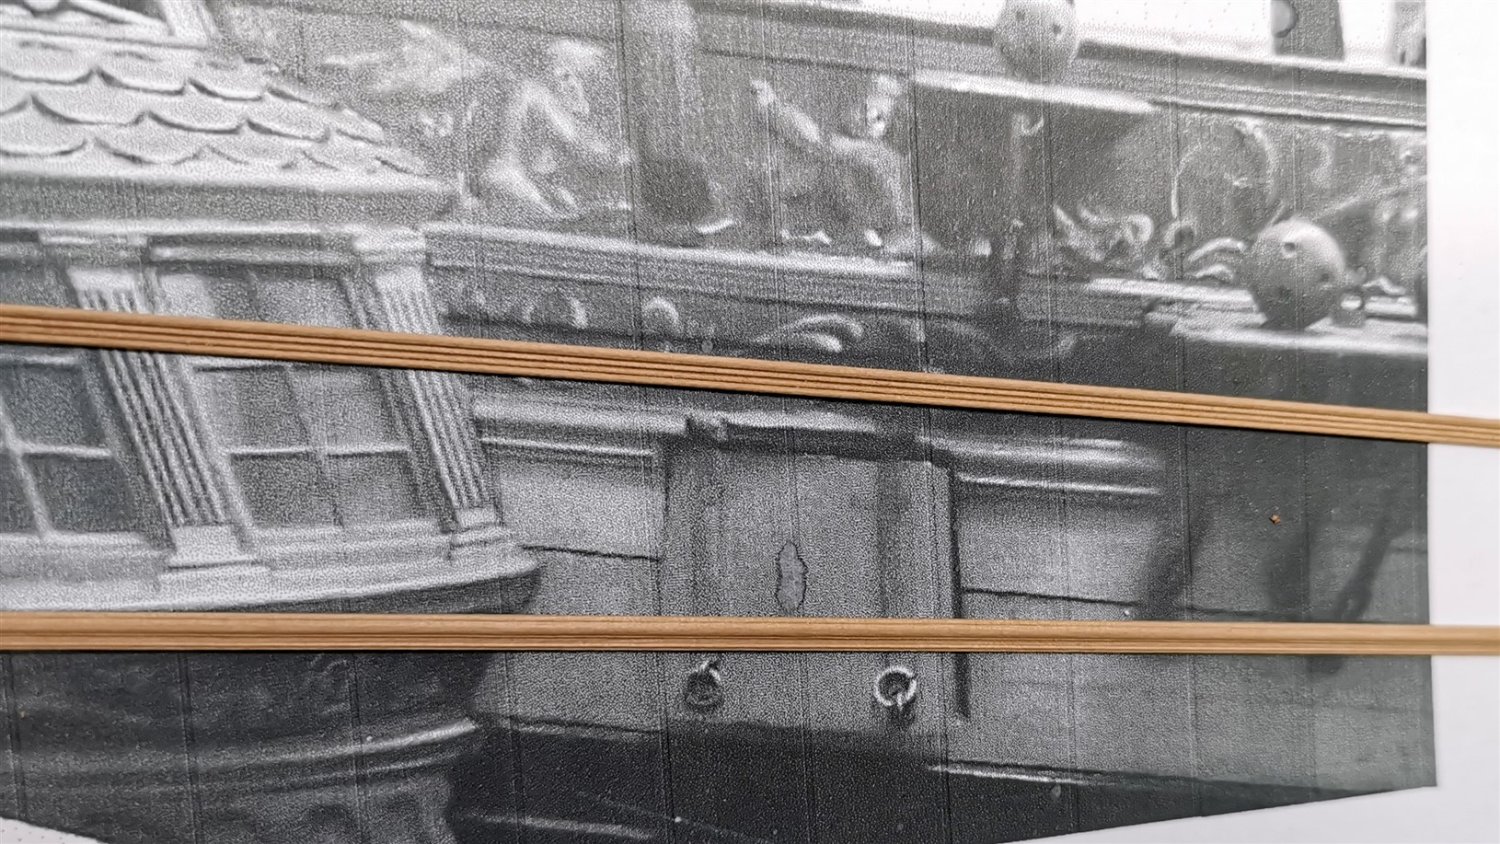
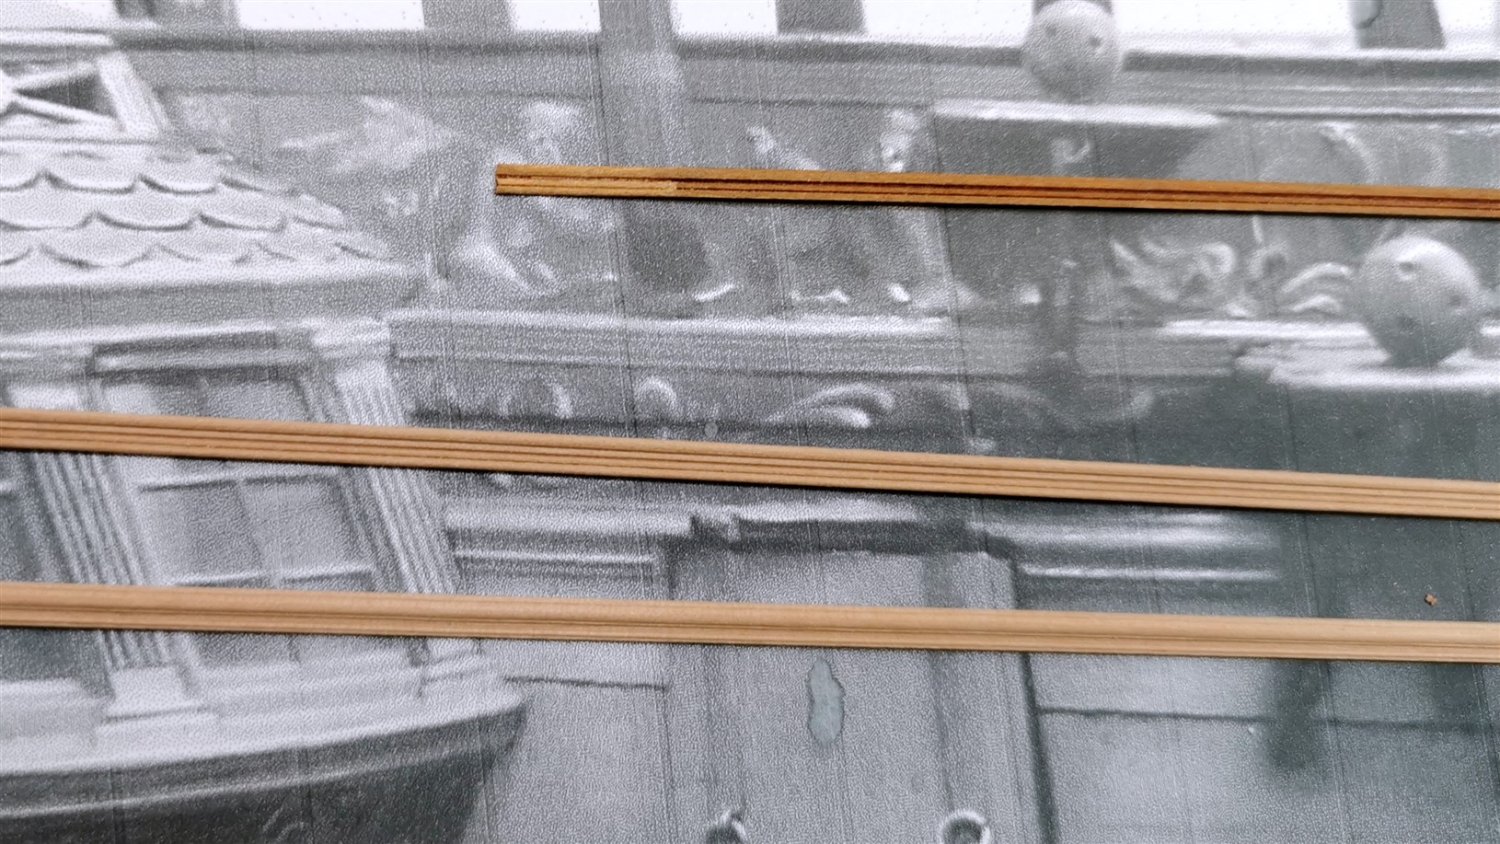
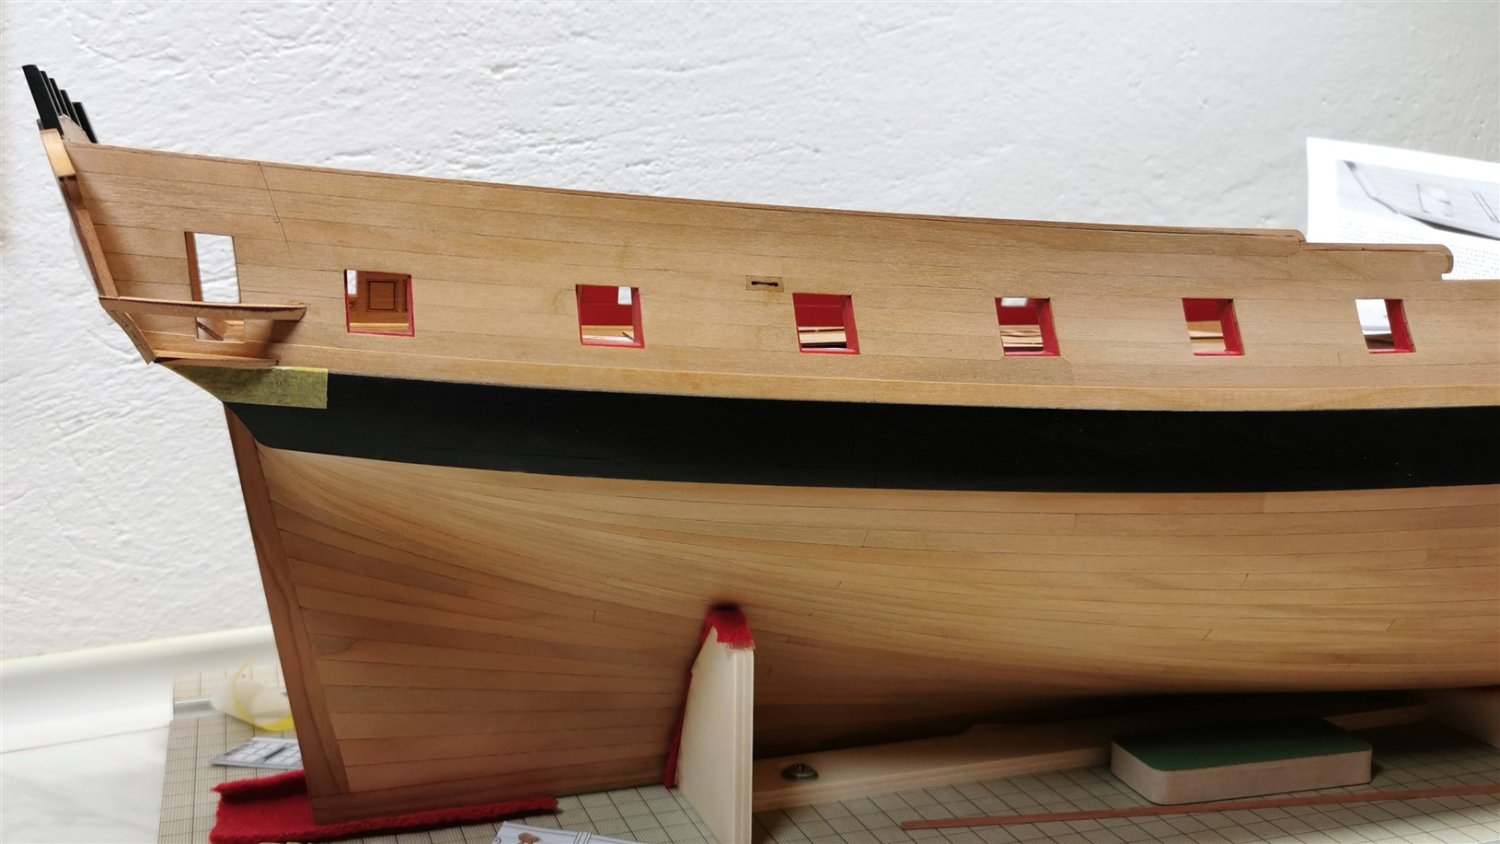
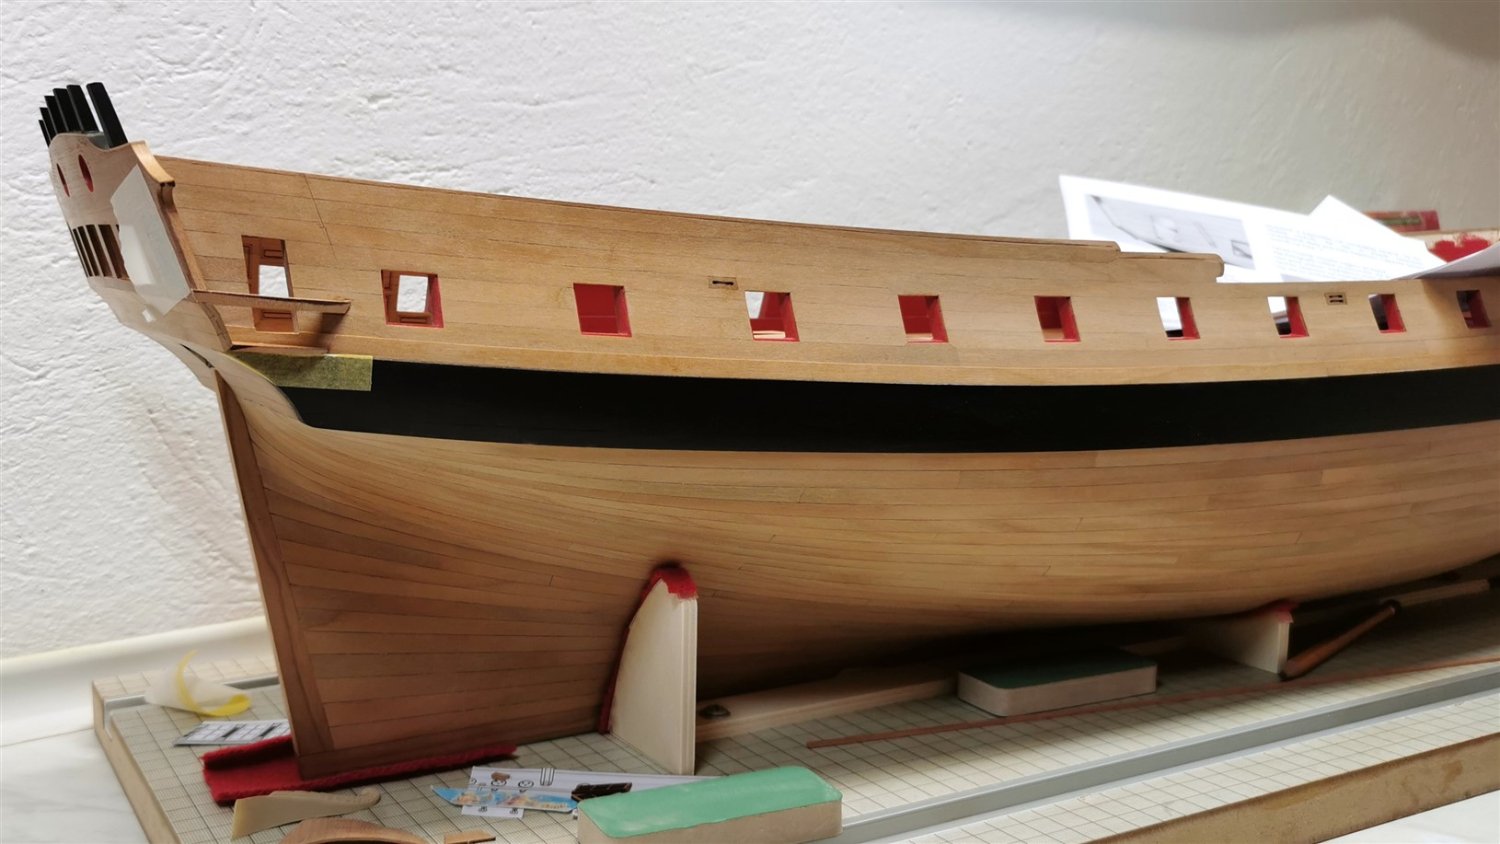
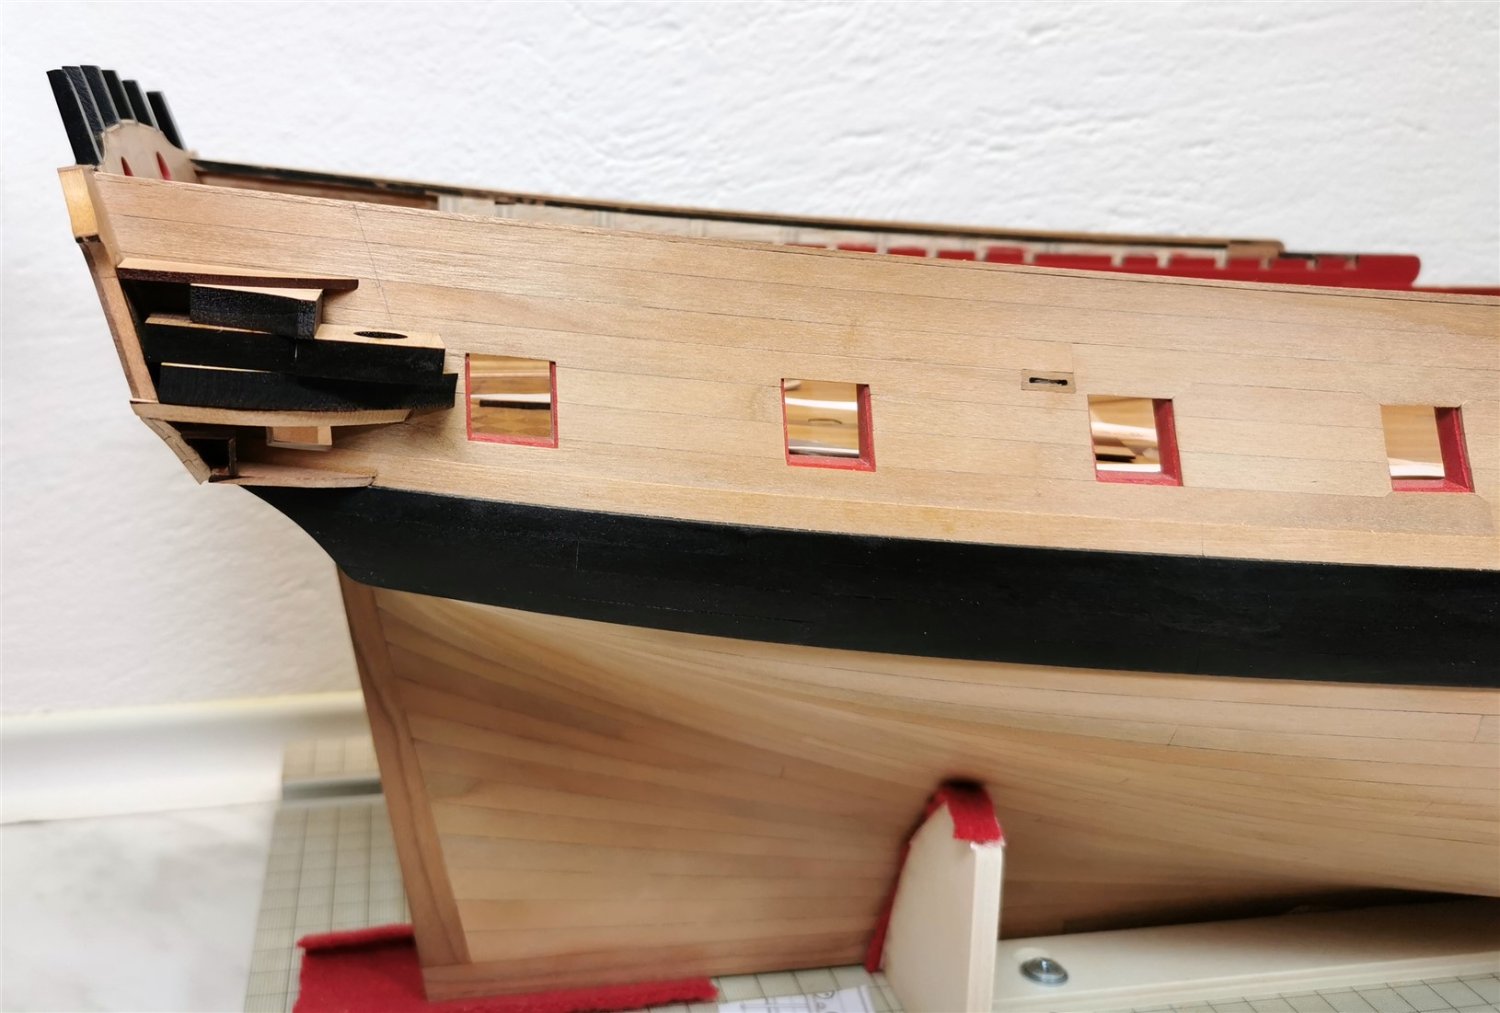
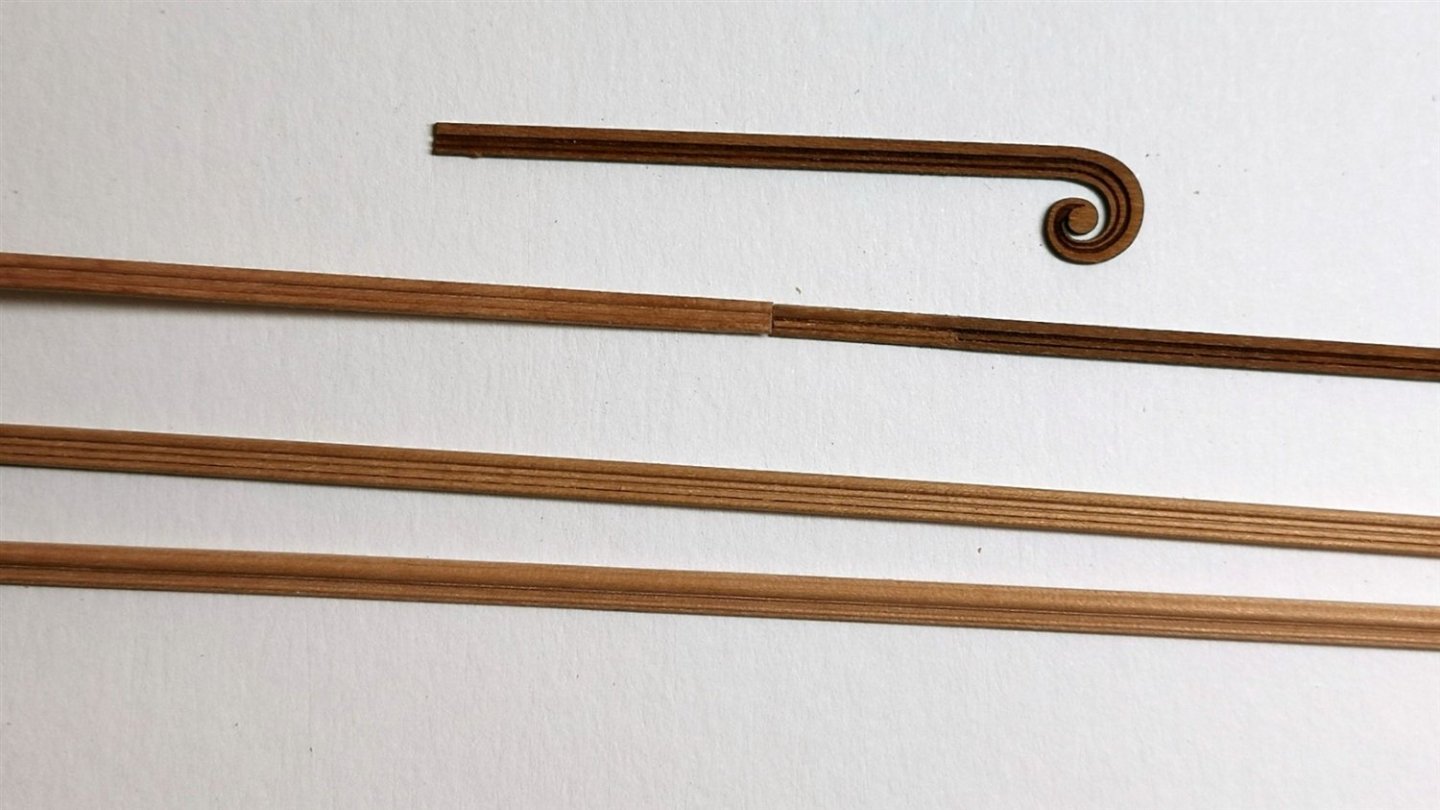
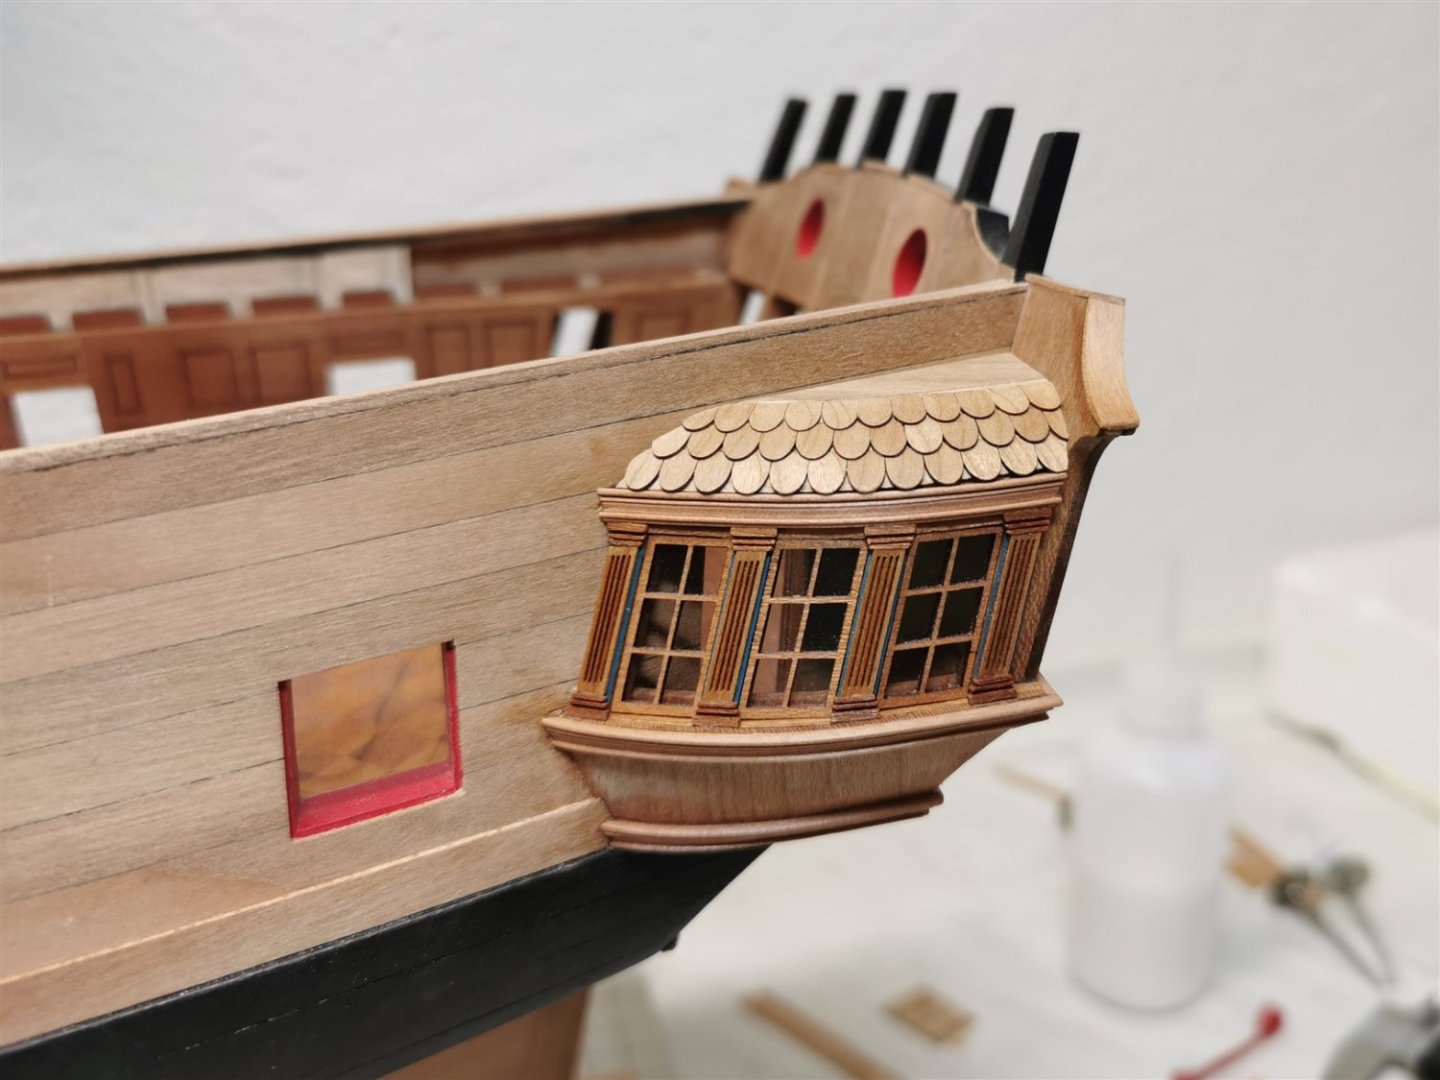
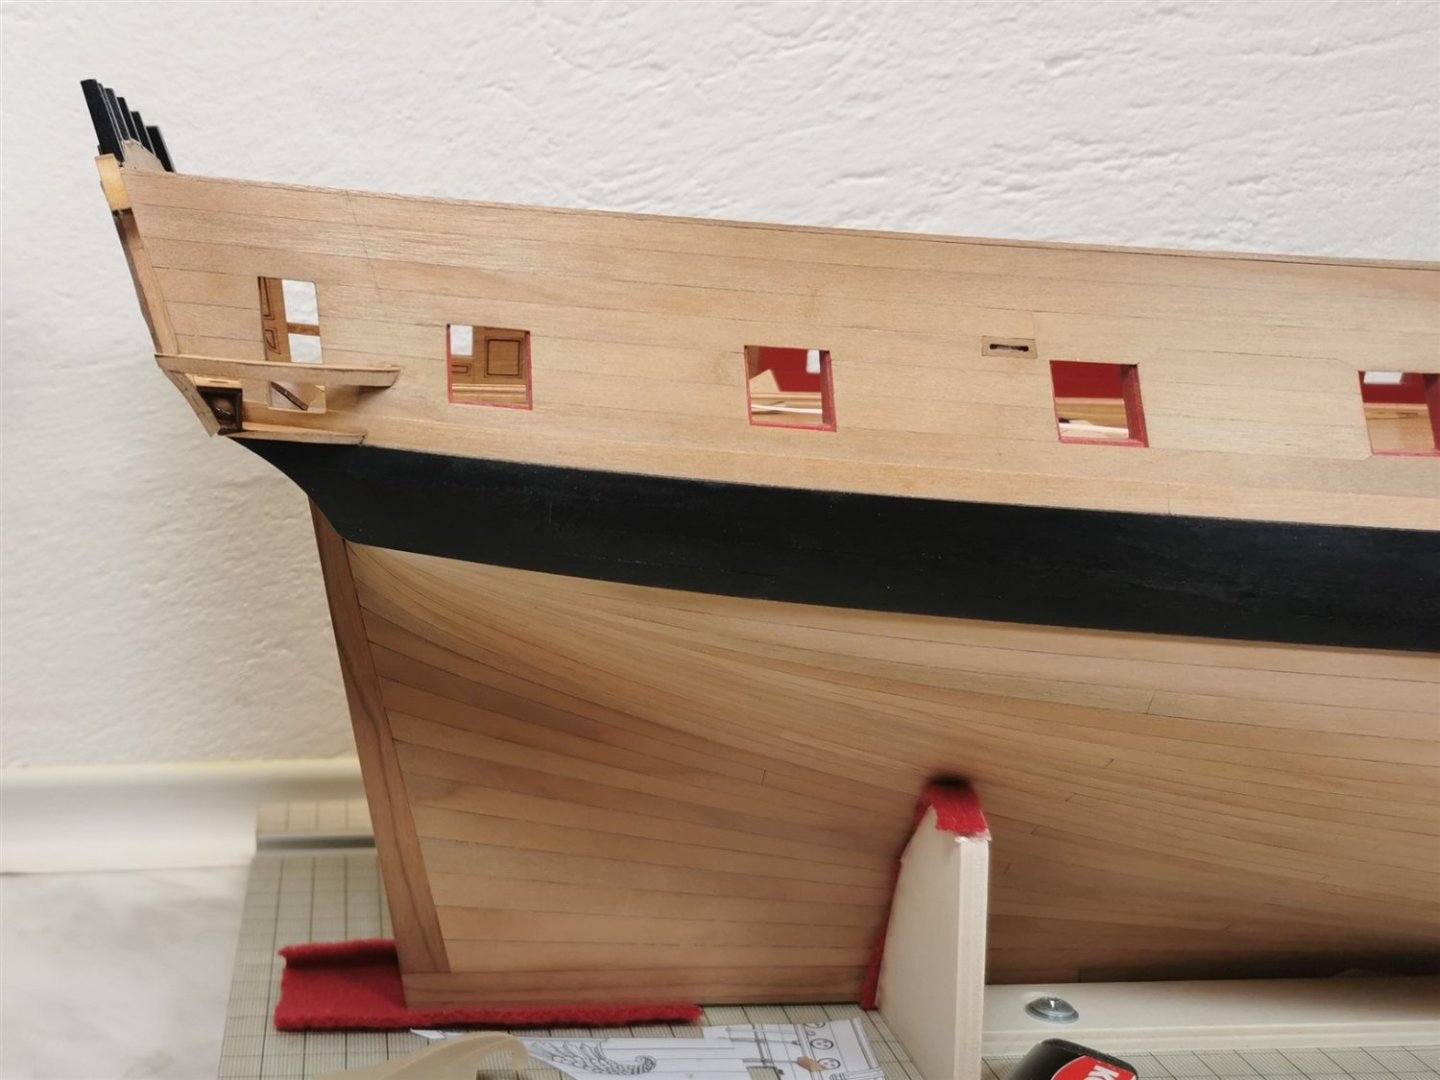
Thanks for the compliments guys. I've scraped off the other moldings and I'm just one step away from gluing them in place. But I still have my doubts. The thing is it's a bit wider than the monograph mentions. I stayed with Chuck's earlier idea of making the bottom molding wider. So the result that the top is 2.5 mm the middle almost 3 mm and the bottom 3.17 mm. What do you think ? I also made a scraper for the top molding for homogeneity and I will use probably only the finely cleaned spiral laser cut.


-
Beautiful result Jim, congratulations. And It's also nice to add a crew.
- 105 replies
-
- 1
-

-
- winchelsea
- Syren Ship Model Company
- (and 1 more)
-
wow you're off to a good start Rob. It's great that you are able to make the plans in CAD, for me it is a totally unknown.
-
With each update I like it more and more Chuck.
-
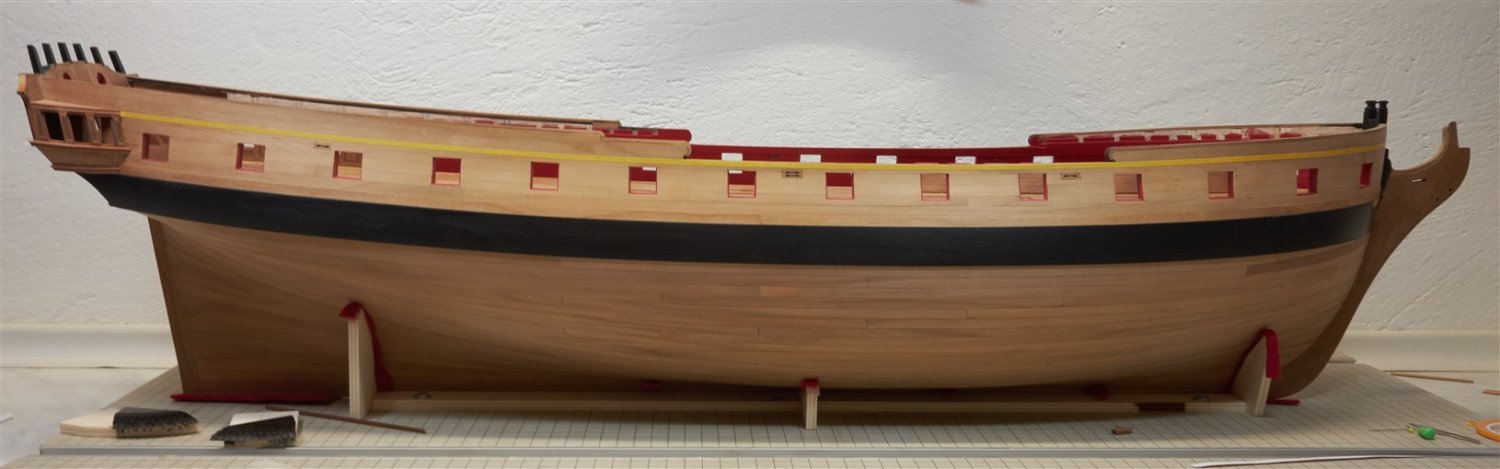
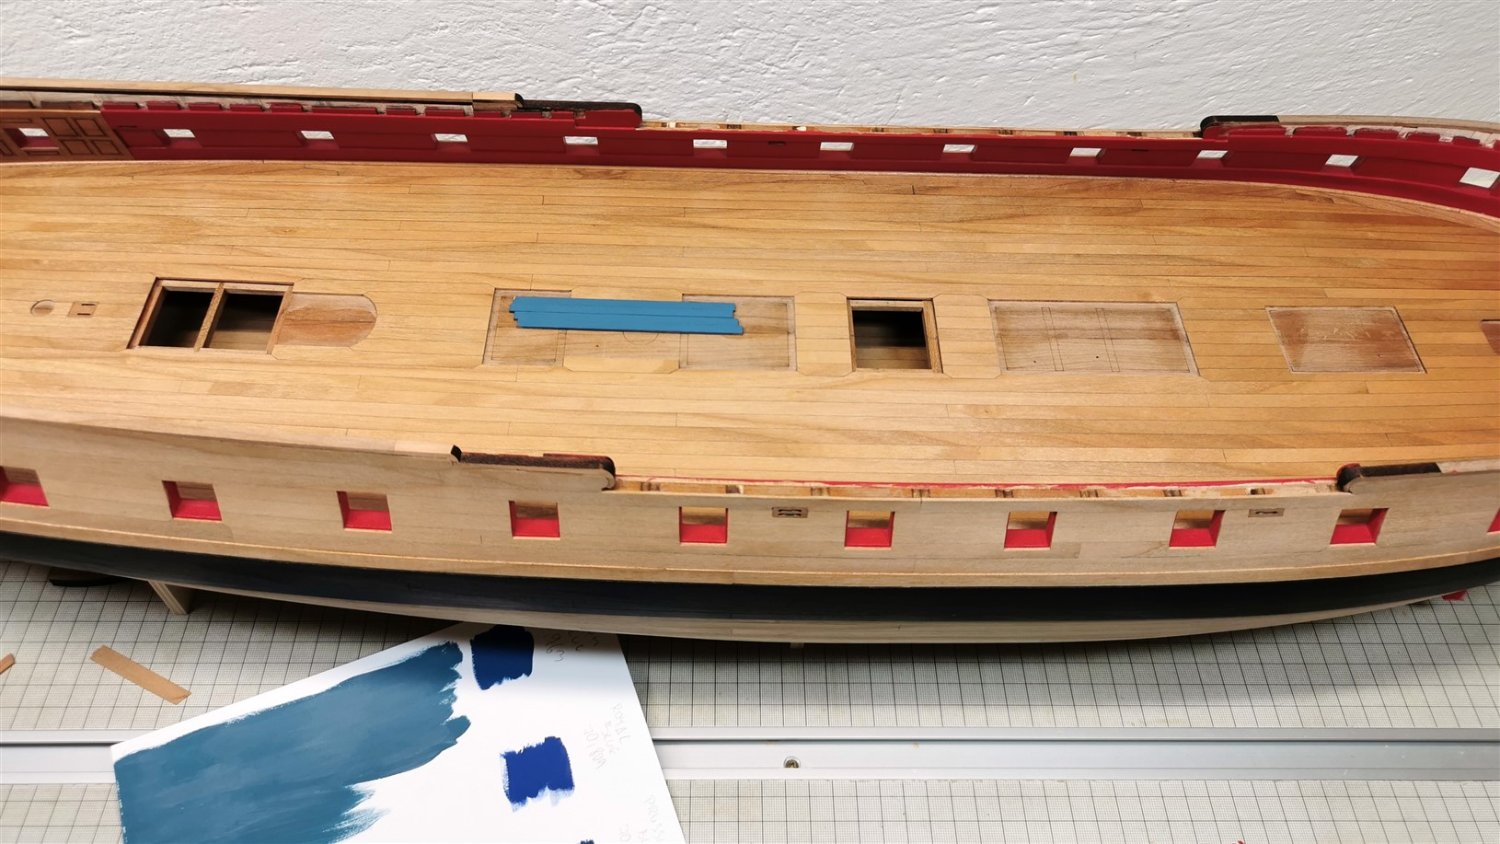
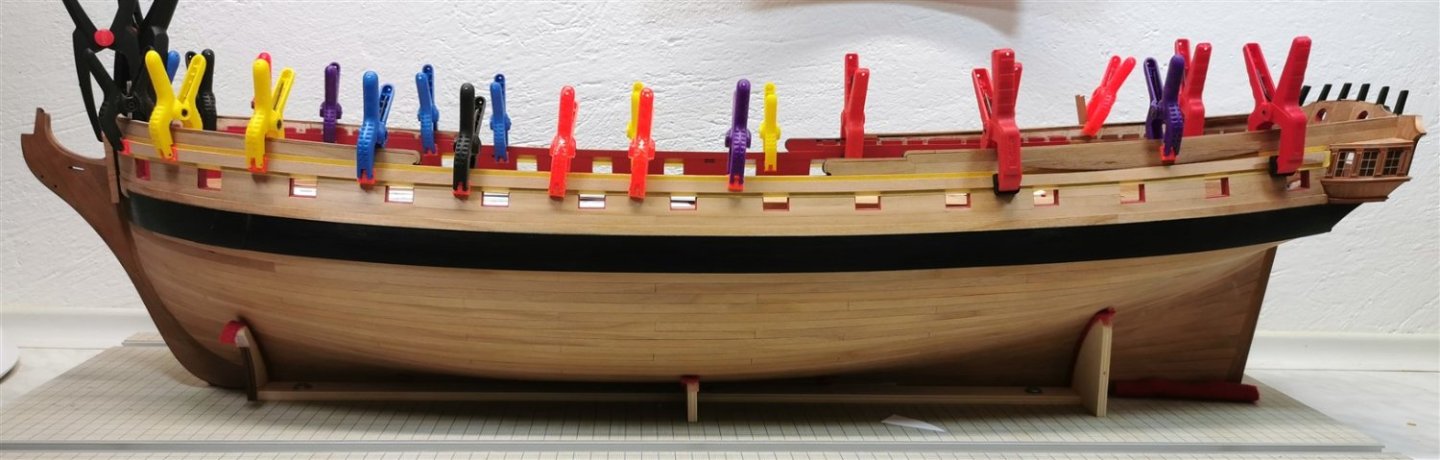
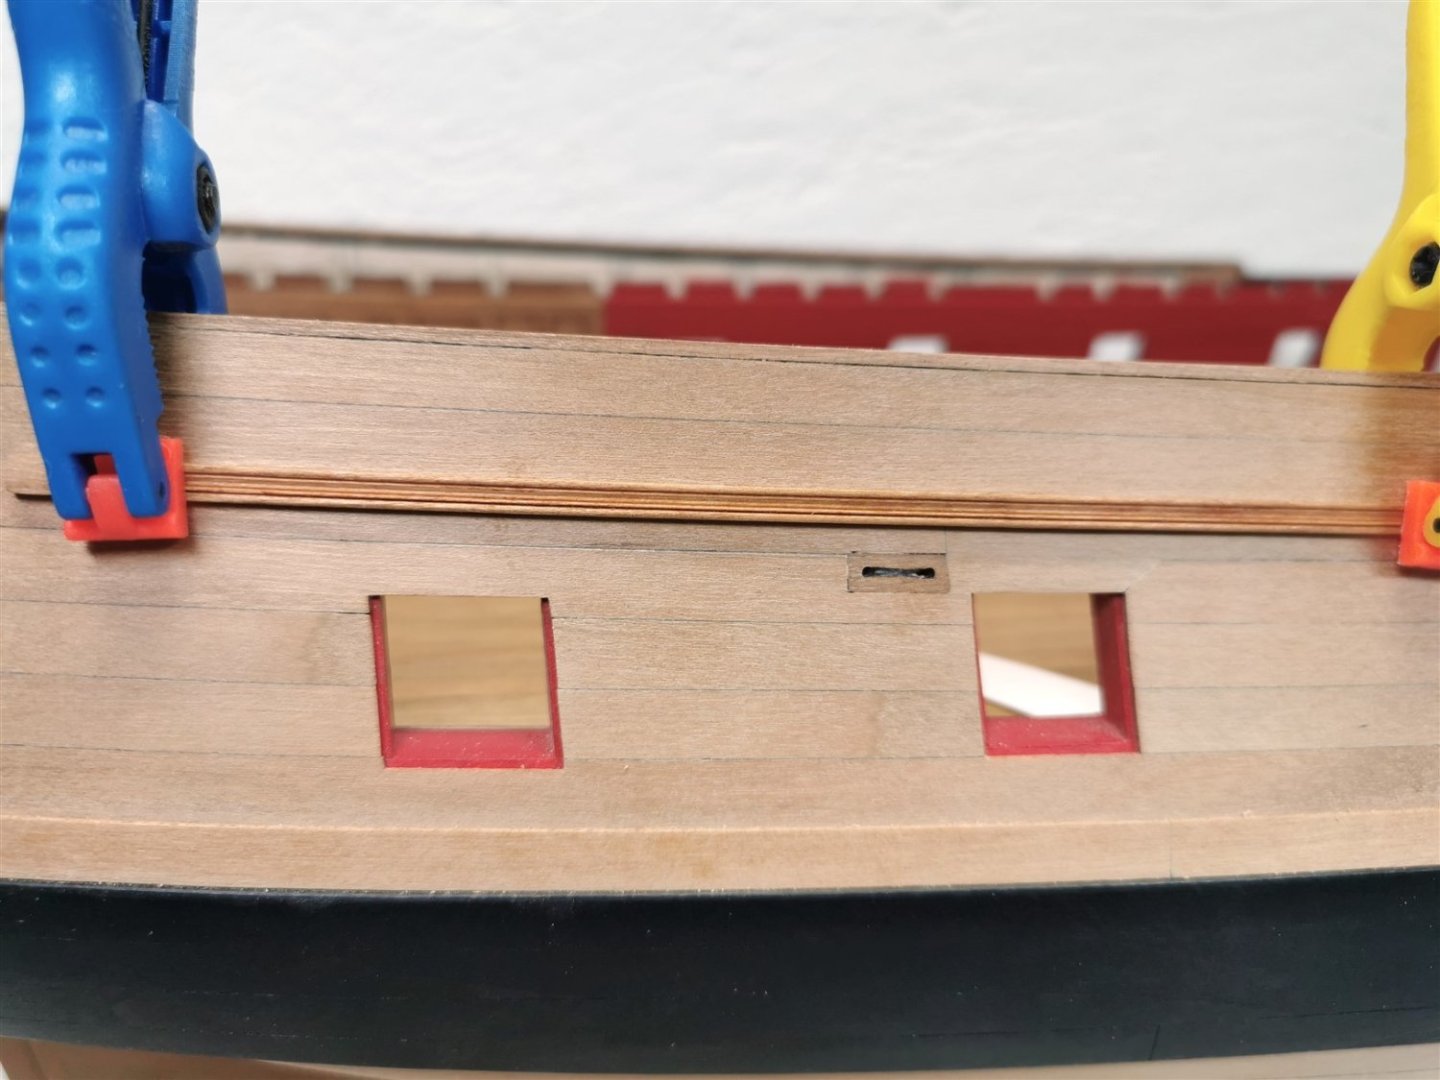
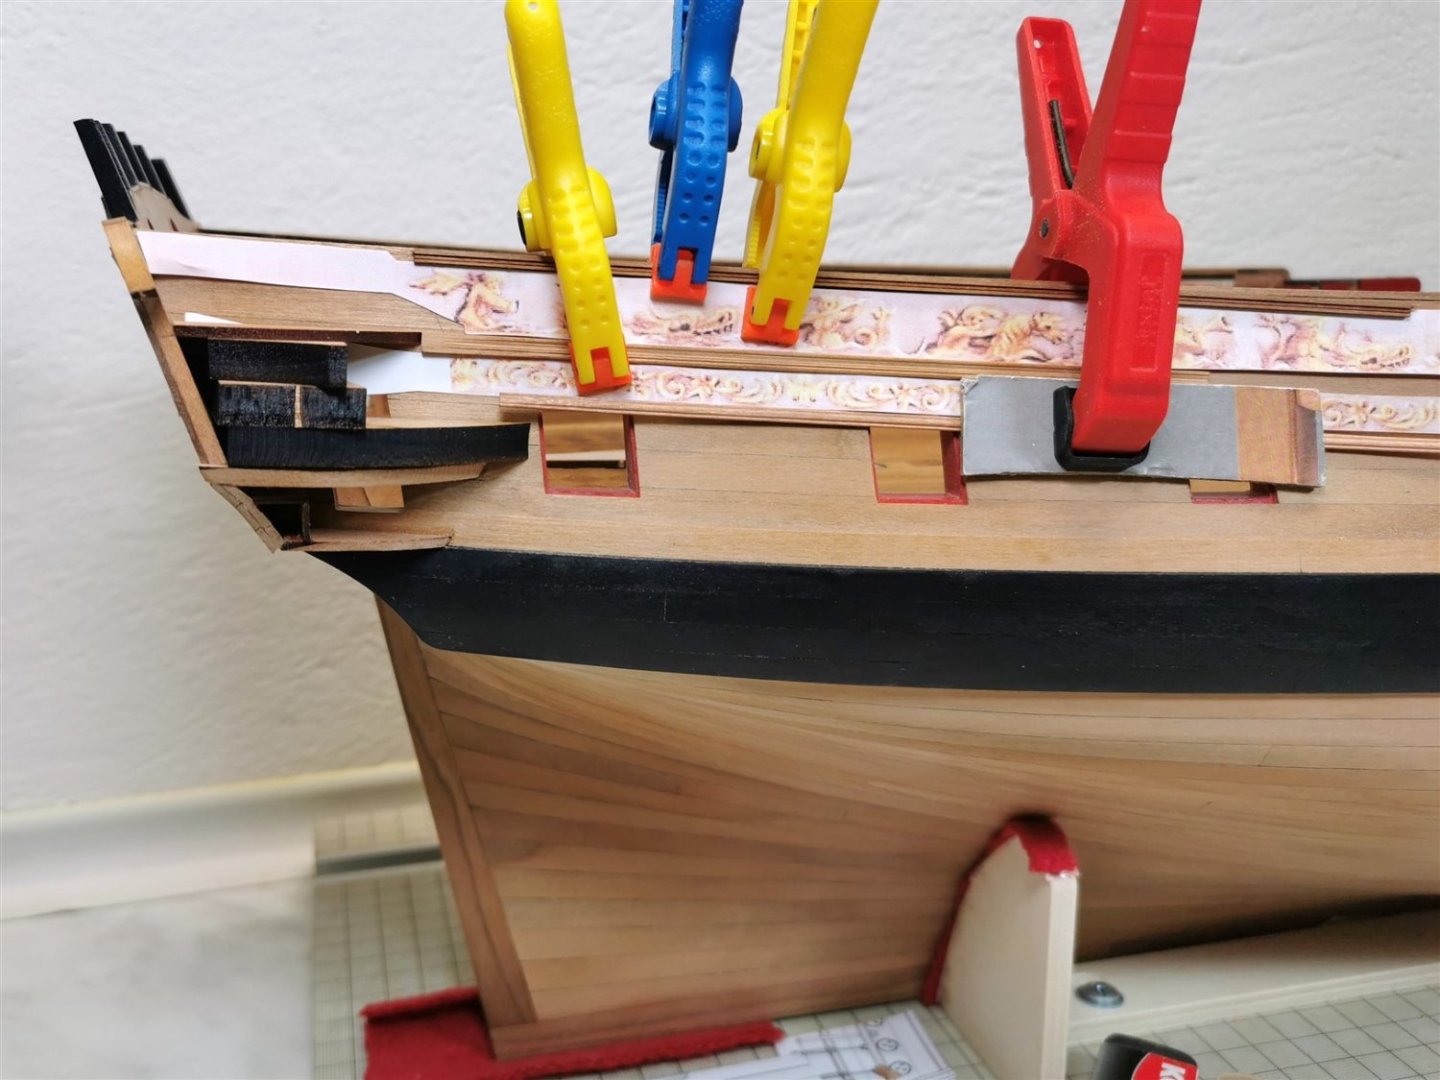
Hi guys, just a little push forward, I put down the shingles, then I used 3mm masking tape to test the run of the central moulding, then I formed the support strip for more comfortable installation - gluing molding strip (at least I hope so) and finally I tried to make a scraper with a suitable profile. I'll see tomorrow if I still like it or if I'll change it. the friezes on the photo are just test in a wrong colour
-
wow, that's beautifully crafted Frank 👍
-
Thanks for the kind words and likes guys. Now I have a shingle roof to do and then I finally have to make the fancy moldings. But I still have to figure out which profile of scraper to make. I have the friezes printed and I'm also thinking if I should spray the friezes with some varnish, fixative before cutting them out. Maybe something with a satin finish.
-
When you also have assistants, I'm not surprised that your build looks so good.🙂 But seriously really nice tight and clean joints, well done Glenn.
- 840 replies
-
- 3
-
-
- winchelsea
- Syren Ship Model Company
- (and 1 more)
-
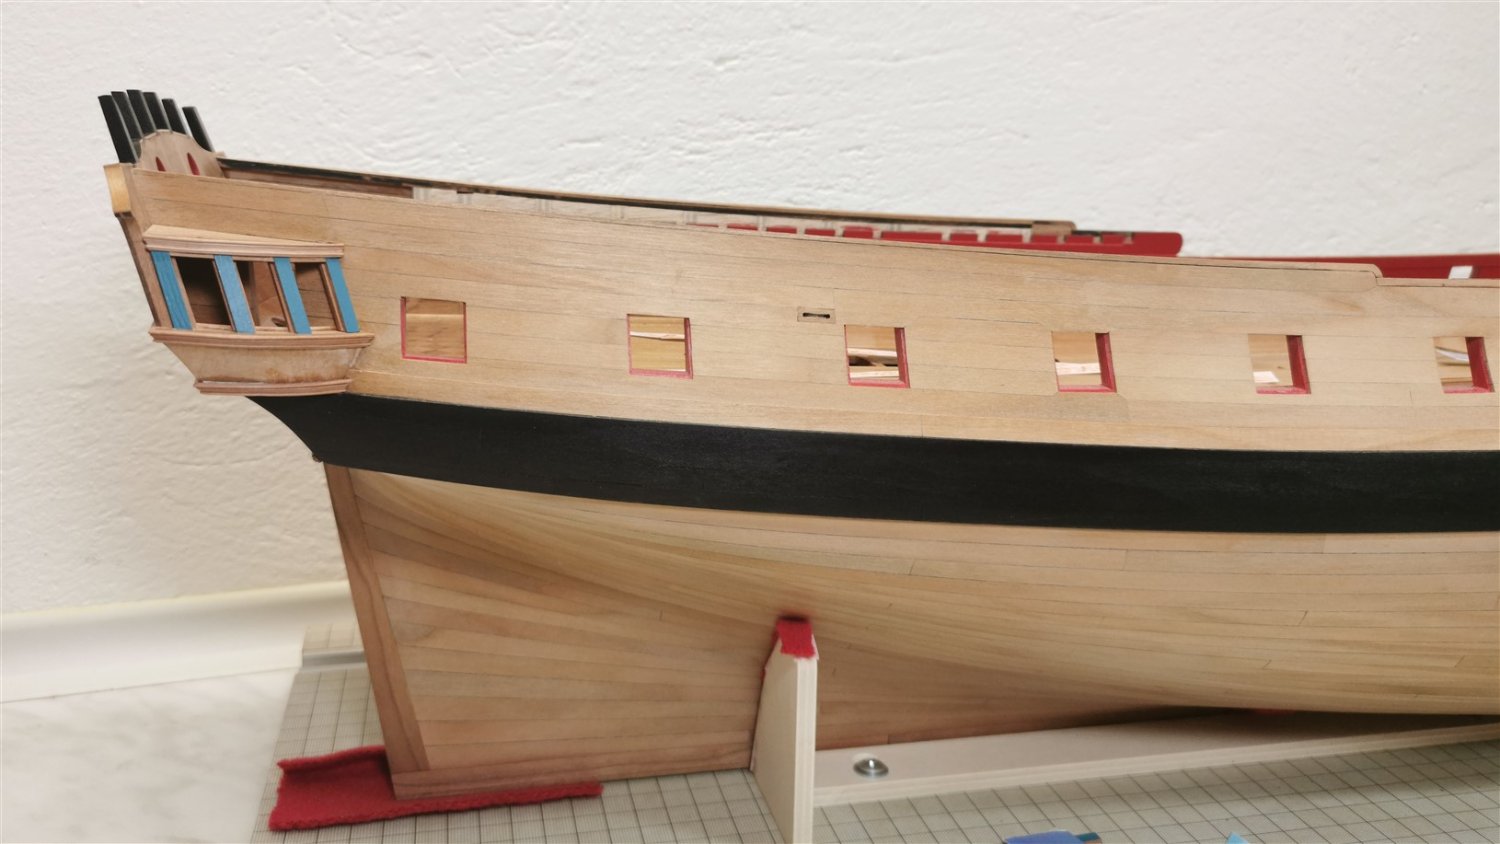
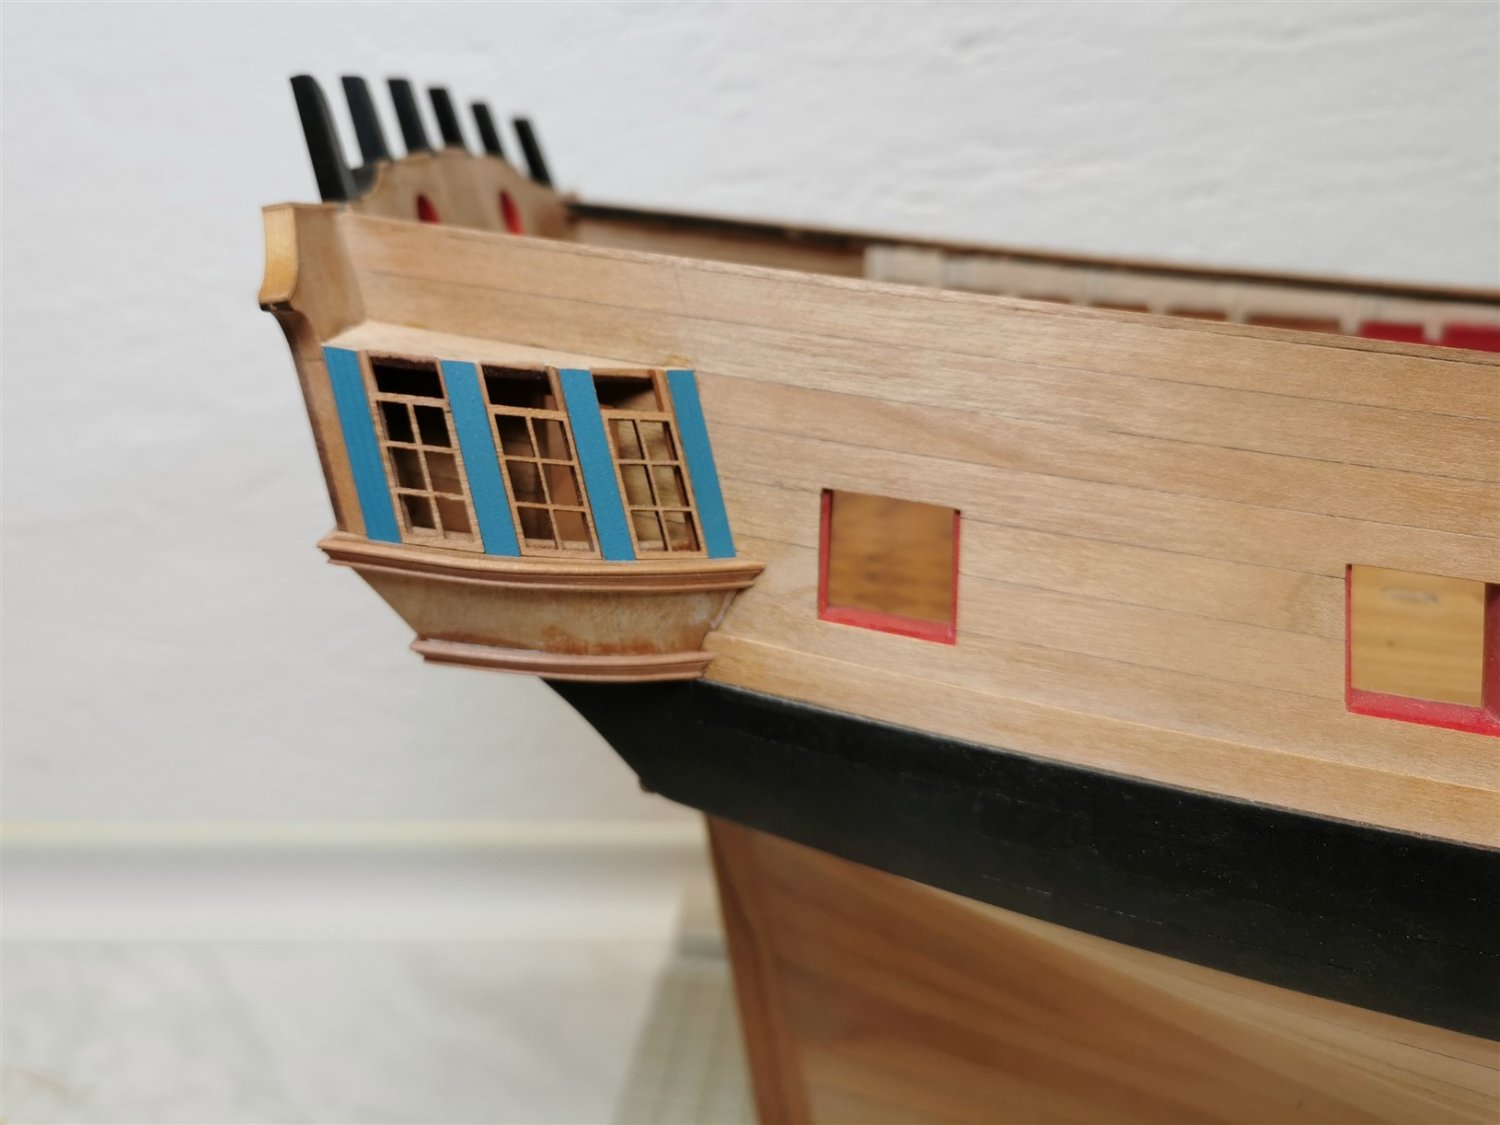
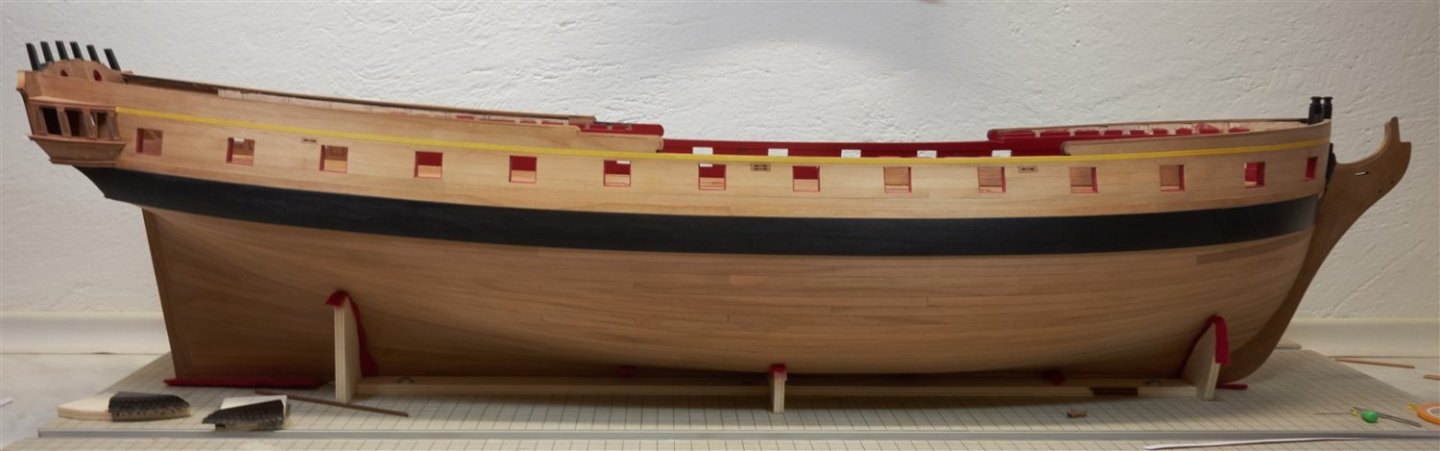
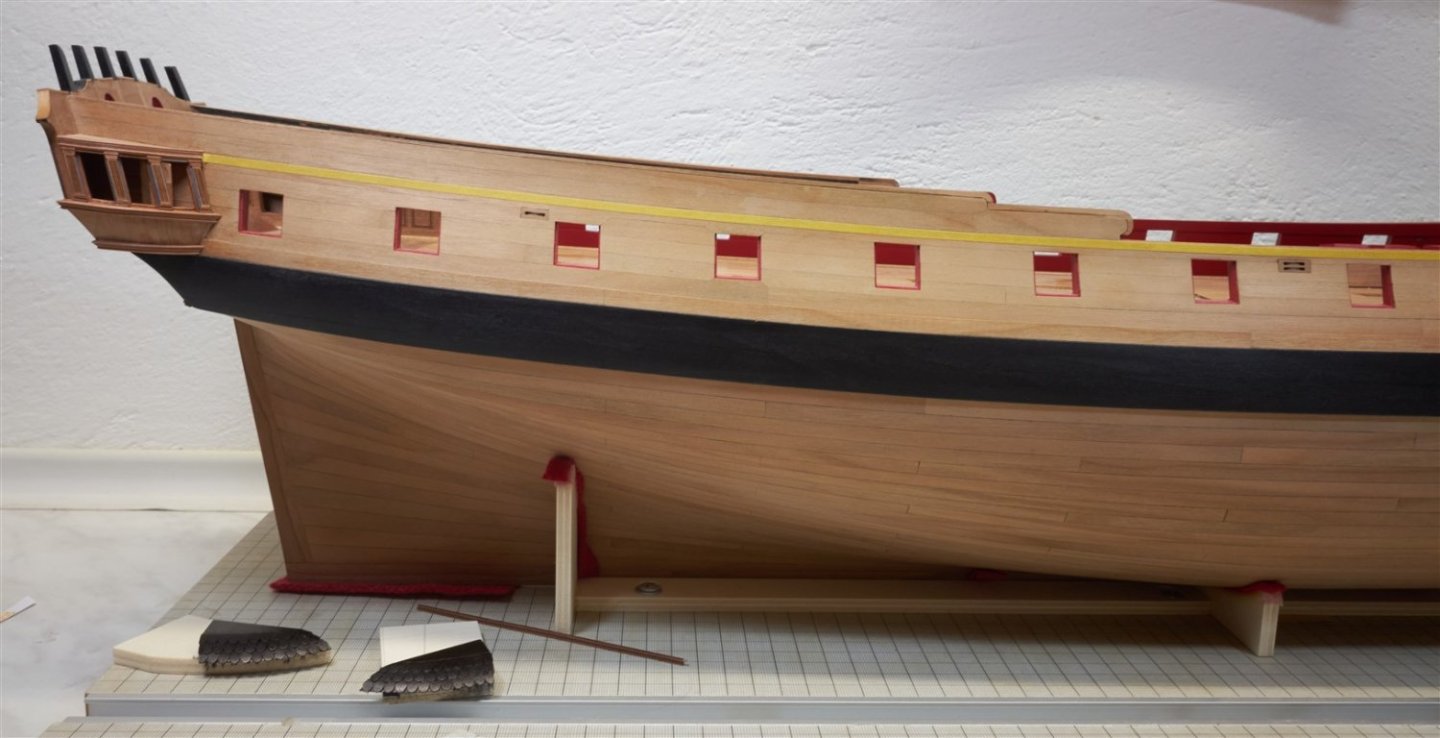
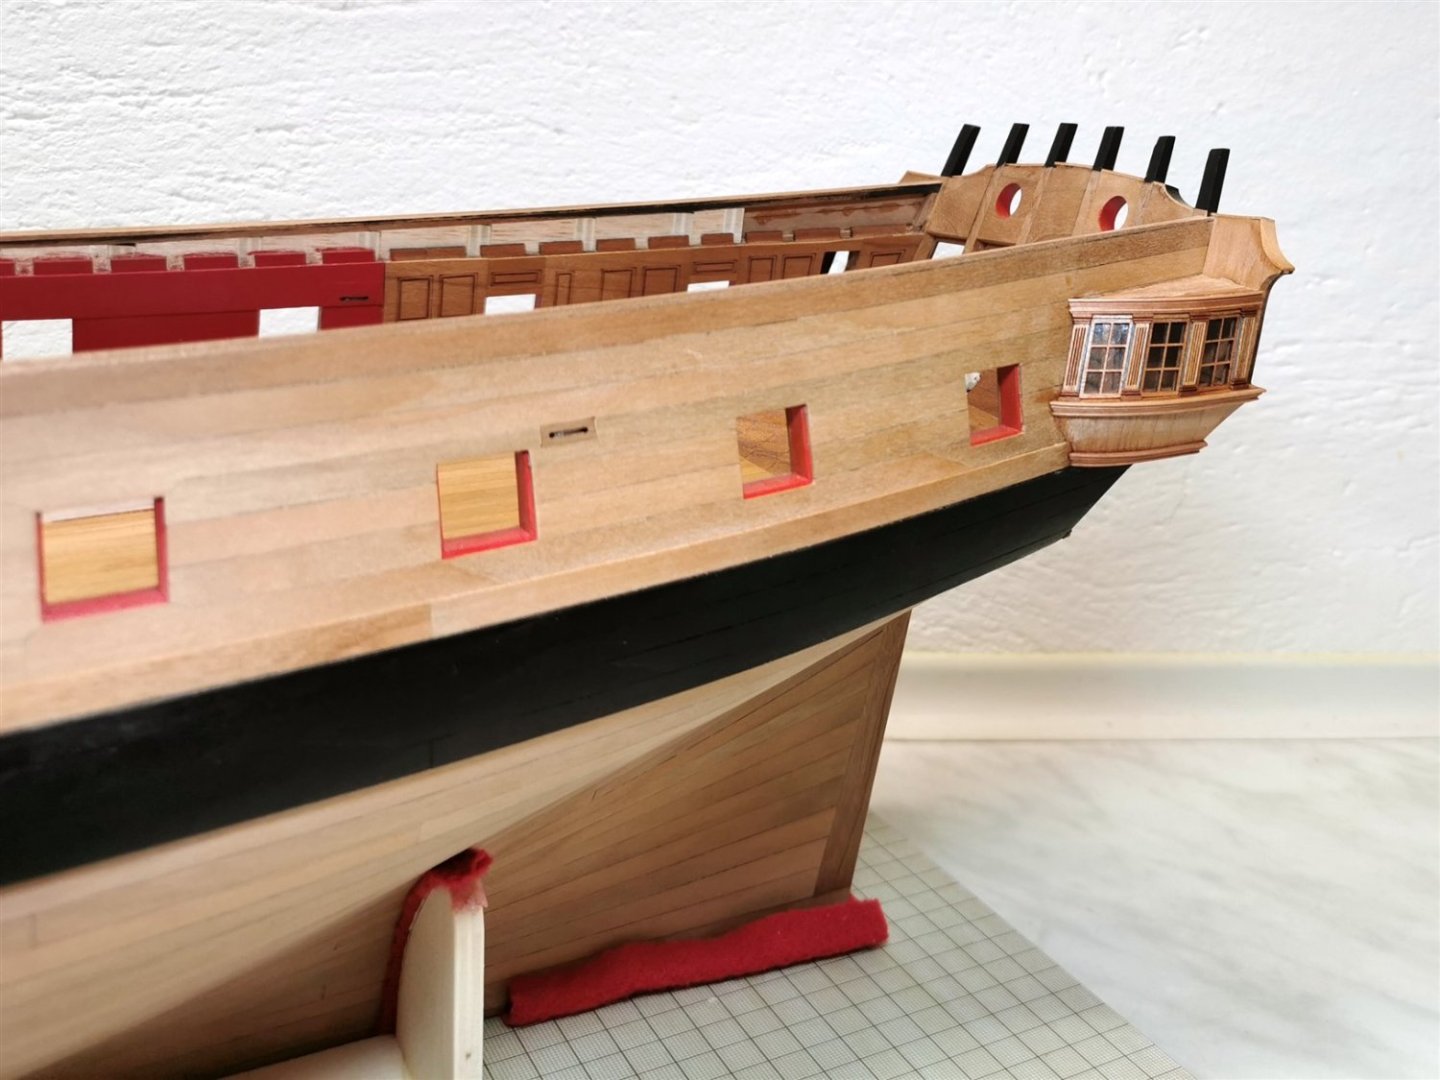
Thank you for your comments and likes. After a little break I came back to work on the gallery today. I didn't manage to get all the angles to match one hundred percent. But I hope that in the final view it will be enough.


-
It looks really good Gary. I'm sure you can handle the last belt.
-
Congratulations on the completion of this amazing build Patrick. If I someday get back to my Revenge I'll know where I can look for inspiration.
- 756 replies
-
- 4
-
-

-
- galleon
- golden hind
- (and 2 more)
-
I have only just discovered this wonderful work. I'm reading from the beginning and bookmarking it. Very inspiring Jason. Such precise clean work, attention to detail... Just wonderful and I look forward to the continuing. And I would still like to ask what colour red are you using? Thanks
-
wow very exciting announcement. I'm bookmarking this project. I like Bristol very much. I think Chris Watton is also planning a kit but watching the scratch build is even more fun. So good luck Rob and I look forward to seeing more photos of this project.
-
I look forward to seeing more pics of the deck planking Glenn. So far it looks very good. The center belt and the binding planks are challenging but then it's quite fast.
- 840 replies
-
- 2
-
-
- winchelsea
- Syren Ship Model Company
- (and 1 more)
-
Really beautiful and precise work Matthias 👍
-
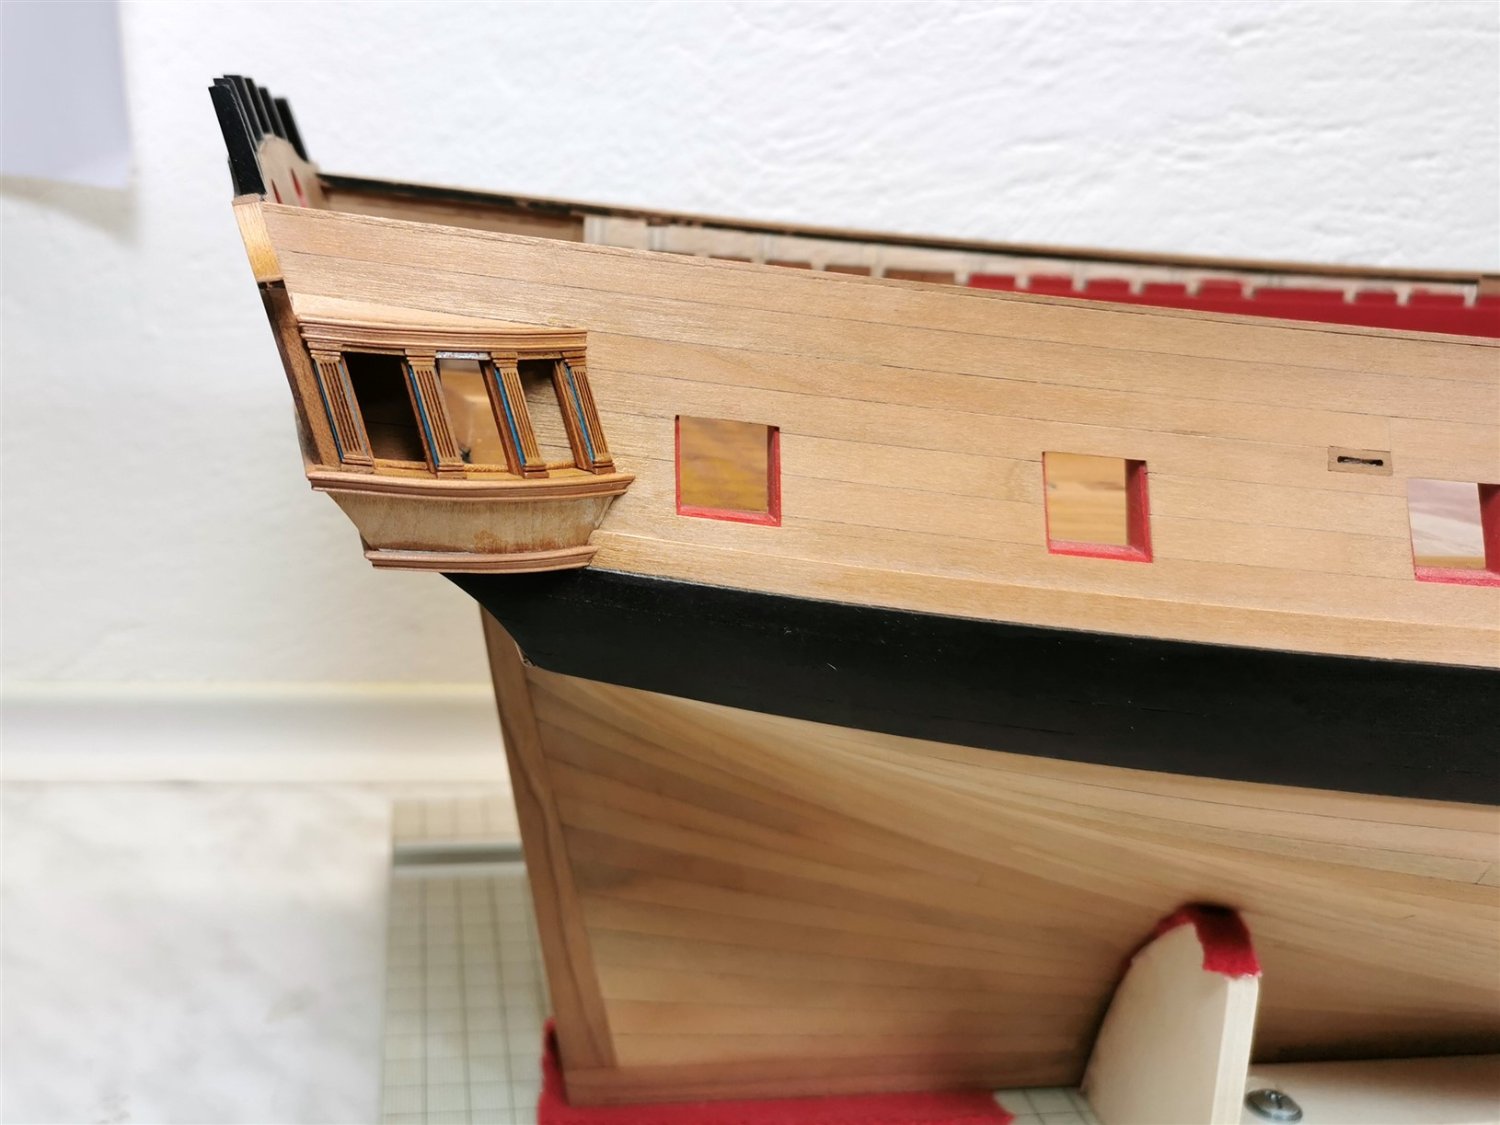
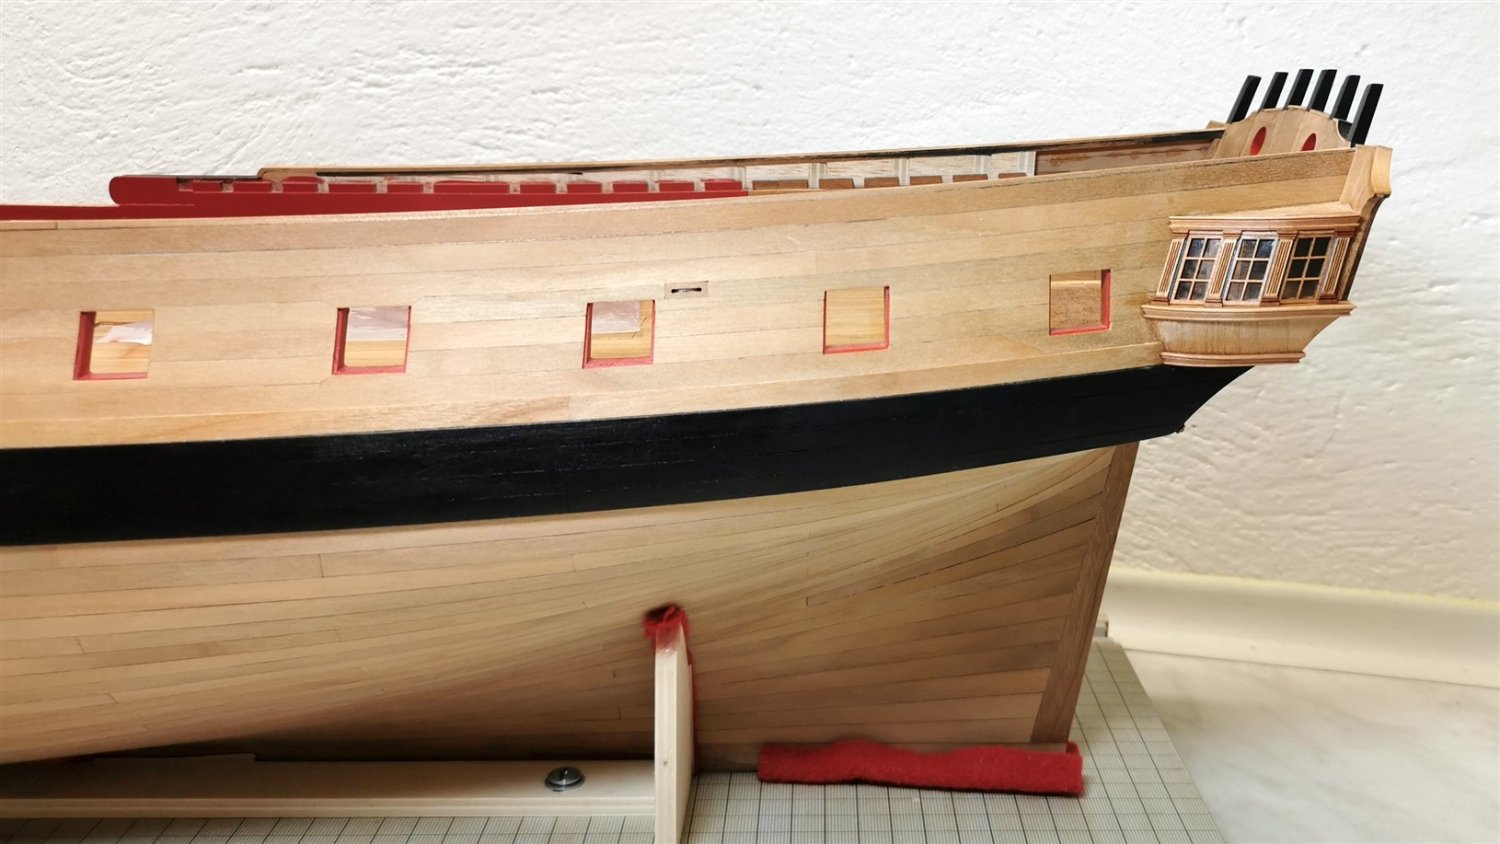
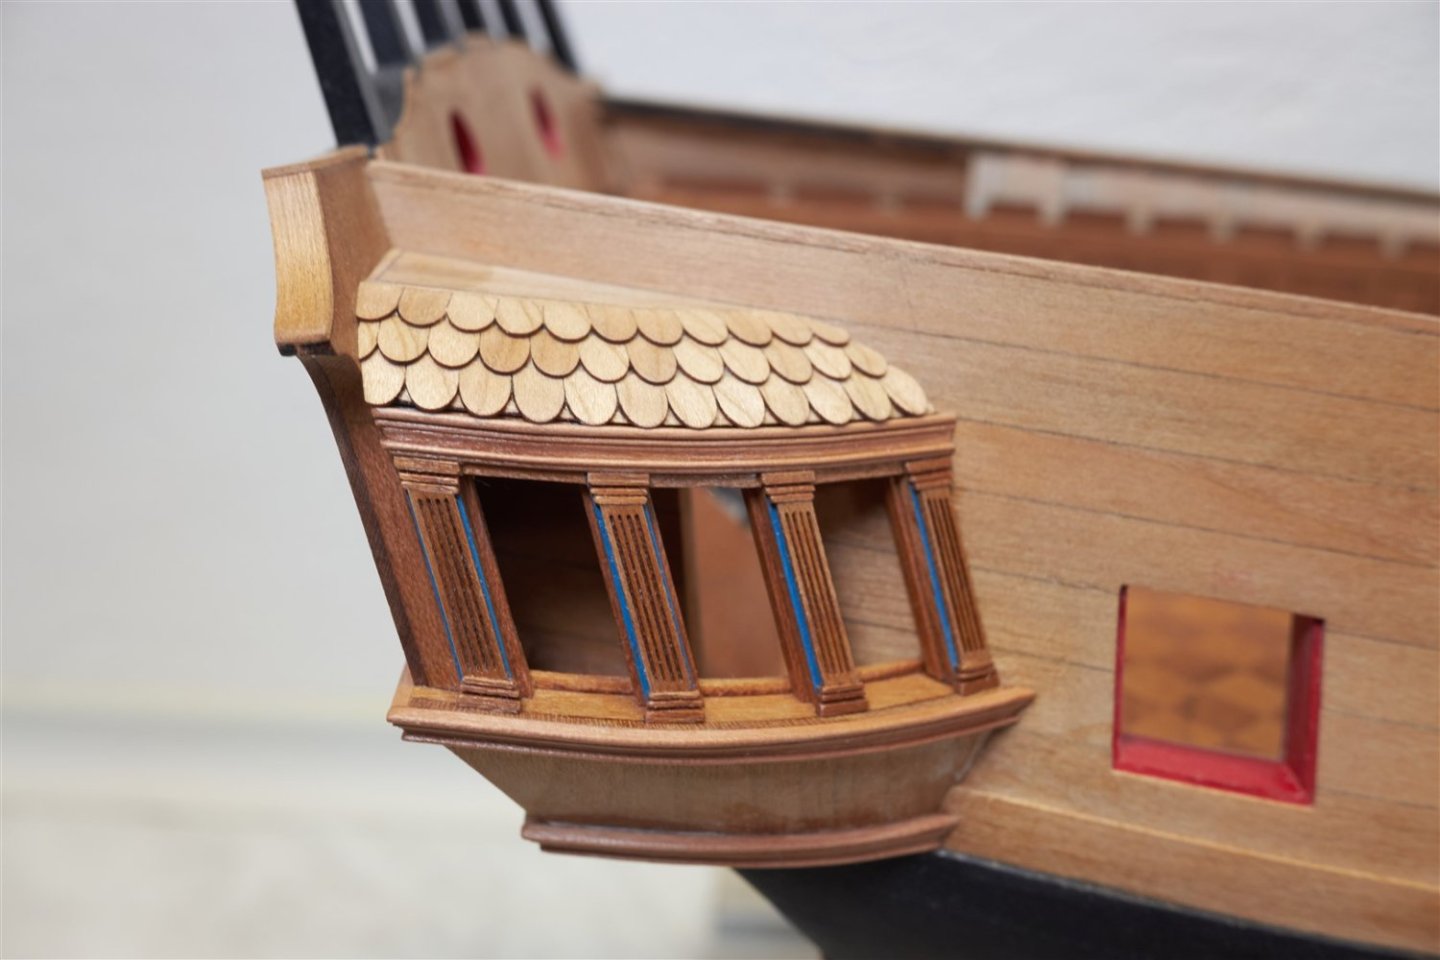
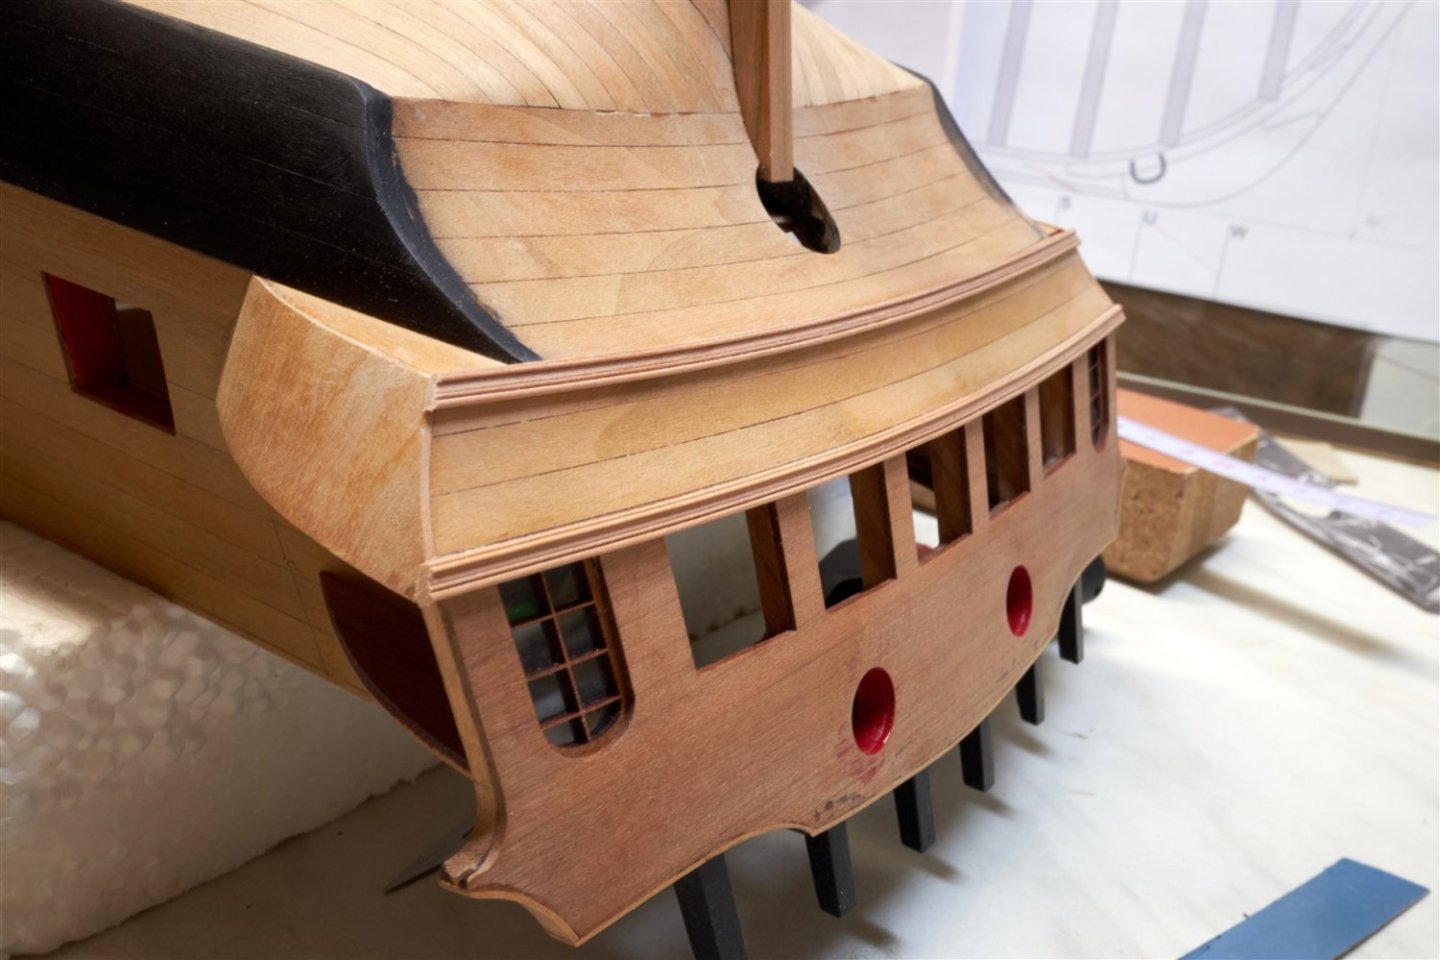
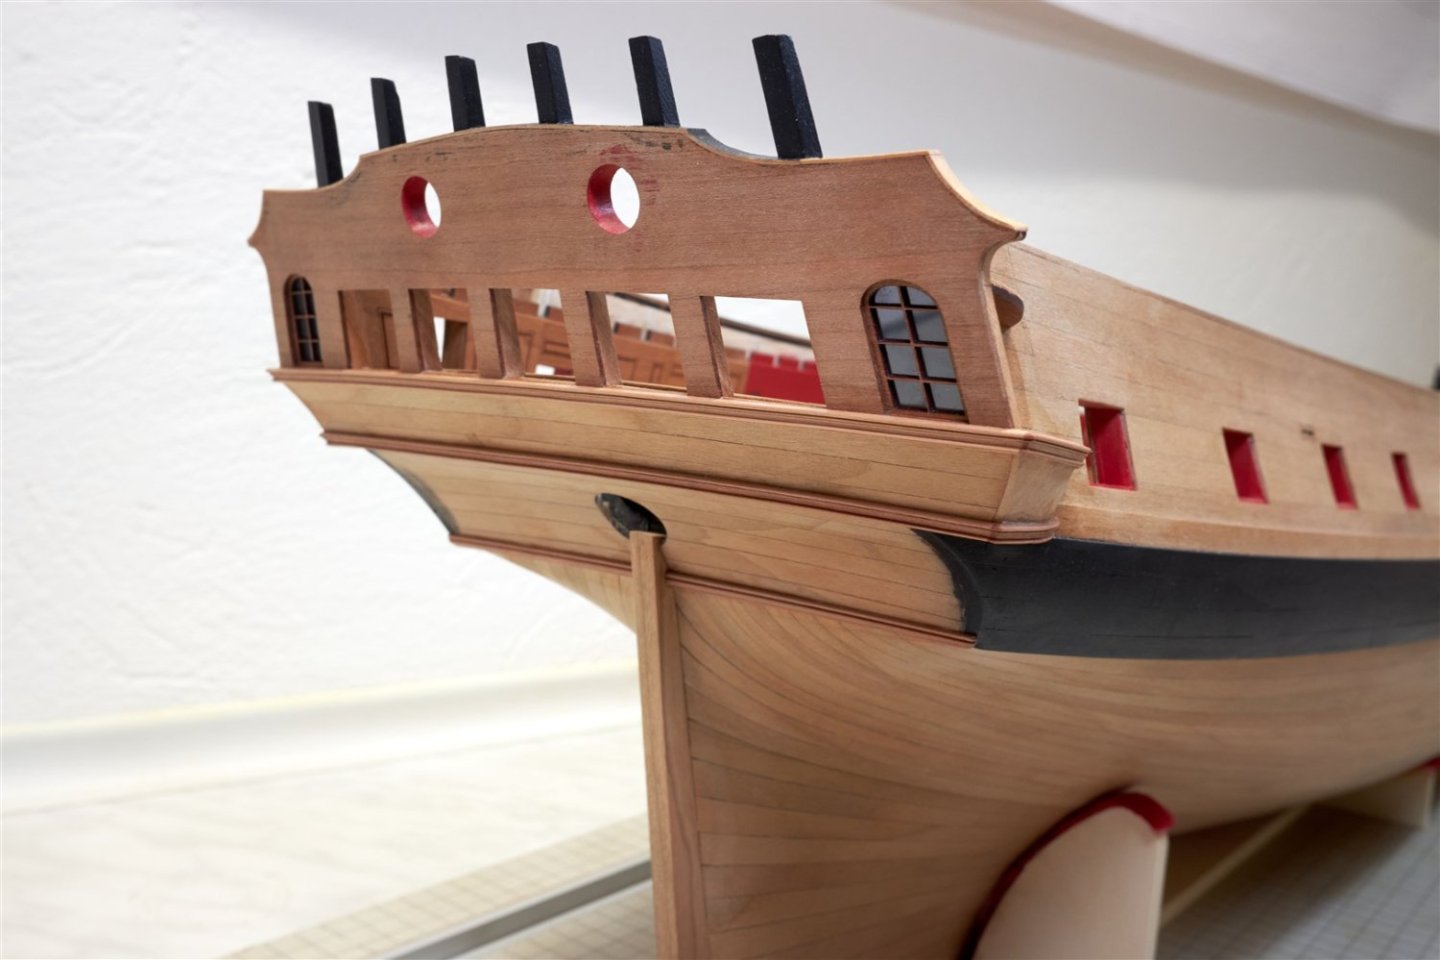
small update on the quarter gallery


-
wow that's perfect Mike ! A ton of assembly, tuning and reassembly is well worth the effort.
- 607 replies
-
- 1
-
-
- winchelsea
- Syren Ship Model Company
- (and 1 more)
-
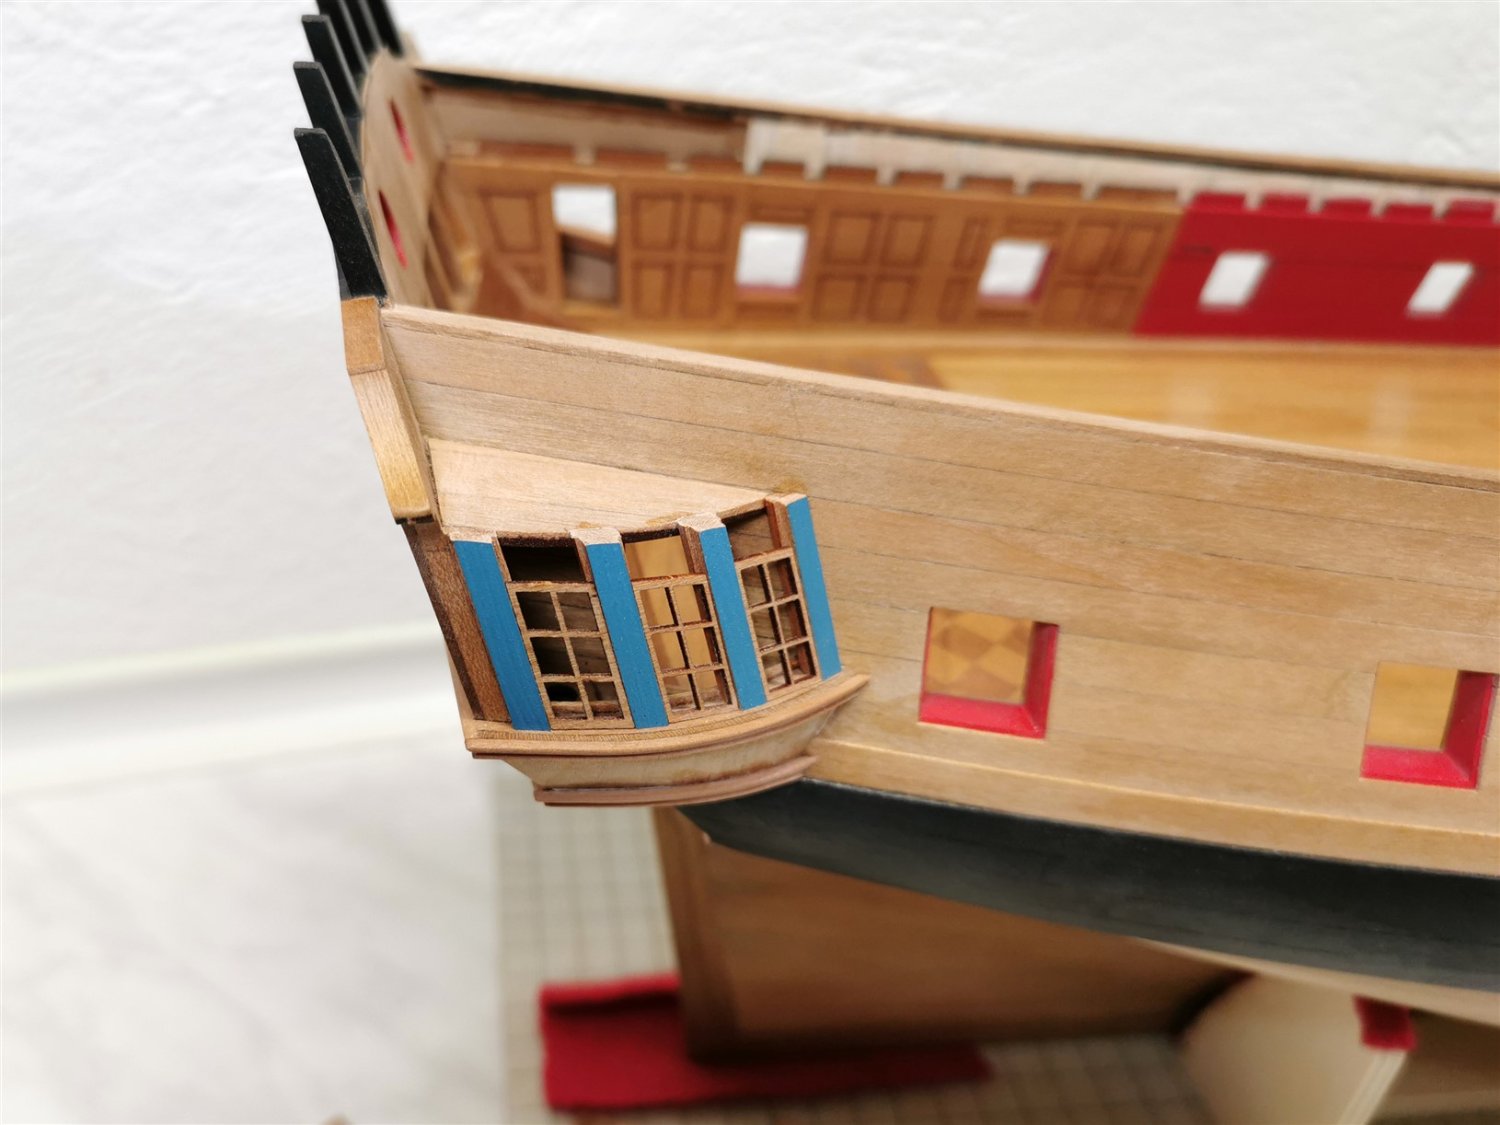
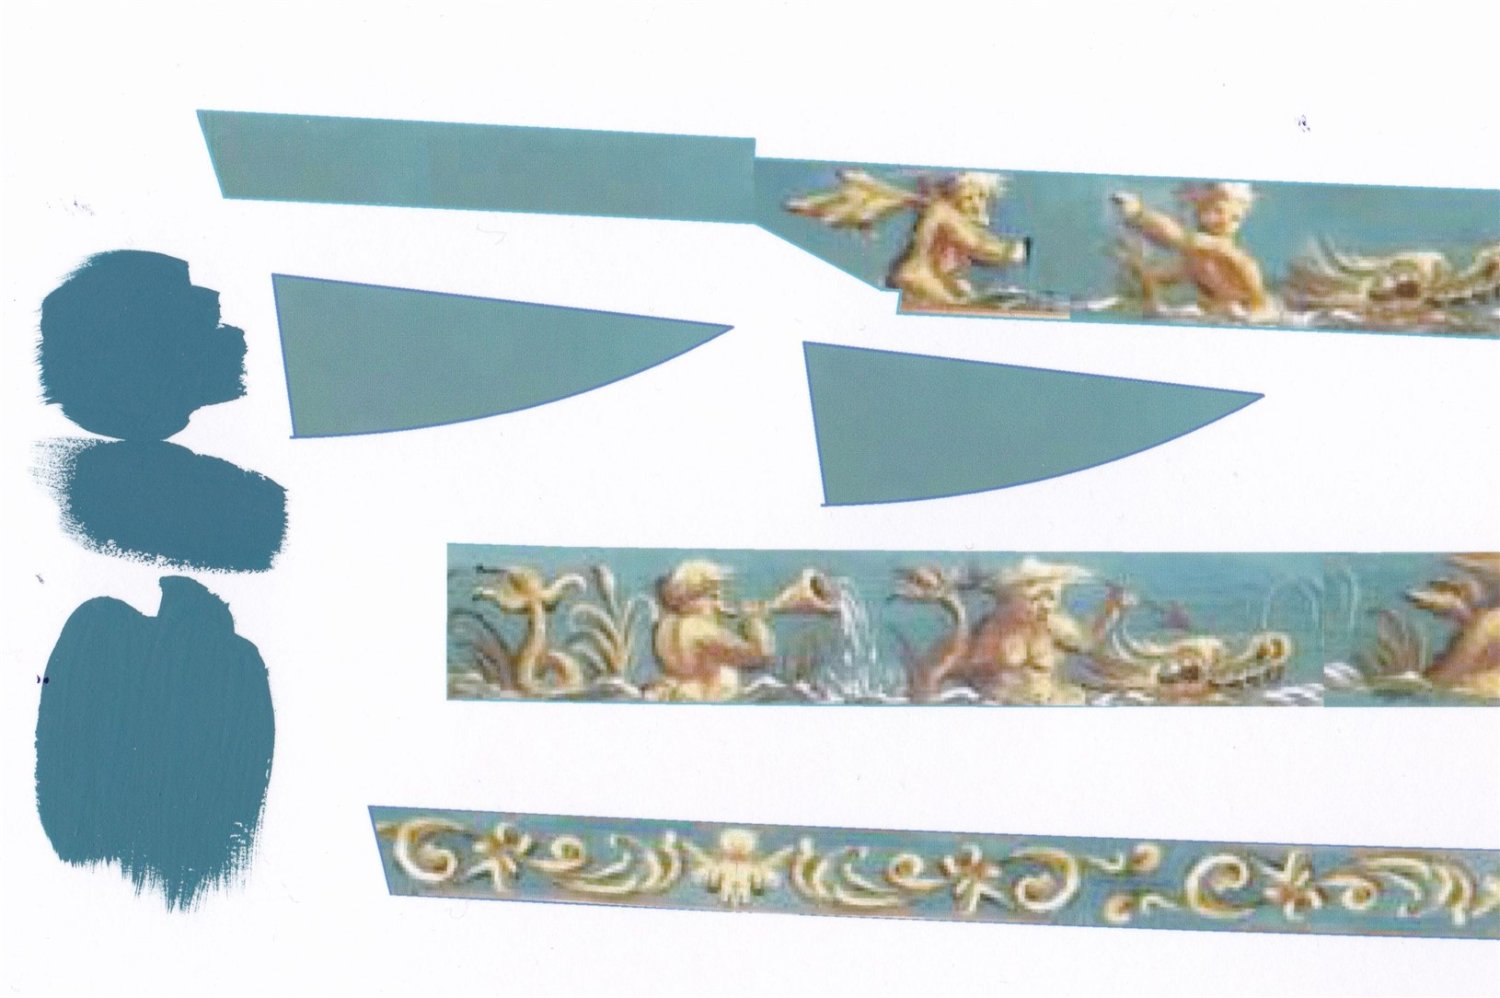
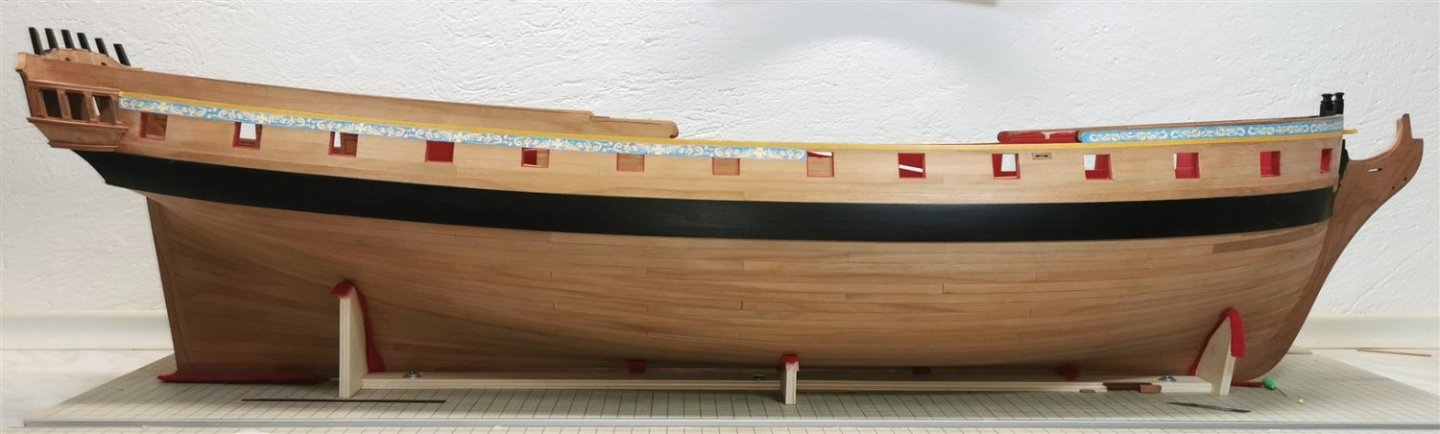
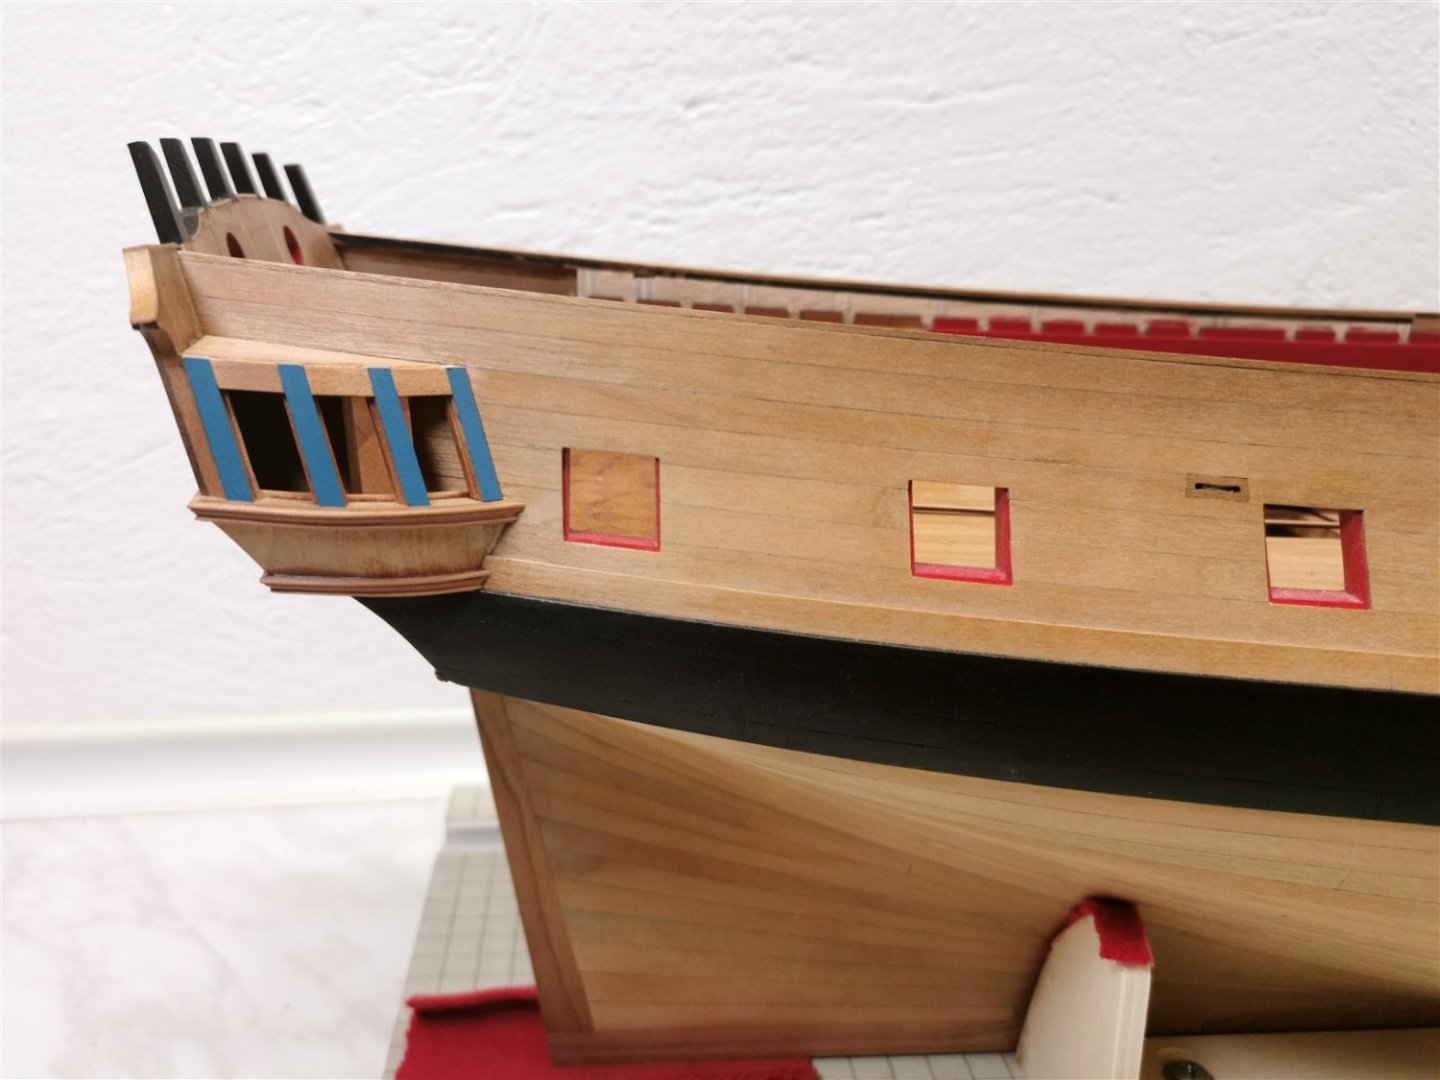
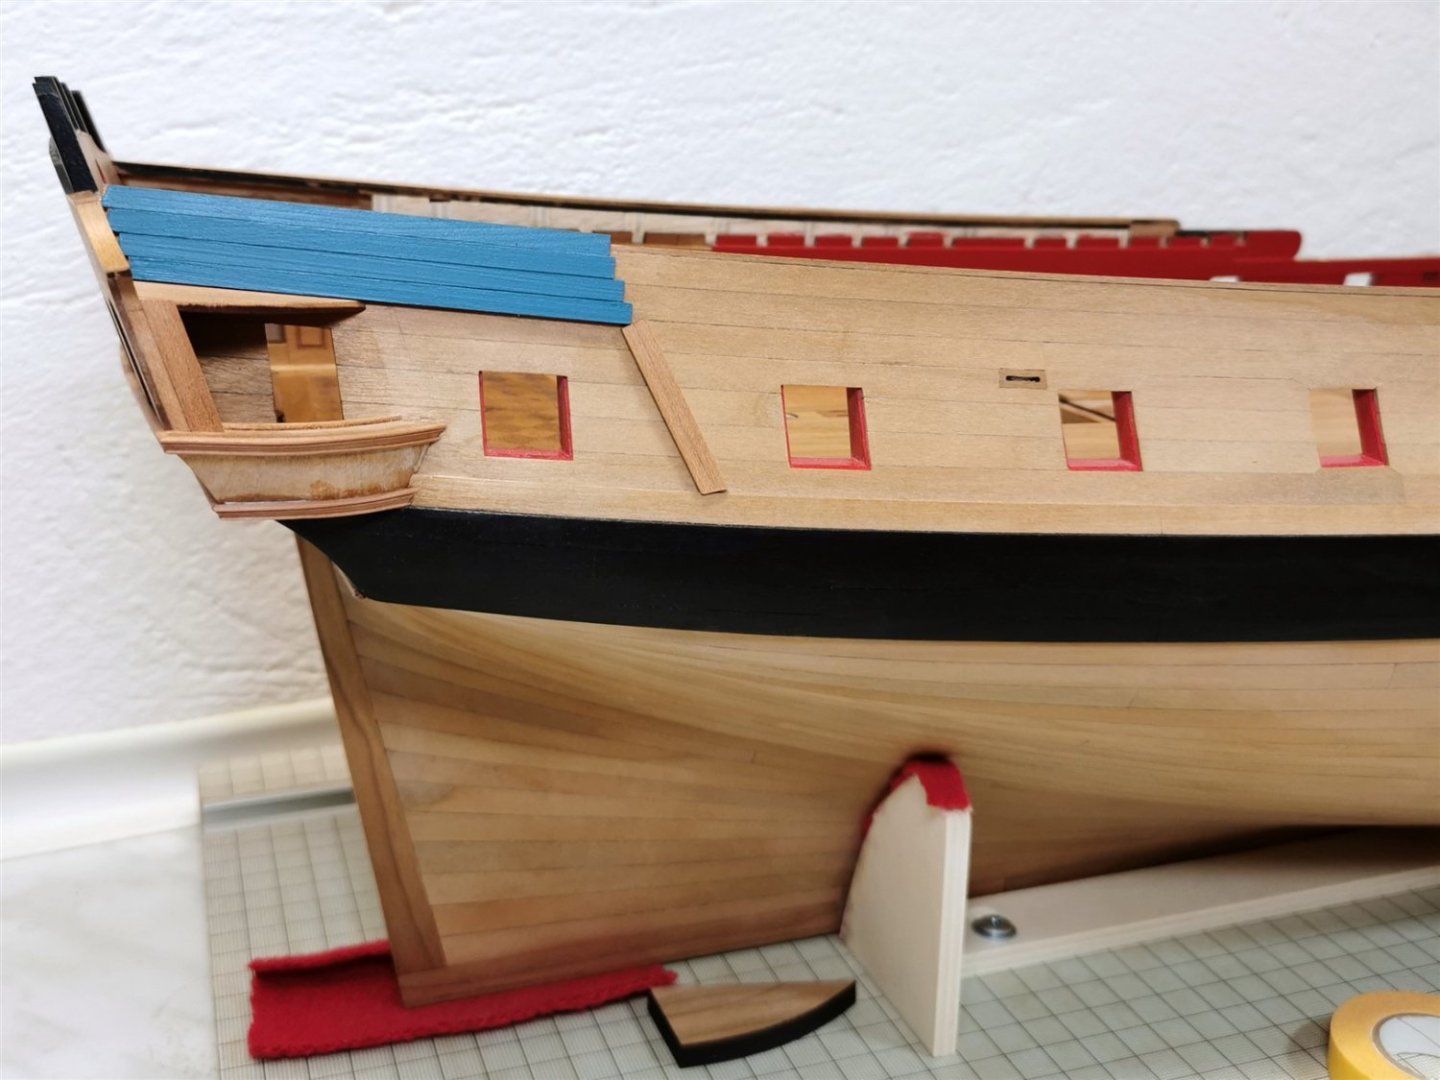
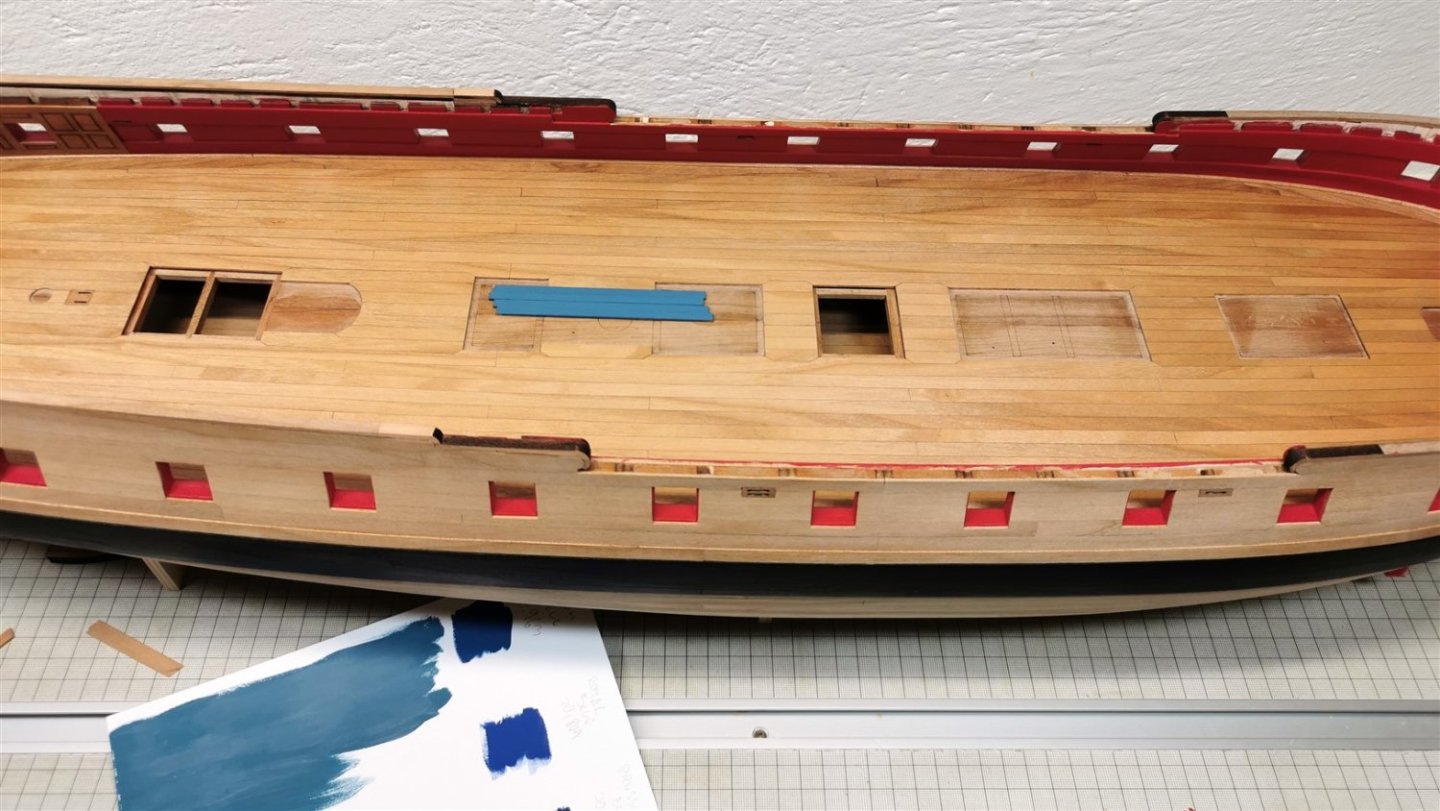
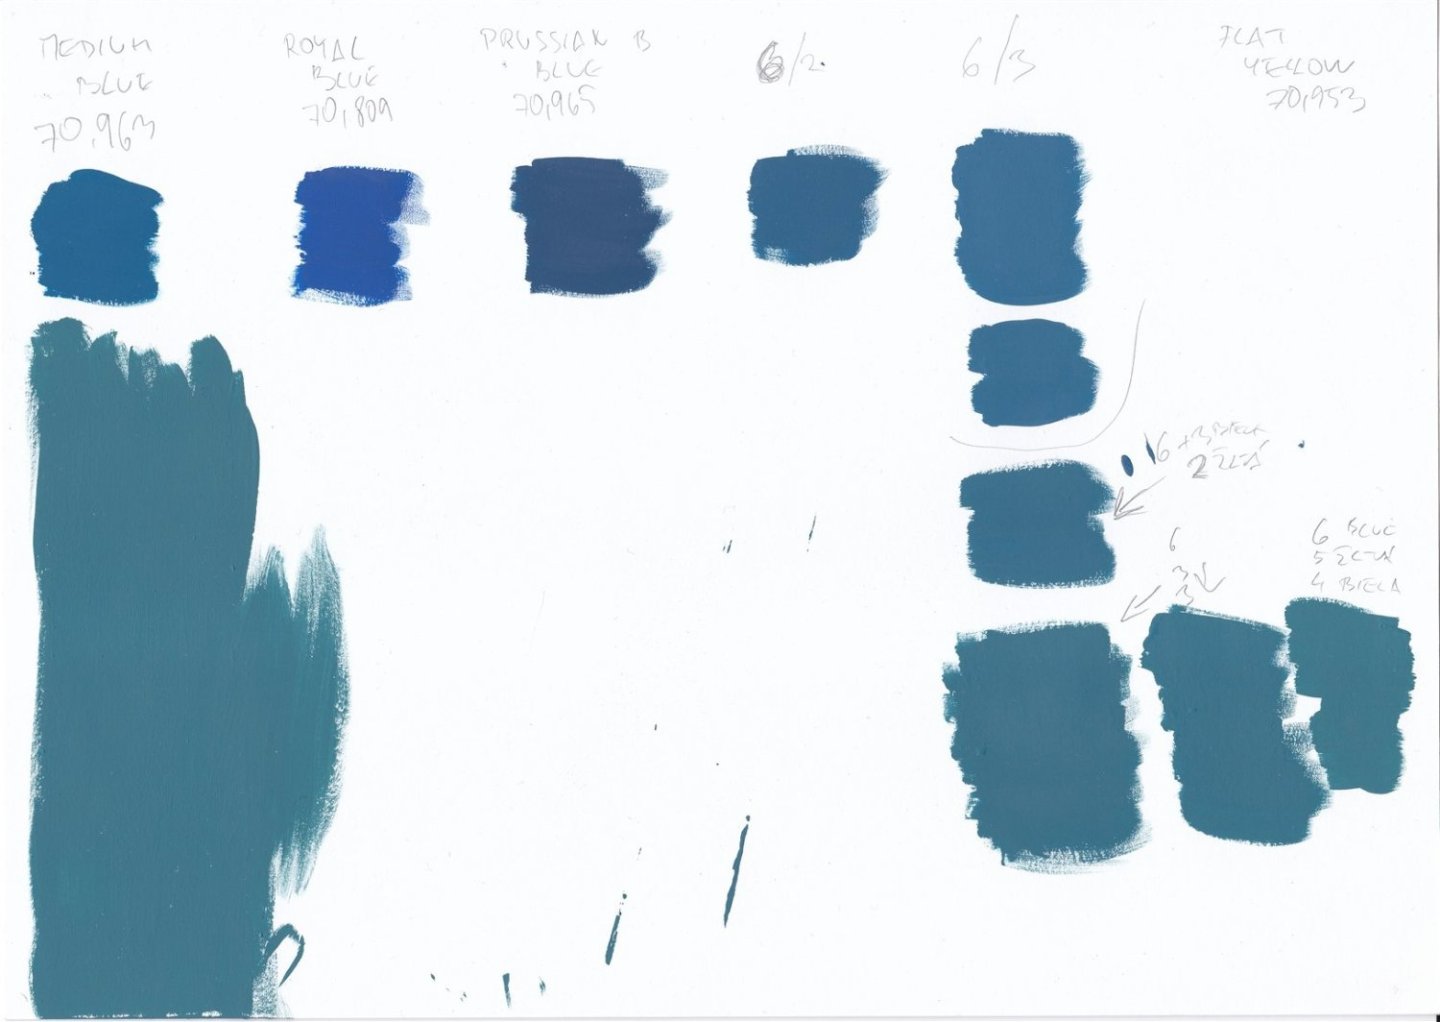
Now I'm experimenting with blue, I have the friezes printed on a laser printer. I just can't decide what blue to use as a base for the gallery columns and later for the transom because there is a bit of a difference in the friezes for the hull than for the friezes for the top and bottom counters and transom. I am testing Vallejo model color. I like this mix the best. 6 drops of Prussian blue, 5 drops of flat yellow and 4 drops of white. I can't get a good photo of it so I took a scan where the color presentation is better. What do you think? Or Isn't there a good graphic designer who can adjust the colors of the friezes ?

-
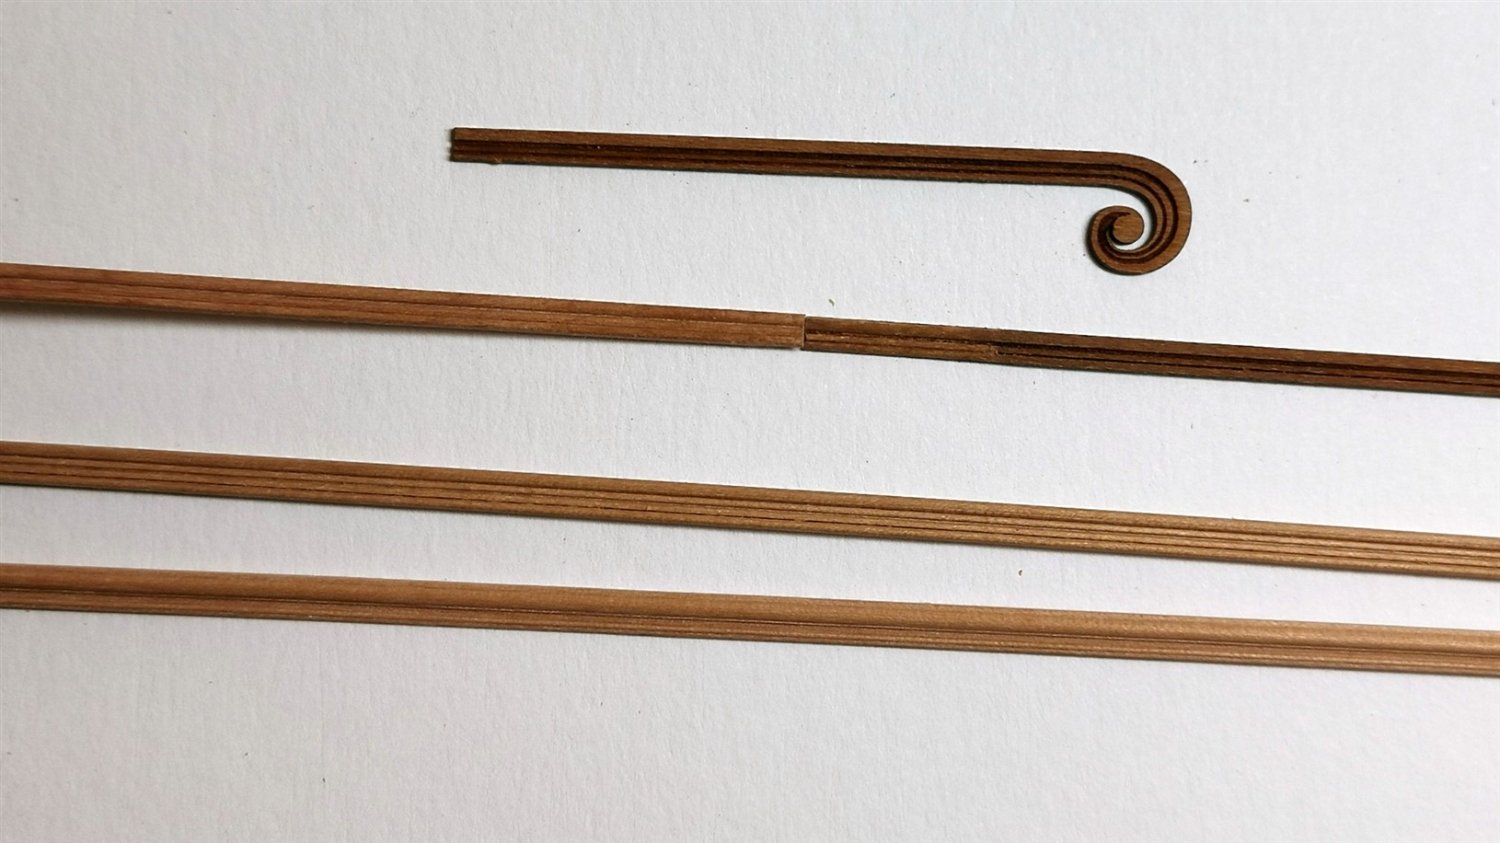
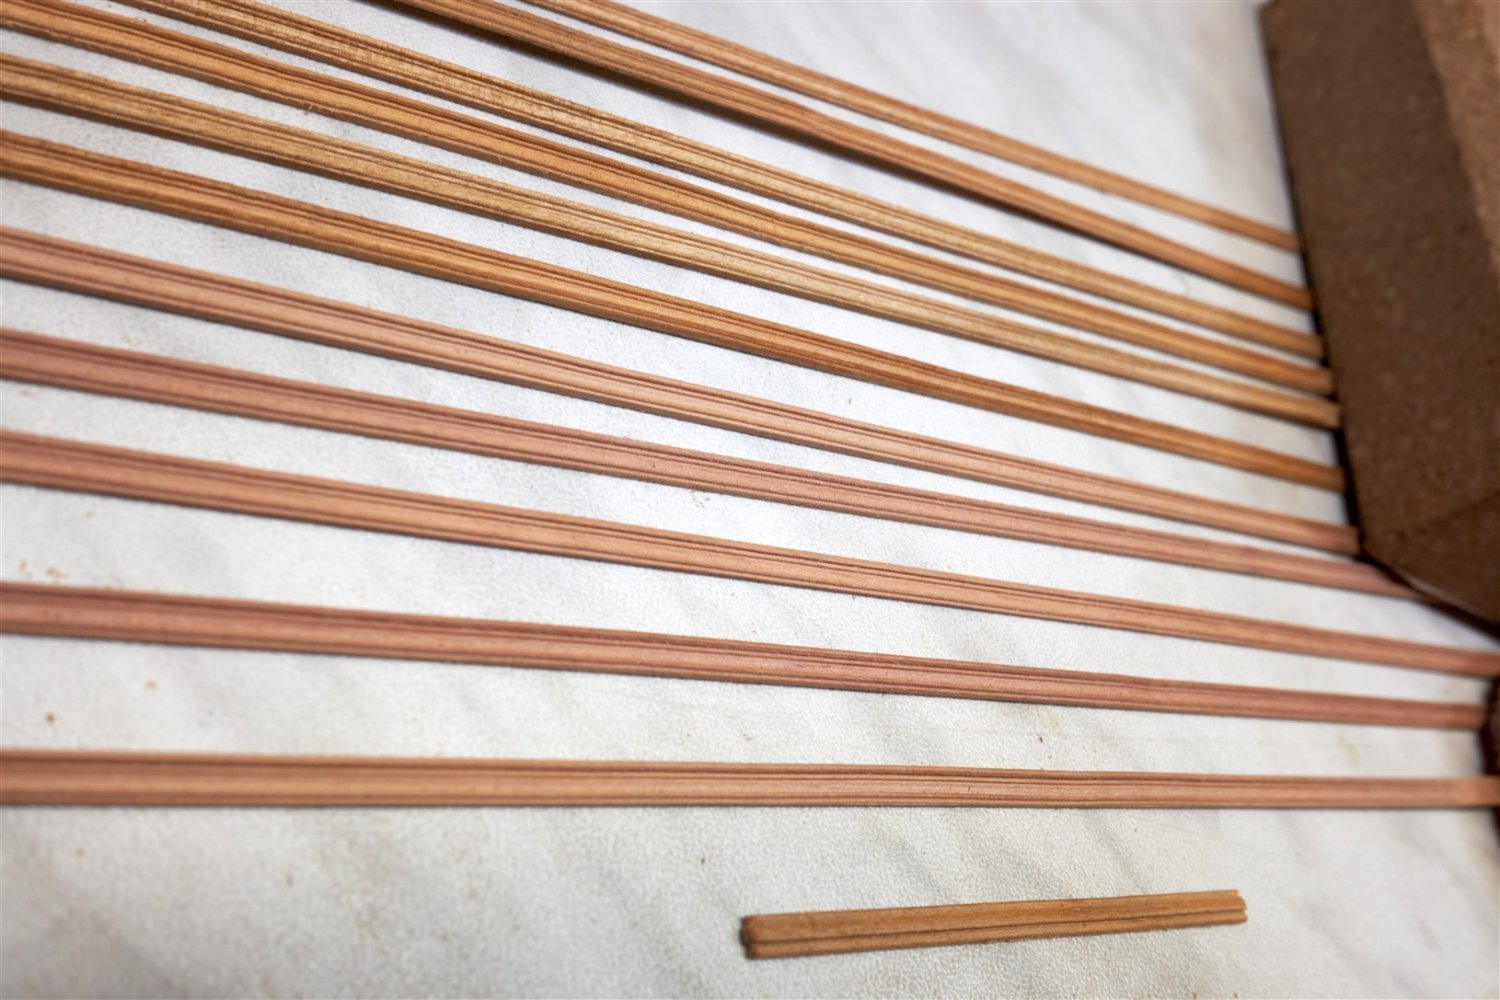
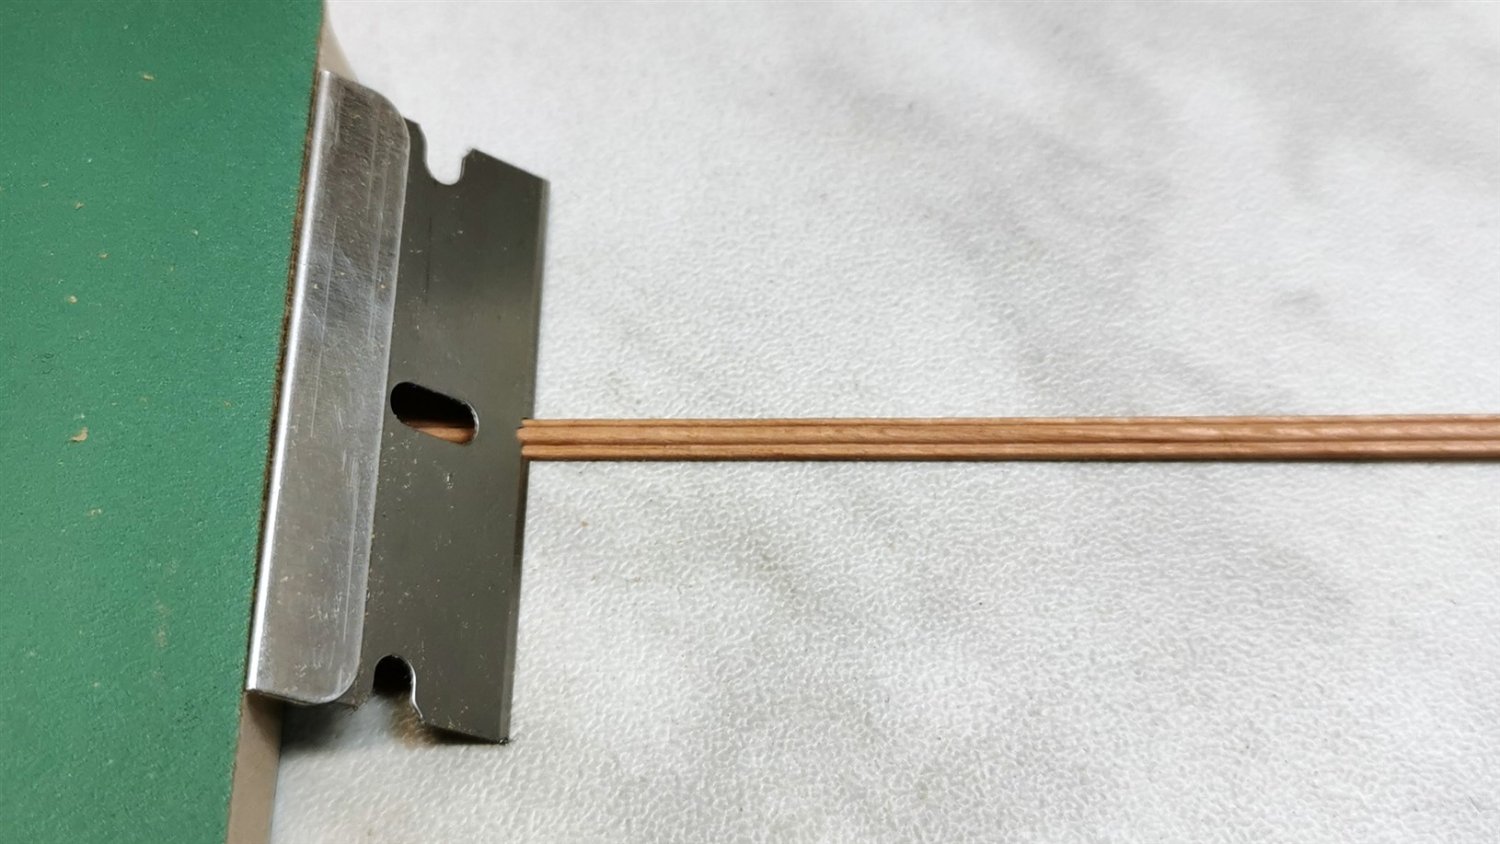
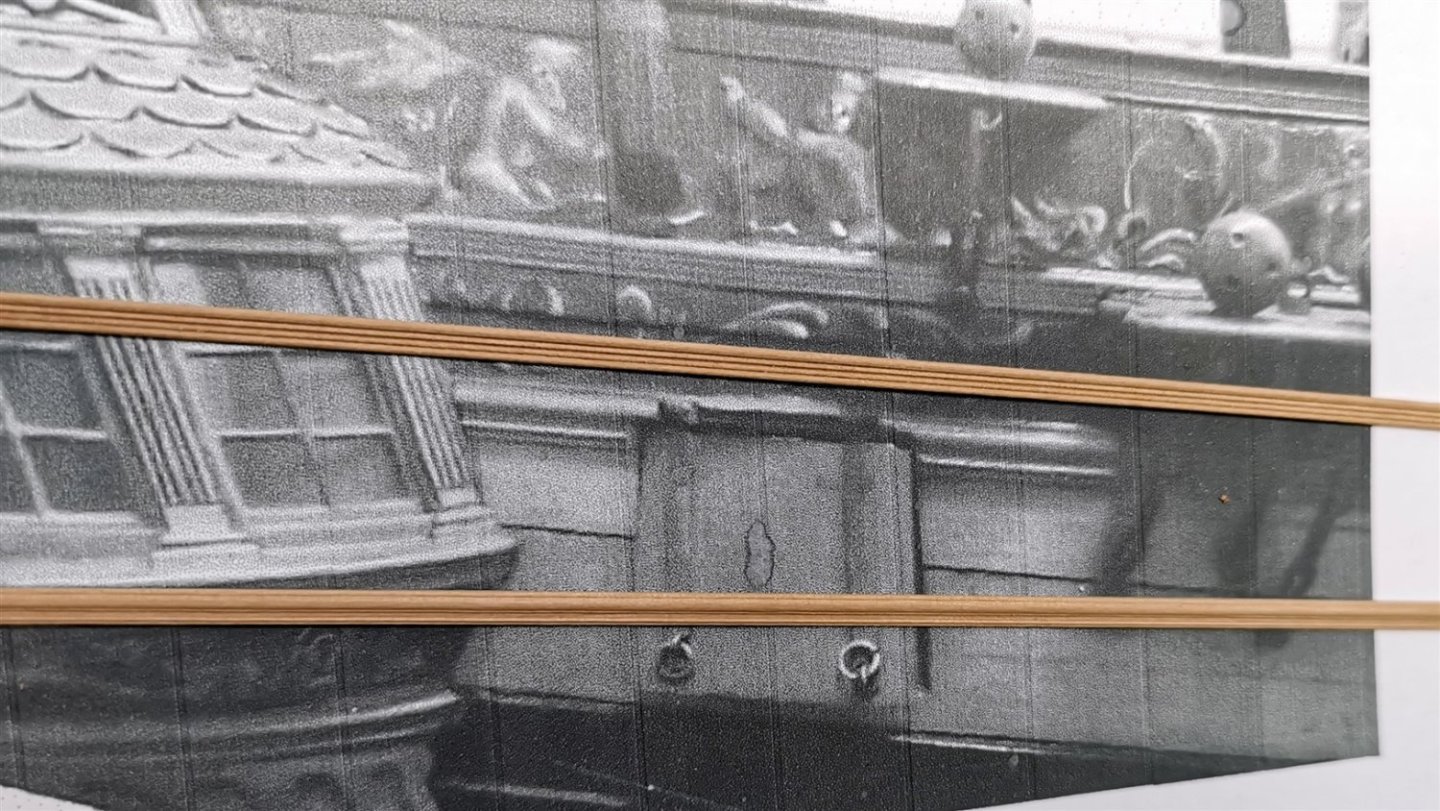
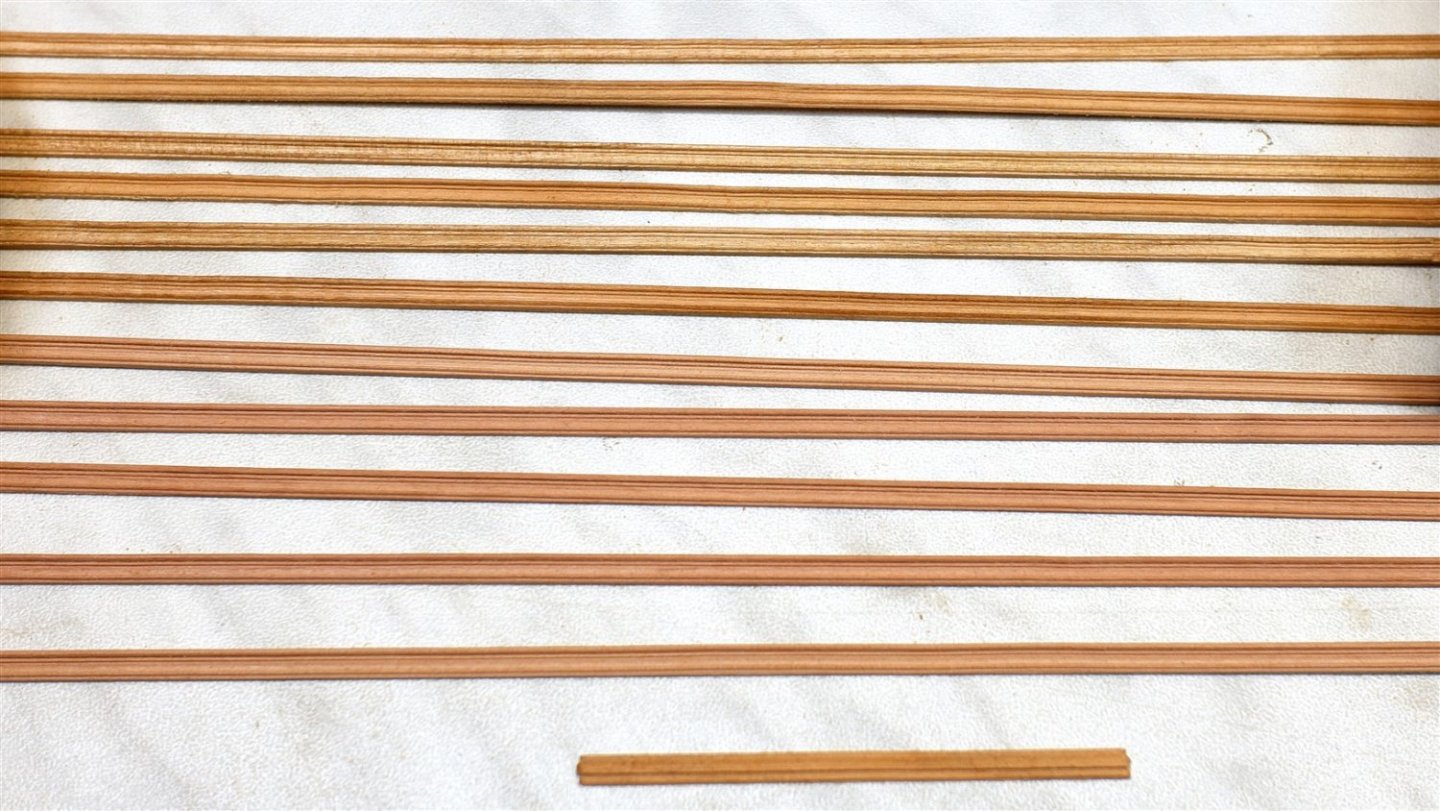
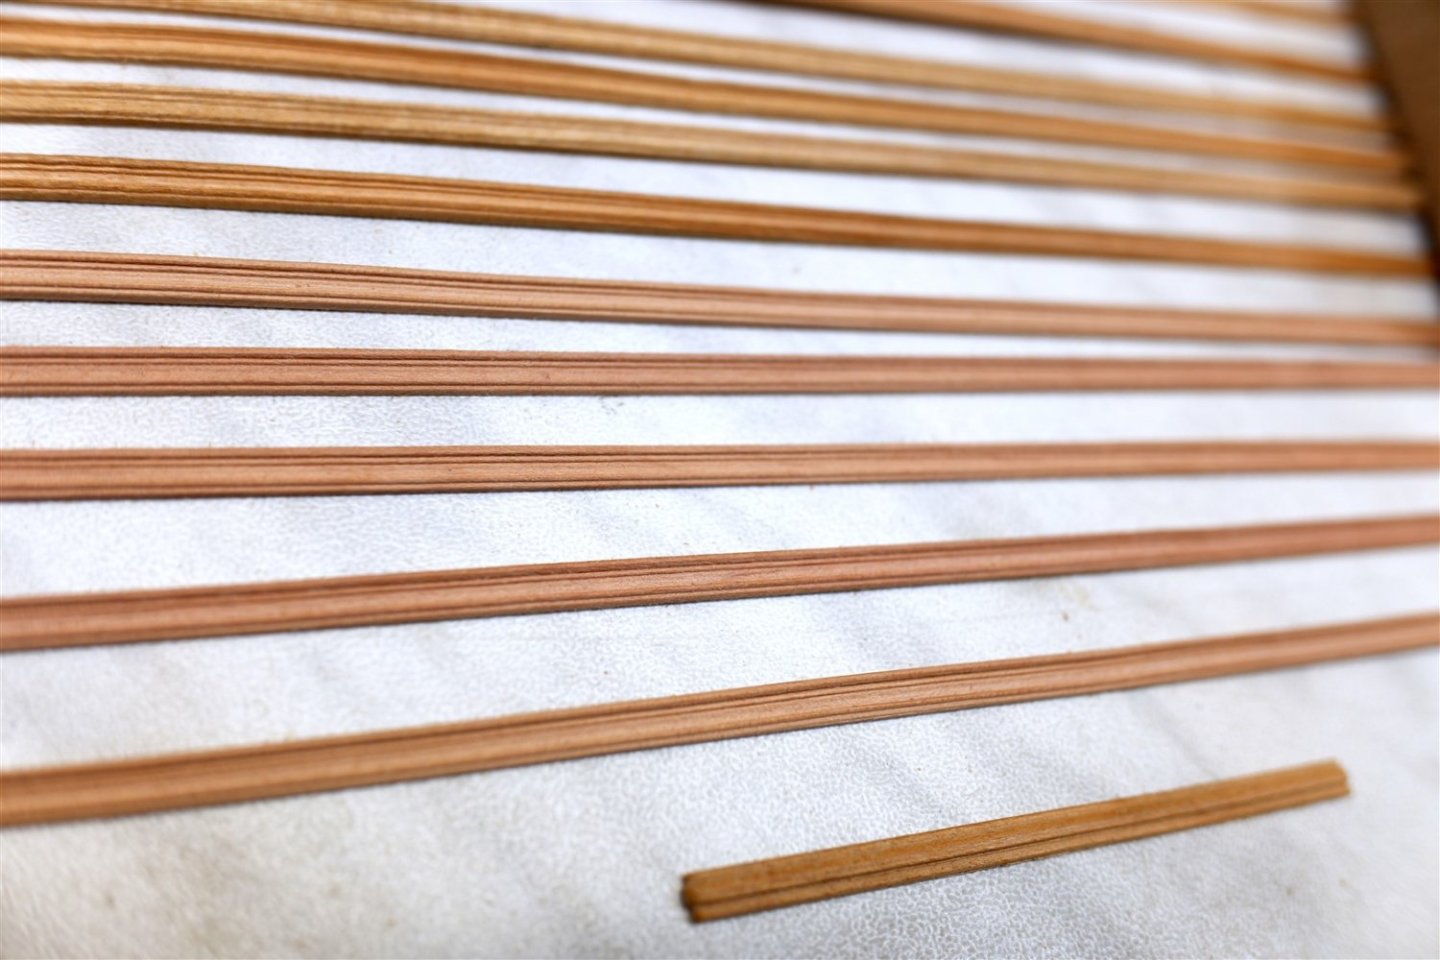
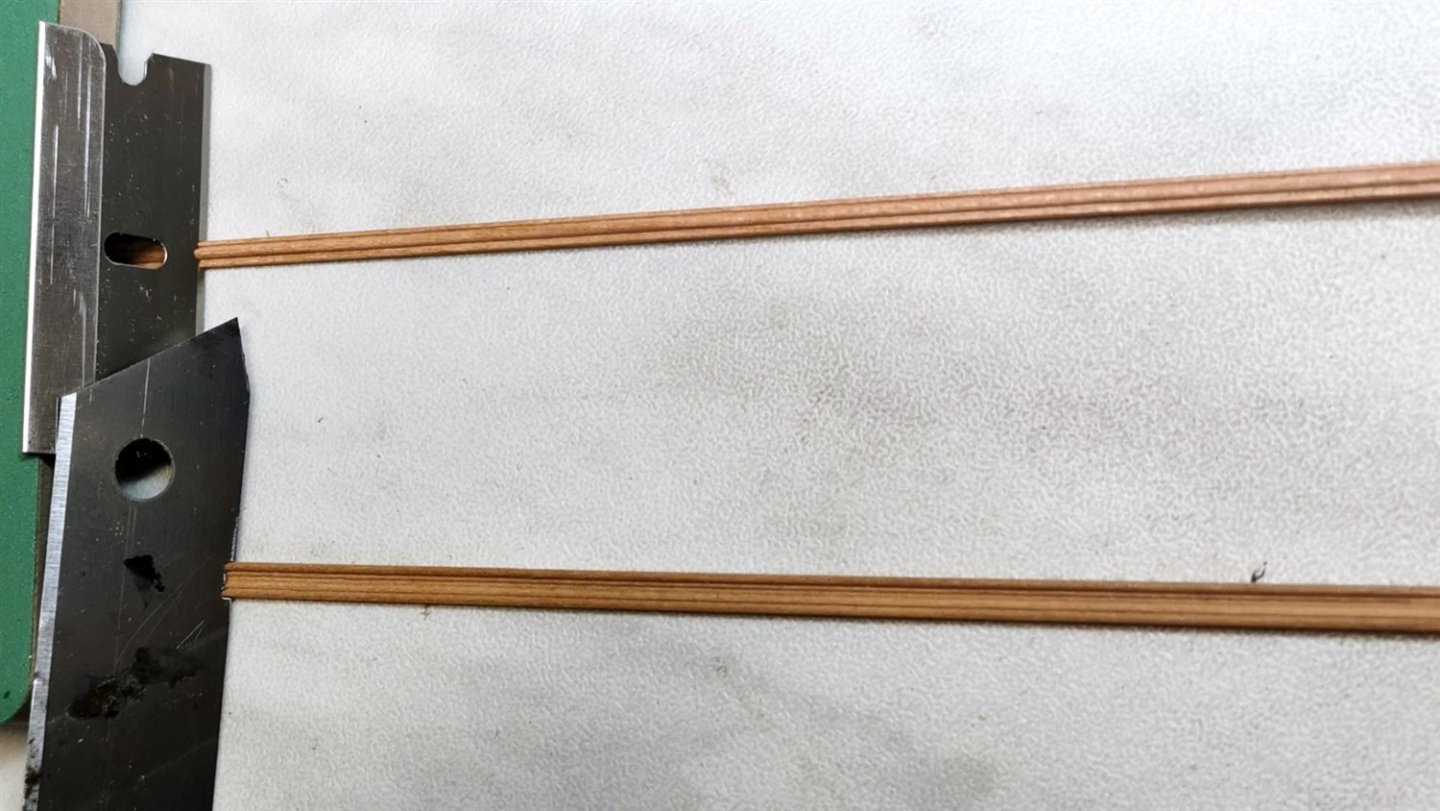
So It's been a year since I started posting my build log. Thanks for the kind comments and likes through the whole year guys. I hope my motivation to build won't leave me 🙂 Over the holidays I made a little progress... I made the scraper from a razor knife and the fancy mouldings are scraped with it freehand. No other special tool. But as I wrote I used pear wood. Because in cherry the scraper tended to float and the thickness wasn't consistent either.


-
Hi Frank, your planking prep looks really good. Still, I'll add Chuck's advice: (52 post on of my thread) I still had to do some fine sanding at some bulkheads when planking. So fingers crossed and I wish you all the best in this new year.
-
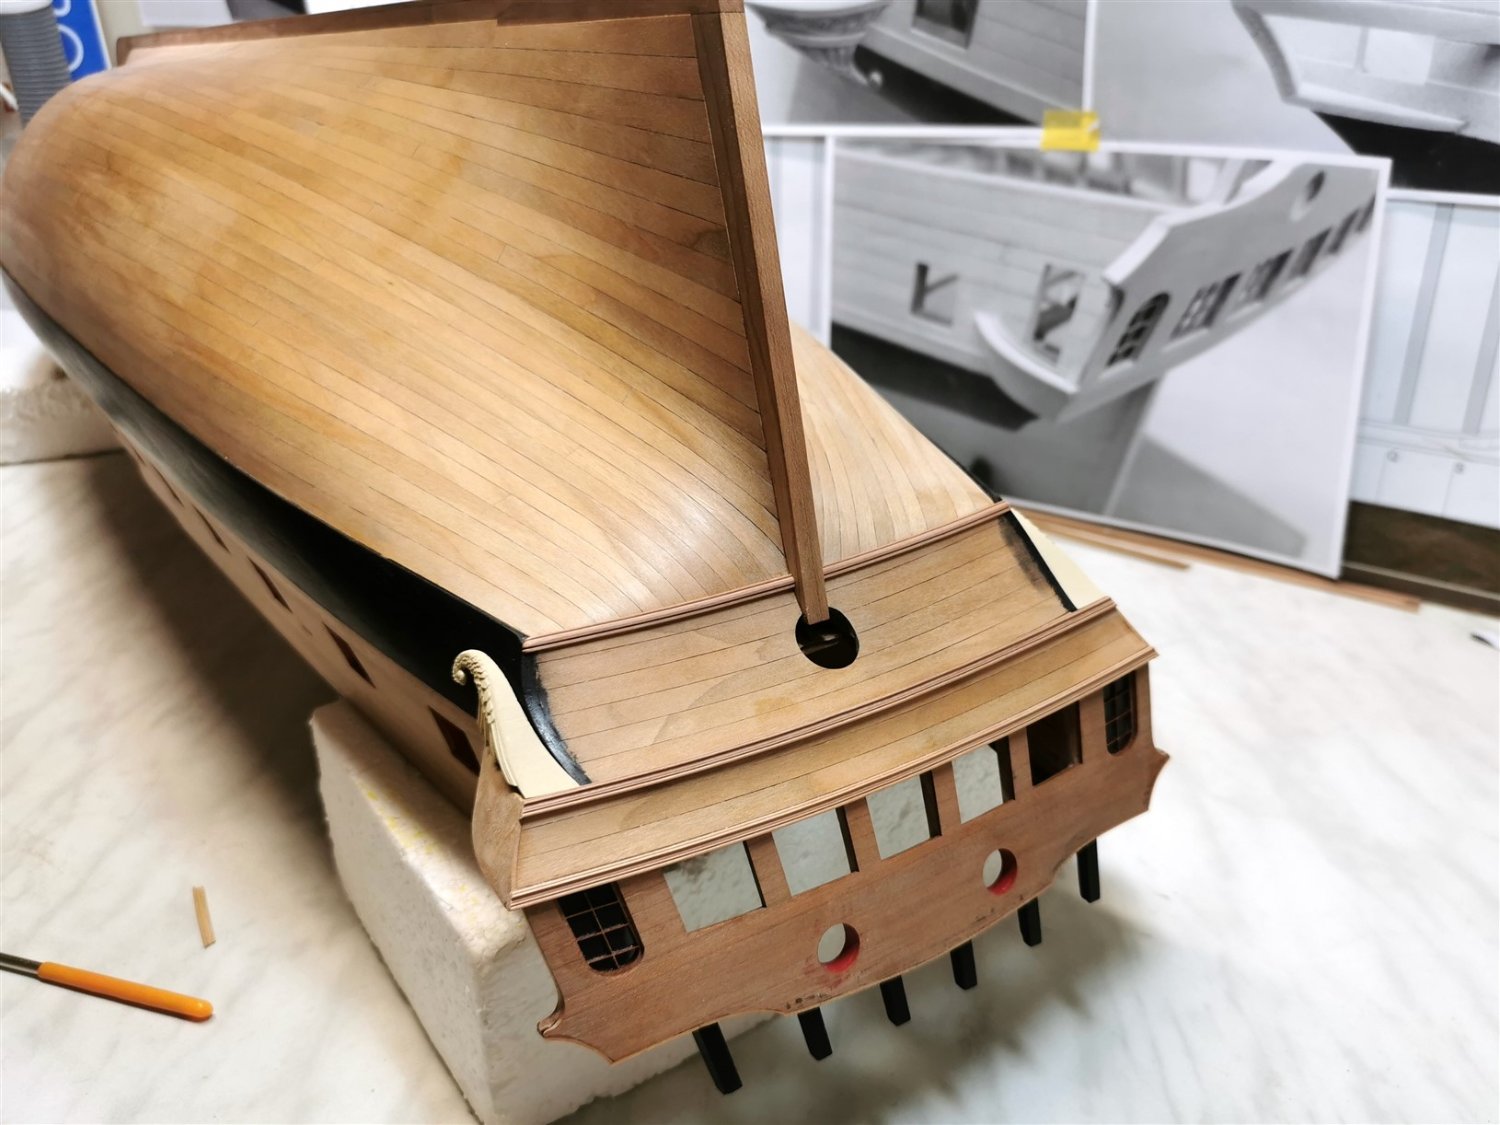
I continue to work on the Qgallery. Before gluing the shell, I glued the upper part to better check that all three frames are parallel. Now I'm trying to make fancy moldings. In a previous post I showed the first test and I was satisfied with how it went. But now I made a different profile of the scraper and I can't make fancy mouldings from cherry at all anymore. I tried it with three different kinds of cherry wood and the result was the same. But I tried pear and the result is much better. So I'll probably go this way for fancy mouldings. You can easily identify it in the photos.


-
Well done Frank, fingers crossed for planking, another fun weeks ahead of you. And I wish you and all builders a Blessed and peaceful Christmas.
-
Thank you Chuck, Yes, the frieze is just a test, the printer was without paint. So I have already done the final ones but there's still a lot of work to do before they're applied.
-
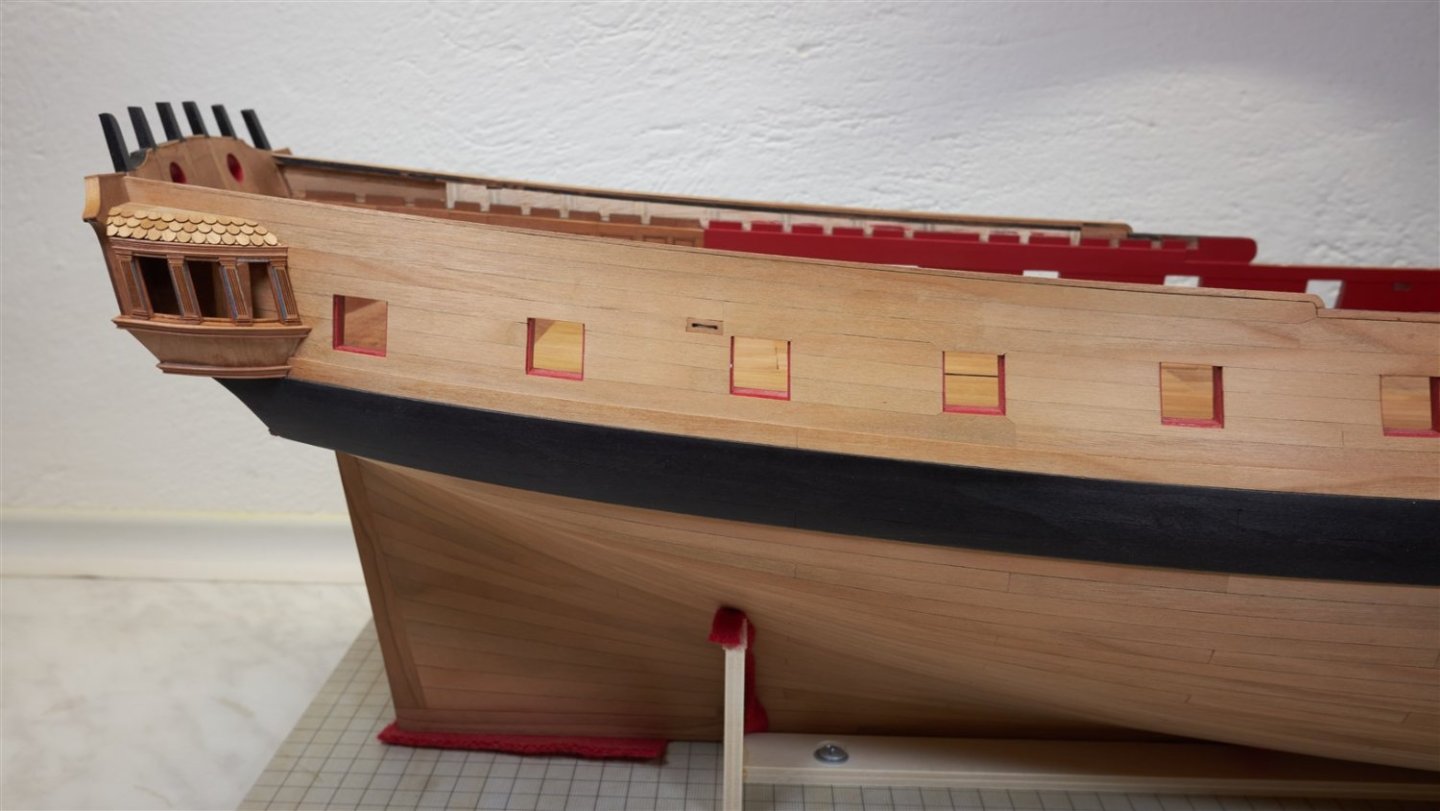
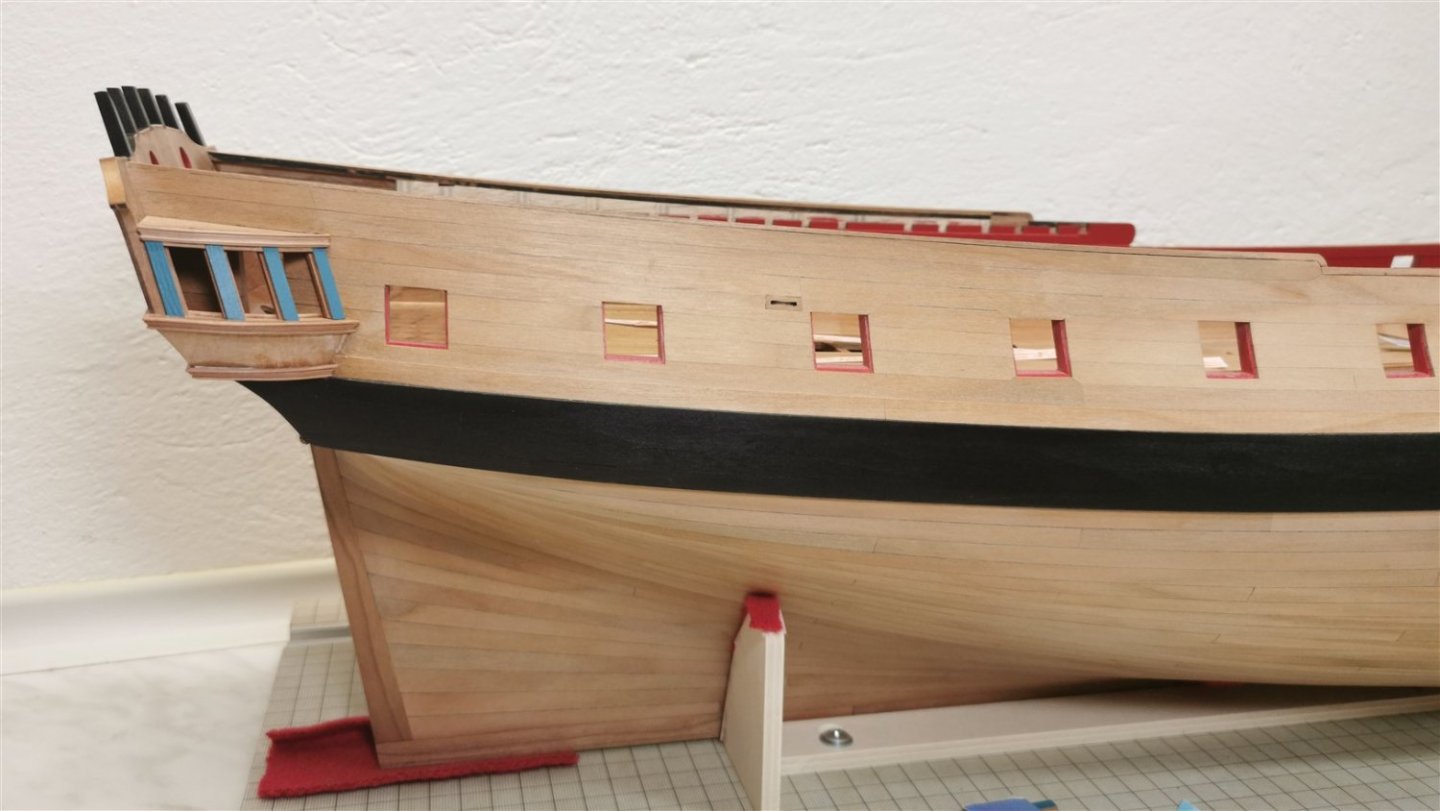
Thanks for the likes guys, I finally decided to move the quarter gallery stool to run parallel to the planking. I'm much happier with the result now. Using the waste pieces I tried the top part as well. I'm hoping it will be ok. And finally I tried making a scraper for the fancy moldings...


-
Congratulations Greg, this is truly a work of art. I'm flipping through your and David's book right now but please I want to see more photos in the gallery.