HOLIDAY DONATION DRIVE - SUPPORT MSW - DO YOUR PART TO KEEP THIS GREAT FORUM GOING! (Only 72 donations so far out of 49,000 members - Can we at least get 100? C'mon guys!)
×


westwood
-
Posts
275 -
Joined
-
Last visited
Content Type
Profiles
Forums
Gallery
Events
Everything posted by westwood
-
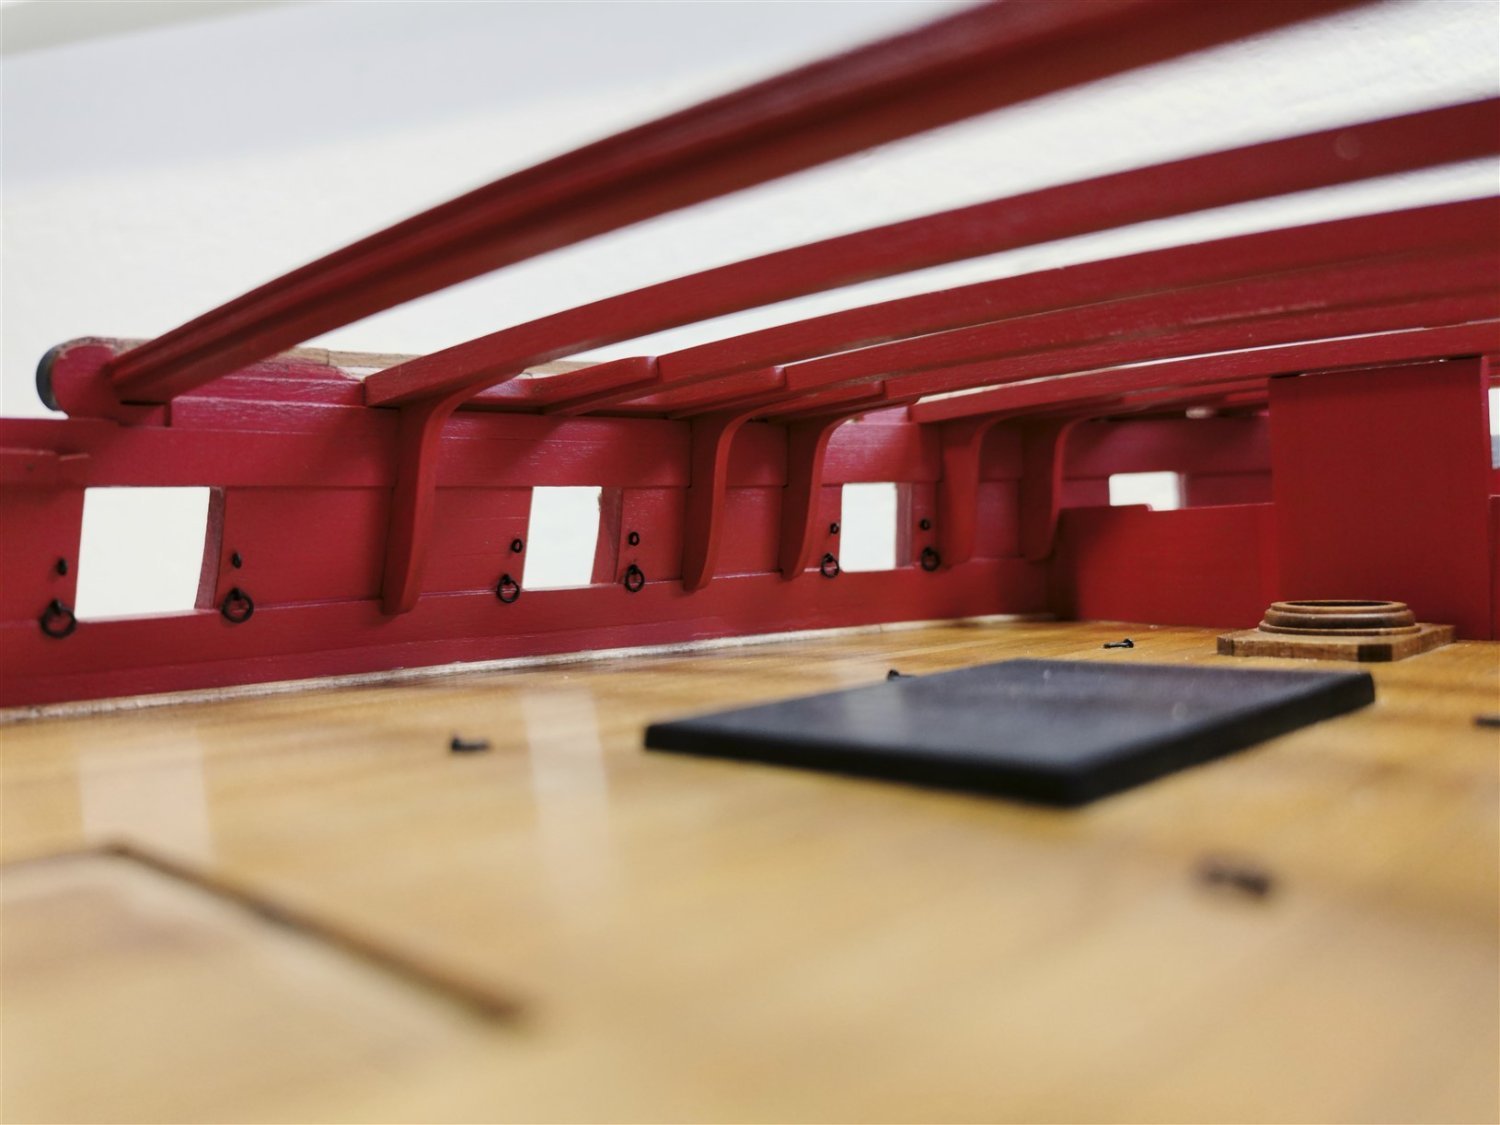
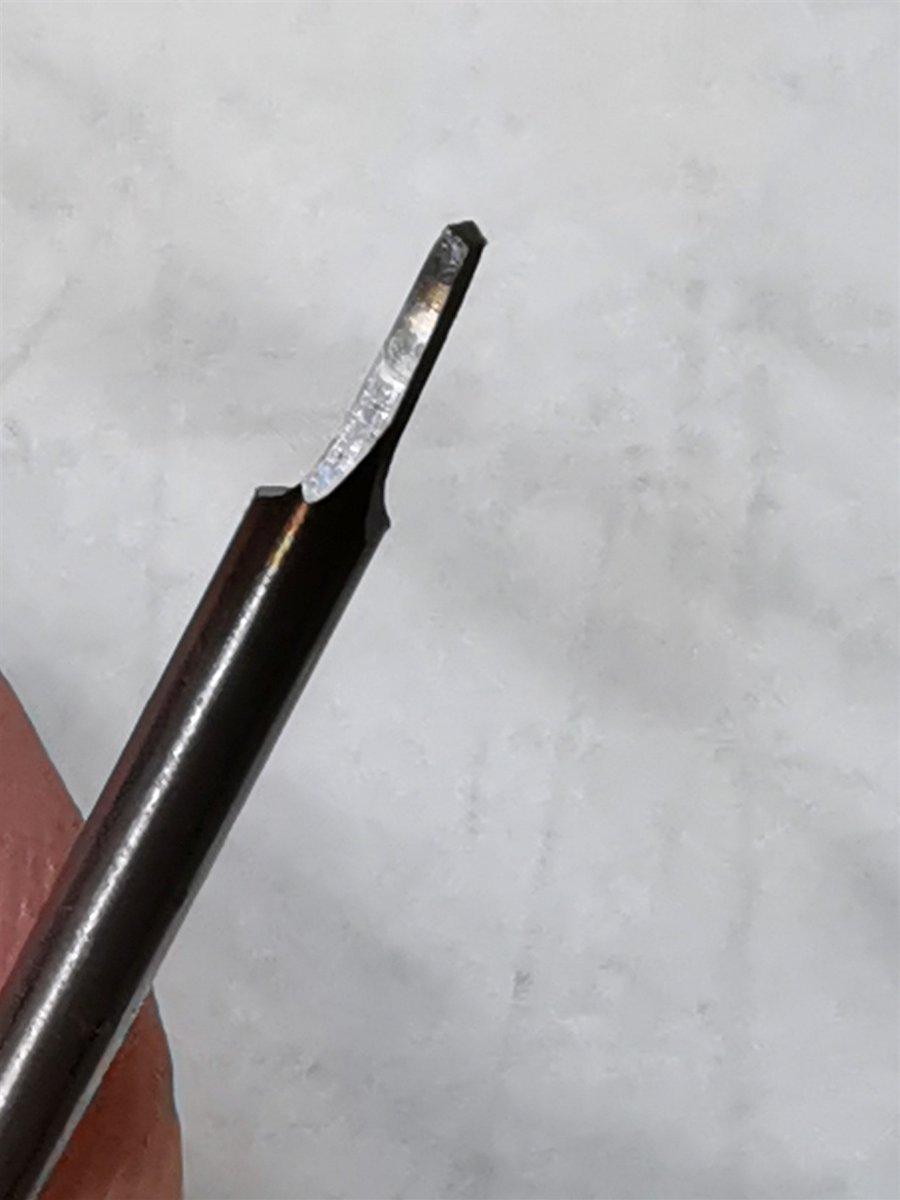
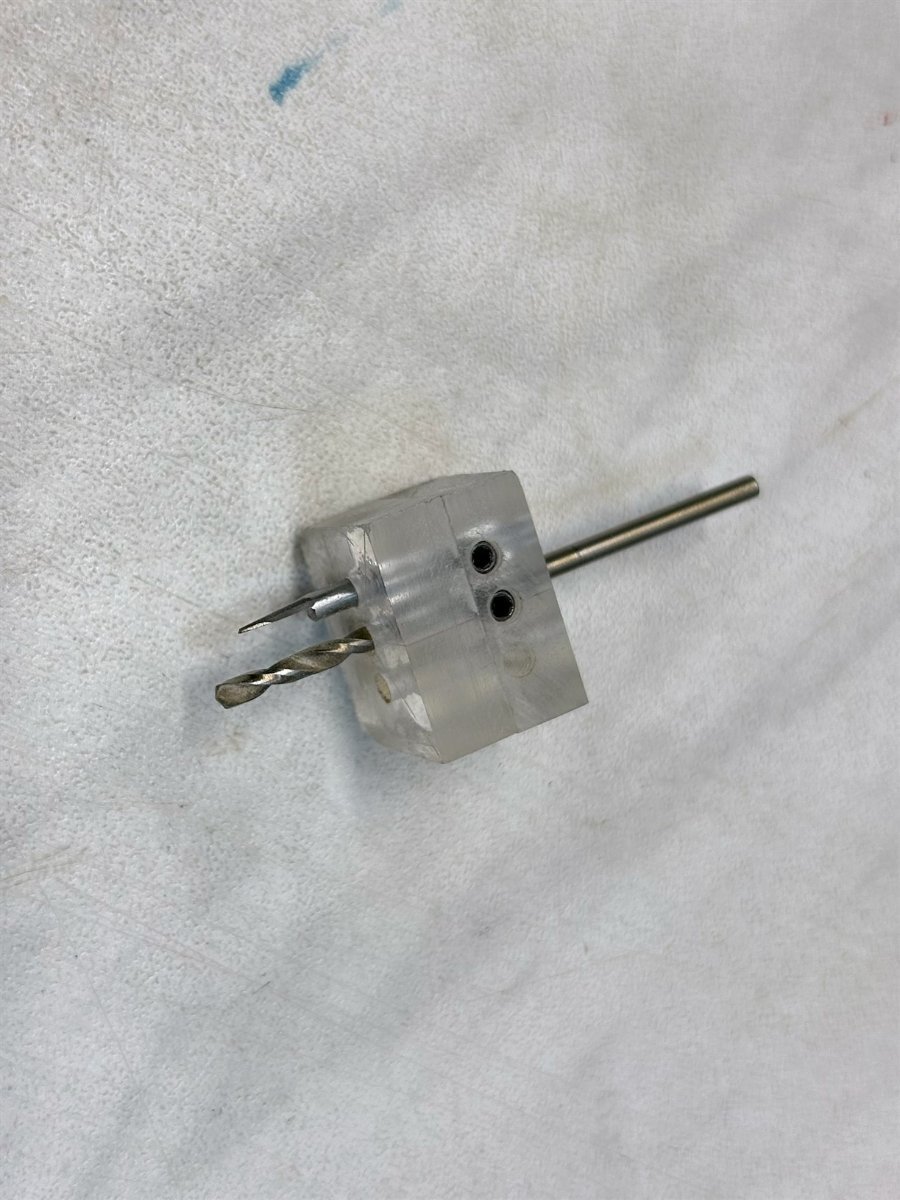
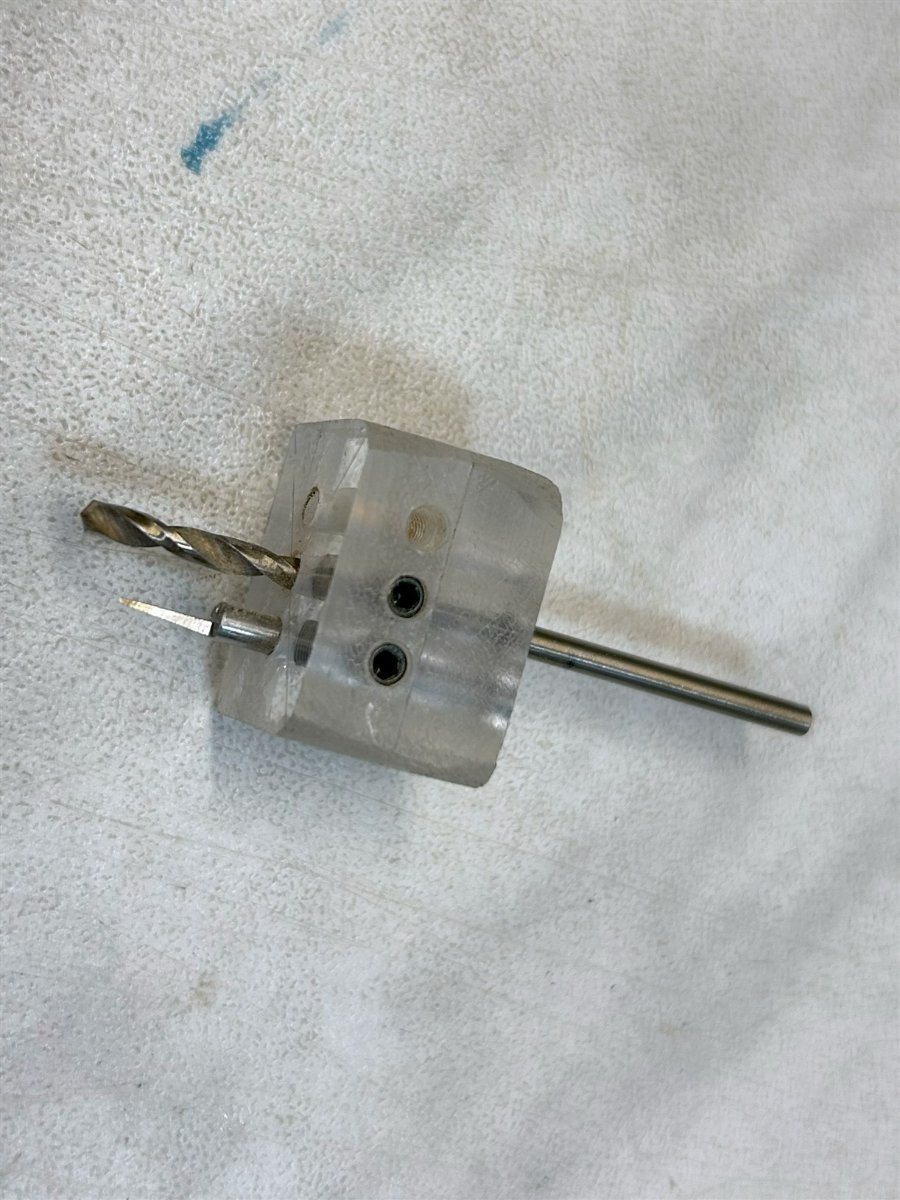
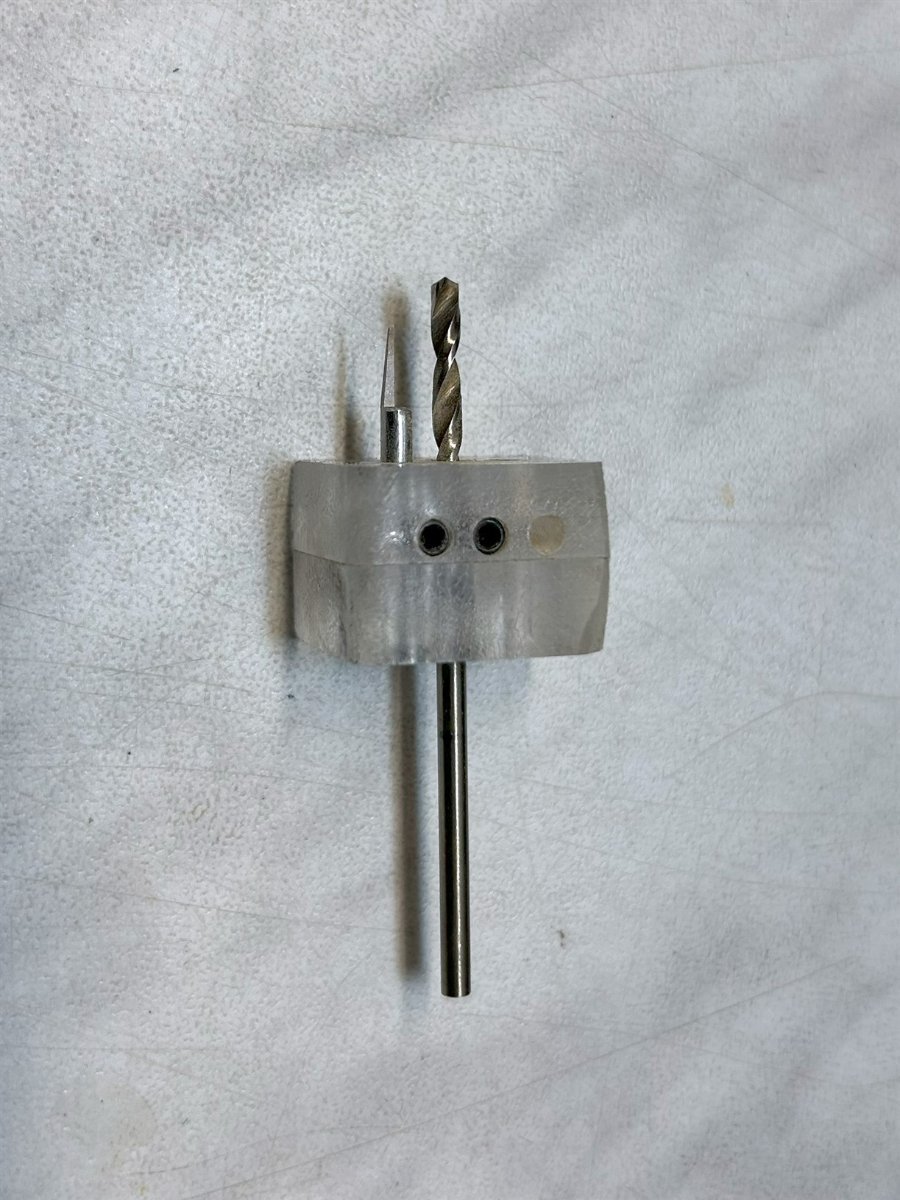
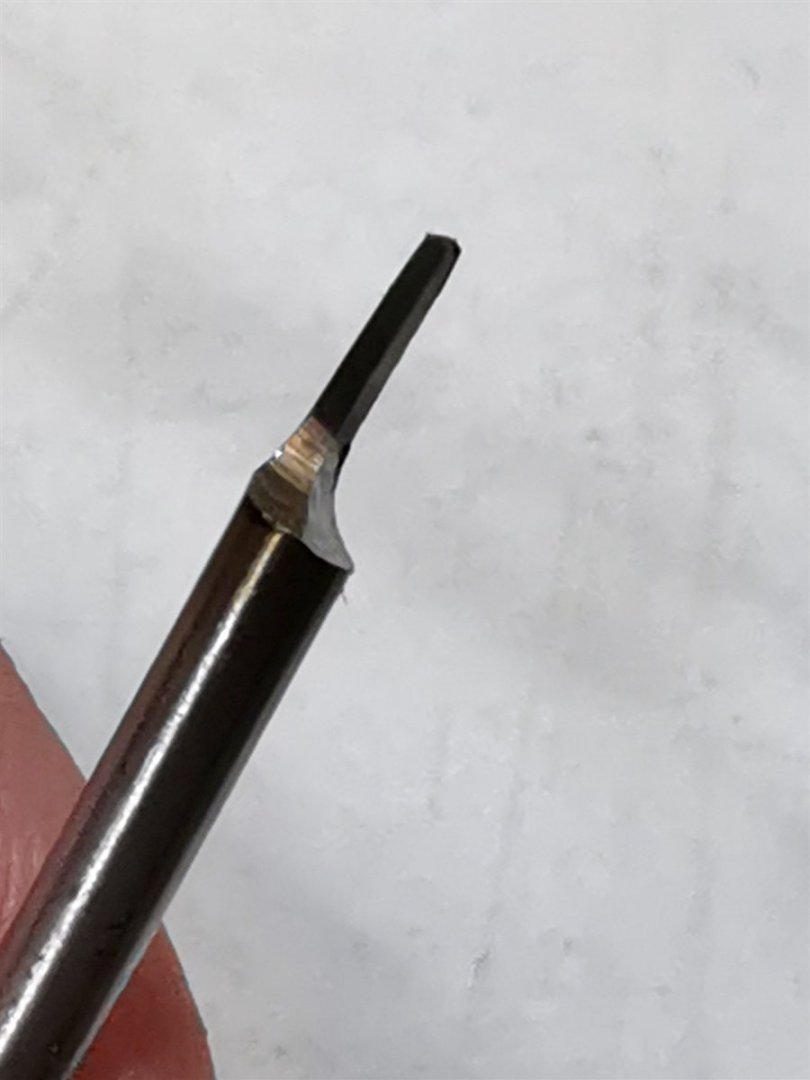
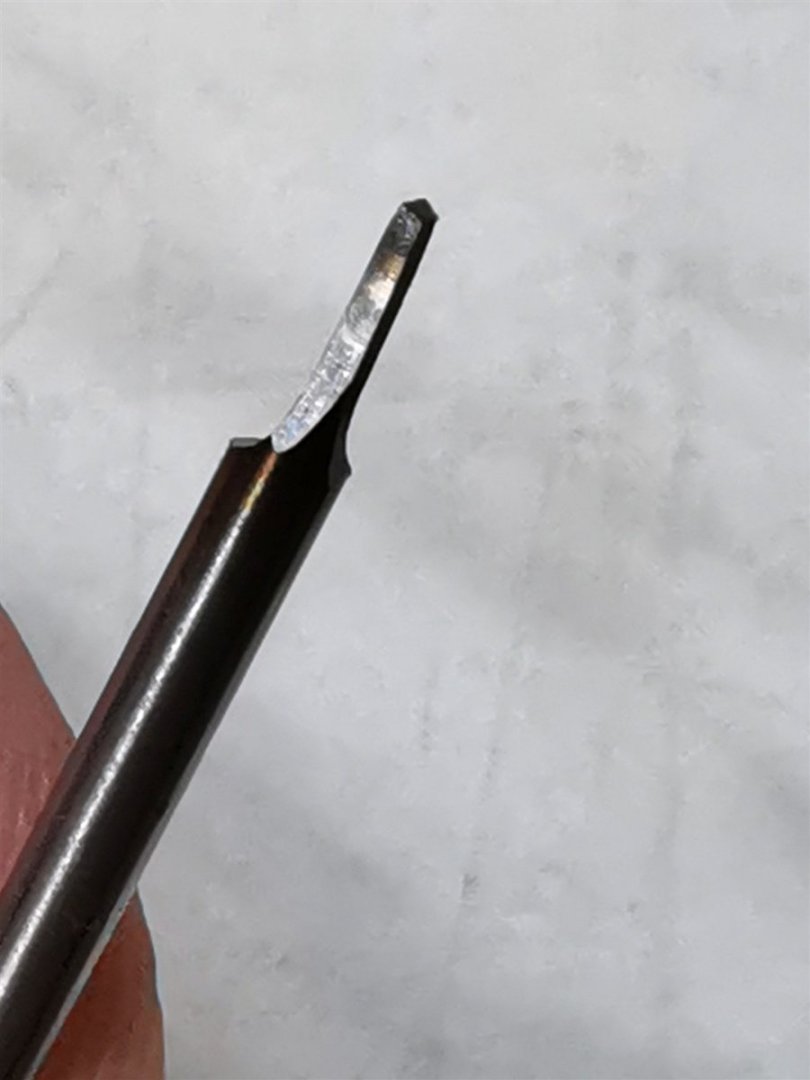
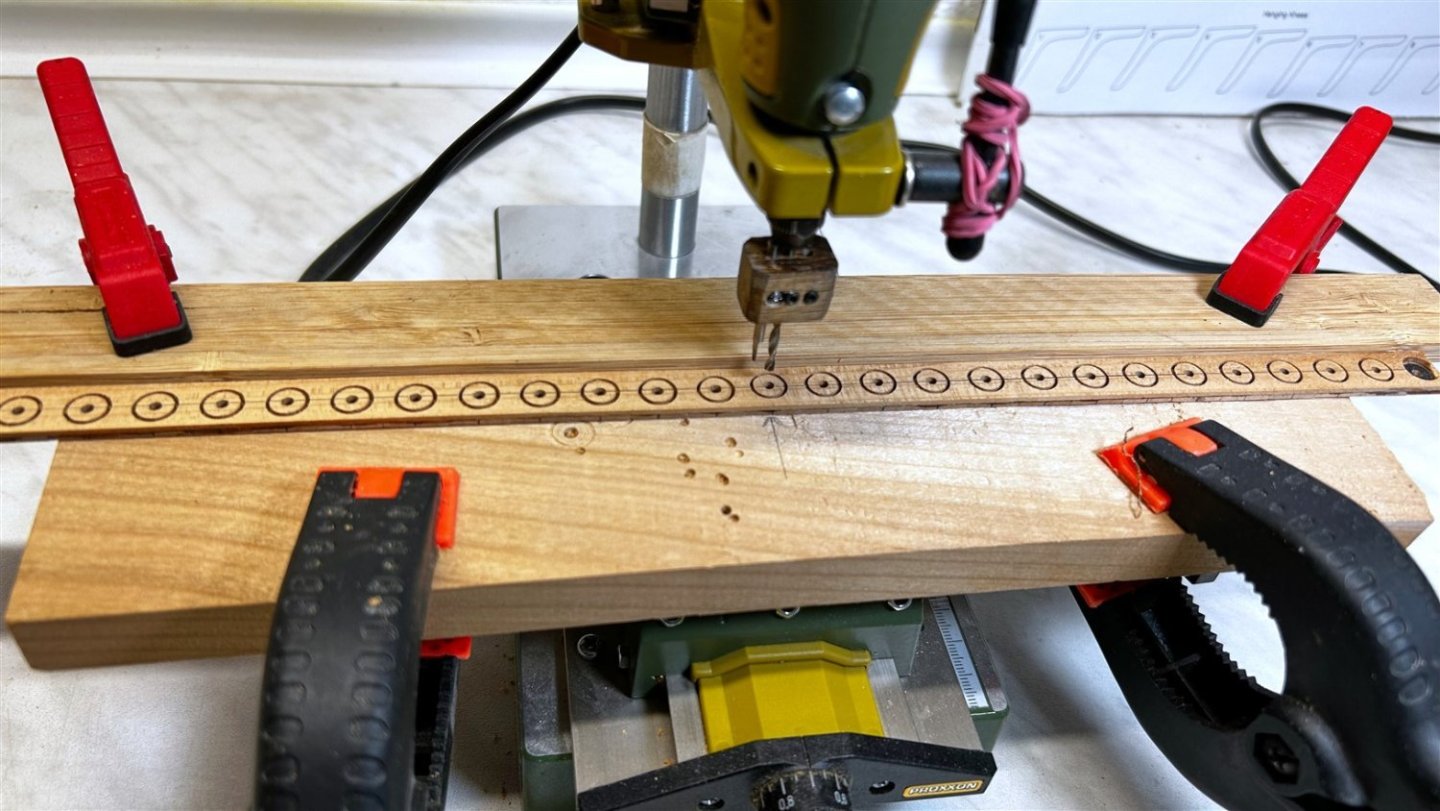
Thank you JJ although working with metal is not really one of my favorites. I made the countersink with a diamond dental burr.
-
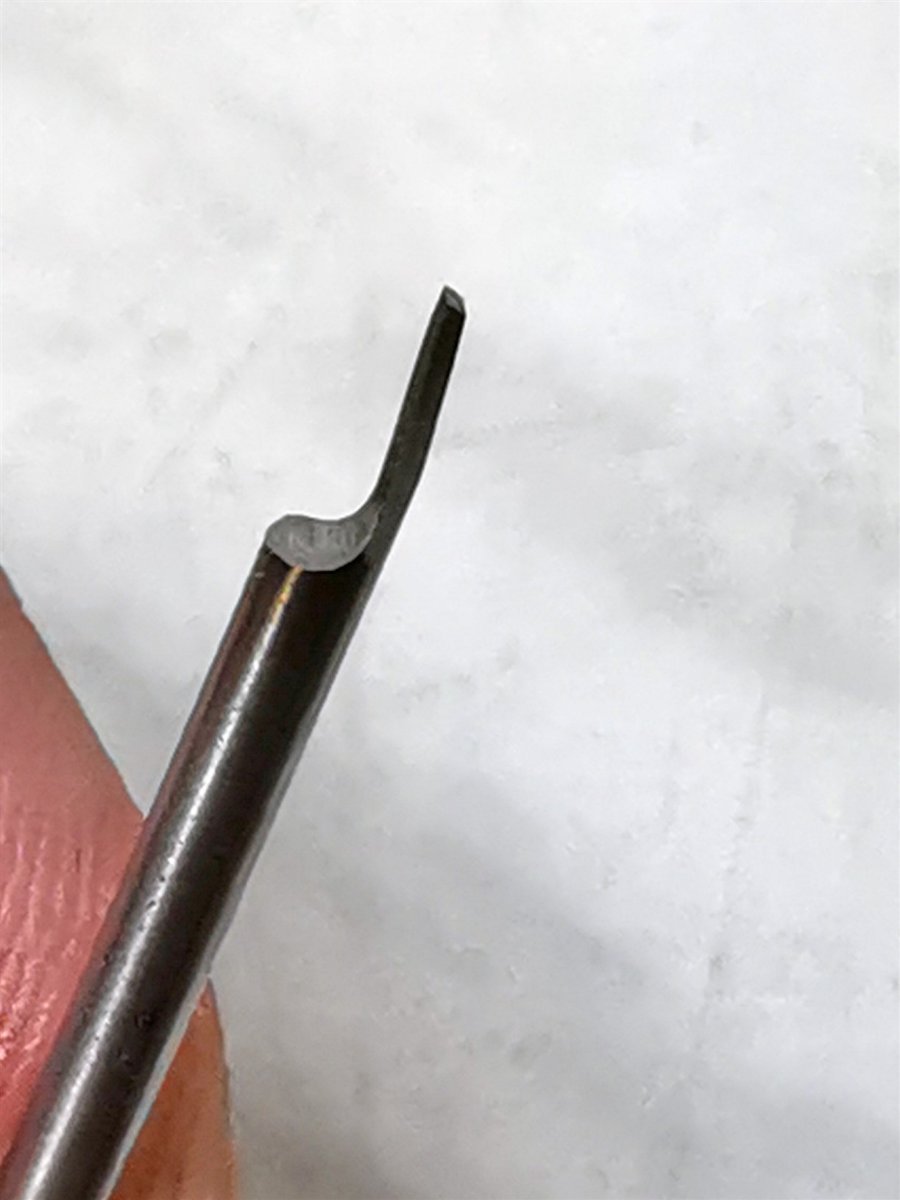
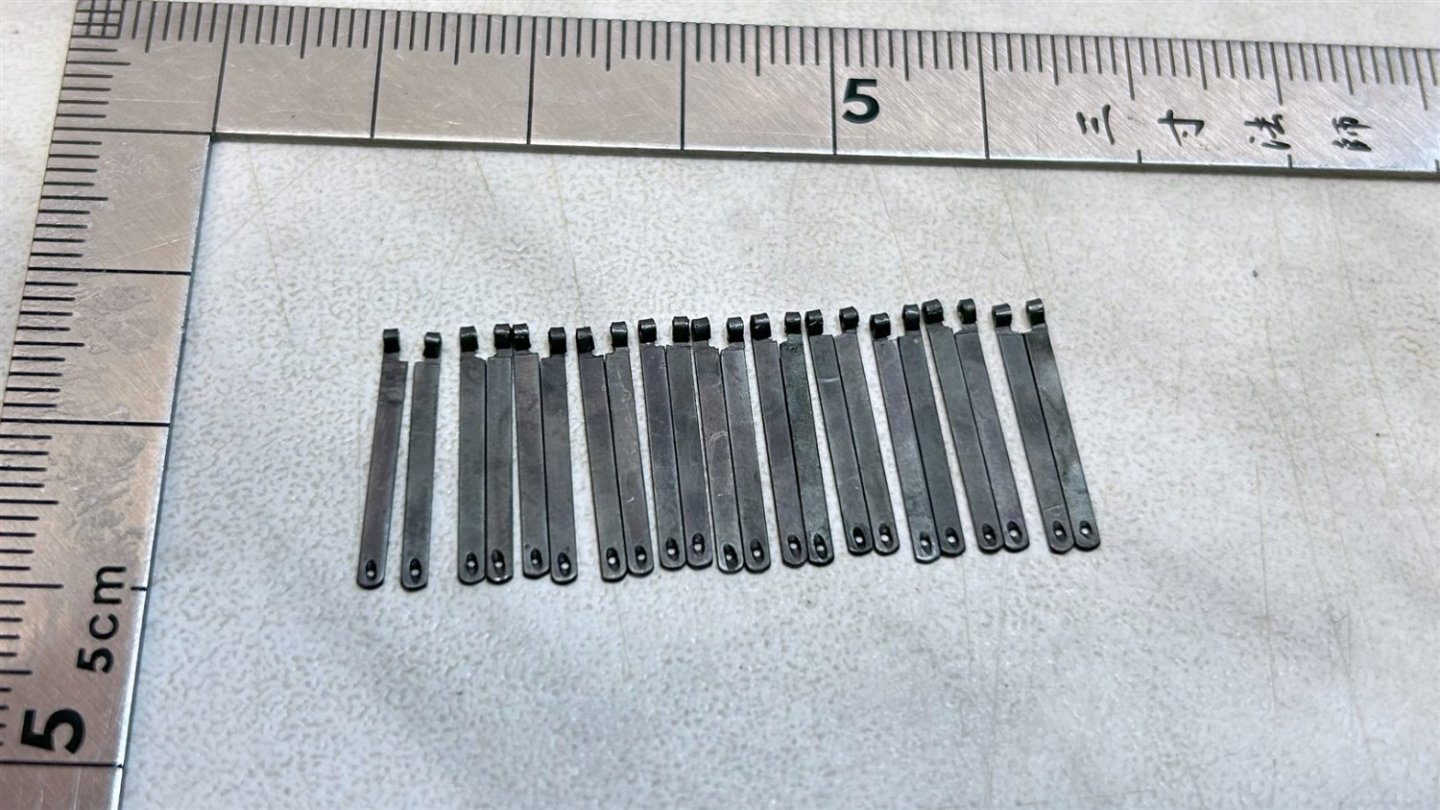
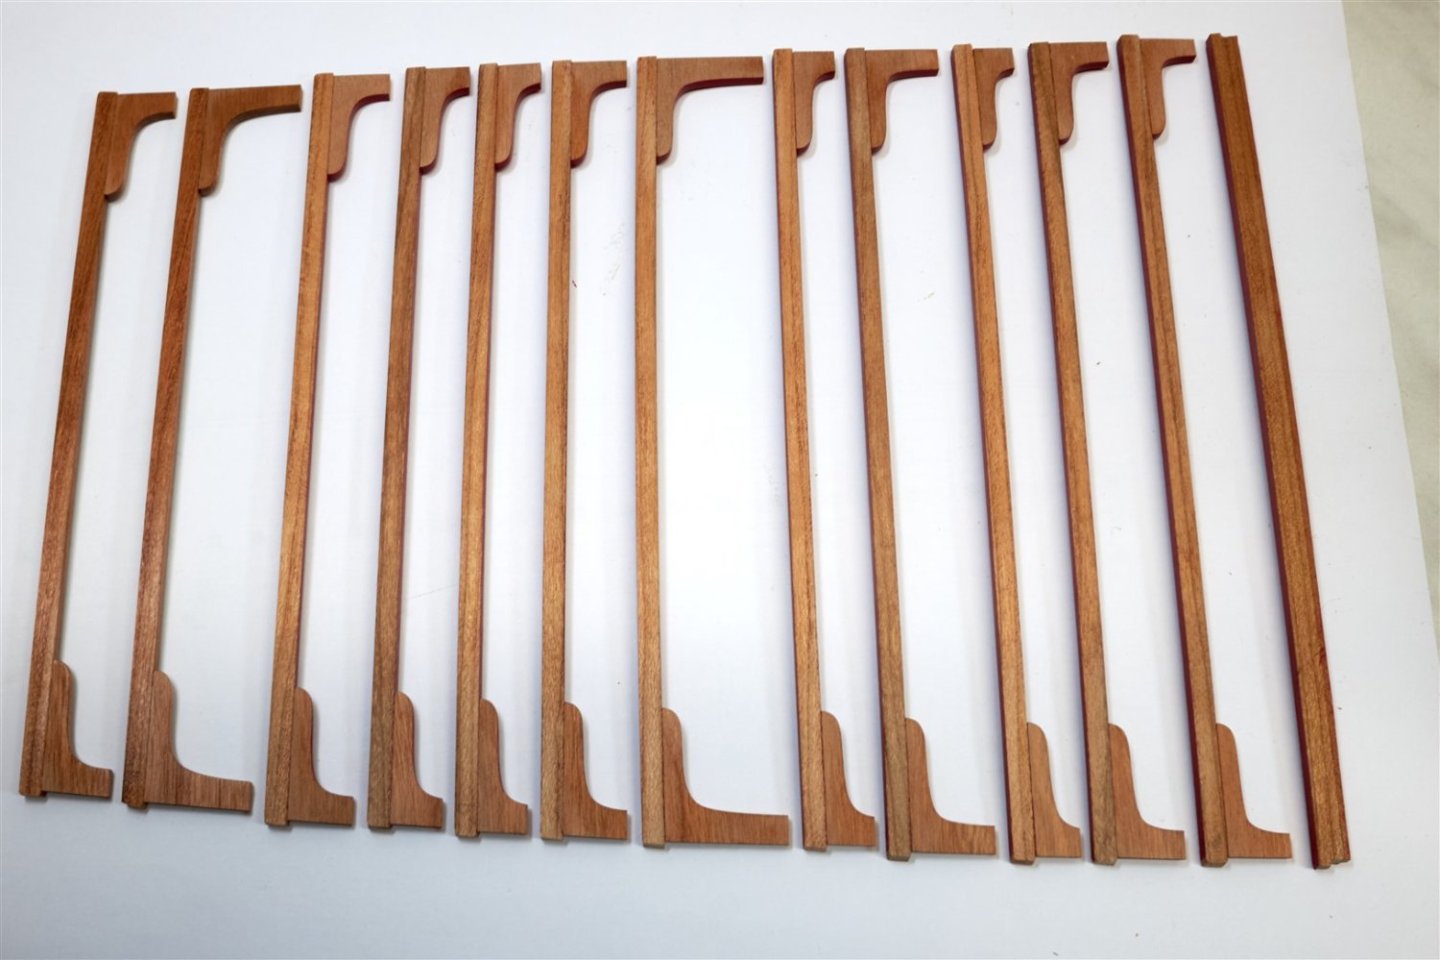
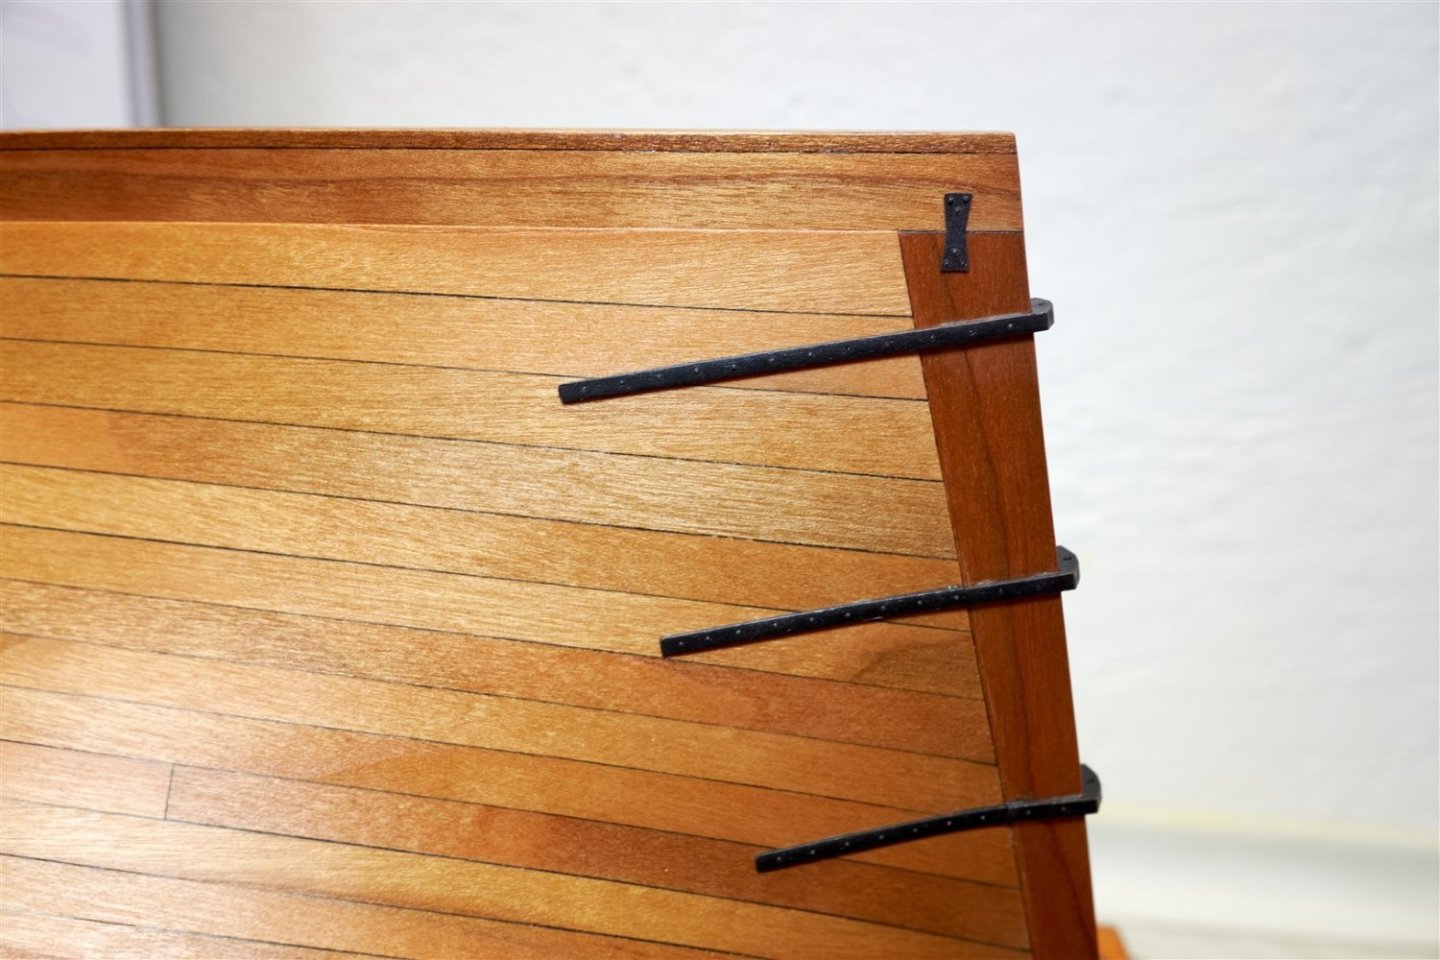
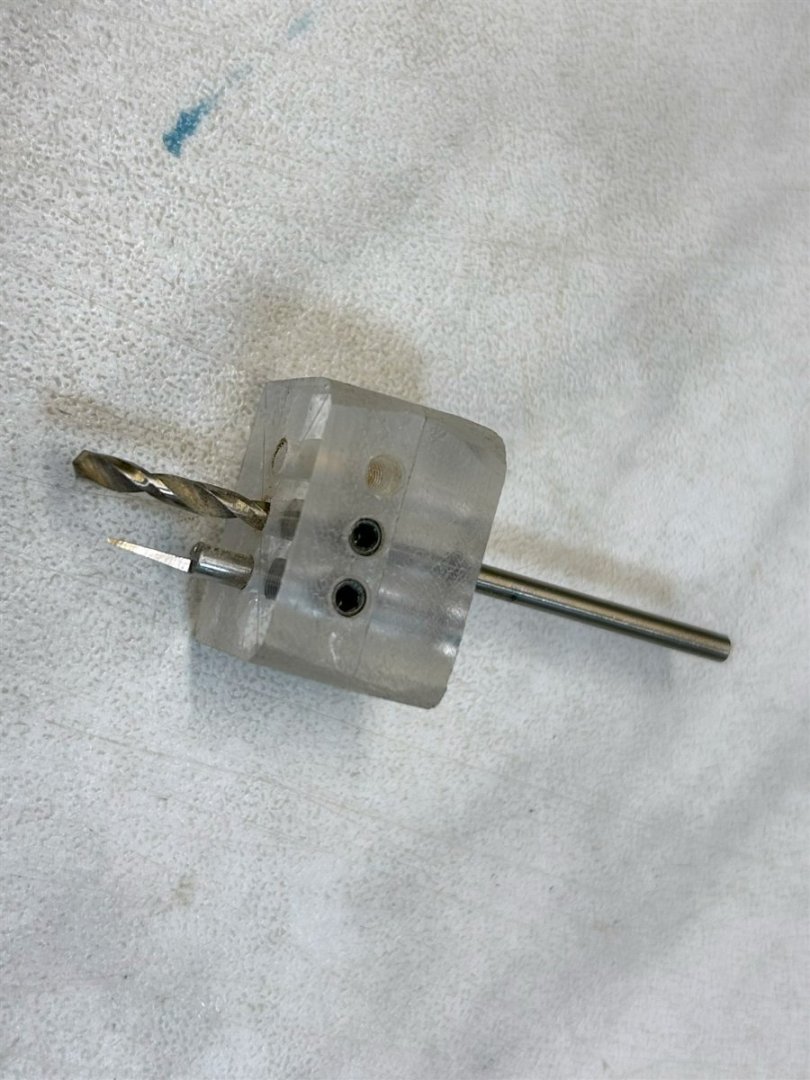
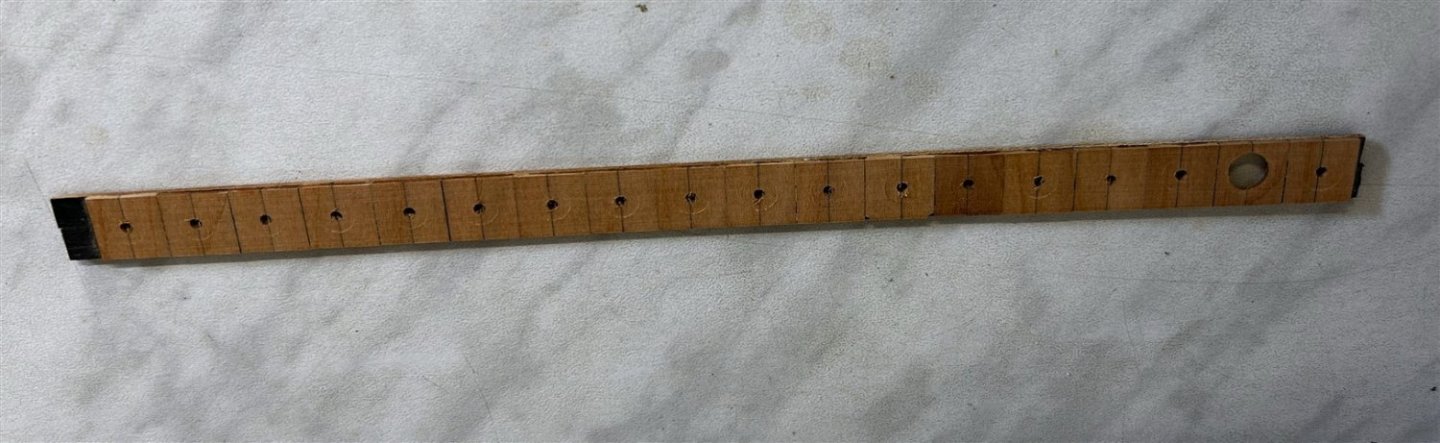
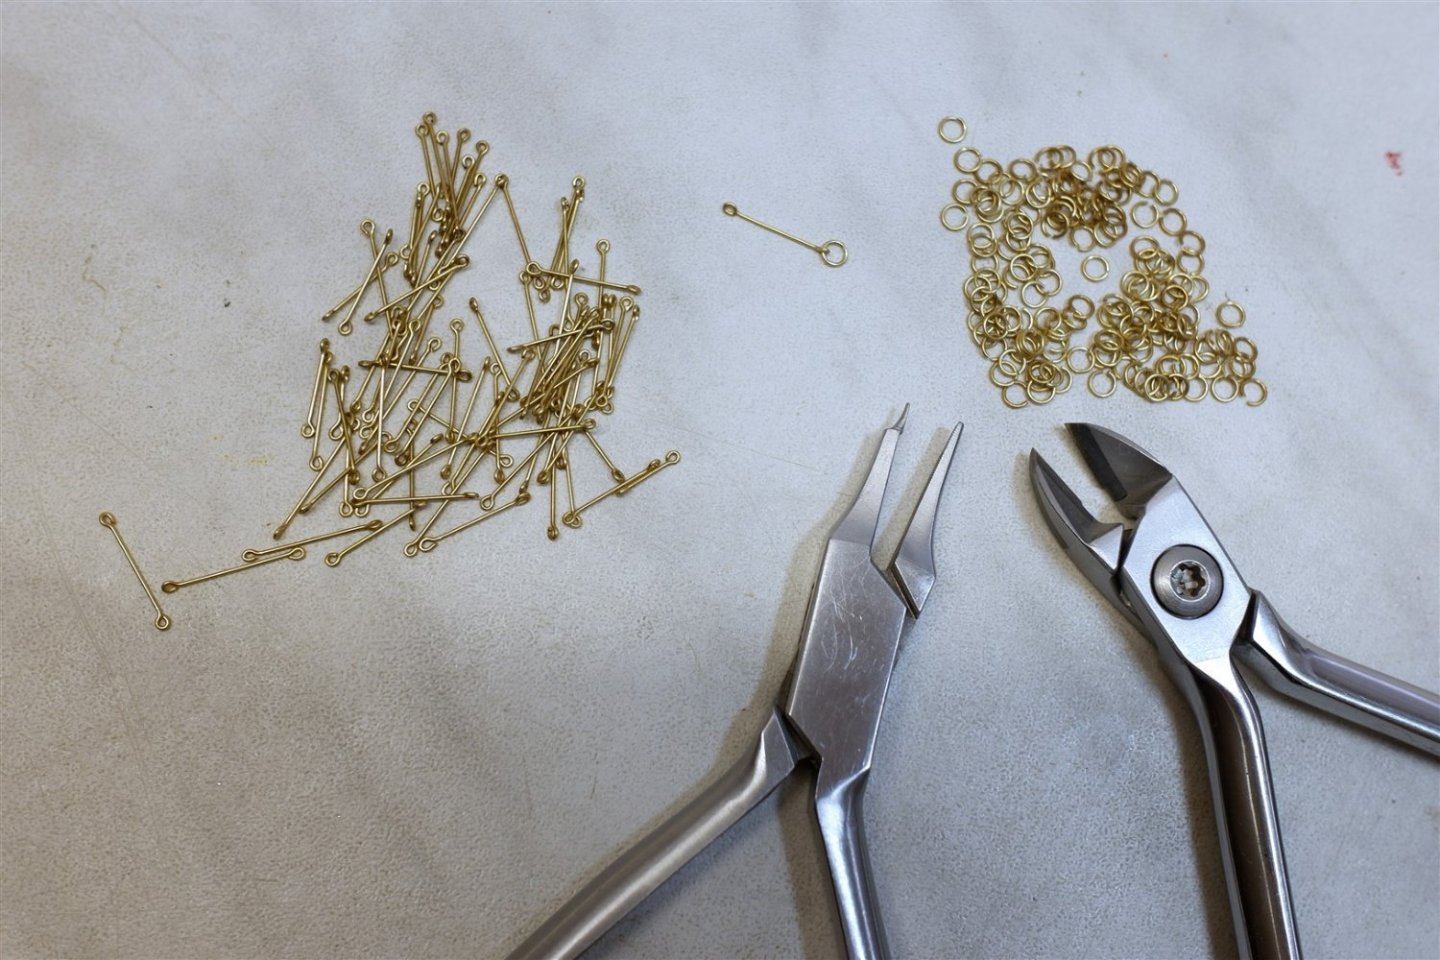
Thanks for the kind words, guys. I appreciate them very much and they encourage me to continue my work. Again a small update from last weekend. Fred, unfortunately I don't have a detailed picture of the hinge making process. I only have this photo where you can see the notch for the eyebolts. I didn't even have a any jig, so they are definitely not one hundred percent identical...


-
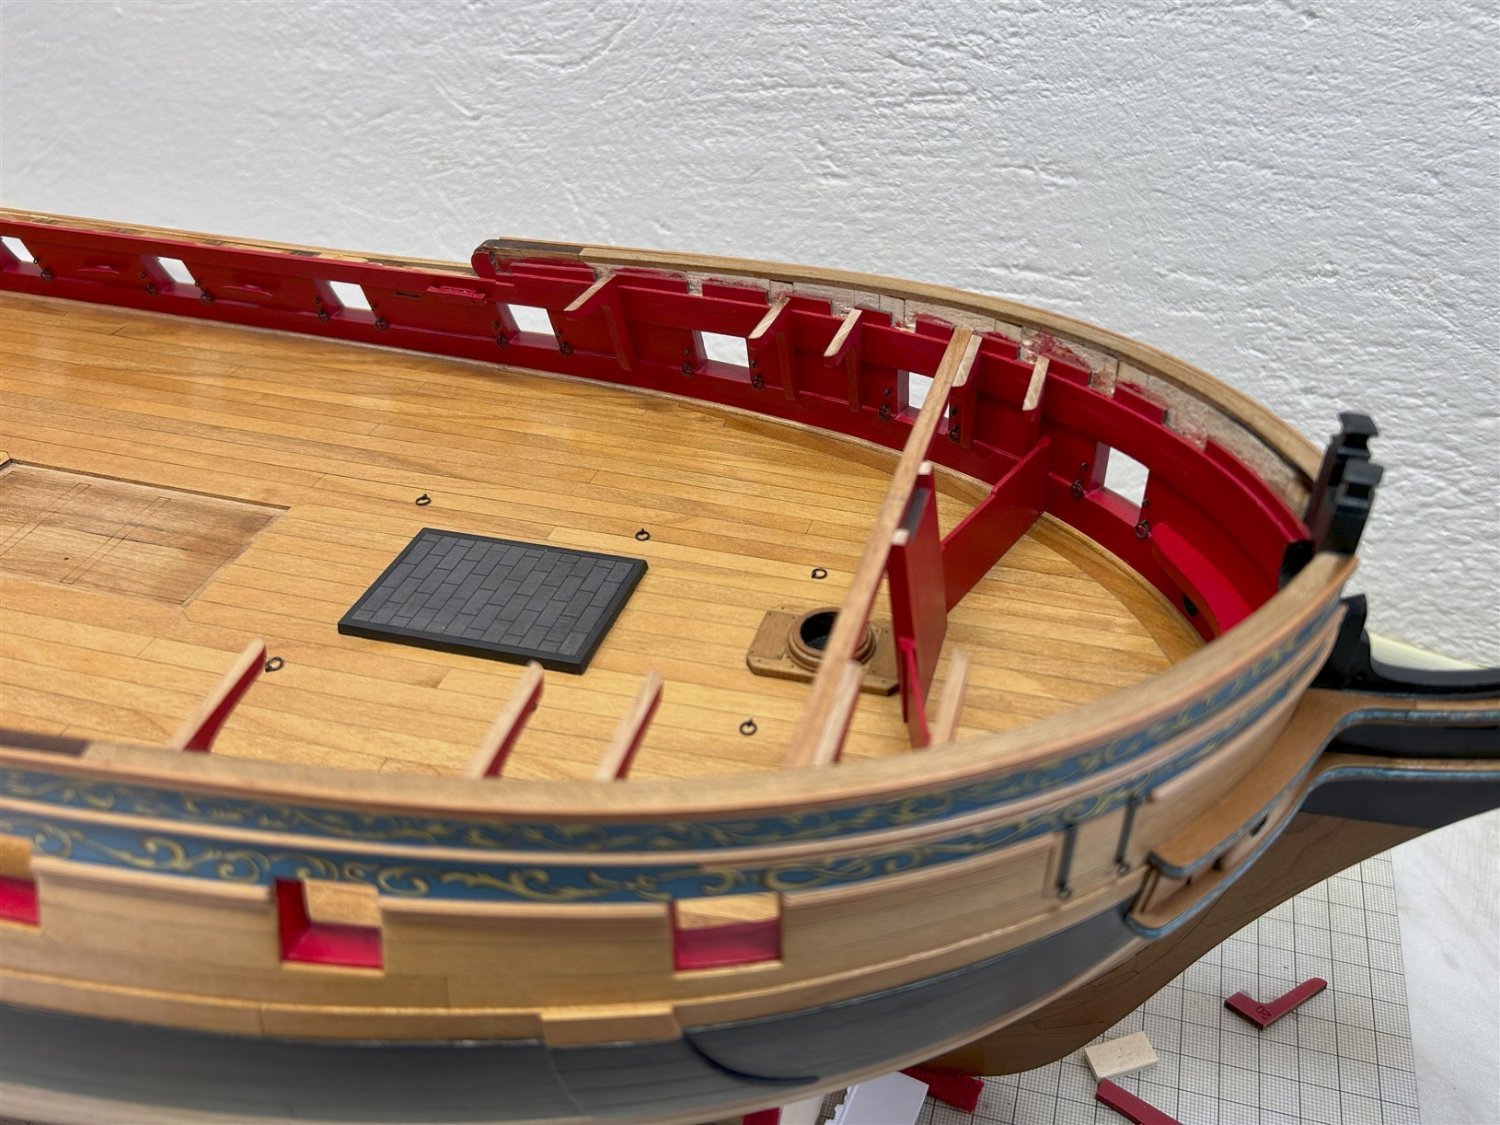
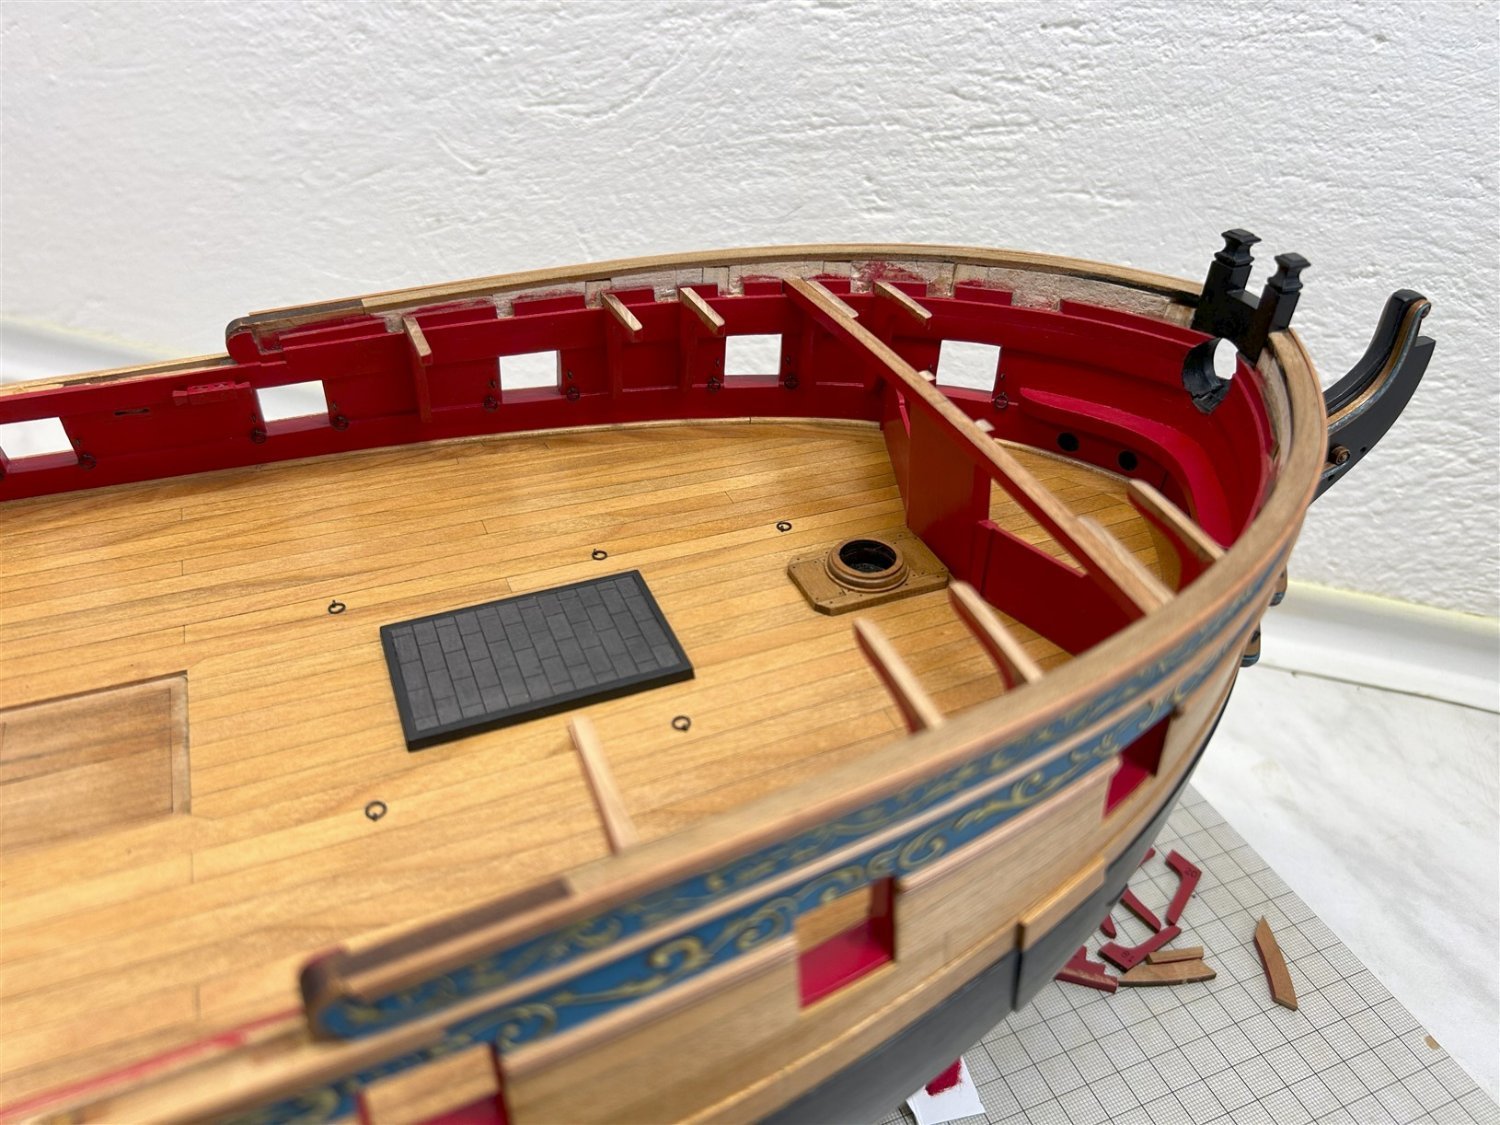
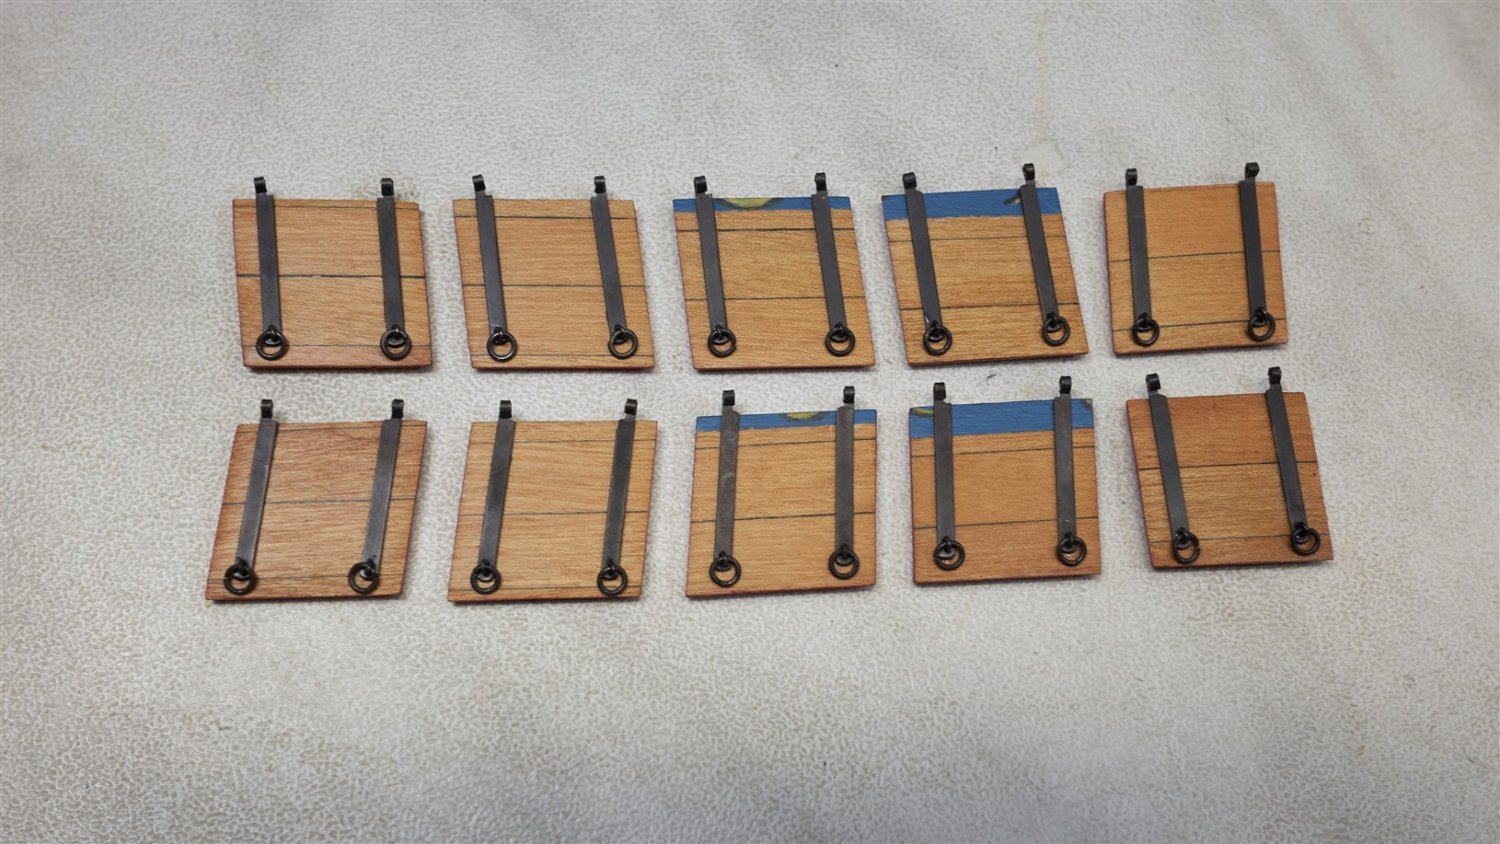
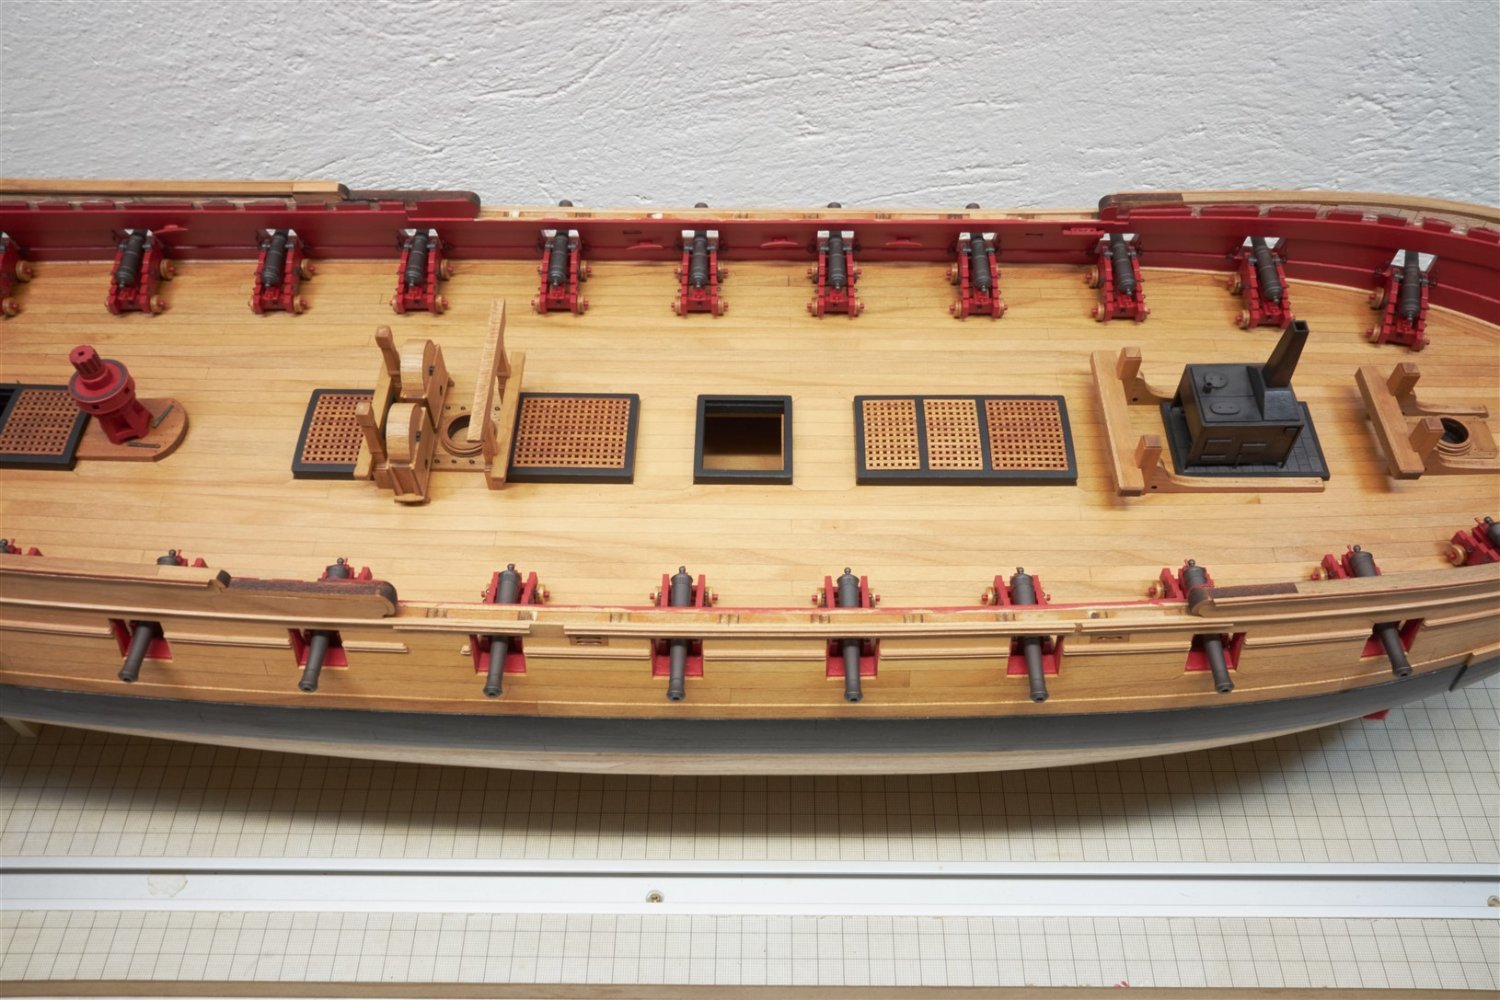
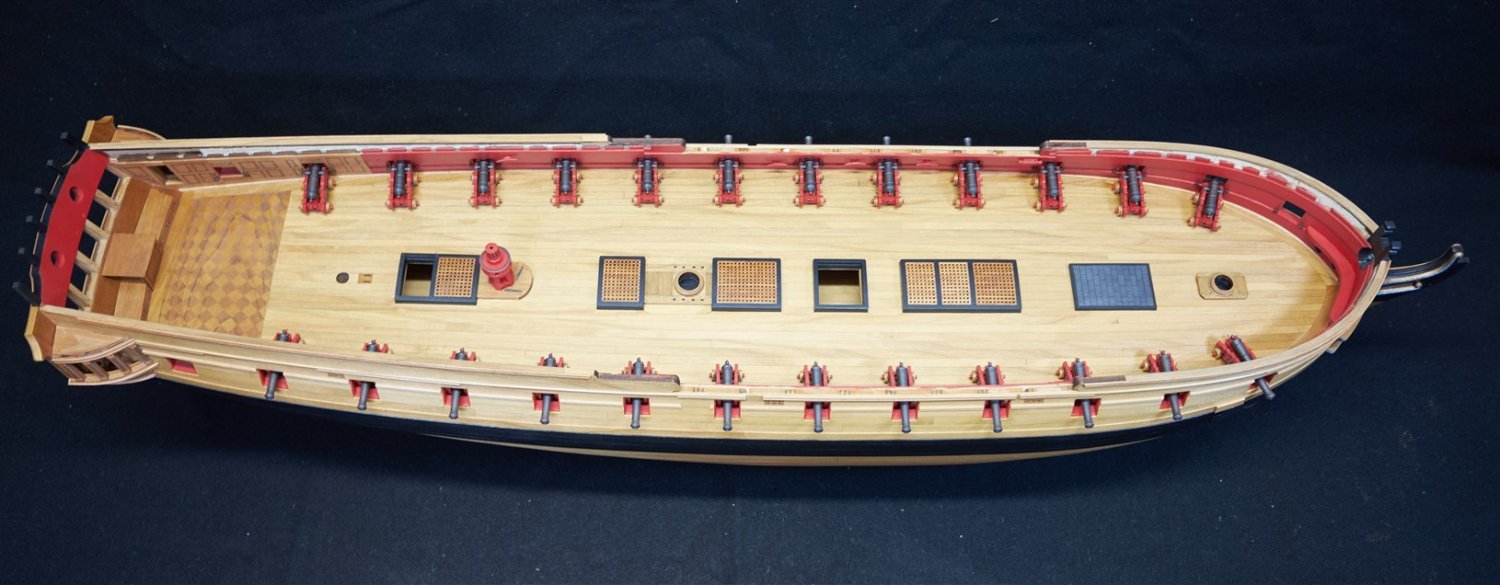
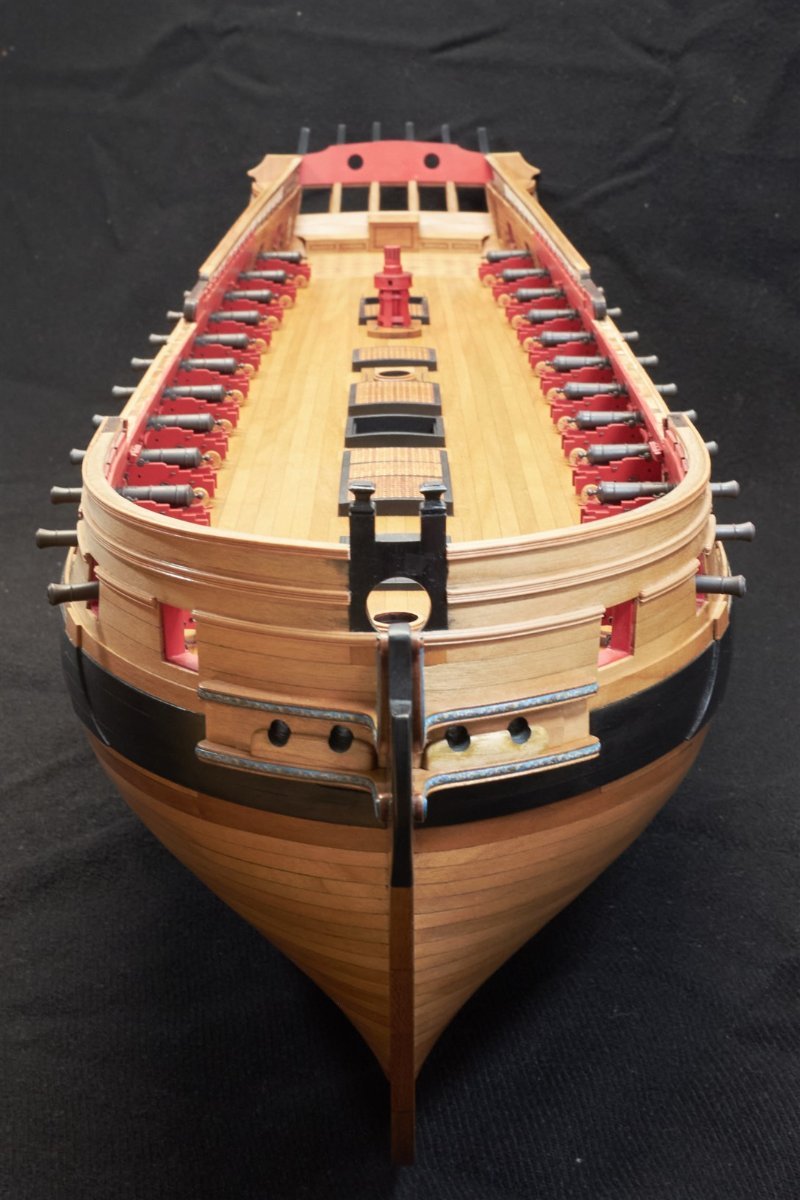
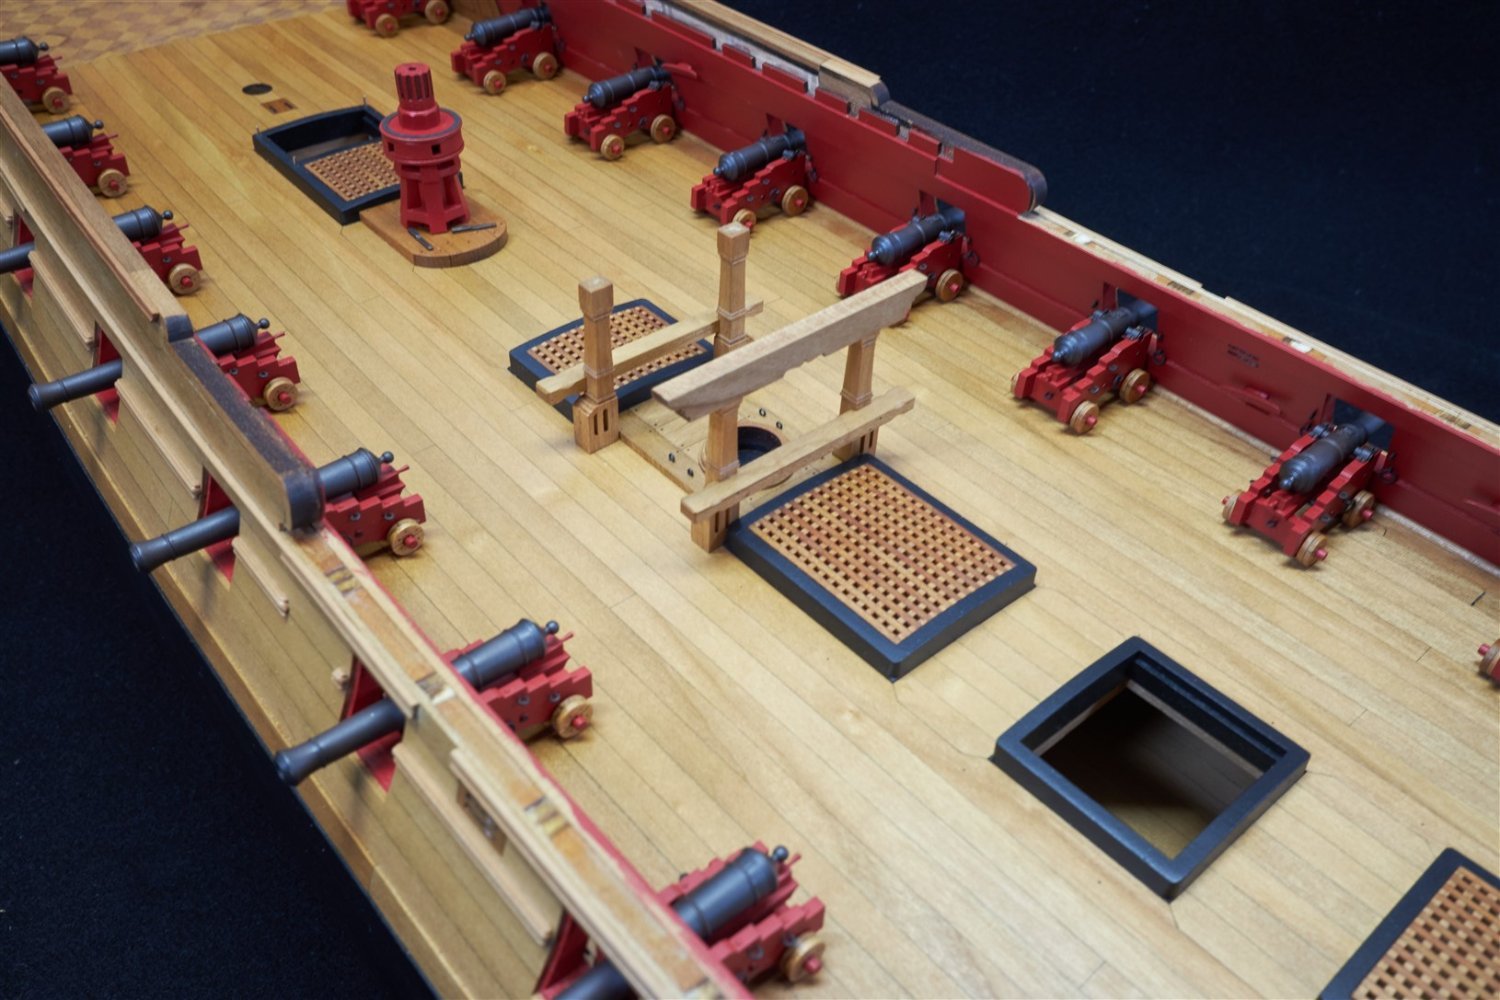
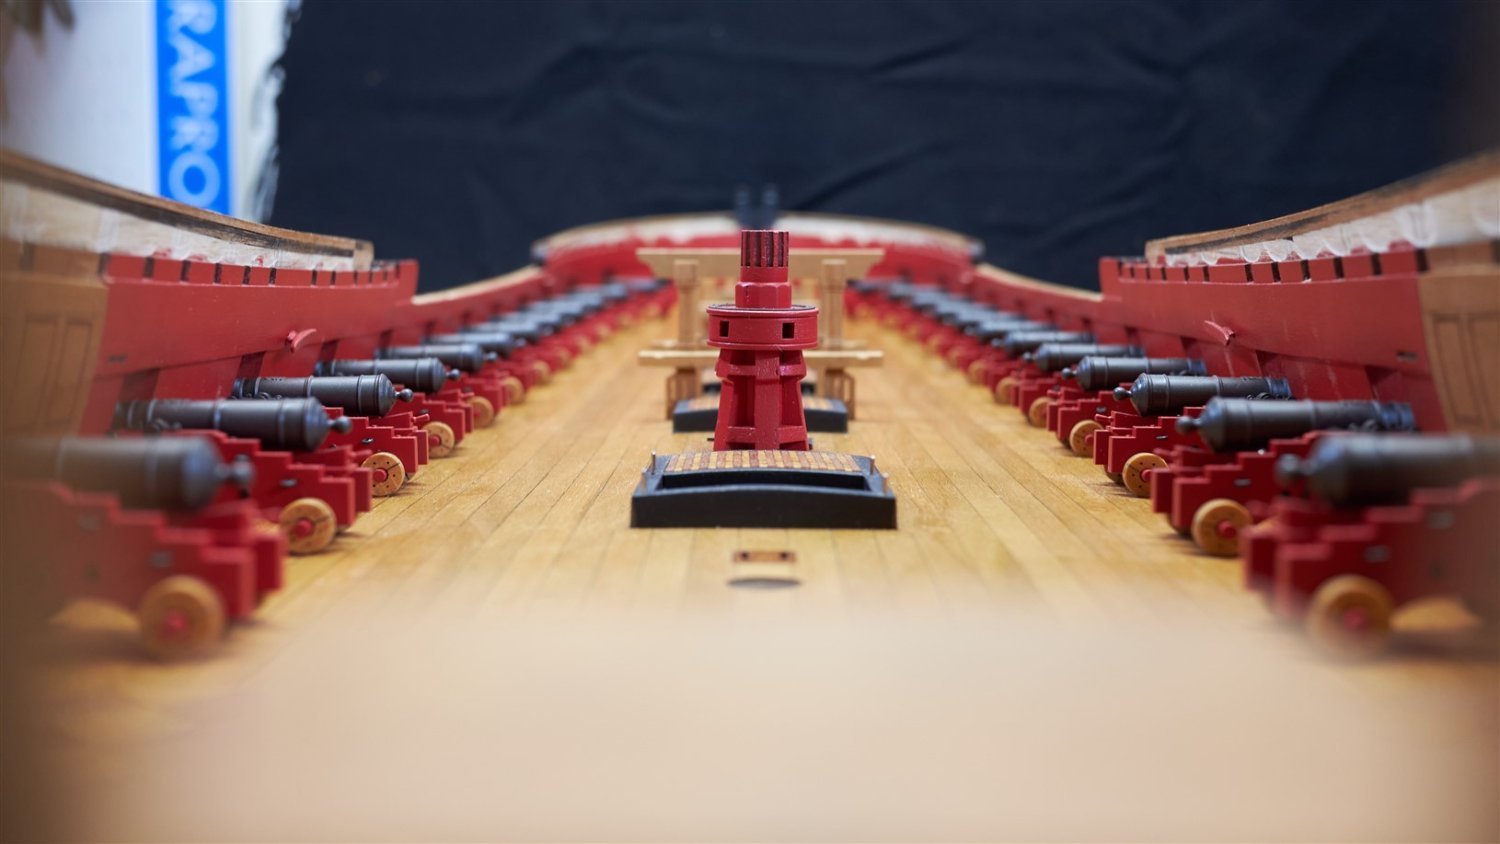
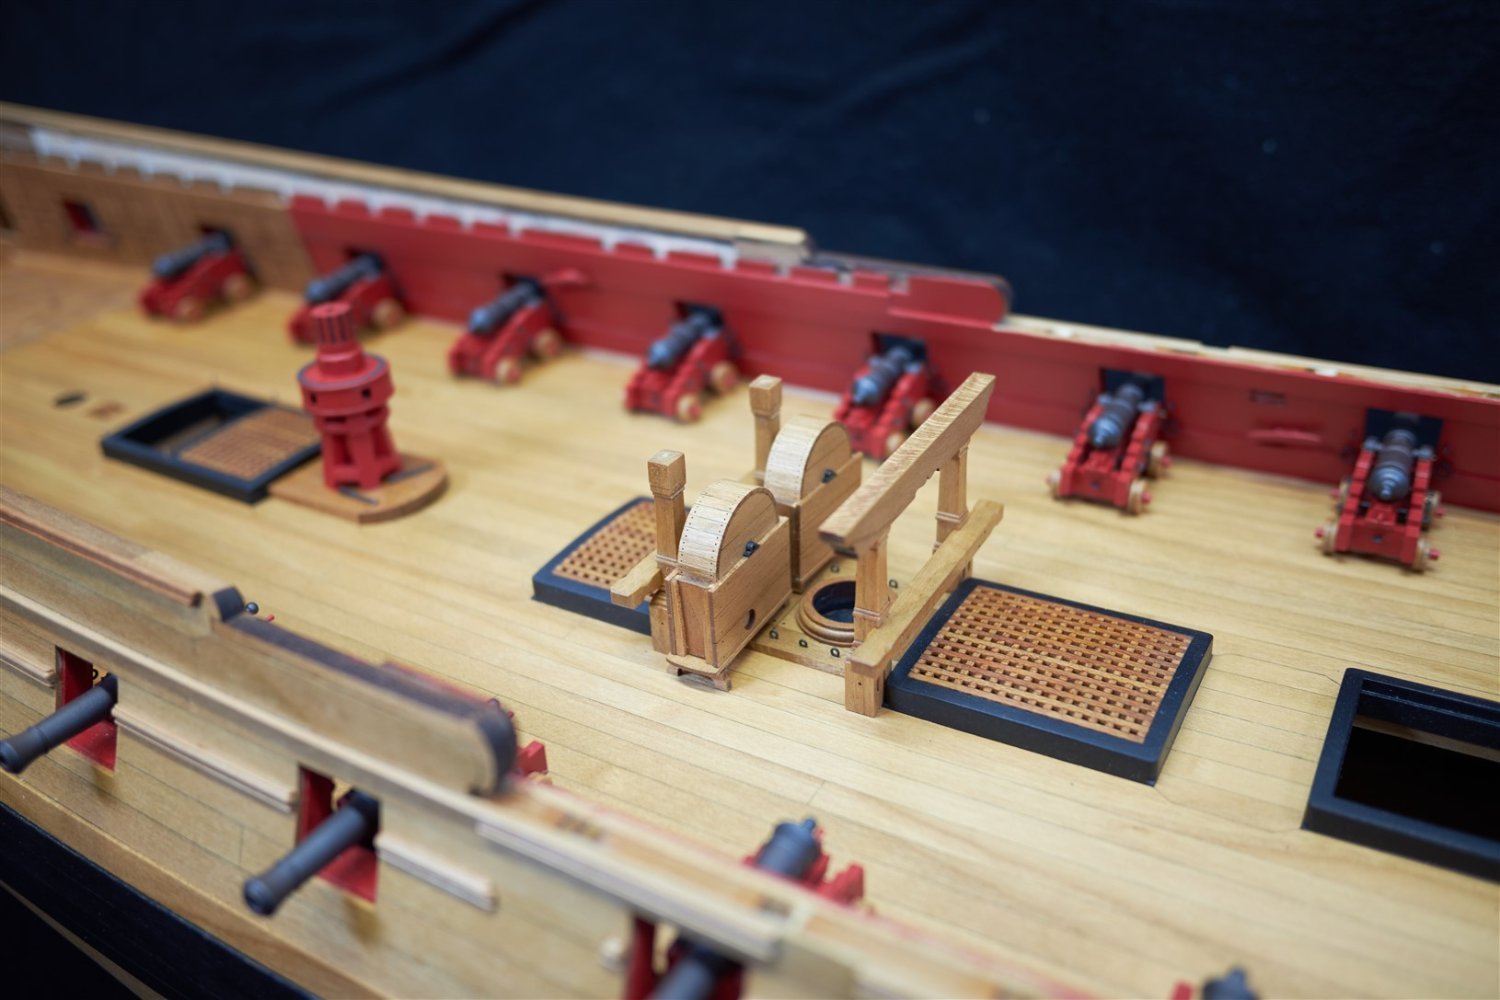
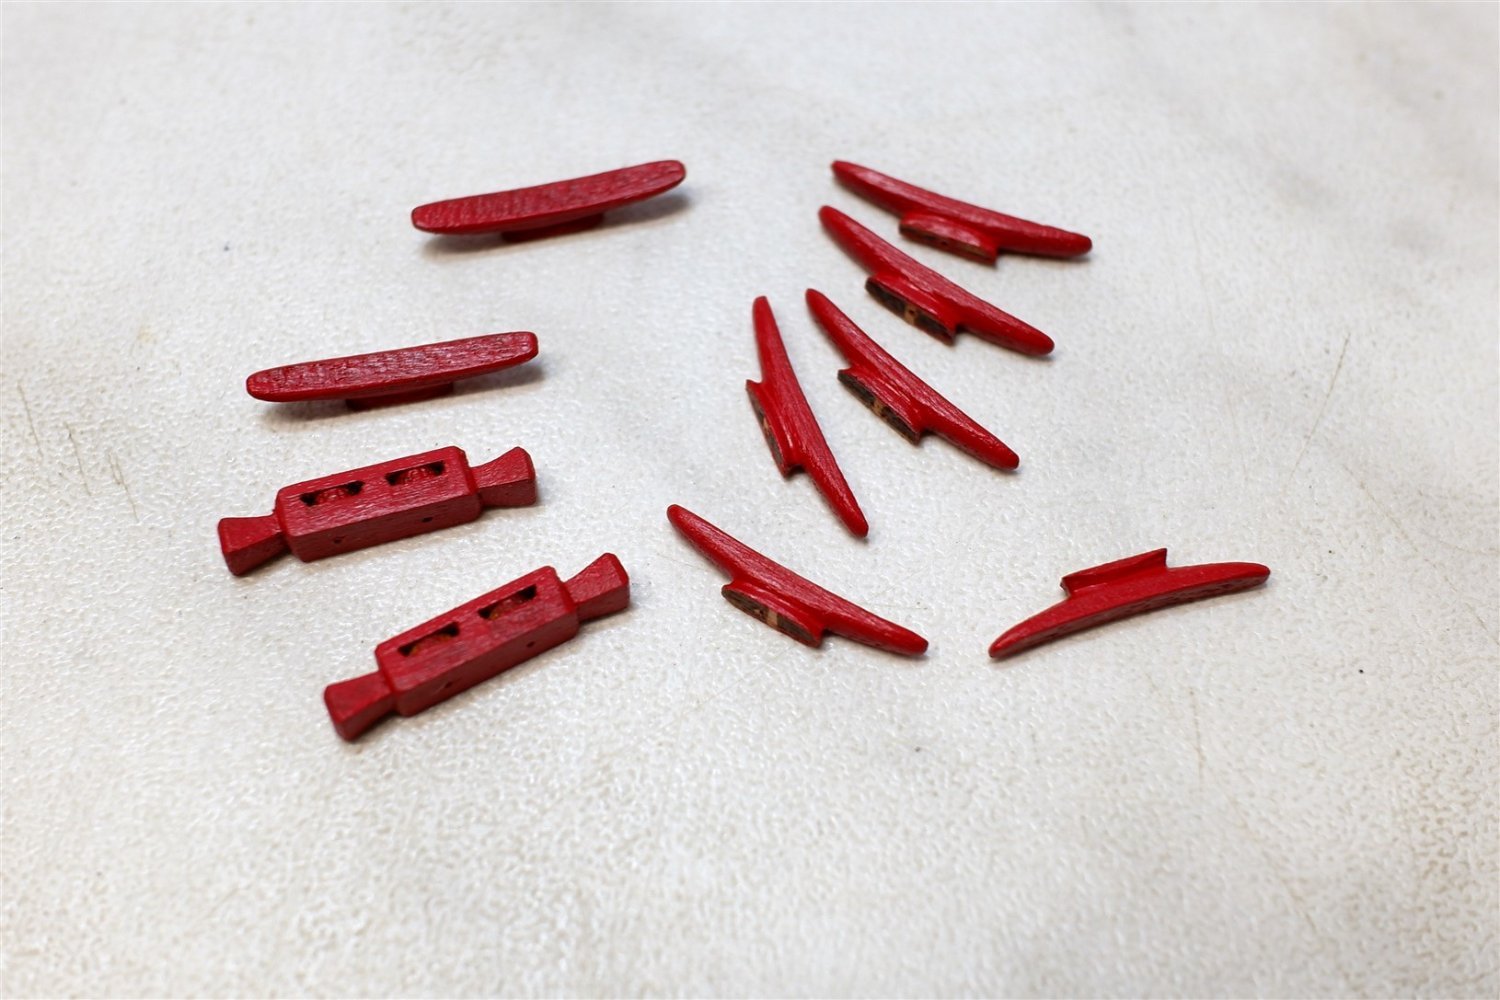
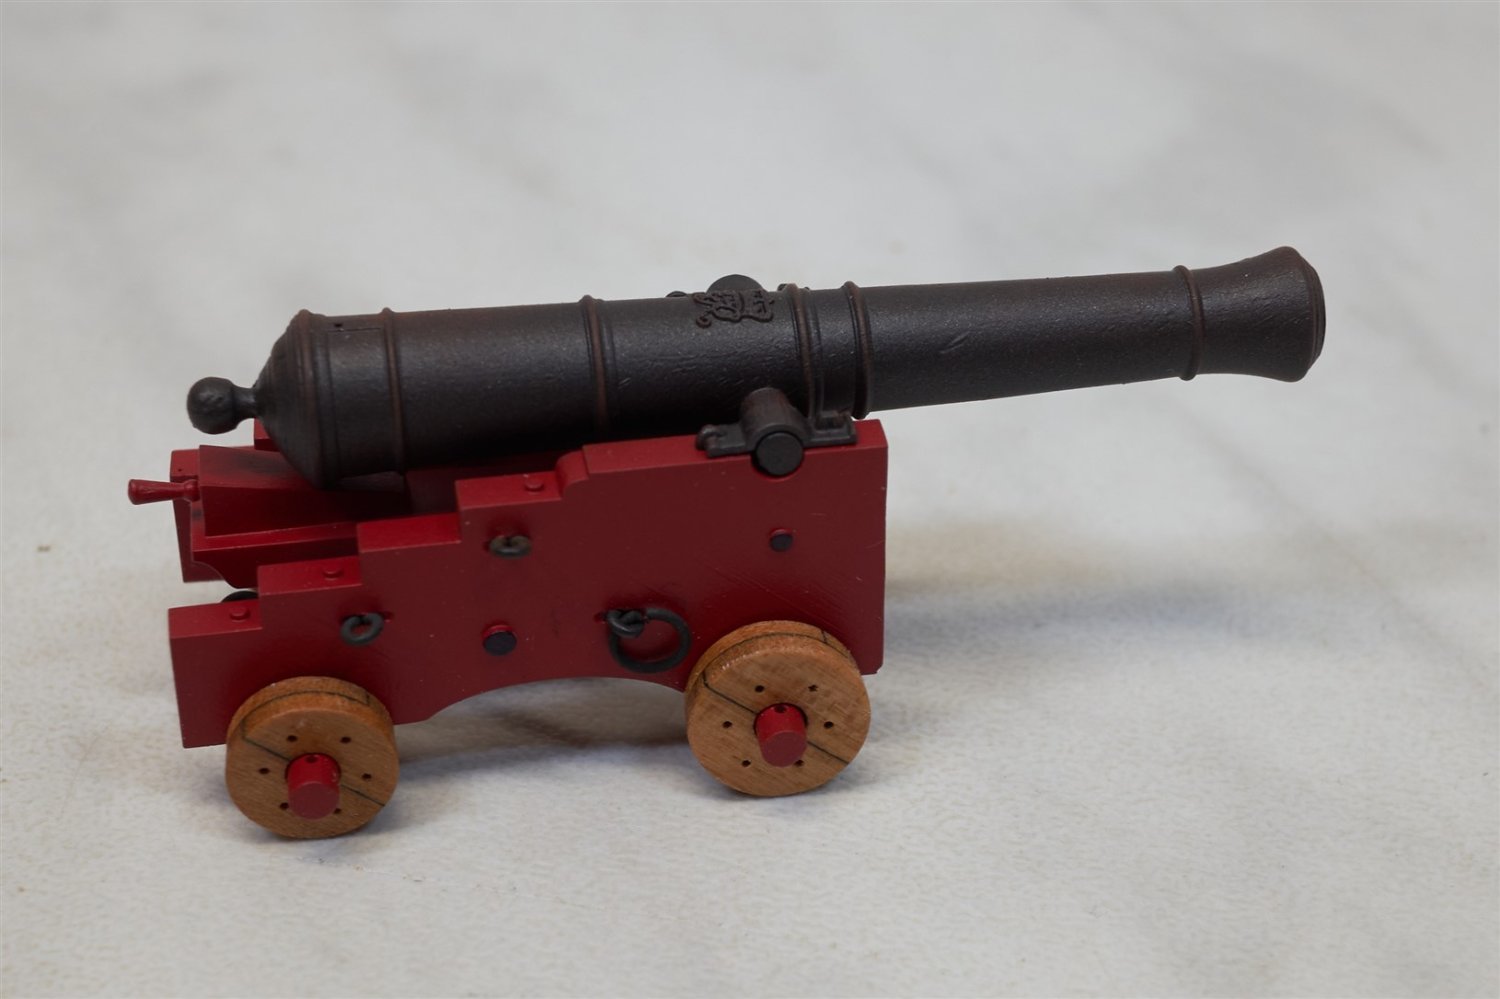
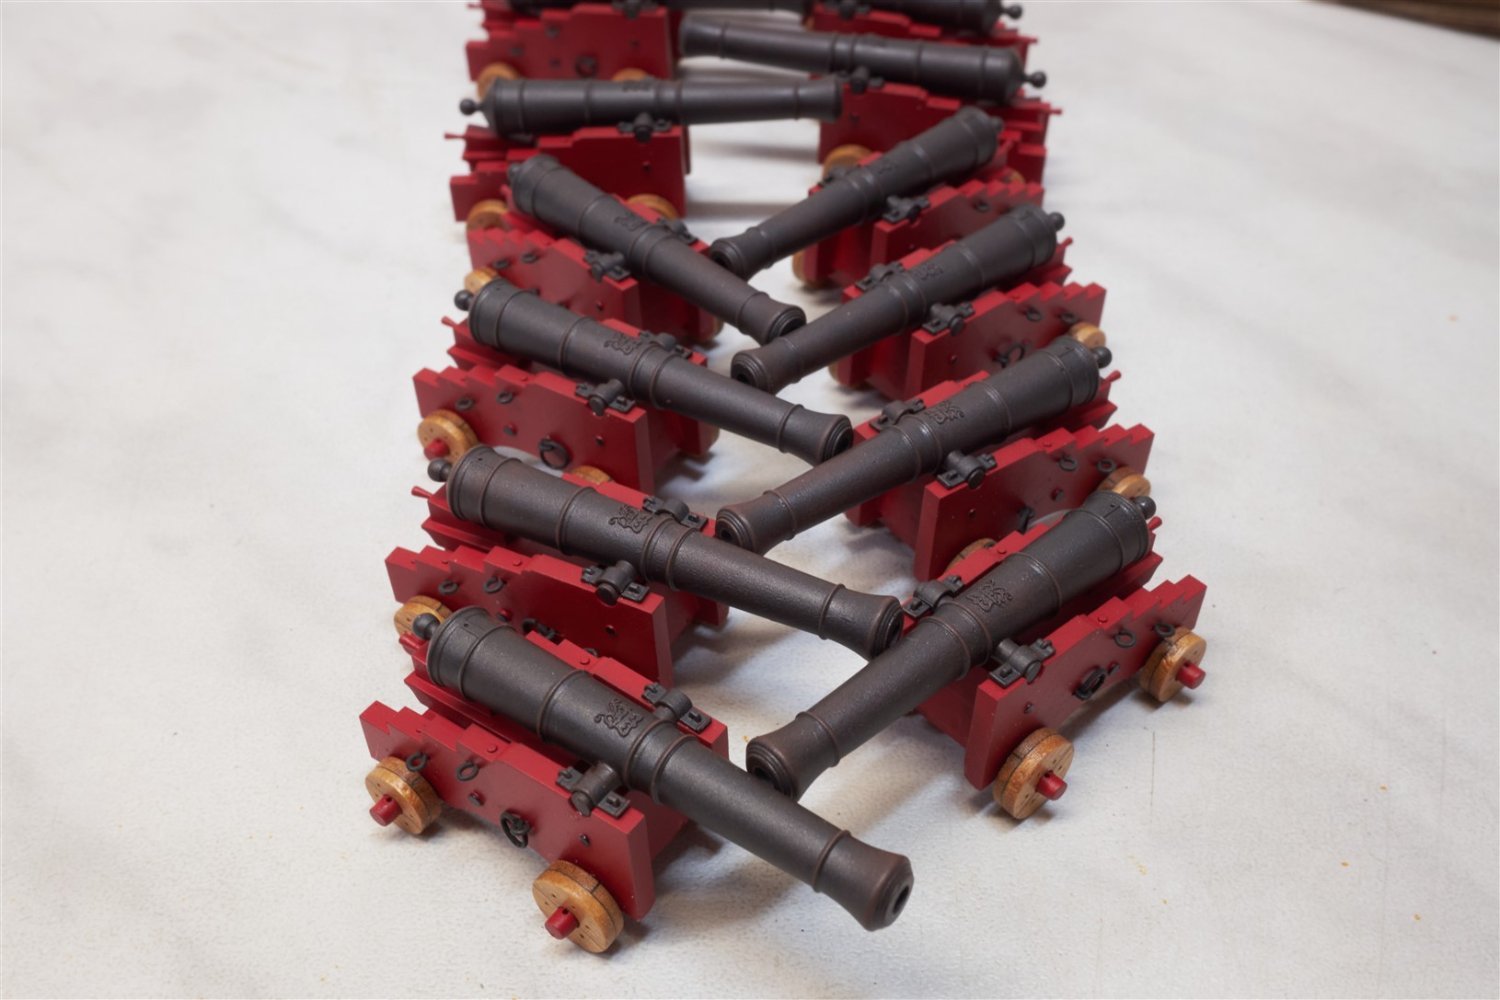
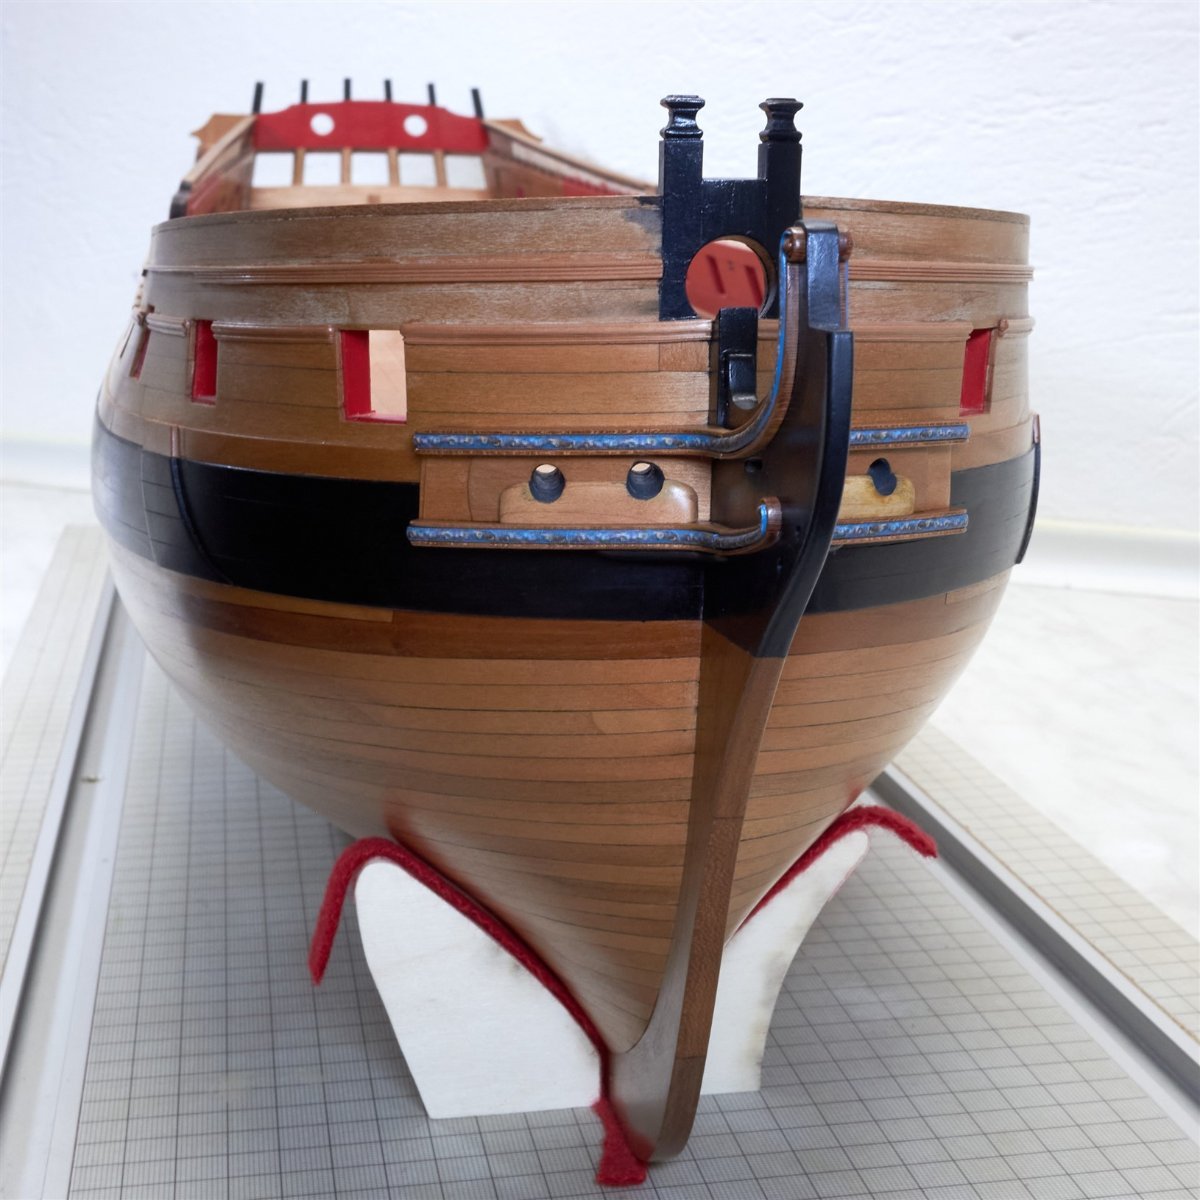
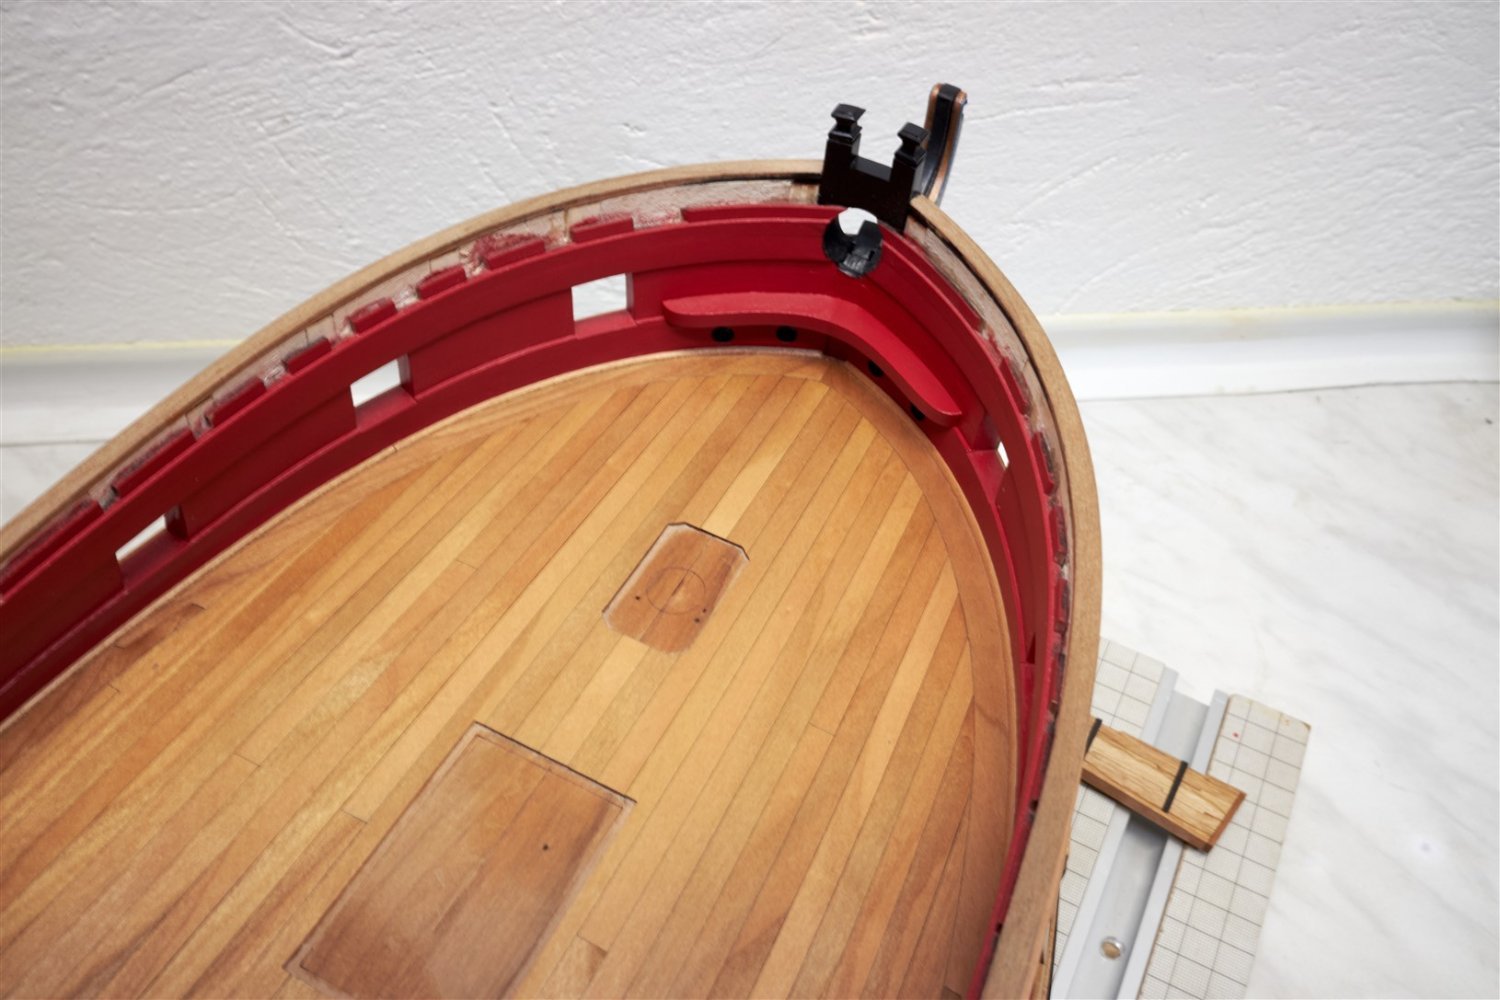
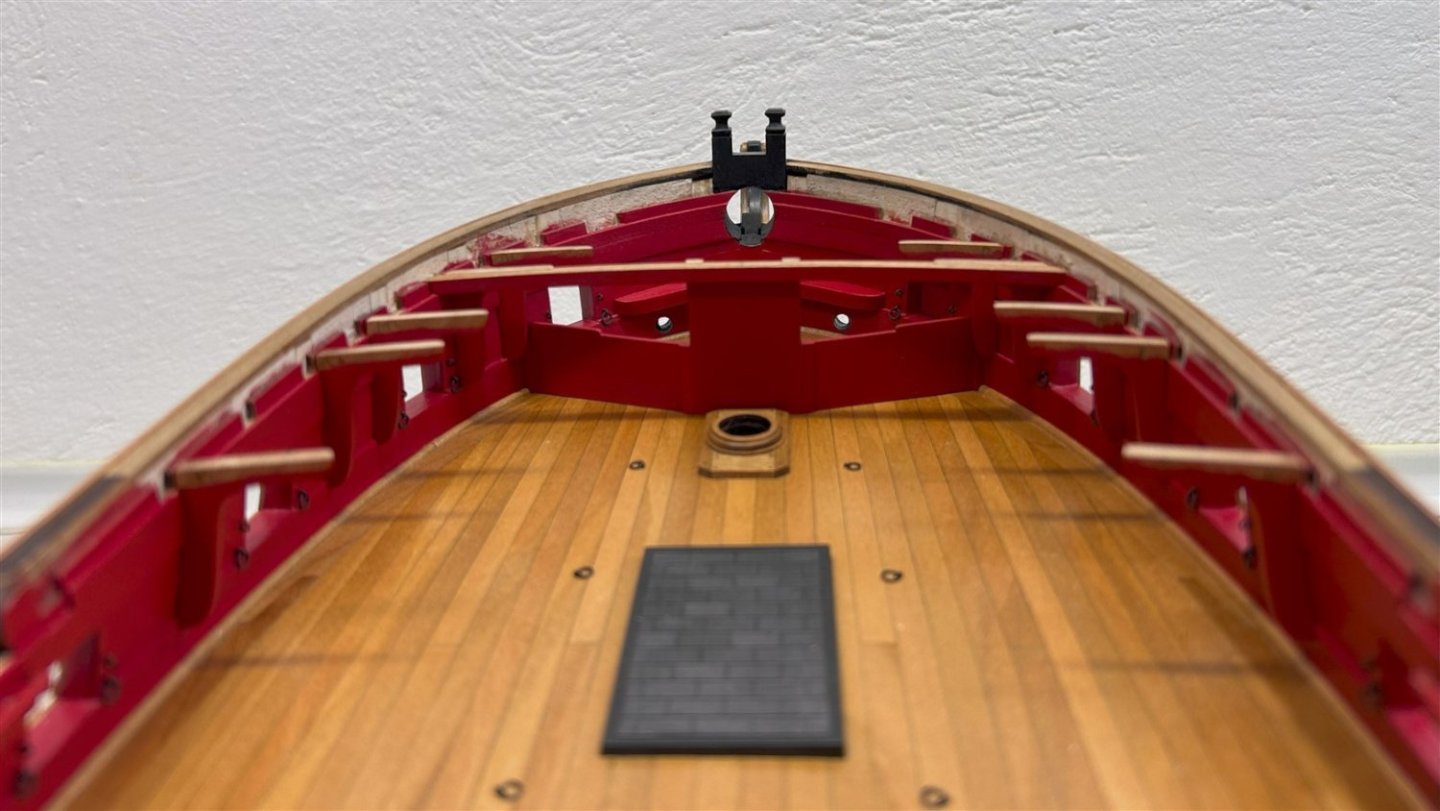
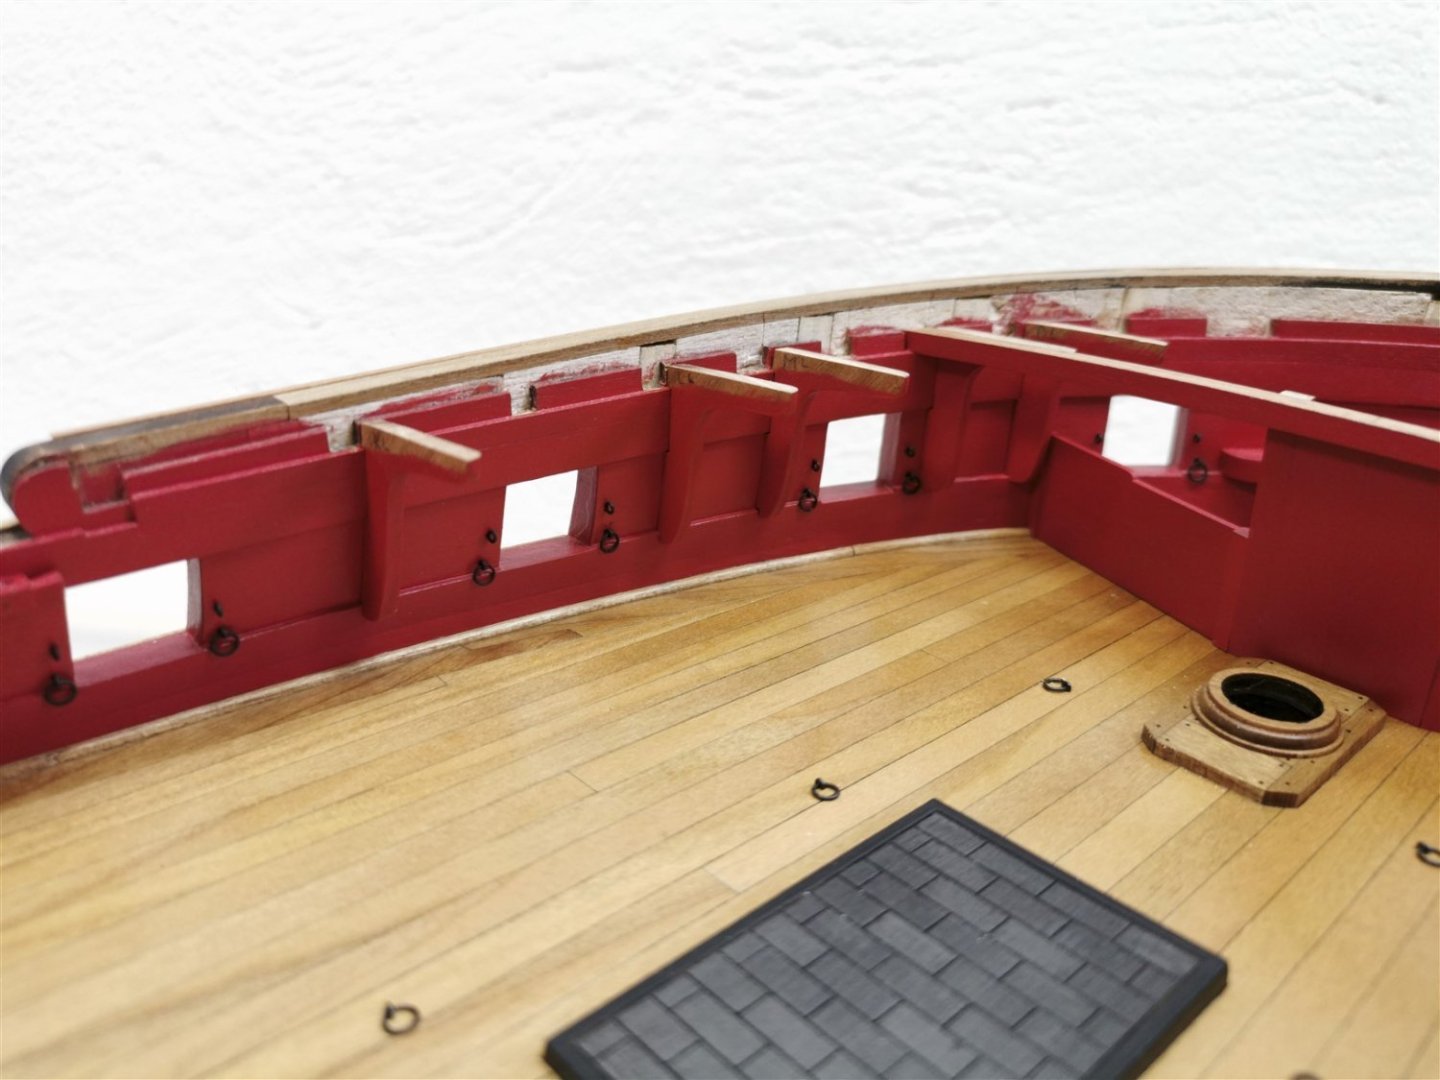
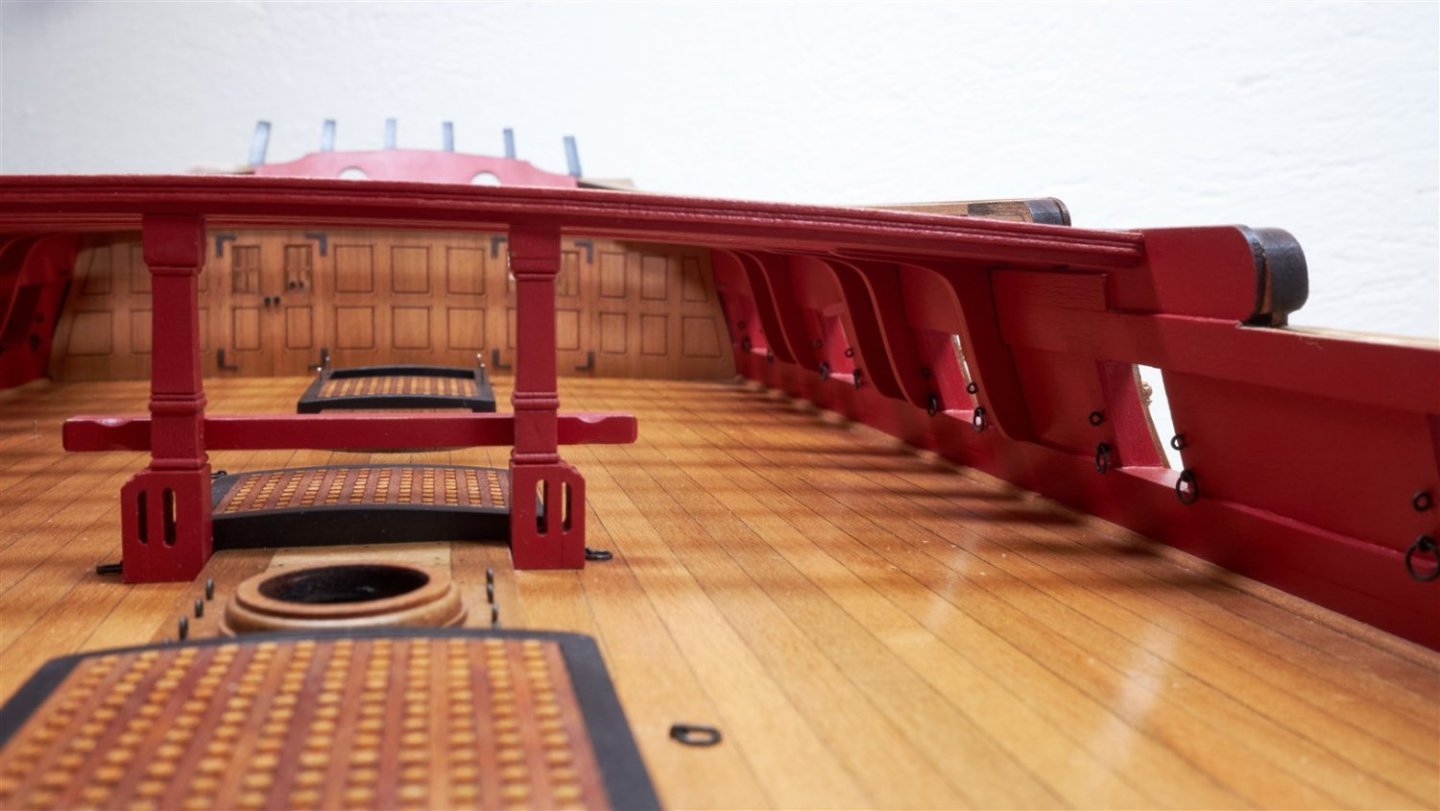
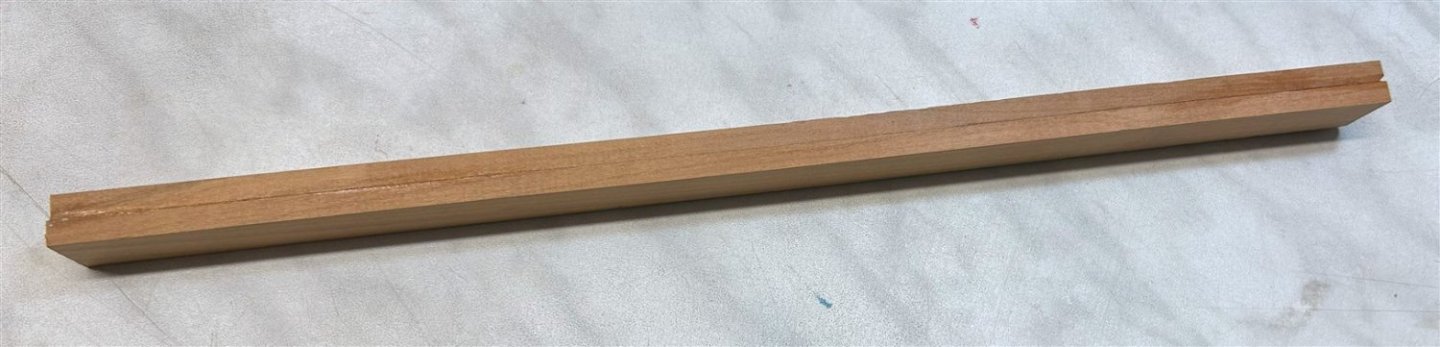
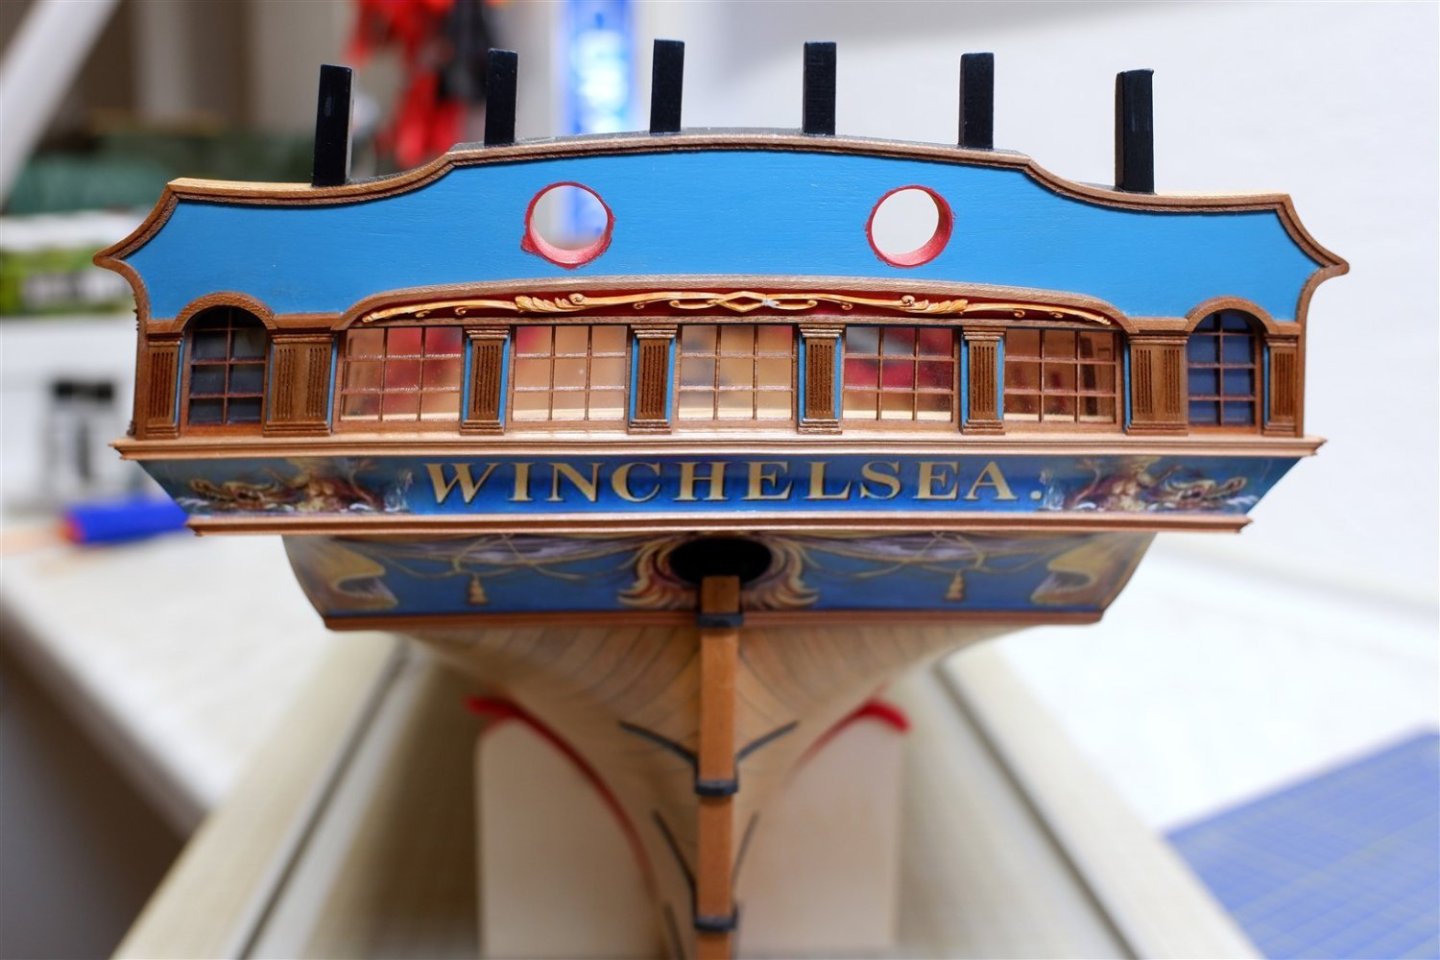
Finally another update. I finished the port lid with the hinges. I just left them straight, it made my job easier but I also like it that way. The canons for chapter six are actually done, so I can move on to chapter seven. I tweaked and glued the bulkheads and doors. So far only the beams are glued on top. Then I dry fitted the rest of the deck beams and glued the hanging knees in place. Next, I glued the lodging knees to the beams so they could be removed. Only when I have the pump handles ready, will I glue the canons and beams in place for good.


-
As always perfect and clean work Glenn, Simply beautiful!
- 840 replies
-
- 3
-

-
- winchelsea
- Syren Ship Model Company
- (and 1 more)
-
Excellent work Gary and the long boat is really a great improvement. Congratulations on the completion, Awesome Fleet!
- 389 replies
-
- 2
-
-
- winchelsea
- Syren Ship Model Company
- (and 1 more)
-
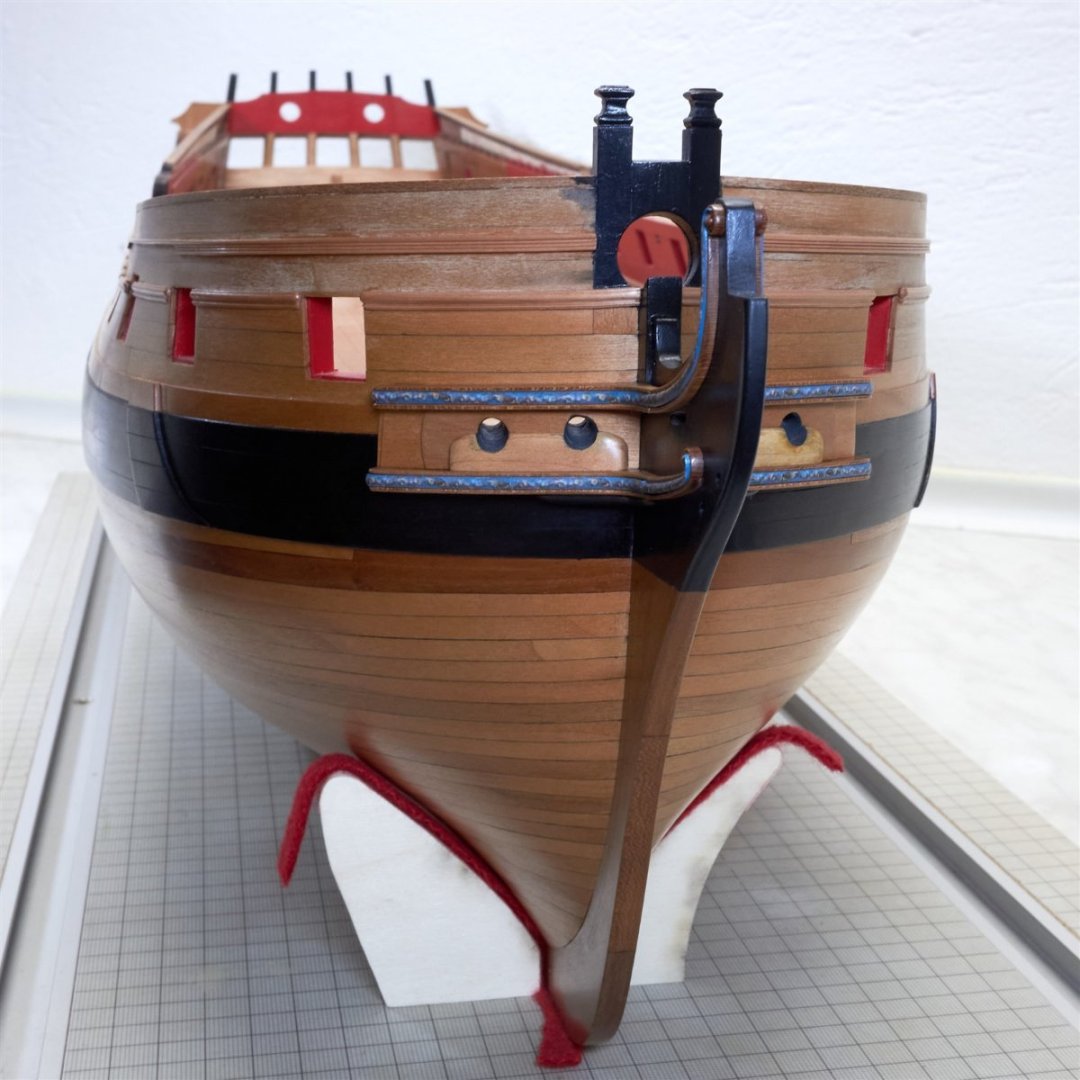
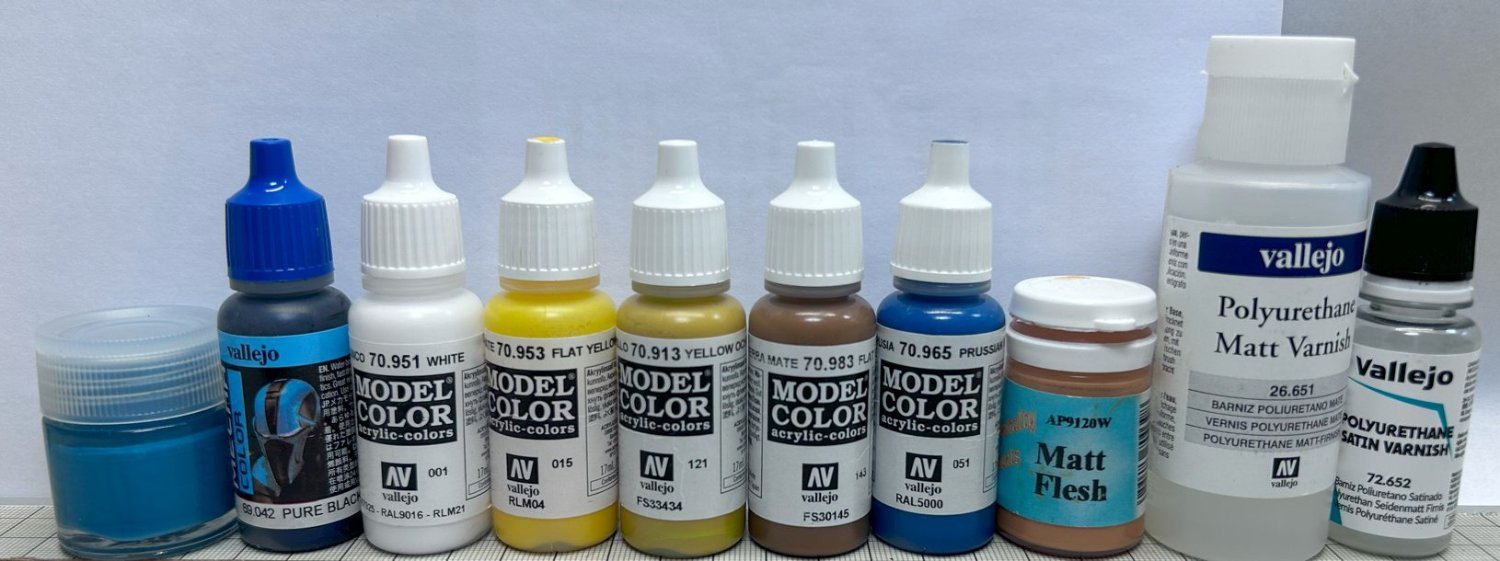
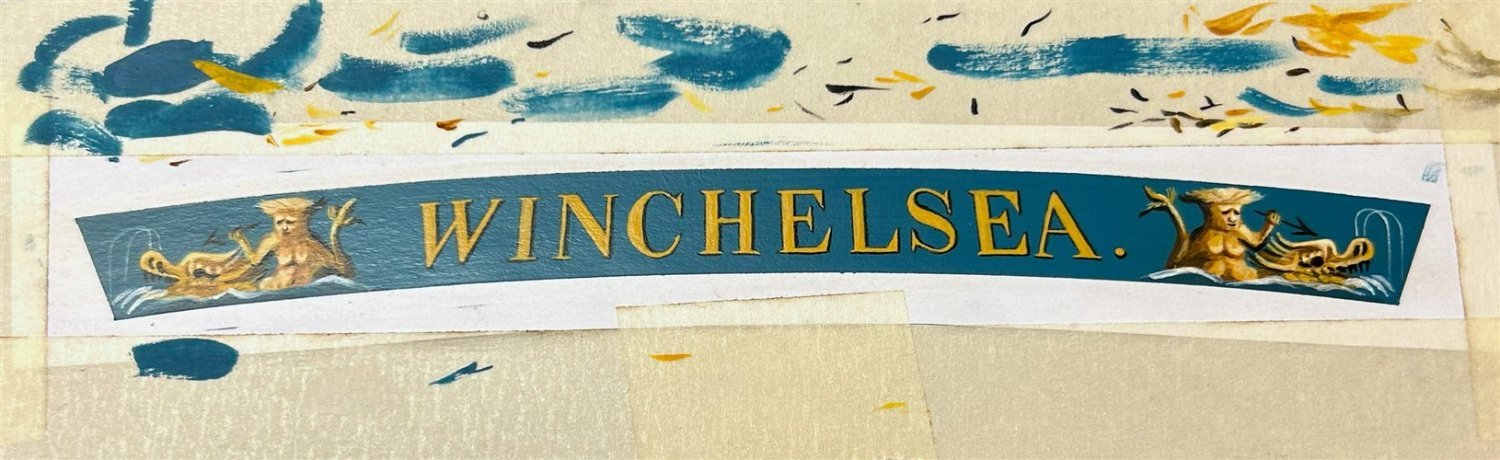
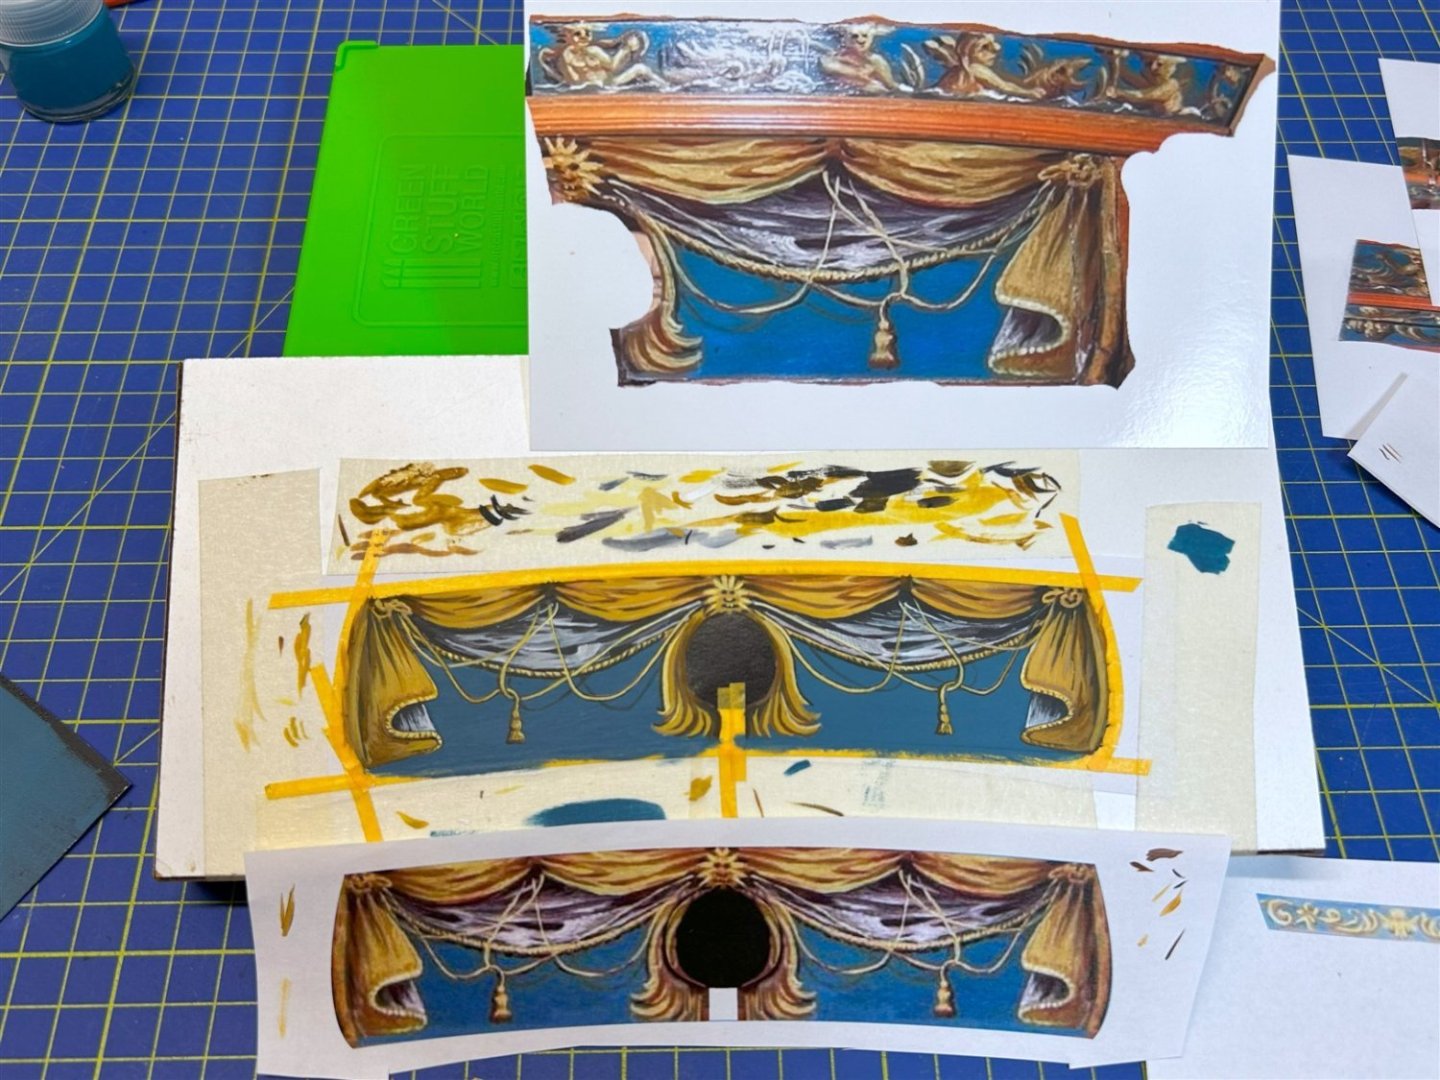
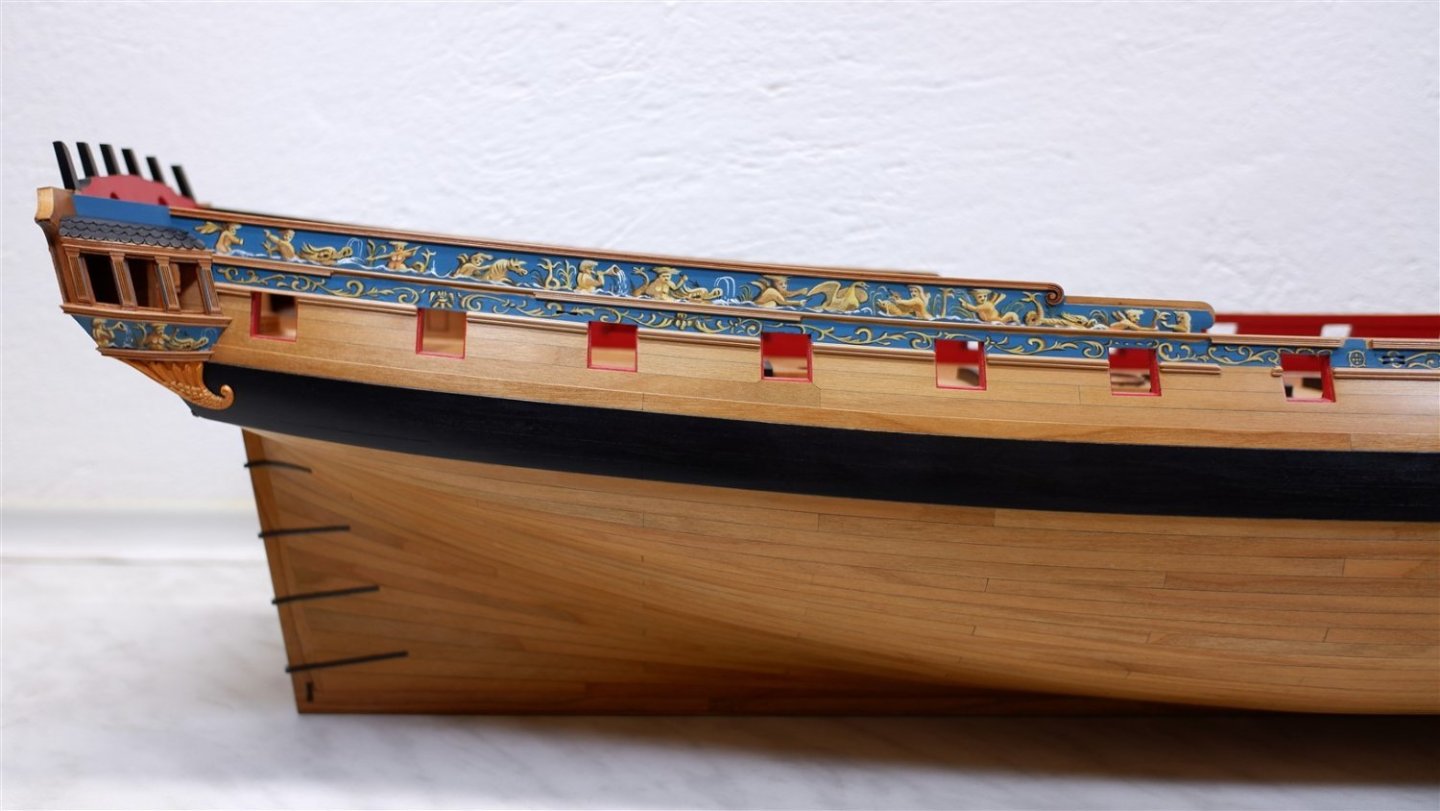
Thanks guys, I'm glad you like it. I wanted the blue to be similar to contemporary models. For example Minerva.. Now, in the winter, I don't have much daylight in my workshop and I can't take color accurate photos. maybe this iphone shot is pretty close Fred I use acrylic paints suitable for brush Vallejo Model Color. But the blue color I used was a mixture of Prussian with yellow and white. When I painted the ornaments, I simply drew the outlines in pencil and used Caldercraft's Matt Flesh as my first base color. Then I filled in the dark areas with a mixture of brown and black. Then yellow ochre and finally a mix of ochre and white for the light areas. Finally when the paint was dry enough I repainted everything with a 1:1 mix of polyurethane satin - matt varnish. I must add that the wet palette also worked well for me. And even then, it was necessary to thin the paint with water and a retarder so that it wouldn't be too thick and dry too quickly. This was my first attempt at painting so maybe someone can advise better. But I'm really looking forward to seeing your pics. I'm sure you'll do better than you think.


-
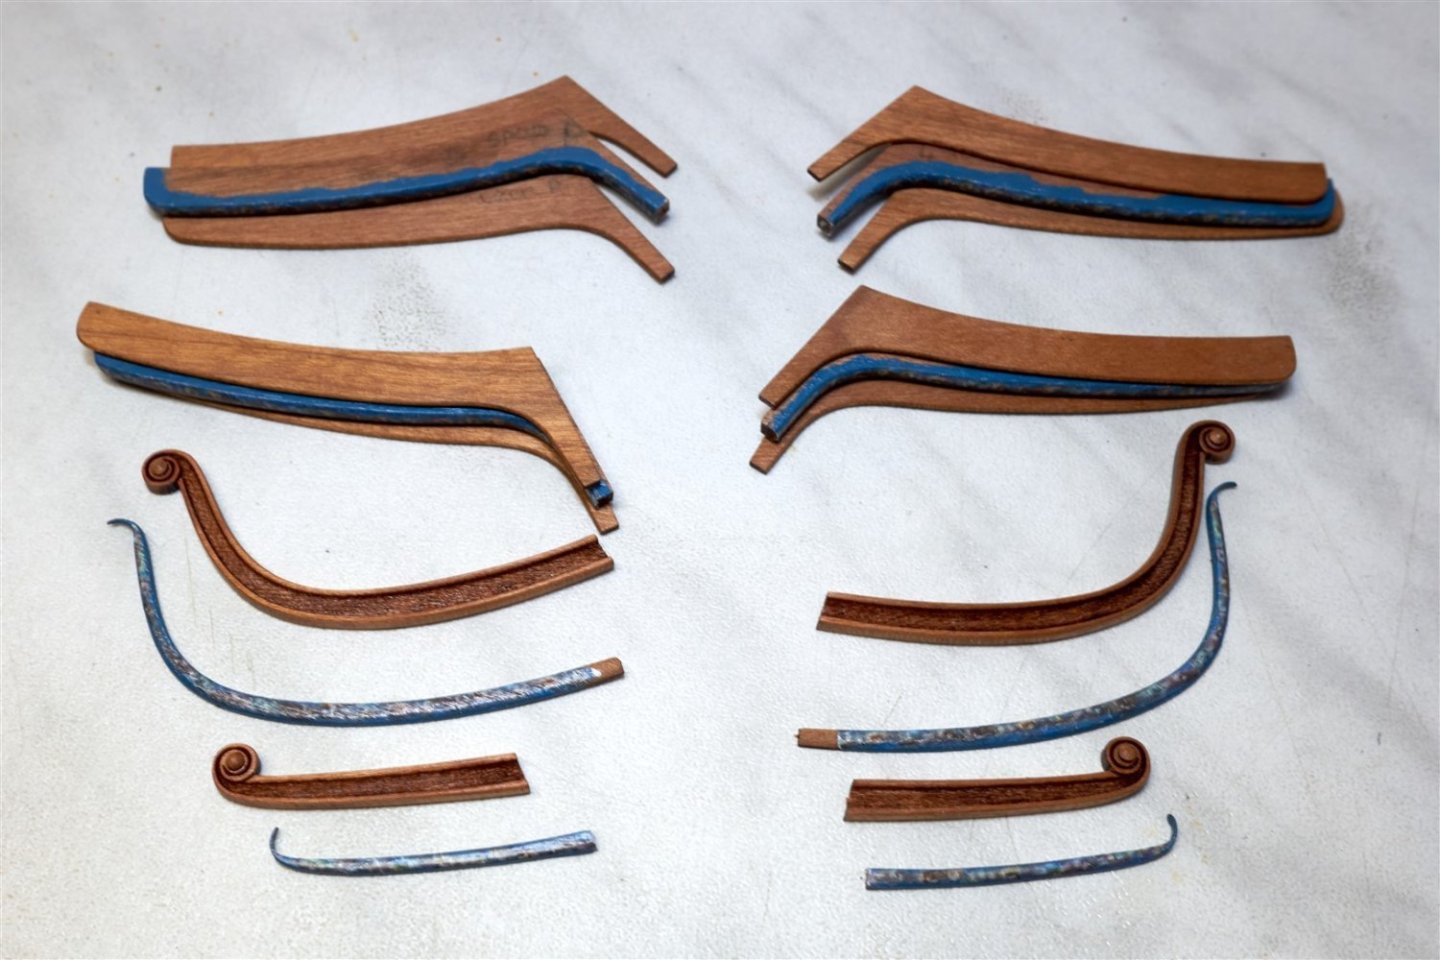
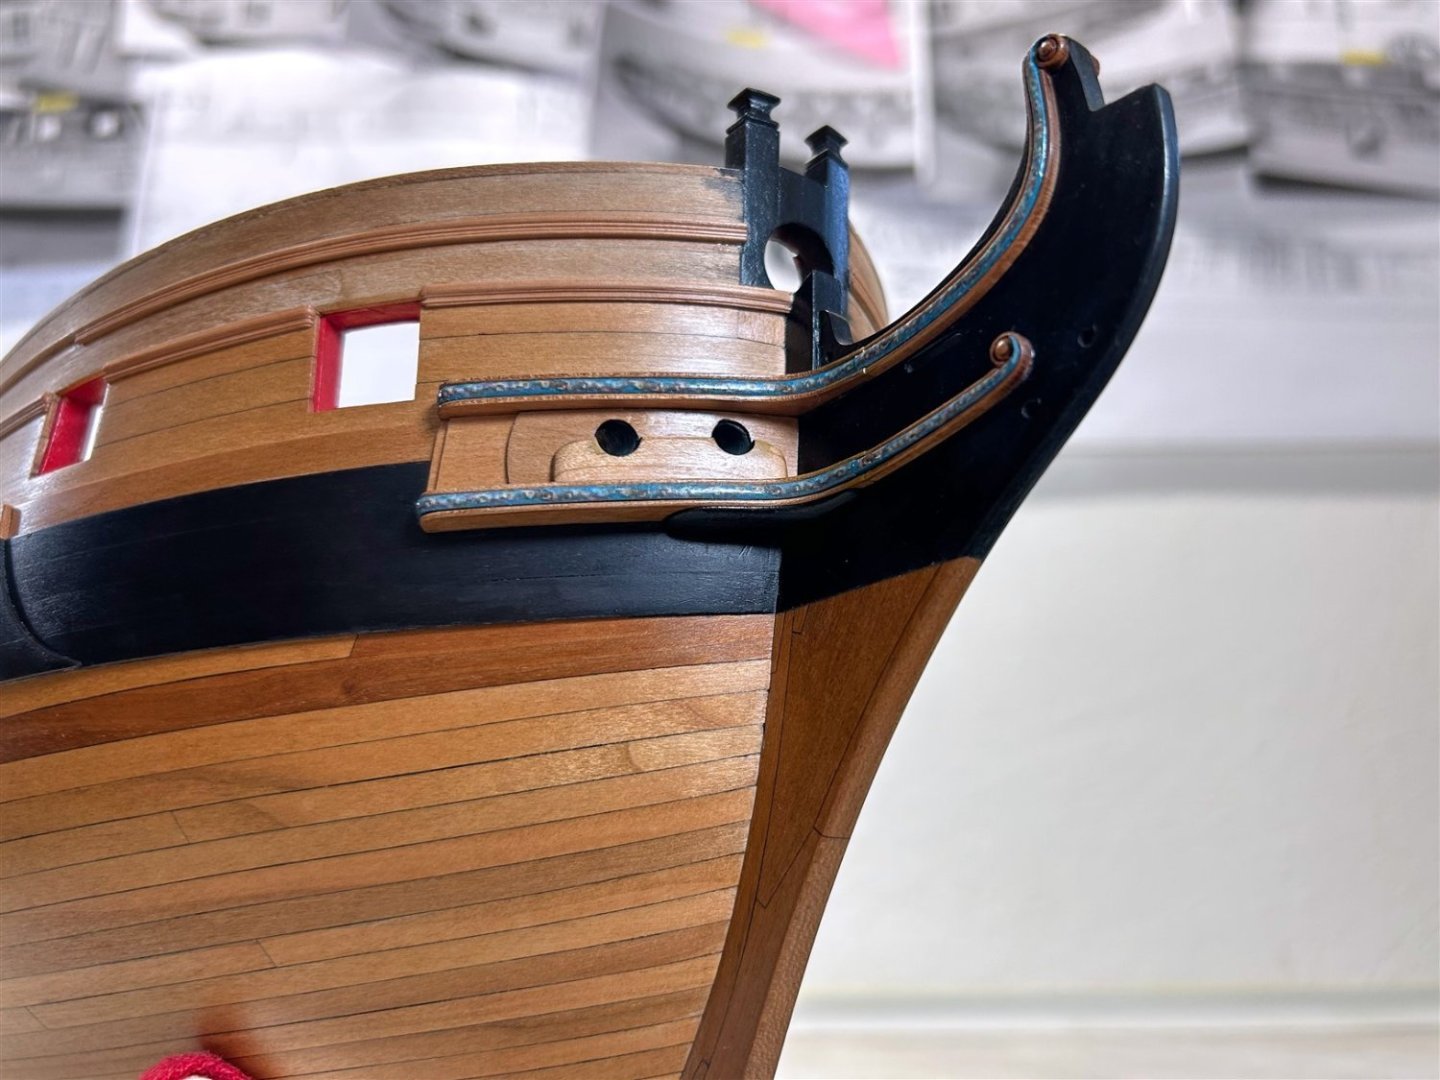
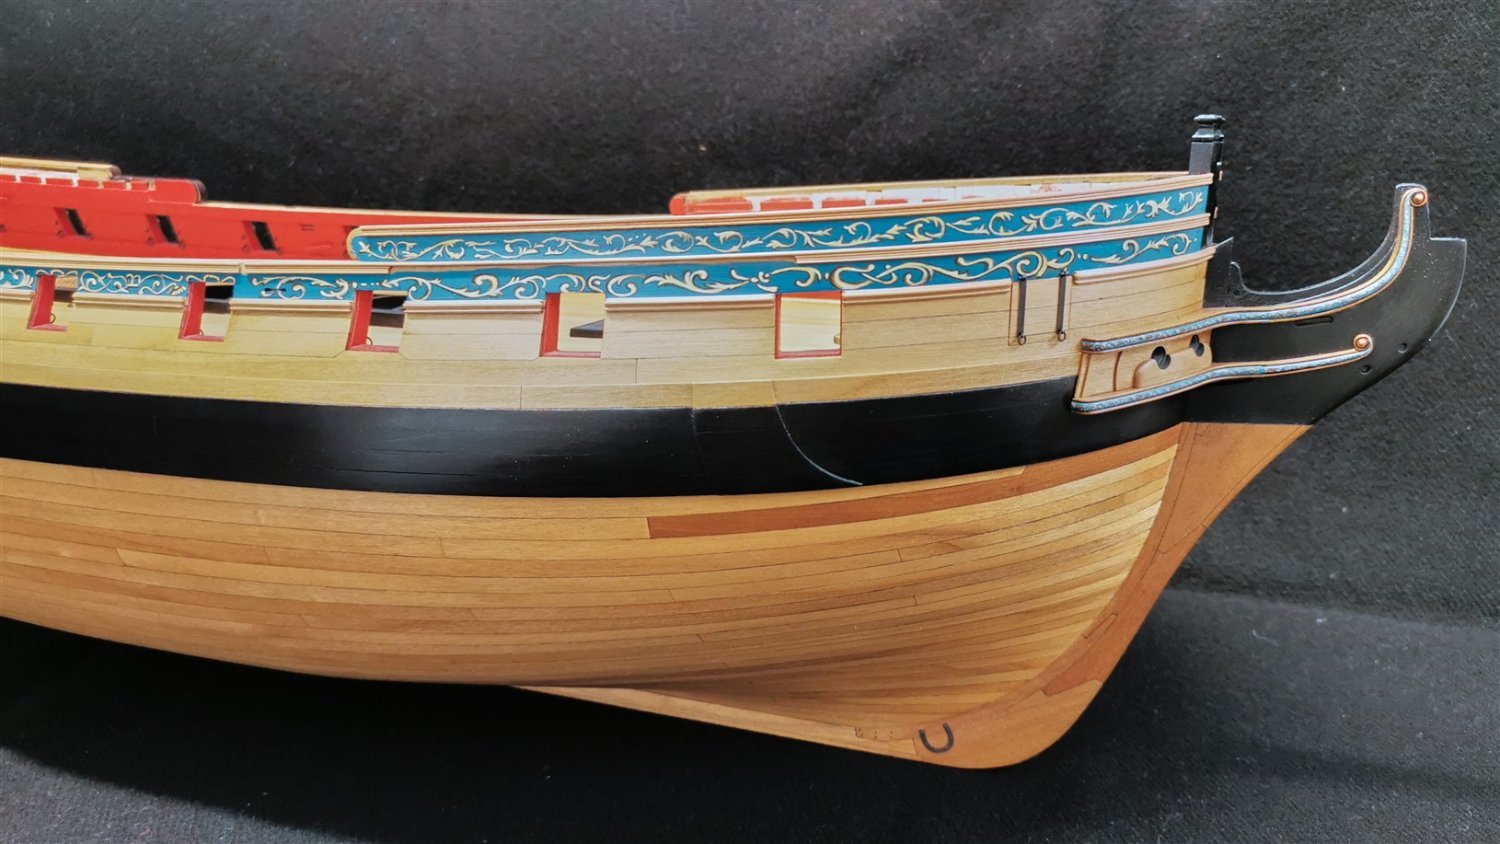
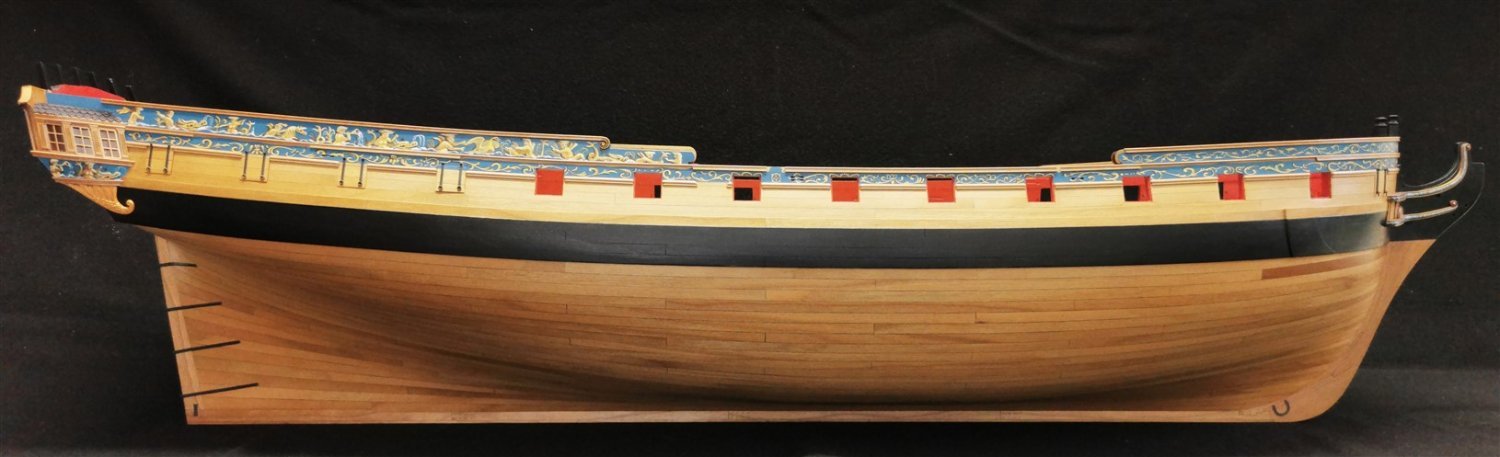
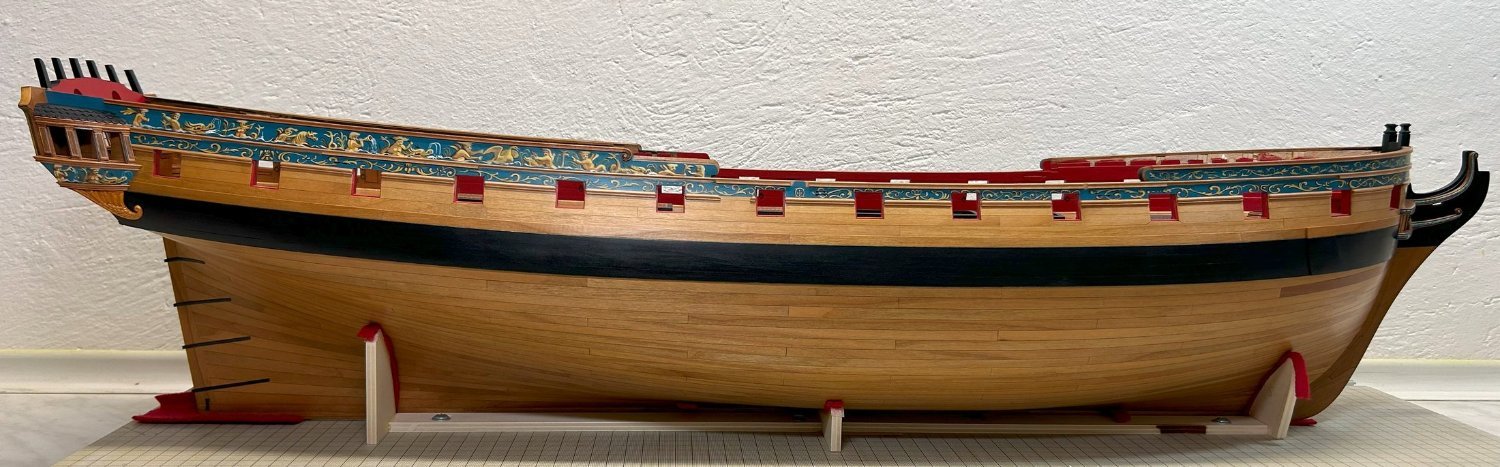
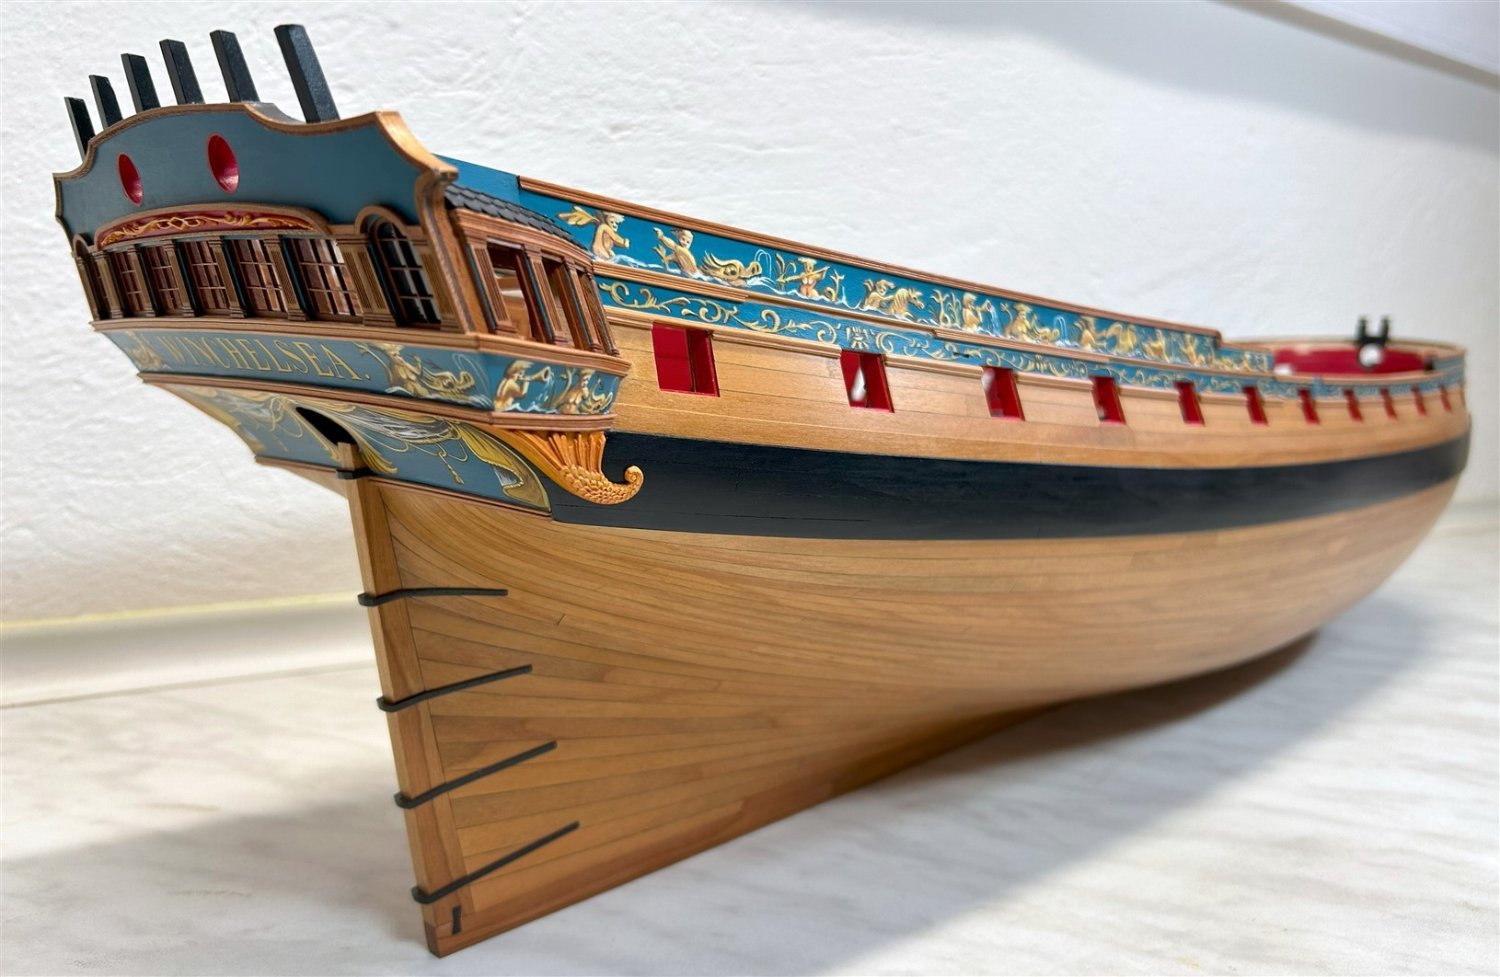
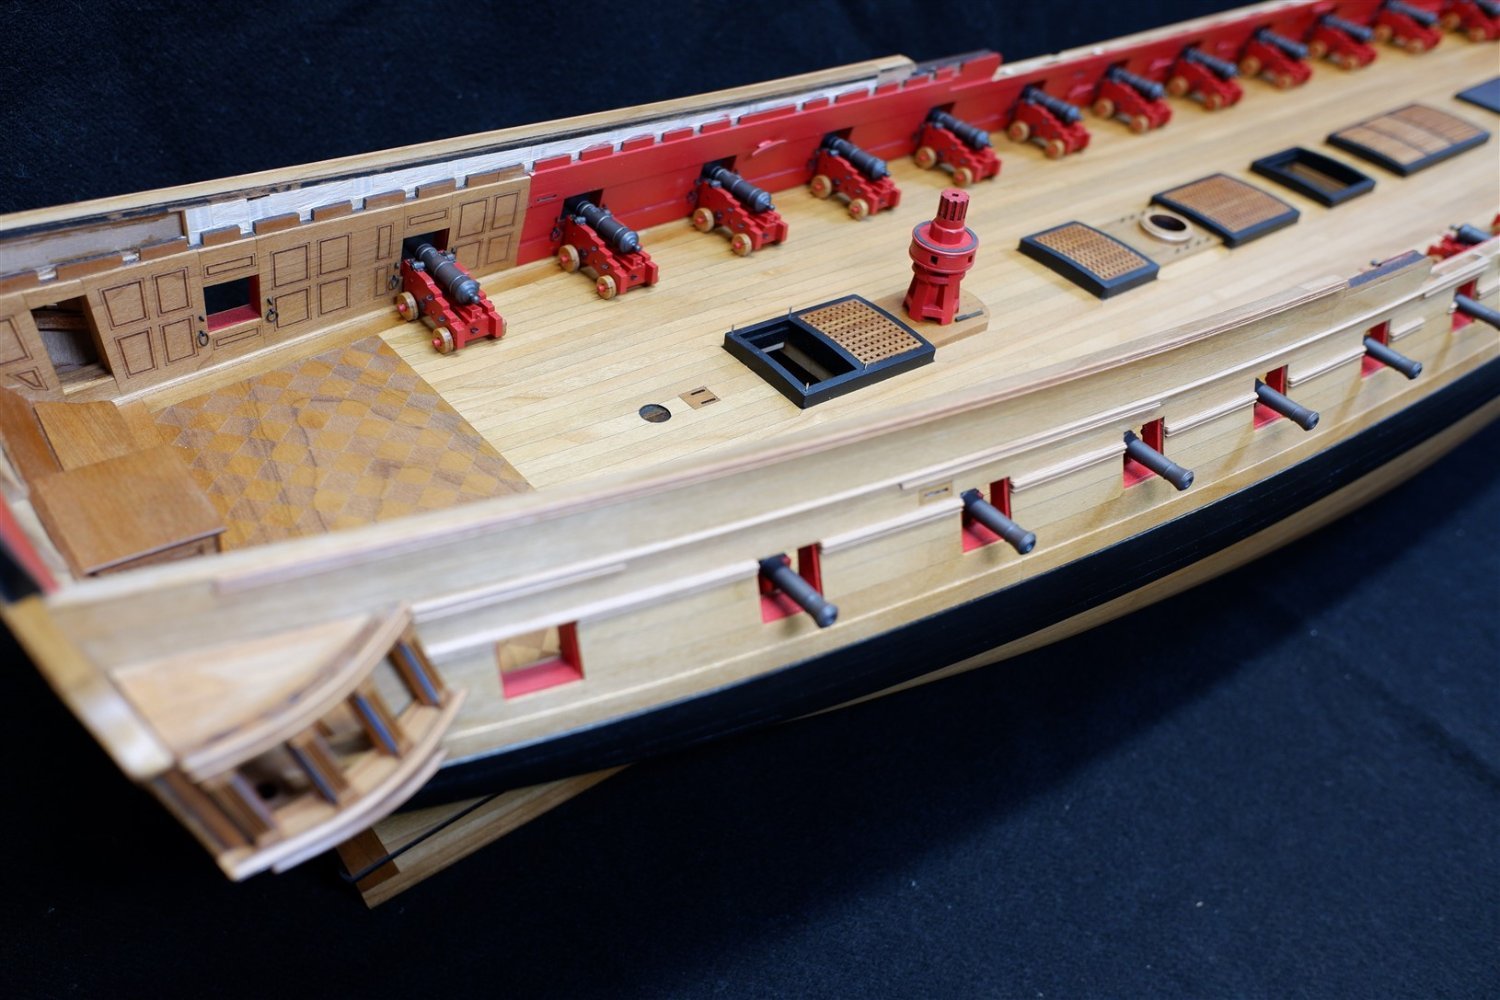
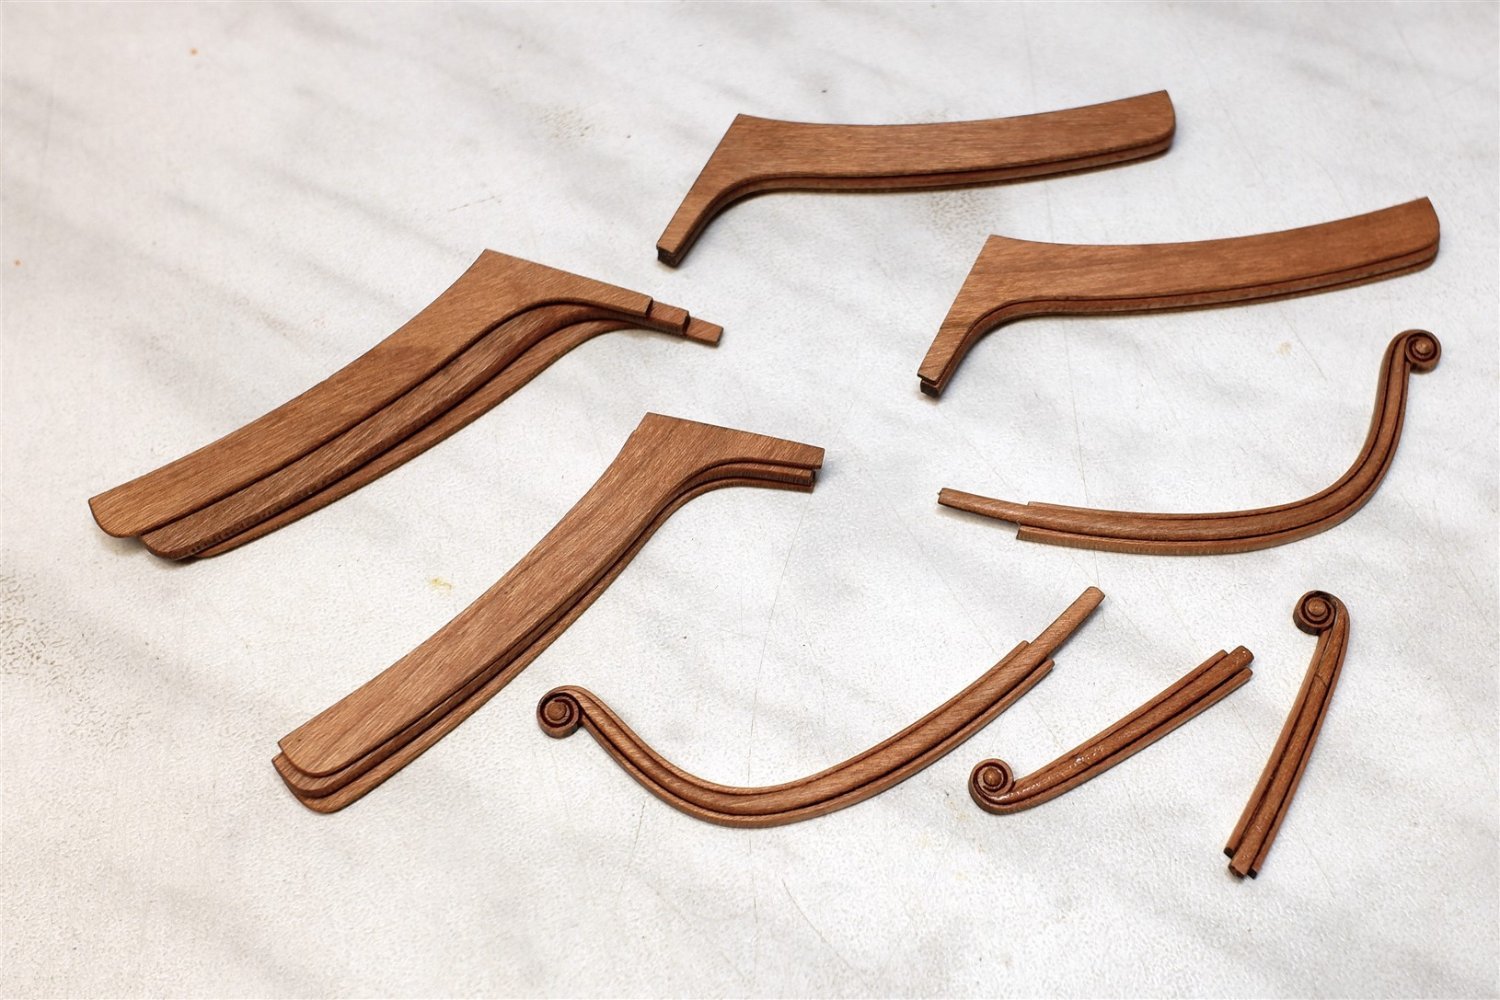
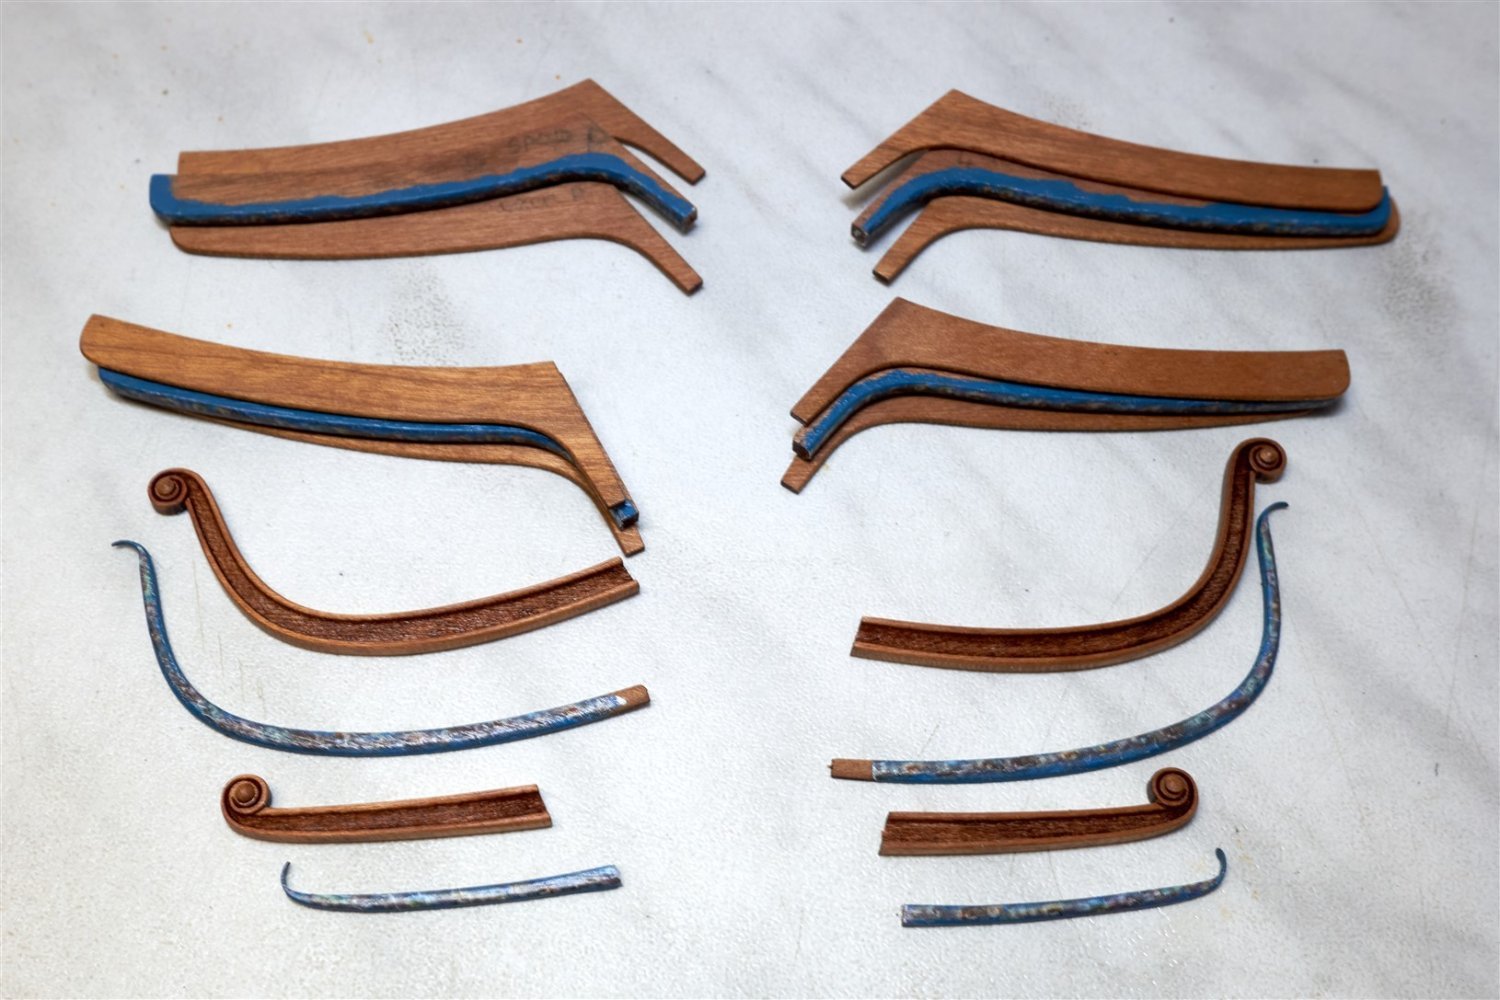
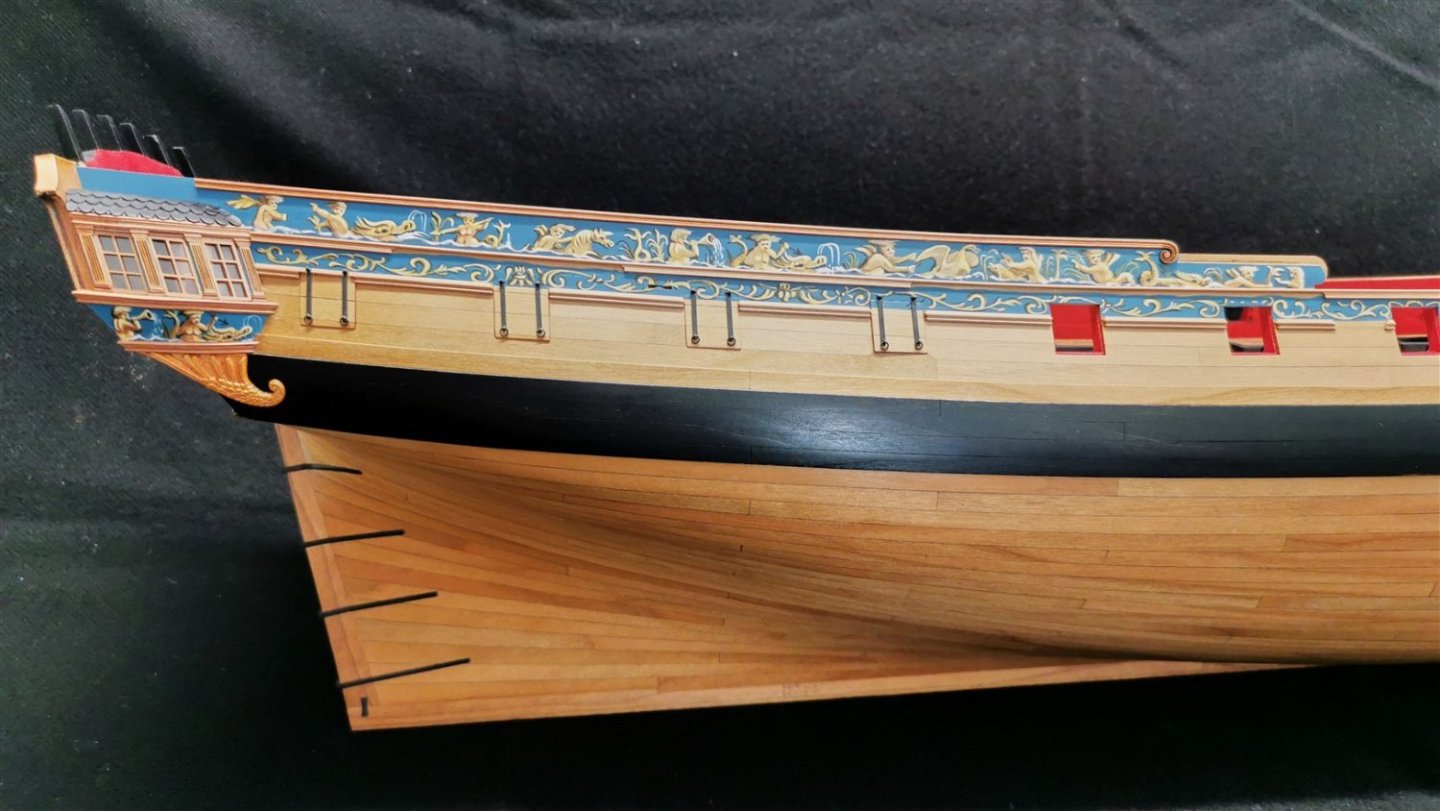
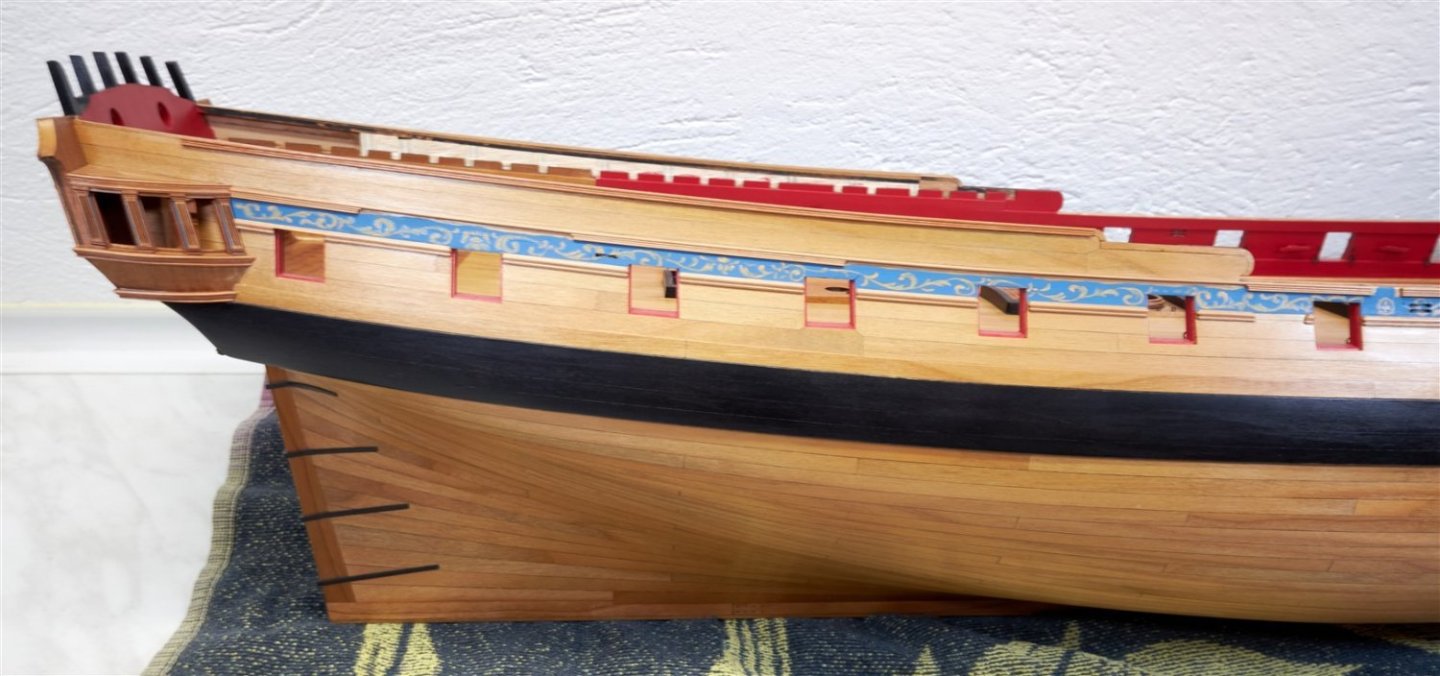
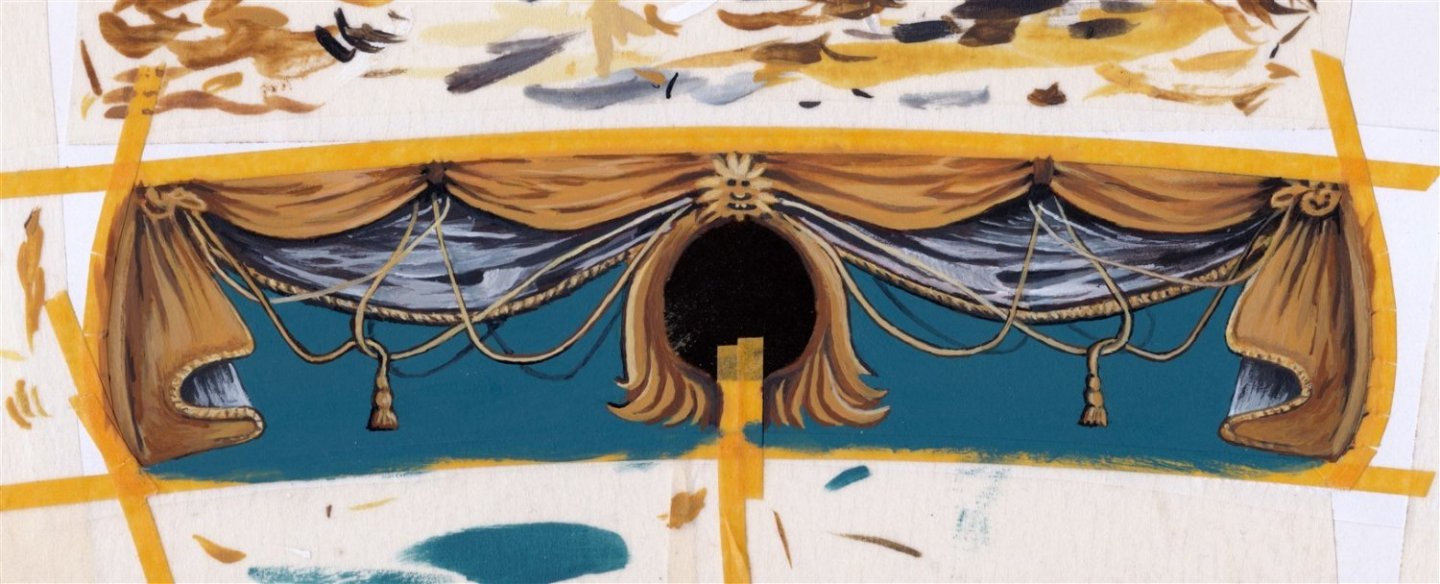
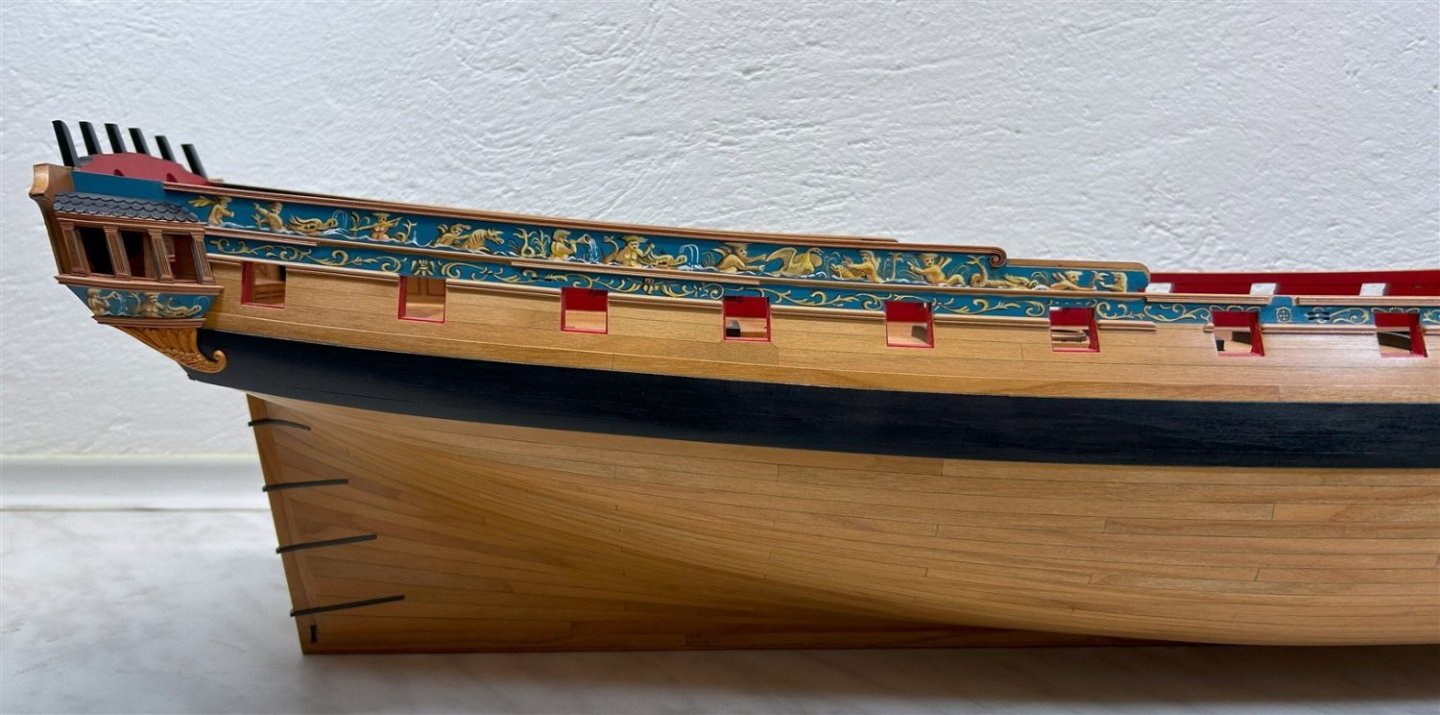
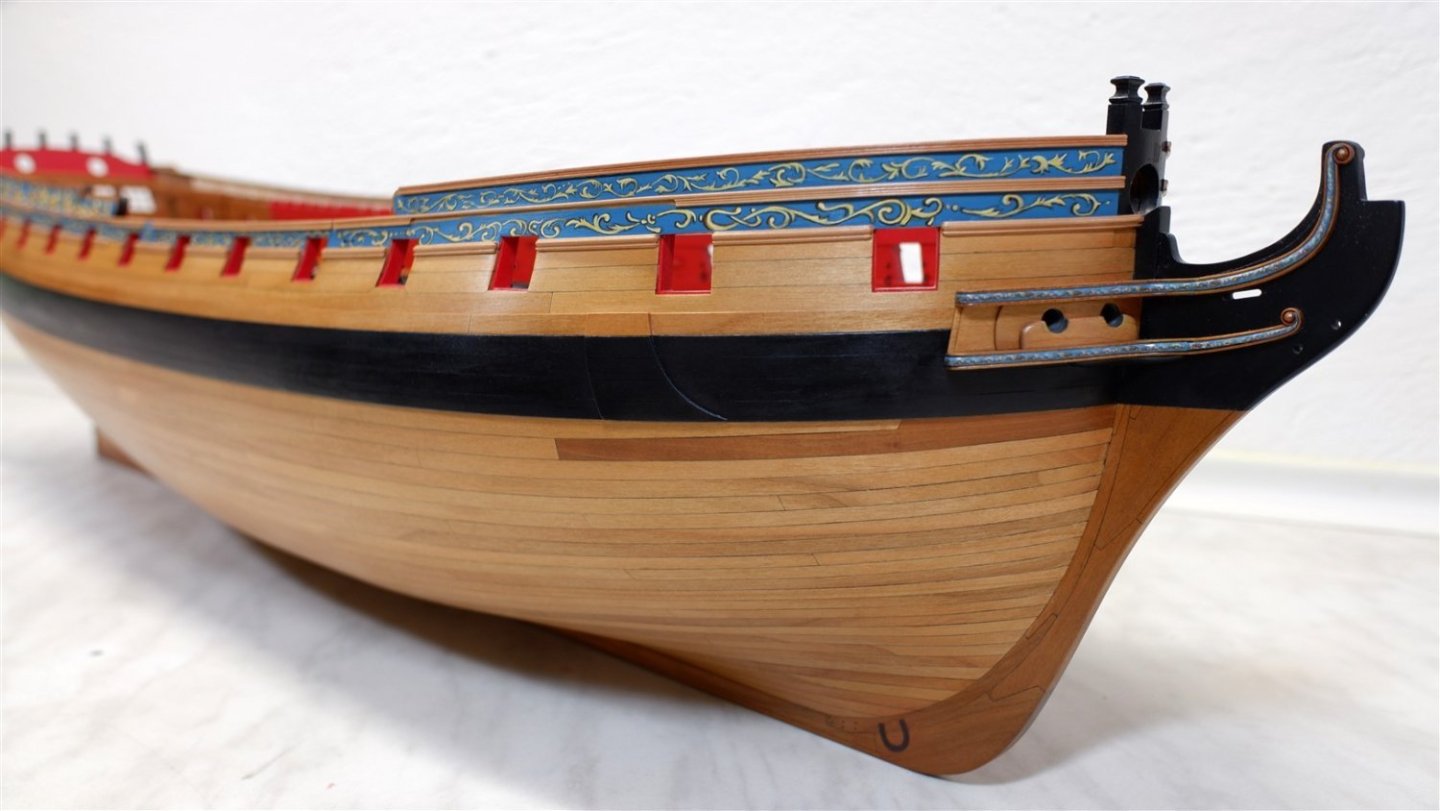
Thanks for the encouraging words and likes guys. This weekend I finally finished the friezes after an endless struggle. I tried everything, printing on both inkjet and laser printers on different papers, but I still wanted something different. Finally I decided to paint the friezes. First, I repainted the Monsters - how do you call them, right? And then the ornaments - acanthus leaves, which I decided to paint directly on the model. Judge the result yourself. I regret that I didn't start with the ornaments. Today I would have done it differently and used much more muted colors. Maybe next time... But the photos are not faithful either, I have to take new ones in better light... And I still managed to do a few little things. Now I have to finish the gunport hinges and then yay for the next chapter.


-
It's perfect, Fred. And I can't wait to see more pictures of the frieze painting.
-
Fred, I only have a few low quality pictures of me working on the wheels. If you want, I'll send you a drawing of the cutter.


-
Hey guys, I'm responding late as usual, sorry... but thanks a lot for the likes and the kind words. It was a motivation to keep going, albeit slowly, because I had a hard year and it didn't go as expected. I'm hoping to finally finish painting the friezes and move forward. Because the plans for the future are big - Speedwell and I hope JJ that your Portland will follow.
-
The journey continues. My best wishes for the new year.

-
Fred, your work looks great! I admire that you have a taste for nailing as well. But it will be a great improvement. Best wishes
-
Hi Glenn, it's been a while since I last wrote to you. I must admit, I'm impressed with how far you've come with the build. It's a perfect and clean job that I truly admire! I wish you all the best in this new year. And this also applies to all the builders.
- 840 replies
-
- 4
-
-
- winchelsea
- Syren Ship Model Company
- (and 1 more)
-
that's so perfect Frank Merry Christmas
-
Looks great Frank, keep it up.
-
Hey guys, When I was looking for pictures of contemporary models with painted friezes I came across an interesting project by the Art Gallery of Ontario. https://ago.ca/collection/exploring-bristol https://store.steampowered.com/app/2605210/AGO_BRISTOL_1775_From_Warship_to_Prison_Hulk/ Unfortunately I don't have the necessary VR set but I'll give it a try and hopefully a mouse and keyboard will be partly possible. I would love to build a Bristol or Portland one day and this looks like a great source of information for us modellers.
-
Beautifully done work Frank.
-
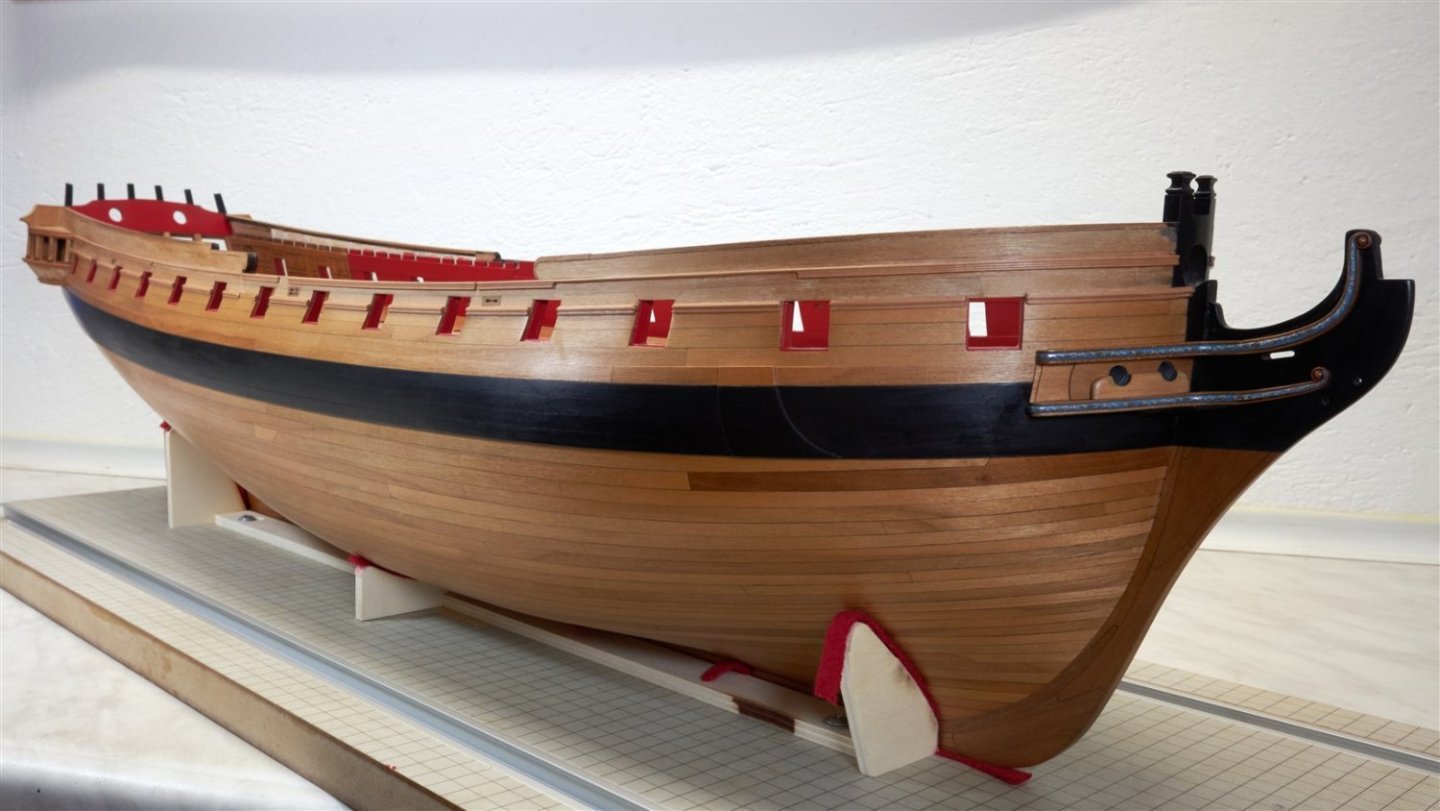
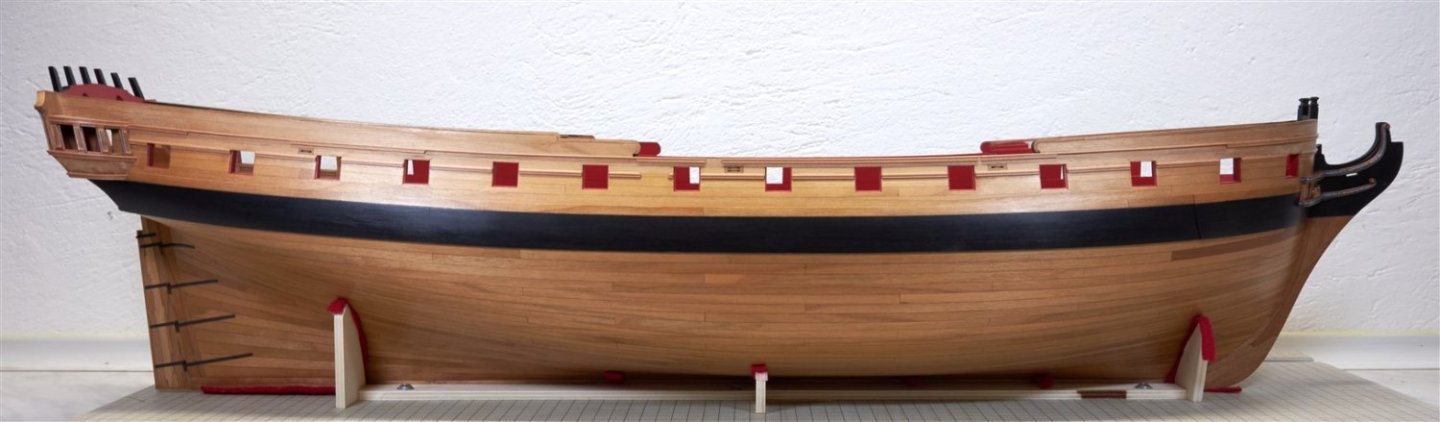
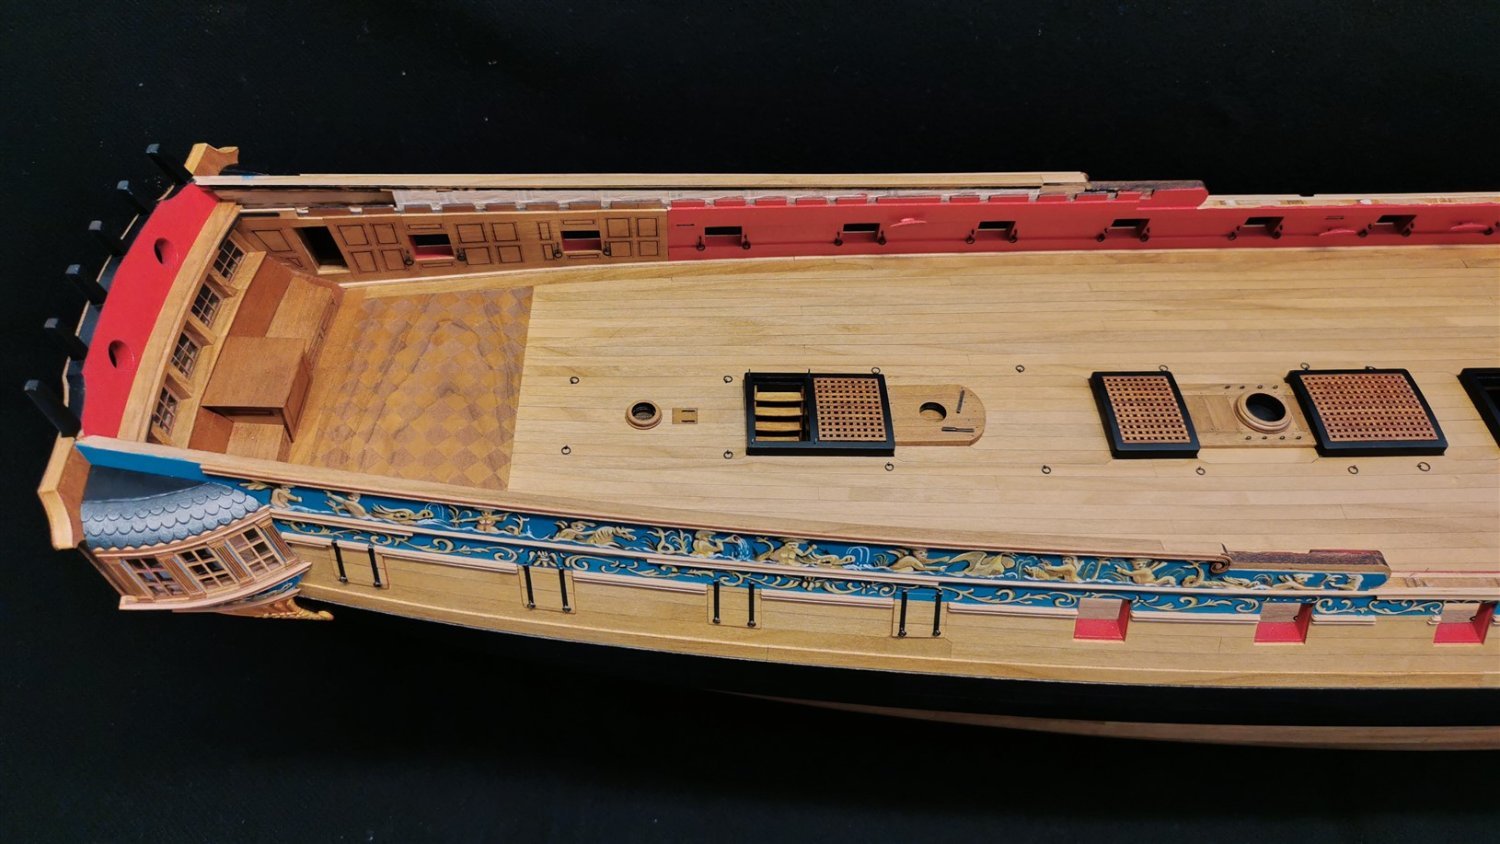
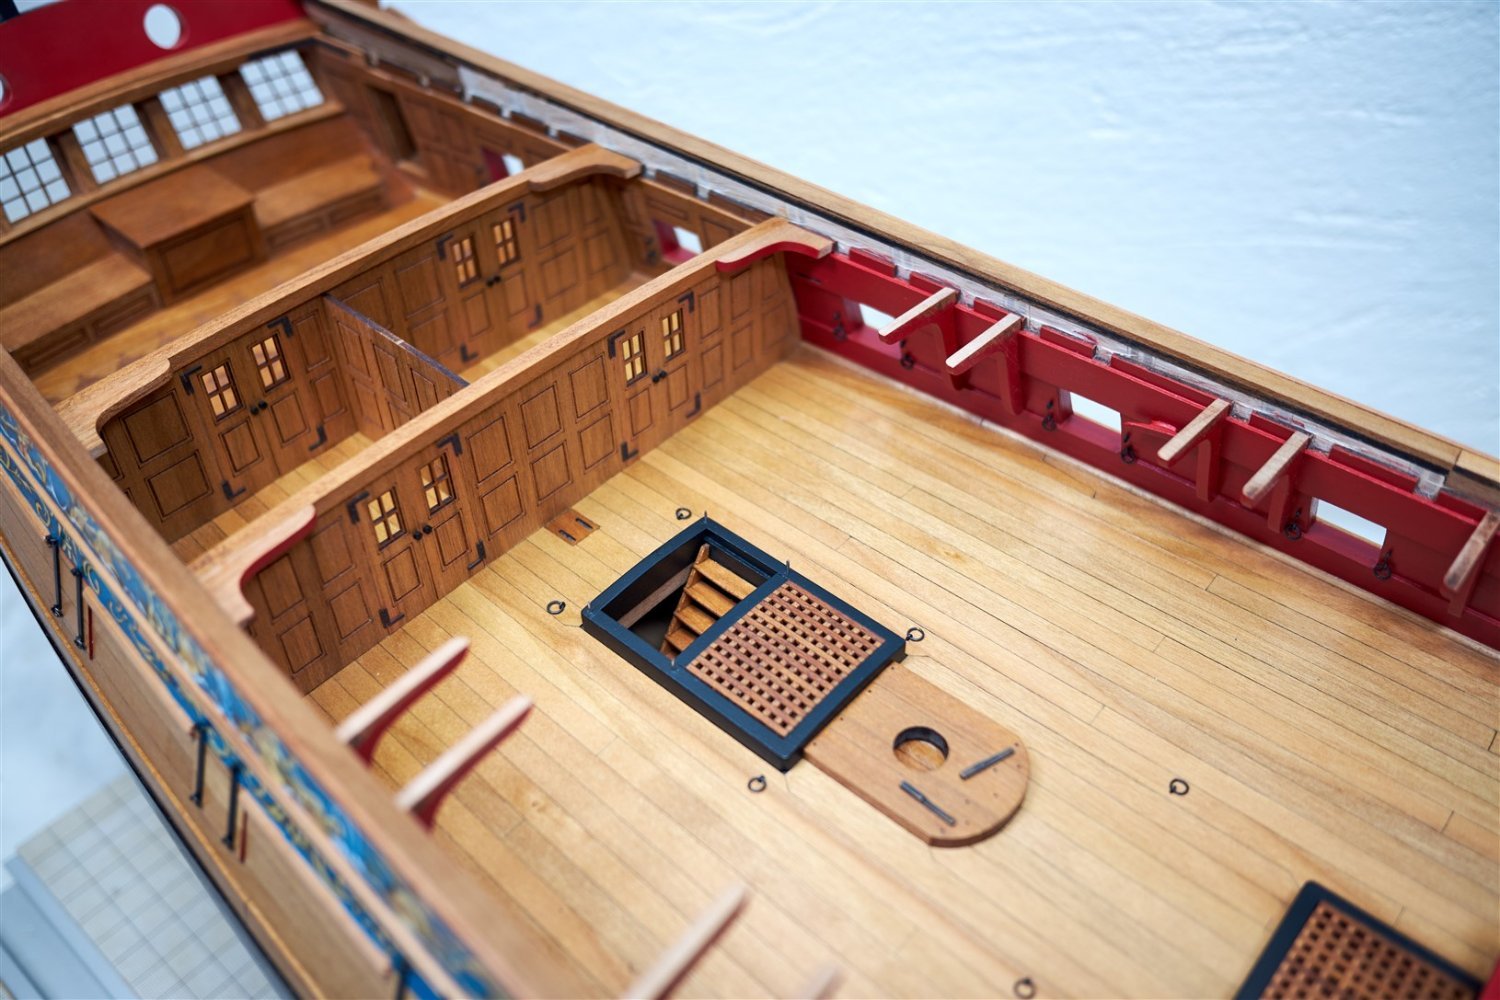
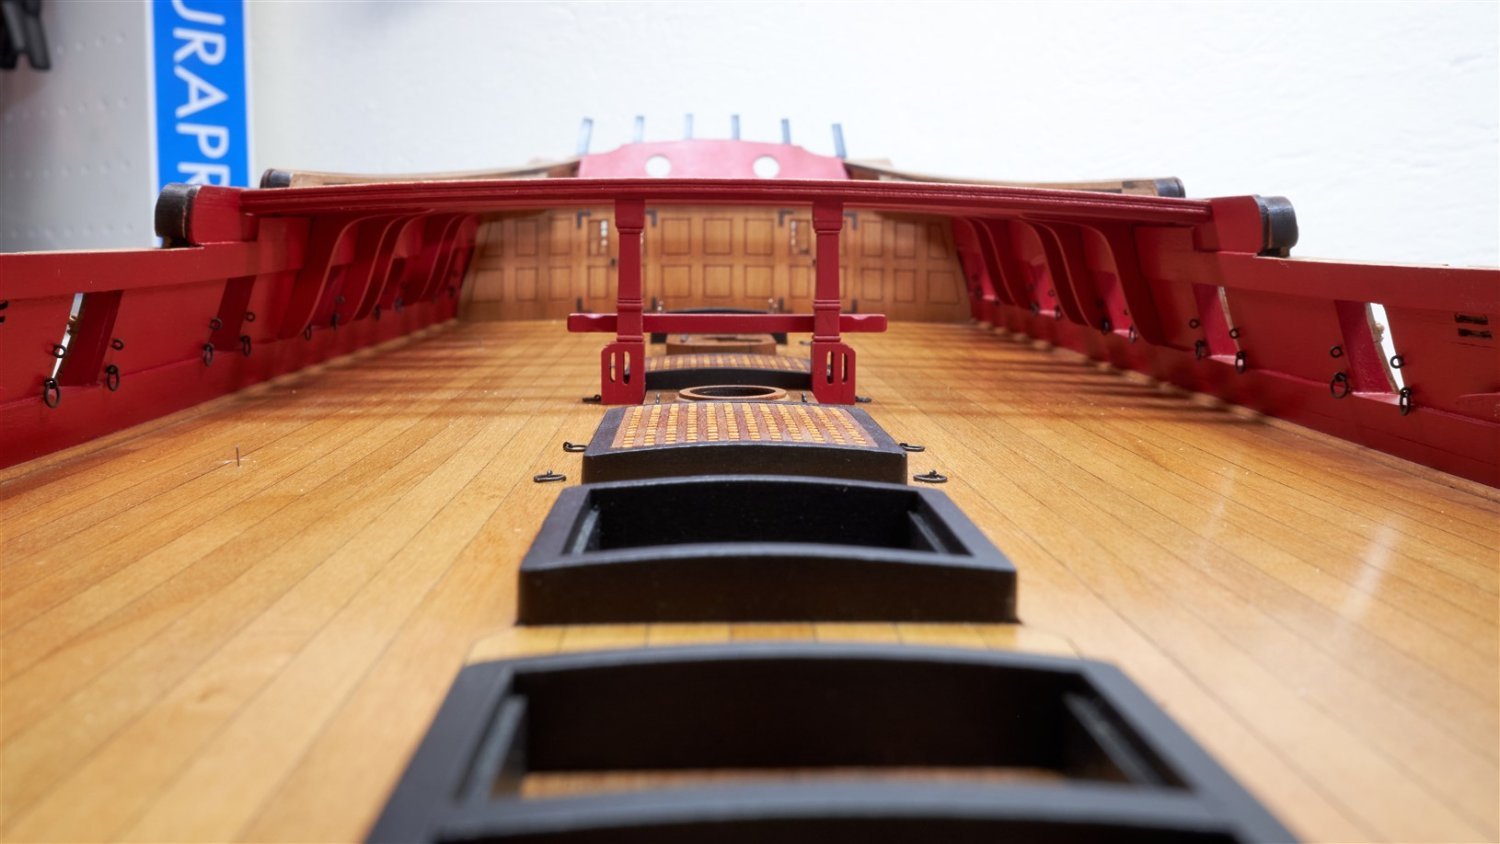
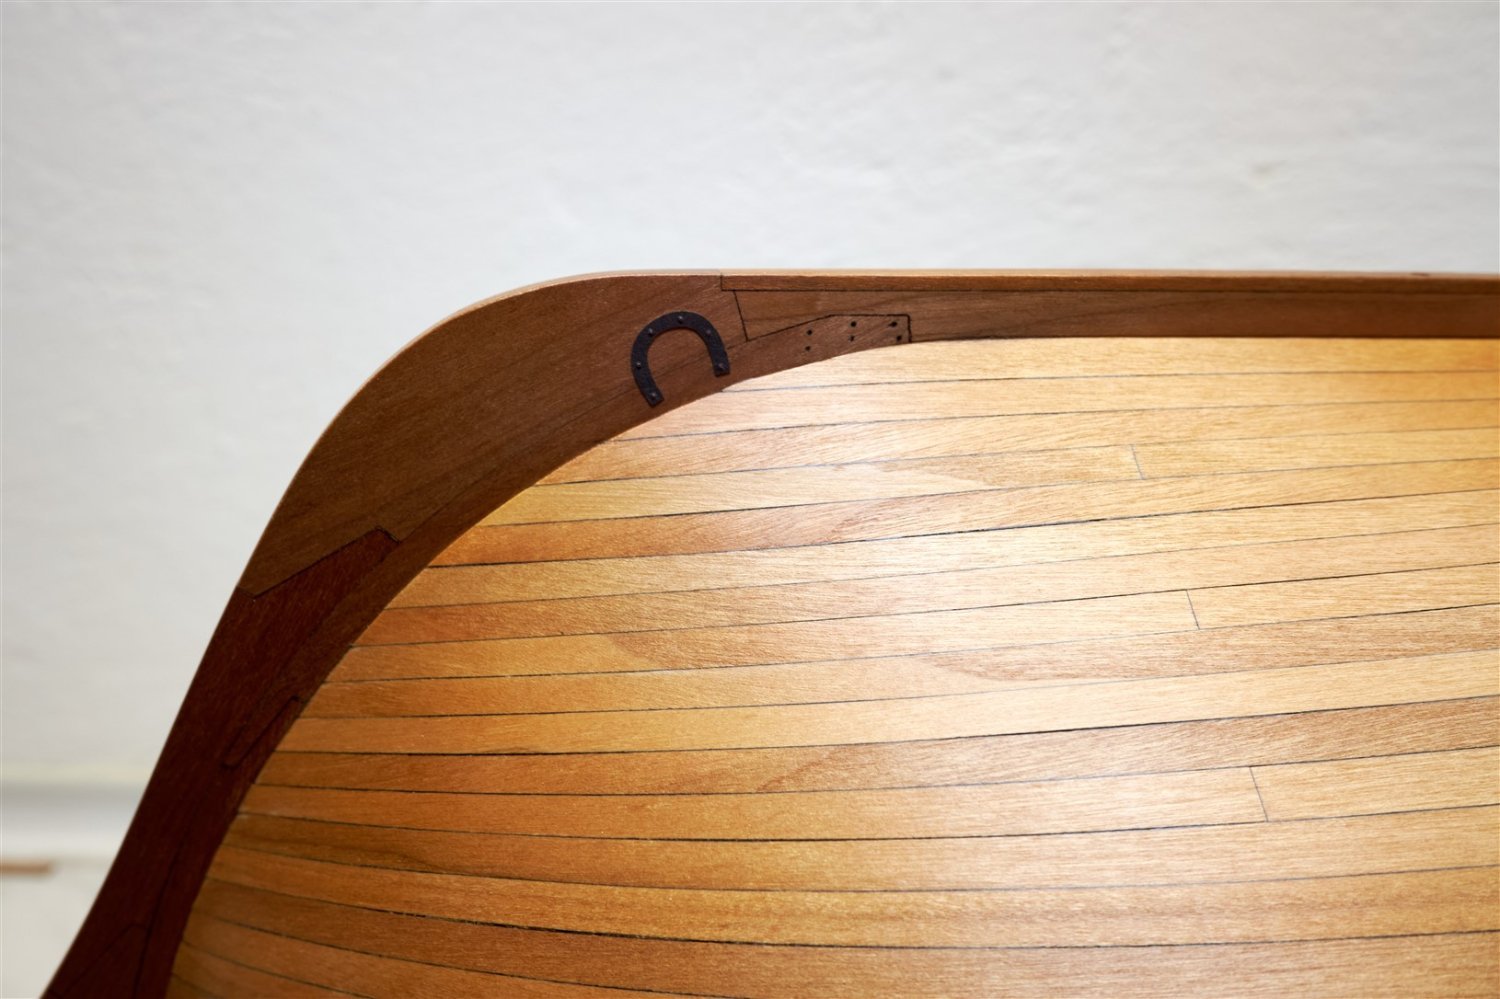
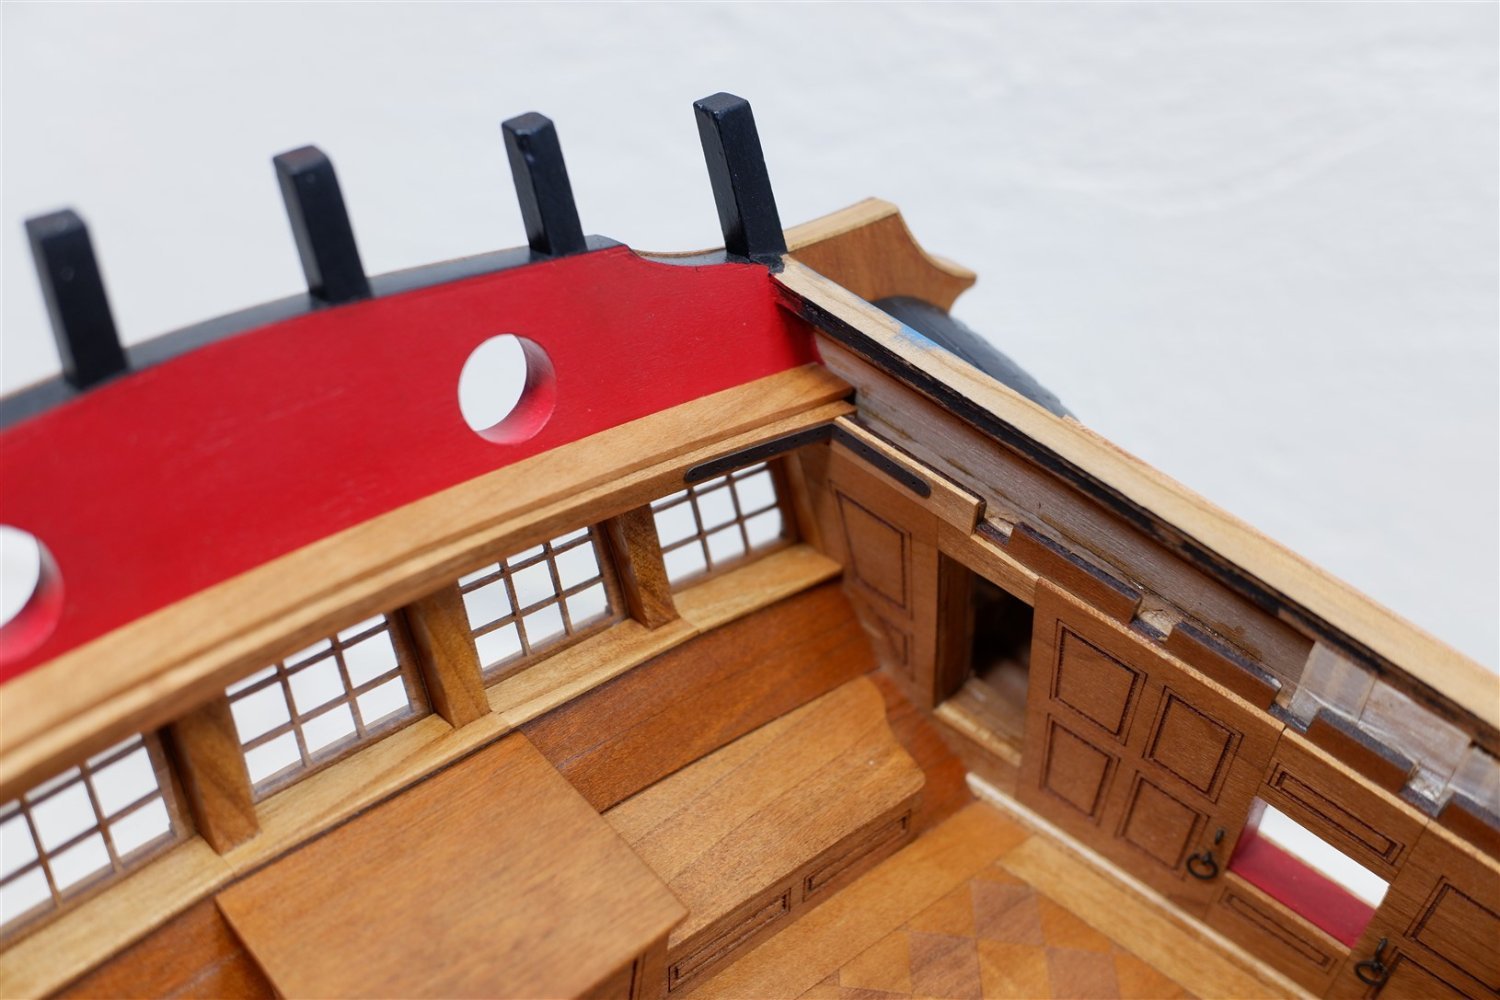
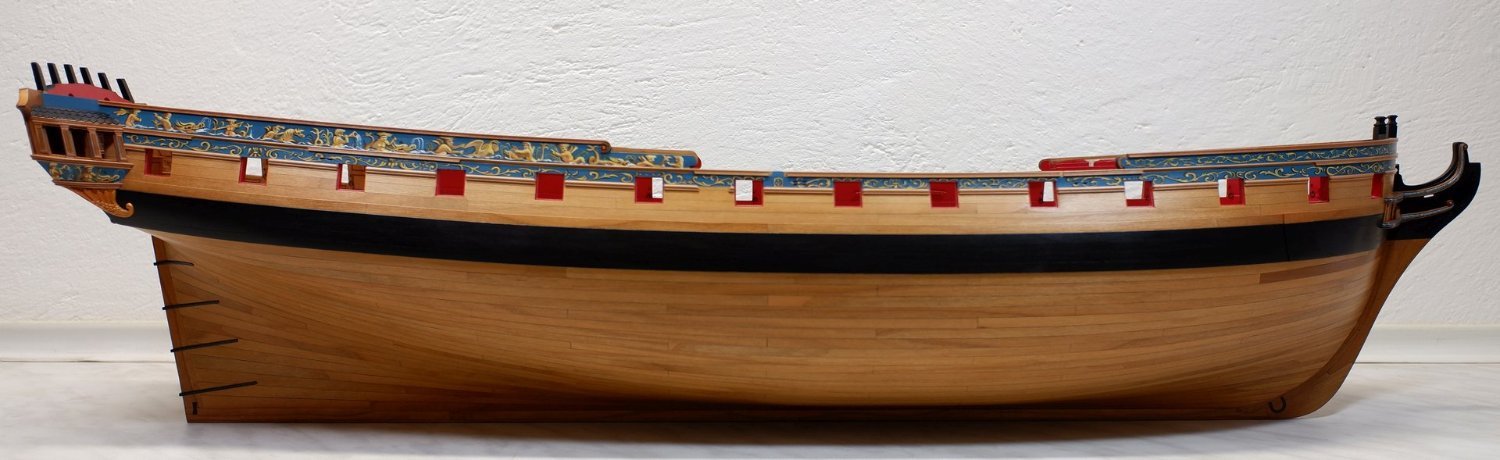
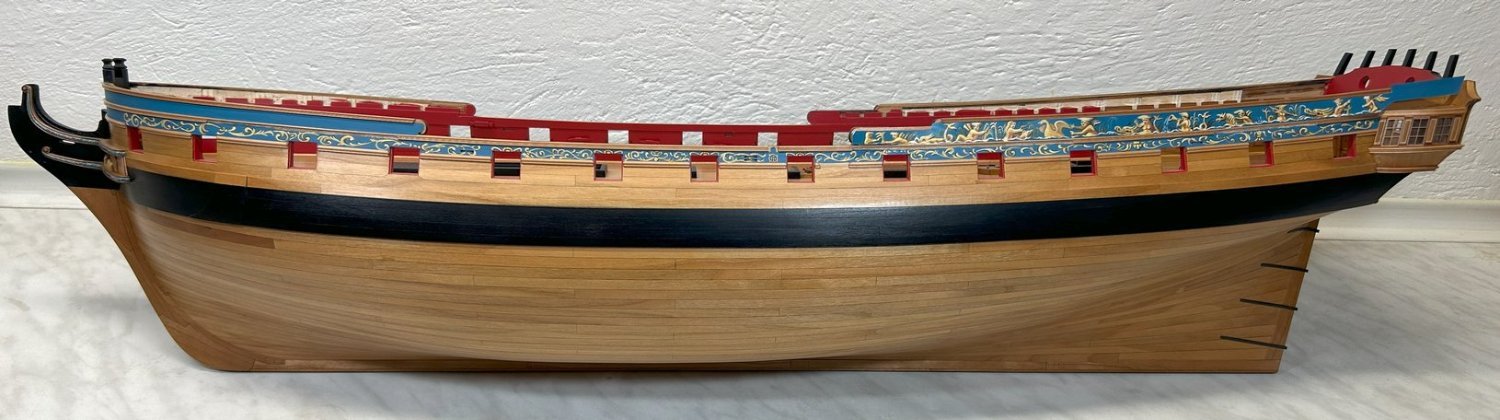
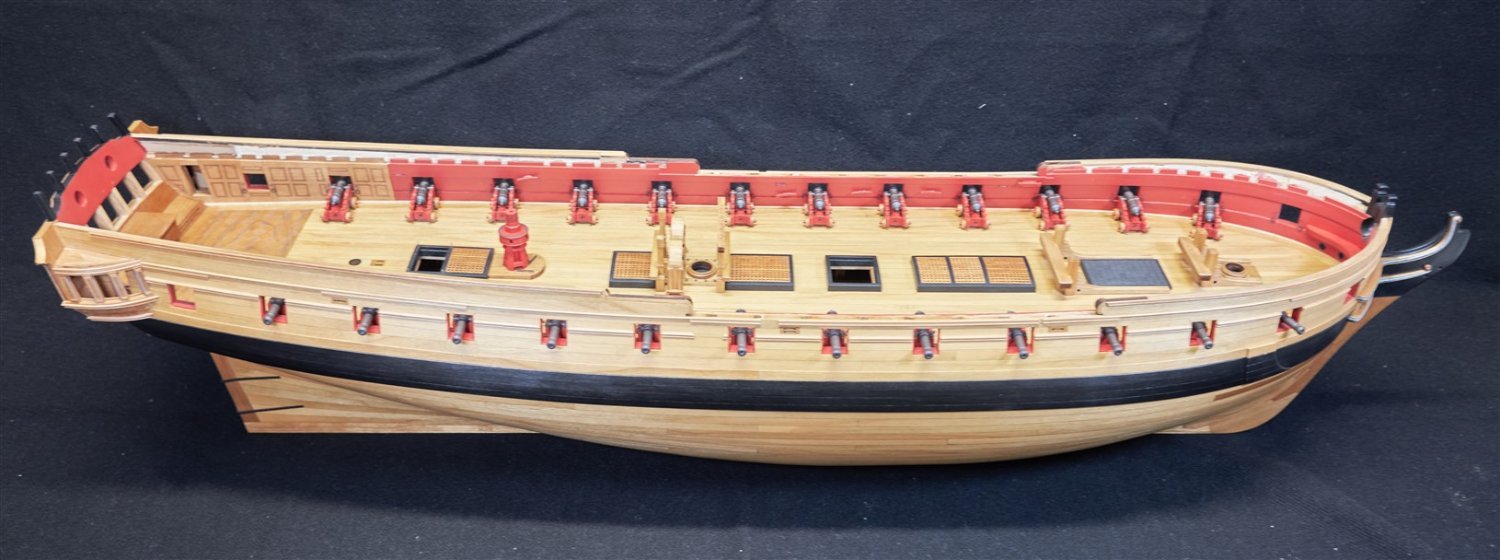
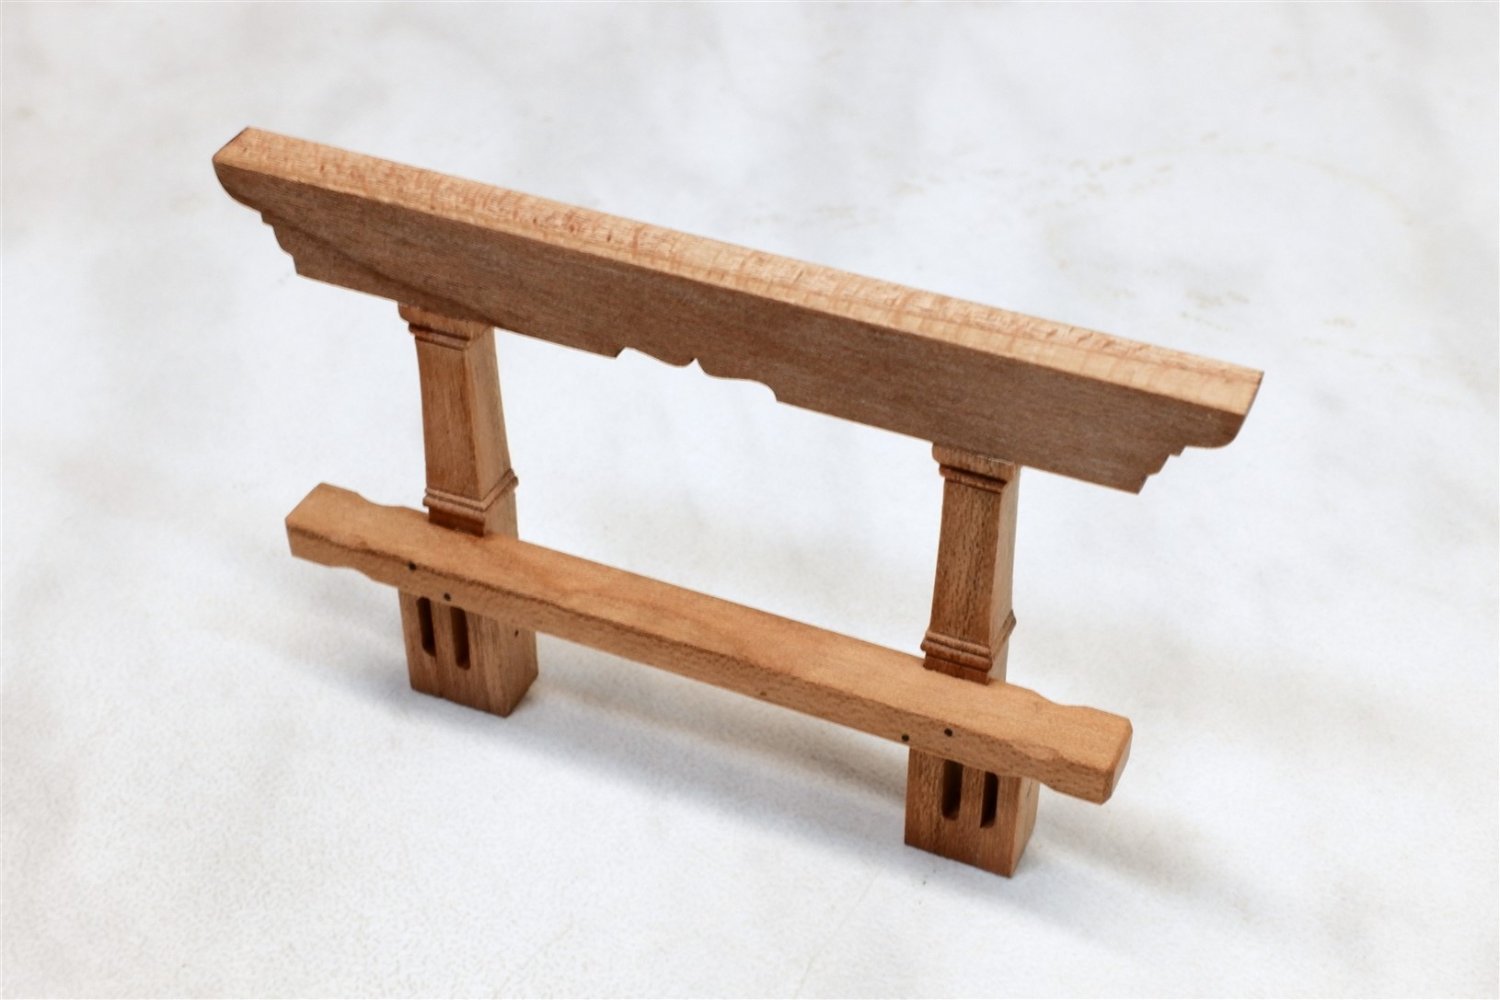
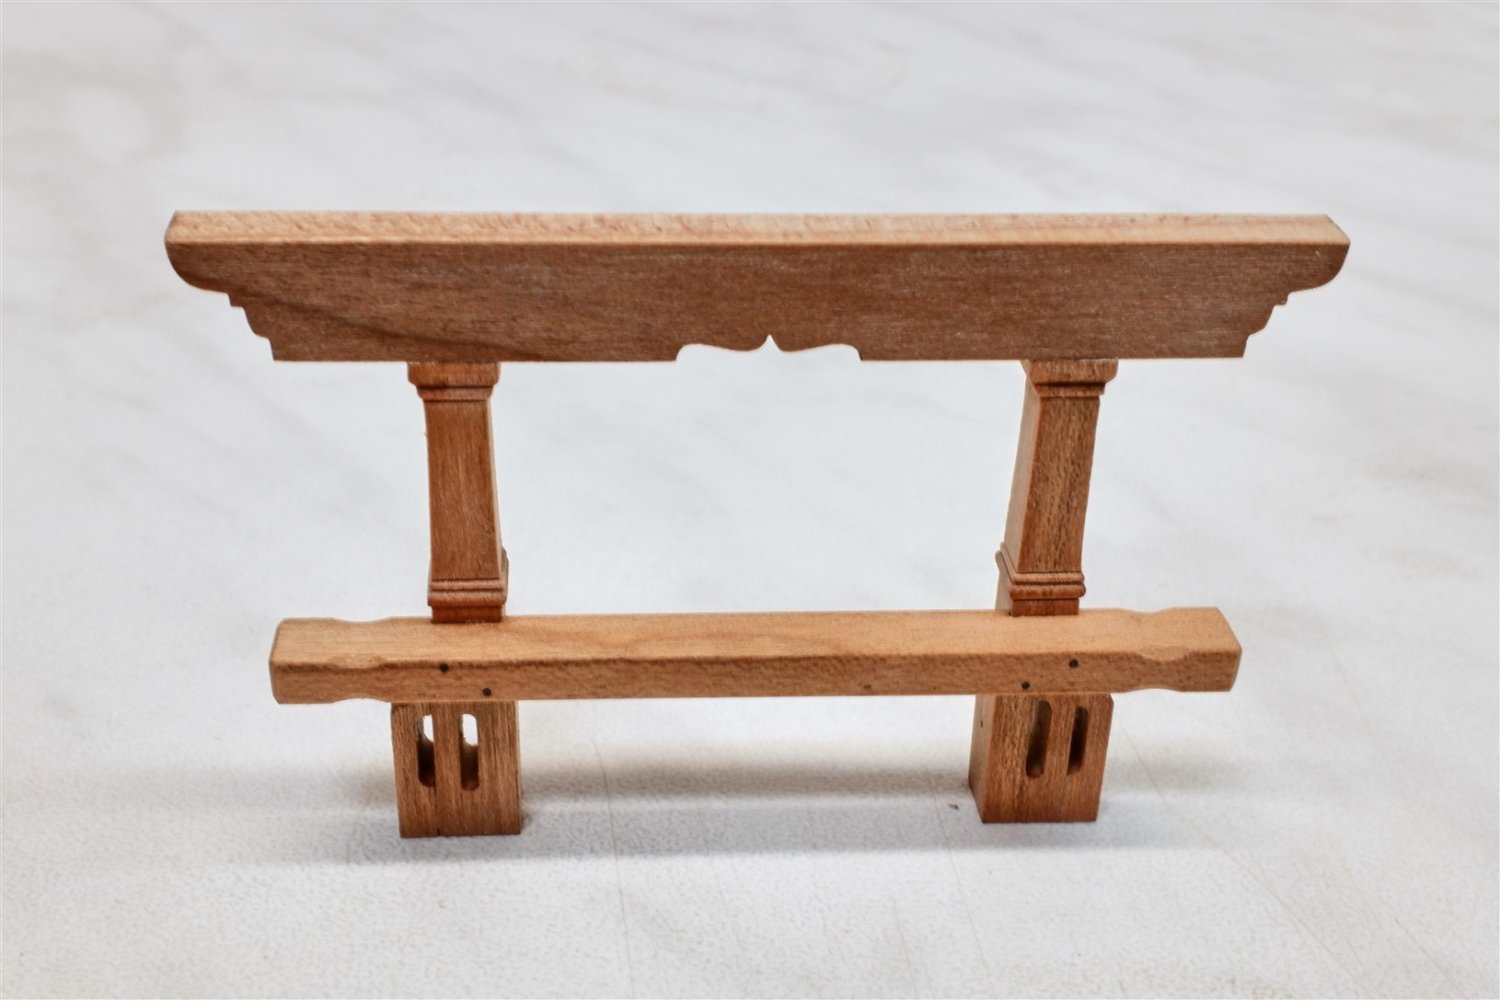
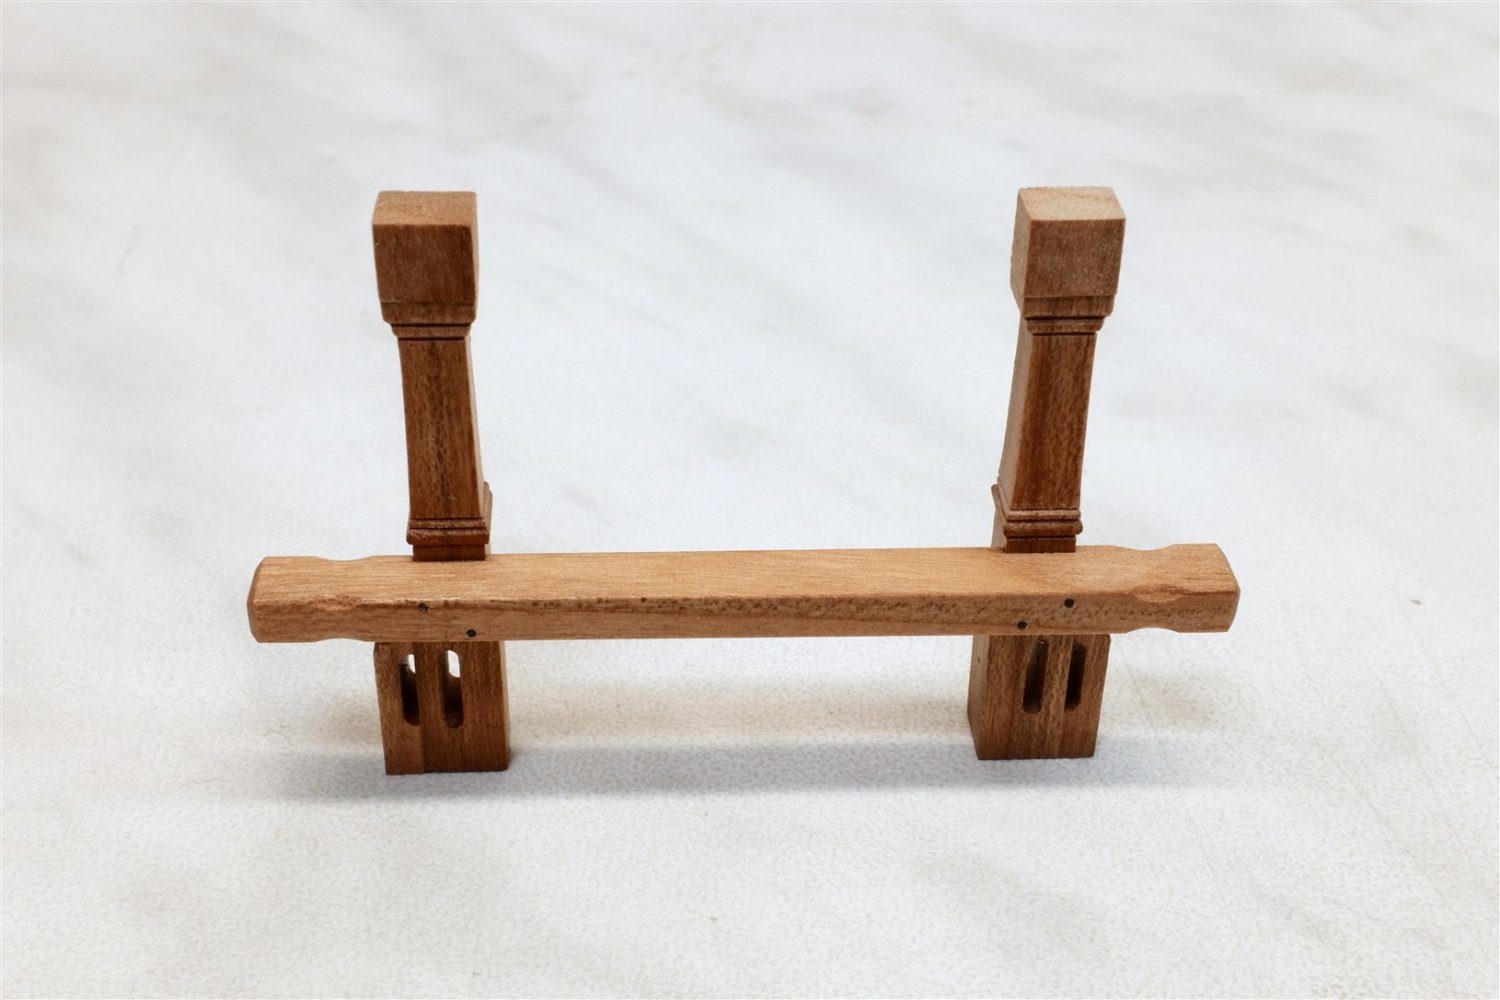
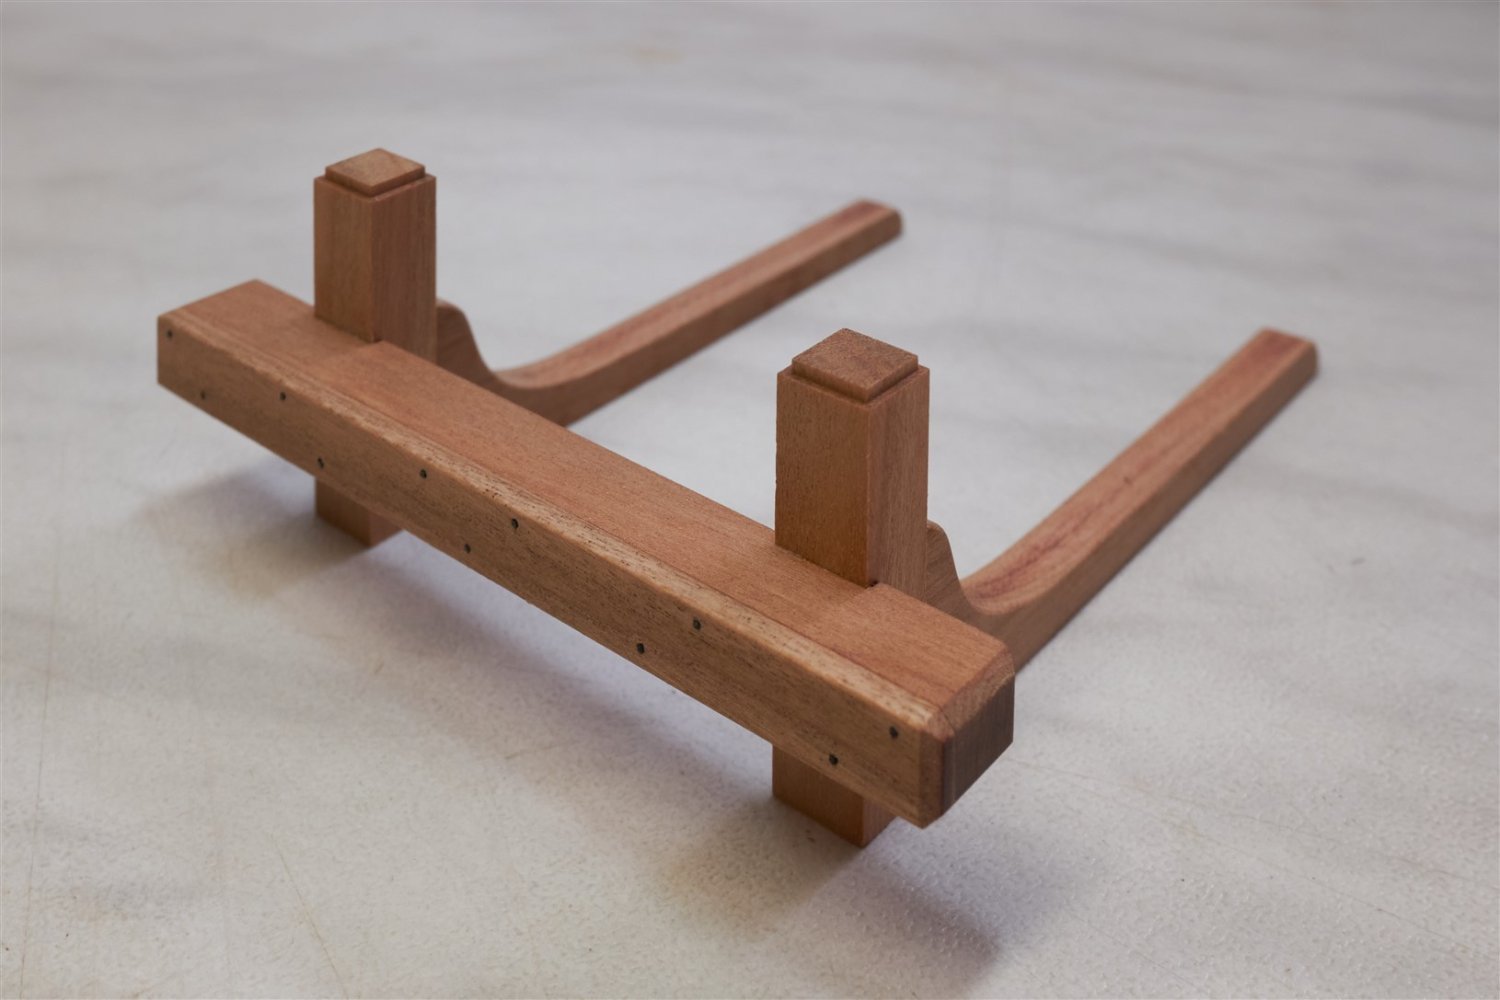
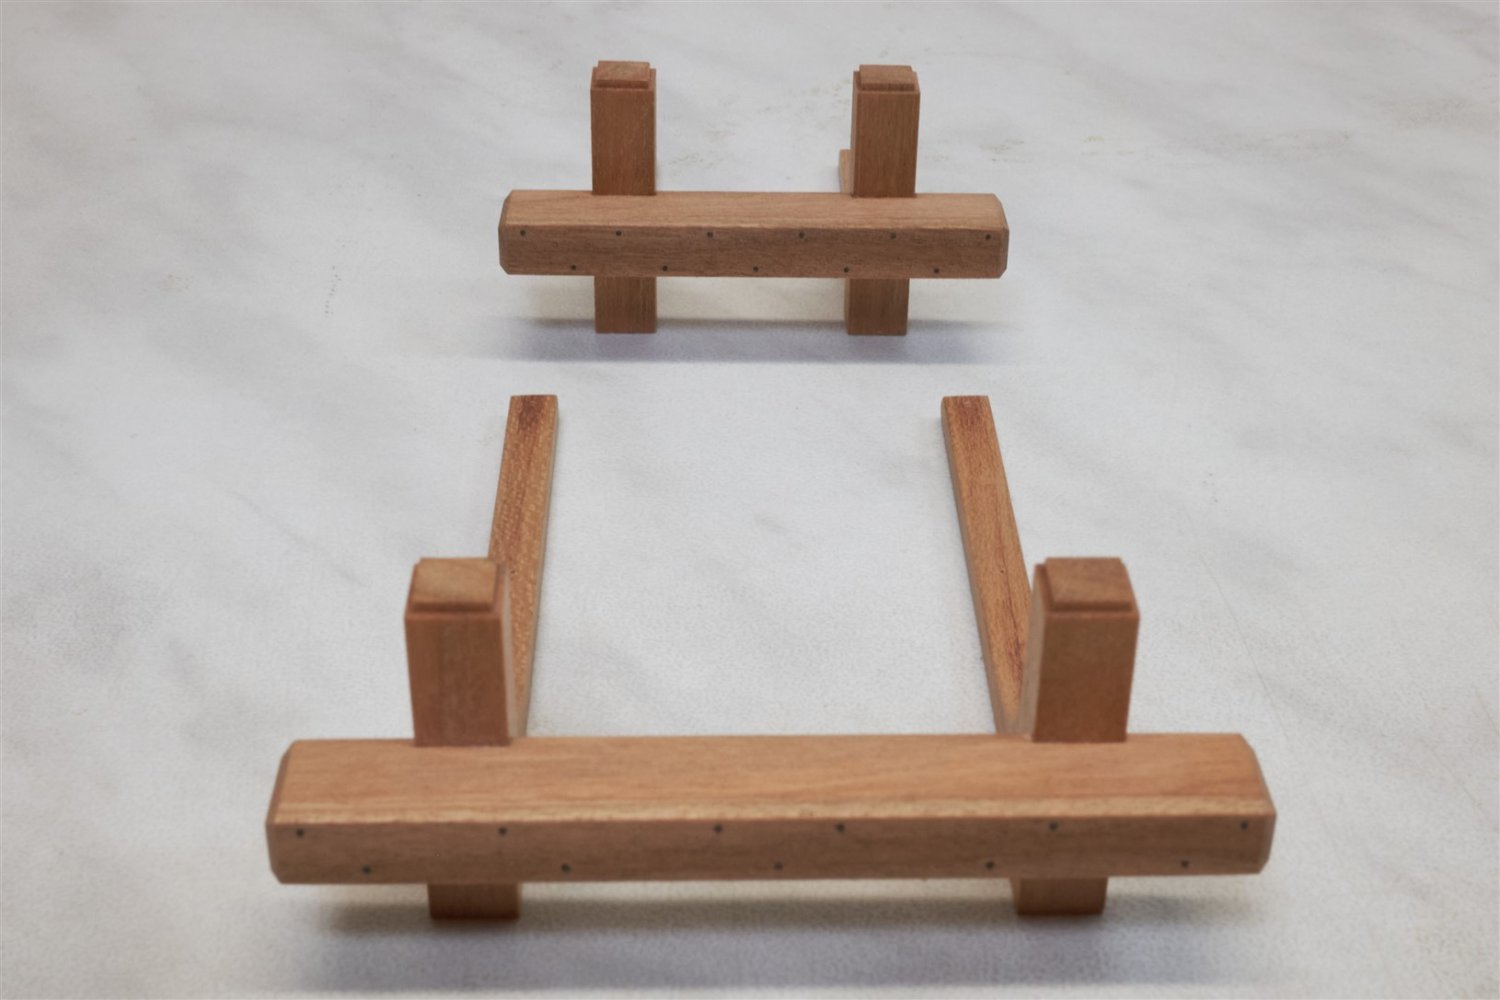
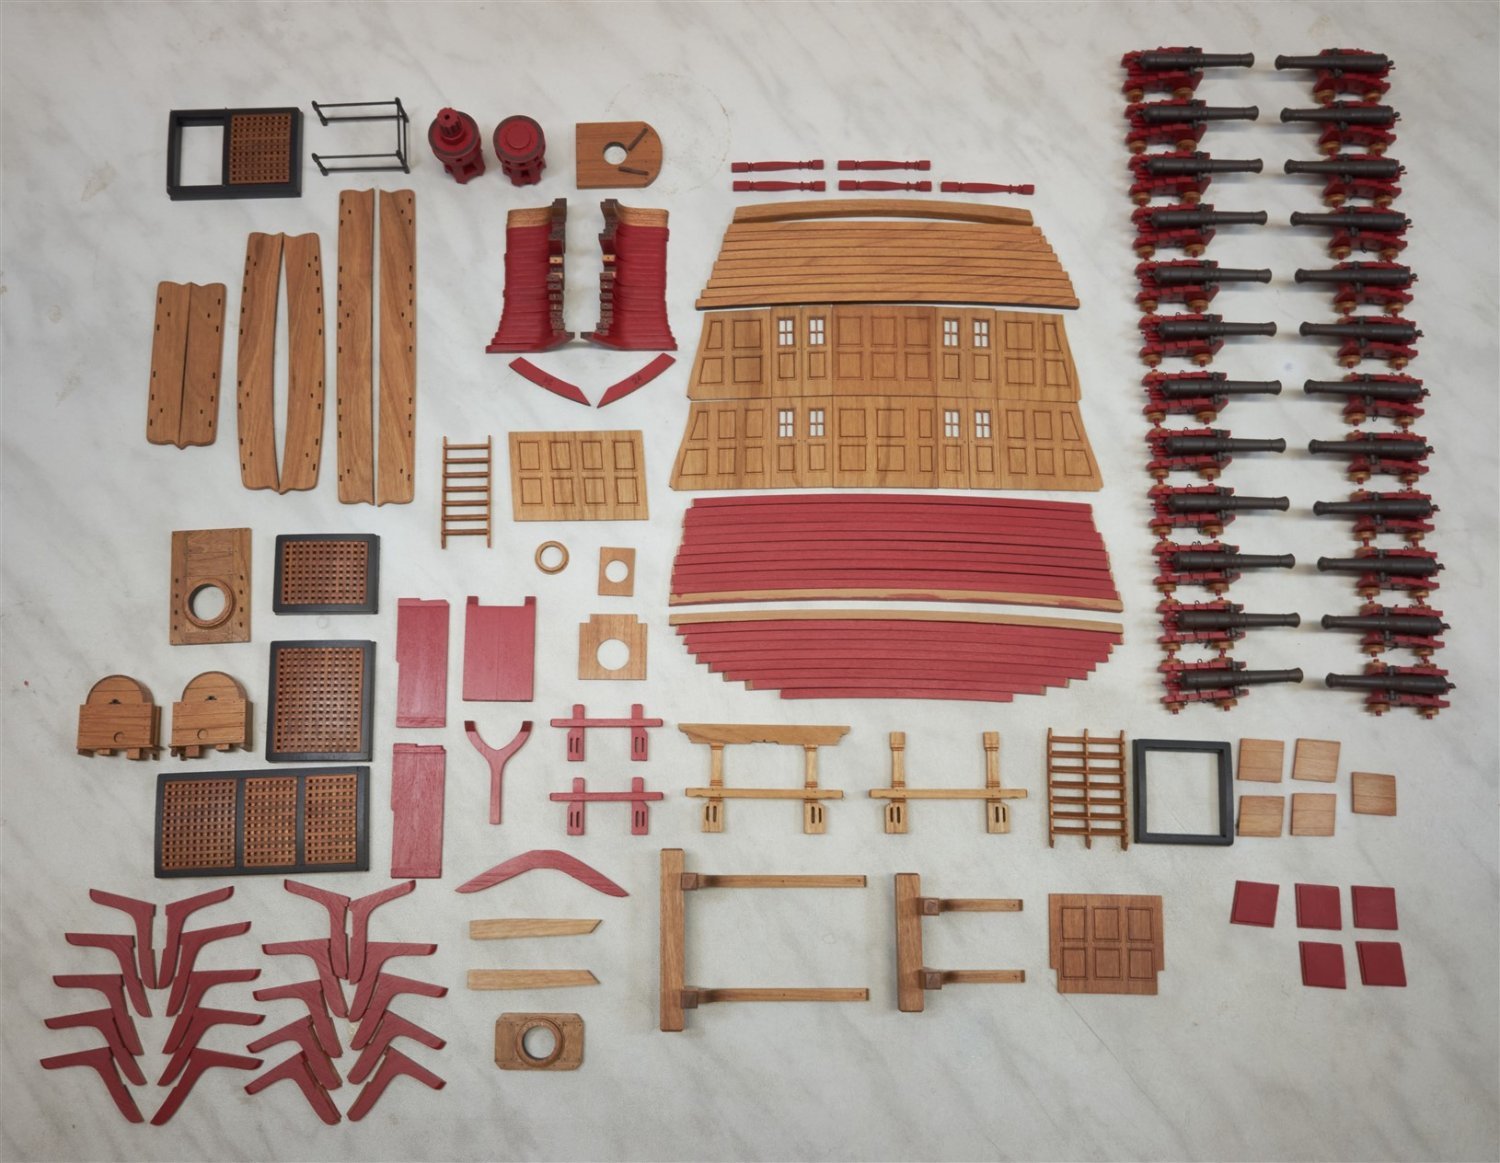
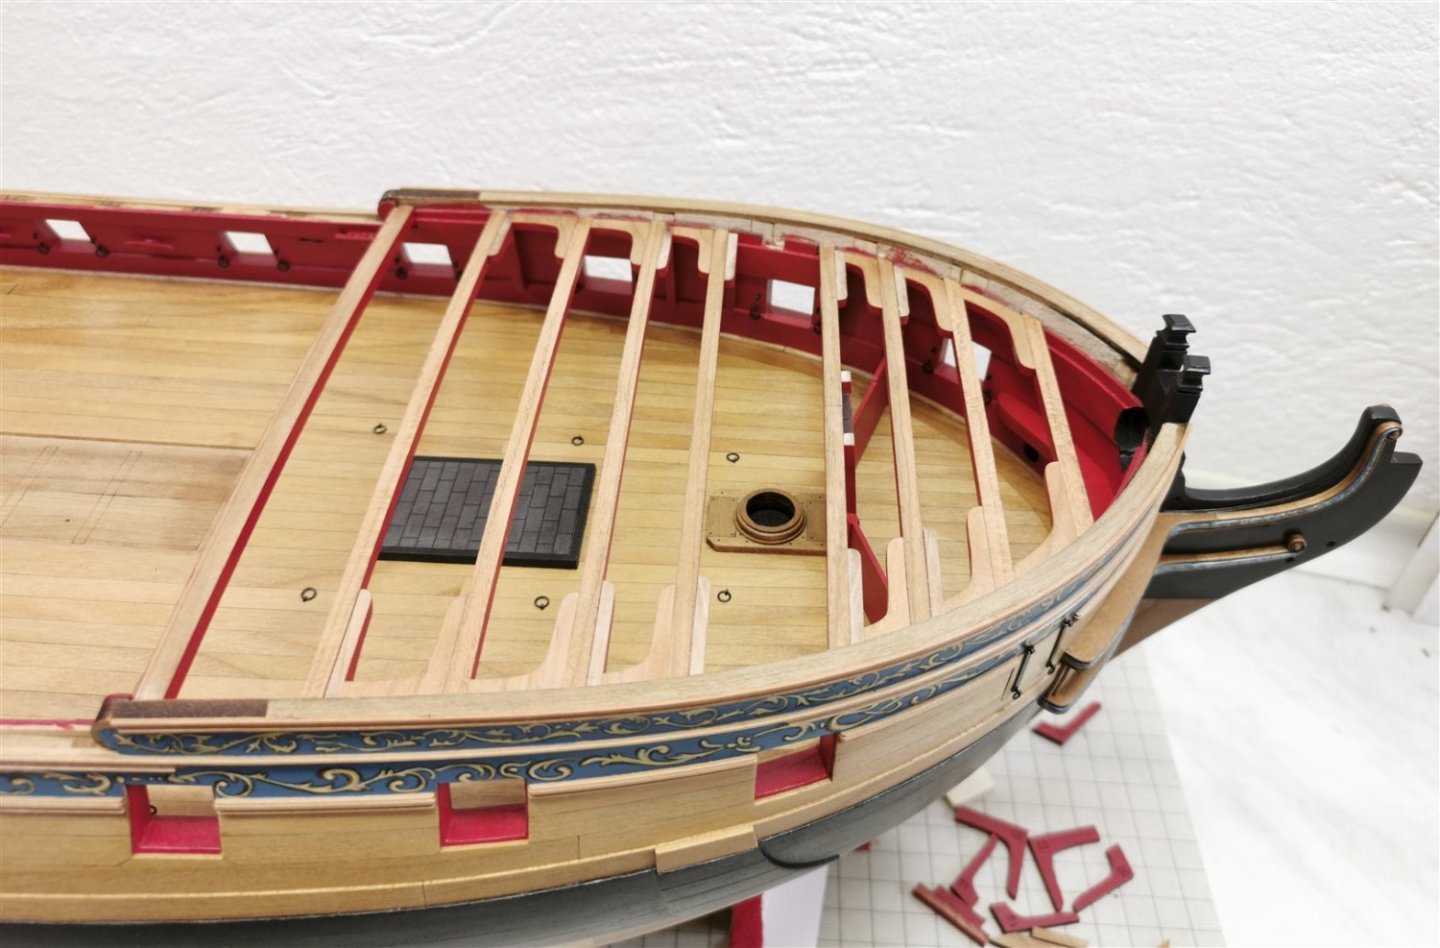
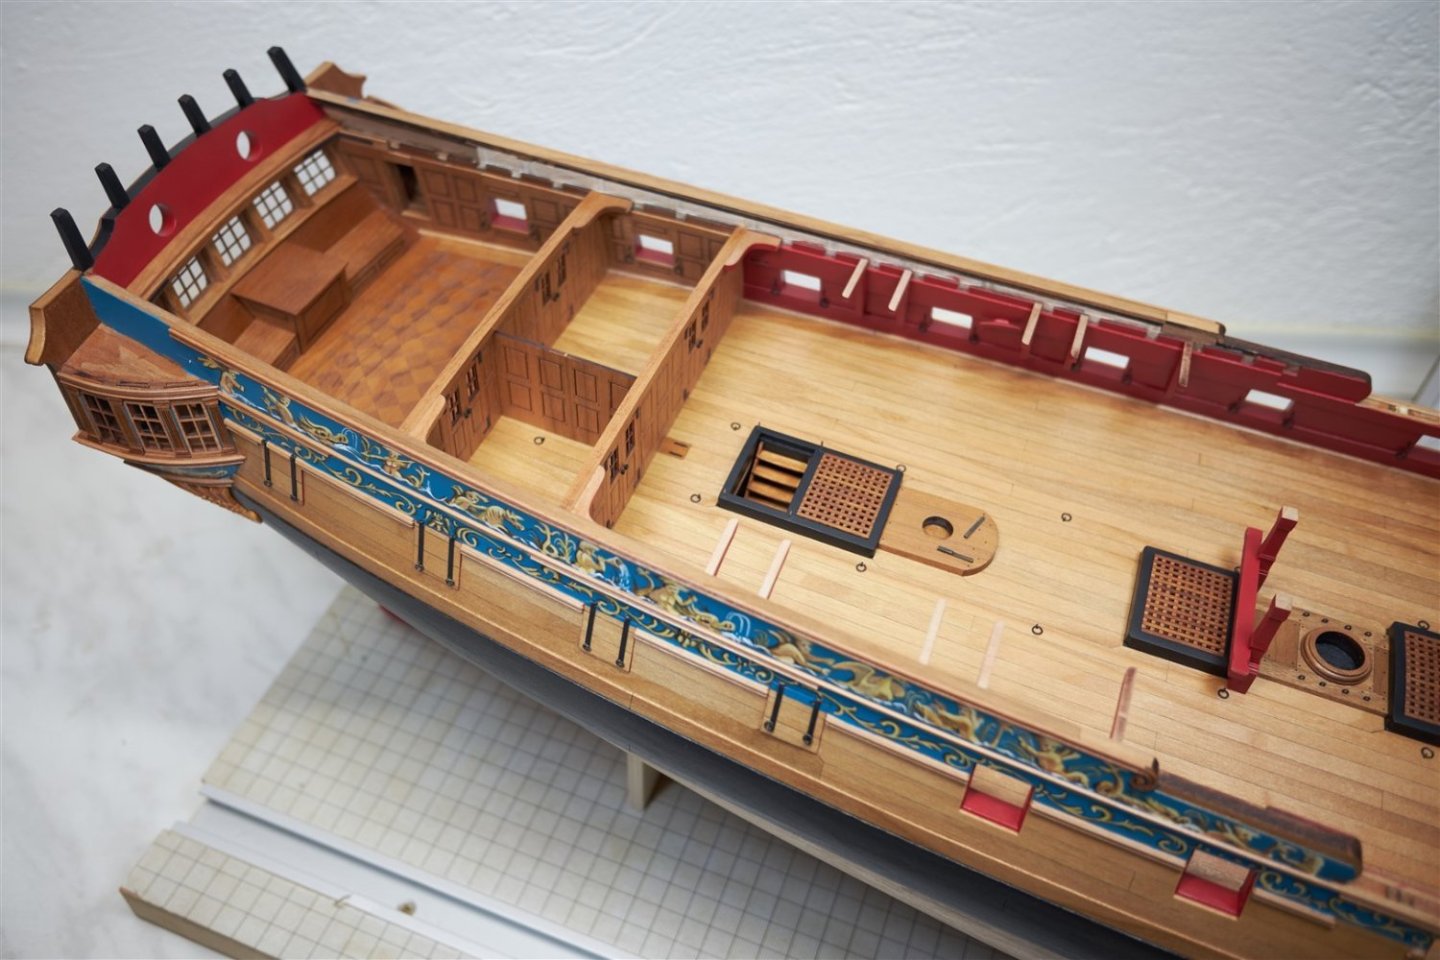
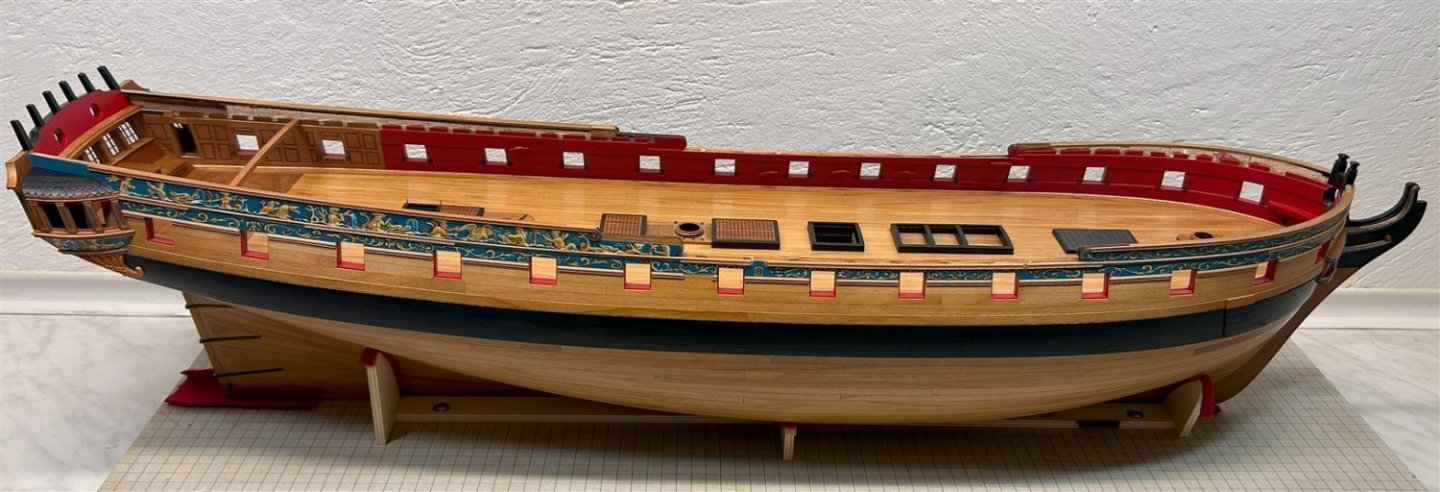
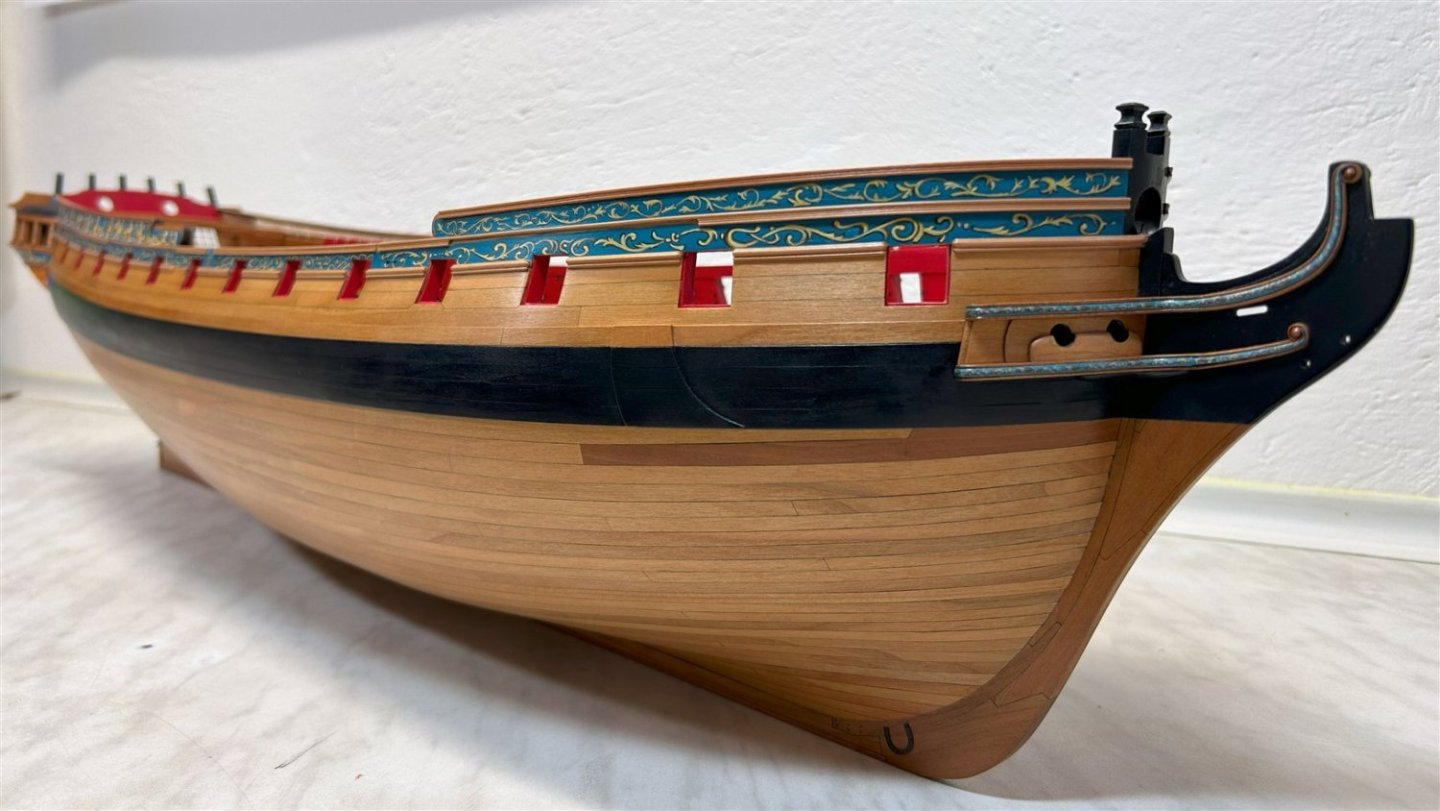
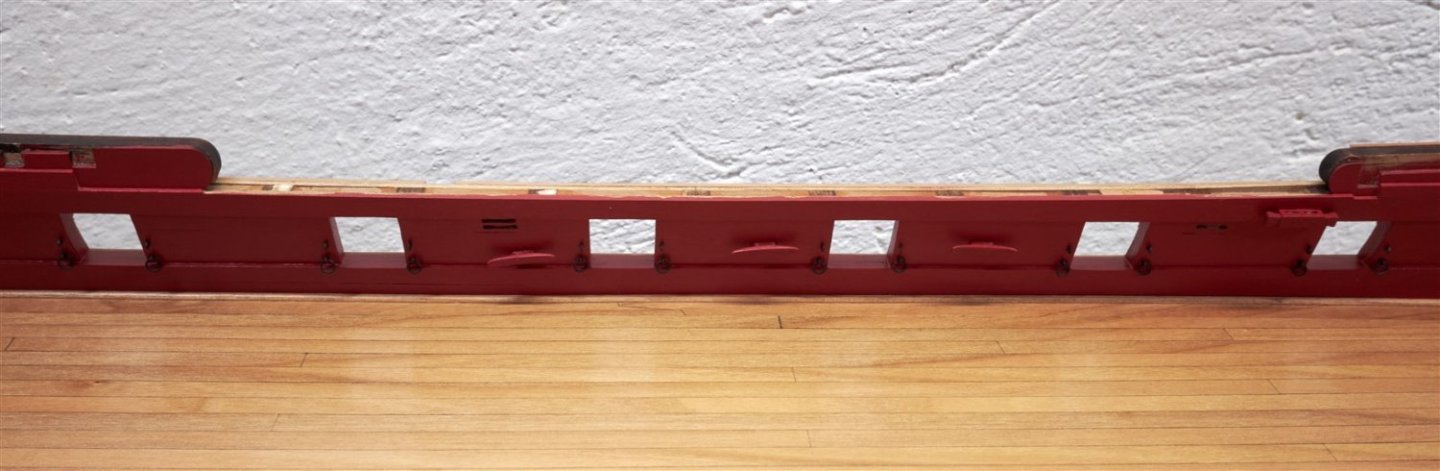
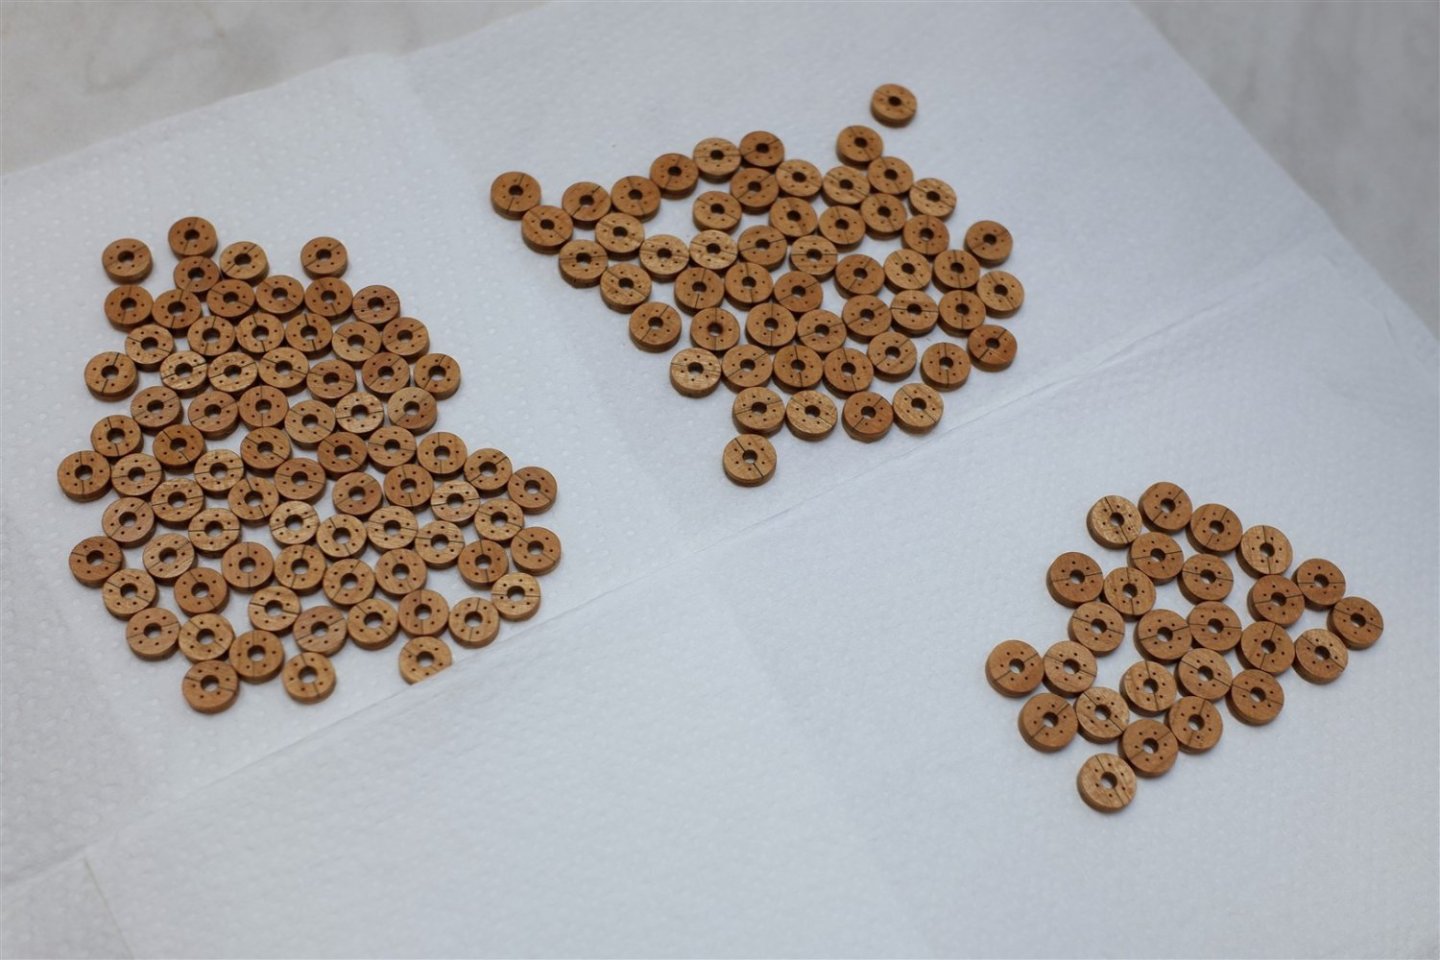
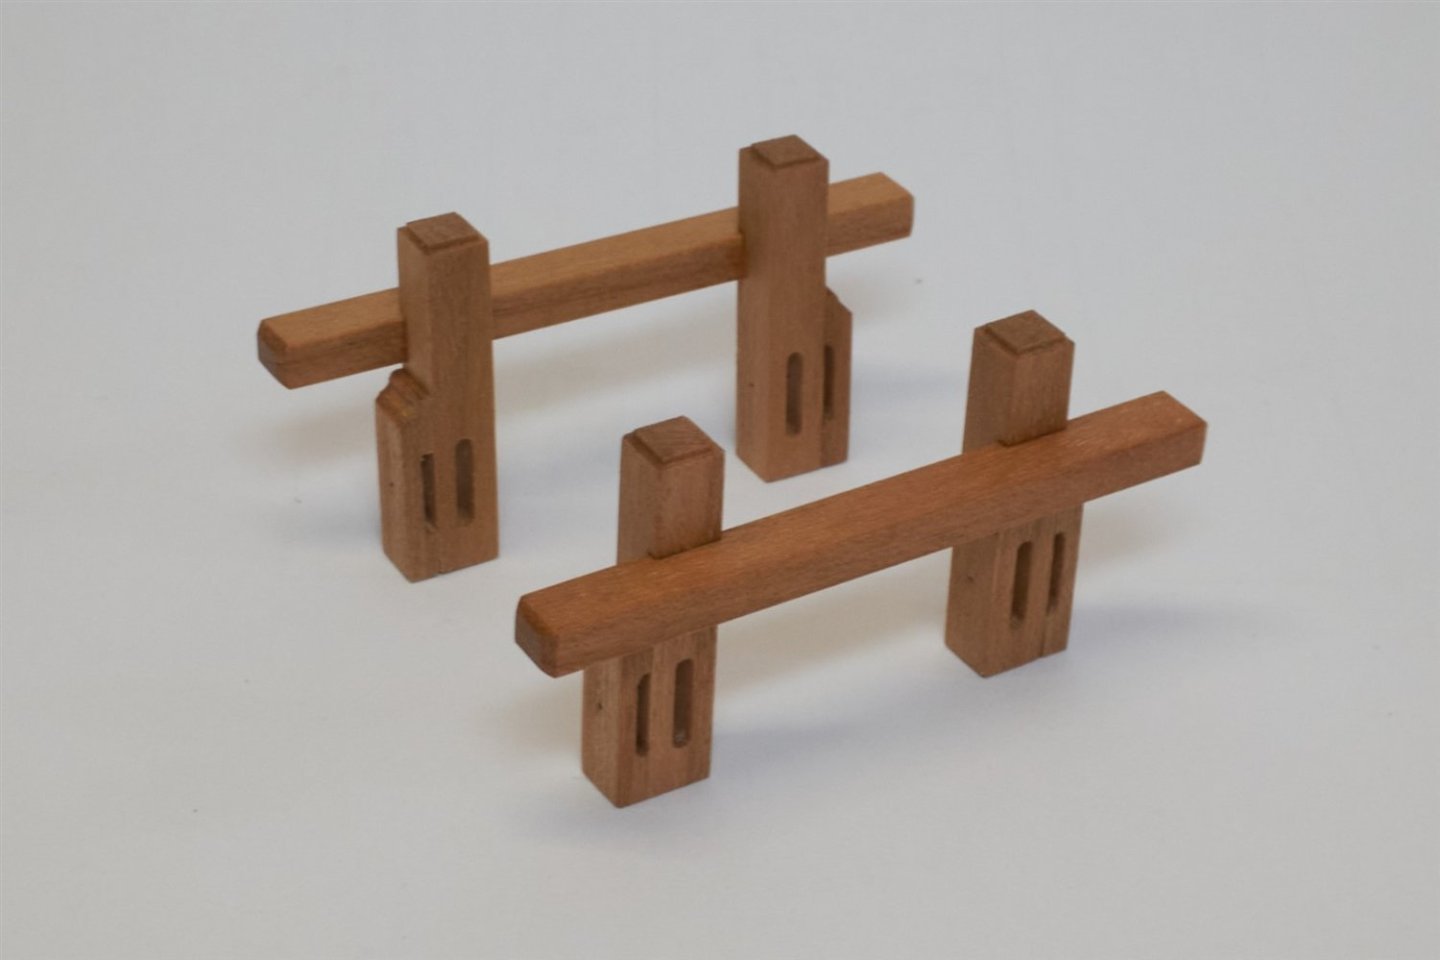
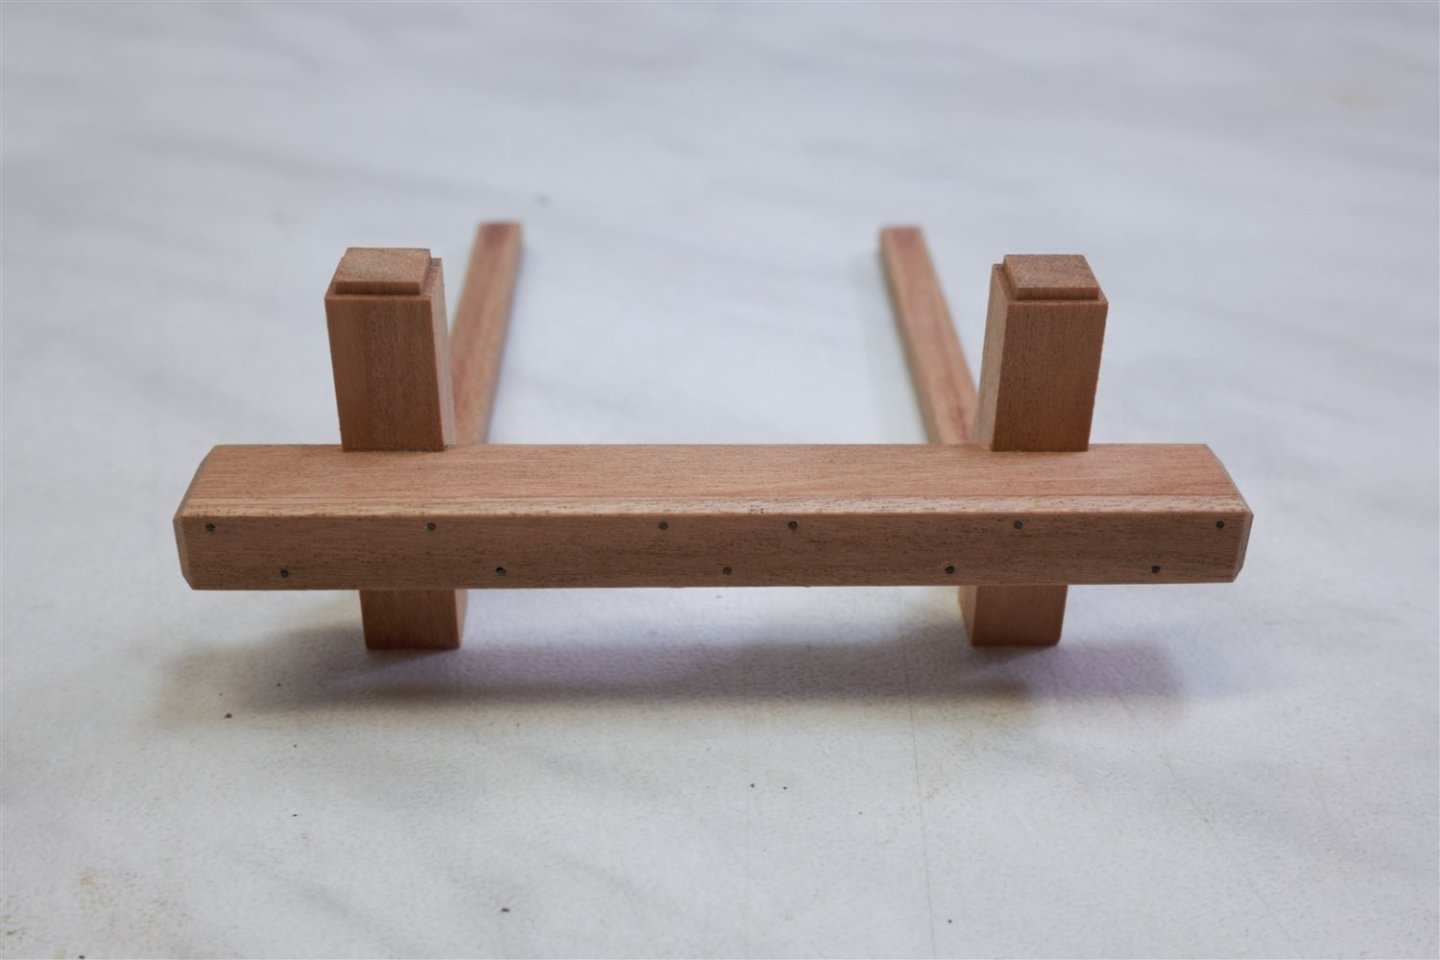
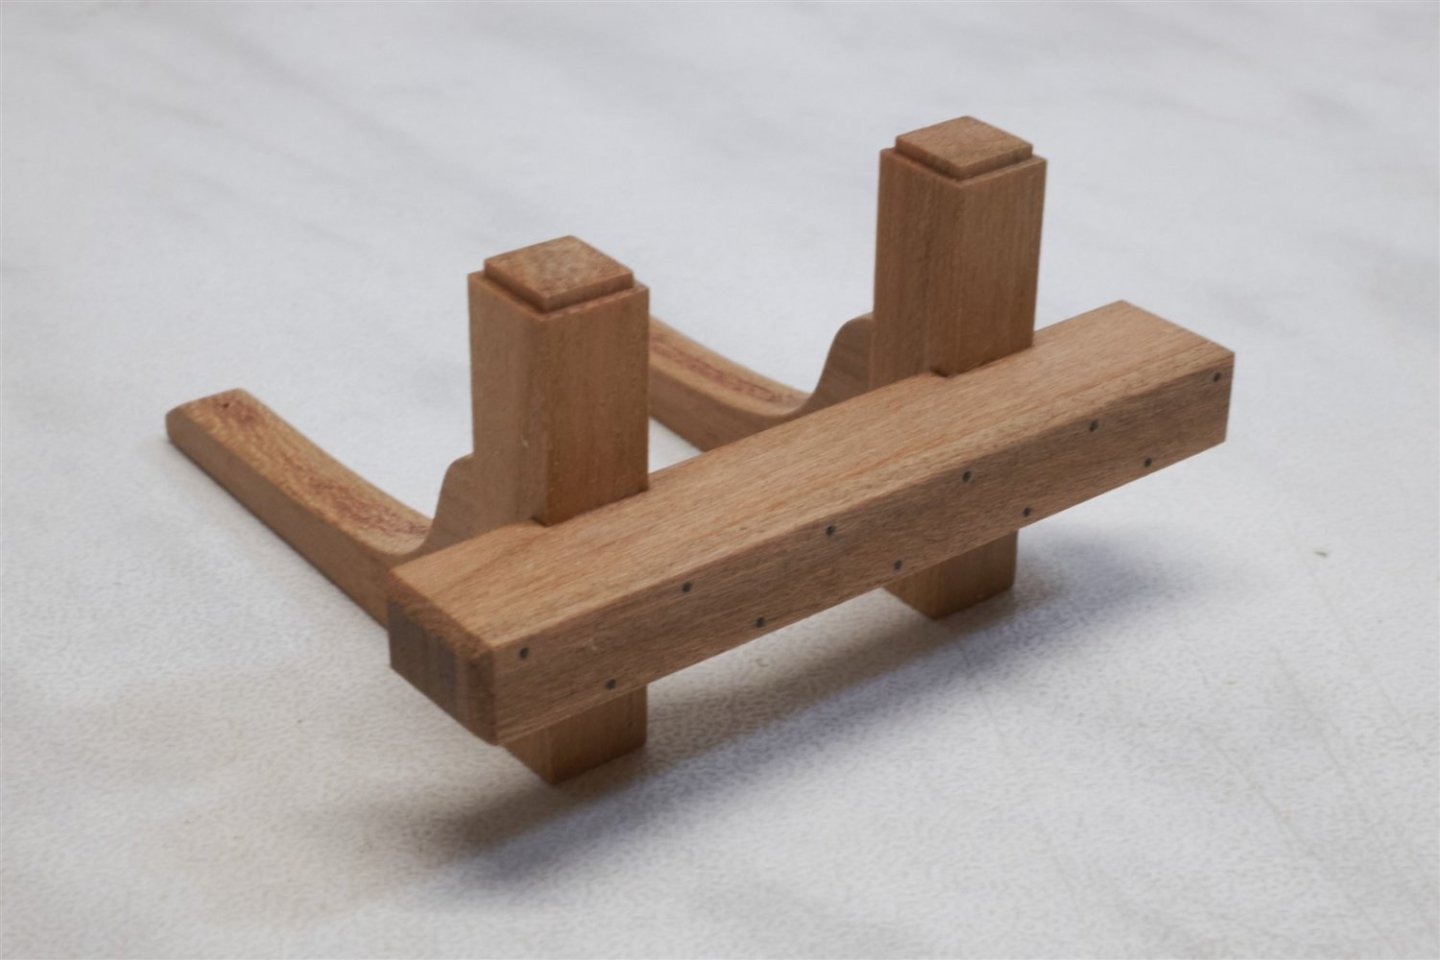
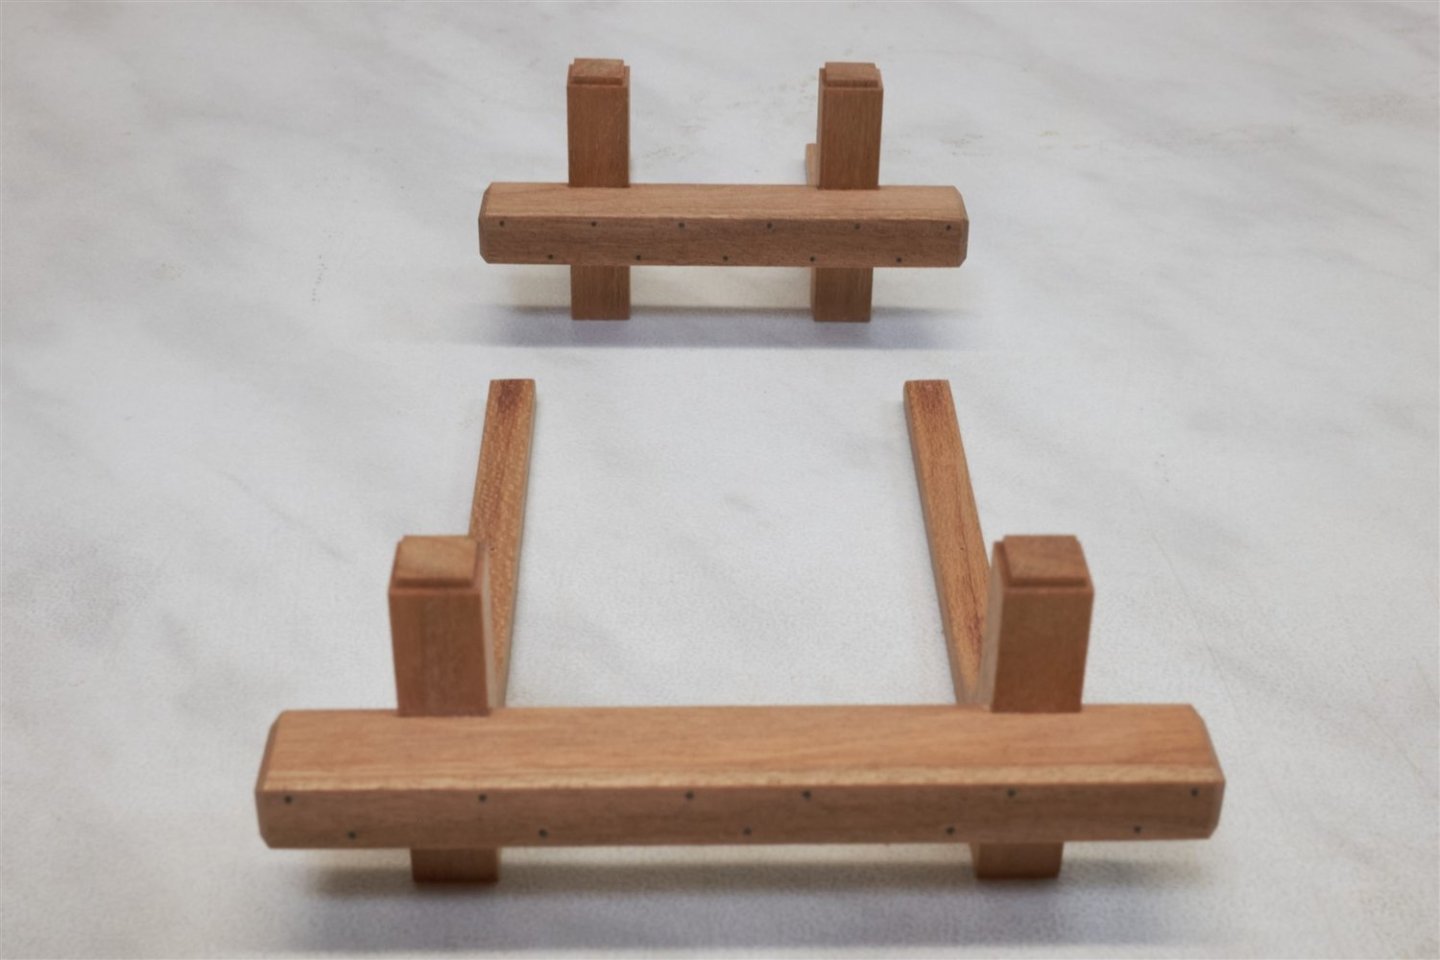
So the summer is over and I finally processed all the photos I took over the summer on the model. I thought I'd have the third and fourth chapters finished by now, especially the friezes, but as you'll see, I'm still avoiding that particular part.... I have finished some details on the stern, the windows and the inner sill. The only thing still missing are is carvings. From chapter five I worked on the bulwark and added all eye bolts and split rings, cleats and staghorns. I only need to make the port lid hinges. Chapter six is finished. So far only dry on the deck. I used Mike's method to fix it. The cannon wheels really gave me a beating. Chapter Seven. Ready are all the beams, bulkheads, knees, chain pumps, gallows, jeer bitts, Capstan and almost all the other deck fittings I think. So I've got a bit of a lego puzzle ready to go. 🙂 Chapter eight is also almost ready for final assembly. Enough words, here are the pictures:


-
Congratulations on completing the planking Frank, You made a fantastic result, Bravo
-
wow it's beautiful planking Frank. great job 👍
-
Congratulations for completing a beautiful model Don. It has been a pleasure to follow your posts as you build this model.
- 144 replies
-
- 2
-
-
- winchelsea
- Syren Ship Model Company
- (and 1 more)
-
Lovely work Matthias 👍
-
Hi, Vlado,🙂 great improvement. By the way, I have a question: What did you use to paint the carvings?
-
continuing So chapter five is almost done and it's time to finish chapters three and four...