westwood
-
Posts
278 -
Joined
-
Last visited
Content Type
Profiles
Forums
Gallery
Events
Everything posted by westwood
-
Welcome aboard Robert, thanks for the compliments and I wish you all a Merry Christmas


-
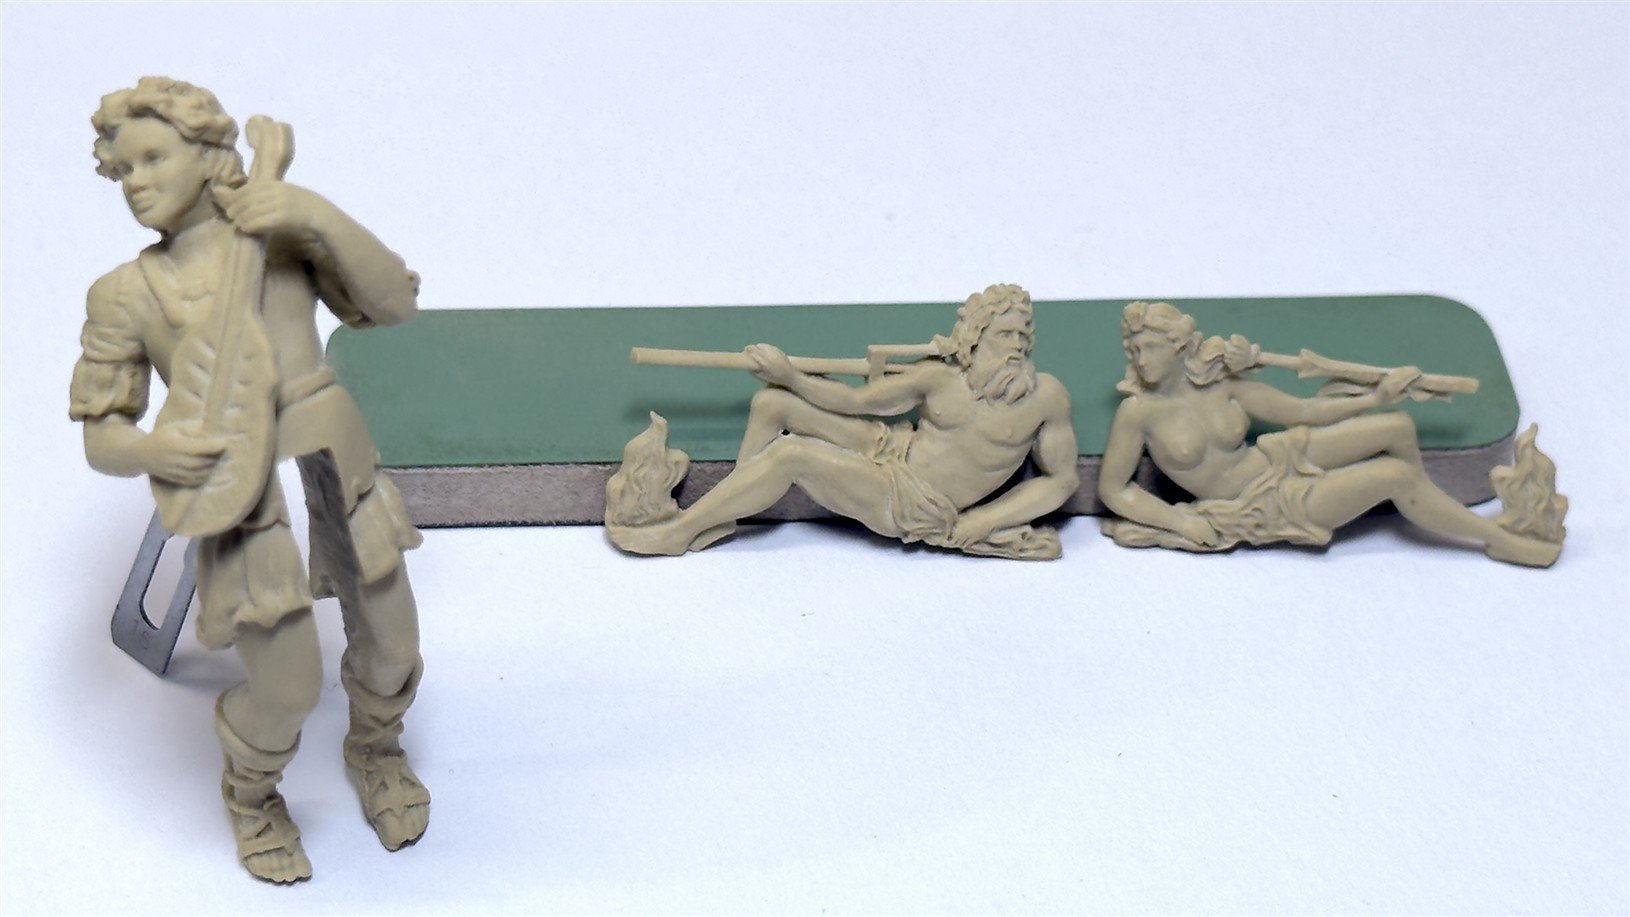
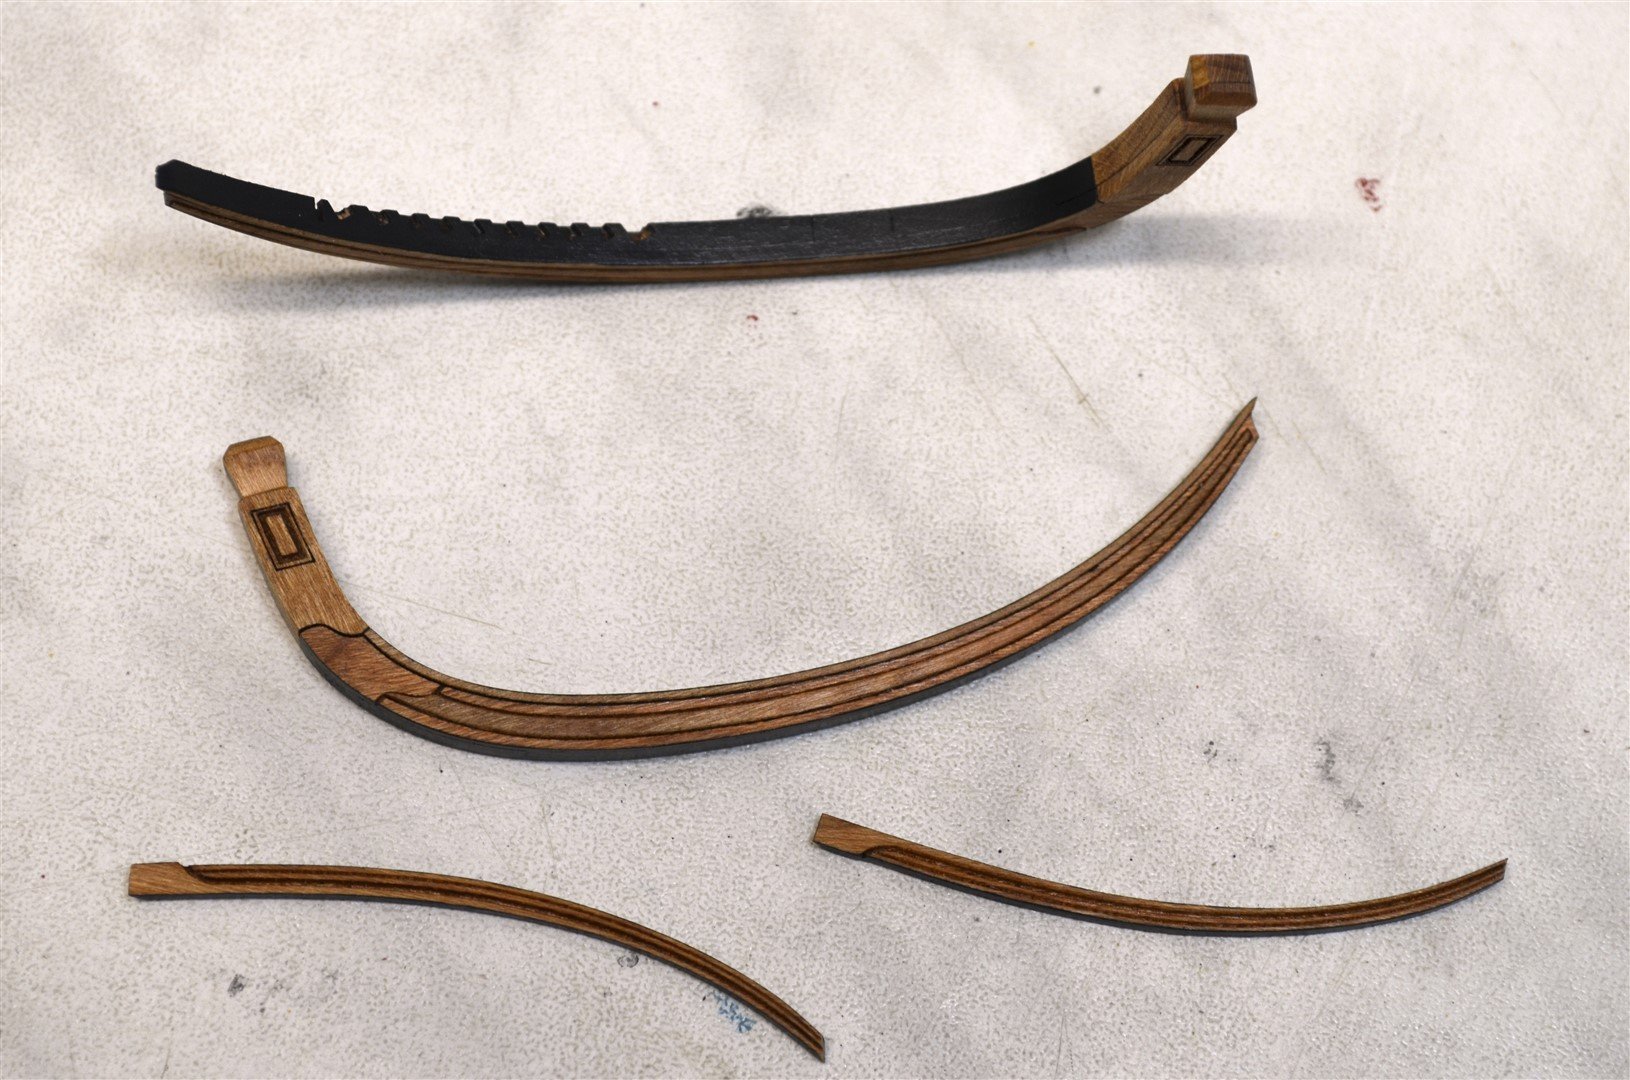
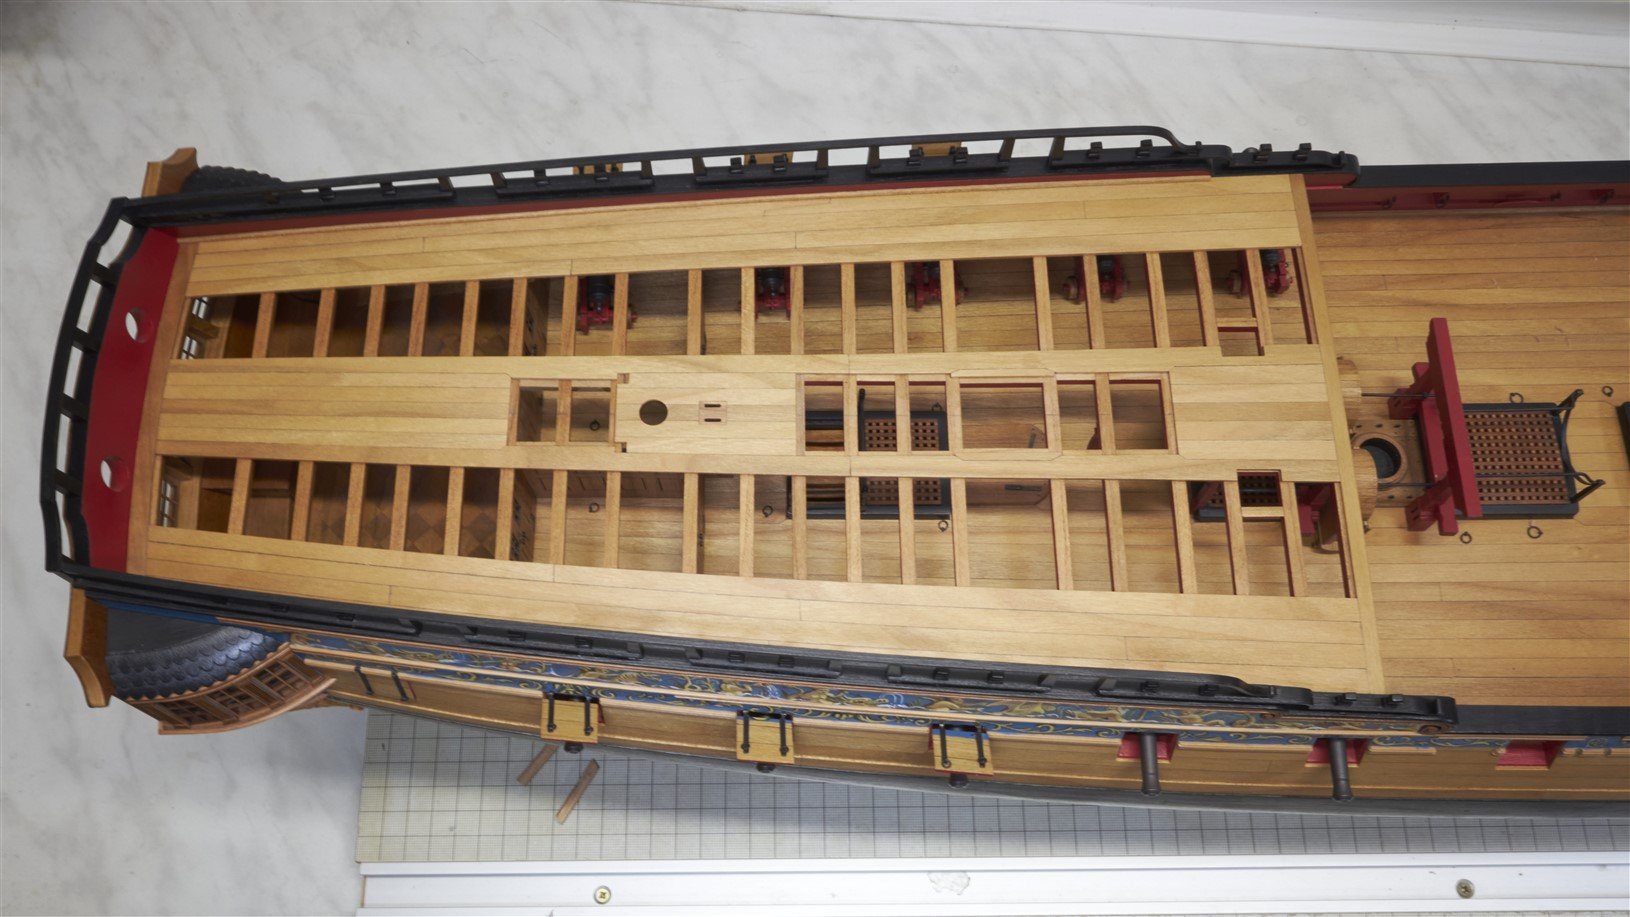
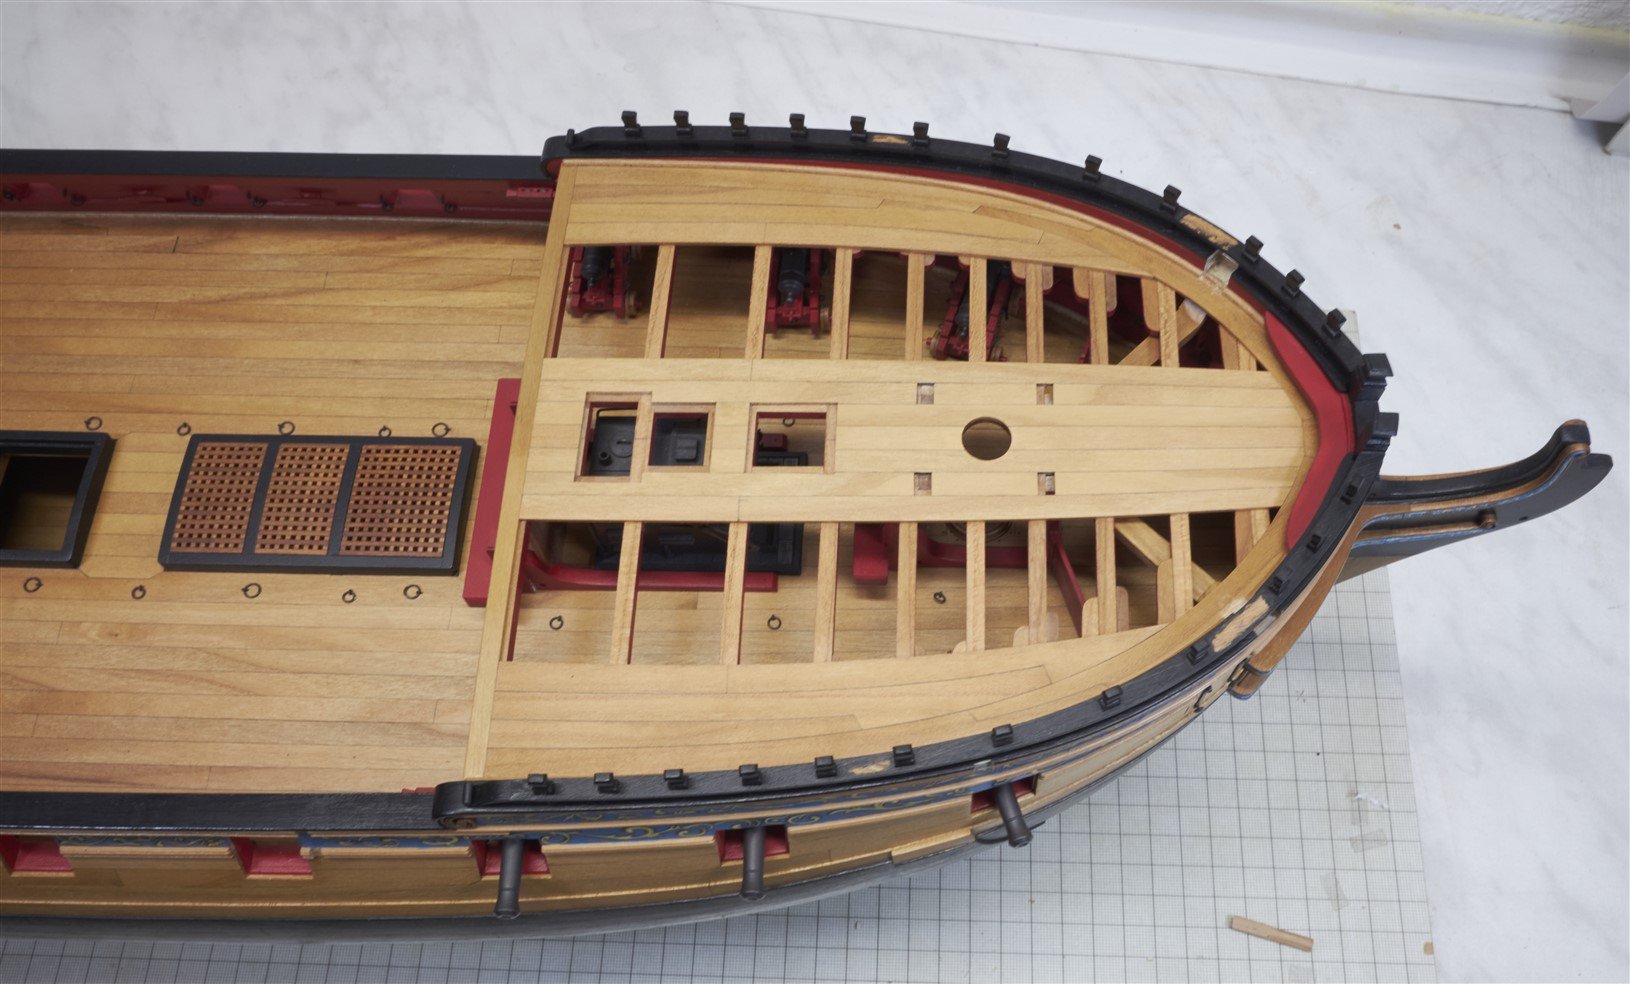
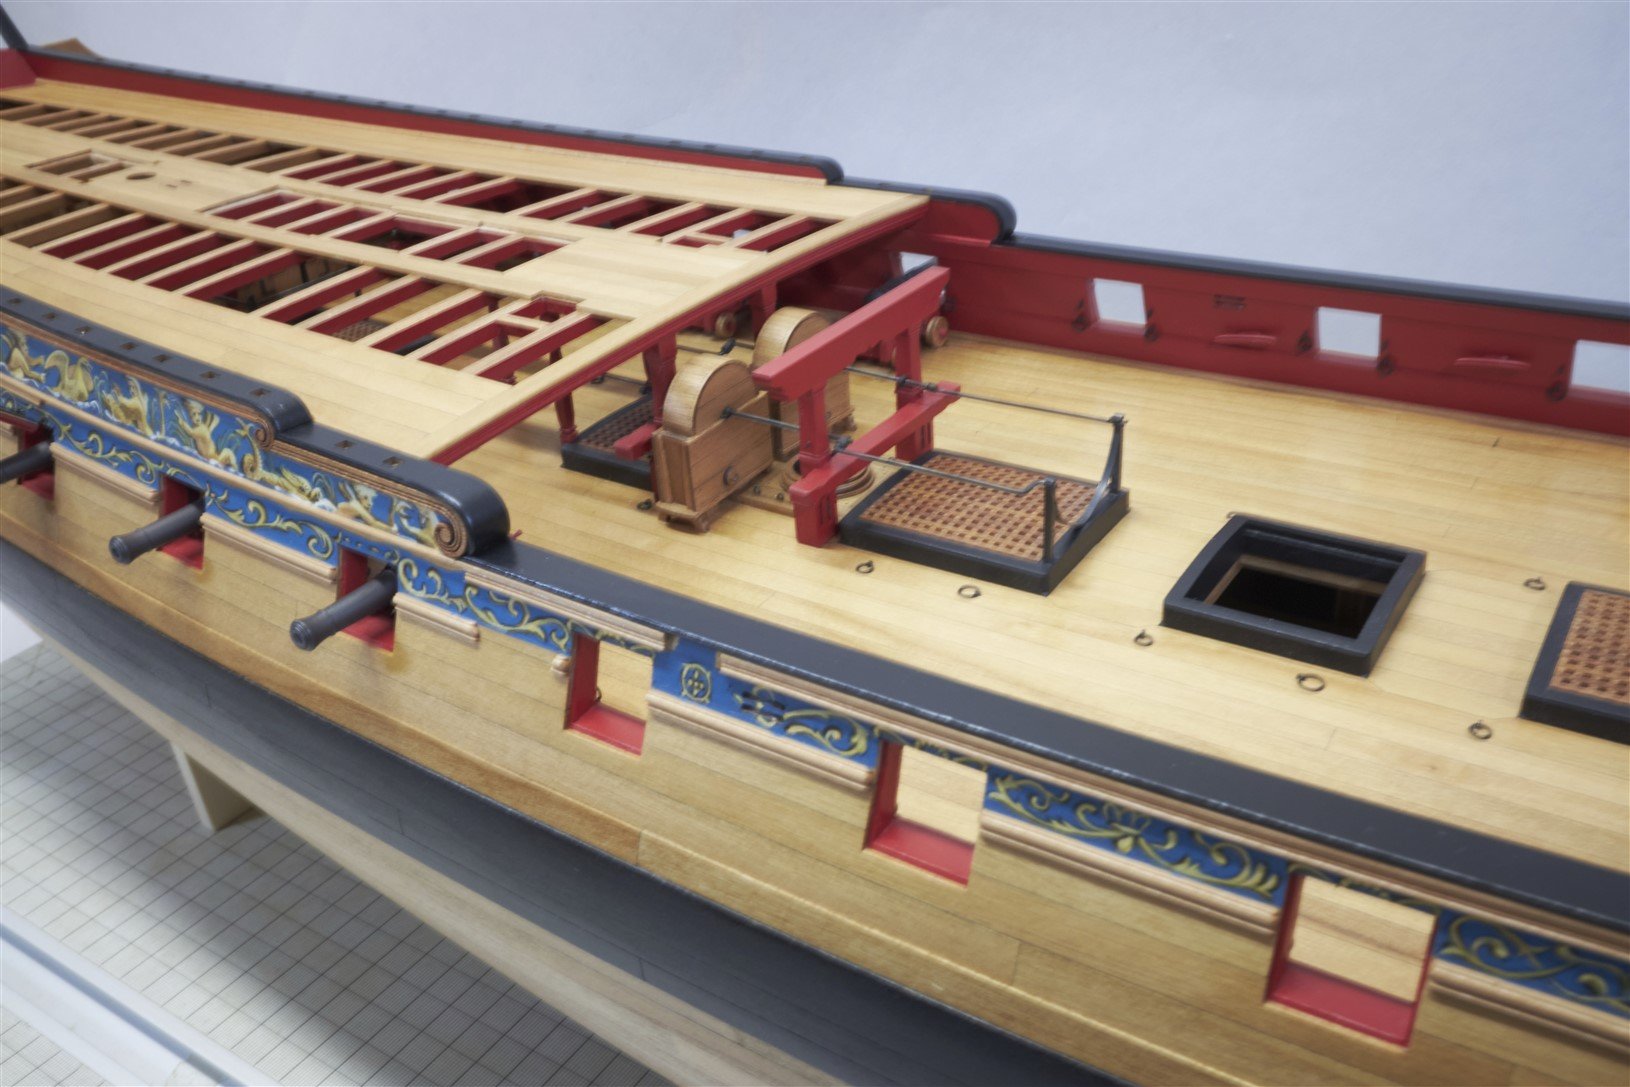
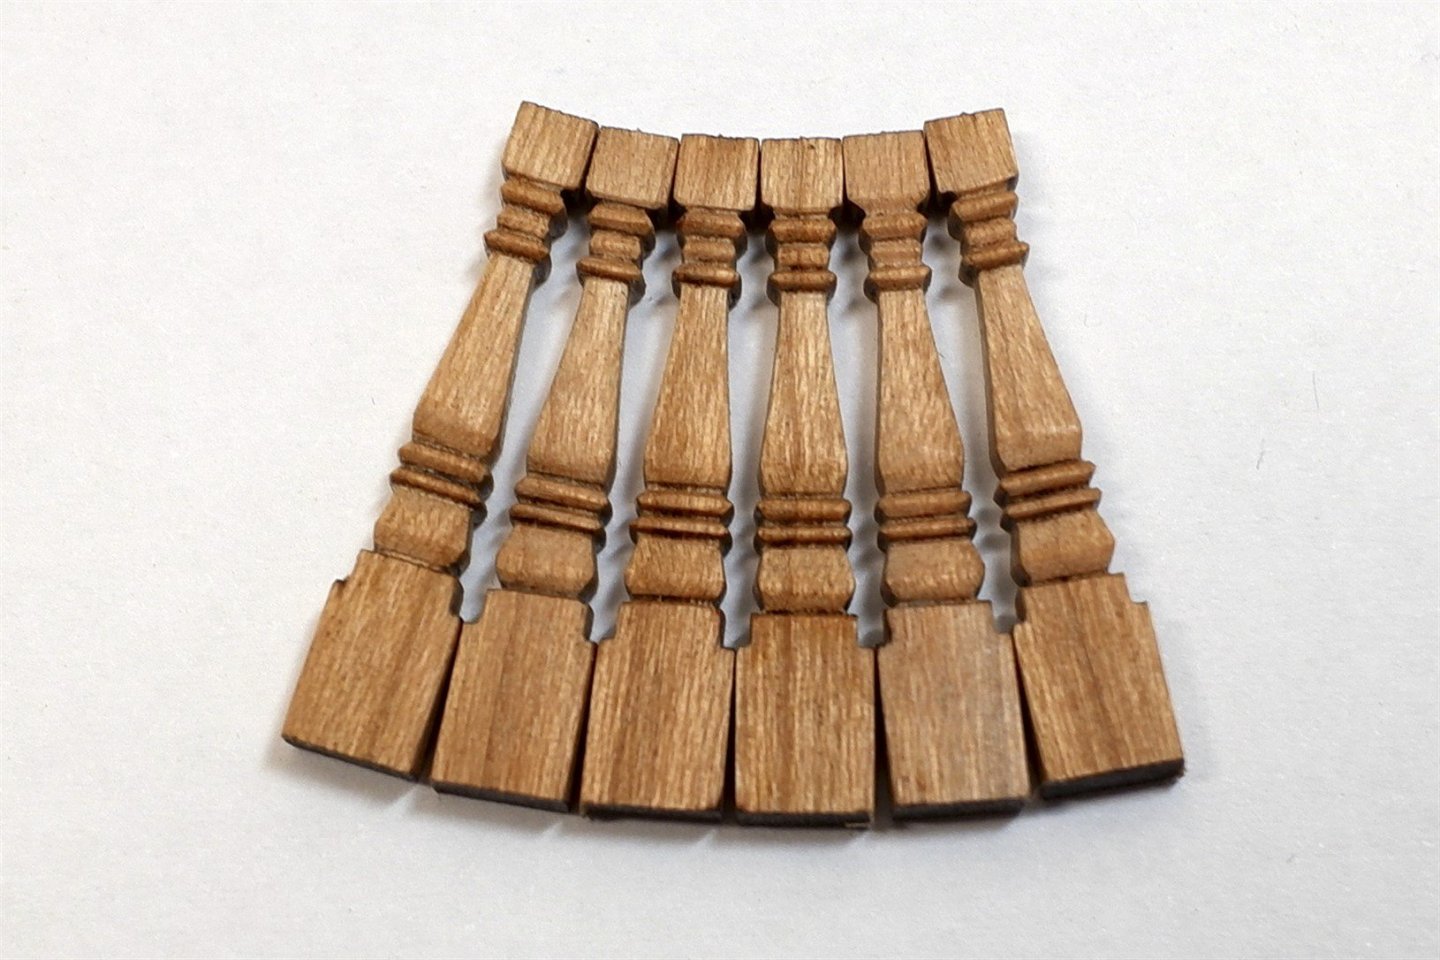
continued... I finished the fancy roof rail qgallery and I started to place the carvings and fittings for the Qdeck…


-
This looks amazing, Matthias. You are a master carver!
-
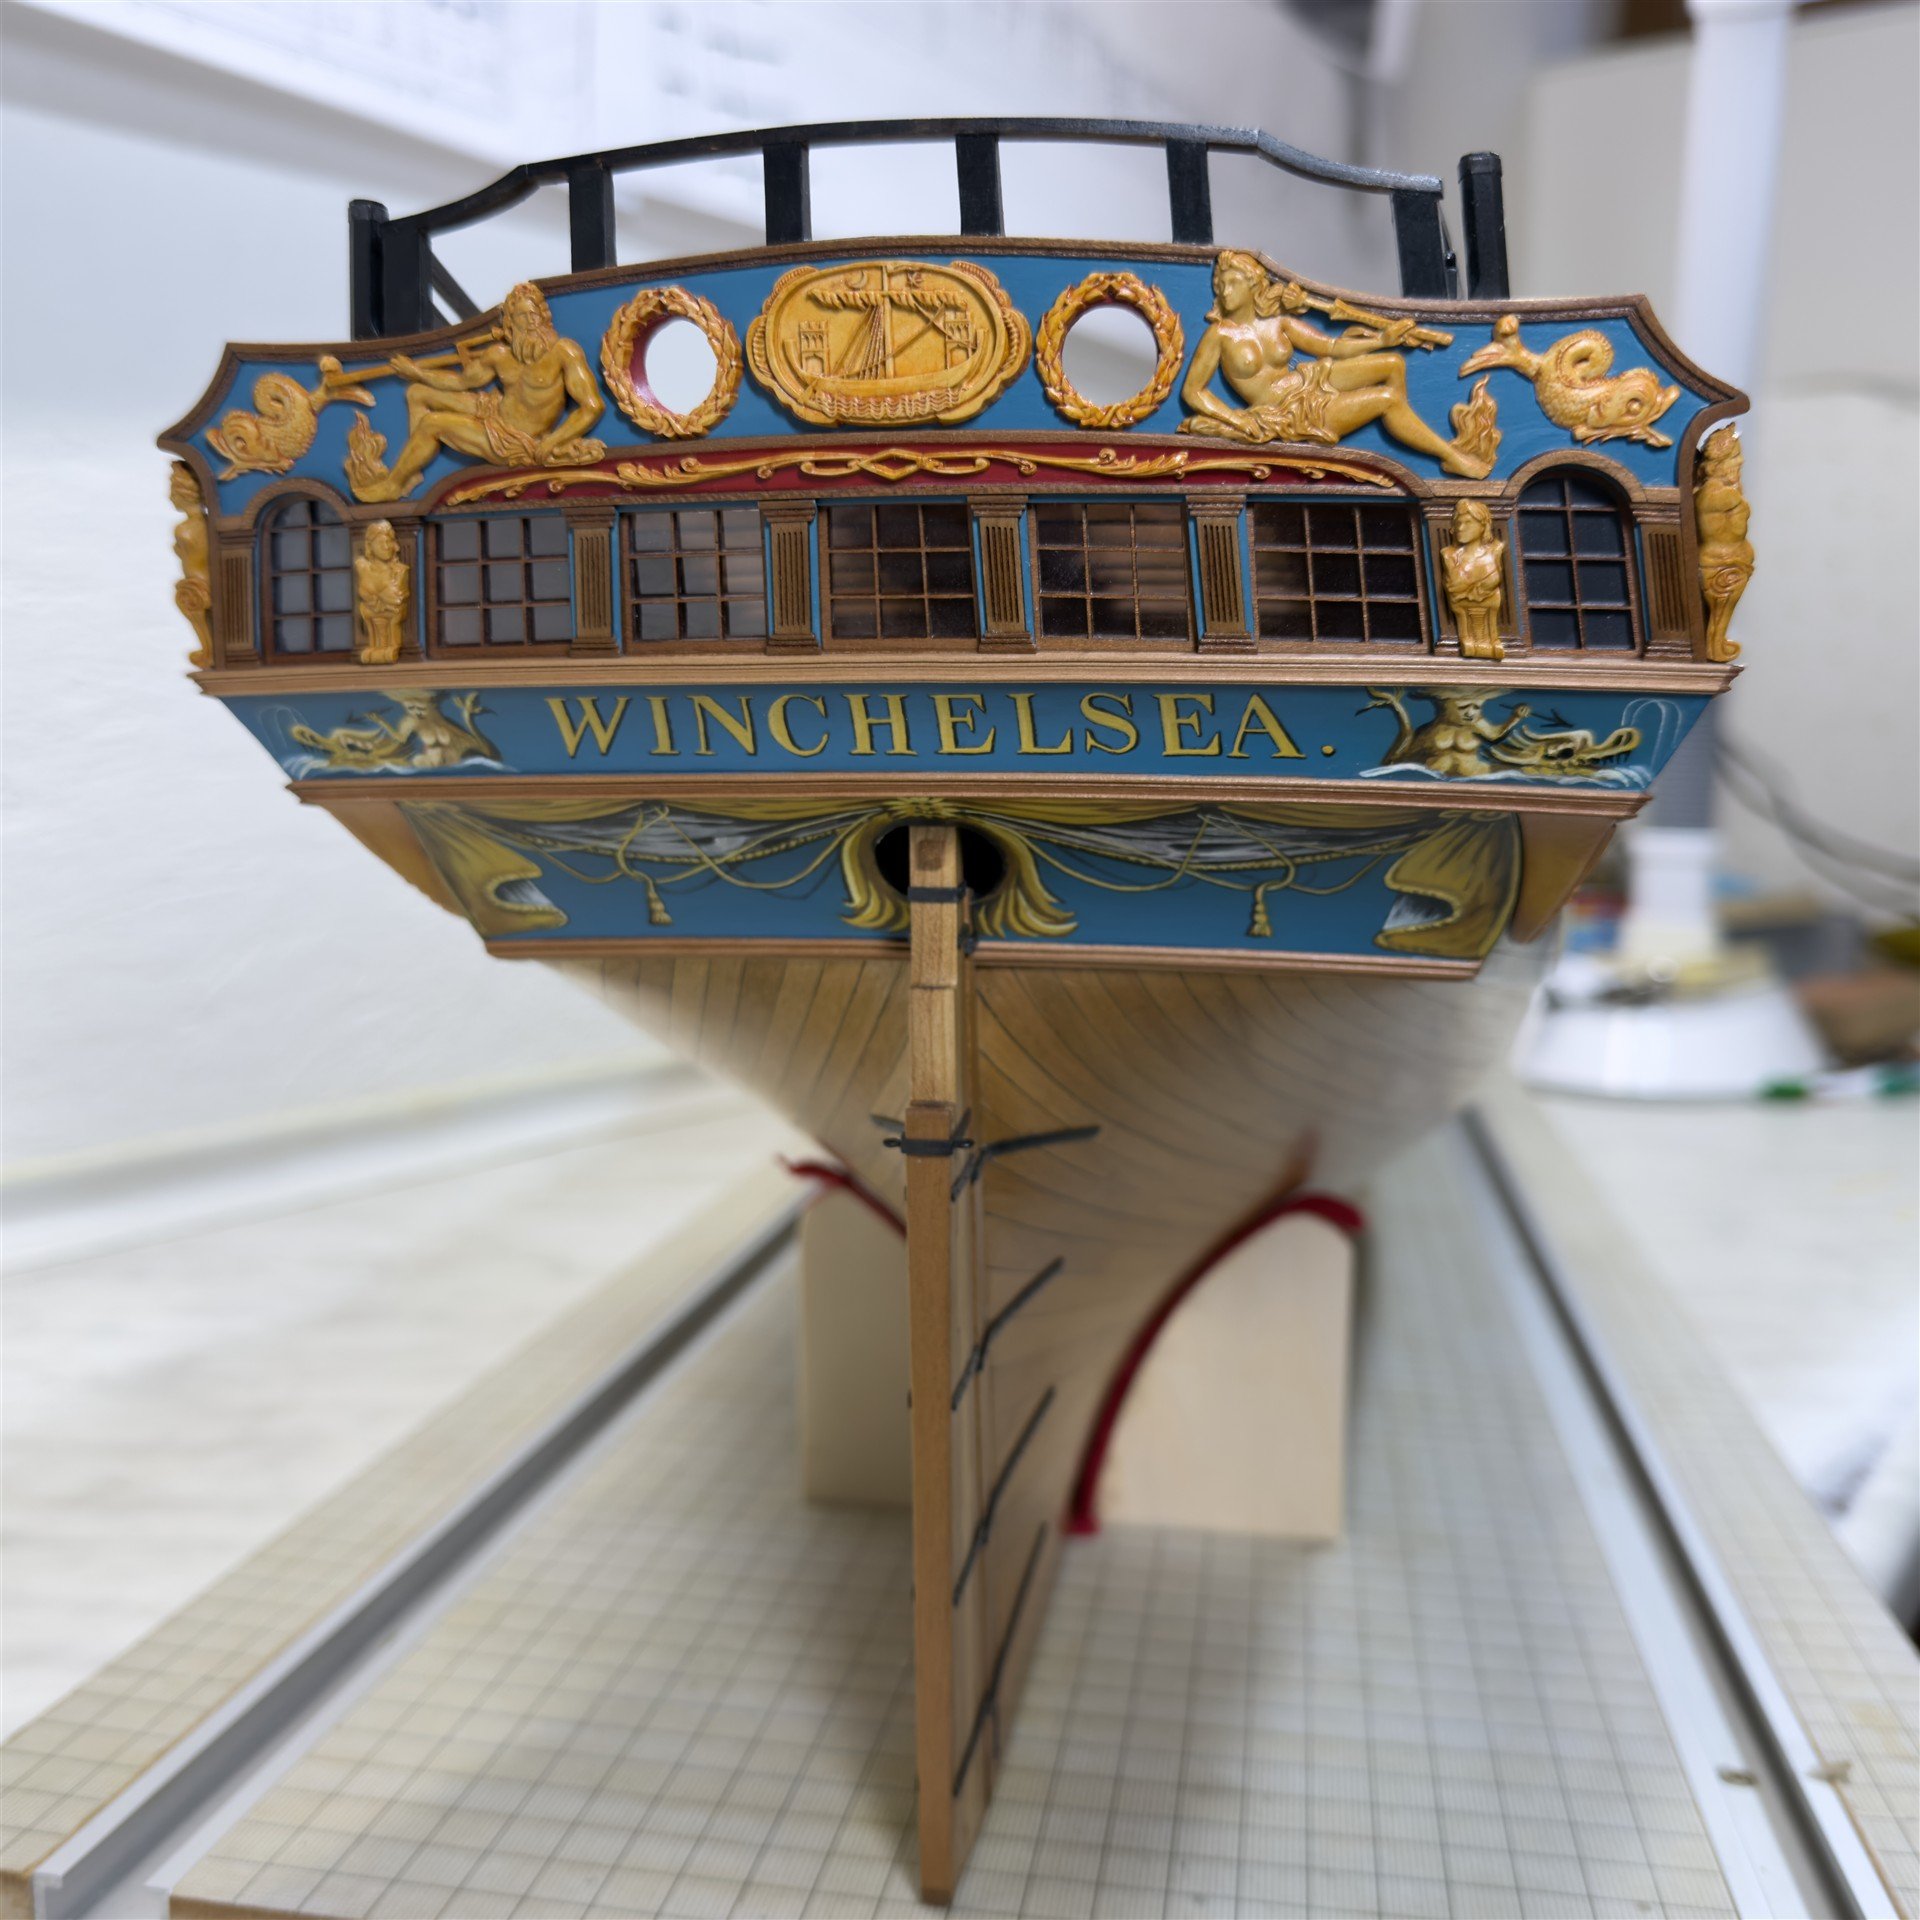
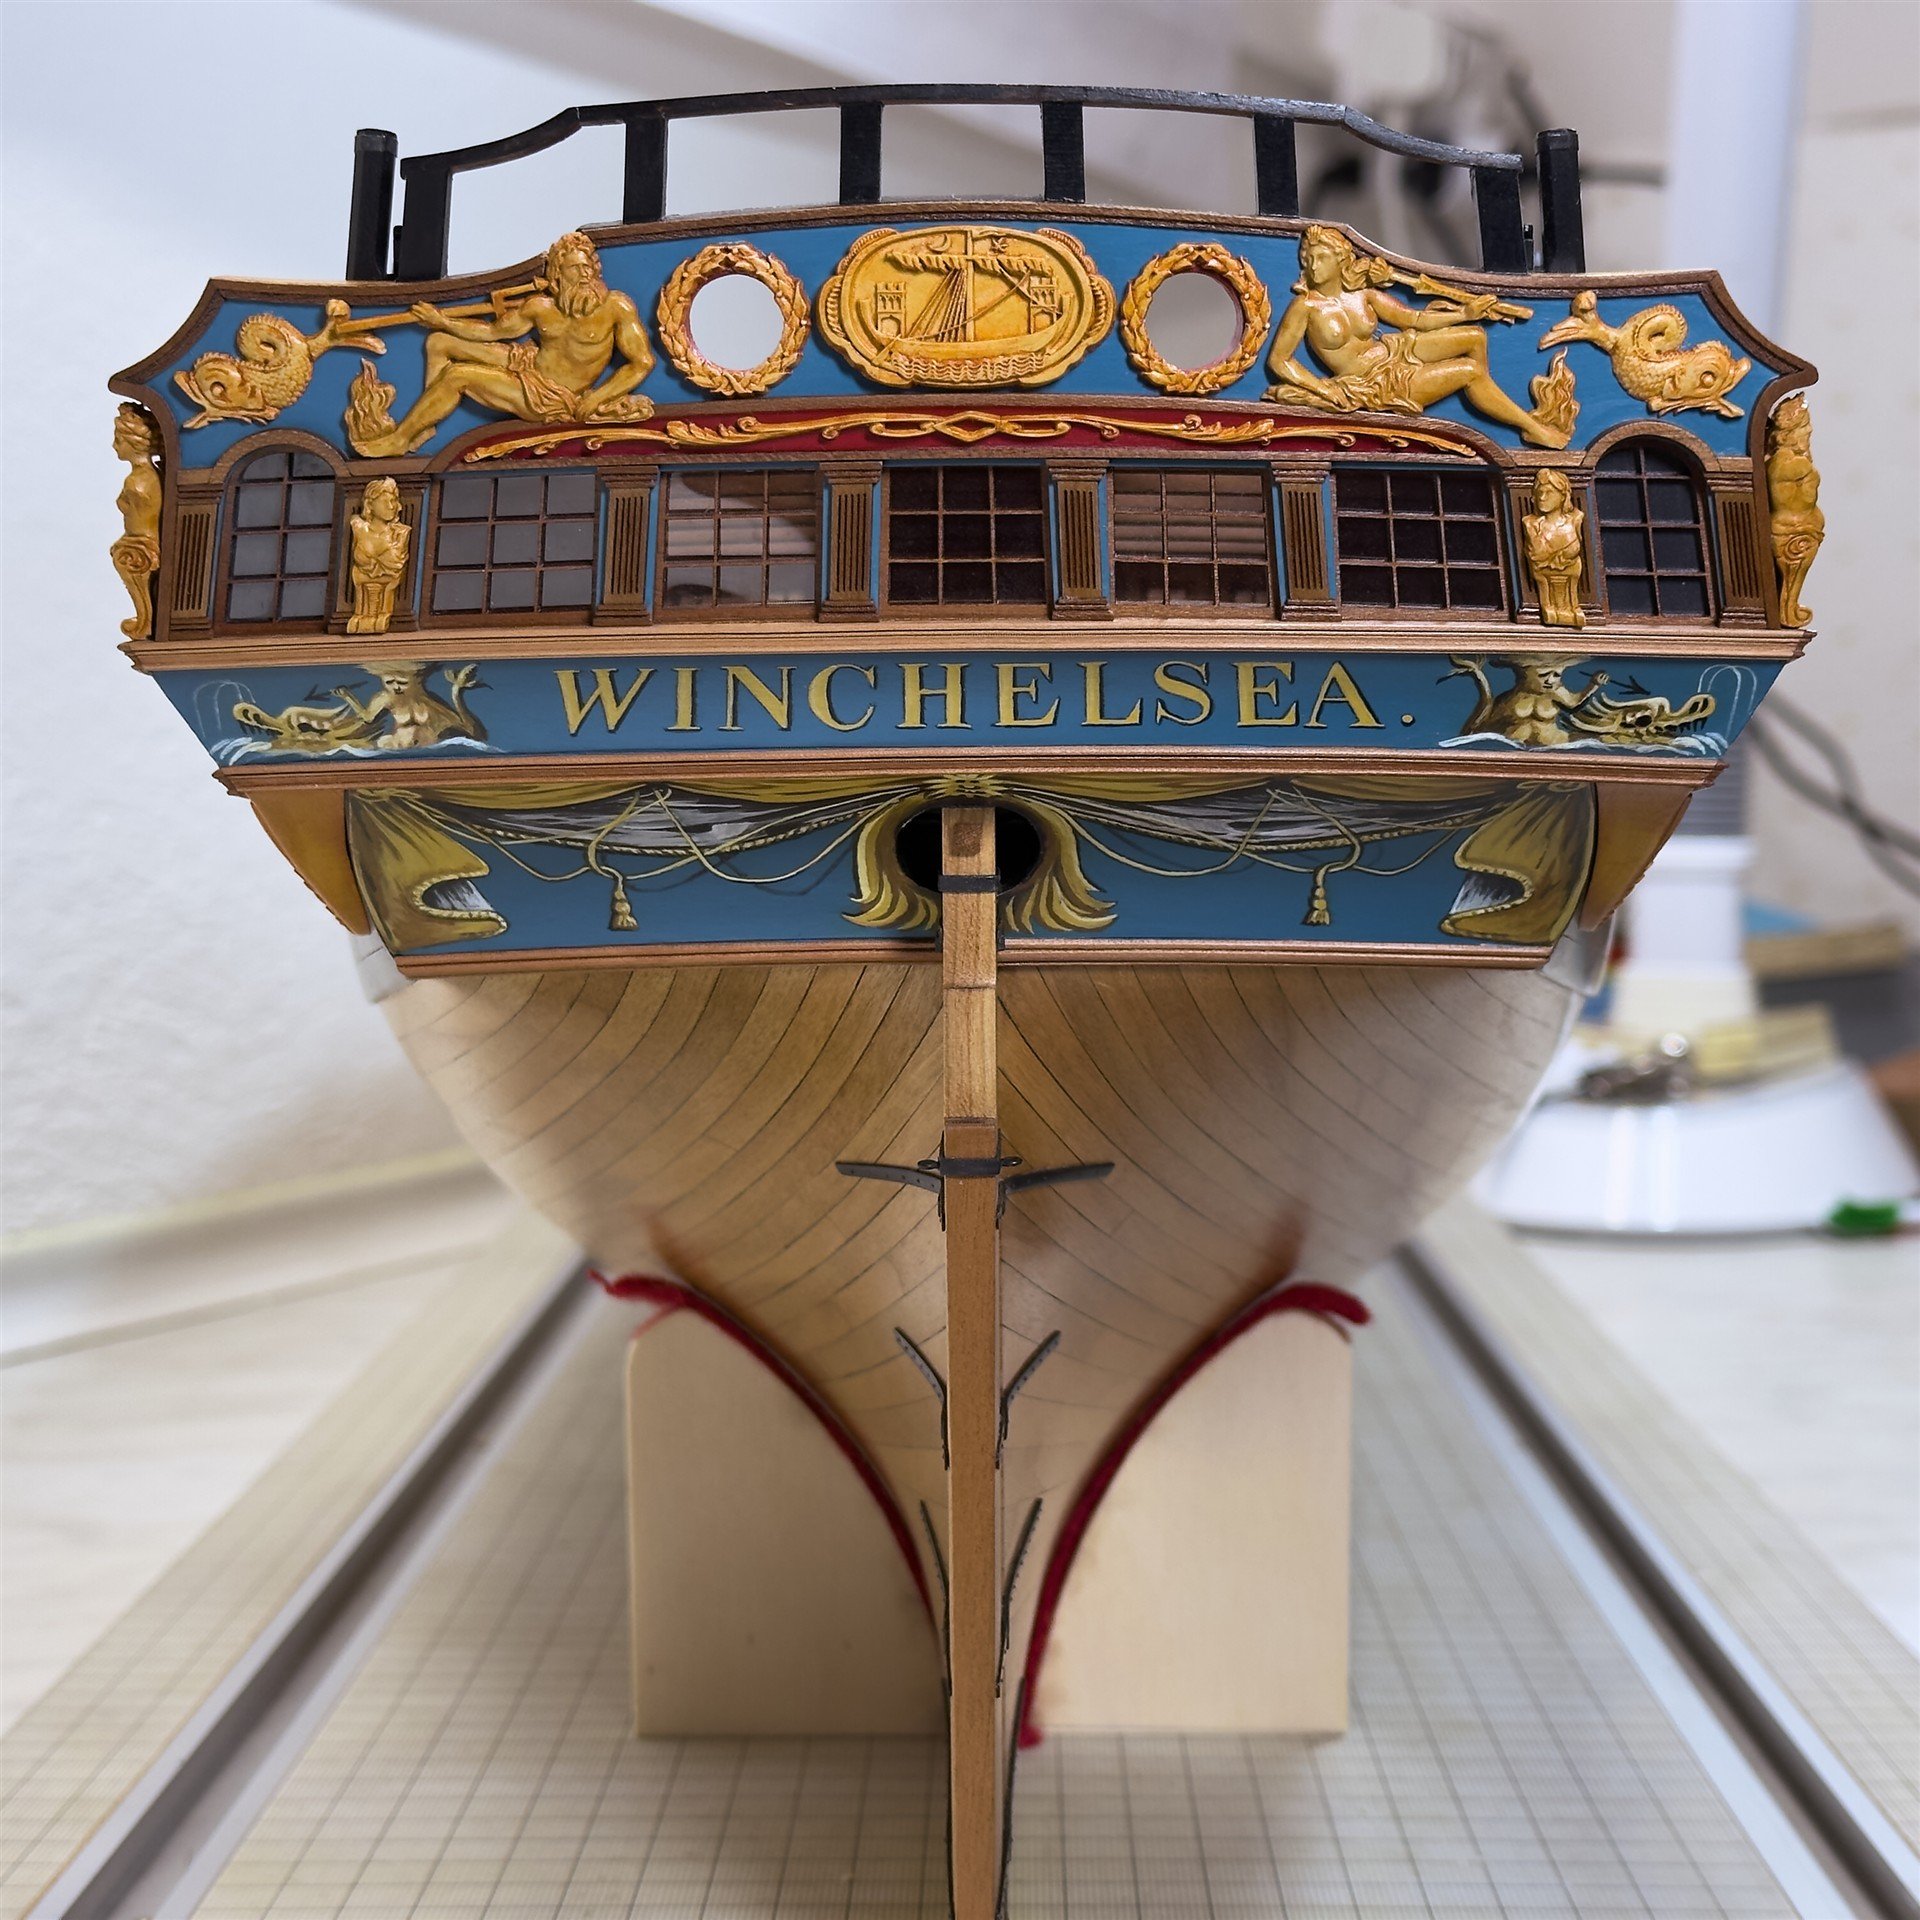
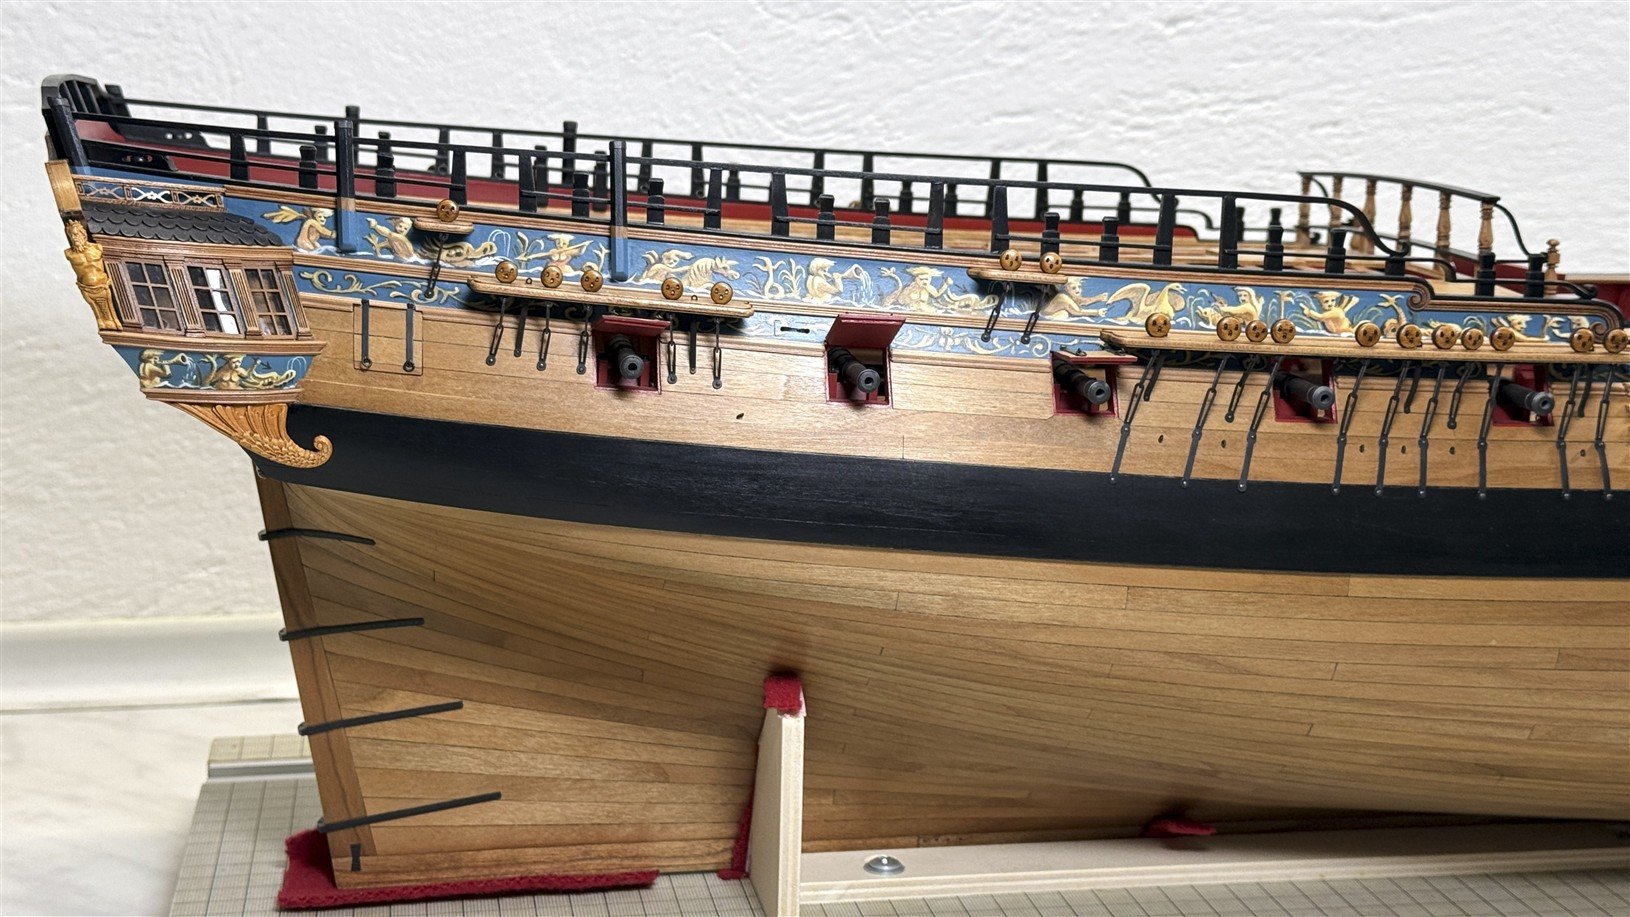
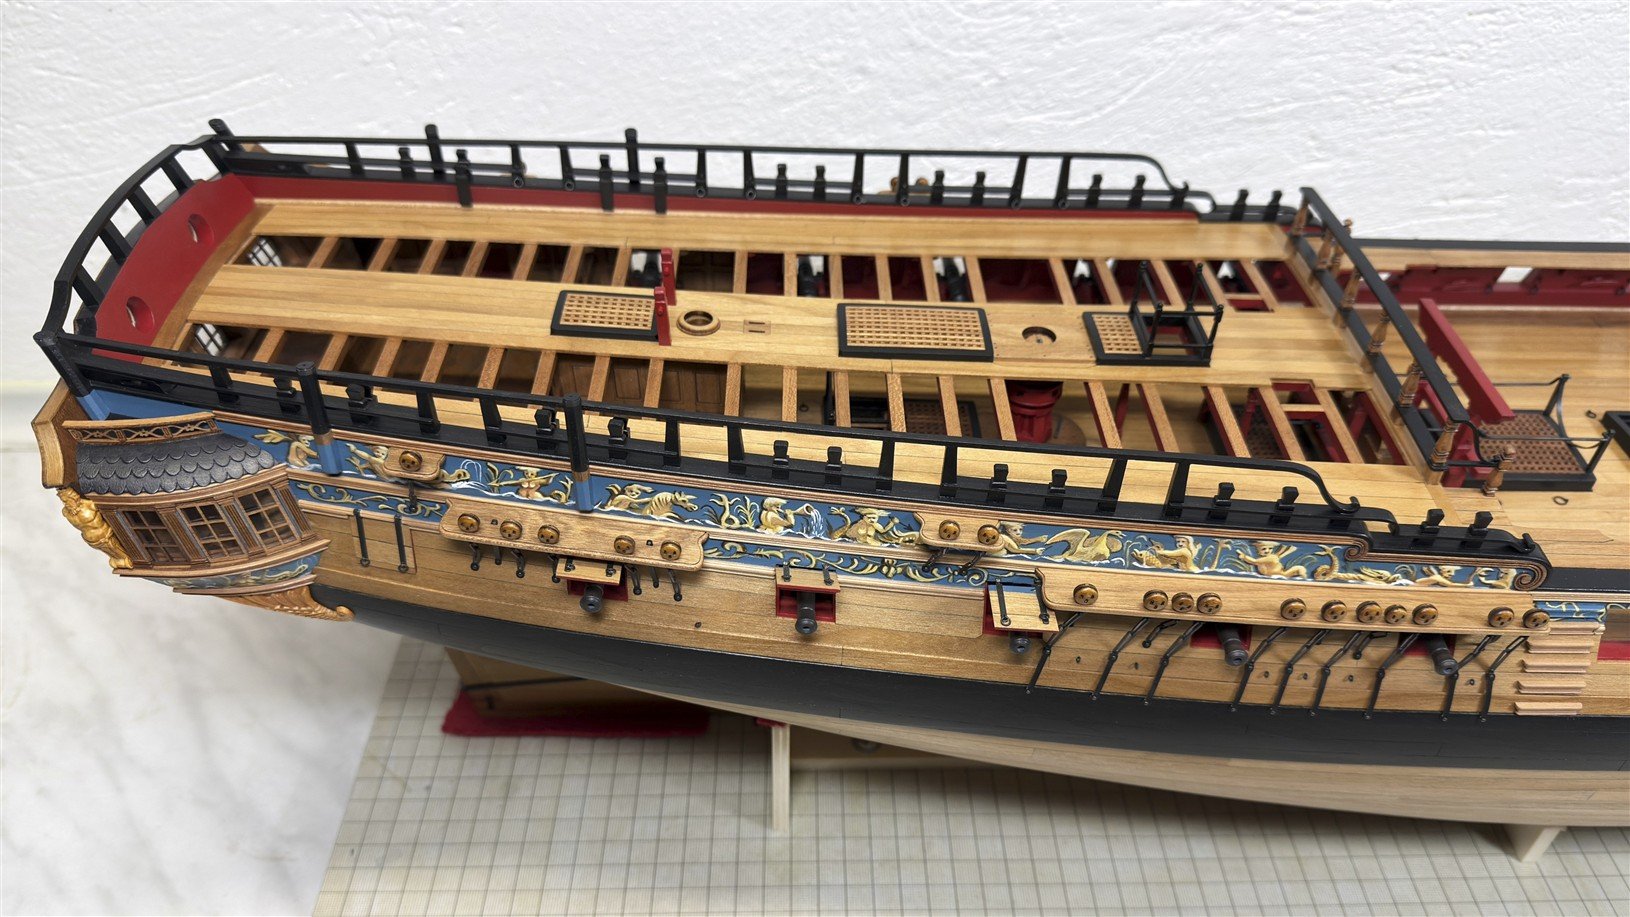
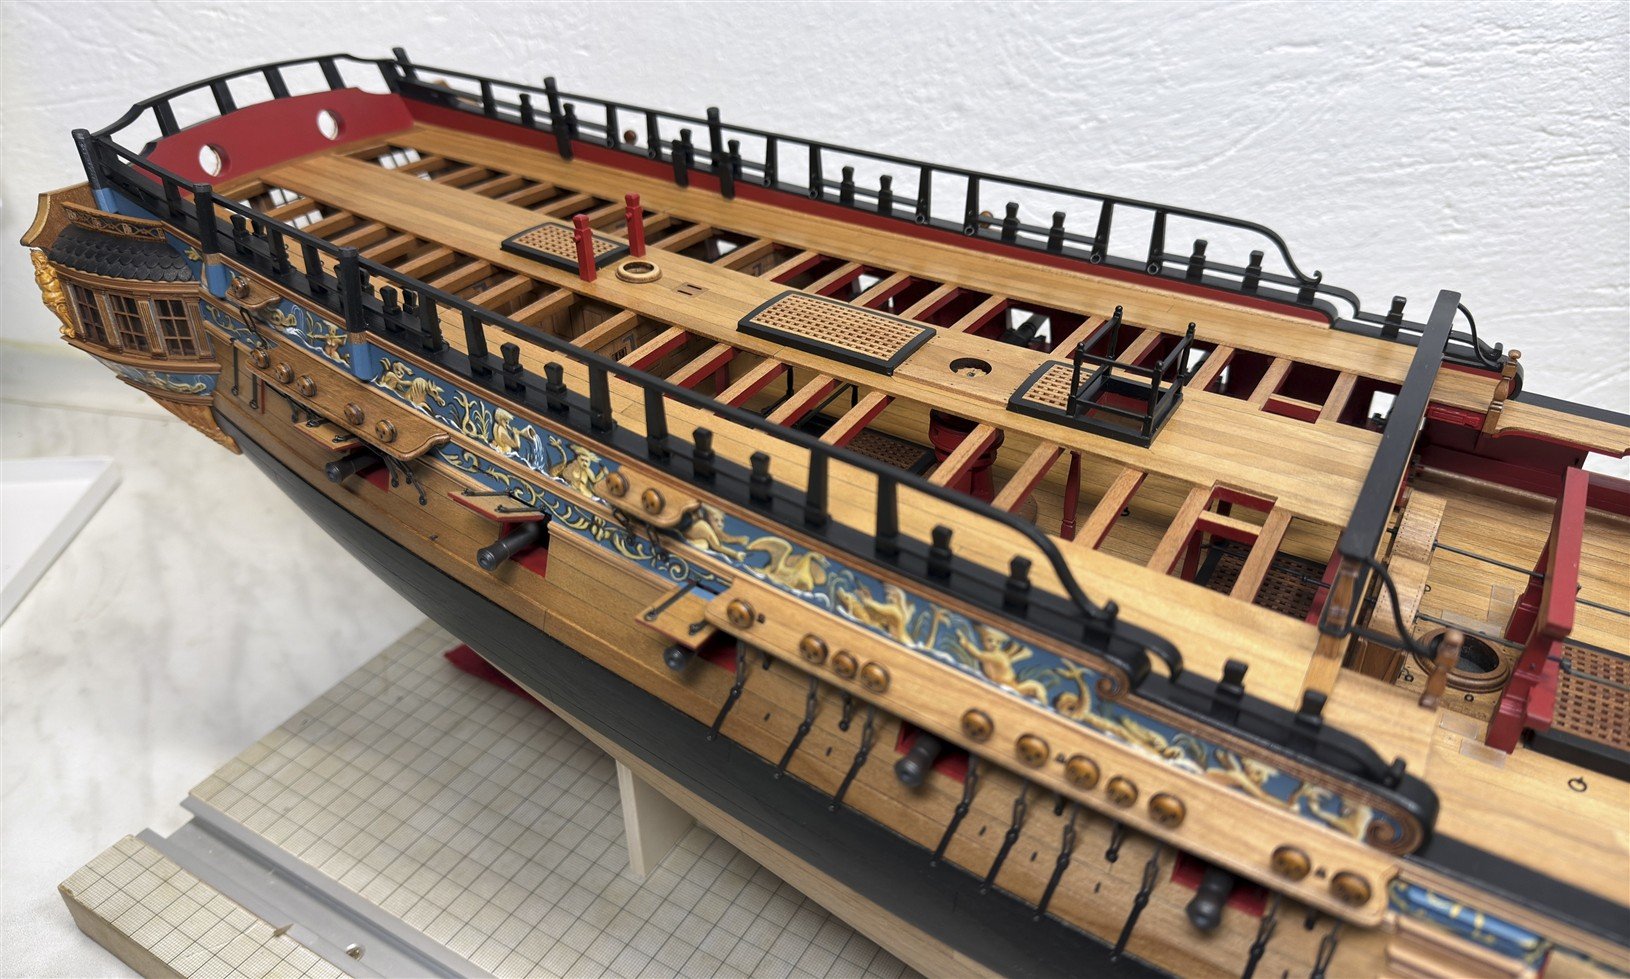
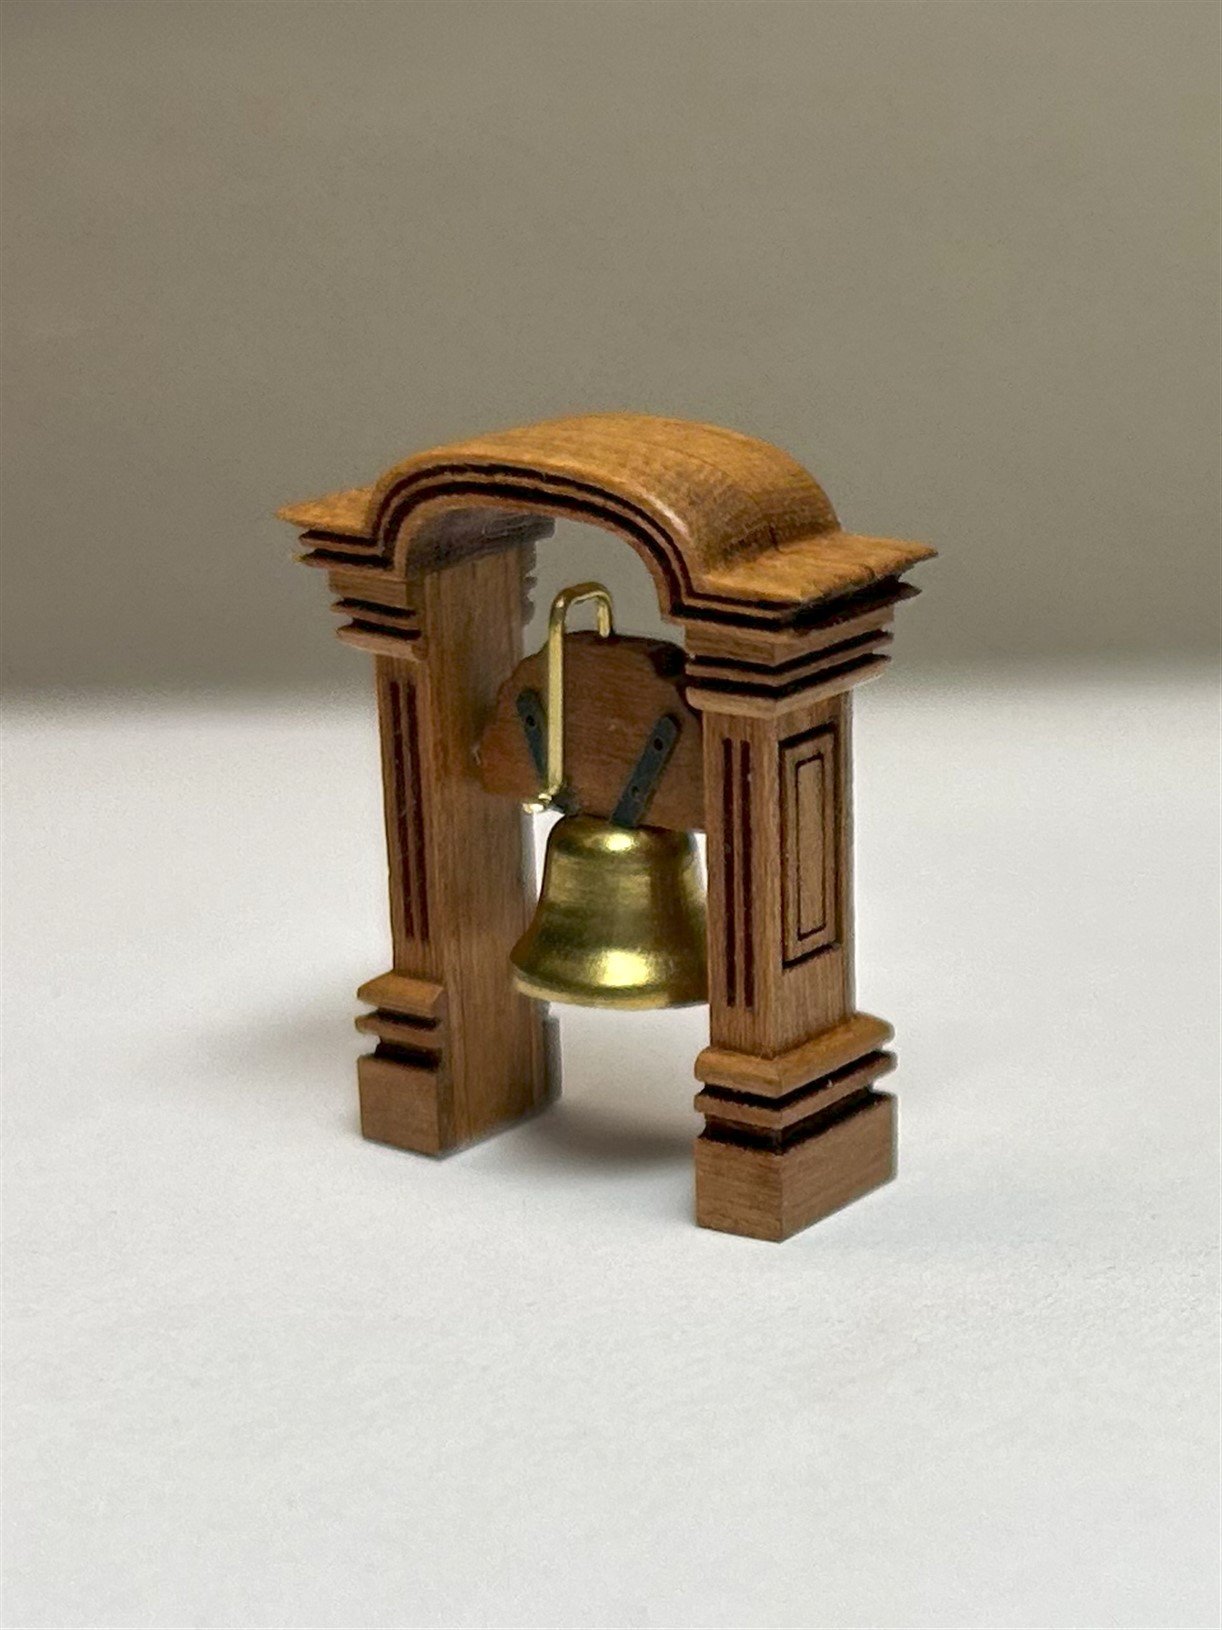
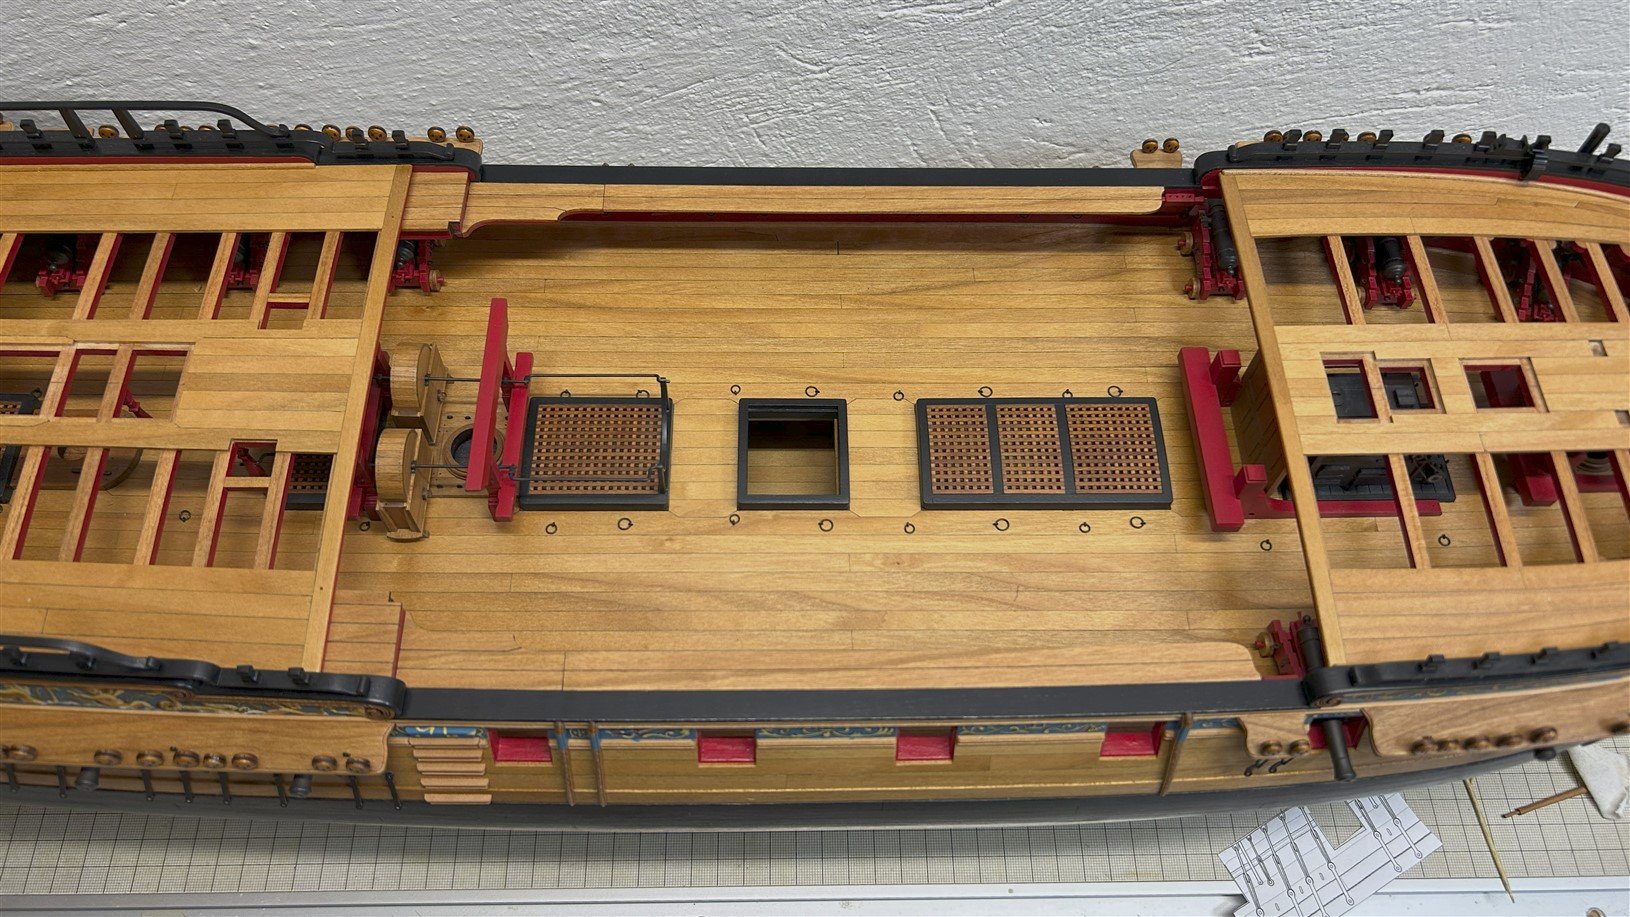
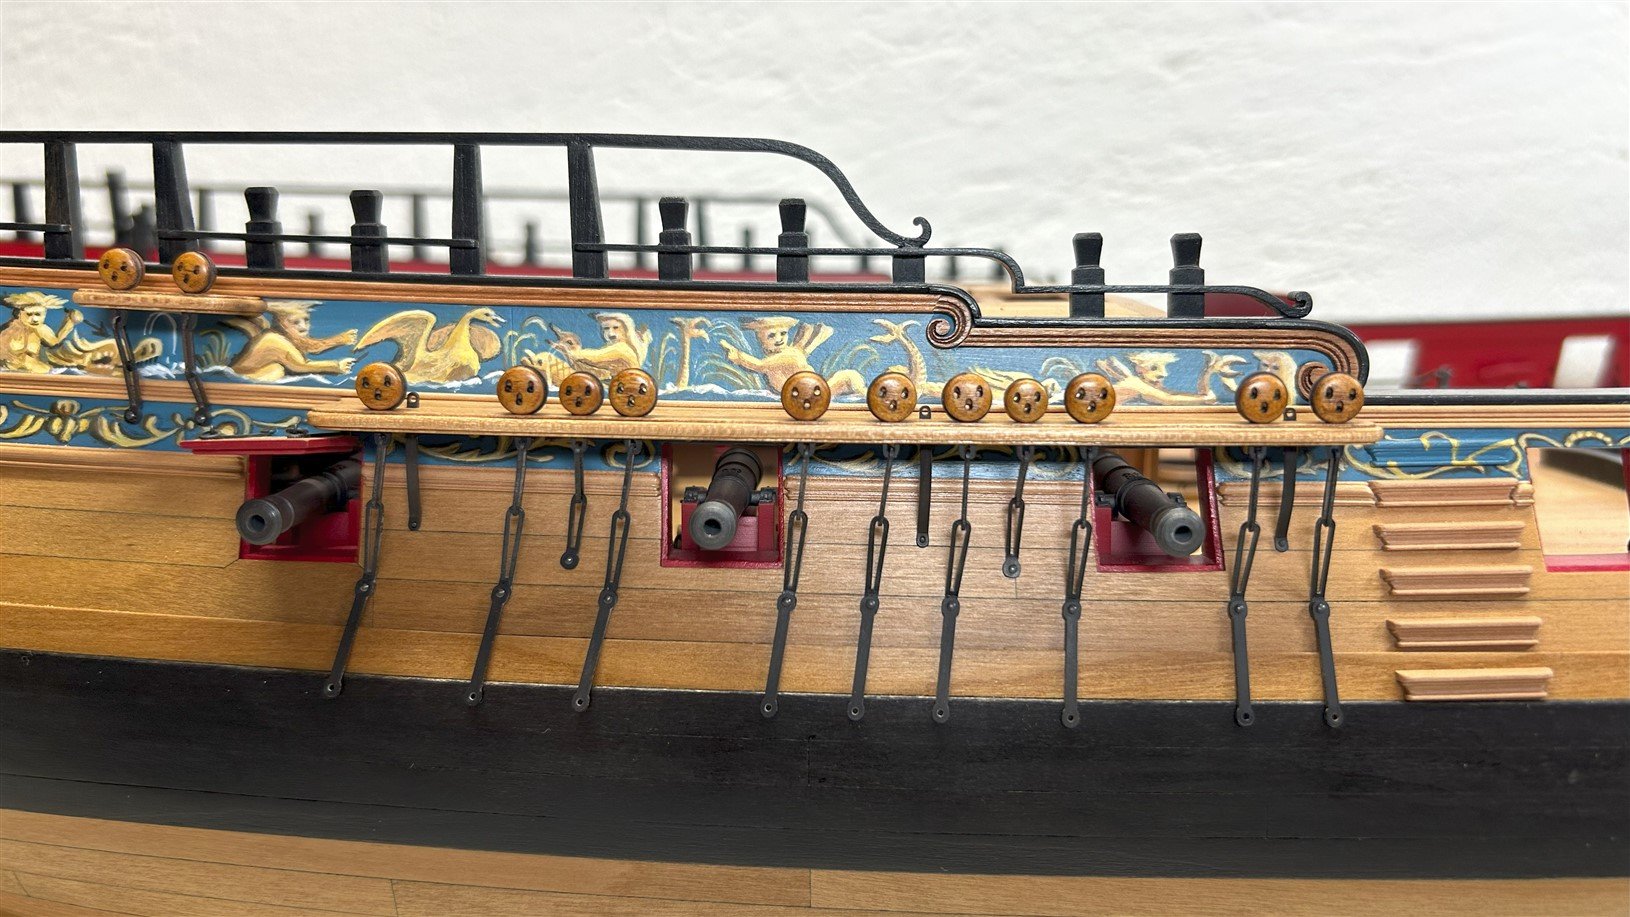
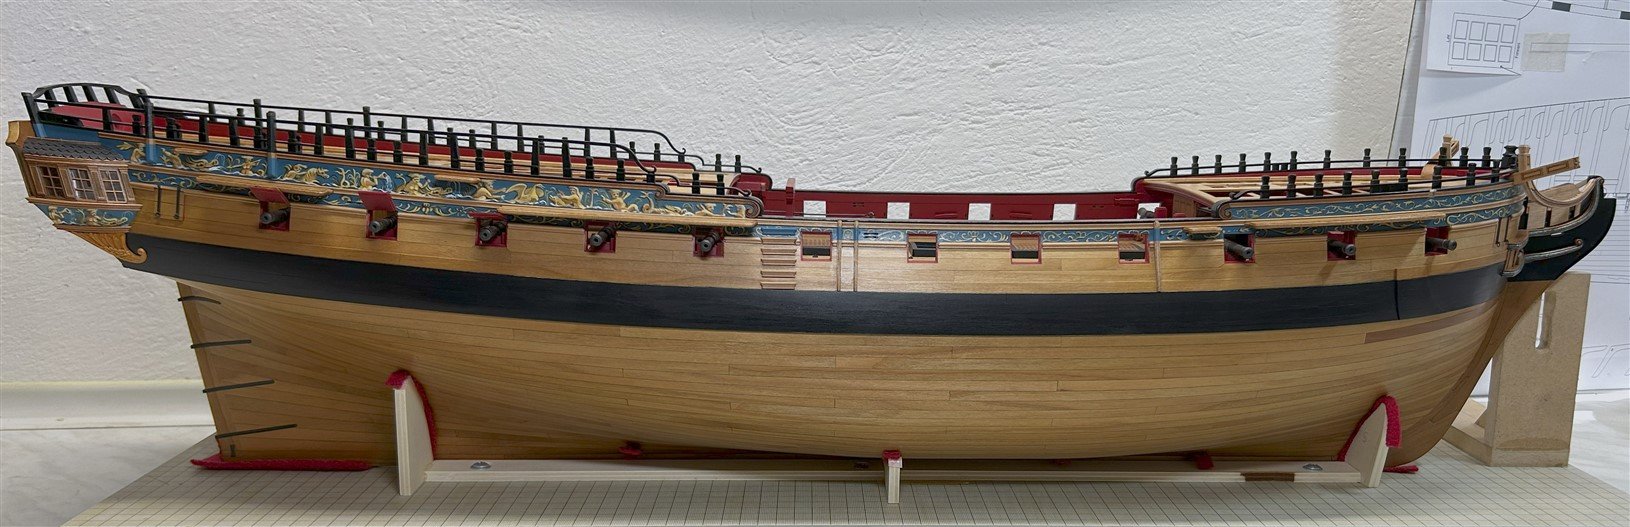
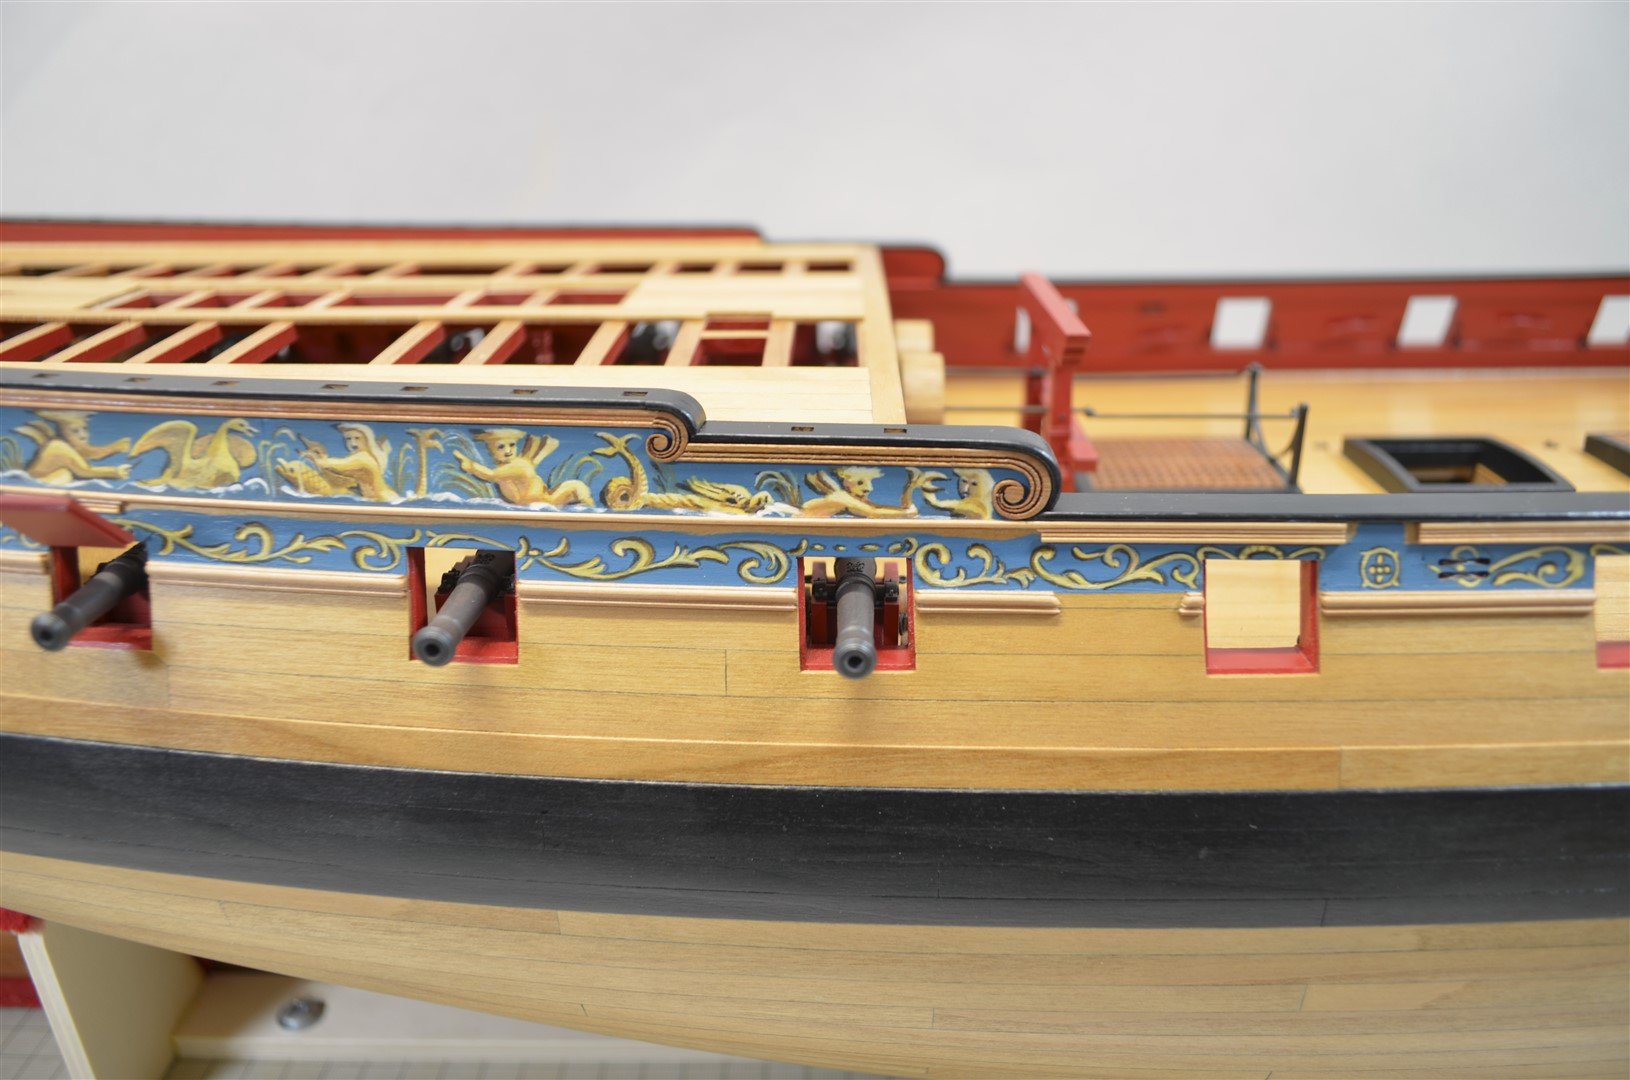
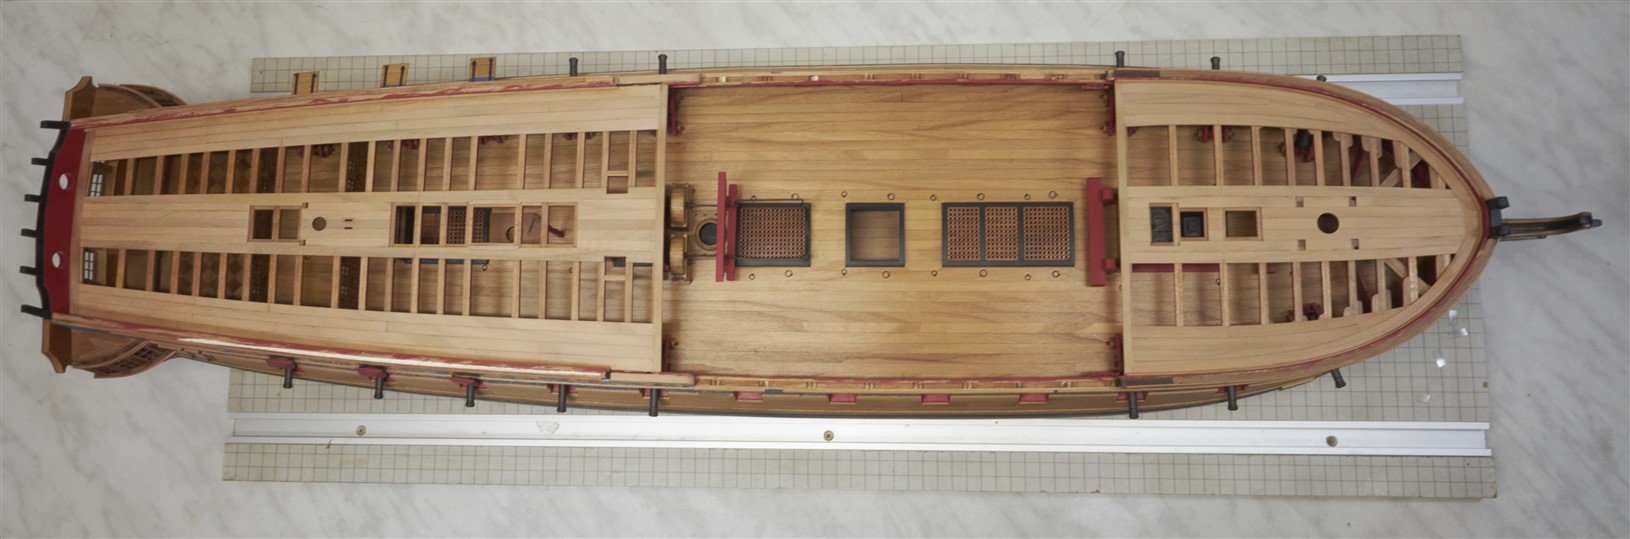
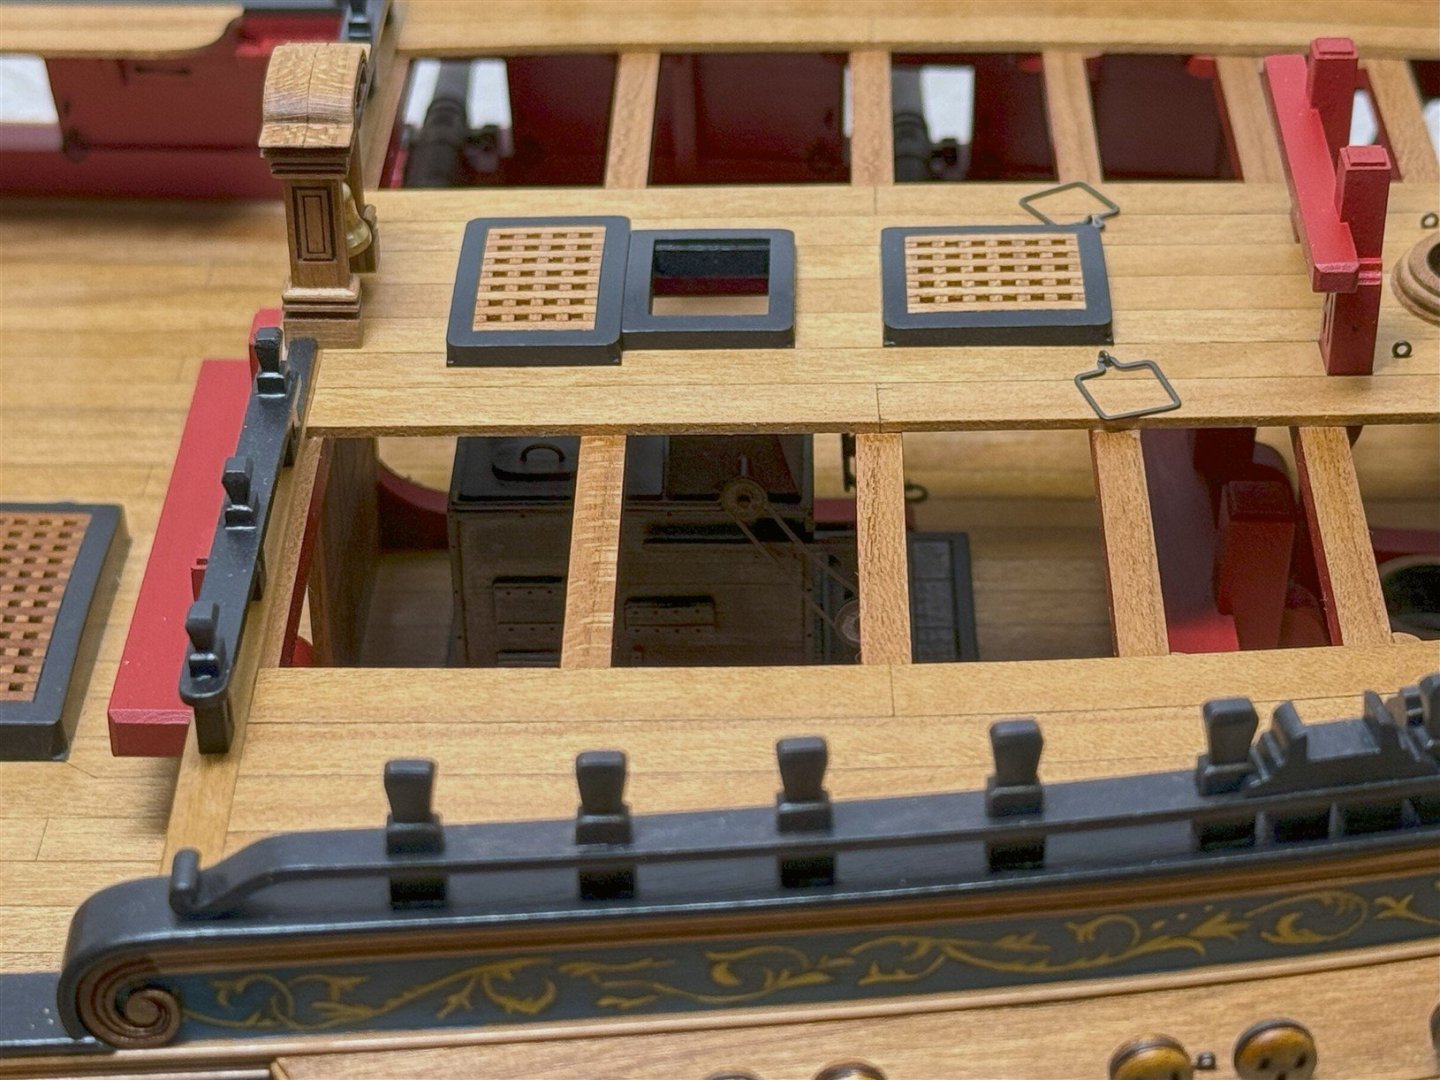
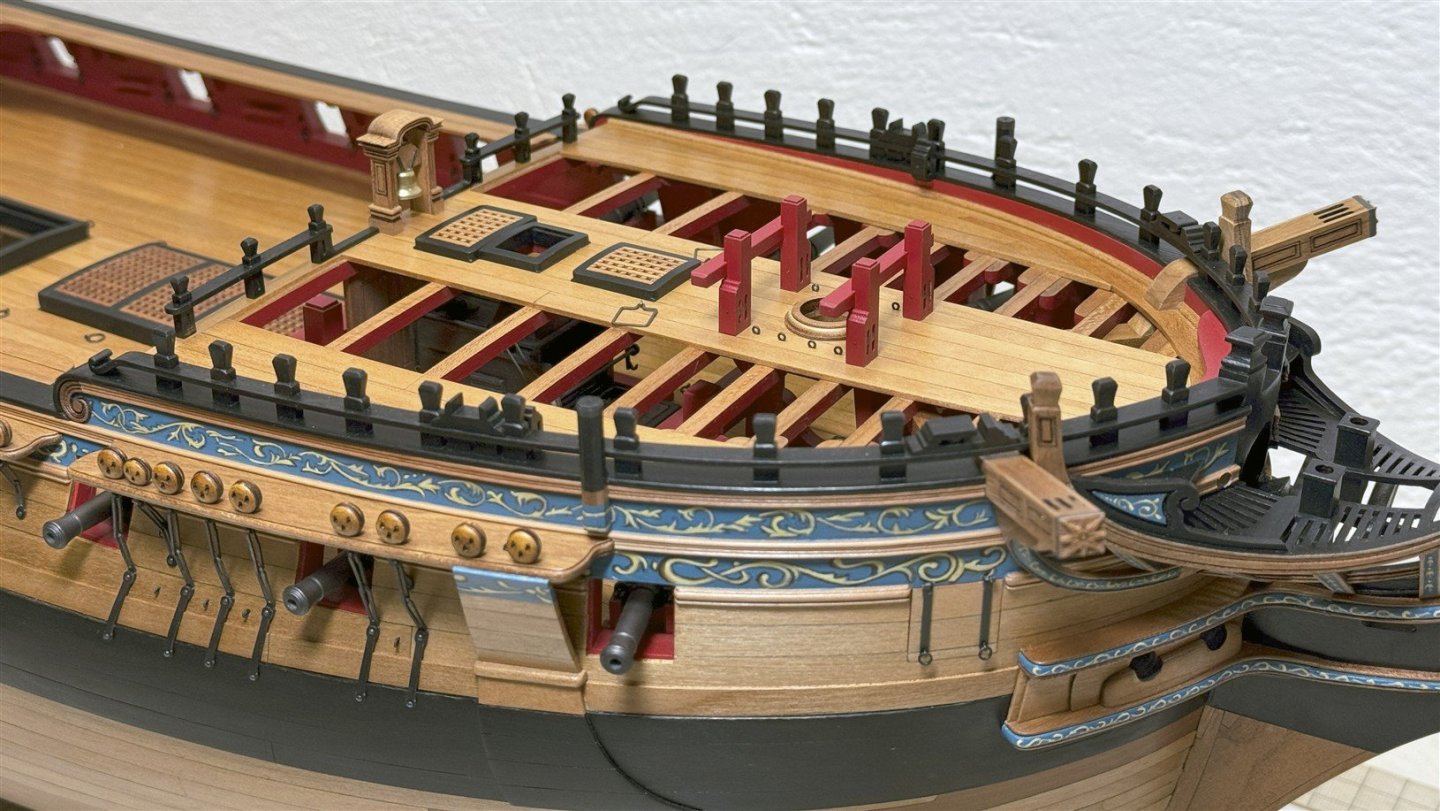
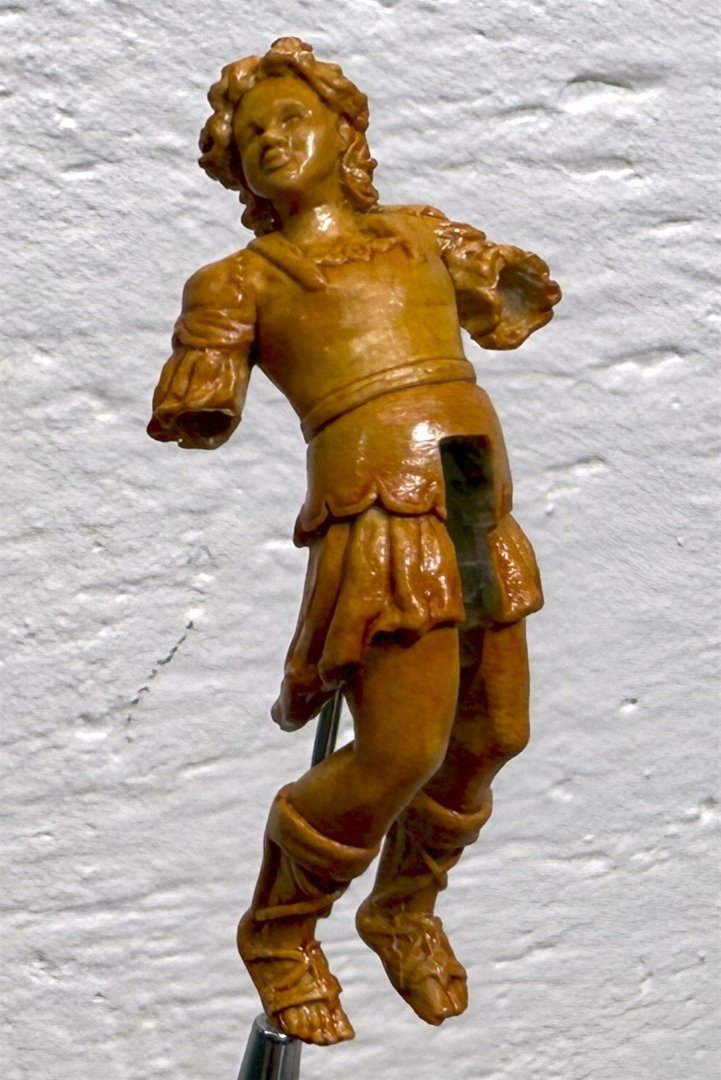
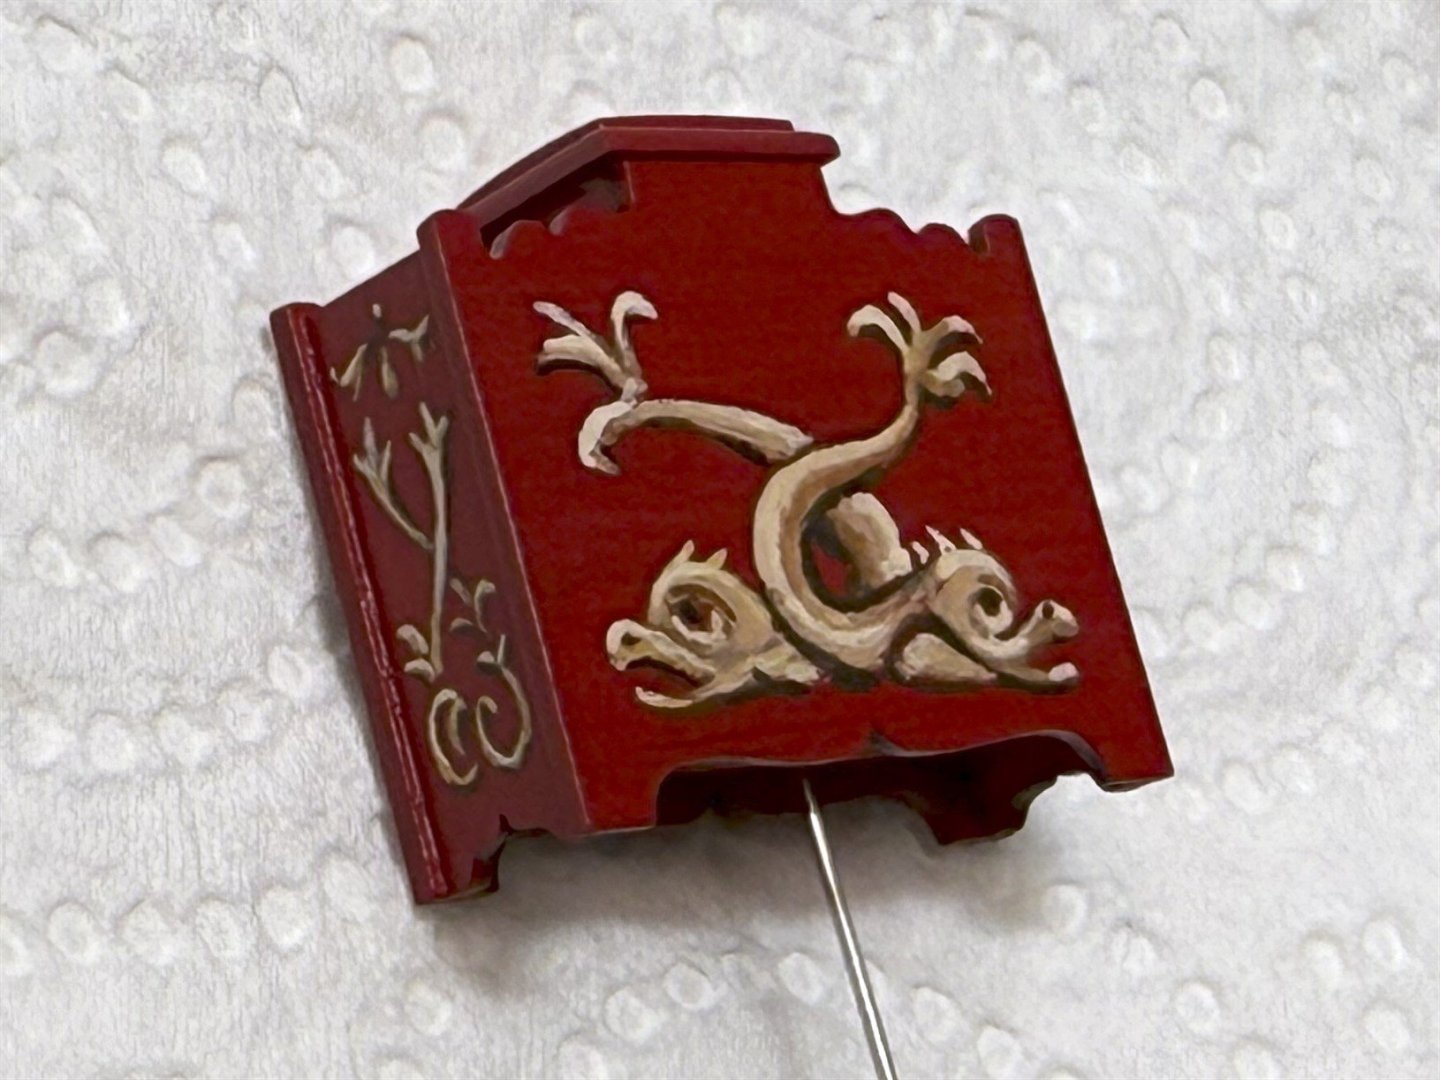
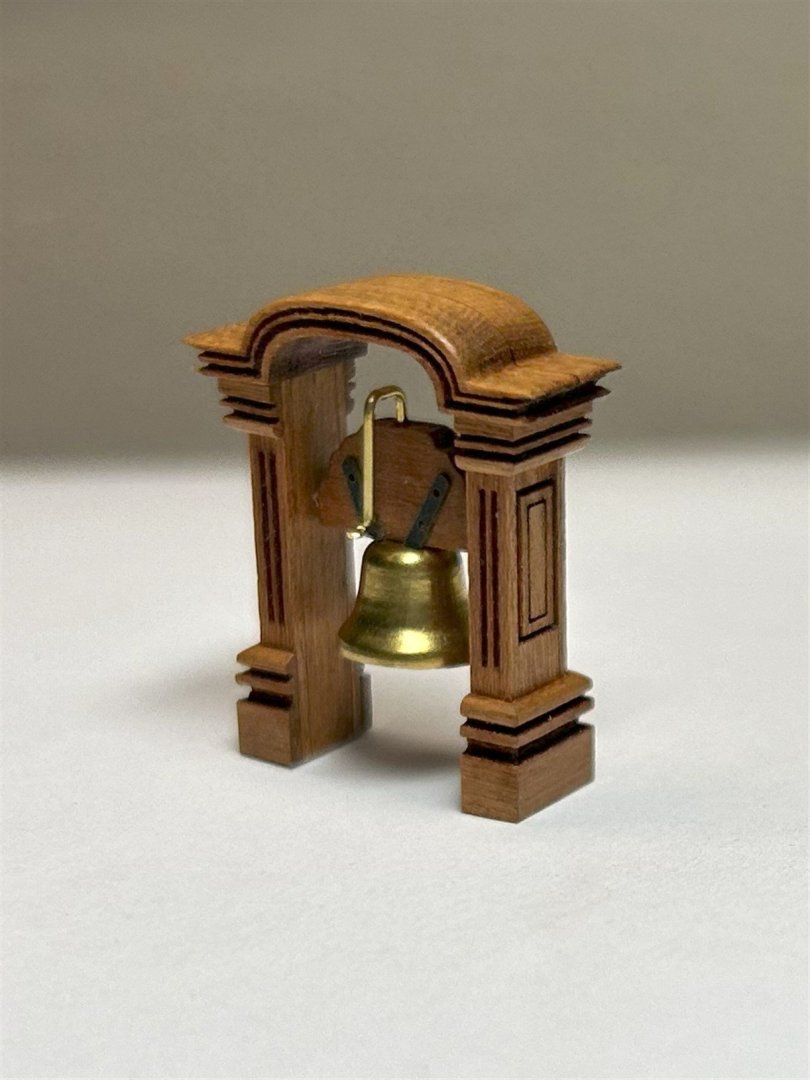
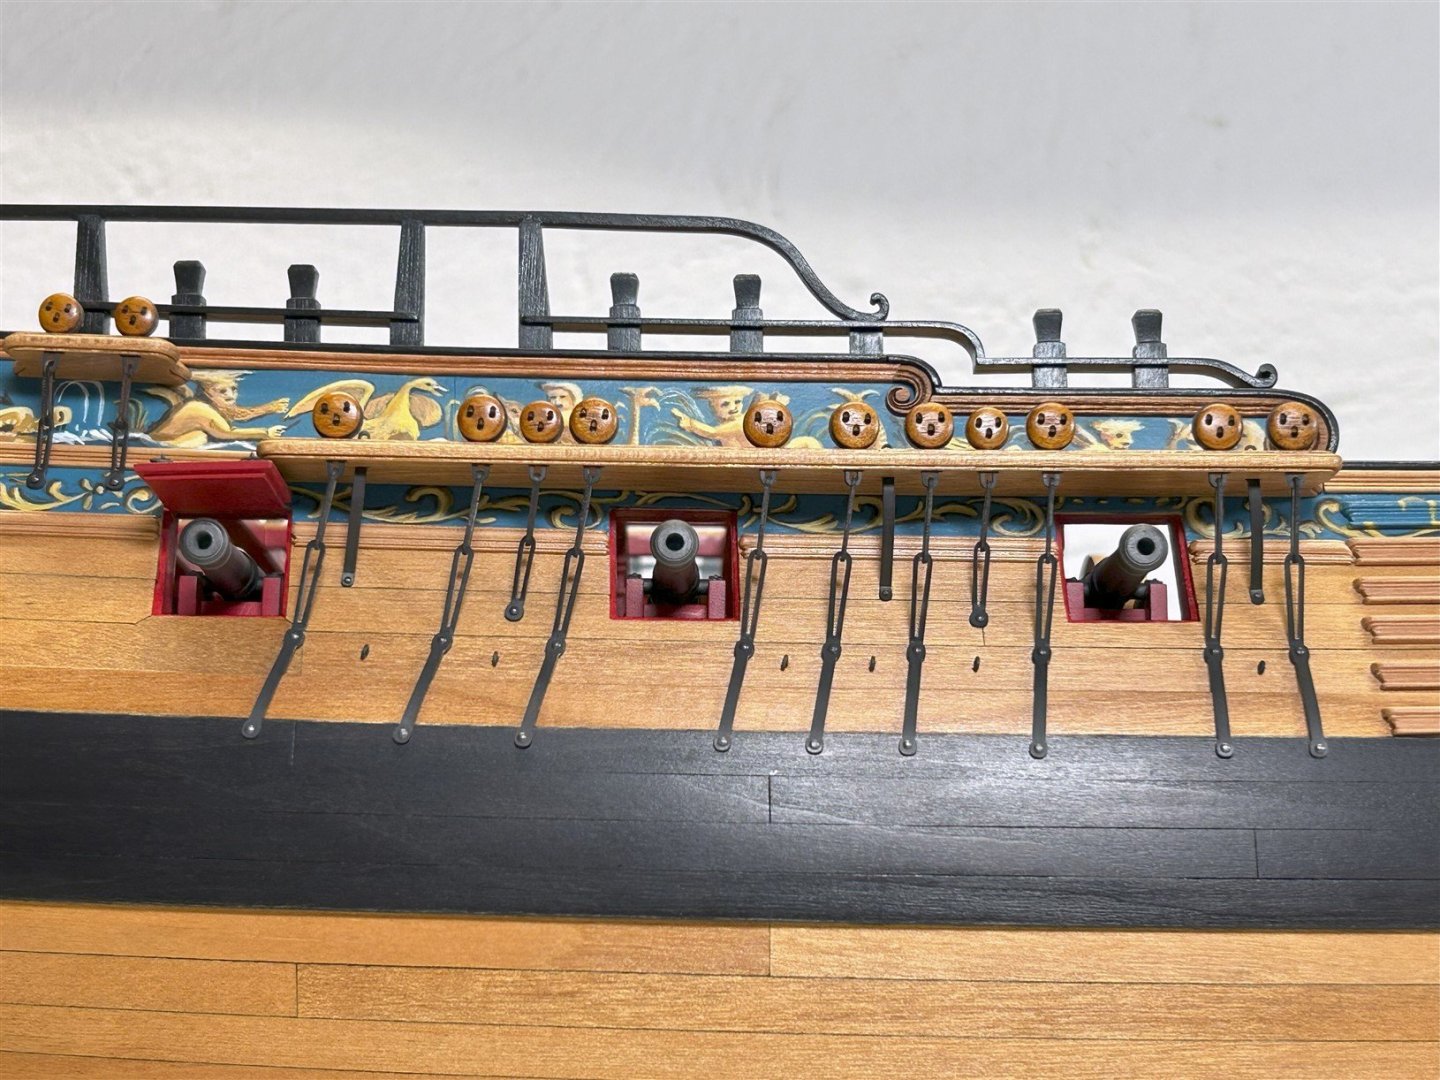
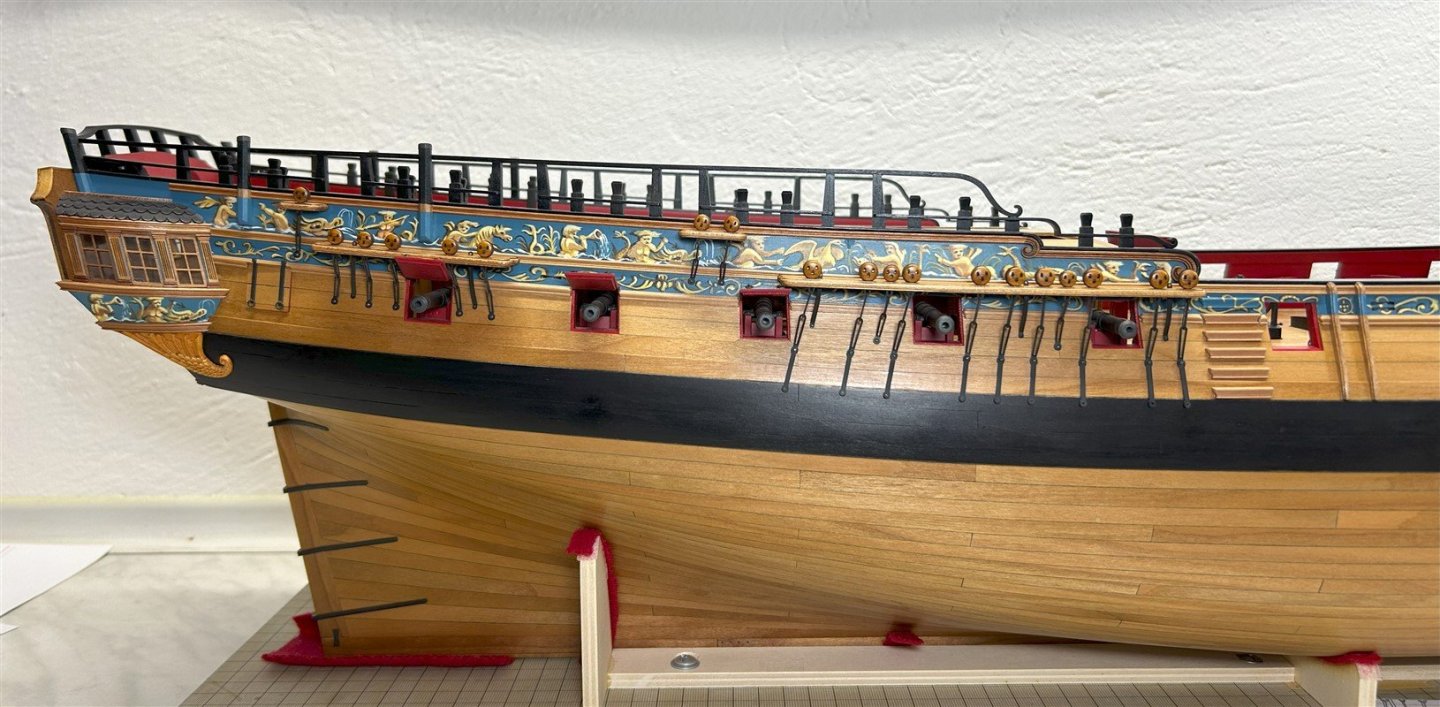
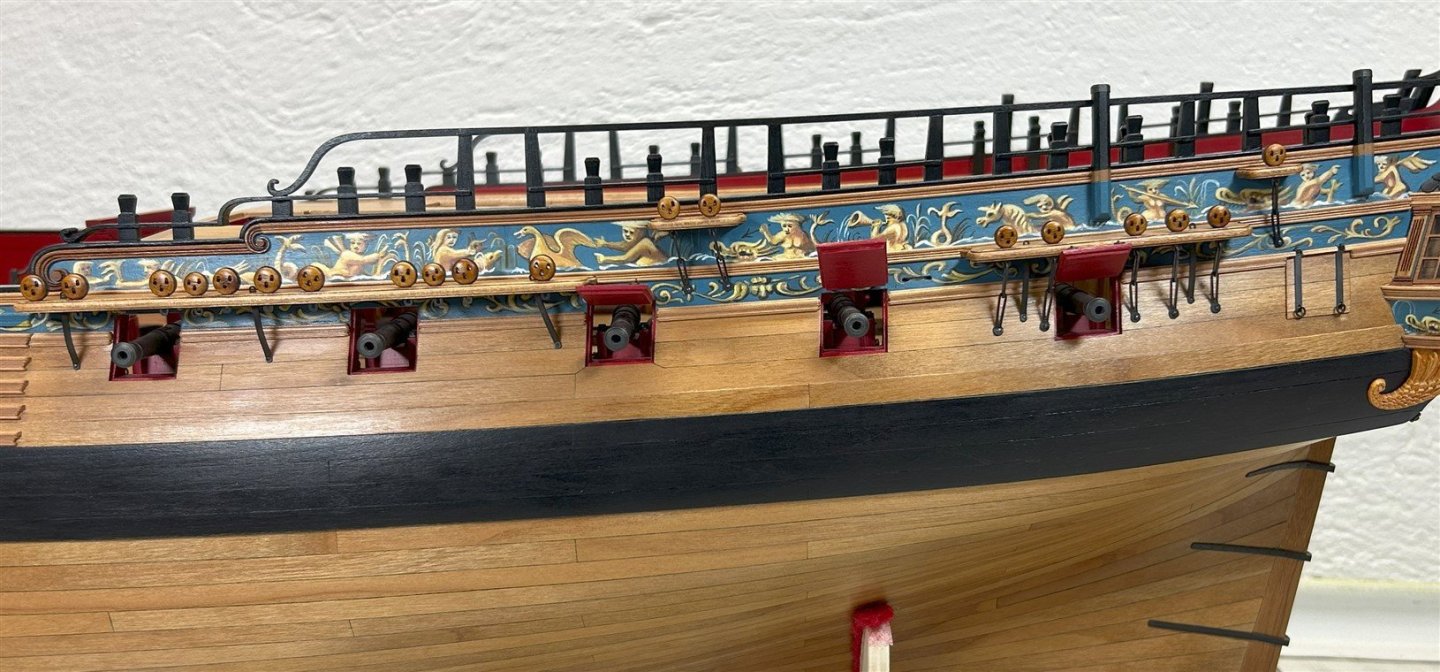
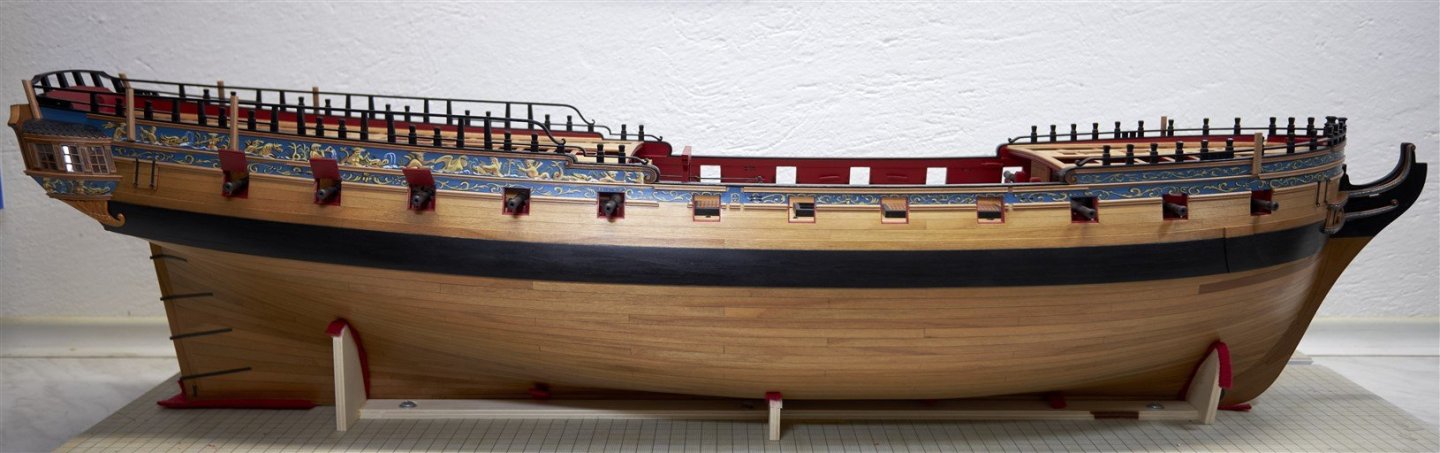
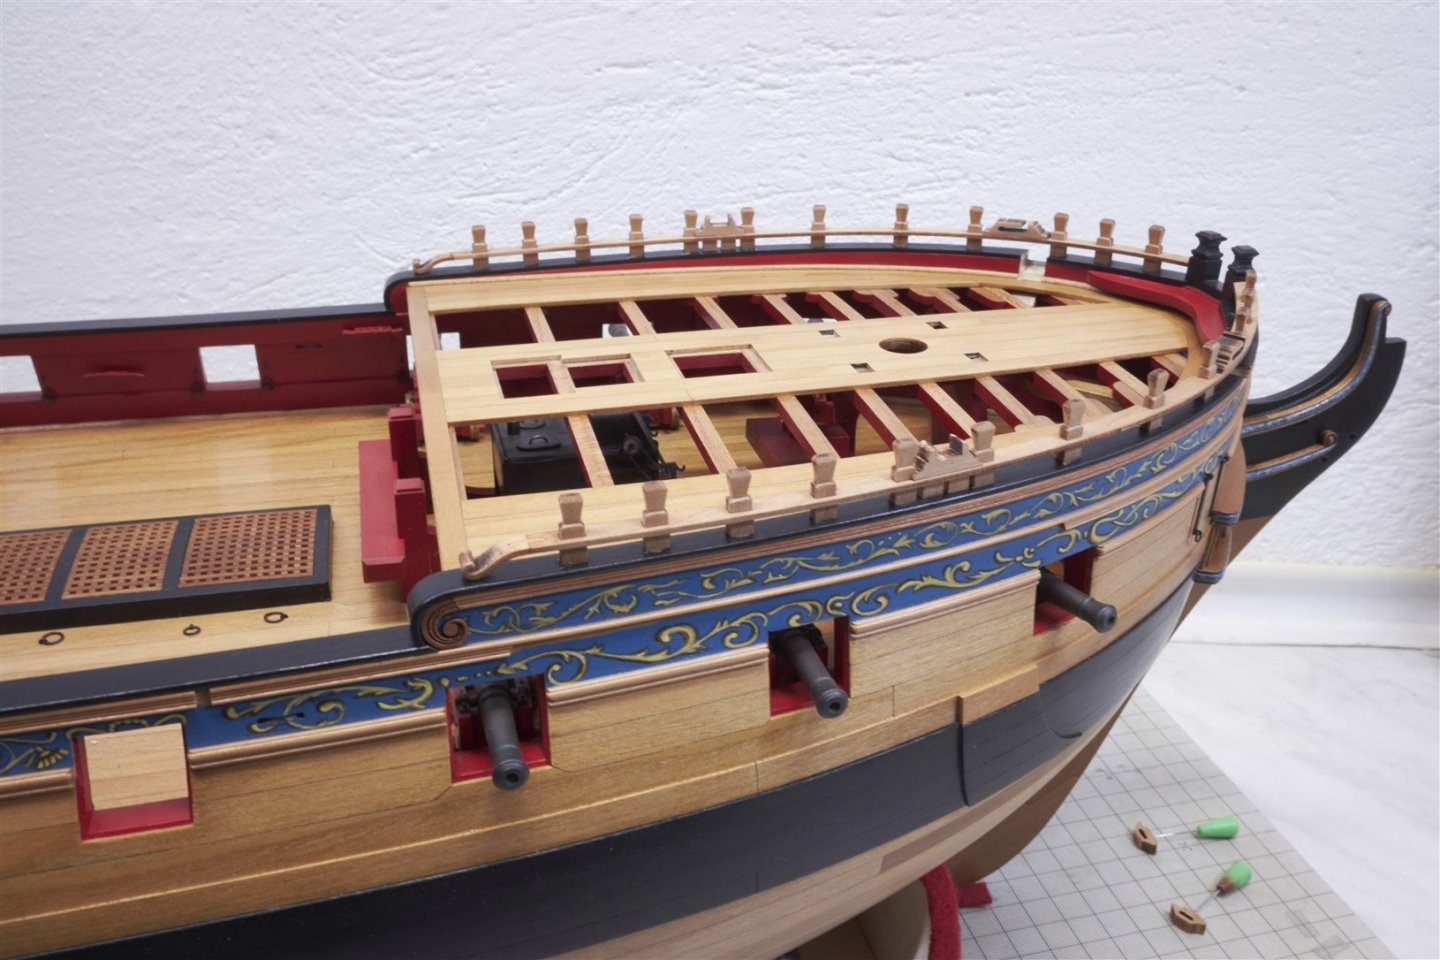
Hey guys, Thanks for your kind words and likes. I'm slowly making progress, finishing things I've been putting off. I cleaned up the carvings and since I couldn't get the Old Masters Gel Stain I had to find another solution with Vallejo Wash. I also had to paint the friezes on the binnacle... It didn't turn out as I wanted, but I can live with it. The belfry, belfry rail and other details and the forecastle are almost finished. The breastrail.... is finished and I just have to install the rest of the parts and finish the quarterdeck.


-
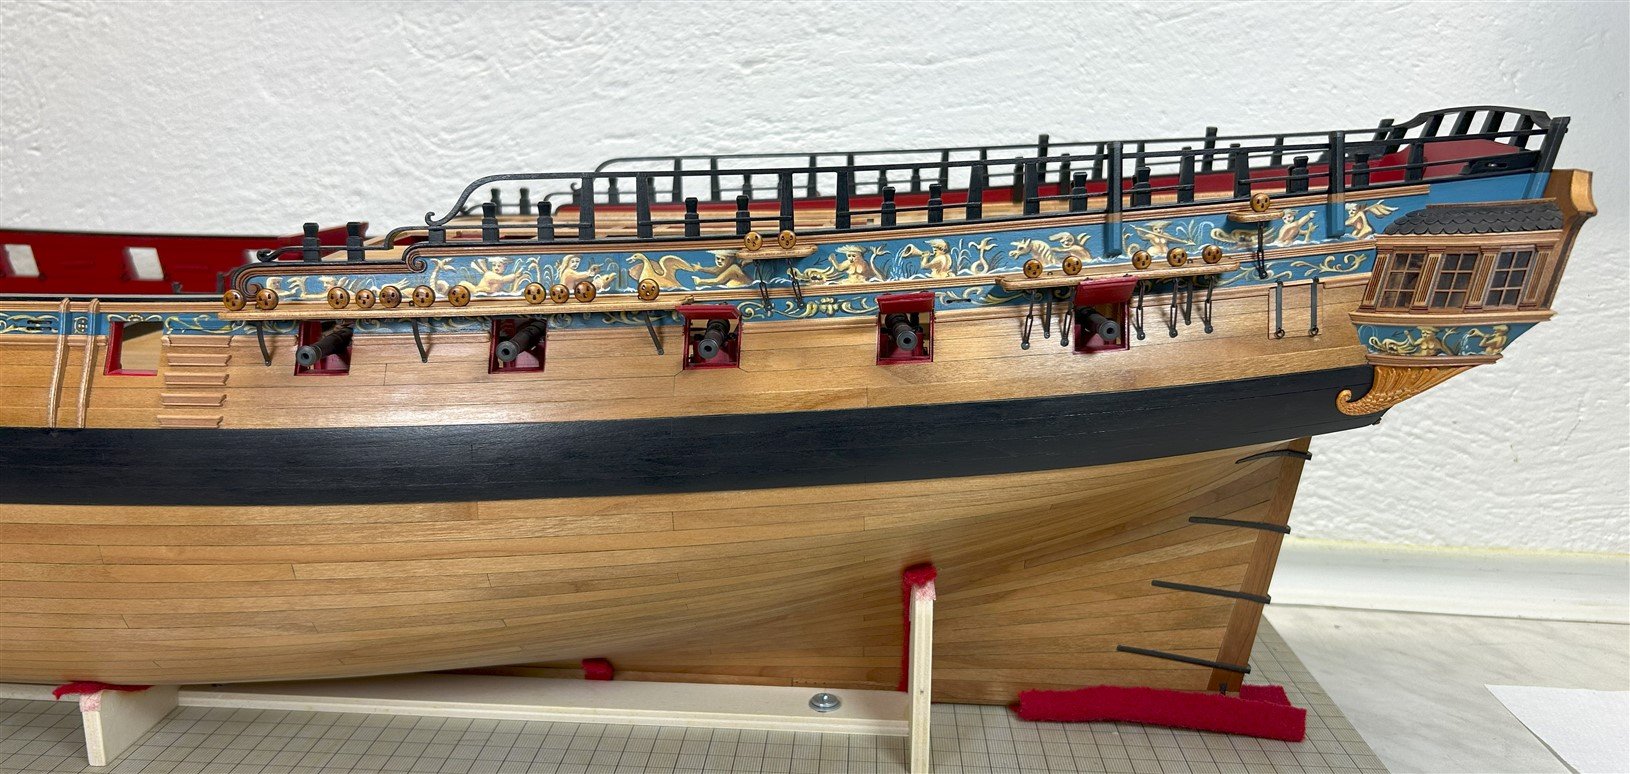
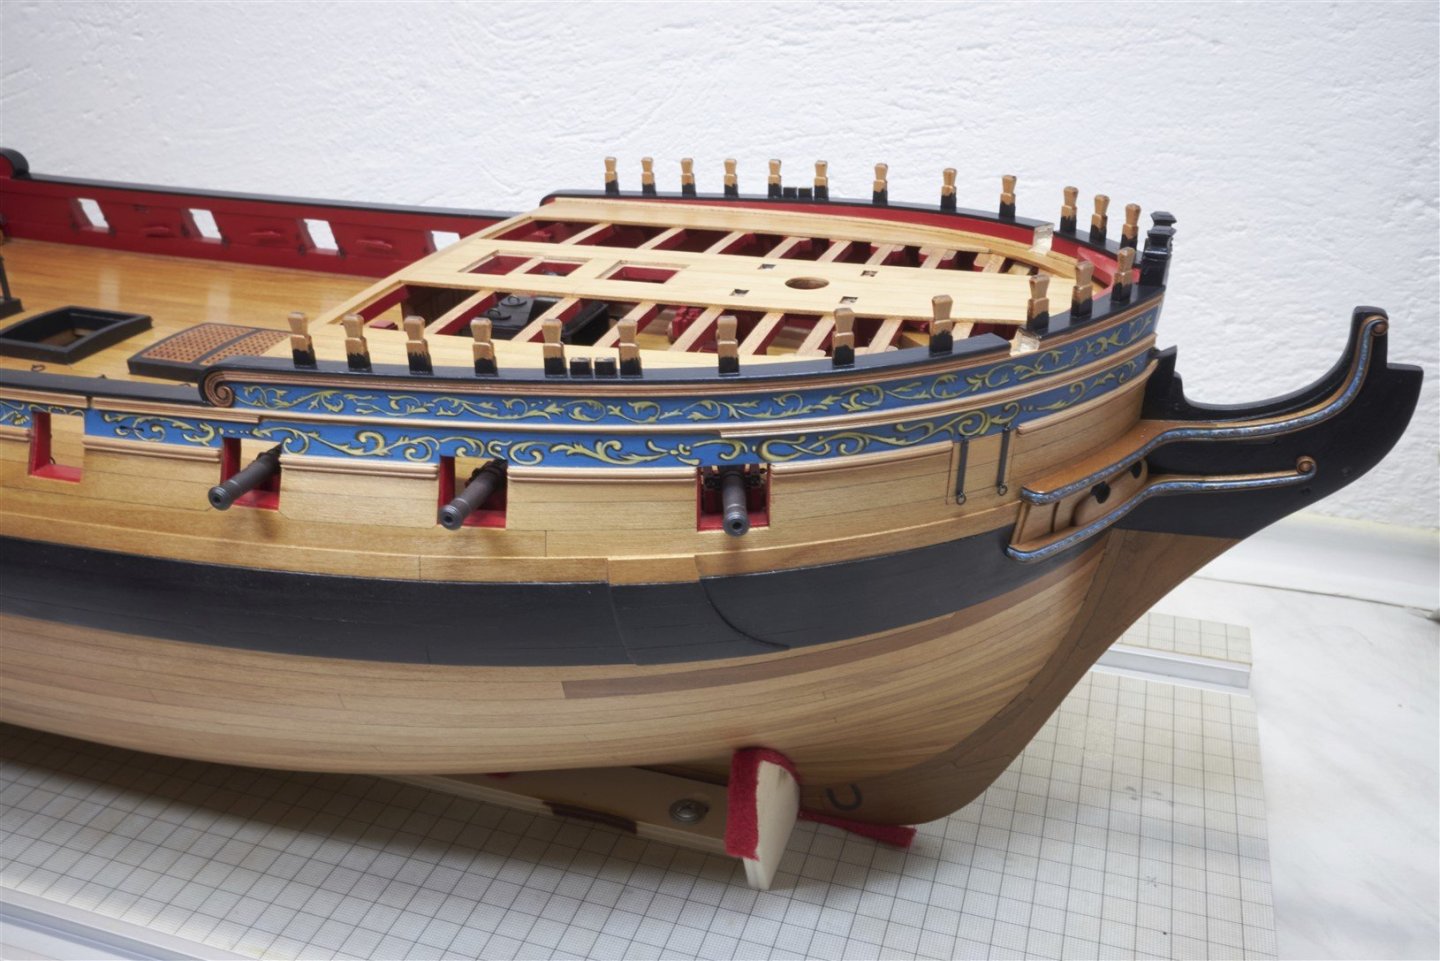
Hello I've finished the belfry and some bits and pieces, so I'm slowly starting to fit out the forecastle deck


-
It looks gorgeous.
-
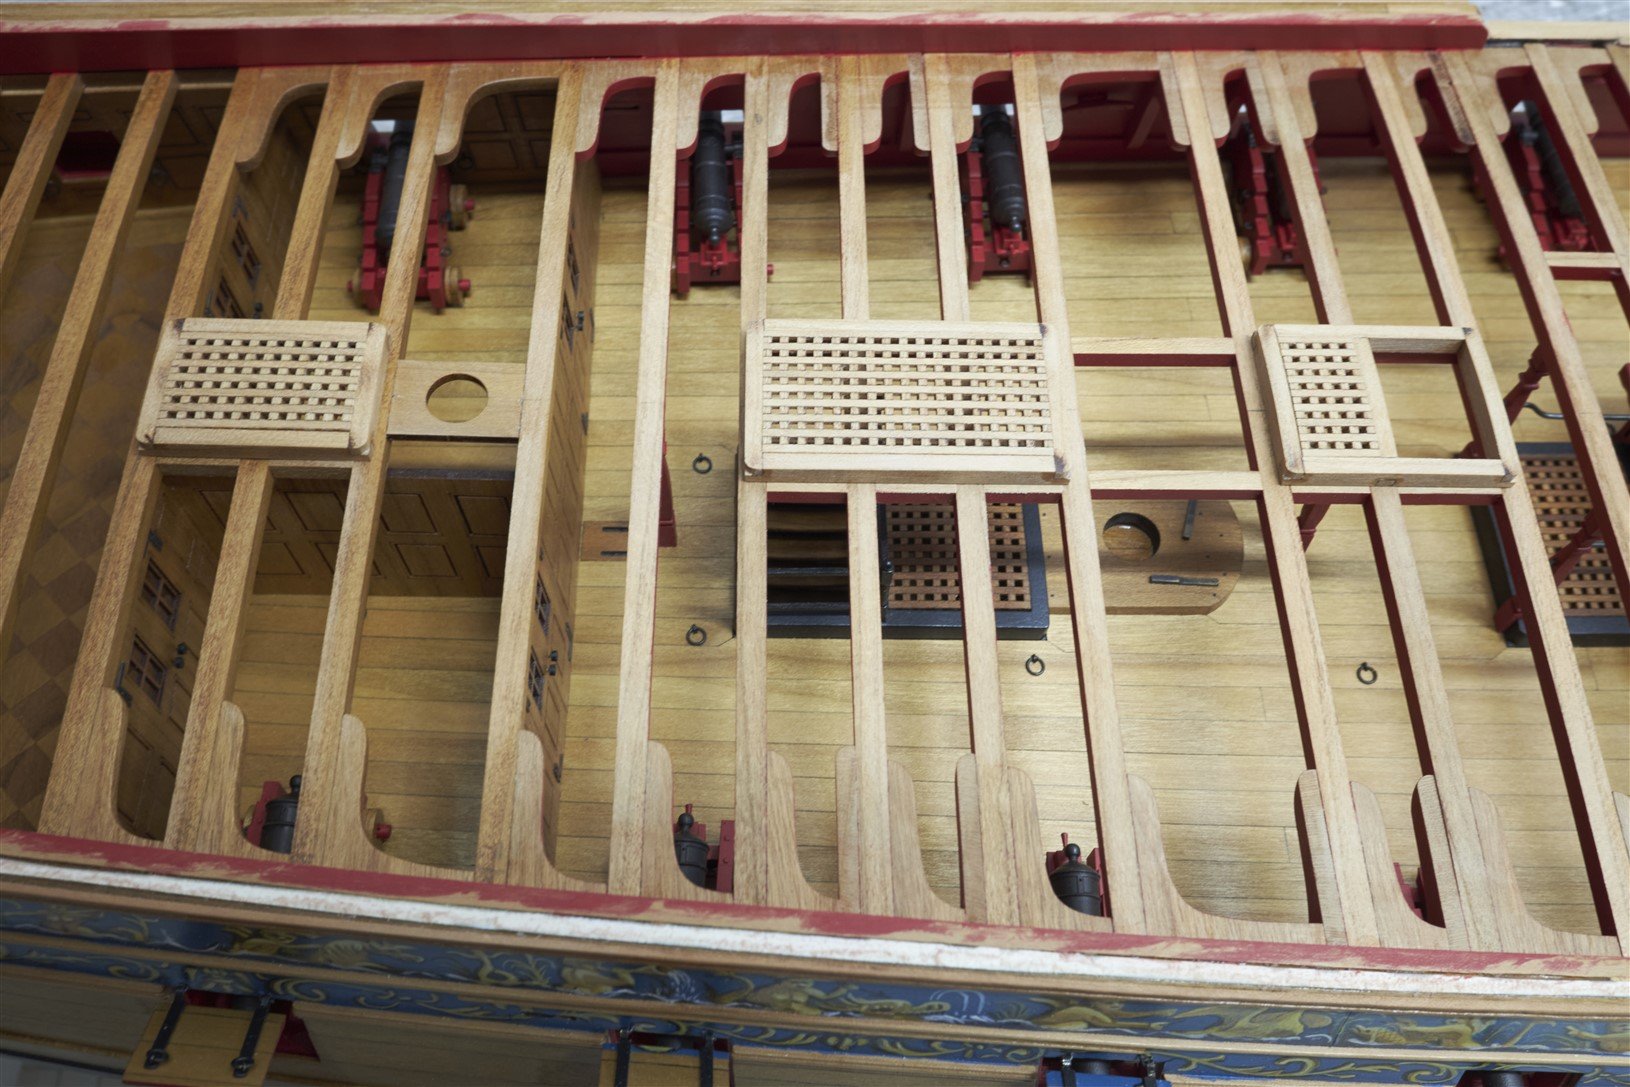
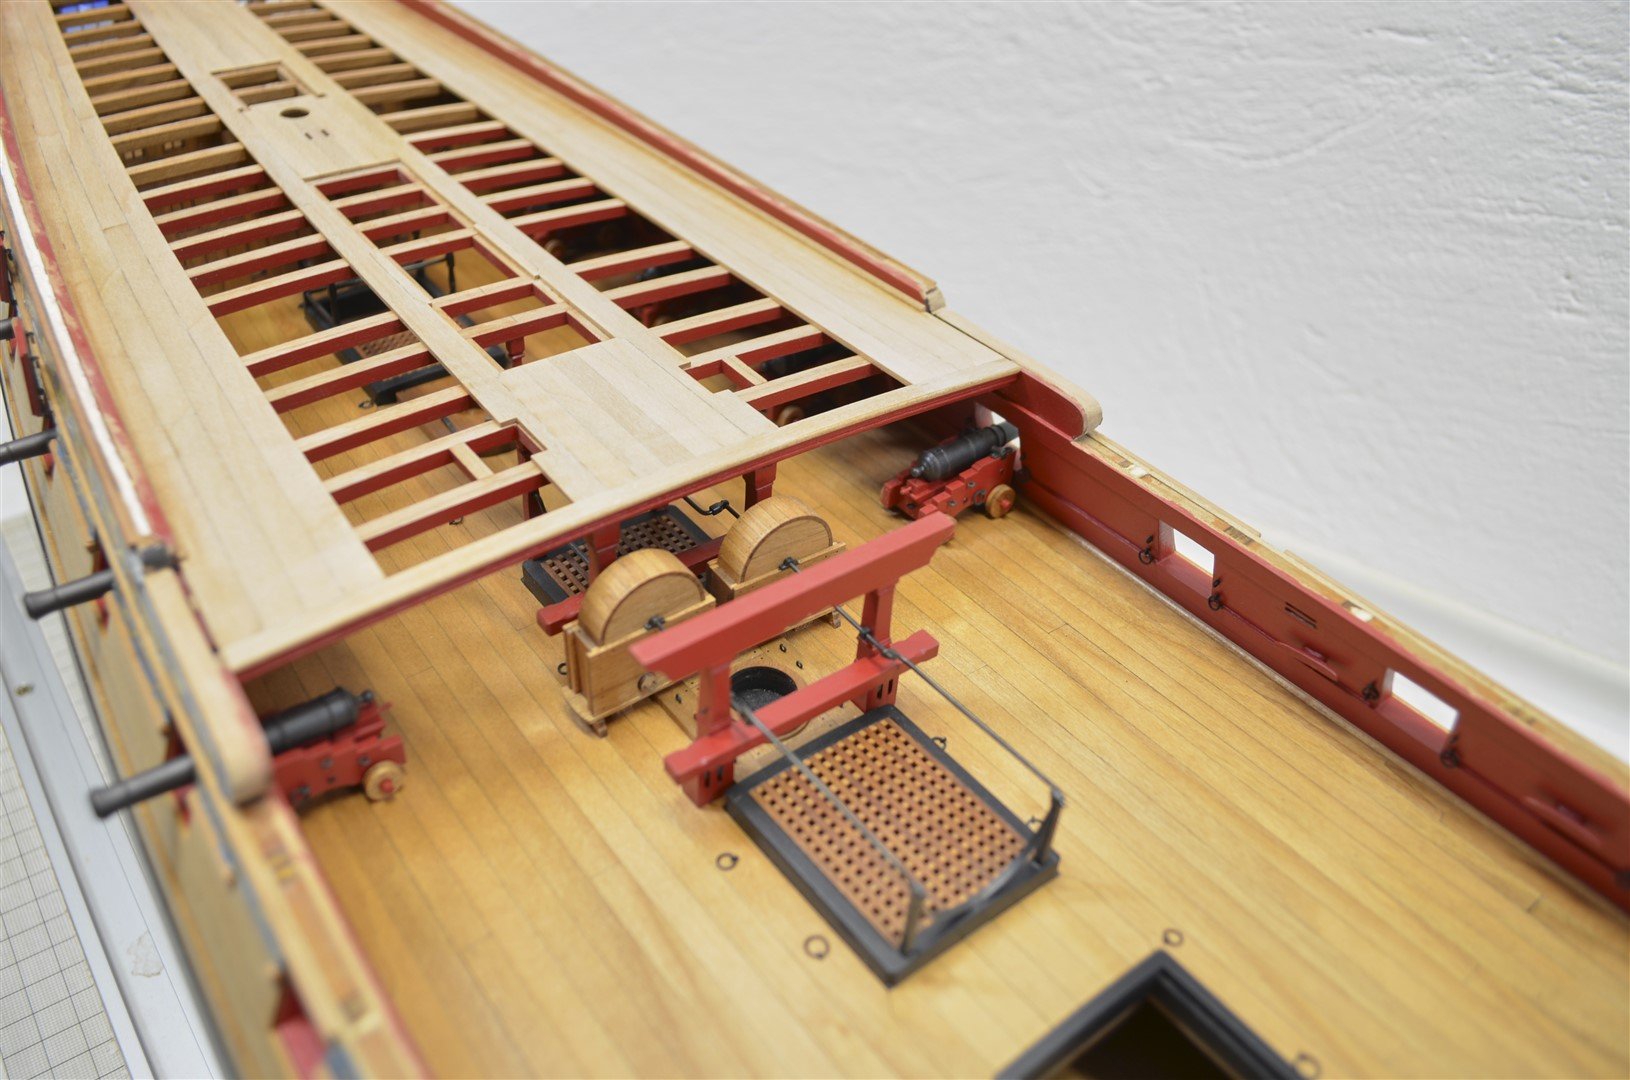
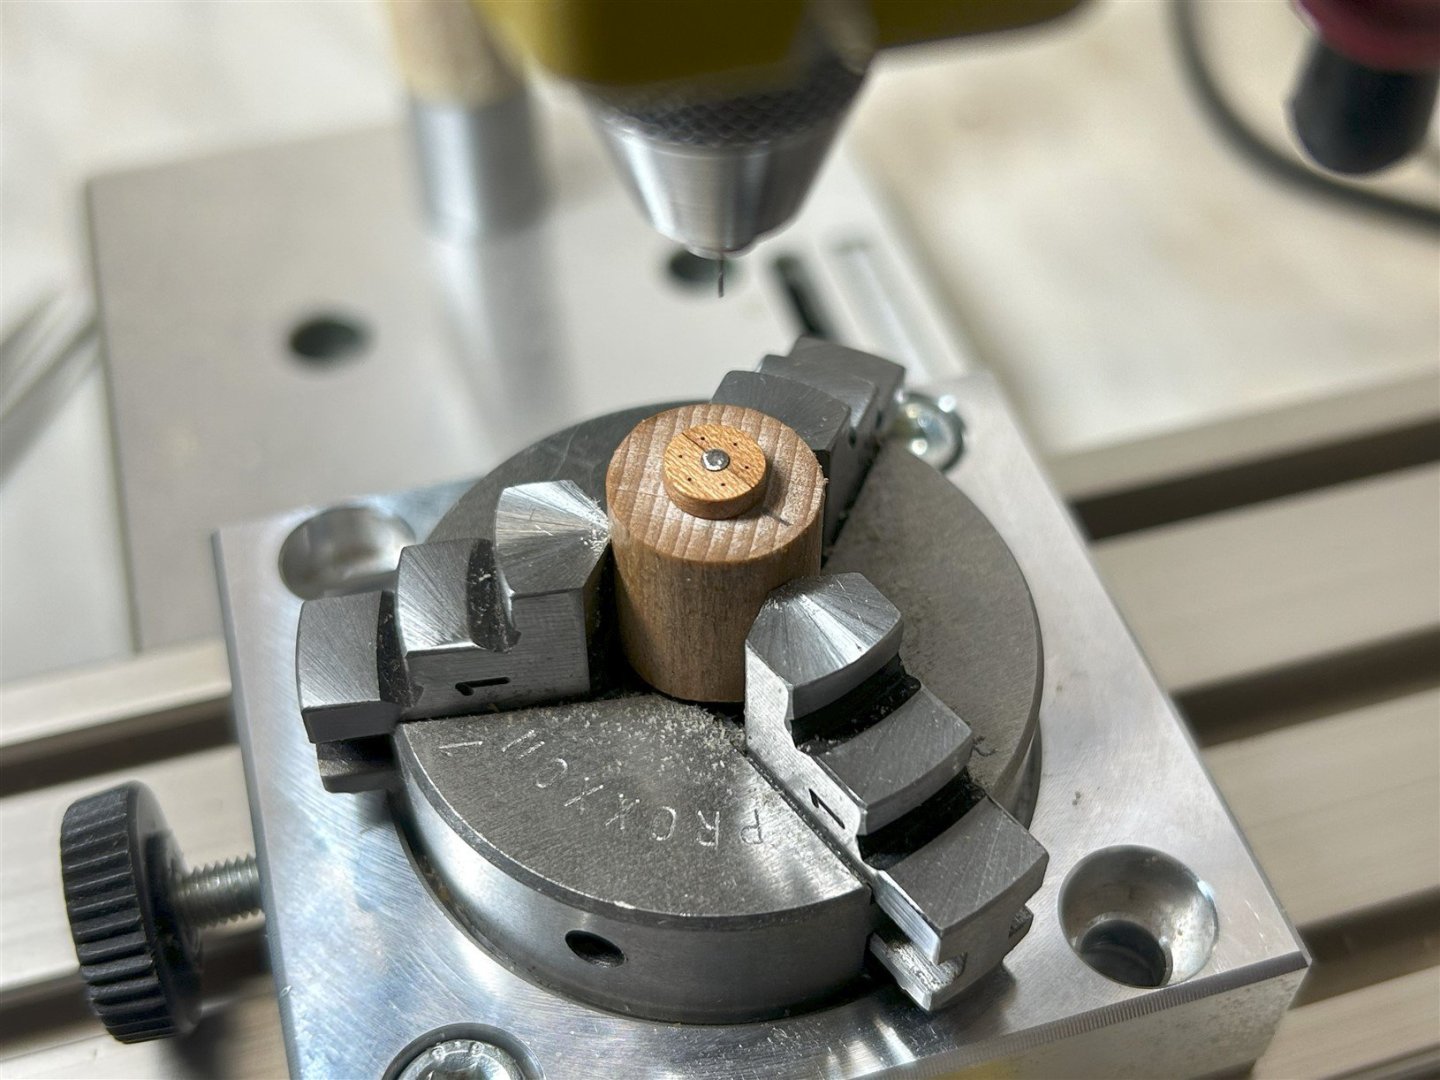
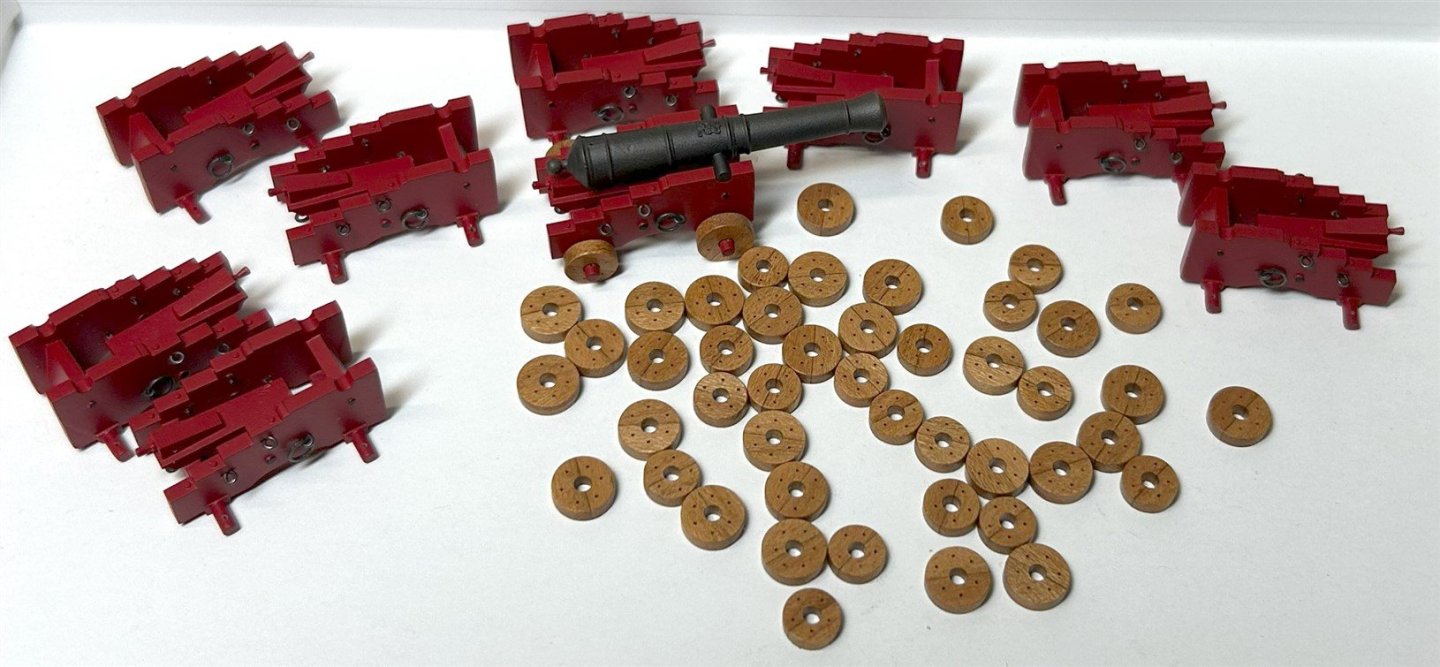
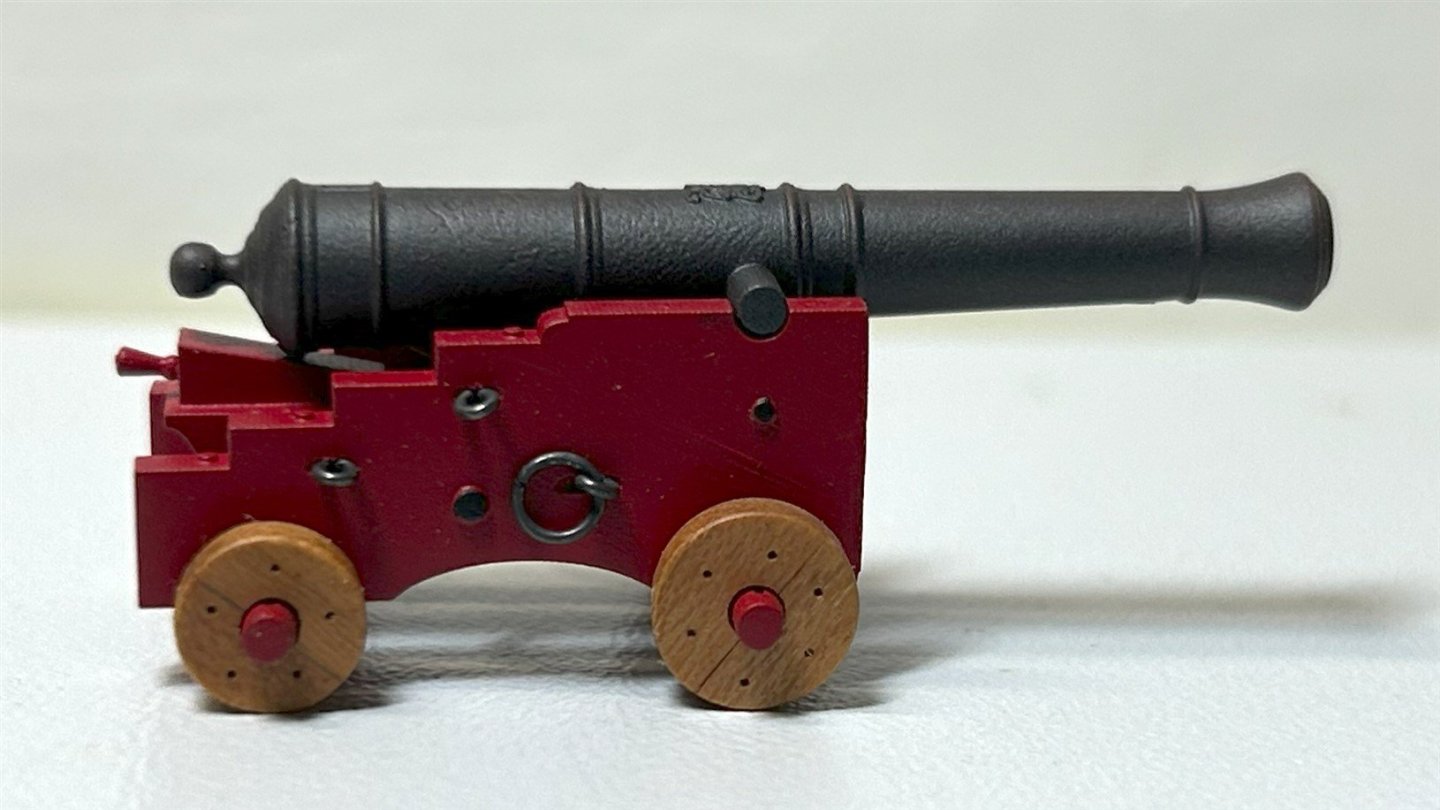
Thanks for the comments and likes guys. I'm already finishing Six Pounders for the Qdeck...

-
Hey Glenn, I've been following your blog since the beginning, I always enjoyed it when you posted new photos and comments, insights from the build. It was a great motivation for me. Thank you for that. You have built a really beautiful and admirable model. Congratulations and I can't wait to see what you will do next time.
- 840 replies
-
- 3
-

-
- winchelsea
- Syren Ship Model Company
- (and 1 more)
-
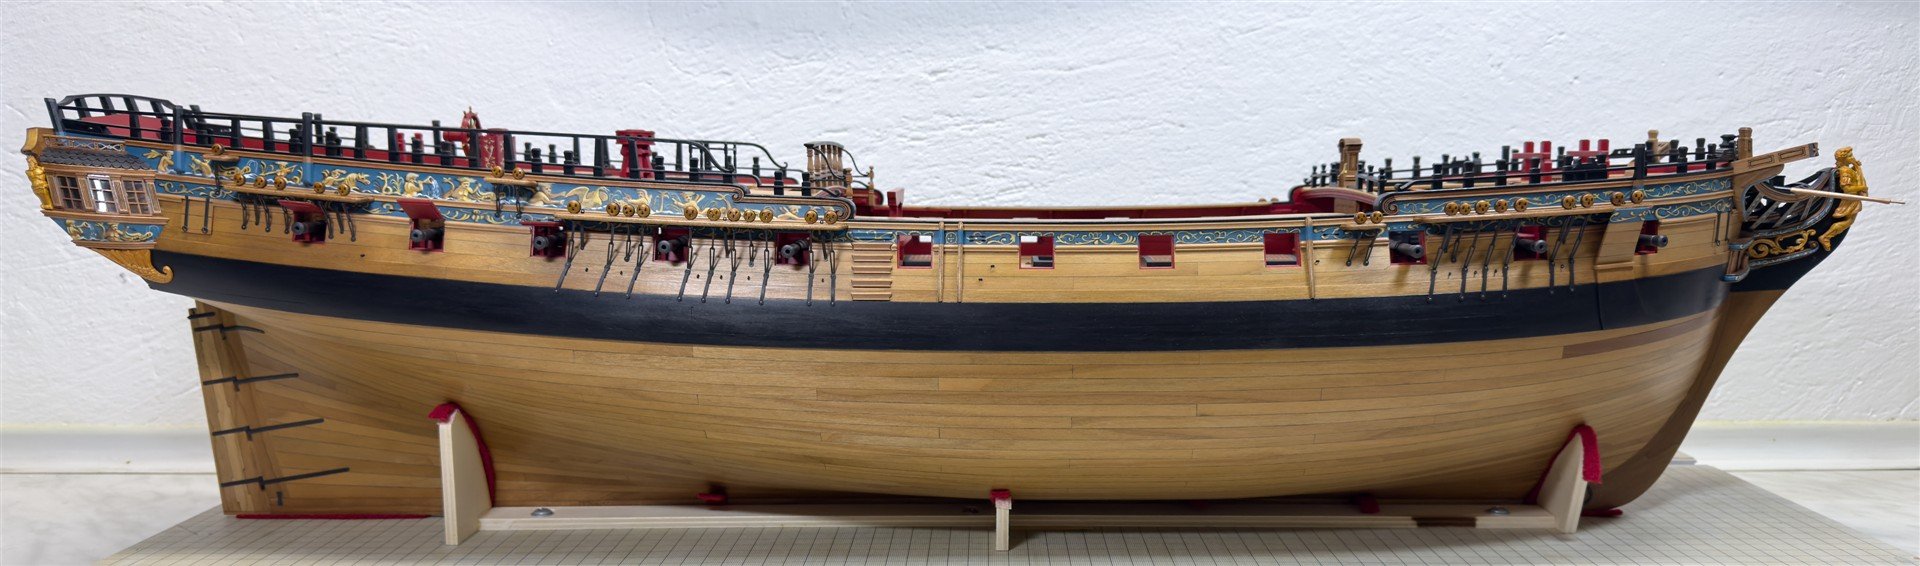
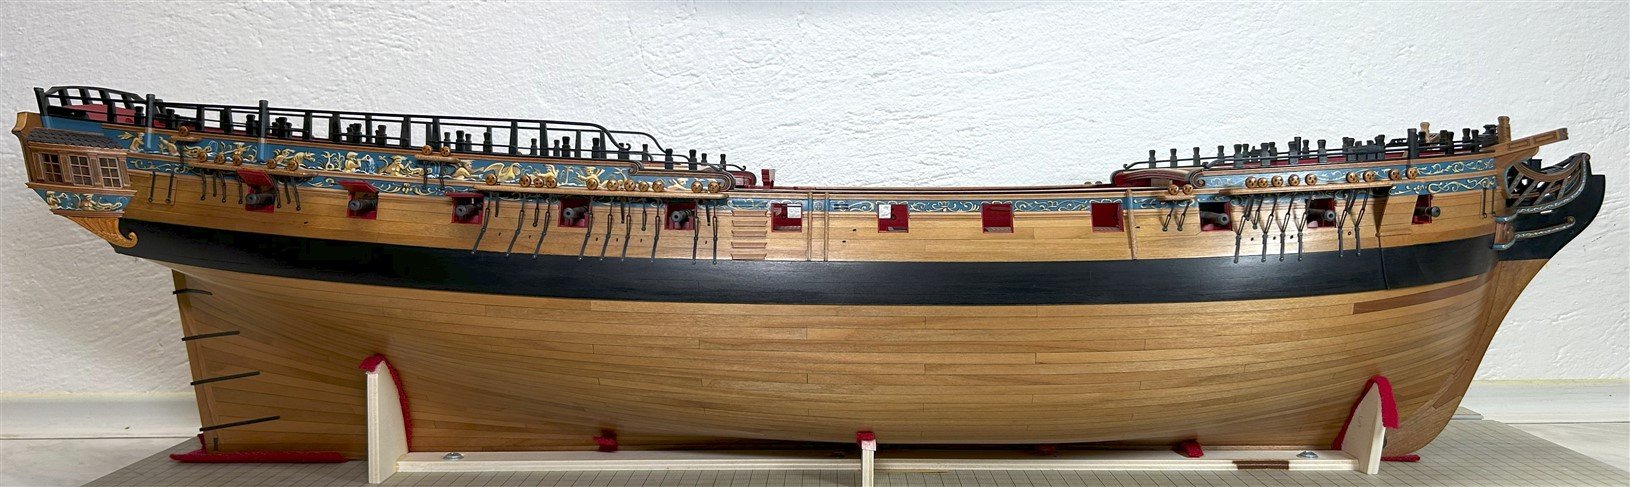
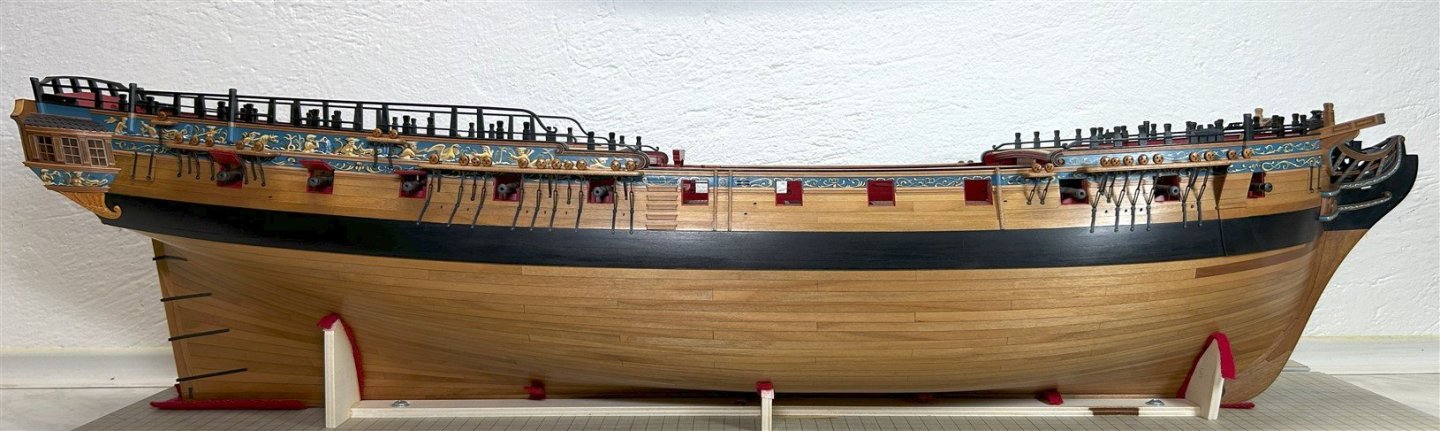
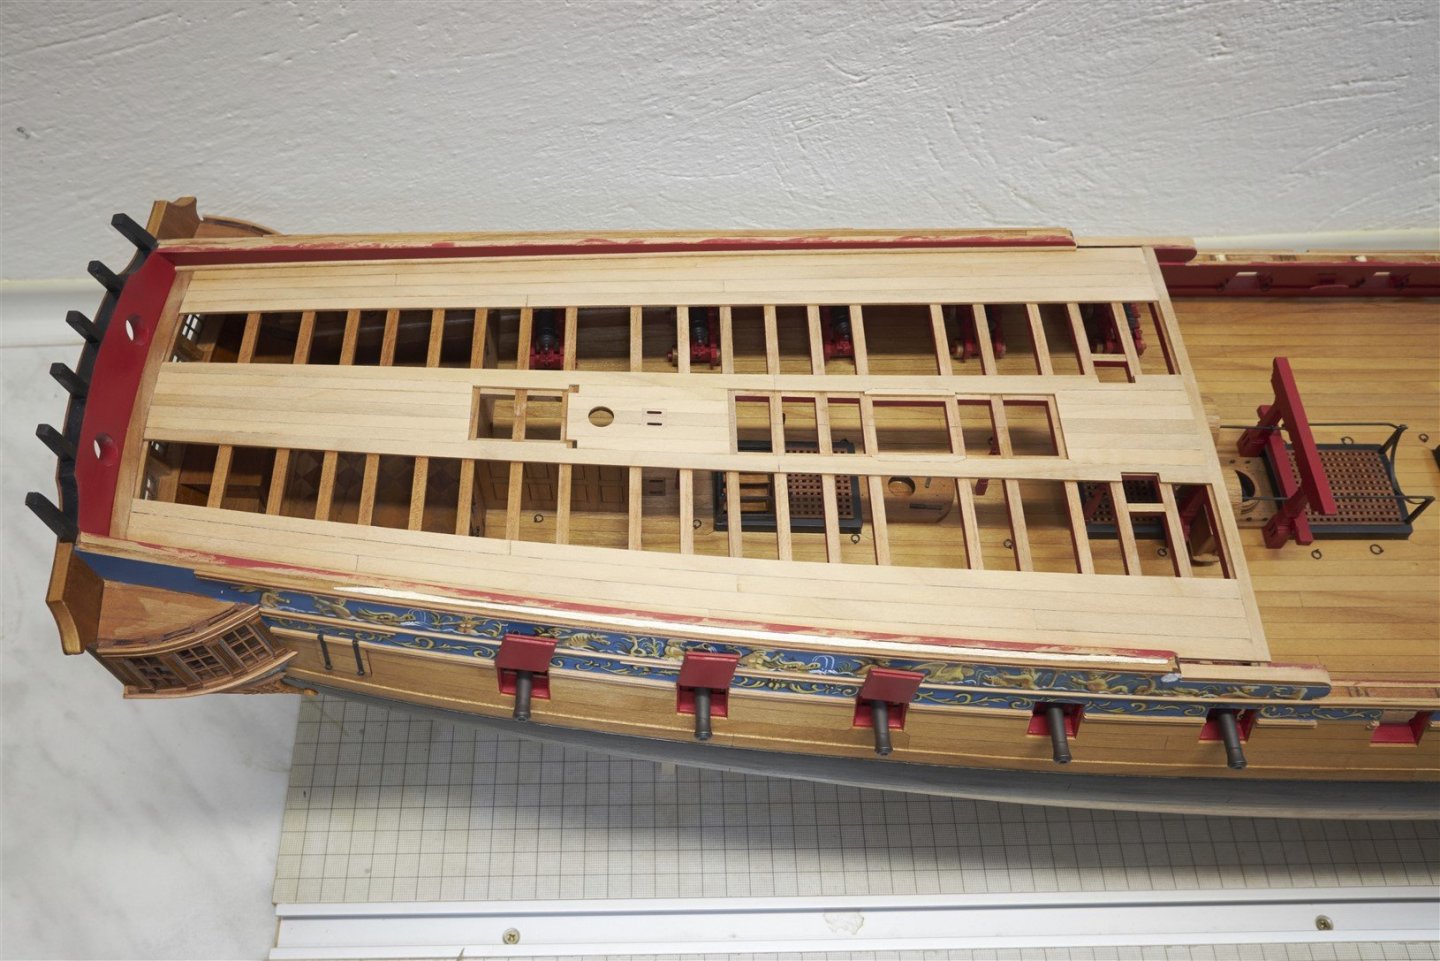
Hey guys, It's been almost a month since my last post. As I get closer and closer to finishing this build, it seems to slow down. But the main thing is that I'm trying to keep going.


-
Hi no staining on the hull and deck, just WOP. I've only stained deadeyes to match the rest.
-
Hey guys I made some progress today...

-
It was definitely one of the more difficult parts of the build. But you did a wonderful job with it, Glenn!
- 840 replies
-
- 3
-
-
- winchelsea
- Syren Ship Model Company
- (and 1 more)
-
such a quick progress and beautiful as well
- 399 replies
-
- 1
-
-
- winchelsea
- Syren Ship Model Company
- (and 1 more)
-
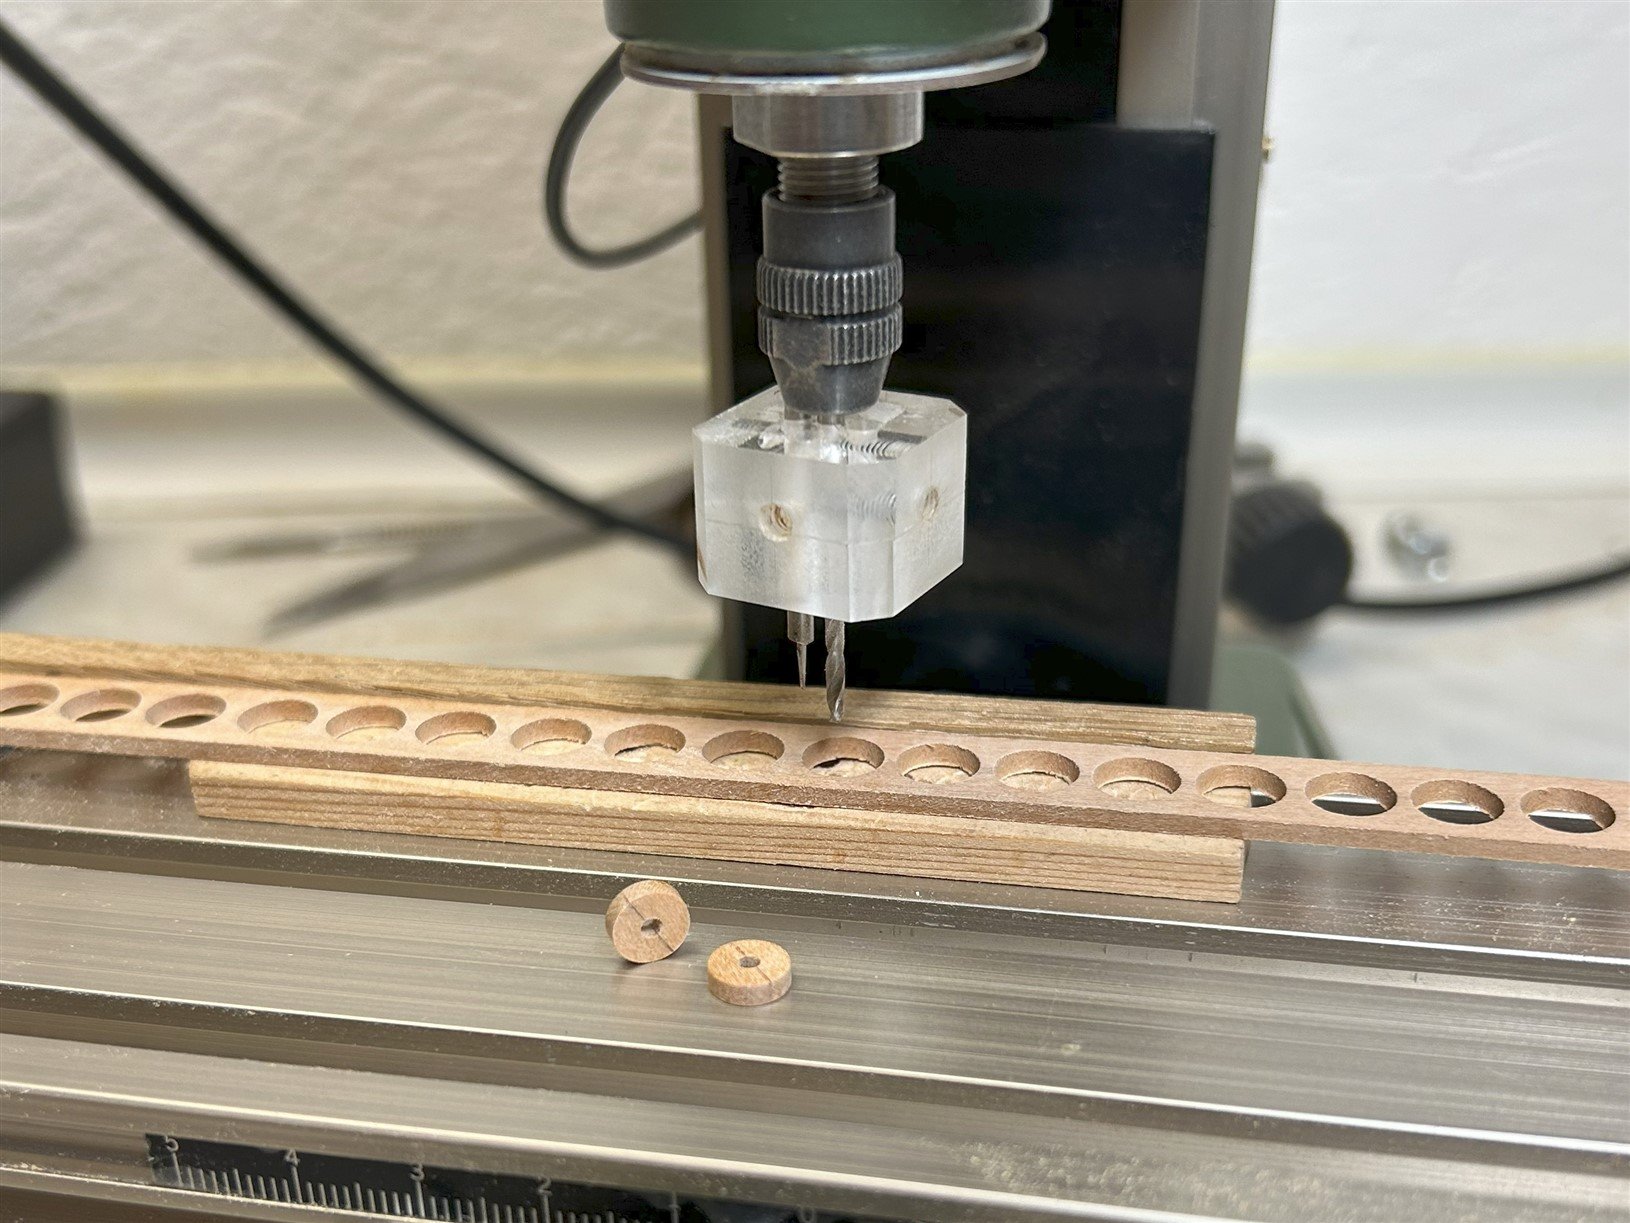
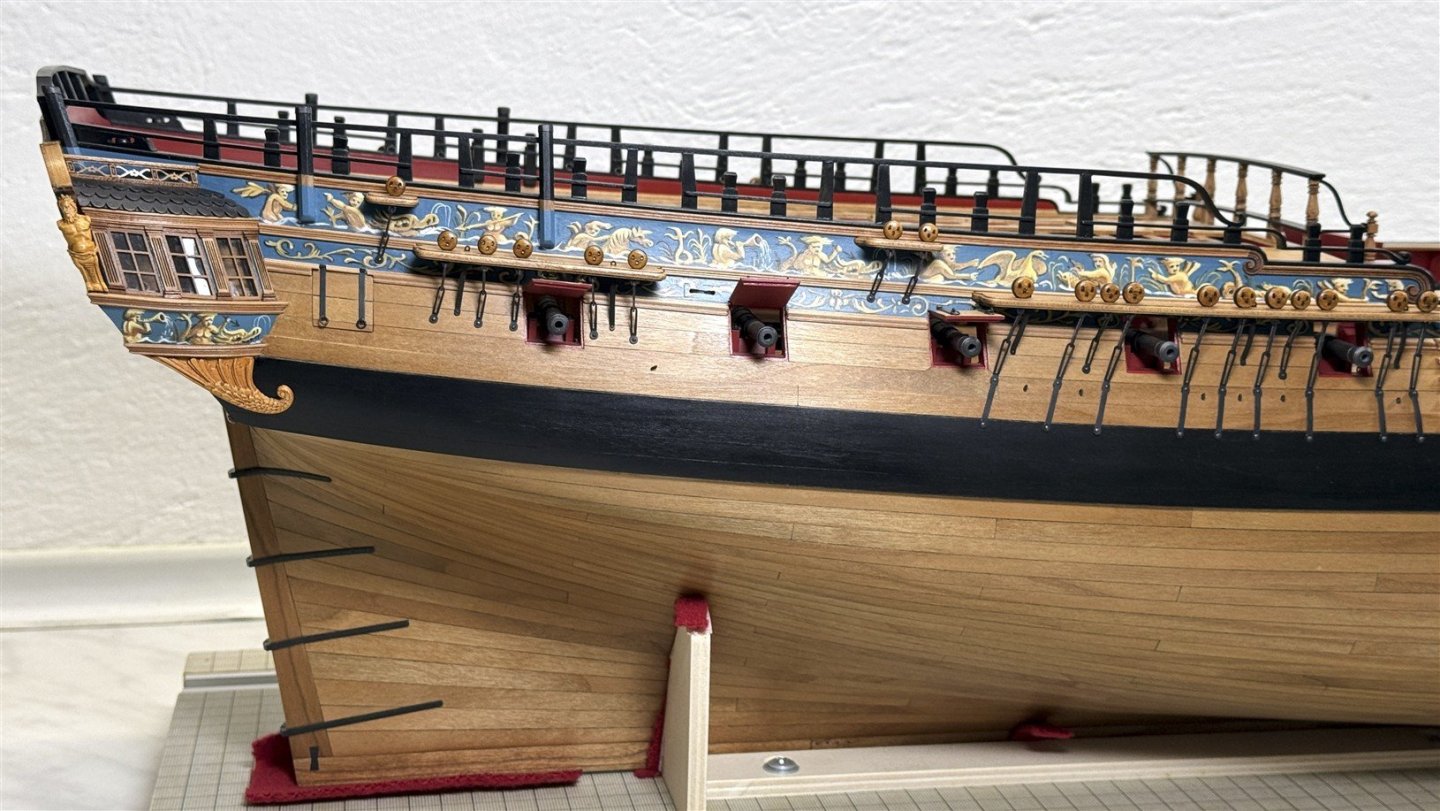
Thanks guys, I'm now finishing the channels, deadeyes and chainplates, strops and straps...


-
Thank you so much guys for all the comments and likes. And I agree that this part was hard, but somehow I managed to finish it. And now I just have to finish all the postponed parts...


-
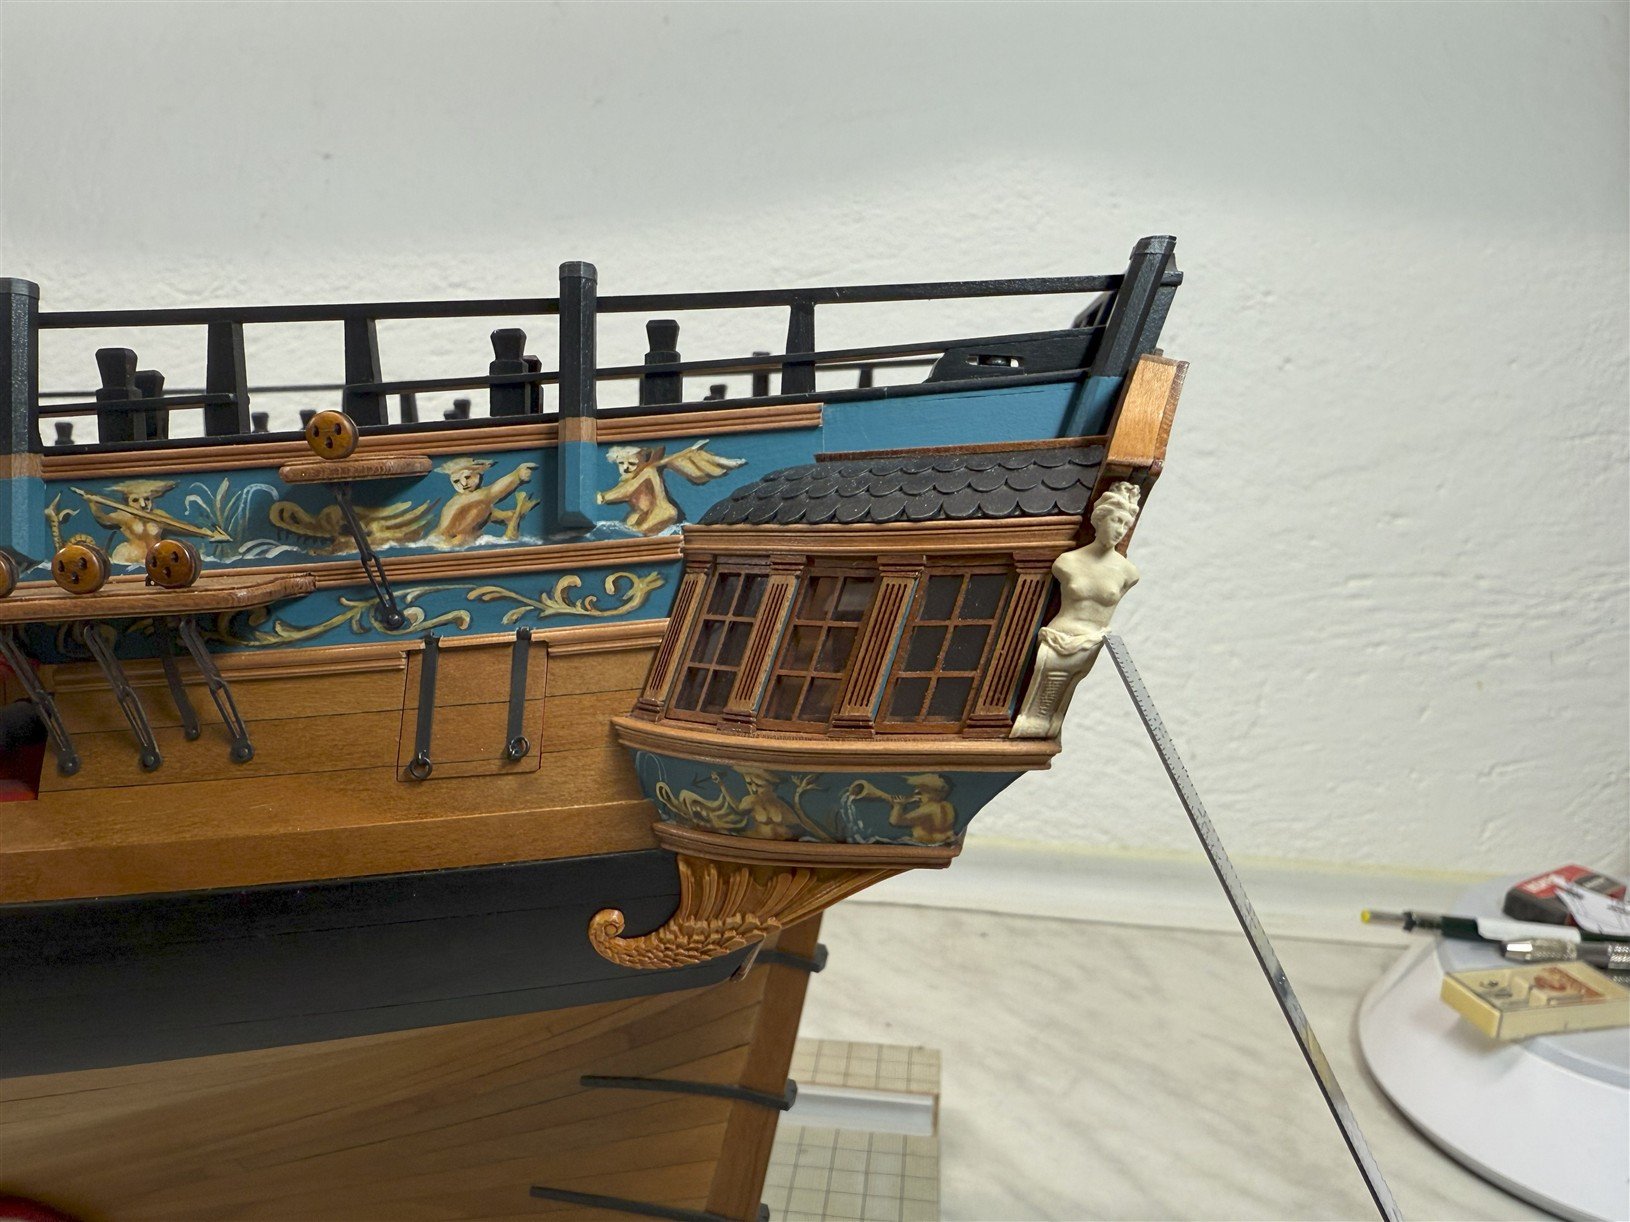
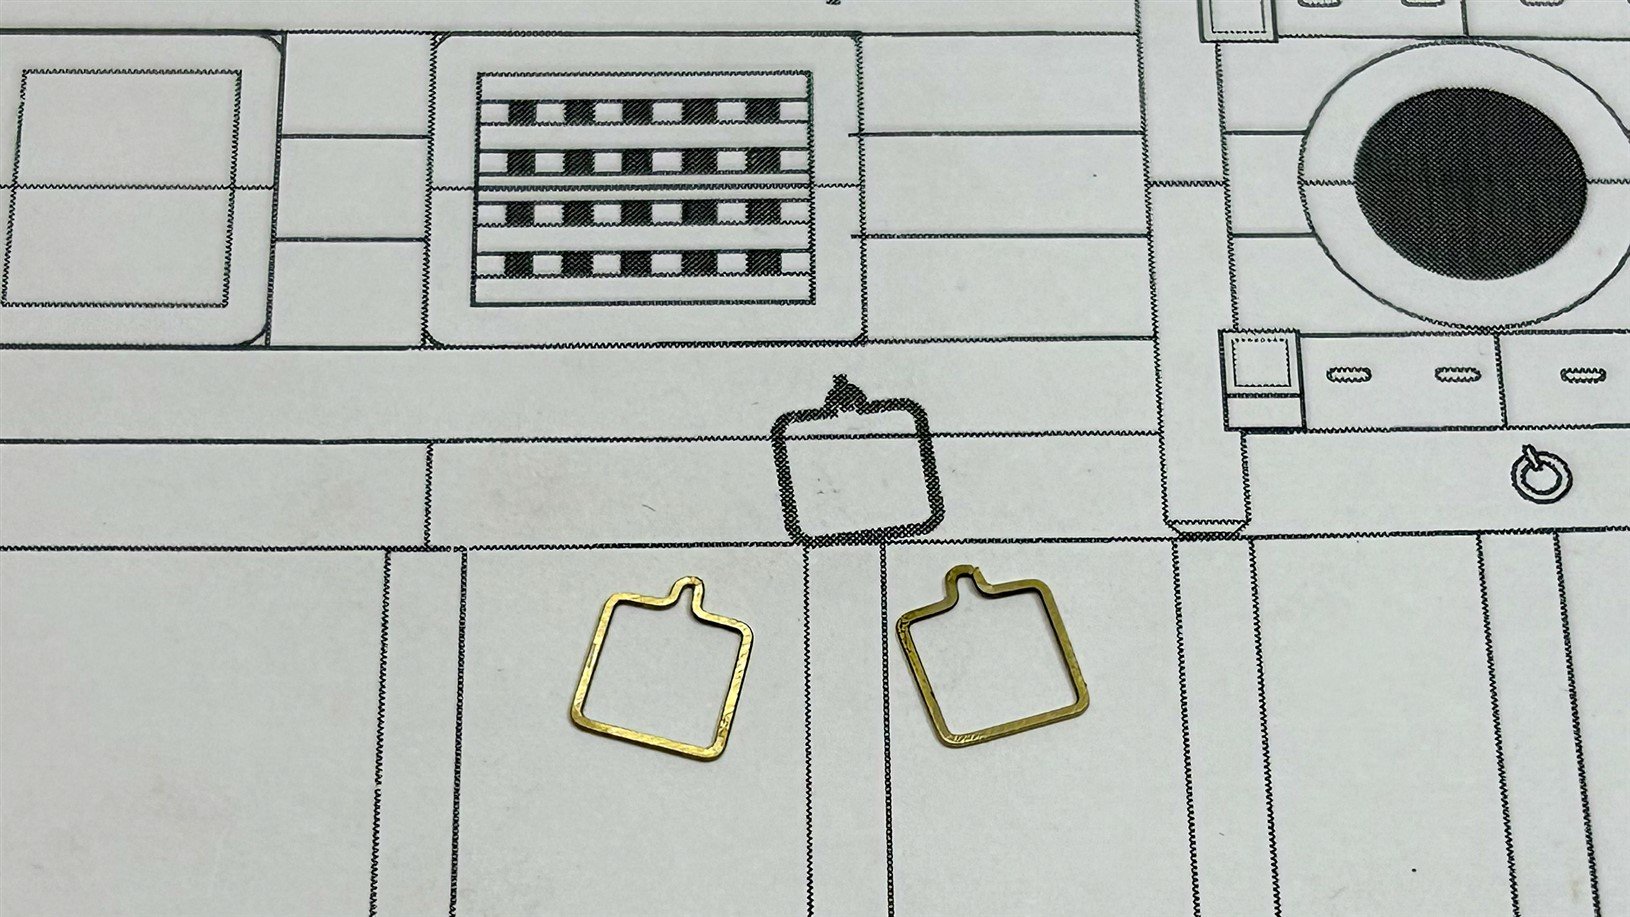
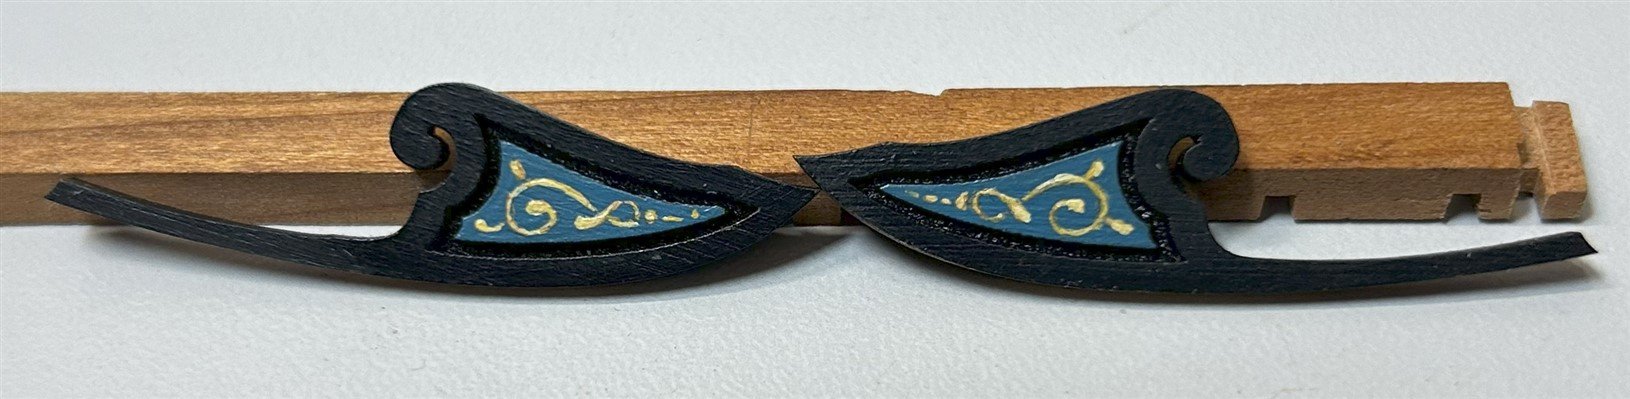
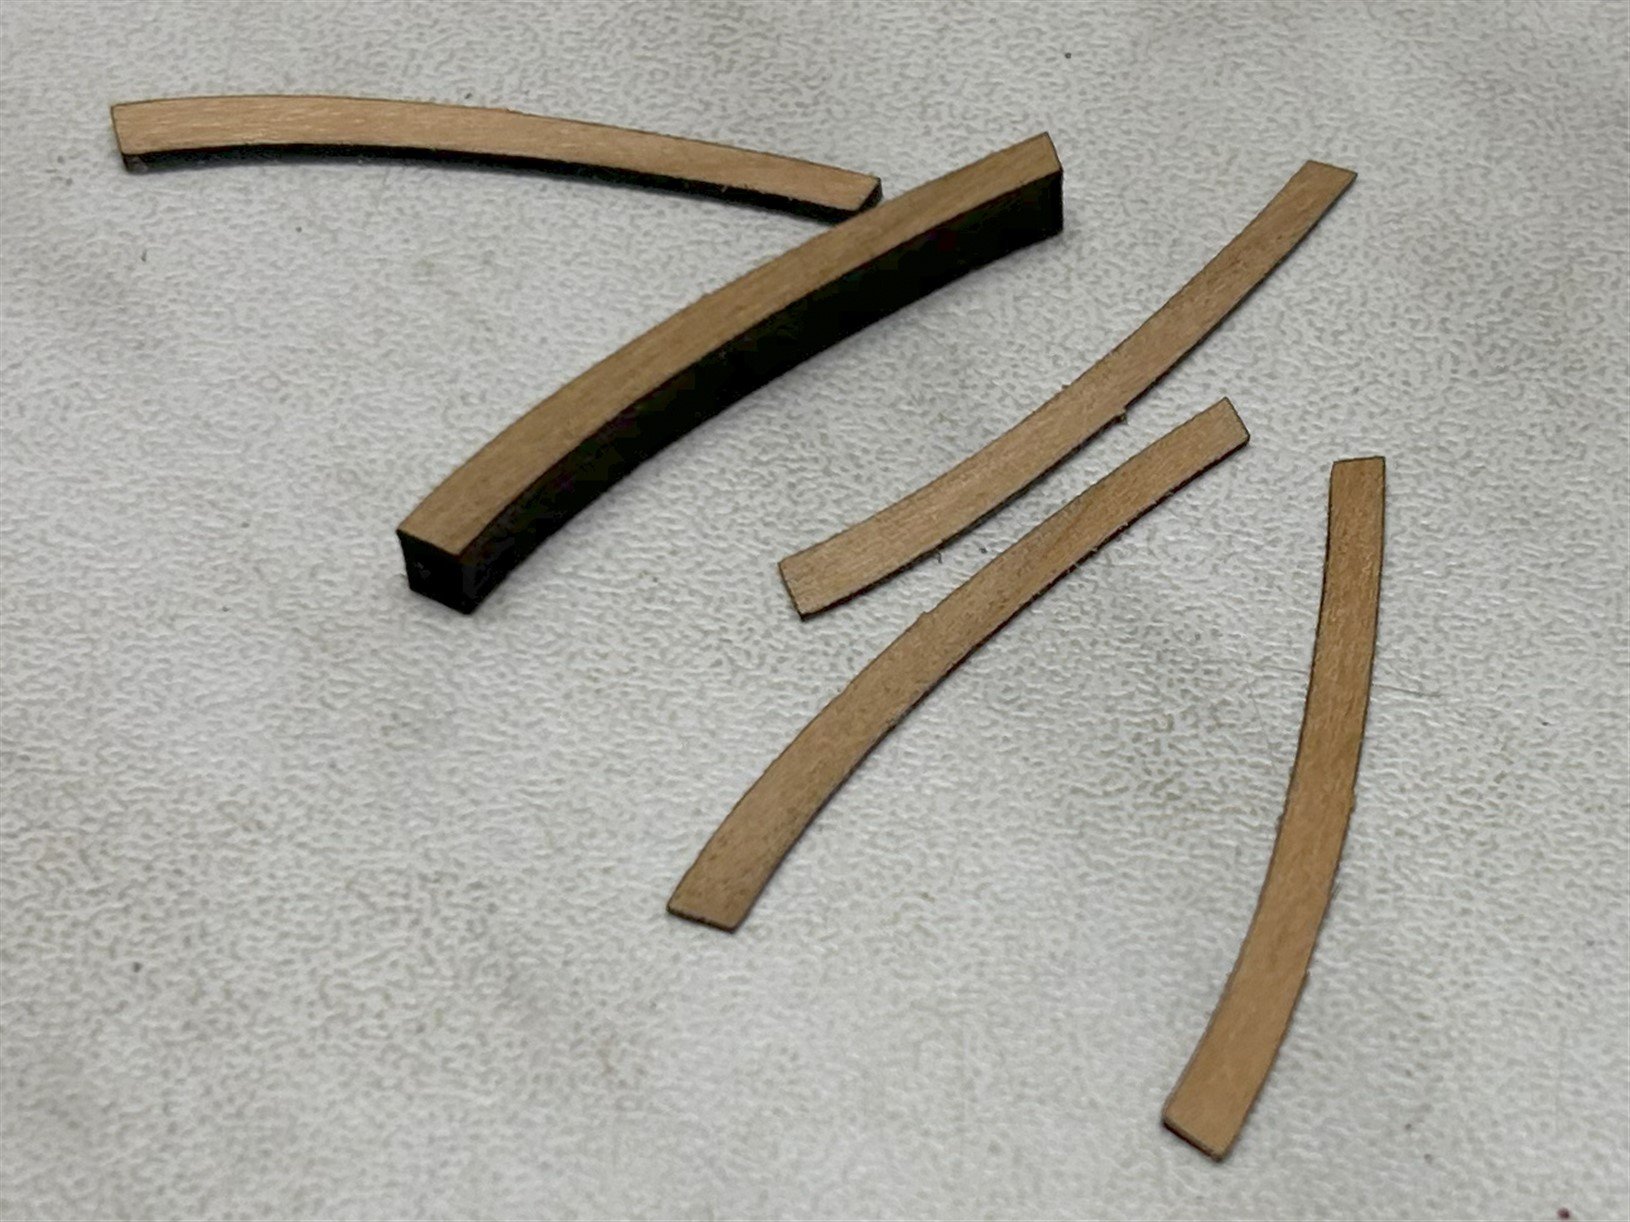
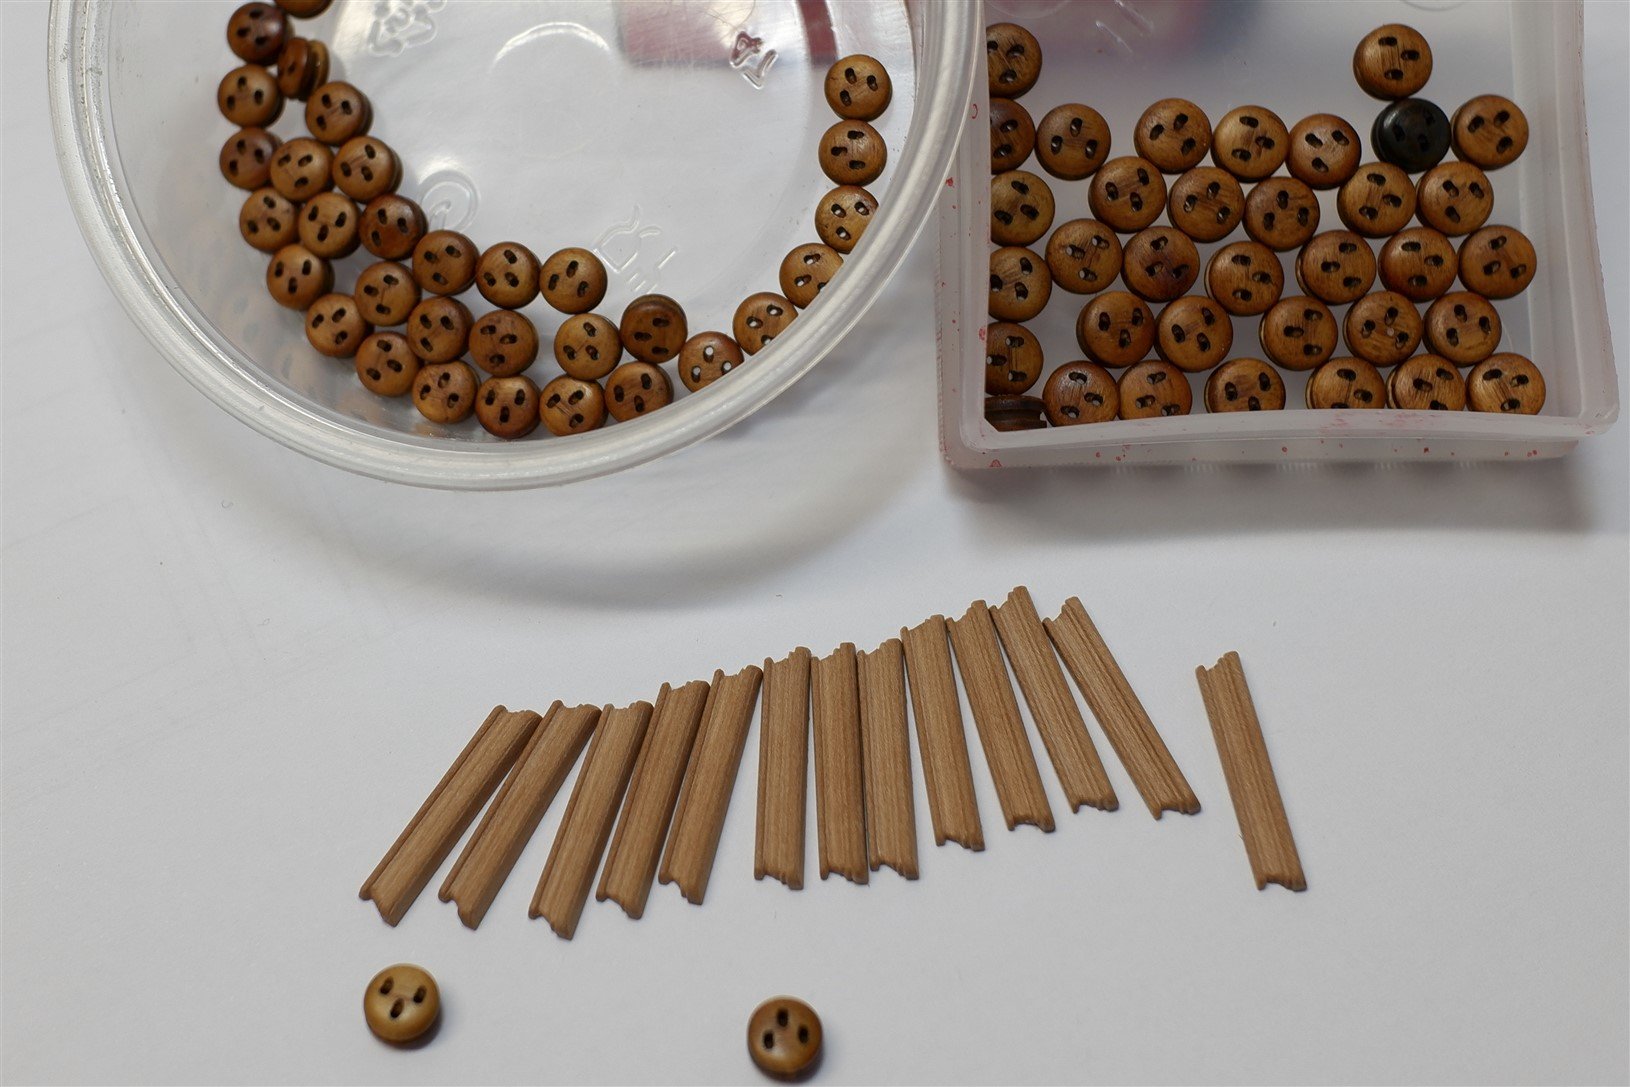
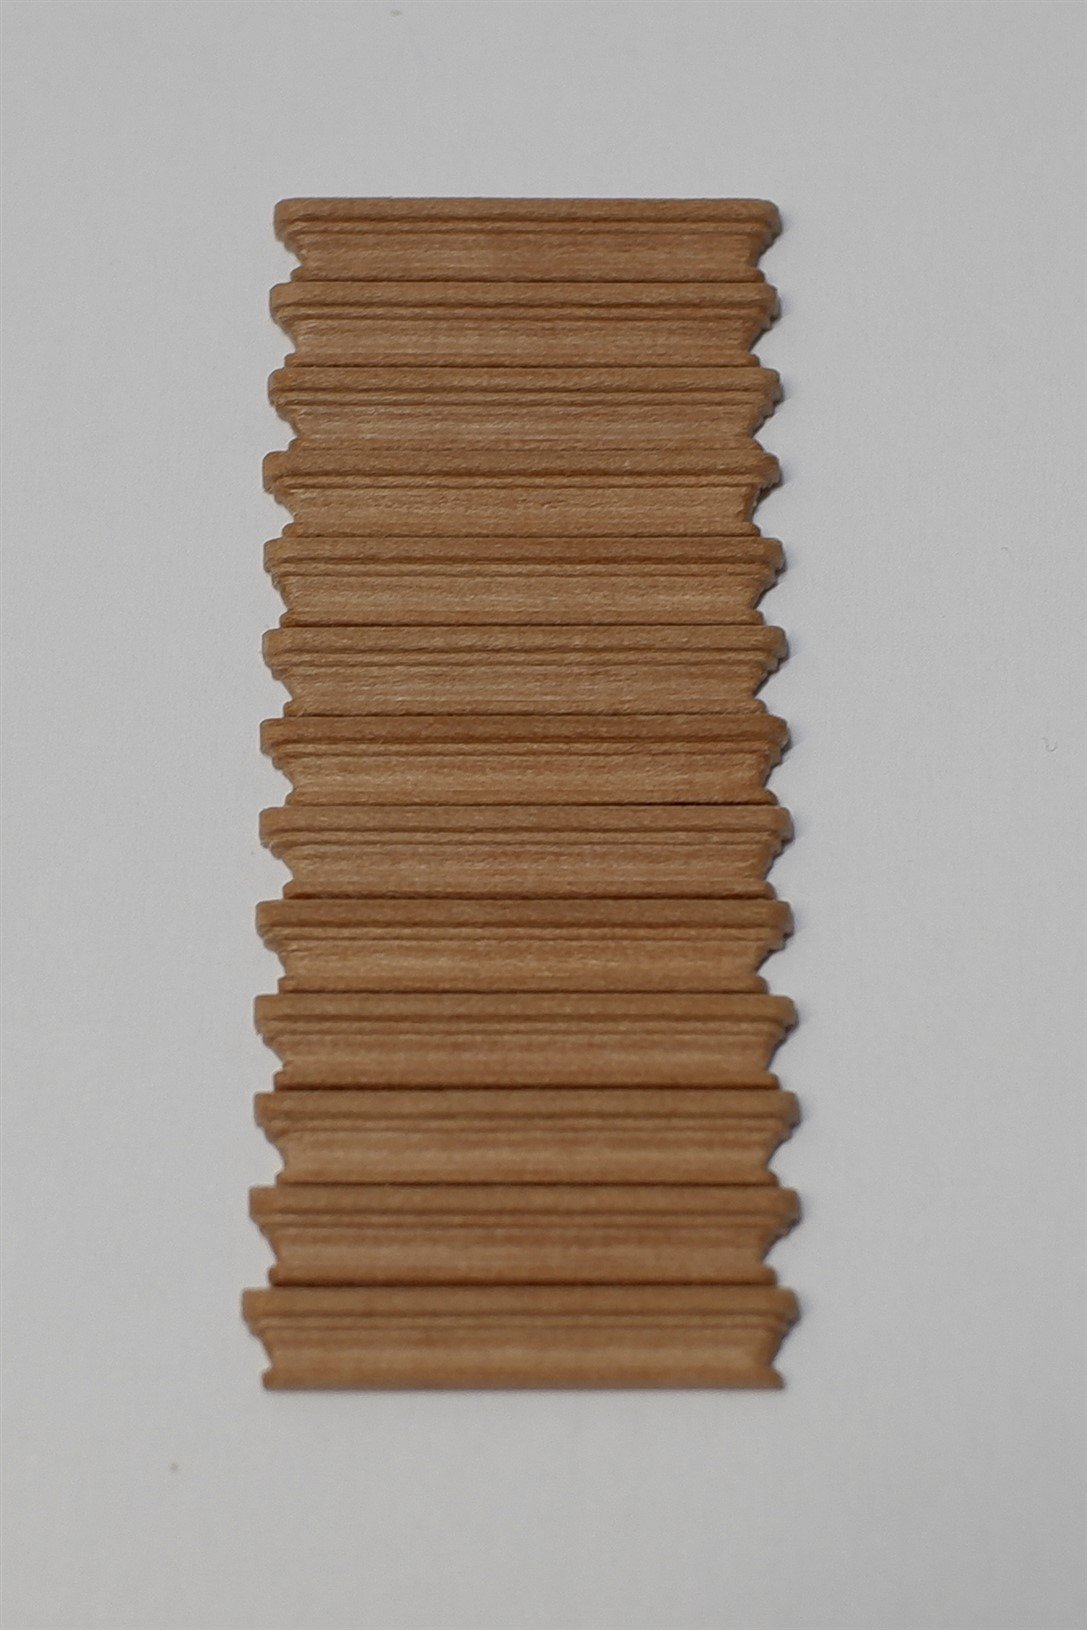
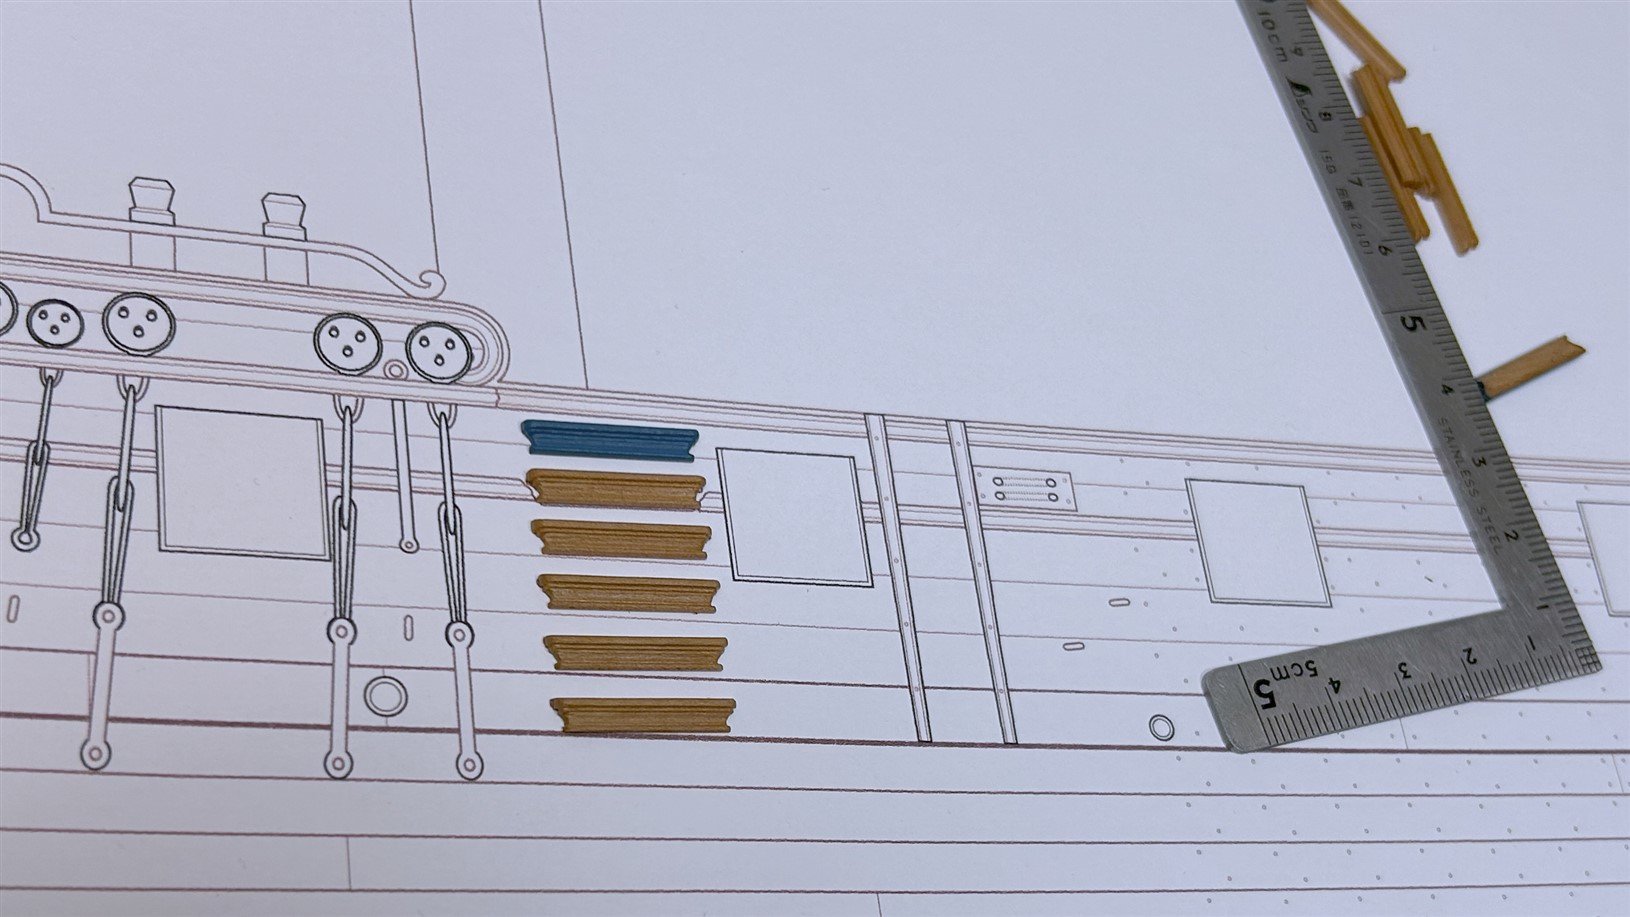
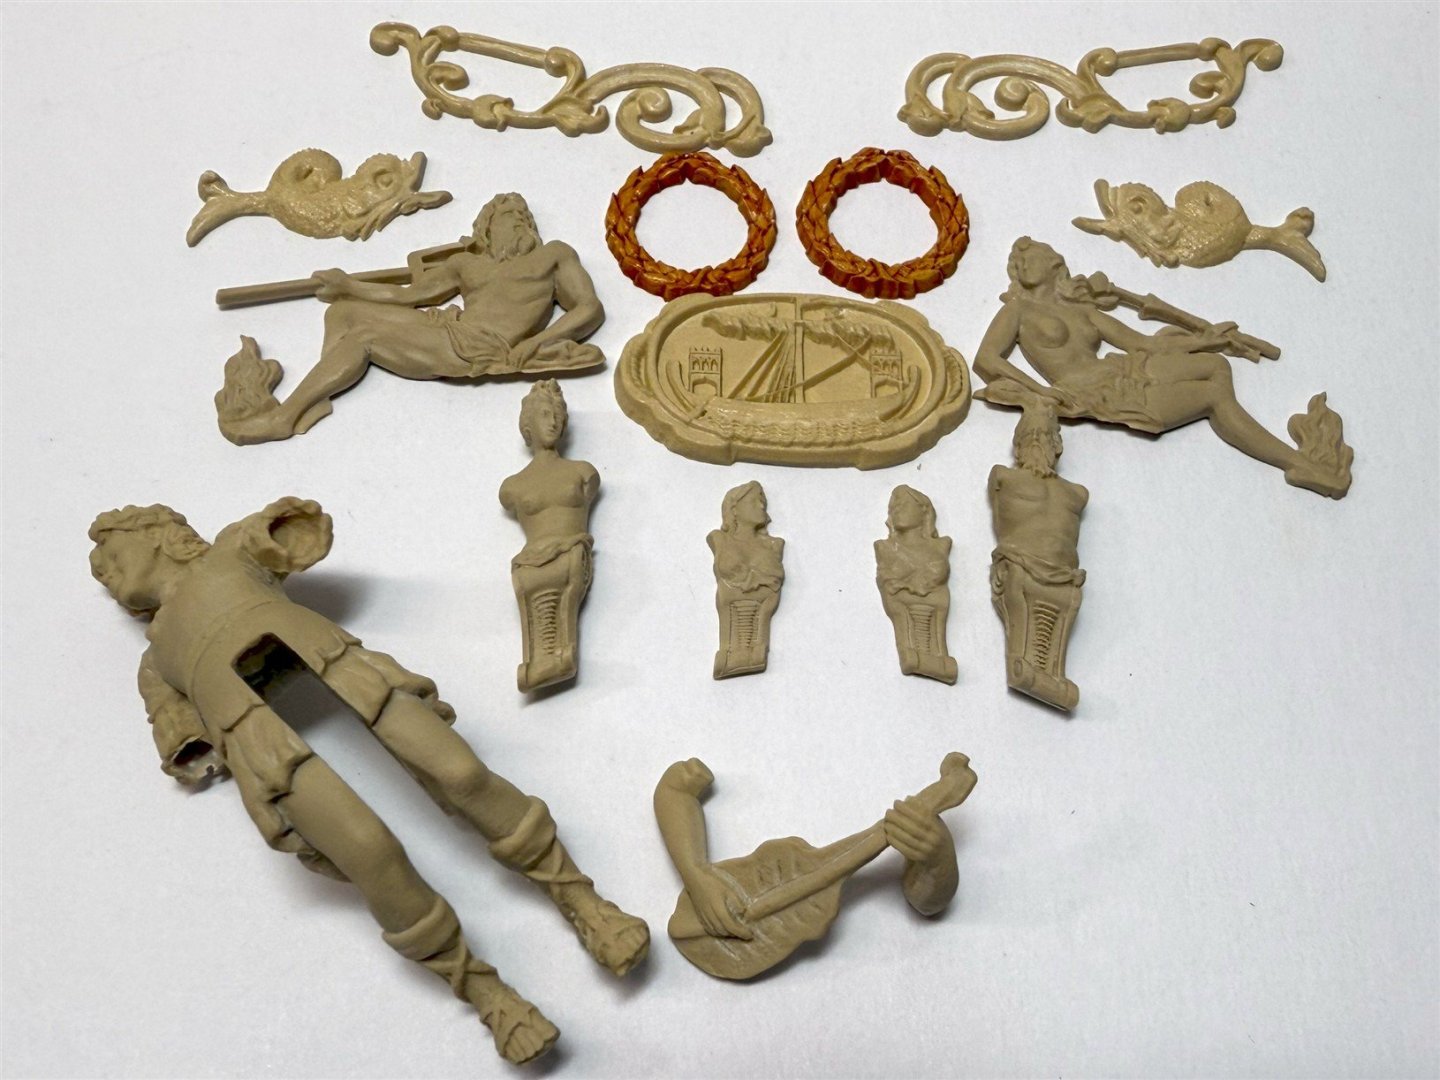
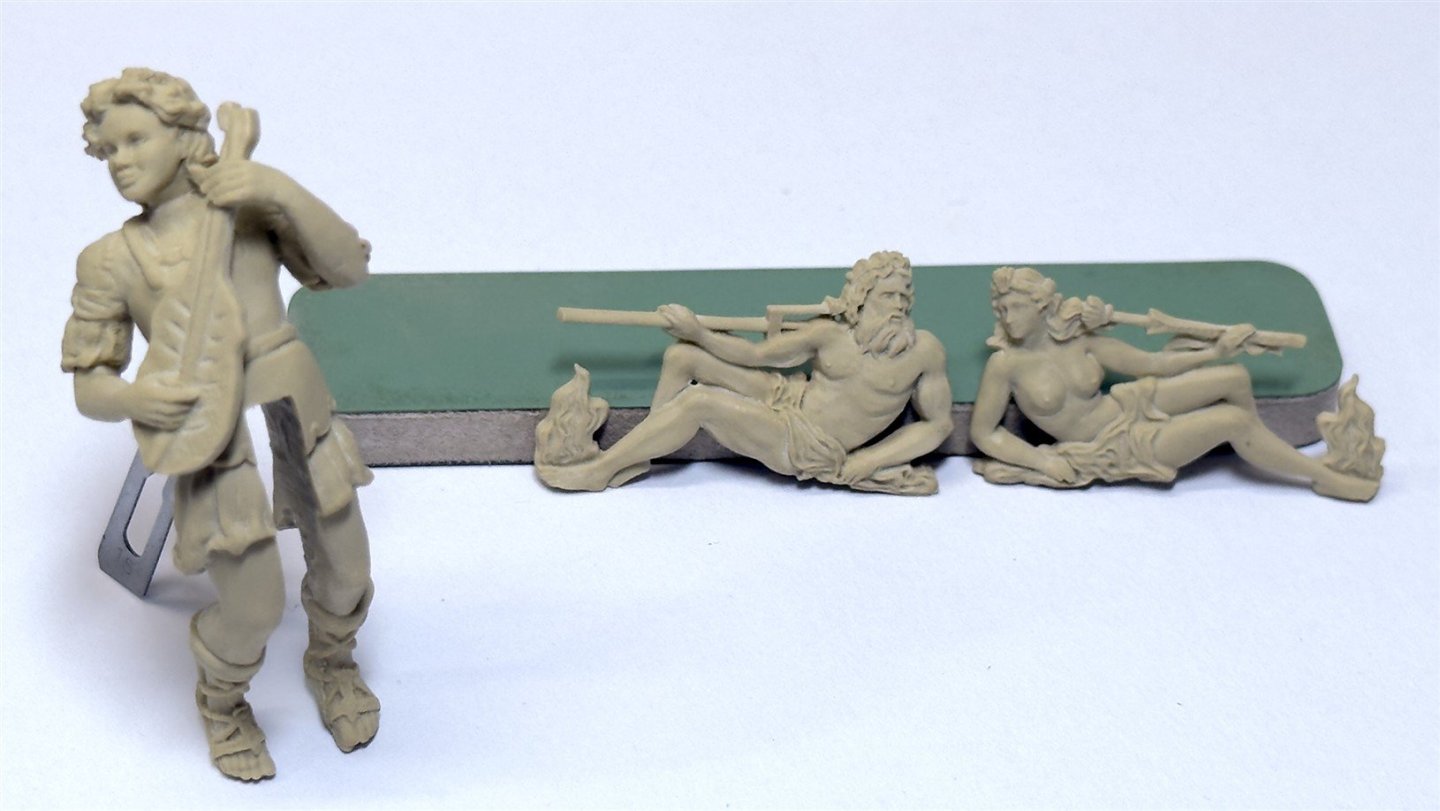
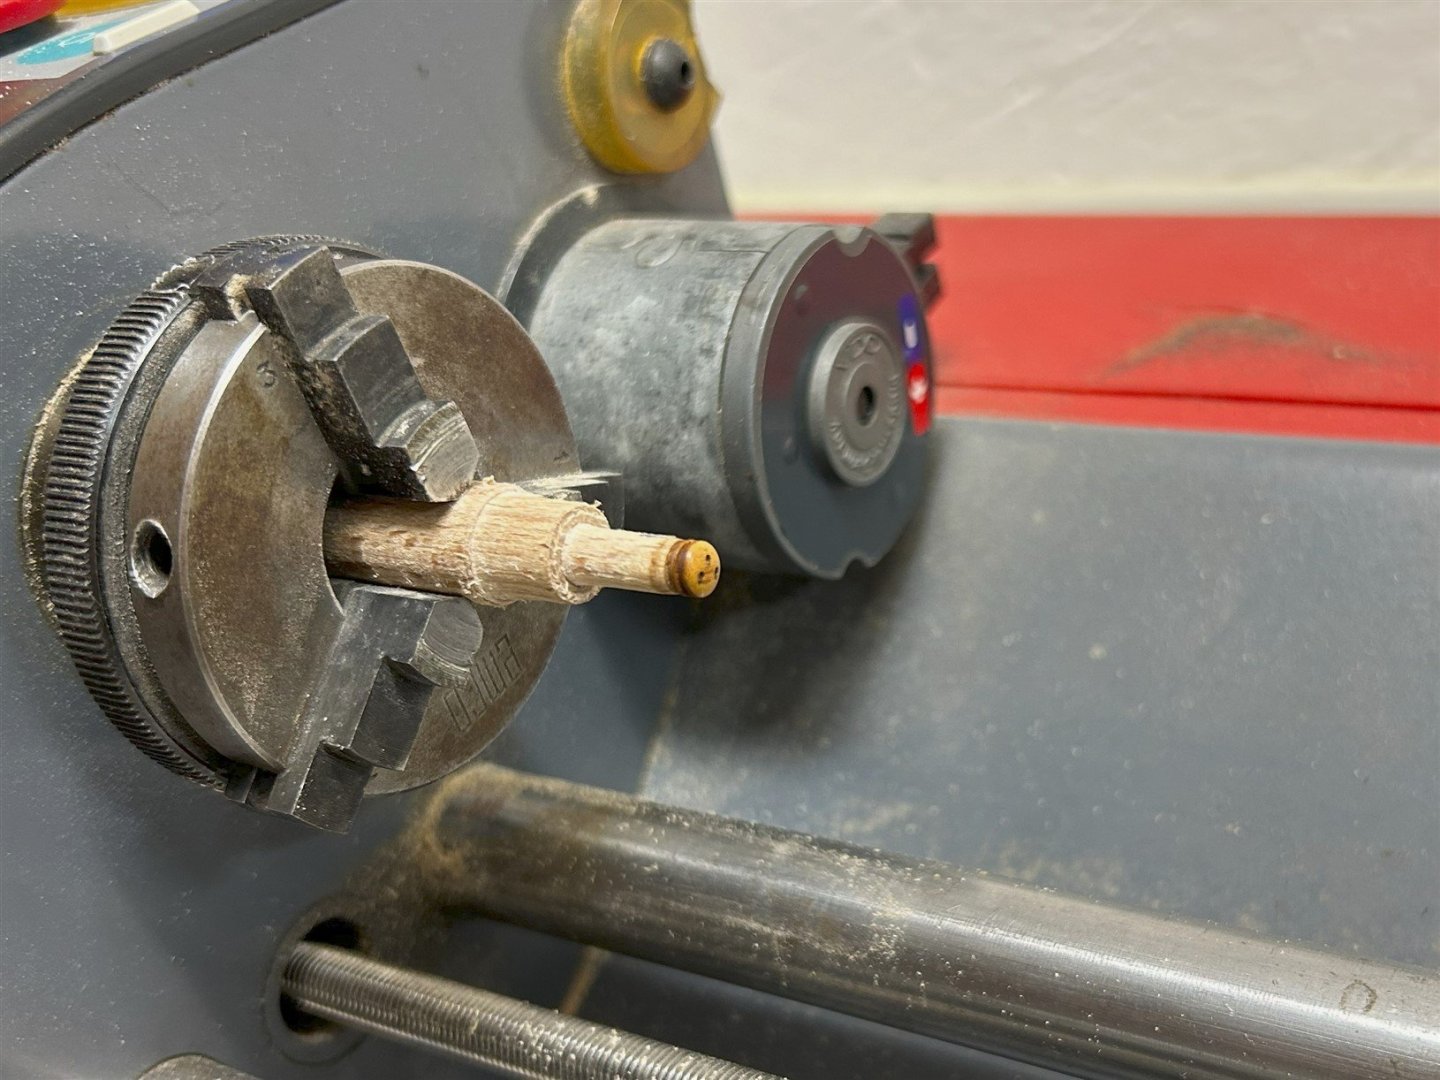
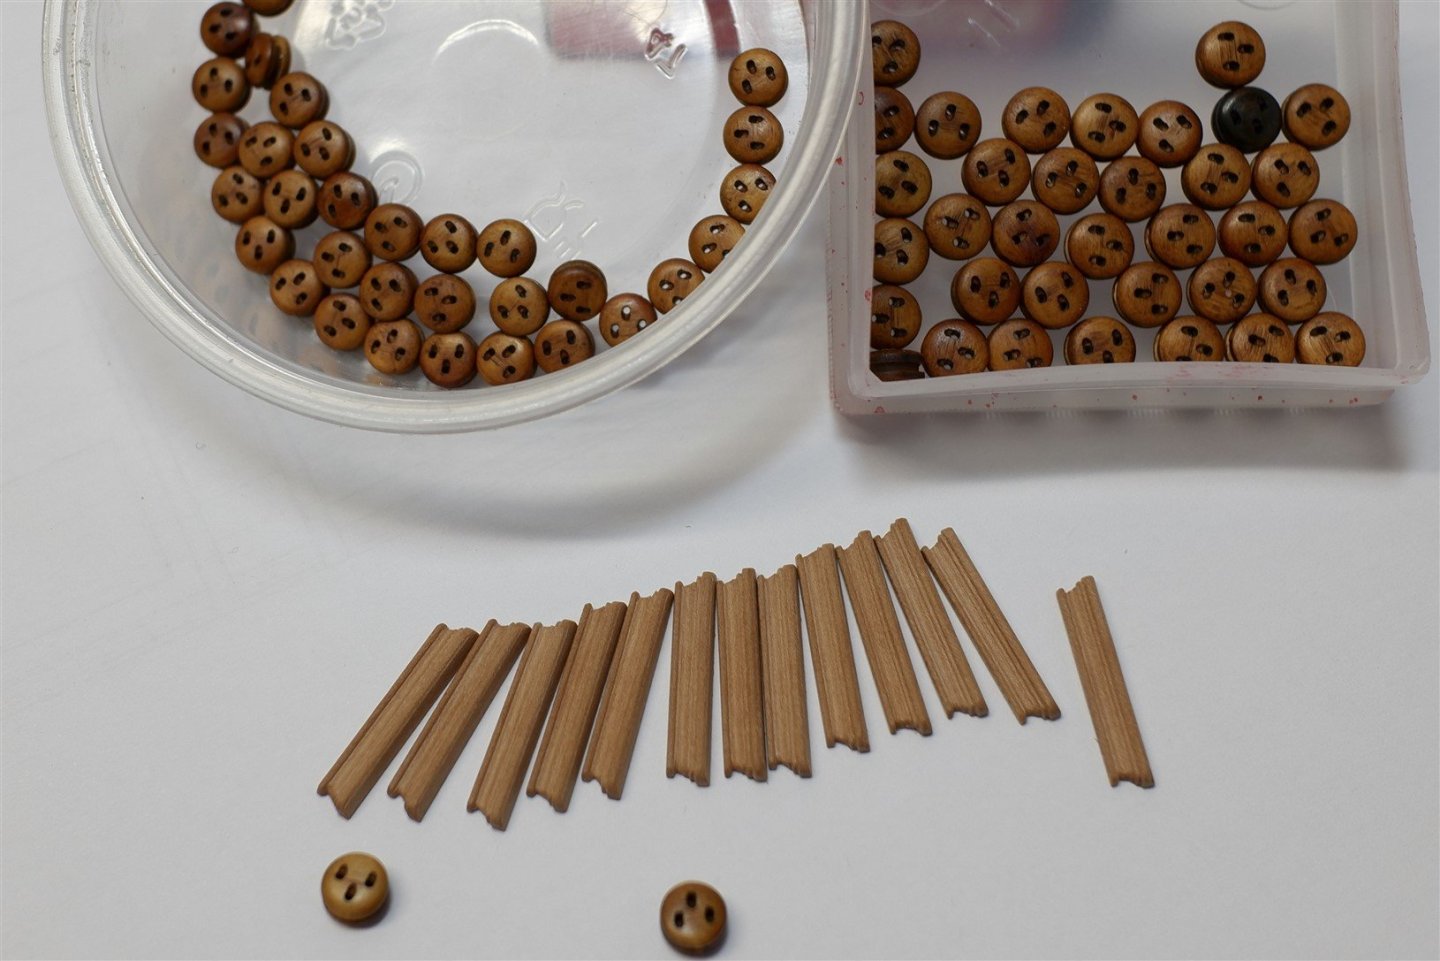
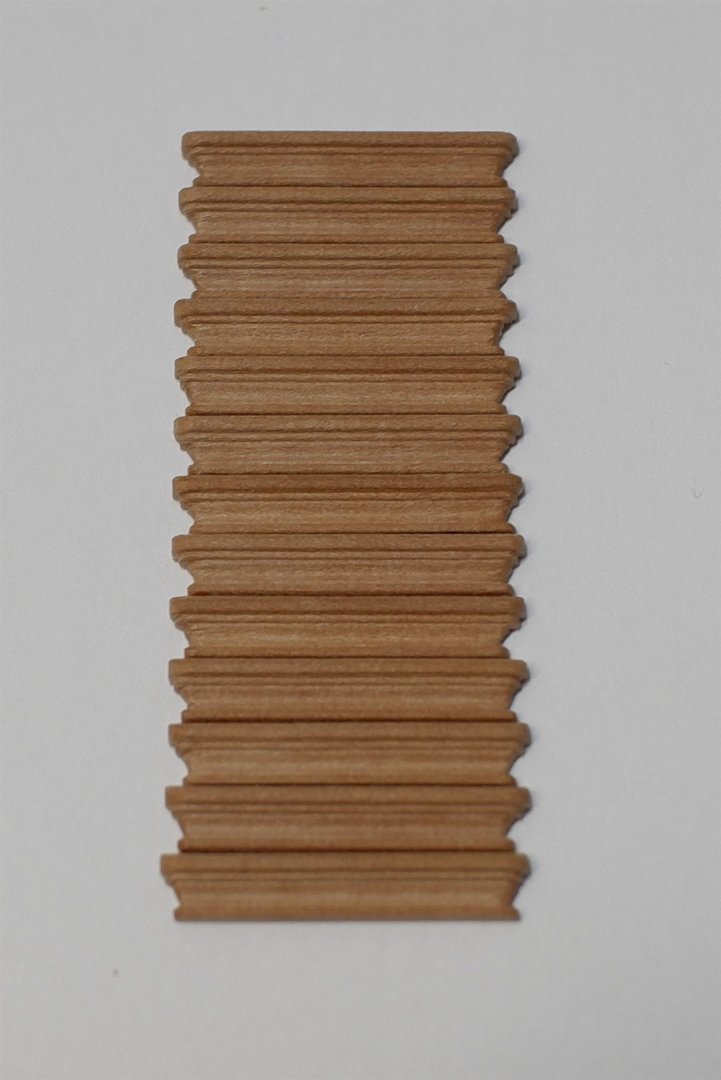
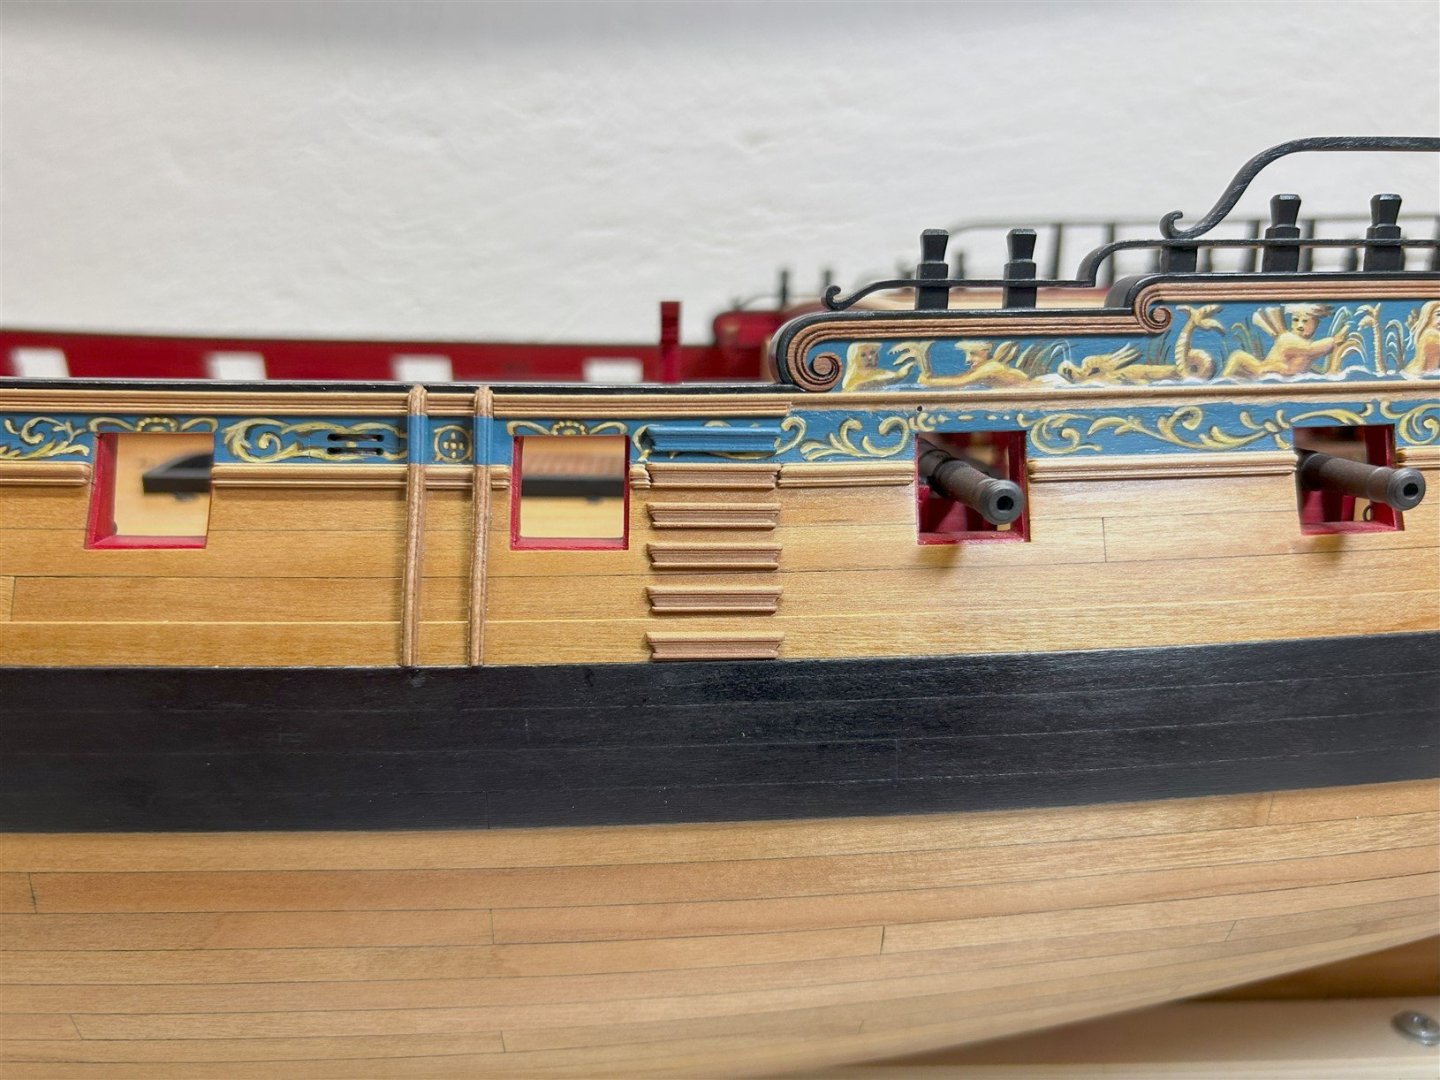
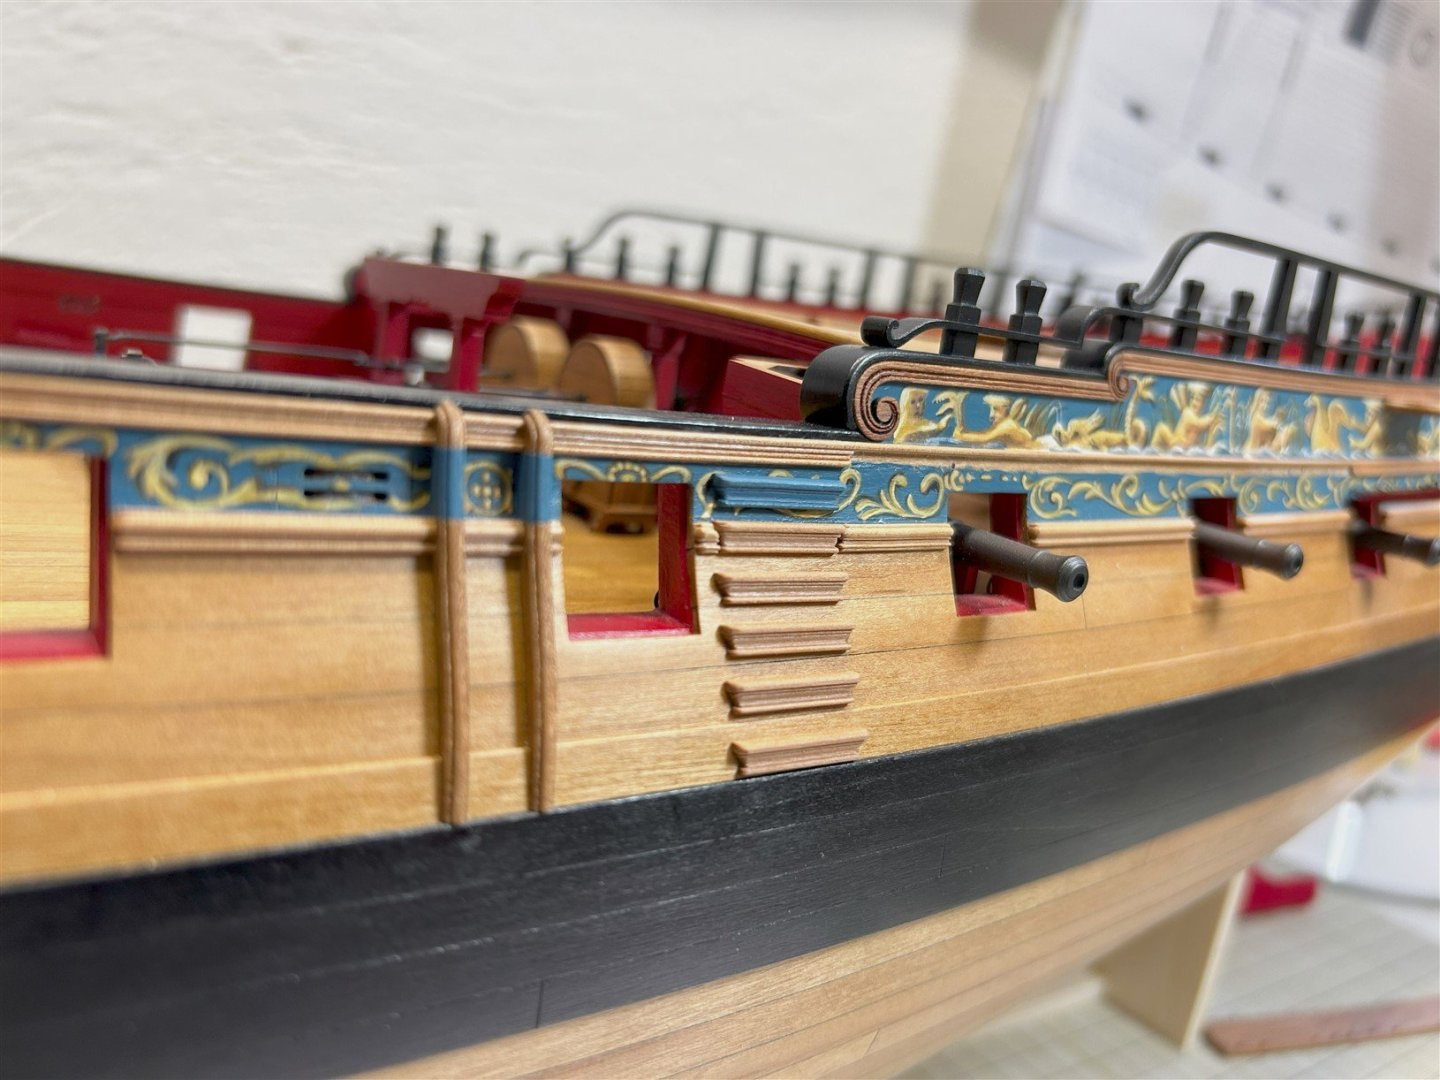
Fred, I am sorry that I do not have any pictures of the making of the entry steps. But the method was the same as for the fancy moldings. I'm slowly moving on here are some photos


-
Beautiful work Ben. I like it a lot also like this when you left a lot of parts without red paint.
- 399 replies
-
- 1
-
-
- winchelsea
- Syren Ship Model Company
- (and 1 more)
-
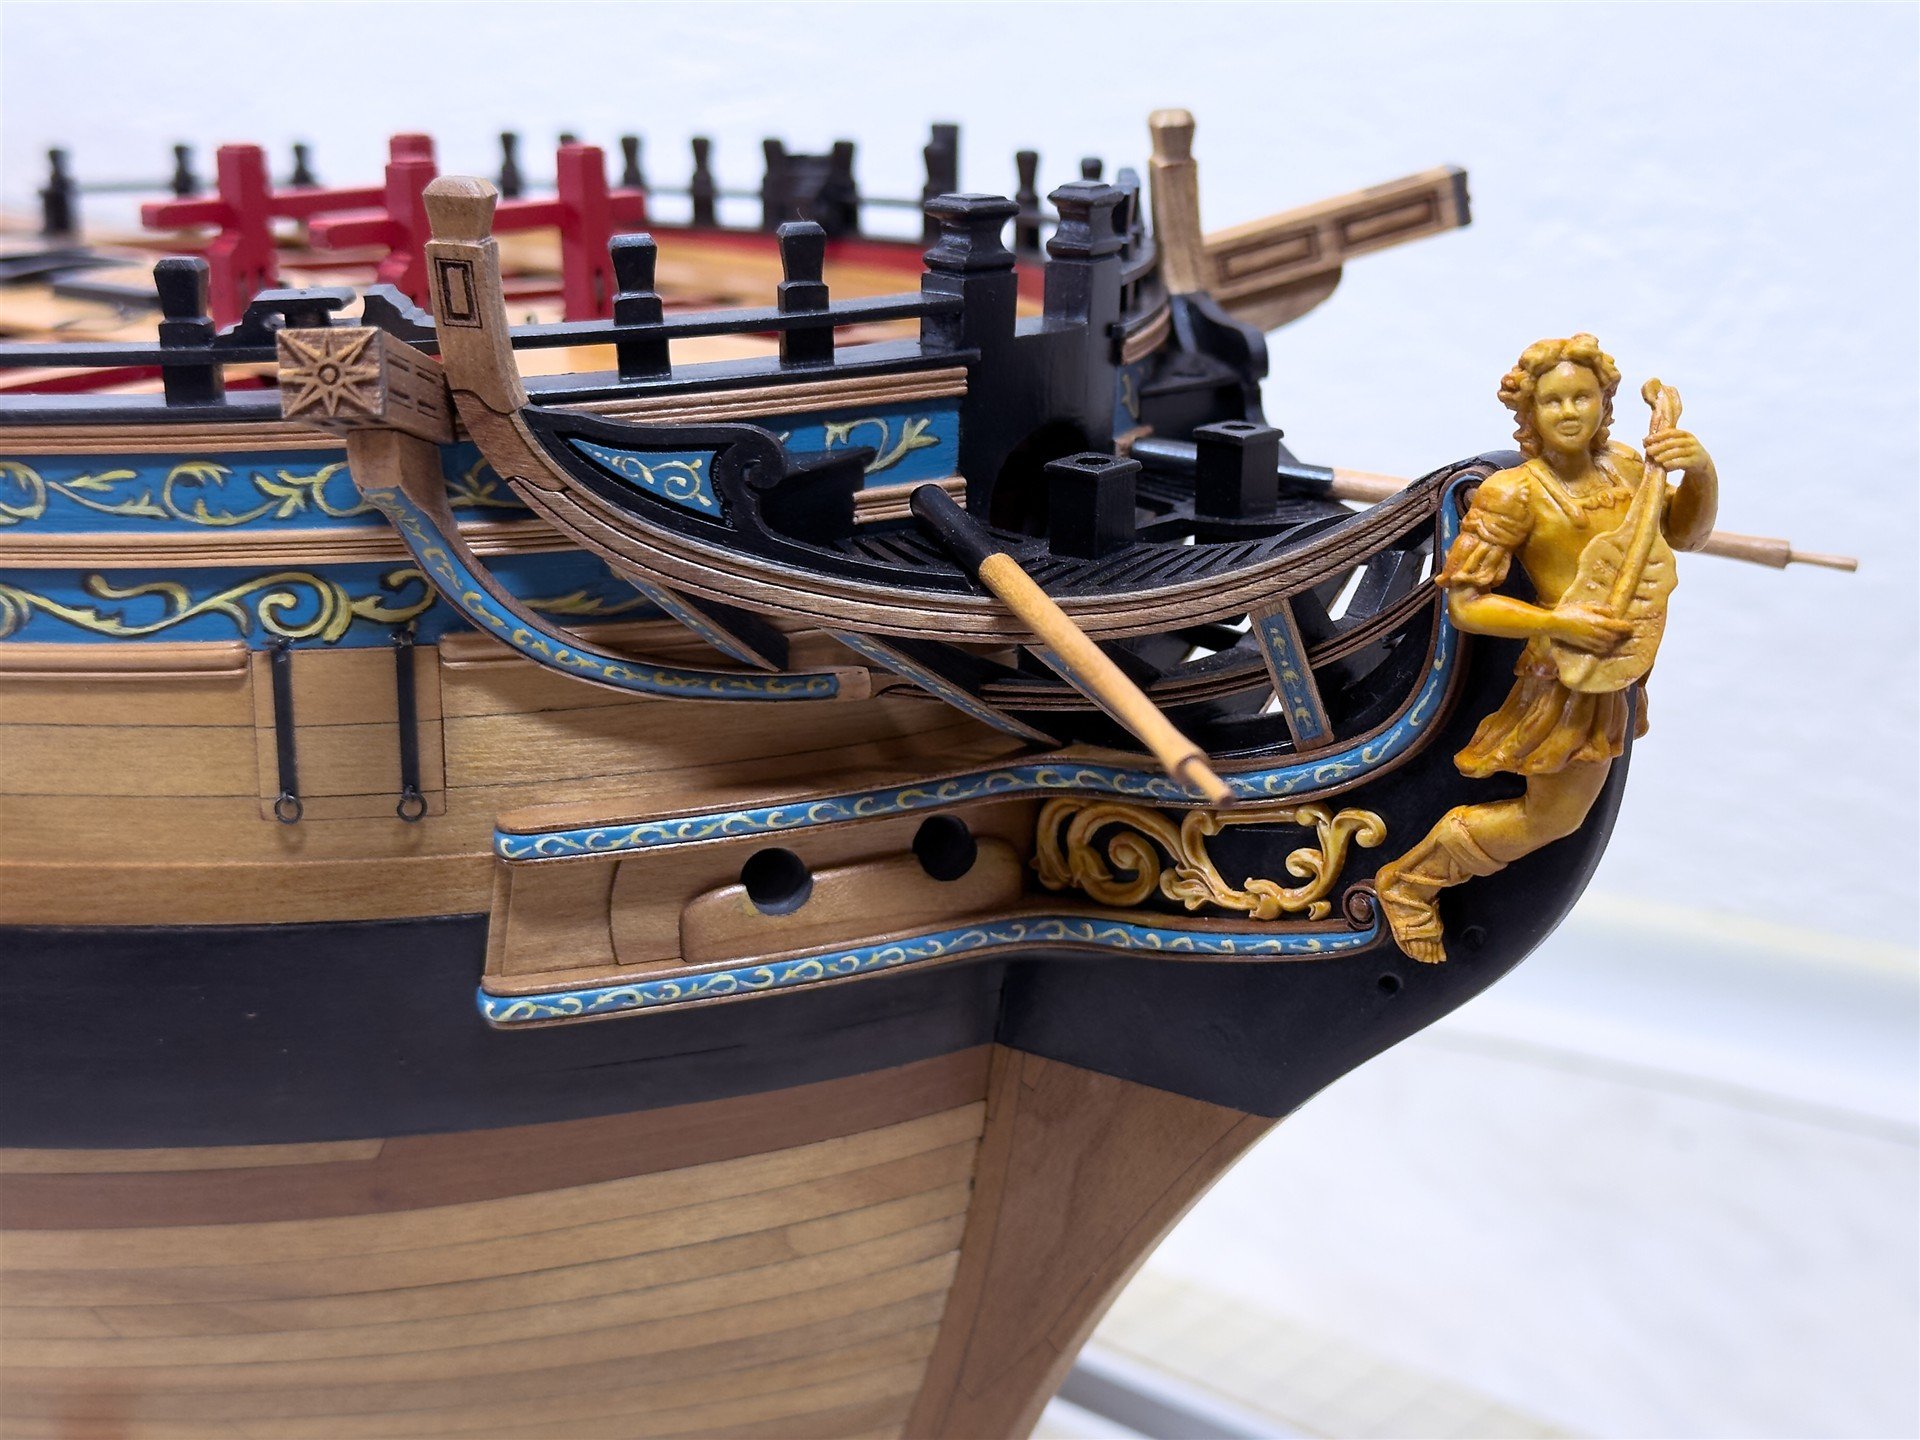
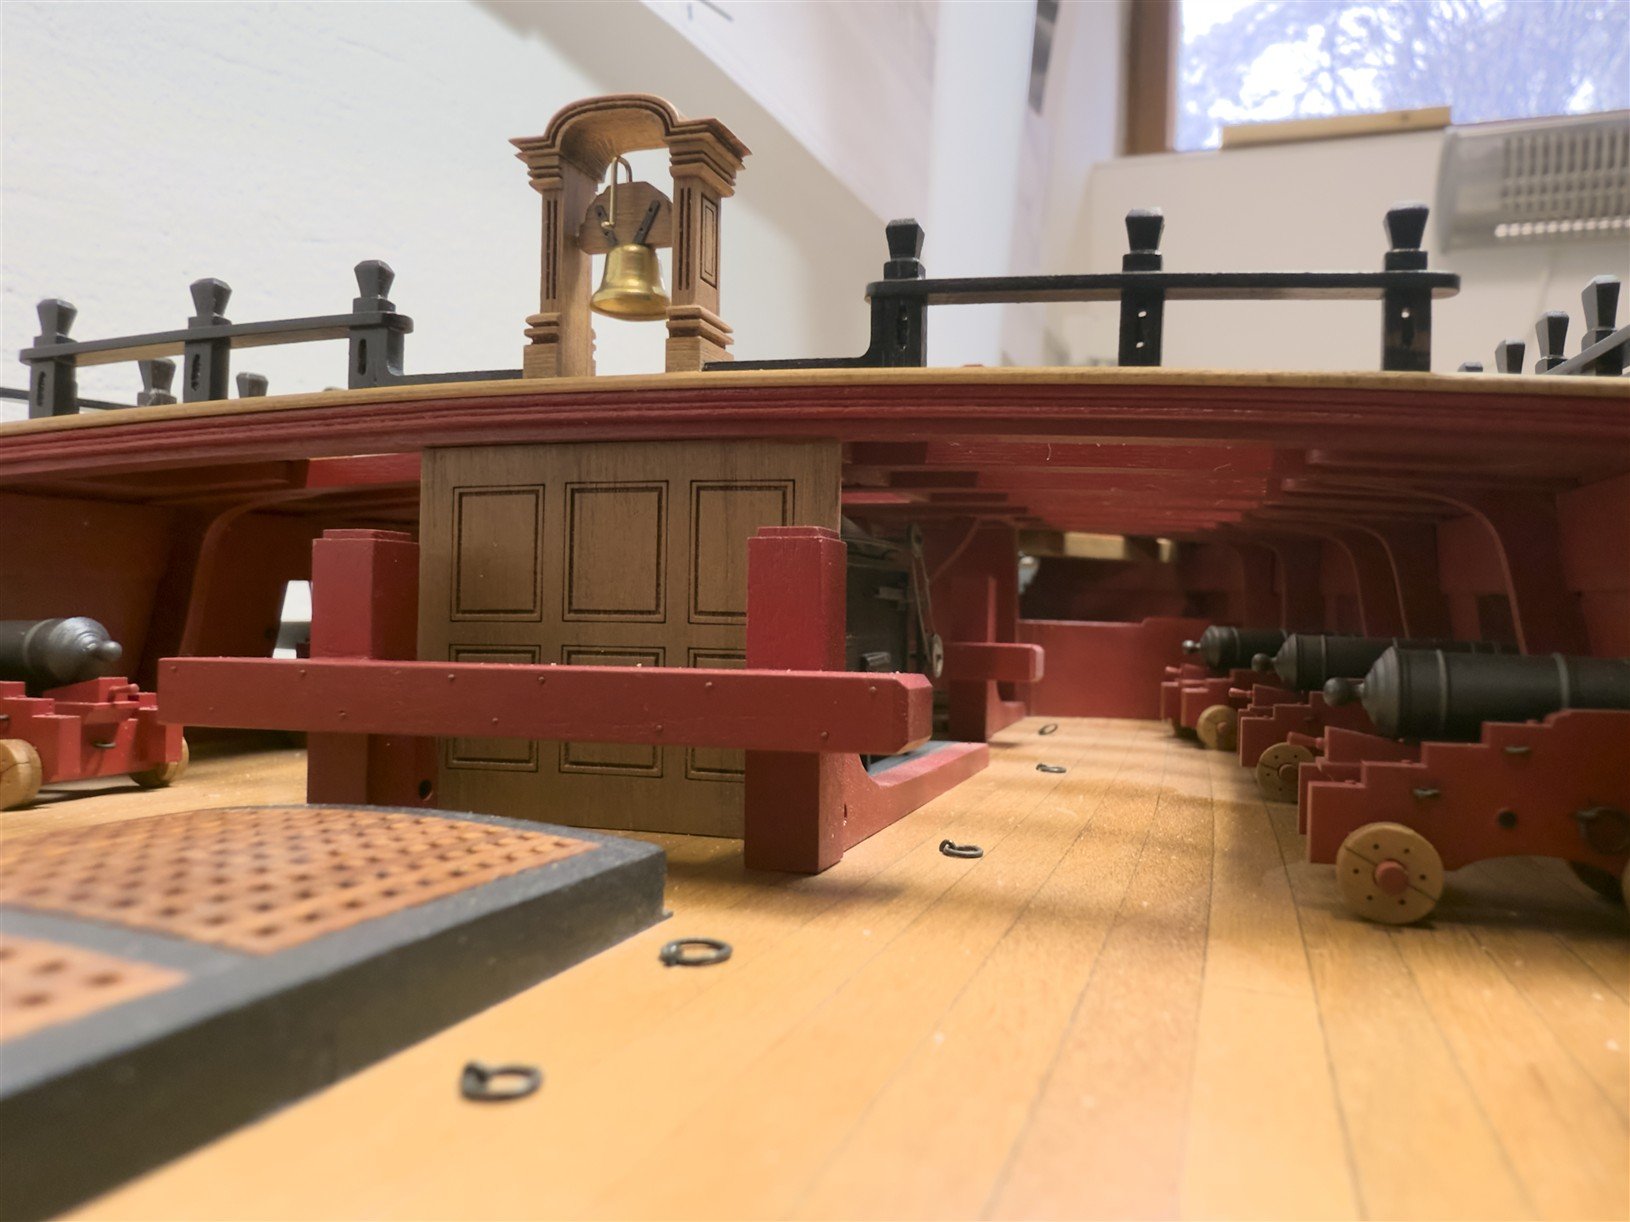
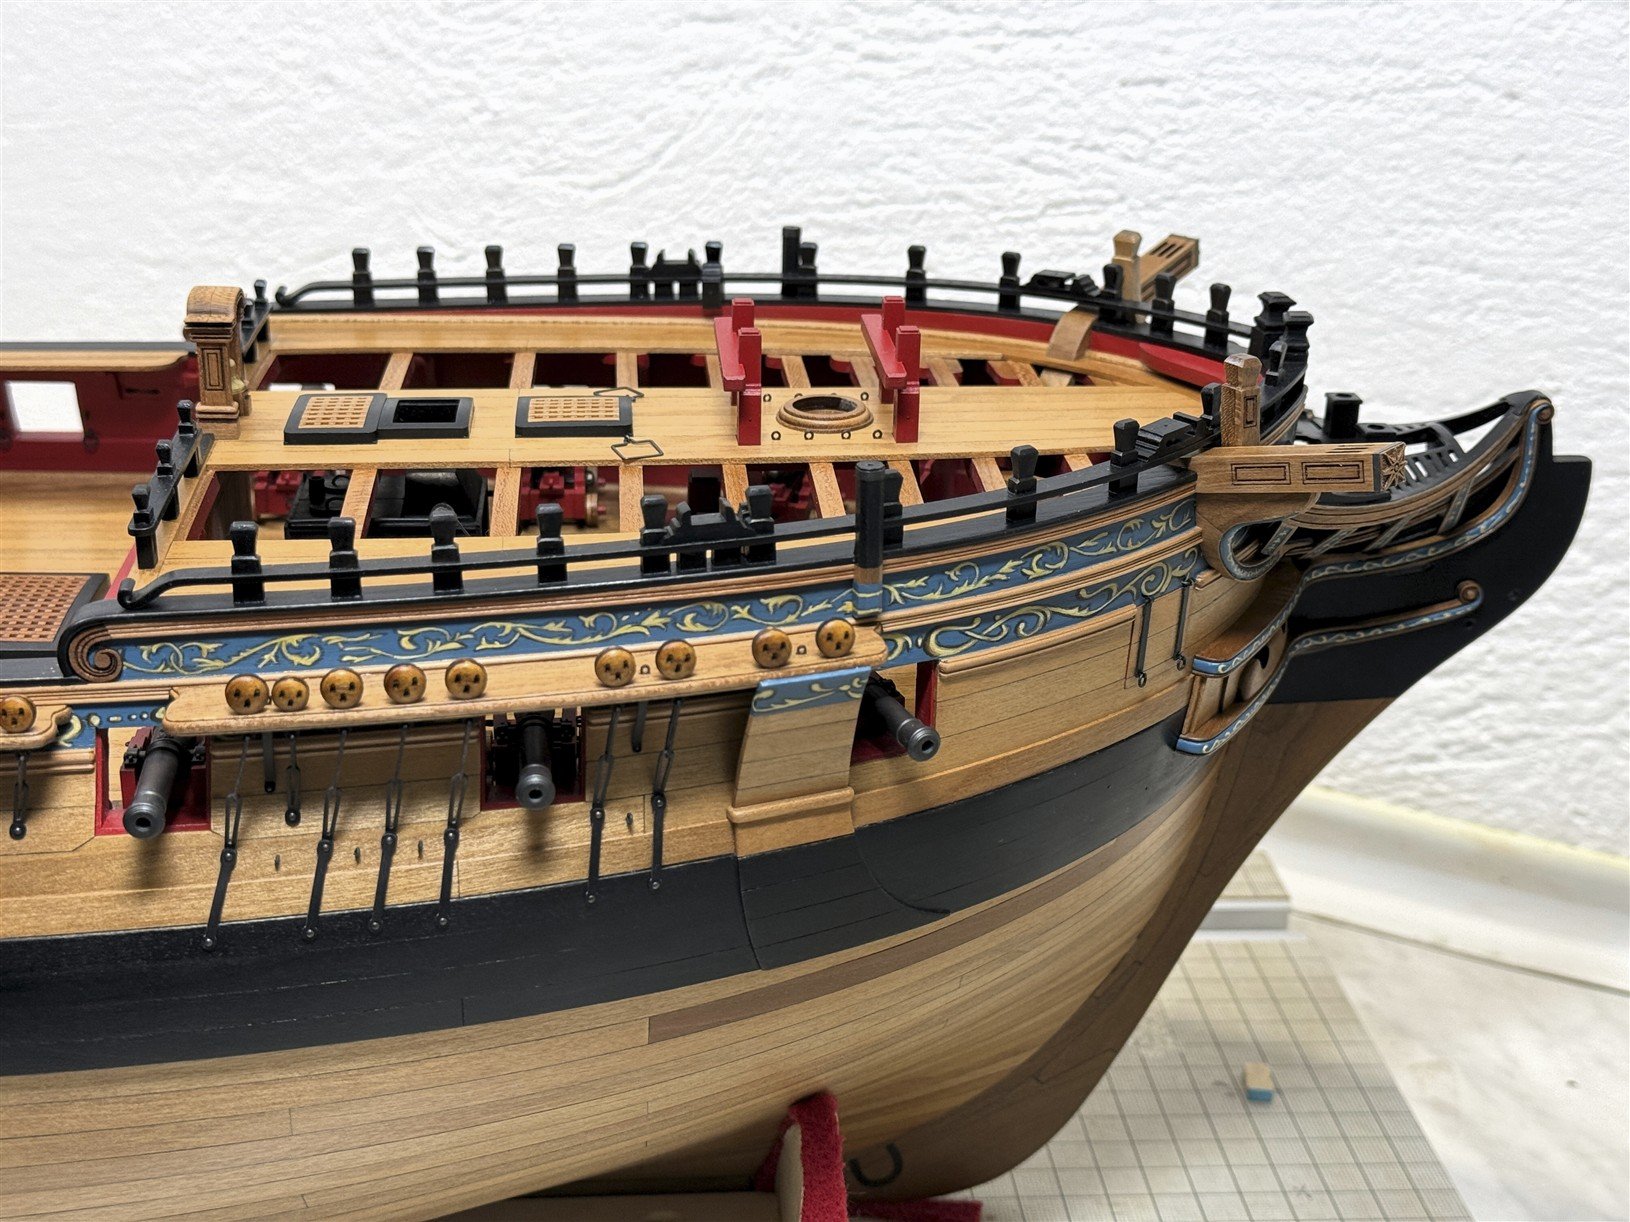
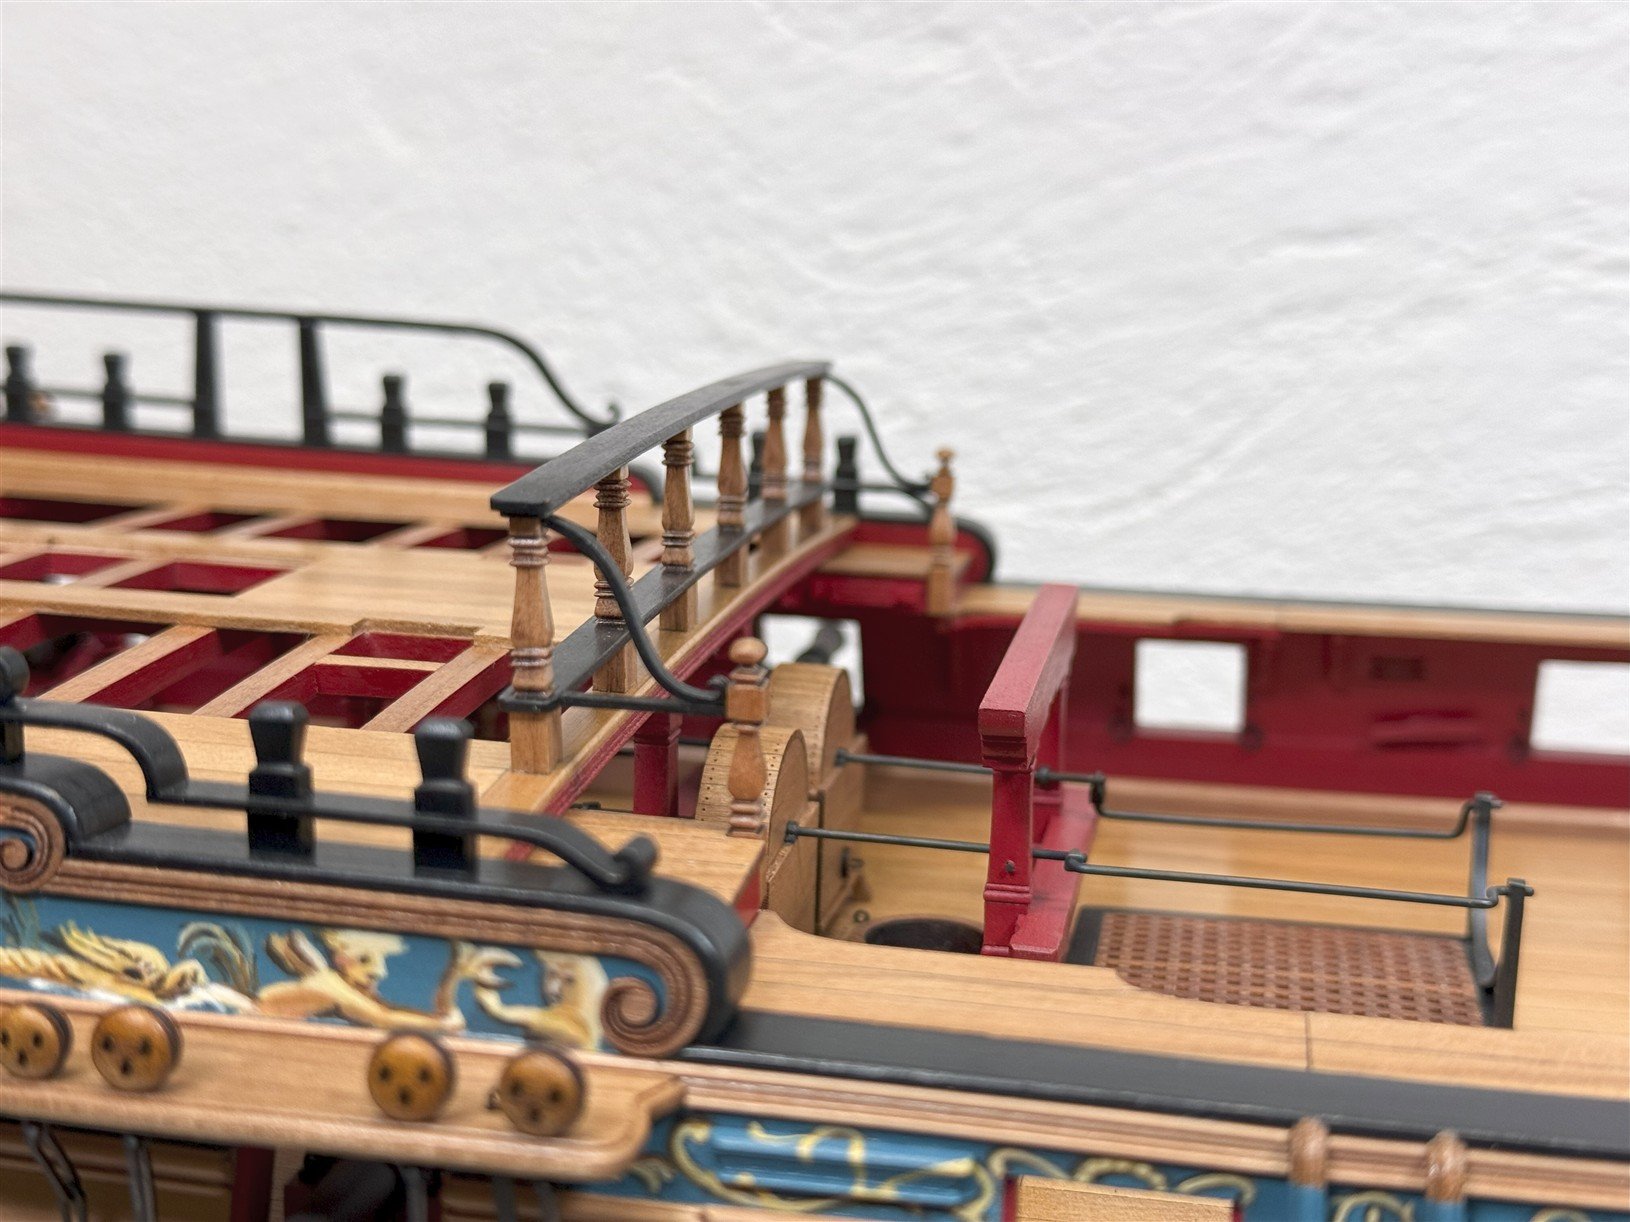
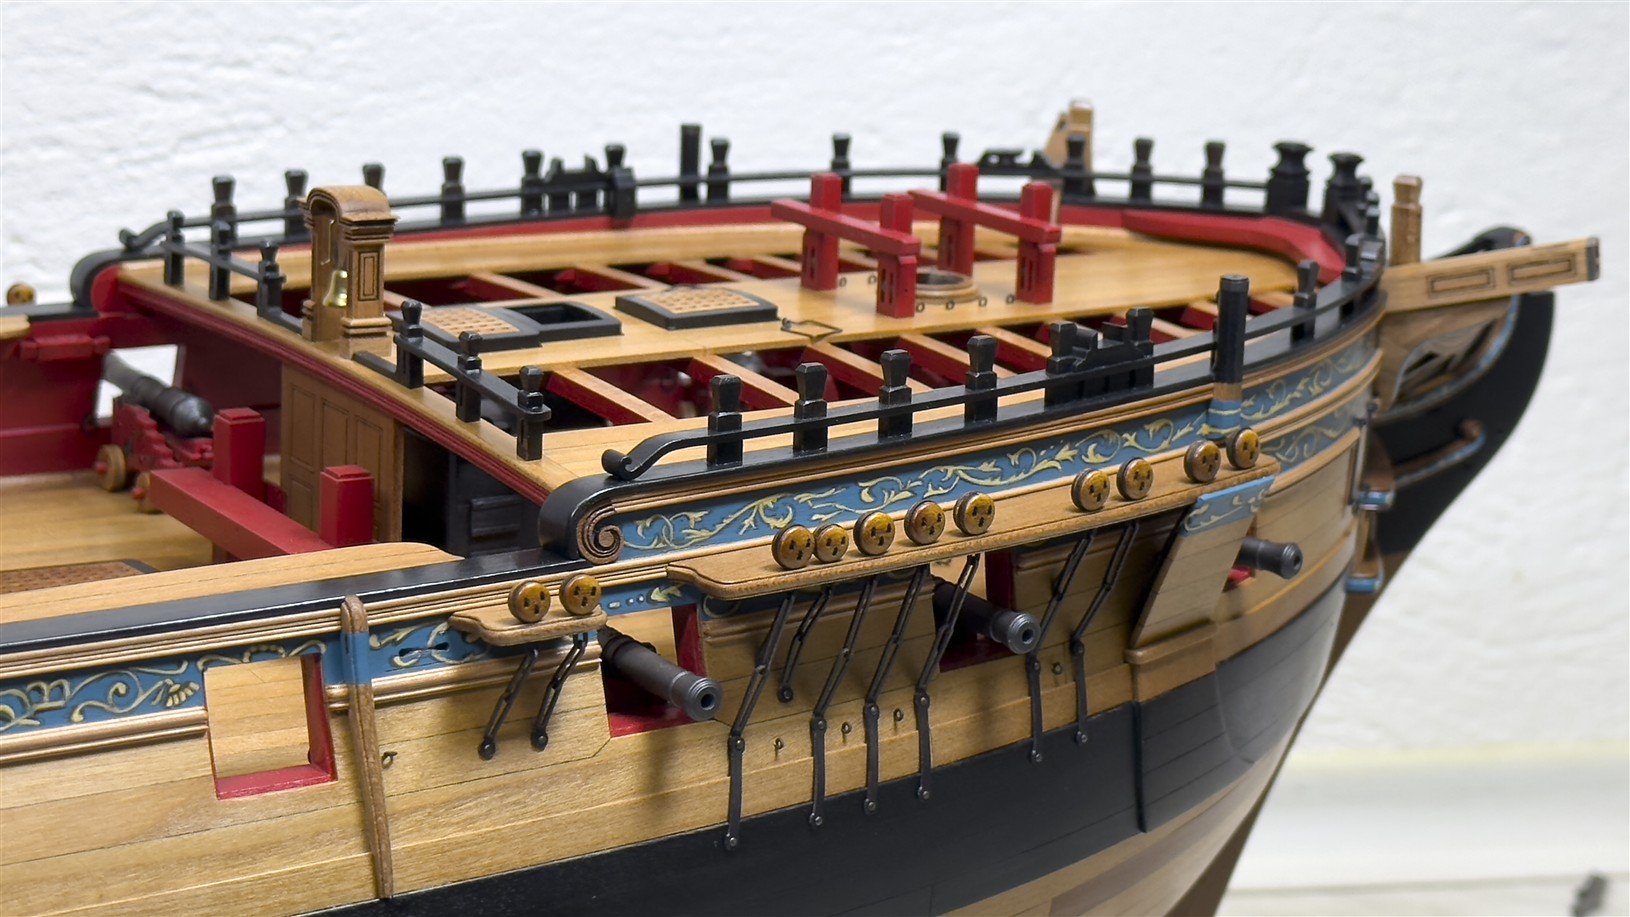
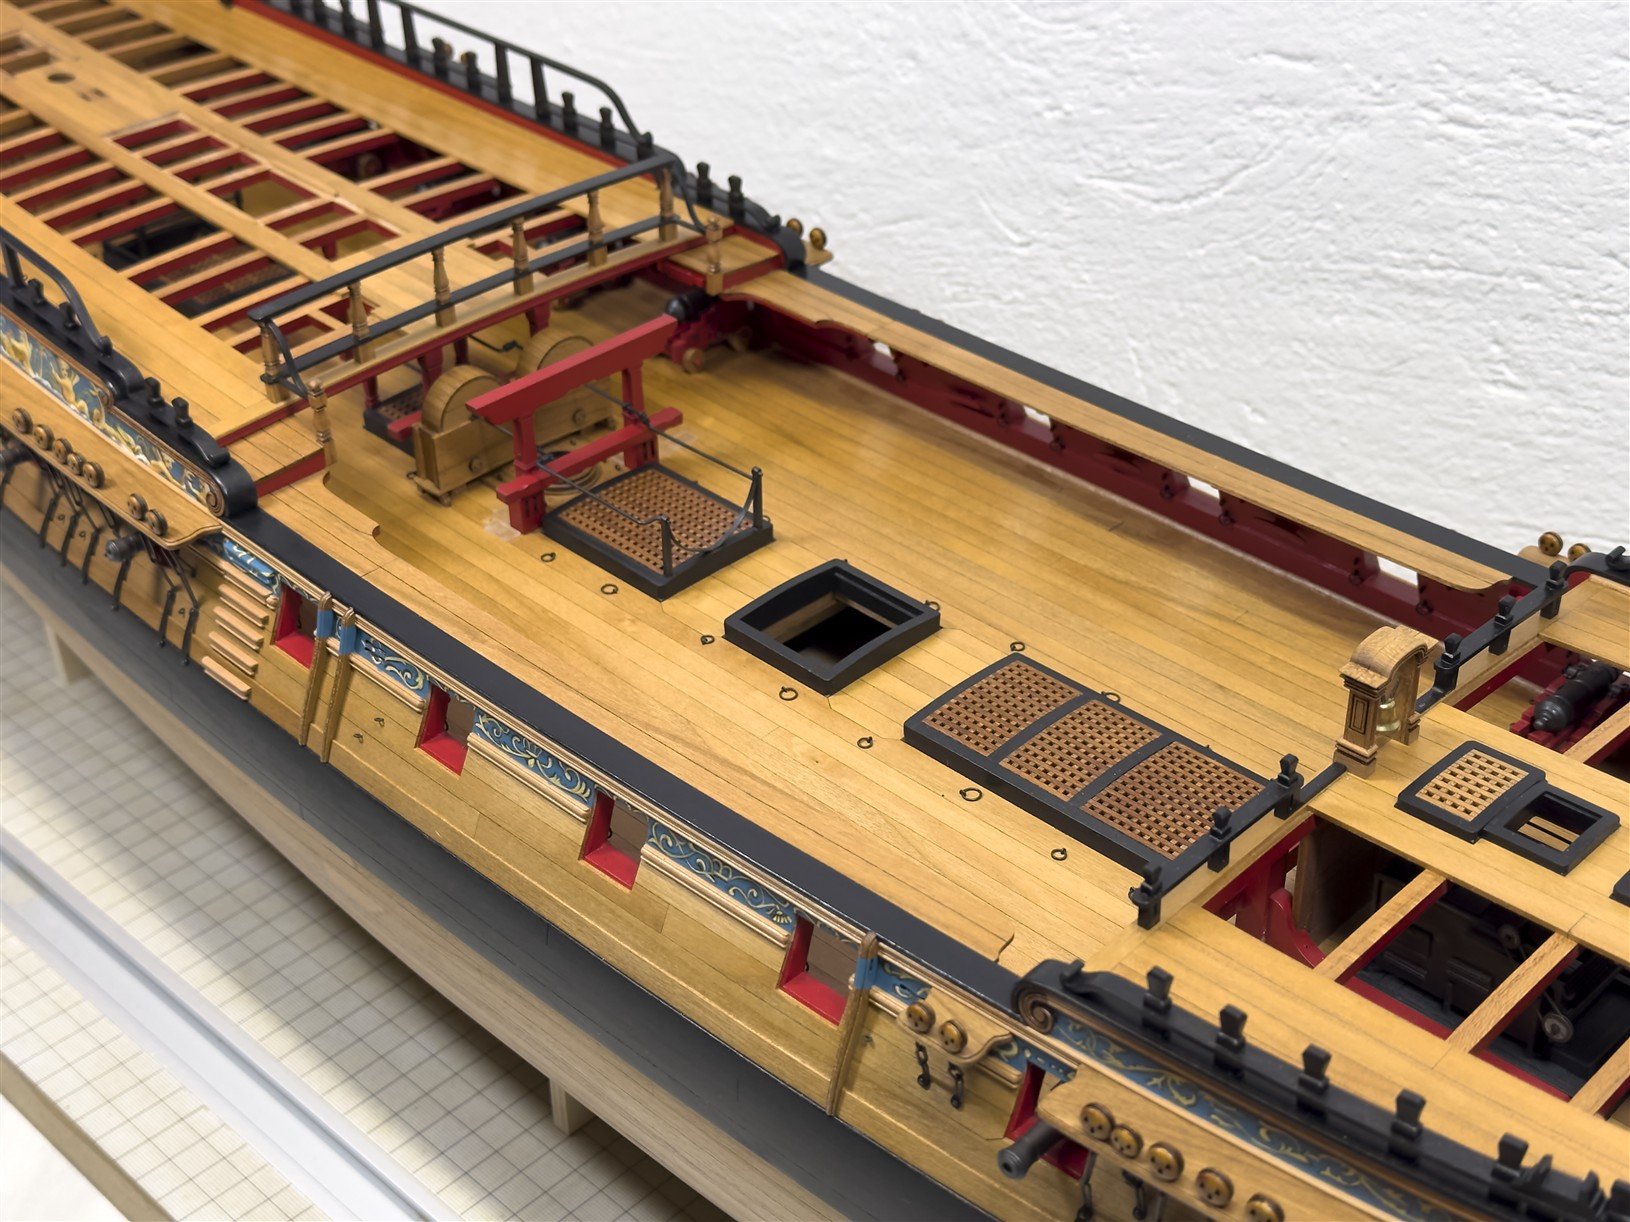
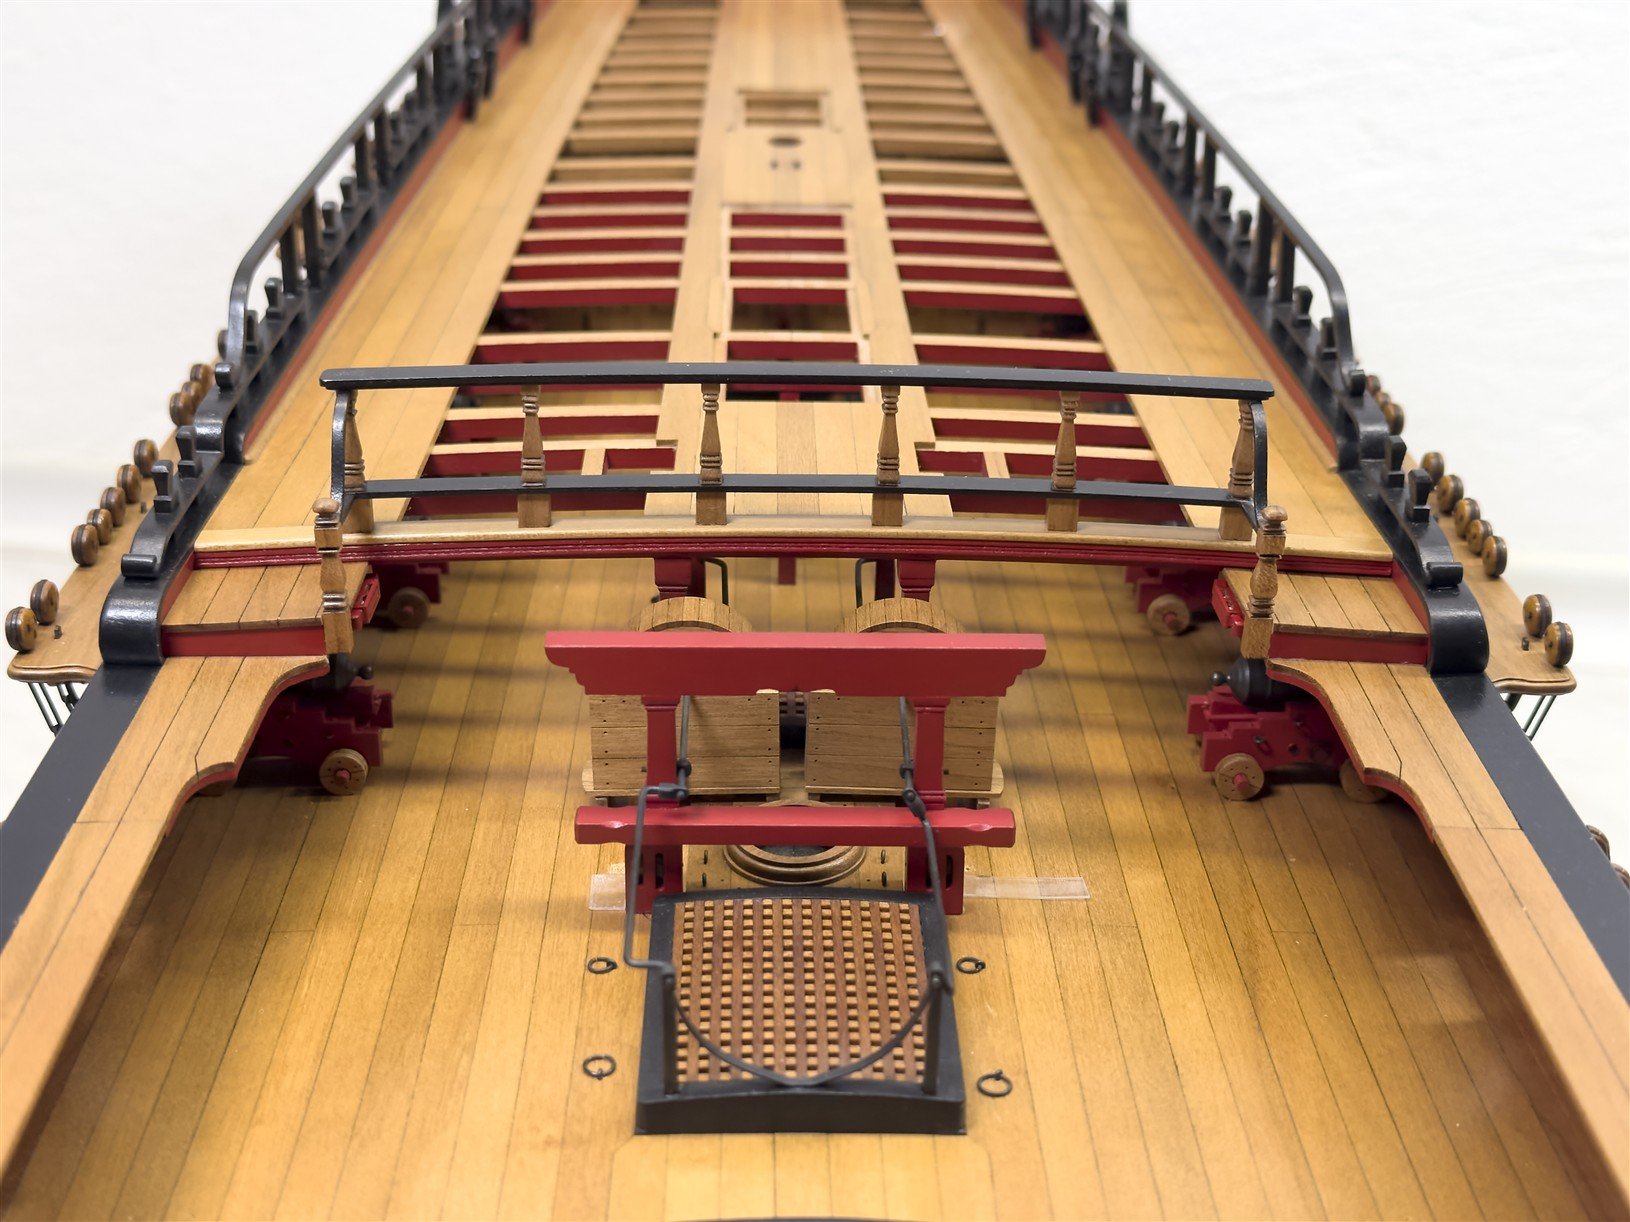
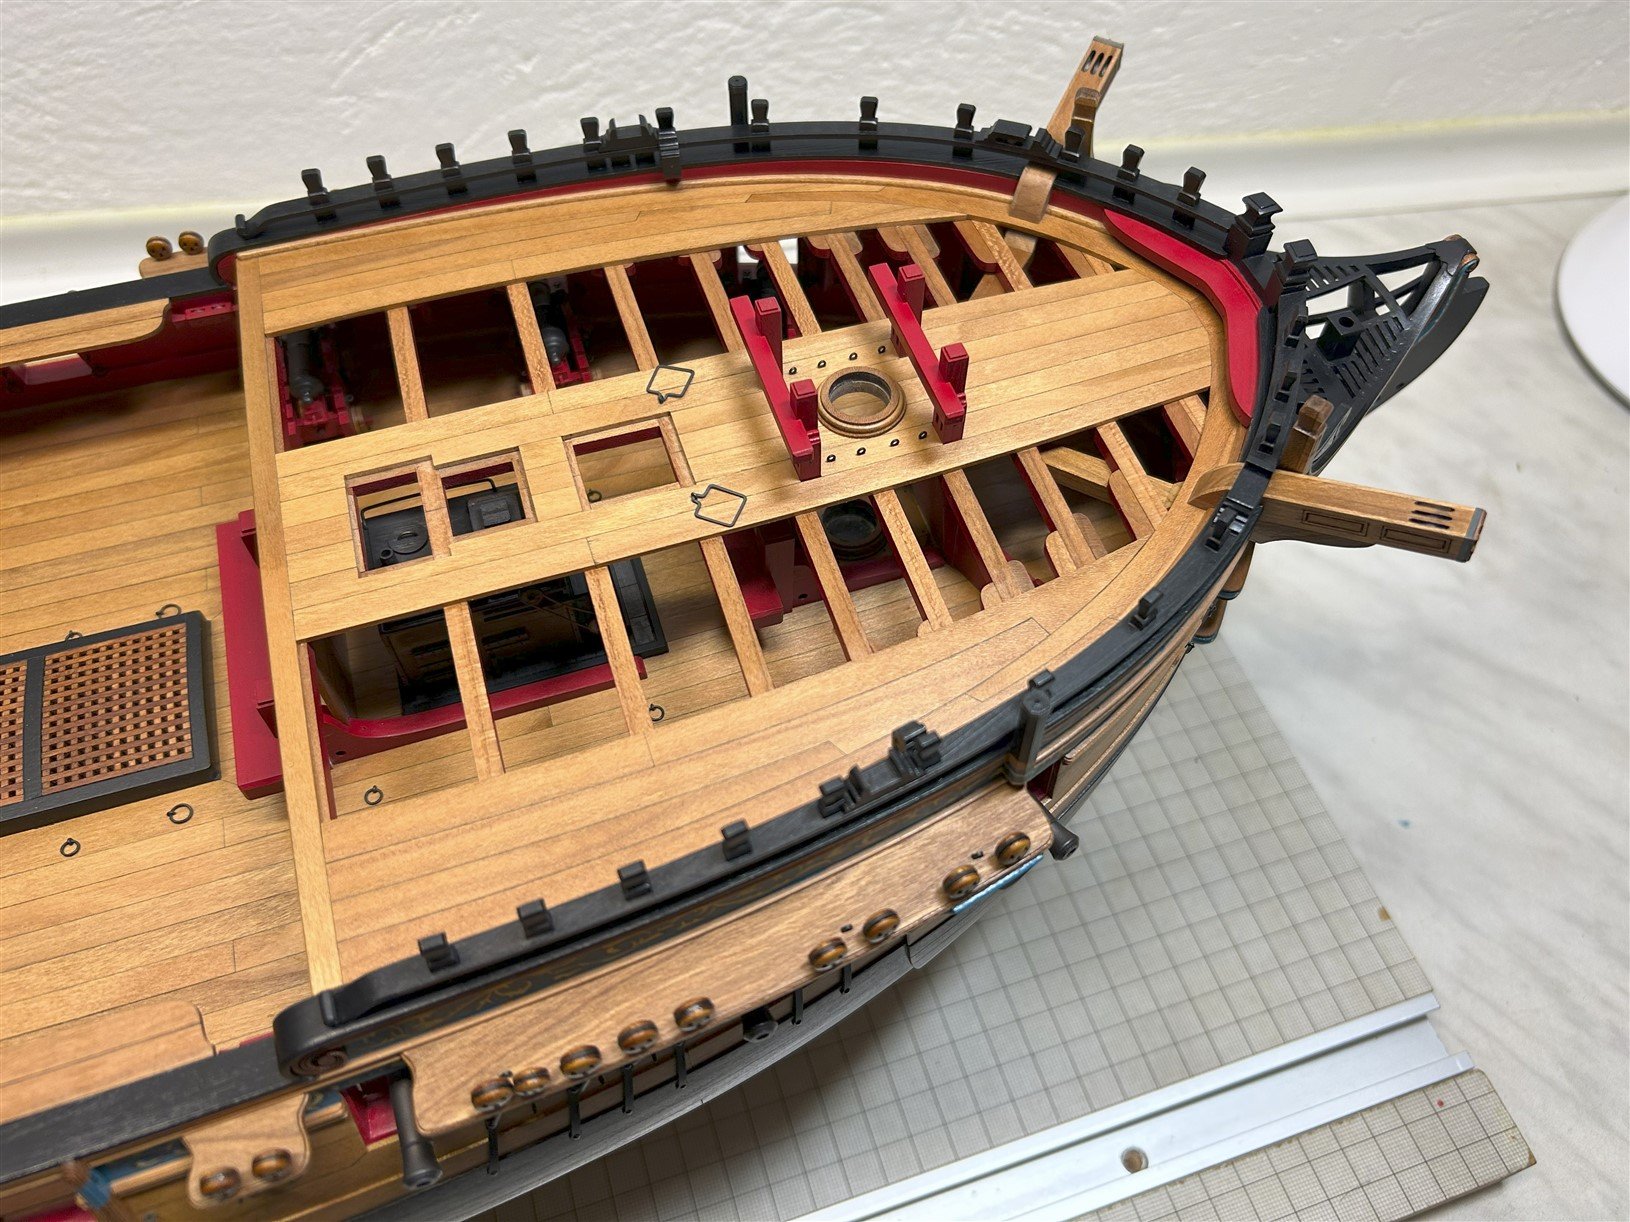
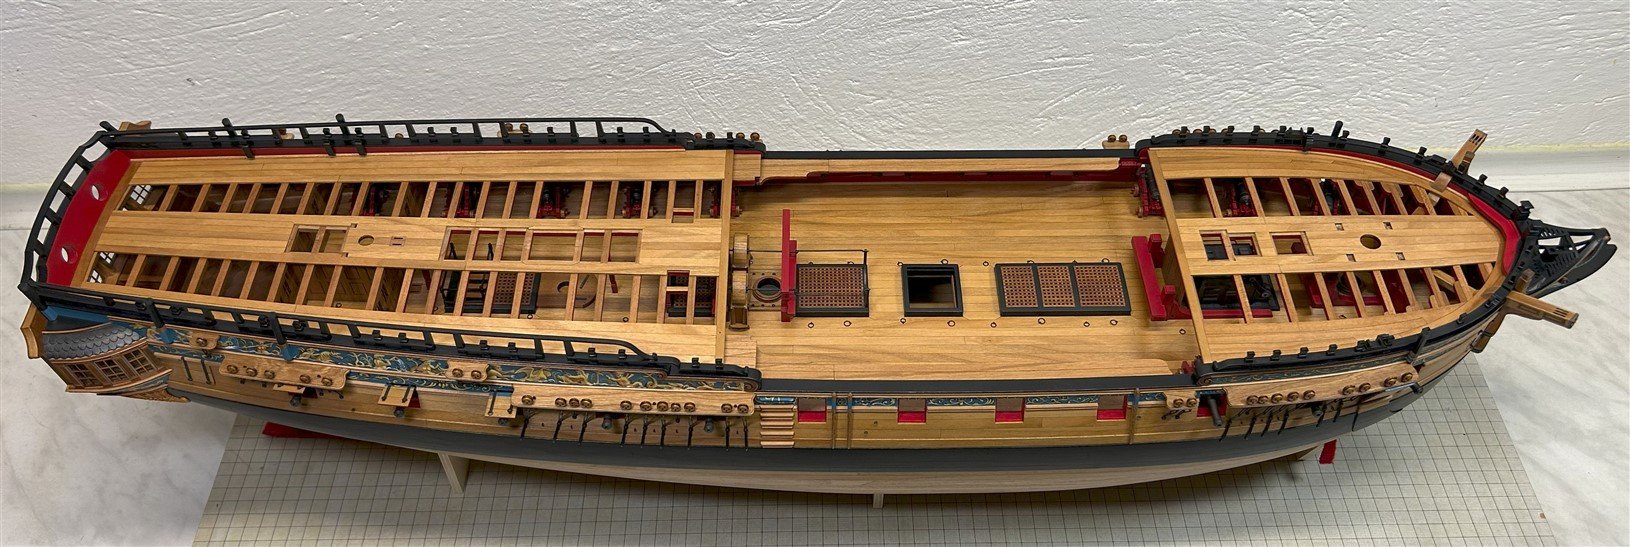
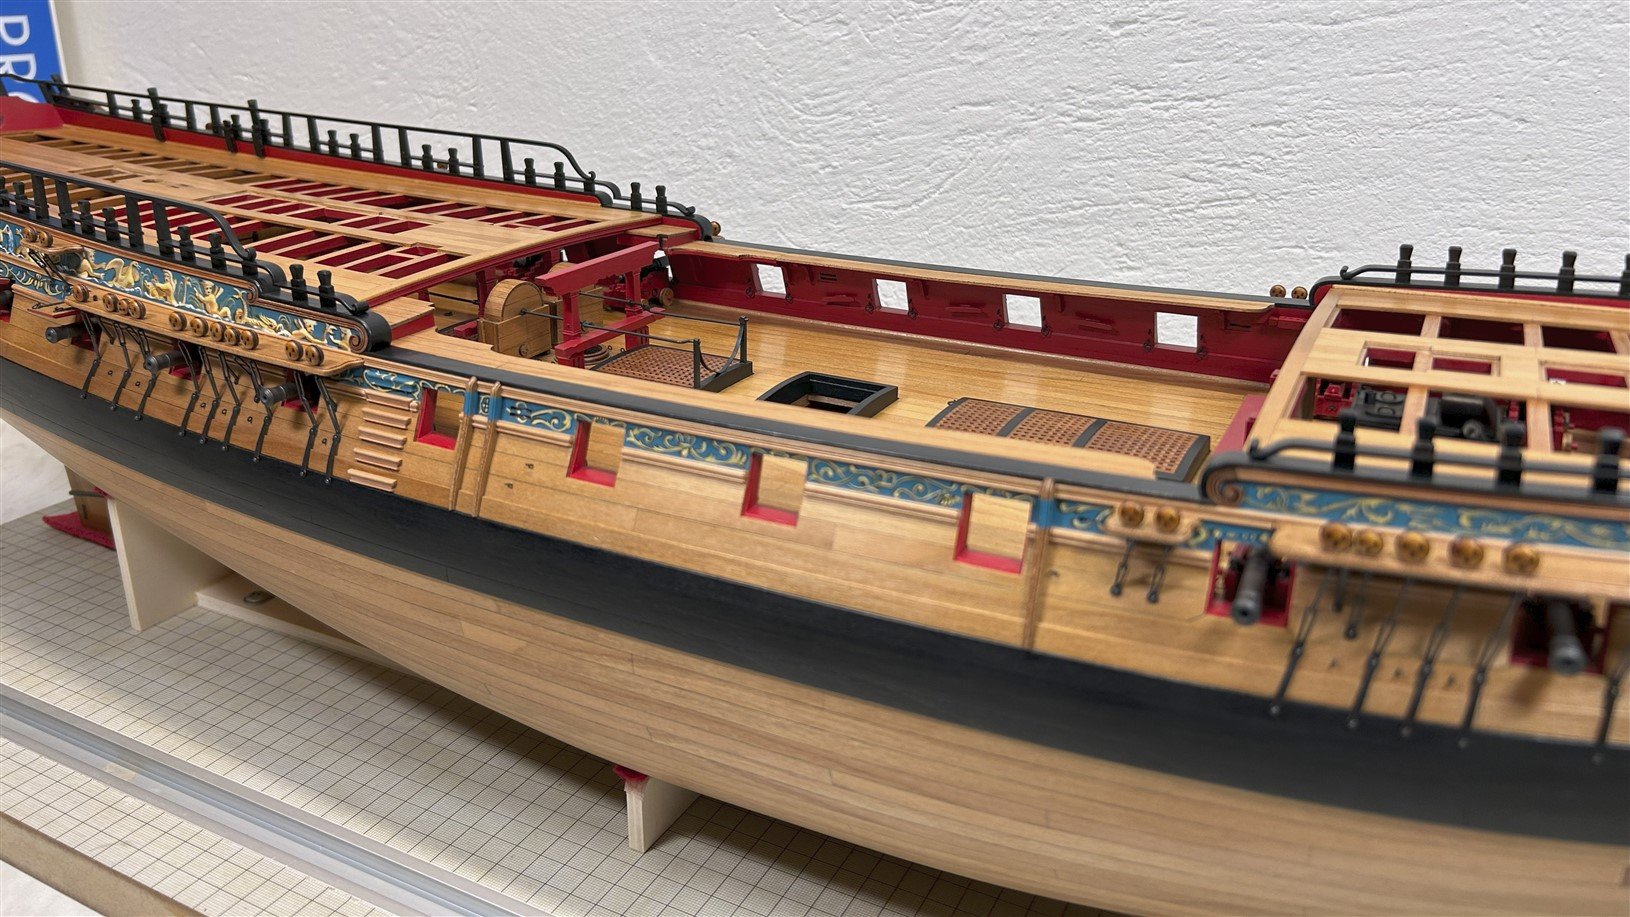
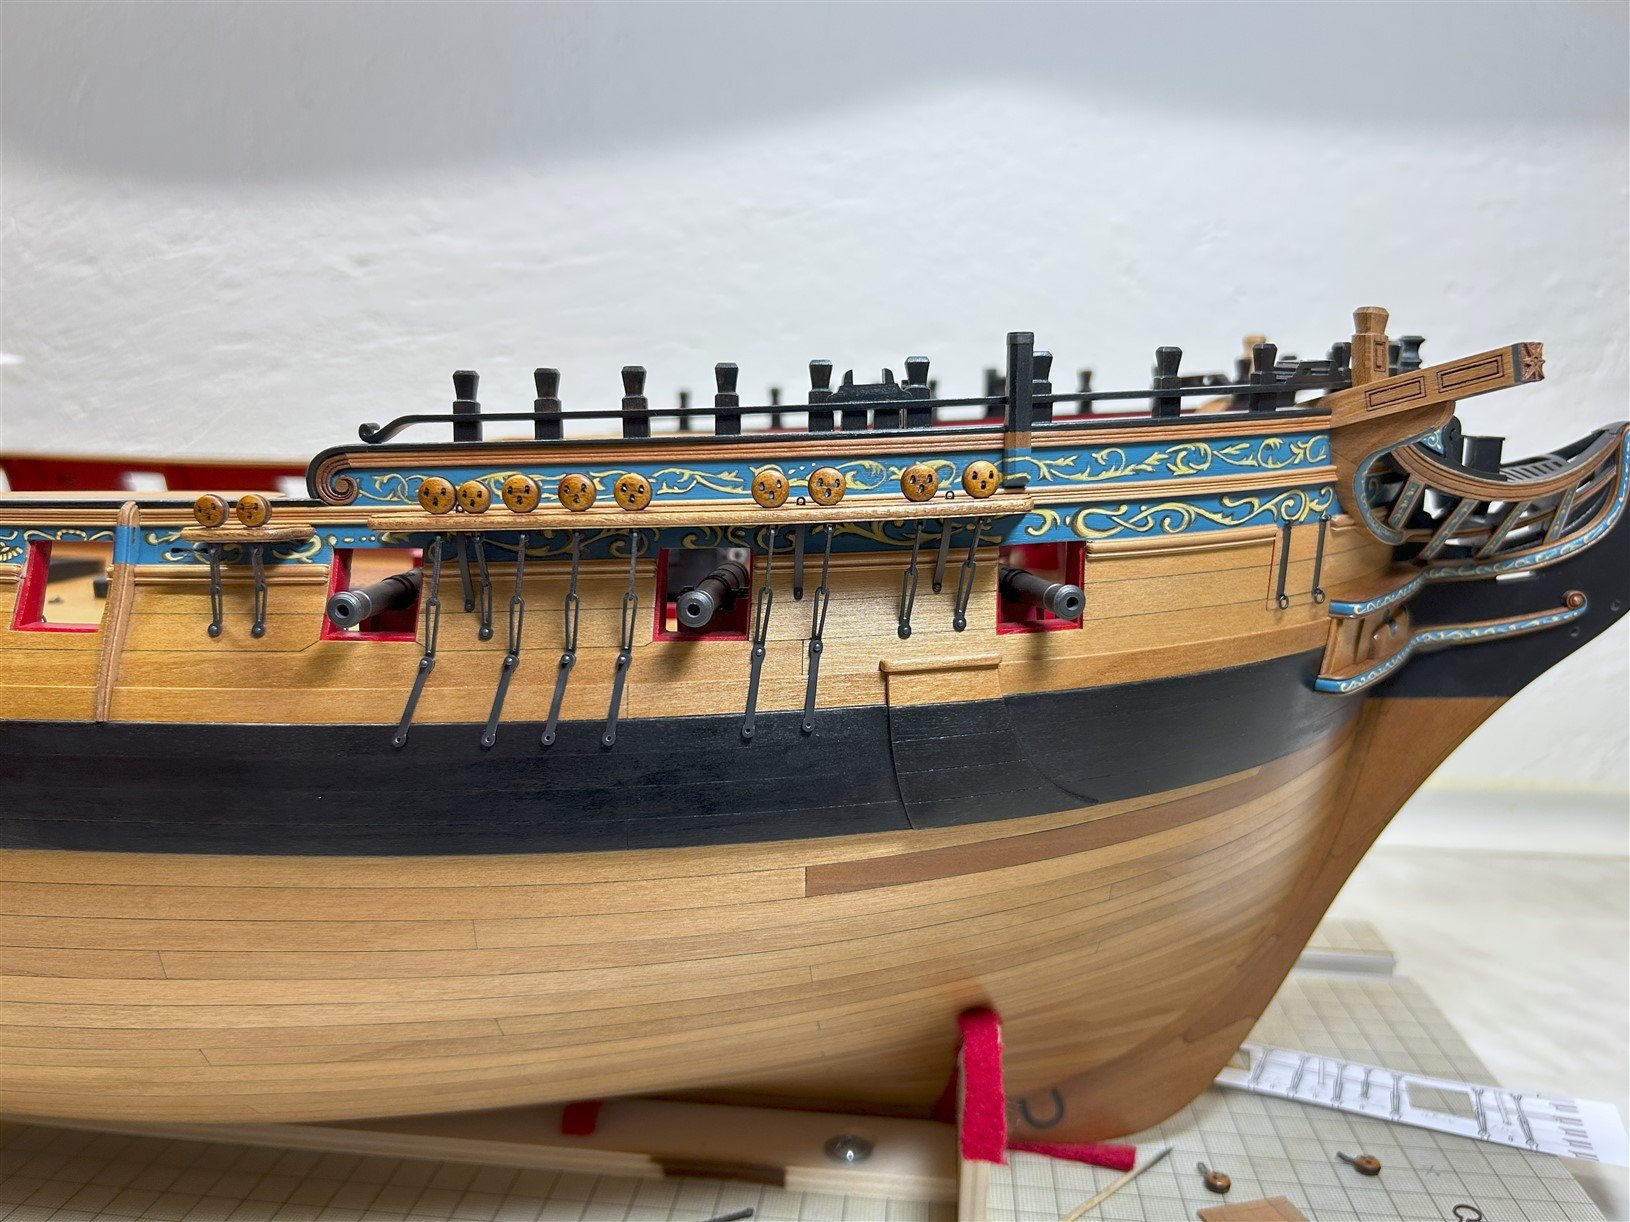
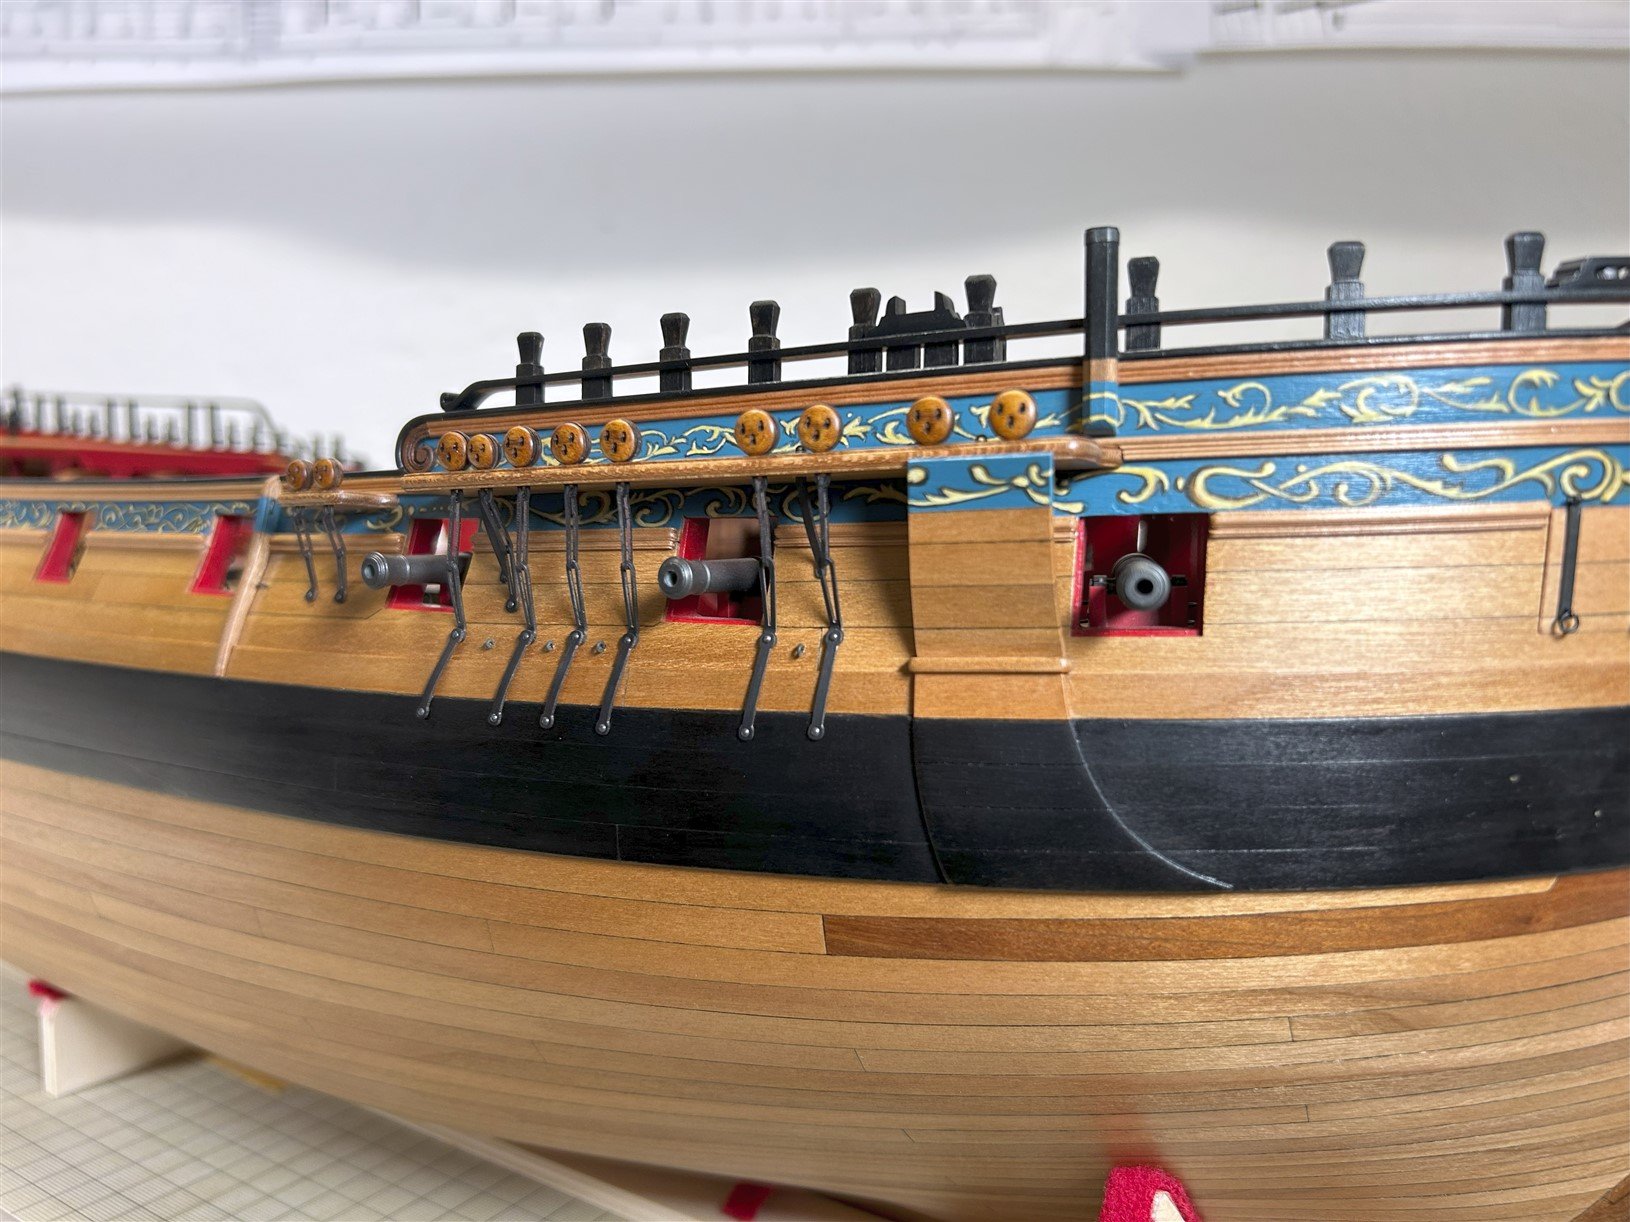
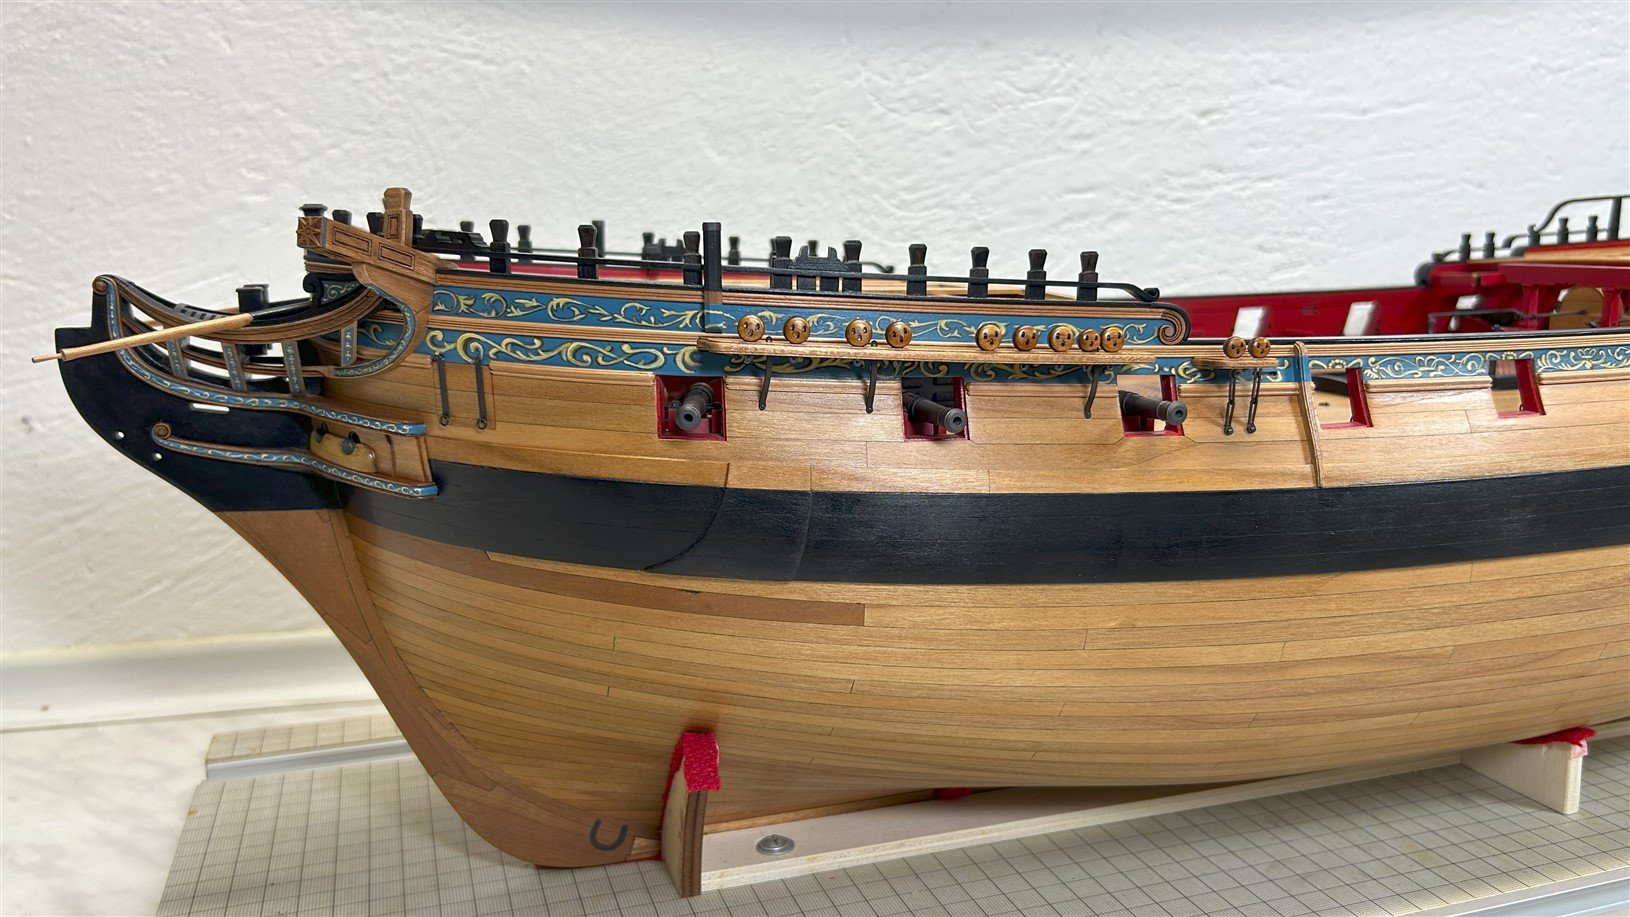
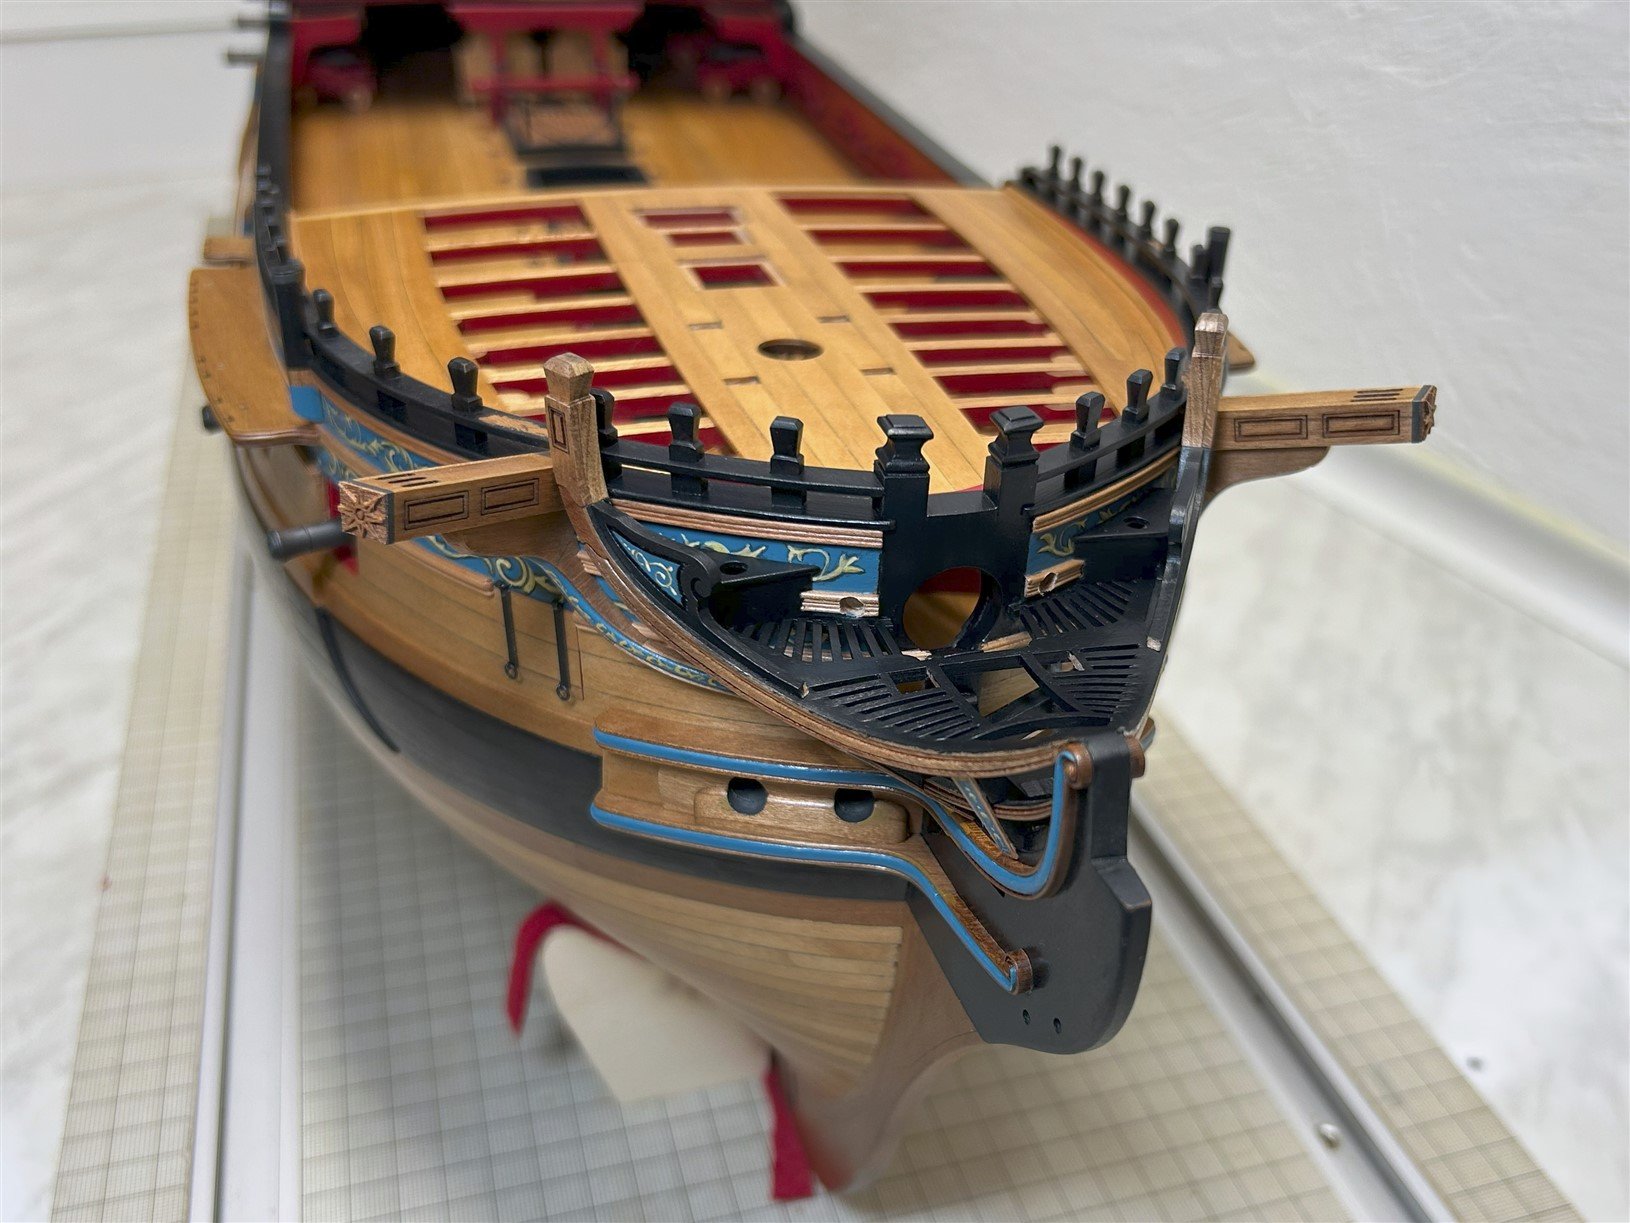
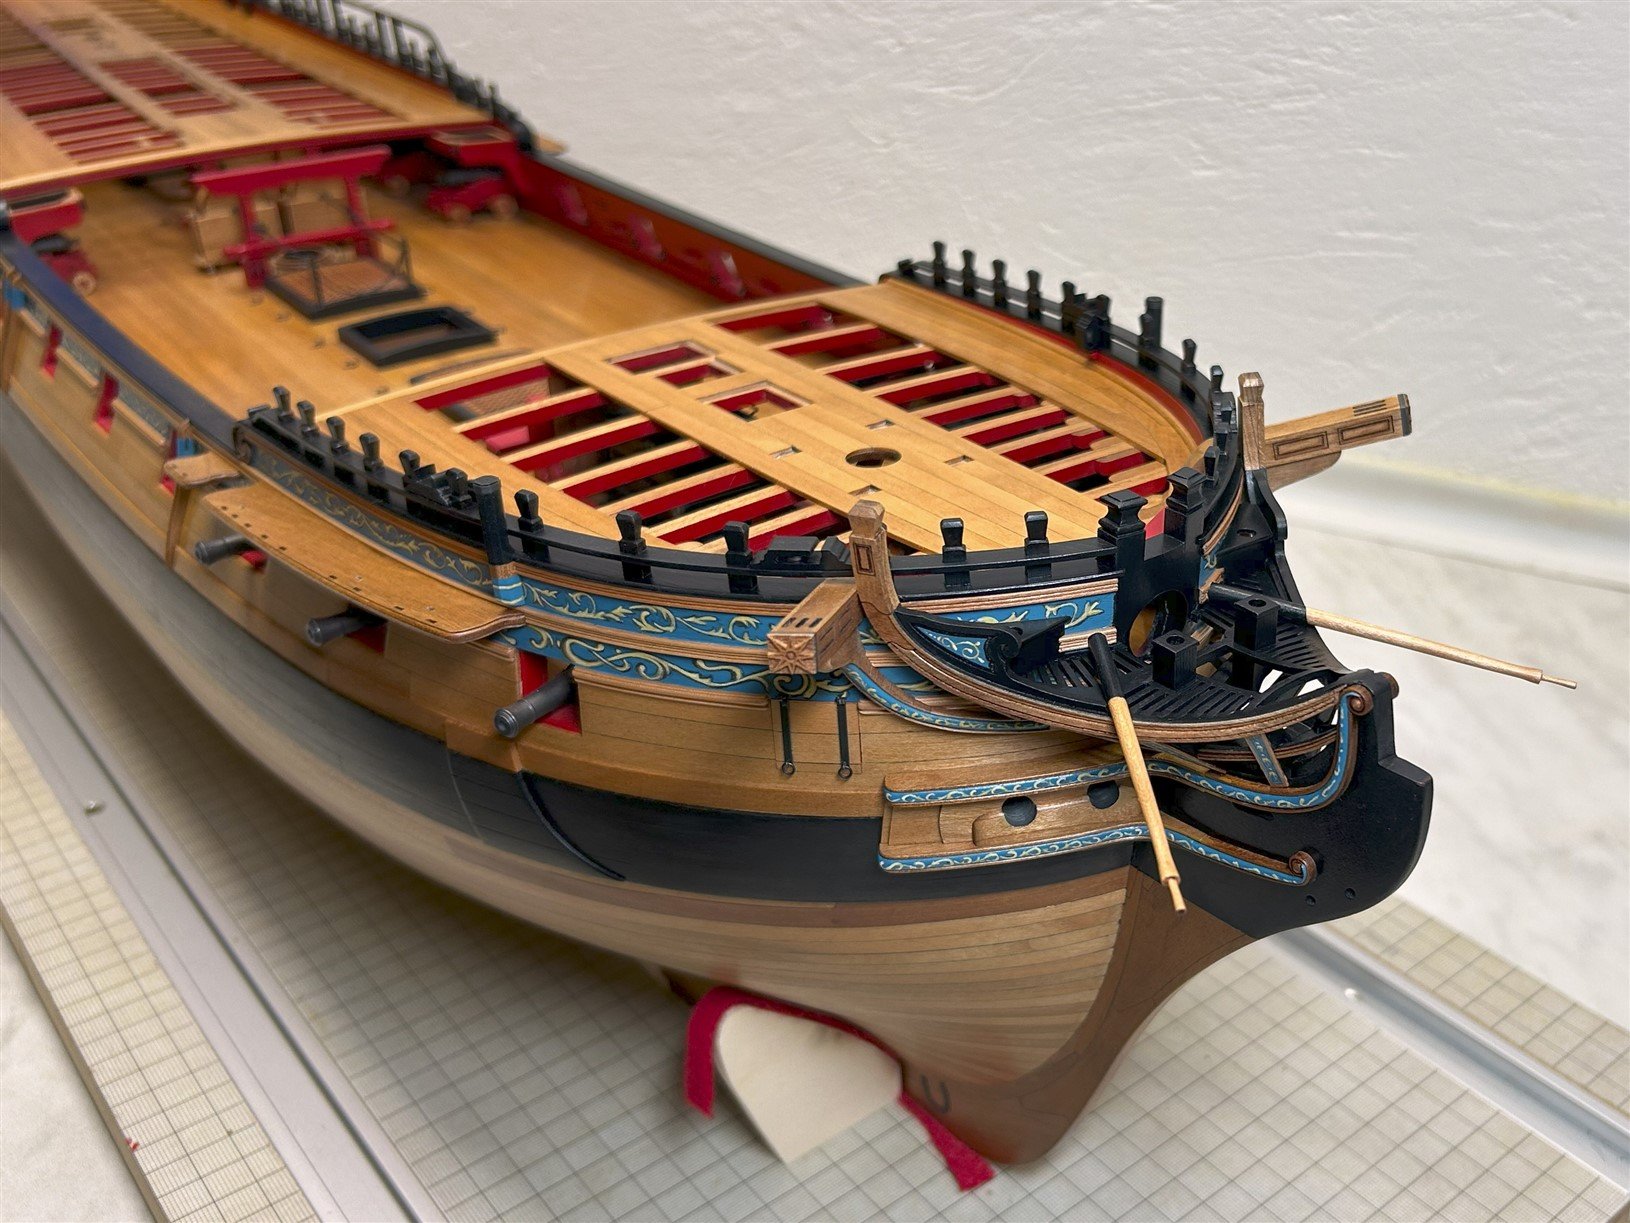
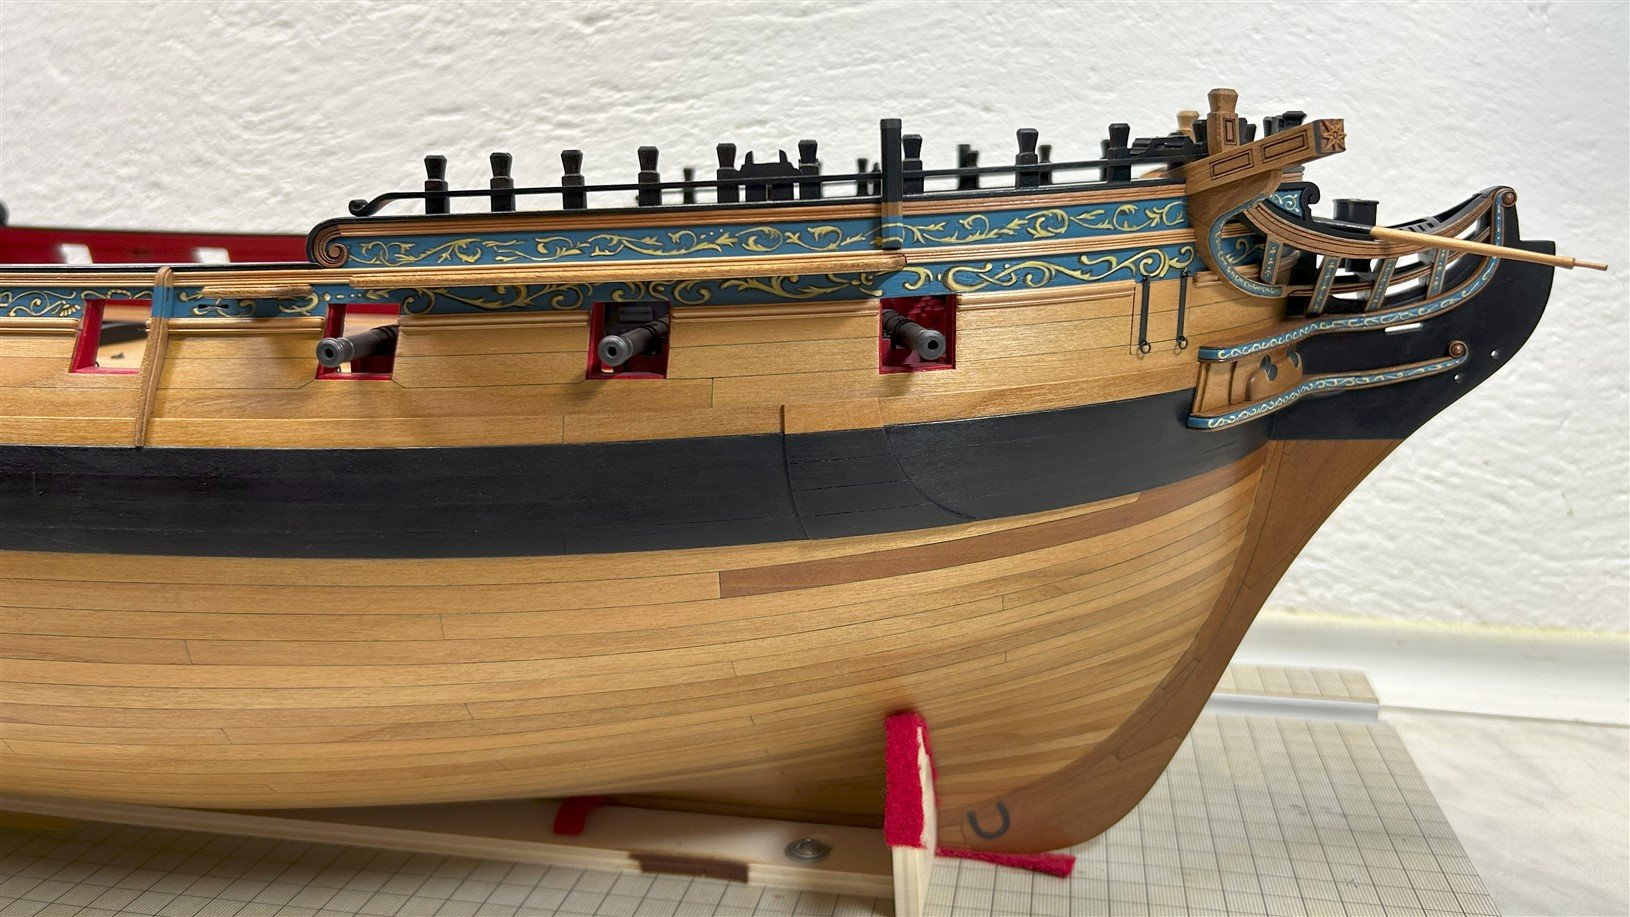
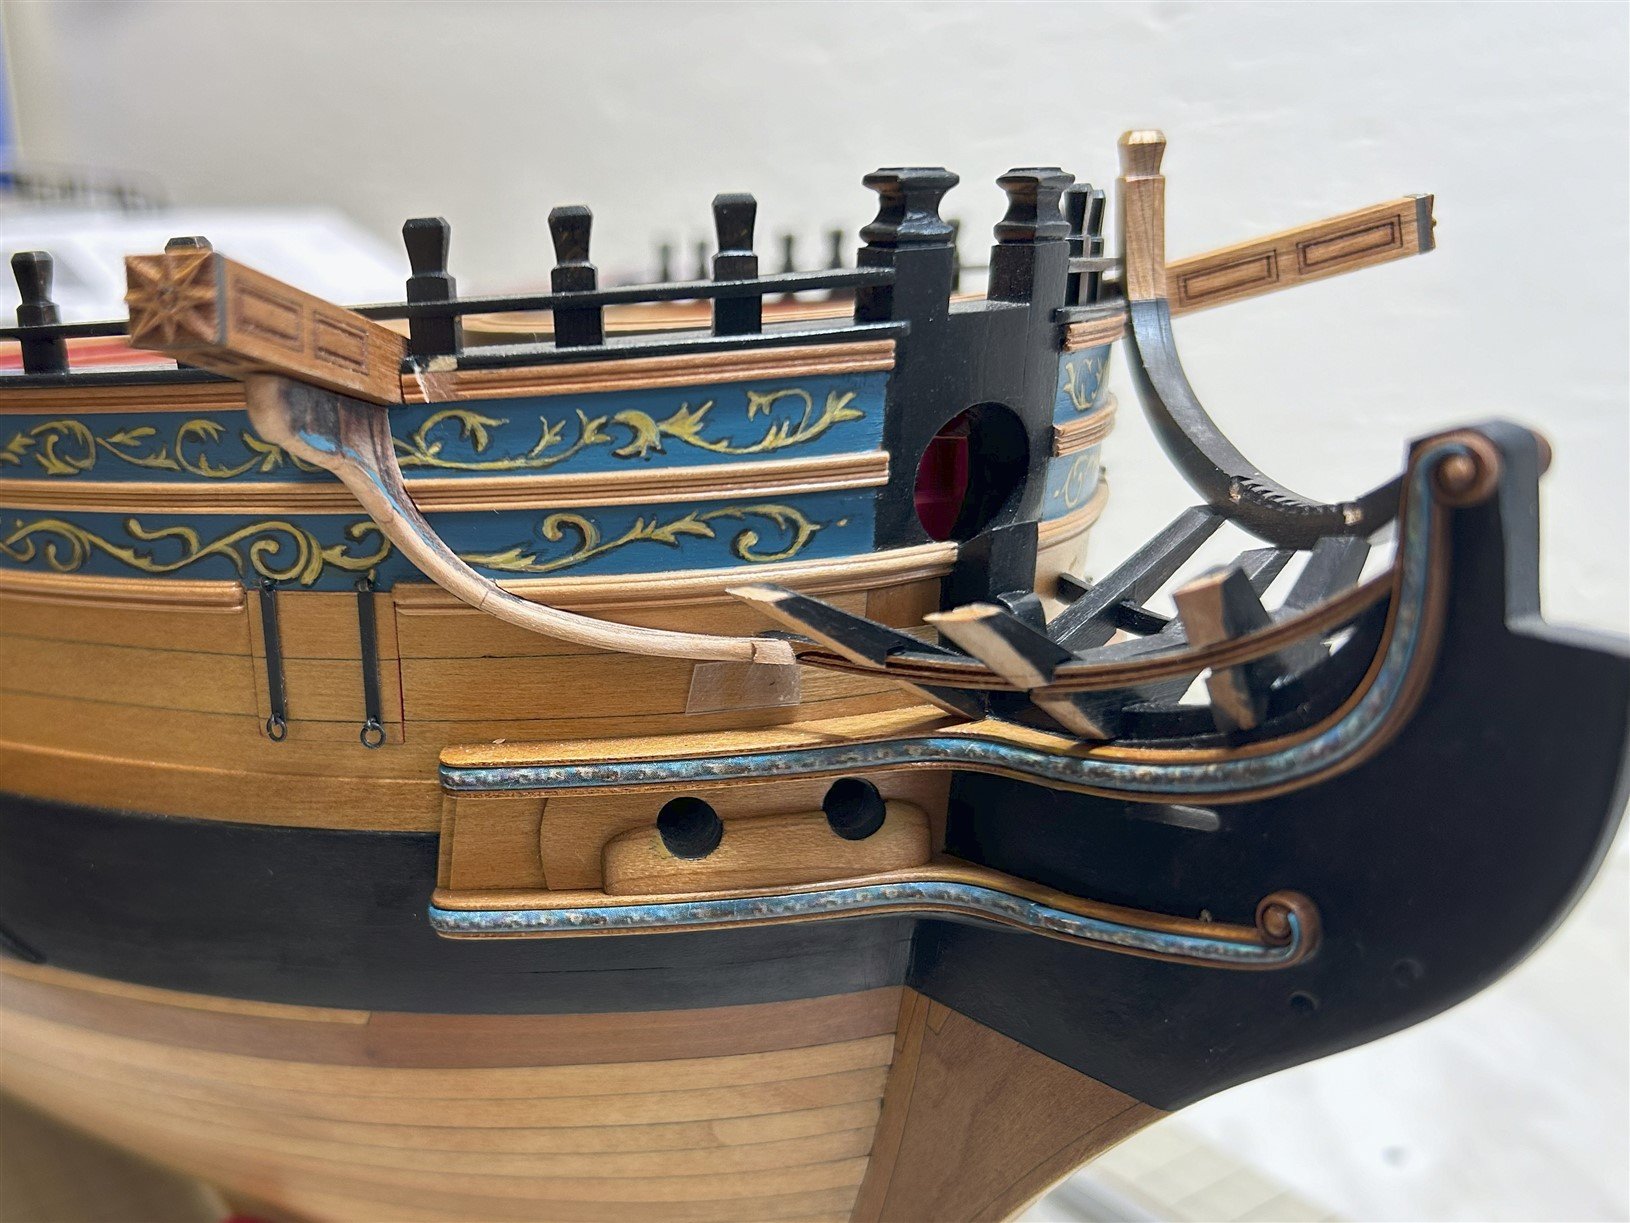
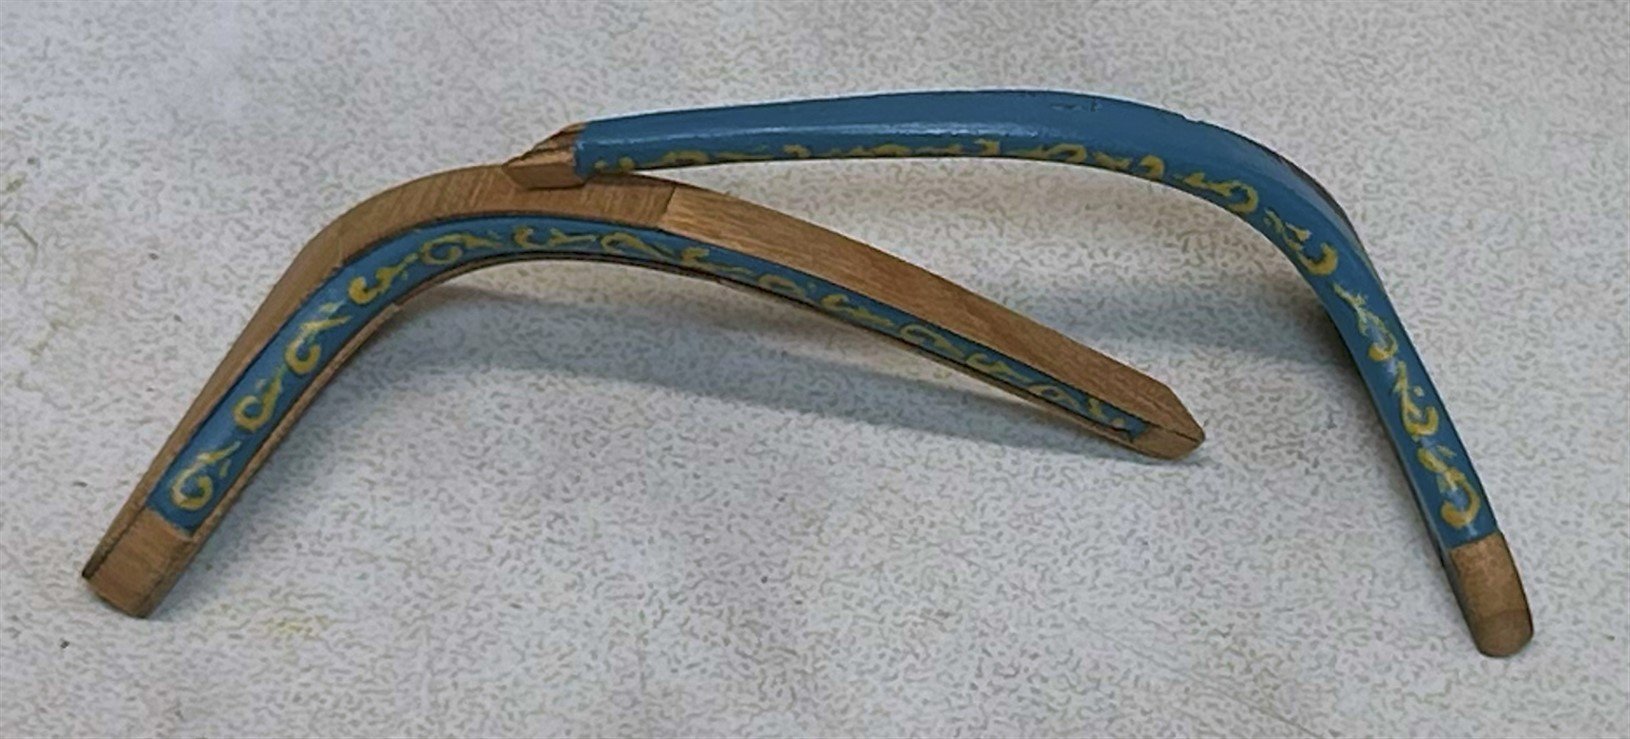
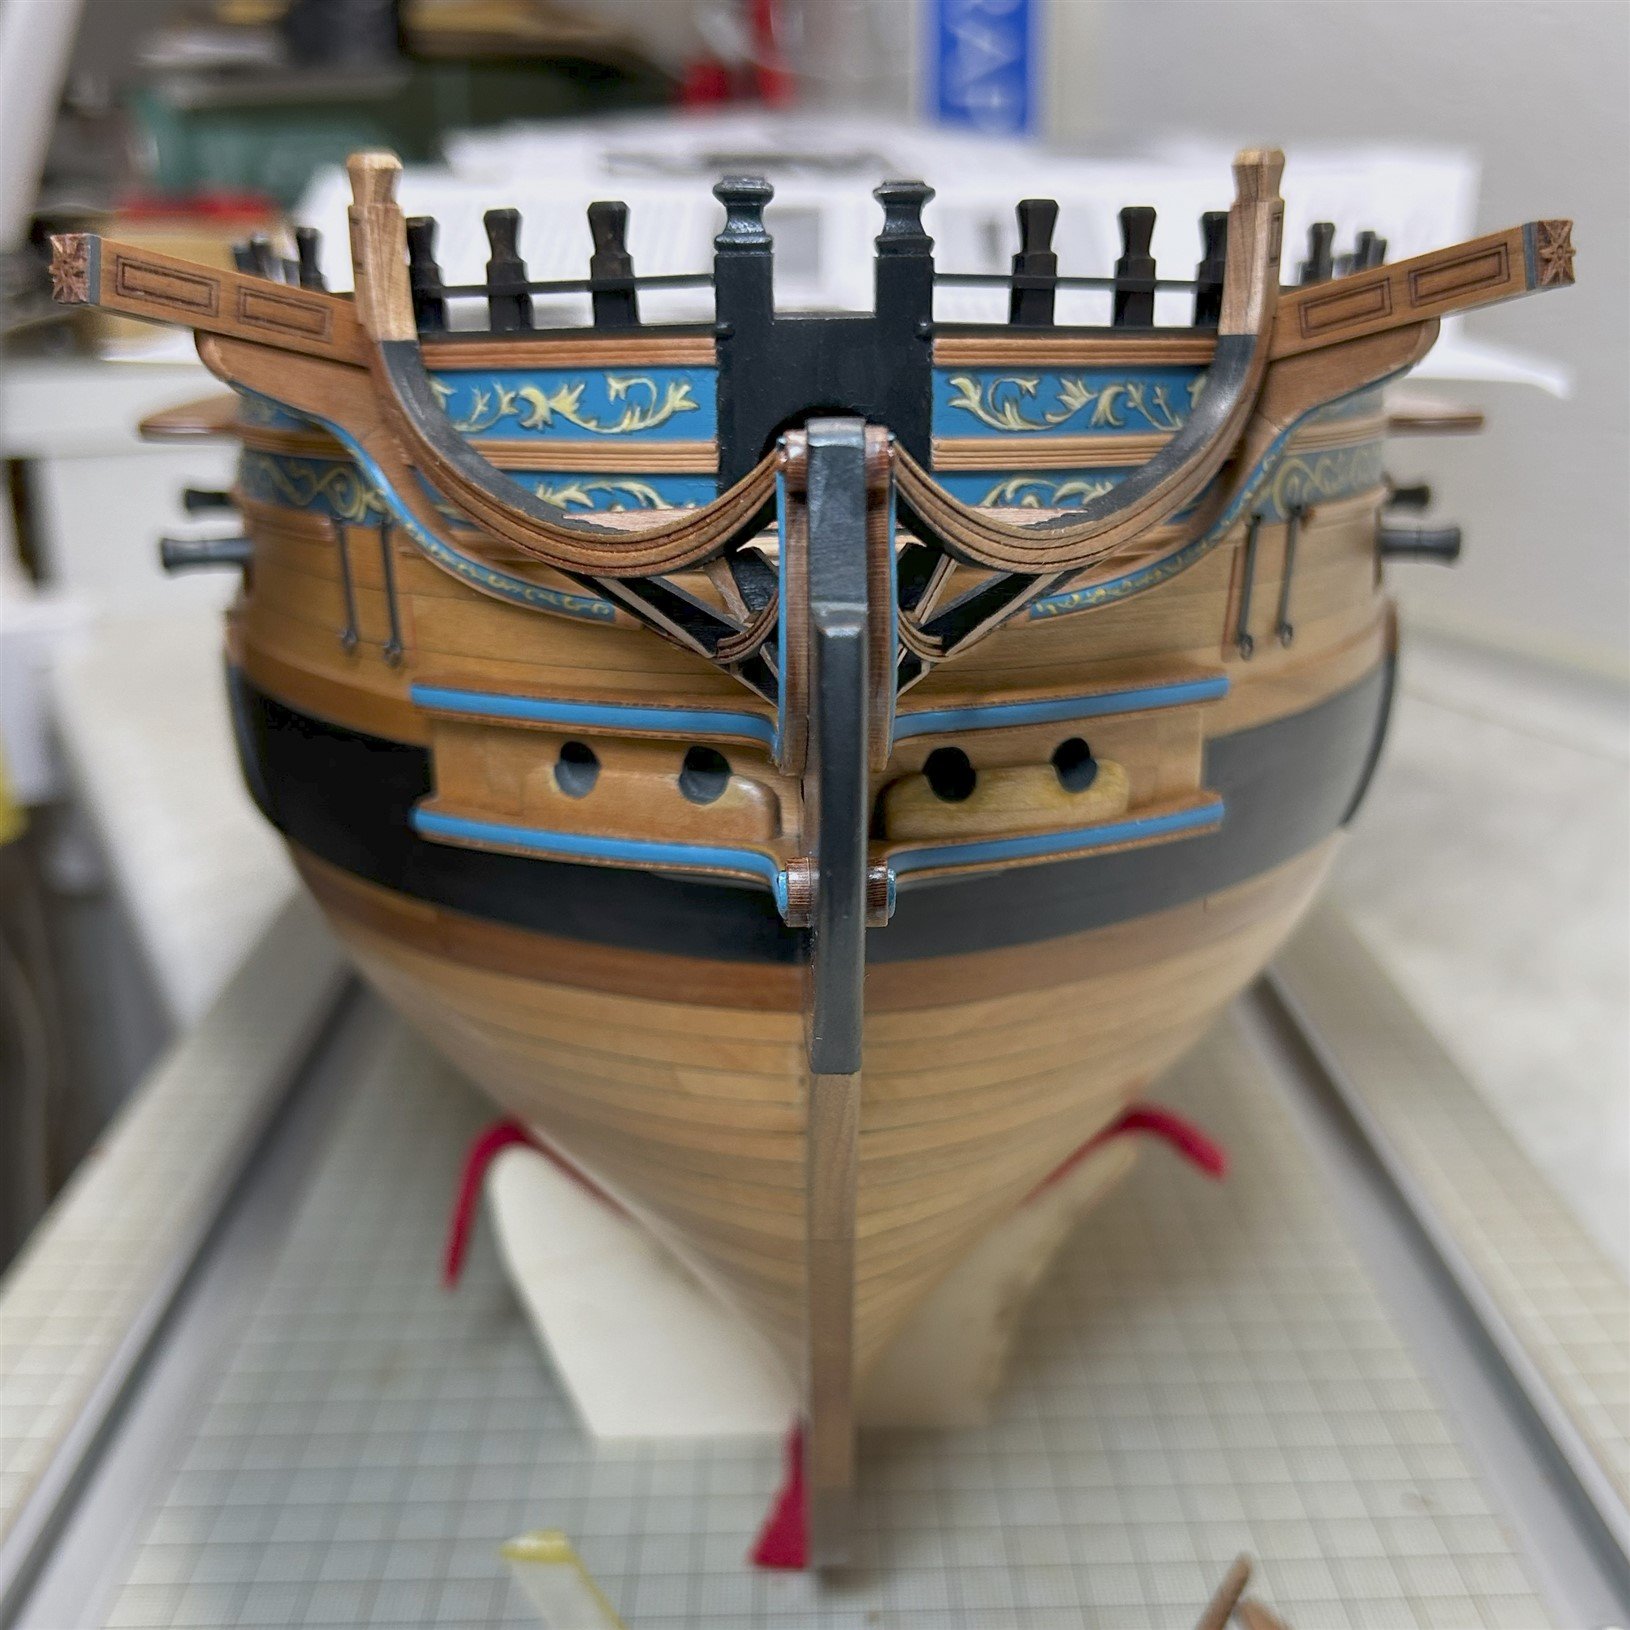
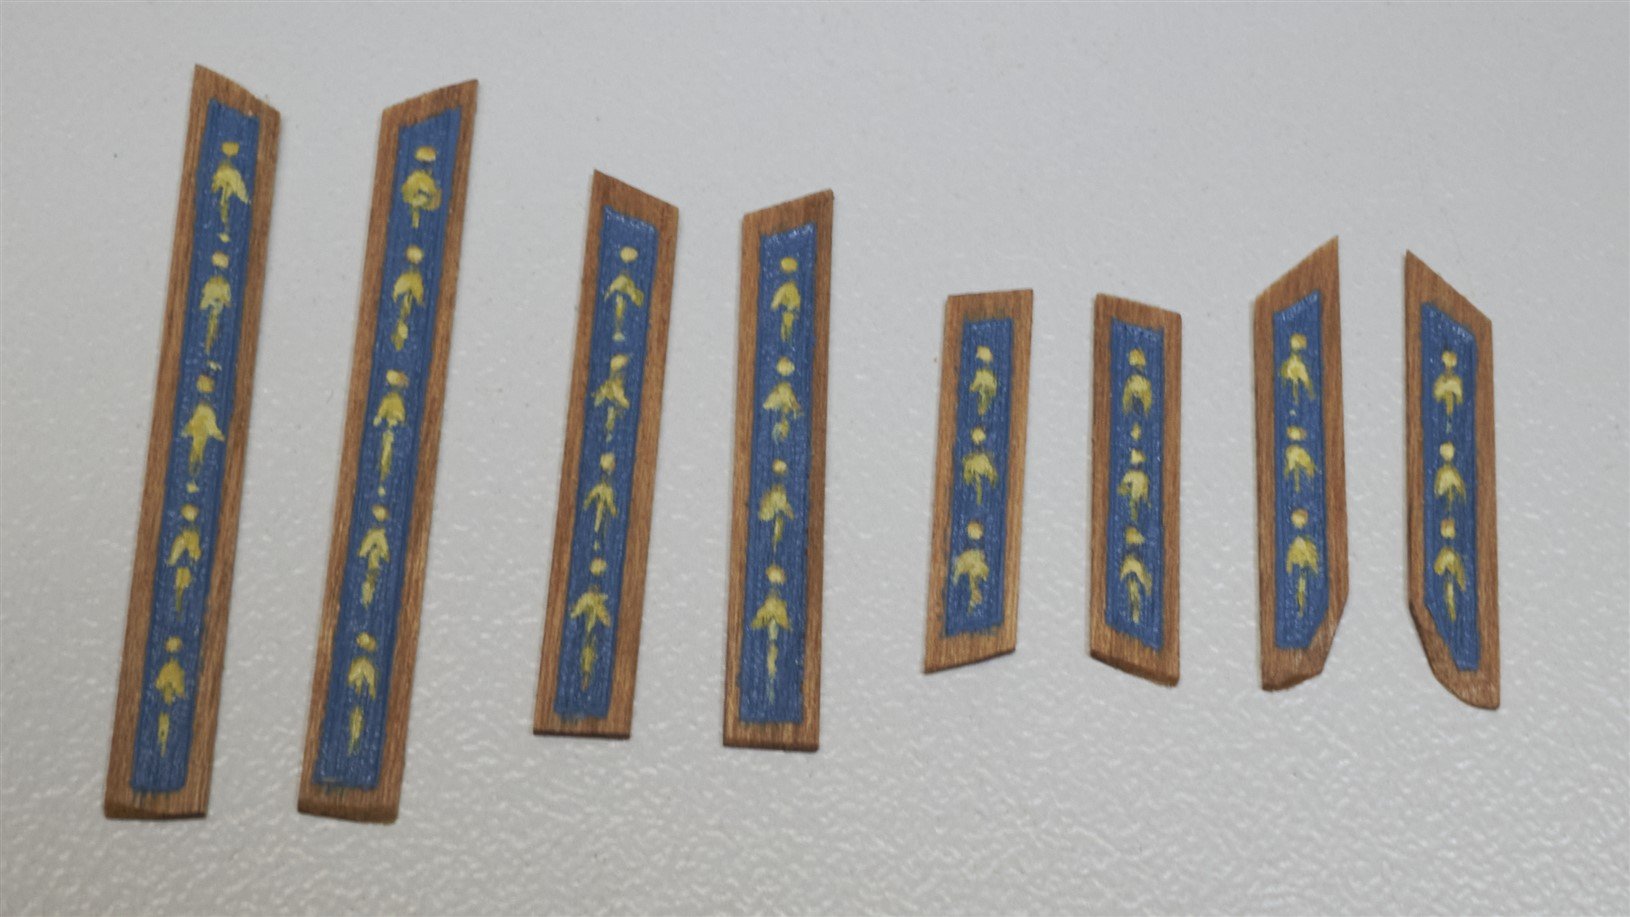
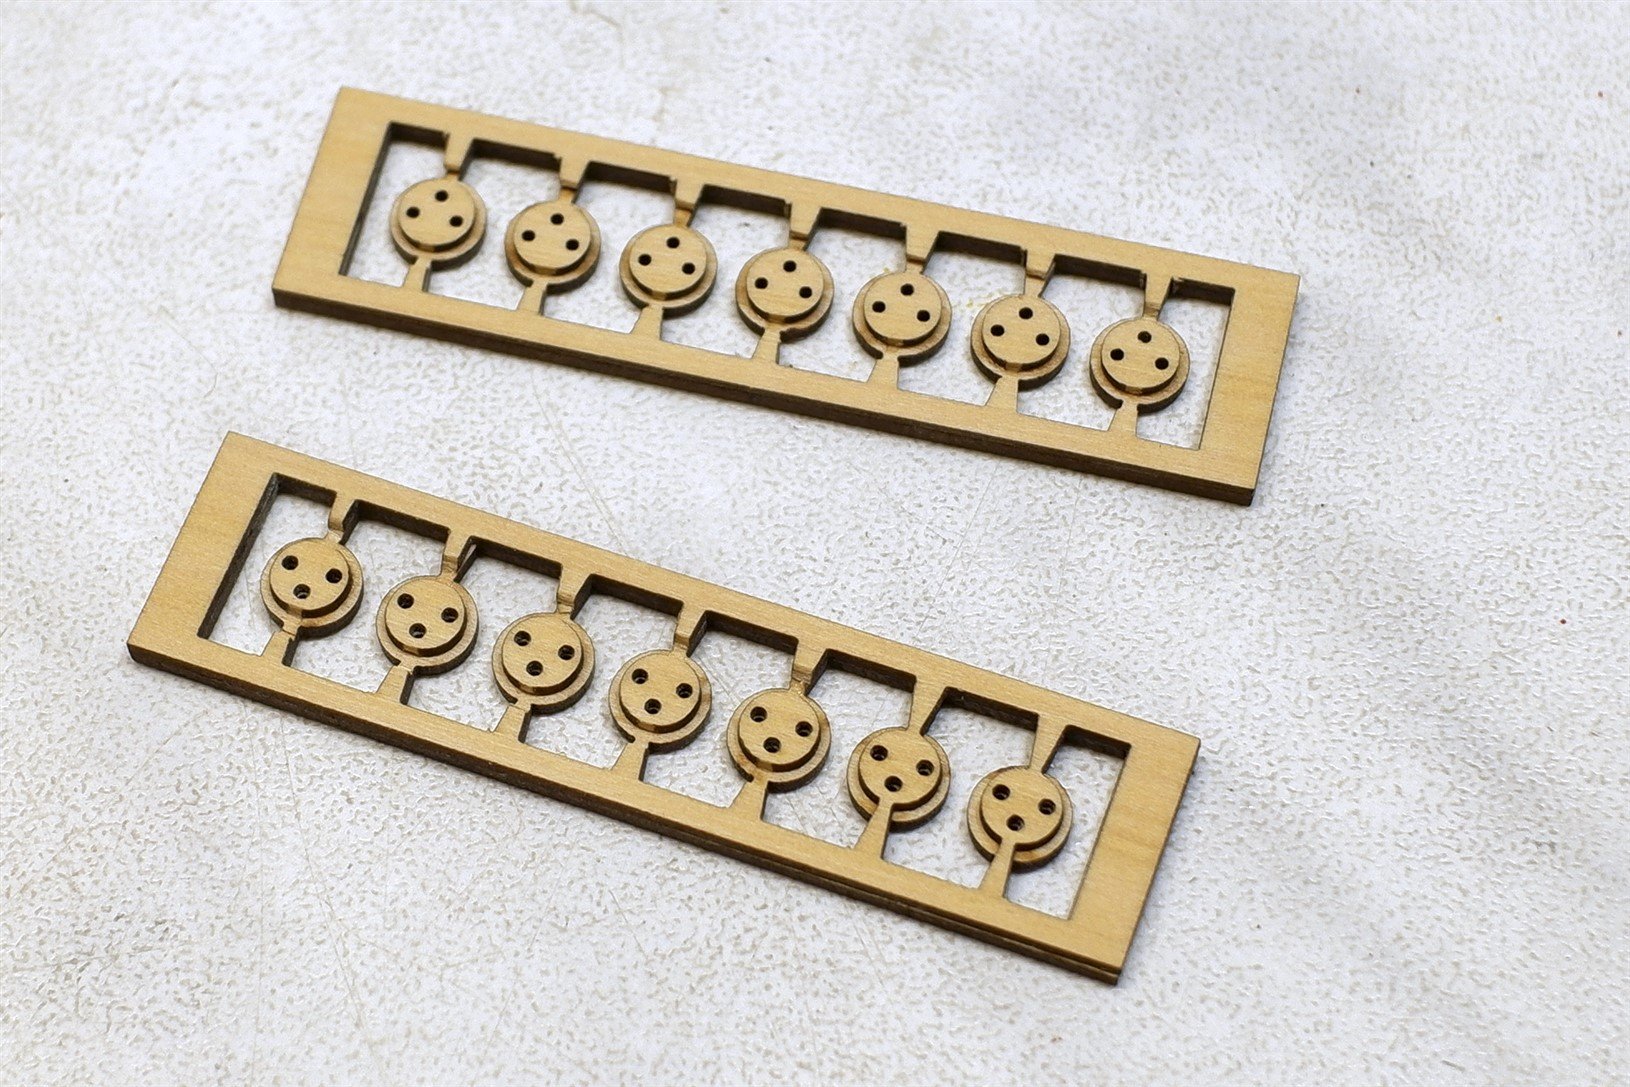
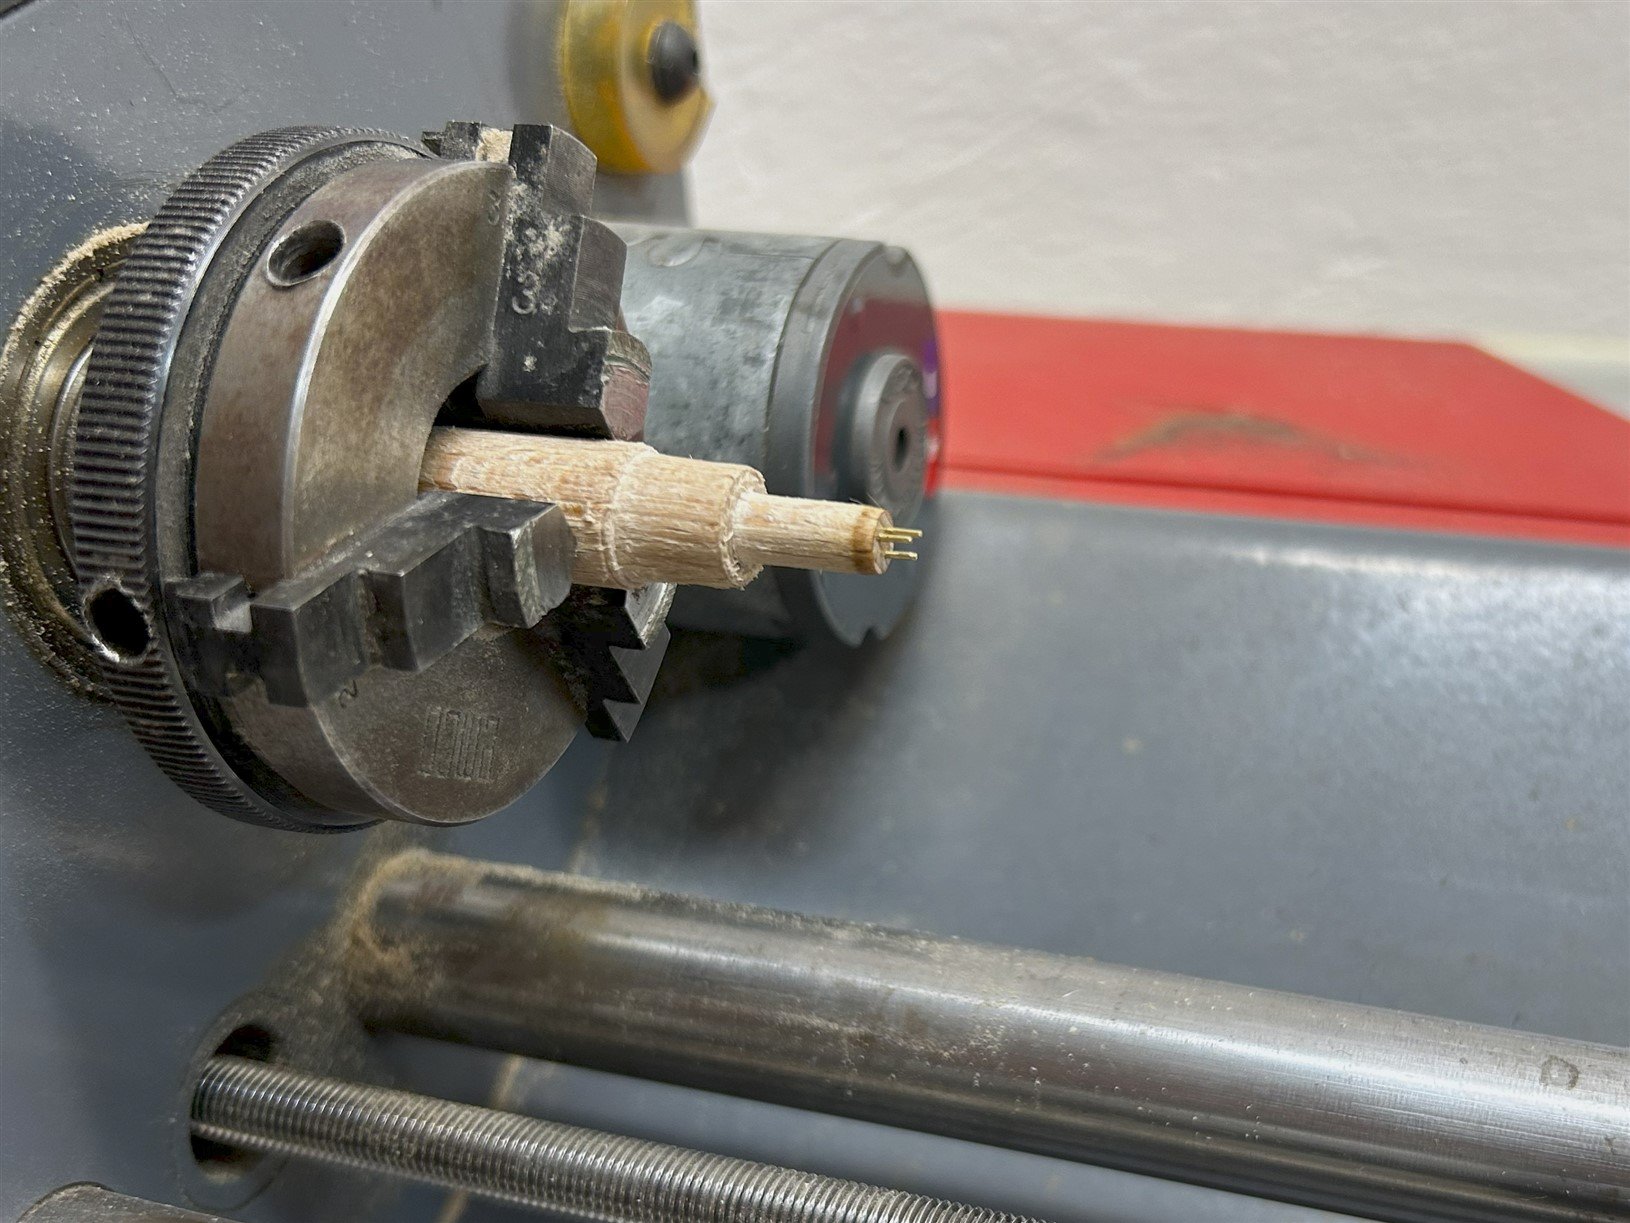
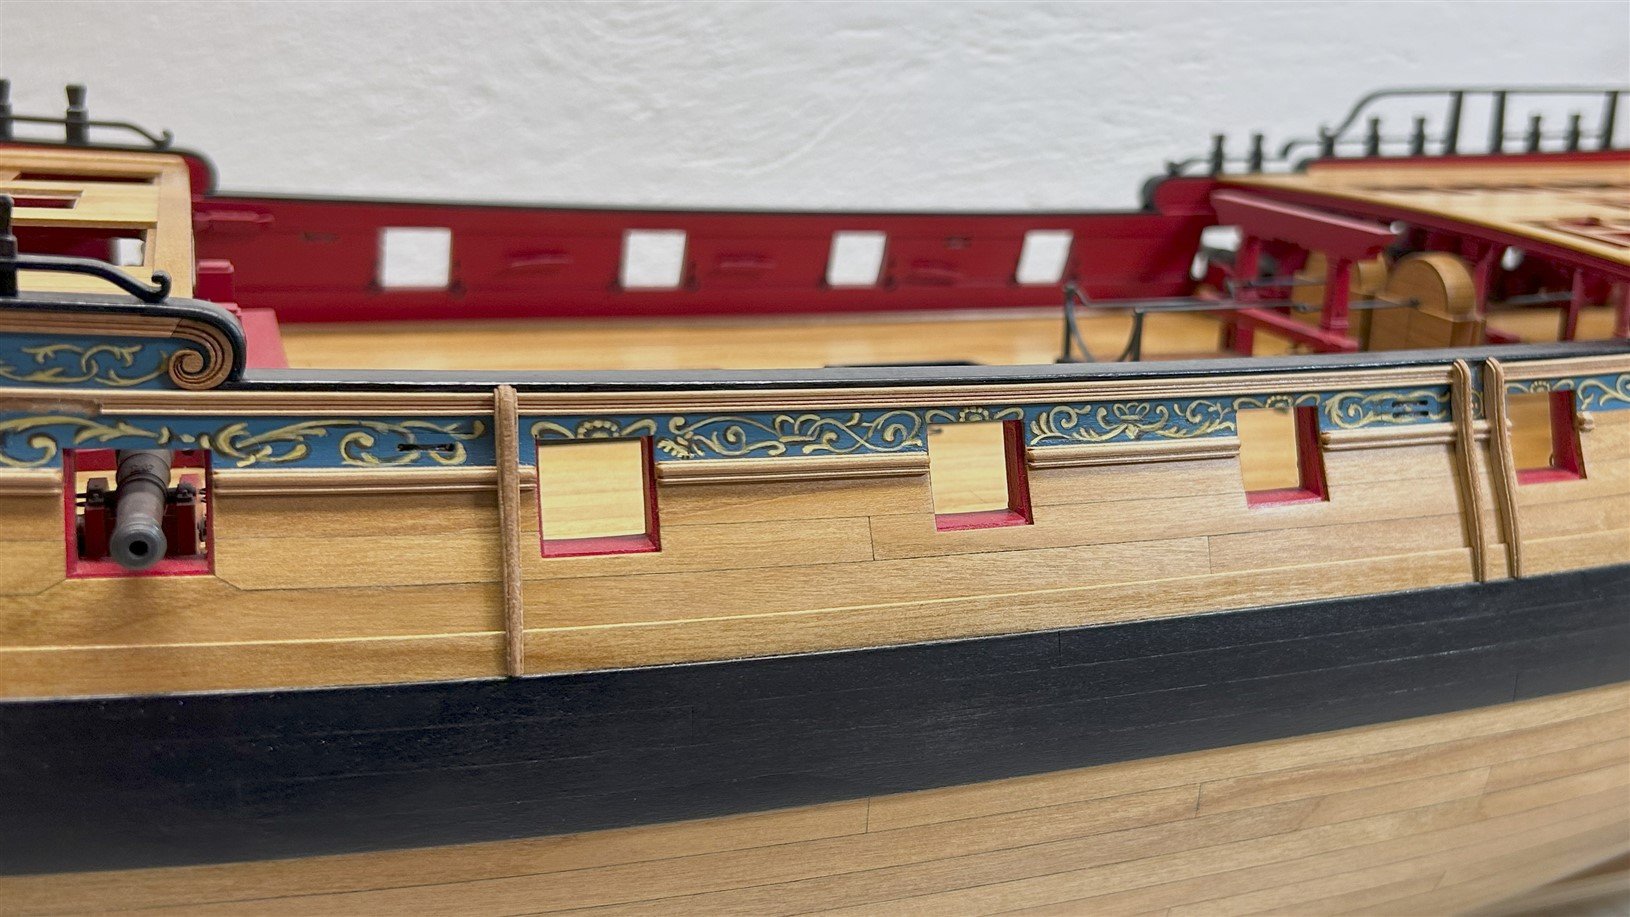
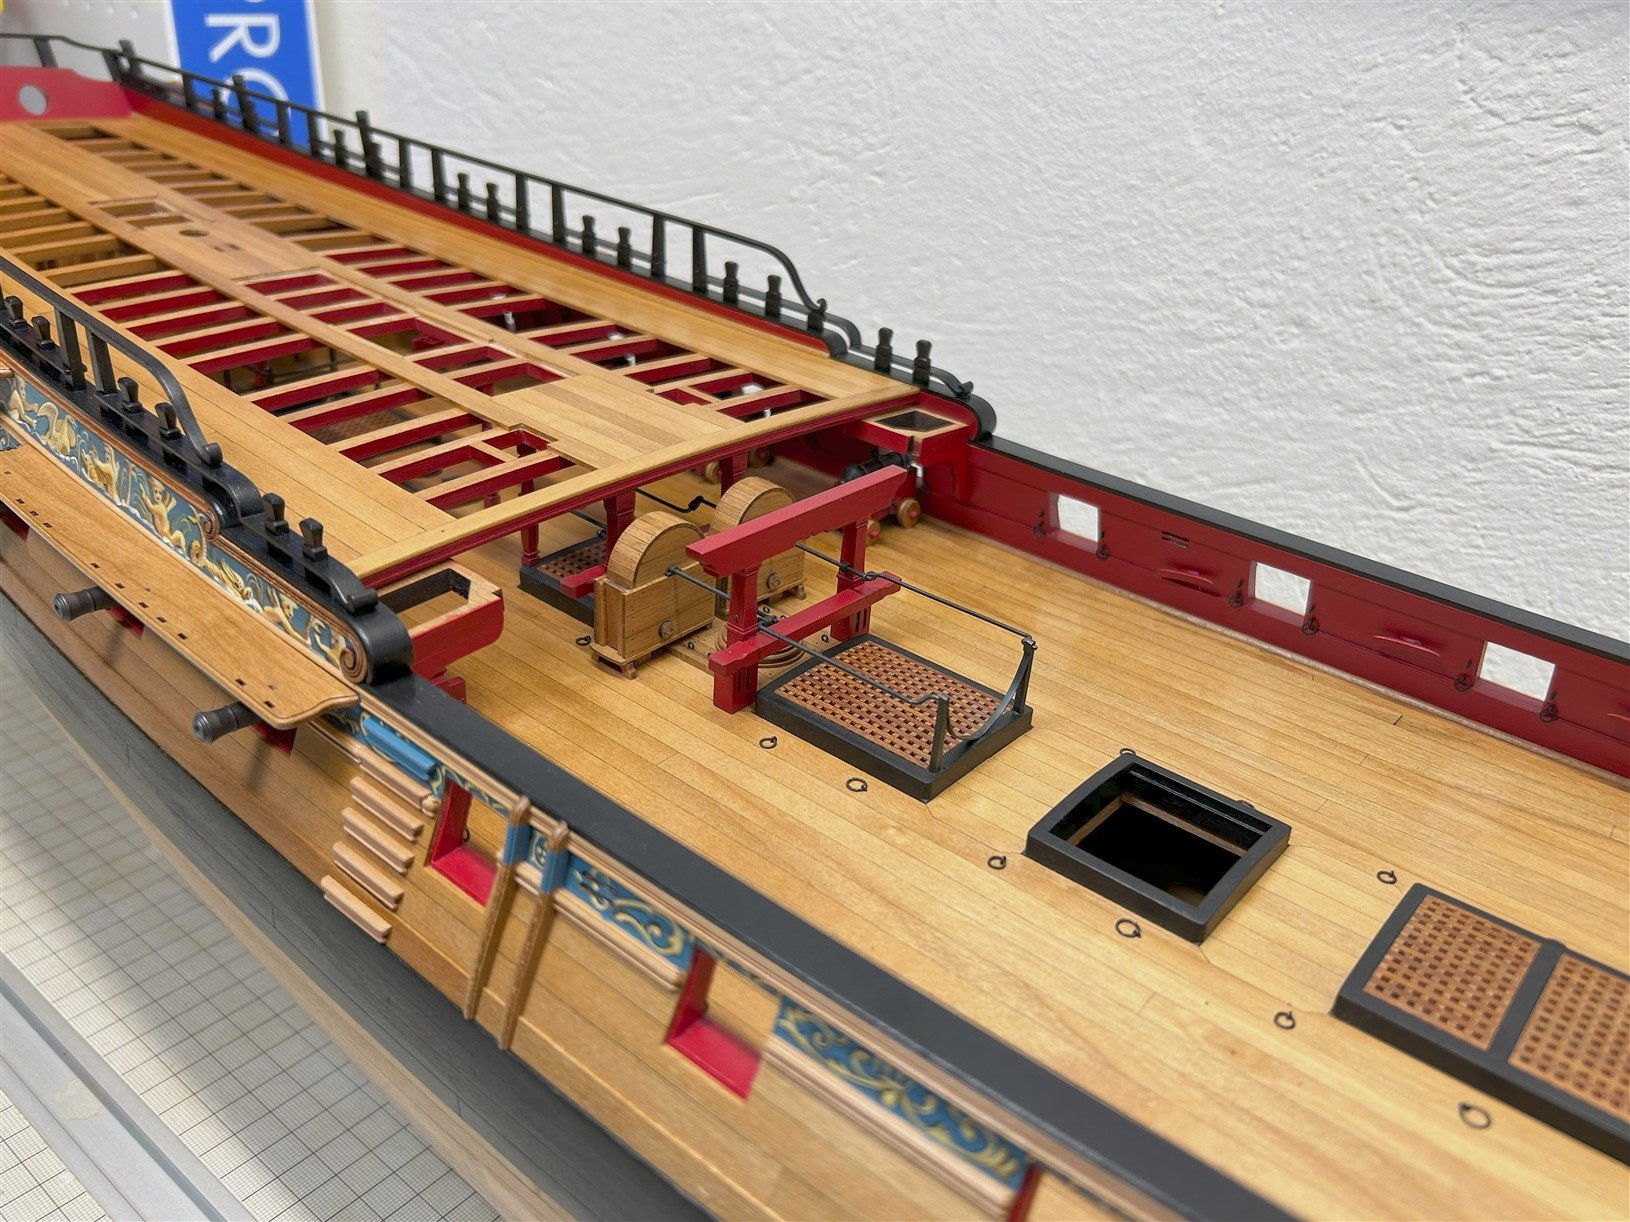
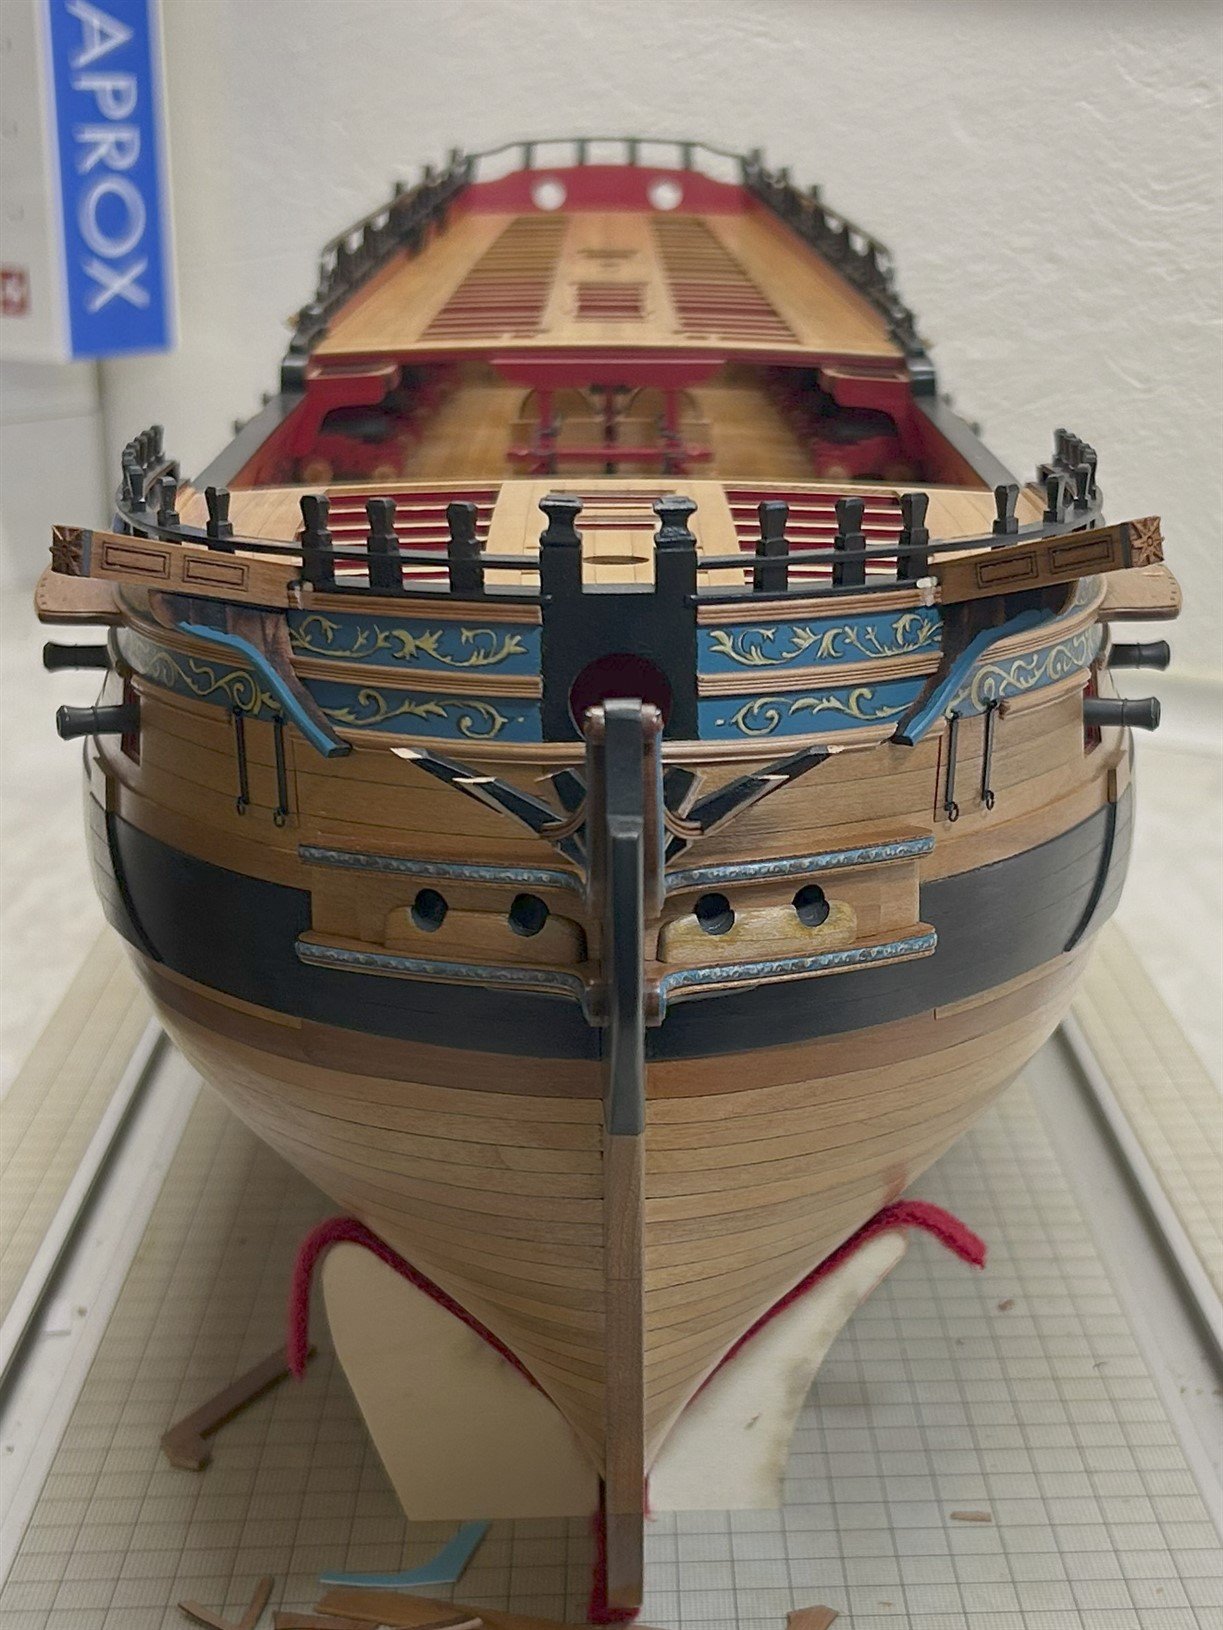
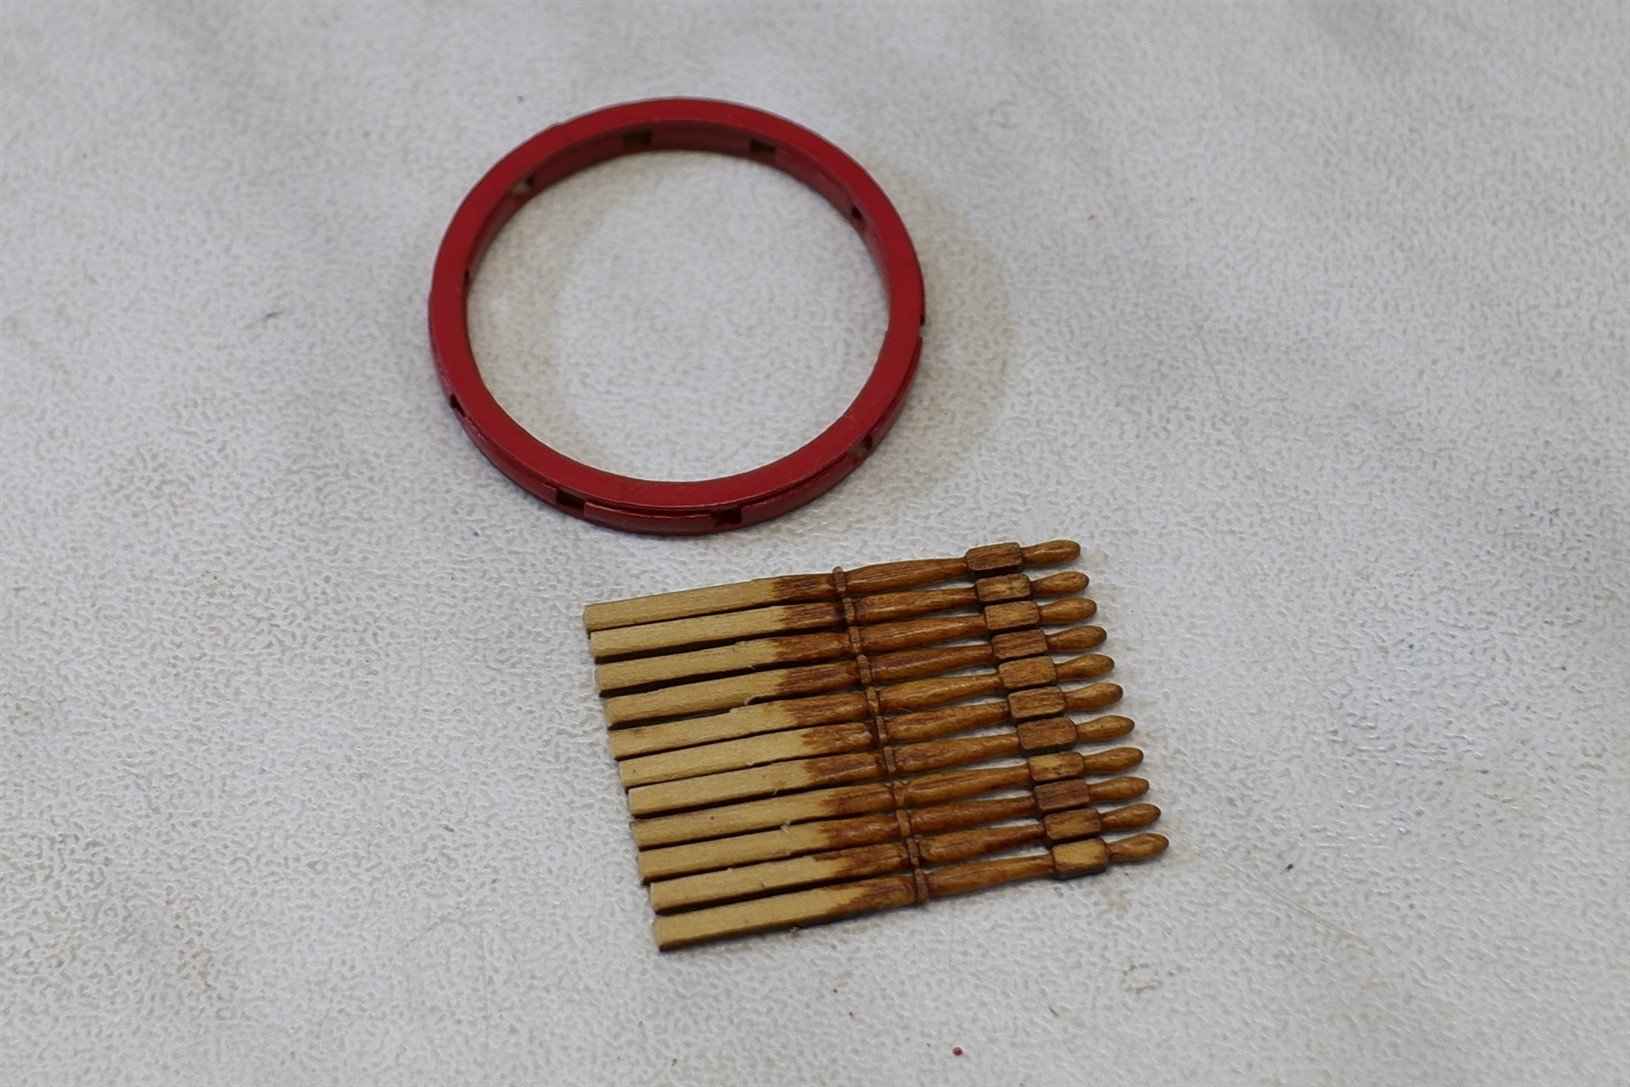
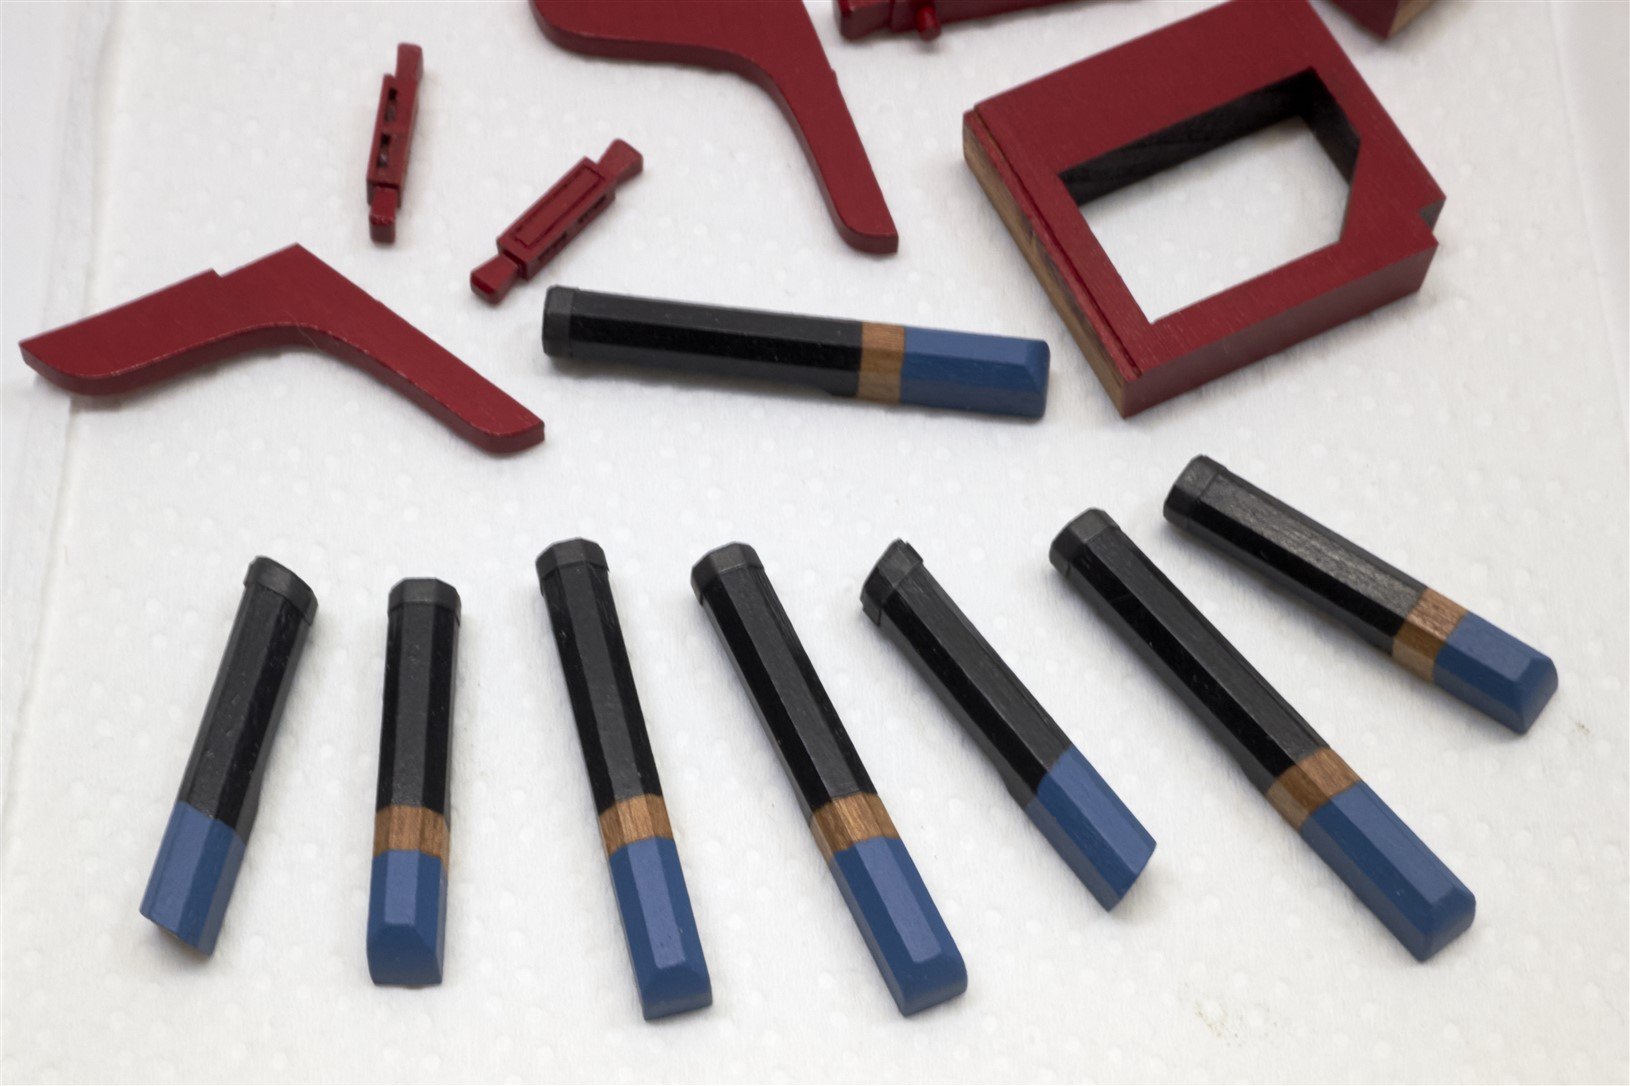
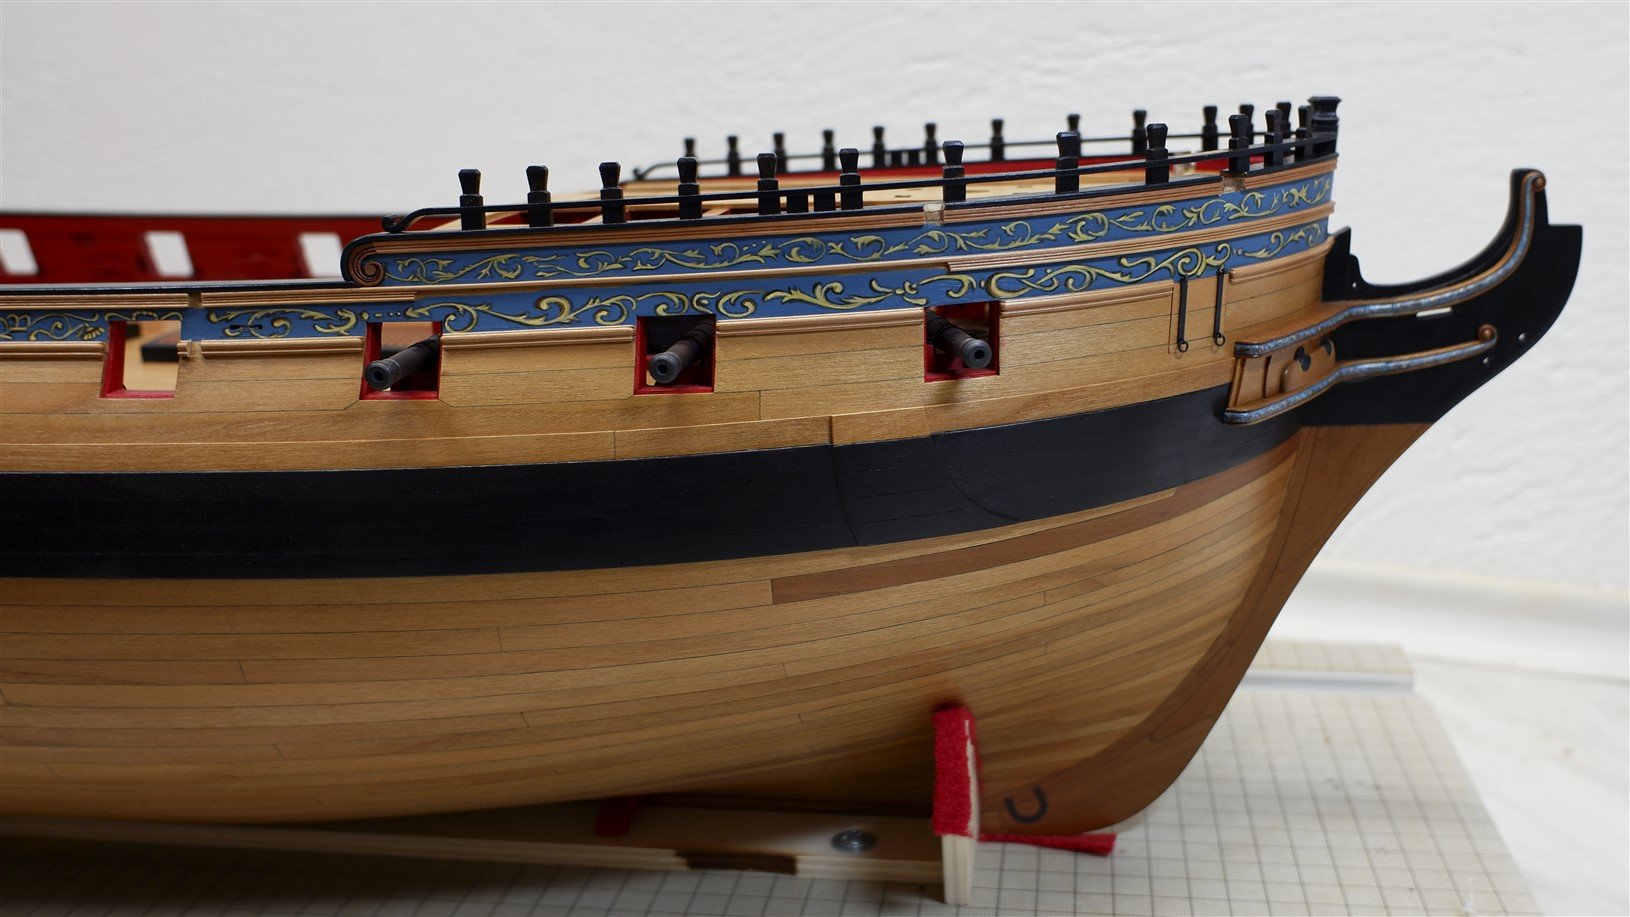
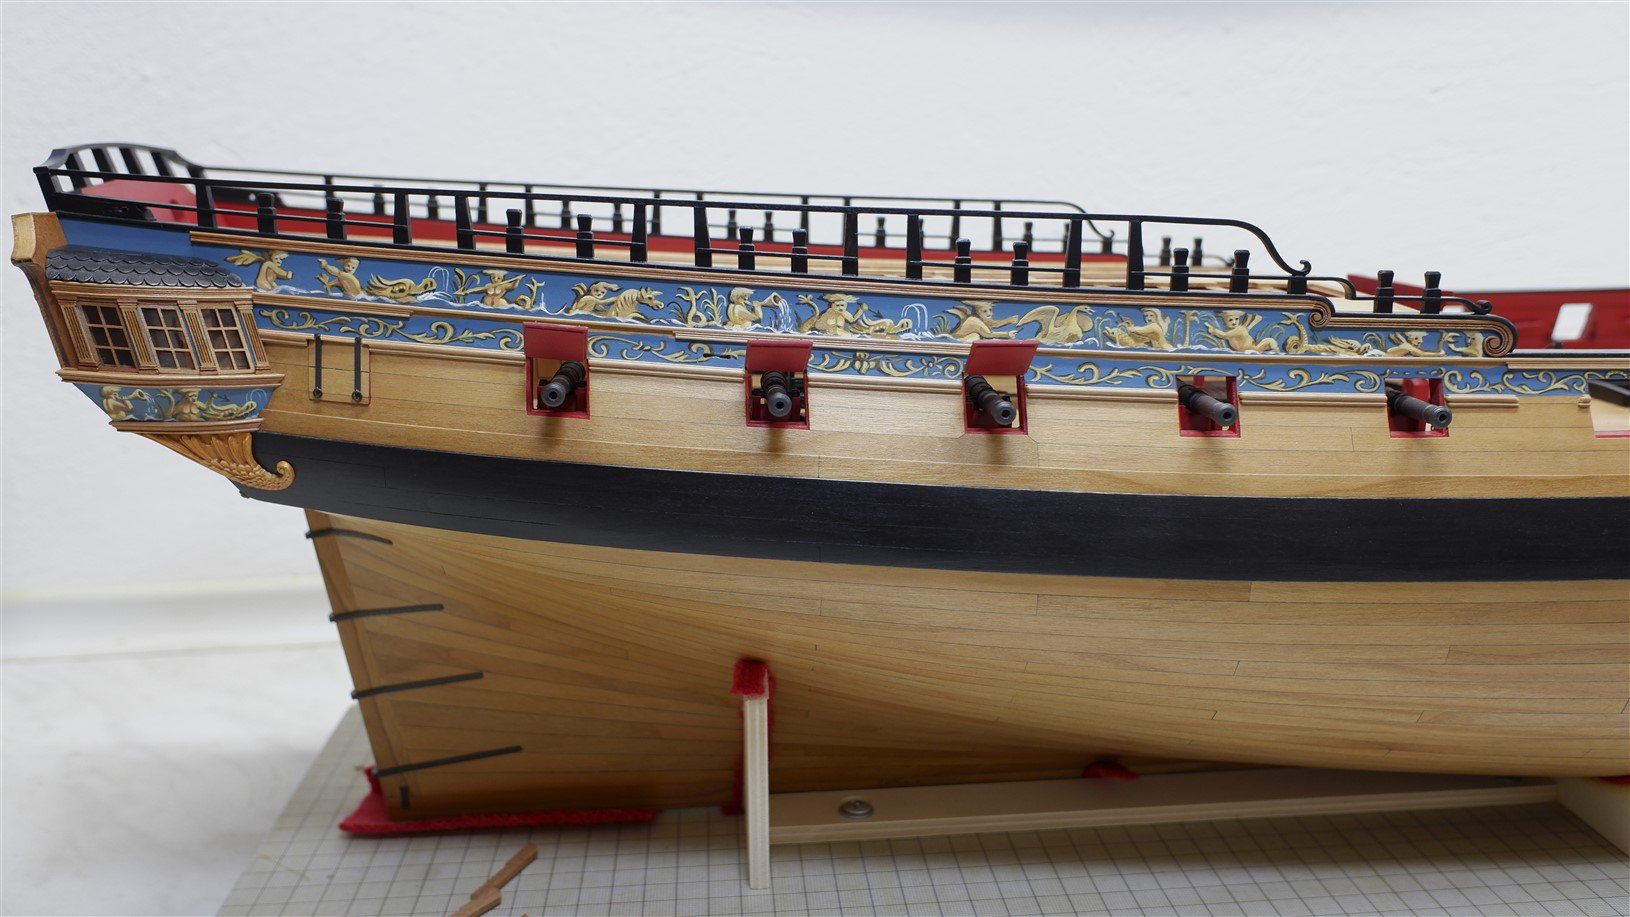
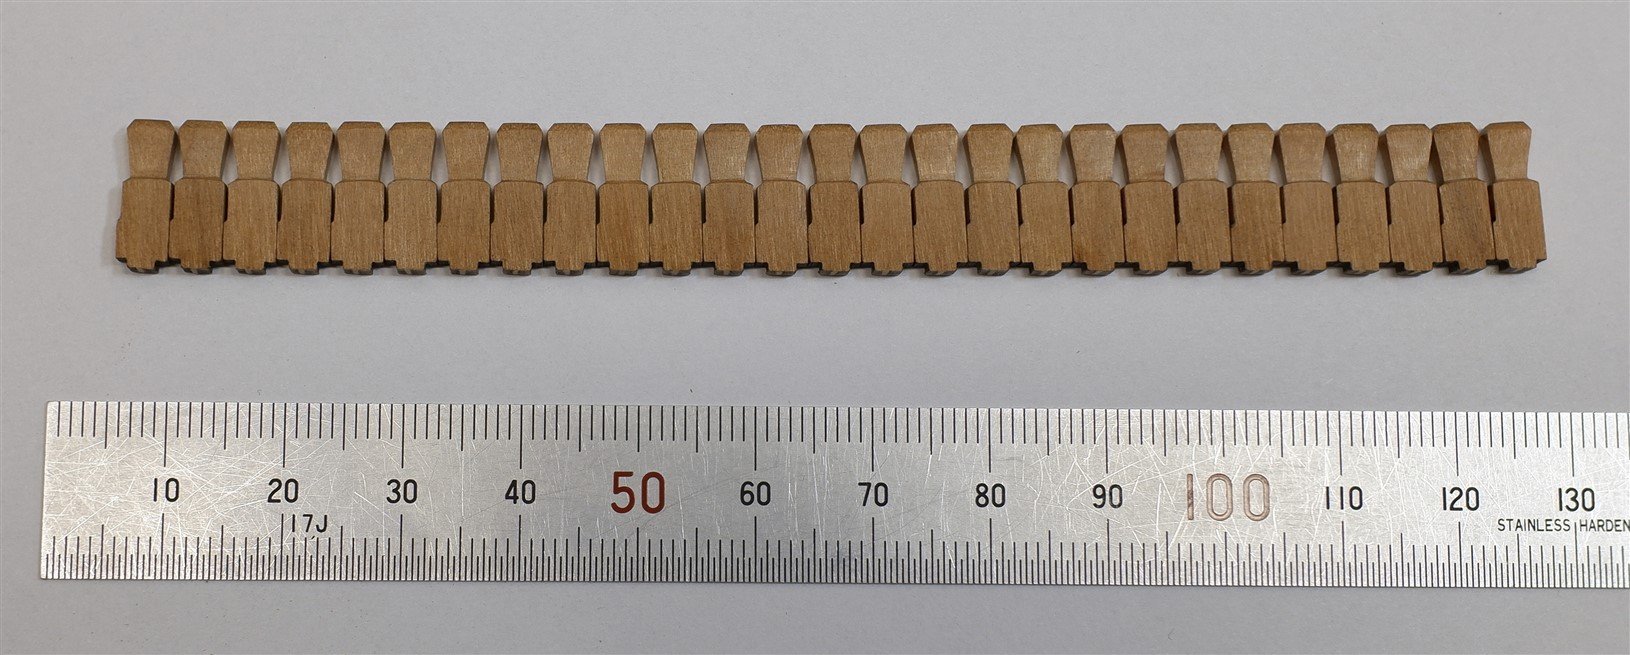
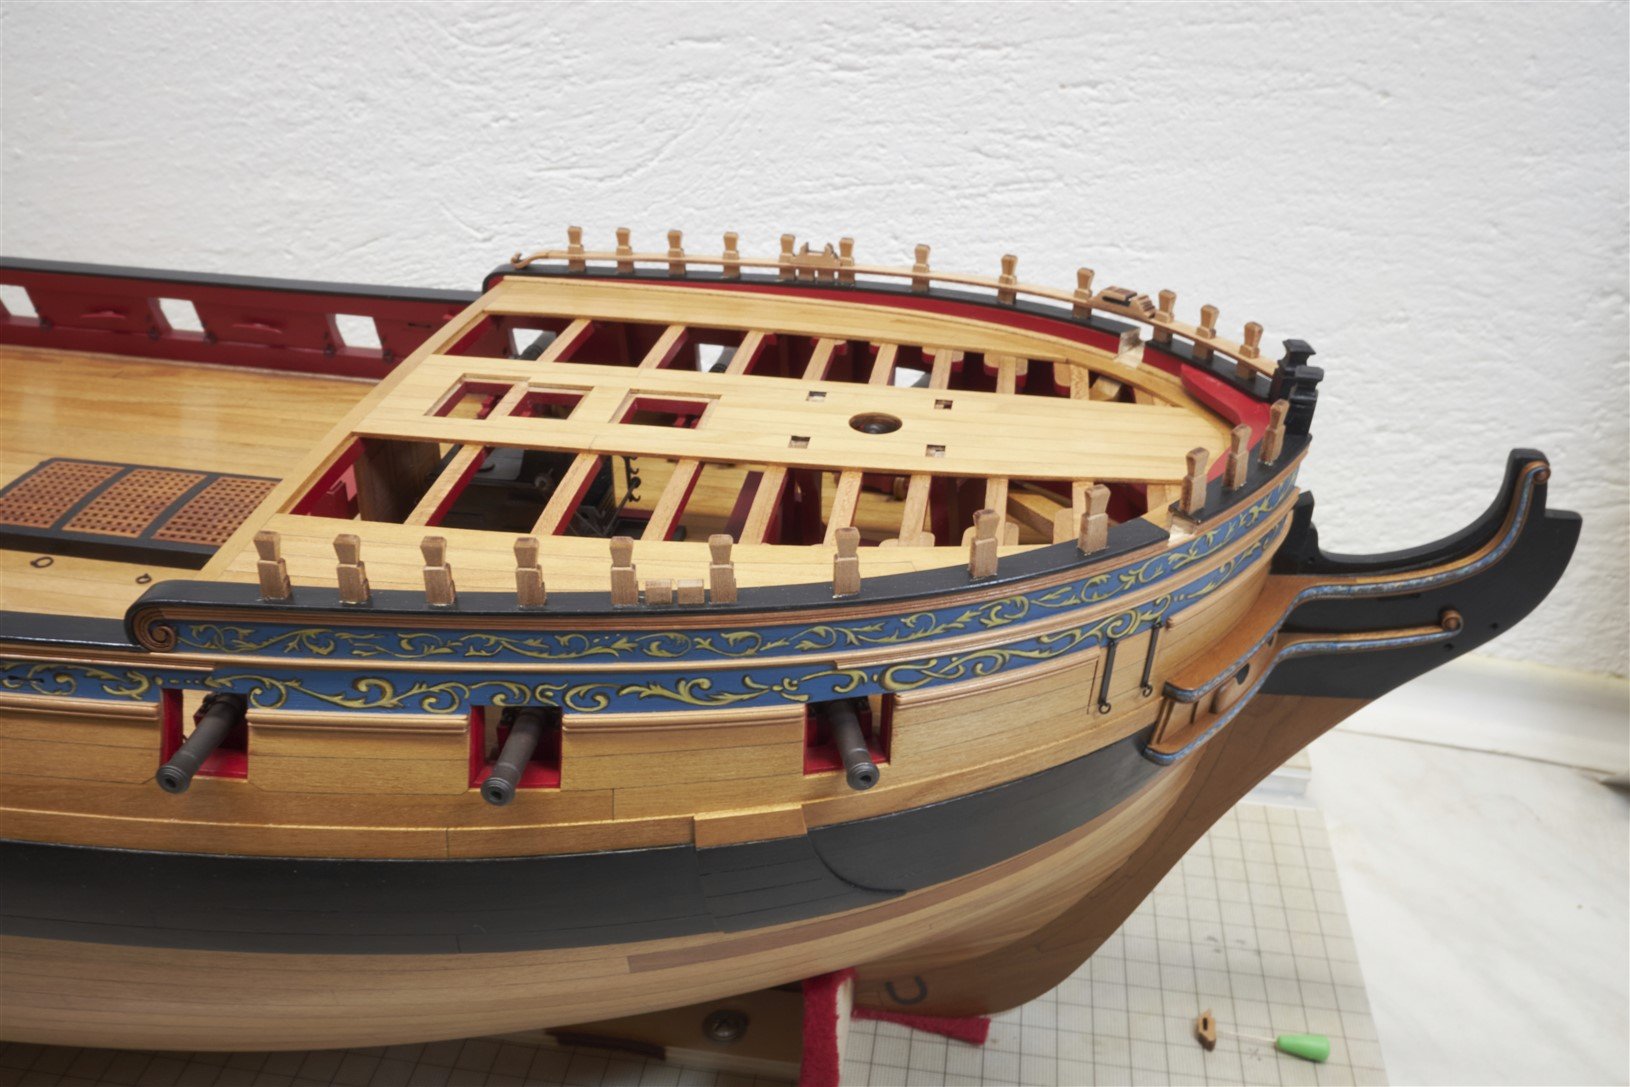
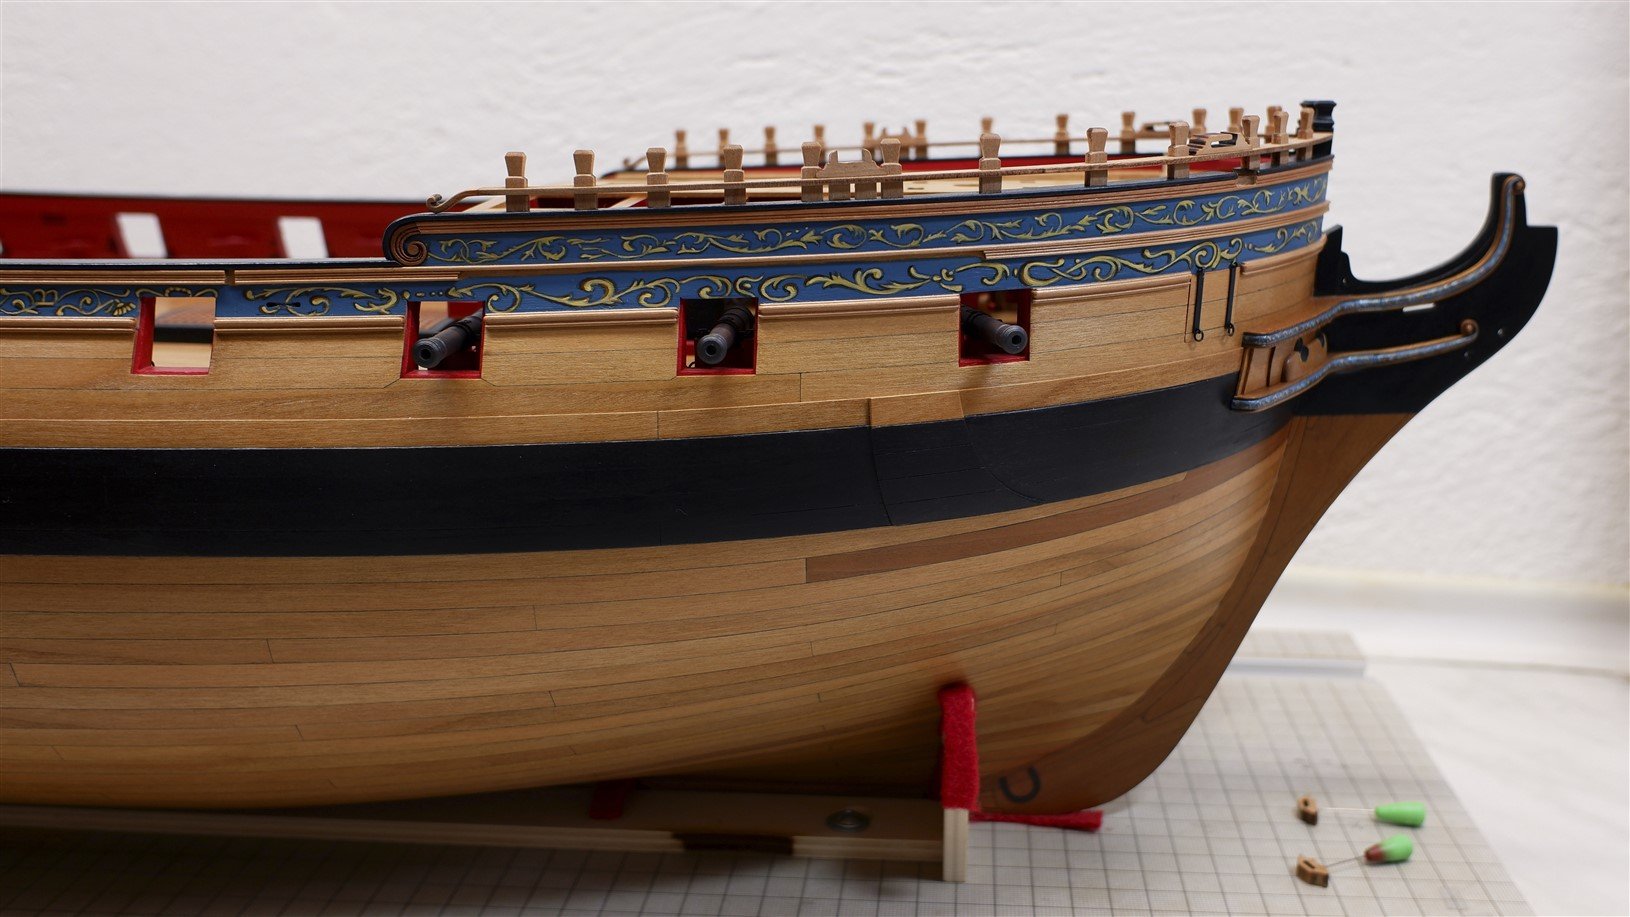
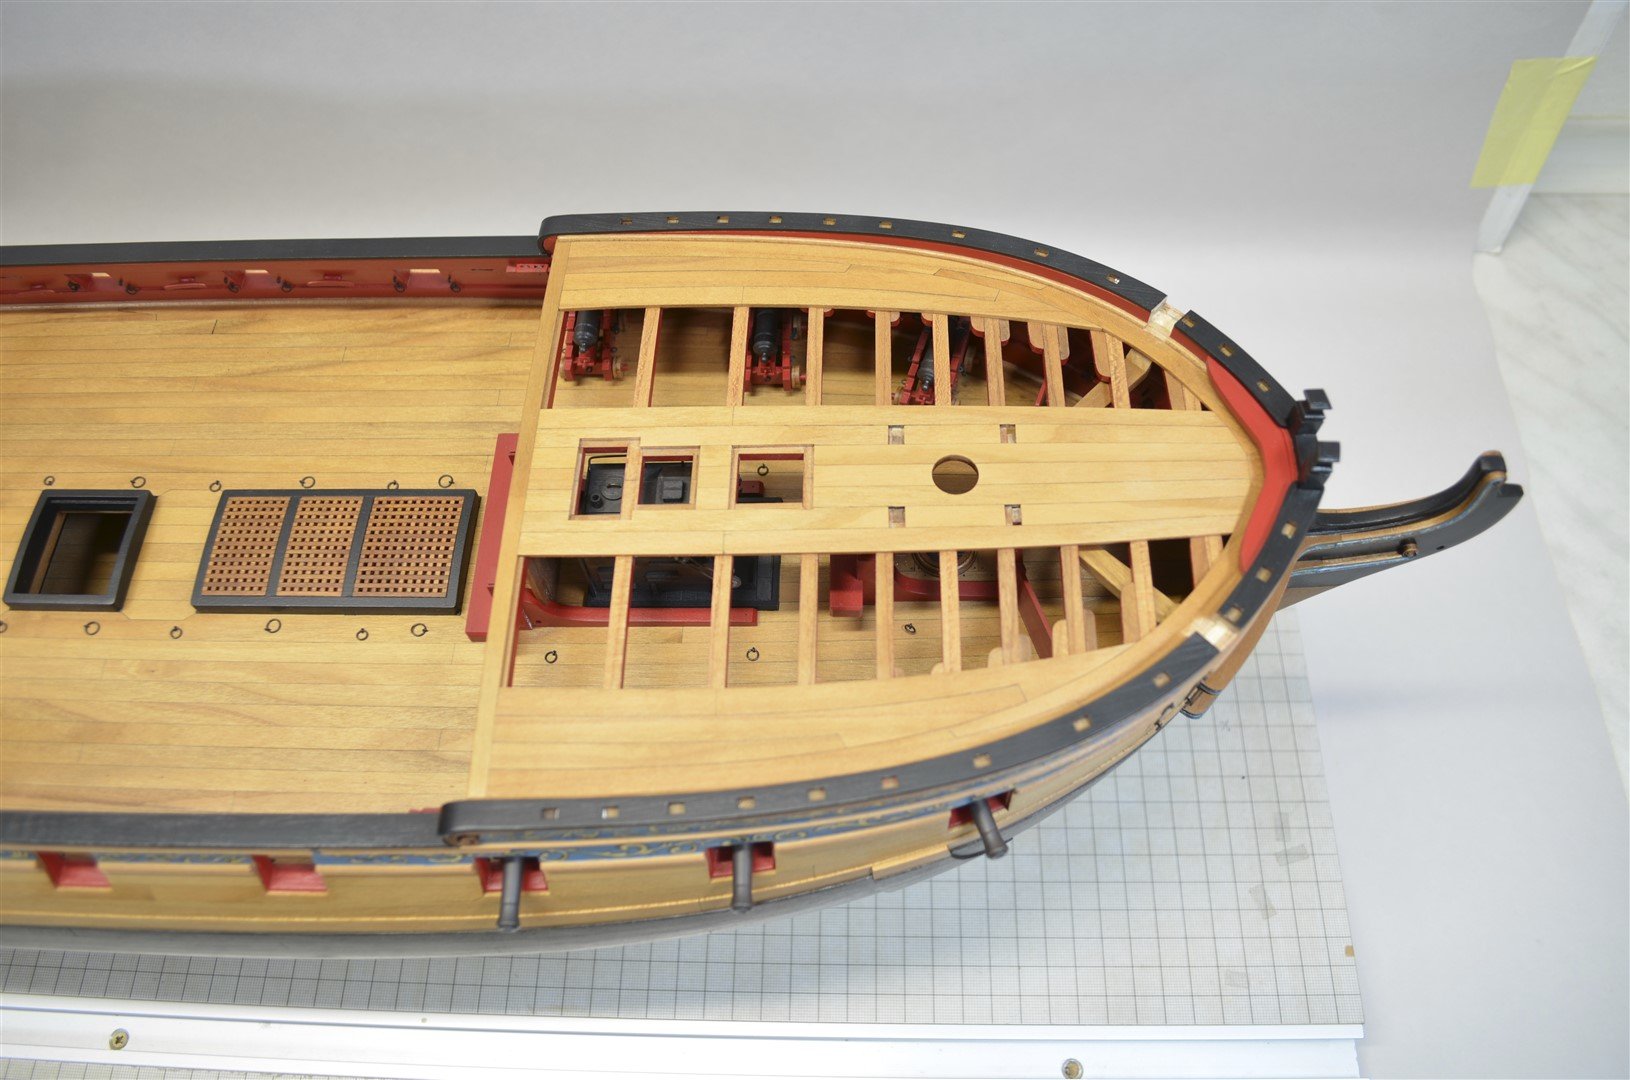
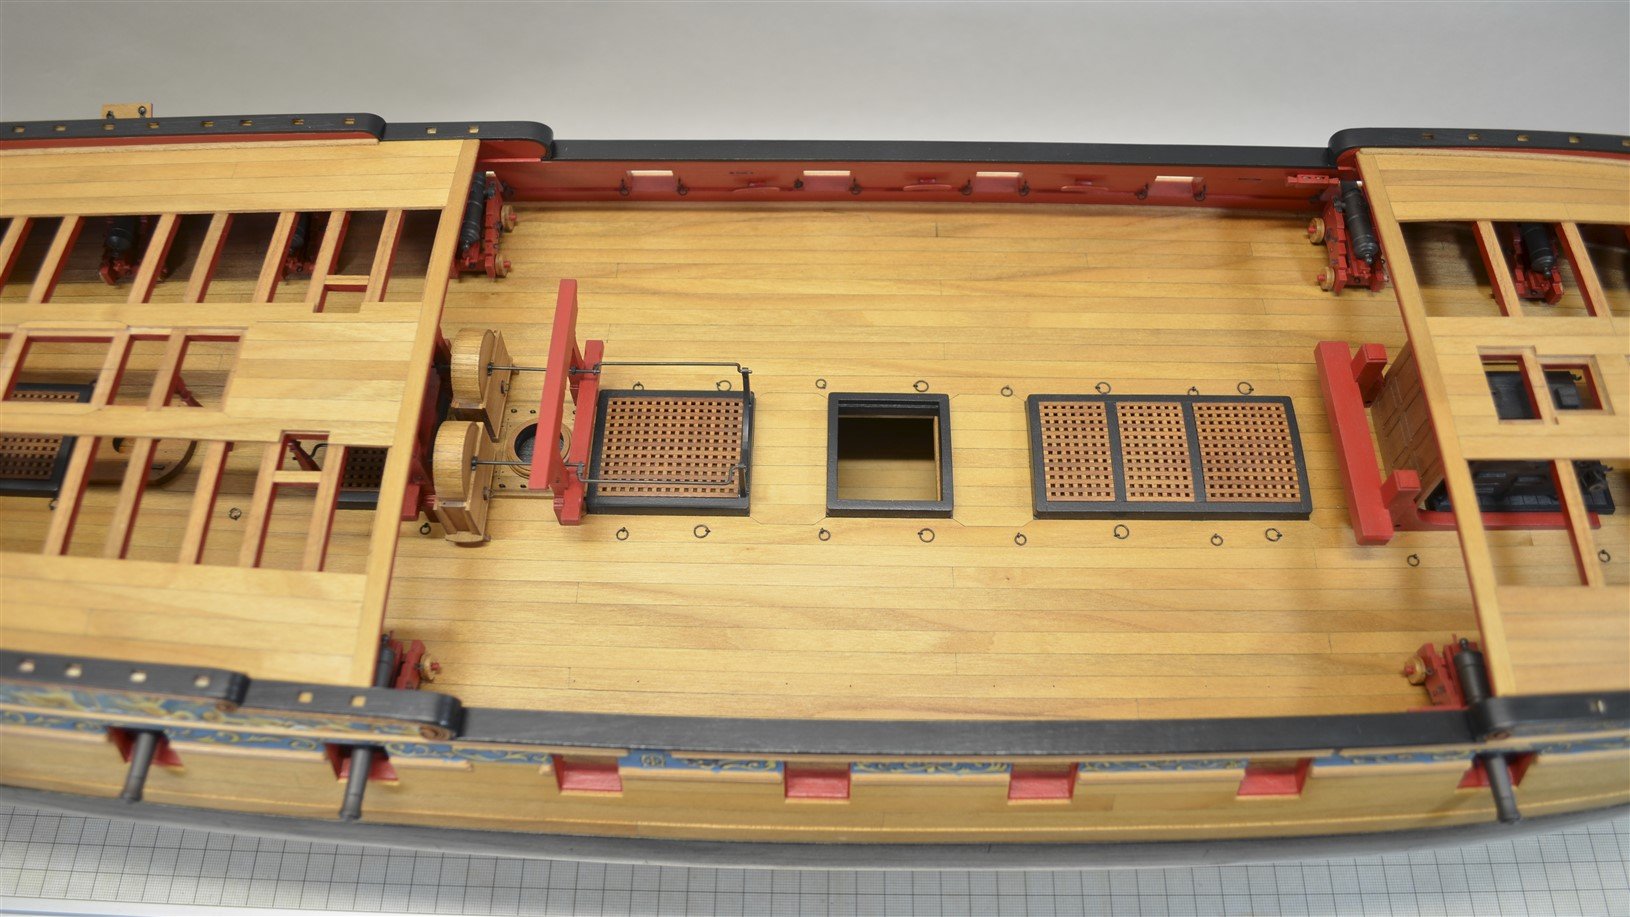
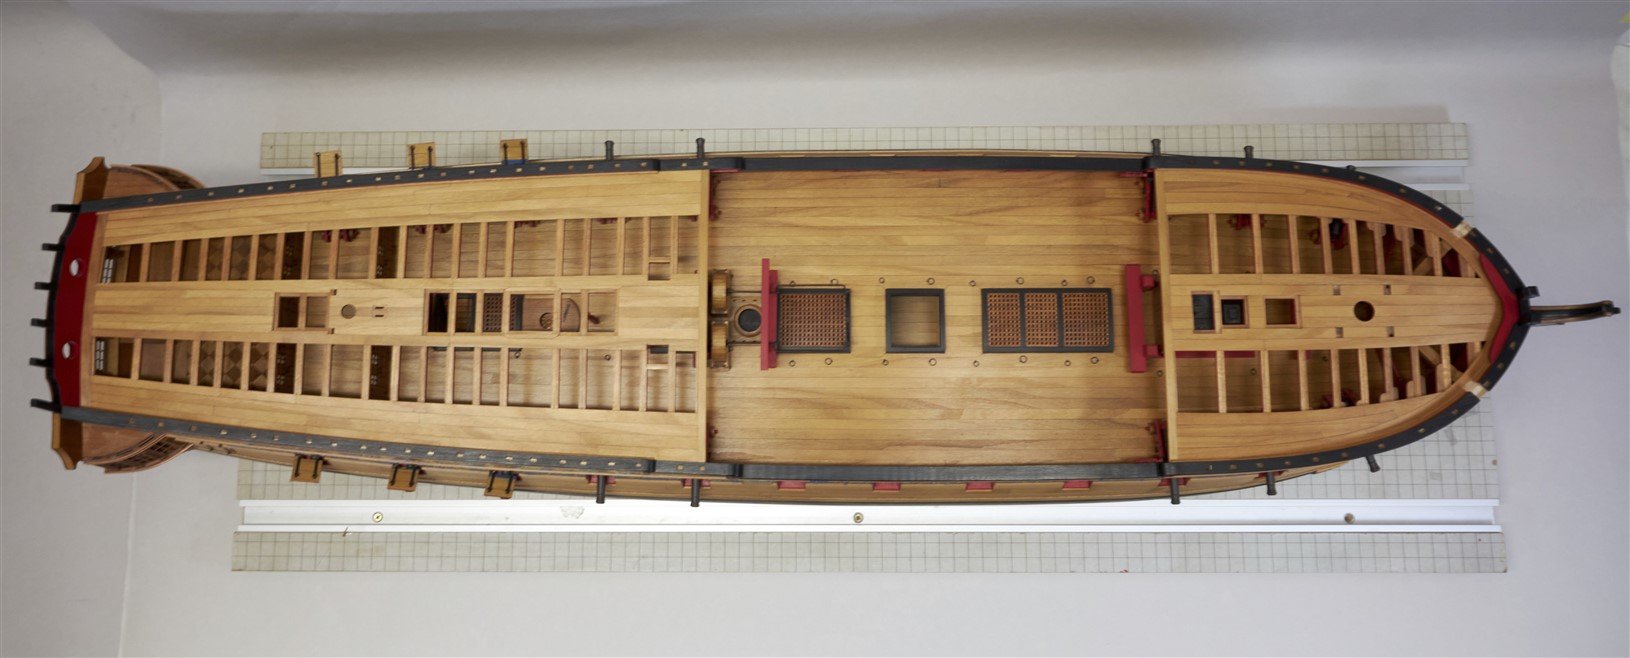
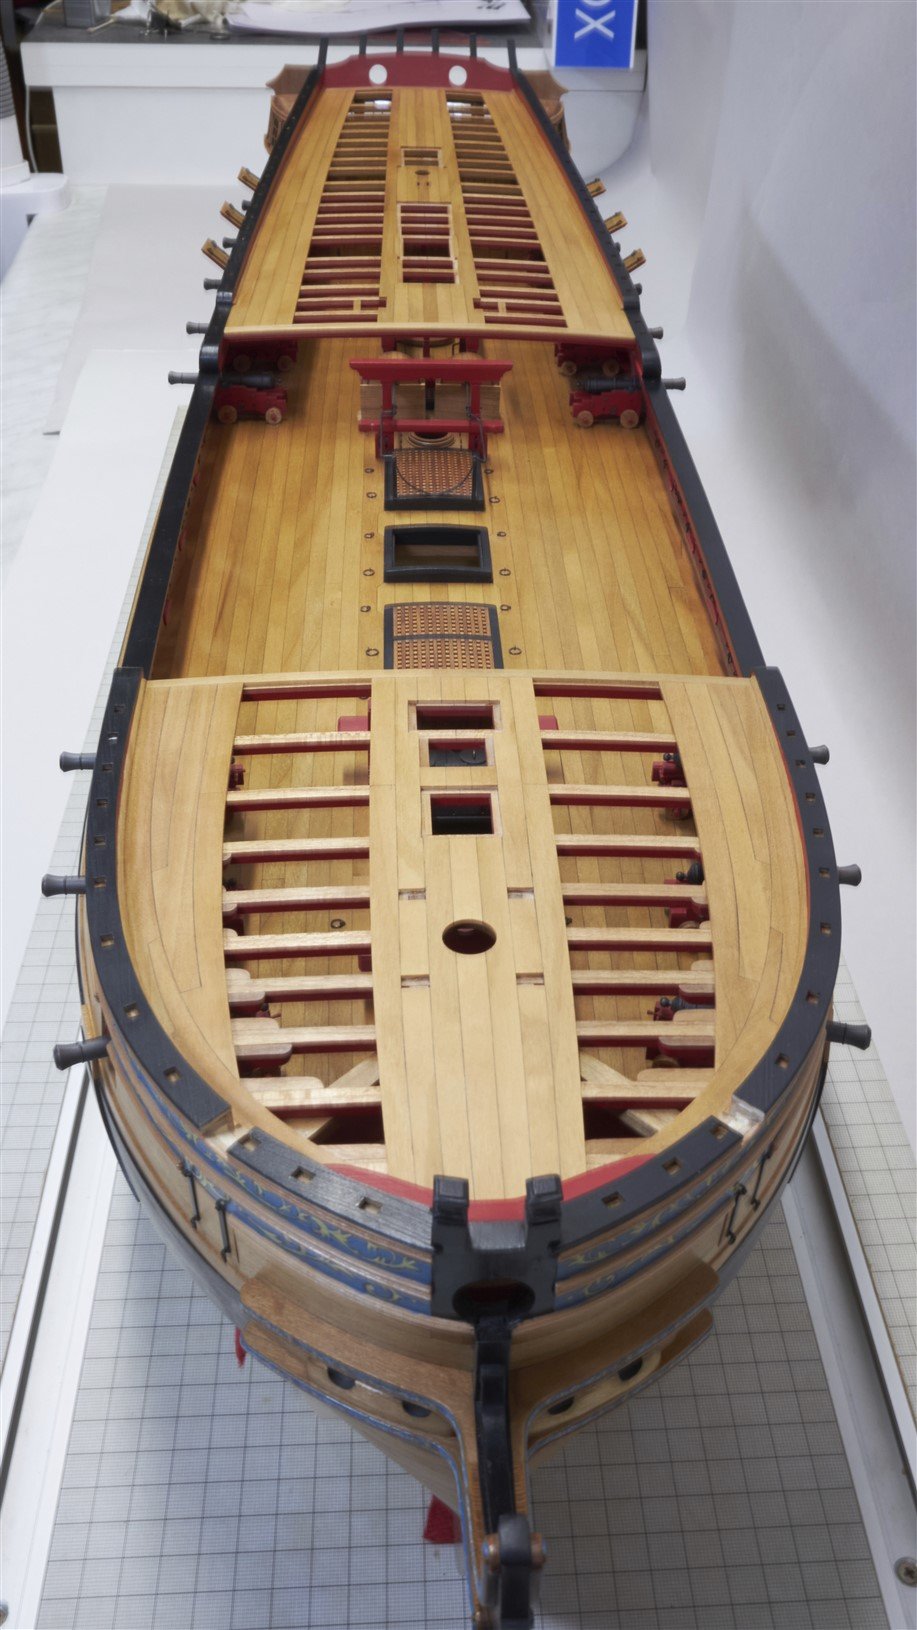
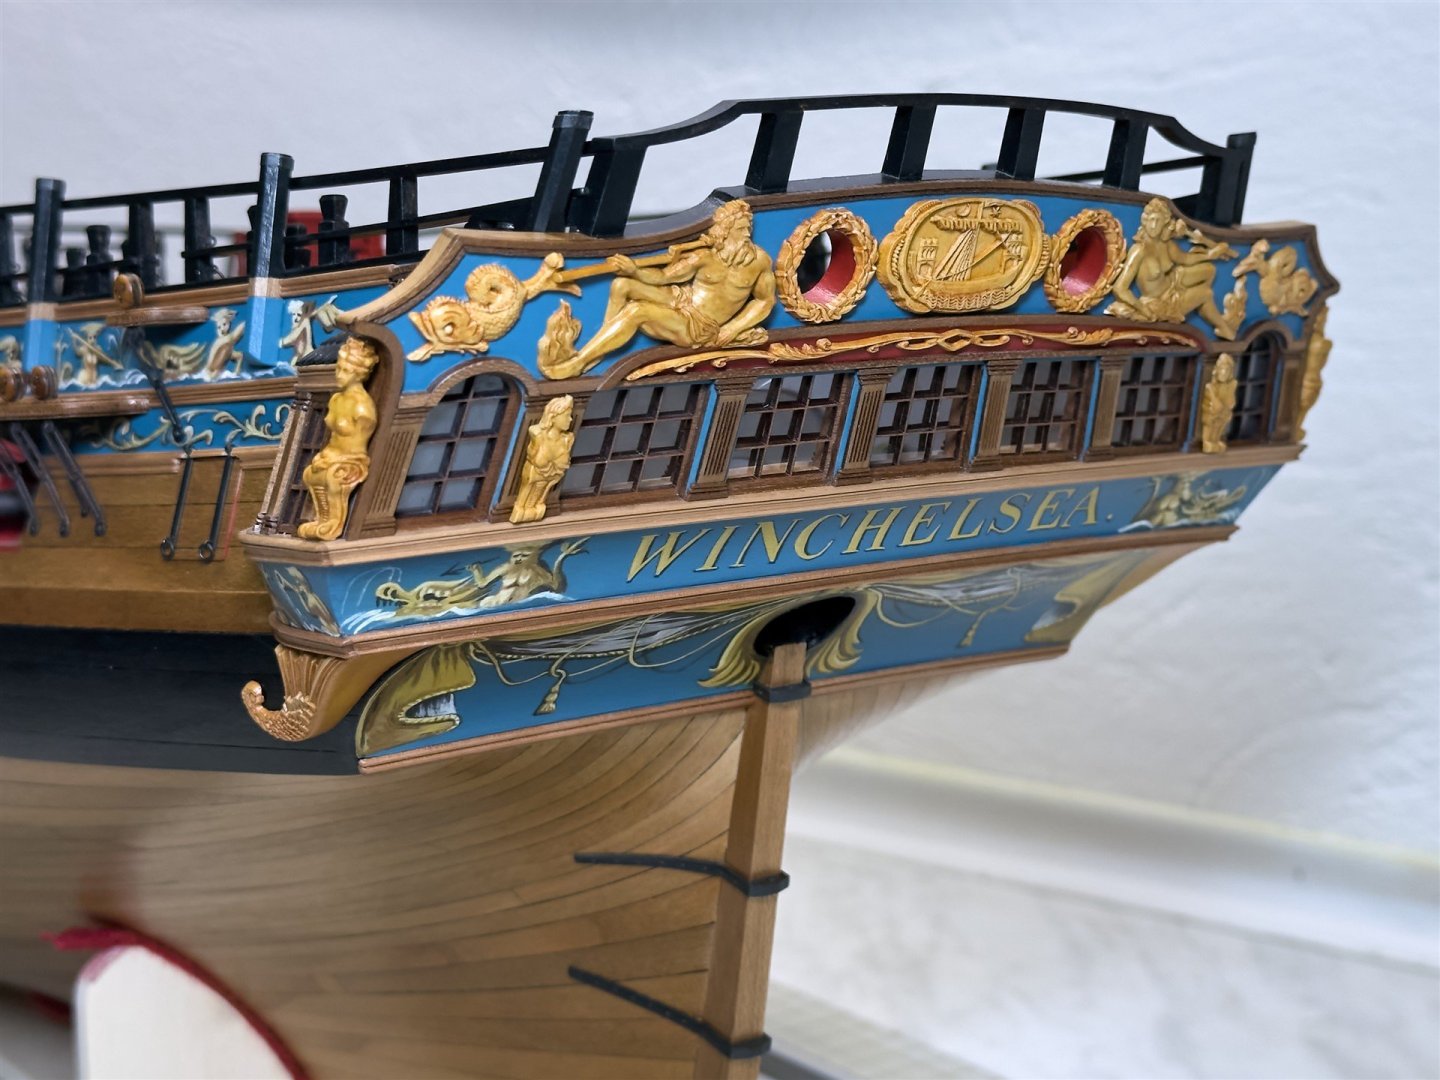
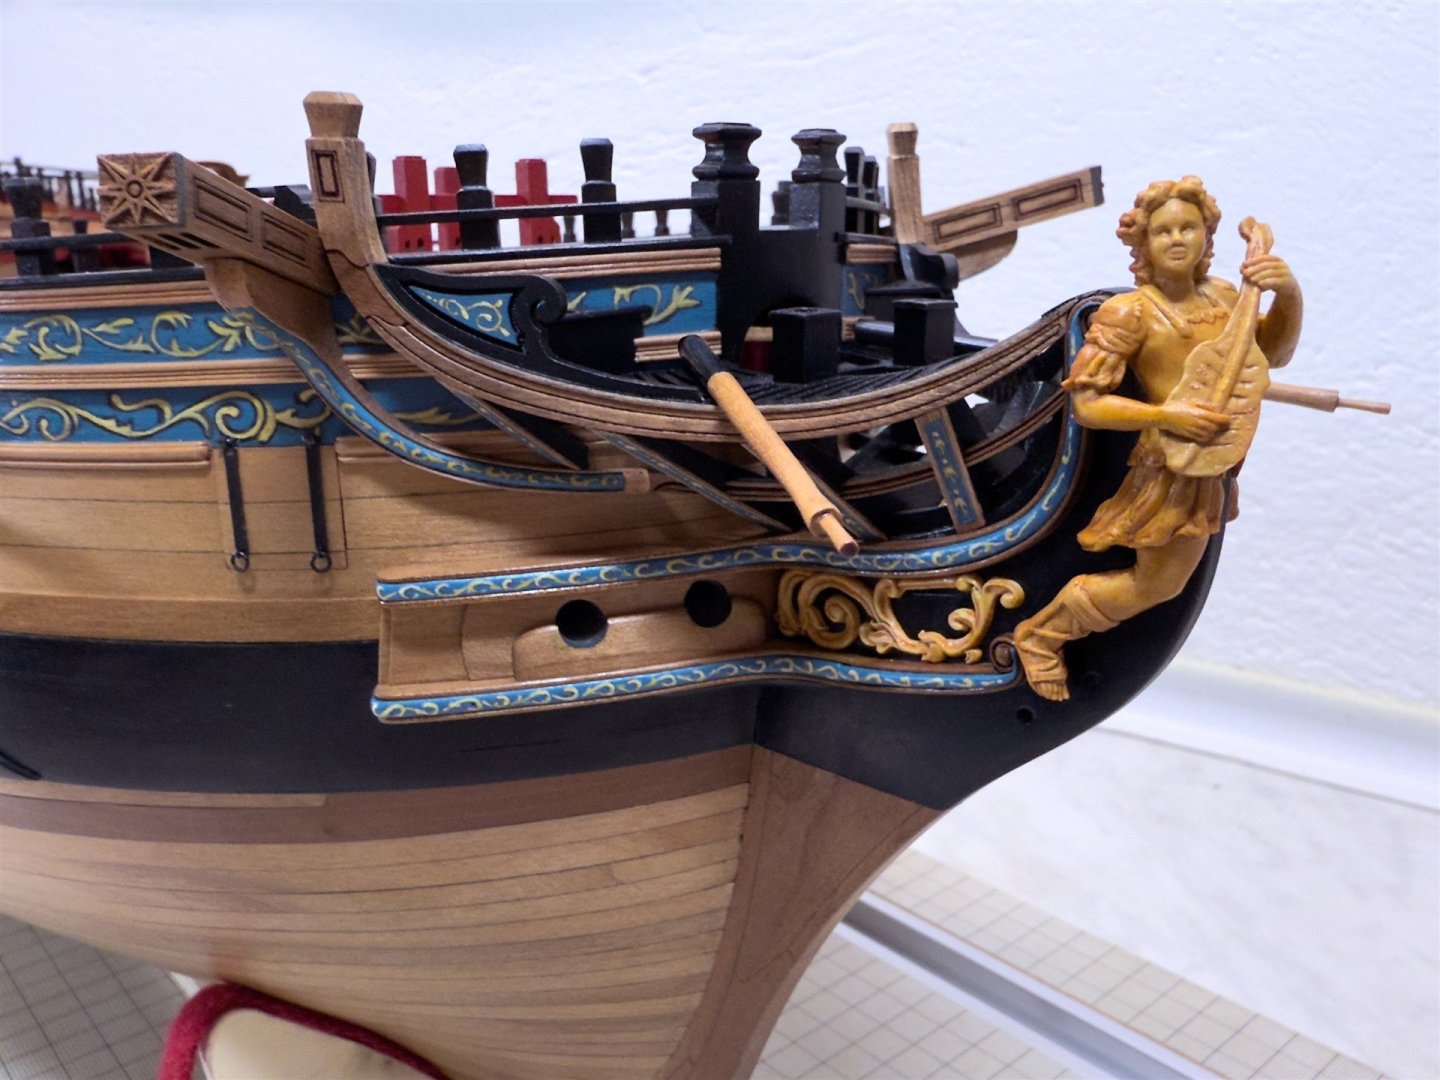
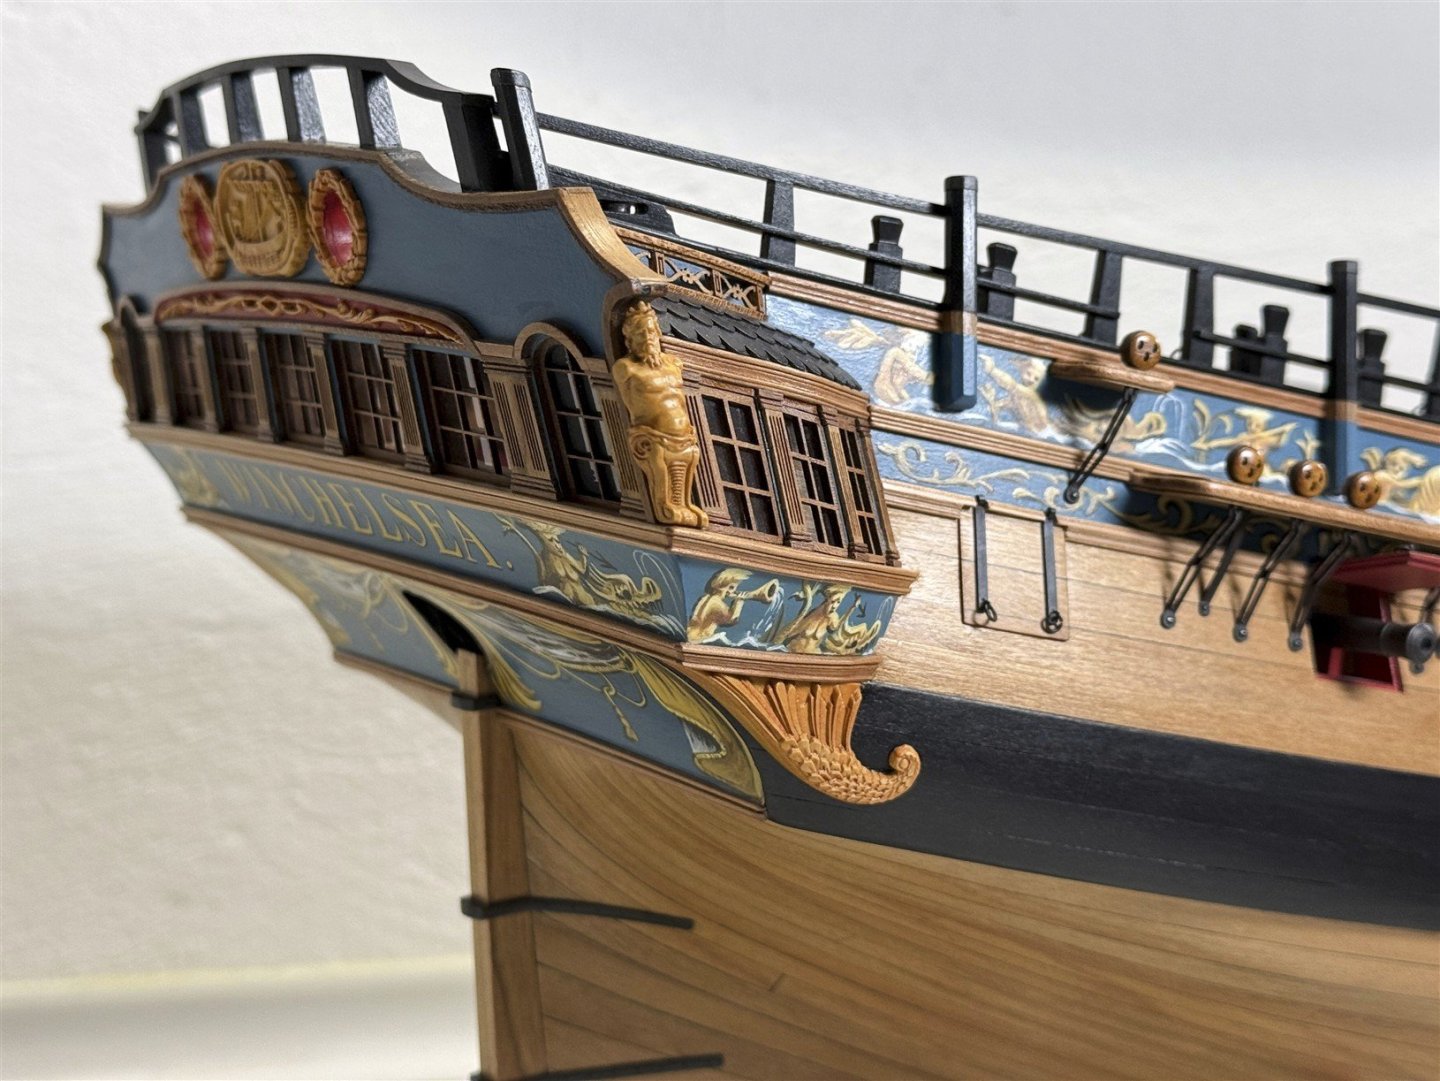
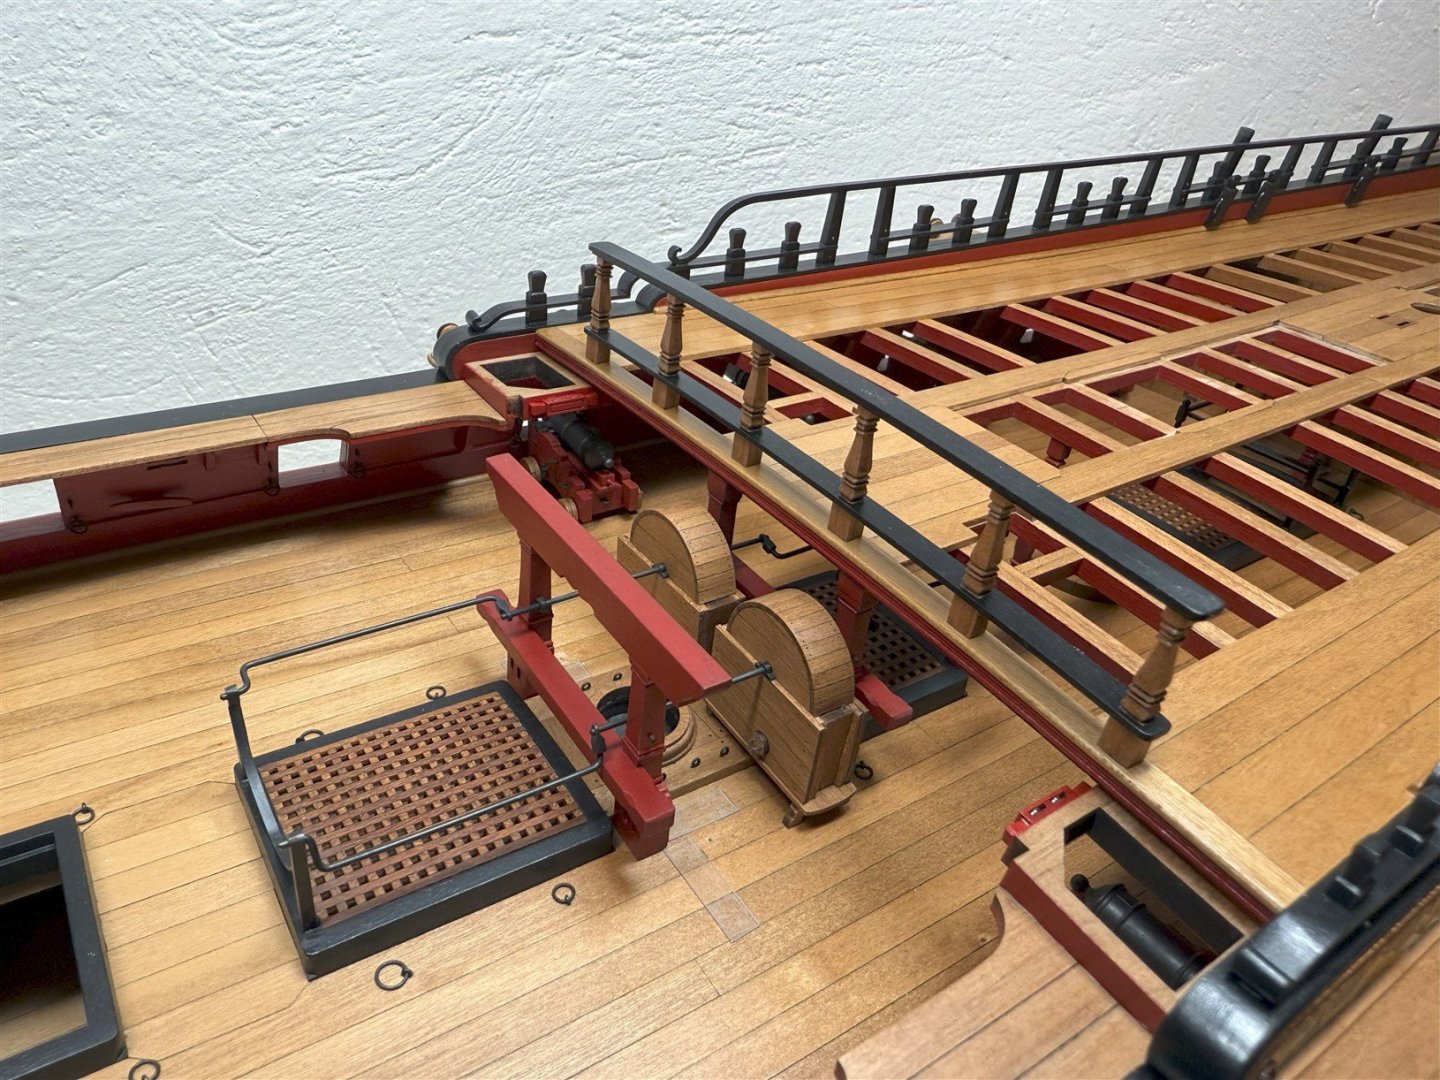
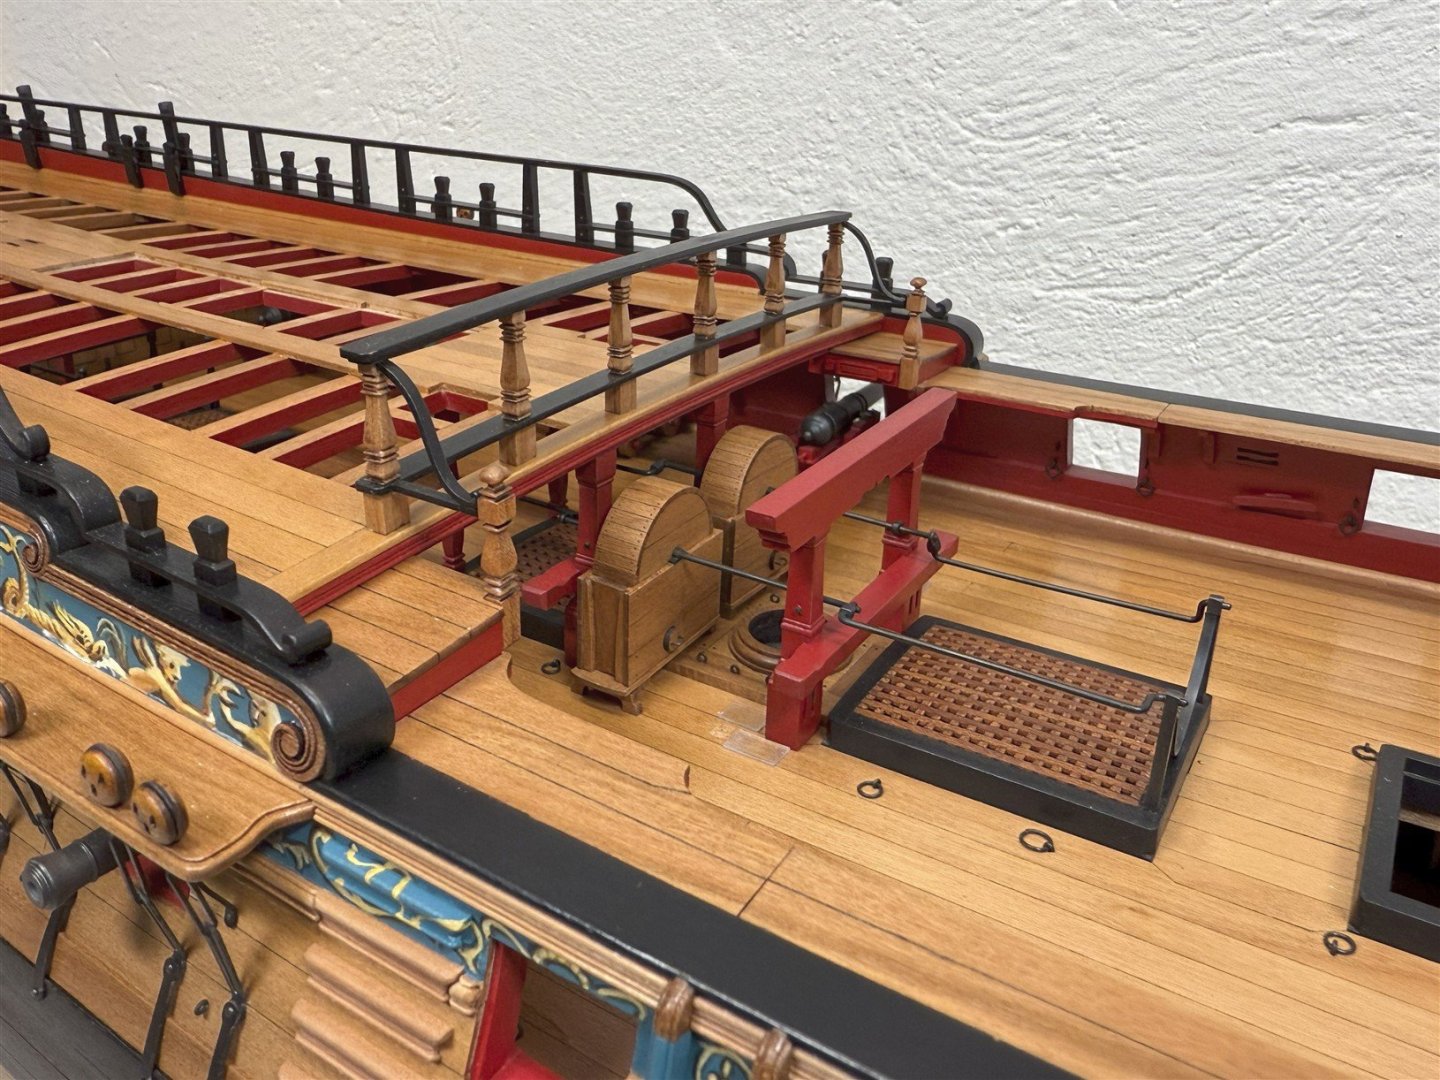
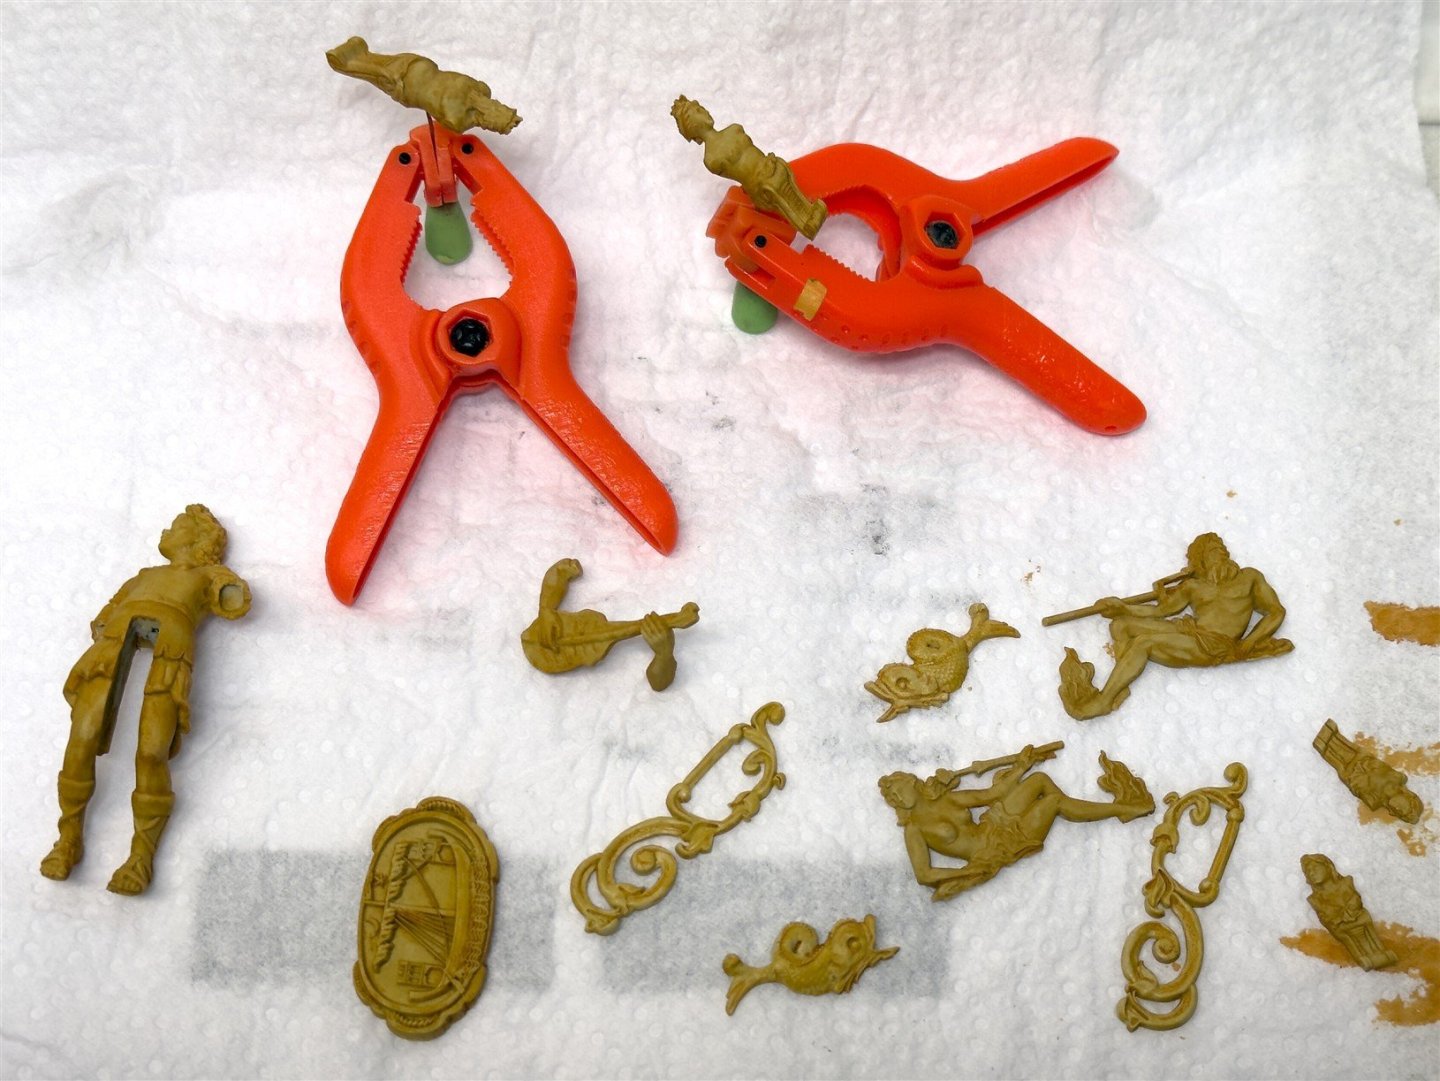
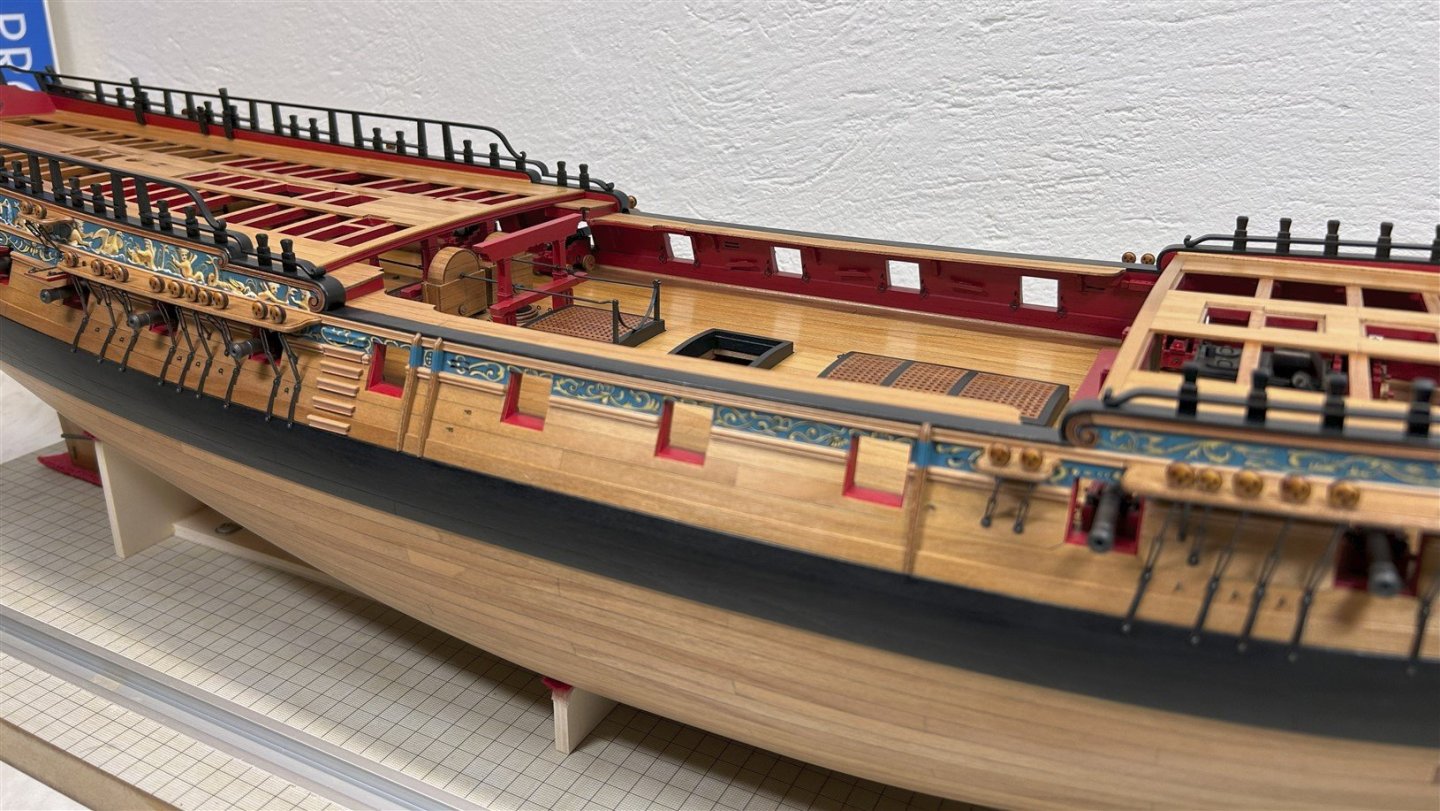
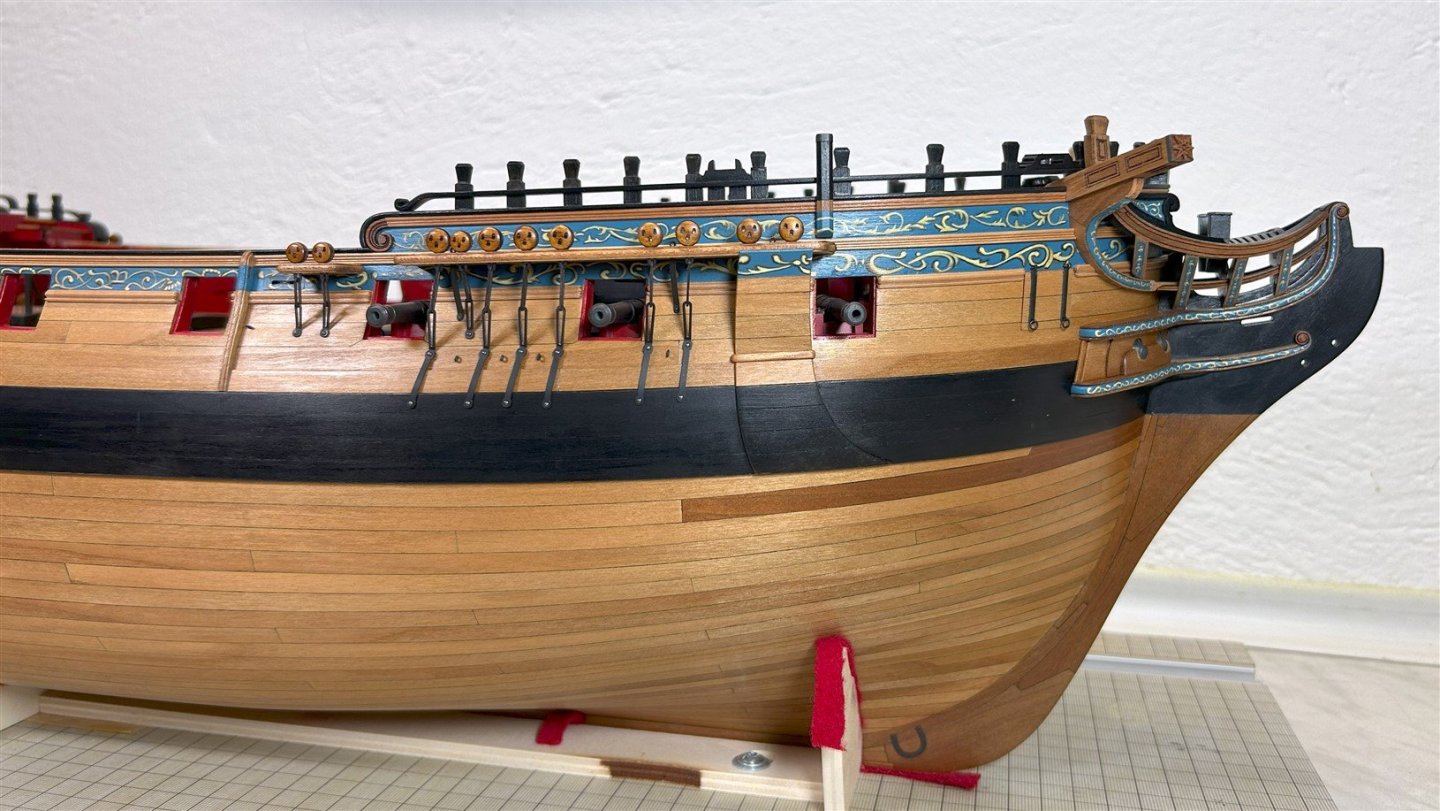
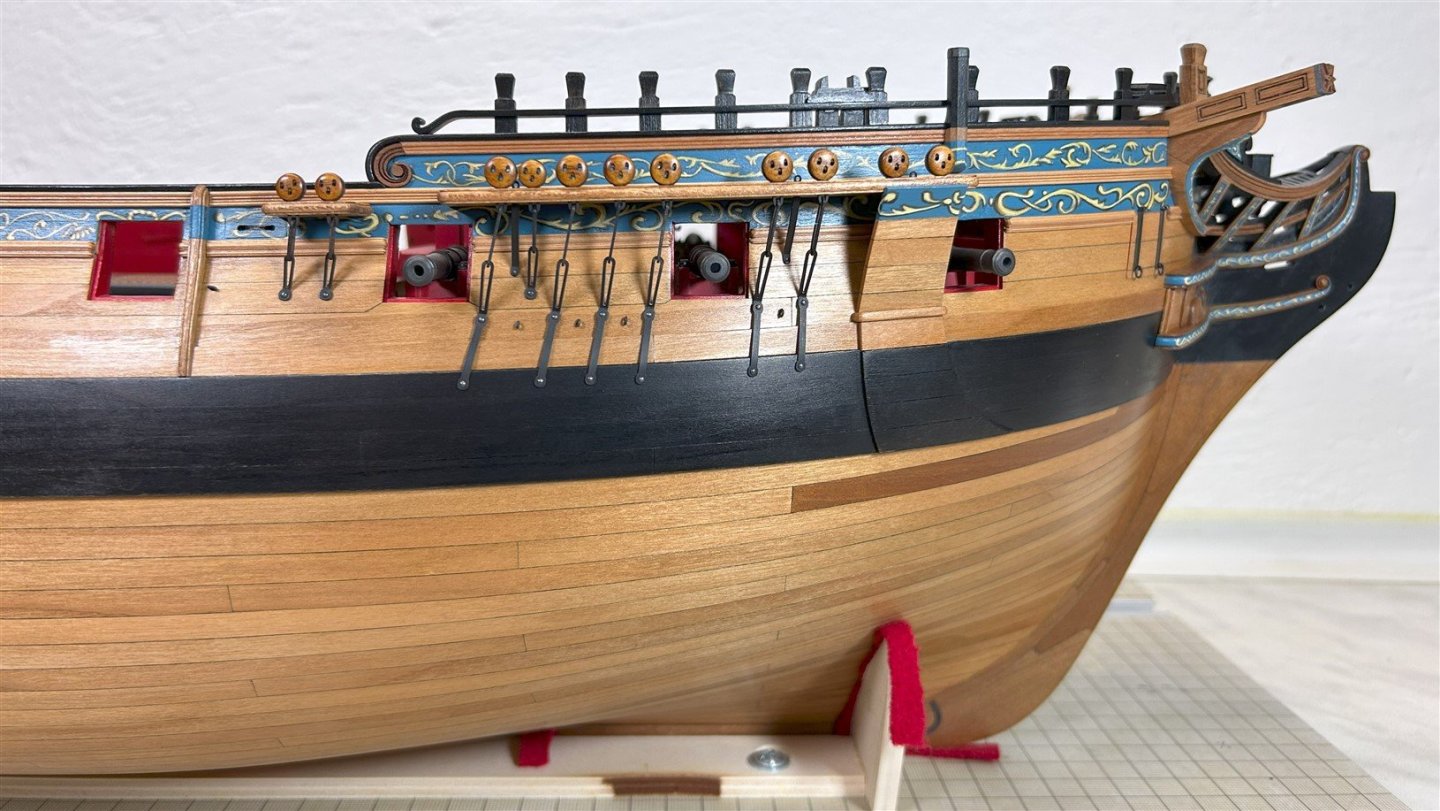
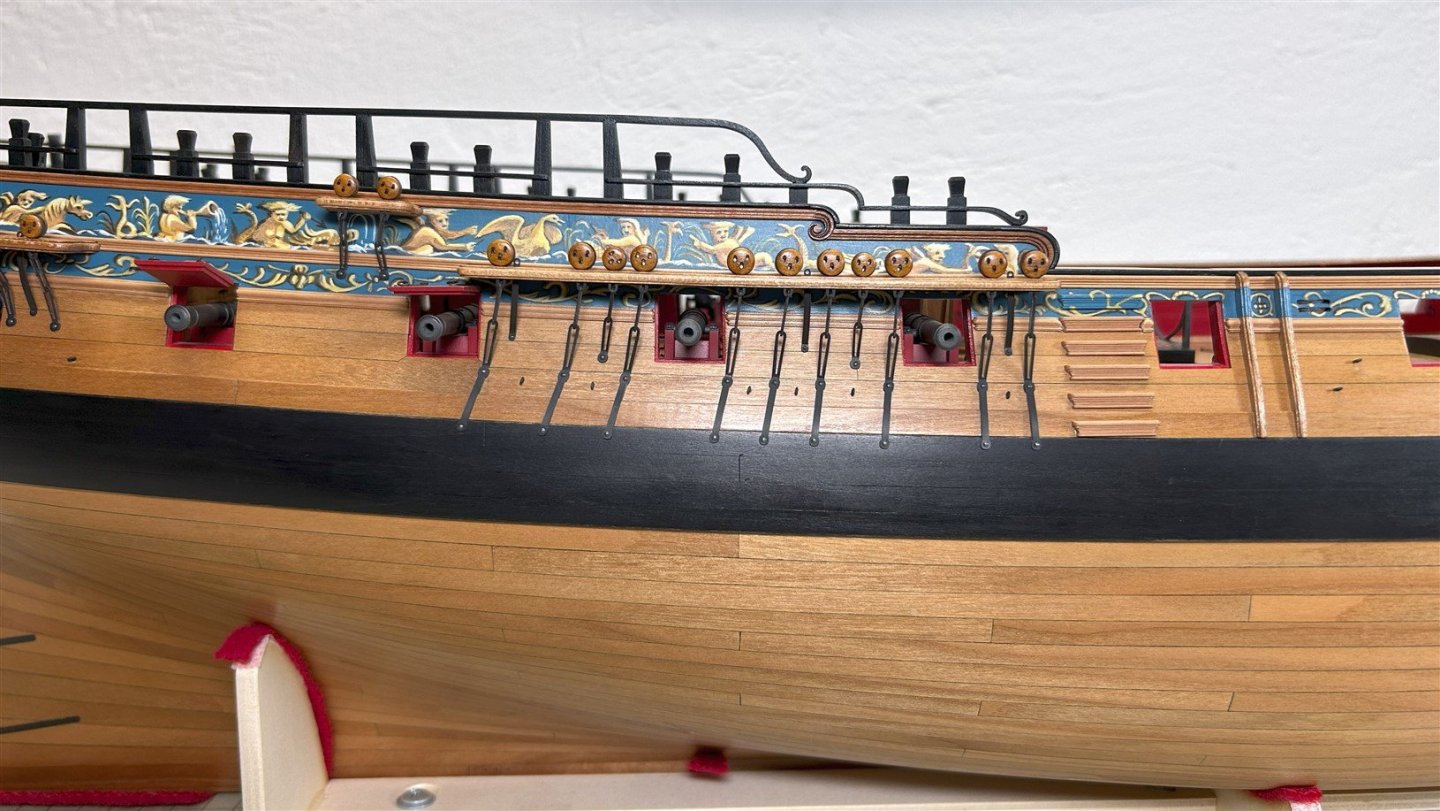
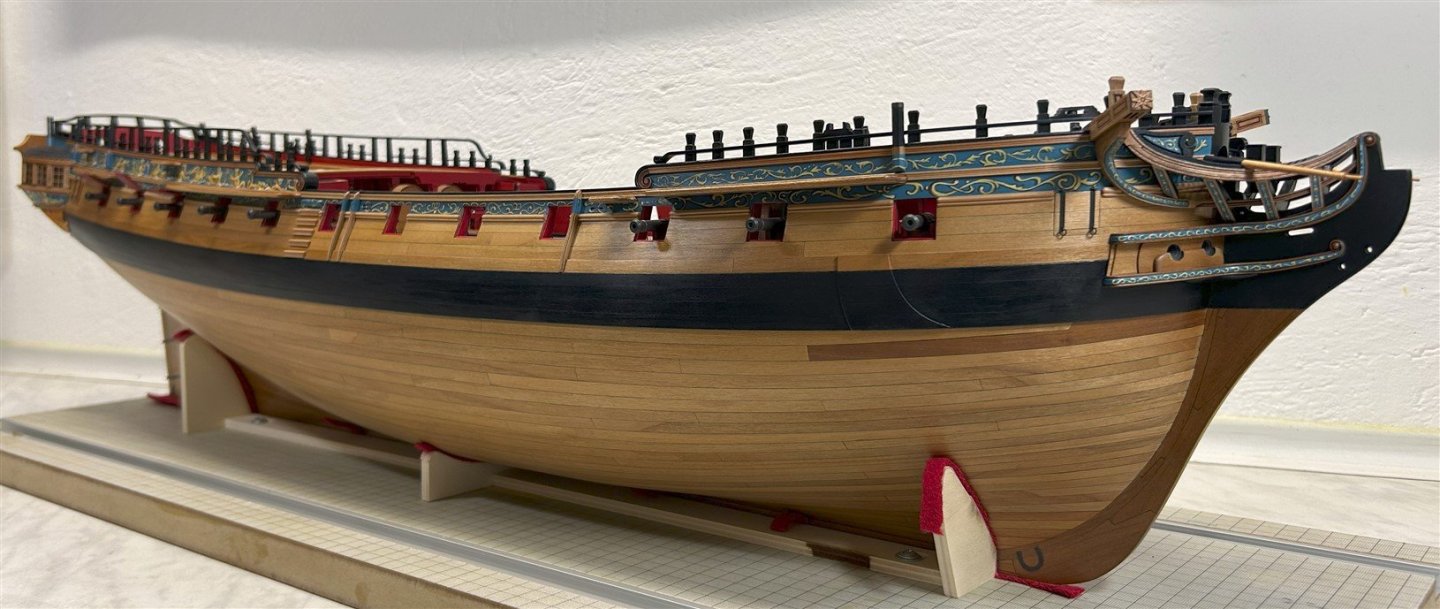
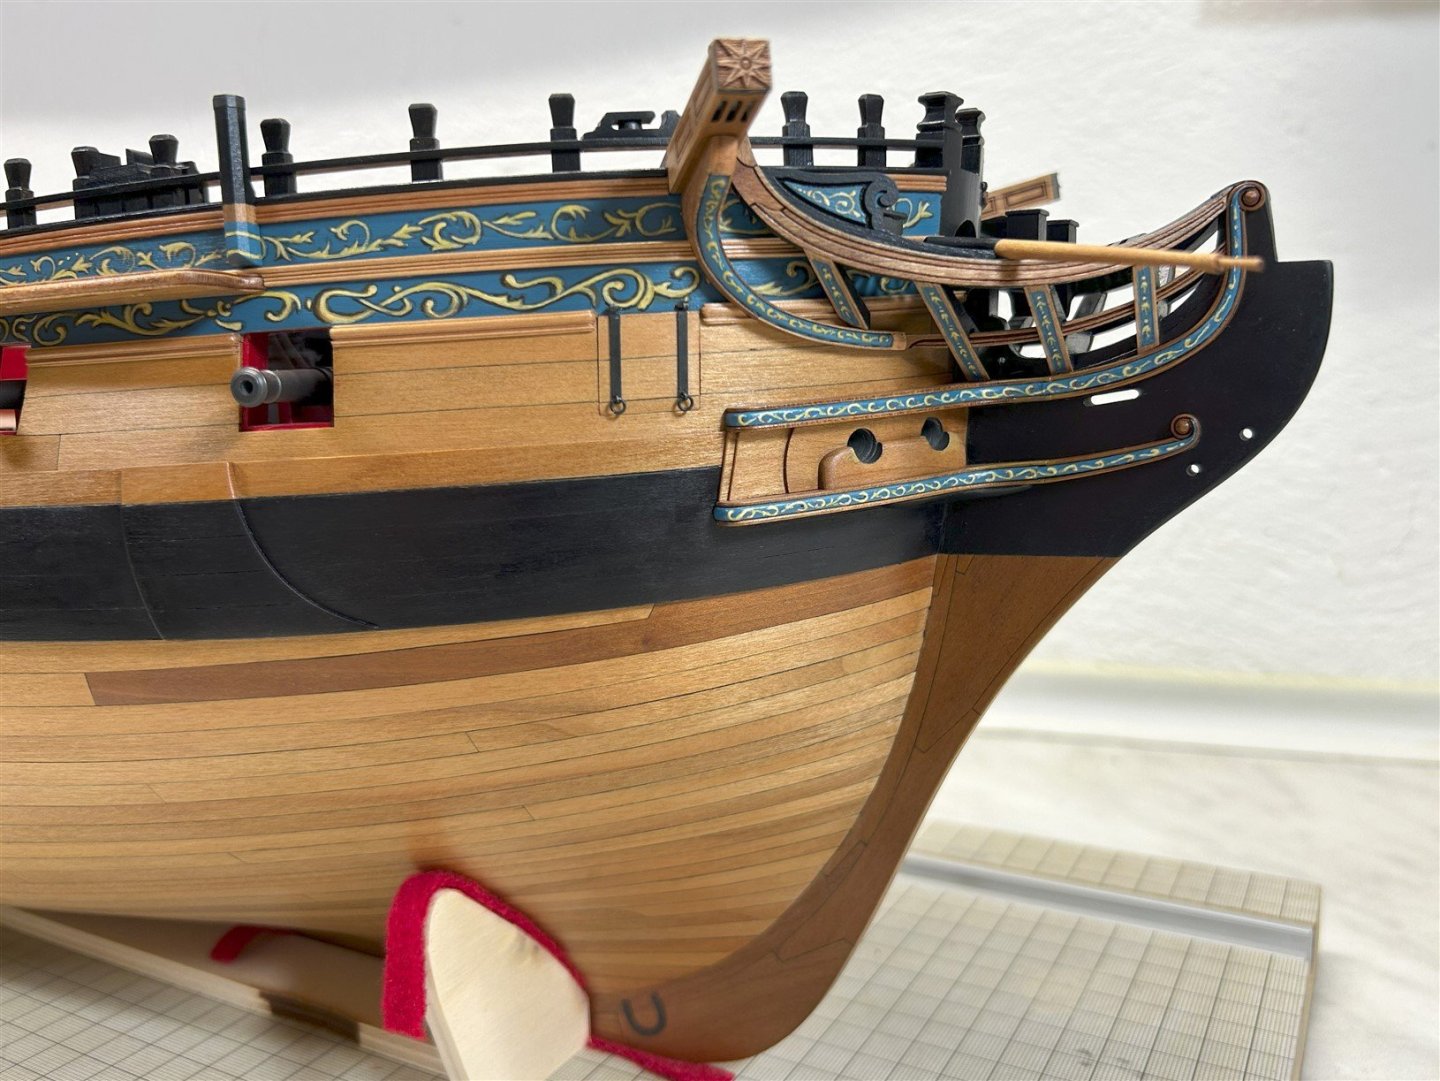
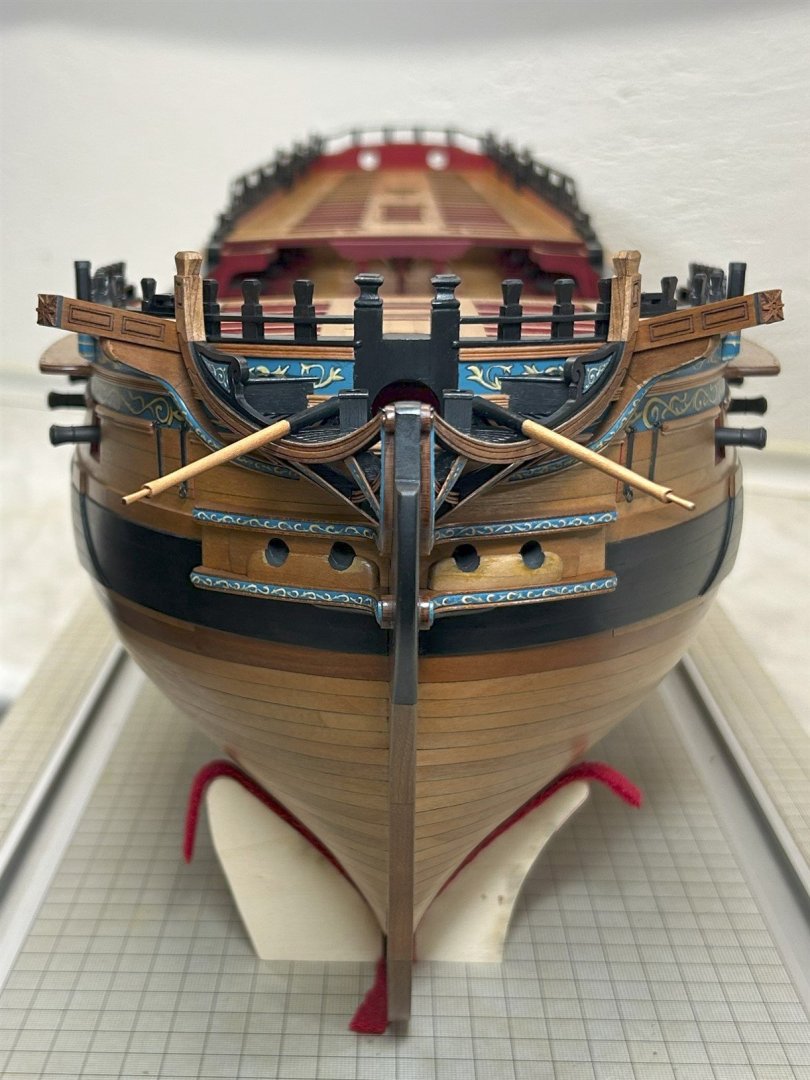
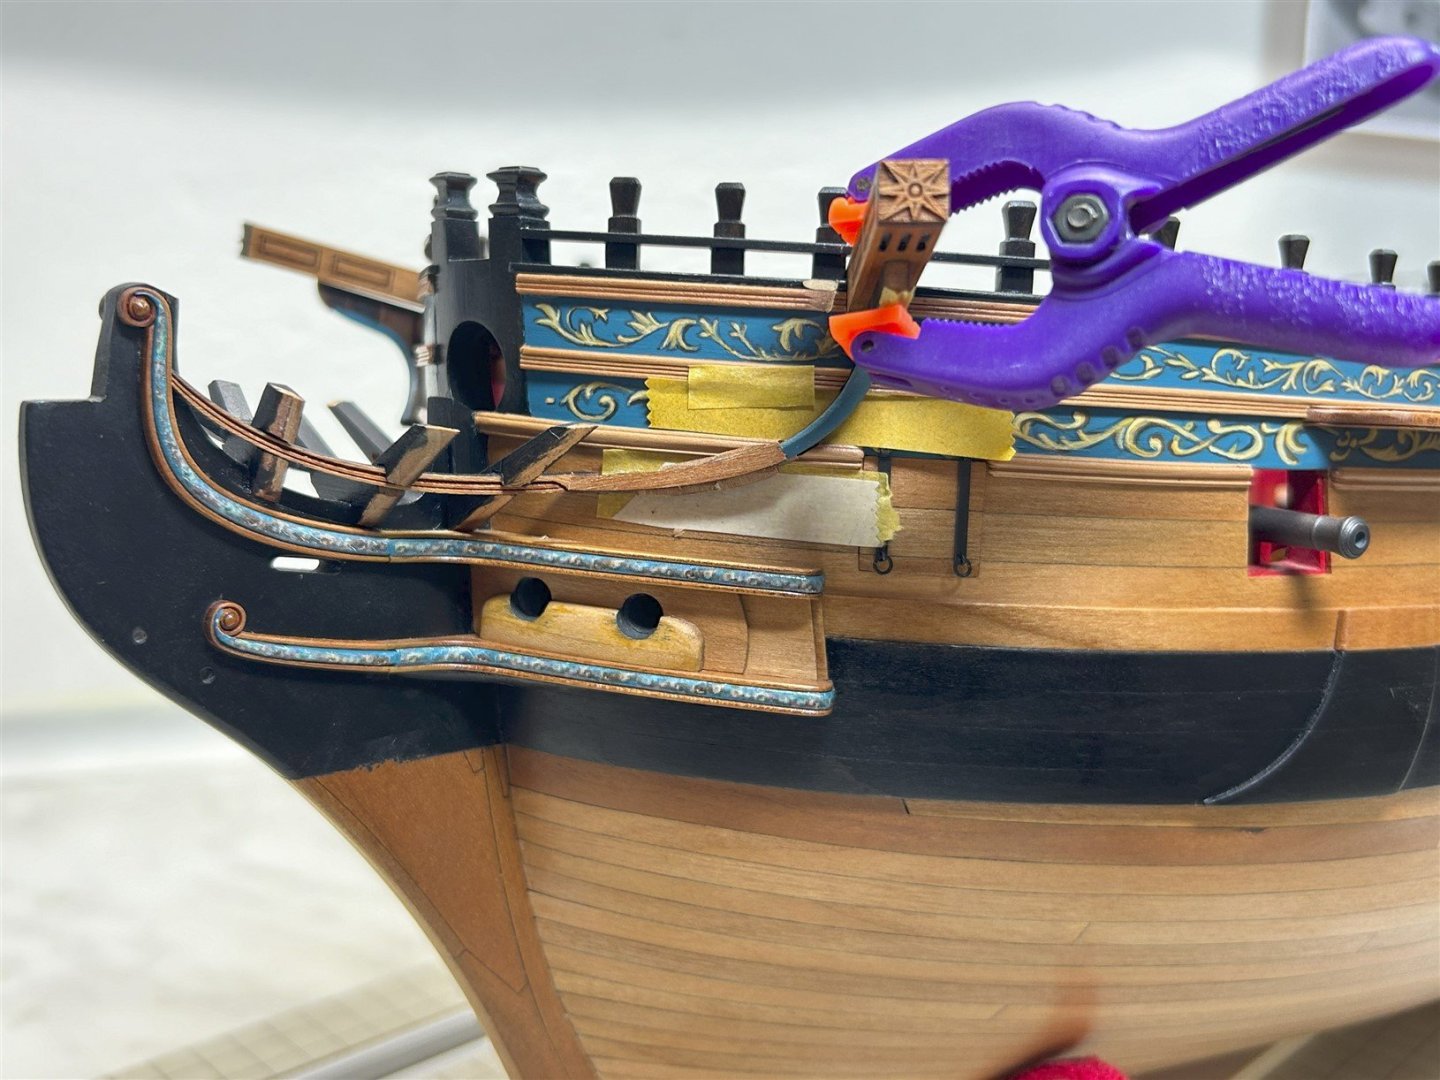
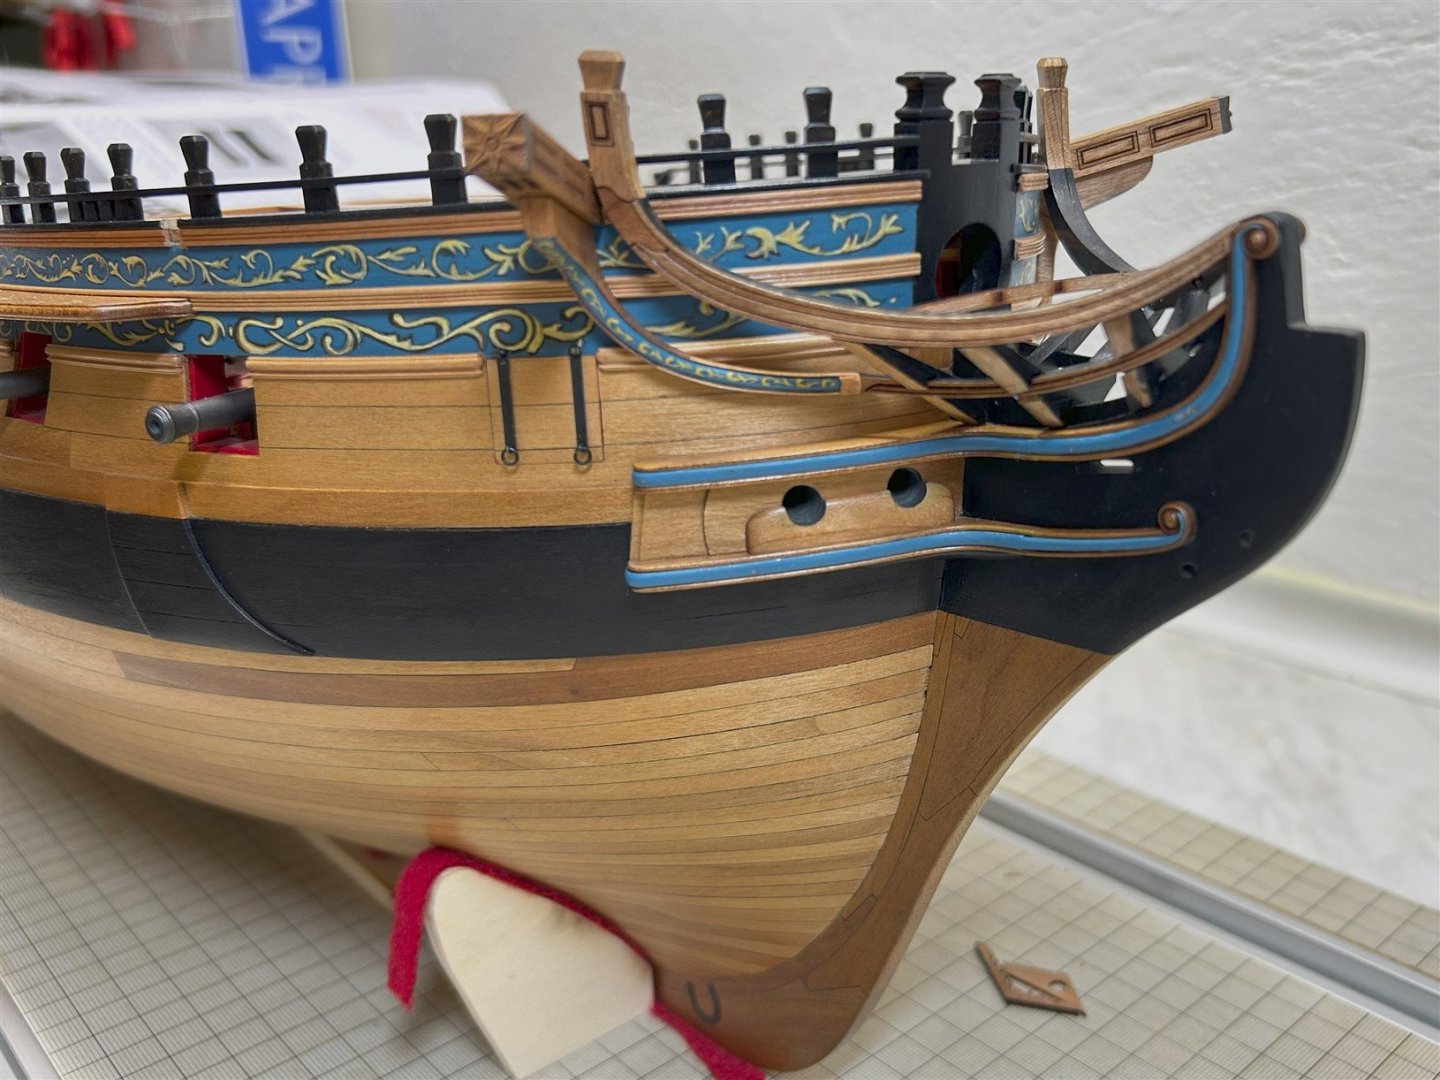
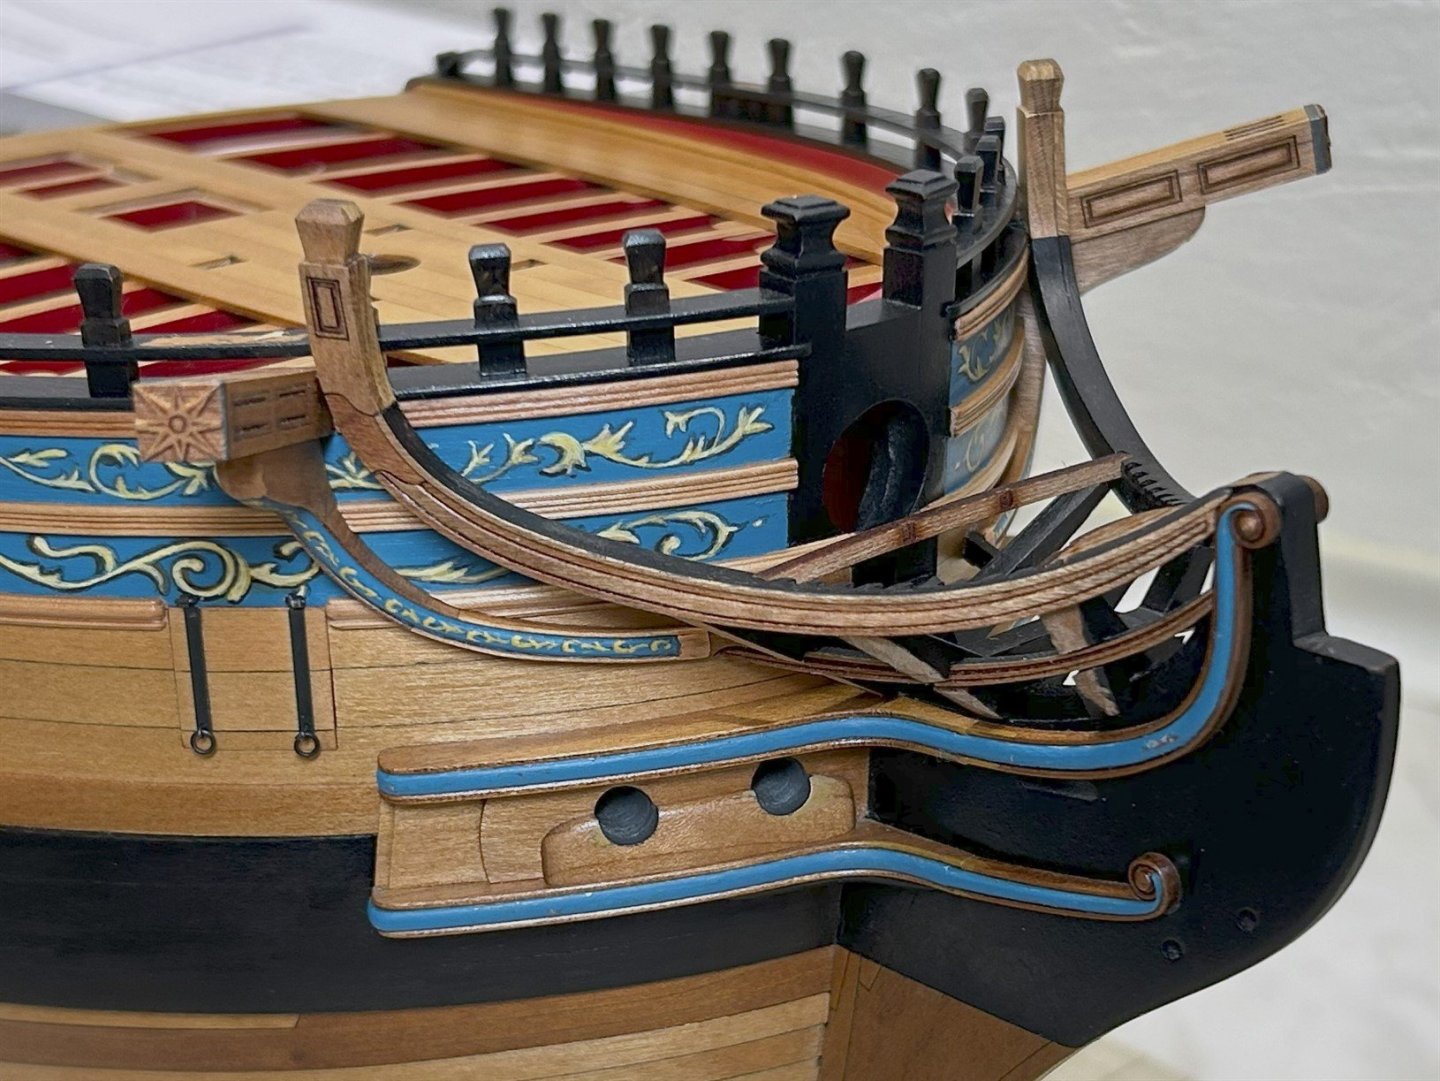
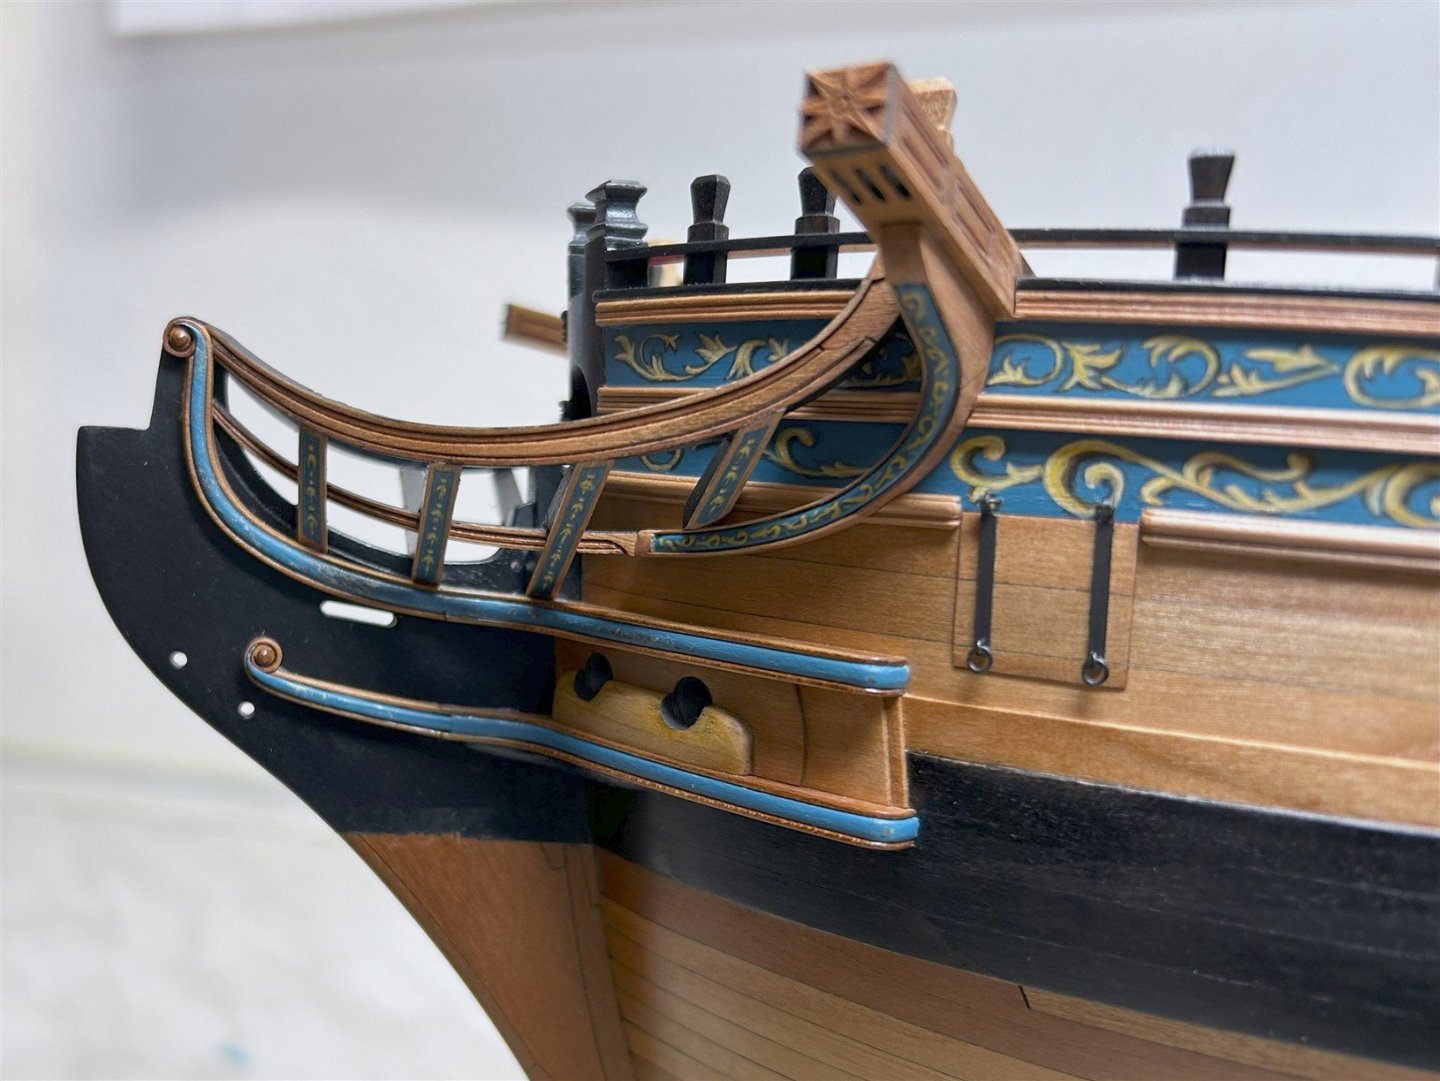
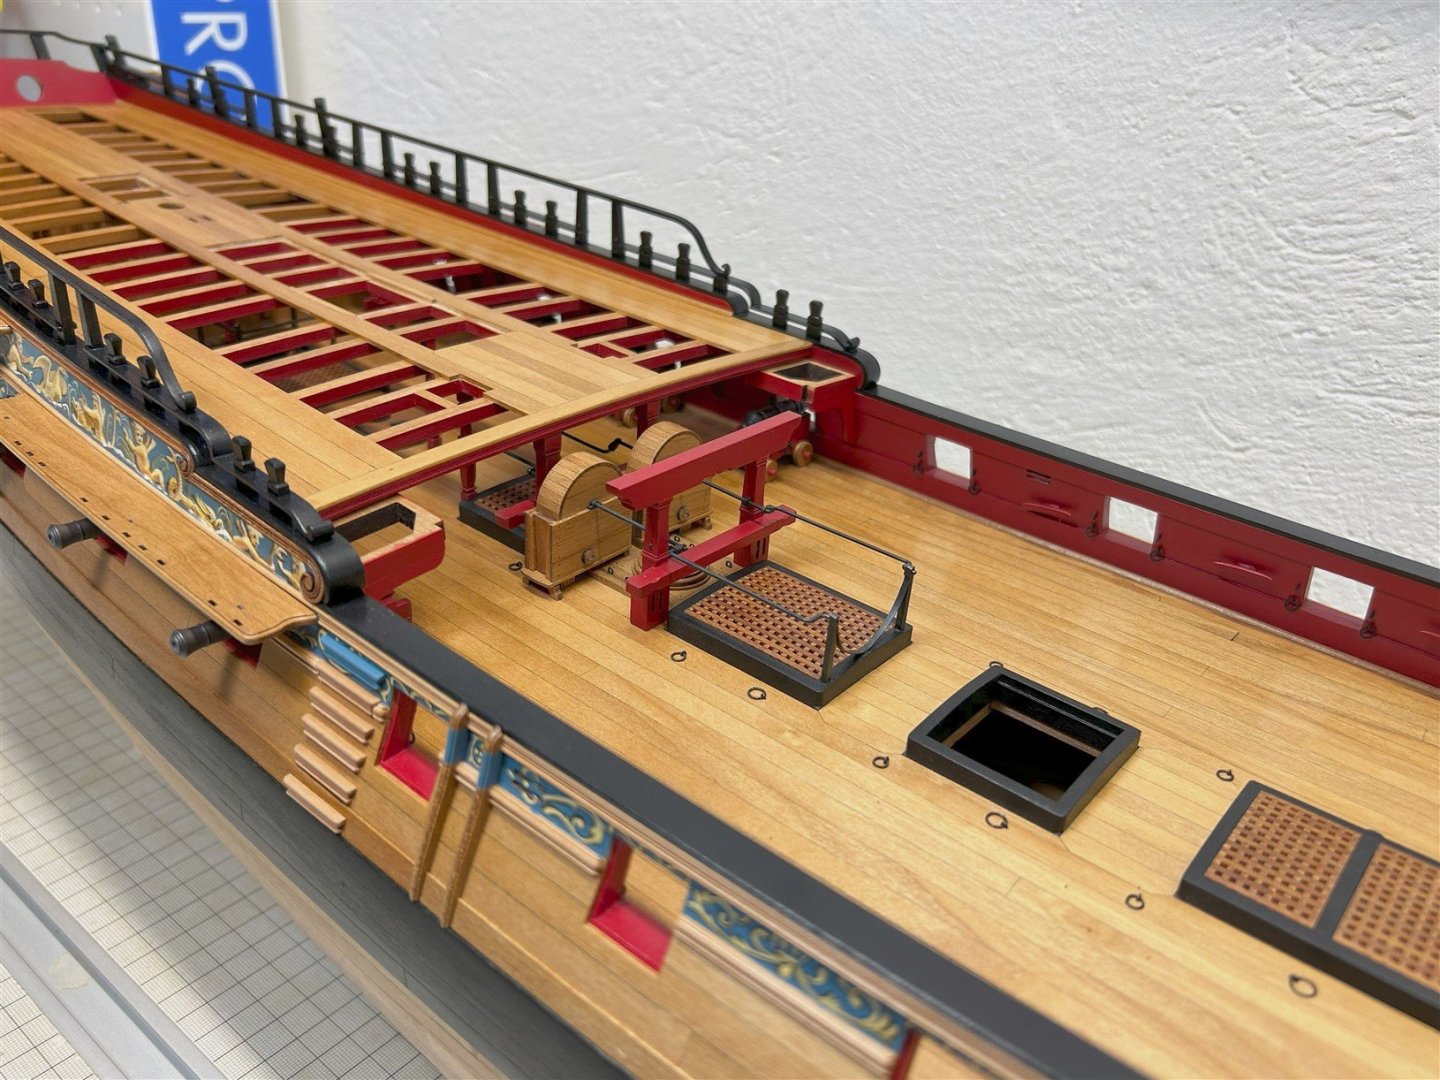
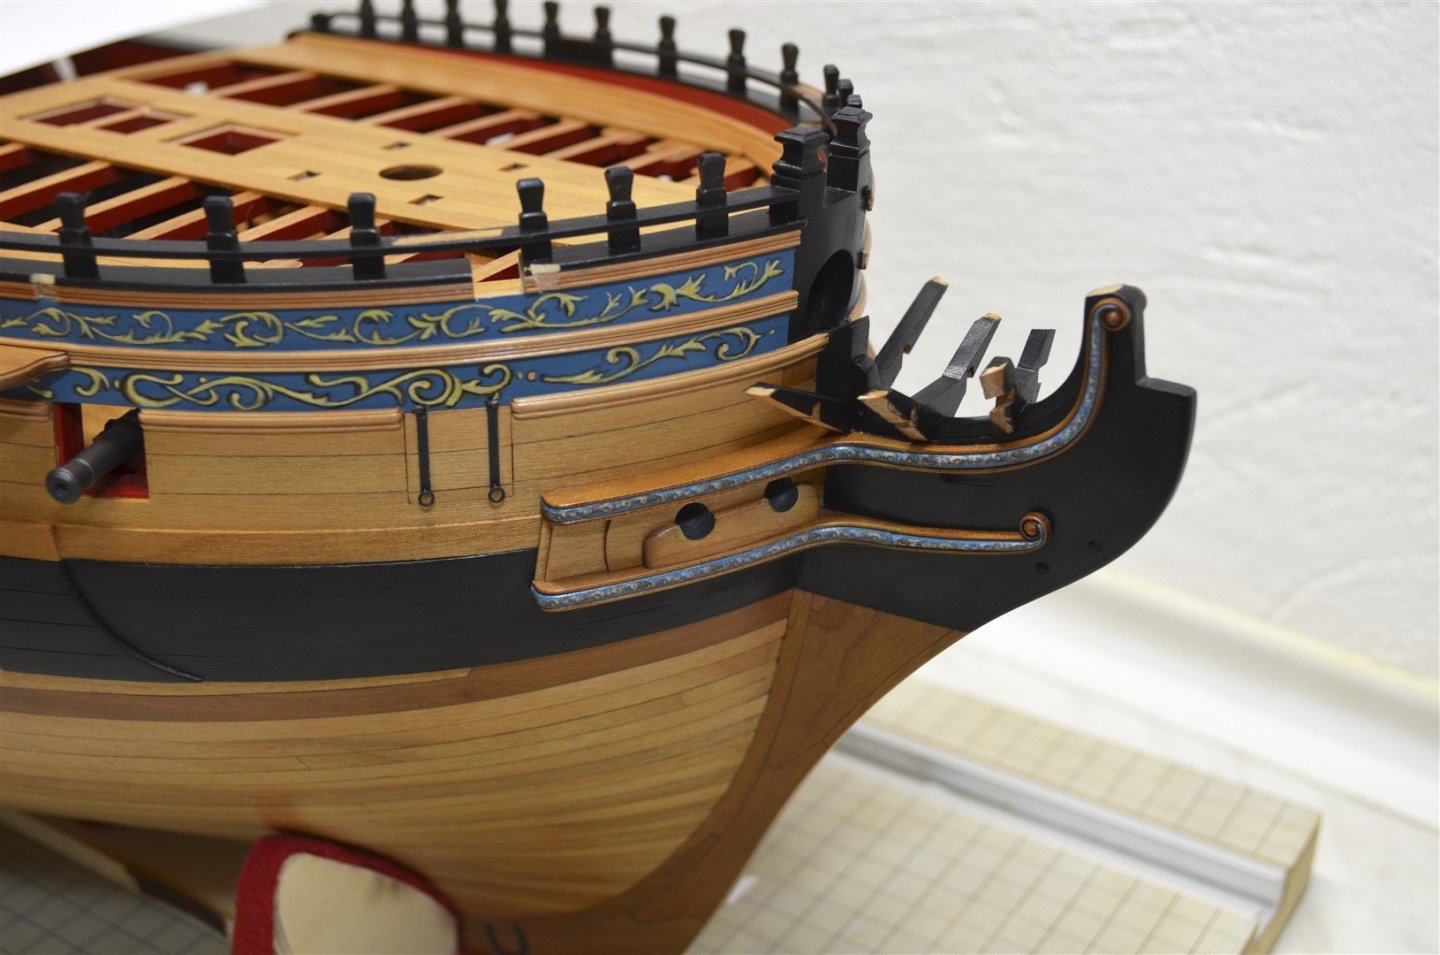
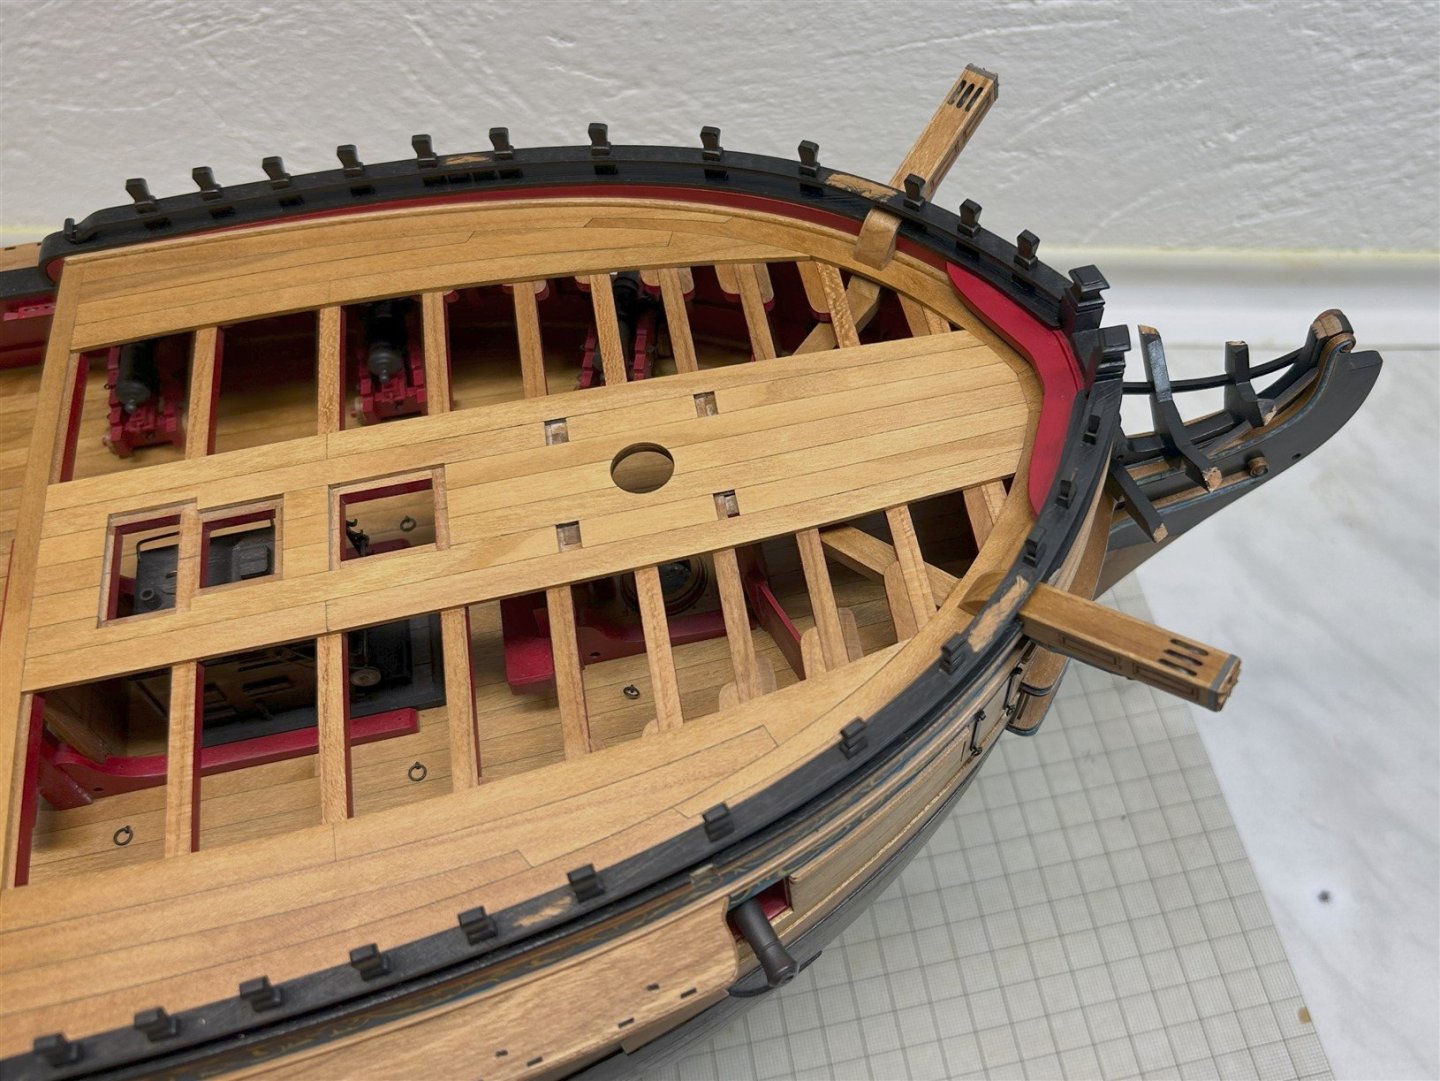
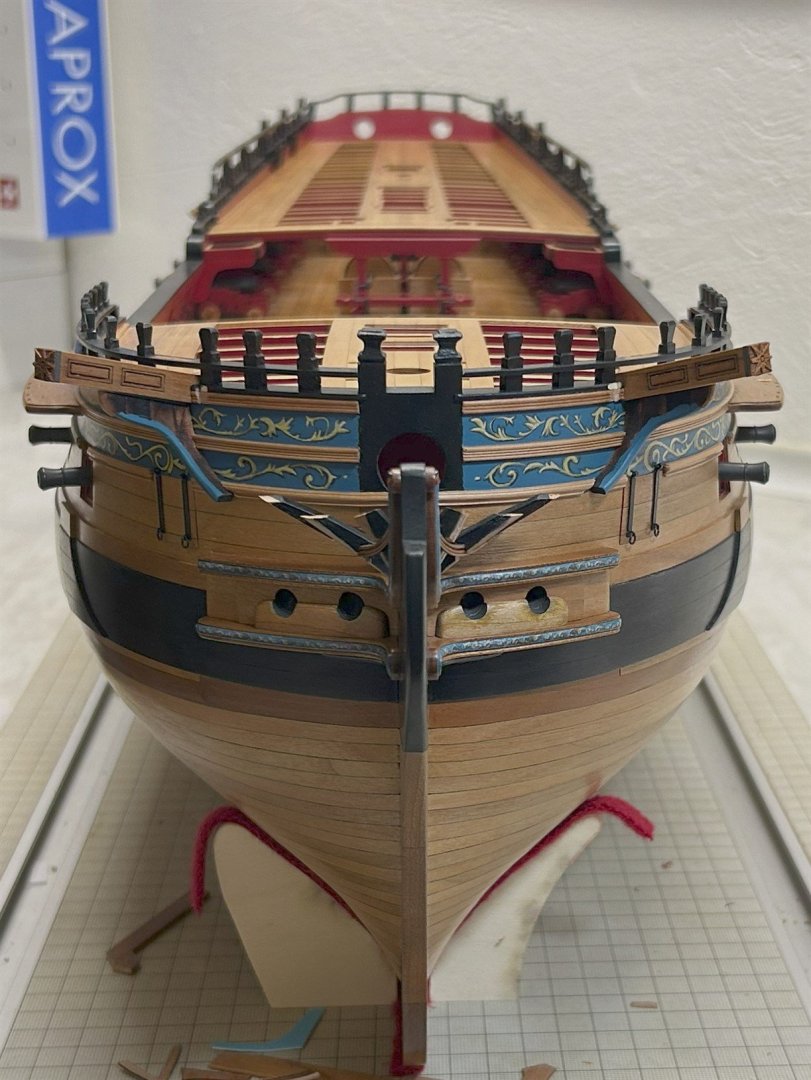
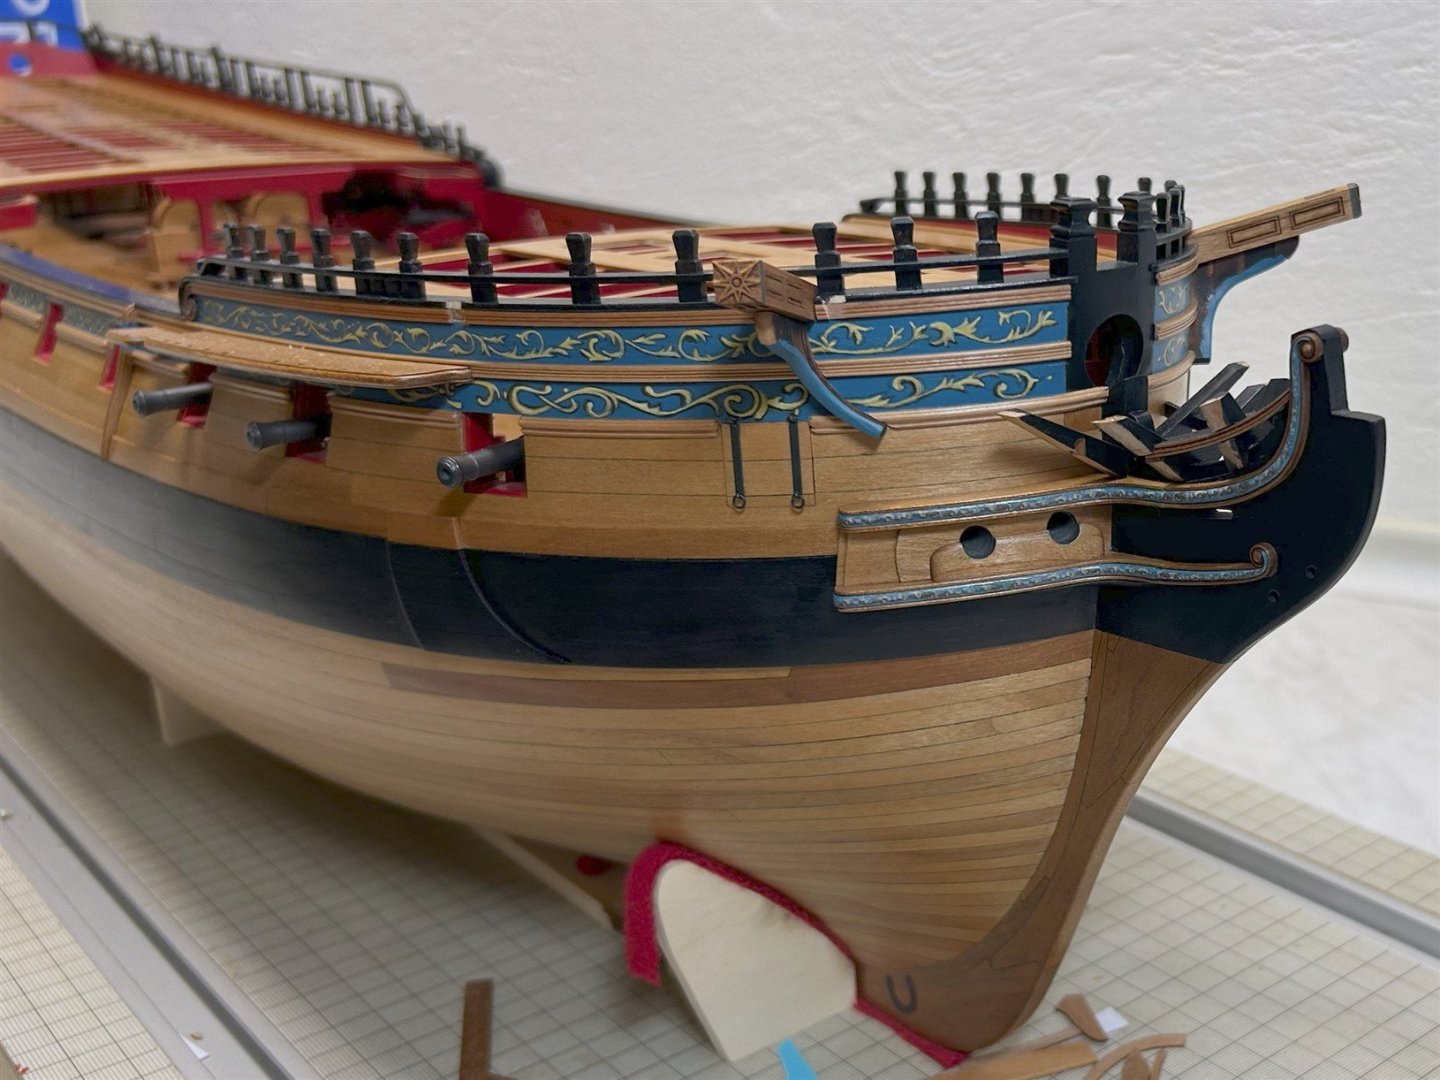
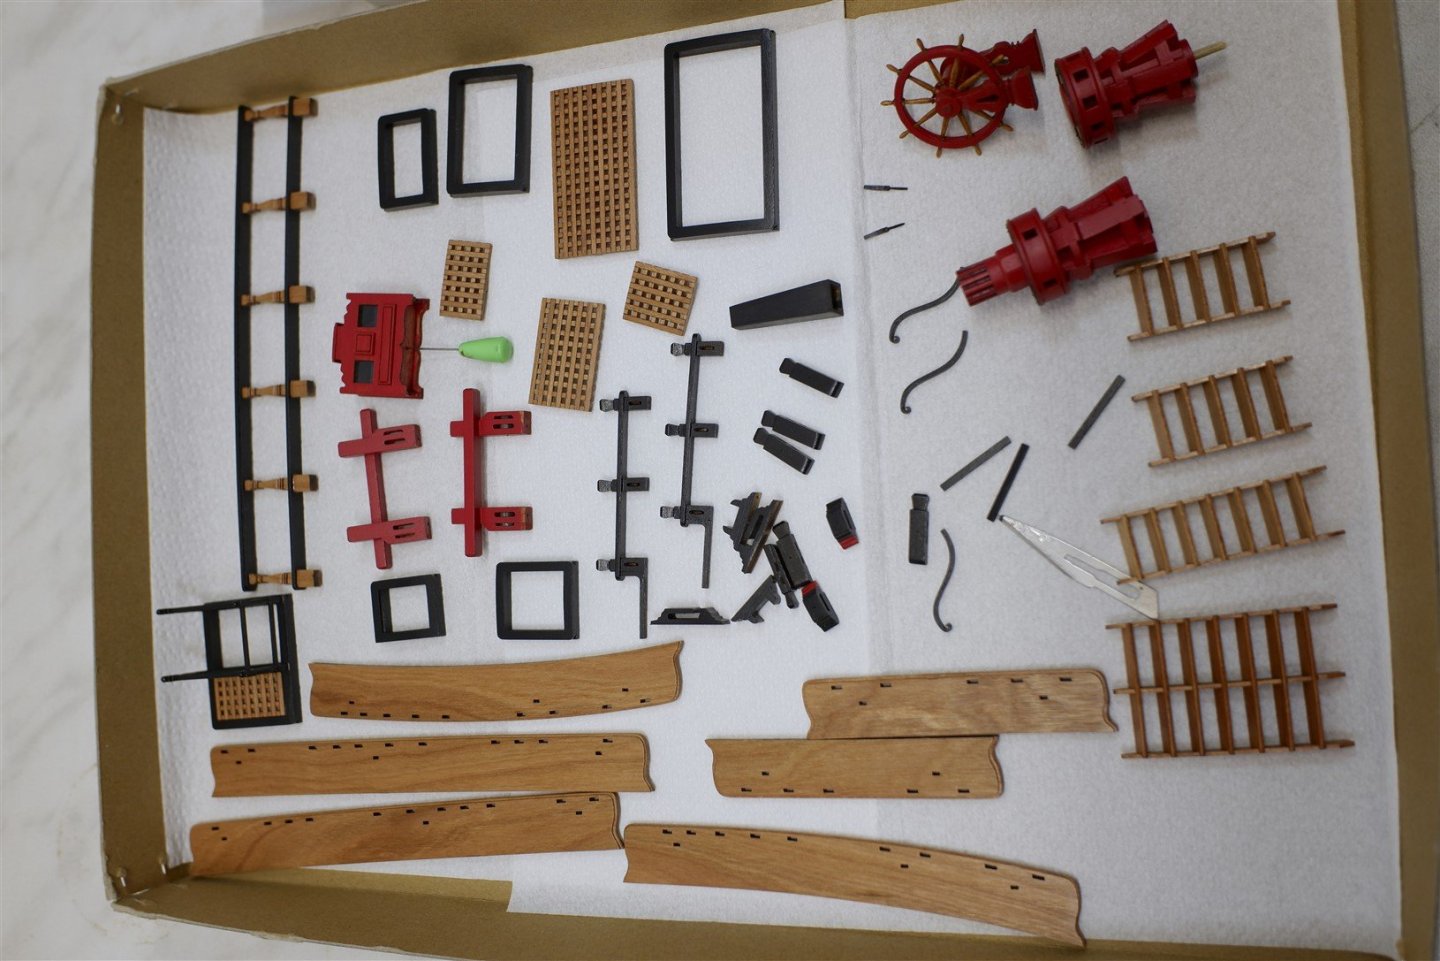
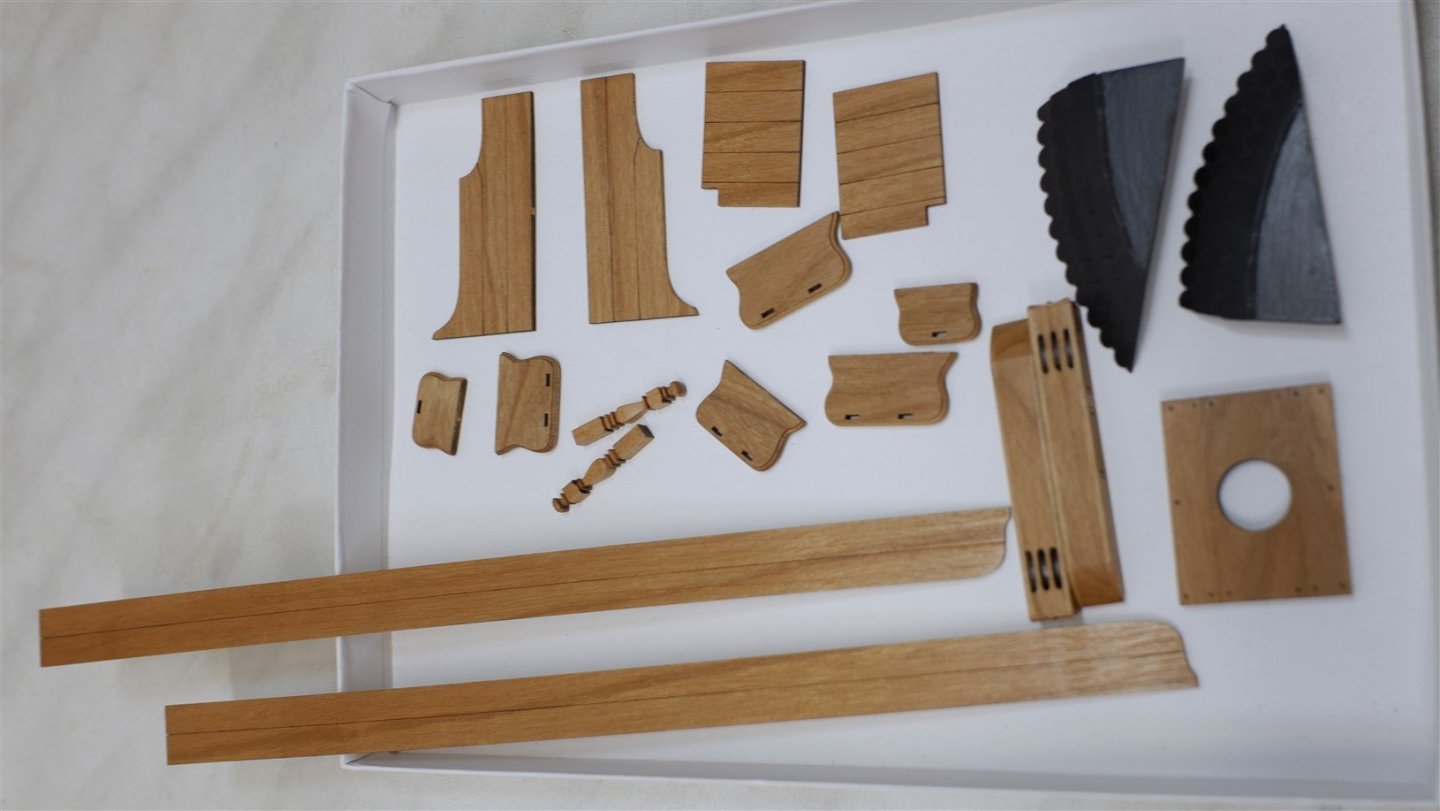
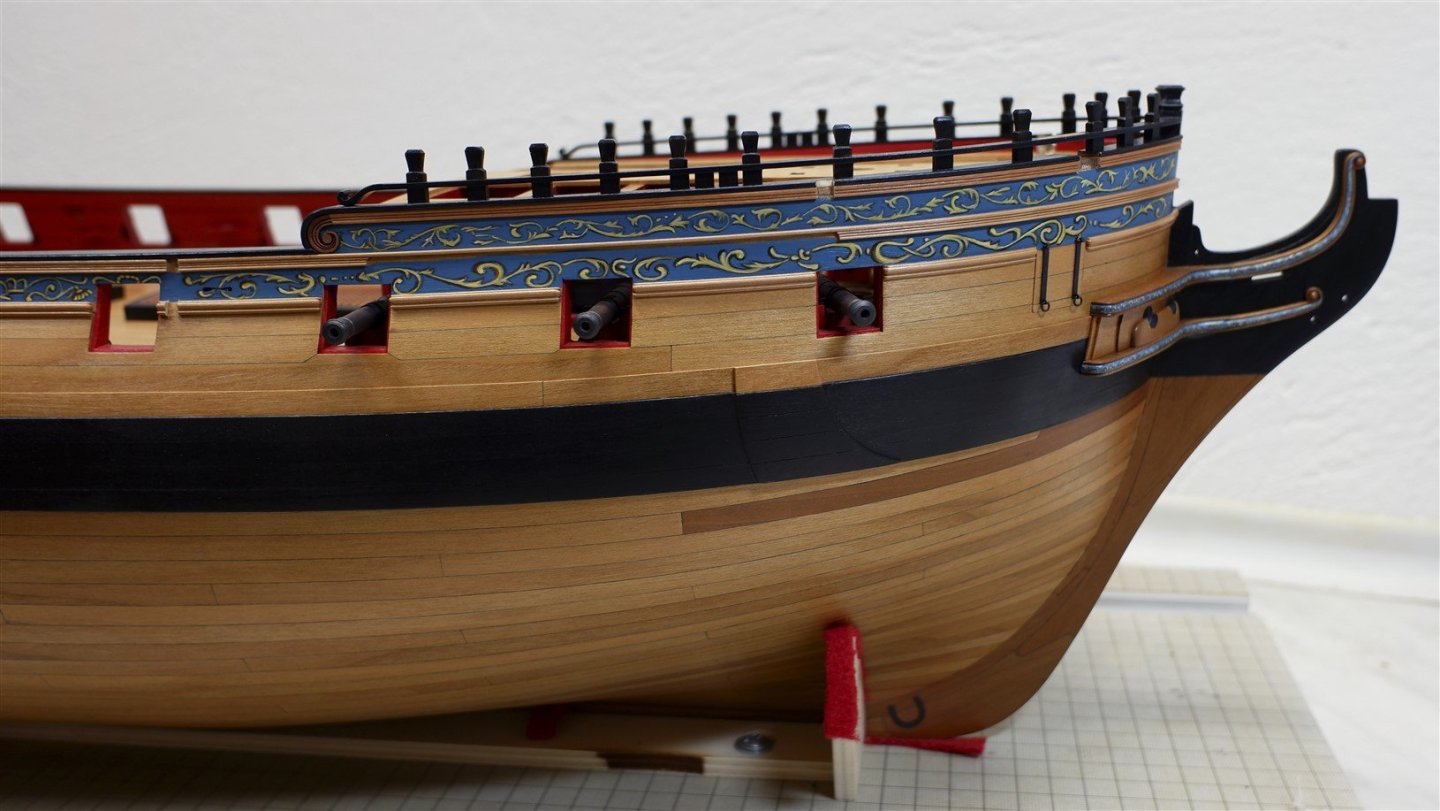
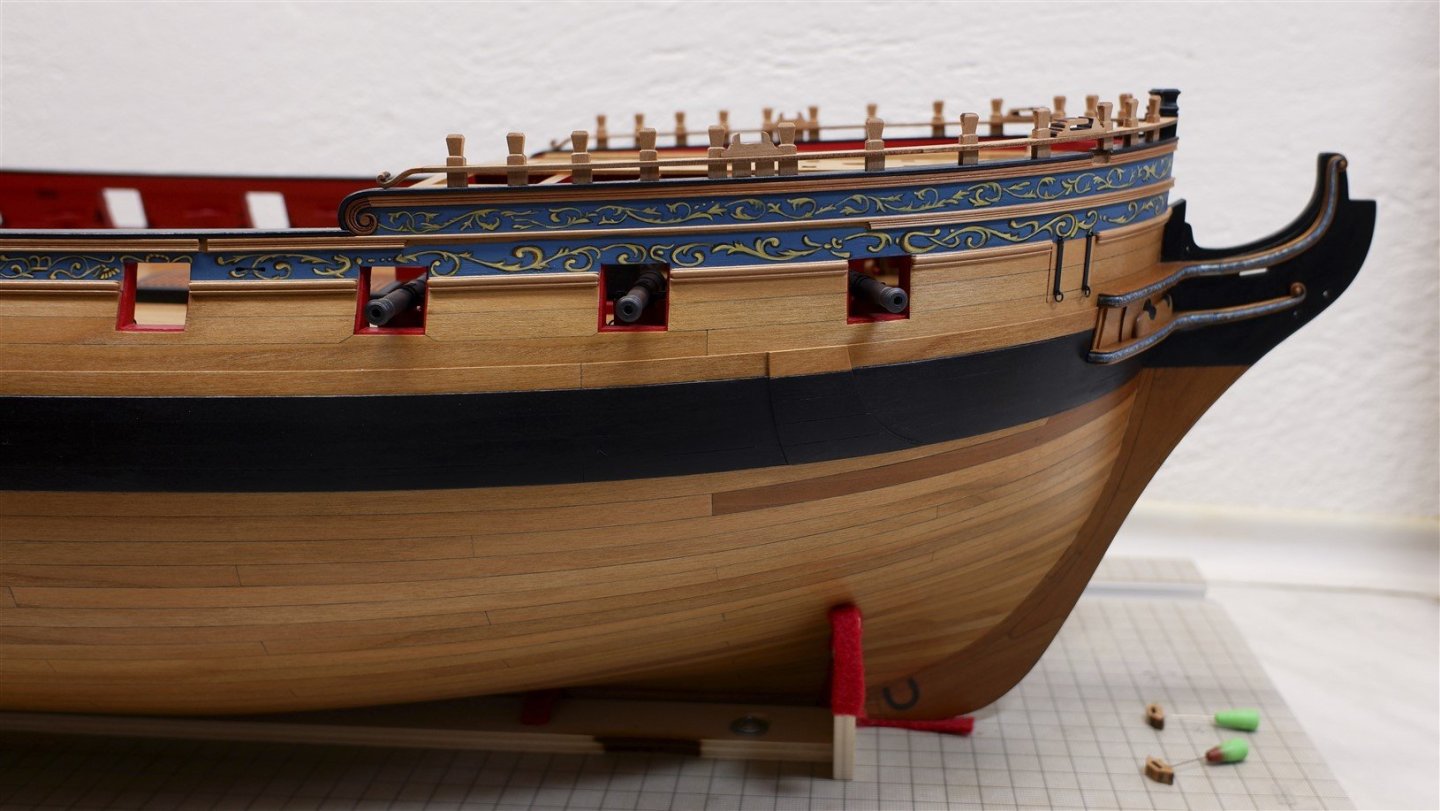
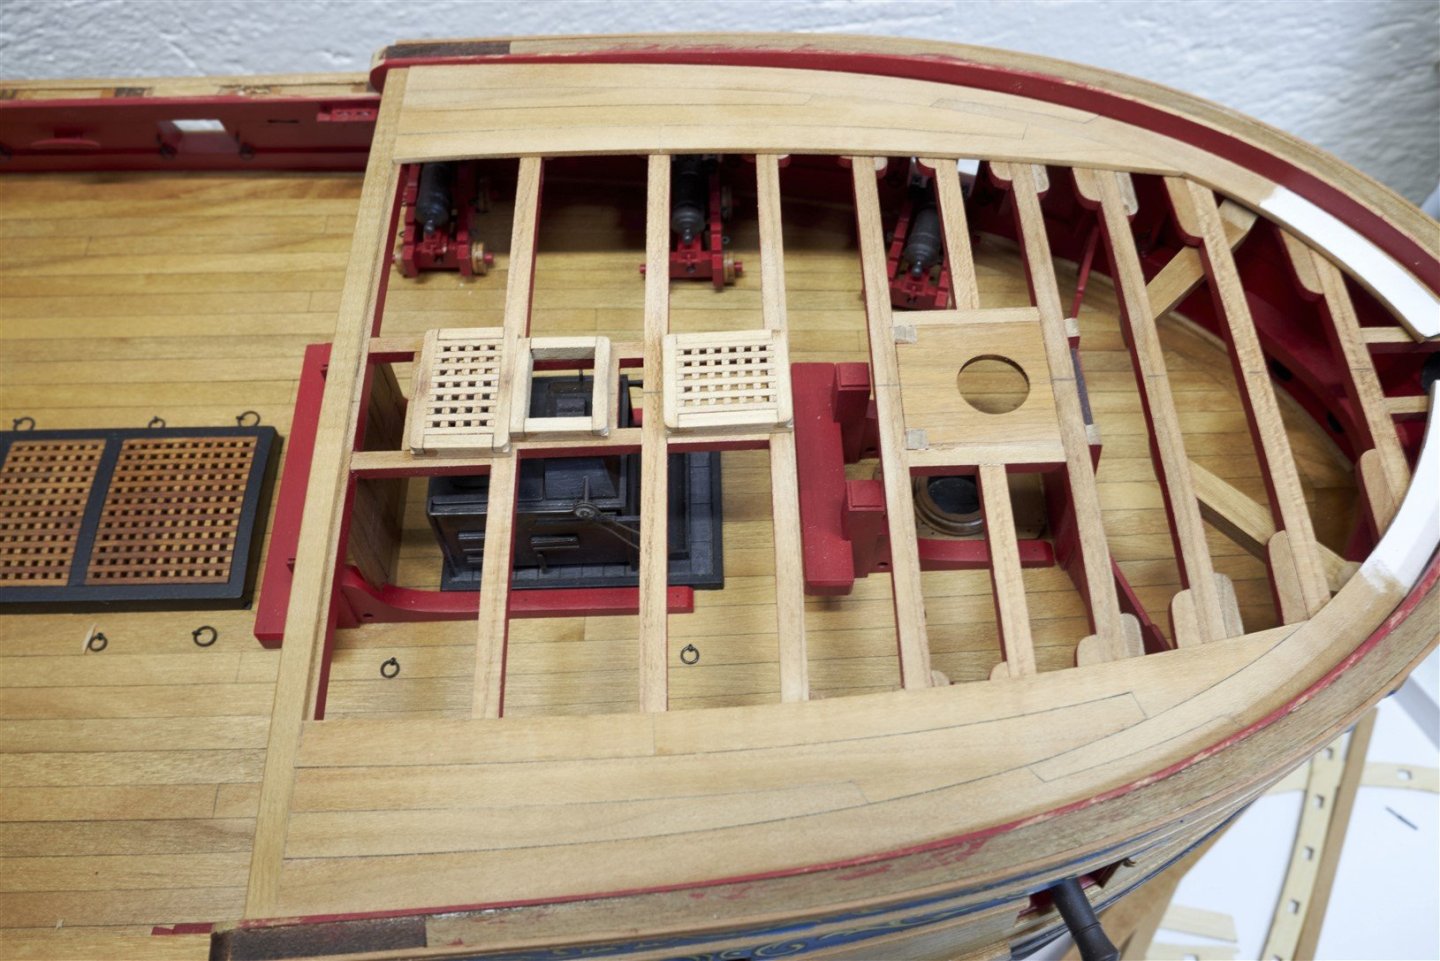
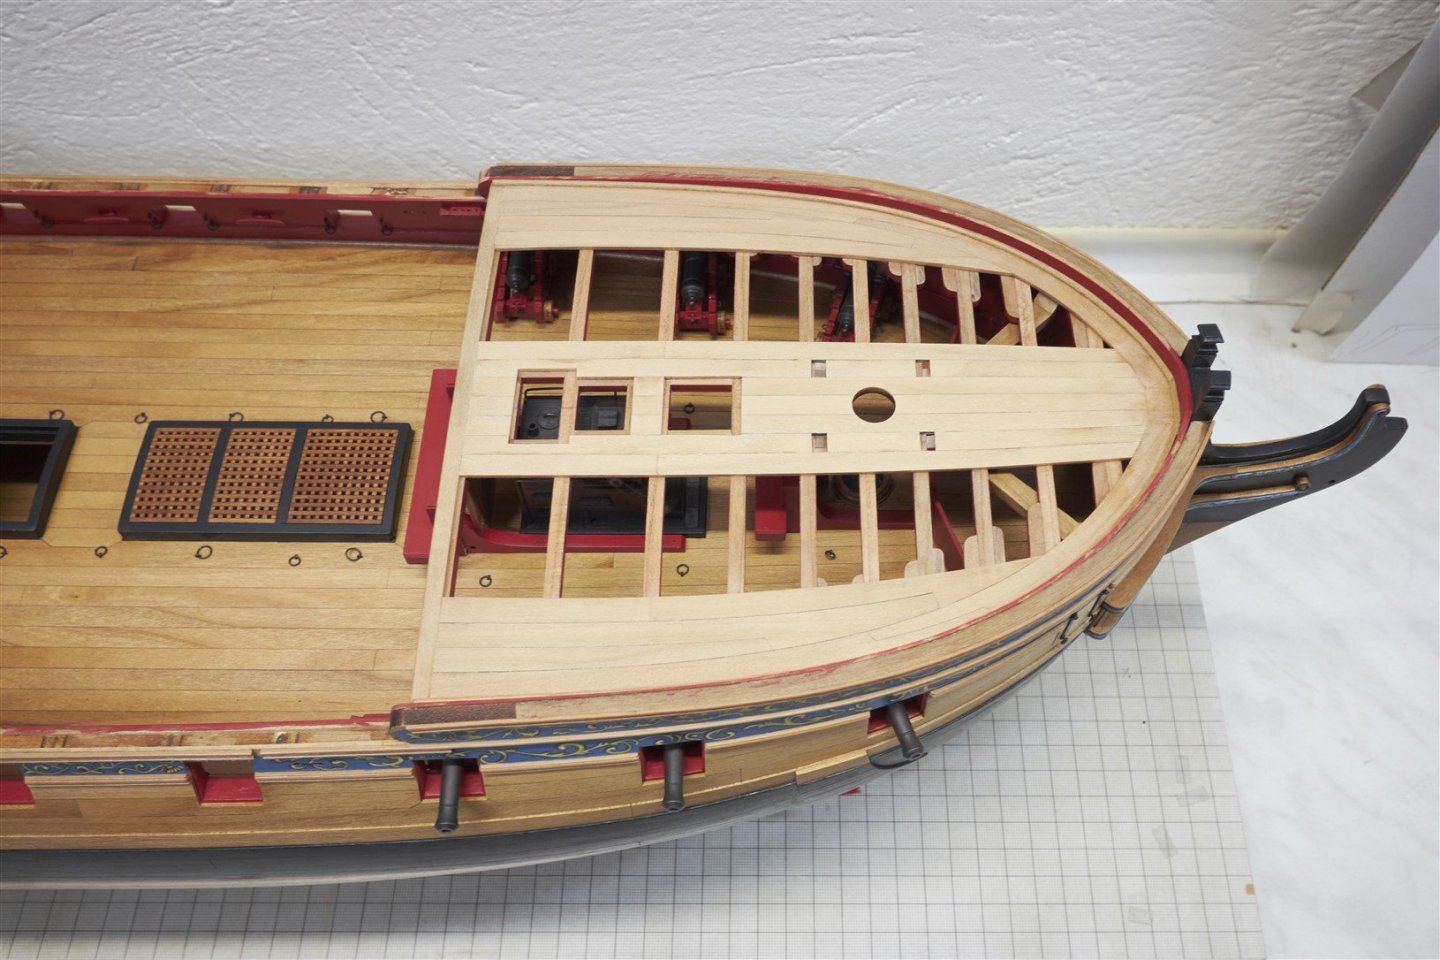
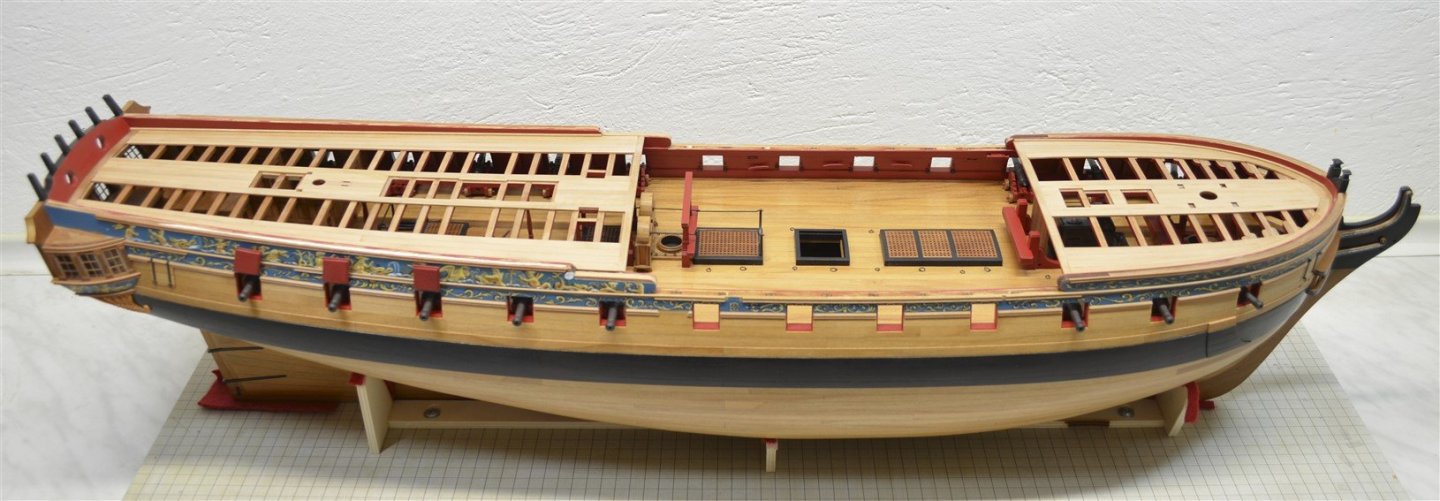
Thanks for the kind words and likes, guys. I can't wait to get all these little things in their place on qdeck and fcastle, but for now I'm keeping them safely stored away. It's both to keep the dust off while I work on the final chapter and to keep them from getting damaged. I'll add them at the very end. But something is there... I made the deadeyes (they will be added to the model at the end as well) The ladder - I have to paint the frieze and then glue the main channel. The other channels are already glued on, as well as the fenders and the chesstrees and the swivel stocks. Partly also the gangways. And now the main thing, I'm working on the last chapter. The headtimbers are in place. The headrails are ready but not glued yet. But I've finally permanently glued Catheads. And right now I'm currently preparing the Catheads support. And here is some photo


-
Thank you guys for the kind words and likes. Today I have some photos again


-
and something more today


-
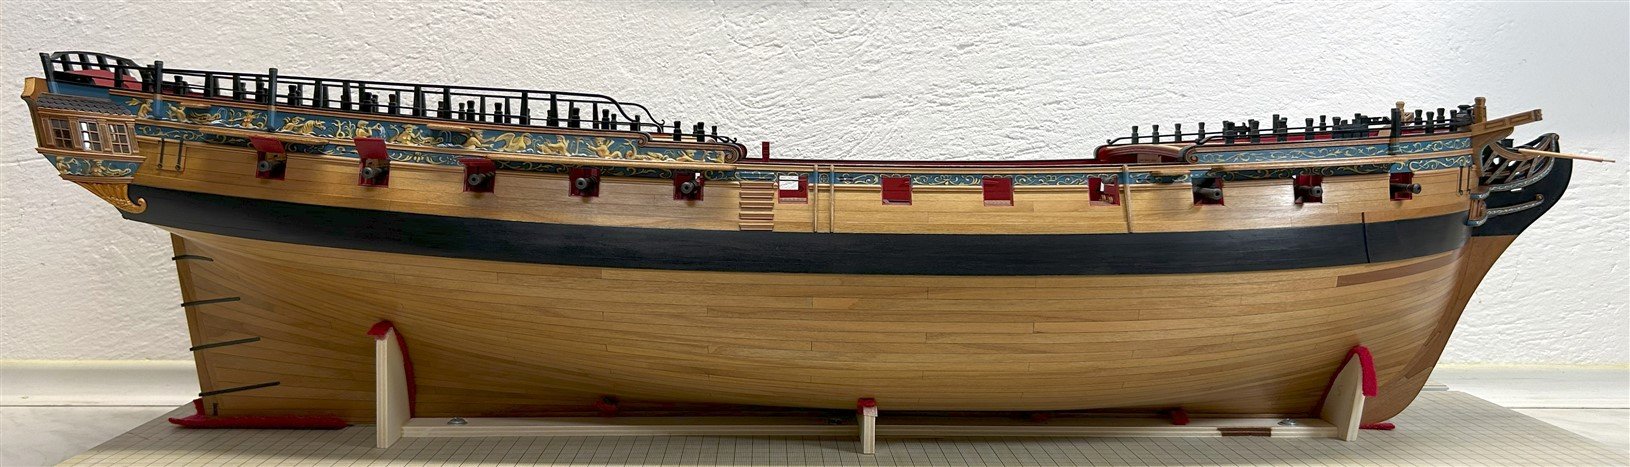
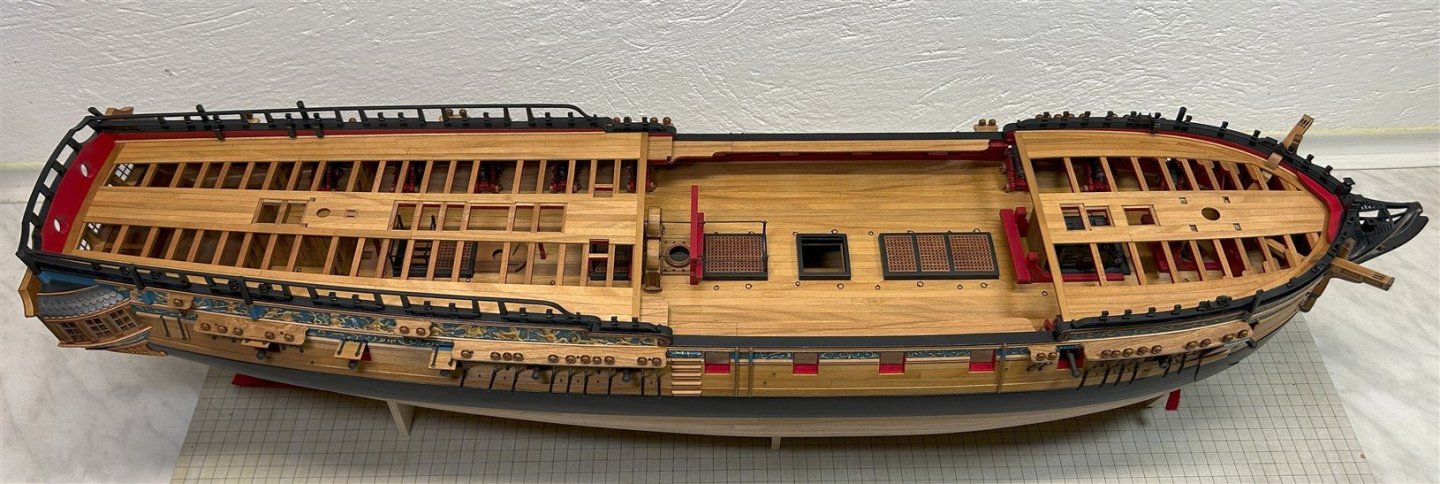
Hey guys, It's been a while since I've updated my build log, but I'm still at work, even though there's a bit less time for building this summer. Still, I think I've made some progress and I'm getting close to the final chapter. But I won't say more, I'll let the progress photos do the talking.


-
Hi Mike, thank you I cut all the hull and deck planking strips myself from cherry wood. For the finish I chose a Minwax Wipe on Poly.