


marktiedens
-
Posts
1,737 -
Joined
-
Last visited
Content Type
Profiles
Forums
Gallery
Events
Posts posted by marktiedens
-
-
There is a store in my area called The Woodsmith Store.they have a fair selection of birch & walnut dowels although I could not find them on their website.They also have a good selection of exotic woods.
Mark
-
Hello Steve.I have the complete set of plans for the Mamoli Friesland & would be happy to send them along to someone who needs them.My plans are numbered 1-2 on the first sheet,3-4 on the second sheet,5-6 on the third & so on.They are dated 1978.If you could use them just send me a PM with info.
Mark
-
-
How about taking a couple of wheels off the gun carriages for repair & lay them over the holes.
Mark
-
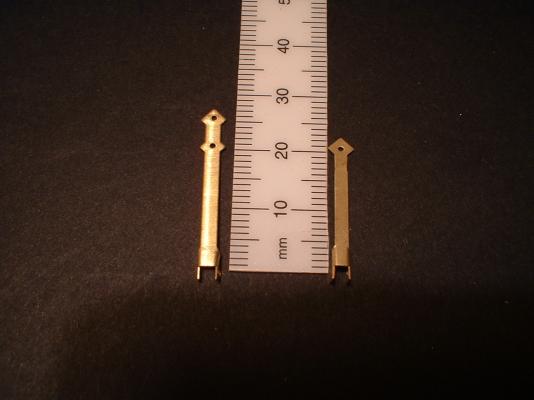
Andre - the 5mm plates are 22mm long & 2mm wide.The 7mm plates are 27mm long & 2.5mm wide.These measurements do not include the little "ears" that I cut off.After thinking about it I could probably have made these out of some plain brass strip.At the scale of your ship they might be a little too wide.
Mark
-
Hello dkettl.I am afraid I don`t have any pictures of this area as I didn`t start a log or take any pictures until halfway through the build but I will try to explain how I did this area.If memory serves me correct you are correct about the planking seeming to end in mid-air.I planked the 3 stern counter formers before the hull side planking & left them a little long.Then I brought the hull side planking up to meet the counter planking.Any small errors or gaps can then be covered by the second planking.Hope this helps.
Mark
-
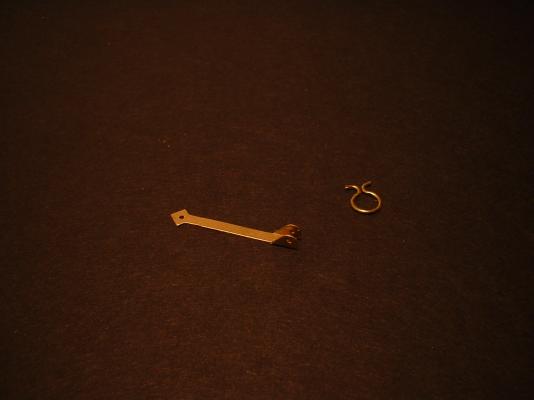
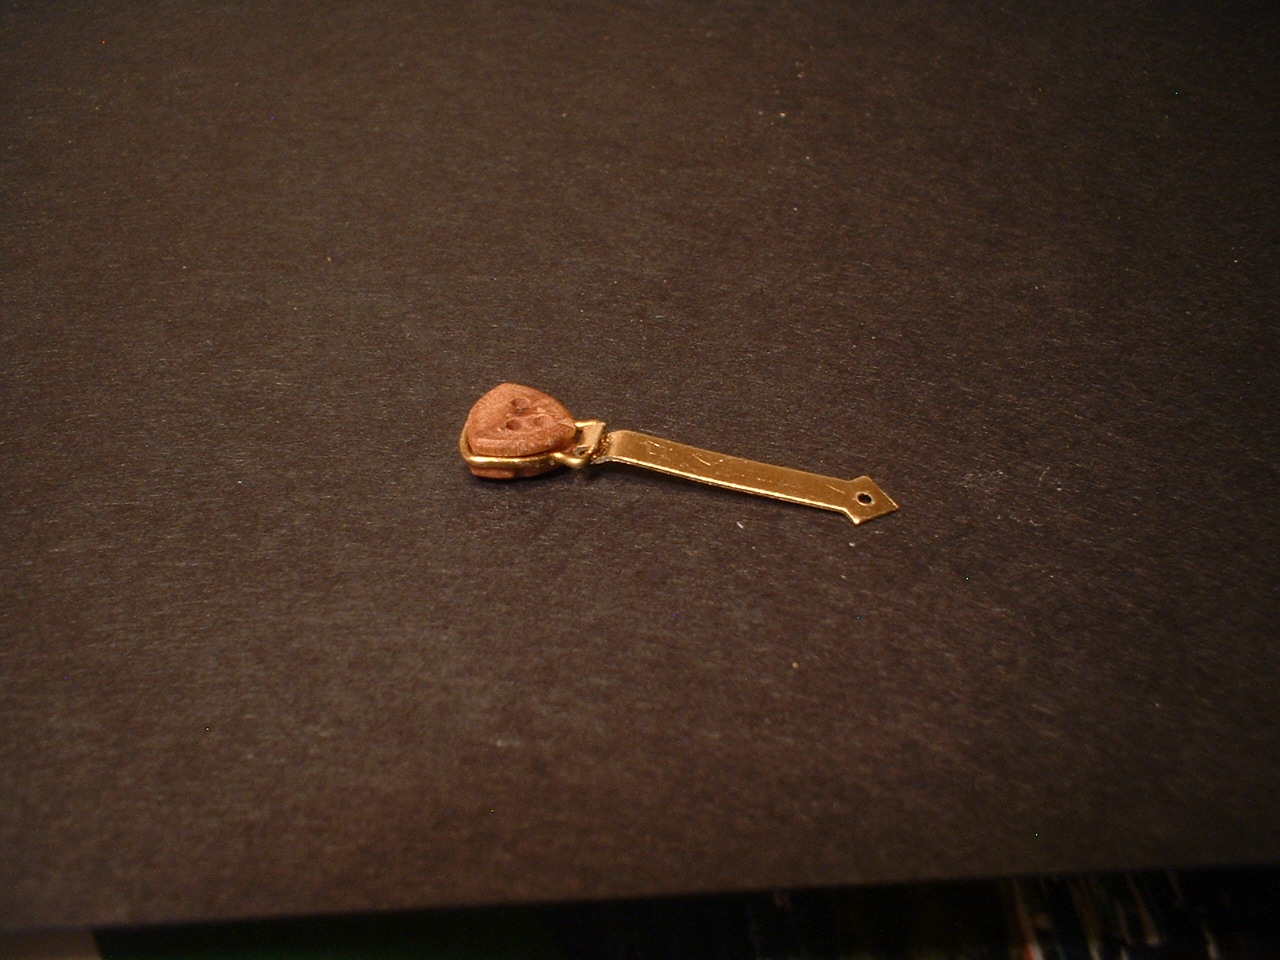
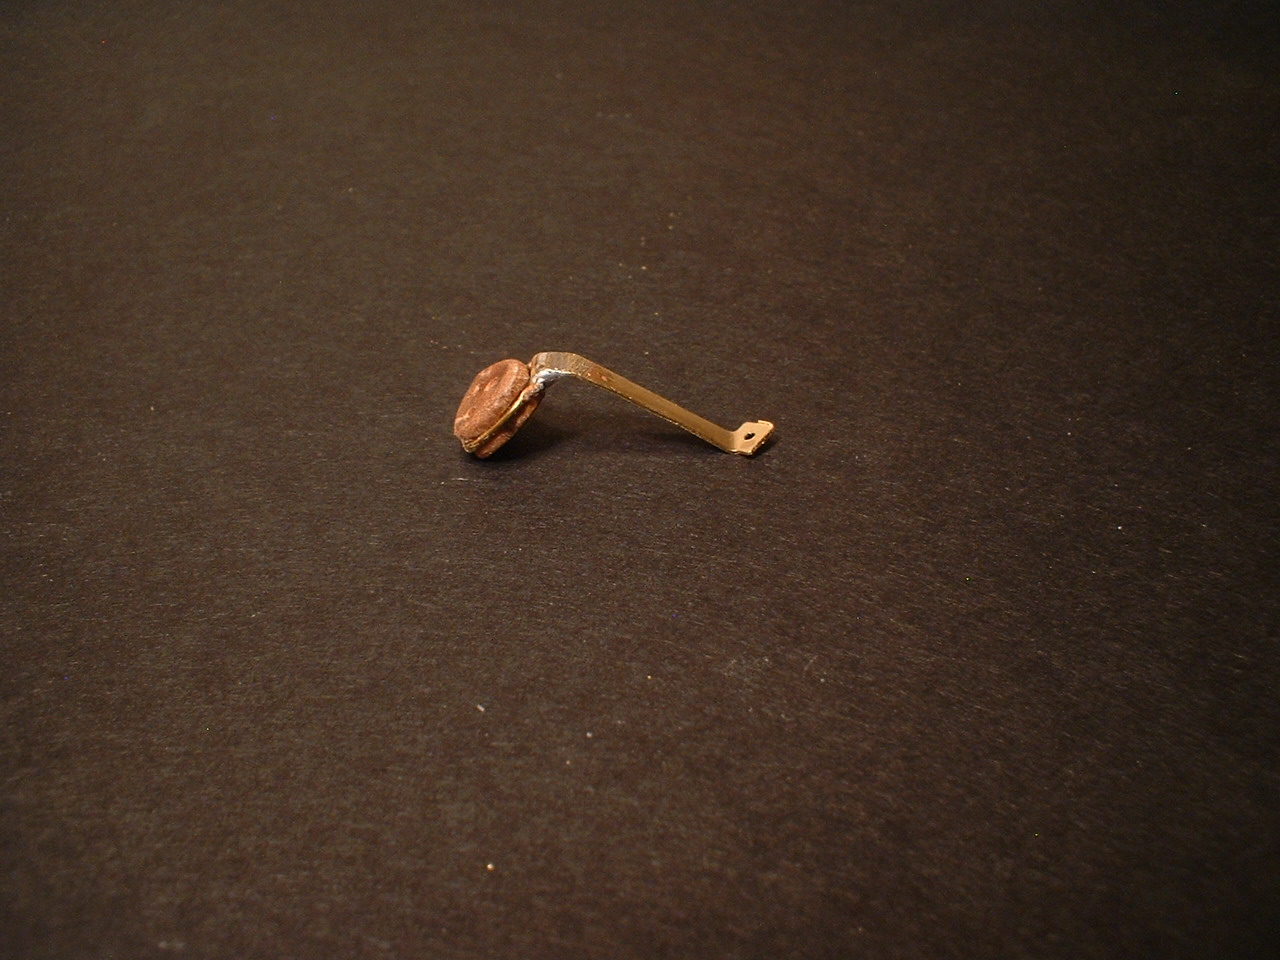
Michael - I will try to explain a little better.In the first picture the chainplates & strops are as they came out of the package as you already know.On the right side of the picture is how they look after simply bending them with a very thin tipped needle nose pliers & a little swearing
 .My last post was the 5mm mizzen deadeyes.This picture is of the 7mm deadeyes.The 5mm chainplates came out just the right length but the 7mm chainplates as you can see had 2 nailing holes & were too long.They came out about the right length after cutting the lower hole off.
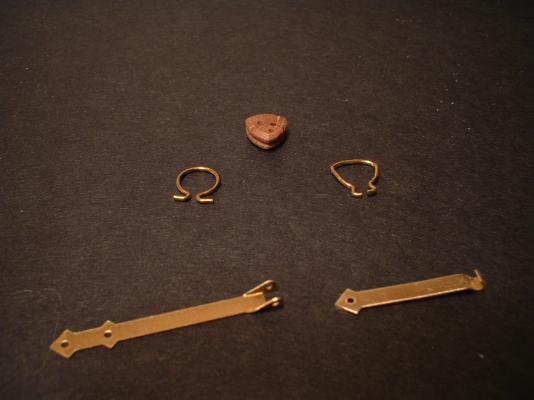
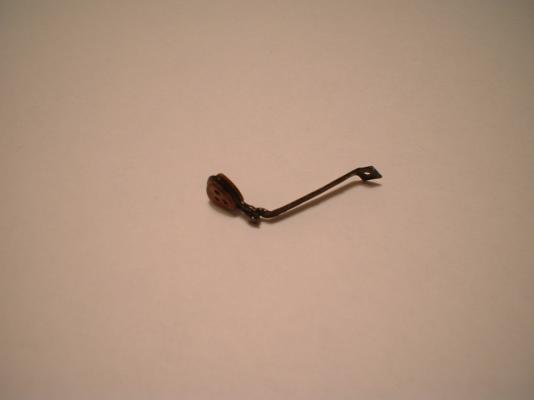
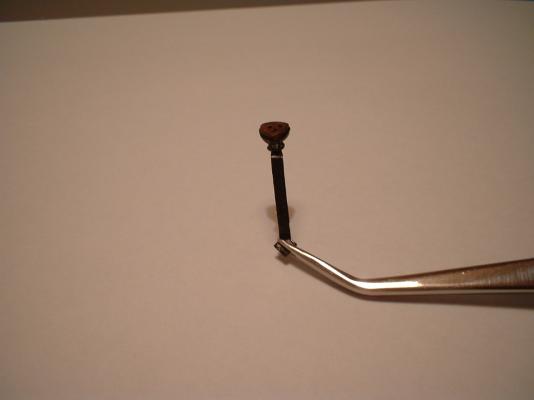
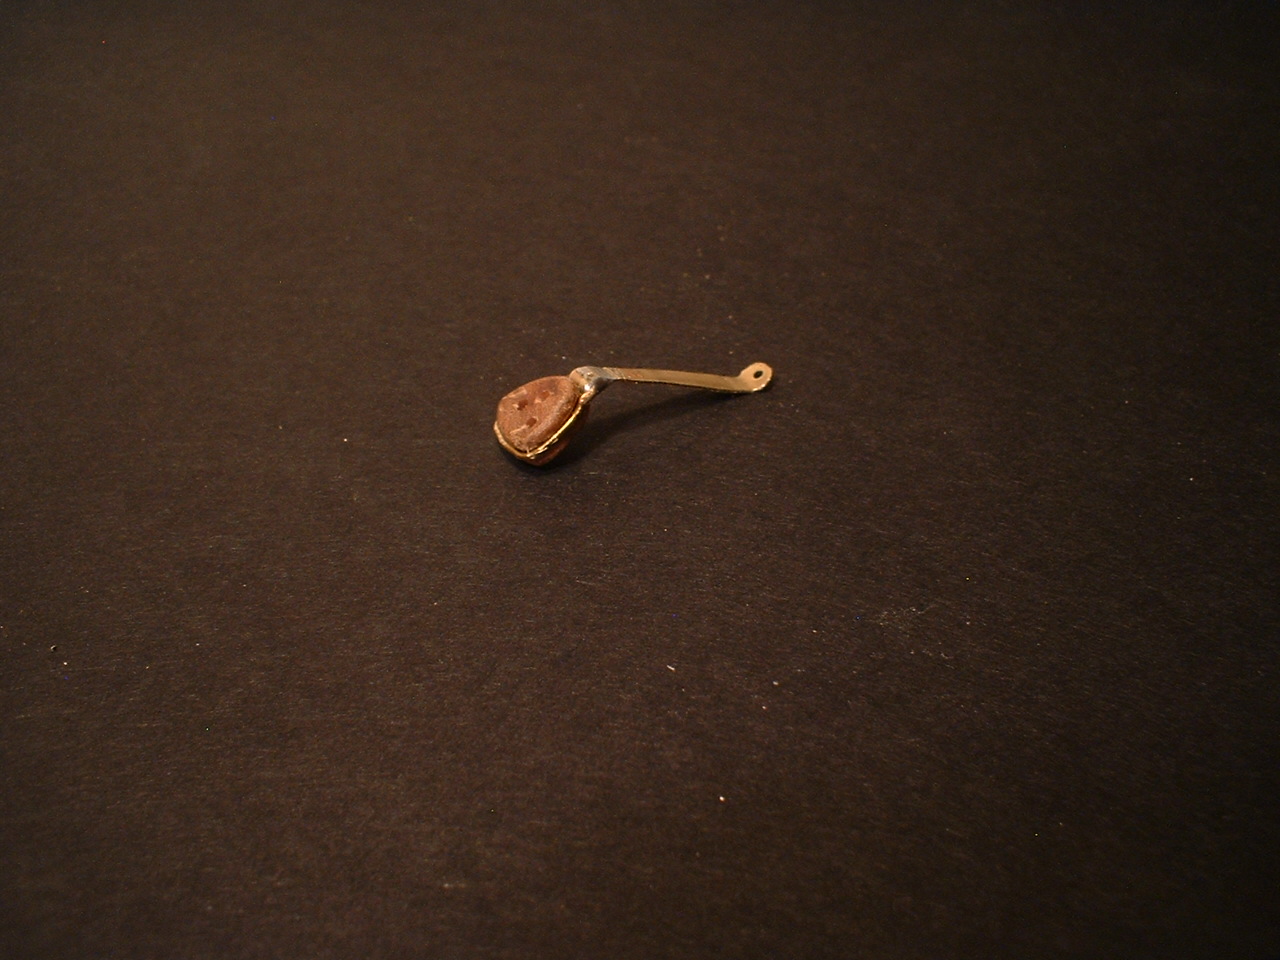
The next picture is after inserting the deadeye & bending over the small loop on the end of the chainplate.

The next picture is after securing with a drop of solder & bending to about the right shape.
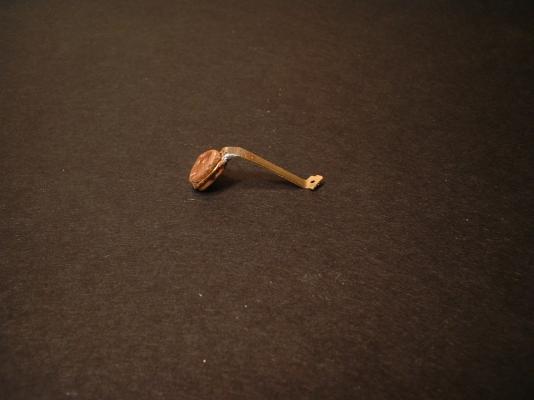
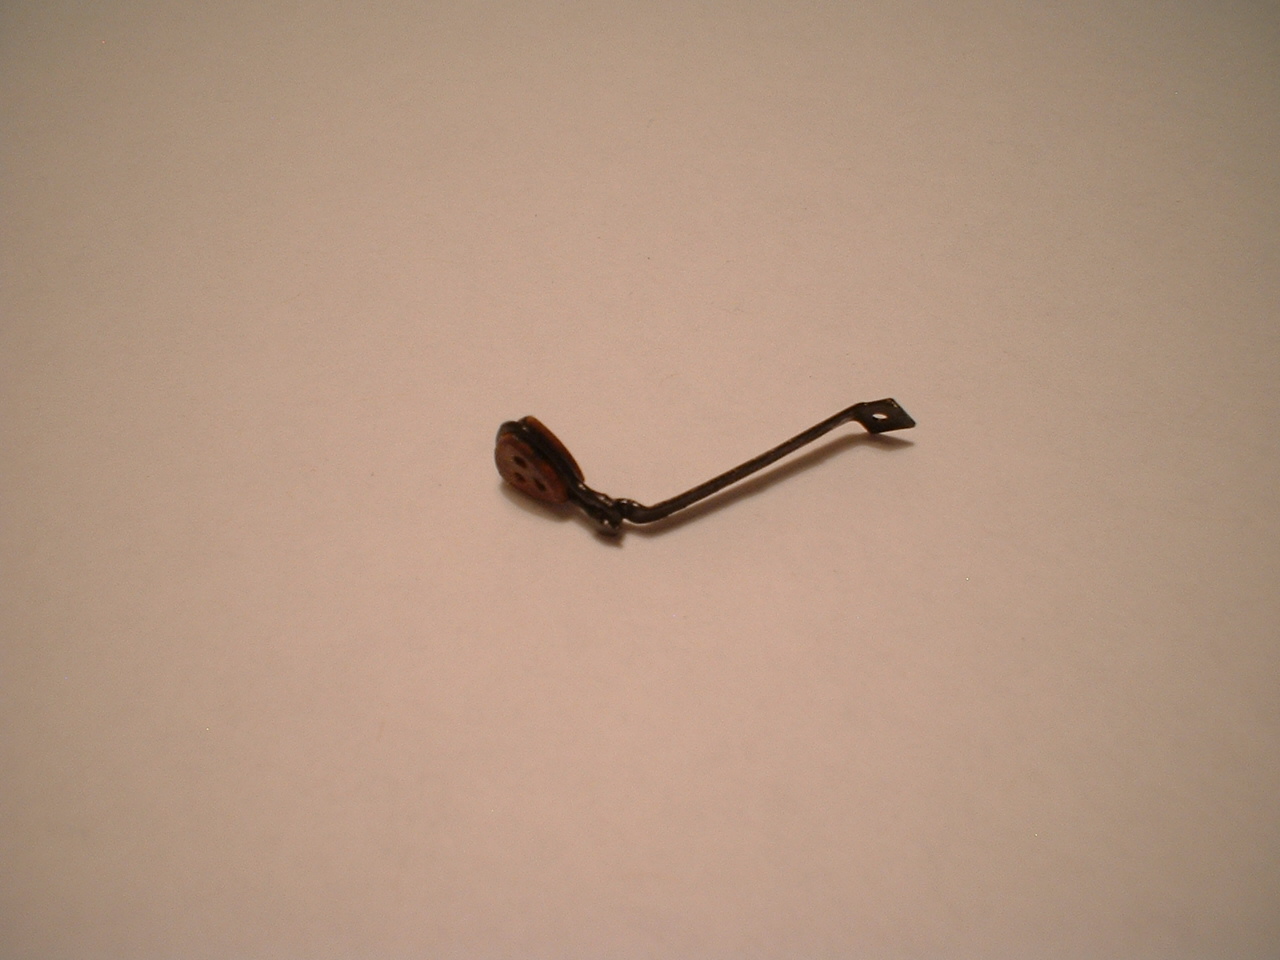
The next picture is after filing off the sharp points at the nailing end of the chainplate.

Now all that`s left to do is paint them black.I was fortunate that my kit came with the correctly shaped triangular deadeyes although the bad part is the holes in most of the deadeyes are drilled way off center
 .I hope this explains it a little better.
regards,Mark
-
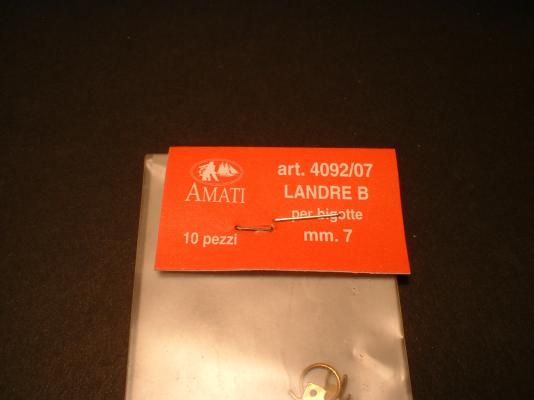
A litttle update.Been working on the chainplates.I didn`t like the kit version so I found some flat bar chainplates from Amati at ages of sail.
After cutting off the little ears from the brass strips & doing a little bending & filing I ended up with something similar to what they should look like.
Mark
-
Just admiring your rigging.Are you using Corel`s rigging plans or another source?My Sergal rig plans are totally wrong but I do have the Corel kit.I was thinking of using Corel`s rig plans.
-
I was thinking of using Caswell`s home plating system for the castings on a future build.Anyone know how well this works?
-
-
Hello Michael
Lawrence is absolutely right about the victory - somewhat harder because of all the photo etched parts but in some ways easier because there is a lot fewer things you have to "fix" compared to the Wasa kits - at least in the Caldercraft version.Have also done the SoS - no harder than the Vasa i`m currently working on although I did not modify it from the kit.
Mark
-
So sorry for your loss.Always remember the good times with him.
Mark
-
Thanks Matti.What book is that & do you know who will be selling it?
-
Anyone know where I can find a correct rigging plan ?I am to the point that I would like to establish the belaying points on the deck & hull.My Sergal plans appear to be totally wrong.I do have the corel plans but I don`t know how accurate they are.
-
-
My Sergal kit has this casting but I still don`t know what it is supposed to be so I just painted it about the right color.
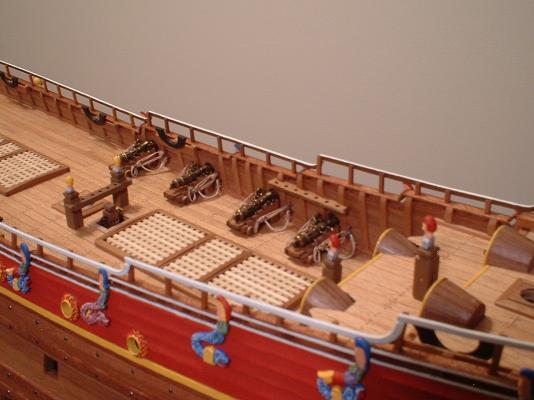
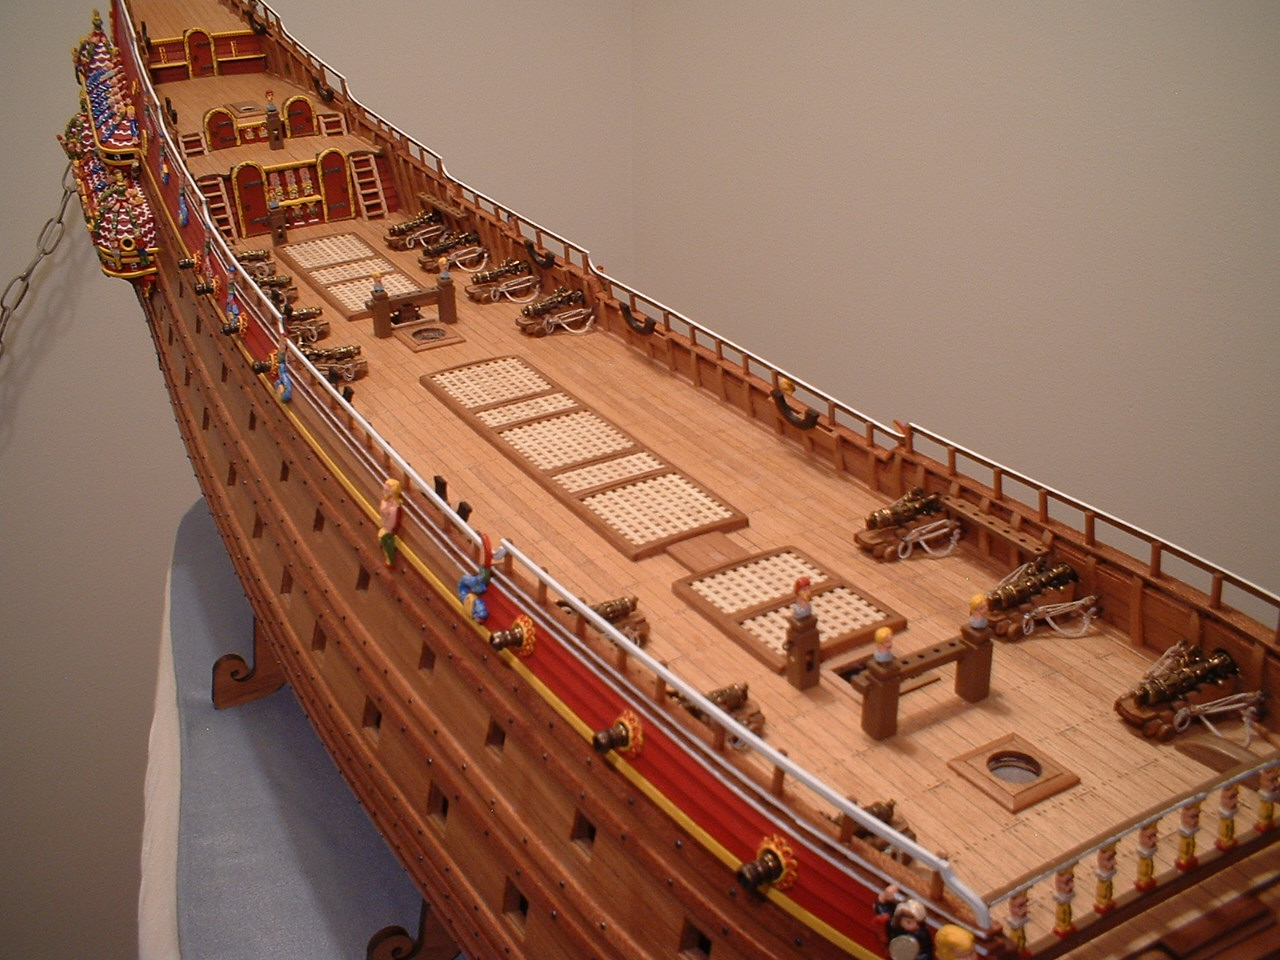
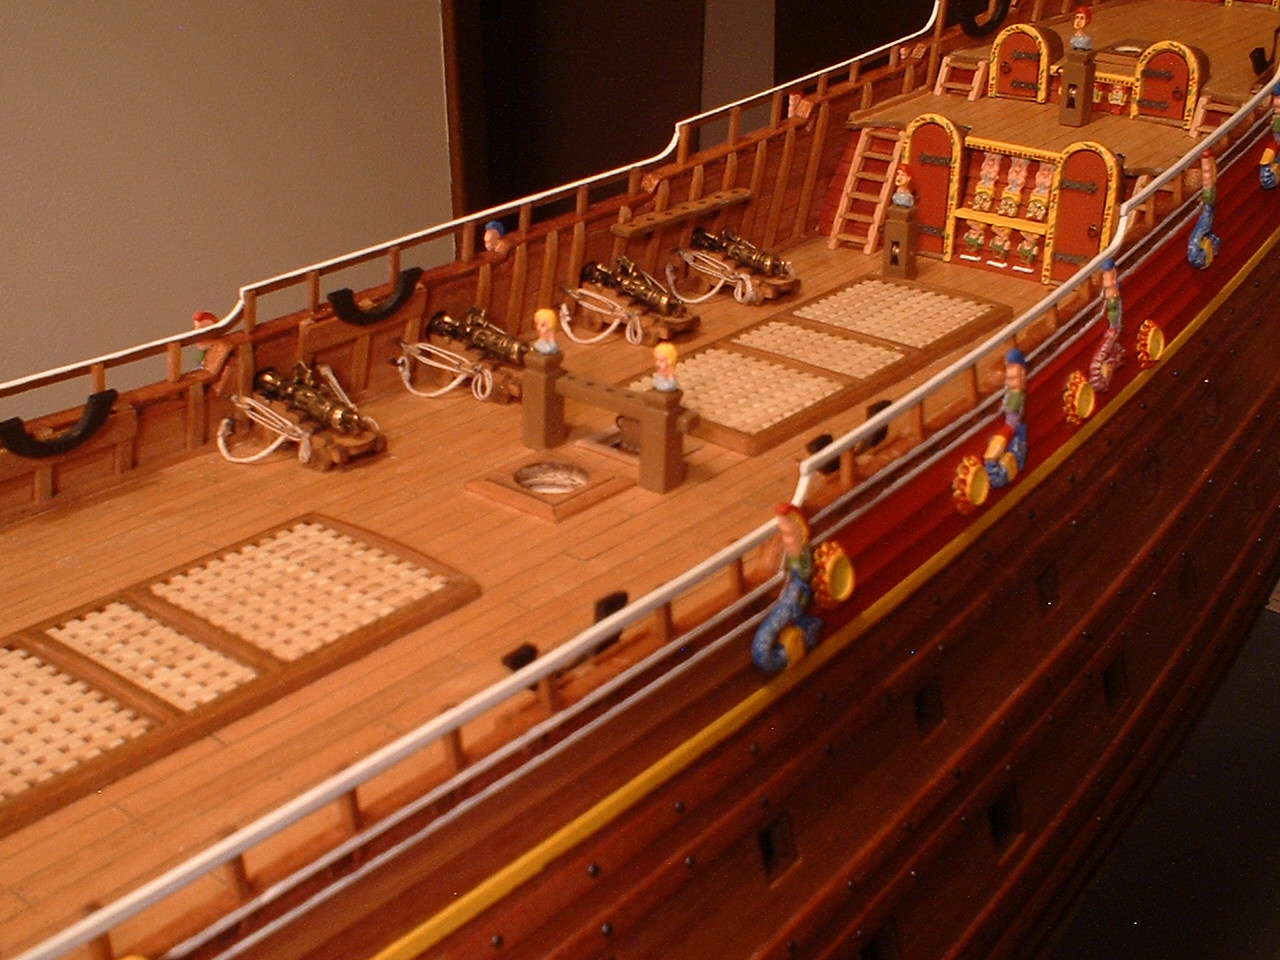
Also got my upper deck cannons done.

I have been having problems getting pictures uploaded recently so I hope they came through ok.Keep getting error messages.

-
-
I have built about 16 ship models and this is almost exactly how I plank.

- Mr Whippy and FrankWouts
-
 2
2
-
-
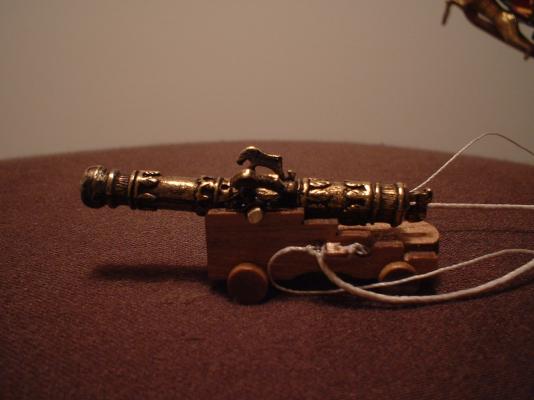
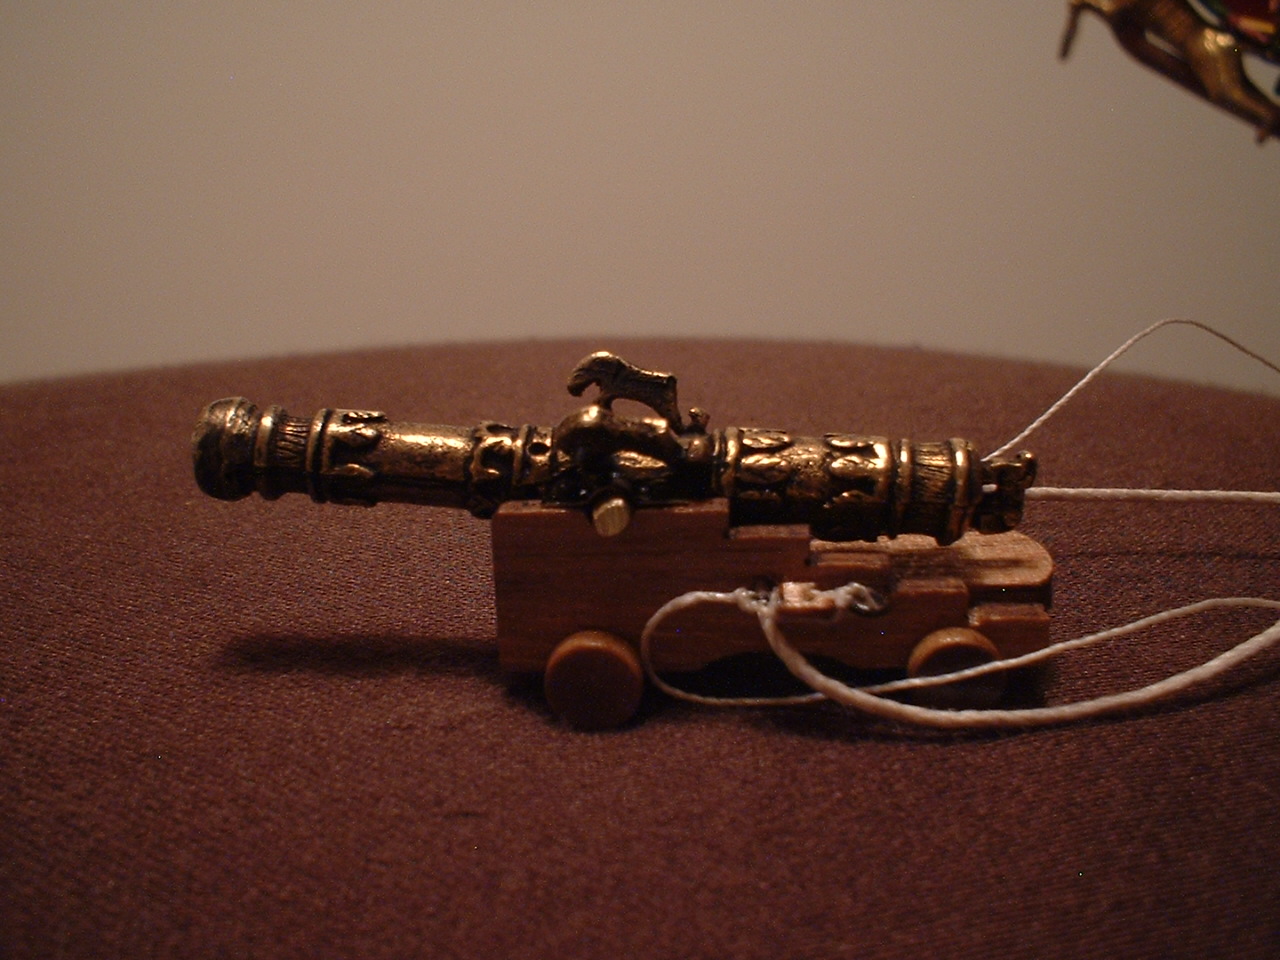
Working on the cannons now.They are nicely made with the lions cast onto the barrels.They were way too shiney out of the box so I darkened them with a thin black wash.Note how the breech ropes go through the carriages & not the back of the cannon.

Mark
-
Thanks Matti.Very little paint work left - like the lion heads on the gunport lids.
-
Nice work - looks good.
Mark
-
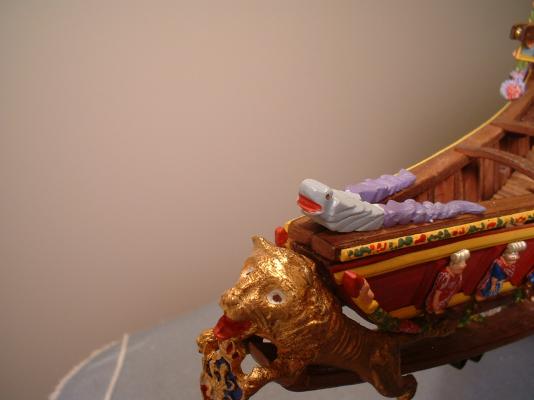
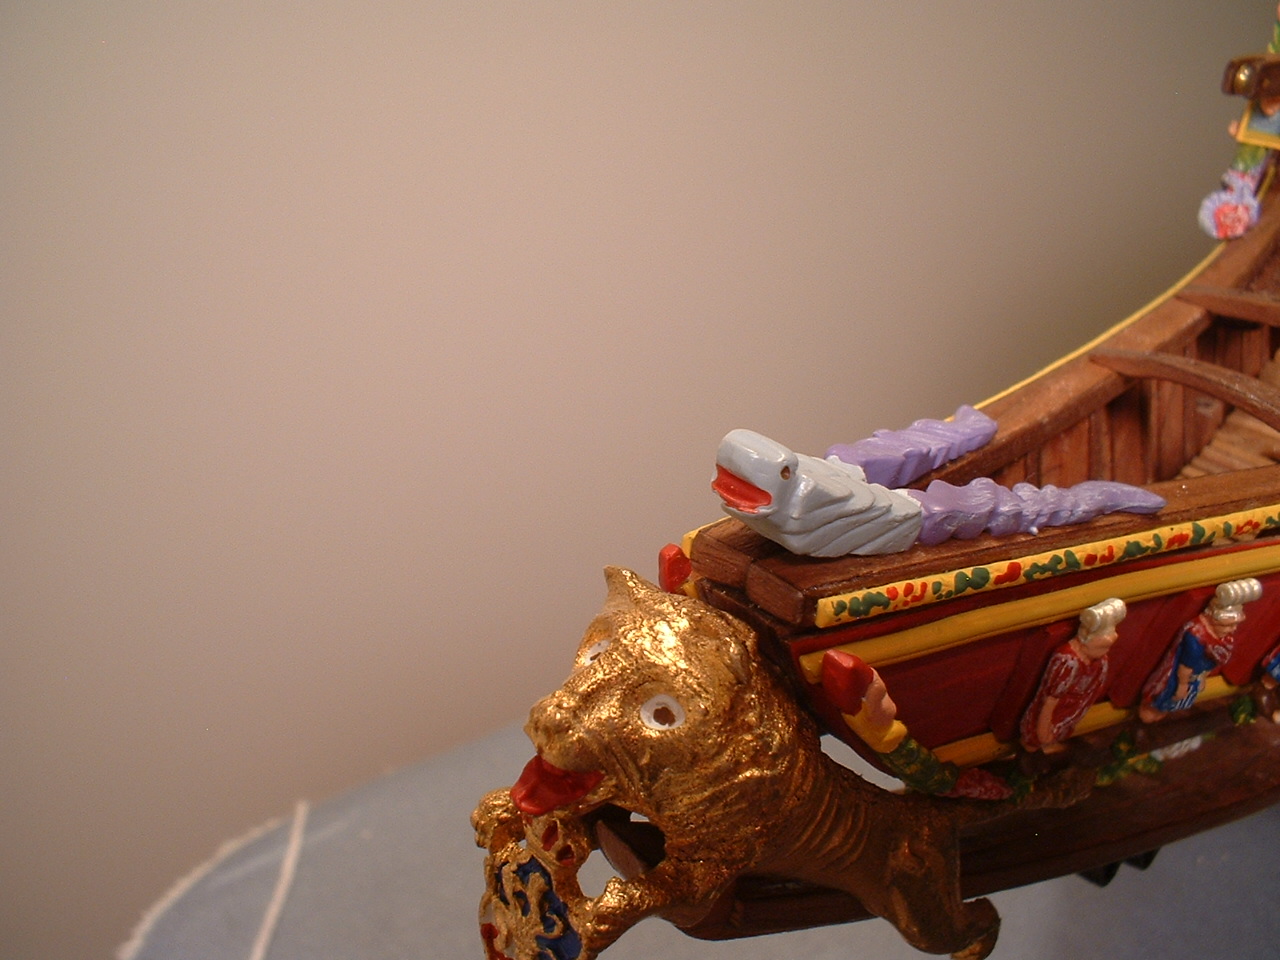
 .Might be some kind of fish or maybe a mermaid?
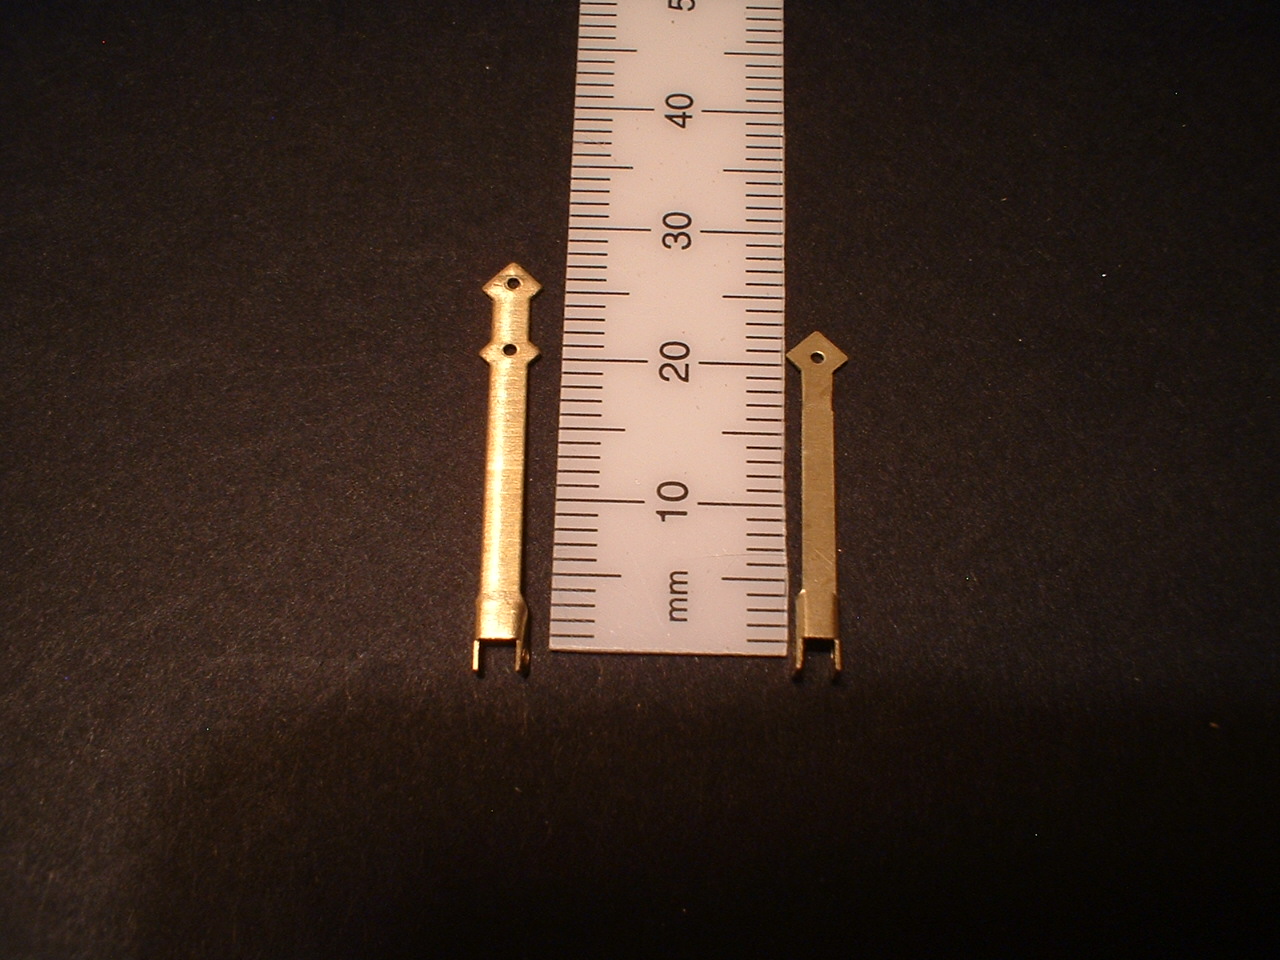


Vasa by marktiedens - FINISHED - Sergal - scale 1:60
in - Kit build logs for subjects built from 1501 - 1750
Posted
Michael - actually I don`t have a milling machine & probably would not know how to use it if I did .The upper railings are actually brass mouldings that came in the kit.All I had to do was cut & bend them to the correct shape - which was not too easy as they were folded up in the box.Made for some sore fingers for a while.I don`t know if they were intended for the railings as the really bad instructions made no mention of them for this purpose.In fact I am pretty much ignoring the instructions anyway.One of the frustrating things about this kit is all the wood is plywood except for the planking strips so I have had to either paint or veneer the edges where they show.
regards,Mark