HOLIDAY DONATION DRIVE - SUPPORT MSW - DO YOUR PART TO KEEP THIS GREAT FORUM GOING! (Only 20 donations so far - C'mon guys!)
×


jim_smits
-
Posts
653 -
Joined
-
Last visited
Content Type
Profiles
Forums
Gallery
Events
Everything posted by jim_smits
-
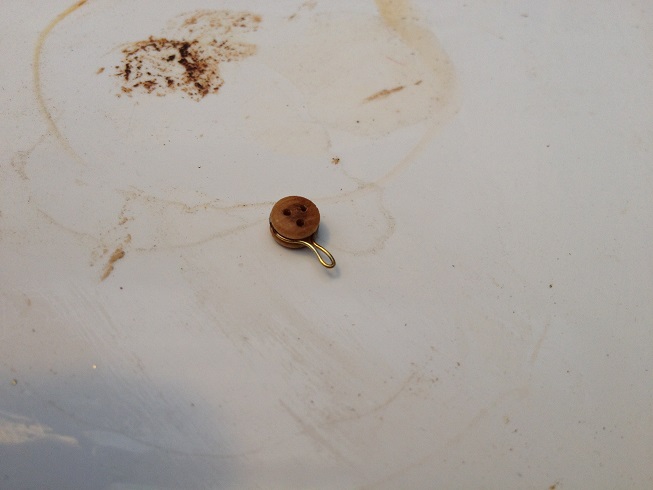
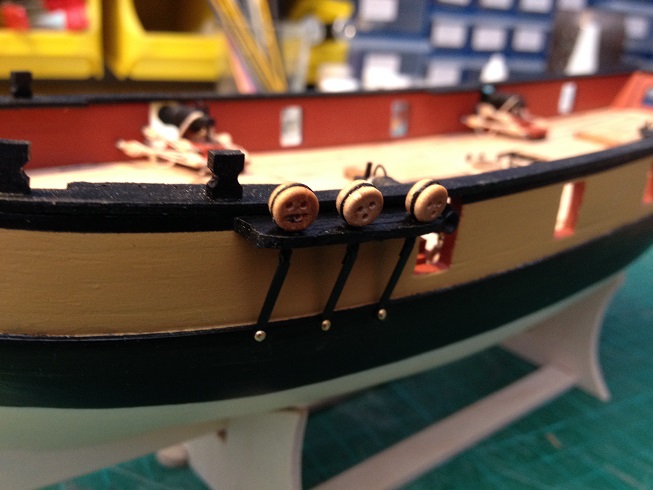
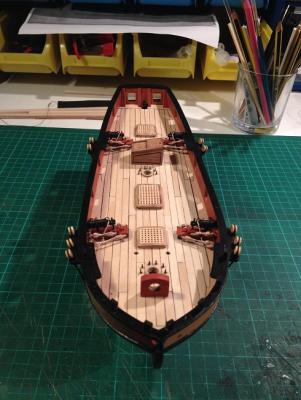
 Right. Time for an update. Channels are complete, so have moved onto to completing the last of the deck furniture. Added the bowspirit post. It is drilled and pinned into the deck to add strength and ensure that the rigging does not cause any problems. Deck cleats are still to be added to the top. Also put together the companionway housing. Spent a while cutting out all the separate parts and sanded smooth from 120 grit down to 320 grit. After dry fitting each part I added some small off cuts of walnut to the inside edges to aid fitting the pieces together. To finish the housing, I stained with 50% light oak stain to bring out some grain and then very lightly sanded back and then added a coat of satin varnish. Finally, drilled holes to insert 0.5mm brass wire to give handles on the doors and hatch lid. Hinges were added by drilling several shallow holes and using a blade to link the holes. Four small lengths of 0.5mm brass wire were then sunk into the gaps and fixed with a spot of cyano. The build so far.
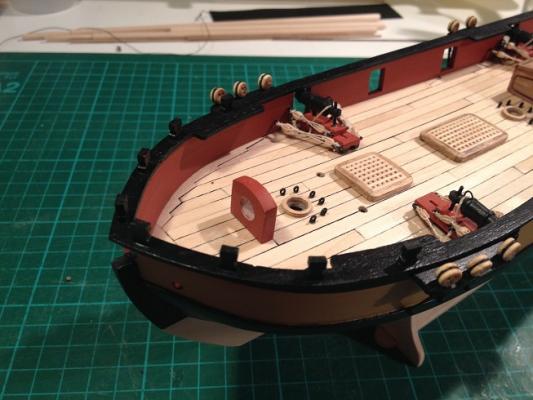
- 226 replies
-
- 7
-

-
- ballahoo
- caldercraft
- (and 1 more)
-
Hi Stergios If I remember correctly I sanded the bottom of the mast itself and added a shim so that the very bottom of the mast is shifted to remove the slant.
- 412 replies
-
- 1
-
-
- snake
- caldercraft
- (and 1 more)
-
Hi all, Sorry it's been a bit of a while. Life has got in the way and there's been a couple of ups and downs. In addition the conservatory workshop is not very conducive to working in the summer as it gets a touch hot. Anyway, went back to the builds today. Completed deadeye strops for the rear channels, and just painting and adding the chainplates. Will need to assemble and add to the channels and seal with the capping bar. Good to get back into the groove.
- 226 replies
-
- 2
-
-
- ballahoo
- caldercraft
- (and 1 more)
-
Ditto
-
Good shout there with the Diana. That will be my next build after Snake and Ballahoo are complete!
- 800 replies
-
- 2
-
-
- snake
- caldercraft
- (and 1 more)
-
Will also echo the sentiments that the serving machine is excellent. Makes serving a doddle! Build also looking fantastic!
- 536 replies
-
- 1
-
-
- diana
- caldercraft
- (and 1 more)
-
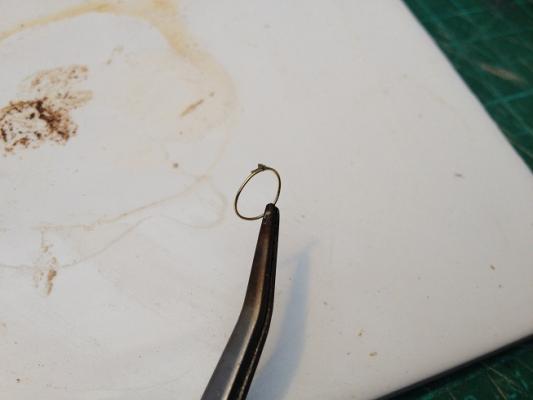
Hi I was silver soldering the rings so a soldering iron will not get hot enough as far as I know. Plus the butane torch is very quick far each joint. Literally less than a second on a low flame was all it took for each joint. Then left with a very strong joint, better than lead solder.
- 226 replies
-
- 1
-
-
- ballahoo
- caldercraft
- (and 1 more)
-
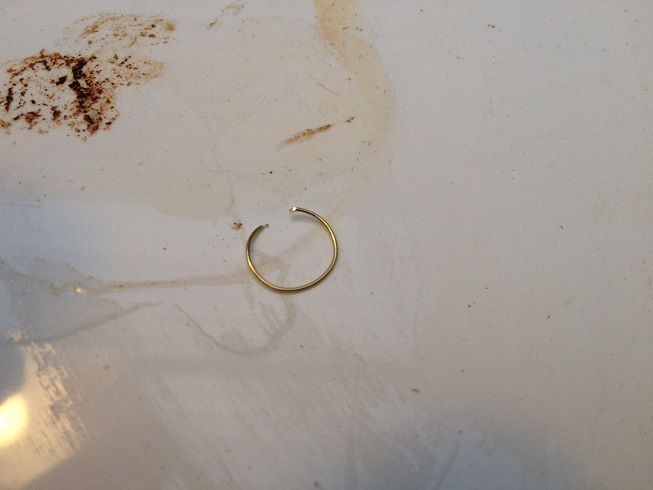
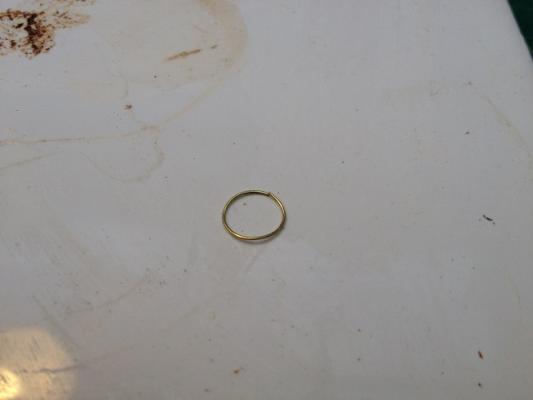
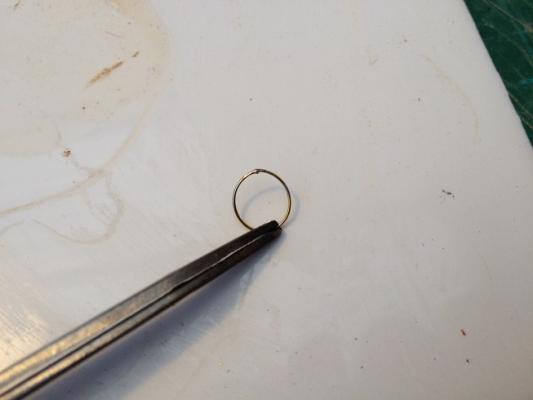
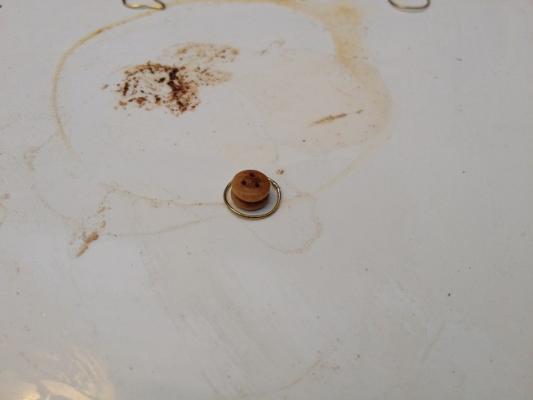
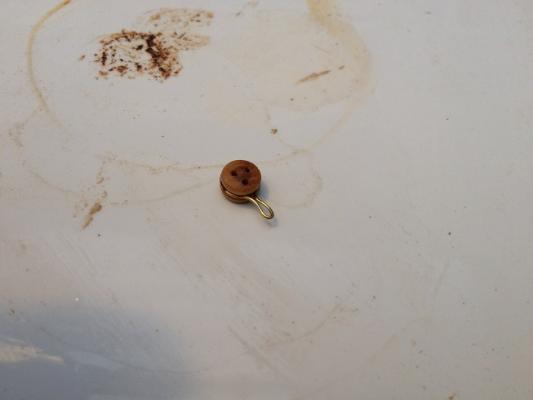
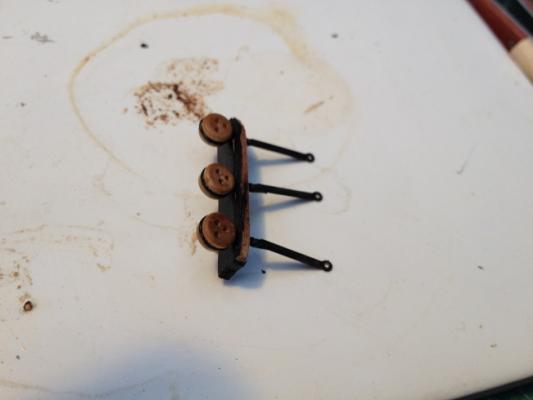
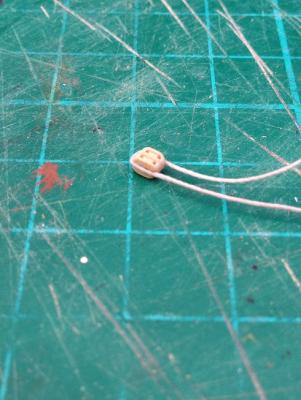
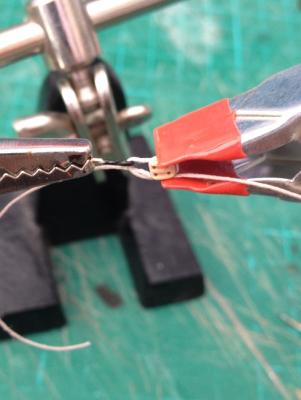
Started work on the channels. The kit comes with deadeye strops that fit into a hole drilled in the channel notches. These strike me as not only a poor shape, having a flat profile as opposed to circular, but also the strop is 'split' and seems weak to me. So I decided to create my own deadeye strops from 0.5mm brass wire. Firstly created a coil of brass wire by wrapping the wire around a 6mm diameter dowel. I then used a pair of snips to cut rings from the coil to use as the strops. Each ring is manipulated to bring the ends together with a good edge and the tension holding the ends together, ready for soldering. Added a little blob of silver solder and flux paste. Used a butane soldering torch on a low flame to carefully solder the ends together to form a complete ring. The ring can then be bent around a deadeye to form the strop. I completed three deadeyes and strops, added the rest of the chainplate assembly and painted with primer and then black. Added the three assemblies to the channel and then glued the capping bar in place. Glued and pinned the channel to the ship just below the capping rail and drilled and pinned the chainplates to the wale and touched up with black paint. Just need to repeat another three times.....


- 226 replies
-
- 7
-
-
- ballahoo
- caldercraft
- (and 1 more)
-
Hi mate, I actually went back and re-did my gammoning on the bowsprit and added in some cleats to aid the gammoning process. Looked fine as I painted but not sure how to achieve this on a wood finish. Jim
- 412 replies
-
- 1
-
-
- snake
- caldercraft
- (and 1 more)
-
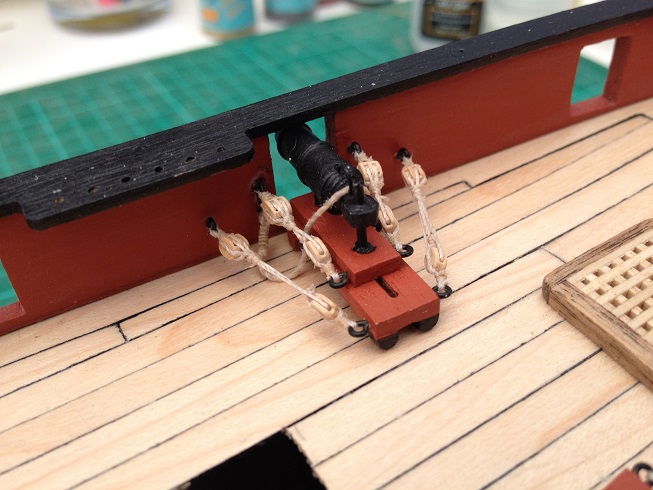
Another quick update. (in the correct build log this time......) Last for a few days as I am off camping in Weymouth for a few days. Just a slight update on the carronade rigging. Decided to frape the loose thread around the tackle to leave a tidy finish, painted with diluted PVA and then trimmed off the excess thread. Might not be historically accurate to any degree but it leaves a neat and tidy finish I am happy with.

- 226 replies
-
- 8
-
-
- ballahoo
- caldercraft
- (and 1 more)
-
Whoops! Wrong build log should be on the Ballahoo.... I'll shift this post when I get back. UPDATE - post deleted and added to Ballahoo
- 412 replies
-
- 1
-
-
- snake
- caldercraft
- (and 1 more)
-
Updated!
-
Yeah haven't really had time to check all the other pages.....!
-
Hi Stergios, I've fixed the missing pictures in that series of posts. As for the anchor rope, I used a 2mm rope ought from Cornwall Model Boats, cant remember the make though. Jim
- 412 replies
-
- 1
-
-
- snake
- caldercraft
- (and 1 more)
-
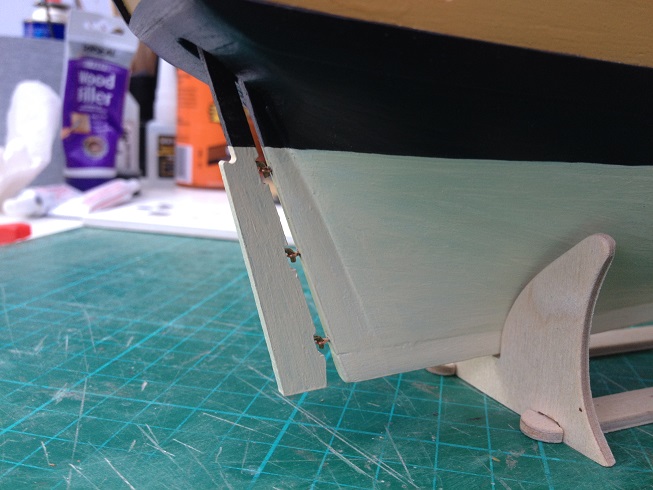
Cheers Eamonn. The gap at the rudder was as small as I could get. It is basically the width of the eyelet used as the hinge.
- 226 replies
-
- 1
-
-
- ballahoo
- caldercraft
- (and 1 more)
-
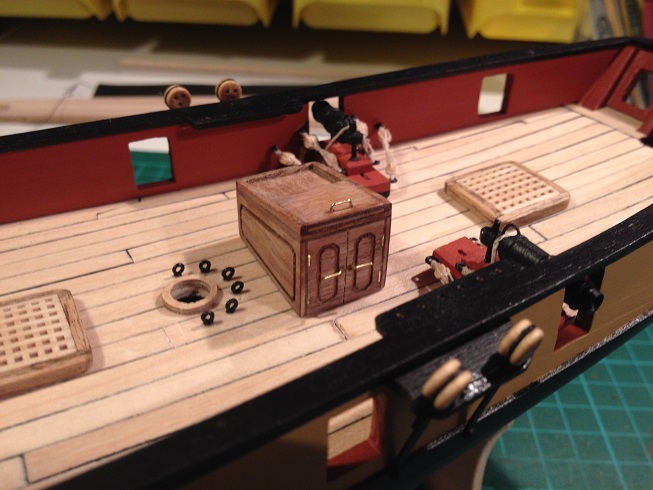
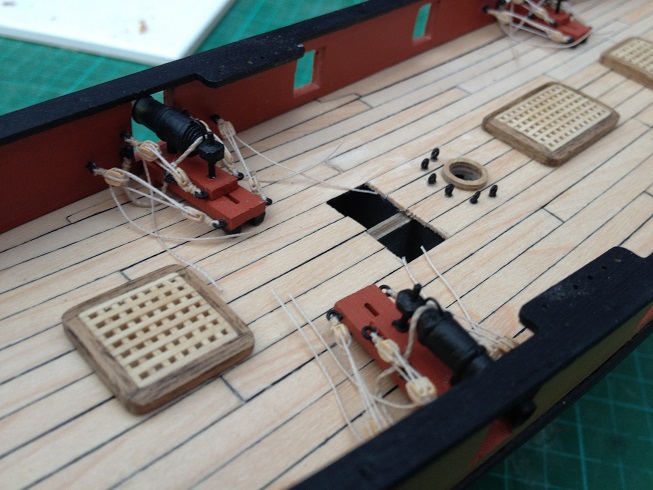
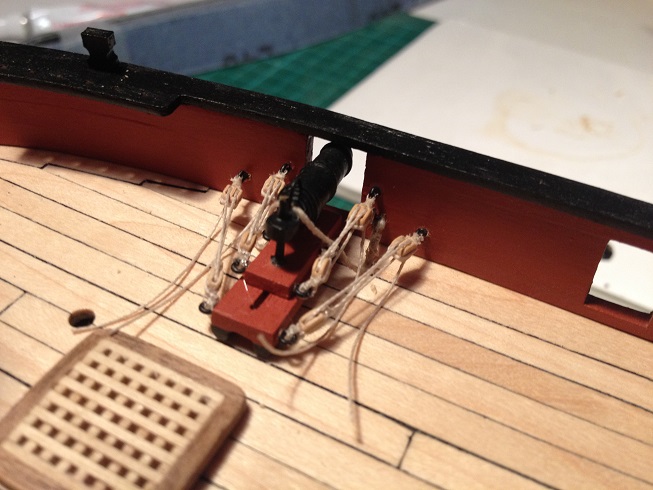
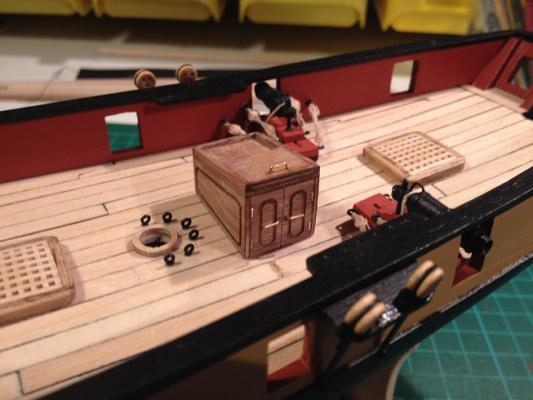
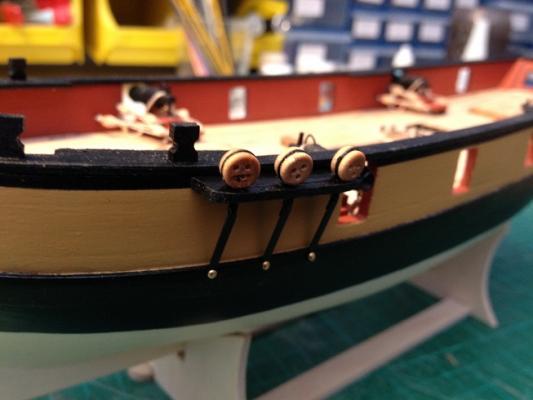
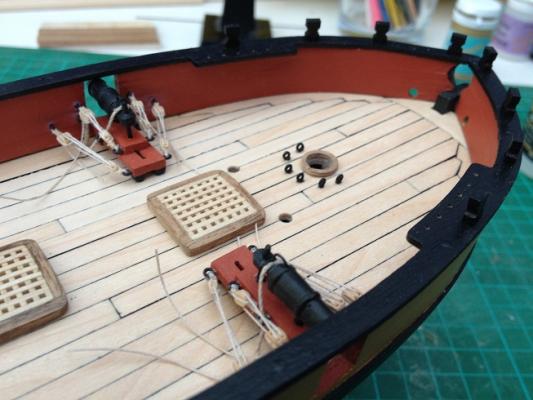
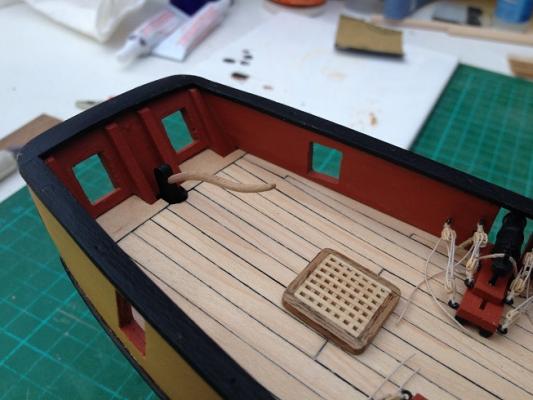
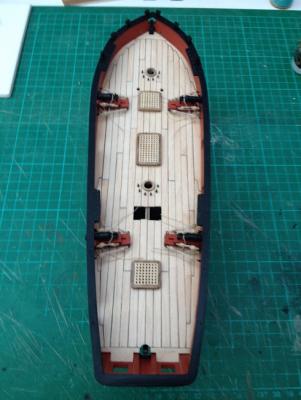
Further build update for everyone. Thanks for the likes and comments as always! The four carronades are now in and 95% rigged up. I just need to decide what I am going to do with the trailing ropes and whether to have them coiled on deck or lashed up to the tackle or a combination. Any suggestions? At the moment I am leaning towards lashing to the tackle as it looks clean and tidy and because coils are a pain.....! In addition to the carronades I have added the deck eyelets.... And finally added in the rudder post and painted as per the waterline. Getting the eyelets and the brass rod to line up perfectly for the rudder hinges was slightly tricky but got there in the end. I've also cut out and sanded the tiller piece and drilled holes for the pin. I have shown the tiller in place but I will wait to glue in place for a while as it is screaming break me......


- 226 replies
-
- 2
-
-
- ballahoo
- caldercraft
- (and 1 more)
-
Hi Jason I had the same issue with the position of the futtock staves on the mizzen. I ended up moving them a further 1cm up if I remember correctly.
- 800 replies
-
- 1
-
-
- snake
- caldercraft
- (and 1 more)
-
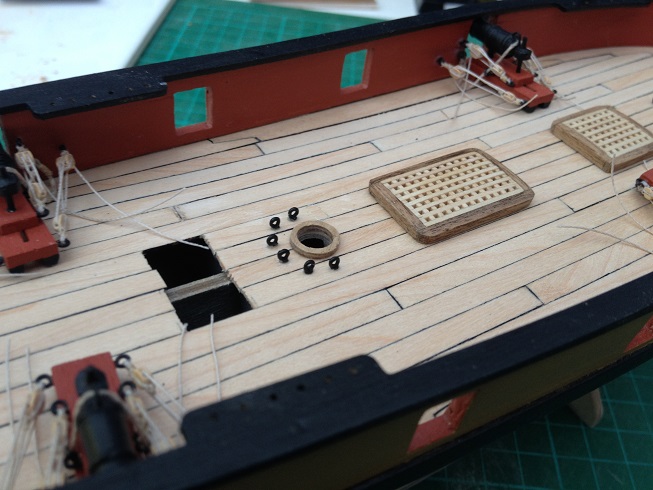
It's coming together nicely! Definitely easier installing deck eyelets without other deck furniture in the way.........
-
Two down..... Two to go...... Glad there are only four to rig up, but I may have to steel myself when I build another larger ship........
- 226 replies
-
- 3
-
-
- ballahoo
- caldercraft
- (and 1 more)
-
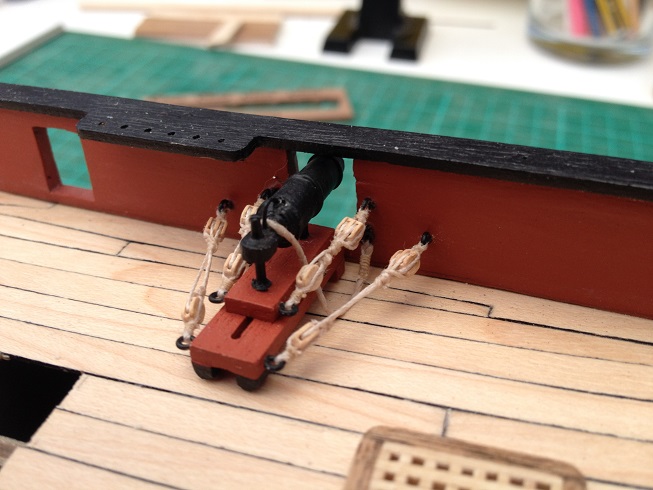
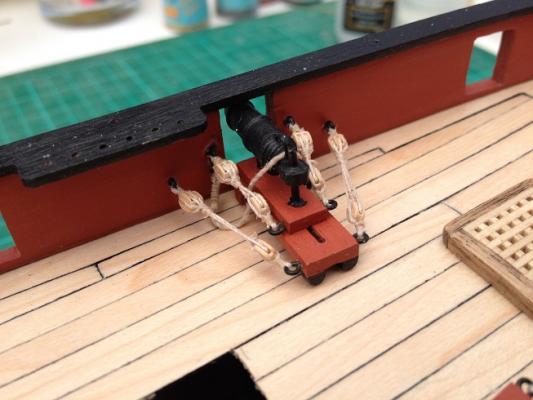
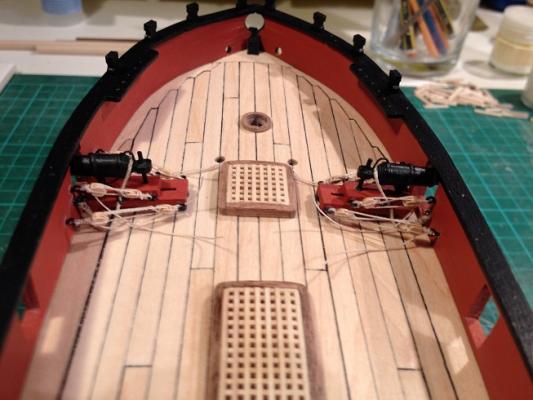
Result! Managed to get the technique to work and I will now be applying this to all my future block stropping. Looped some thread around the block and fixed with a tiny spot of cyano. Threaded an eyelet over one end of the thread and doubled back over the block and fixed with a clip. Next, seized the three lengths of thread together to give the impression of a simple loop around the block and eyelet. Once the seizing was completed, I soaked the area in diluted PVA and allowed to dry. Once dried, all the loose ends were trimmed off with a sharp knife. This left a very nice tidy block stropped to an eyelet. Very happy with the result. Repeated for four sets of blocks and glued in place on the bulwark. Fixed the carronade in place and threaded the rigging through all the blocks. Really pleased with the result and just three more carronades to go.


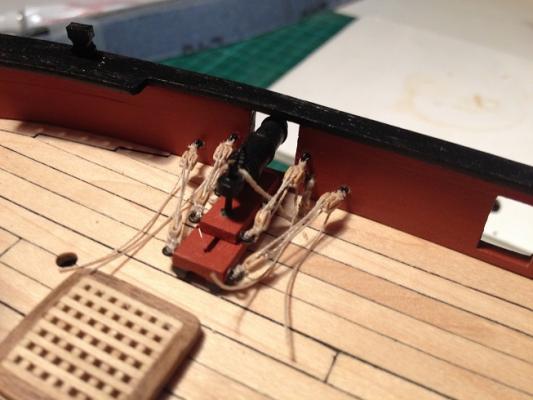
- 226 replies
-
- 9
-
-
- ballahoo
- caldercraft
- (and 1 more)
-
Yeah, this is where I am trying to make a show of the carronades as I am rigging the training tackle as well. I shall have a 'tinker' tonight an see how it goes....
-
Hmmmmmm. There is much faffing about at the moment. Carronades are coming together but rigging them is starting to bug me a touch. I have added breaching rope to one and rigged all four single blocks to the eyelets on the carronade. The trouble is the double blocks to be attached to the bulwarks. I just cannot seem to get a nice tidy strop between the eyelet and the block. Previously I might have said 'that will do' but i'm now starting to get fussy....! I am going to attempt the methodolgy as set out here: http://www.modelboatyard.com/stropping.html and see how I fair. I had also been using GS-hypo but I am starting to come round to the thought of using watered down PVA as it is less messy. Certainly not using hooks makes the process more tricky as I will have to get all the rigging attached and threaded through the blocks before attaching the carronade to the deck and the blocks and breaching rope to the bulwarks. Is there an eaasier way to do this? As I say, using hooks possibly but even with Chucks lovely small blocks, I would still get a result where the opposing blocks are almost touching. If I can get the non-hook method to work I am hoping the overall aesthetic result will be better.... Hopefully..... All thoughts welcome.....
-
Opinions please. There is so little space between the bulwark and the carronade rigging points, that I am thinking of removing the hooks from the gun tackle and just rigging directly to the eyelet instead. This should give a better look to the rigging whilst not being the most accurate. Good call? Also, a second random question. Gun tackle blocks are attached to hooks and eyebolts by non-tarred line (light coloured) whilst most other blocks are attached using tarred (black) line. Why is this?
-
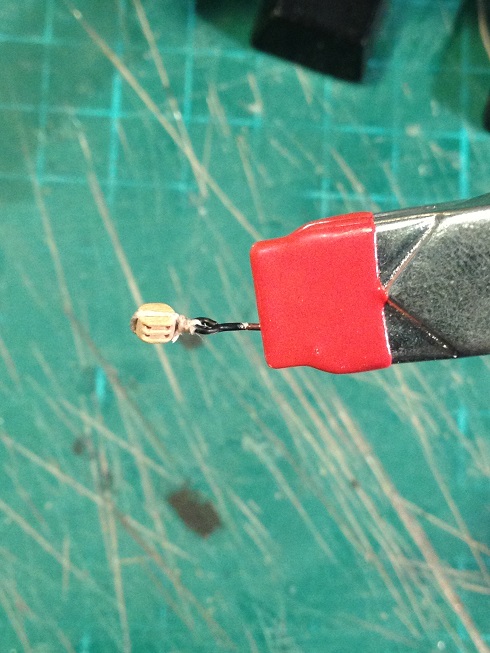
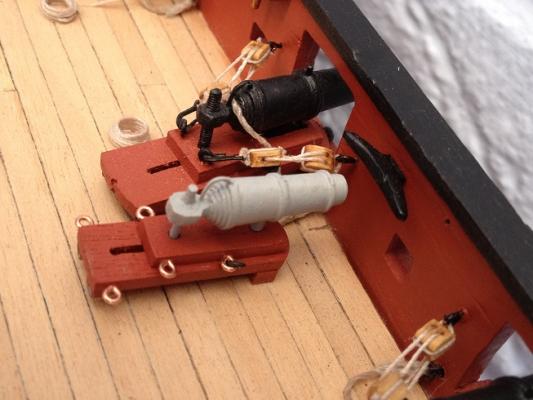
Hi Jason, Yes, the barrels were drilled out as well. The casting process tends to leave one side of the barrel filled in. Picture as requested....!
- 226 replies
-
- 3
-
-
- ballahoo
- caldercraft
- (and 1 more)