HOLIDAY DONATION DRIVE - SUPPORT MSW - DO YOUR PART TO KEEP THIS GREAT FORUM GOING! (Only 24 donations so far out of 49,000 members - C'mon guys!)
×


jim_smits
-
Posts
653 -
Joined
-
Last visited
Content Type
Profiles
Forums
Gallery
Events
Everything posted by jim_smits
-
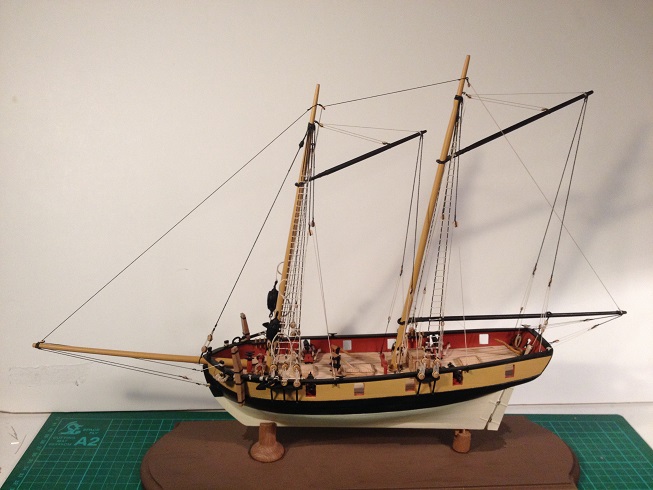
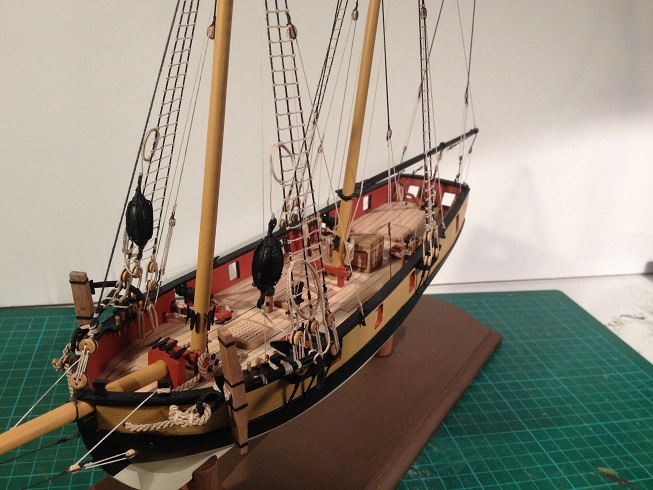
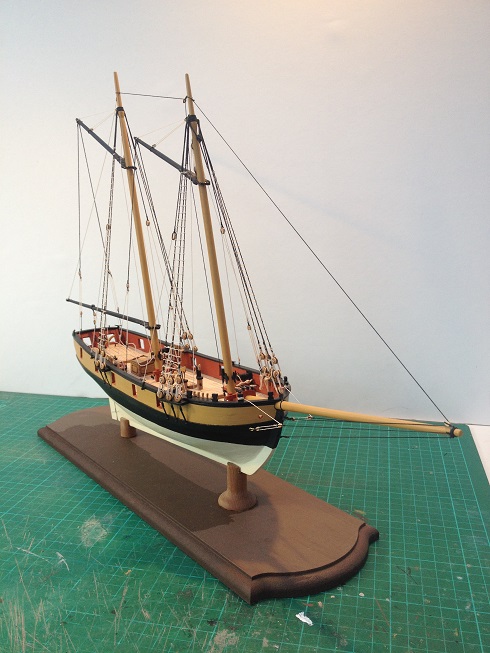
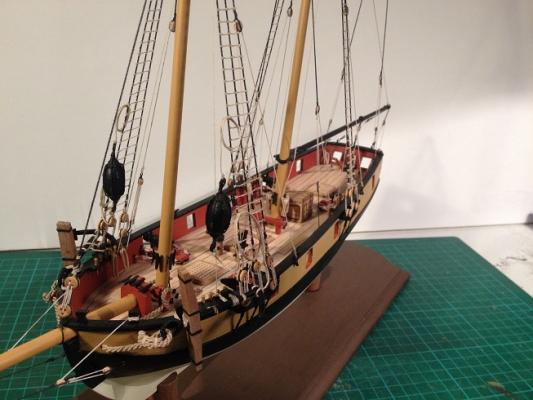
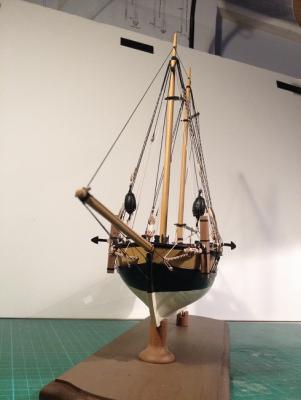
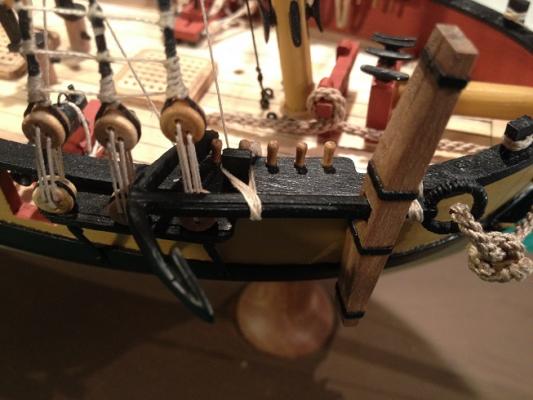
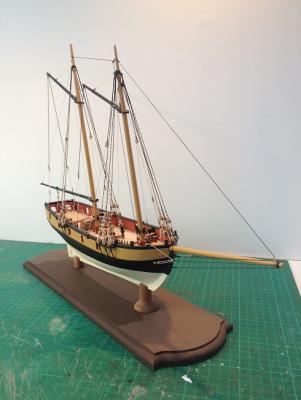
 And the build is complete! Got all the little bits and pieces finished. Painted all the rigging hooks, added the second nun buoy and rigged to the shroud and anchor, added the last belaying coils and touched up the white paint around the rudder hinges. Really happy with the completed build, and while it is not strictly my first build, it is my first completed build and it feels like a major accomplishment. I've added some images of the completed build itself but still got the completed to case to unveil!
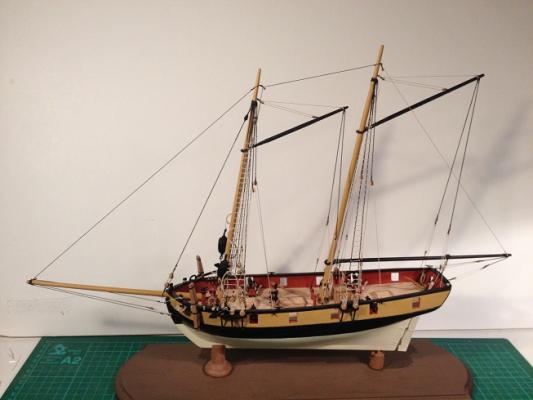


- 226 replies
-
- 5
-

-
- ballahoo
- caldercraft
- (and 1 more)
-
I think quite a few people drill a hole in the yard and mast and pin in place using a small length of brass rod.
-
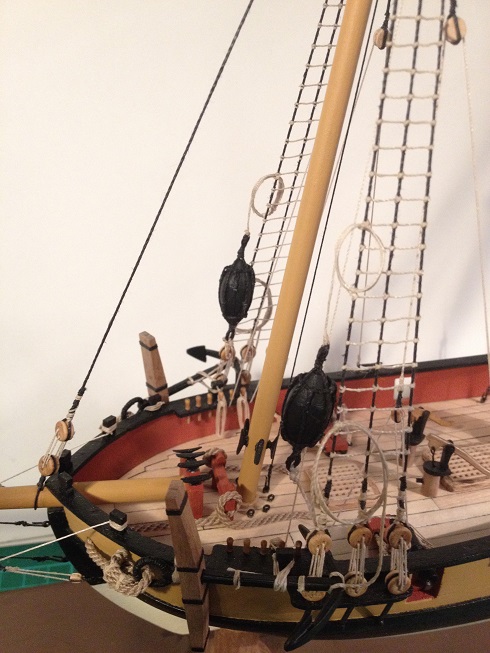
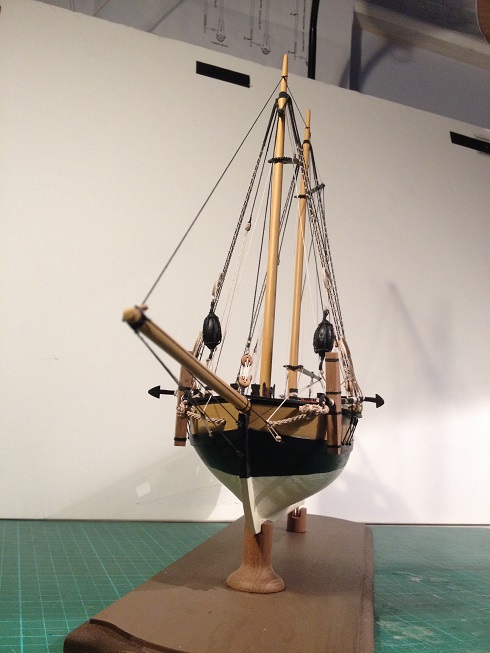
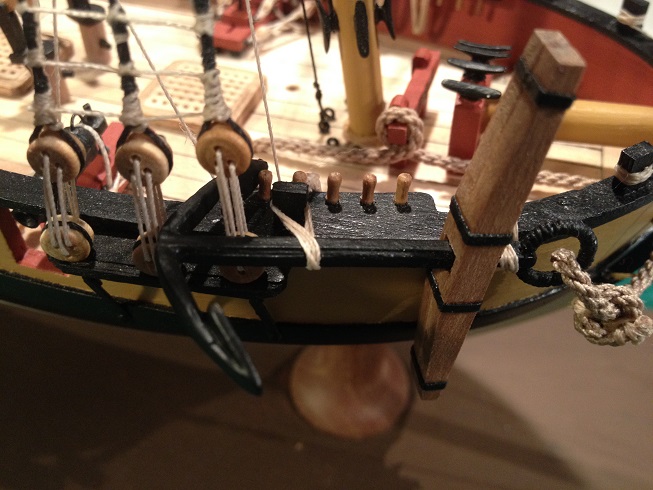
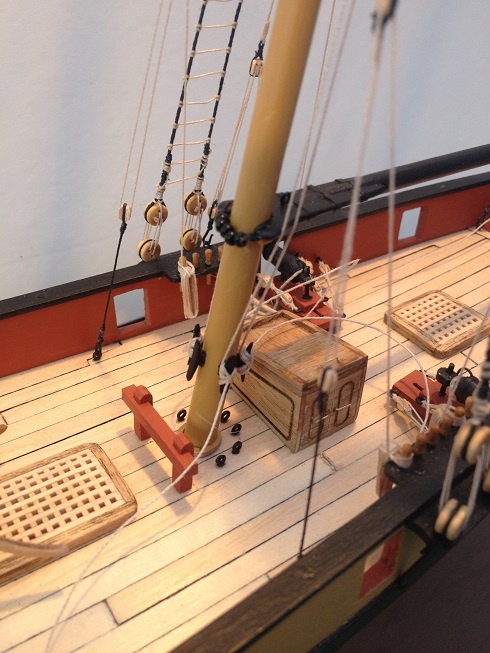
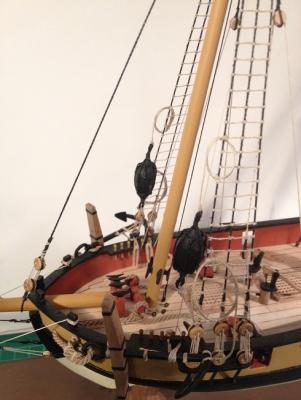
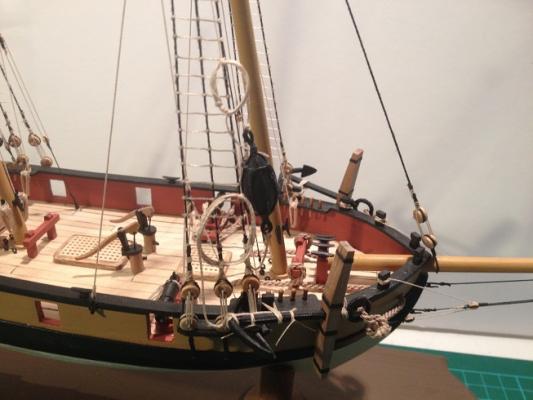
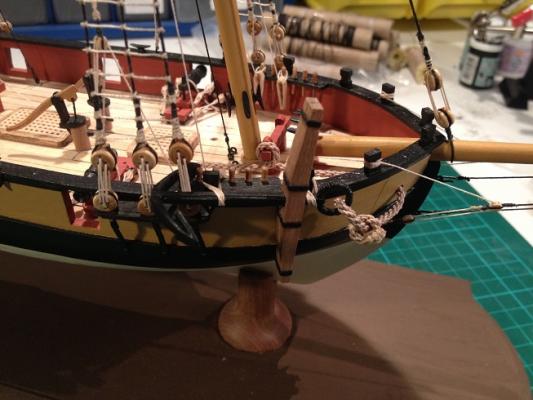
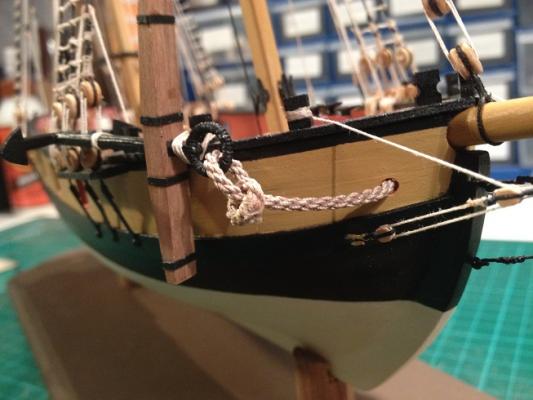
Pictures as promised! This is the display case I received yesterday. Still some work to do on it though...... Here is the first nun buoy attached to the fore shrouds by two coils of rope. Thicker rope attached the bottom of the buoy is also lashed to the anchor. And finally added guy pendants to the boom.


- 226 replies
-
- 8
-
-
- ballahoo
- caldercraft
- (and 1 more)
-
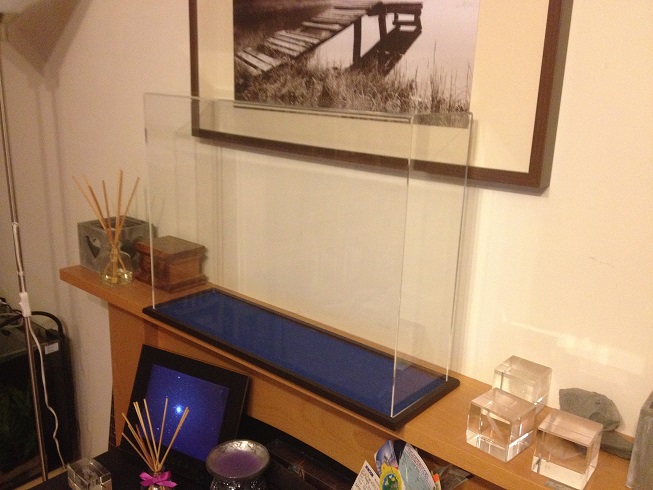
Managed to do some work on trying to 'rig' up the nun buoy by using Dafi's build as a basis, thanks for the link Jason. Will follow up with photos tomorrow hopefully. Biggest news is that my display case has arrived. Ordered a wood base and acrylic cover as a set from www.widdowsonsltd.co.uk cost £108. Looks the business but got a 'minor' modification to make, so will do quintuple check before I commit but should look awesome and different to anything I've seen. Few little touch ups and last few coils to add to belaying points and I should be done...!
- 226 replies
-
- 1
-
-
- ballahoo
- caldercraft
- (and 1 more)
-
Your progress is looking good! The ships always seem to come alive when the shrouds are all added. Keep it up!
-
Cheers Jason that looks pretty good. I'll need to adapt it a little bit as there are only three shrouds on the foremast of the Ballahoo as opposed to Dafi's monster.
-
Hi all, Happy new year first off. Just a quick update as I've technically not made a huge amount of progress. I've ordered a (hopefully) nice base and acrylic cover for the ballahoo, which should hopefully arrive in a week or so. Also ordered and received material for my 'twist' on the mounting, which I am now making a start on attempting to produce. Still keeping it schtum until I can make it a success or not. As for the nun buoys, I haven't made a start on the second as of yet. I was also wondering, as I can't seem to find any info, what the rope lengths and stowage would be for the nun buoys when not actually in use. I think that the buoy would be hung from the foremost shroud roughly above the anchor stowage, but I've no idea about the two sets of rope that would be attached. Anyone got any ideas? On the rest of the build I think I will add guy pendants to the boom and a lanyard to the gaff.
- 226 replies
-
- 1
-
-
- ballahoo
- caldercraft
- (and 1 more)
-
Minor update - the second anchor is now on and cables etc rigged in place. Managed to produce the first nun buoy but don't have any pictures at the moment. I will update when I return after Chrimbo as I will be up in Costa del Coventry for a couple of days or so. So until then Merry Chrimbo all!
- 226 replies
-
- 1
-
-
- ballahoo
- caldercraft
- (and 1 more)
-
Hi Jason, To answer your questions: I got the anchor cable from Chuck Passaro. It's great stuff and will be replacing the current cable on the Snake. As for the anchor stock, I did see the sides tapered in literature and I think I've seen straight and to be brutally honest it was less effort to leave them straight....
- 226 replies
-
- 1
-
-
- ballahoo
- caldercraft
- (and 1 more)
-
My only clue is that it's a contemporary twist on the display method.... I could also easily screw it up and just go with wooden columns.....
-
Made an attempt at my first nun buoy last night. Got the wooden buoy itself shaped out of a piece of scrap wood fine, but had a bit of a fail when trying to get the first set of rigging done. Fiddly to say the lease so will re-examine my technique. Gil Middleton has kindly given a couple of pointers so heopfully will try again this weekend. I've also started putting out feelers to work on the display case. Ordered a nice bit of mahogany with a milled edge to accept a case over the top. Just investigating acrylic display cases on internet. The cost of the case and base will be around the same outlay as the model itself but should look really good. I've also ordered some materials for an extra little project for the display that may or may not work. I show work away in secret for a while and reveal all if it works. If not, then in the bin and it will be my dirty little secret....!
- 226 replies
-
- 1
-
-
- ballahoo
- caldercraft
- (and 1 more)
-
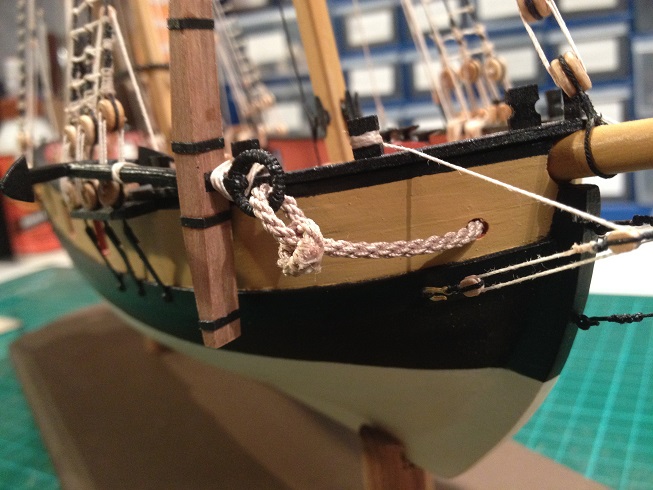
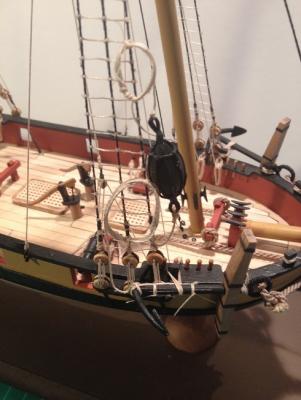
Pictures as promised. Lashed the anchor to the side of the ship and then tied an anchor clinch with the anchor cable. It took a fair while to seize the sections of the clinch together as each turn required a needle to thread each half knot round the cable. Now to repeat on the other anchor.
- 226 replies
-
- 7
-
-
- ballahoo
- caldercraft
- (and 1 more)
-
Clearly a slob.... That planking just looks a total mess..... Horrendous..... Not sure what you would class as good as that looks pretty good to me! Keep up the work and be sure to keep a log of all the issues you have so I can steal it later....!
-
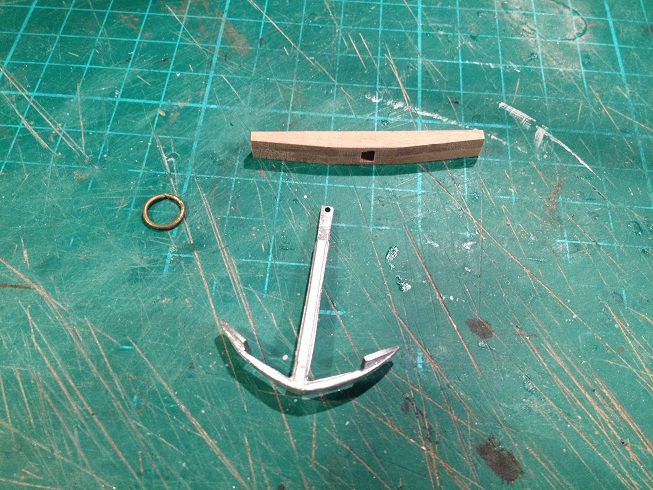
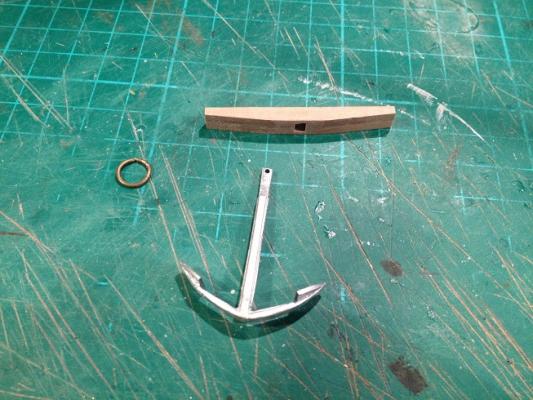
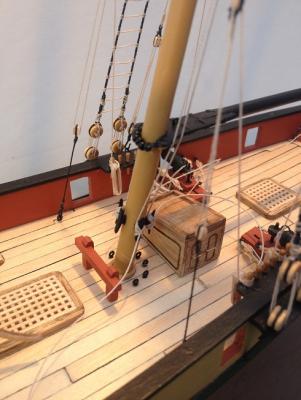
Pretty much completed the first anchor last night. The paper fix round the casting has helped seat it in the stocks, so that is a win. Added some iron straps with black paper and then varnished the walnut section and finished of the flukes etc in black. The ring was made by bending a length of 1mm brass wire round a 6mm dowel and then cutting with pliers to create the ring. A little filiing to get the ends to mate snugly and it could be inserted into the anchor and bent into a complete ring. Then spent what felt like hours tying thread around the ring. The first attempt was simply to wind thread around the metal, in the same way as serving. This didnt really work as I couldnt keep tension and then whole kept unraveling. I could have glued every turn or so but decided on another technique which was the same as my seizing method. Alternative half knots all the way round the ring. Took a while but was dead solid and not hard to do just repetitive. The first of the cables has been threaded through the hawse holes and through the deck. Just need to do an anchor clinch adn then add the slings to the anchor and knightheads. Also, been inspired by Gils victory log and may attempt some anchor buoys. Did see some listed in Global Schooner but is there any reason that they would not have been present on a Fish class schooner? Will follow up with images tonight.
- 226 replies
-
- 1
-
-
- ballahoo
- caldercraft
- (and 1 more)
-
My copy of Global Scooner arrived today. Will be reading through it this evening. After having stalked a copy on the Internet for months, with costs of at least £100, I had almost given up. Then spotted a hardback for £15 and was straight in there....!
- 226 replies
-
- 1
-
-
- ballahoo
- caldercraft
- (and 1 more)
-
Well, other than finishing Snake off? I will be following you with a Diana kit. Having been eyeing it up for a while. I like the mix of the quarter galleries, an additional deck and cannons. Should be a great project. Not that I'll be stealing masses from yourself and Ray....!
- 226 replies
-
- 2
-
-
- ballahoo
- caldercraft
- (and 1 more)
-
Made a start on the anchors last night. Put together one of the sets of stocks and sanded smooth. The gap in the stocks is actually too large to fit the cast anchor, so I have cut a section of black paper and wrapped it around the top of the anchor to increase the size where it should be held by the stocks. Seems to have worked ok but proof will be after gluing. Need to paint the cast piece black first off.
- 226 replies
-
- 1
-
-
- ballahoo
- caldercraft
- (and 1 more)
-
Yeah, only having to do four Carronades was an improvement on the eighteen for Snake.....! Keep up the good work mate and see you on the finish line....!
- 1,039 replies
-
- 1
-
-
- ballahoo
- caldercraft
- (and 2 more)
-
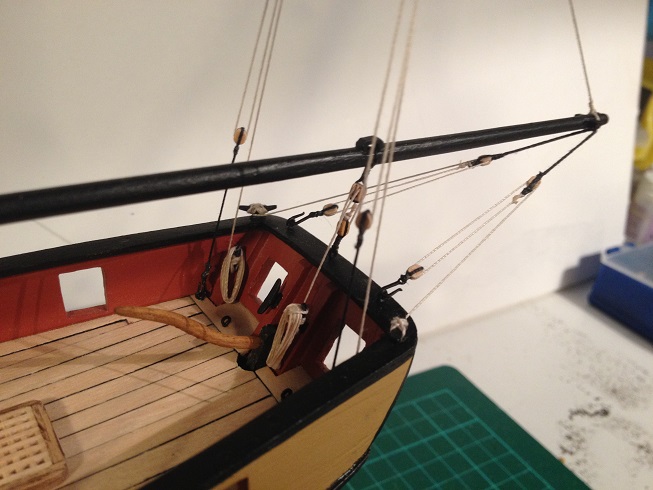
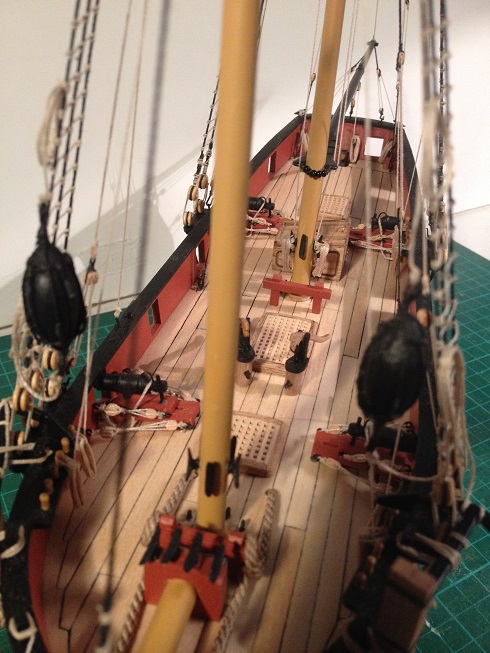
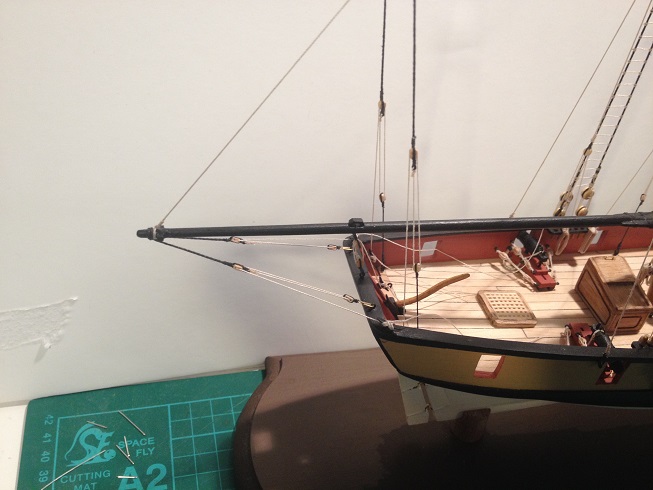
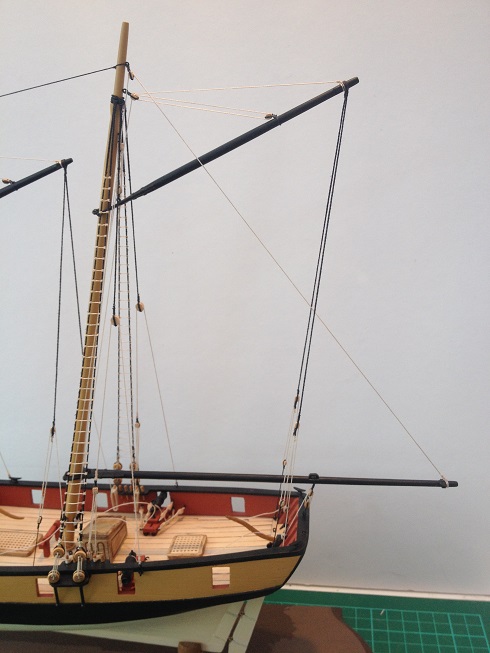
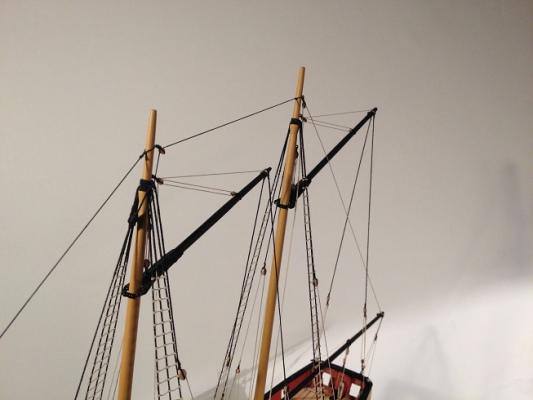
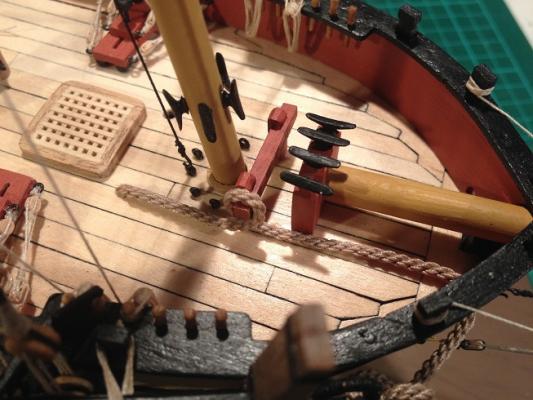
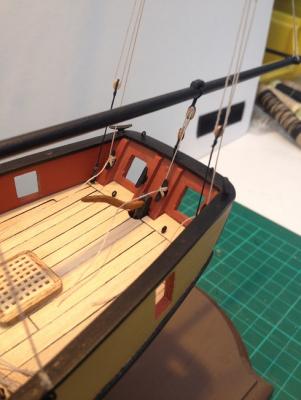
Made some major progress in the last few days. Finished making up the boom adding rigging cleats to the end, iron straps using black paper and a saddle to hold the boom sheet rigging. Managed to get hold of two blocks of boxwood for £2. This enables carving small accessories far more easy as the walnut I've used previously tends to splinter and fall apart. Finally gave it a couple of coats of black to finish. Next step was adding the rigging. Stropped a block under the saddle for the boom sheet and tied the end of the topping lift to the end of the boom. Not sure if it was strictly necessary but added a small boom saddle to the aft mast to help hold the boom in place. Fitted the boom to the mast and rigged the topping lift to hold the boom up. Then added the parral beads and line to hold to the mast. Finally, rigged up the sheet. Next, added the gaff and all its associated rigging and added, in addition to the plans, a pair of vang pendants. Once the vangs were added I was able to gradually iterate the tension of the rigging to get the final position of the gaff. All the lines have been belayed to cleats on the mast or transom. Quick question at this point..... I have coils of rope added to lines belayed to belaying pins, would there also be a coil hung from cleats and is the technique for hanging the coil the same? When I say technique, I mean in real seafaring. Anyway.... That completes the vast majority of the rigging. I am still undecided about adding guy pendants, I need to added the appropriate finishing touches to the belayed lines and or course the anchors will need to be added. Also, trying to think of any other random deck furniture or gubbins that could be added. For instance, my Ballahoo is lacking any ammunition currently so may add some cannon balls. What is the most appropriate storage method for a schooner? In garlands or stacked or....? Onto the anchors.....!


- 226 replies
-
- 4
-
-
- ballahoo
- caldercraft
- (and 1 more)
-
From what I can see on the diagrams i've seen, they are essentially the equivalent of the vang pendants on the gaff. So presumably they can be used to control the position of the boom in addition to the sheet that is indicated on the plans already. I did see a diagram somewhere on MSW today that was quite useful but didnt make a copy.
- 226 replies
-
- 1
-
-
- ballahoo
- caldercraft
- (and 1 more)
-
Ok. Come up with a plan of action. Firstly, I can rig vang pendants from the gaff, hooked to the deck eyebolts at the transom with the free line belayed to cleats already mounted on the inboard side of the transom. Secondly, once the boom has been added I can add guy pendants. These, however look to need an additional pair of eyebolts mounted to the top of the capping rail on top of the transom and then belayed to the cleats mounted on the capping rail at the aft corners. this should mean everything is logocally accessible to both myself as a modeller but also to the real life crewmember. The topping lift for the boom is already in the plans anyway. I wont have time to look at this tonight but hopefully thursday and friday night.
-
Cheers for the posts Eamonn. Makes sense as to why the vangs are hooked to the deck in the plans for the foremast gaff. Managed to find diagrams in Petersson pg 26-27 showing vang pendants and also guy pendants for the boom. Will look at the eyebolts in the deck and the available cleats and plan accordingly.
- 226 replies
-
- 1
-
-
- ballahoo
- caldercraft
- (and 1 more)