HOLIDAY DONATION DRIVE - SUPPORT MSW - DO YOUR PART TO KEEP THIS GREAT FORUM GOING! (Only 13 donations so far - C'mon guys!)
×


jim_smits
-
Posts
653 -
Joined
-
Last visited
Content Type
Profiles
Forums
Gallery
Events
Everything posted by jim_smits
-
 Front of the manual appears to show what looks like an ensign halyard rigged from the end of the gaff but unsure of the rest.
 -
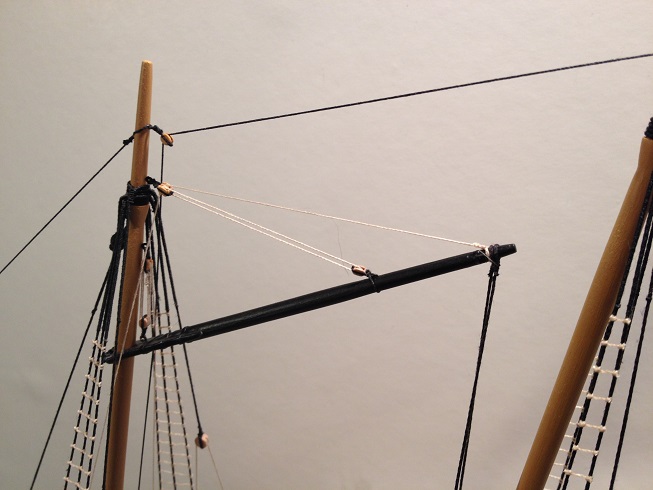
Thinking it through. The gaff vangs are fine on the foremast gaff as there is no boom. On the aft mast the boom will surely hit the vangs?
-
After trawling around in the internet it appears I am looking at rigging up gaff vangs. Hopefully this is reasonably correct but any input is really welcome.
-
Right, a bit of advice and perhaps confirmation needed. Putting together the aft gaff and rigging it up last night. Struck me that the plans do not show any rigging to control the lateral position of the gaff. The equivalent rigging is shown and complete on the foremast gaff. So, firstly, what are they called? Sheets? Braces? Secondly, would this be present on the aft gaff? If it is present, I think that I can use eyebolts that are set into the deck at the aft by the transom and the bulwark cleats at the corners of the aft of the capping rail. Is this accurate at all? I have ordered a copy of Global Schooner but until it arrives any advice would be appreciated. Thanks in advance for any guidance, and please correct my terminology.
-
Thanks for the likes and comments guys. Not too much done today as been helping to put up Chrimbo tree. I have however, added iron bands to the aft gaff and added cleats to the end of the gaff. Also made up and tied in two coils for belayed lines. Still going to need a few more though....
- 226 replies
-
- 1
-

-
- ballahoo
- caldercraft
- (and 1 more)
-
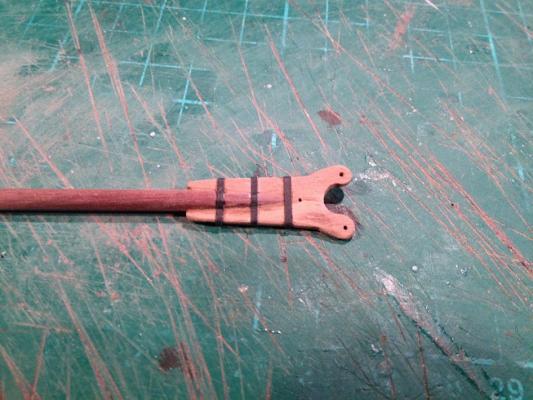
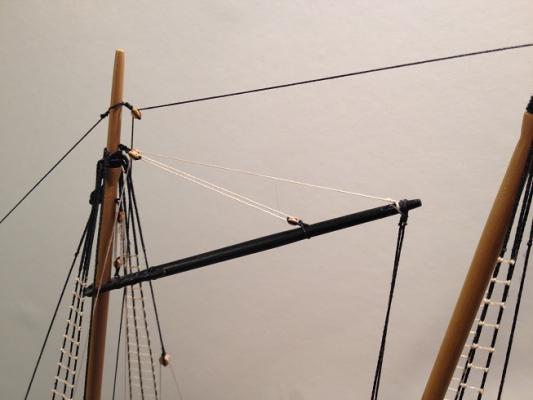
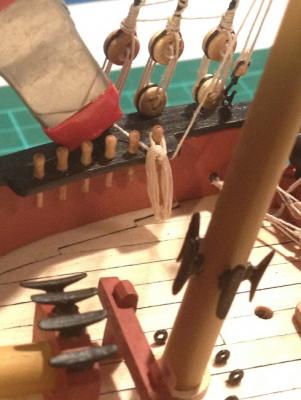
Good bit of progress today despite being slightly hungover from last nights work Christmas party. Managed to complete and install the foremast gaff. Spent a while shaping walnut dowel to fit one of the gaff jaws and tapering to 2.5mm. Glued the gaff to the jaws piece and pinned in place to add strength. Cut three strips of black paper about 1mm wide and added to the gaff to simulate iron bands. Finally drilled a hole to take an eyepin once it has been stropped to a block. Made up the rest of the rigging gradually over the afternoon and fitted to the gaff, including the parral beads at the back to fit to the foremast. Gradually iterated the rigging tension until the gaff was in the correct position and all lines were correctly tensioned. Belayed all four lines to belaying pins and painted with dilute PVA to fix in place. Currently putting some coils together to finish.
- 226 replies
-
- 9
-
-
- ballahoo
- caldercraft
- (and 1 more)
-
Fantastic looking build with amazing details added. Something definitely to aspire to.
-
Announcing the Model Ship World Ship Kit Database Project
jim_smits replied to SkerryAmp's topic in Wood ship model kits
Hopefully some constructive criticism but I think you need to check the kit difficulty for the Caldercraft series. You have ballahoo down as an intermediate and yet Snake as a beginner. Havent really checked the other kits as I have no experience with them but probably worth having a look when you have a moment. Cheers! -
I think the main problem is the wood used for the dowels has very inconsistent grain structure and therefore takes up stain to different degrees. This gives the resultant blotchiness.
- 1,039 replies
-
- 4
-
-
- ballahoo
- caldercraft
- (and 2 more)
-
I tried for a while to stain the light dowels with no luck and gave up, although I never used sanding sealer, and ended up painting. Could you try ordering some walnut dowel and using that? Should take stain and varnish far better.
- 1,039 replies
-
- 3
-
-
- ballahoo
- caldercraft
- (and 2 more)
-
Booms, gaffs and anchors to go indeed. And the it will most definitely be back to Snake and a load of yards to do. A few months away but after that will be Diana most probably, hopefully with some LEDs to add to cabins, decks and lanterns.
- 226 replies
-
- 1
-
-
- ballahoo
- caldercraft
- (and 1 more)
-
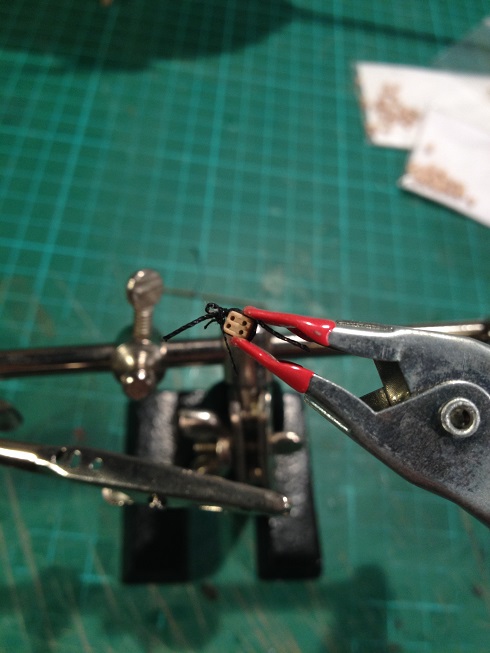
Thanks Jason - the rope loop itself is dead easy but threading the hook onto the pin and getting it to sit right is a bit of a pig.....
- 226 replies
-
- 1
-
-
- ballahoo
- caldercraft
- (and 1 more)
-
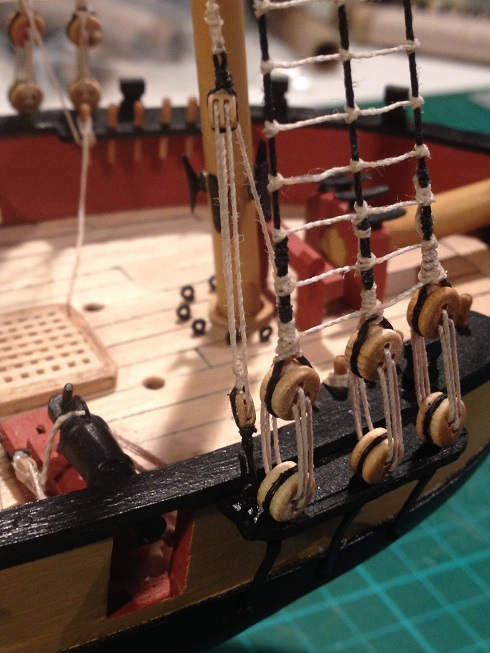
Standing rigging done....! That's another big step out of the way! Now I'm onto plan 3 of 3 and the running rigging and the booms. The end is in sight.


- 226 replies
-
- 5
-
-
- ballahoo
- caldercraft
- (and 1 more)
-
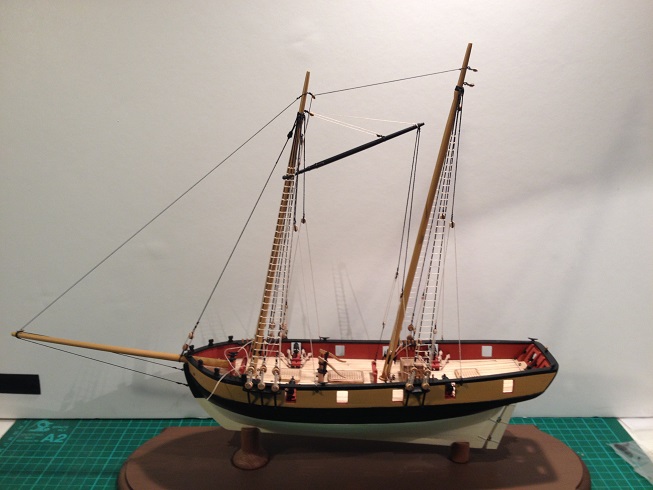
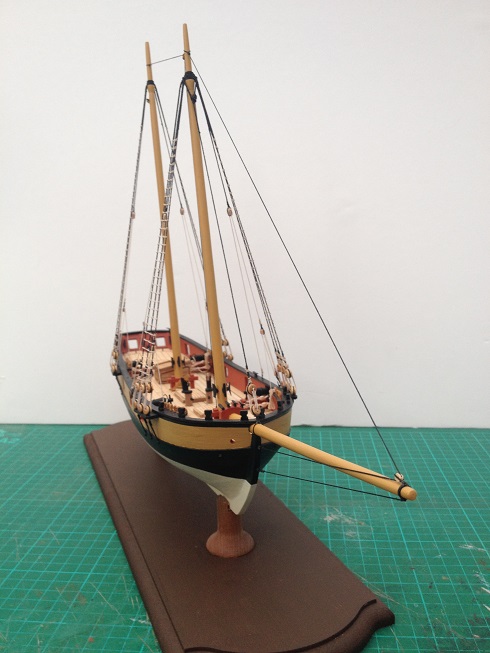
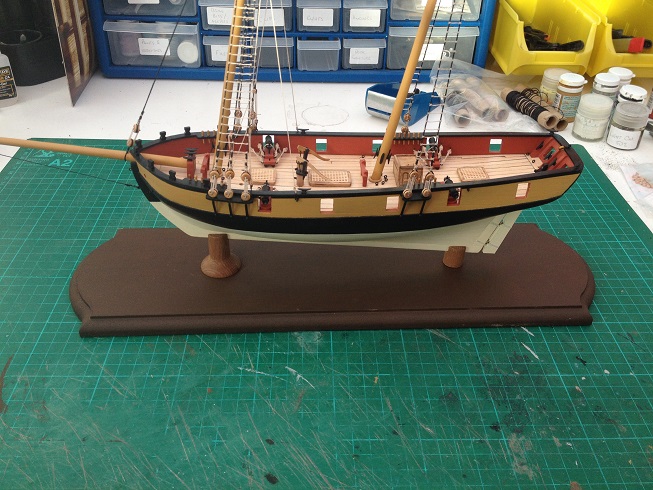
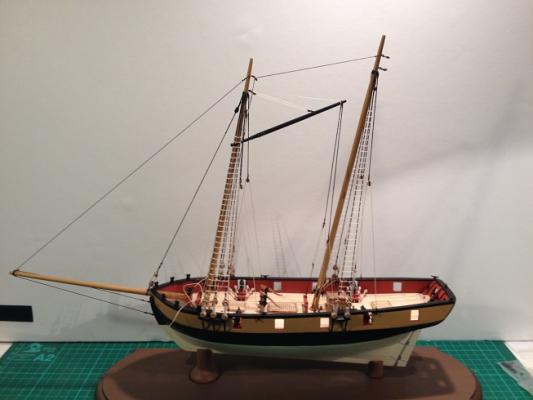
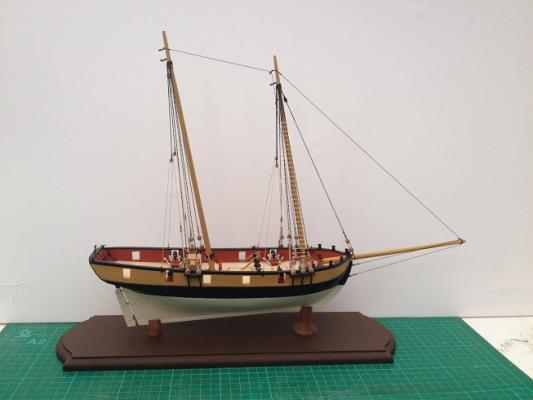
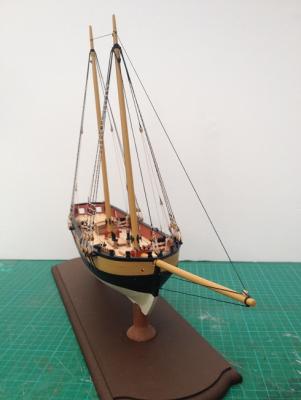
Finally received the base for the Ballahoo together with a couple of support columns. I've got a shorter support column on order as well due to the large gradient on the keel. In the meantime I have shortened the rearmost column to fit. Measured up the base and drilled a couple of holes to fit wooden dowel up through the columns and into the keel of the ship to keep it stable. The base itself was mdf so I have given it a couple of coats of paint. Currently it is a dark brown but I may well mix in some yellow ochre and try and match the colour of the columns. Also needs a gentle sand between coats and then a final varnish to keep it as good condition as possible. I may upgrade to a full properly finished base at some point.

- 226 replies
-
- 3
-
-
- ballahoo
- caldercraft
- (and 1 more)
-
How much was it mate?
-
Looks like every shroud is served to just above the futtock stave with the anterior shroud serving extending to below the stave.
- 1,144 replies
-
- 2
-
-
- snake
- caldercraft
- (and 1 more)
-
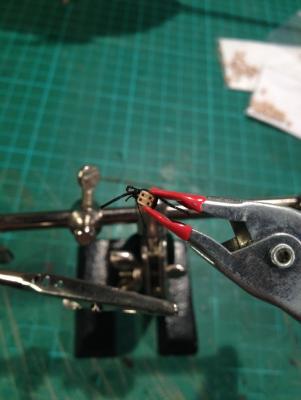
Hot tips....: File the ends perfectly flat and clean Ensure that the tension on the ring is holding the gap shut This will ensure that the silver will flow over the gap. If you're using flux/silver paste it will only require a second of heating. Anymore and the brass ring will itself melt.
- 1,039 replies
-
- 2
-
-
- ballahoo
- caldercraft
- (and 2 more)
-
Hopefully that will work for you. I will recommend buying a soldering pencil torch and silver silder paste. Get the learning curve out the way and it is dead easy to use and joint will be rock solid.
- 1,039 replies
-
- 1
-
-
- ballahoo
- caldercraft
- (and 2 more)
-
Great effort mate. Are you using soft solder with an iron or silver solder with a torch?
- 1,039 replies
-
- 1
-
-
- ballahoo
- caldercraft
- (and 2 more)
-
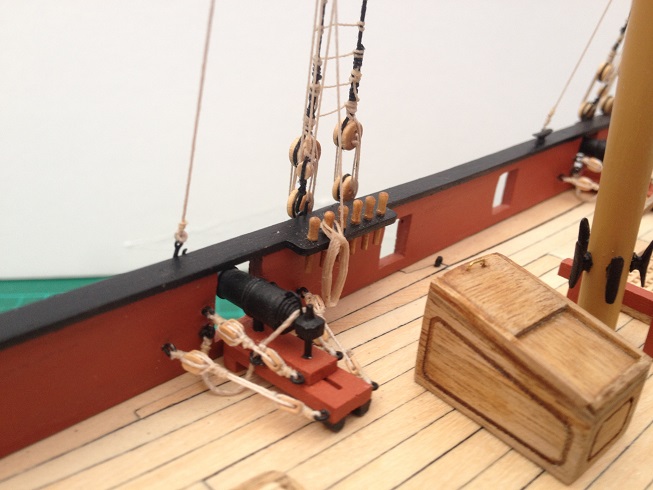
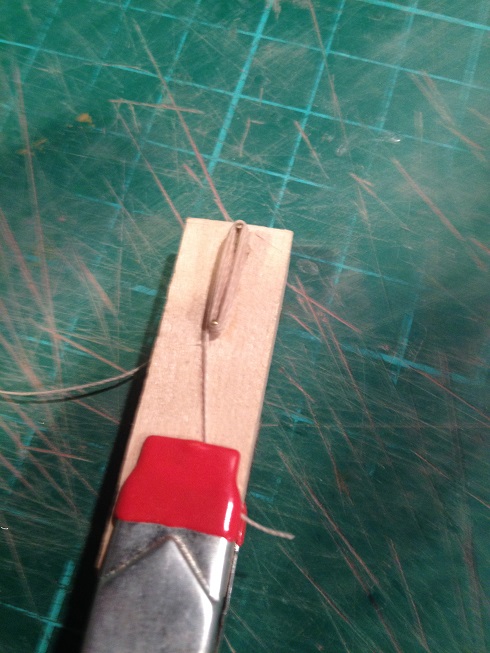
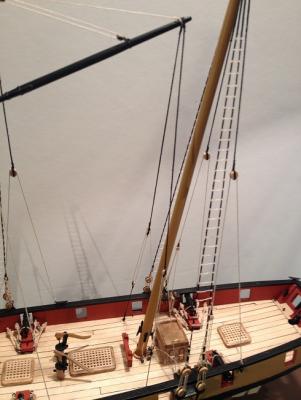
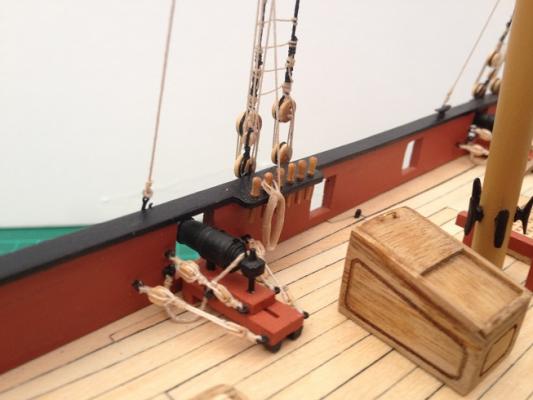
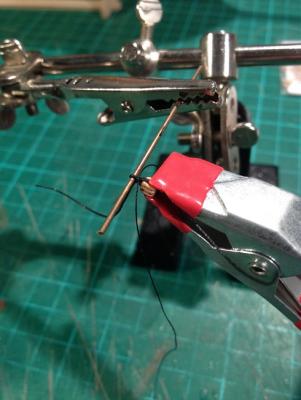
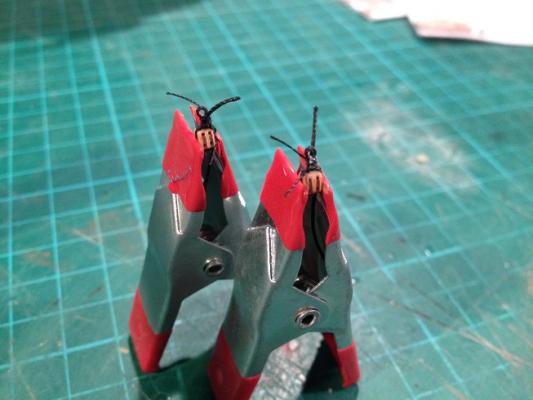
Another quick update from last night. Finished both foremast backstays and belayed to bulwark belaying pins. Finally finished the effect by adding a coil of rope. Formed the coil around two pins in a small block of wood and drowned in diluted PVA. Allowed to dry and trimmed off the ends. Then used the excess from the belayed line to form a loop which is threaded through the coil and back over the belaying pin. Used a clip to tension the lines in the correct position and again drowned in diluted PVA to fix in position. Really happy with the results!

- 226 replies
-
- 6
-
-
- ballahoo
- caldercraft
- (and 1 more)
-
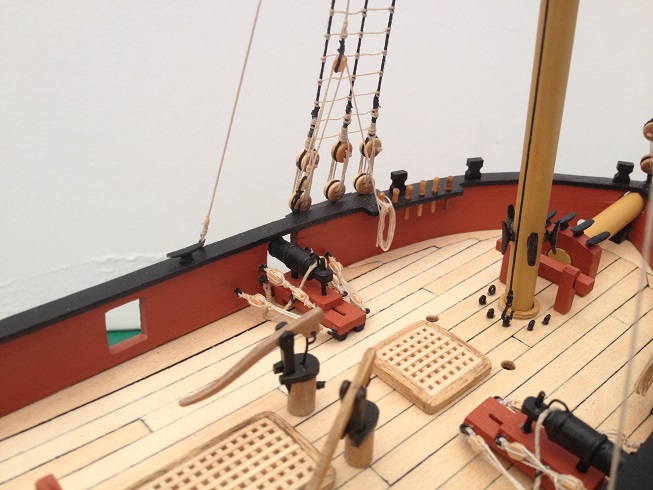
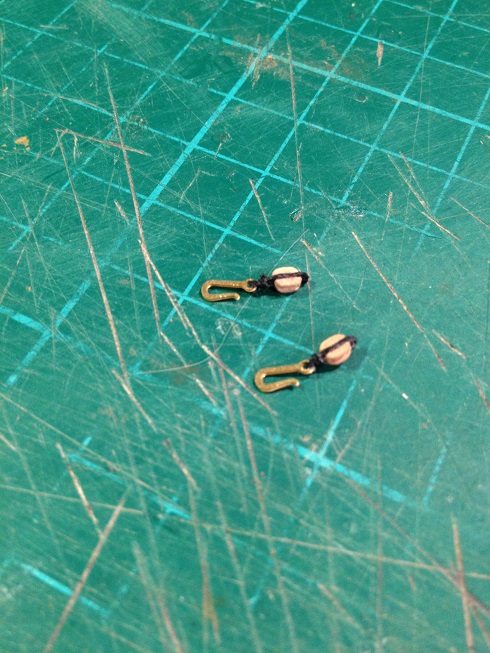
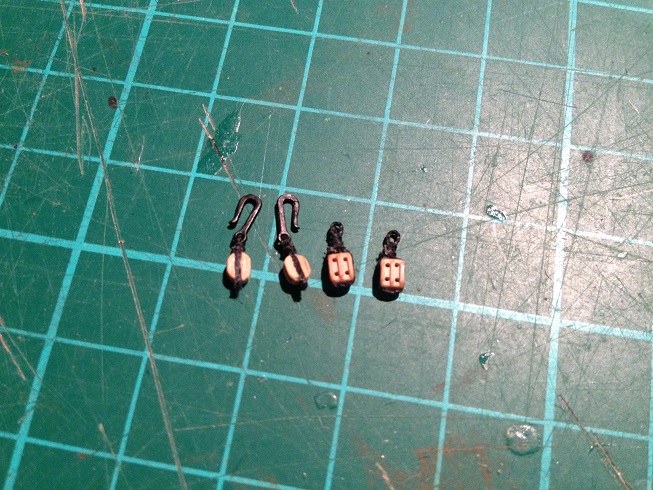
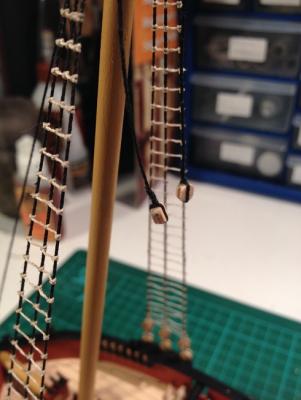
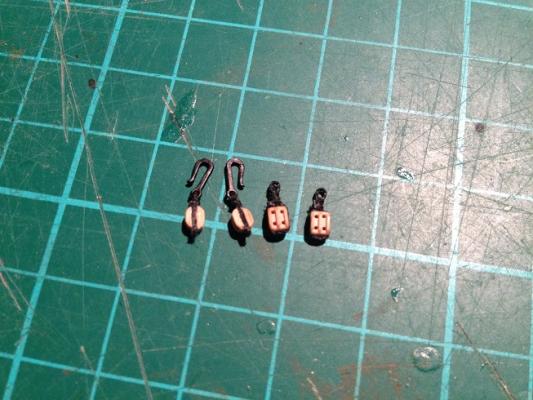
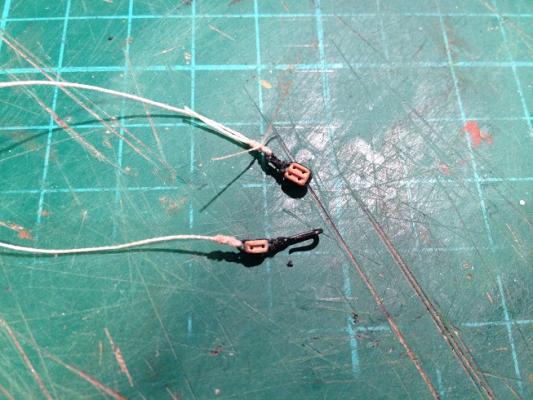
Hi all, Next update on the build has been start work on the two pairs of back stays, one each for the fore and main masts. Started off with the foremast by cutting two lengths of 0.75mm thread and serving around 5cm at the end of each line. As per the shrouds the served end is formed into a loop and a false splice used to fix in place. Added a 5mm block onto the end of the lines. There are a couple of other components to put together to create the backstay assembly: Block stroped to a rigging hook and; Double block stroped with a small loop to accept a second line. Lines are added to these blocks The whole assembly is then threaded up and a hook added to the end and all suitably tensioned. The free line is then belayed to a pin on the bulwark. Takes a little while but looks good. Need to repeat for the main mast.


- 226 replies
-
- 5
-
-
- ballahoo
- caldercraft
- (and 1 more)
-
Take a look at my ballahoo build as there's my section on creating deadeye strops. Hope it provides some tips.
- 1,039 replies
-
- 1
-
-
- ballahoo
- caldercraft
- (and 2 more)
-
Looking good Rob. Particularly impressed with the ceiling shot....