NenadM
-
Posts
3,254 -
Joined
-
Last visited
Content Type
Profiles
Forums
Gallery
Events
Everything posted by NenadM
-
 Just have no words and no breath ! Outstanding!
- 131 replies
-
- 5
-

-
- bottle
- the old man and the sea
- (and 1 more)
-
Cutty Sark by NenadM
NenadM replied to NenadM's topic in - Build logs for subjects built 1851 - 1900
Thanks, Peter. Rigging deadeyes WILL be ... hmm... interesting? Painful? Headache? Challenge? I can see my destiny even now ... deadeyes 3 and 4 mm dia... Micro works I have done, seems to be a good training for devil's rigging waiting in furure- 4,152 replies
-
- 8
-
-
- cutty sark
- tehnodidakta
- (and 1 more)
-
Do you dream frames? During coopering, when I first draw, make "rivets", cut and glue over 4000 pieces, I meet a pain itself. Again, when making planking strips for decks Your work is more delicate, and at the same time, much harder, demanding much more patience How more to go?
-
Cutty Sark by NenadM
NenadM replied to NenadM's topic in - Build logs for subjects built 1851 - 1900
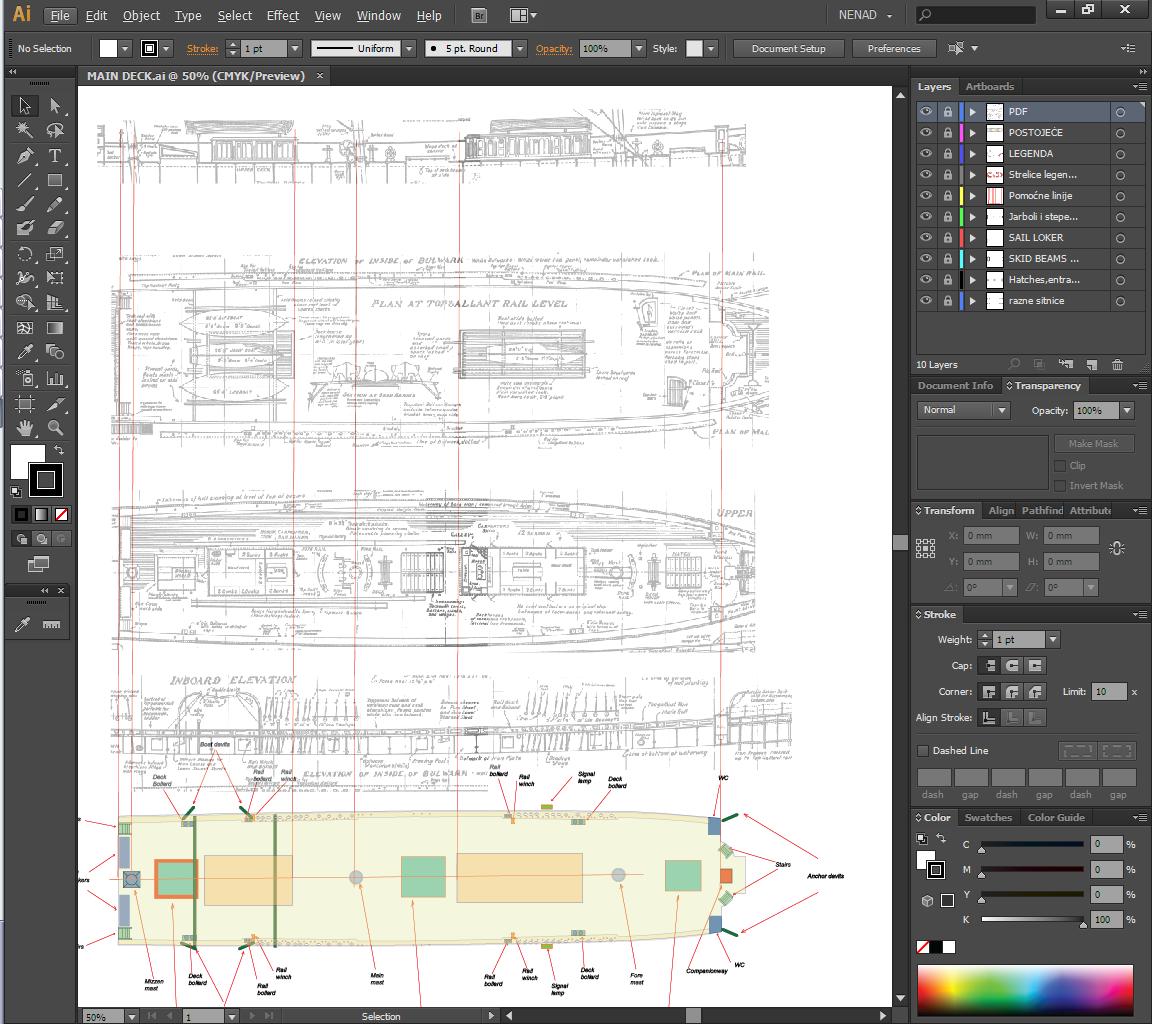
Gerhard, I use Illustrator, regular program from Adobe family. Same results you can get with Corel, CAD or any other drawing program in which you can put pdf jpg bmp etc etc raster image in one layer, and draw and edit vector drawings over - in another layers Long ago I found on internet ... hmmm... scaned C-plans, pretty blured, saved as *.pdf files, imported them to Adobe acrobat, enlarged them to my scale, and have got more blur and distorsion... So, I am, on some way, forced to make my own working drawings- 4,152 replies
-
- 7
-
-
- cutty sark
- tehnodidakta
- (and 1 more)
-
Cutty Sark by NenadM
NenadM replied to NenadM's topic in - Build logs for subjects built 1851 - 1900
Playing with AI continues ...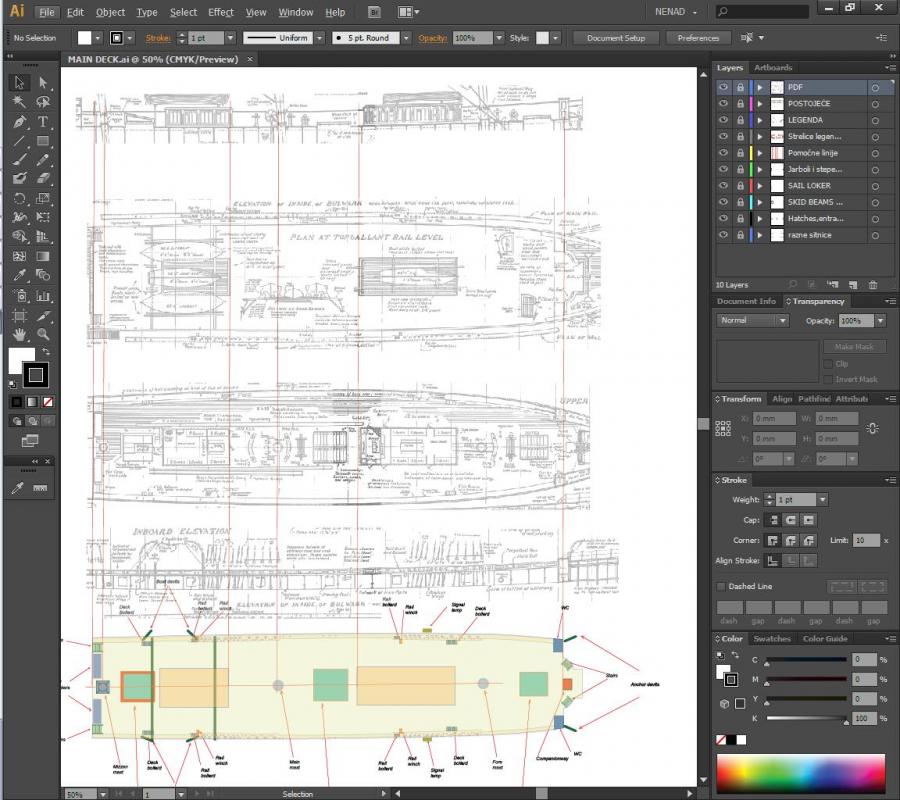
- 4,152 replies
-
- 10
-
-
- cutty sark
- tehnodidakta
- (and 1 more)
-
Cutty Sark by NenadM
NenadM replied to NenadM's topic in - Build logs for subjects built 1851 - 1900
Thank you Patrick for nice words and encouragement Hey Gerhard, one of the Caps was a bada ... it is interesting to read a history of this ship My fingers are still attached, not breaked. But it was pretty crowded during pulling down steer-box in this tight space- 4,152 replies
-
- 6
-
-
- cutty sark
- tehnodidakta
- (and 1 more)
-
Enormous time for something smaller than a coin .... Sounds familiar ... Our destiny Briliant work, Mark !
-
Cutty Sark by NenadM
NenadM replied to NenadM's topic in - Build logs for subjects built 1851 - 1900
I`ll turn it to right direction, and maybe add some rope ... if I could produce enough thin one- 4,152 replies
-
- 6
-
-
- cutty sark
- tehnodidakta
- (and 1 more)
-
Cutty Sark by NenadM
NenadM replied to NenadM's topic in - Build logs for subjects built 1851 - 1900
You are right, Carl, what was I thinking about? Here is right posituon on next photo - look at left down corner Steersman was primary target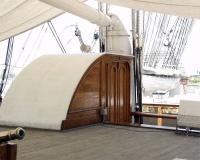
- 4,152 replies
-
- 6
-
-
- cutty sark
- tehnodidakta
- (and 1 more)
-
Cutty Sark by NenadM
NenadM replied to NenadM's topic in - Build logs for subjects built 1851 - 1900
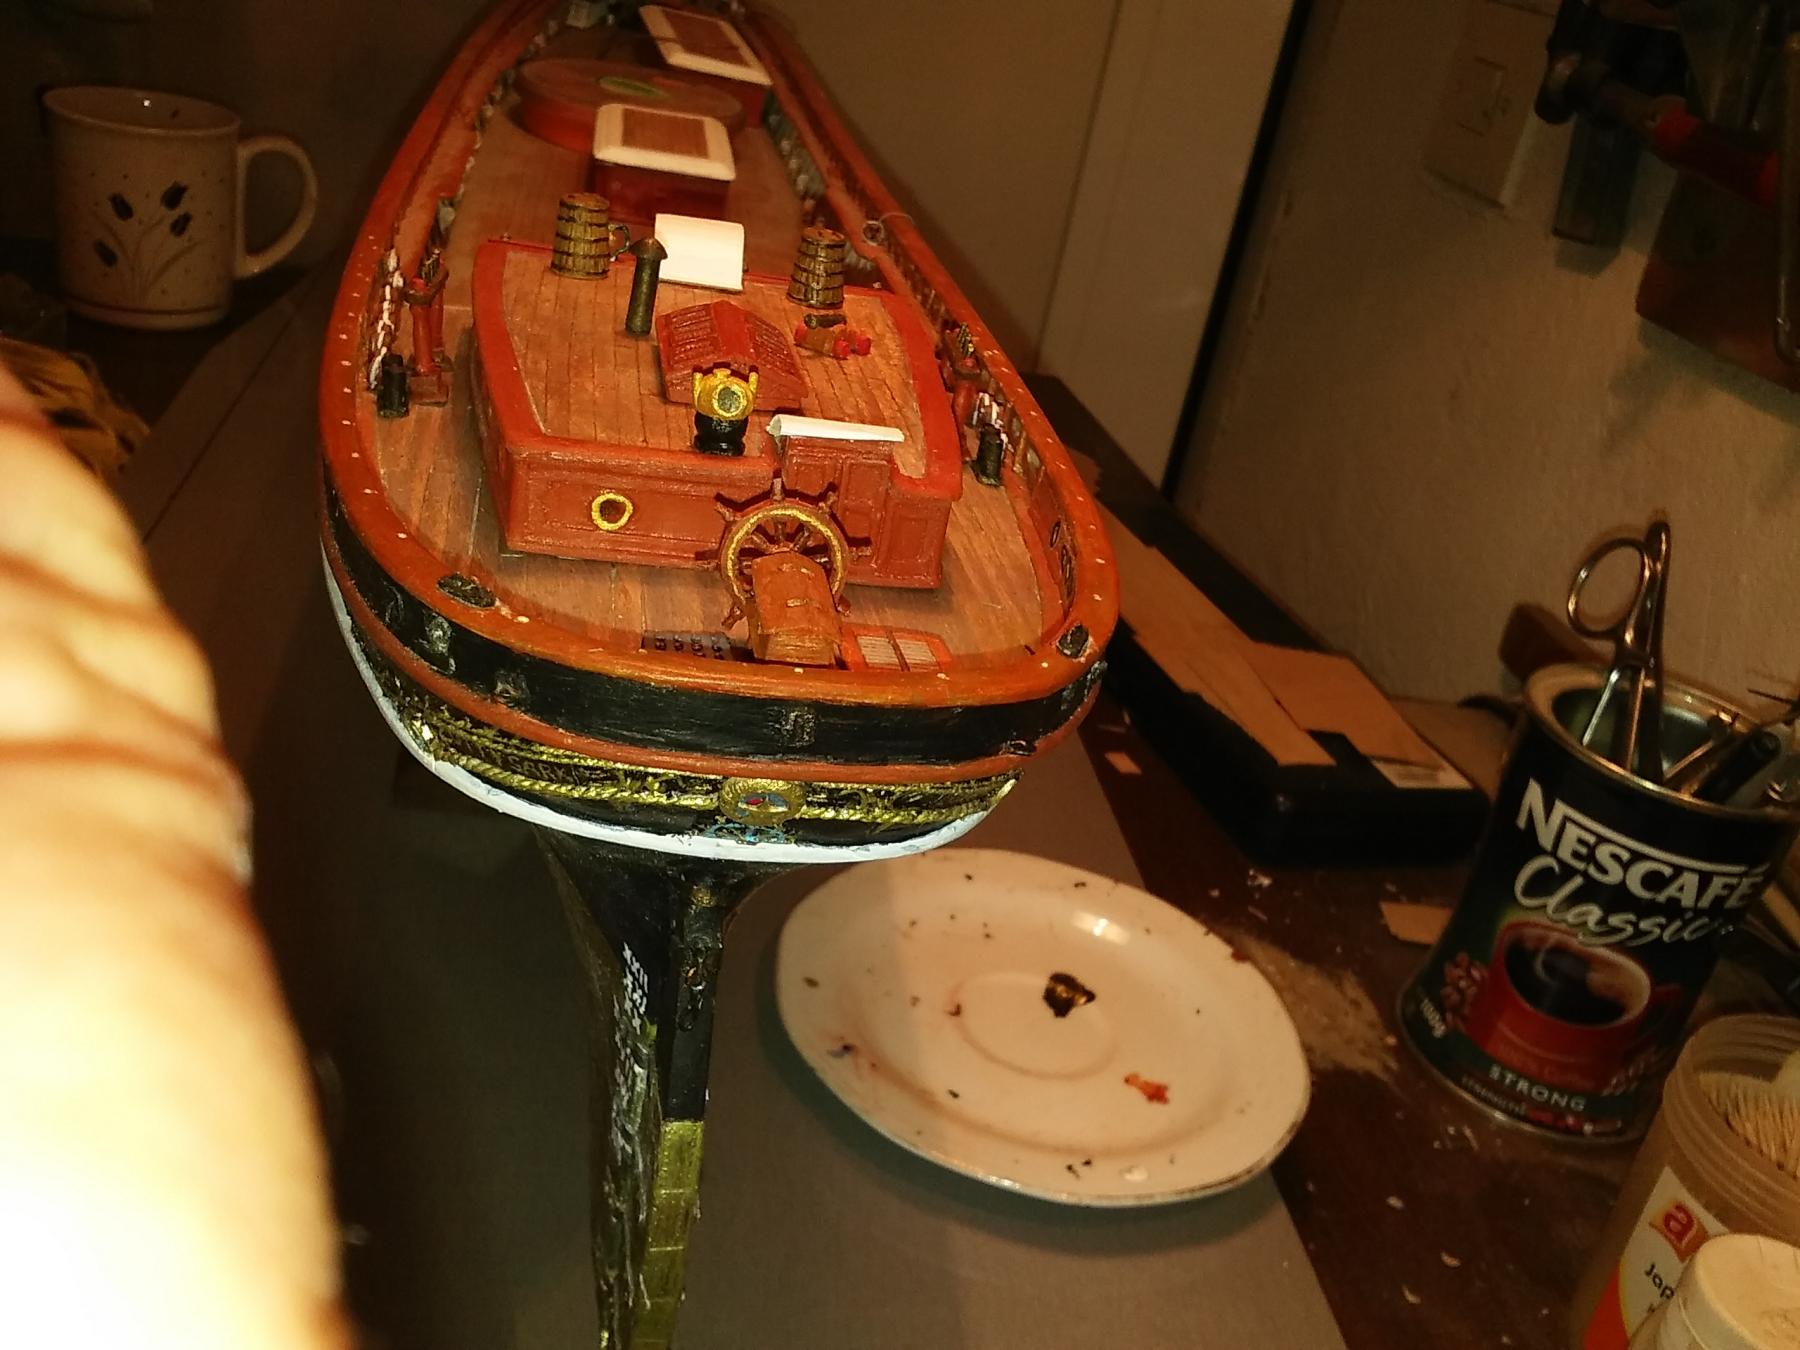
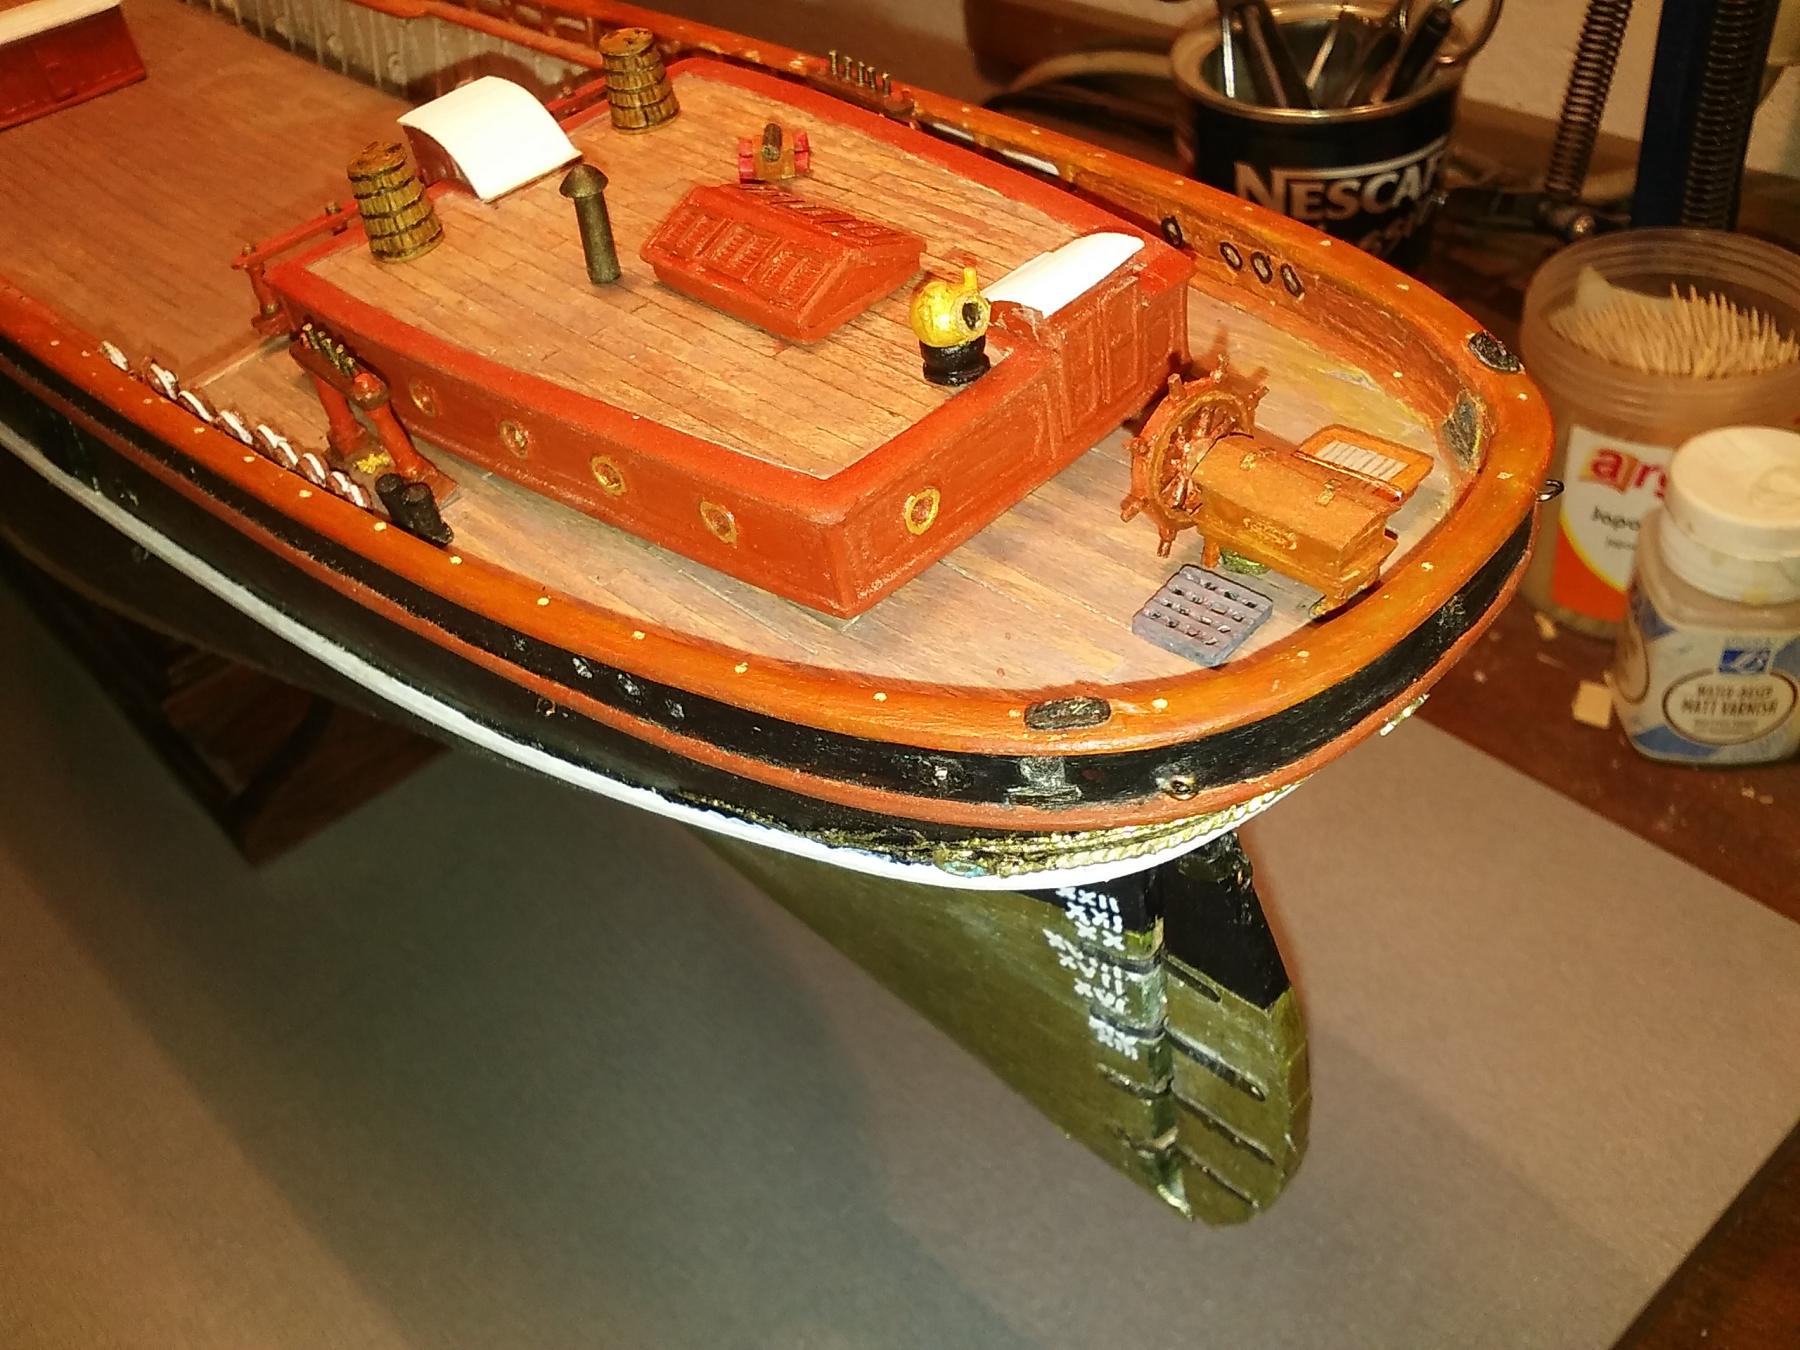
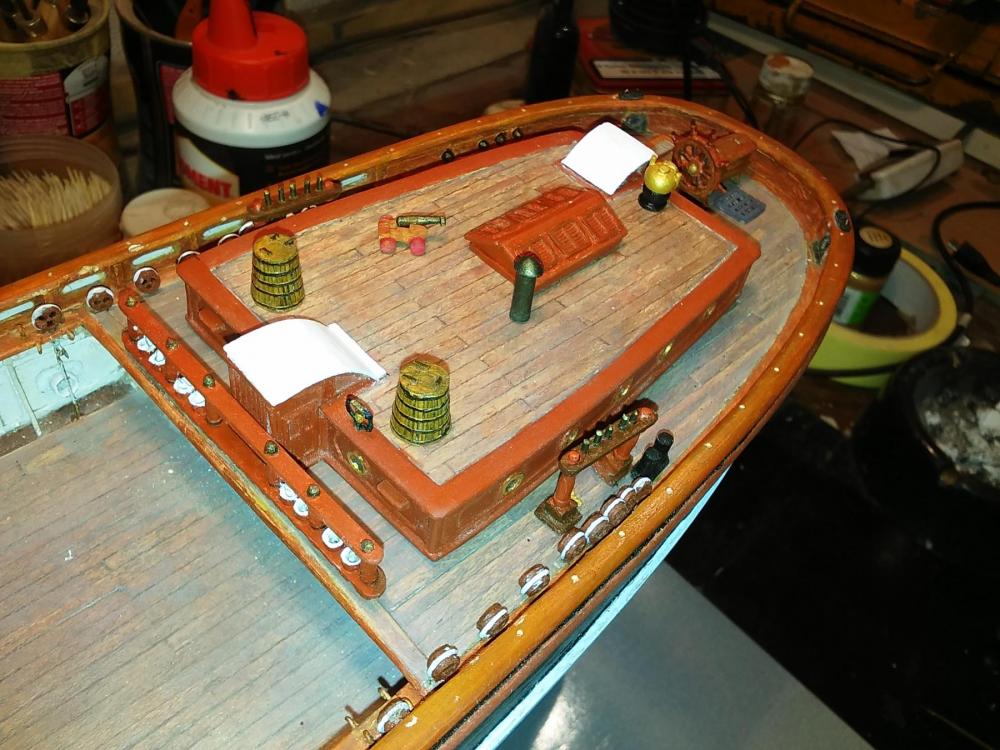
Lego game finished. Aft-deck content on place Price for unexperience payed. This time I forgot to take care about latitudinal deck sloop, which I was very proud when I succeded to make. So, I had to do some gymnastic and cheating, to try to hide little gasps that apeared. Lesson learned. For next build. There will be a lot over to mask this 0,5 mm wide gasps All in all, not bad, I am satisfied with results Let's go to main deck!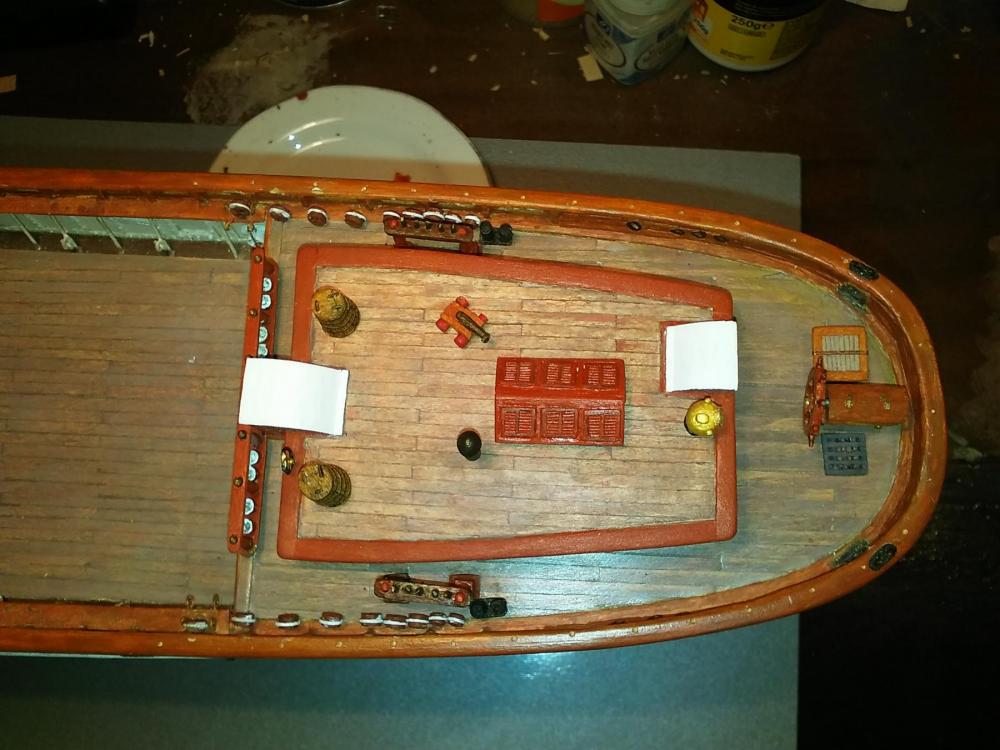


- 4,152 replies
-
- 17
-
-
- cutty sark
- tehnodidakta
- (and 1 more)
-
Cutty Sark by NenadM
NenadM replied to NenadM's topic in - Build logs for subjects built 1851 - 1900
Thanks Denis In mean time, HotHead go back to Novi Sad, Princess today started her four-day lasting trip to Zagreb, Croatia, and I`ll be alone at weekend and couple of days. Today is Friday, last working day, not much office job at 14h, and, waiting for evening to come when is my usual model time, I started with preparing to attack main deck. First step is to locate and identify all main deck contents on C-plans, and huge research job - to review and analyze all available photos from my collection ( about 700 photos, among them 245 photos of main deck). I returned to my old helping friend, Adobe Illustrator, make new file with "paper" size 500x500 mm, copied in 1:1 scale crops of main deck from pdf CS plans sheet I have, and joined them in first layer as transparent background, and started drawing sketch of main deck and existing content in second layer. locked this two layers, and opened a new layer for each part I identify. This method will help me not to forget something, similar as I have done preparing for front and aft deck Notice: Applying this method with drawing masks over original drawings, and moving masks around, even when mirror them for another side of ship ( e.g. rails with dead-eyes) I noticed that Campbell drawings are not 100% symmetrical and consistent, and this can be warning point for those modelers who build strictly to C-plans. For my purpose, I trimmed layers just to represent as closely as possible main deck space For now, I noticed on C-plans many nice details to be added which are not presented on Her today ( e.g stunt sail yards, Spare Hermaphrodite Spars, Topsail yard ... ), also get inspiration from some old photos (some chains lay on deck, etc) Here is beginning Precise positioning of the individual parts and the analysis of their appearance and structure follows later, when the time comes to make each individual of them So, work will continue on two synchronous fields: In shipyard mounting aft-deck content followed with cleaning of main deck and after that installation of side dead eyes and pins. in office on PC - as parallel process - completing sketch of main deck.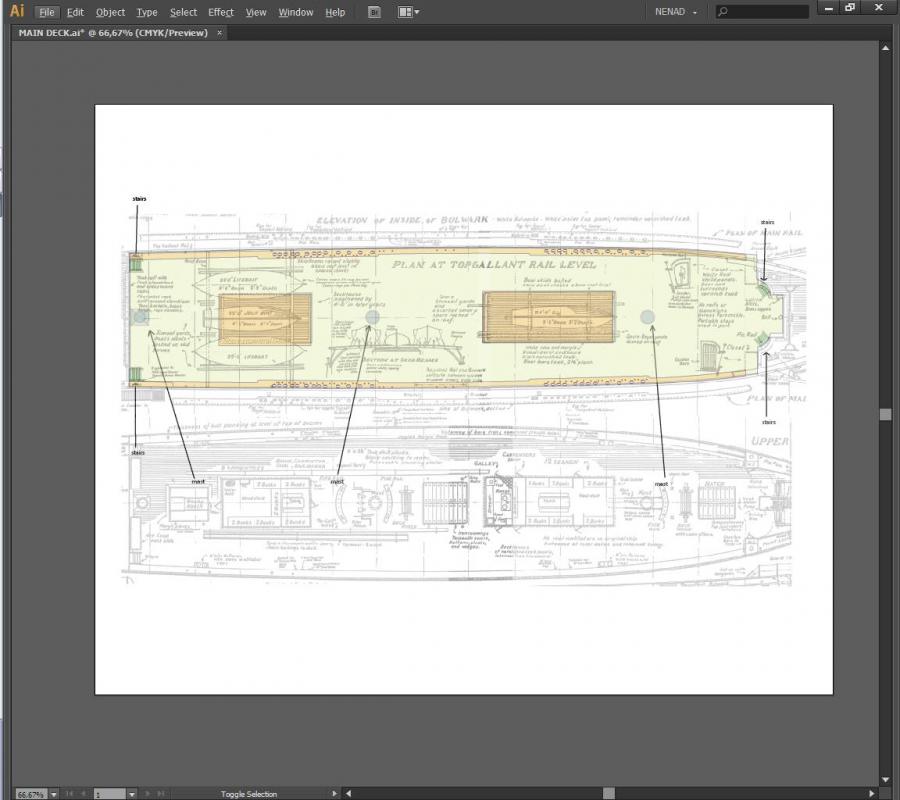
- 4,152 replies
-
- 9
-
-
- cutty sark
- tehnodidakta
- (and 1 more)
-
You are just unbelievable man! What a drama you are making !
- 131 replies
-
- 7
-
-
- bottle
- the old man and the sea
- (and 1 more)
-
Cutty Sark by NenadM
NenadM replied to NenadM's topic in - Build logs for subjects built 1851 - 1900
So do I Mark, but there is one thing called "social life" which spoiled my plans ... There is no exactly idea how to arrange them, considering C-plans and present stage are a bit different, and I made some details which are not present now, also made some details which are not presented in C-plans. Something between it will be ... a pair of dry tests will show the way- 4,152 replies
-
- 6
-
-
- cutty sark
- tehnodidakta
- (and 1 more)
-
Hi hi hi hi... when post from phone and have not spelling checker ... we are talking about beer or bear ? I made THIS mistake in one of my posts ... suppose people who read fall under table laughing Looking photos you posted ... are you sure it is your first ?
-
There are a lot "coopering" photos of CS. That layer goes over planking, and on this point you will meet color question No 1: on CS is used, so called "Myntz" metal, which has more yellow tone than pure cooper color. But, you can not find Myntz foil on market ... Also test for you to recognize how big are your ambitions with your model: rivets? 4-5000 strips with rivets? Veneer for second layer? 1-2mm wide strips of veneer? How long? Colored hull or natural wood? Wellcome to the yellow brick road, and remember - all is fun and joy! Btw, nice scale for a lot of details Sorry for my bad English if I use or write unproper word
-
Wellcome to CS fleet! Just echo Popeye's words of wisdom: research! And patience! And enjoy! Good start with fine lines of hull. Keep on posting!
-
Lovely work Denis. We have to be good to our keyboards, and to feed them from time to time. My keyboard likes coffee. Real coffyboard
-
Cutty Sark by NenadM
NenadM replied to NenadM's topic in - Build logs for subjects built 1851 - 1900
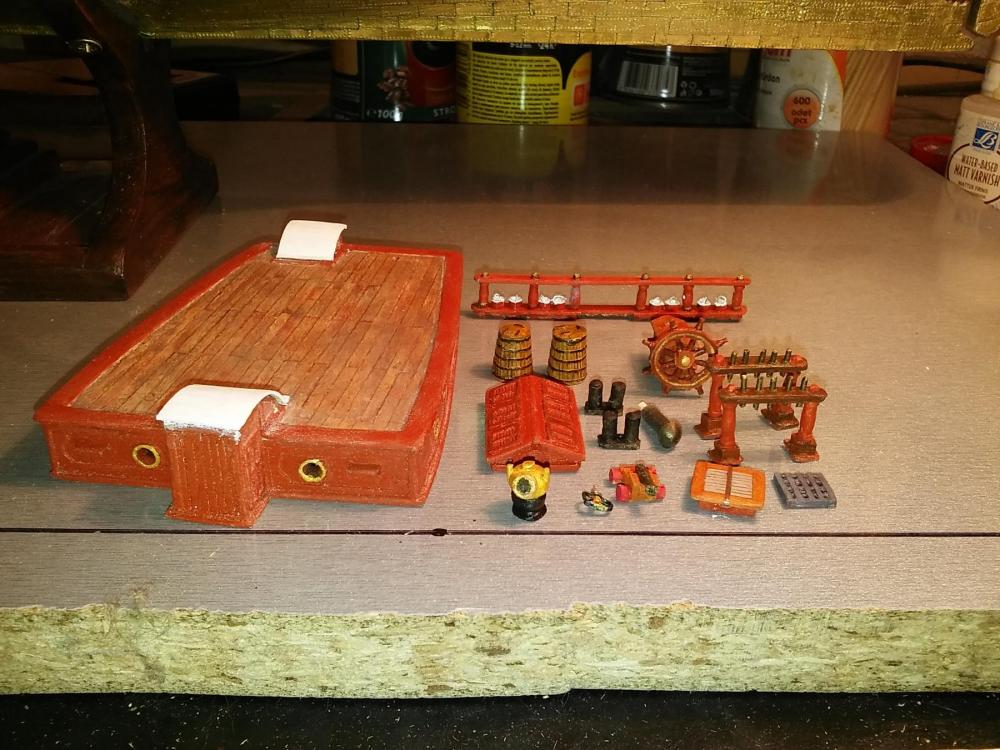
Huh, almost to forget chimney !!! And finaly, all content of after deck ready for mounting A lot, when you put them together. Some color corrections, and mounting can start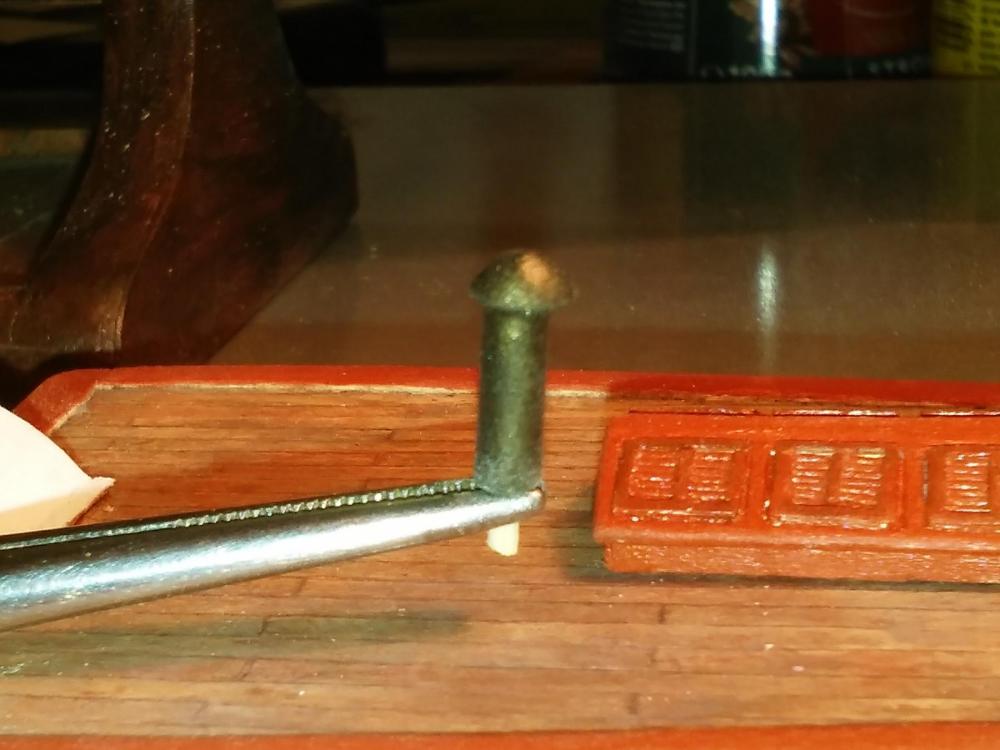
- 4,152 replies
-
- 14
-
-
- cutty sark
- tehnodidakta
- (and 1 more)
-
She begin to look as proud lady, just as it has to be. She get her dress, and She is satisfied. As every lady Keep on with a good work
-
Very very well done, my friend. It is a pity you did not show photos of "road to" some parts, sometimes it can be interesting how you resolve particular "how to" issue Keep on good work Nenad
-
Cutty Sark by NenadM
NenadM replied to NenadM's topic in - Build logs for subjects built 1851 - 1900
Life is to short, Denis, and this planet is too big to see everything we want. Probably I`ll never see Grand Canyon, Monument Valley, Niagara Falls, and thousand nice places over the ocean. Generally I agree with you about chains etc... but just could not find appropriate piece. let it be as it is, maybe I`ll find better solution later Thanks for nice words, Piet. Those days I was occupied with another usual and no-usual stuff, family meetings, spending time with kids ... so I was not at workshop. Today Hothead go back to Novi Sad, and I hope to return in my regular path Hello, Pavel, it was a long time I didn`t see you here. Also in your logs. It is great that you returned to us.- 4,152 replies
-
- 7
-
-
- cutty sark
- tehnodidakta
- (and 1 more)
-
Cutty Sark by NenadM
NenadM replied to NenadM's topic in - Build logs for subjects built 1851 - 1900
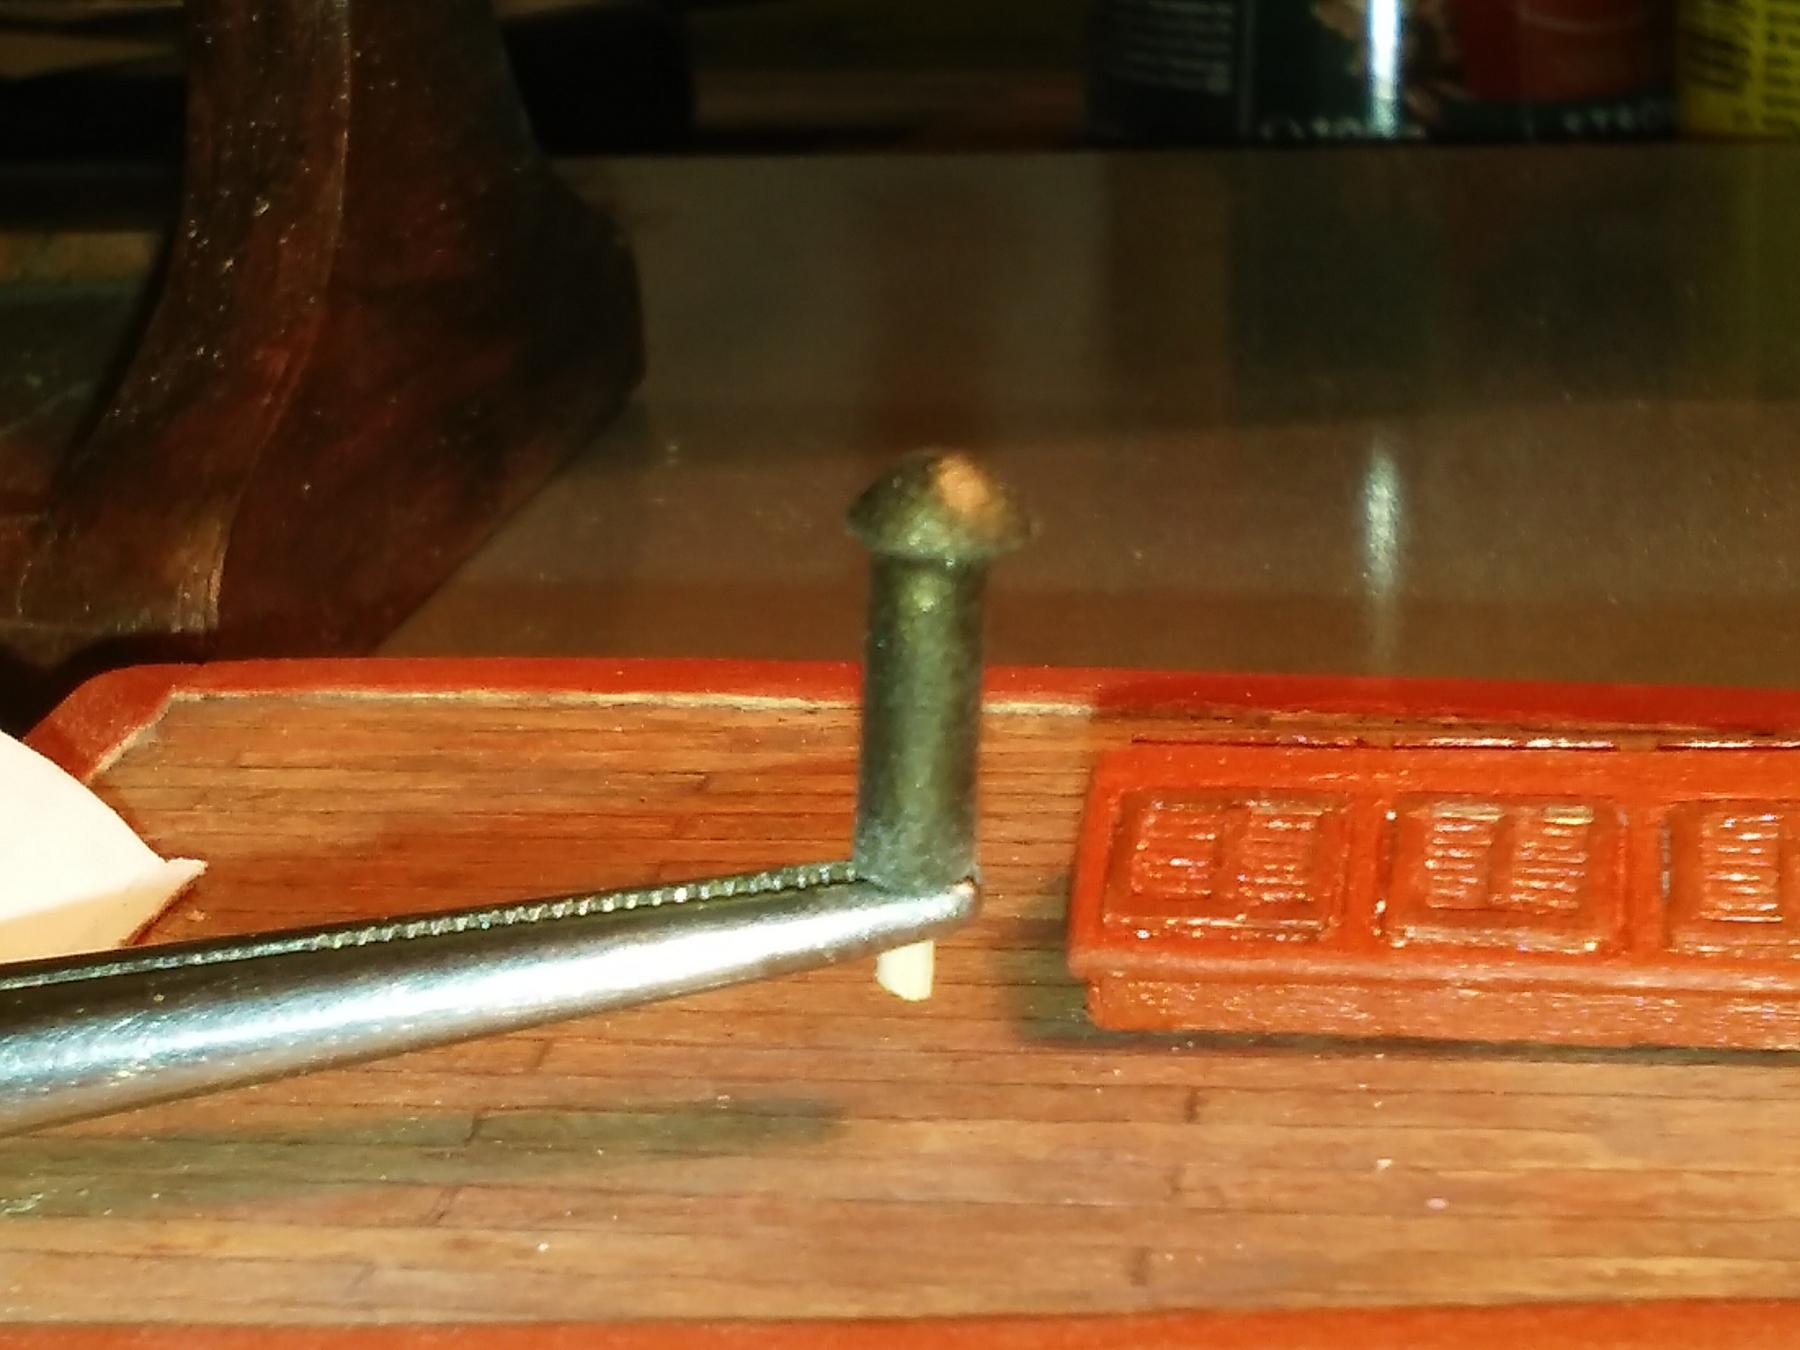
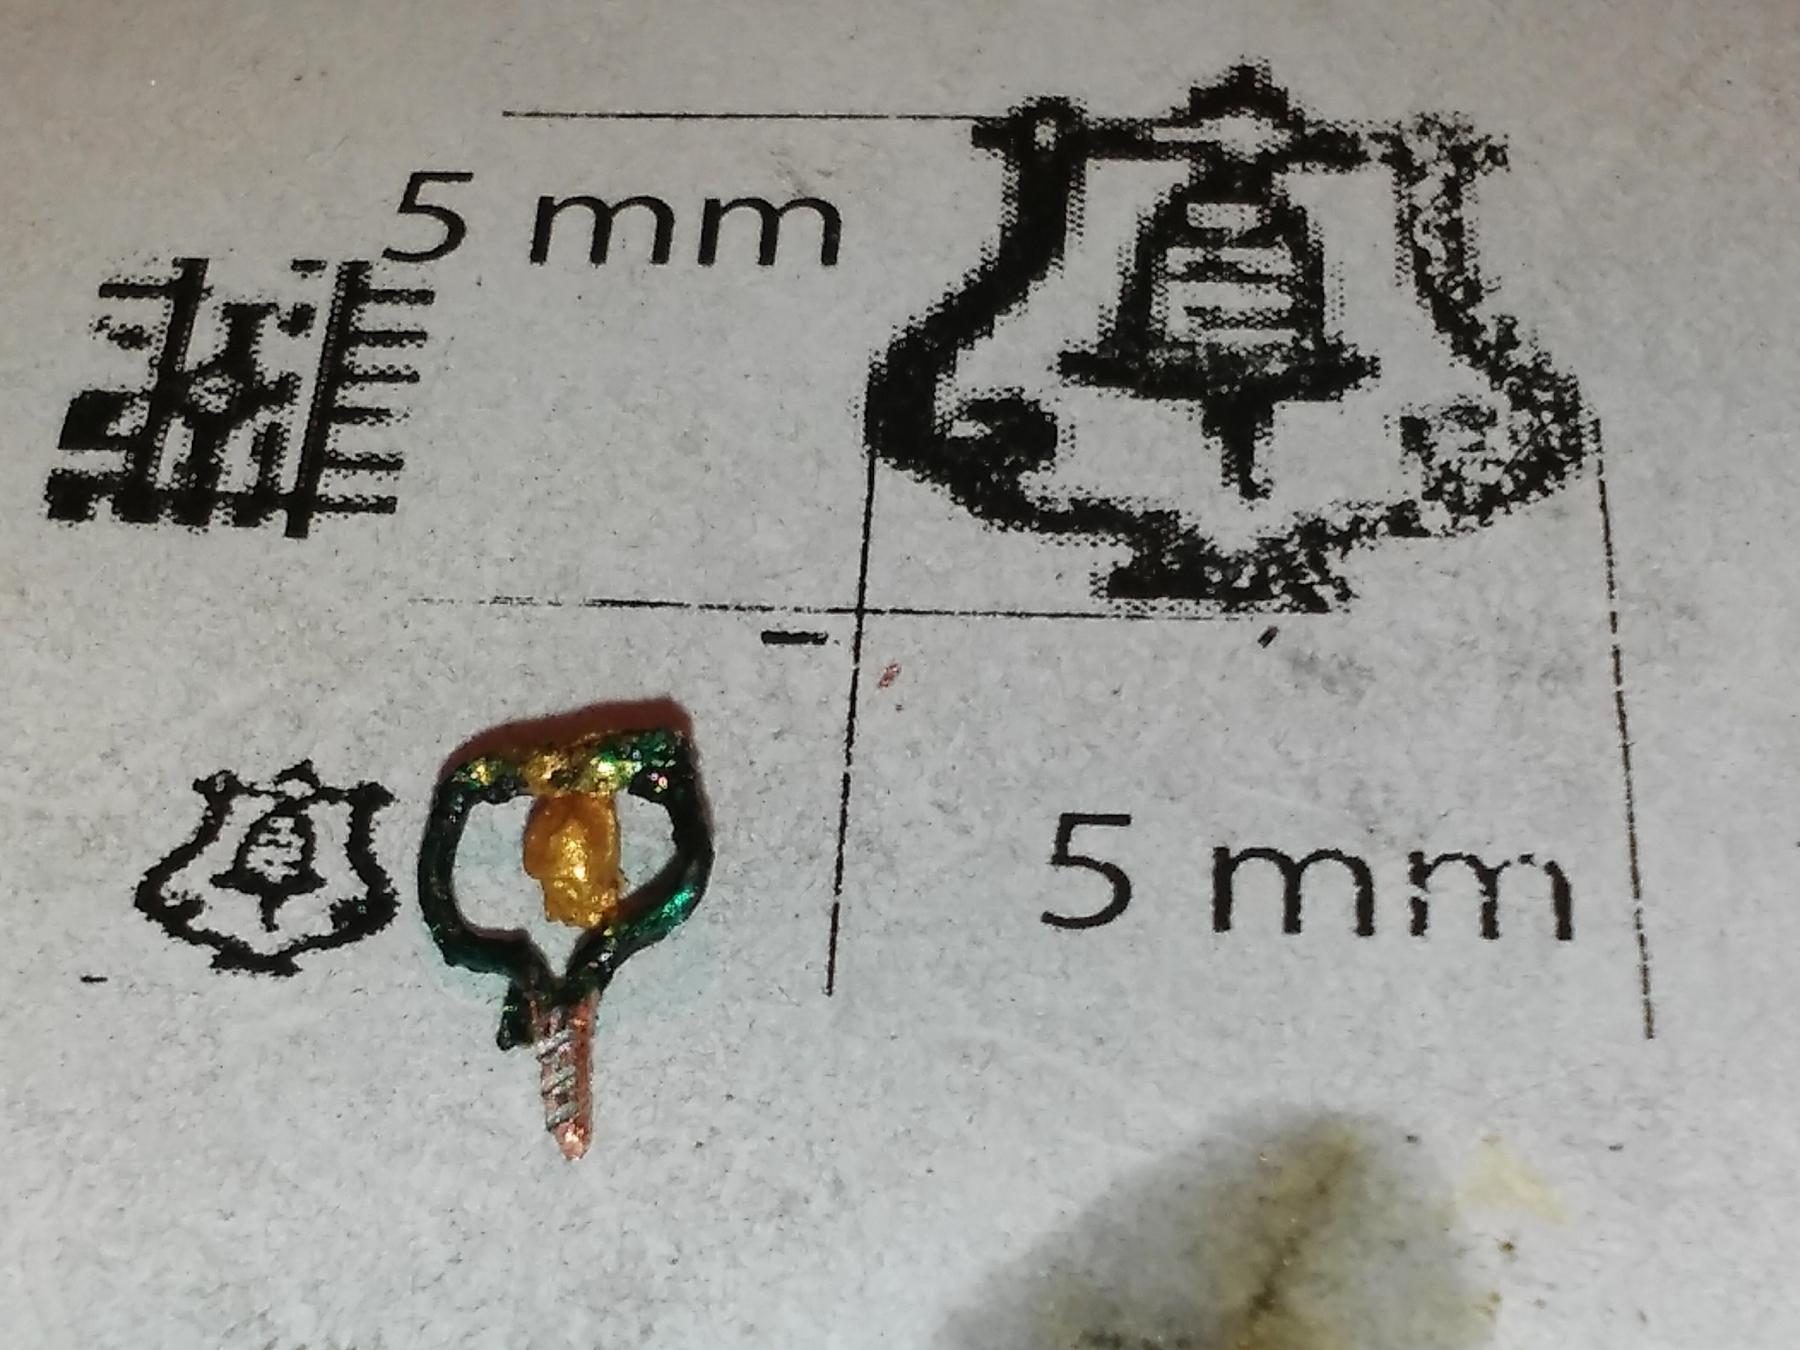
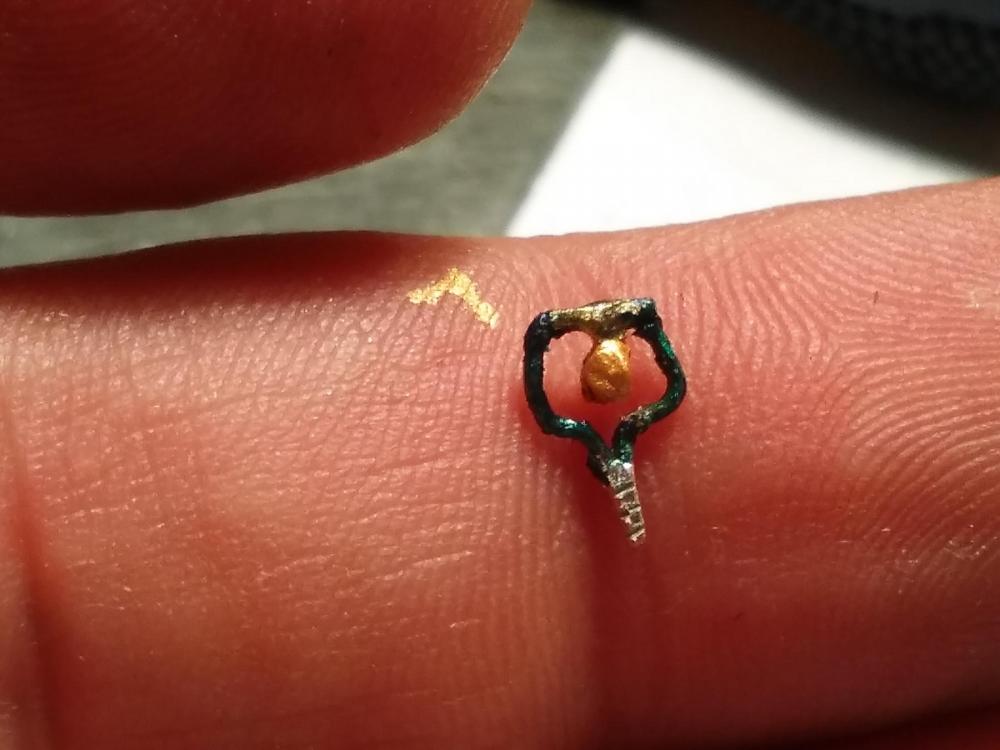
Time to move on Last detail for aft deck - bell. This bell does not exist in present stage, but it exist on C-plans, and I want it badly. ( "details overloading strategy") Considering dimensions in scale is only 5x5 mm, after several attempts I concluded that I just can not make real bell 2mm dia, and decided to make something which will look as a bell from airplane Frame is made from allmighty telephony Cu wire, and bell is drop of gold acrylic paint applied with toothpick top, dot by dot So, last aft-deck detail is finished, and next move is to glue and fix aft-deck content on place with some corrections. Then I'll move to main deck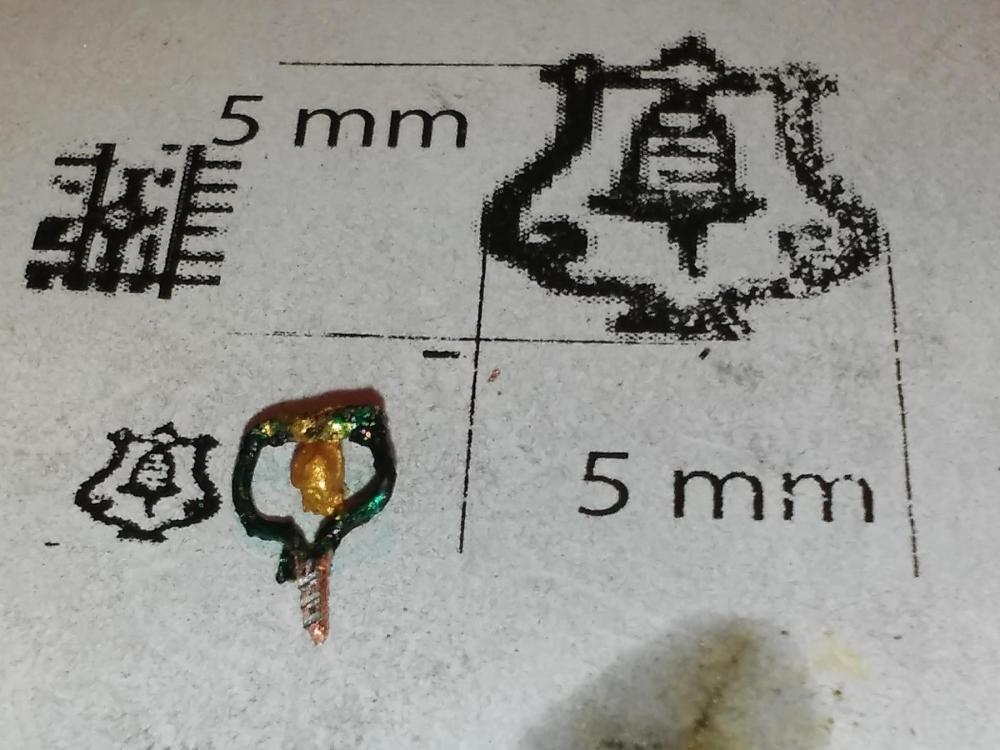

- 4,152 replies
-
- 12
-
-
- cutty sark
- tehnodidakta
- (and 1 more)
-
Very very nice