SaltyScot
-
Posts
871 -
Joined
-
Last visited
3 Followers


About SaltyScot

- Birthday 10/03/1961
Recent Profile Visitors
1,914 profile views


-
 Canute reacted to a post in a topic:
Columbia 1835 by Glen McGuire - 1/400 - BOTTLE - Steam Packet
Canute reacted to a post in a topic:
Columbia 1835 by Glen McGuire - 1/400 - BOTTLE - Steam Packet
-
Keith Black reacted to a post in a topic:
Columbia 1835 by Glen McGuire - 1/400 - BOTTLE - Steam Packet
-
 Wow, that was some intricate work, Glen and you pulled it off with alacrity, sir It is actually quite exciting seeing this come together.
 -
SaltyScot reacted to a post in a topic:
Lynx by Gaffrig - Panart - Scale 1:62
-
ccoyle reacted to a post in a topic:
Endeavour J class by TerryPat - Amati - 1:80
-
Canute reacted to a post in a topic:
Columbia 1835 by Glen McGuire - 1/400 - BOTTLE - Steam Packet
-
 Glen McGuire reacted to a post in a topic:
Columbia 1835 by Glen McGuire - 1/400 - BOTTLE - Steam Packet
Glen McGuire reacted to a post in a topic:
Columbia 1835 by Glen McGuire - 1/400 - BOTTLE - Steam Packet
-
Gaffrig reacted to a post in a topic:
Lynx by Gaffrig - Panart - Scale 1:62
-
Keith Black reacted to a post in a topic:
Columbia 1835 by Glen McGuire - 1/400 - BOTTLE - Steam Packet
-
Admiral Rick reacted to a post in a topic:
Endeavour by Ellie_ - Amati - 1:80
-
I have a 3D printer here. I might just see if I can't design and print the deadeyes for my build. You are right, the kit supplied ones are too big and bulky.
-
TerryPat reacted to a post in a topic:
Lynx 1812 by SaltyScot - Manuta-Panart - 1:62 - building as Mosquidobit
-
You are a braver man than me, sir. It turned out nicely though and the dowels will ensure it sits together correctly. There will never be a time in my life when I build something as miniscule as this (I doff me cap to ye sir for yer skill) but that tip with the laminated wood pieces and how you got the color stripes so accurate was awesome. Work smarter not harder as they say
-
 SaltyScot reacted to a post in a topic:
Columbia 1835 by Glen McGuire - 1/400 - BOTTLE - Steam Packet
SaltyScot reacted to a post in a topic:
Columbia 1835 by Glen McGuire - 1/400 - BOTTLE - Steam Packet
-
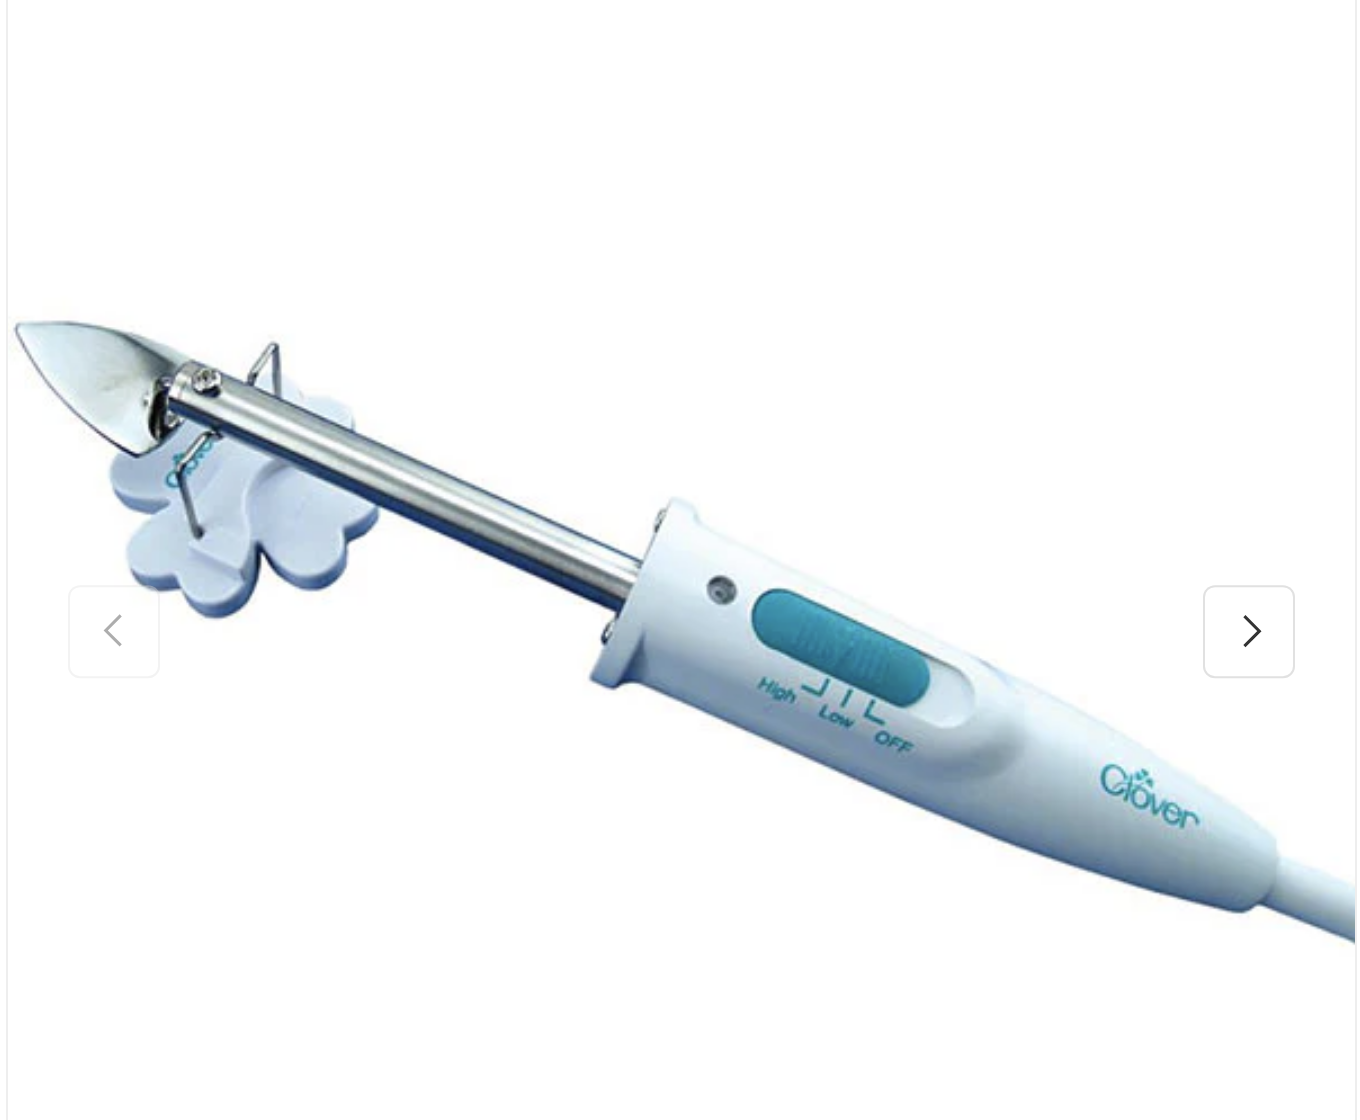
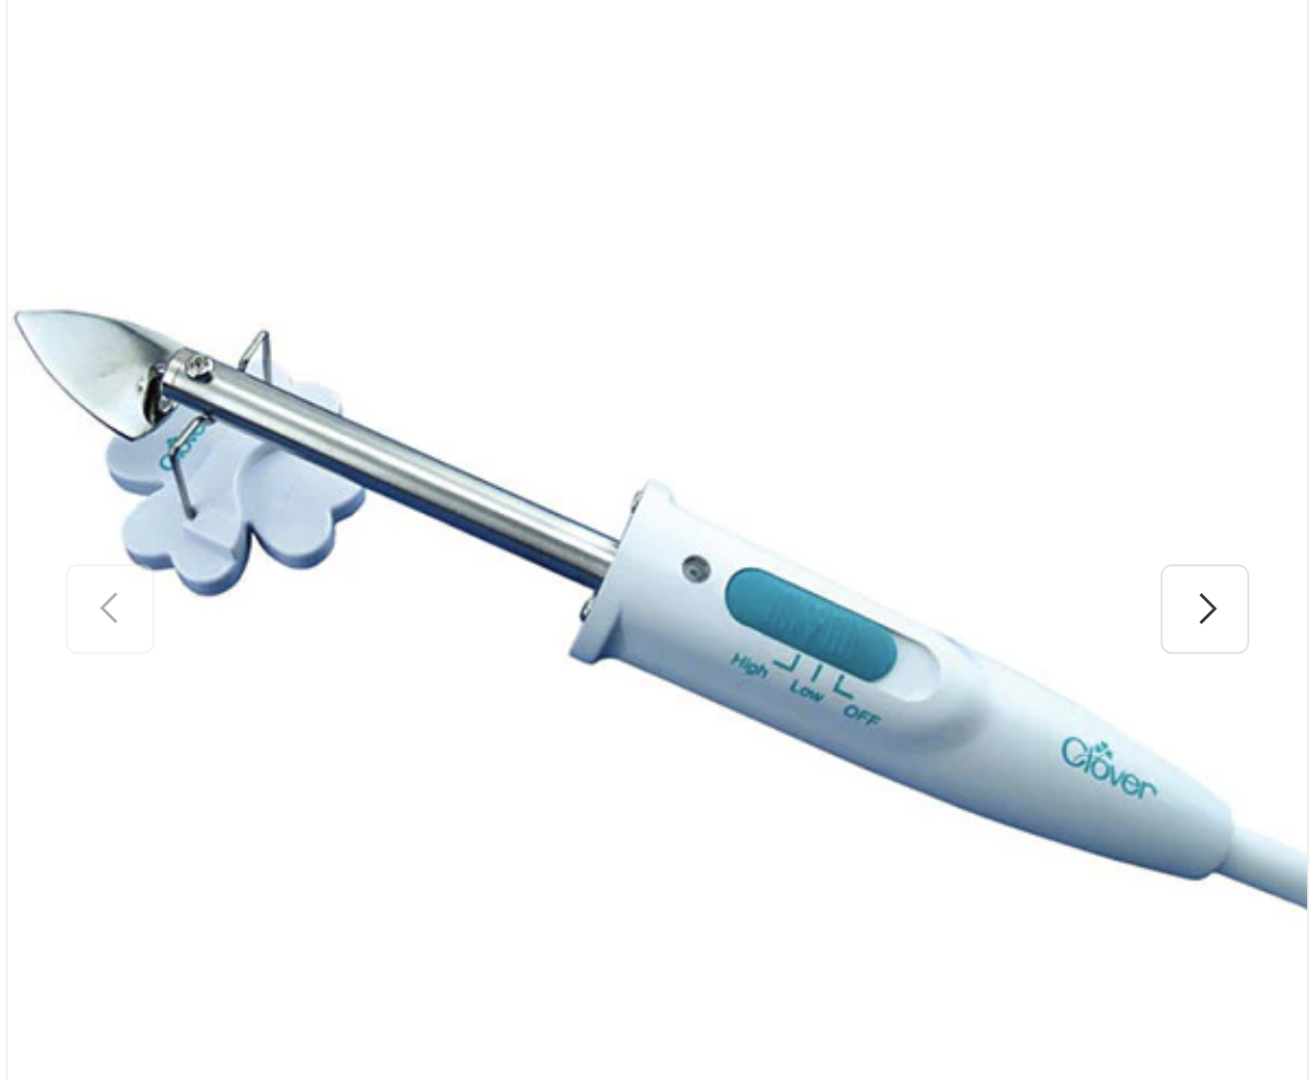
I use one of these mini quilting irons to bend my planks: It was recommended to me by @Dr PR and now I don't know how I got along without it. Yopu soak the planks, as usual, then my method is to superglue one end in place, just the tip, then run the hot iron along the wet plank while holding it against the hull. The glued tip prevents it from slipping. The plank will bend nicely this way and the iron dries it out so that you can use normal wood glue to hold it in place afterwards. If you so wish, you can apply superglue to the other tip as well (once the plank is coated with wood glue) and this will hold that end down nicely. When using that superglue, correct placement of the plank is critical. it adheres very fast.
-
 SaltyScot reacted to a post in a topic:
Lynx by Gaffrig - Panart - Scale 1:62
SaltyScot reacted to a post in a topic:
Lynx by Gaffrig - Panart - Scale 1:62
-
Admiral Rick reacted to a post in a topic:
Endeavour by Ellie_ - Amati - 1:80
-
This method works well with super glue but not the normal wood glue. It does not adhere when the wood is wet.
-
SaltyScot reacted to a post in a topic:
Endeavour by Ellie_ - Amati - 1:80
-
SaltyScot reacted to a post in a topic:
Endeavour by Ellie_ - Amati - 1:80
-
When I did this part I literally laid the planks in very hot water for a few hours to ensure they were thoroughly soaked. I had not cut them exactly to length at that point, they are much easier to cut with a good Exacto blade if they are wet. I glued these guys in place with super glue because, as you said, they do tend to spring back up again. Once glued I taped them in place with painters tape and let everything dry for an extended period of time. It is all documented in my build log here if you want to go take a look.
-
SaltyScot reacted to a post in a topic:
Endeavour by Ellie_ - Amati - 1:80
-
Hello, Ellie. Considering this is your first build I would say you are off to a very good start. The Endeavour was my second build and I enjoyed every second of that particular journey. She now graces a prime spot in our family room. I shall follow your build and am looking forward to the progress reports. You have already received some good input from others so please continue to ask lots of questions. This is a great forum, truly, and the input from others reduces the climb up that often very steep learning curve. Above all, don't give up
-
This one is going to be interesting. If anyone can pull it off, it is you sir.
-
As I would be. I may just very well steal this idea sir. Ha en flott dag
-
Will do buddy
-
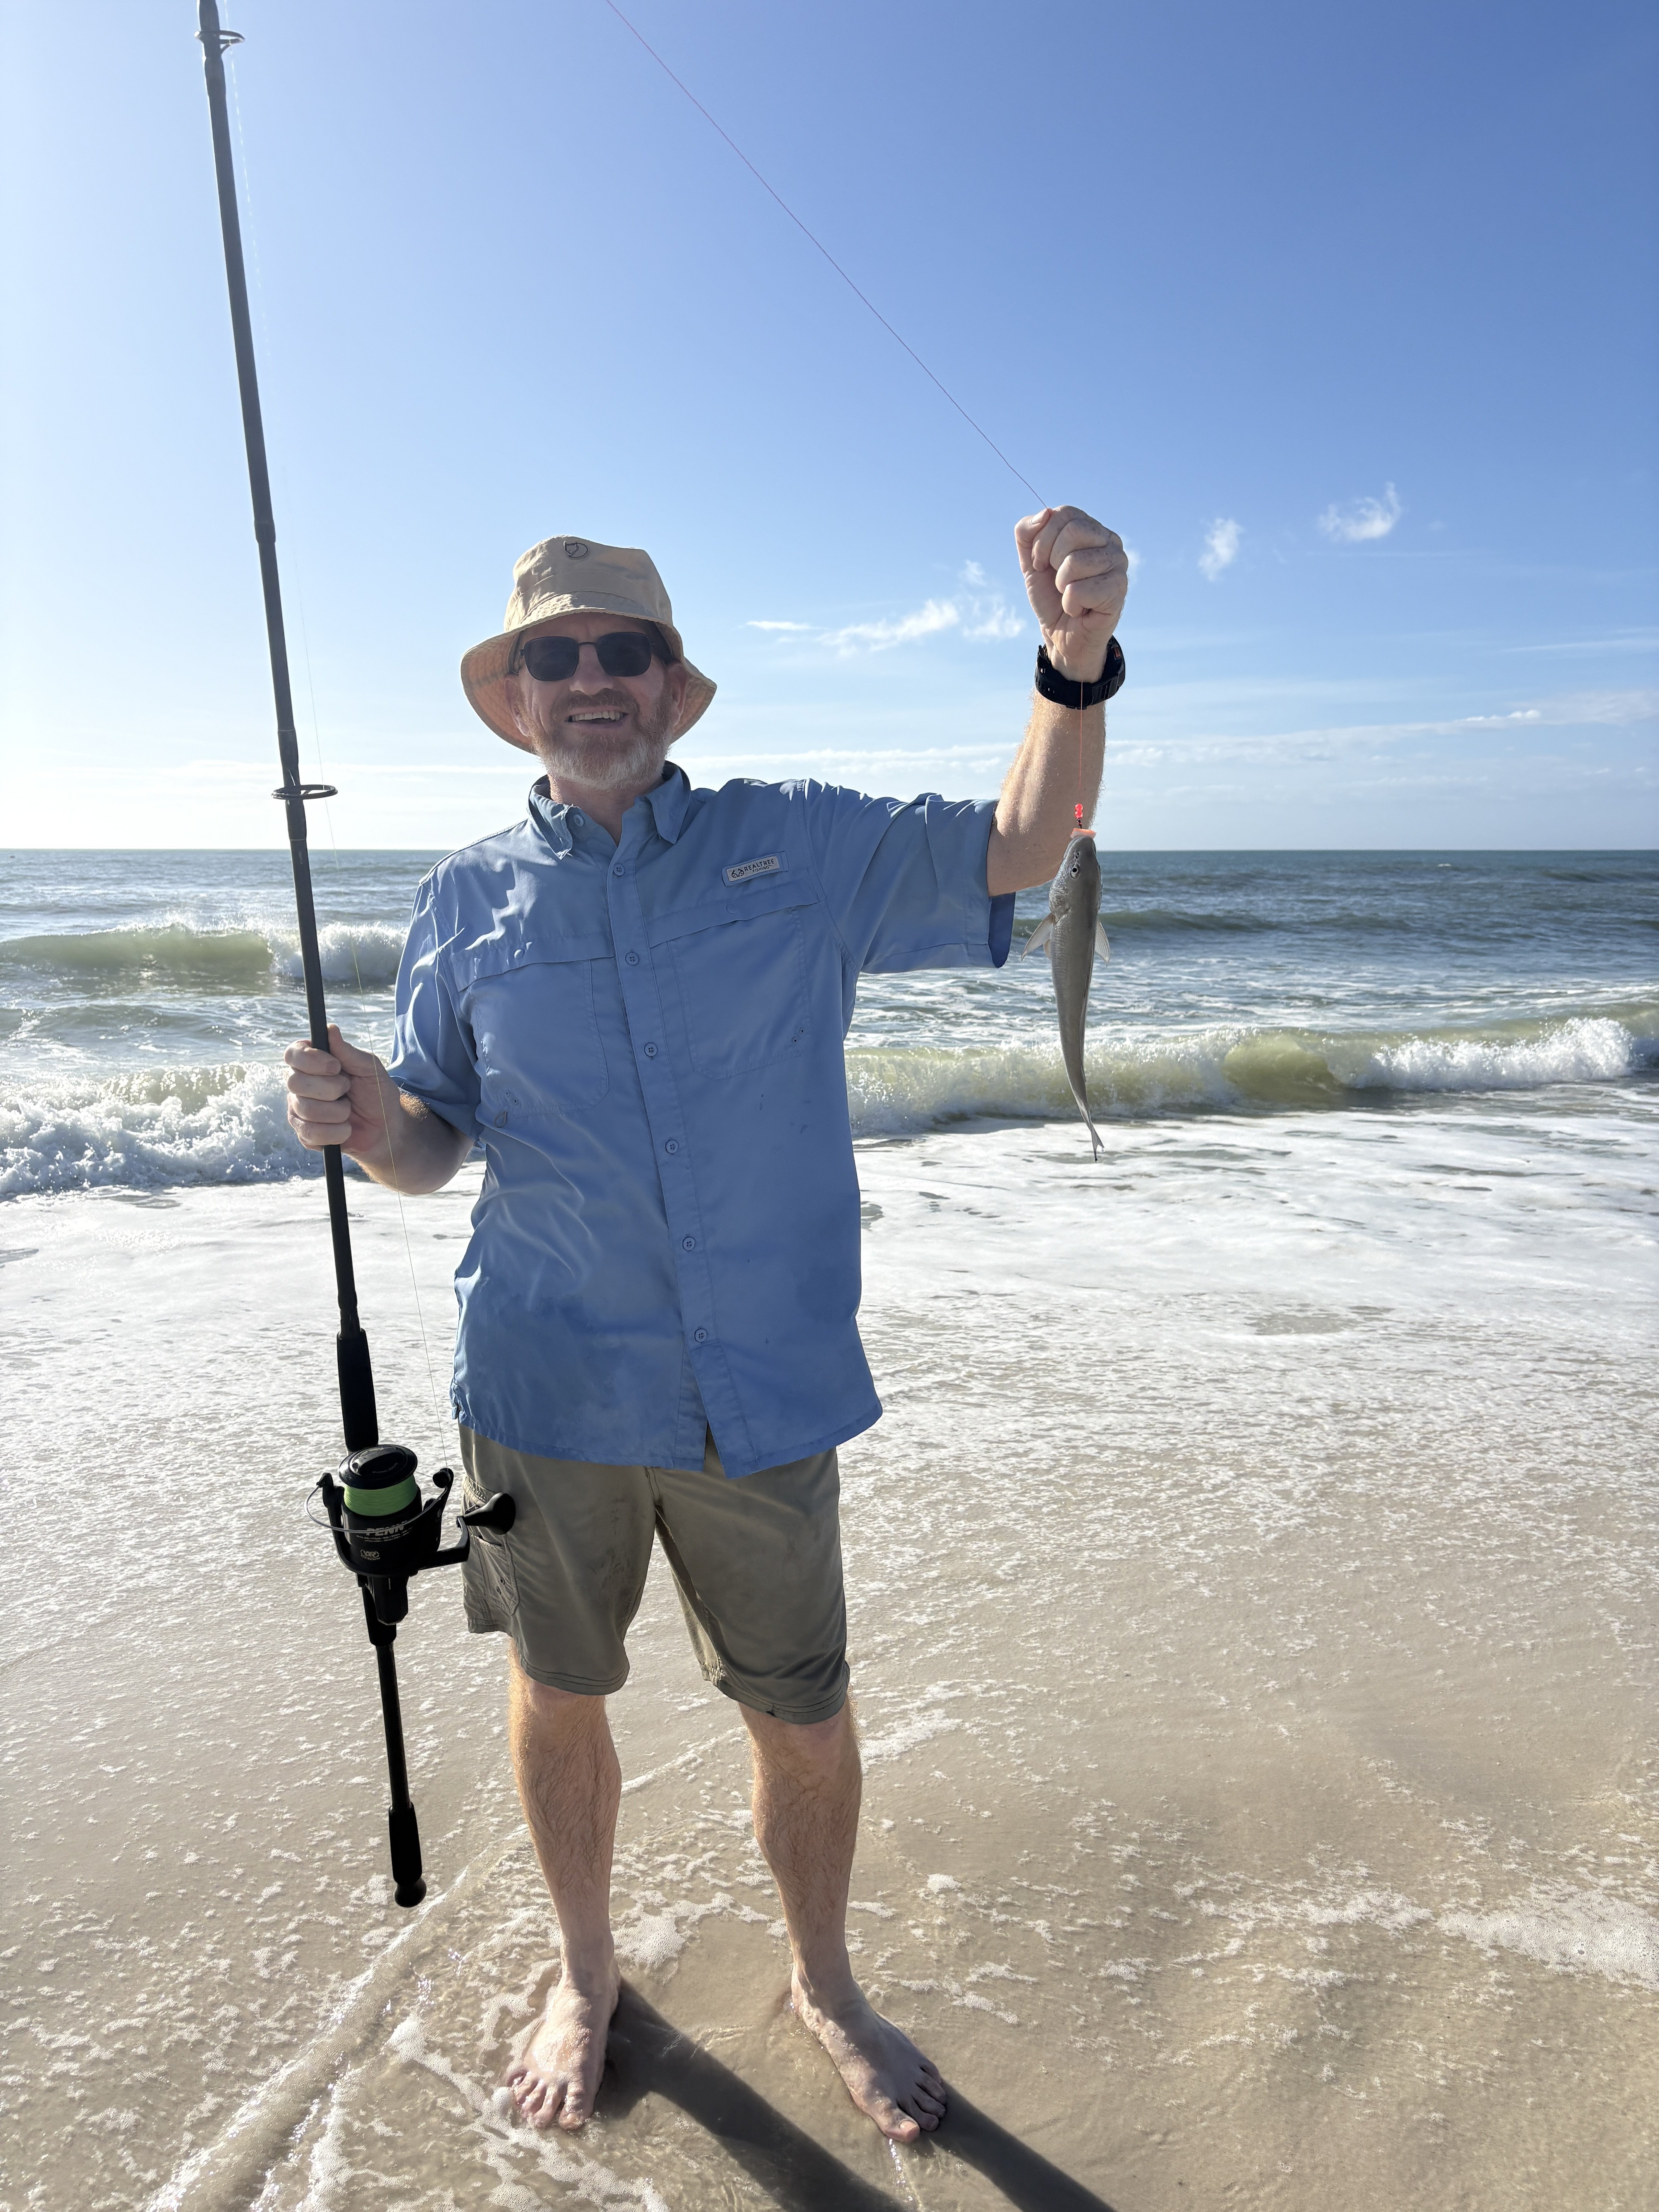
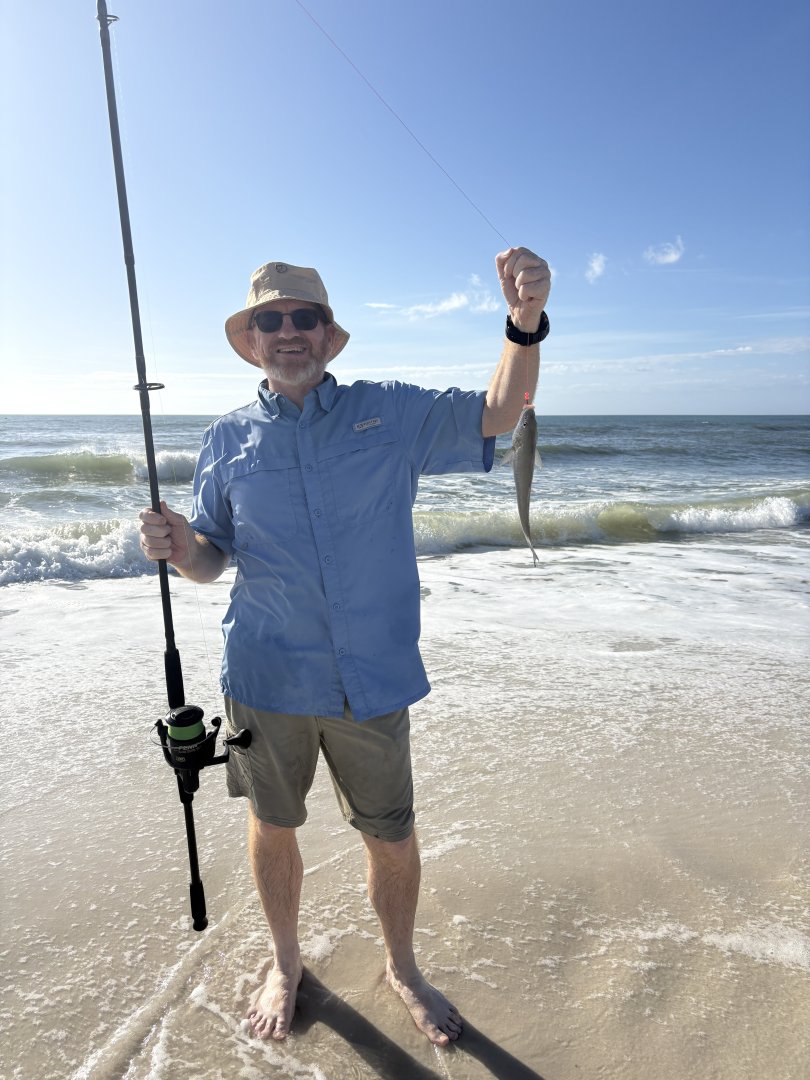
Terry, We changed plans and headed to Florida after Xmas (Cape San Blas), it is a lot warmer there. We will be down there until the beginning of April (currently home in VA to get a few things taken care of. Heading back out in a couple of weeks). I didn't get any stripers but a lot of whiting. Good eatin' fish right there!
- 53 replies
-
- 2
-
-
- Endeavour
- j-class yacht
- (and 1 more)
-
Her rear end looks just fine the way it is Steve You have done some great work on her mate, truly impressive.
-
Those chain plates look amazing. The intricate work paid off here. Nice work!!
-
Coming along very nicely indeed sir. That hull looks magnificent.
- 53 replies
-
- 2
-
-
-
- Endeavour
- j-class yacht
- (and 1 more)
-
It's the small details that matter. Nice work.