schooner
-
Posts
741 -
Joined
-
Last visited
Content Type
Profiles
Forums
Gallery
Events
Everything posted by schooner
-
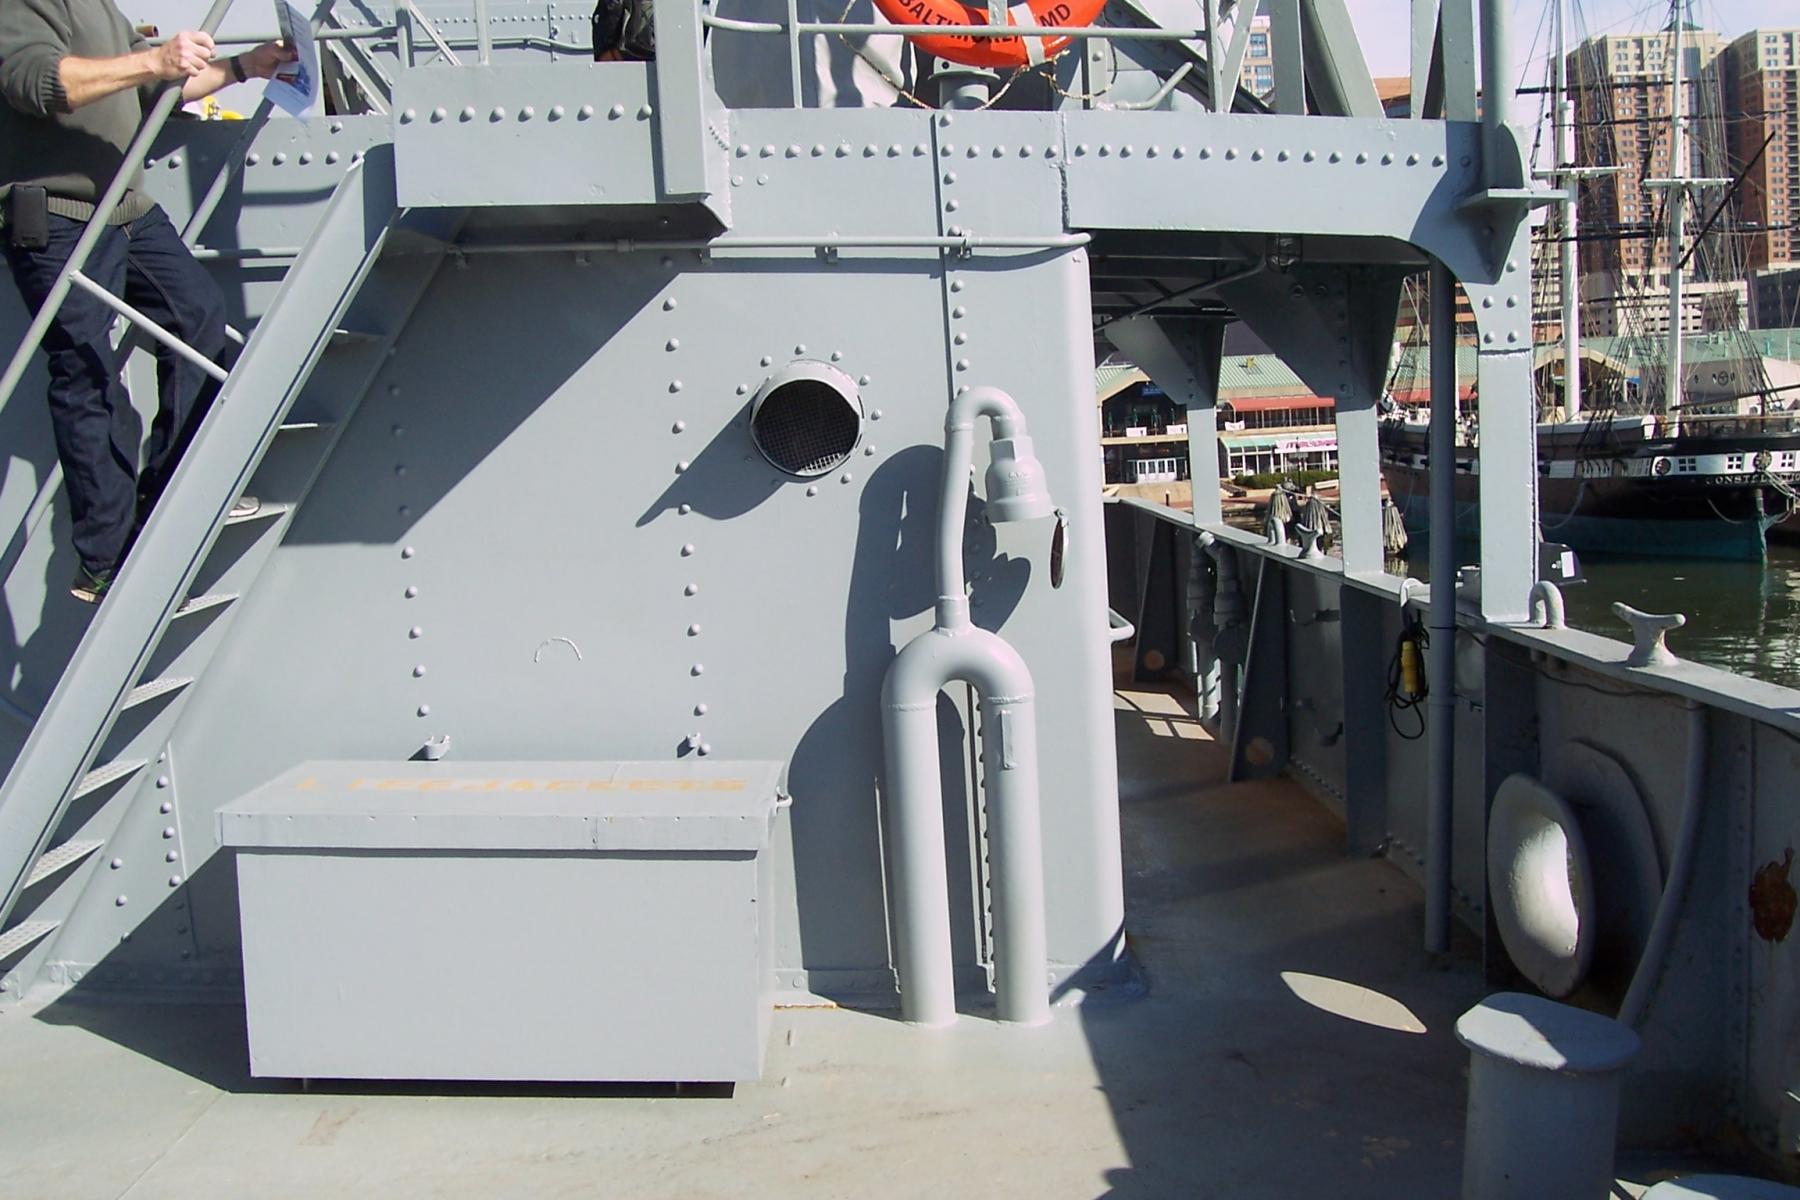
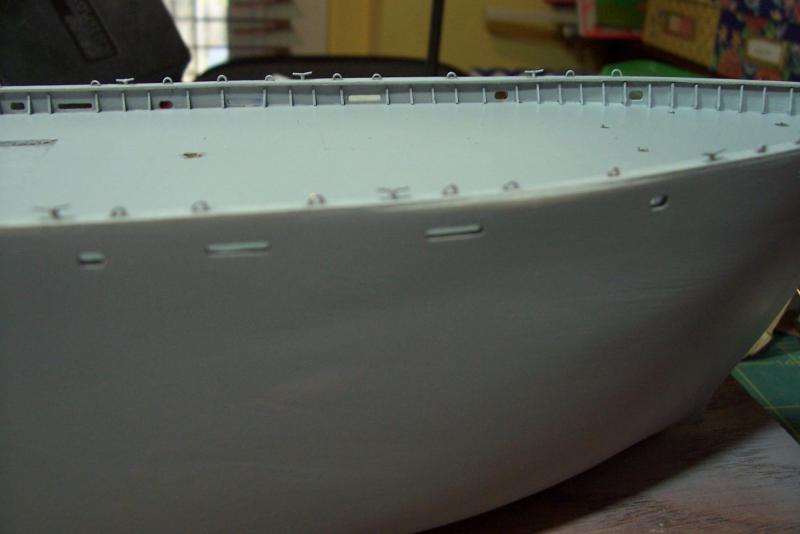
 Caprail Details During my visit to the SS John Brown I was struck by the large number of eyes and cleats along the cap rail of the bulwarks, mainly in the vicinity of the hatches. I used a diagram of the main deck proved to visitors to mark their number and locations. Later, while doing research on the cargo rigging I discovered there was a need for so many so that wherever the cargo booms were positioned there would be a securing point for the boom vangs reasonably perpendicular to the boom in order to exert maximum control. You can see a couple of them here: The eyes were easy to make: just place a nail of the right diameter at the desired distance from the edge of a board, bend the wire around it and clip it at the board edge. I was able to make about 15-20/minute. The cleats were more time consuming. The wire was too small to solder easily so I just cut a slot in the end of some plastic rod and glued the wire in place. Unlike the eyes, they won’t be under any tension when I rig the model so I’m comfortable just going with glue. Between the bulwark stiffeners, eyes and cleats that makes for over 300 small pieces just along the bulwarks so this is a good time and place to take a break for about 6 weeks while we go on an extended road trip. When I return I can get back to work with larger, less repetitive pieces.
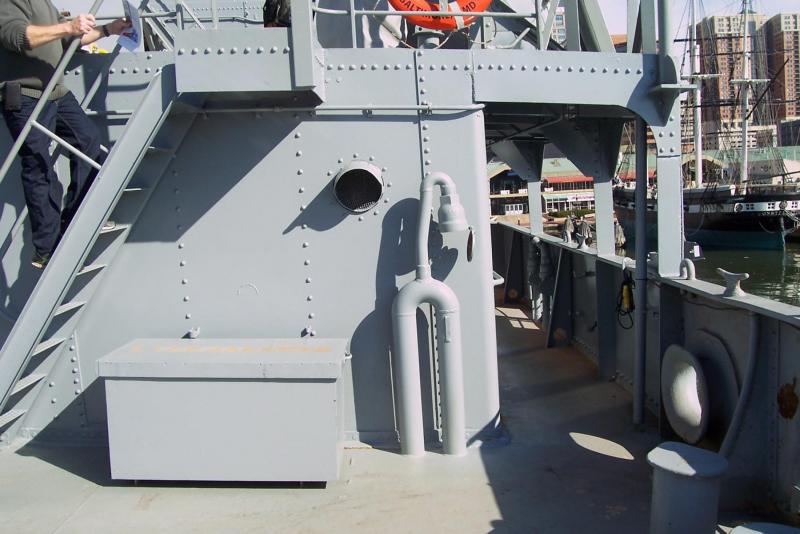

- 227 replies
-
- 15
-

-
- BlueJacket Shipcrafters
- Stephen Hopkins
- (and 2 more)
-
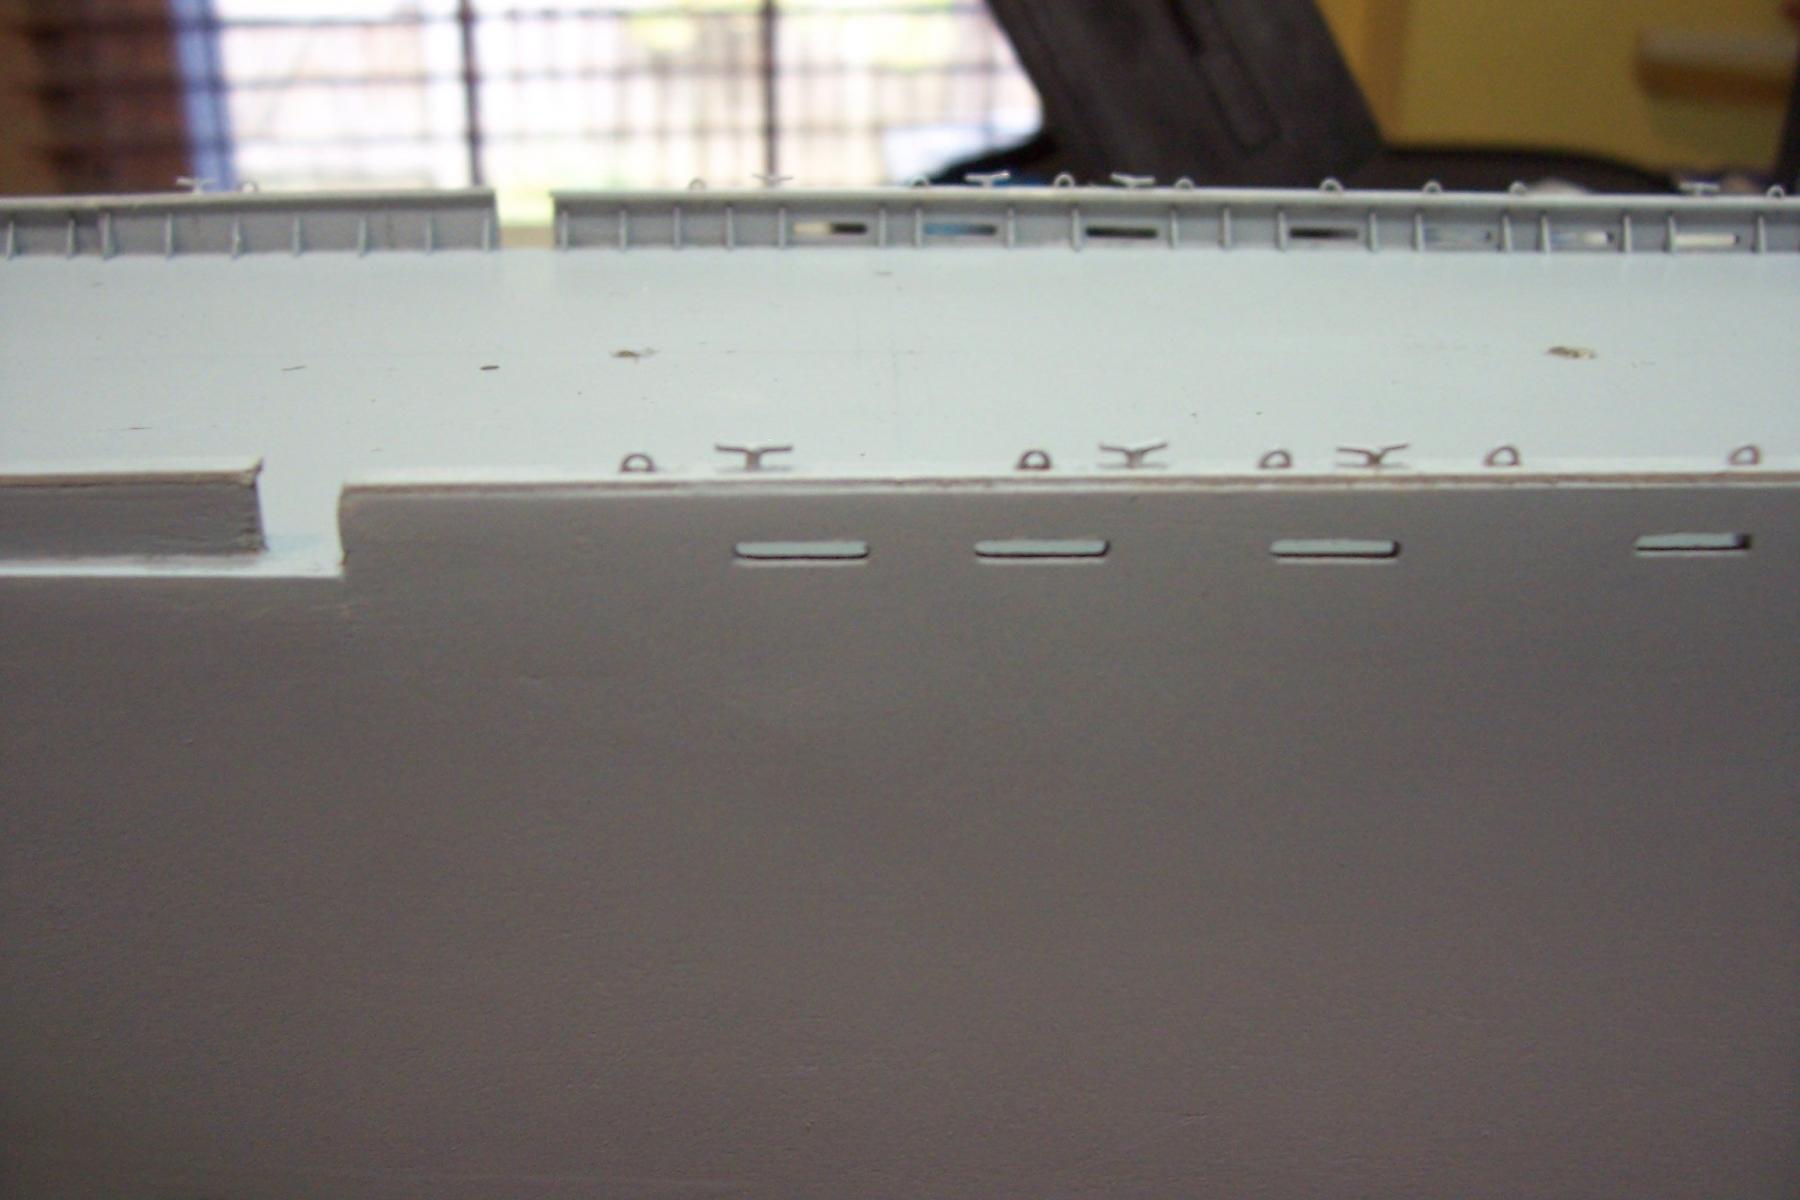
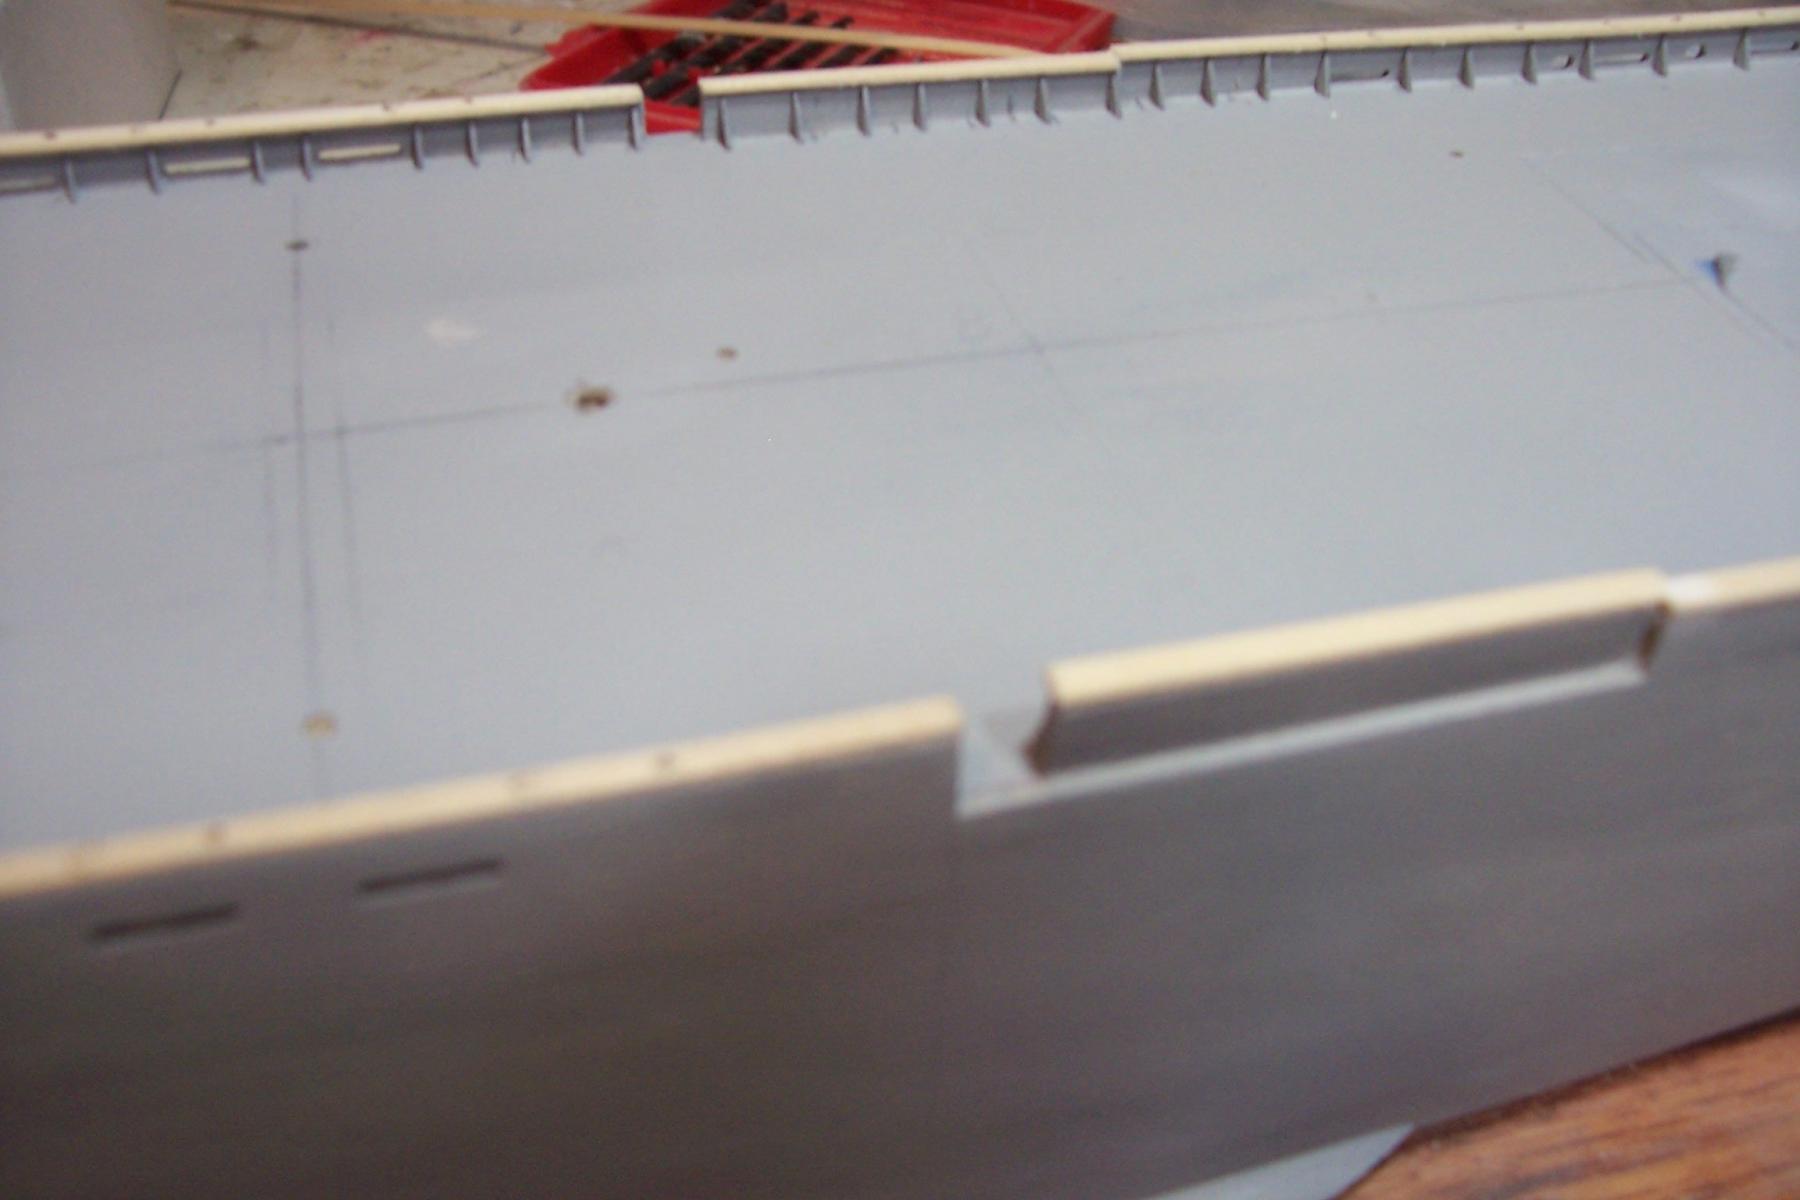
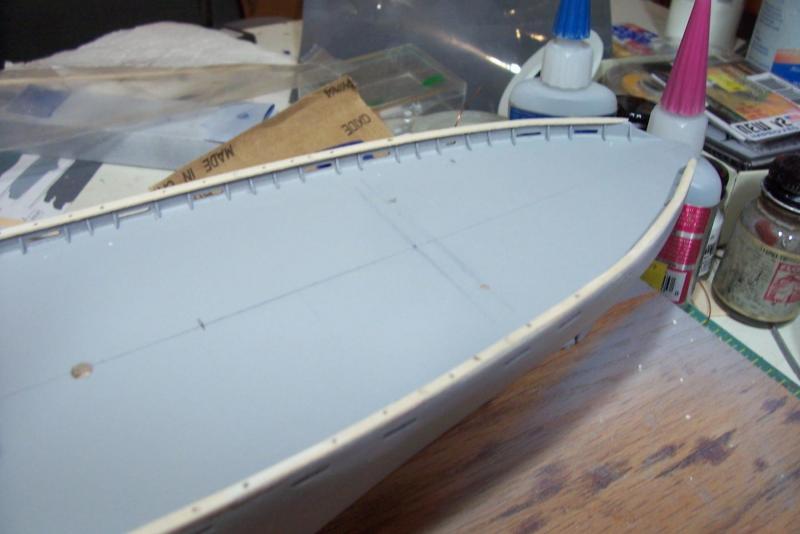
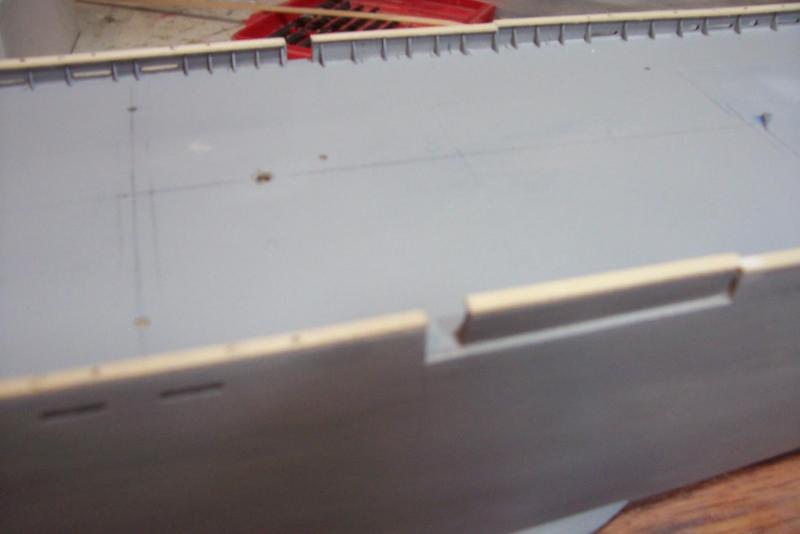
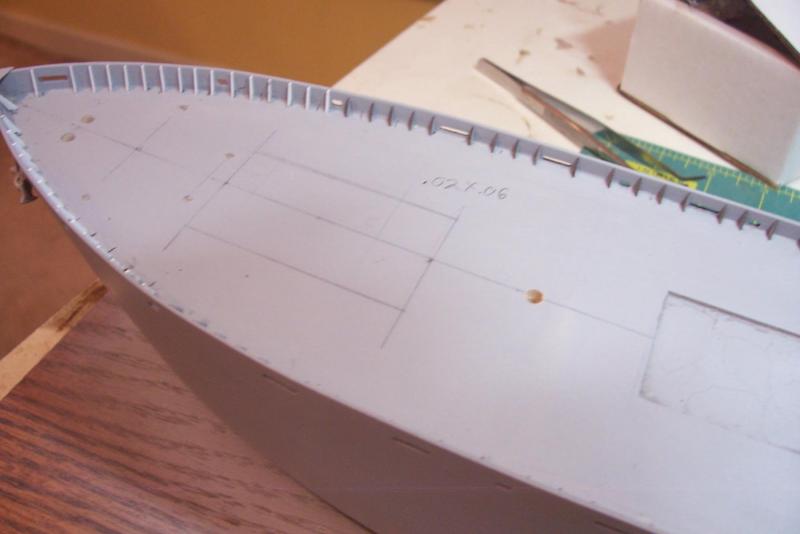
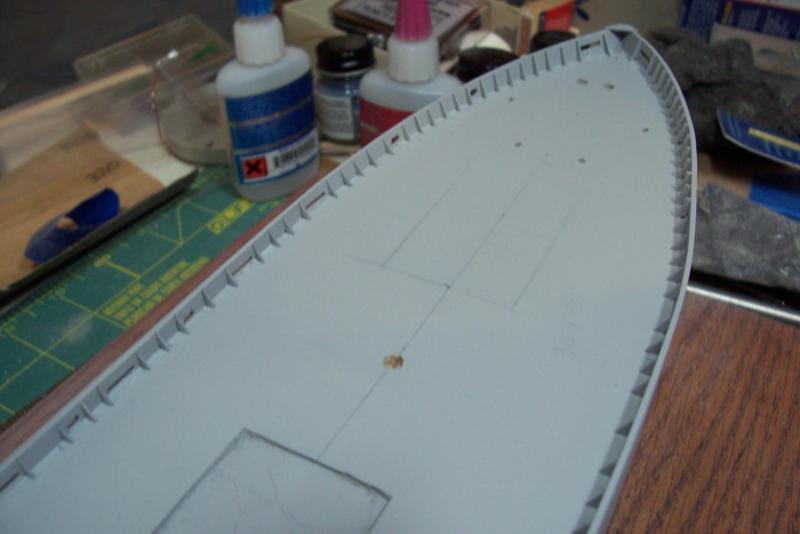
Caprails I used some strip wood (soaked in hot water to fit the curves) to fashion the cap rails. They scale out to 18” wide which is what I saw on the SS John Brown. The pencil marks are where the 90+ scratch eyes and cleats will go.

- 227 replies
-
- 12
-
-
- BlueJacket Shipcrafters
- Stephen Hopkins
- (and 2 more)
-
Bulwark Braces The kit provides 160 nice laser cut braces, complete with the cutout on the outboard lower corner for draining the pockets (I’m not sure if they are called Limber Holes like they are in the bilges). Since the bulwarks near the bow are higher than the rest I scratched the braces there from strip plastic to ensure they reached closer to the top of the bulwark. After priming they both look about the same which is what I was after. Next will be fitting cap rails to the top of the bulwarks.

- 227 replies
-
- 12
-
-
- BlueJacket Shipcrafters
- Stephen Hopkins
- (and 2 more)
-
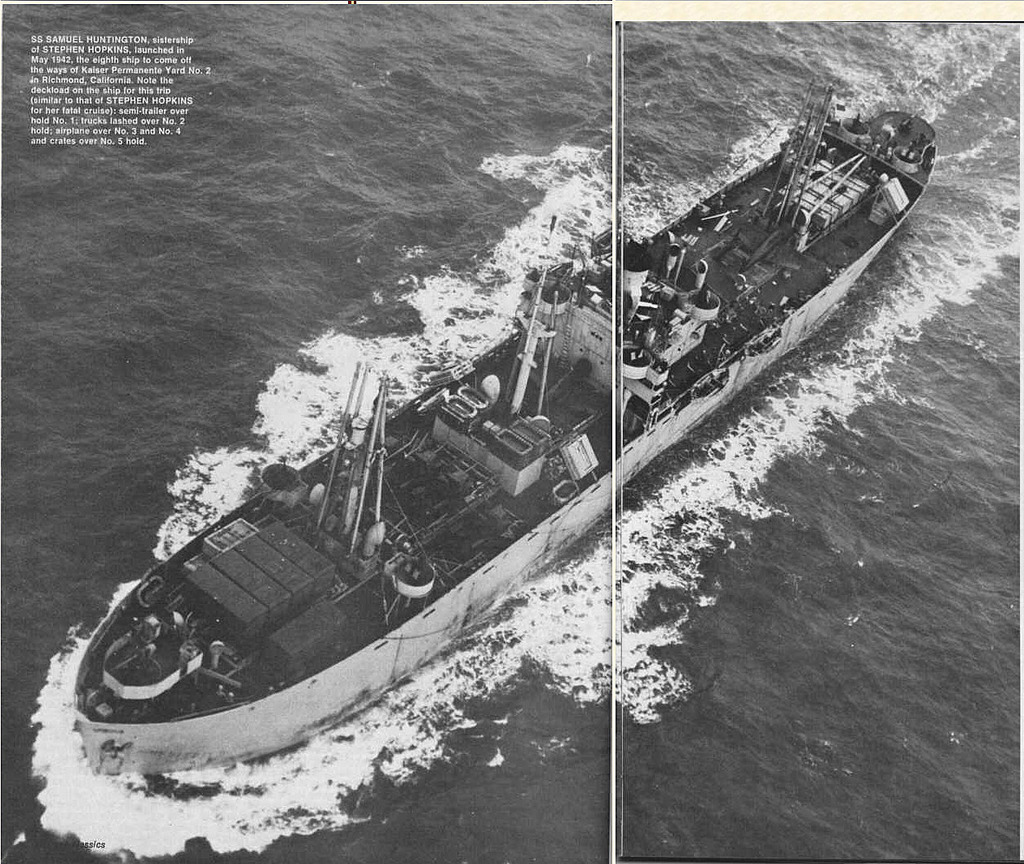
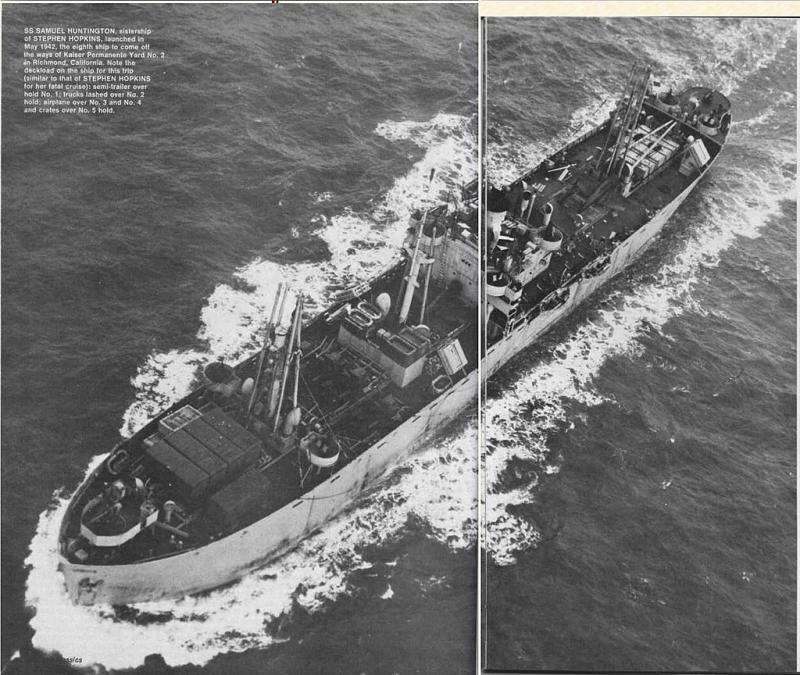
Jud, You are right that things were a little "unusual" regarding gun tubs on those ships. Many of them had elaborate "rails" on top of the tubs that varied in height depending on the azimuth that served as crude, but effective, firing cutouts, i.e. they kept the guns from firing into the masts, superstructure, etc. I'm comfortable in showing the main 5" gun platform on the Hopkins without a splinter shield because I've come across many photos showing the early Libertys' with just stanchions around it (all the smaller guns had solid splinter shields). Later Libertys' (basically 1943 on) all had conventional splinter shields around the main gun. Here's a photo of the Liberty ship that was launched next in line after the Hopkins at the same yard (the SS Samuel Huntington), she clearly has just stanchions around the aft gun: I suspect that trying to reclaim spent brass was not a priority during wartime like it was during my time in the peacetime Navy when every shell casing had to be policed up and sent back as retrograde. They were probably more interested in allowing the maximum depression of the gun barrel against close in subs/periscopes. Another, and more likely reason is that the 4" guns that the early Libertys' had sat much lower to the deck than the later 5/25's, so low that a splinter shield may not have been practical. If you google the old 4-stacker DD's you will see the 4" guns I'm talking about. Then again, at this remove, who knows what their rationale was. Thanks for your feedback, I've learned more from folks on this site than from any other source.
- 227 replies
-
- 8
-
-
- BlueJacket Shipcrafters
- Stephen Hopkins
- (and 2 more)
-
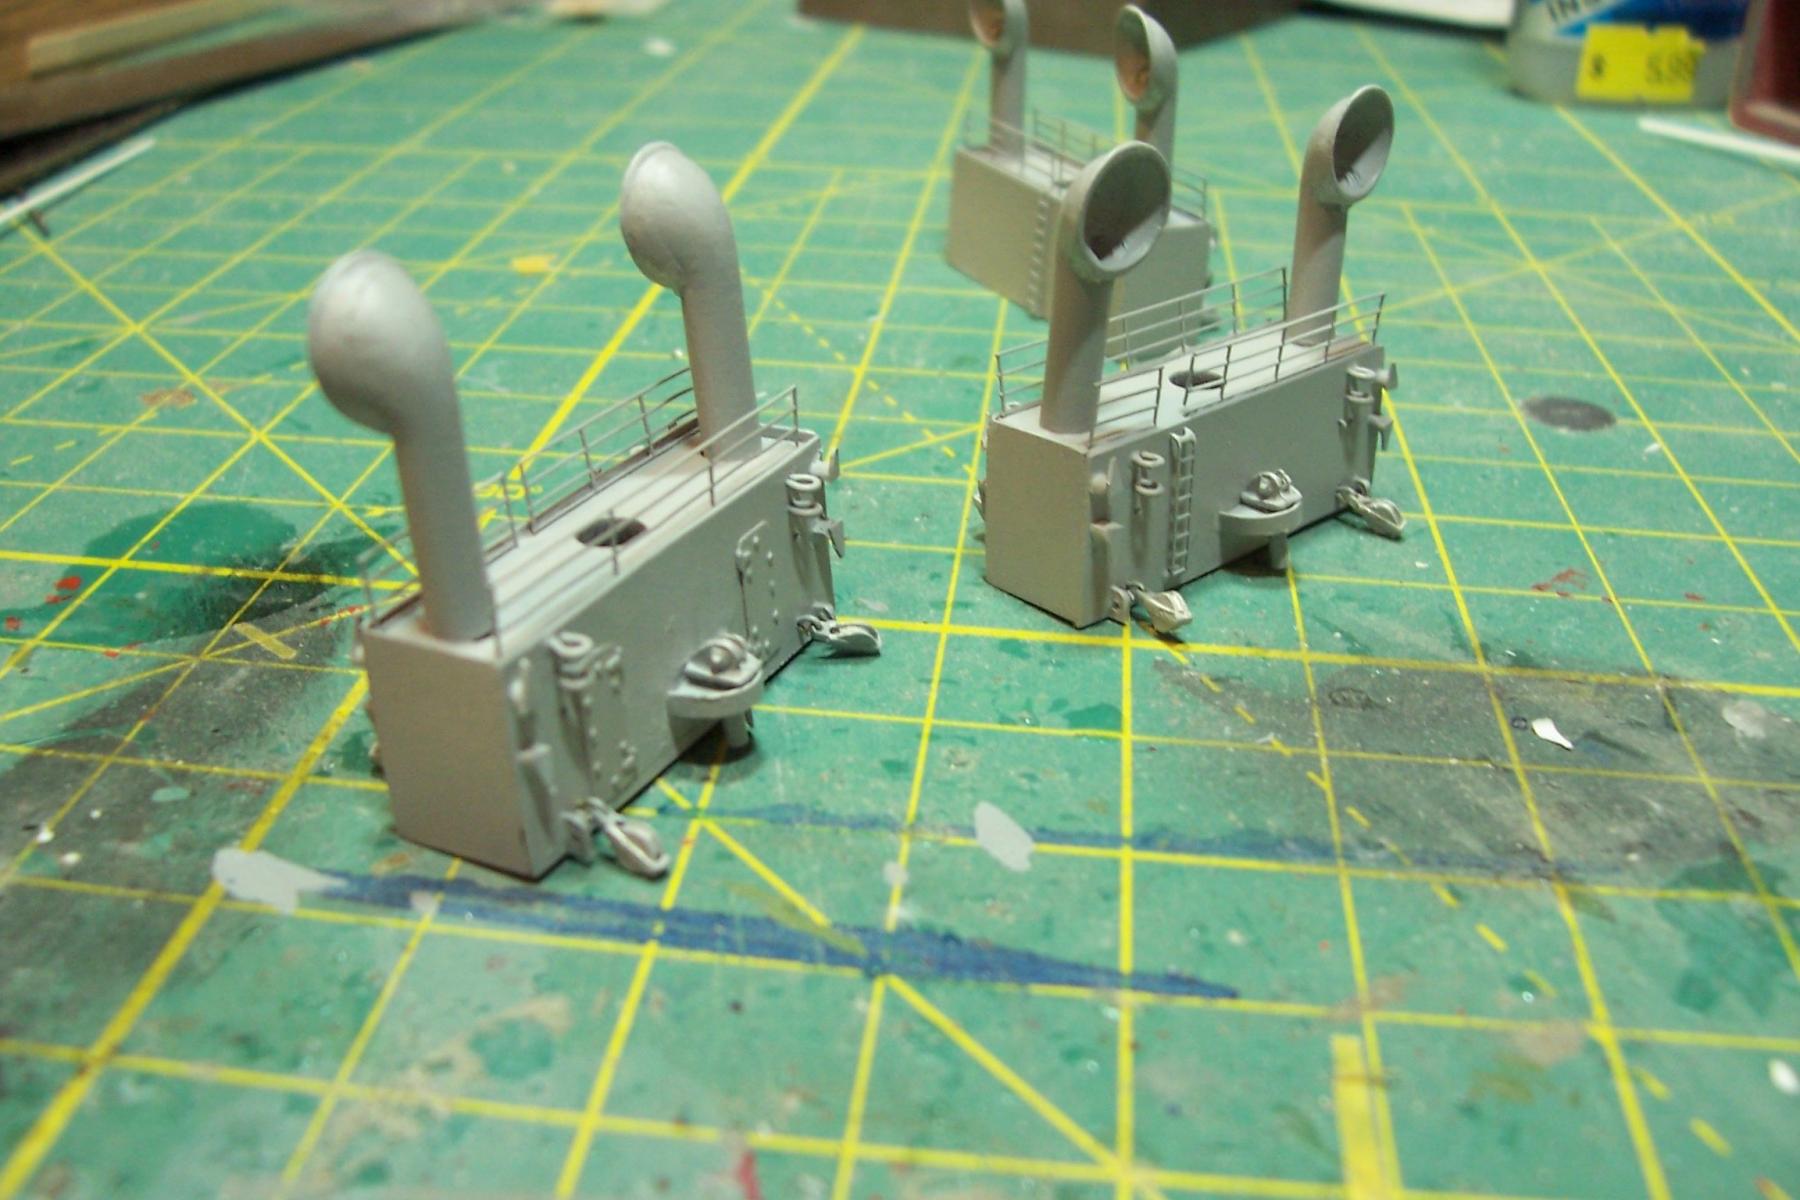
Thanks for the kind words everyone. Bob, I used a round file and sandpaper on the exterior of the vents. For the inside I wrapped some flexible sandpaper around the non-working end of a paintbrush and used that to smooth out the inside. Finally I drilled an opening down into the shaft with a small bit and then used a larger bit, twisted with just my fingers, to enlarge it (the Brittania metal is pretty soft).
- 227 replies
-
- 6
-
-
- BlueJacket Shipcrafters
- Stephen Hopkins
- (and 2 more)
-
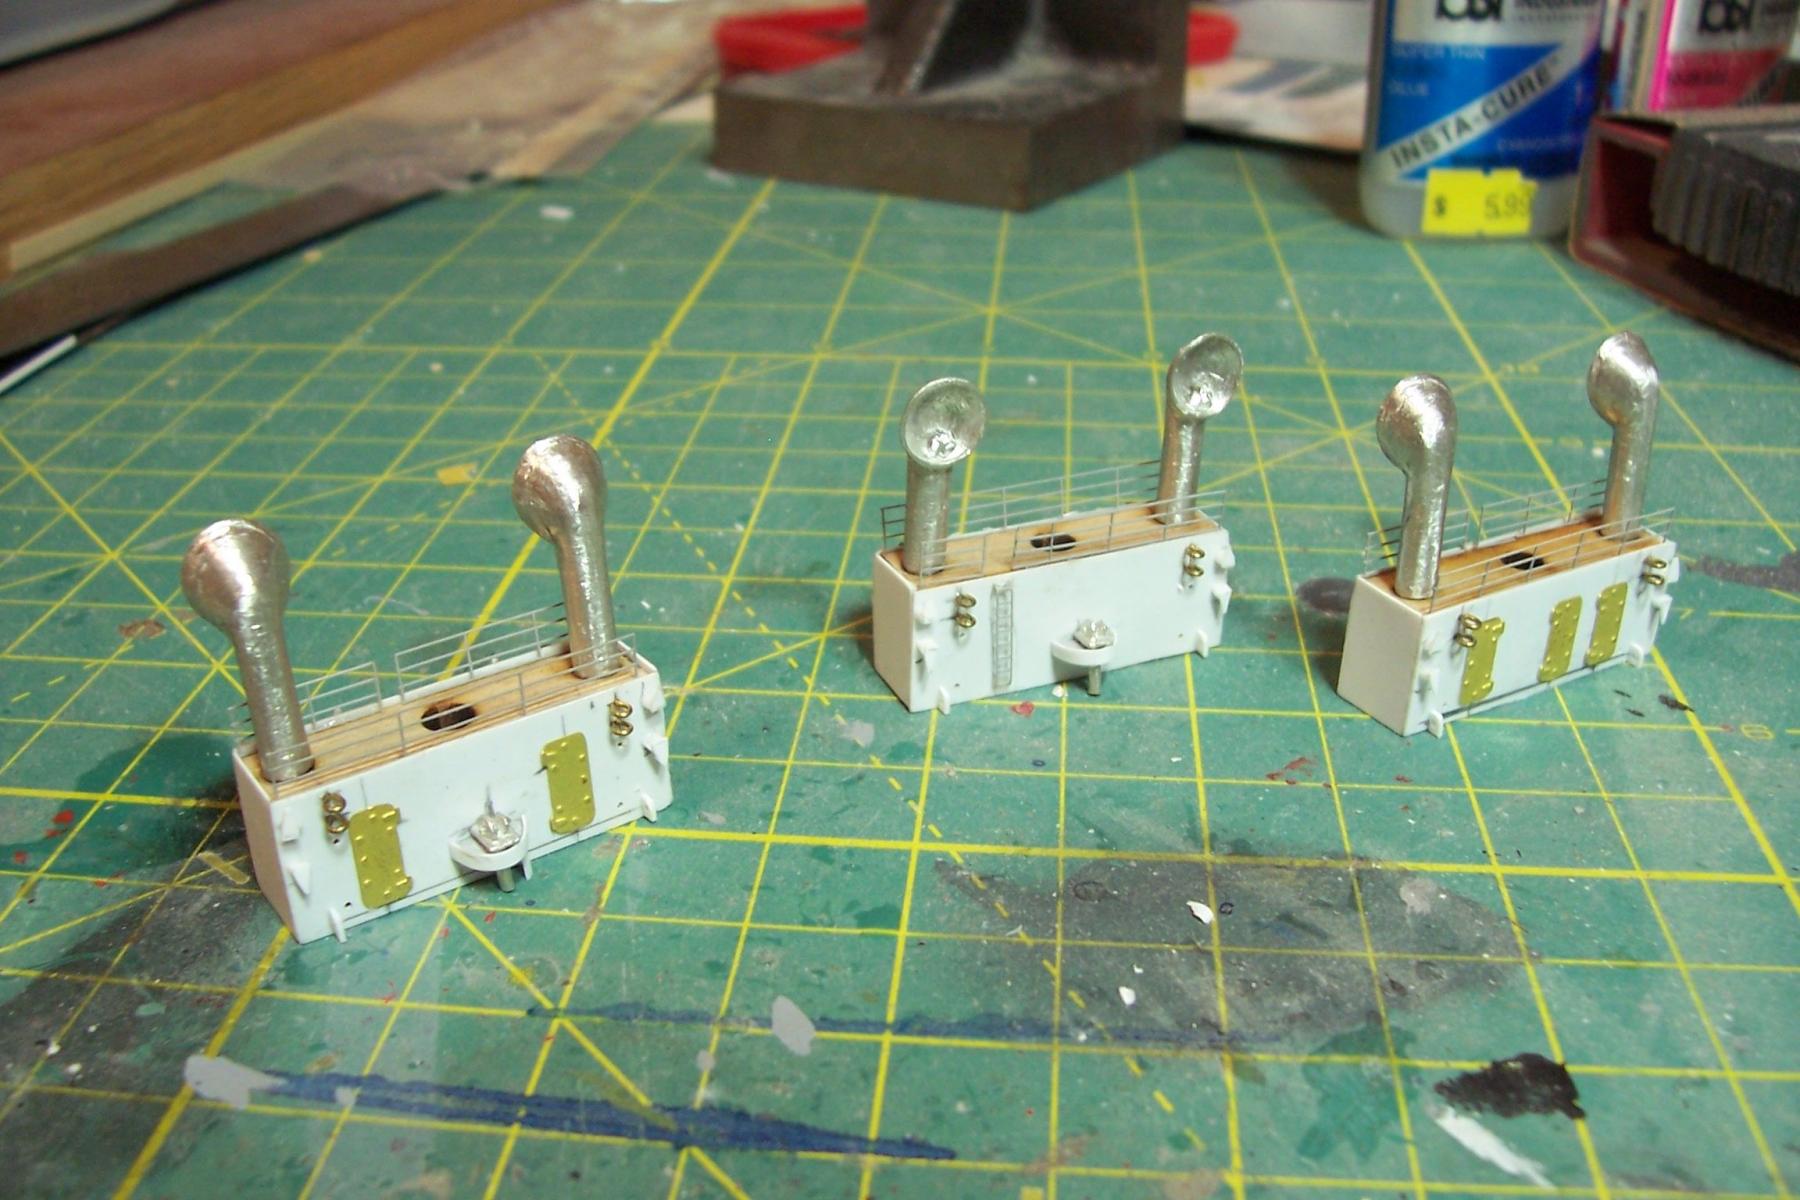
Mast Houses The mast houses are made up of 2 stacked laser cut pieces with the holes for the masts and ventilators pre-drilled. Given the rough faces from the laser cutting and the need to eliminate the seam between the pieces I thought that sanding them smooth would be tedious and might result in rounded corners so I decided to face them with sheet styrene. Doing so gave a nice smooth “steel” finish, sharp corners and a slight coaming along the deck edge. The details are a combination of kit items, scratch, and after market. Between them they are the anchor point for 15 masts, booms and cranes so there will be a lot of rigging around them. Next will be the start of adding the 160+ bulwark braces (maybe not tedious but certainly repetitive).


- 227 replies
-
- 15
-
-
- BlueJacket Shipcrafters
- Stephen Hopkins
- (and 2 more)
-
This looks like a great kit so I will be following the build closely. I'm currently working on Bluejacket's Liberty ship kit and have also done their Gearing destroyer and Destroyer Escort kits so I'm familiar with their Navy kits. I see that you have quite a few kits under your belt so this one should be easy. If you have not worked with a solid hull before I think you will find this one a great place to start since it looks from your photos that it is about 95% done, which has been my experience with BJ kits. One difference from your previous builds is that you can find a wealth of close up photos of the ship online in case you want to add your own scratch details. Good luck
- 68 replies
-
- 5
-
-
- Arleigh Burke
- BlueJacket Shipcrafters
- (and 1 more)
-
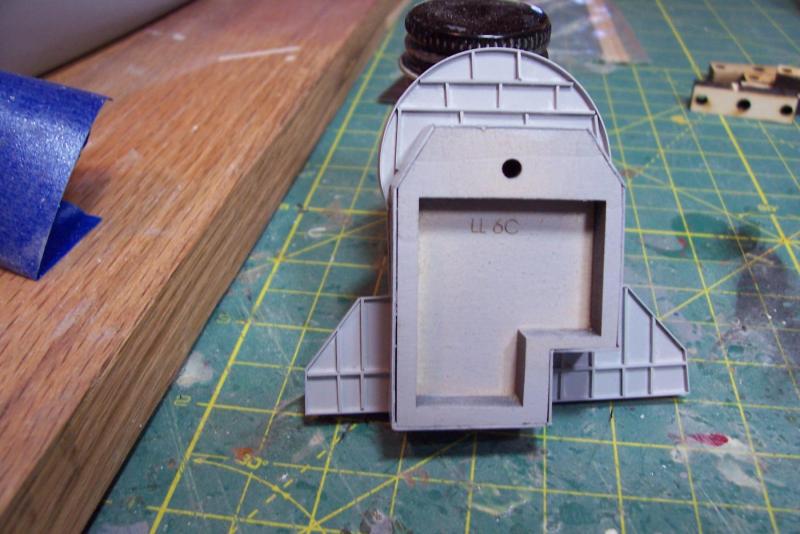
Aft Deckhouse The aft deckhouse went together just like each layer of the main house; 3 wood lifts topped by a laser cut plastic deck, and the sides covered with thin ply. The deck edge coamings and underside stiffening girders are scratch. One item that will be different from the plans is the large gun tub. Rather than have a solid waist-high shield I’ll install a single strand lifeline, like you can see in the upper background of the photo below, the early Libertys seemed to have that style. Not sure what I will use for the lifeline stanchions yet but they are quite a ways down the road anyway. Next up will be the 3 crane houses.


- 227 replies
-
- 14
-
-
- BlueJacket Shipcrafters
- Stephen Hopkins
- (and 2 more)
-
Deckhouse detailing It’s been fairly slow going adding detailing along the upper deck edges and stiffeners under the upper deck projections as well as completing the sidelight boxes and adding the forward gun tubs. I’d planned on adding some details to the bridge wings but after looking at photos of all 3 surviving Libertys I realized that compared to Navy ships they had virtually nothing in the way of rudder angle indicators, pelorus’, sound-powered phone jacks, etc. After priming the main deckhouse it can be set aside for awhile and I’ll move on to the after deckhouse and the crane houses.


- 227 replies
-
- 11
-
-
- BlueJacket Shipcrafters
- Stephen Hopkins
- (and 2 more)
-
Welcome aboard John. I had a similar experience with a mothballed destroyer when I was a kid in the early 70's . My friend's family ran a tugboat company and was hired to tow it to the scrappers. We were able to spend most of a day on her during the tow. EVERYTHING you can imagine was carefully packed away onboard including a full machine shop with tools, wardroom china (no silver though), damage control gear, linens, etc. Just about everything needed to get her in service except beans, bullets and black oil. Tim
- 227 replies
-
- 3
-
-
- BlueJacket Shipcrafters
- Stephen Hopkins
- (and 2 more)
-
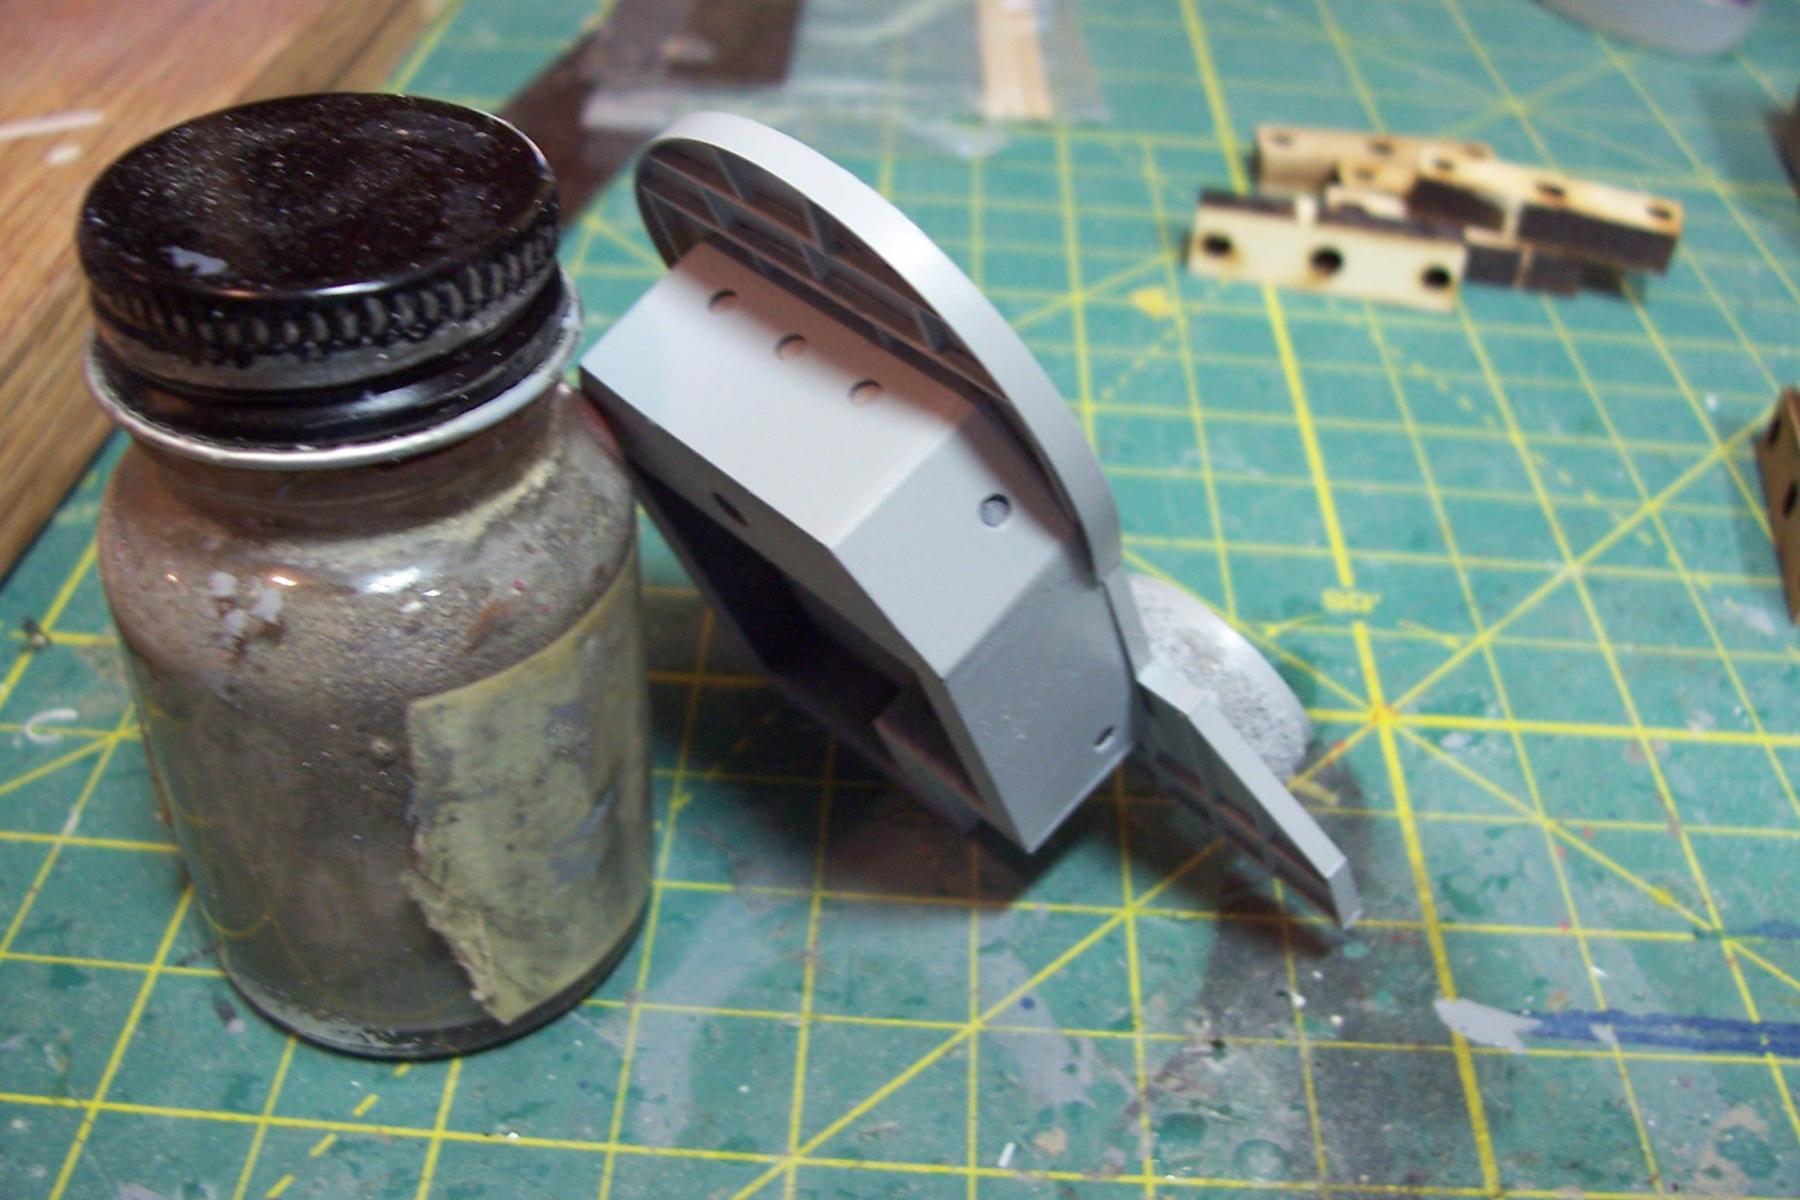
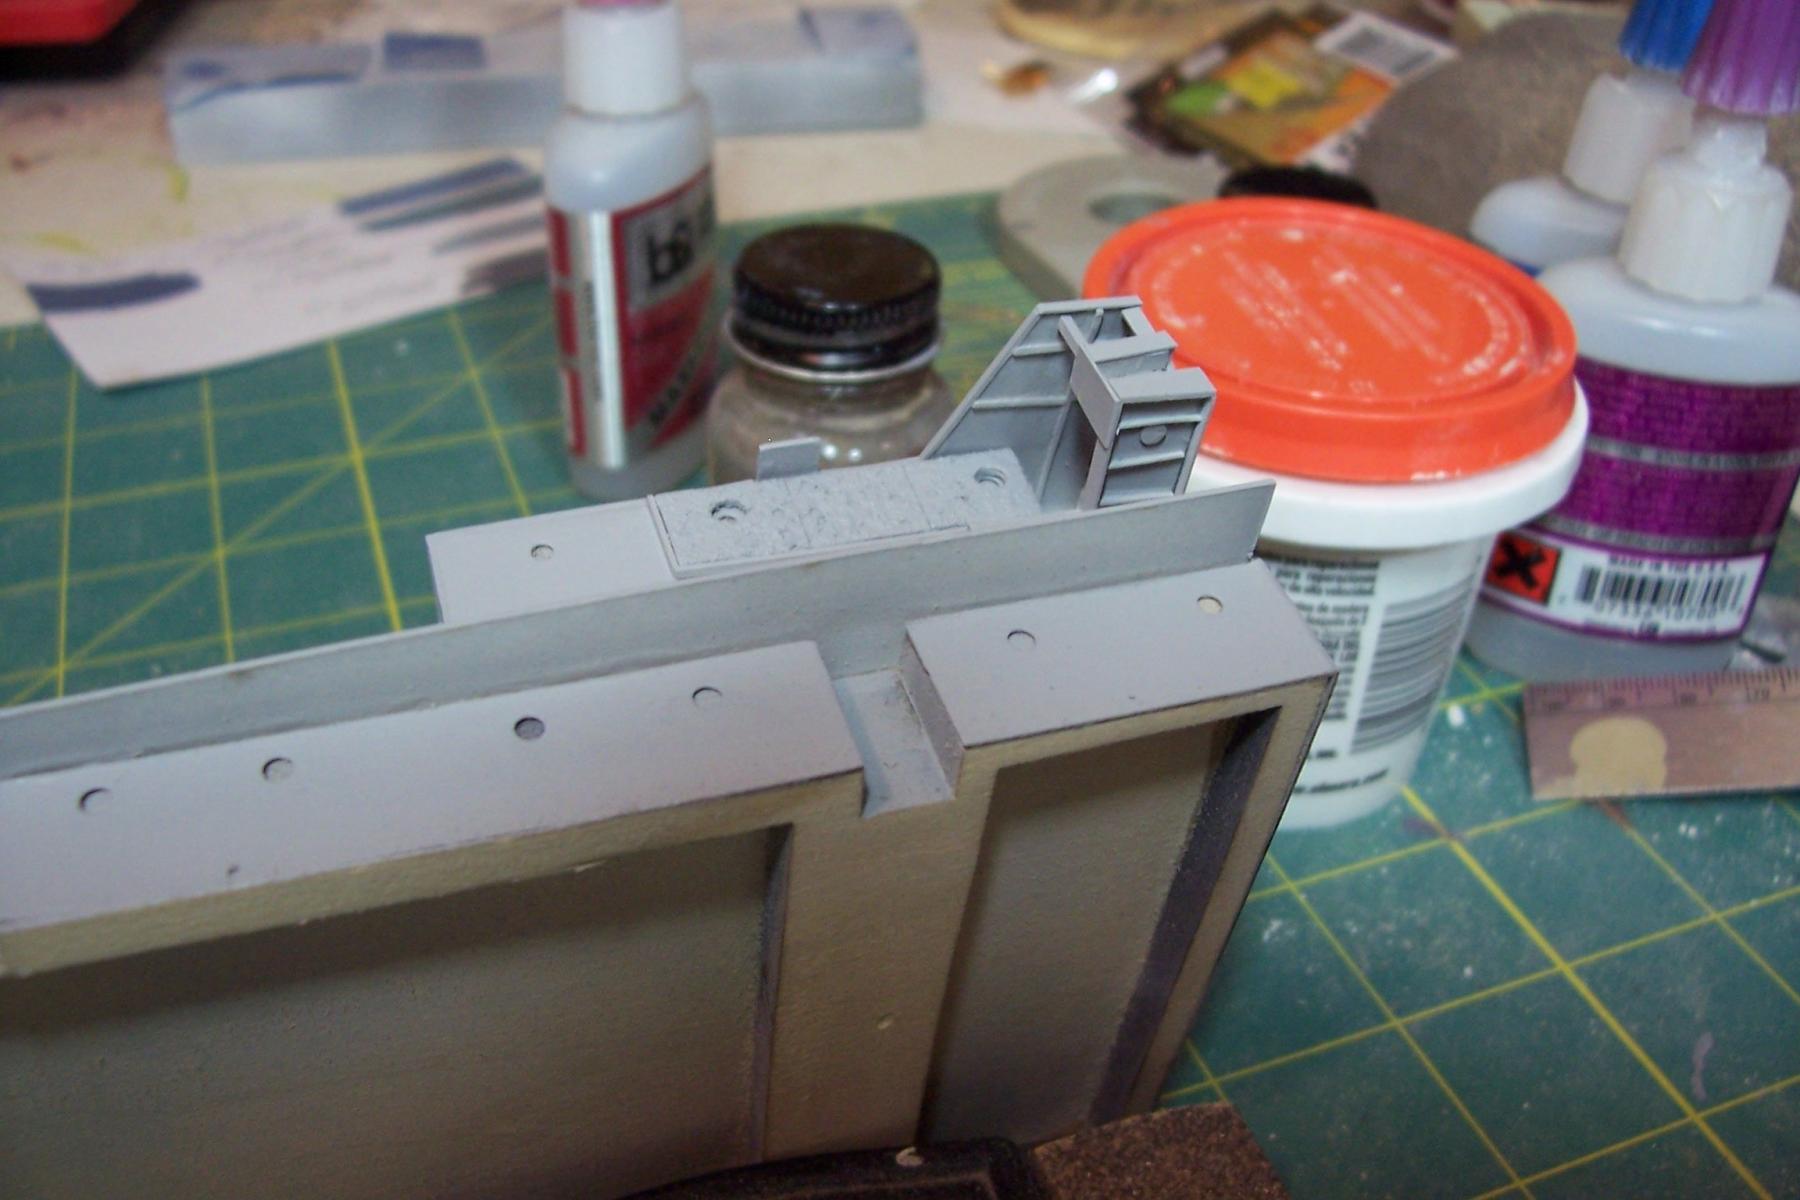
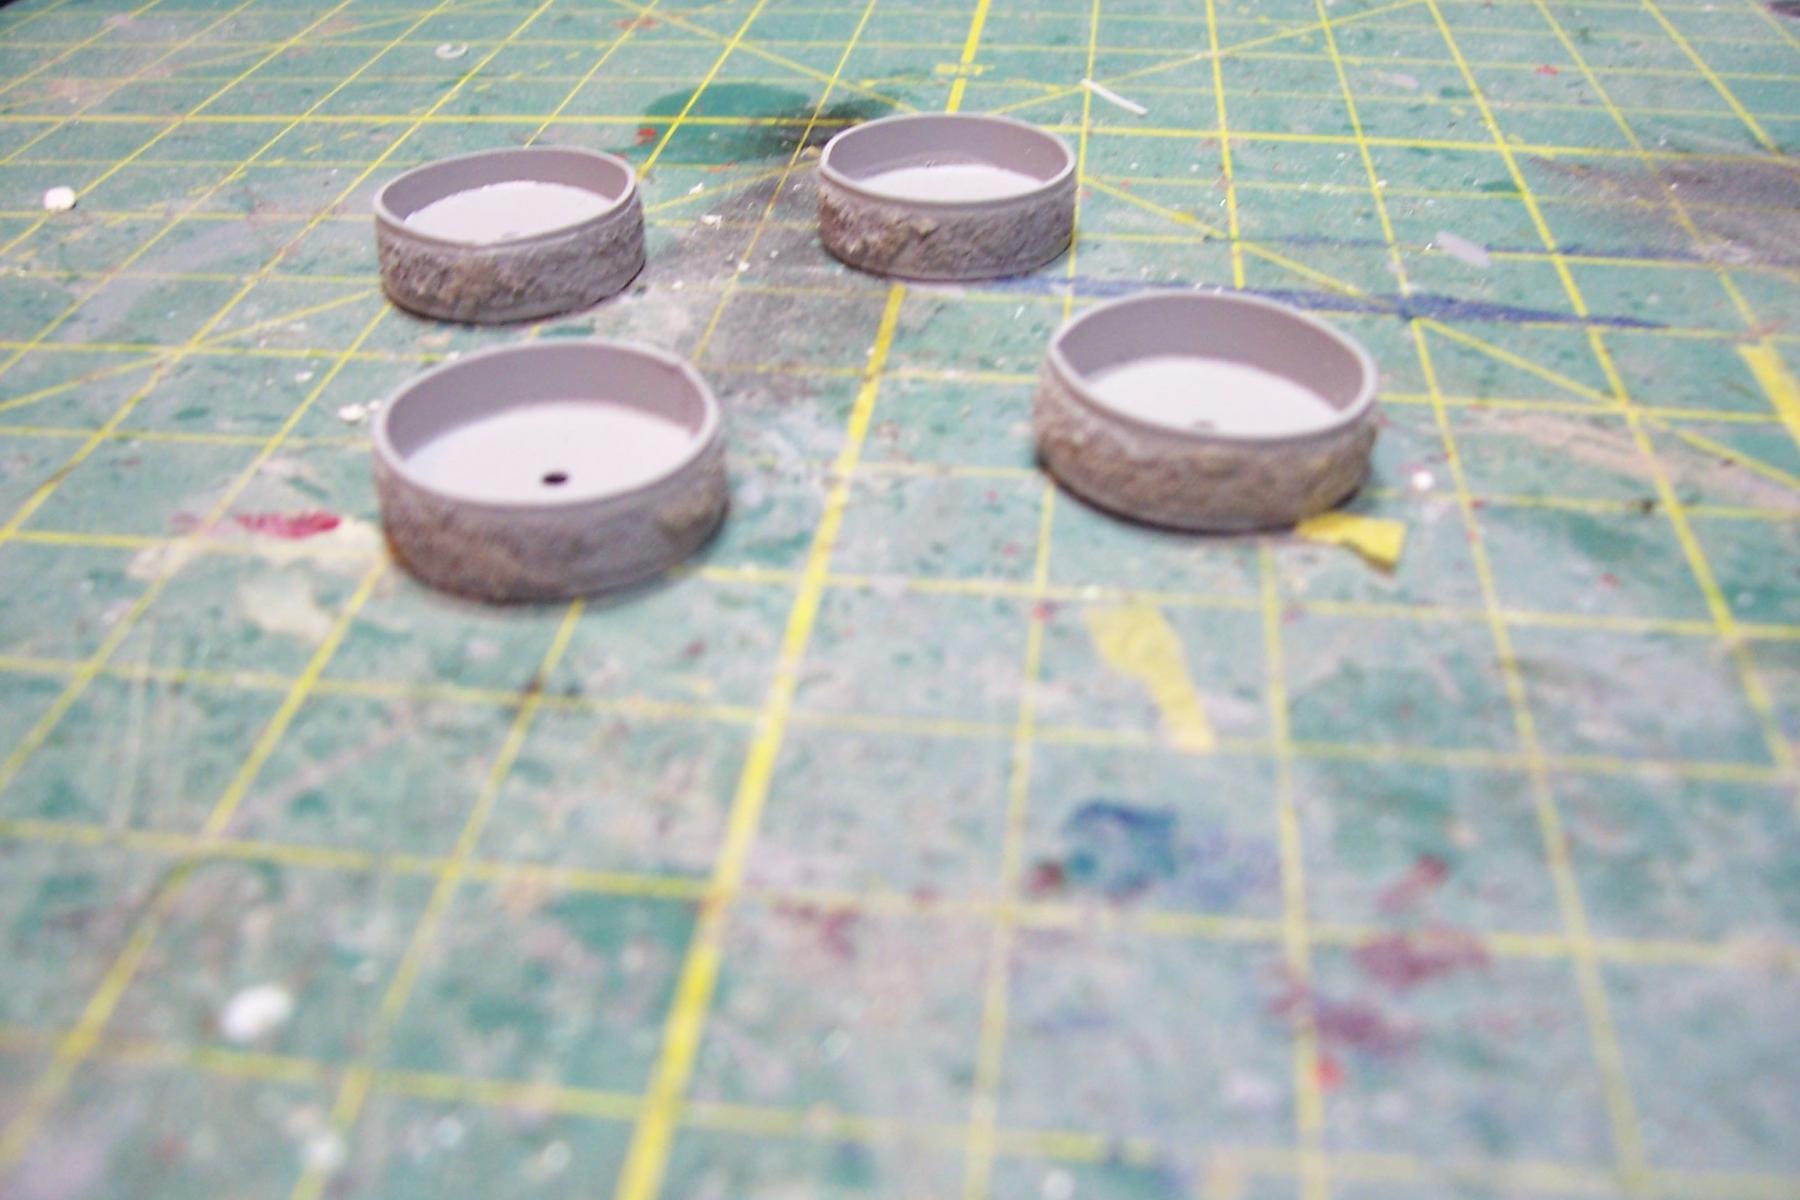
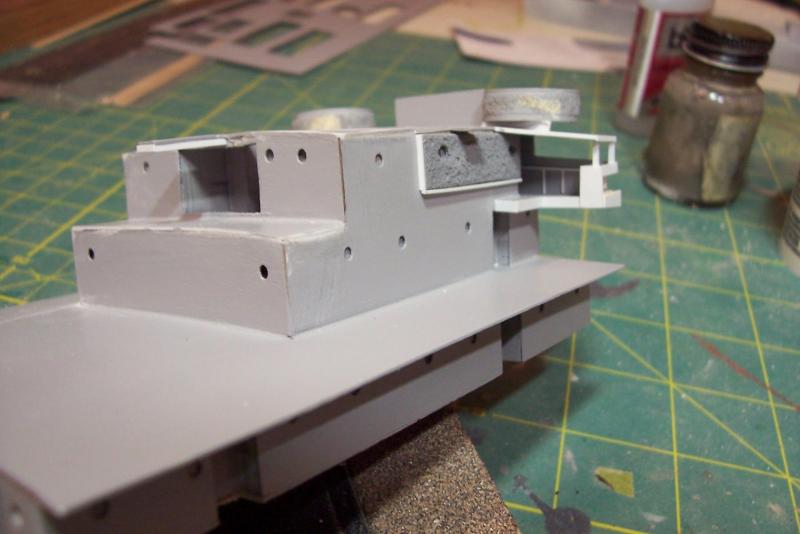
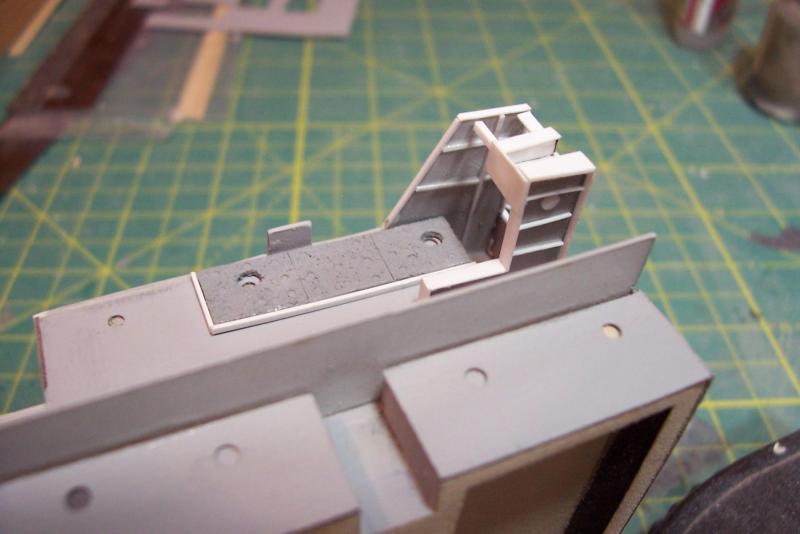
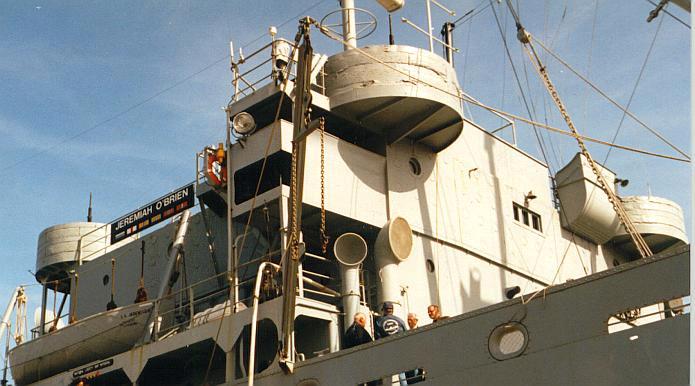
Deckhouse detailing Before heading off on a week and a half vacation there’s a little time for a little detailing. The gun tubs are made out of styrene and the plastic armor belt added: The deckhouse front facing piece on the kit provides cut-outs where the sidelights go and the plans show the box in which the lights sit but there is no material or mention of it in the instructions so I think it just fell thru the cracks. Here’s what they looked like on the ship: Here’s the start of the modification, the box on the starboard side has had its height increased and it’s depth decreased, the port side is the original: Here’s one side finished, overhangs have been added to the bridge wing deck to cover the outboard ends of stiffener pieces I will add to the underside next: Next steps in detailing will be to add the vertical braces between the decks in order to stiffen the currently floppy plastic bridge wings and set their angle and spacing, some stuff on the wings like voice tubes and junction boxes, then move up to the top deck and add the gun tubs and flag bag.


- 227 replies
-
- 13
-
-
- BlueJacket Shipcrafters
- Stephen Hopkins
- (and 2 more)
-
Daddyrabit, Given your uncle's connection with the Libs you might be interested in looking at the website for the former WWII USN Armed Guard members at: http://www.armed-guard.com. Although I settled on the SS Stephen Hopkins for my build my second choice was the SS Henry Bacon for her heroics against JU-88's on the Murmansk run, you can google the name, the Wikipedia article is pretty good. Tim
- 227 replies
-
- 4
-
-
- BlueJacket Shipcrafters
- Stephen Hopkins
- (and 2 more)
-
Welcome aboard daddy rabbit, your Scharnhorst looks to be a great build although seeing that PE bender brought back some disturbing memories from my last build (it was an Orange Hobby kit - a ton of unbelievably small and complicated PE) Bob, thanks for the compliment. I tried textured spray paint that has worked well for me before but it just didn't work this time and since I've no shortage of sawdust with this build I thought I'd give it a try.
- 227 replies
-
- 3
-
-
- BlueJacket Shipcrafters
- Stephen Hopkins
- (and 2 more)
-
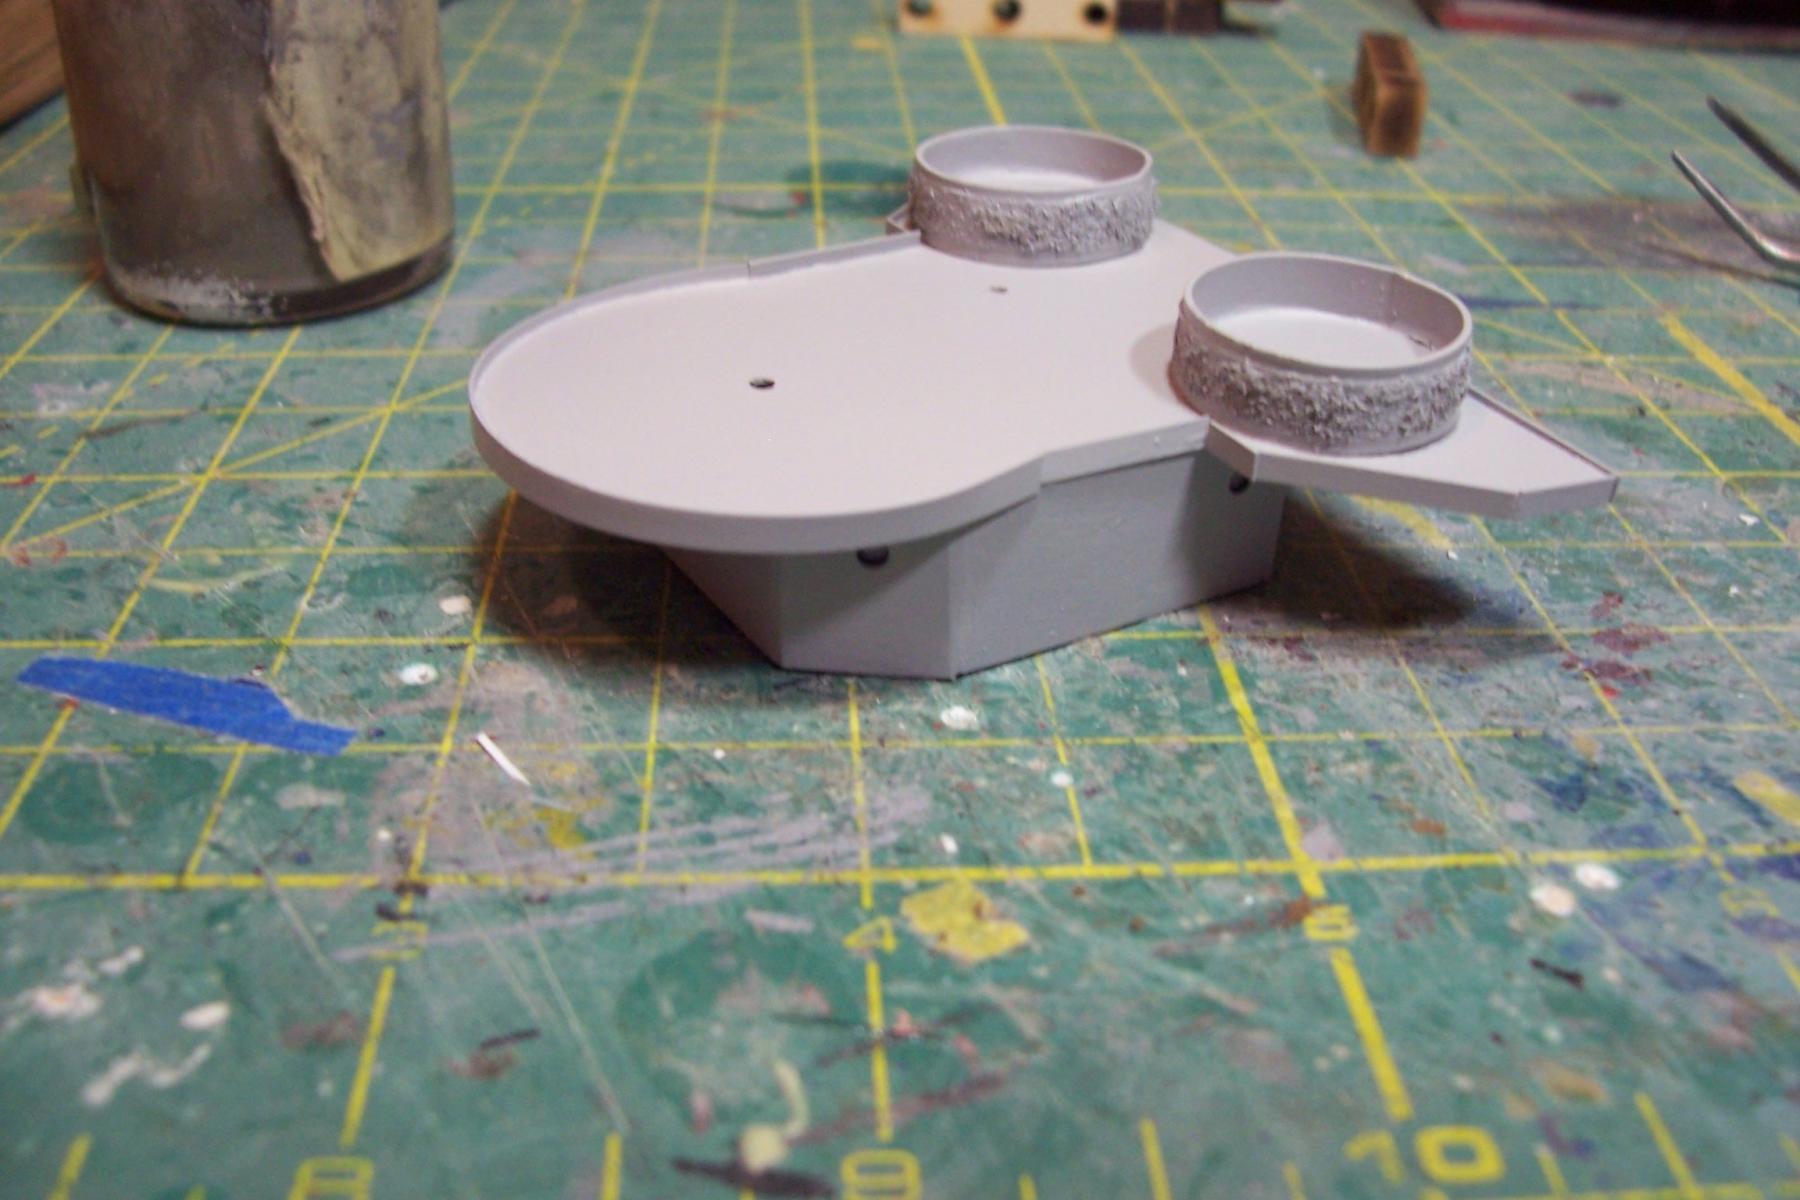
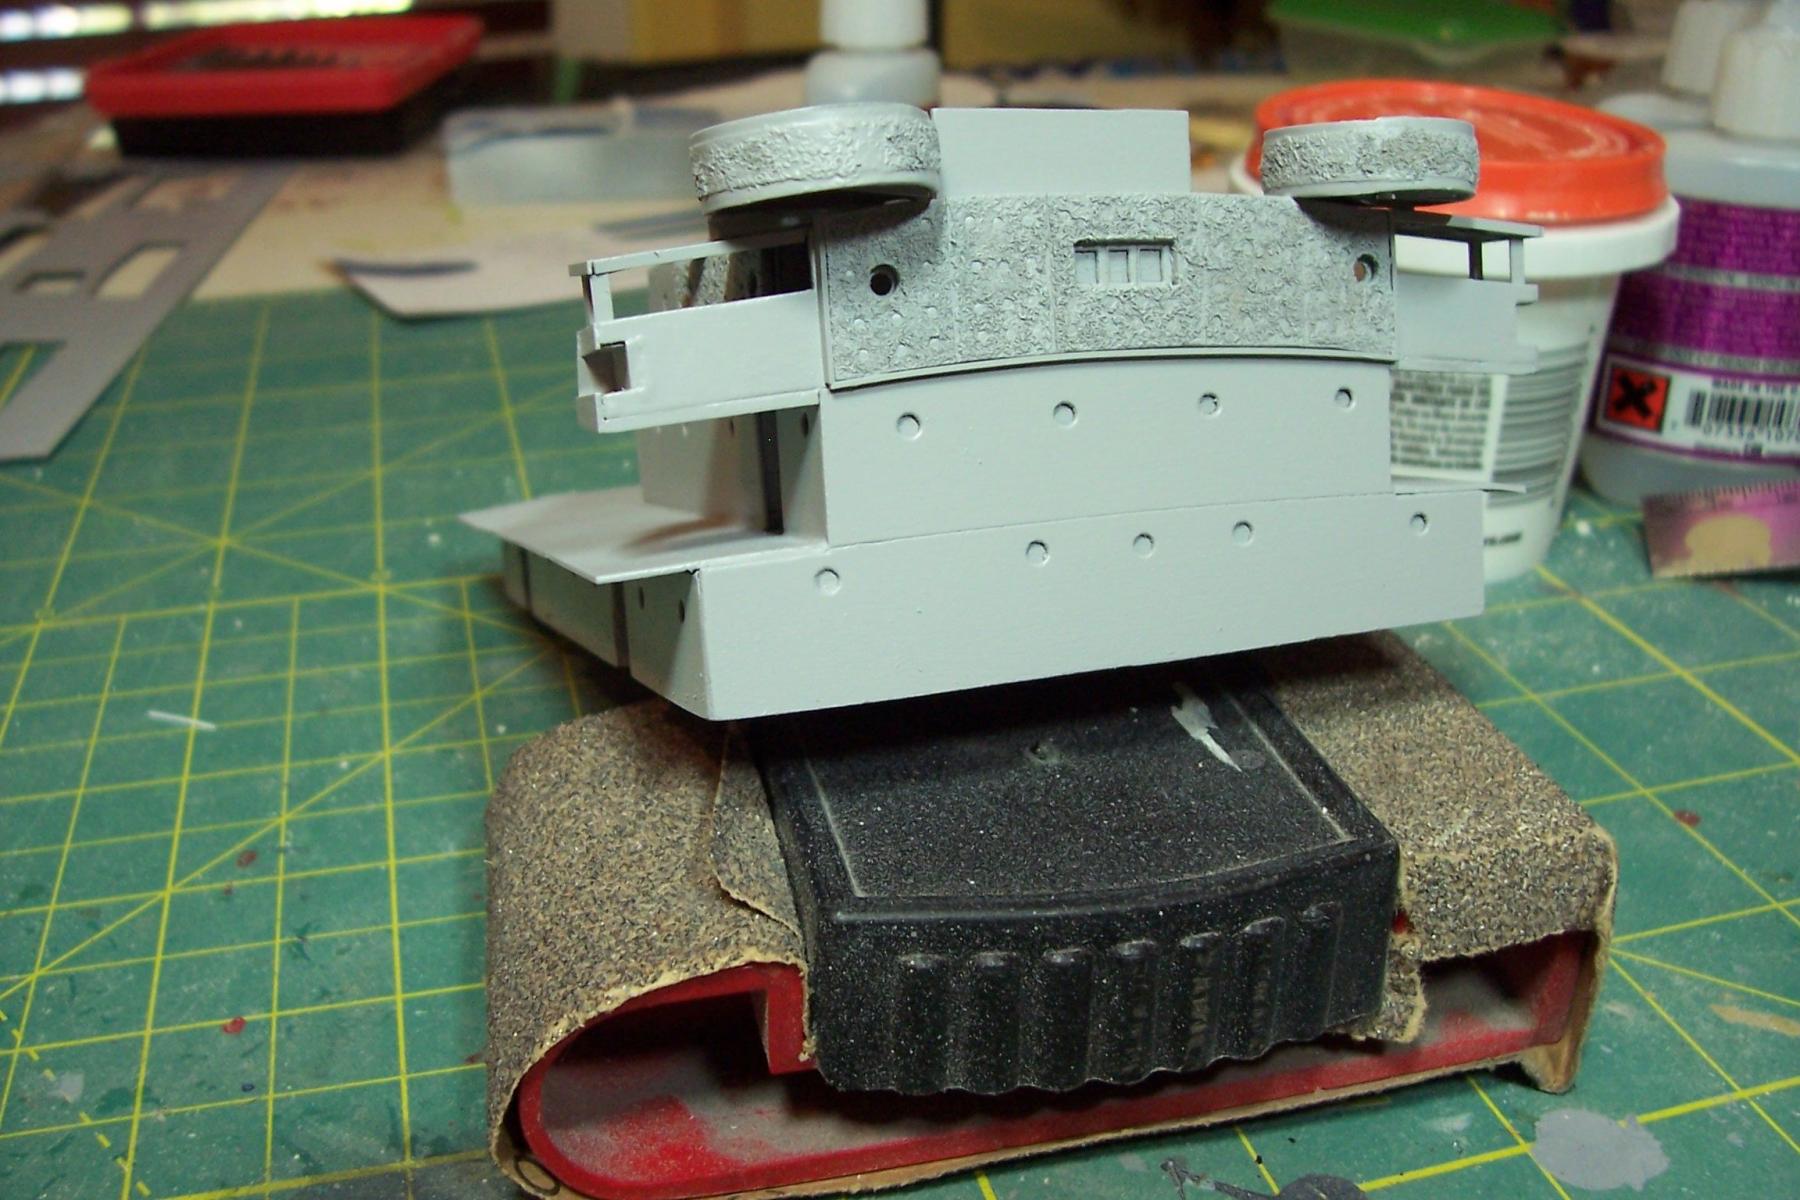
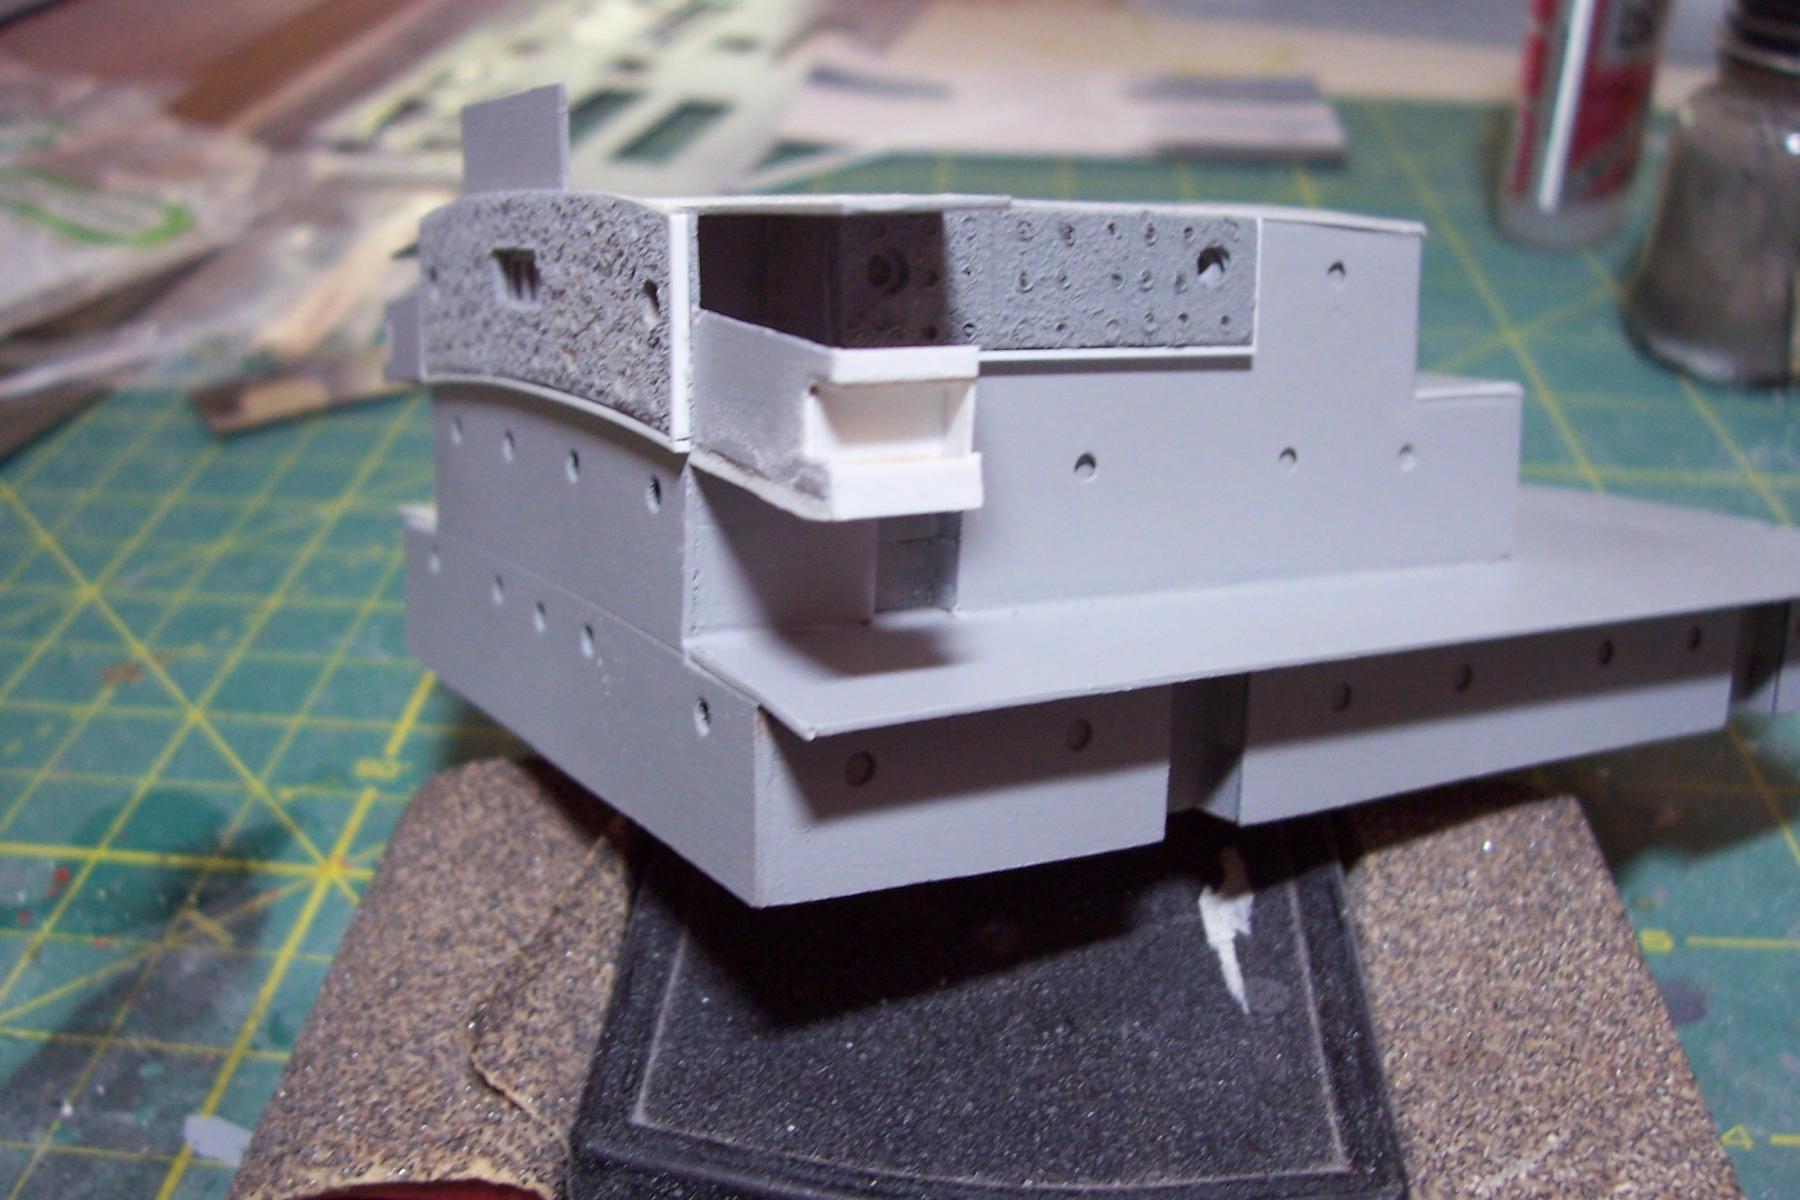
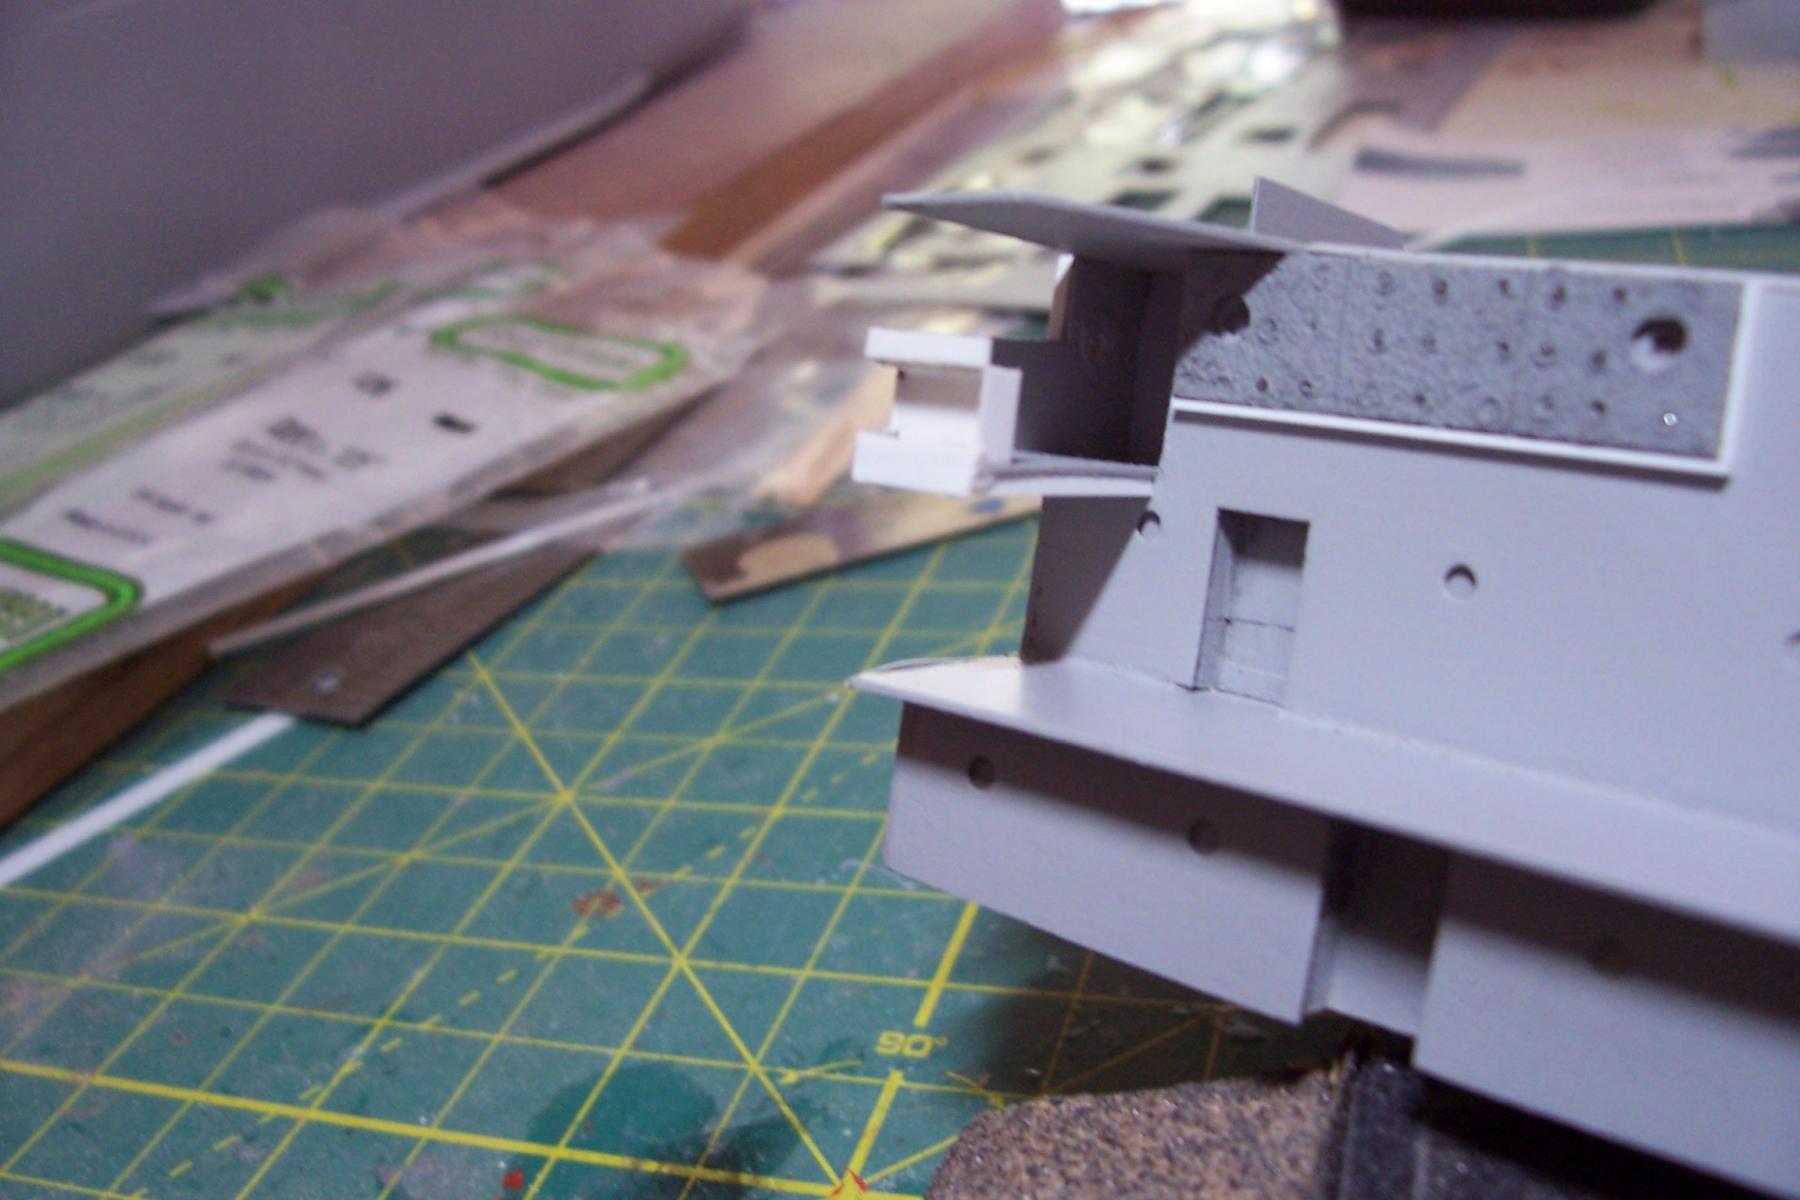
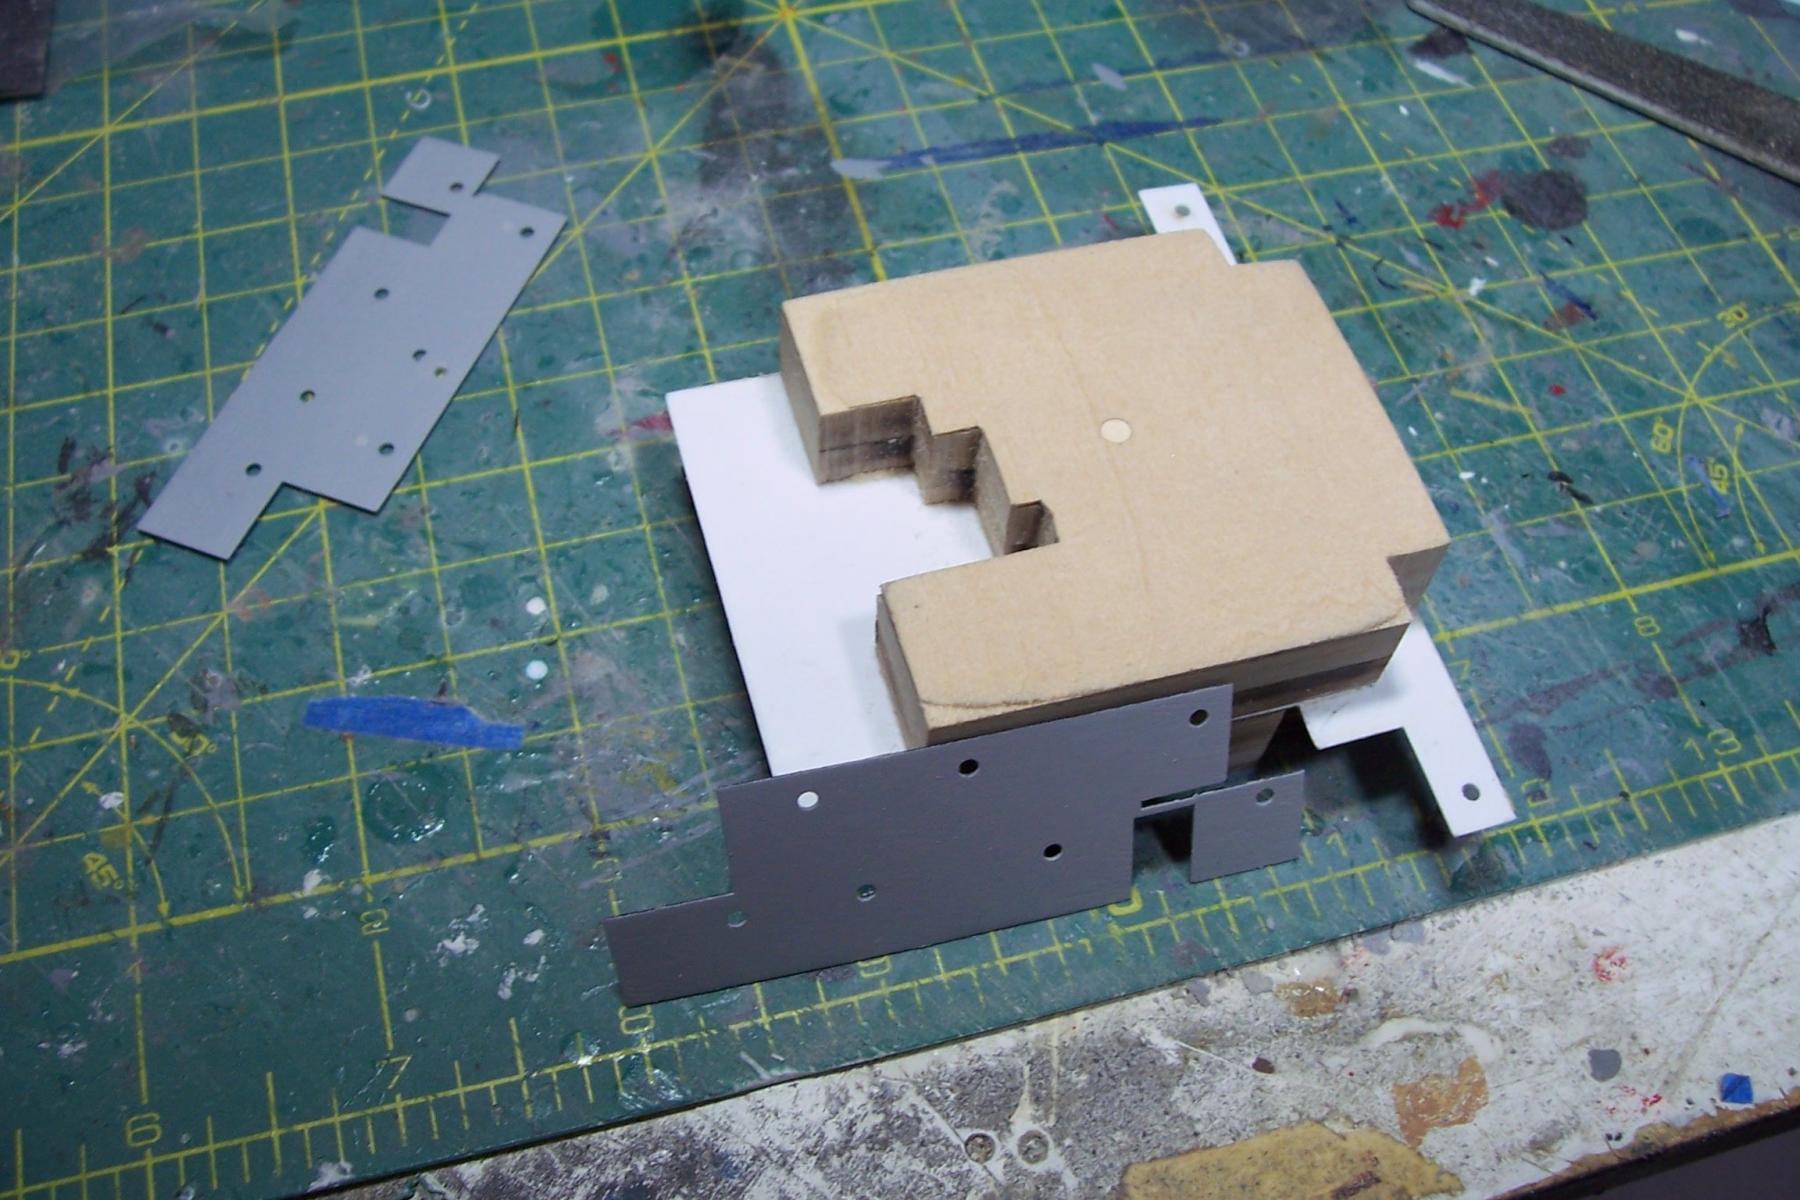
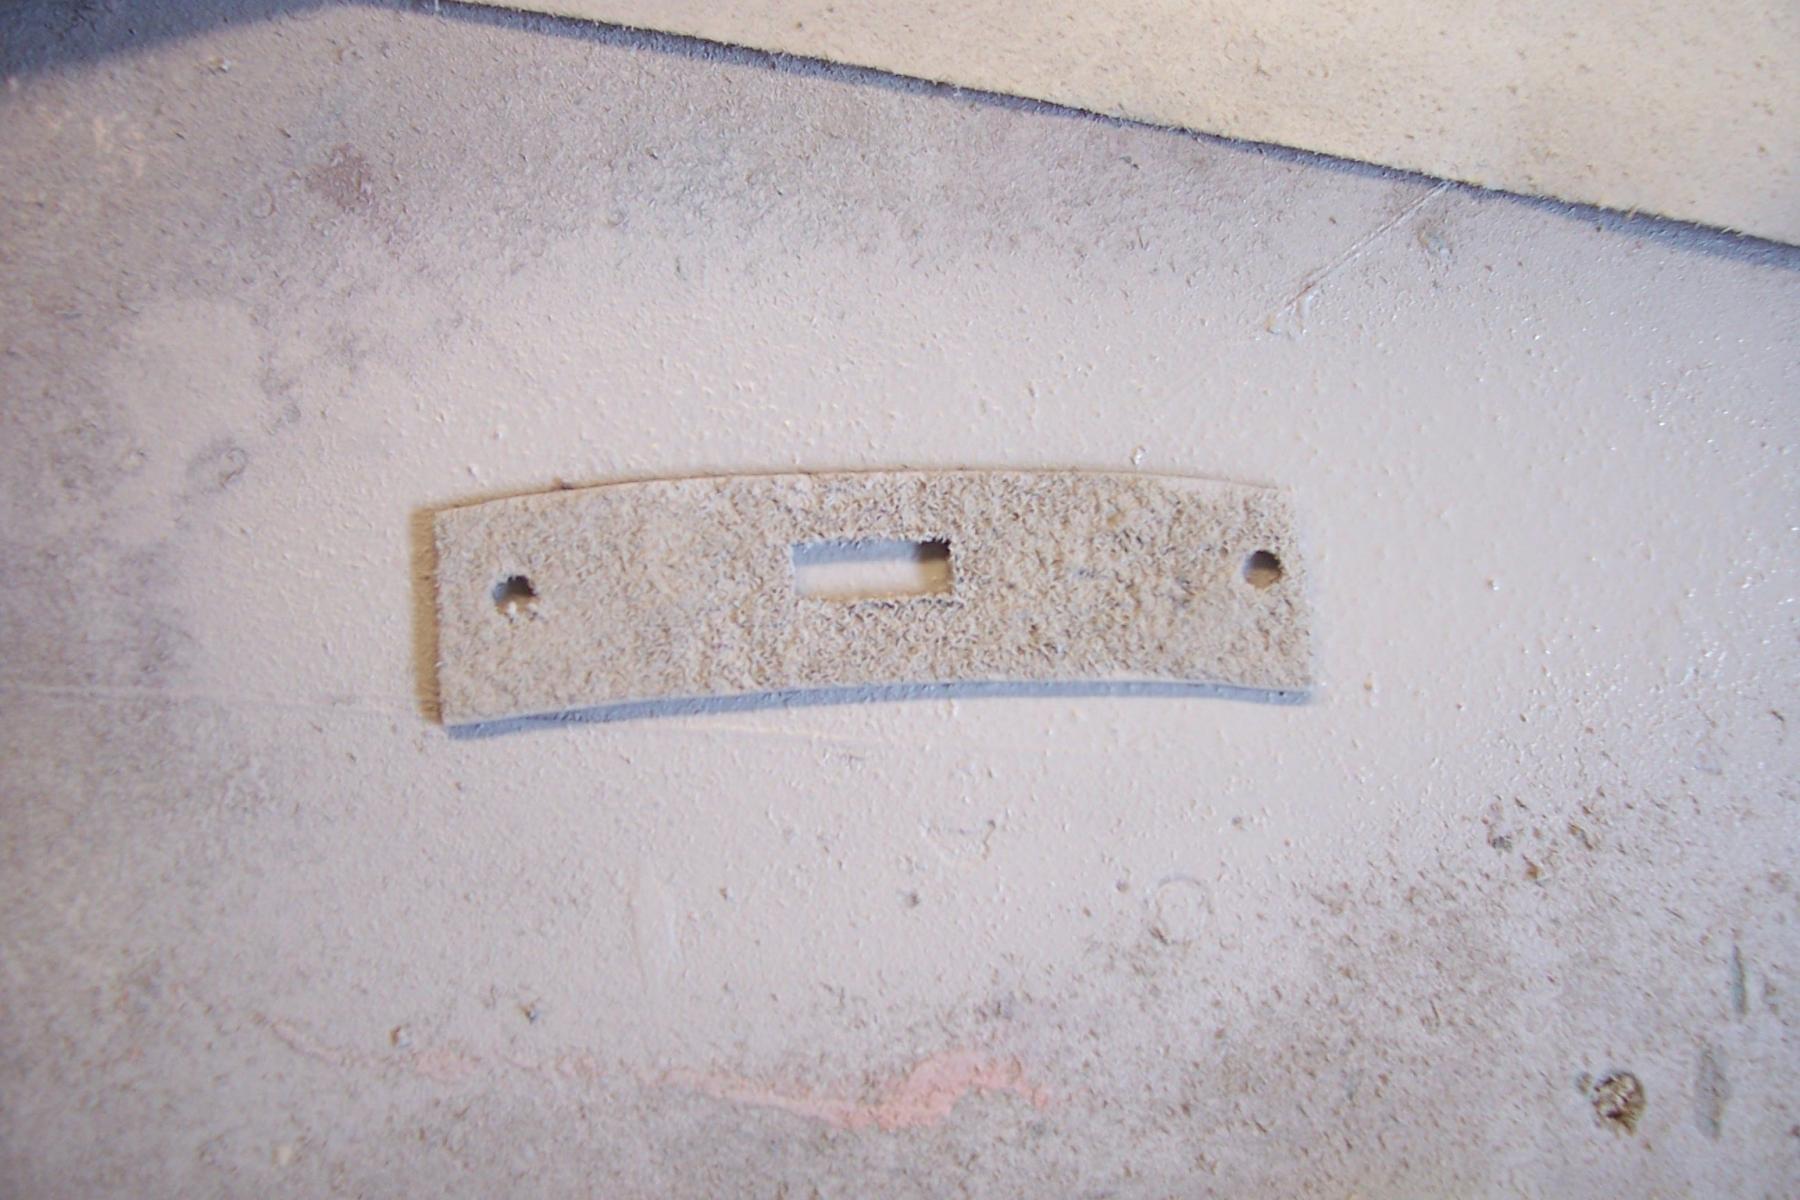
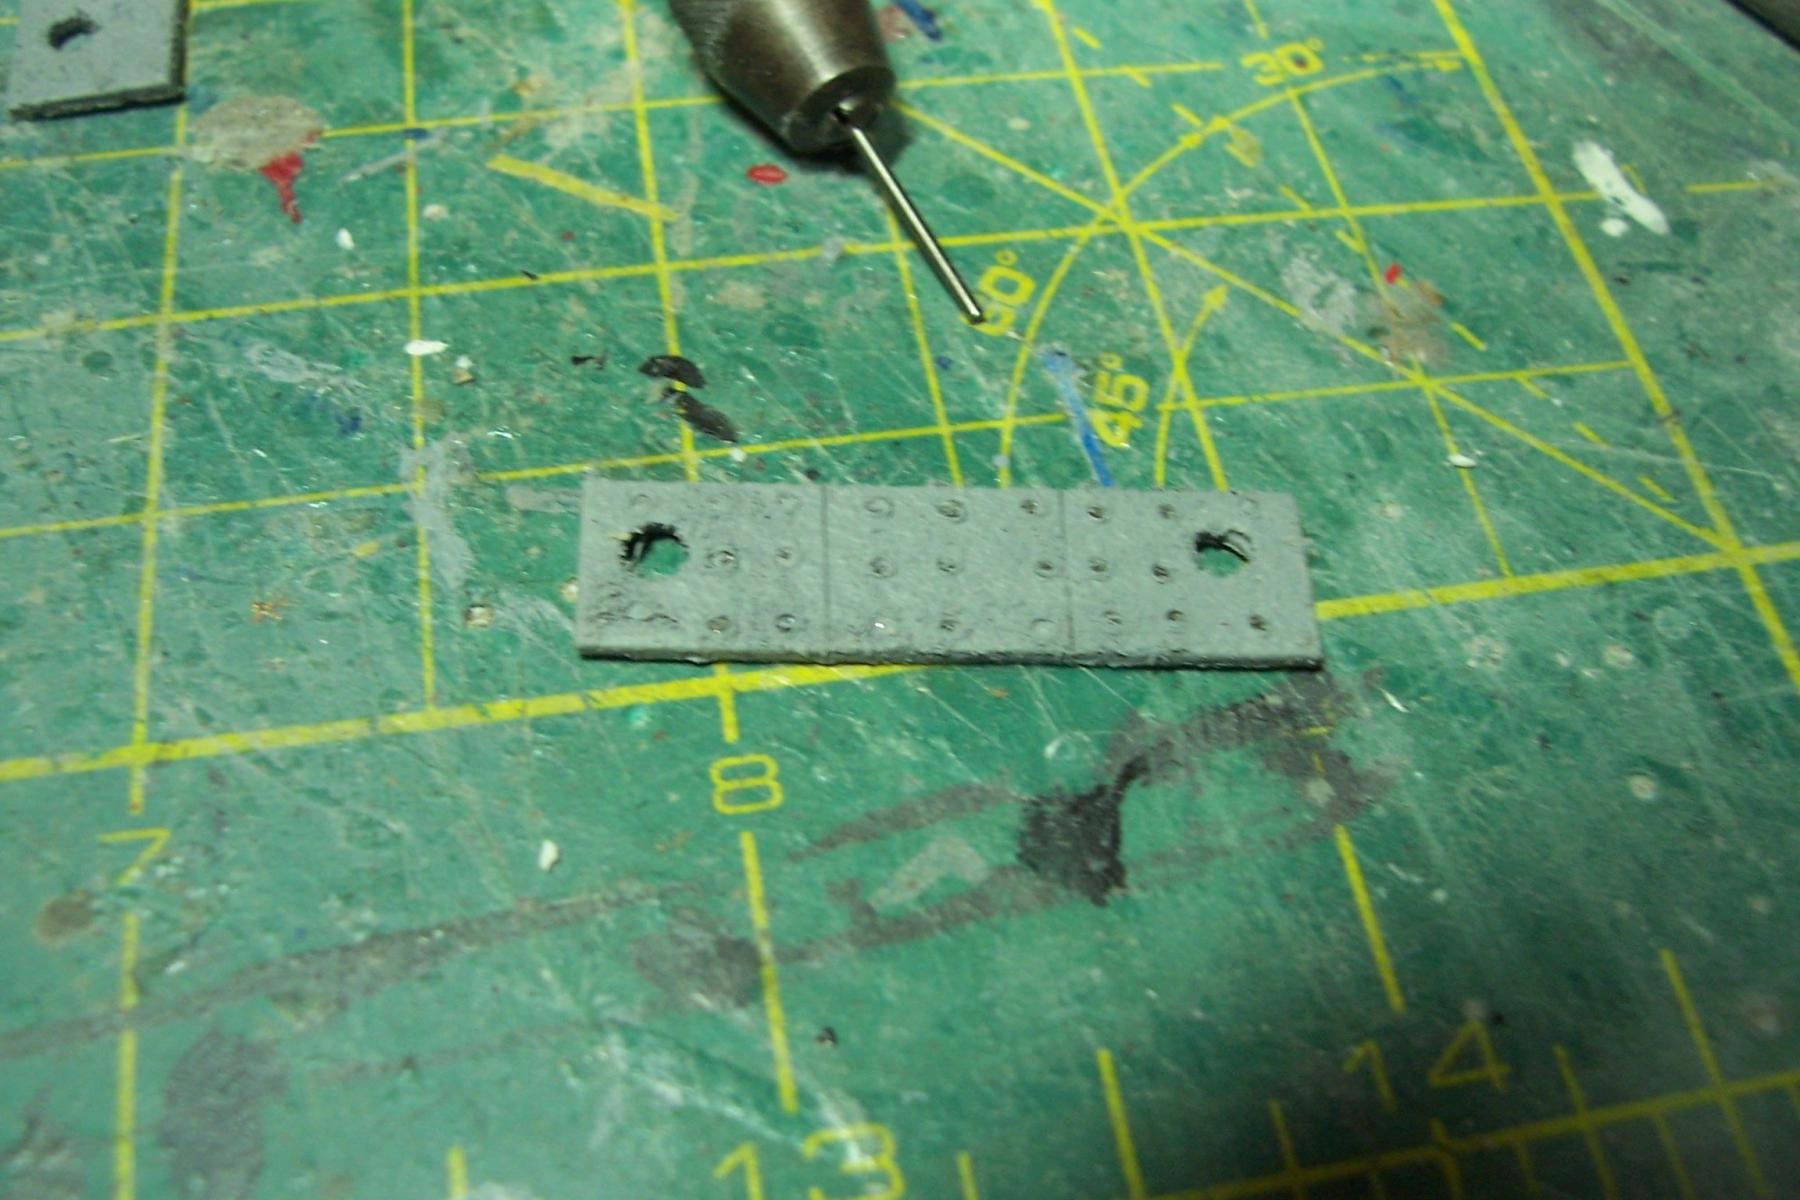
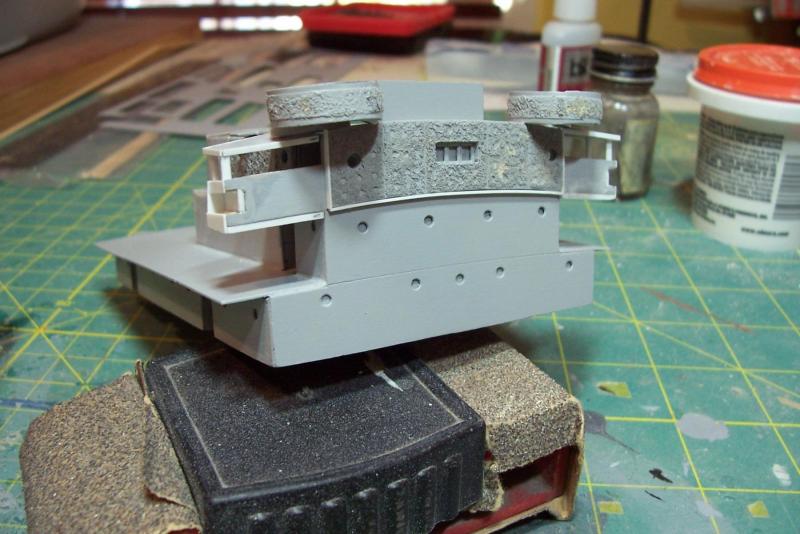
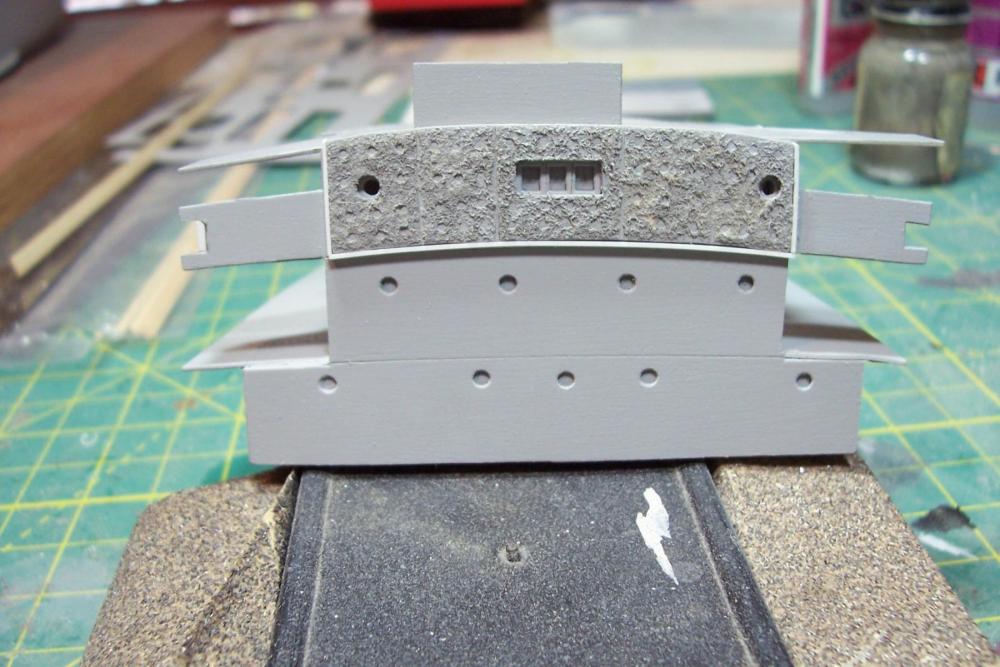
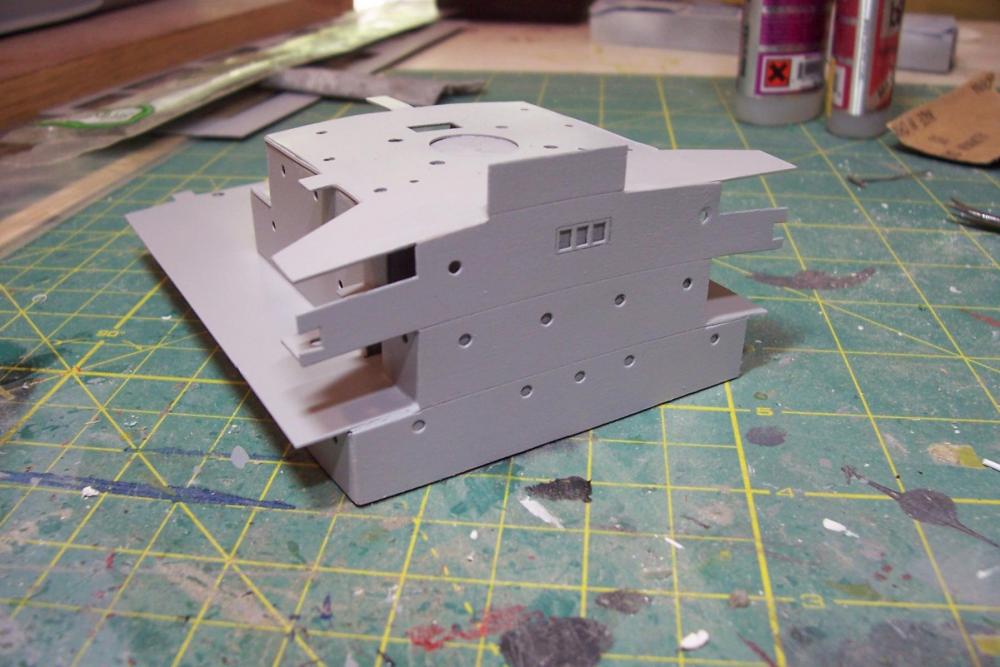
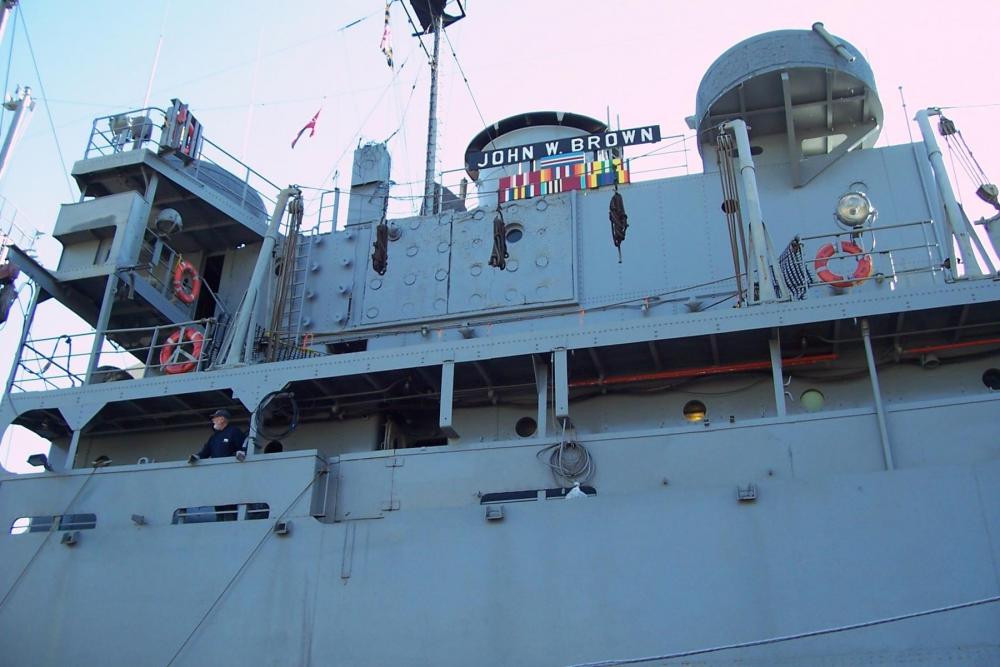
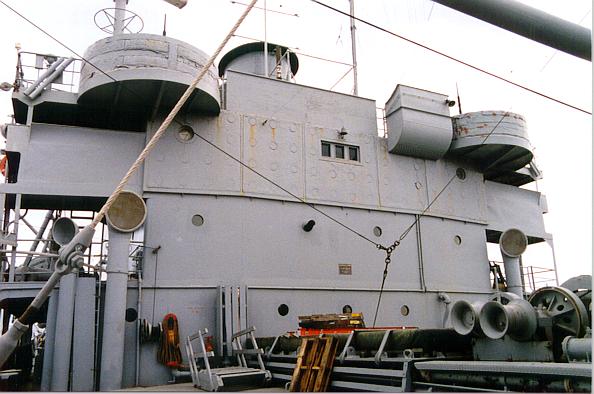
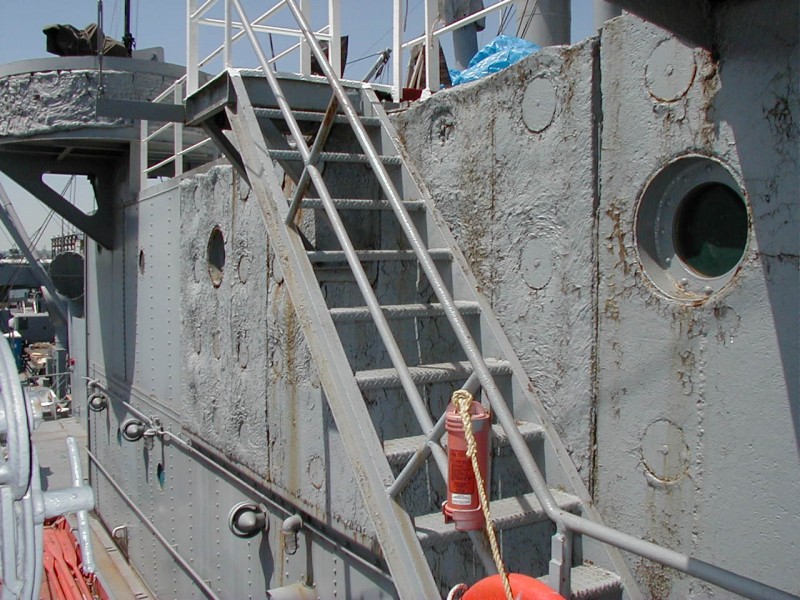
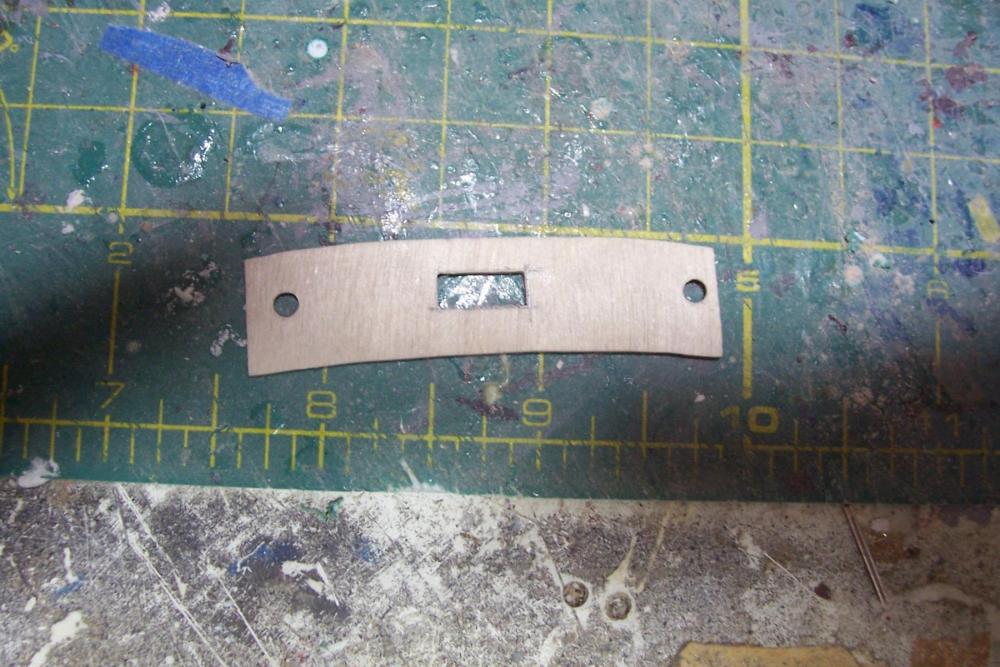
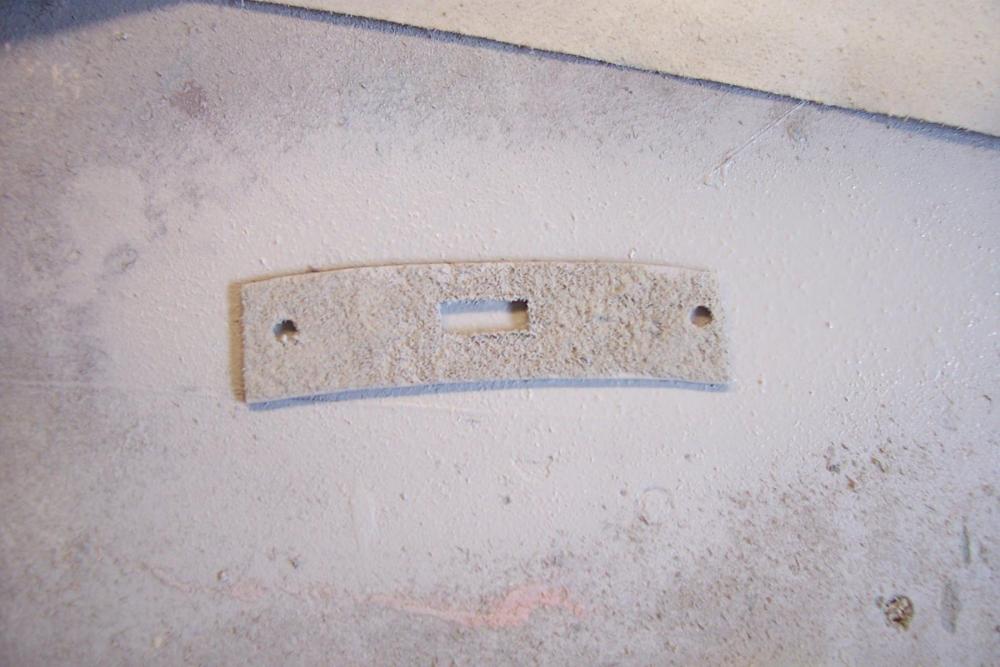
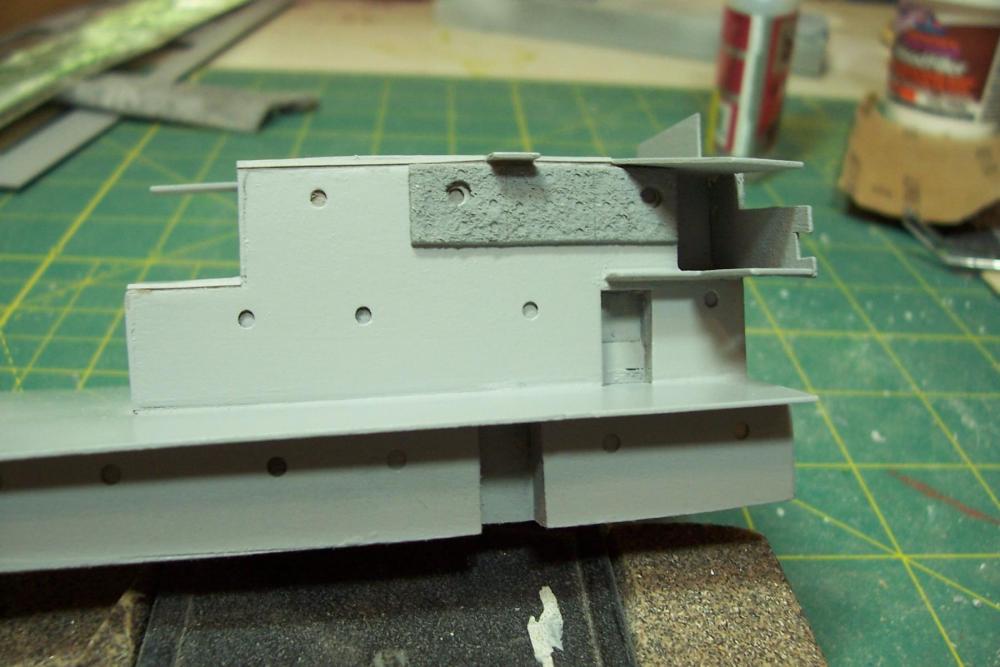
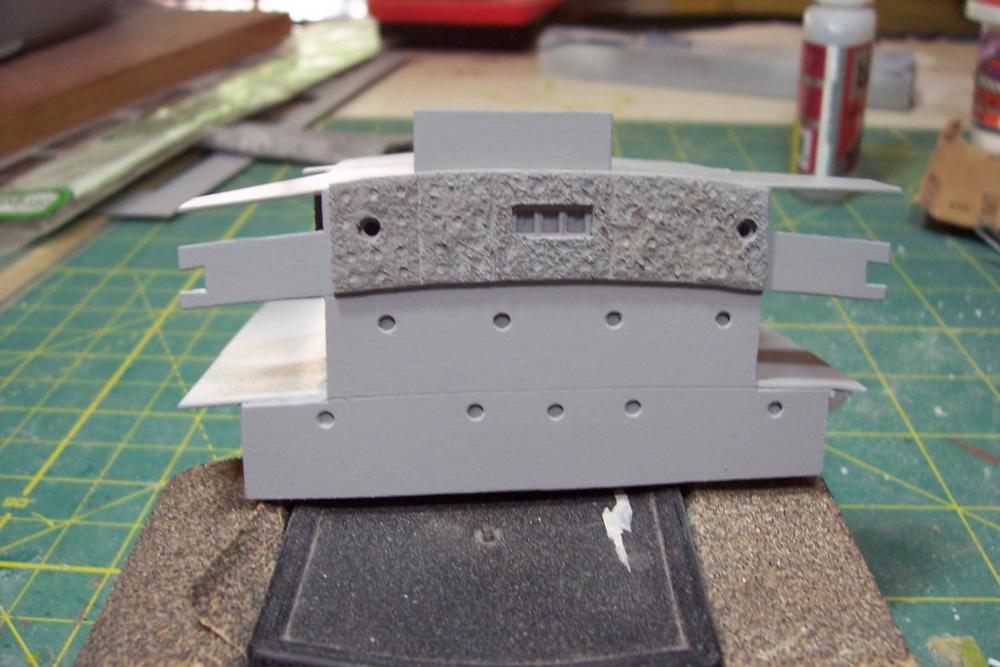
More of the Deckhouse After glueing up the lifts it was time to add the thin laser cut facing pieces. While test fitting them it quickly became apparent that the superstructure was taller than the facing pieces, as confirmed by the plans. The facing pieces are the correct height but the lifts are too tall, about 6mm total when all are stacked. After removing 1.5 - 2 mm from each level everything fit together. One of the odd features of the liberty ships was what looked to be concrete slabs around the pilot house and gun tubs like you can see here: While visiting the SS John Brown I learned that it is not concrete but a British invention called Plastic Armour which is really just road paving material like asphalt. You can read about it here if you are interested: https://en.wikipedia.org/wiki/Plastic_armour As you can see in this pix it varied in its appearance even on the same ship; the nearest slab is smooth, the ones next to it rougher and the slabs protecting the gun tub in the background look like a sloppy job of adding foam insulation: I decided to add it to my model. I cut thin wood to shape, drilled out the porthole lights larger than the portholes for the distinctive “stepped” look. I then sprayed them with primer and while it was still wet pressed them into some fine sawdust. A few more coats of spray primer reduced the fine granularity. I then used the non-working end of a drill bit to press down to create the discs that worked like upholstery buttons to hold the armor in place: Here’s the finished product (Additional airbrush coats of the final color will reduce the granularity even more): Next up will be adding the gun tubs and some more detailing that is easier done before the deckhouse is mounted on the hull.


- 227 replies
-
- 20
-
-
- BlueJacket Shipcrafters
- Stephen Hopkins
- (and 2 more)
-
Beautiful brass work Greg. Funny - I've worked with brass for years and when I've screwed up something with CA I've never thought of reaching for the lighter - I've learned my good tip for the day Tim
- 342 replies
-
- 8
-
-
- dreadnought
- zvezda
- (and 2 more)
-
Thanks for the kind words Elijah and Greg, It certainly weighs more than any plastic, resin, or even a POF or POB model, enough that I don't feel comfortable mounting it on pedestals since the leverage with that weight might loosen them up pretty quickly so I'll mount it on keel blocks (not sure how many yet). Tim
- 227 replies
-
- 4
-
-
- BlueJacket Shipcrafters
- Stephen Hopkins
- (and 2 more)
-
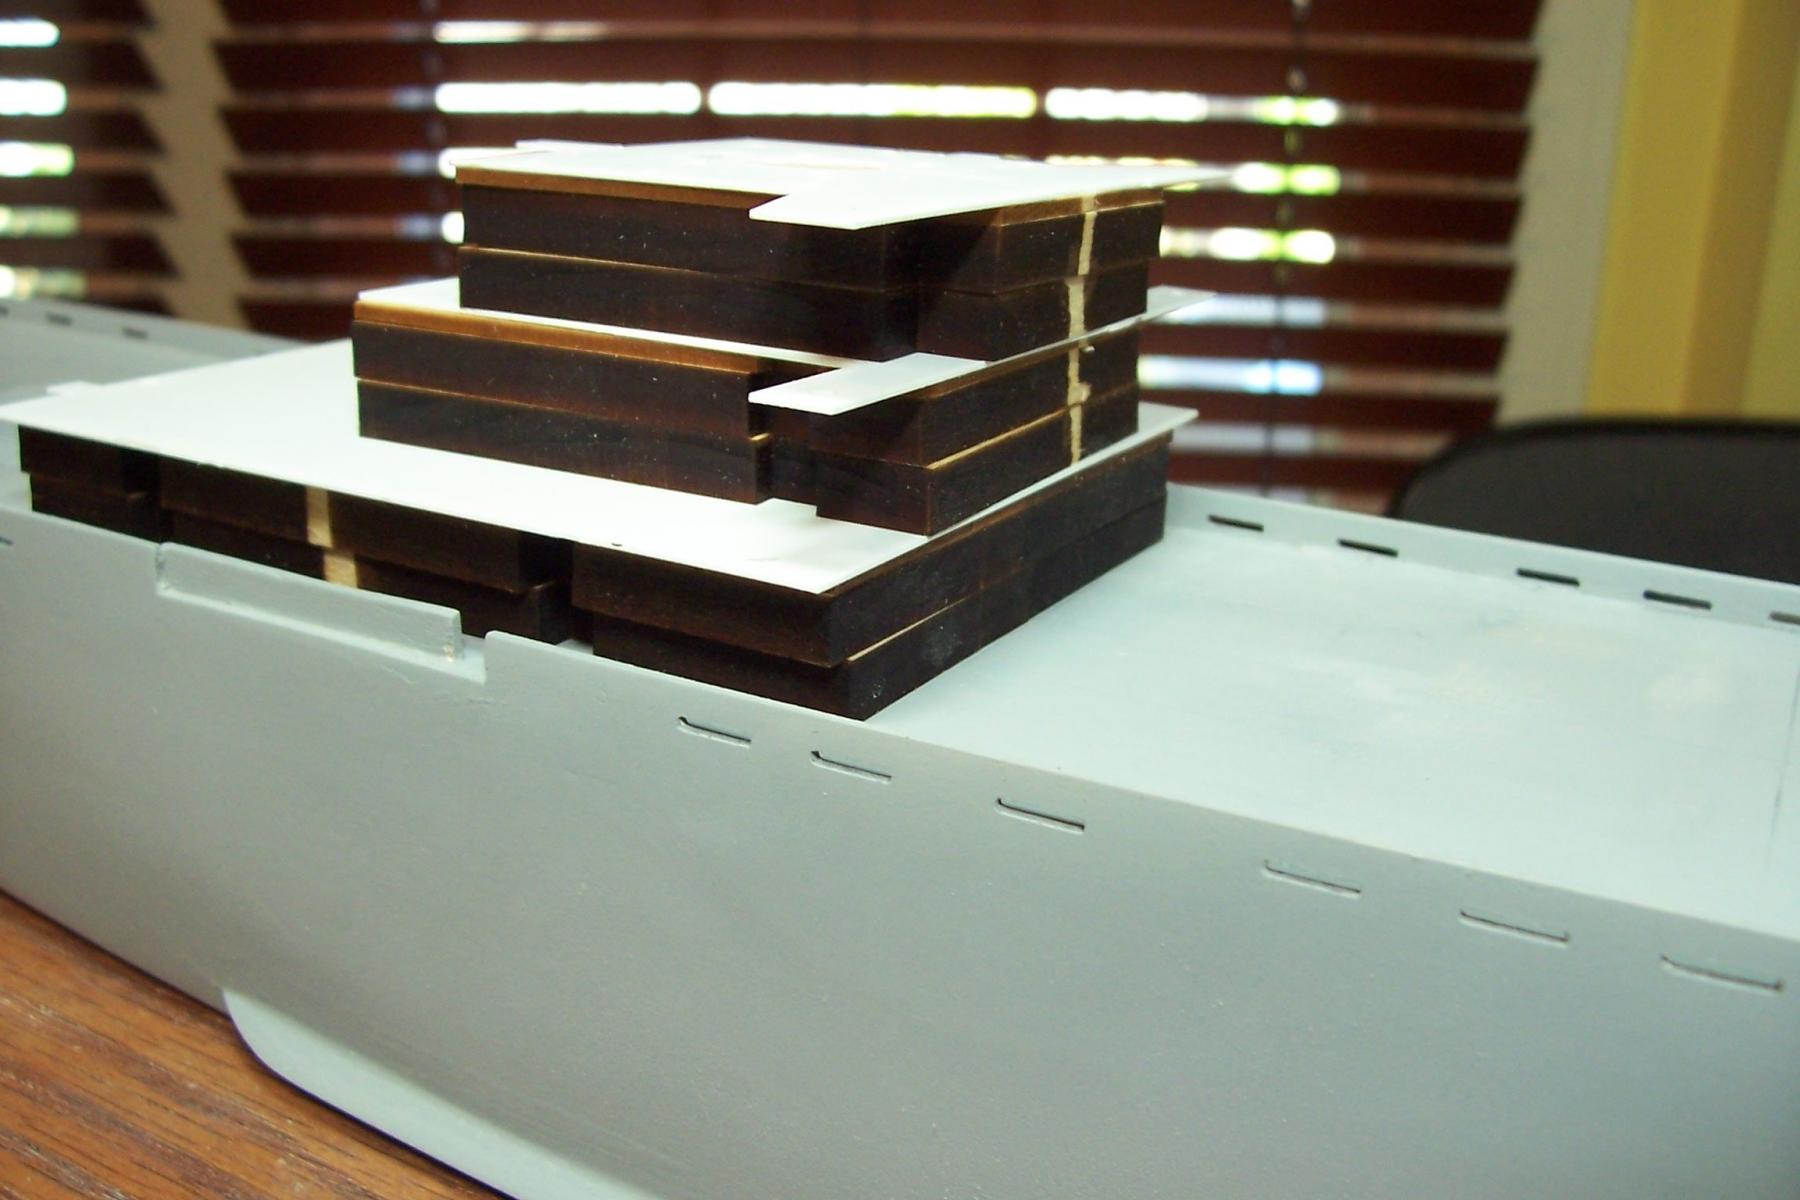
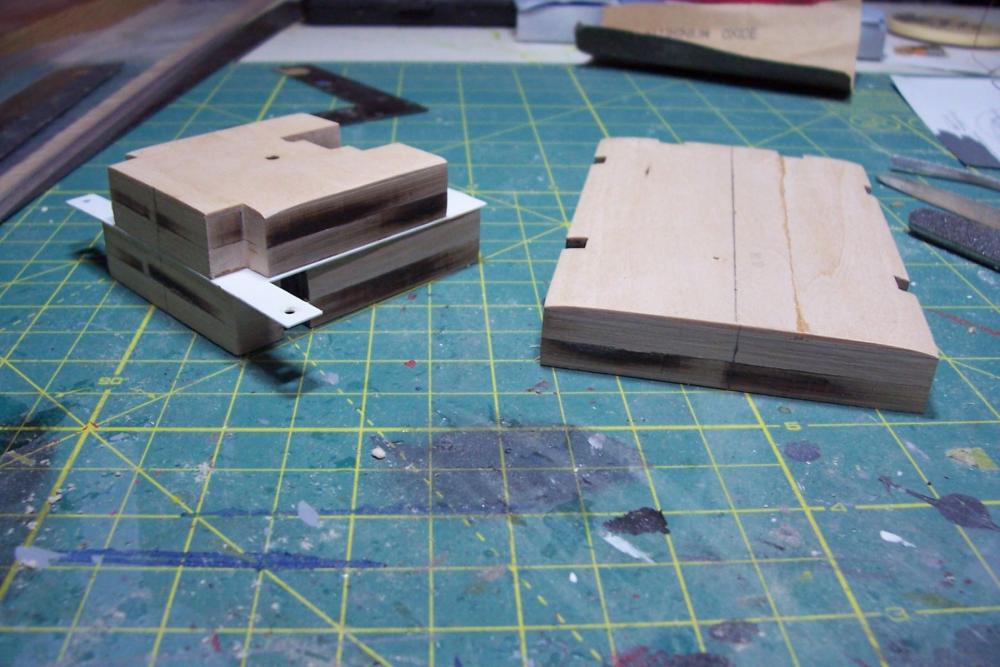
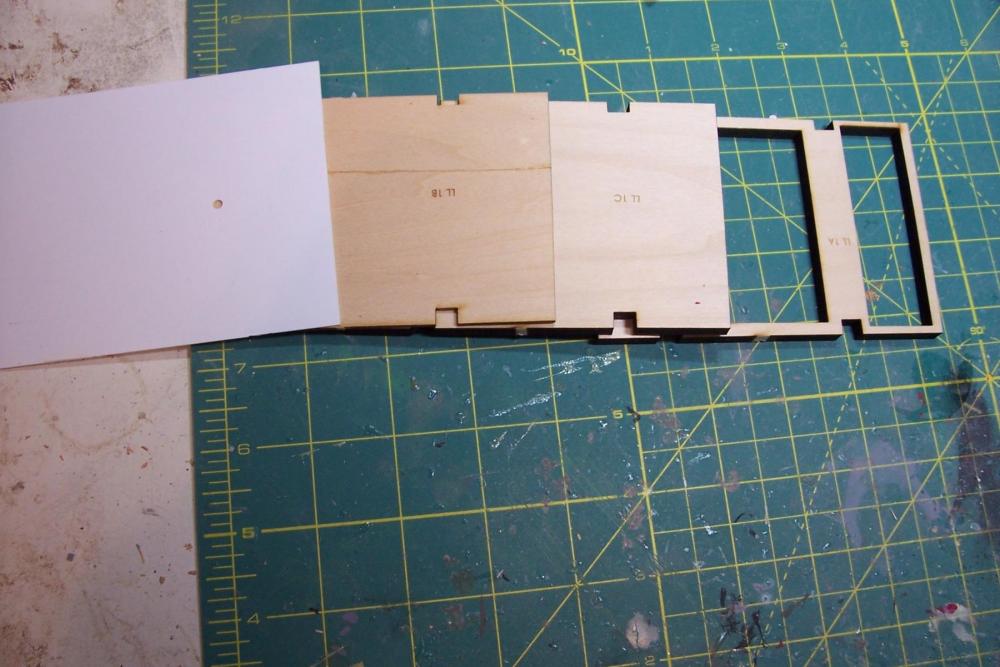
Start of the Deckhouse I’m going to depart from the kit’s build sequence a bit. The next step in the instructions is to install about 100 triangular bulwark braces around the outside of the main deck. I’m going to hold off on that until I’ve fabricated the deckhouses and crane houses because of the need to place sandpaper on the deck and then rub the house bottoms on it to get a good fit with the deck. Given the limited clearance between the bulwarks I’m sure I would end up breaking off a lot of the braces. The Main Deckhouse is made of up 3 levels. Each level in turn is a stack of 3 laser cut wooden pieces and a thin plastic top deck. The bottom wood piece is a framework so that the amount of surface area that has to be sanded to match the deck underneath it is minimized. The top wood piece is a 1/16 inch sheet that is sanded to form a camber, its center staying 1/16 thick and the outer edges sanded to nothing. Here’s what 1 set looks like: Here’s all 12 pieces dry fitted in a stack:

- 227 replies
-
- 11
-
-
- BlueJacket Shipcrafters
- Stephen Hopkins
- (and 2 more)
-
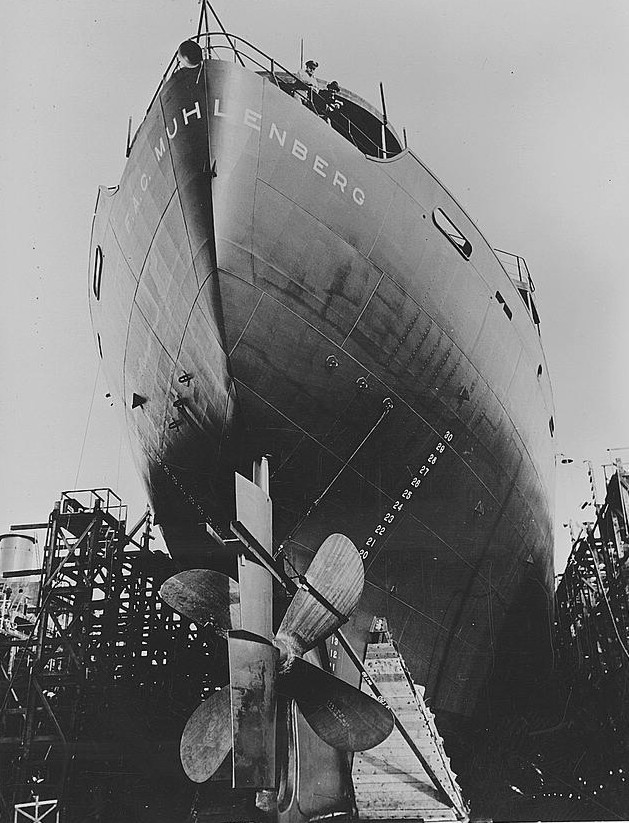
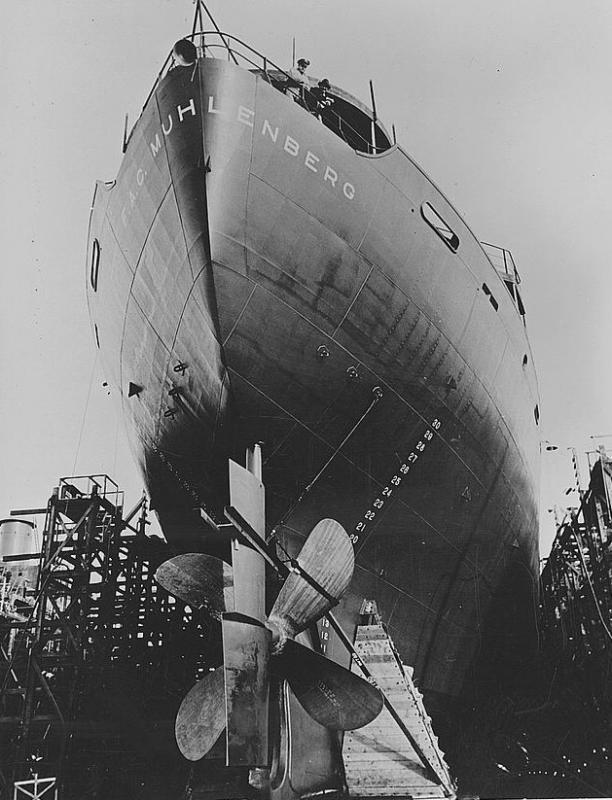
As to when this rudder design was adopted, this pix shows the Liberty F.A.C. Muhlenberg with a contravene rudder prior to her June 1942 launching which was just two months after the Hopkins' launching so I think it's probable the Hopkins had one too. I always like to learn something new. Tim
- 227 replies
-
- 9
-
-
- BlueJacket Shipcrafters
- Stephen Hopkins
- (and 2 more)
-
Thanks Roger! That is some great info. Although I spent most of my working life at sea I've never seen anything like that rudder. I suspected that the liberty ships had to make do with relatively simple, and cheap propellers since the shops capable of making more complex ones would have been monopolized by the Navy. The Liberty props don't look all that advanced over what John Ericsson would have used. Thanks again for an informative post Tim
- 227 replies
-
- 4
-
-
- BlueJacket Shipcrafters
- Stephen Hopkins
- (and 2 more)
-
Bob, for small areas I use Elmers Carpenters Color Change Wood Filler. It dries quick and sands easier than Bondo. For larger areas, or where I need more than minimal thickness, or where adhesion to the wood is an issue (like on a thin or pointed areas) I'll use Bondo. Tim
- 227 replies
-
- 3
-
-
- BlueJacket Shipcrafters
- Stephen Hopkins
- (and 2 more)
-
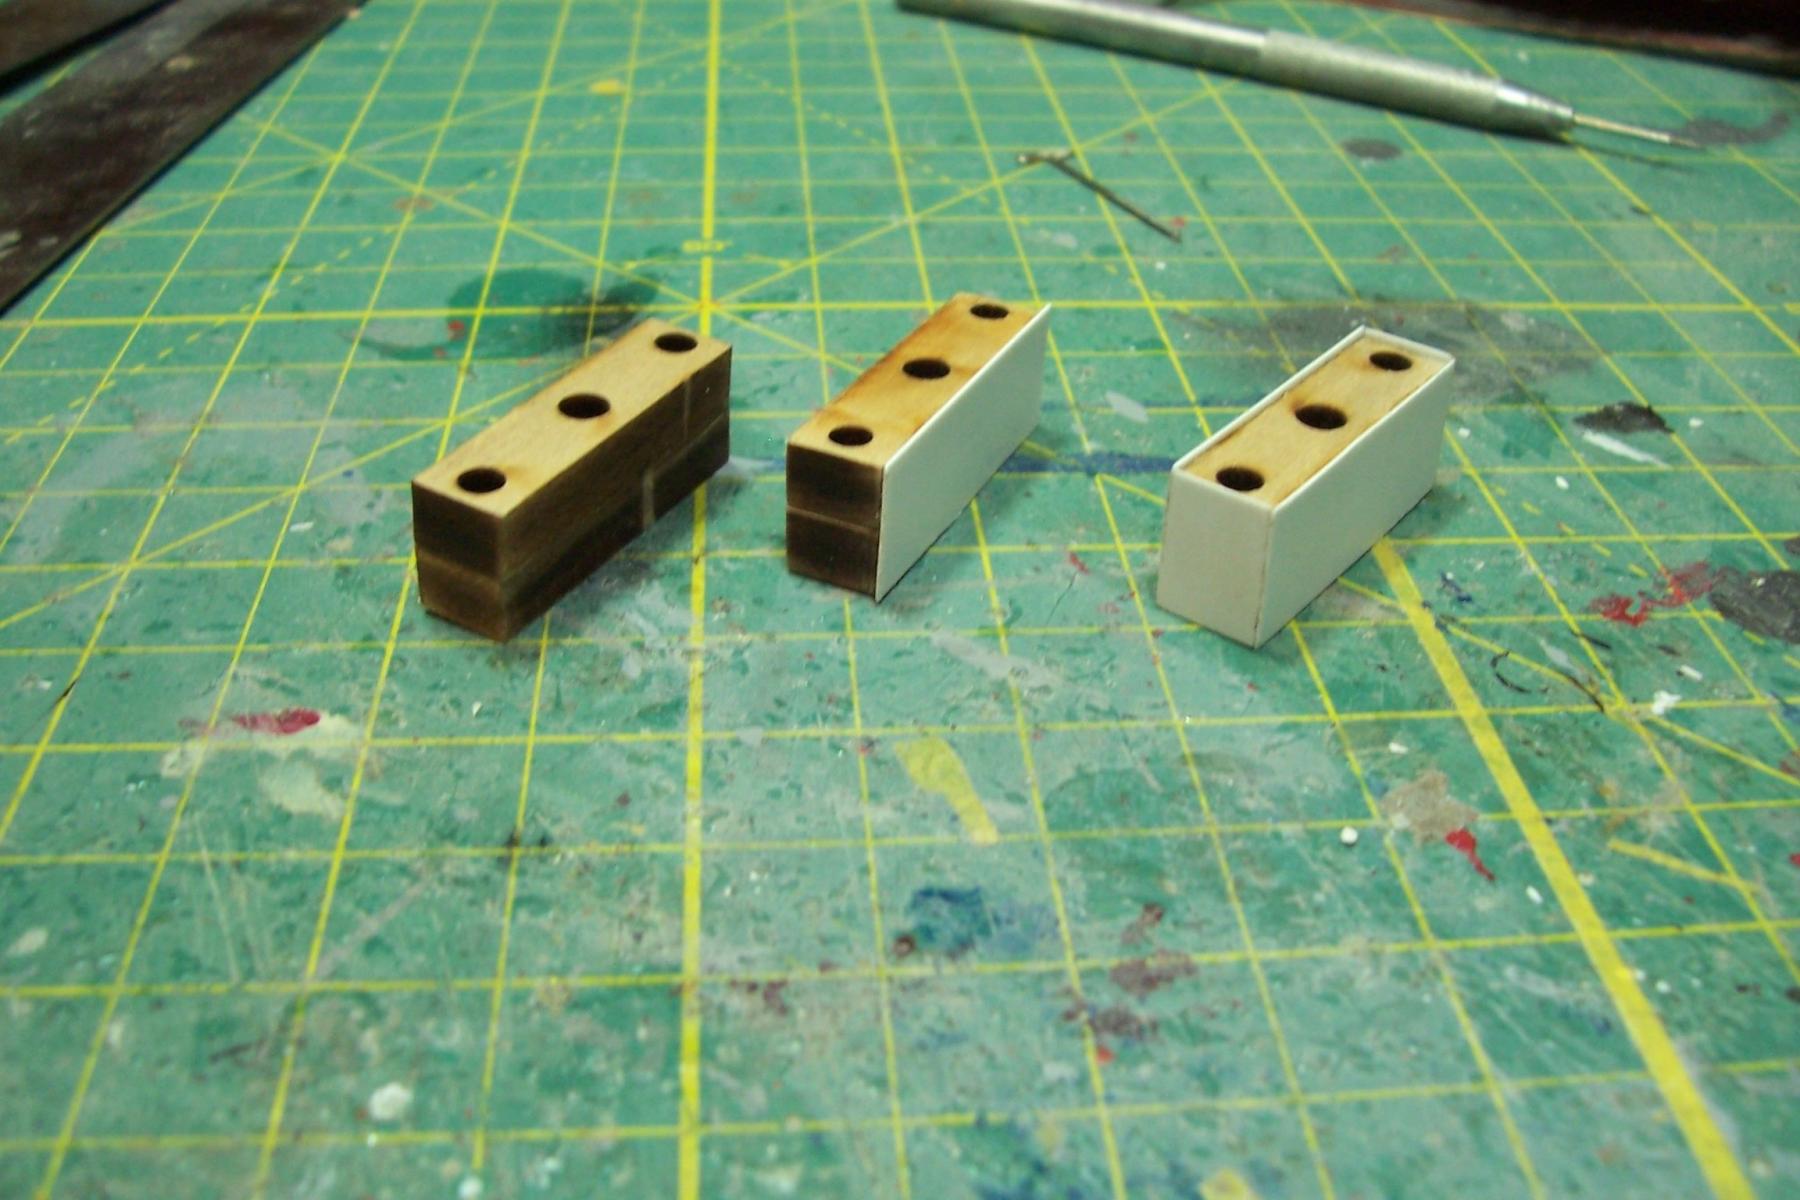
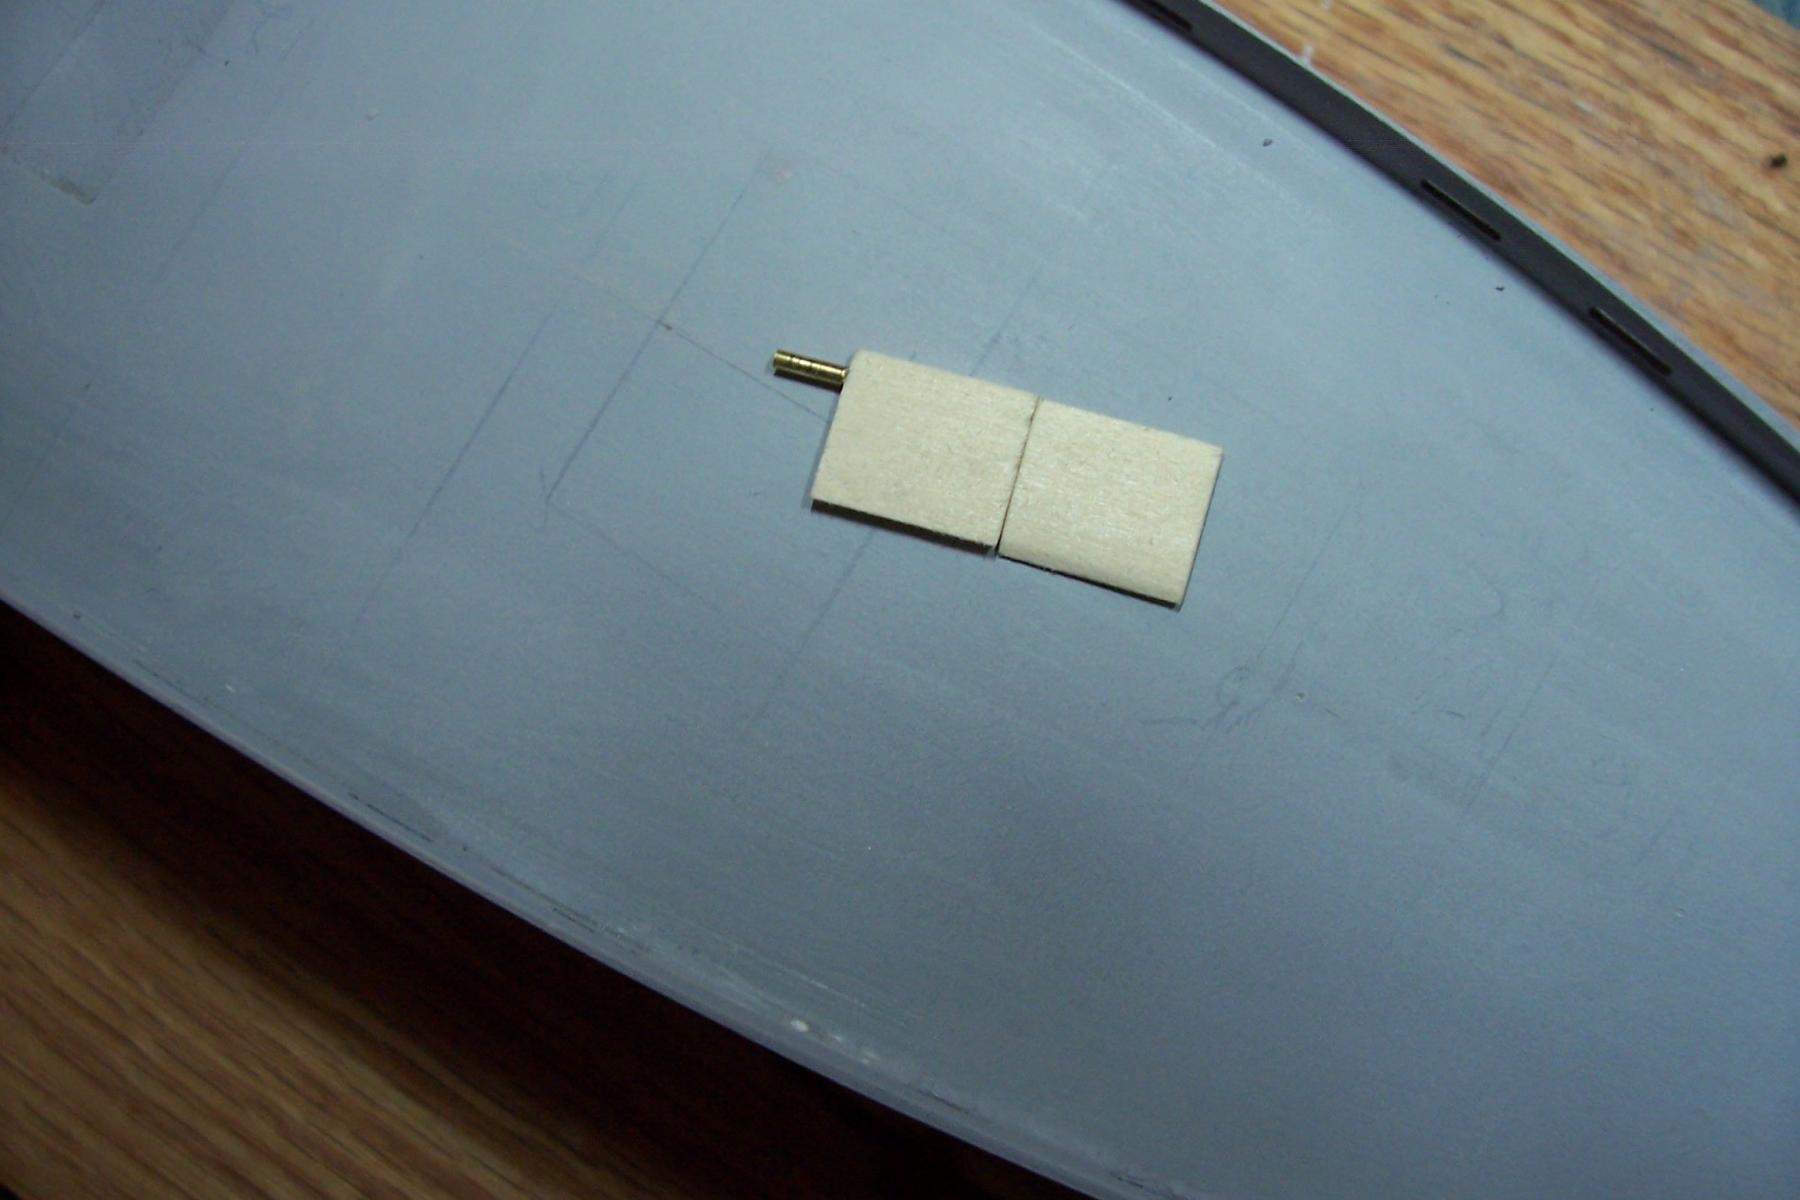
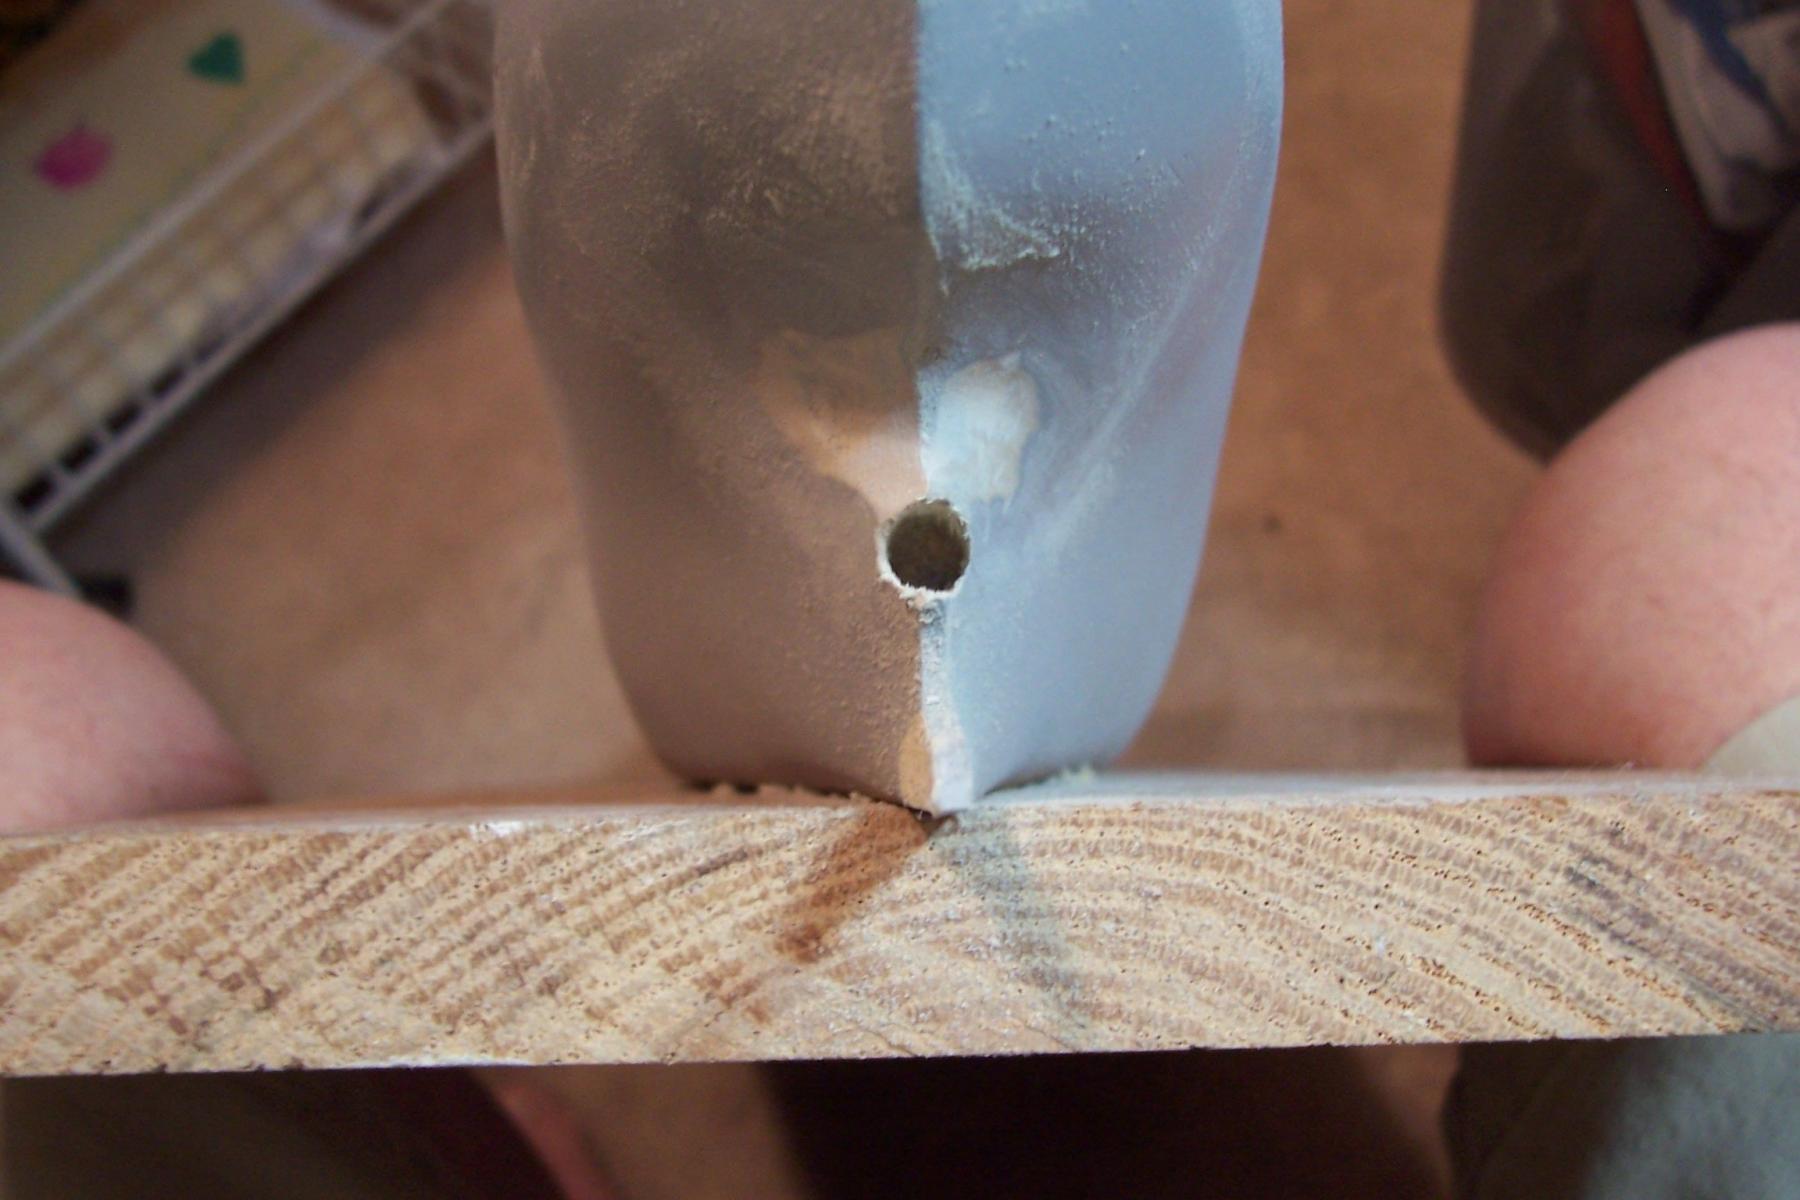
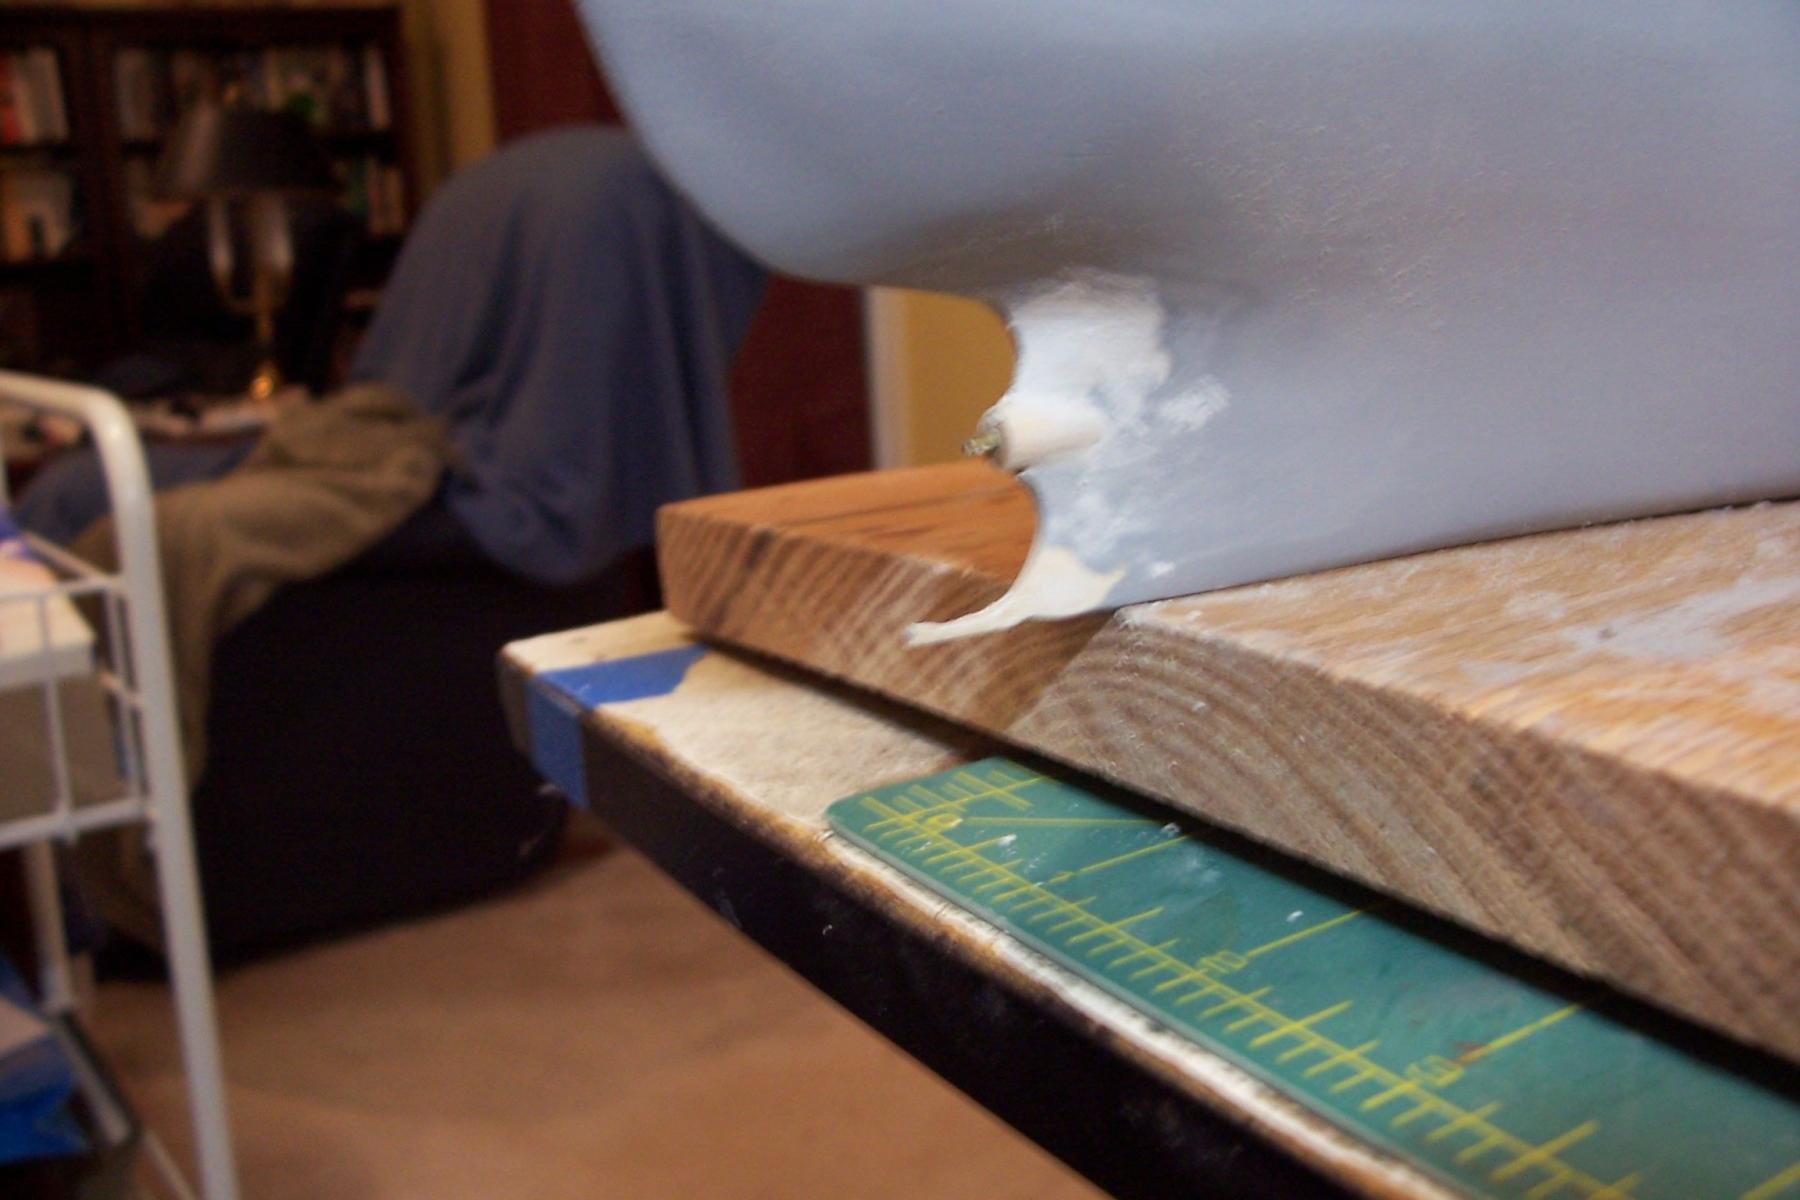
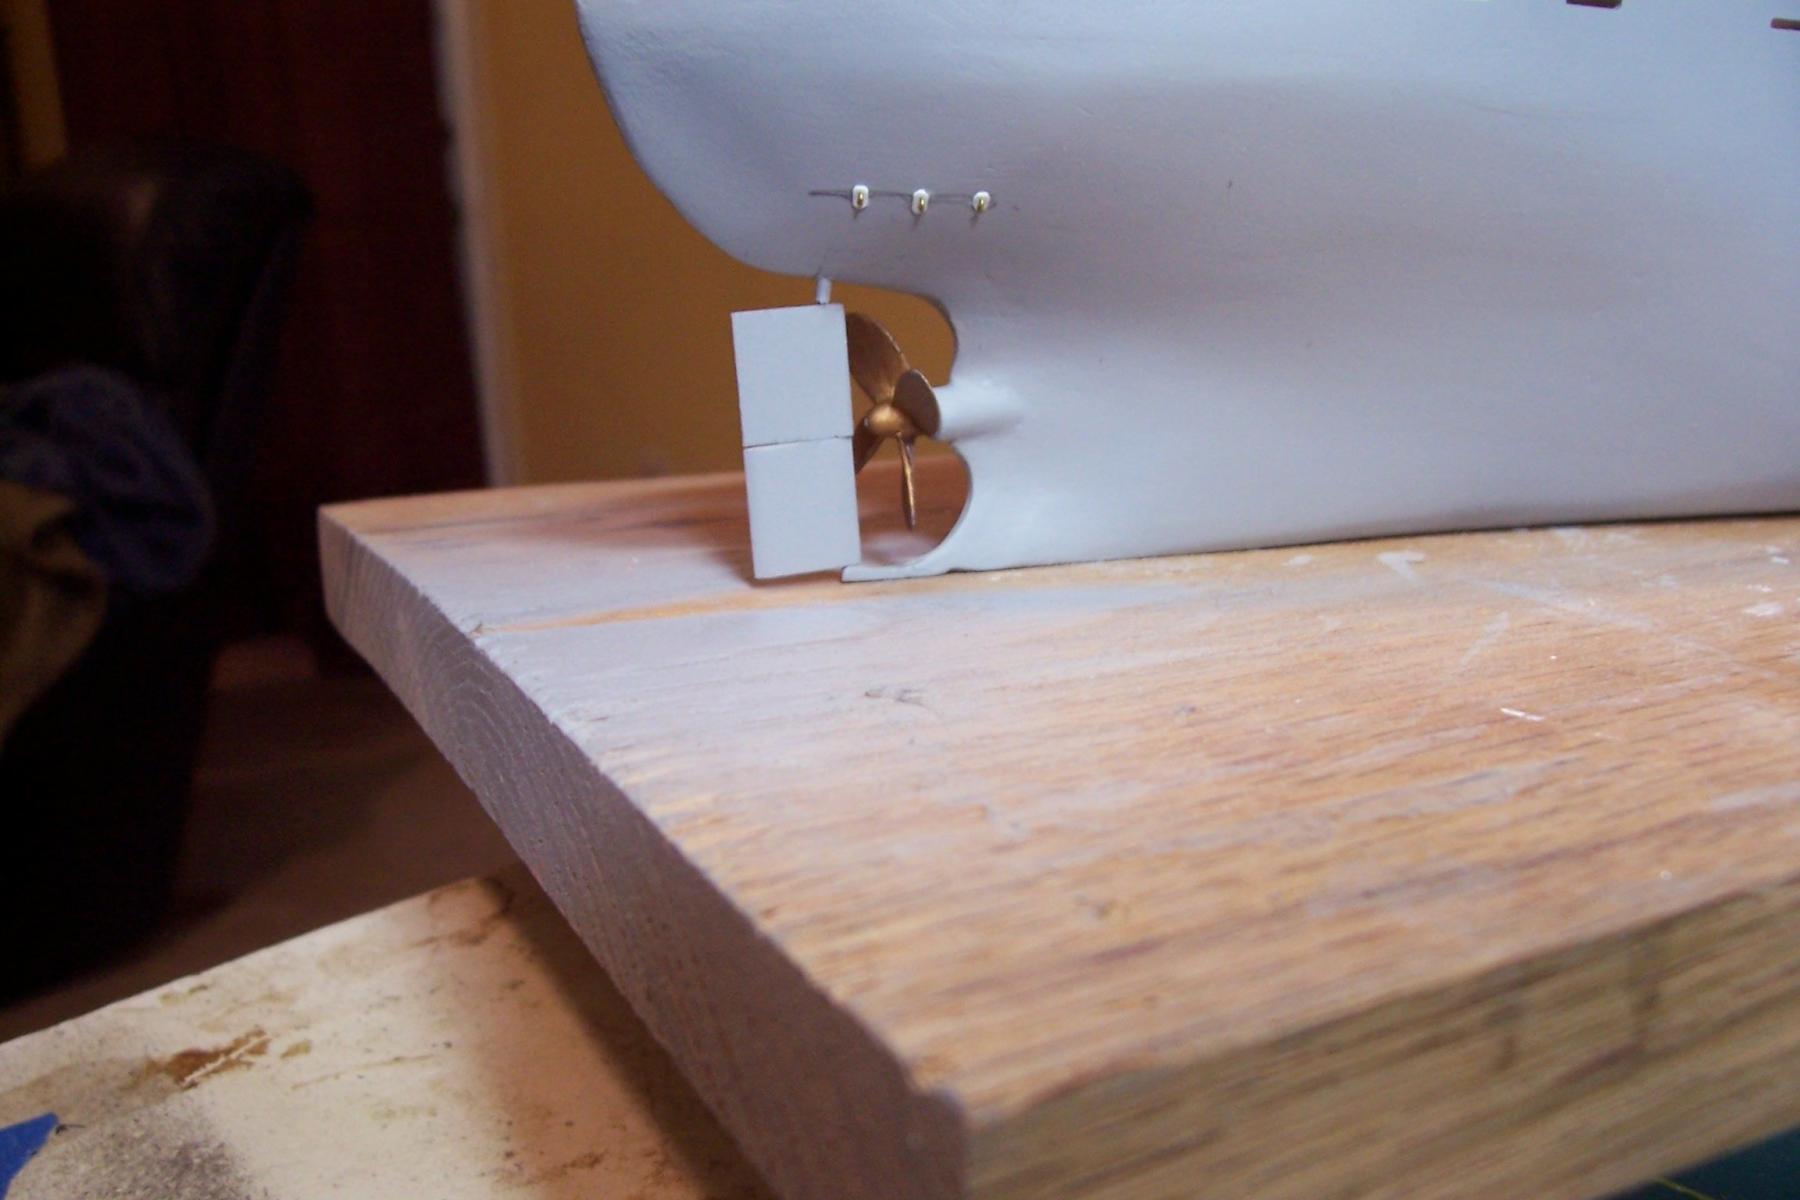
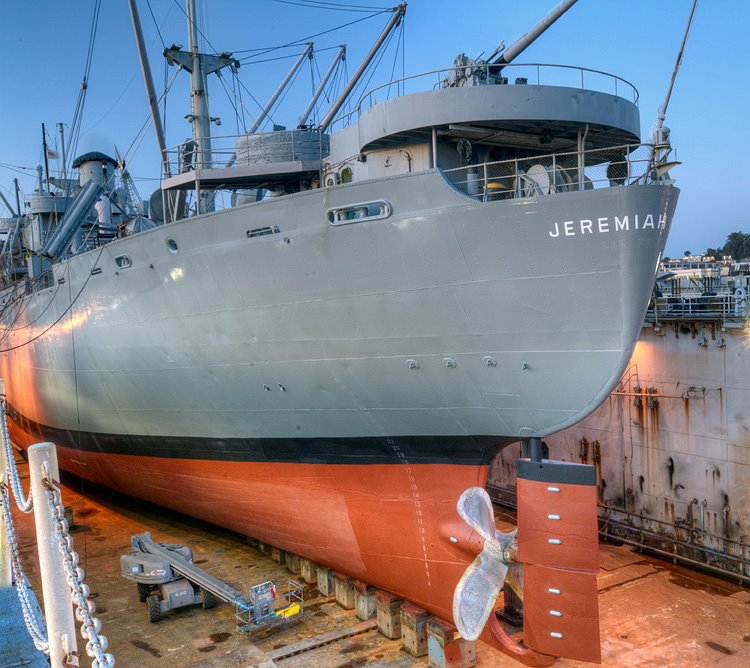
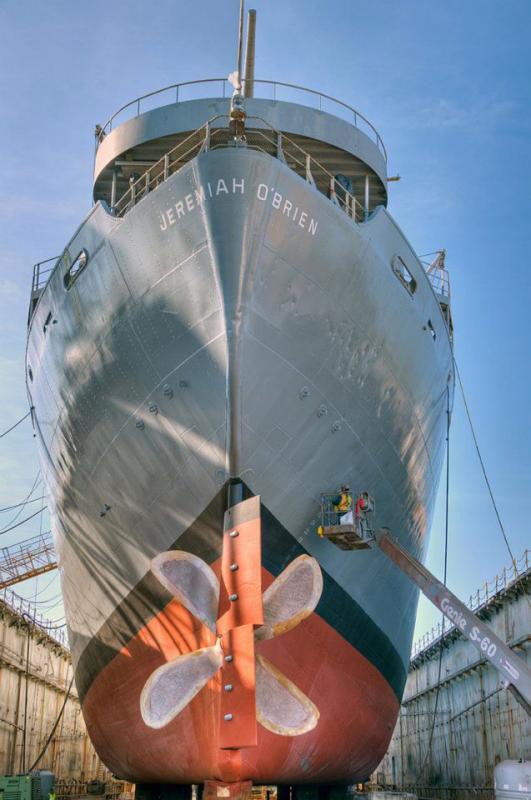
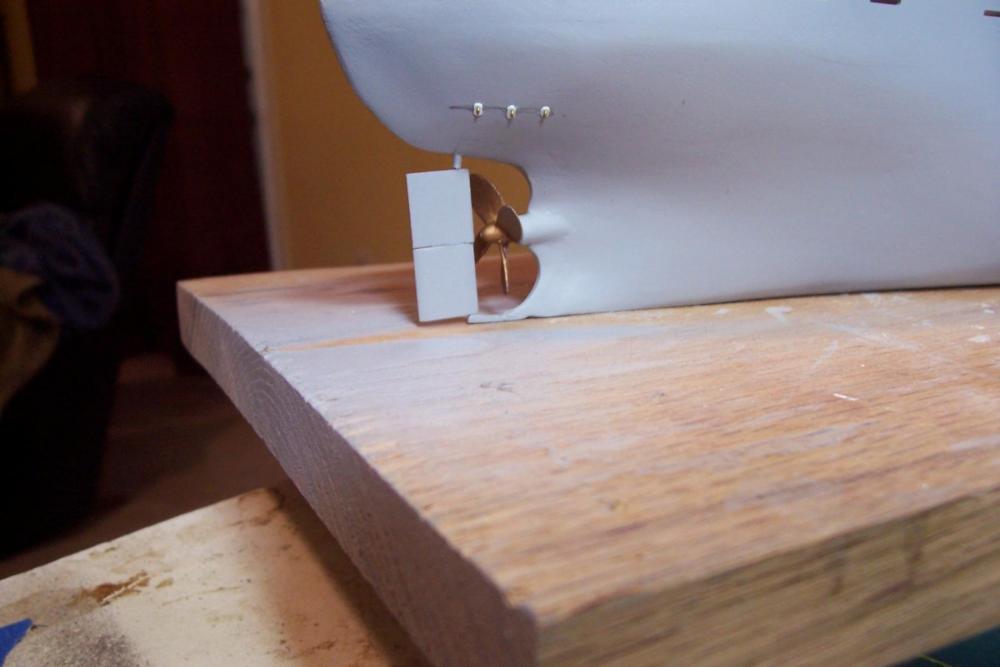
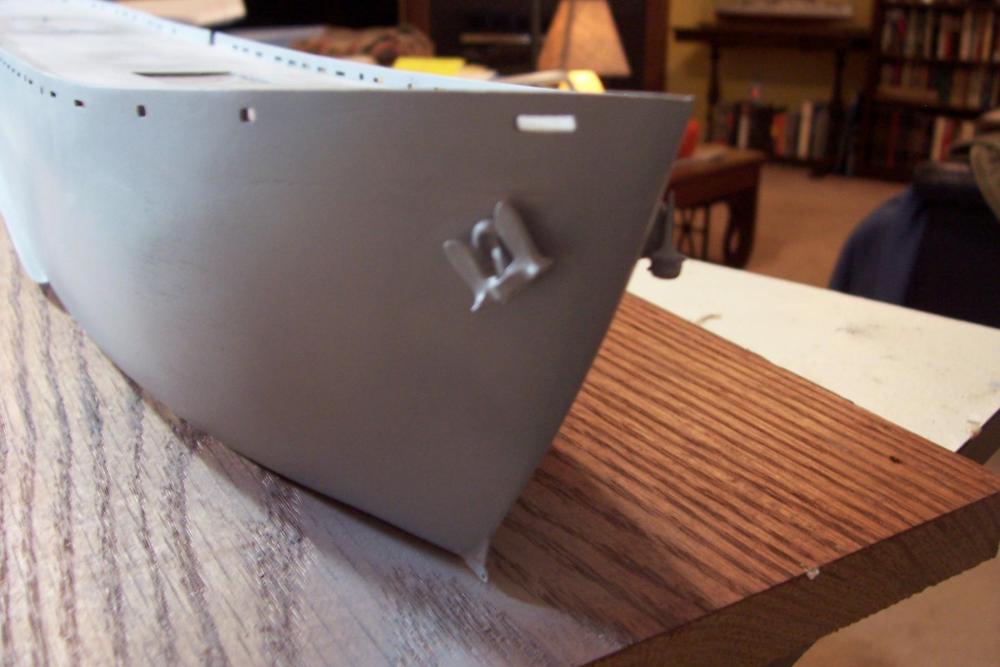
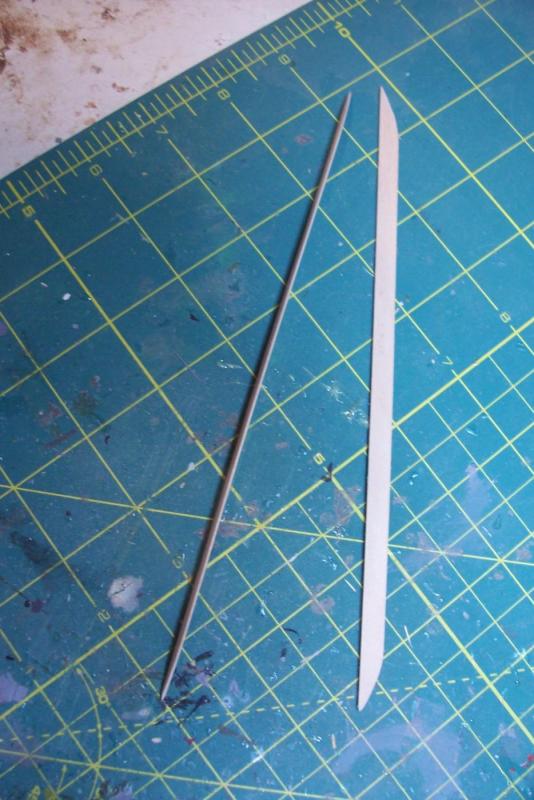
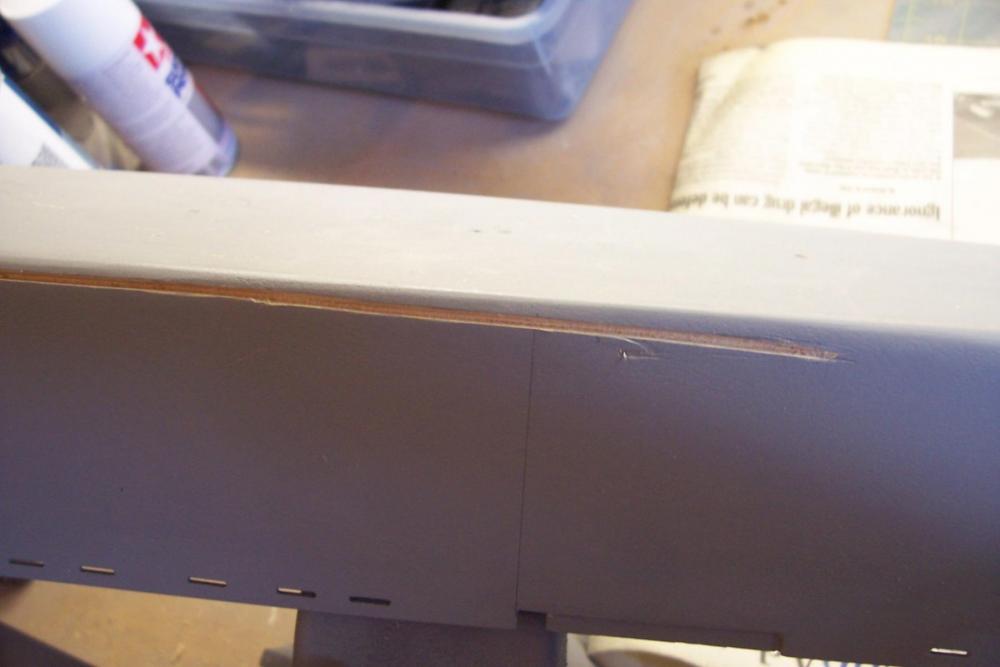
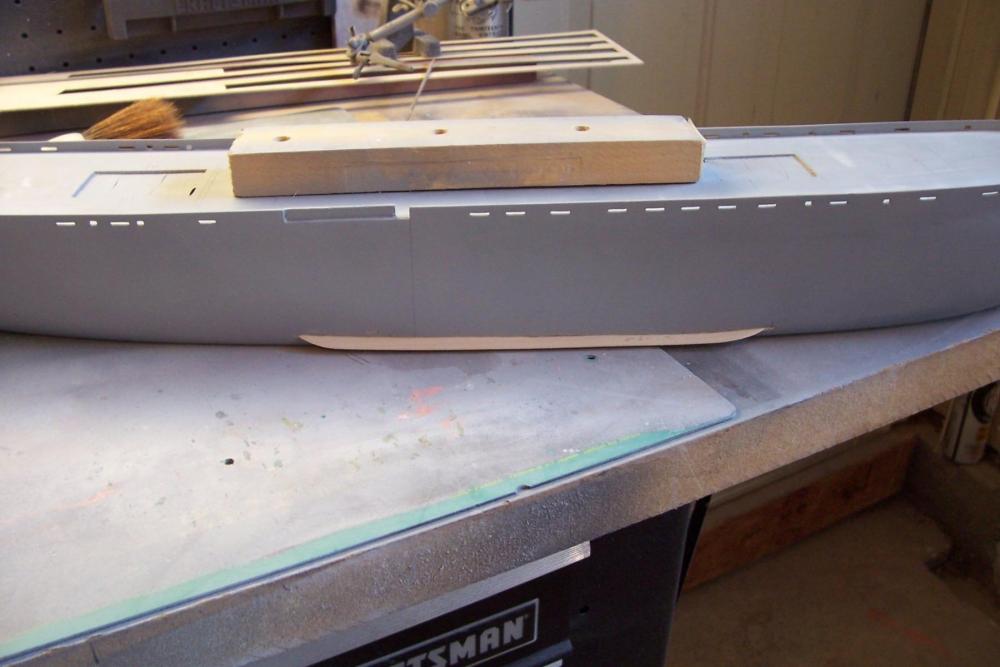
Running Gear The Liberty Ships had a style of rudder that I have not seen before. It’s basically 2 airfoil shapes stacked on top of each other, the top one would give thrust to port and the bottom to starboard. The only reason for this that I can think of is that the relatively crude prop would have more side thrust than more complicated (and expensive) ones would so this was an attempt to reduce wear on the rudder bearings. Here’s mine. For those who may build the kit I recommend using.20 wire drilled into the rudder , covered by 1/16 tubing above it. The 3/32 stock recommended in the kit is too big after the rudder has been shaped. Drilling a 1/8 inch hole into the thin after section was a little intimidating, I started with a 1/16 bit and worked my way up. After the shaft opening was drilled it was time to finish the final shaping of the hull in that area: Here’s the final product ( the prop and rudder are off plumb because they are not glued in place, I’ll glue them near the end of the build to save them from getting wacked.) The eye pads above the prop are scratch, you can see the real things in the first 2 pix above. The anchors were easy to add. At this point the hull “outside the lifelines” is done except for painting.


- 227 replies
-
- 12
-
-
- BlueJacket Shipcrafters
- Stephen Hopkins
- (and 2 more)
-
Thanks for the links David but I've decided not to plate the hull, I might try it sometime on a smaller, and less expensive kit. Tim
- 227 replies
-
- 3
-
-
- BlueJacket Shipcrafters
- Stephen Hopkins
- (and 2 more)
-
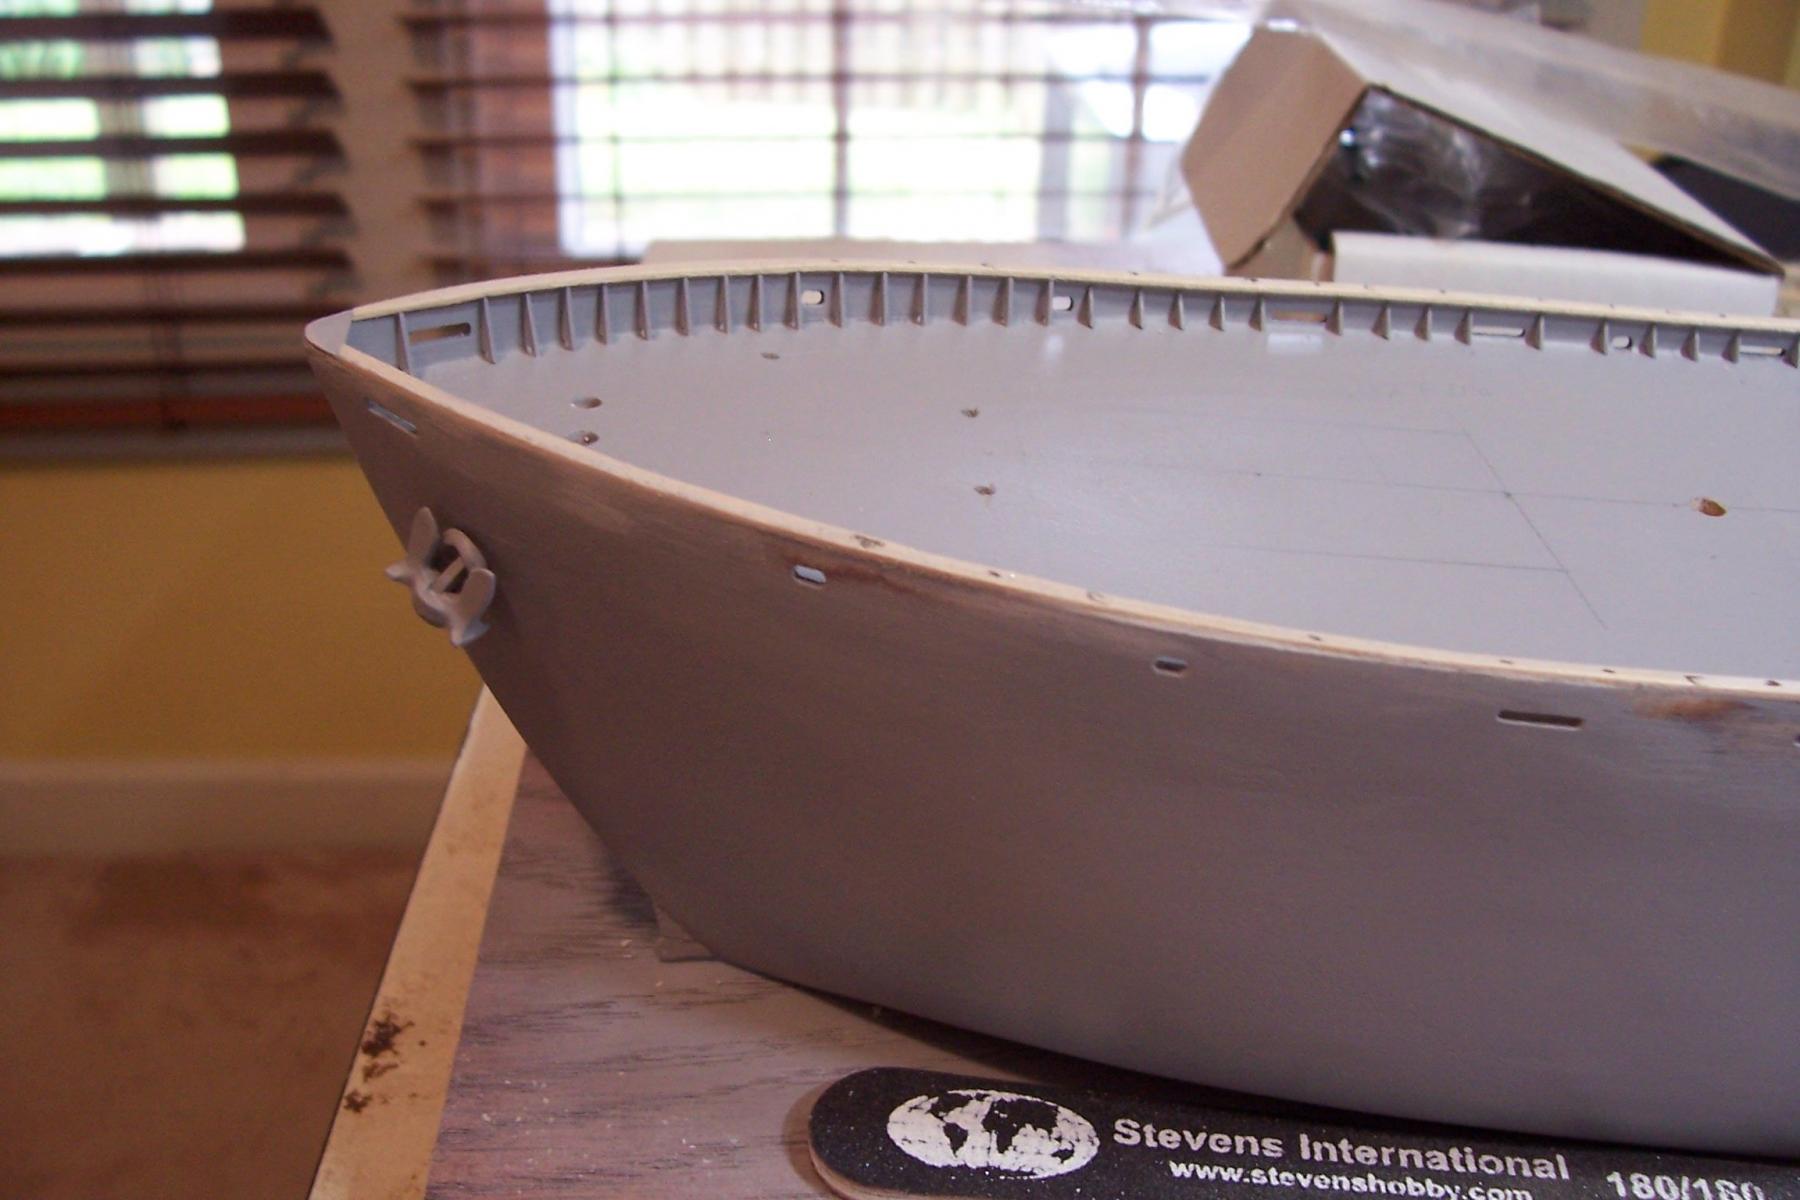
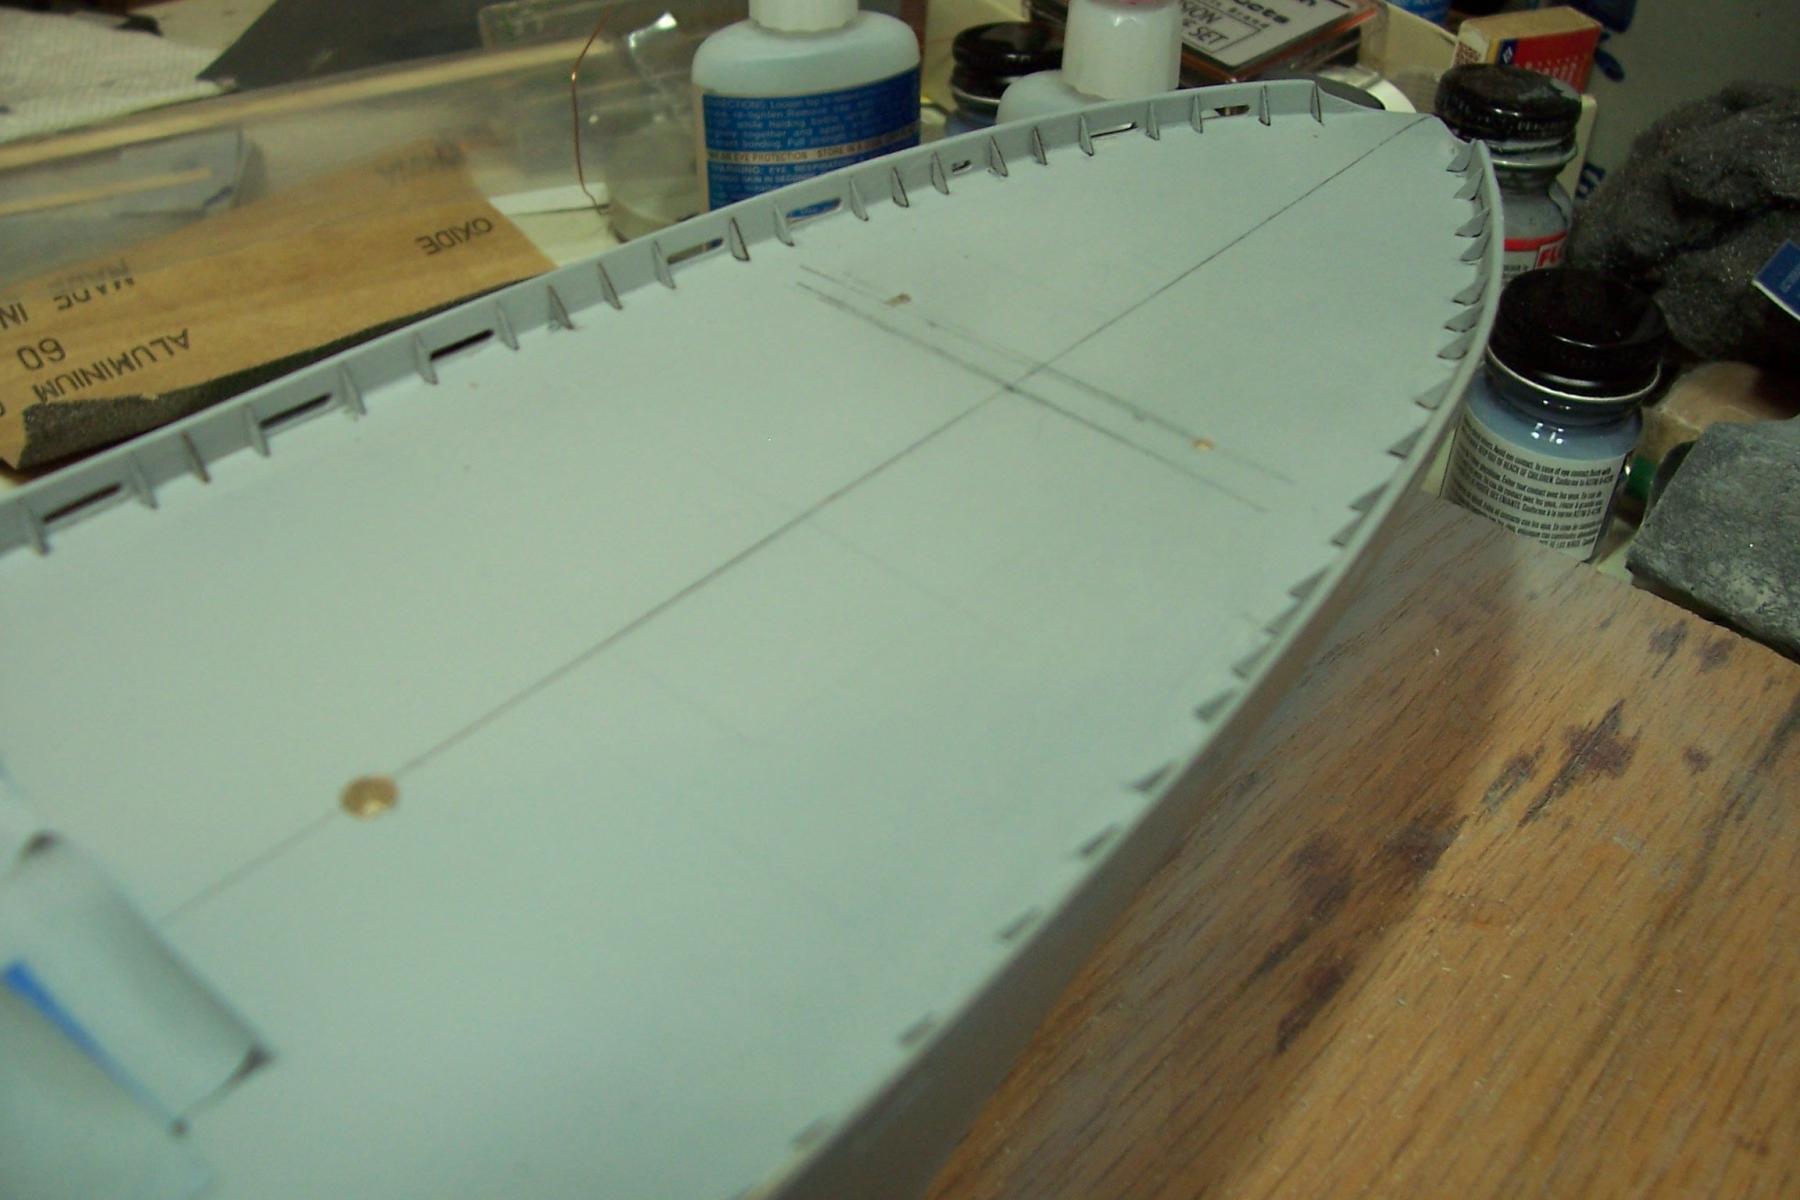
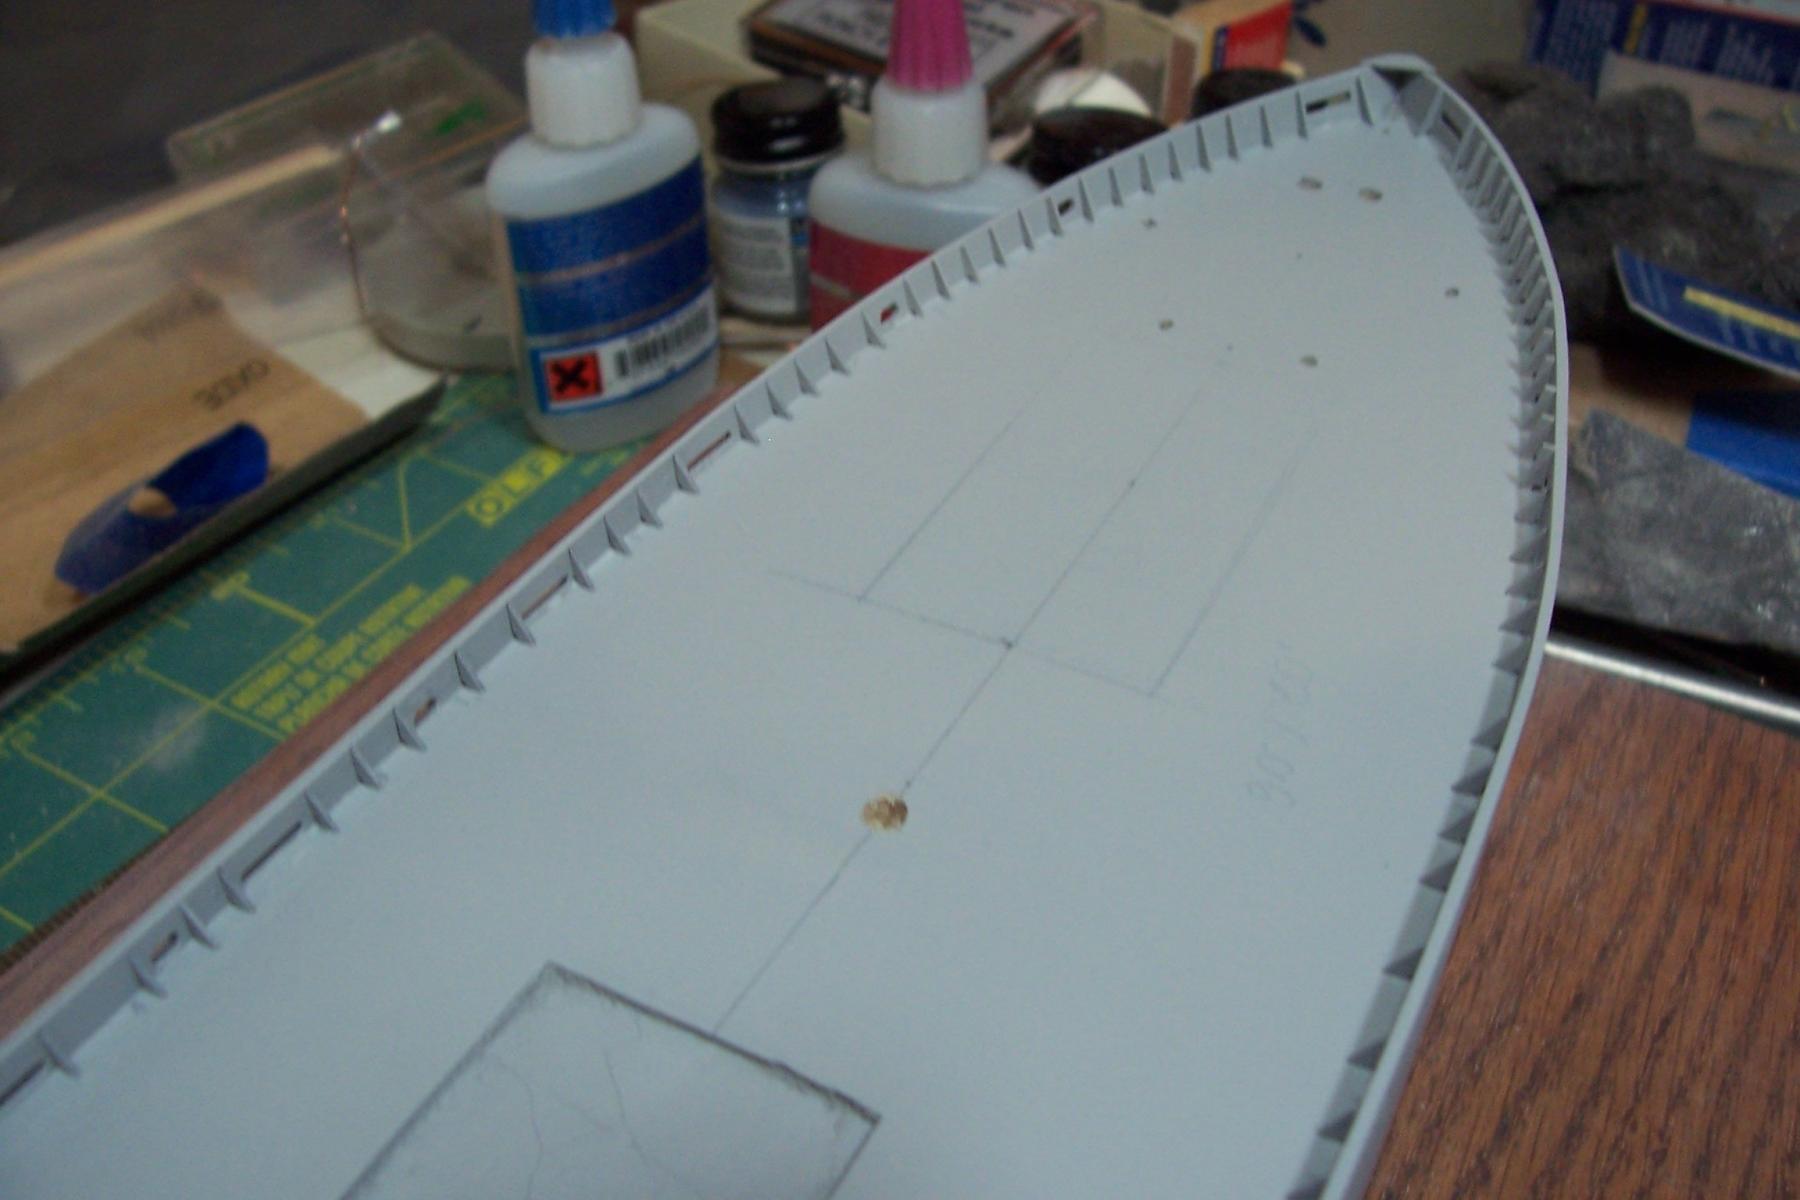
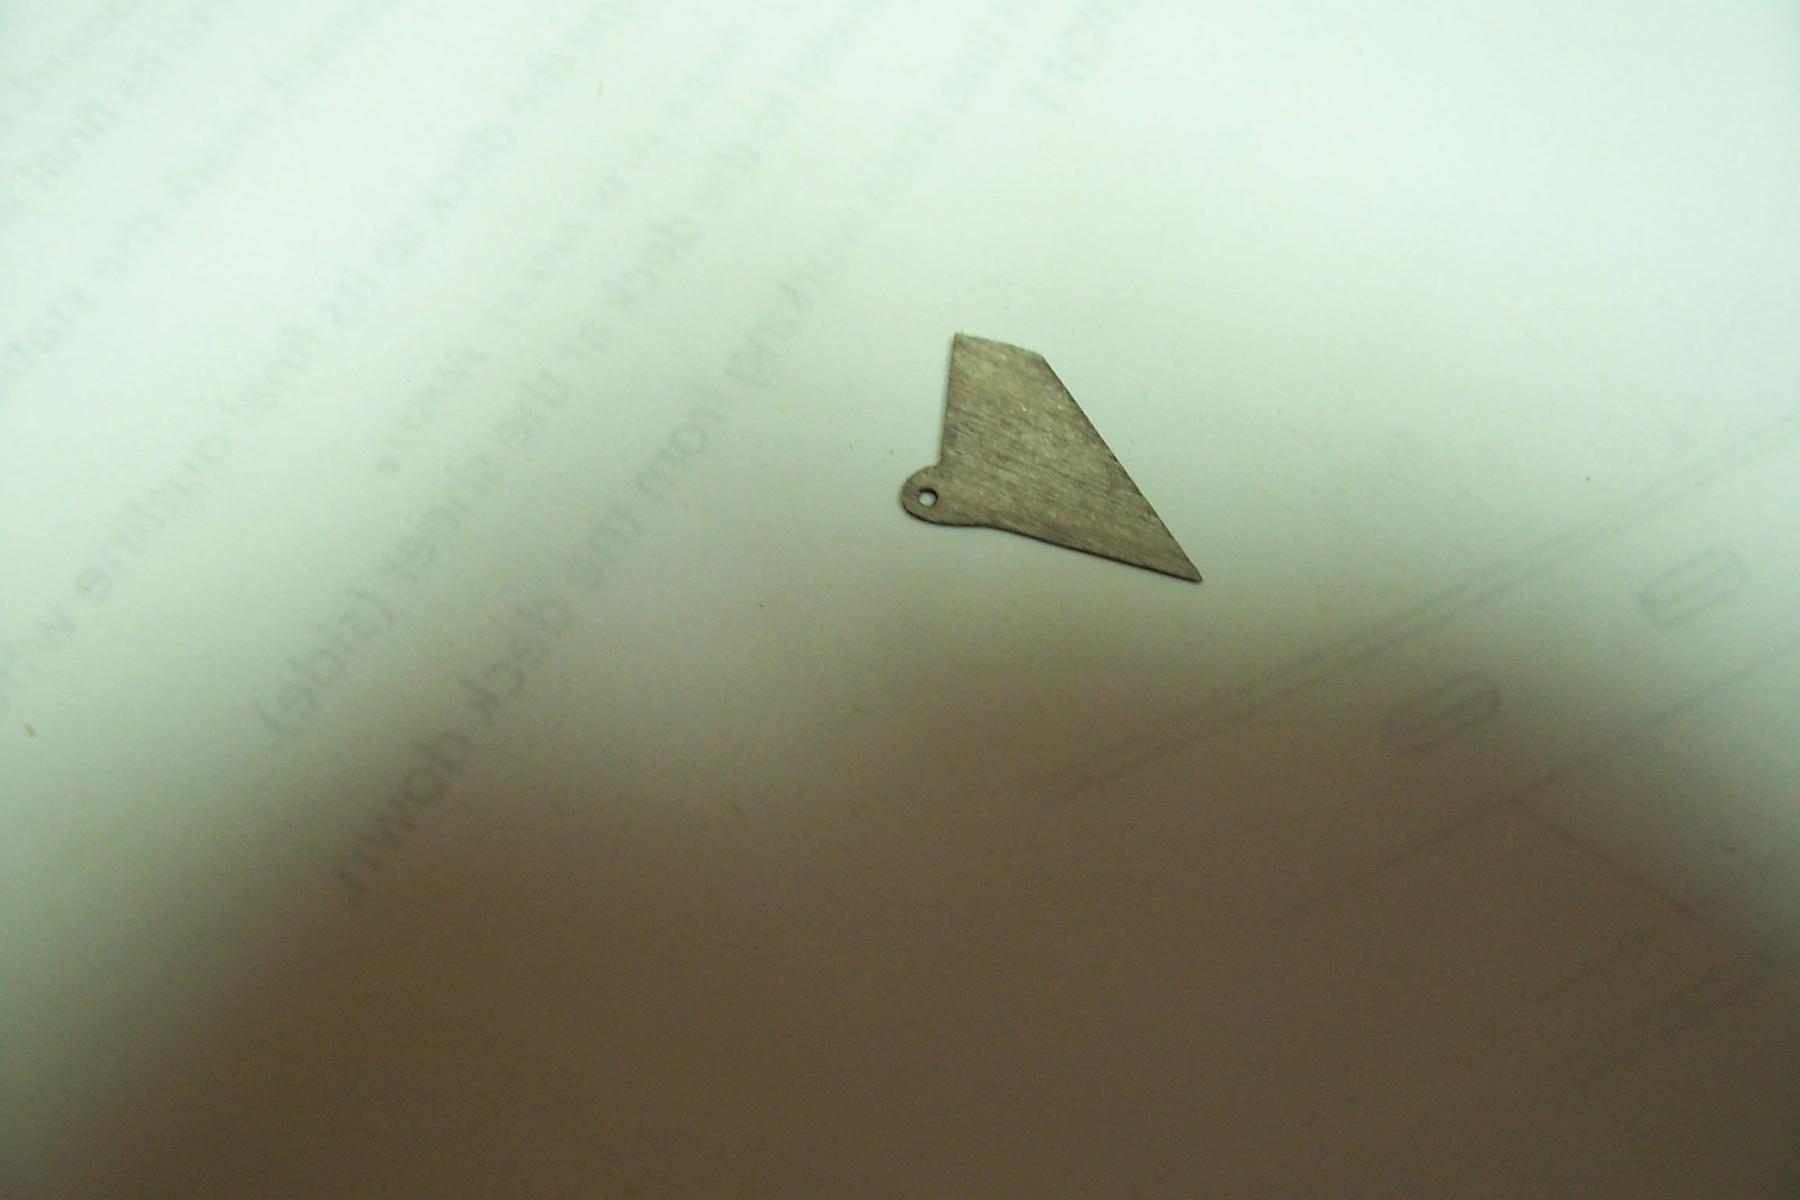
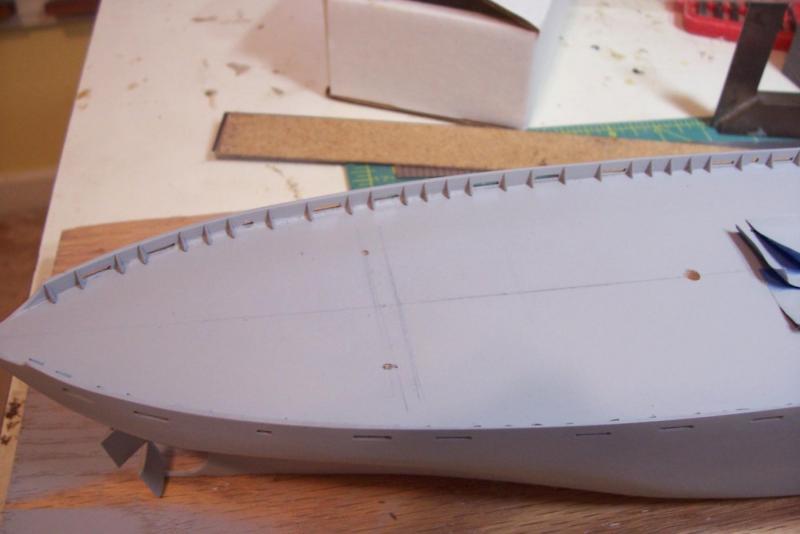
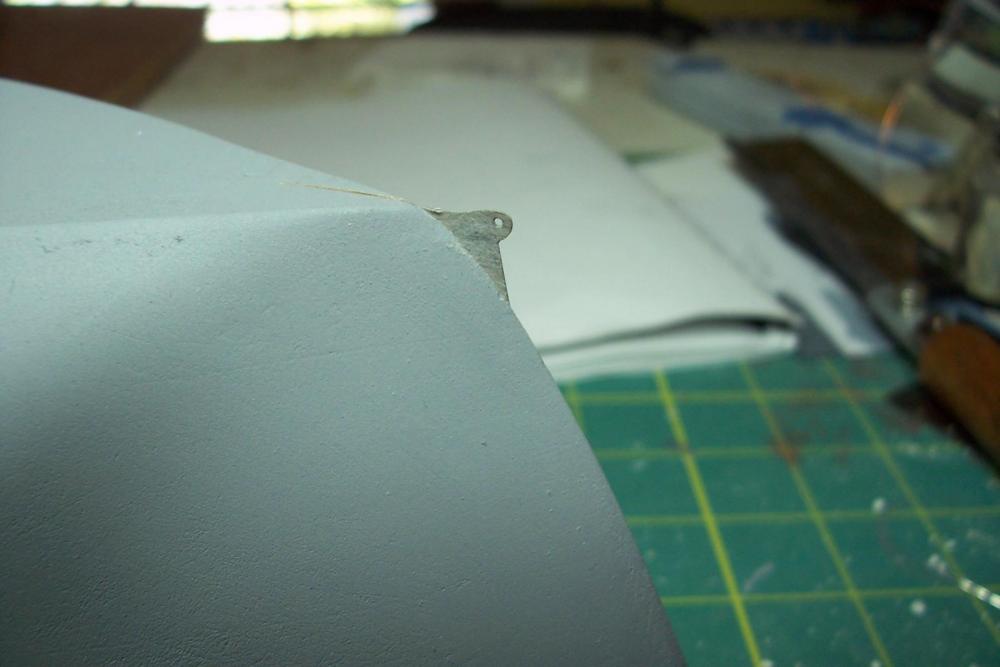
Underwater stuff The first item to add is the Paravane Chain Bracket to foot of the stem. The kit provides a nice piece of laser cut ply for the bracket: After cutting a thin slot in the stem with a razor saw it slides into place: The bilge keels are next. They are first cut to length, then the ends are shaped and finally both sides are sanded to bring the outboard edge to a knife-edge: The slots are marked on the hull using the drawings. These are fairly straight with almost no rise at the ends, probably because with this hull shape and an 11 knot top speed these ships did not throw much of a bow wave. The slots were cut with a hobby knife and deepened and widened with a narrow file: The starboard bilge keel in place prior to touching up with filler and primer: Next up will be fabricating the rudder and prop shaft.

- 227 replies
-
- 14
-
-
- BlueJacket Shipcrafters
- Stephen Hopkins
- (and 2 more)
-
Red- thanks for the kind words. David B - I thought about adding plating with aluminum tape ( the thickness of sheet styrene would be over scale) but after playing with it on scrap wood I've decided not to. 90% of it looked OK but there were enough problems (wrinkles, uneven edges, etc) that I had no doubt I would have ended up stripping it all off. I've got a good, smooth finish on the hull and I'm just going to go with that.
- 227 replies
-
- 6
-
-
- BlueJacket Shipcrafters
- Stephen Hopkins
- (and 2 more)