schooner
-
Posts
743 -
Joined
-
Last visited
Content Type
Profiles
Forums
Gallery
Events
Everything posted by schooner
-
 Wow! That is one of the smoothest and most uniform paint jobs I've seen on any naval model. Well done!
 -
Thanks Mark, Yes I was surprised with the differences, the cast-on detail, the detailed instructions, the amount of PE and even the weight (the old model feels like it is solid metal). My next build will be a kit from the same manufacturer of a Knox class frigate I served on then it will be back to sawdust and splinters.
- 24 replies
-
- 3
-

-
- gemini
- orange hobby
- (and 2 more)
-
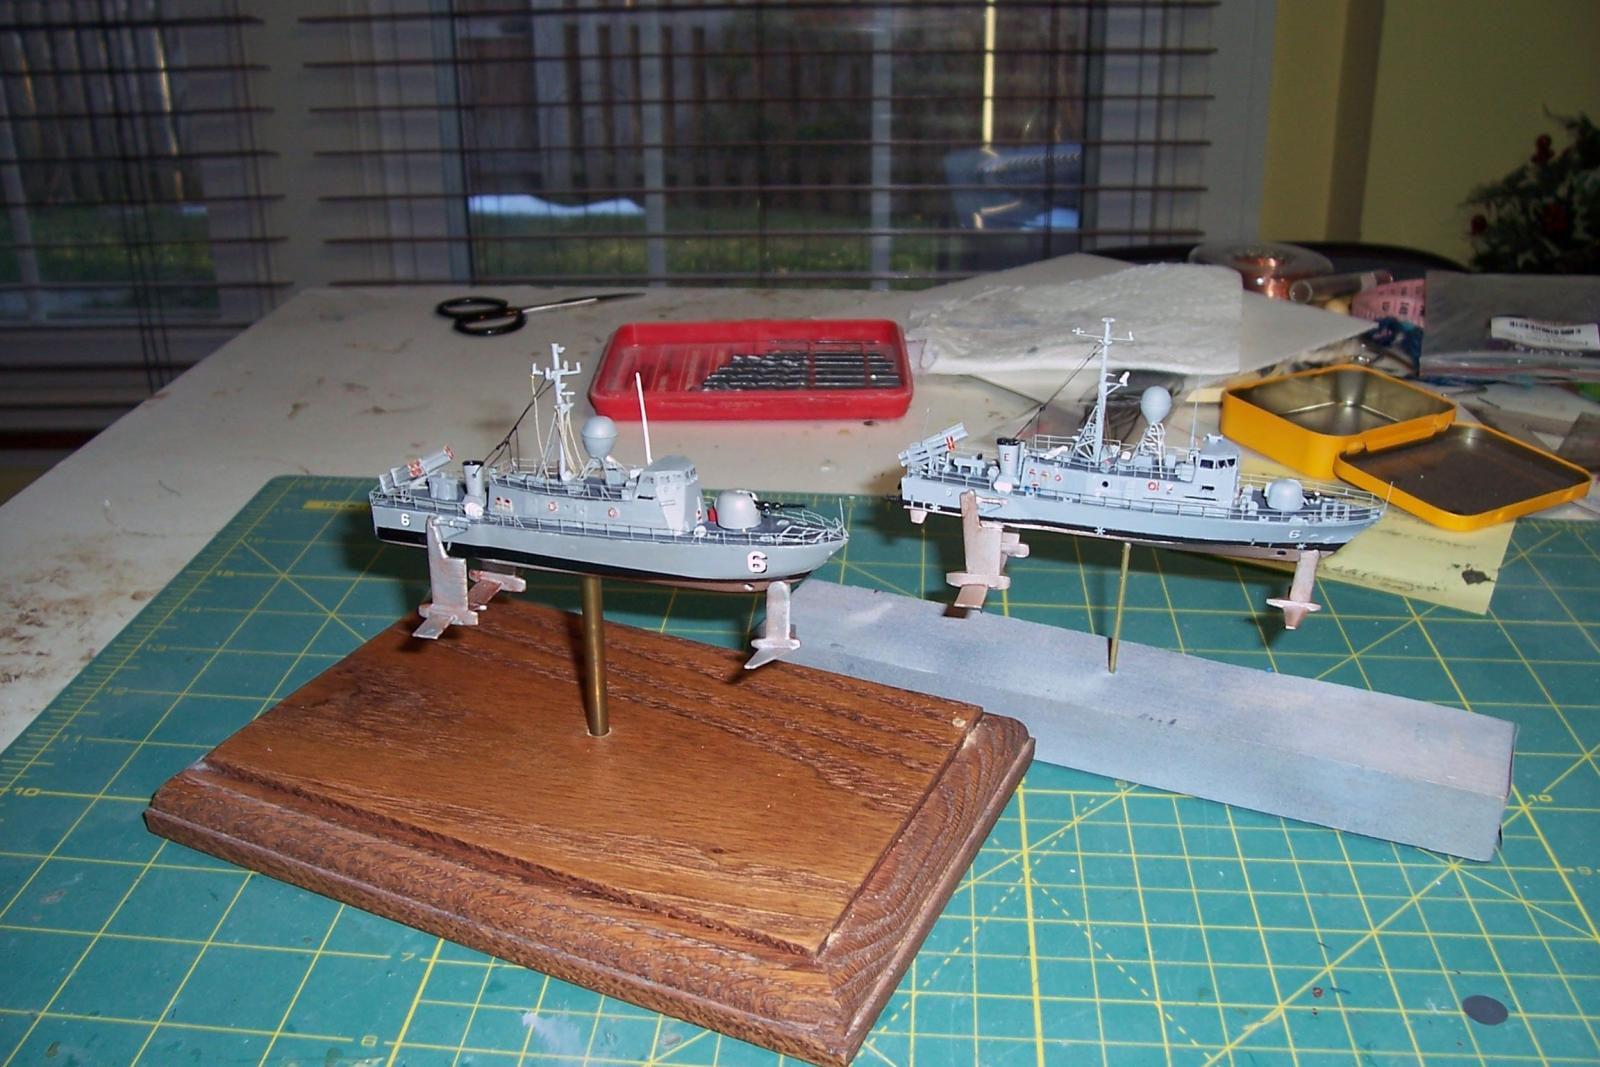
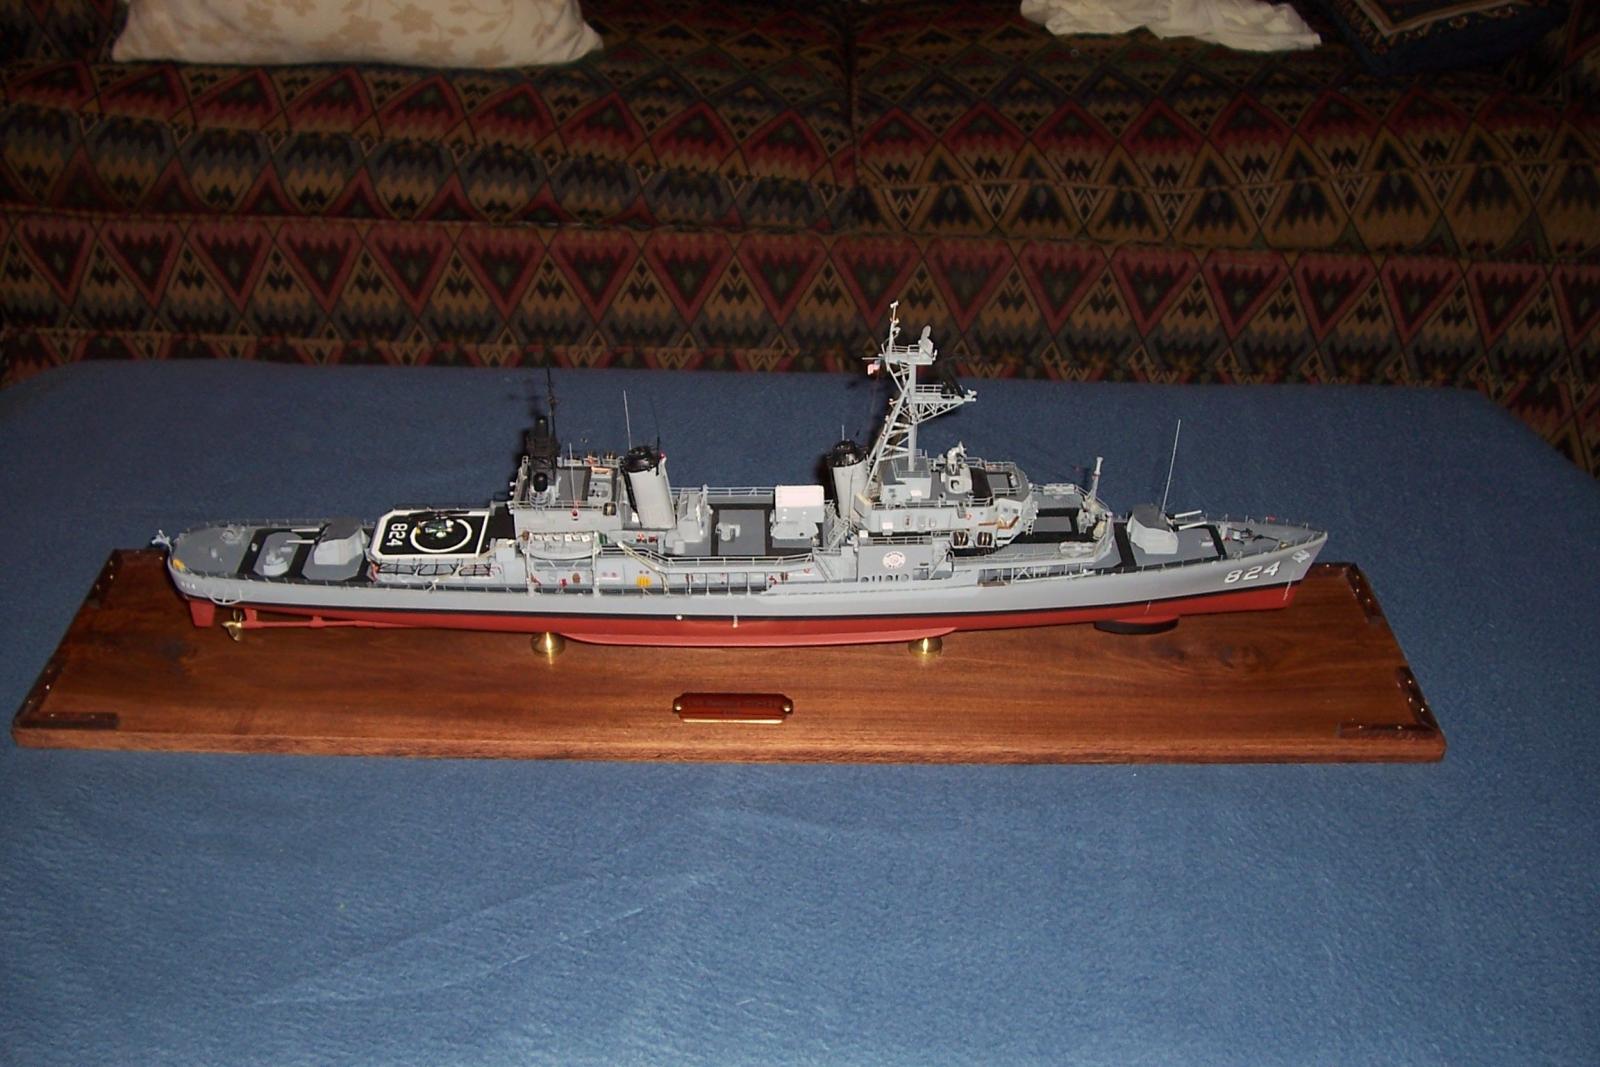
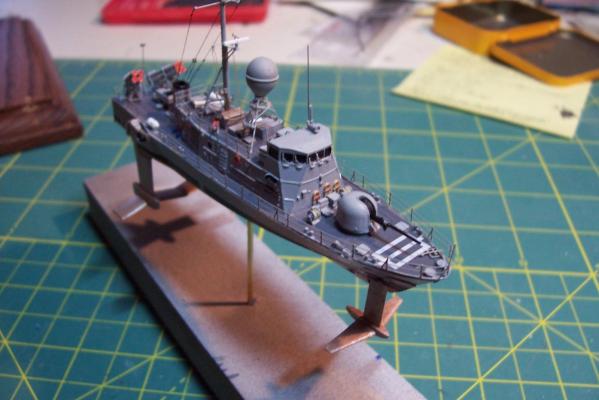
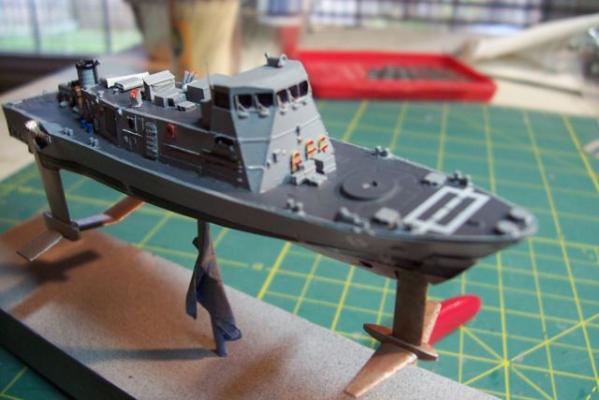
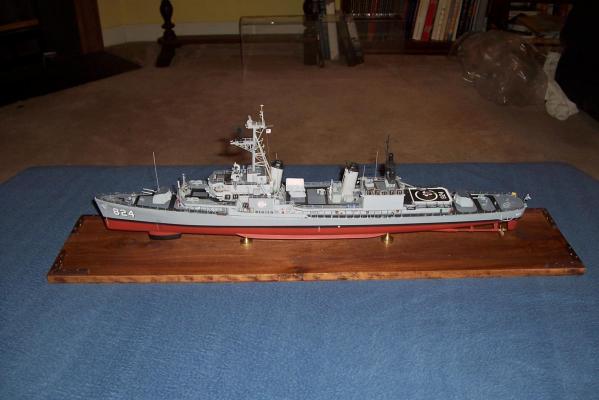
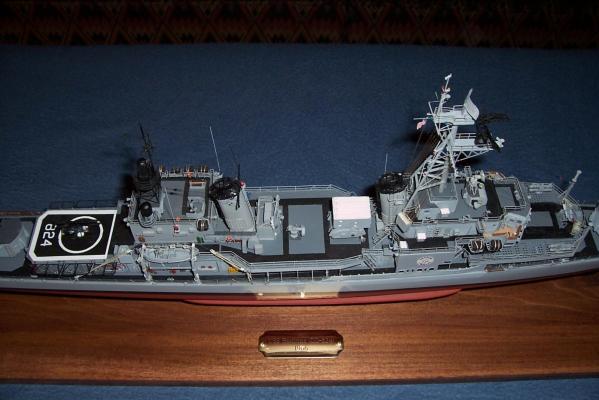
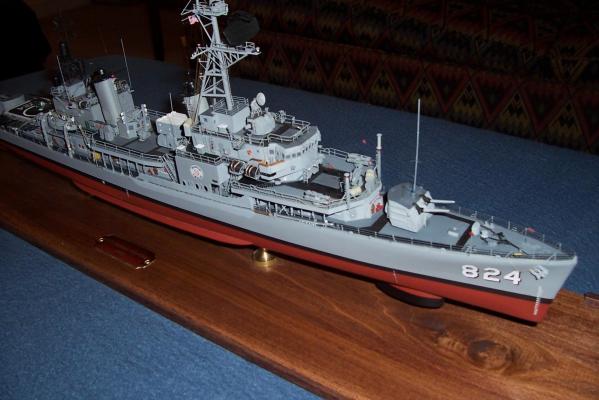
Finished Product Being used to wood kits that take me 1-2 years to complete this was a very quick build. I’m pleased with how it turned out although resin & plastic kits don’t really float my boat, I prefer actually making things rather than just “gluein n’ paintin.” For this build I was after the end result more than the process, I wanted a model of a ship I served on 30+ years ago to replace one from a different manufacturer (White Ensign Models) from about 10 years ago which is shown in the last pix.


- 24 replies
-
- 7
-
-
- gemini
- orange hobby
- (and 2 more)
-
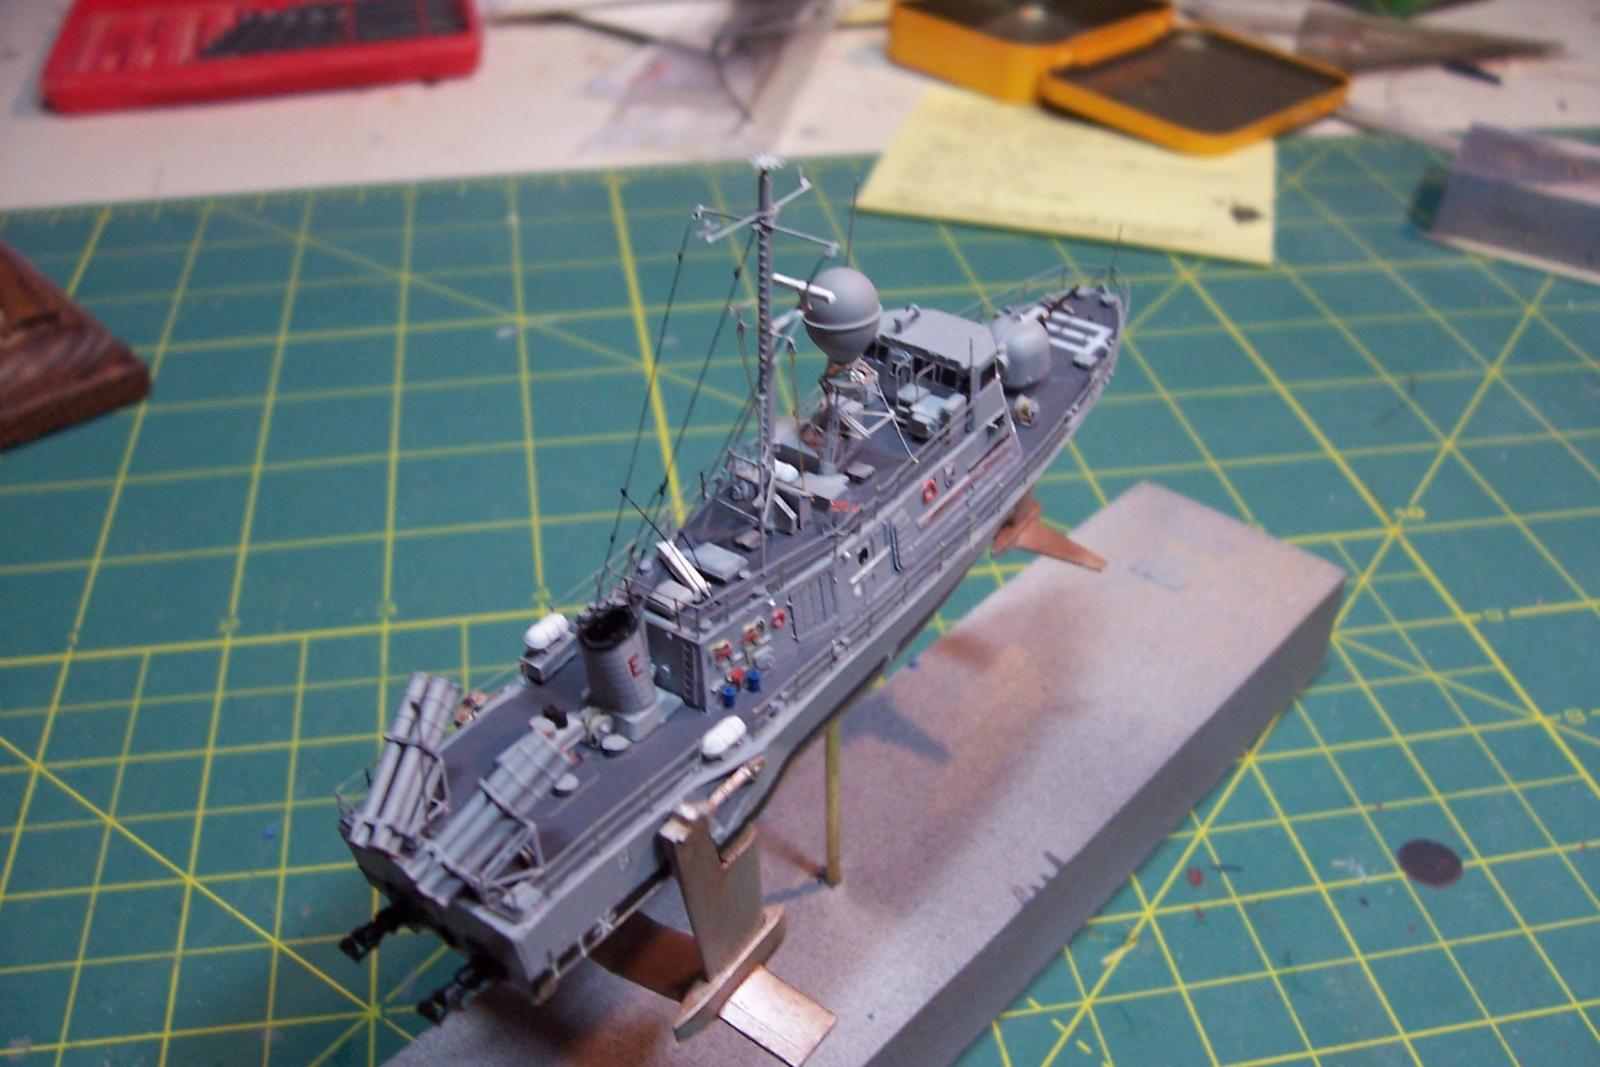
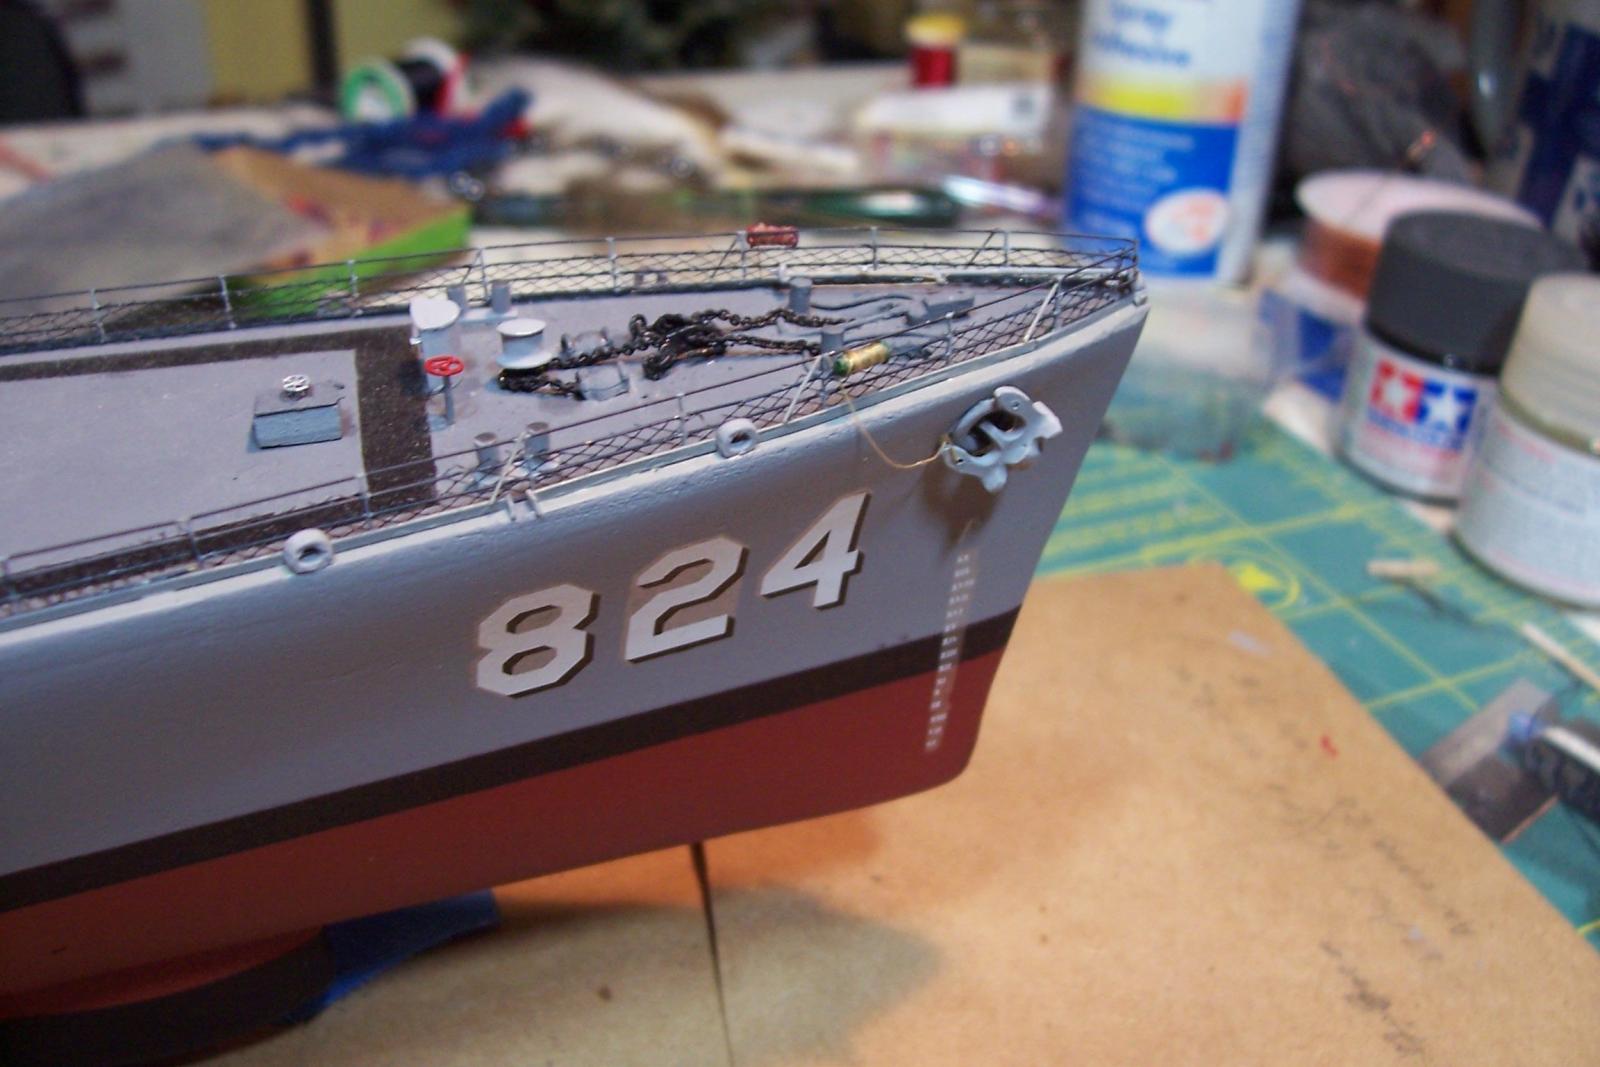
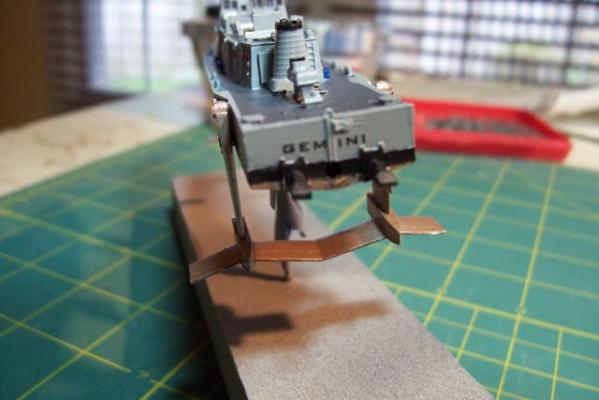
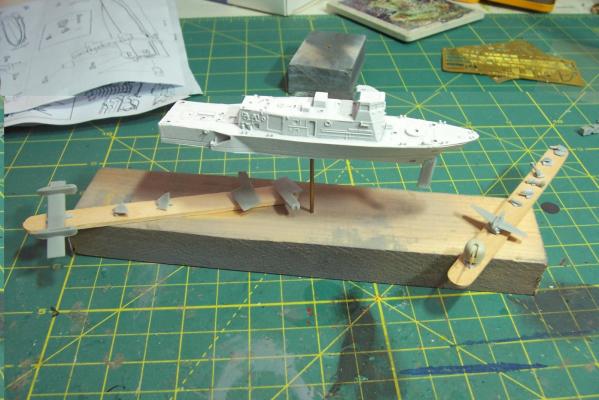
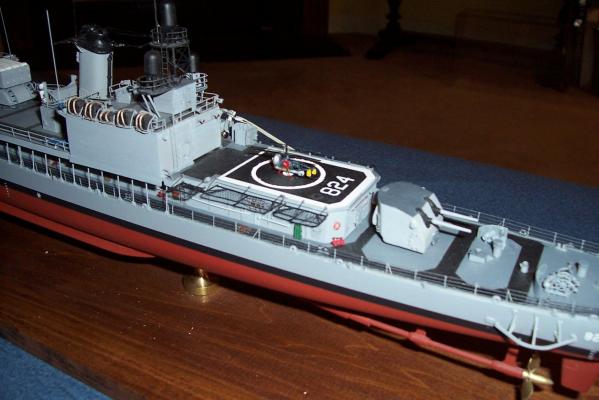
After adding the decals it was time to finally add the “wings”. Several deck details have been added (the tiny windshield wipers were a real treat.) About 75% done at this point.

- 24 replies
-
- 5
-
-
- gemini
- orange hobby
- (and 2 more)
-
Thanks Greg, except for some of the PE this is actually a fairly easy build so far, good practice/training for the larger resin kit up next. Tim
- 24 replies
-
- 5
-
-
- gemini
- orange hobby
- (and 2 more)
-
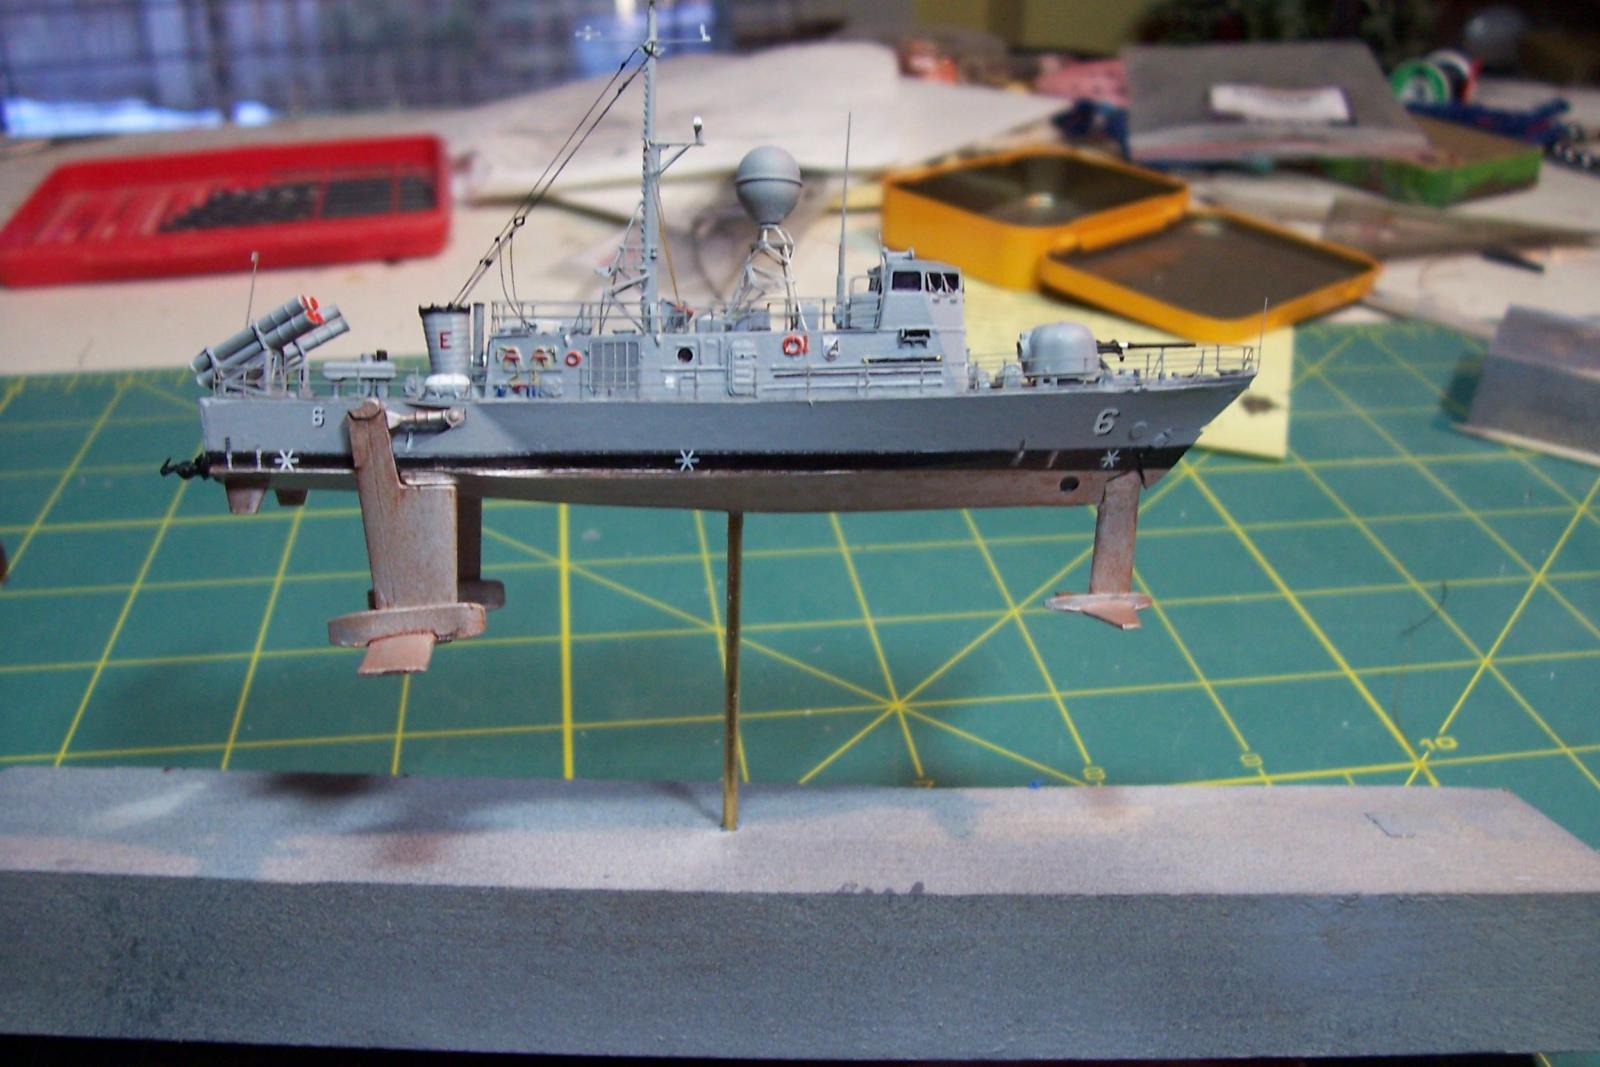
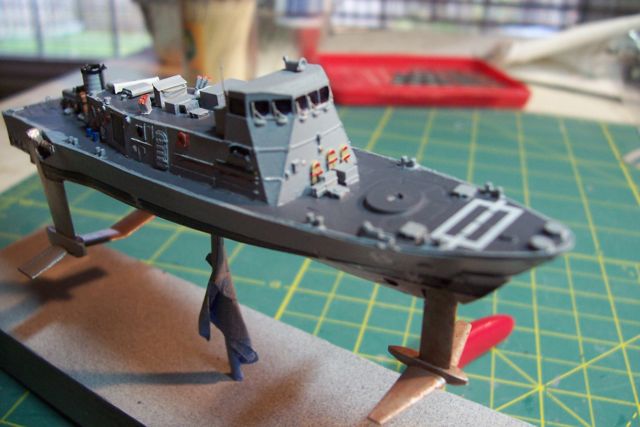
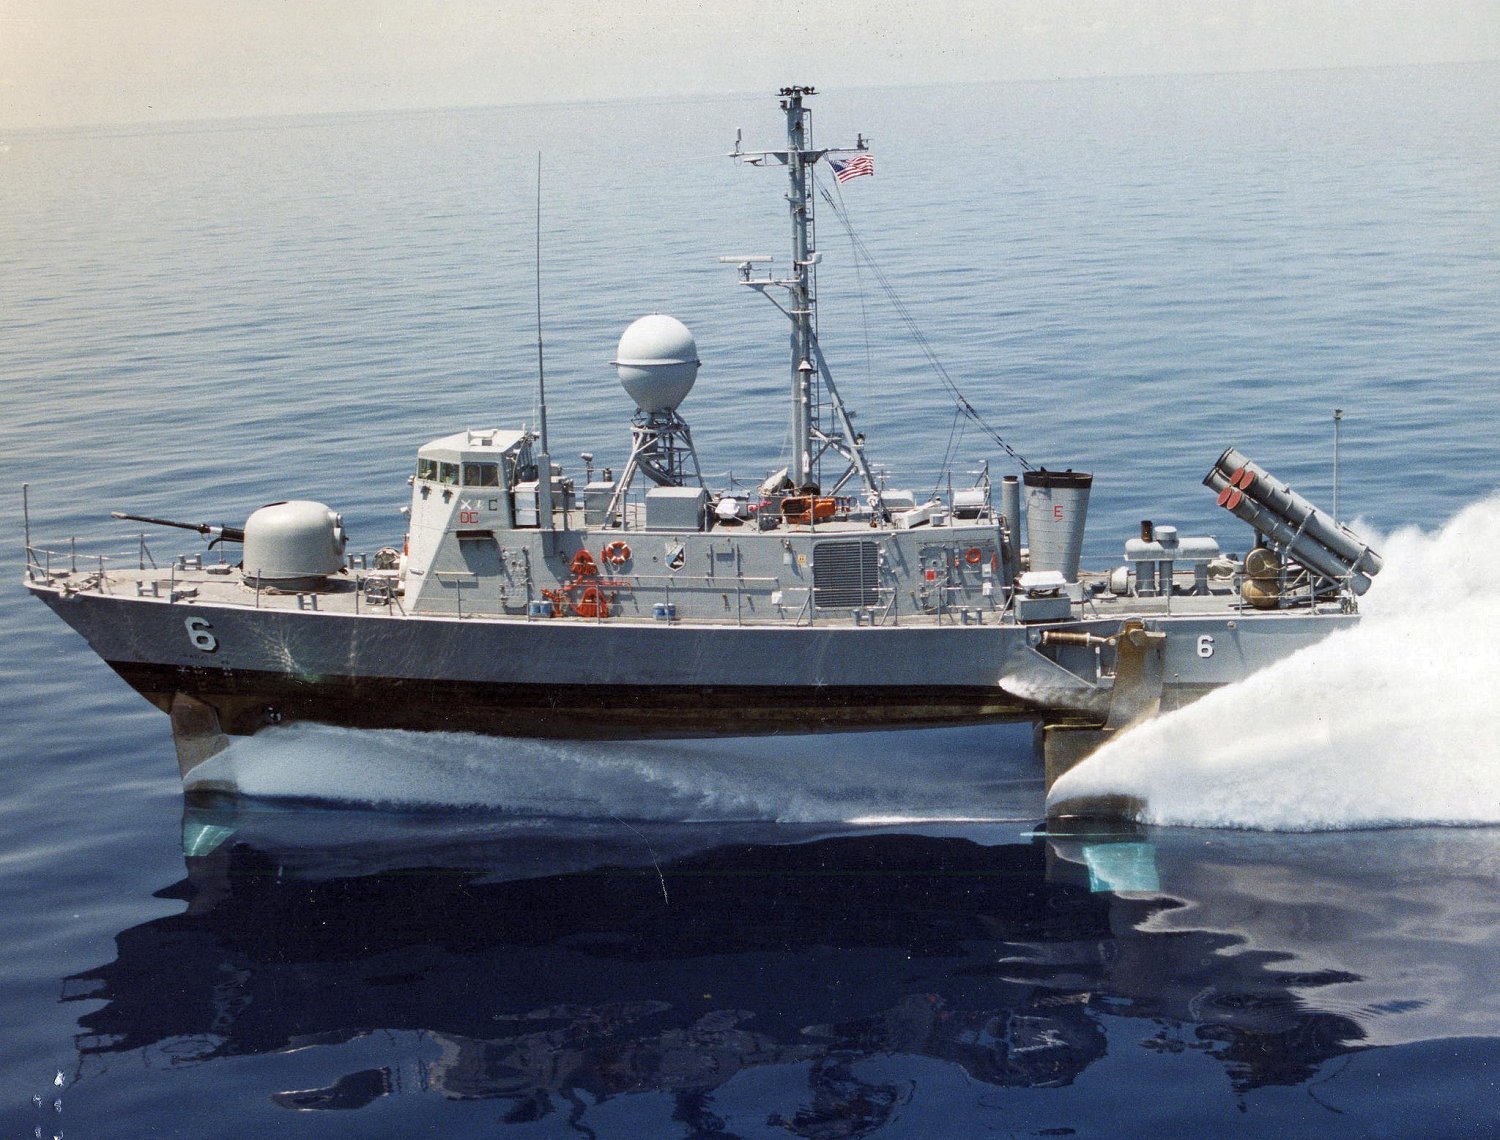
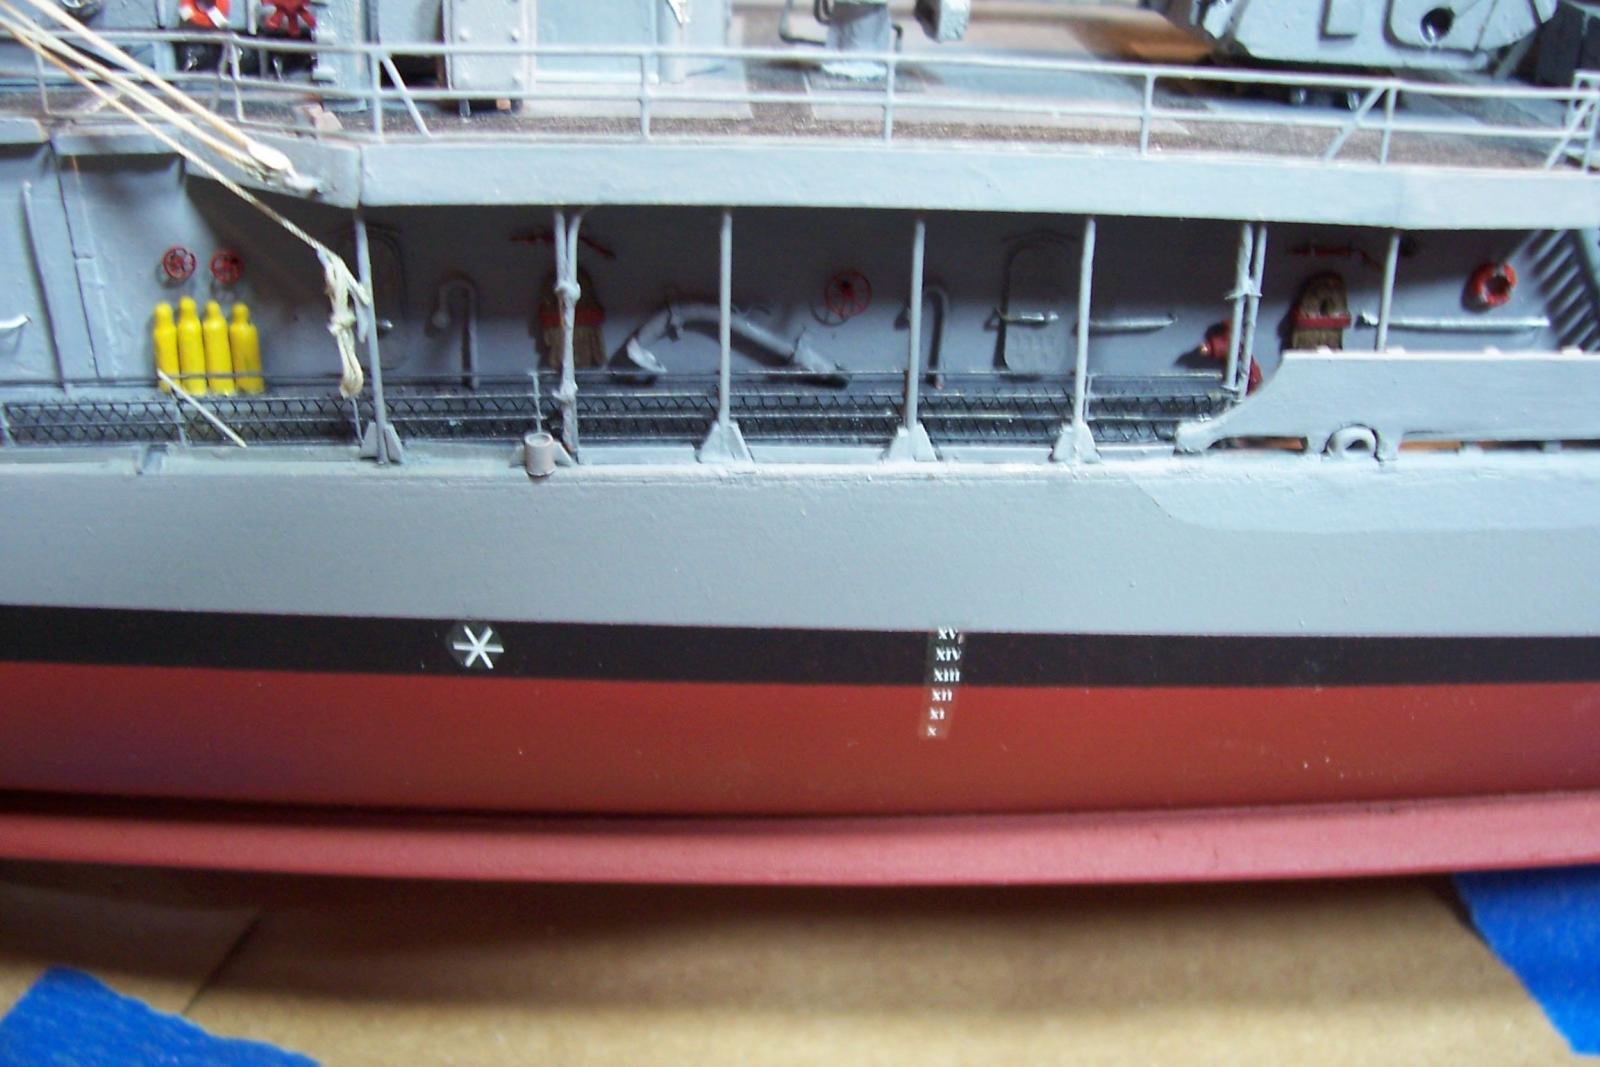
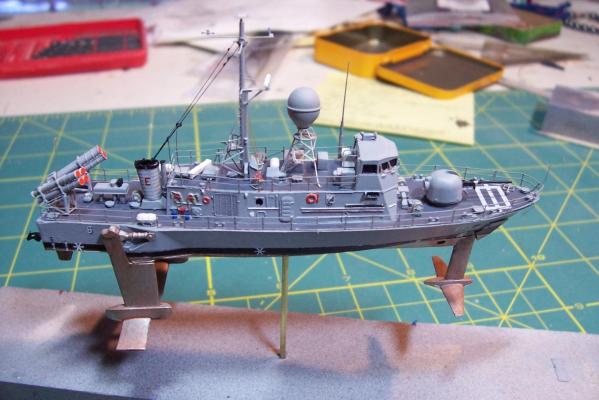
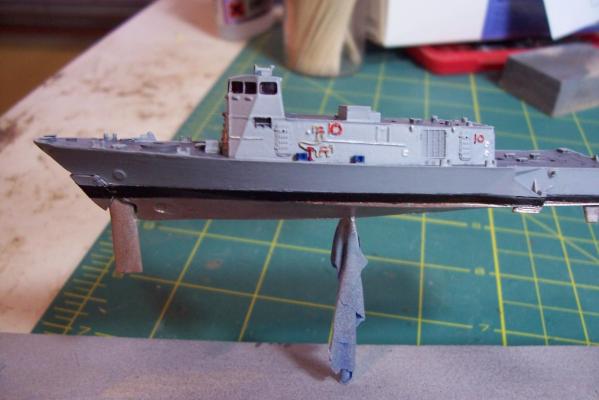
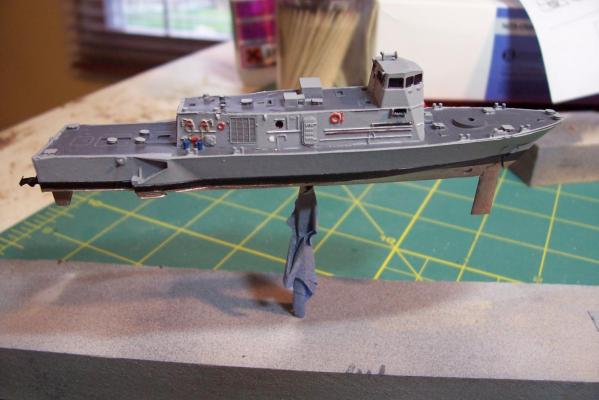
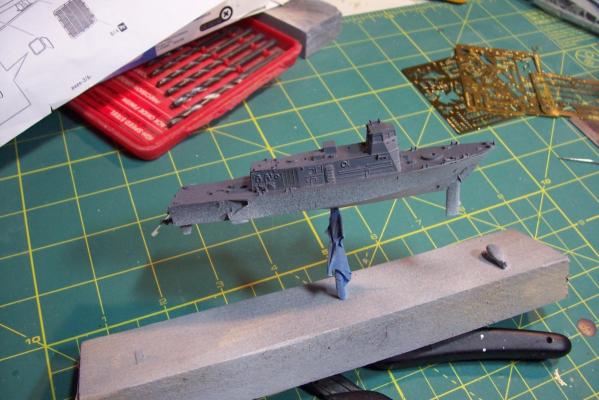
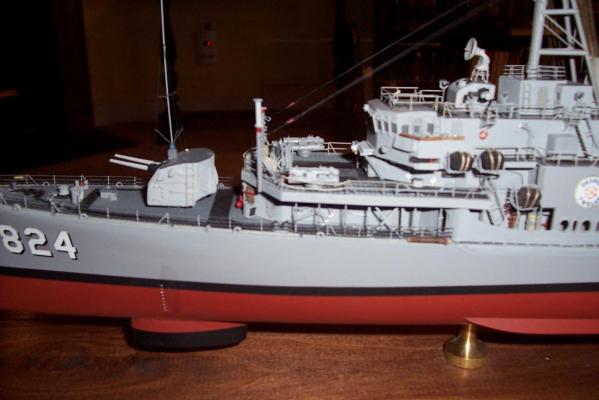
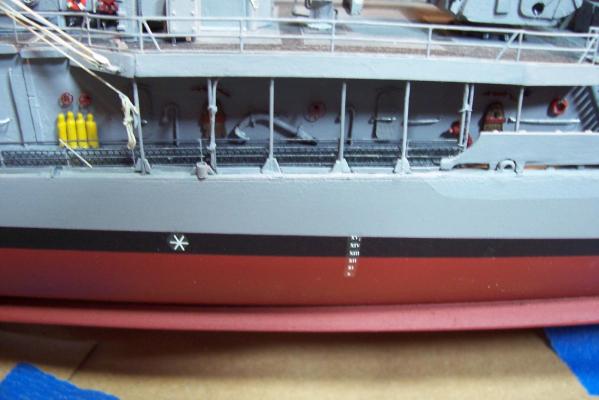
Airbrushing haze gray on the hull and vertical surfaces went well, then it was a matter of painting the cast on details. I found that a sharpened toothpick worked the best for that. I'm still amazed at the attention to detail that Orange Hobby included, as an example the blue cylinders on the deck next to the fire stations are the 5 gallon cans of AFFF fire fighting foam. One error in the kit plans it that they call for painting the underbody and foils haze gray also. They were actually left bare aluminum, although the hulls began to pick up a splotchy brown oxidizing coating even while under construction in the Boeing assembly hanger. Once they hit salt water the oxidation really took off leaving the hulls and foils blotchy brown which I have tried to reproduce with several coats of thinned rust enamel, hitting it with the brush bristle ends while still wet. Next step will be to spray the hull with clear laquer so that the decals will have a good base to adhere to.

- 24 replies
-
- 8
-
-
- gemini
- orange hobby
- (and 2 more)
-
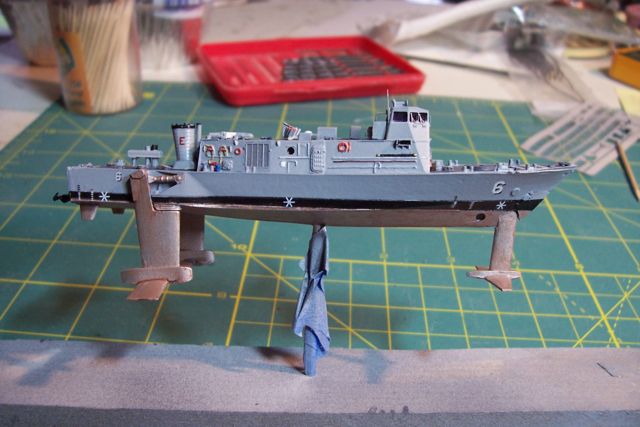
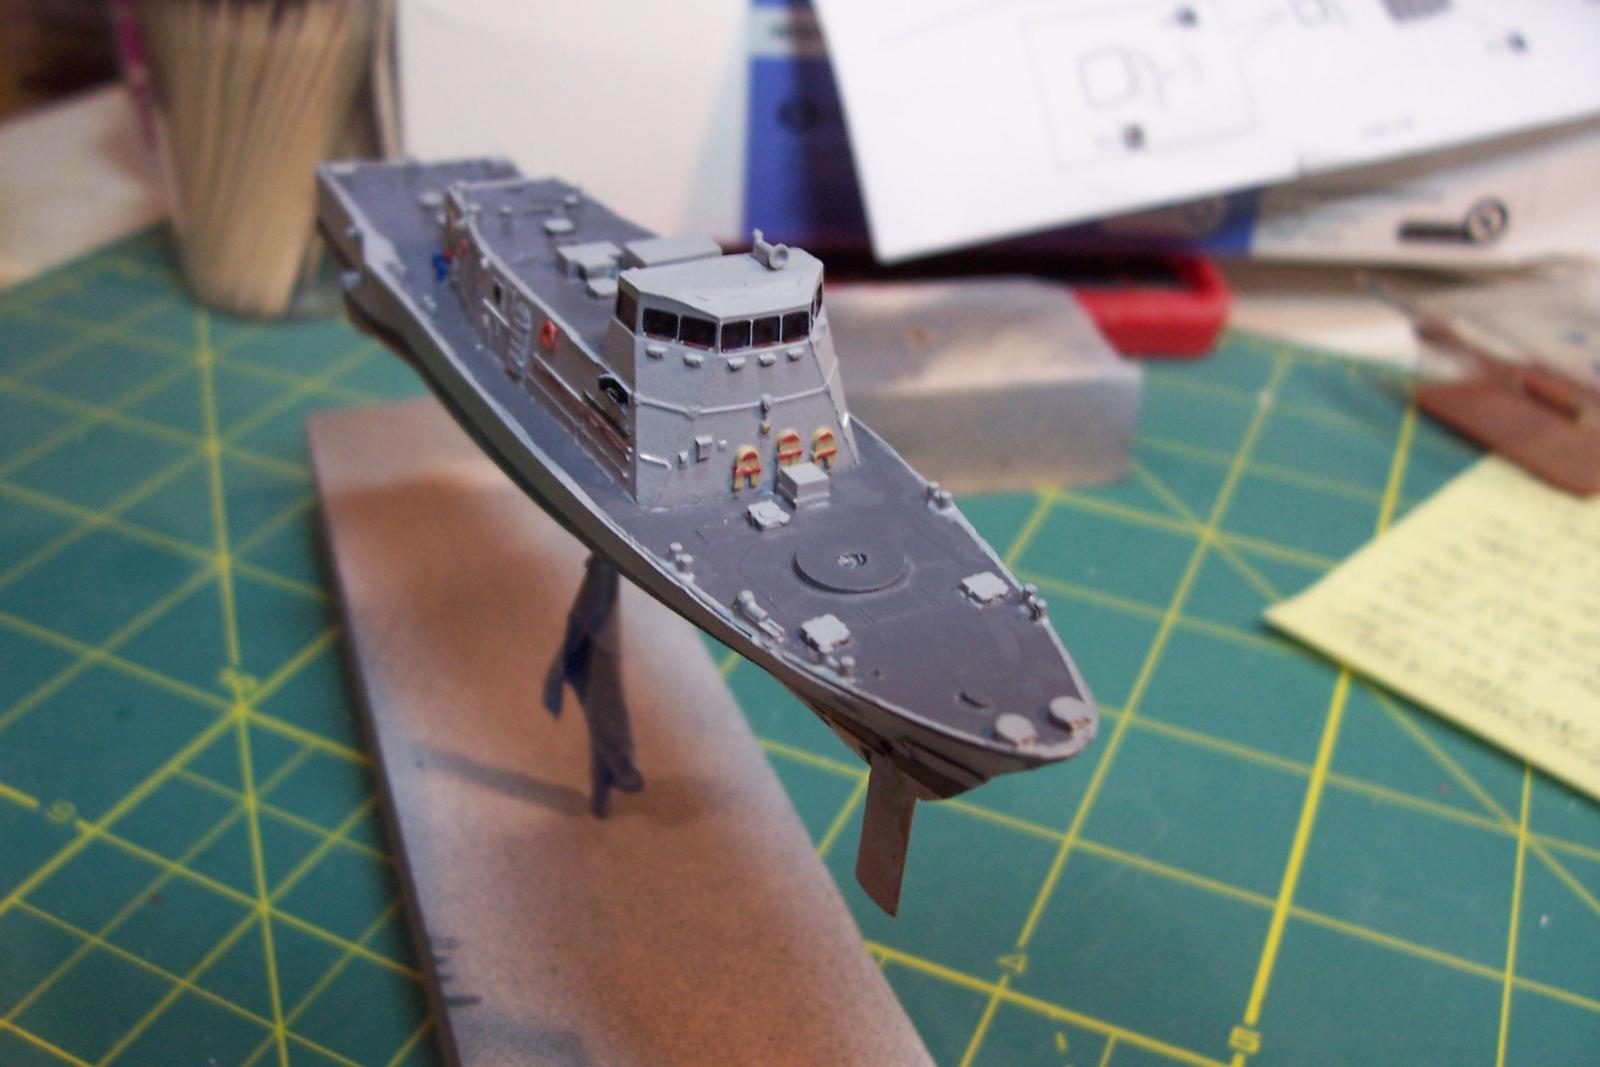
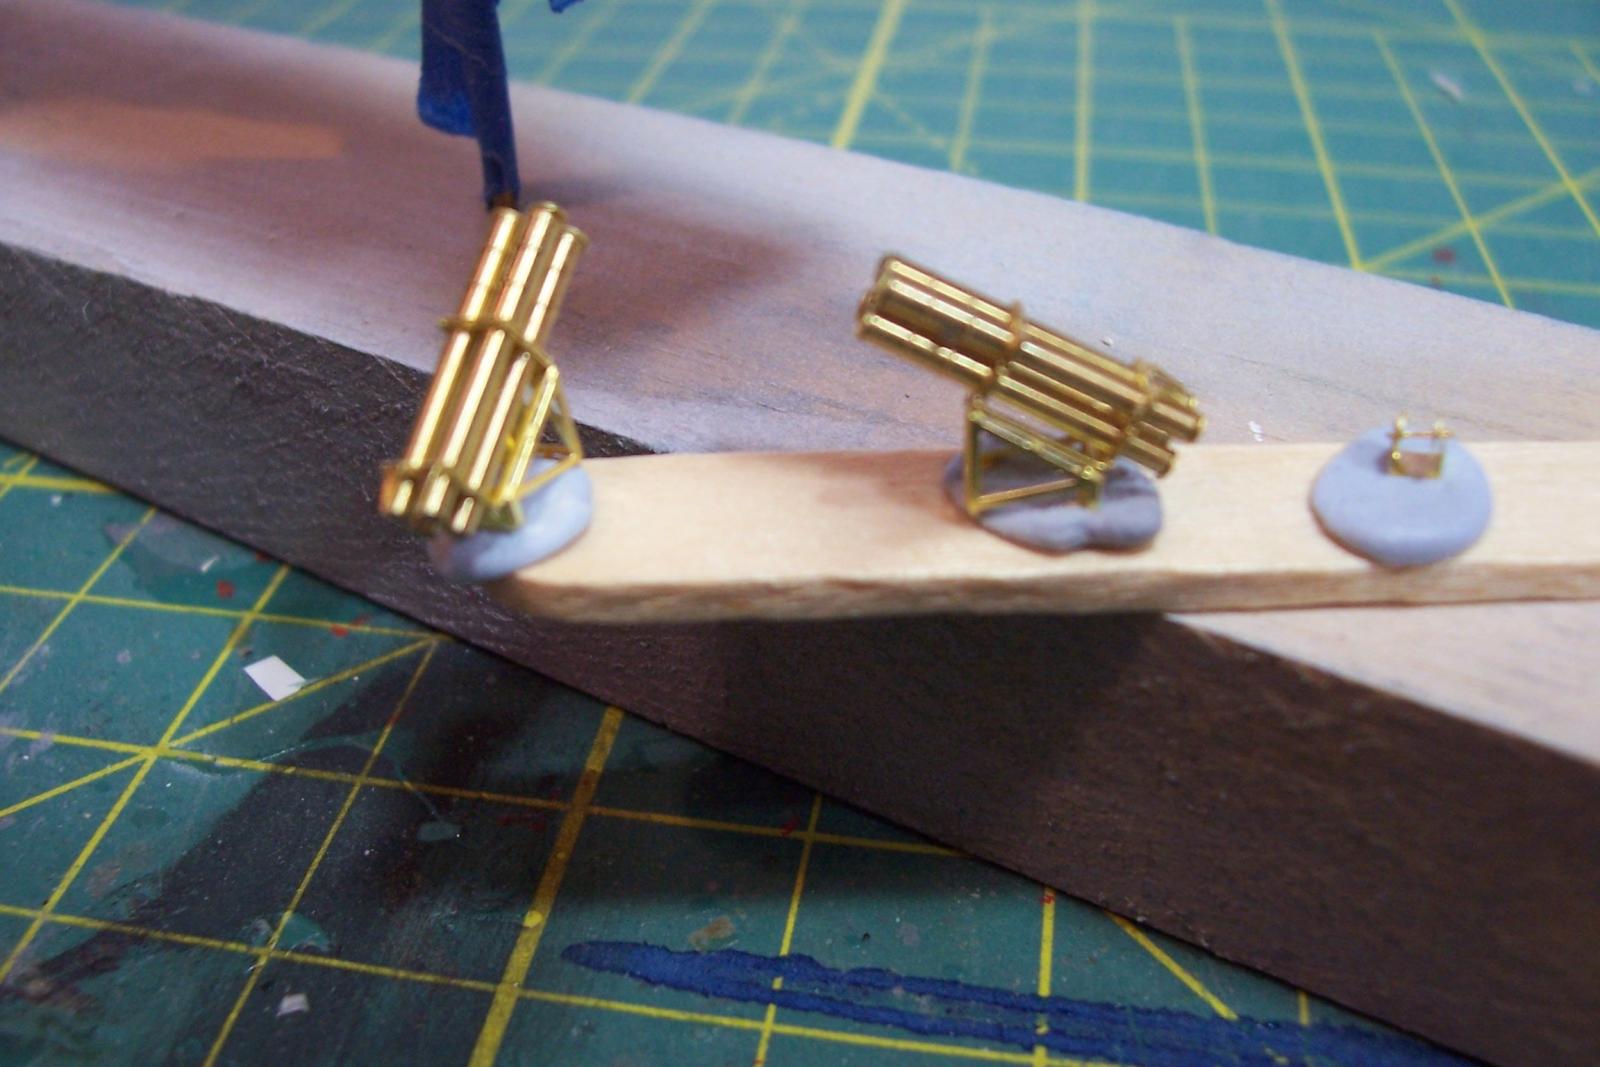
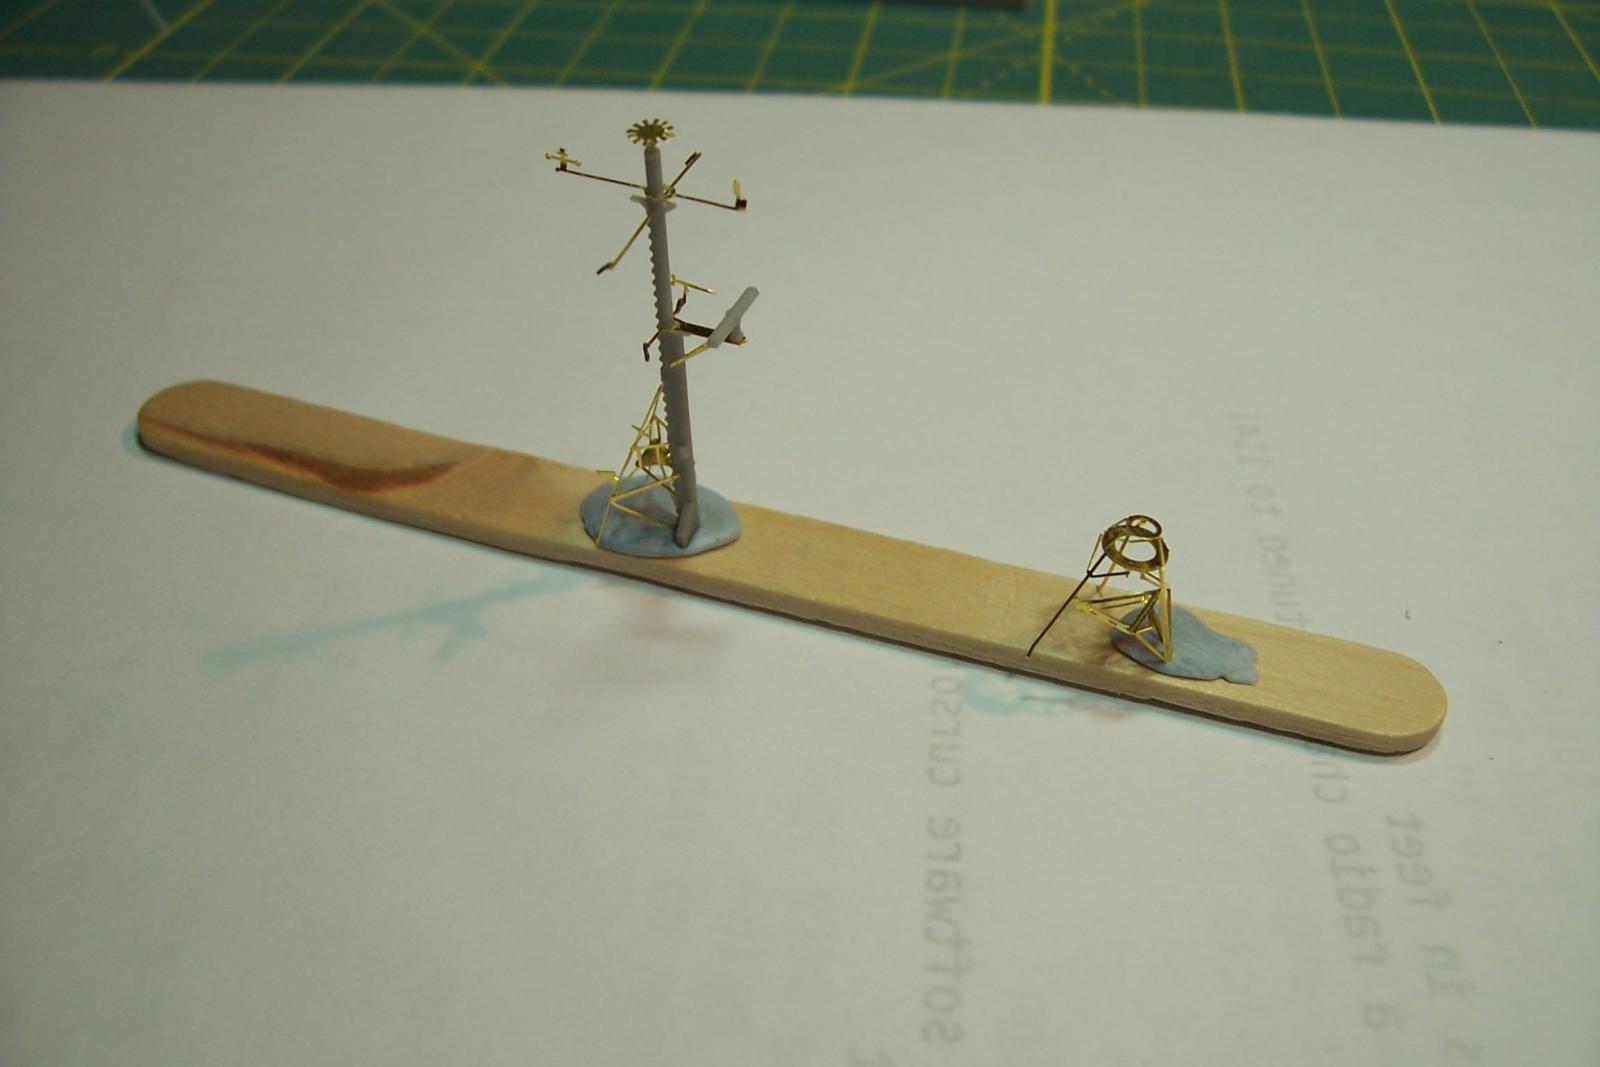
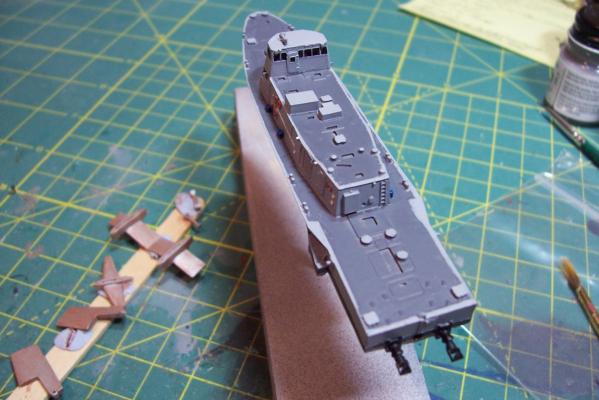
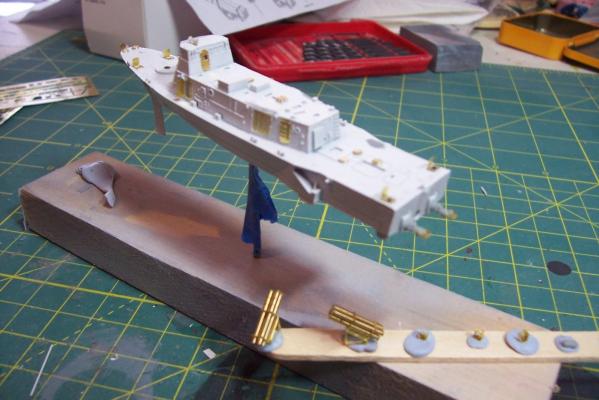
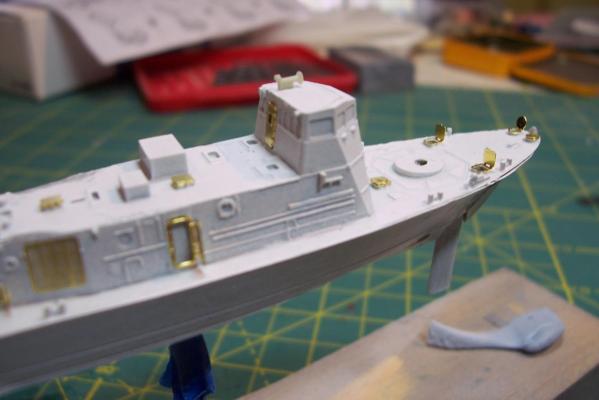
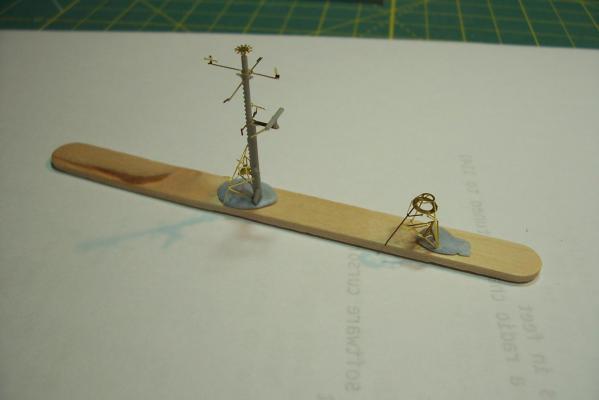
After priming I added some PE details (which I really could/should have added before priming), mainly WT doors and hatches. The kit’s can be placed either in the open or closed position, as I have shown in the below pix. I know open doors can add depth to a model but since I will be showing this hydrofoil in the “flying” (foils lowered) condition where everything was buttoned up tight I will close them all up prior to painting. The Harpoon missile containers went together well, a mix of PE and solid brass The mast and MK92 antenna base was not as much fun, more like trying to do origami with chopsticks. I need to amend what I said earlier about the directions. The diagrams are very clear and are adequate for figuring out 90% of the PE folds but for really complex pieces like these a few sequential folding diagrams would have been a big help. Fortunately having a spare kit saved me when one assembly broke from too many attempts to fold it. I finally tried out the airbrush putting on the deck gray. I’ve got a lot to learn still but the finish is a lot smoother than what I usually get with a brush.

- 24 replies
-
- 6
-
-
- gemini
- orange hobby
- (and 2 more)
-
Thanks for they tip Ken. The tape came off the primer with no problem - the real test will be after I put the tape over paint, hopefully that will be OK since I think the greatest chance of problems is the primer to resin bond. BTW I have enjoyed your Choctaw build, not sure I'll every try a paper build but I have seen some amazing examples.
- 24 replies
-
- 3
-
-
- gemini
- orange hobby
- (and 2 more)
-
Since this will be my first time using an airbrush I’ll lay out my general painting plan in the hopes that those who actually know what they are doing will jump in and let me know where I’m off base. 1) Remove the mold release agent from the resin. I know this is an absolute “gotta do” if I want any hope of getting the paint to adhere to the resin, particularly where it is under masking tape. I’ve used warm soapy water before with no problems but my hobby shop guy recommended soaking the parts in Diet Coke overnight (he emphasized not regular Coke or Coke One). So I did that and then rinsed them in water and let them air dry. Although I would not take the chance of skipping this step I must say that the parts in this kit did not gave the greasy, dusty feel of resin parts from other kits so it might not be necessary. (Done) 2) Assemble the hull and deck. spray with primer (Tamiya’s Fine Surface Primer from a rattlecan) to check for gaps, putty where needed and respray with primer. Let cure for 48 hours (Done) 3) Place some strips of Tamiya masking tape along the hull, leave them for a few hours and then remove to see if the primer is adhering OK. 4) Airbrush the decks with the “dark” gray (it will actually be only slightly darker than the Haze Gray vertical surfaces, given the scale effect) and let the paint cure for 48 hours. I’ll be using Model Master acrylics, thinned with a few drops of Future. 5) Mask the decks with Micro Mask, a liquid masking film that is brushed on. After painting it can be peeled up or removed with a wet Q-tip. This model is so small that trying to cut and apply tape would be a nightmare but if this brush-on stuff doesn't work I'll have to do it. 6) Airbrush Haze gray on the hull, vertical surfaces and sub-assemblies. 7) Airbrush clear gloss on the hull to provide a good surface for the decals 8) Apply the decals 9) Airbrush everything with Future (nee Pledge) to protect the paint and decals 10) After the last details are added airbrush the entire model with clear flat to eliminate gloss.
- 24 replies
-
- 6
-
-
- gemini
- orange hobby
- (and 2 more)
-
Good to hear since I bought Tamiya's Fine Surface Primer I should be in good shape,. That's a neat trick with the straw and rattle can, I've sprayed paint on paper and used that for brush touch-ups but your idea sounds better for both kinds. Thanks!
- 24 replies
-
- 4
-
-
- gemini
- orange hobby
- (and 2 more)
-
Thanks for the tip Bob. I already soaked all the resin overnight in Diet Coke (my hobby shop owner's suggestion, I was going to bring that up in my next post). This kit has 2 things going for it that may make spraying easier; there was none of that greasy powder residue from the mold release agent like I have found on other kits (not saying it does not need to be pre-cleaned) and there is subtle texture on the surface of the resin, not as smooth as plastic, hopefully that will help the paint adhere without having to rough it up with steel wool or sandpaper (this is such a small kit it would be tough to reach a lot of places anyway). I'll use my extra kit as a test bed for priming, spraying, and masking prior to attempting it on the "real" build.
- 24 replies
-
- 4
-
-
- gemini
- orange hobby
- (and 2 more)
-
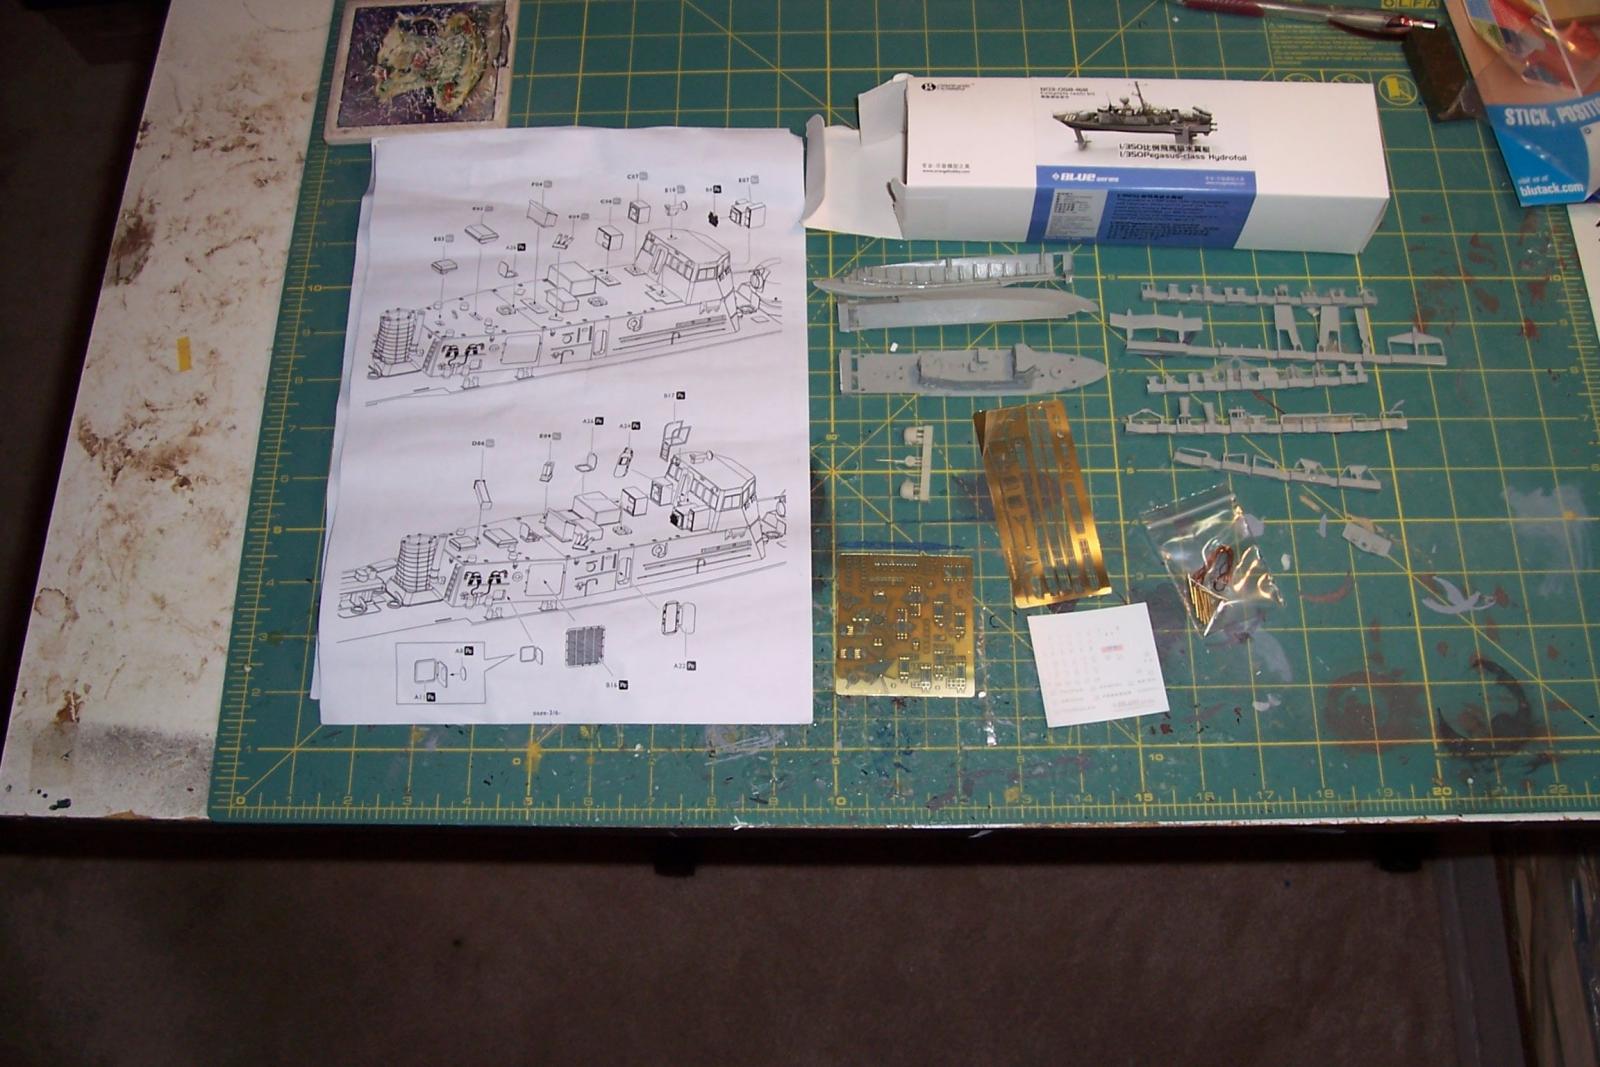
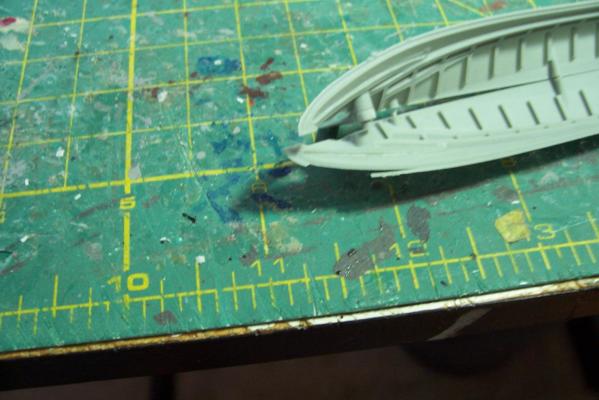
Orange Hobby 1/350 scale resin kit of USS Pegasus (PHM-1) I’m going to use this kit to learn how to use an airbrush and also to figure out how to handle this “new” style of resin kit (I’ll explain what I mean by that in a bit) prior to attempting to build a larger (and more expensive) model of a Knox-class Frigate by the same manufacturer. One mistake that I have already made but that will help me with the many more to come is that when I ordered the kit (along with several other items from an online store) I somehow ordered two of them. I was going to send one back for a refund but given its rather modest price I decided to keep it as a ready spares locker in case I really goon up the airbrush paint job or break/lose an important part. Kit contents: Everything fragile comes well-wrapped in bubble wrap. The main hull is different from what I have seen in other resin kits in that it is very similar to plastic kits where there are 2 hull halves, the stern plate and the deck/superstructure. Most resin kits I have seen have all the above as one solid piece, or maybe with the hull in an upper and lower section so that it can be displayed full-hull or waterline. The smaller resin pieces are on pour legs and are remarkably well done with almost no flash. I said earlier that I consider this as a “new” style of resin kit, by that I mean the differences between this and earlier, older kits from other manufacturers are very noticeable, and welcome: Unlike the older, domestic kits I am used to this one has virtually NO pits or voids along thin edges and the flash is minimal and easily removed. The edges of the hull are very fine and fragile, as you can see in this pix I broke of a little from the forward edge of the bottom (port side) piece, fortunately I can fix that with a piece of strip plastic sanded to shape. The cast-on detail is amazingly fine, so fine you have to be careful when cleaning up the pieces not to remove something that is supposed to be there. I almost removed 2 bumps about the size of a small grain of sand before I realized they were the hinges where the quarterdeck awning frame would have been attached. There is a lot of forethought and planning in how the pieces fit together with locations clearly evident and long pieces have locating pins and beveled edges for a great fit. The directions are almost free of text (being from a Chinese company that is probably no loss) but the diagrams are numerous, detailed and exceptionally clear. All the parts (including the PE) are numbered and, as far as I can tell at this point, they are all included on the directions (something that doesn’t always happen with the hieroglyphs that pass for directions from some other manufacturers). The brass PE is extensive for such a small model. It is very thin with fine detail but I doubt it will hold up to multiple attempts to fold it so I’m going to try to get it right the first time. I’m going to assemble the main hull assembly and then discuss my plan for painting in the next post.


- 24 replies
-
- 11
-
-
- gemini
- orange hobby
- (and 2 more)
-
OK, assuming my first attempt at using an airbrush is not a complete disaster...
- 144 replies
-
- 1
-
-
- basilone
- BlueJacket Shipcrafters
- (and 2 more)
-
Thanks Per, Scott and Yves. Per - I'll probably spend a little time over on the dark side and build a couple of resin kits I have of USN ships I served on. It shouldn't take too long because I can't scratch details at 1/350 scale so it's simply a matter of "glue'n n' painting"
- 144 replies
-
- 4
-
-
- basilone
- BlueJacket Shipcrafters
- (and 2 more)
-
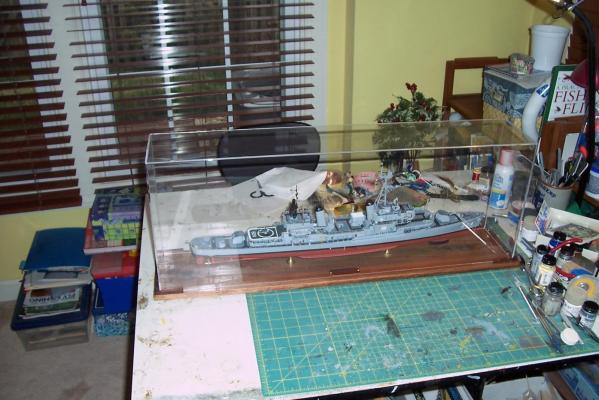
Done at last! I'll post some pix in the "completed kit models" section soon. In case you are wondering (no pun intended) the all - acrylic case in the last pix was custom made by Abordage.com in remarkably short time. If you decide to use them make sure you specify the thickness of the plexi you want (I used 1/8 inch) they also provide base boards although I made my own.


- 144 replies
-
- 12
-
-
- basilone
- BlueJacket Shipcrafters
- (and 2 more)
-
Thanks Greg and Scott! Scott, just in case you didn't know - BlueJacket has the same ship in the WWII 6-gun version in case you dad was a mid on the Glennon before her FRAM update. Either way I highly recommend the kit - all the hard work is done for you, the engineering is great and the scale is not an eyestrain but it is not nearly as big as some 3-master build Tim
- 144 replies
-
- 1
-
-
- basilone
- BlueJacket Shipcrafters
- (and 2 more)
-
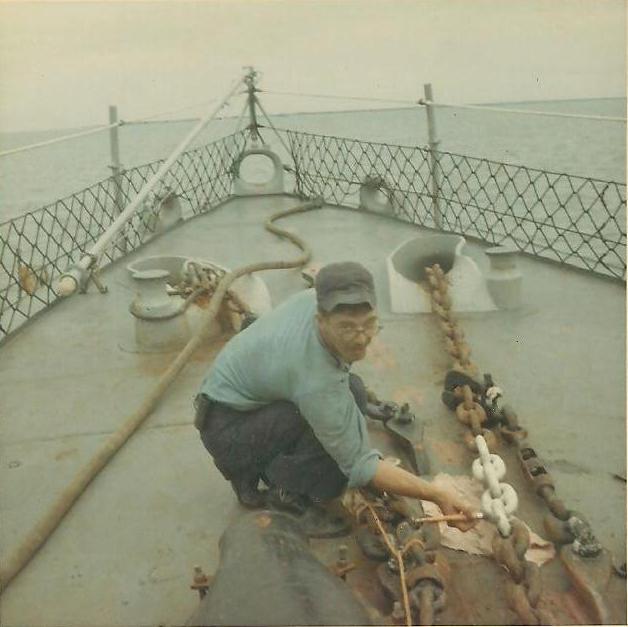
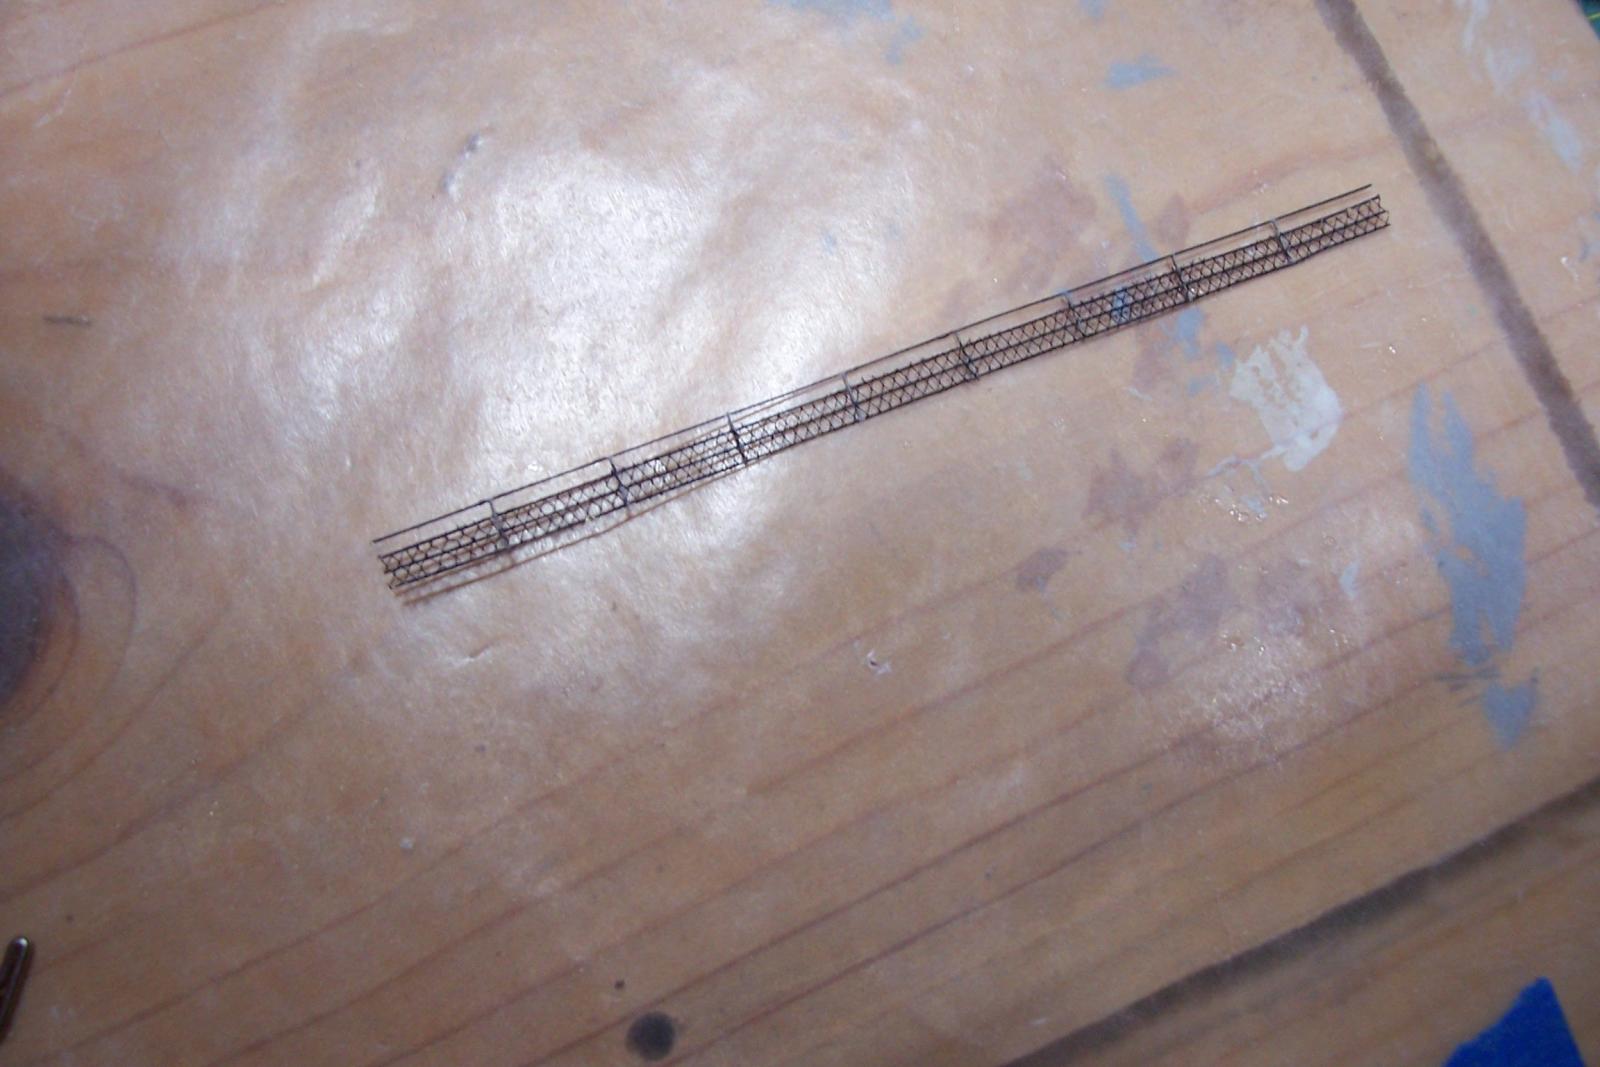
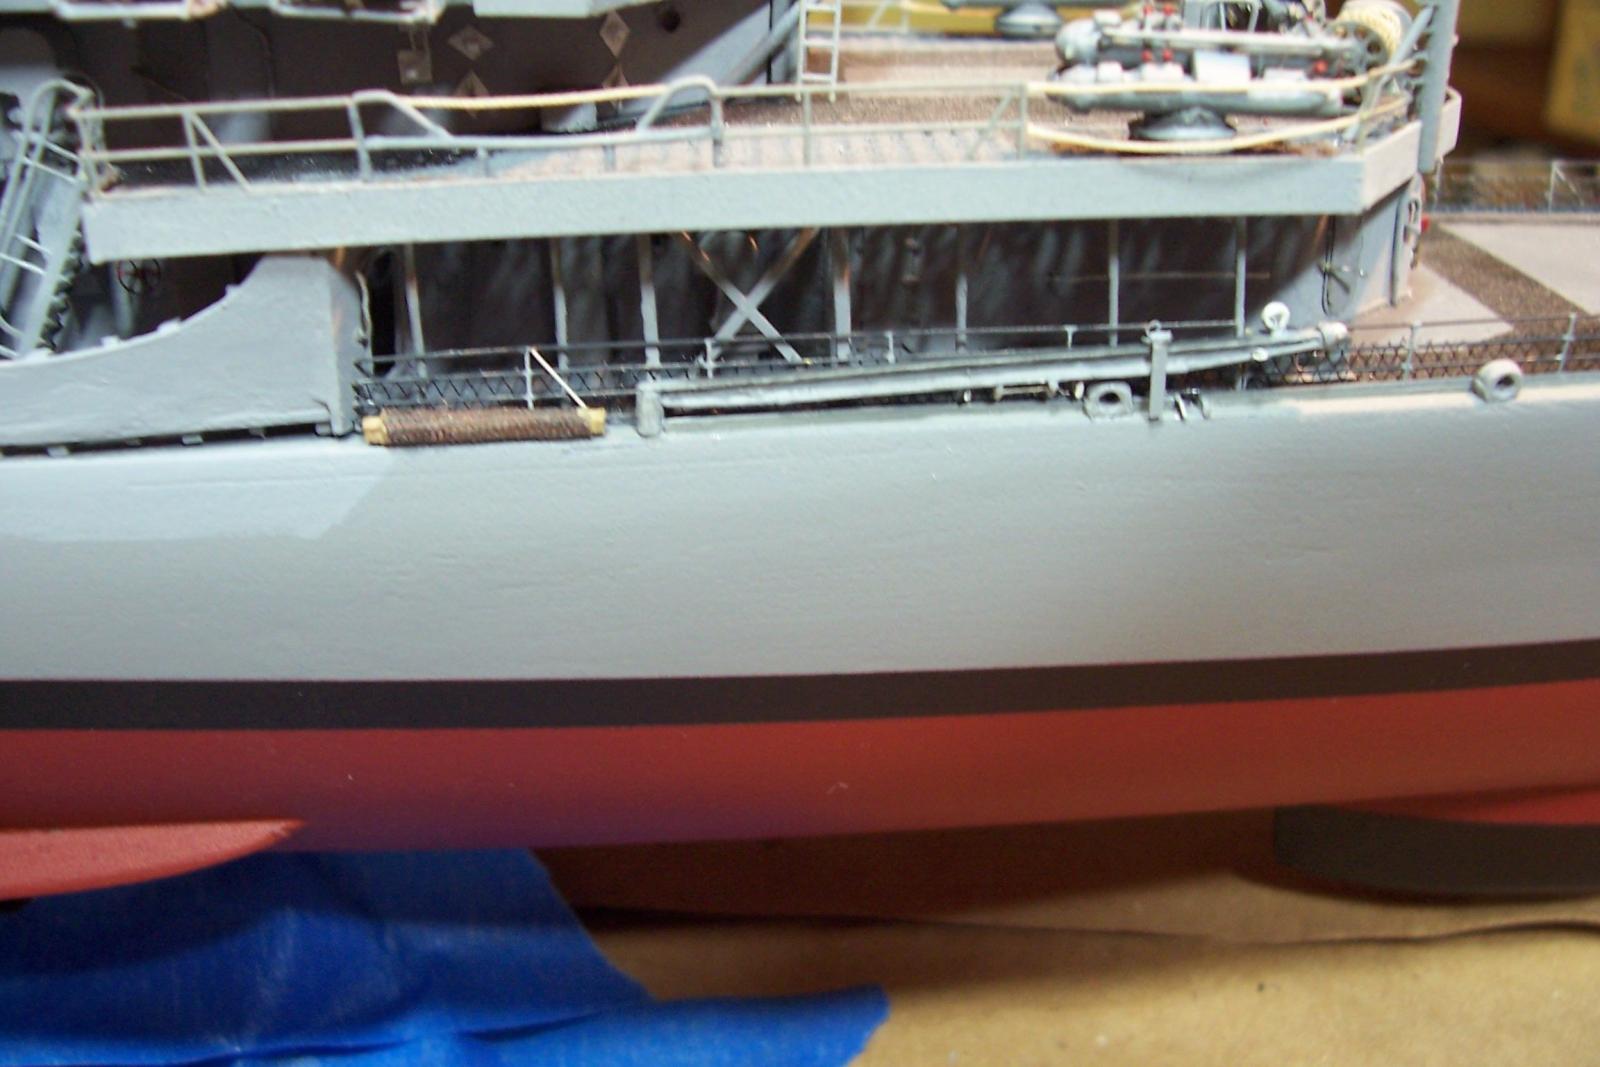
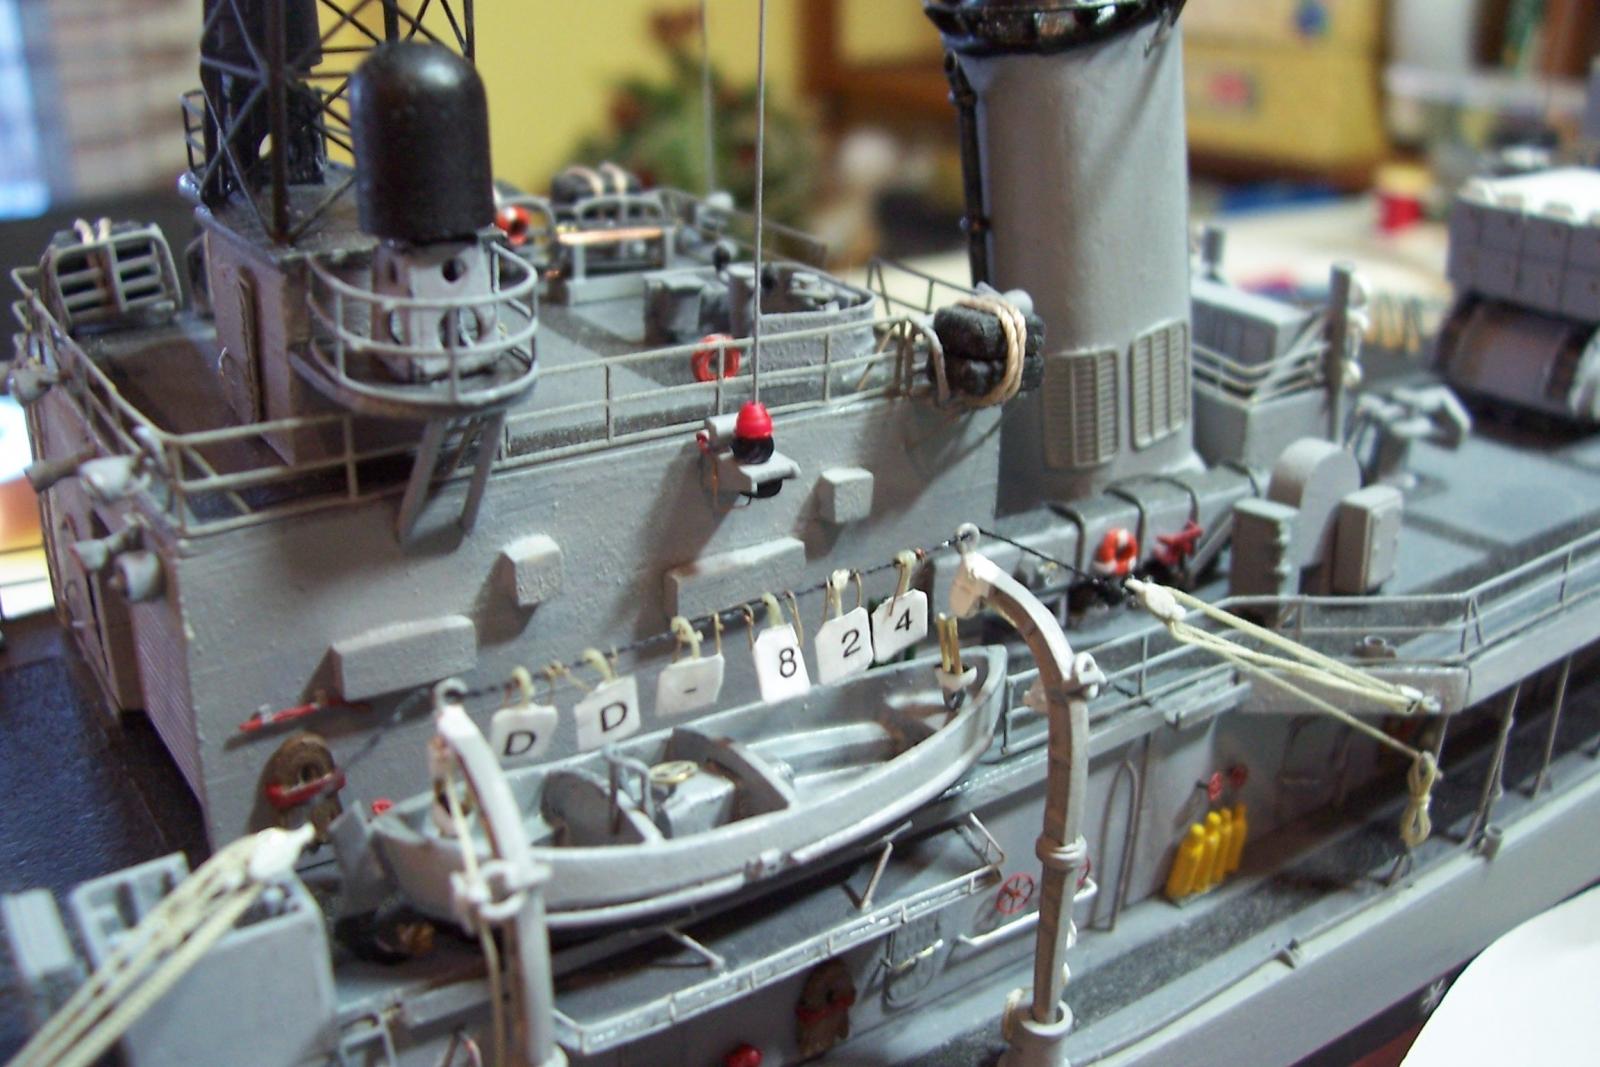
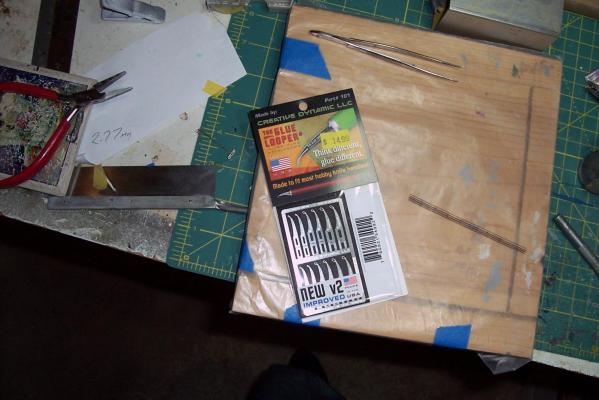
Final deck details The last major item to add was the lifelines around the main deck. I wanted to add webbing between the deck and the lower 2 lifelines, like you can see in the background of this photo: I thought it would be a simple job to add some black Florist’s mesh but it was slow and tedious to glue it on, trim it, re-glue those areas that pulled away while trimming, retouch up the paint, reglue the mesh where it pulled away during the paint touch up, etc, etc etc. It ended up taking about 5 or 6 hours to get them all done. Believe it or not they actually sell PE for use with 1/350 scale kits. Here is one completed section: I glued it to the model using CA glue and a really neat applicator recommended by my hobby shop which had just got them in. They come in several sizes of loops, are made of steel PE and fit in the end of a X-Acto knife handle. They work great for getting CA just where you want it and it cleans up just by holding it over a match flame (I had no idea how flammable CA is (even when dry), I’ll start being very conscious of where my glue bottles are in relation to heat or flame) The railings went on easily. Diagonal braces were added at various spots. The boat boom and scramble net in this pix are scratch additions: The red and green things in this pix are simulated anchor bouys which used to be jury-rigged out of empty 5” powder casing containers with light line looped around them. The jackstaff is also included in the stowed position on deck: Only about one hour’s work left to add the props, rudders and the prop guards and then this cake is baked.


- 144 replies
-
- 7
-
-
- basilone
- BlueJacket Shipcrafters
- (and 2 more)
-
Thanks for the encouragement Chris. It's been a fun build because the kit itself is so good that I didn't need to spend anytime fixing it, I could just get carried away with detailing it, although I still think about things that I wish I could add but just can't figure out how to. Picking a type of ship with plenty of photo references was an unplanned but BIG help.
- 144 replies
-
- 3
-
-
- basilone
- BlueJacket Shipcrafters
- (and 2 more)
-
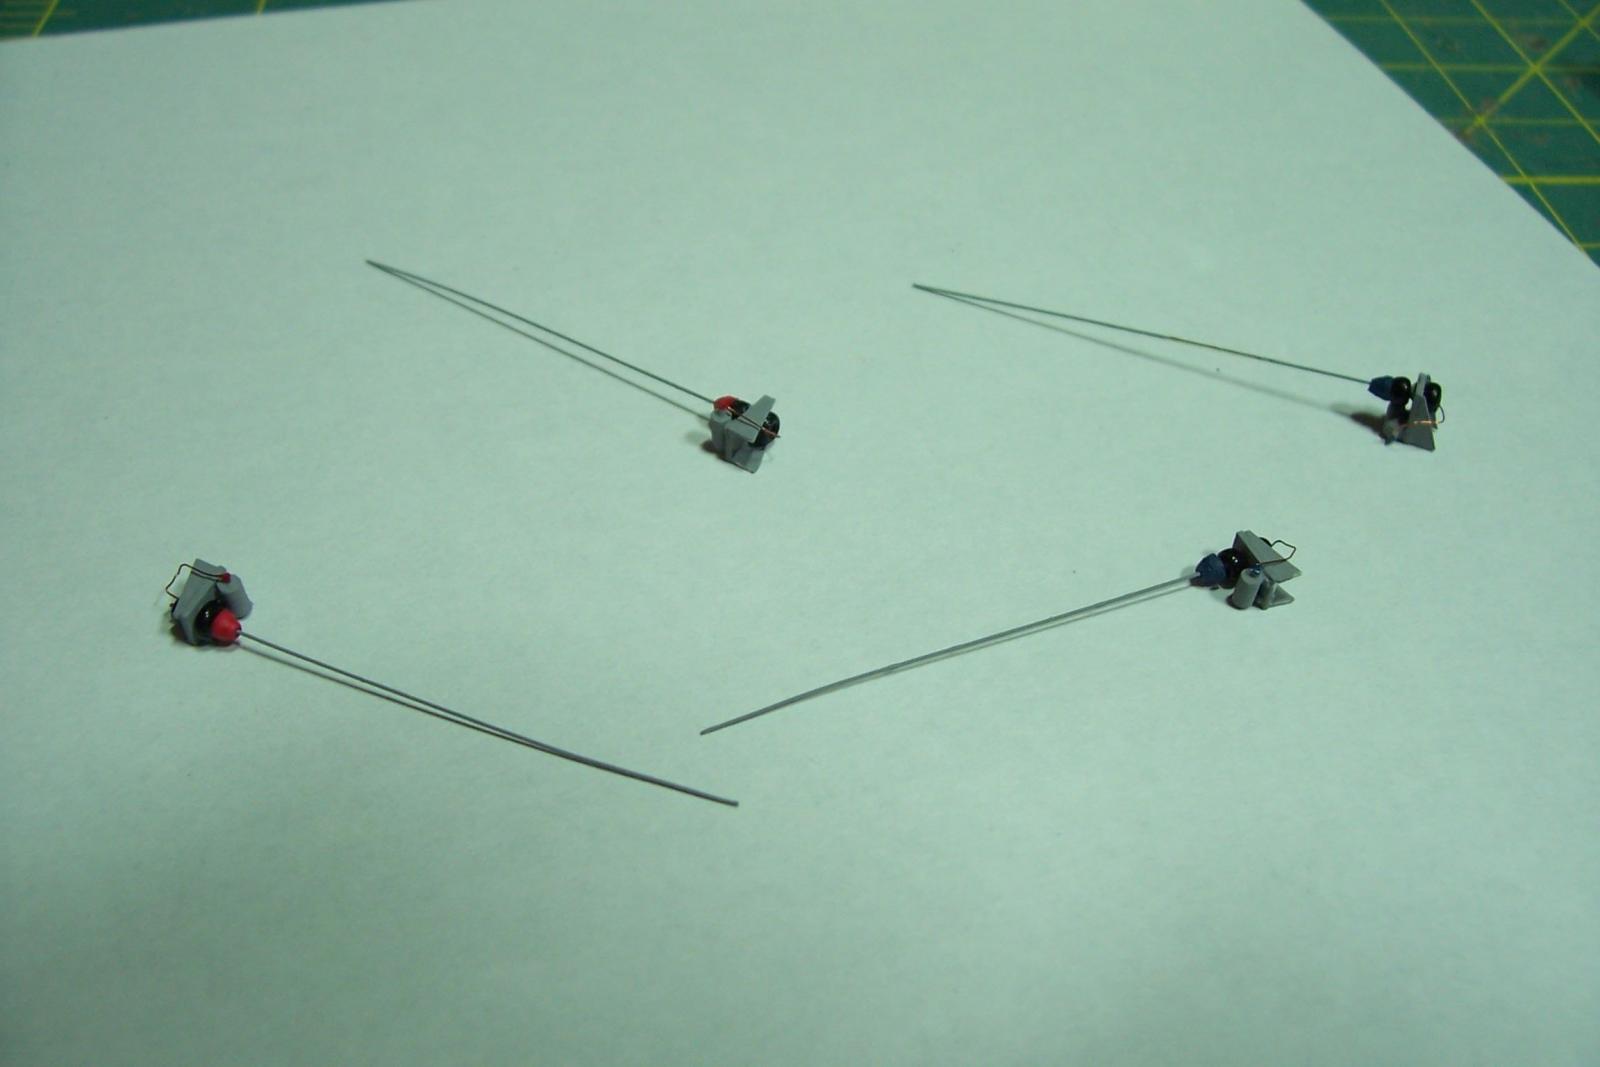
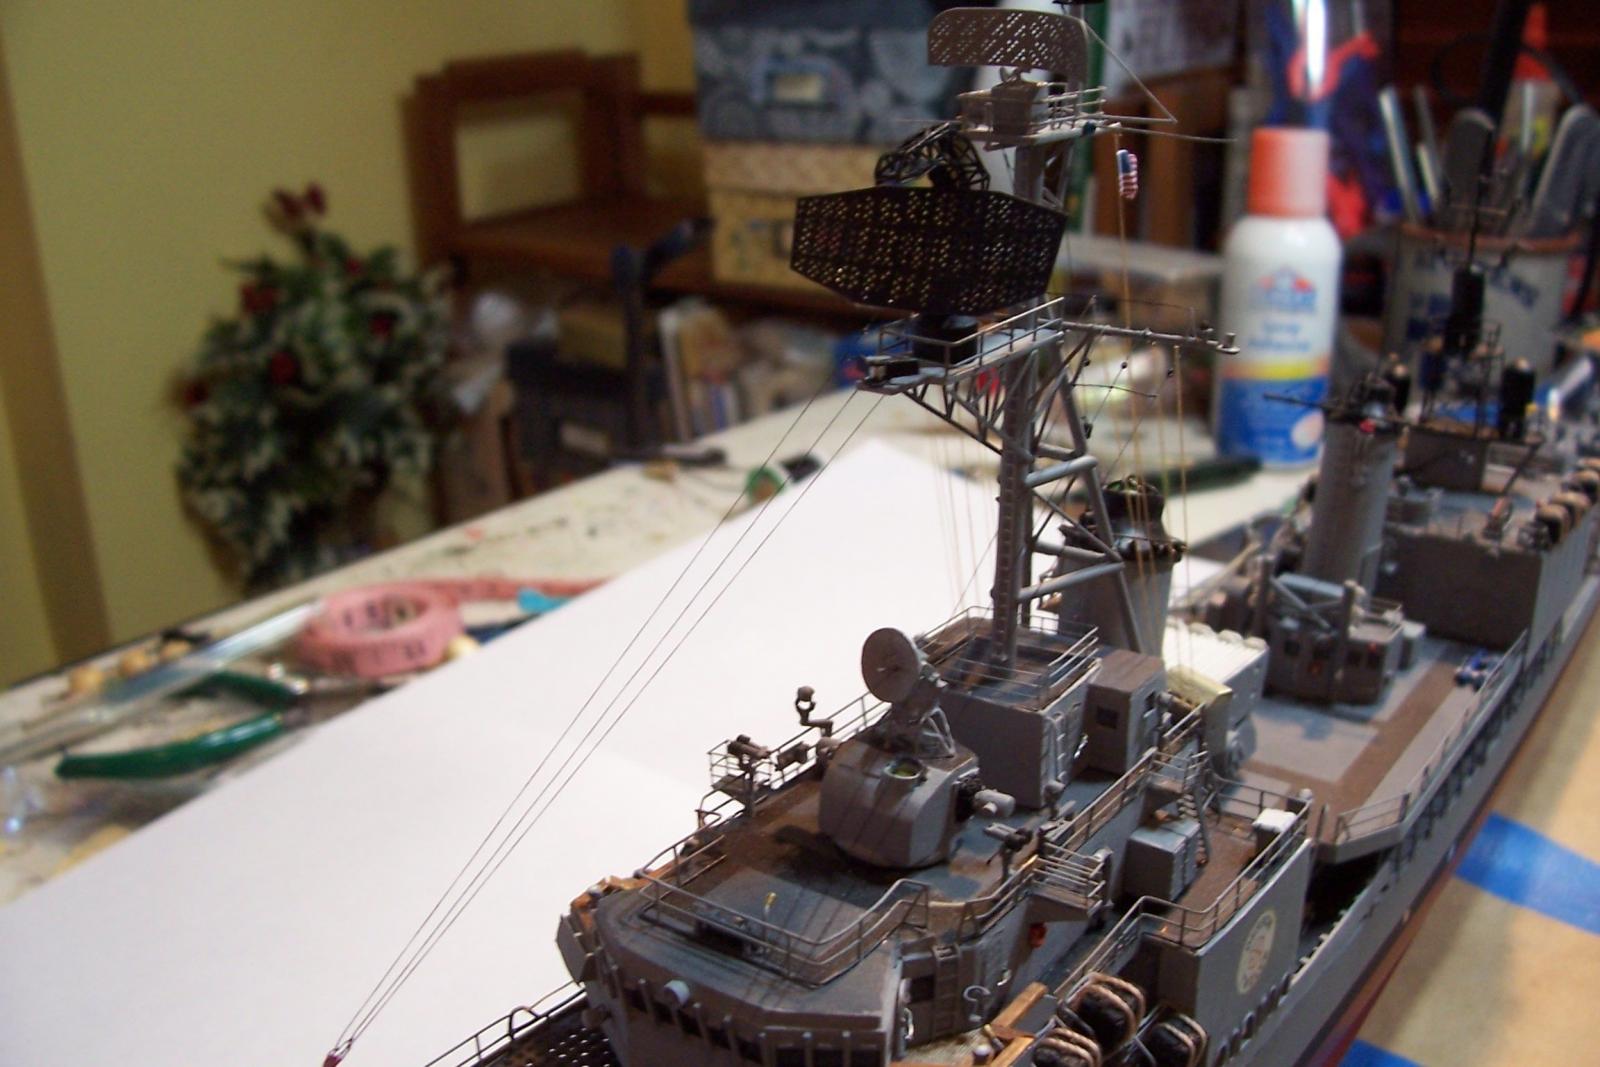
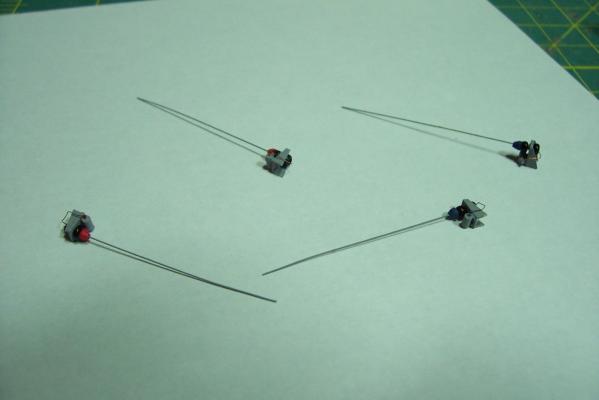
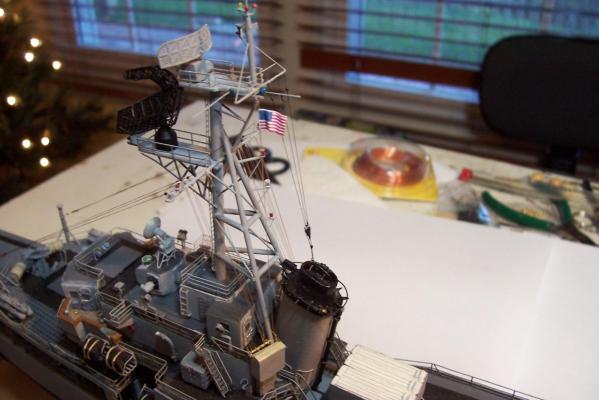
HF Whip Antennas One of the last things to fabricate for this build are the HF whip antennas. They are made out of .010 wire, plastic strip for the base, small beads for the black insulators and plastic rod shaped in a Dremel for the colored insulators and the couplers (tuners):

- 144 replies
-
- 9
-
-
- basilone
- BlueJacket Shipcrafters
- (and 2 more)
-
Hi Craig, Nice looking kit, seems to be plenty of cast-in detail and that PE set looks great. Nice to see another steel hull build here. Keep up the good work and keep the pix coming. tim
-
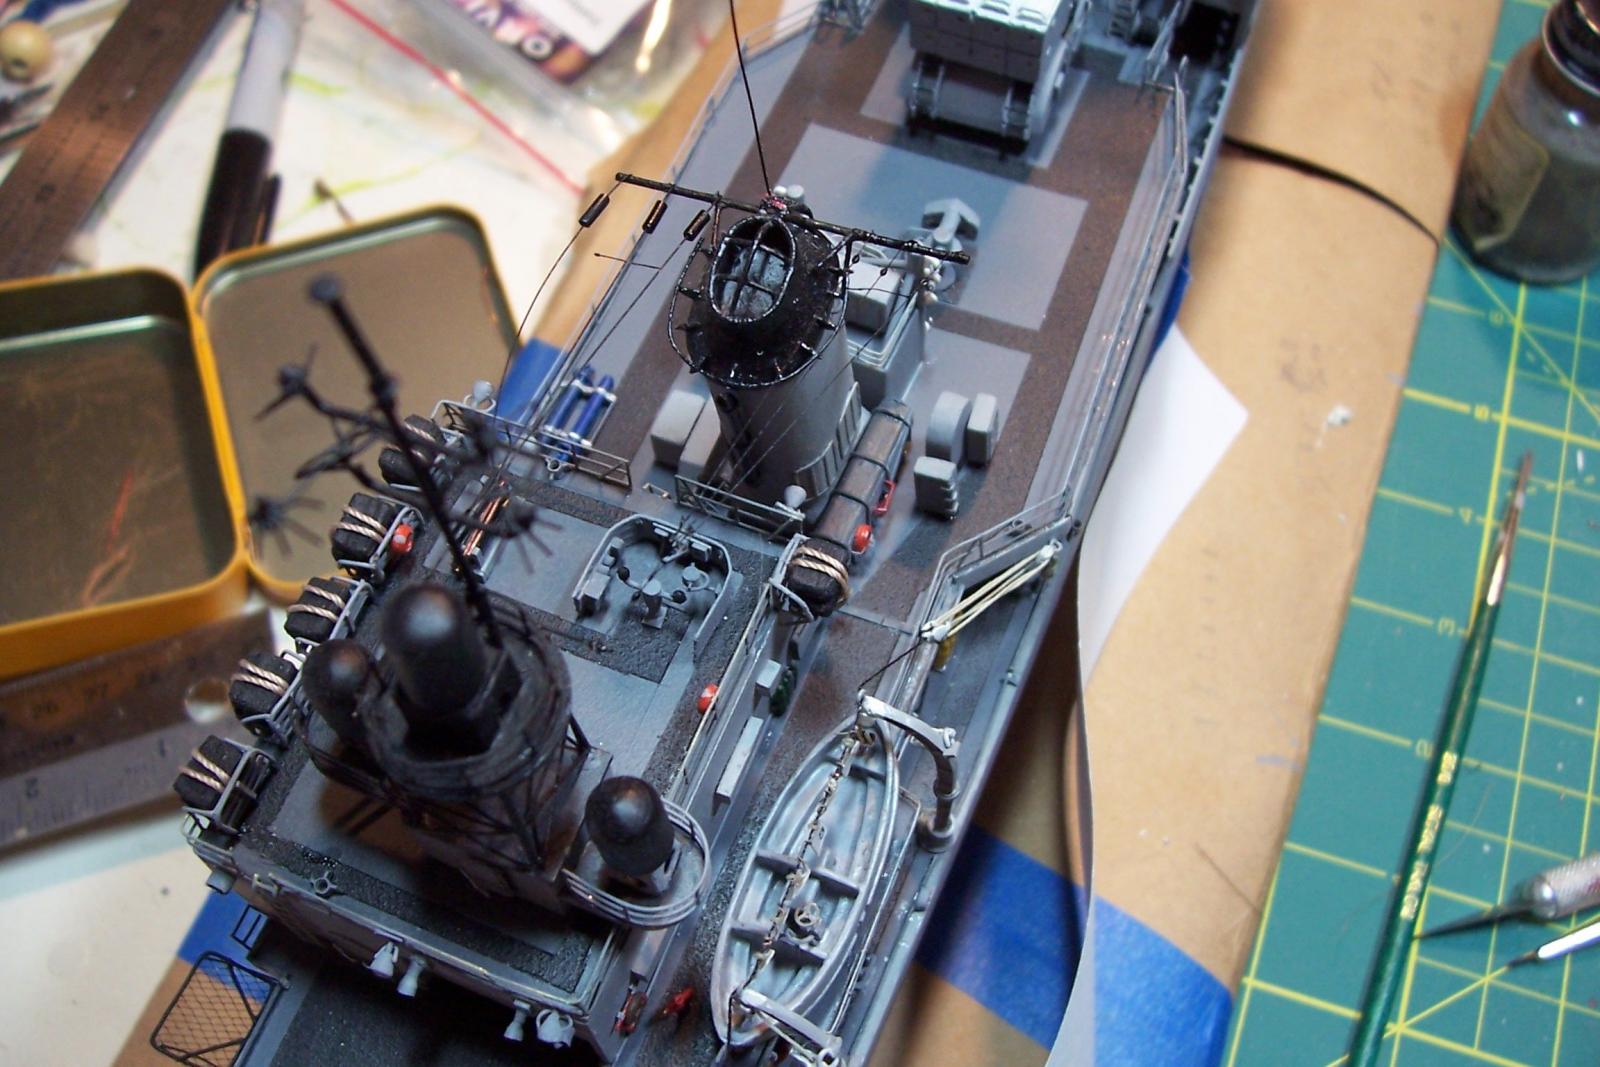
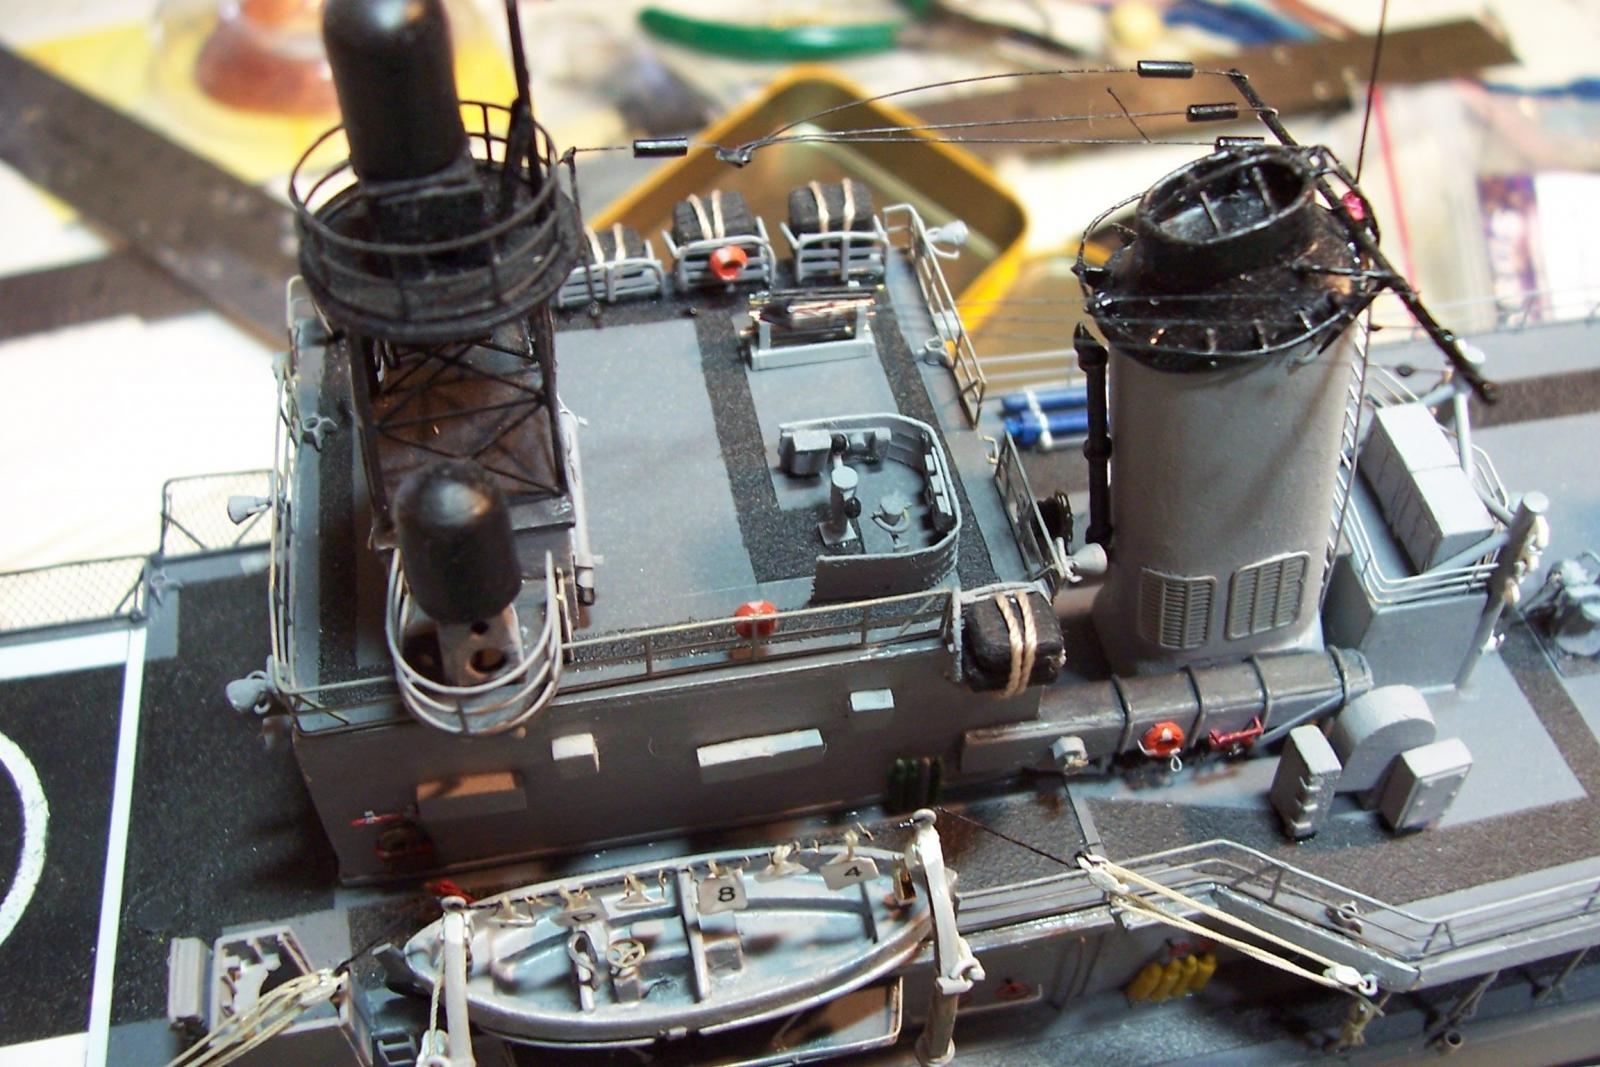
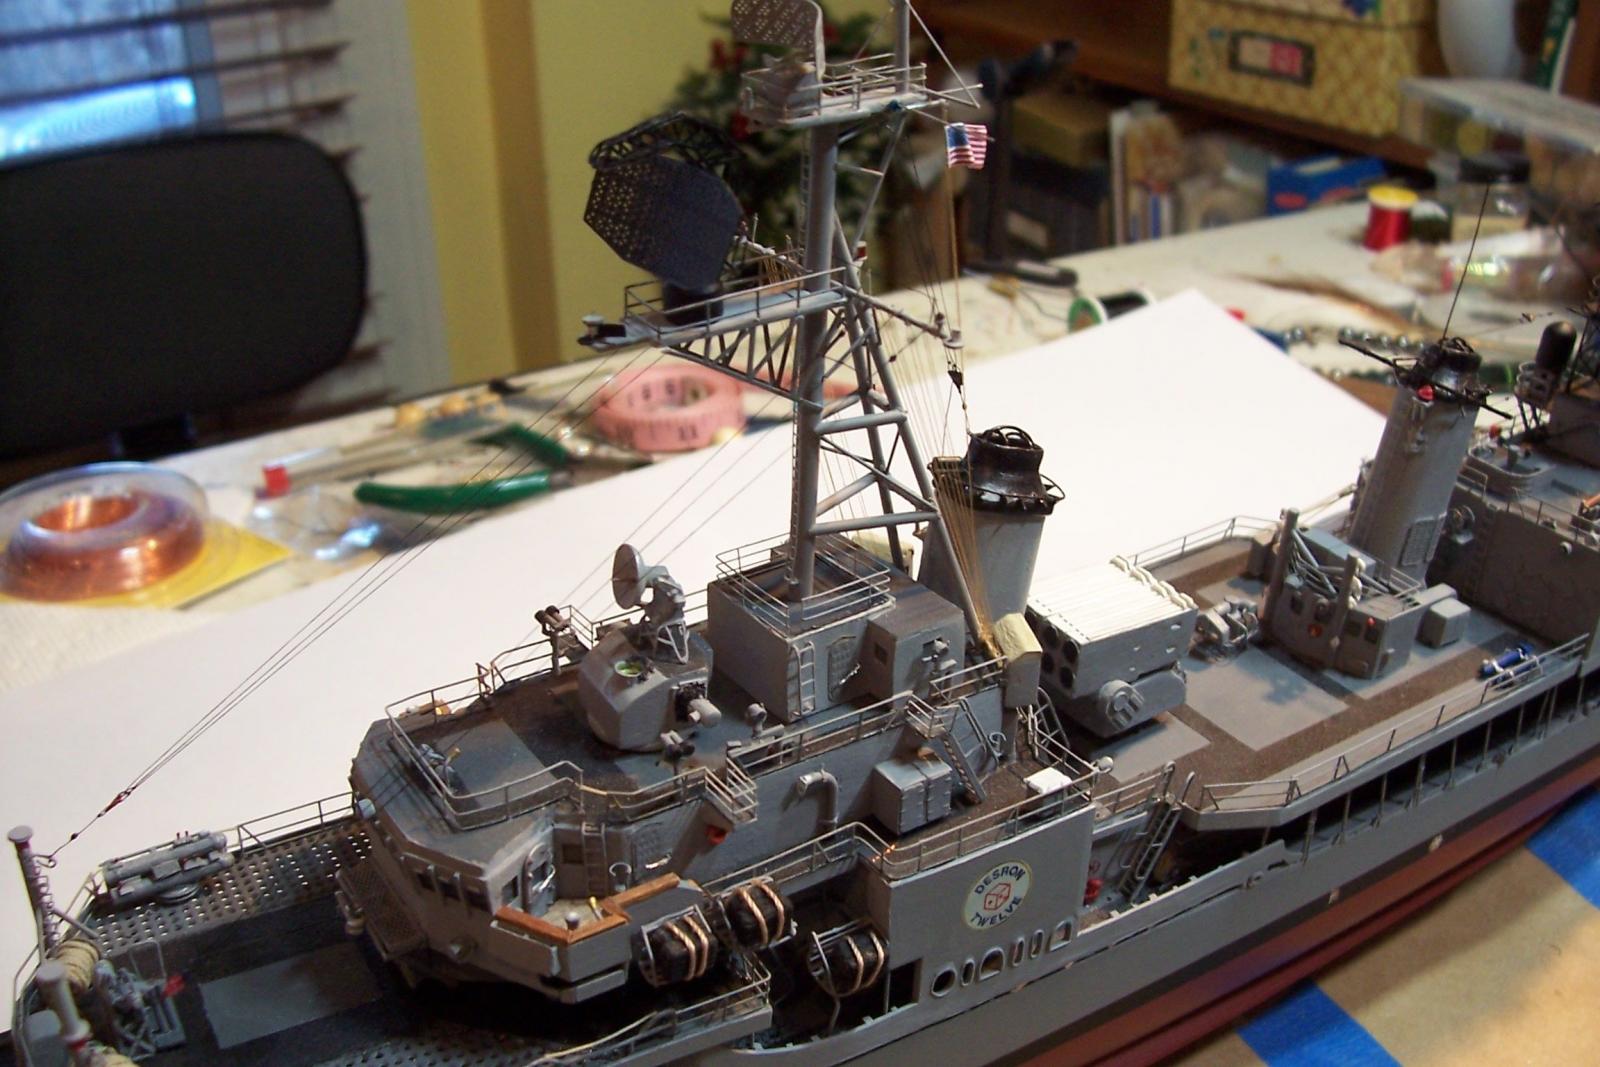
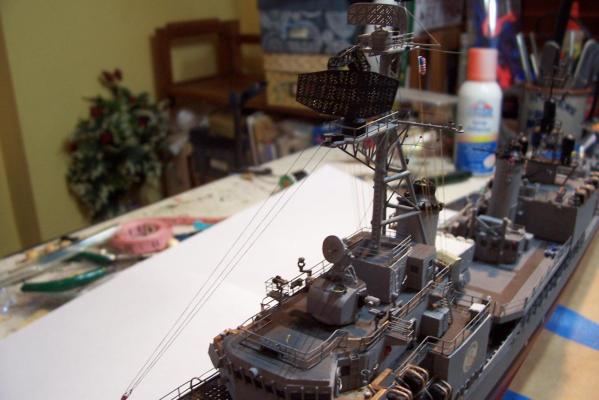
Rigging While getting ready to rig the forward 3-wire HF fan antennas I did some photo research and figured out that the antenna wires were so thin that they barely showed up even on close-up photos of the FRAMS. Finding some thin thread was no problem but for the sake of accuracy and consistency I had to re-do the aft fan antennas. Here’s the re-do in progress, the original, thicker ones are to port and the thinner revised ones to starboard: The forward mast rigging included the signal halyards which were helped by some small 1/350 scale PE hardware I bought from L’Arsenal, the flag halyard, and 3-wire fans forward and starboard aft: Next up will be the HF whip antennas.


- 144 replies
-
- 7
-
-
- basilone
- BlueJacket Shipcrafters
- (and 2 more)