schooner
-
Posts
746 -
Joined
-
Last visited
Content Type
Profiles
Forums
Gallery
Events
Everything posted by schooner
-
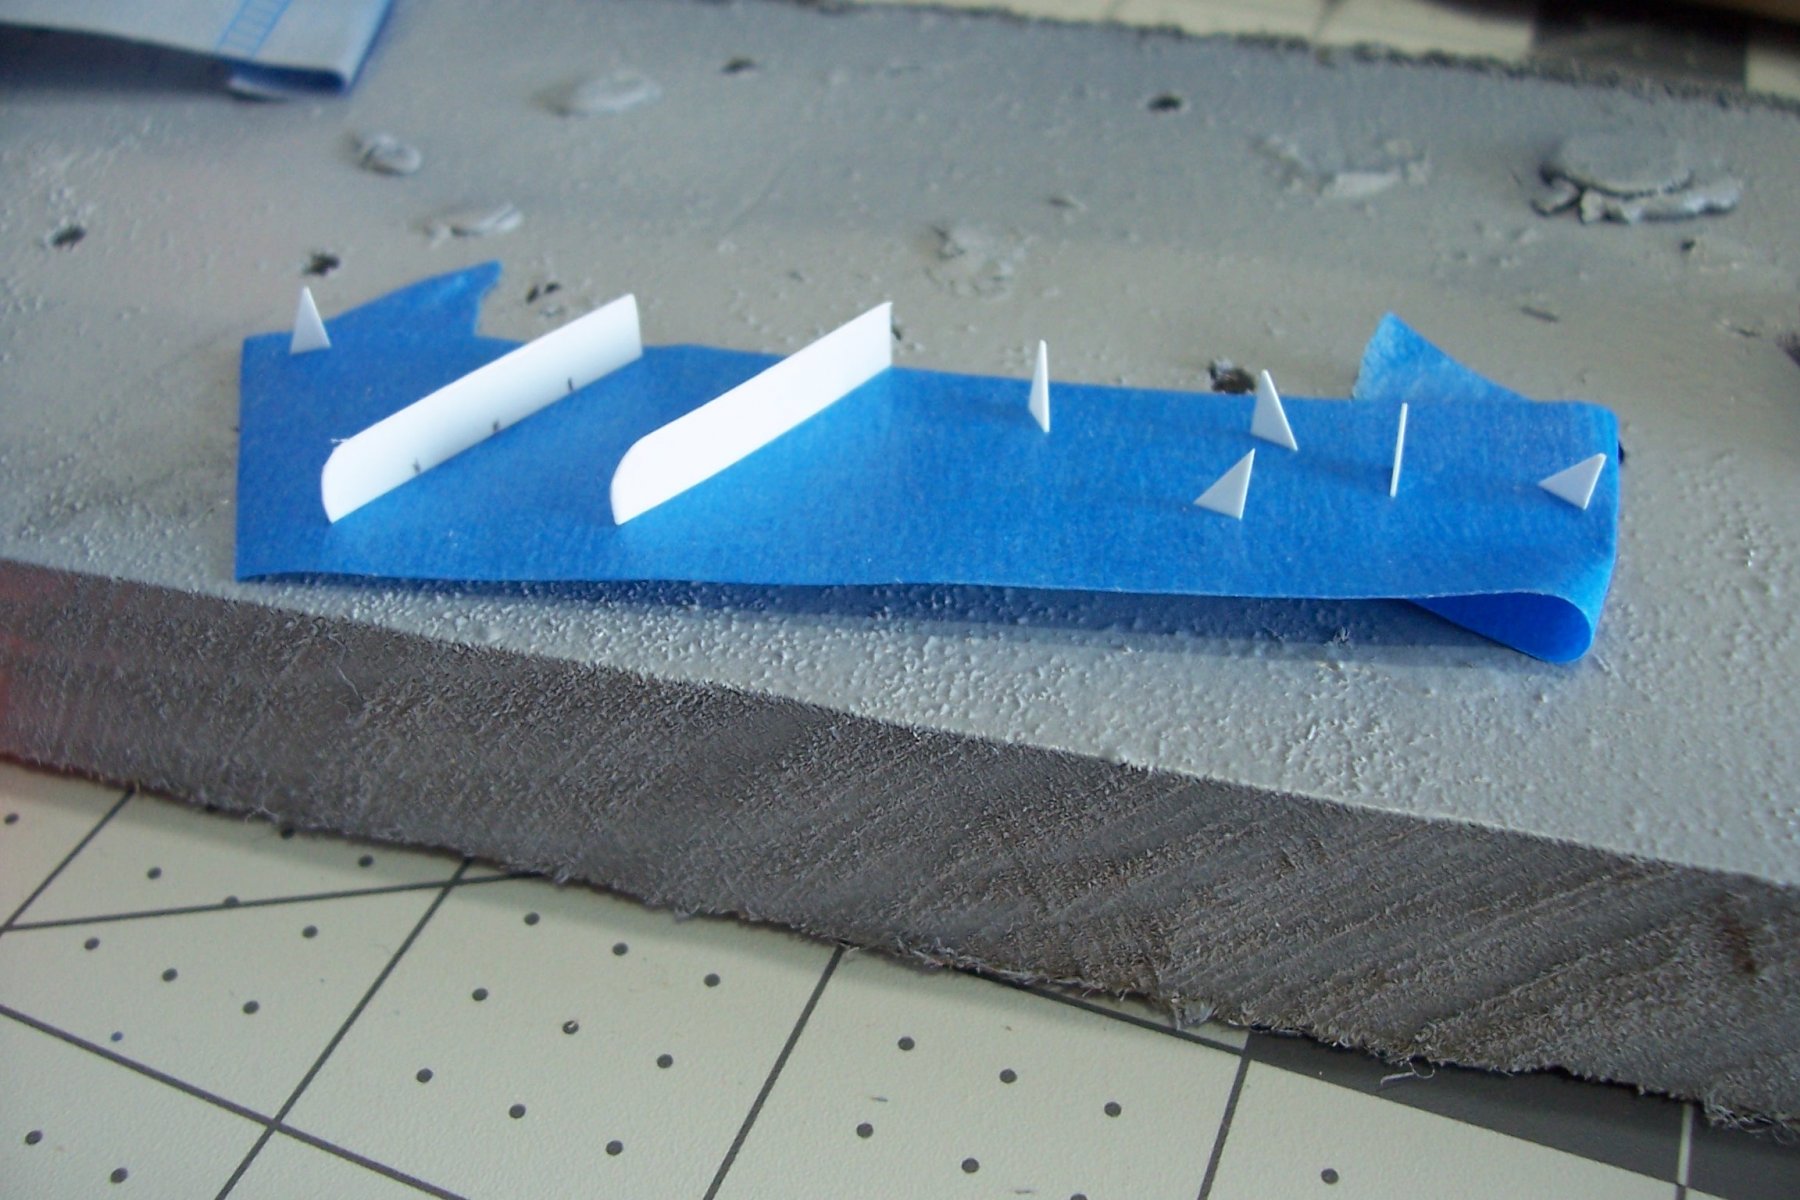
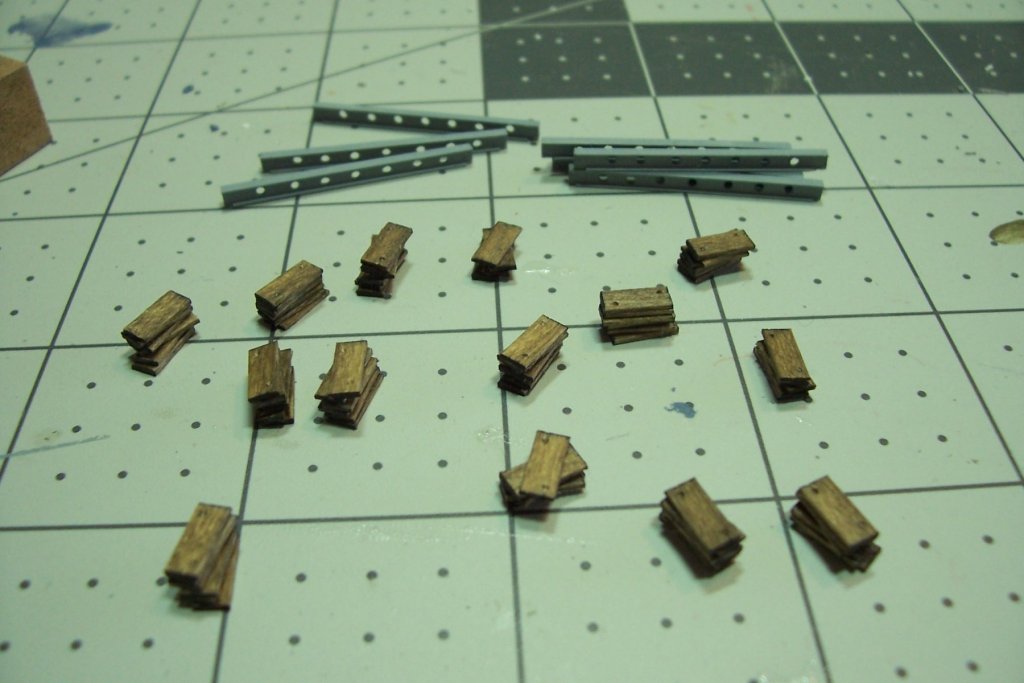
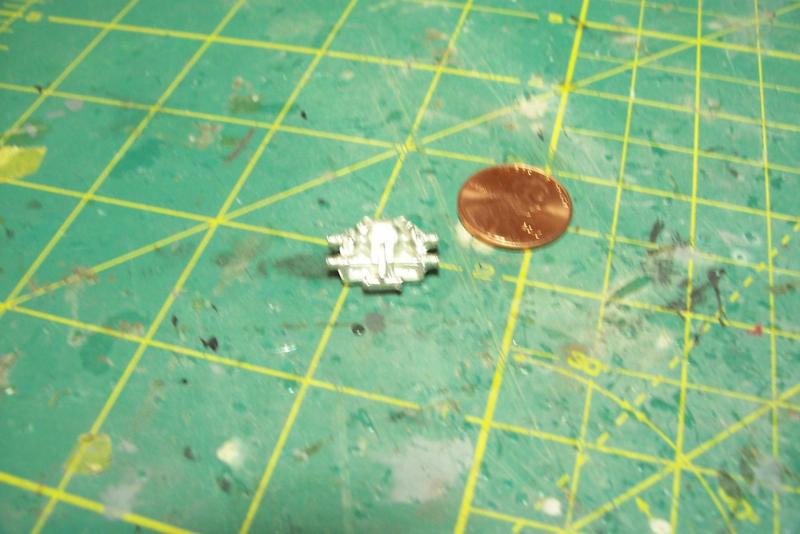
 Individual Hatch Covers I needed to make 81 individual hatch covers to account for the ones removed from the open hatches. I dragged my feet on it because I knew it would be pretty tedious but then I found this tool, the Chopr, from Micromark for about $20 and it did the trick for me: It was just a matter of finding some strip wood of the right width, sanding it down to a scale thickness of about 4”, staining it and then chopping it to length with my new toy. It only took about 5 minutes and the cuts were so smooth that no sanding was required. I blackened the ends with a Sharpie pen to simulate the angle iron reinforcements and used a piece of wire to press the 2 corner depressions for the lifting straps in the ones that would be on top of the stacks and then glued them together in sloppy stacks. It must have been hairy work removing those covers in the rain where one man had to walk on a slick hatch beam over the hold. These stacks will be placed in the scuppers near the open hatches in a random fashion.
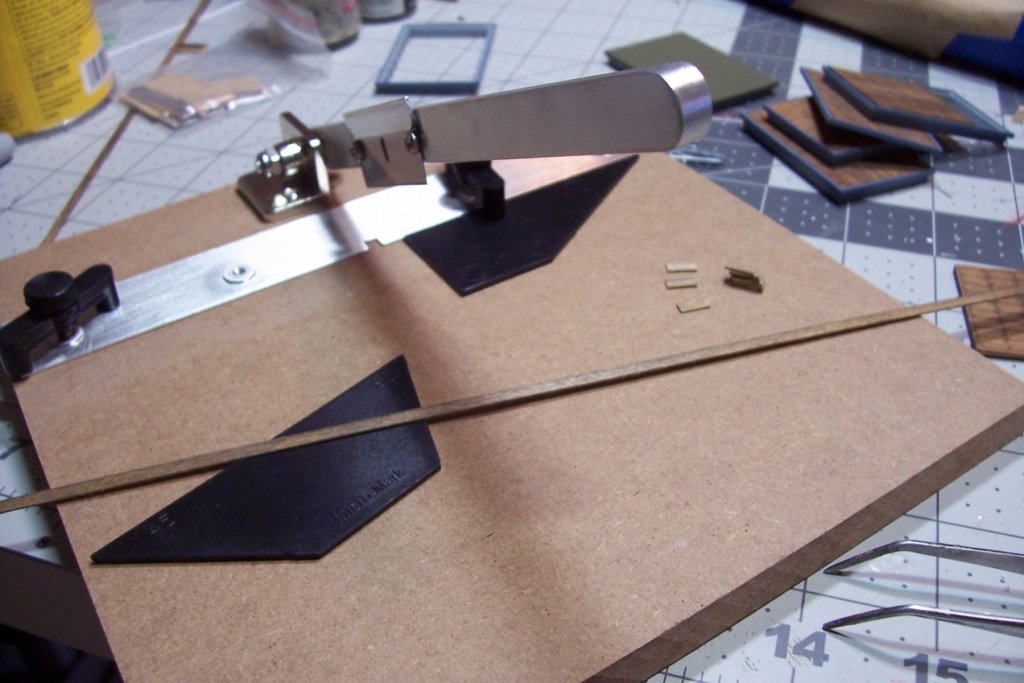
- 227 replies
-
- 6
-

-
- BlueJacket Shipcrafters
- Stephen Hopkins
- (and 2 more)
-
WOW, very nice build. Great idea on painting decal paper - I never would have thought of that!
-
Bill, VERY nice looking build, your paintwork is excellent. I didn't know that there were such nicely detailed kits from way back when.
-
Thanks for the kind words and glad to have you aboard.
- 227 replies
-
- 1
-
-
- BlueJacket Shipcrafters
- Stephen Hopkins
- (and 2 more)
-
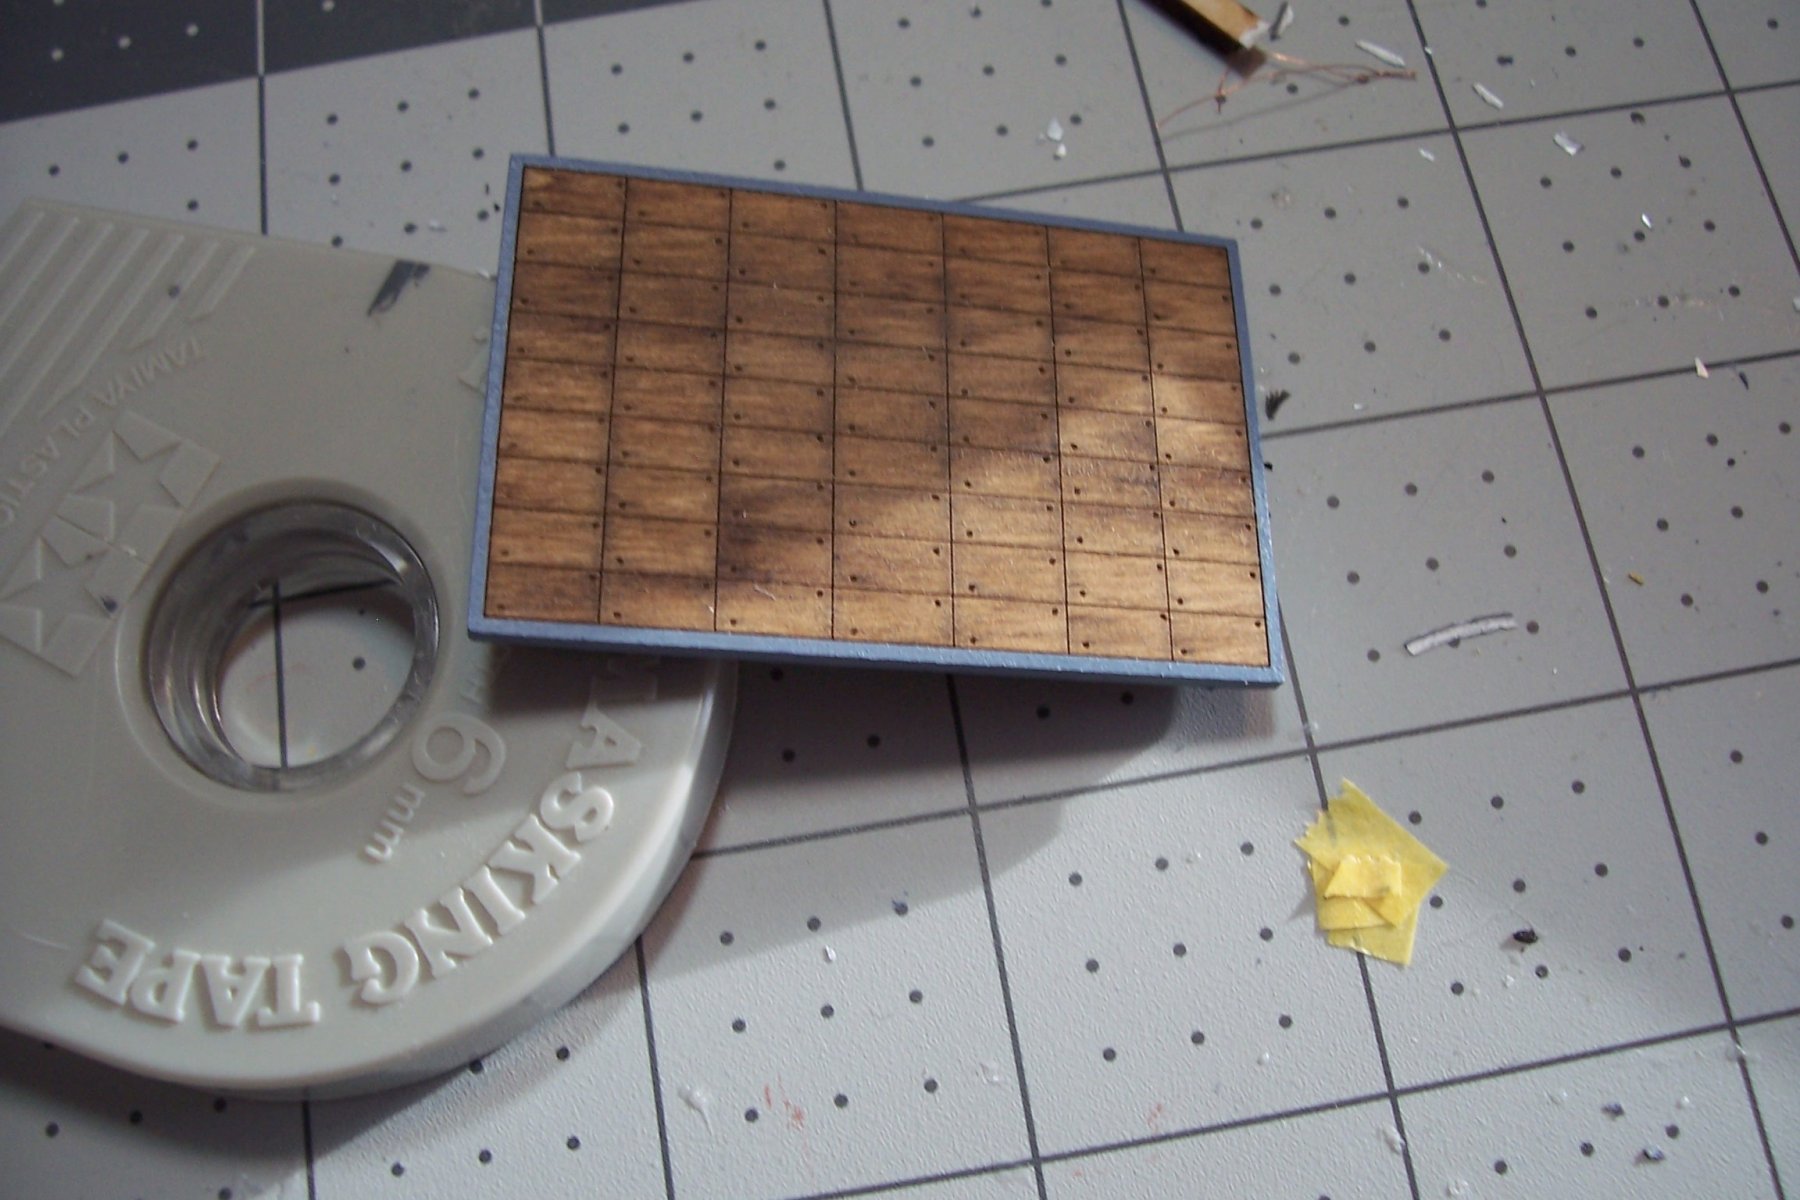
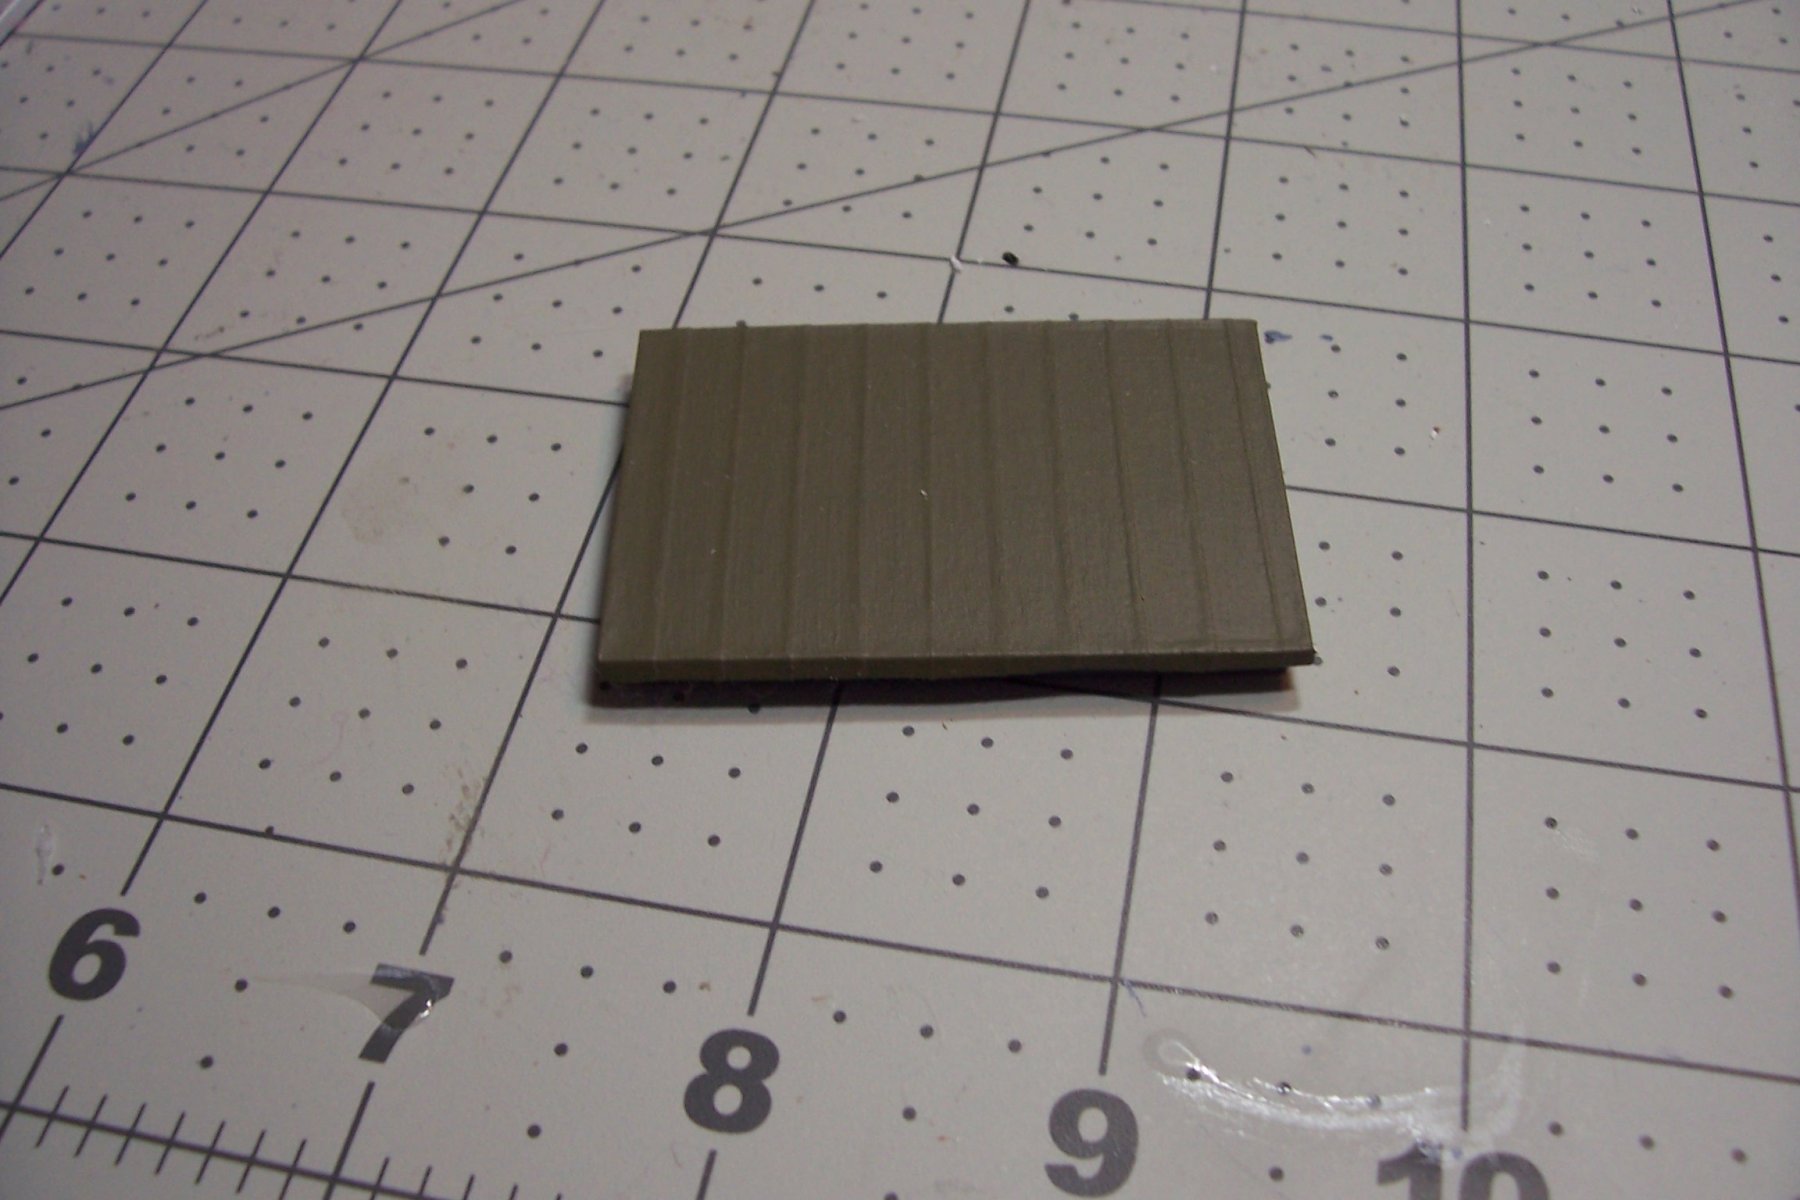
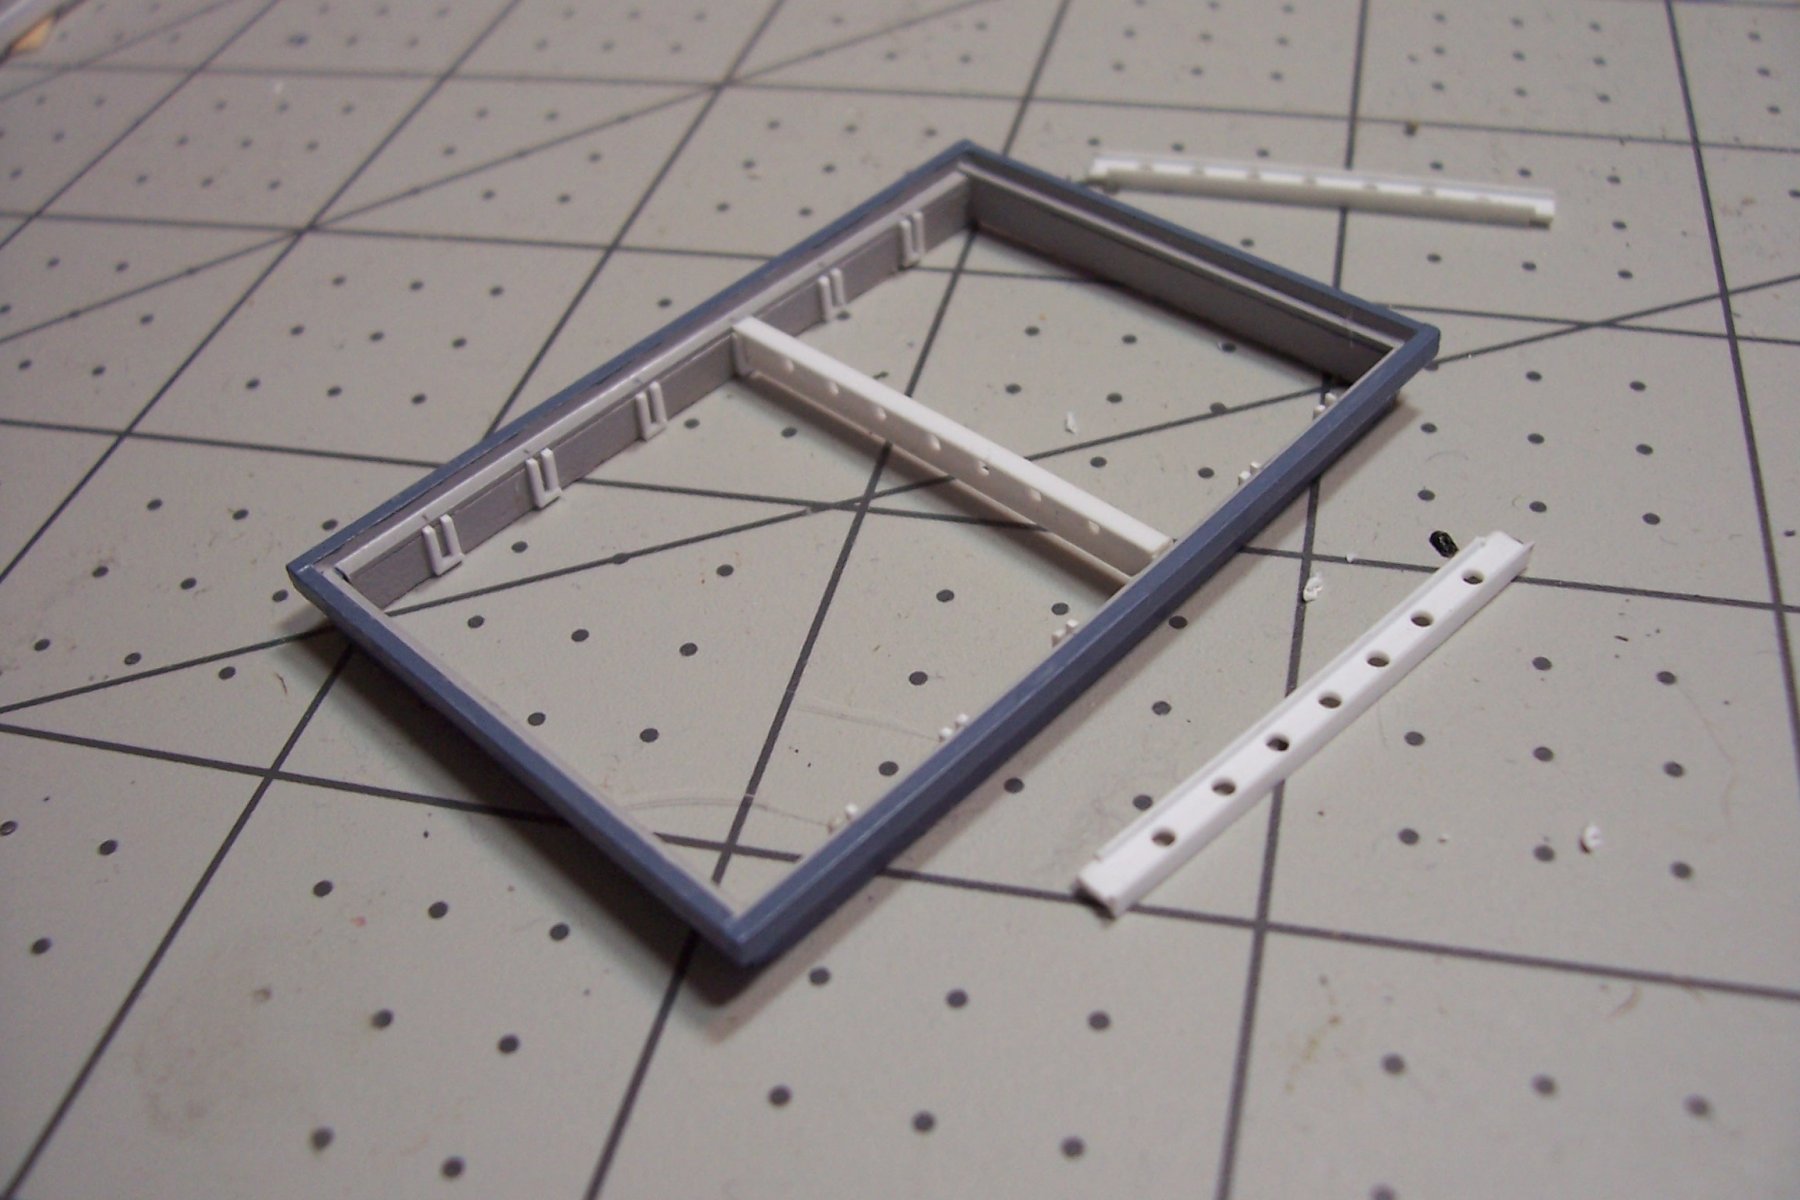
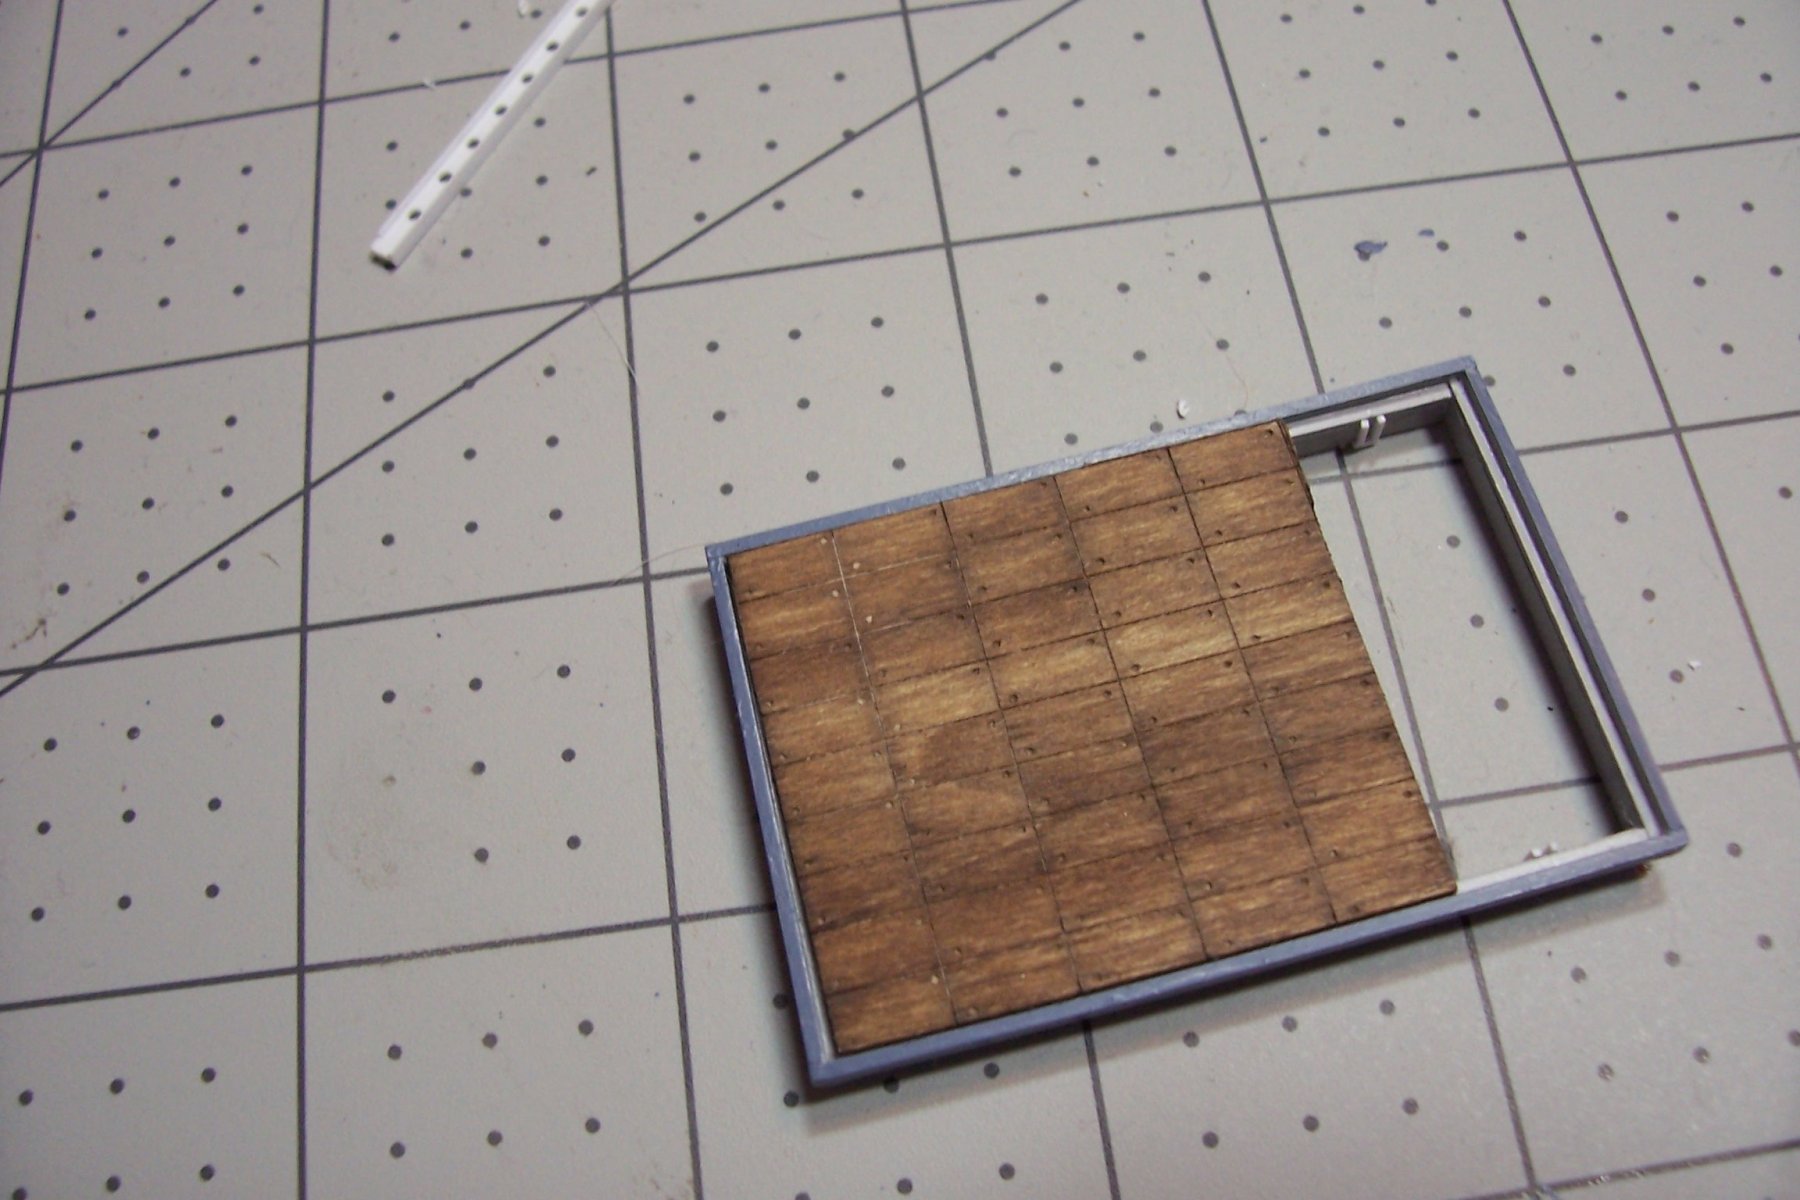
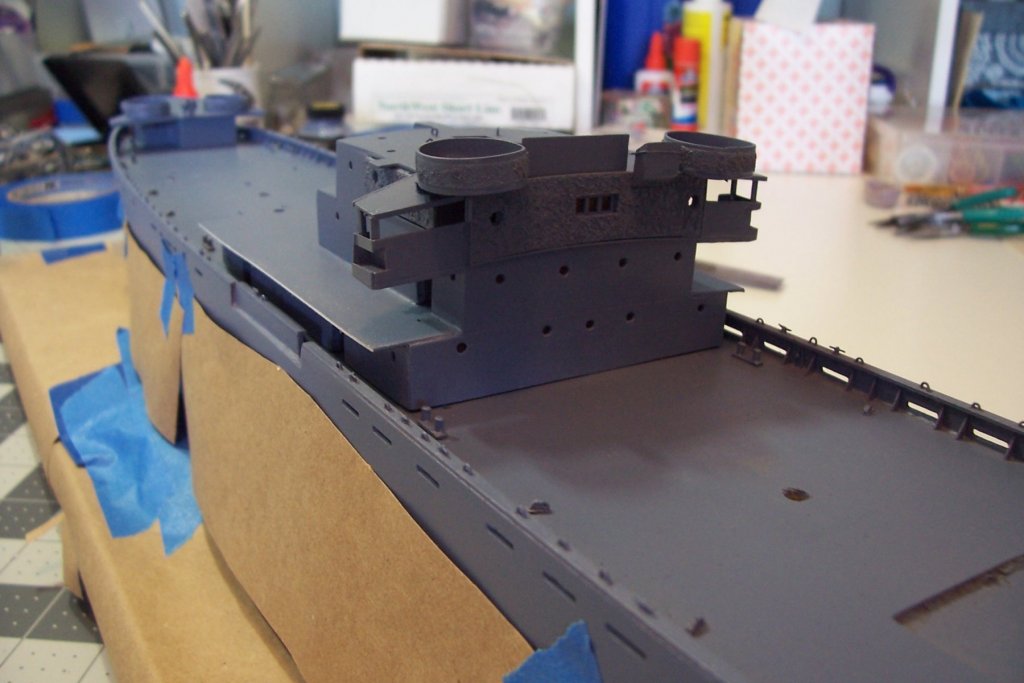
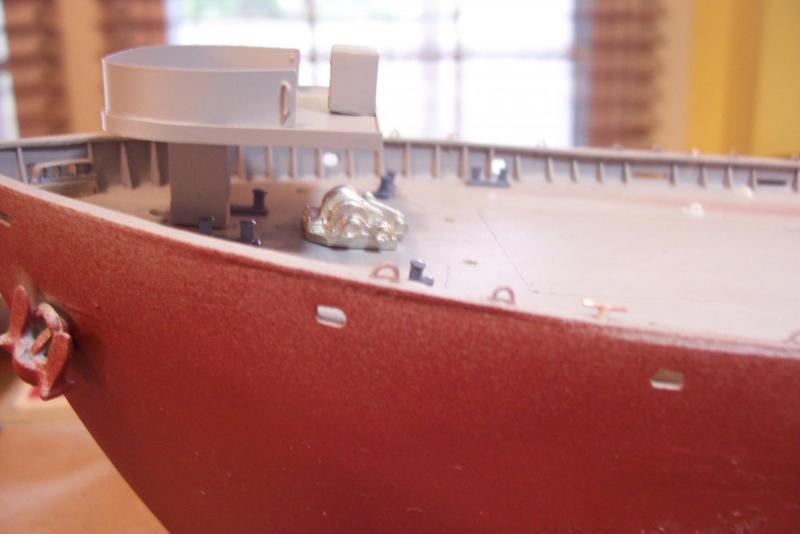
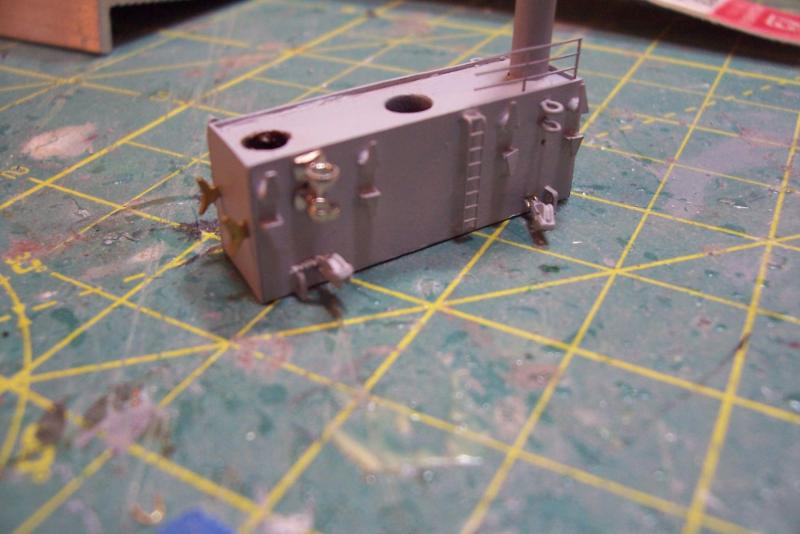
Cargo Hatches After too long away from this build it’s time to get back to work so I’ll start with some modifications to the cargo hatches. The kit provides some nicely laser-etched wood that replicates the individual hatch covers, they are mounted on a smaller supporting piece: I’m going to show hatch nr1 as “secured for sea” with the hatch covered by it’s tarp. Using the appropriate width of Tamiya tape, with each piece overlapping the previous one to the smallest degree possible, I was able to get the effect I was looking for - a tarp with prominent seams. There is more to do on this hatch to include the straps that hold the tarp in place but I’ll get to that later. Hatch nr2 will be partly open with 2 rows of hatch covers removed and hatch nr4 will be completely open with all the hatch covers off. During my photo research I came across a lot of different styles for hatch beams to include oblong weight reduction holes, beams shaped like trapezoids, and some with bars and rod braces. Fortunately for me the ones used on the Hopkins were about as simple as possible; I-beams with circular holes and the ends notched to fit into the beam brackets so it was simple to fabricate them out of plastic I-beam stock. With the exception of 1 beam left in place on hatch nr2 the rest will be placed on the deck, where with the hatch covers they were just stacked on the unengaged side while the hatch was open. The beam brackets are just plastic strip. Next I will fabricate the individual hatch covers that will be shown in stacks and modify the hatches some more.

- 227 replies
-
- 11
-
-
- BlueJacket Shipcrafters
- Stephen Hopkins
- (and 2 more)
-
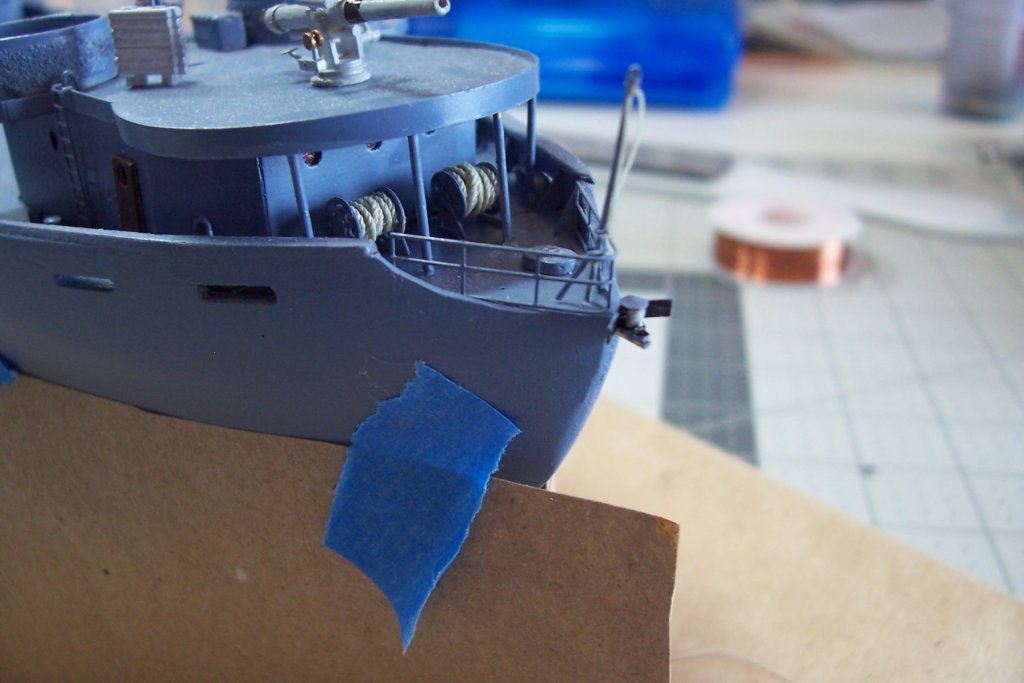
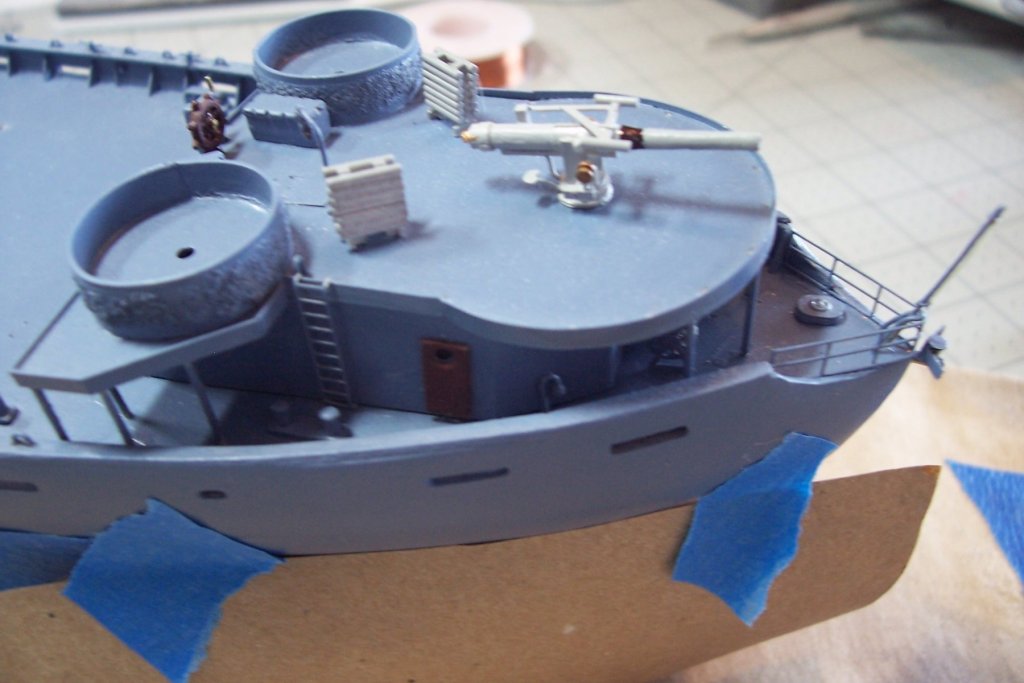
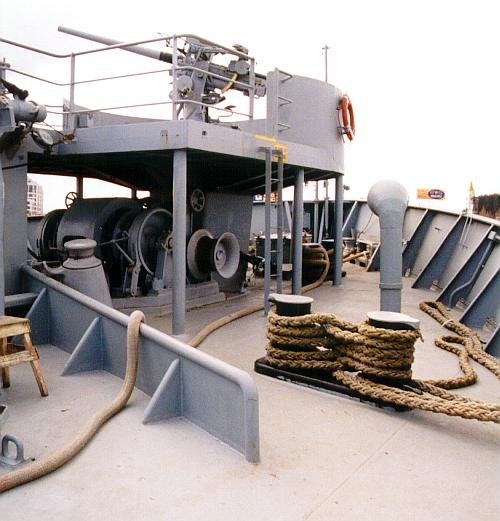
Well I finally found a hobby that is even more expensive and time consuming than messing around with model boats - messing around with a real boat. After several months of unanticipated costs and hiccups I finally have my new boat the way I want it so I have time to get back to my old boat (model). I finished up the aft deckhouse, the only things left to add are the .50 cal machine guns and the single strand lifeline around the big gun tub, which is too delicate to add this early. The kit plans did not include any stanchions under the forward part of the deck overhang but pix of the real ships and common sense made it easy to figure out where to place them. The line reels are aftermarket PE. The flagstaff, stern light, ammo hoist and 4" ready service racks are scratch. I decided to paint the RS racks in navy Haze Gray since, like the gun itself, I figured they would have been pulled out of Navy stores (or off a mothballed 4-stack DD) and craned aboard at the last minute since like the Hopkins' weapons suite was a grab bag of whatever was available and had no similarity to the "standard" Lib ship suite that started to appear just a few months after the Hopkins was delivered.
- 227 replies
-
- 12
-
-
- BlueJacket Shipcrafters
- Stephen Hopkins
- (and 2 more)
-
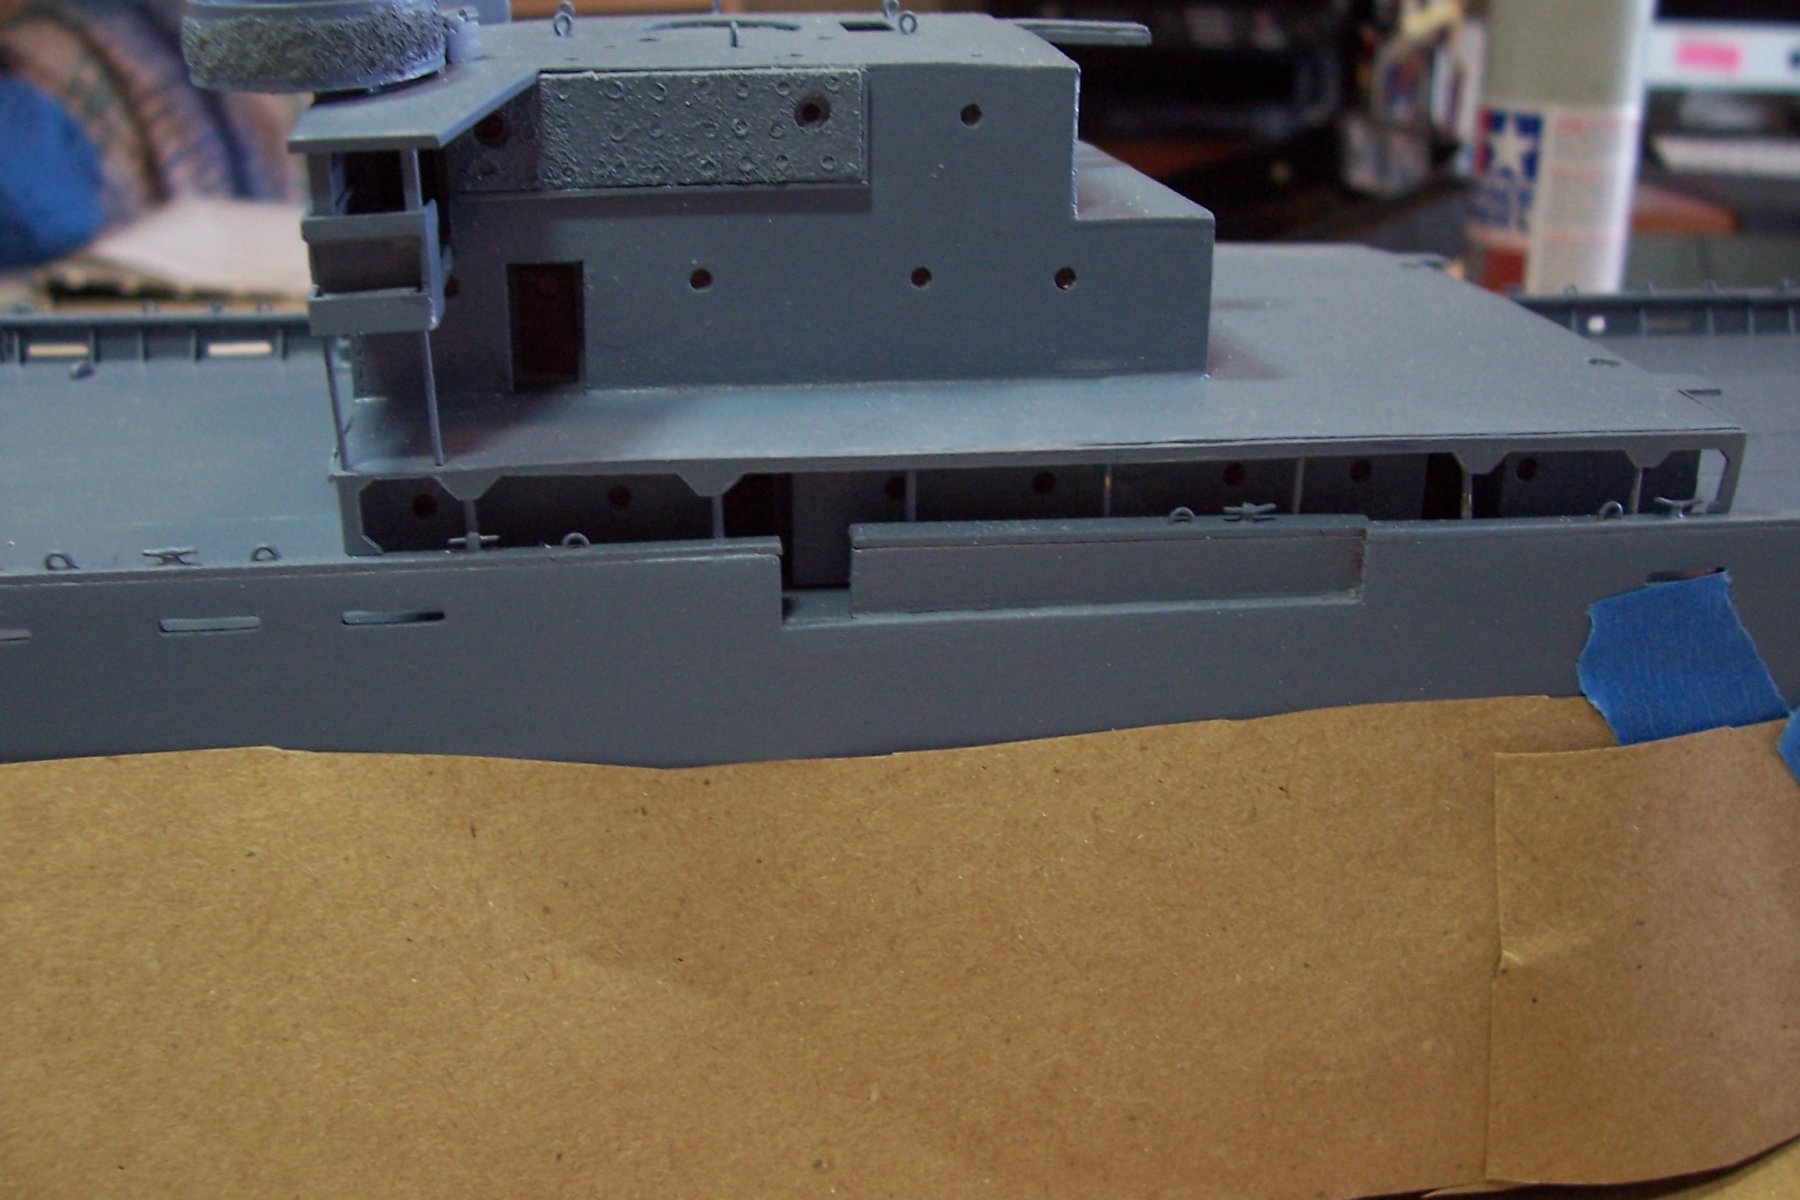
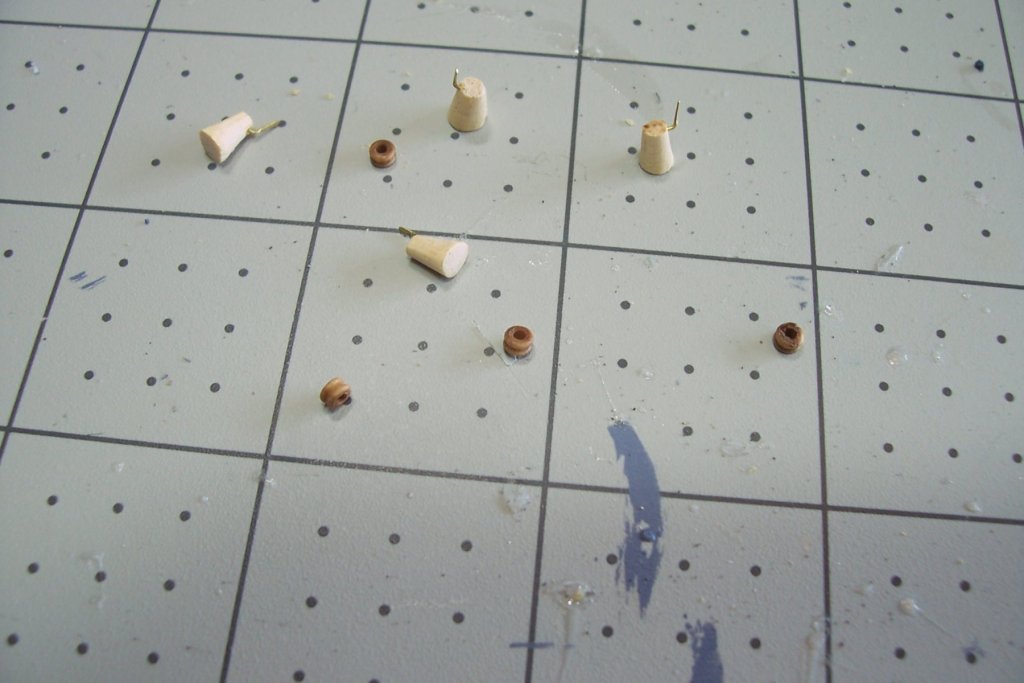
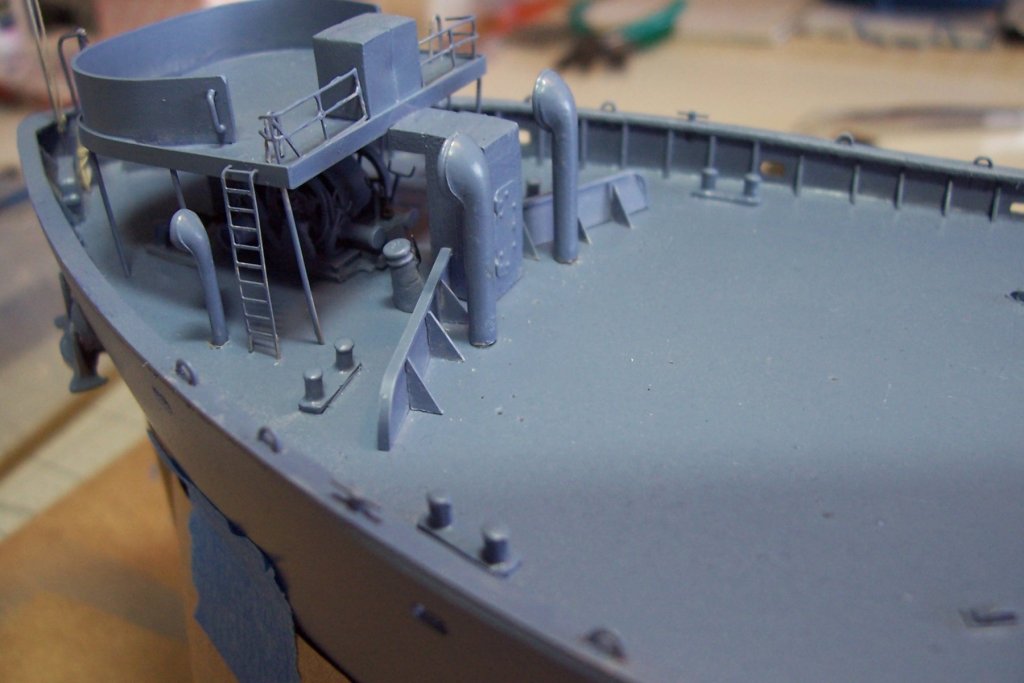
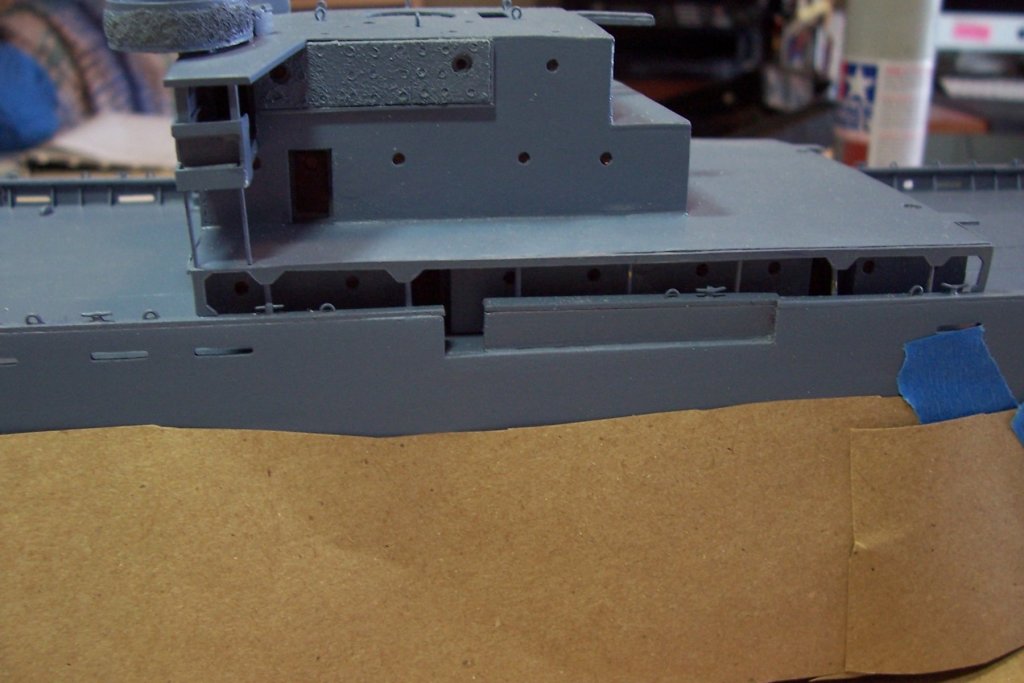
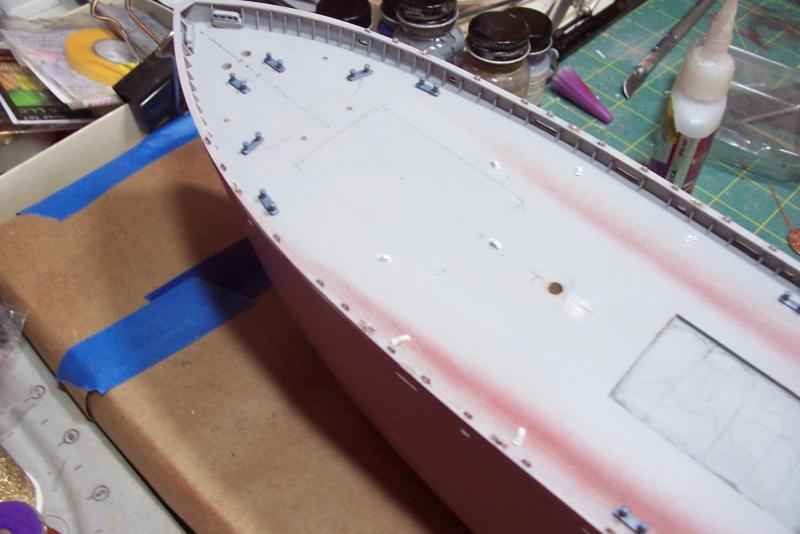
Final Foc’sle details and Main Deckhouse I wanted to include the breakwater and the roller fairleads to the foc’sle. The fairleads help direct the mooring lines straight onto the capstan heads and can also be used to pull anywhere up to 90 degrees off the axis of the capstan. You can see both of them here: I scratched the breakwater out of plastic sheet: The roller fairleads were a little harder until I found some small walnut bullseyes in my spare parts locker. The main body is just some wood rod turned down with a Dremel. The bullseye is fitted on top. The piece of metal that helps keep the mooring line from slipping off is just brass rod flattened. The donut hole in the top of the bullseye is filled in with putty. The bottoms are angled because the fairleads have a "tilt" to them to help keep the lines from slipping off. The finished products: I added the main deckhouse to the deck. It is also pinned with some brass rod since it will be under tension with the rigging and its weight is enough that it might work loose otherwise. As always, when sanding a flat surface to match a cambered deck I always get one corner that is a little high (or 3 that are a little low) which leaves a gap where it meets the deck. If it is small enough I generally just use some white glue which, although transparent, gives the optical illusion of a solid, which works really well if you have 2 different colors involved. If the surfaces are not pre-painted (like they are here) I usually fill the gap with wood filler or a shaved piece of wood. In this case I just covered it with the thinnest piece of strip styrene on hand (not shown in this pic). It is not really noticeable and is often “correct” in that many deck to bulkhead joints have a flange piece extending up the bulkhead up to a foot high. The only details I added to the deck house a this point are the deck supports. The gussets are part of a kit-suppied laser cut plastic fashion piece that covers the deck edge. As always a photo picks up flaws that I would otherwise miss. Looks like I'll have to fill in some gaps along the 01 level deck edge.

- 227 replies
-
- 10
-
-
- BlueJacket Shipcrafters
- Stephen Hopkins
- (and 2 more)
-
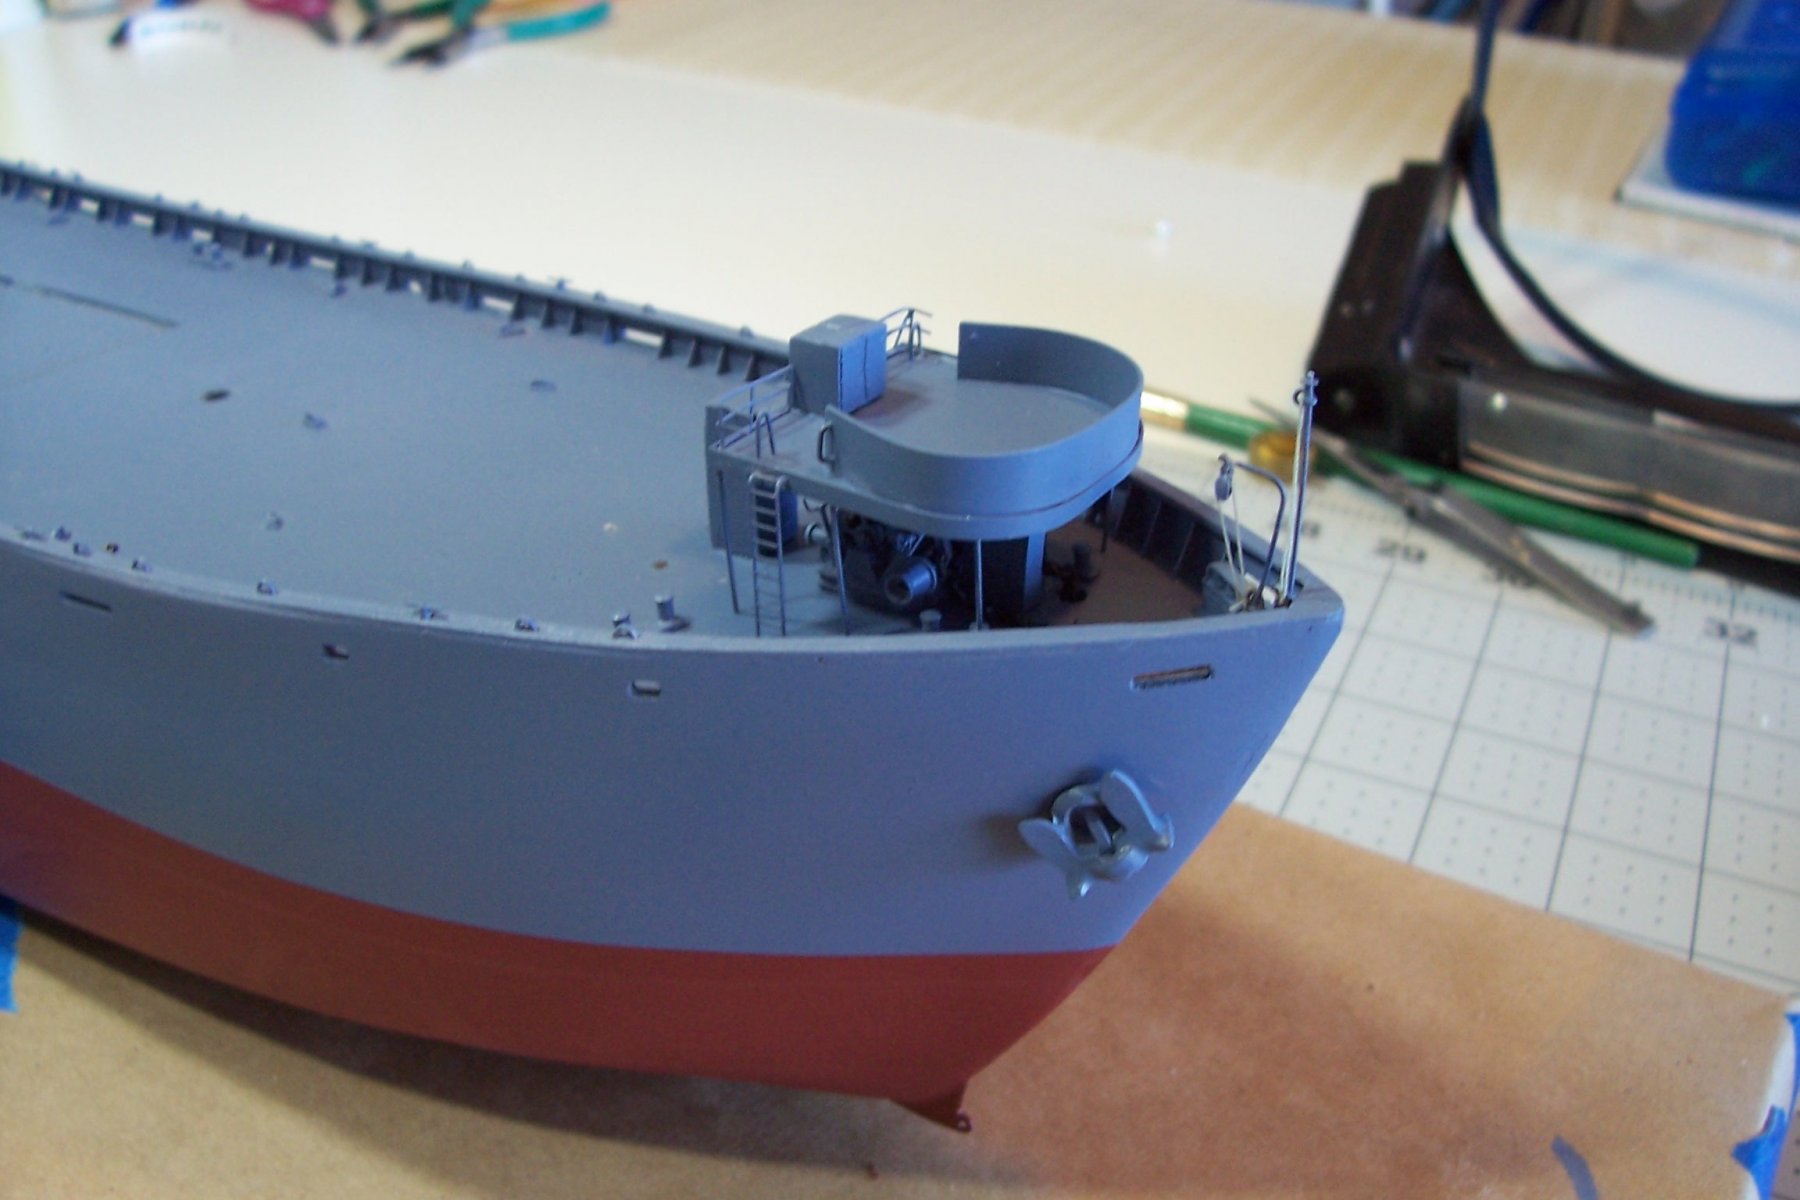
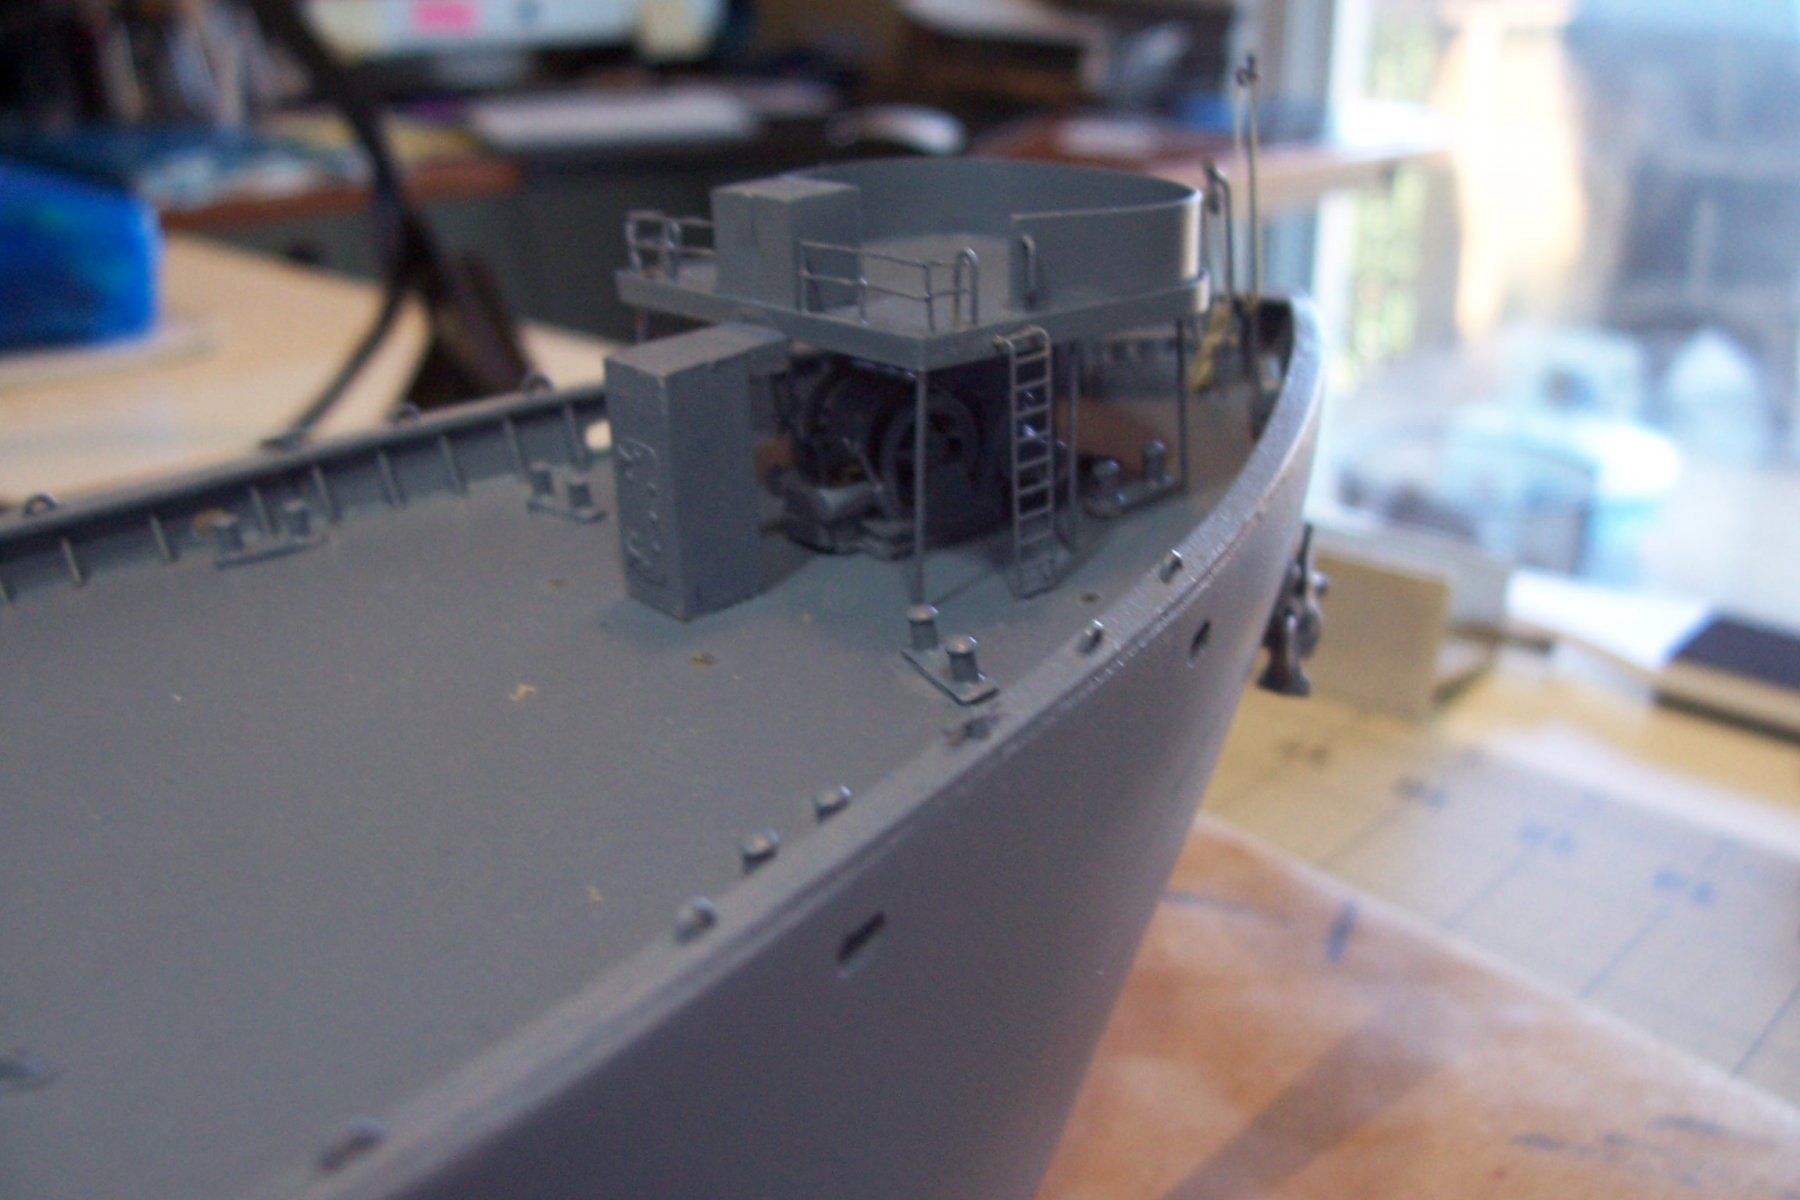
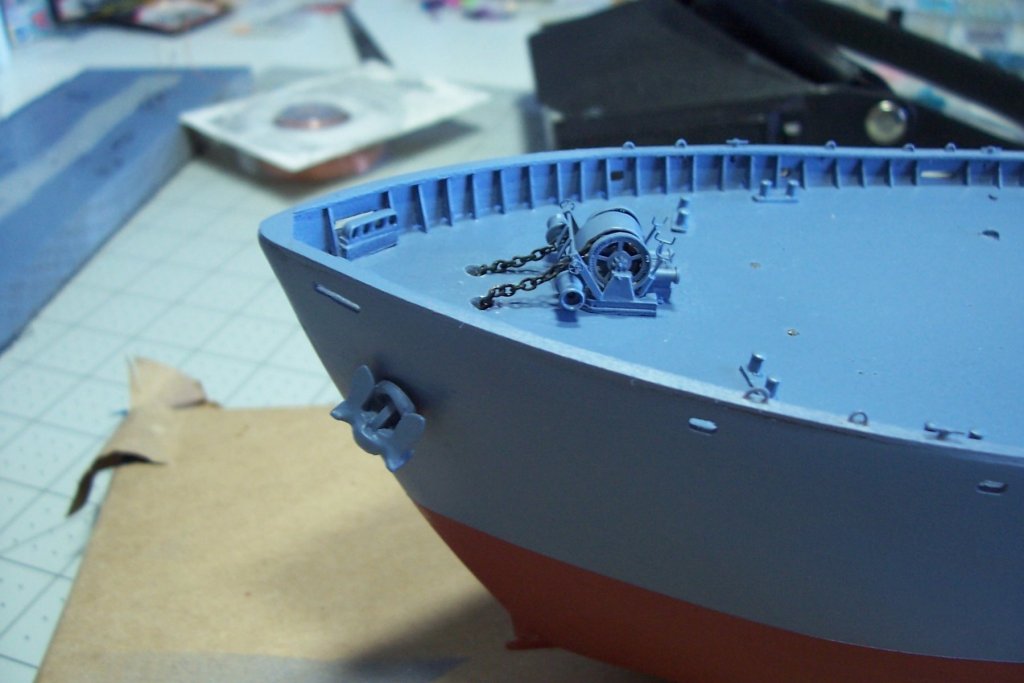
Thanks for all the kind words Carl, Nils & JPAM. Foc'sle I placed the anchor windlass in position and added the anchor chain. I was a little surprised to find no evidence of chain stoppers on the Liberty's, apparently they just let the anchors ride on the windlass brakes - must have made for some excitement in heavy seas. The forward gun tub was next to be added. I'll wait on adding the guns to the very end of the build because they are fragile and I don't want to have to try and dust them. There are a few more items to add in the bow area and then I will probably add the main deckhouse.

- 227 replies
-
- 8
-
-
- BlueJacket Shipcrafters
- Stephen Hopkins
- (and 2 more)
-
Time to paint Between “new house” chores and trying to hook a few more trout before the streams get too hot there hasn’t been much new with the model. I did get the stack put together and I scratched some “J” vents for the fuel tanks that will go along the bulwarks and the superstructures I finally stopped stalling and broke out the airbrush and got to work on that. I chose Model Master's Ocean Gray since the early Liberty's were painted darker than Navy Haze Gray and given the scale effect this is what I was looking for. It has a little more sheen than I wanted but I'll be giving everything a coat of Dull Coat at the end so it should not be a problem. With most of the big parts painted things should start moving along at a more respectable pace now.


- 227 replies
-
- 12
-
-
- BlueJacket Shipcrafters
- Stephen Hopkins
- (and 2 more)
-
Greg, When it comes to realistic super-detailing you are without equal. Stunning work. Your always entertaining comments are a real plus. Thanks for taking the time to share all this. Tim
-
Thanks for the kind words Jean-Pierre. I have seen very realistic anchor chain links in 1/100 scale, as you said, but I have not been able to find any in this 1/192 scale so I'll just have to stick with this simple chain. I think that many of the problems you found with the old Liberty ship kit have been corrected with this new updated version, so far I have been very happy with the accuracy and fit. I agree with you about solid hull versus plank on bulkhead, once your learn the tricks of POB it is easier to work with - my next kit will likely be a POB.
- 227 replies
-
- 3
-
-
- BlueJacket Shipcrafters
- Stephen Hopkins
- (and 2 more)
-
Thanks Carl, it did turn out better than I thought it would and it was also fun to build!
- 227 replies
-
- 1
-
-
- BlueJacket Shipcrafters
- Stephen Hopkins
- (and 2 more)
-
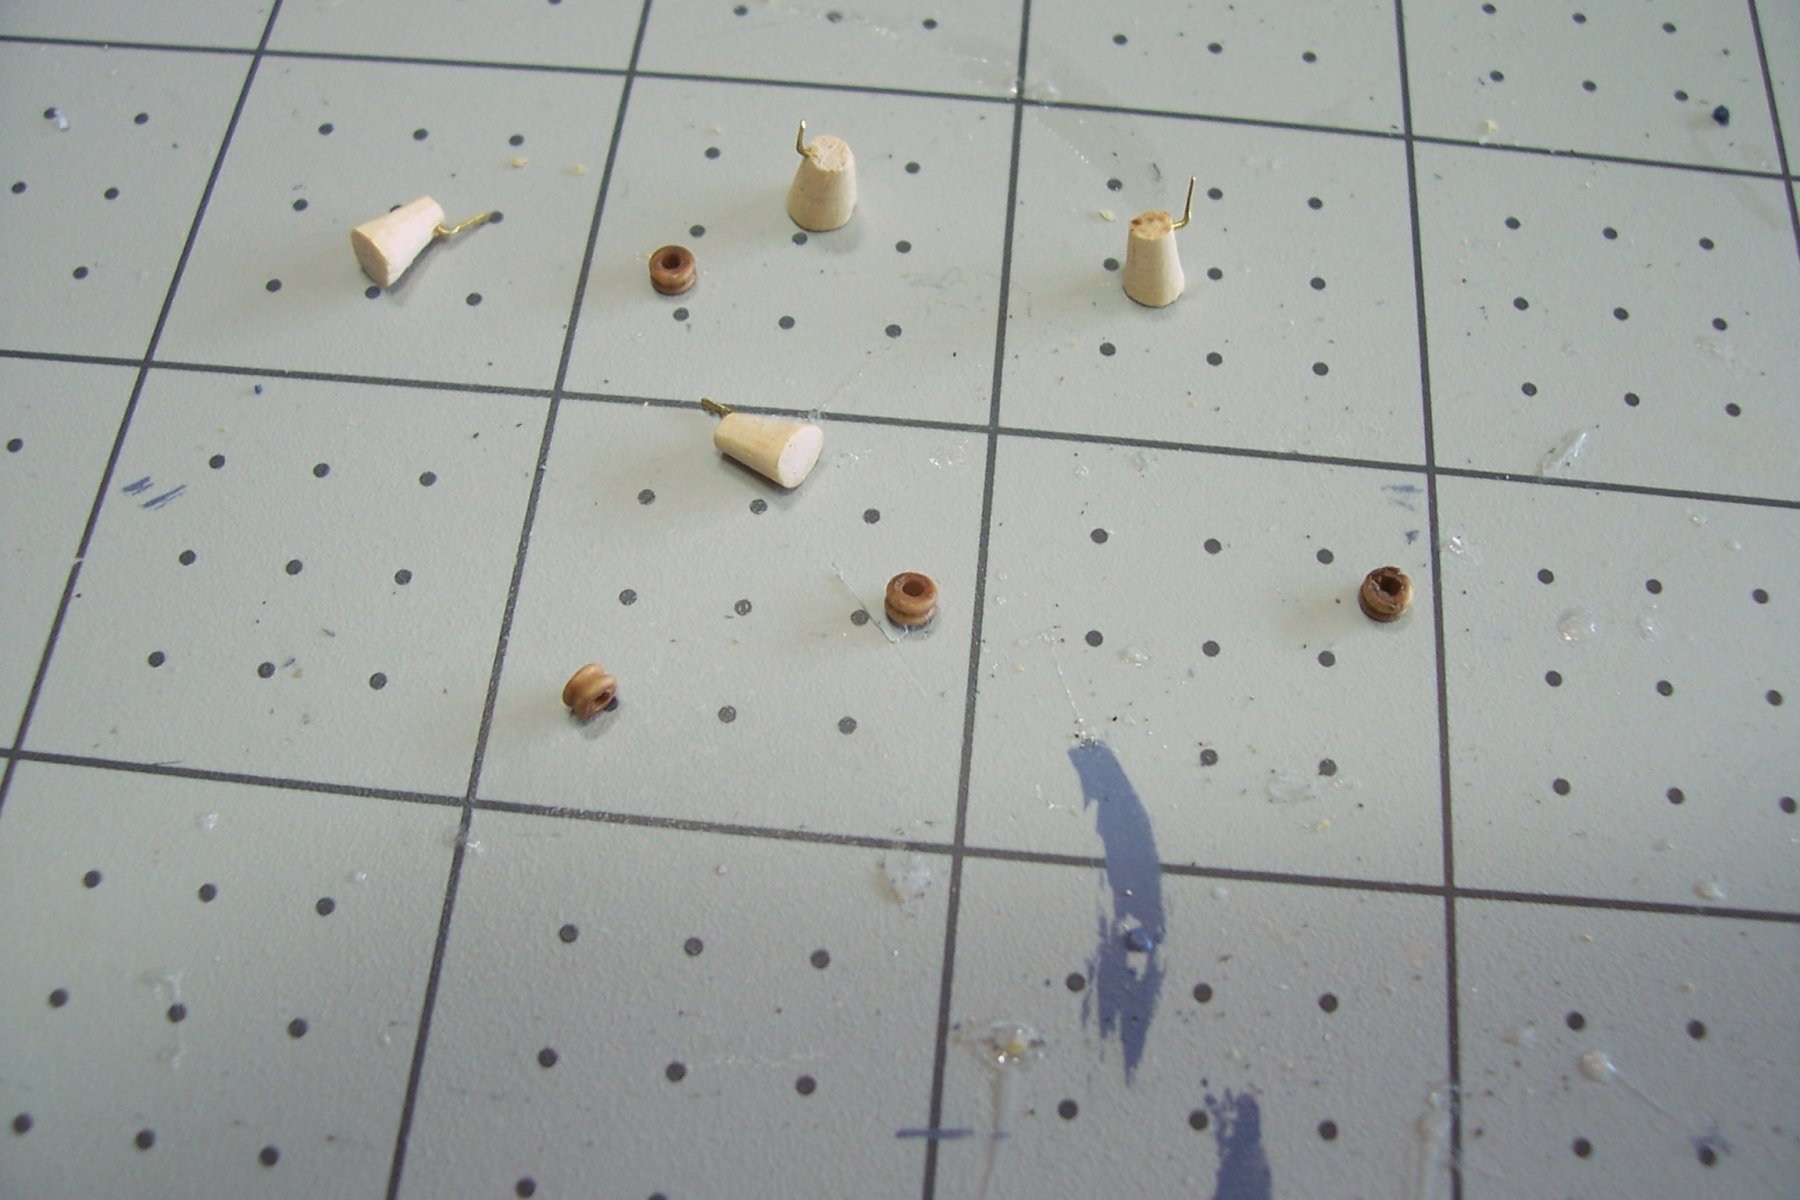
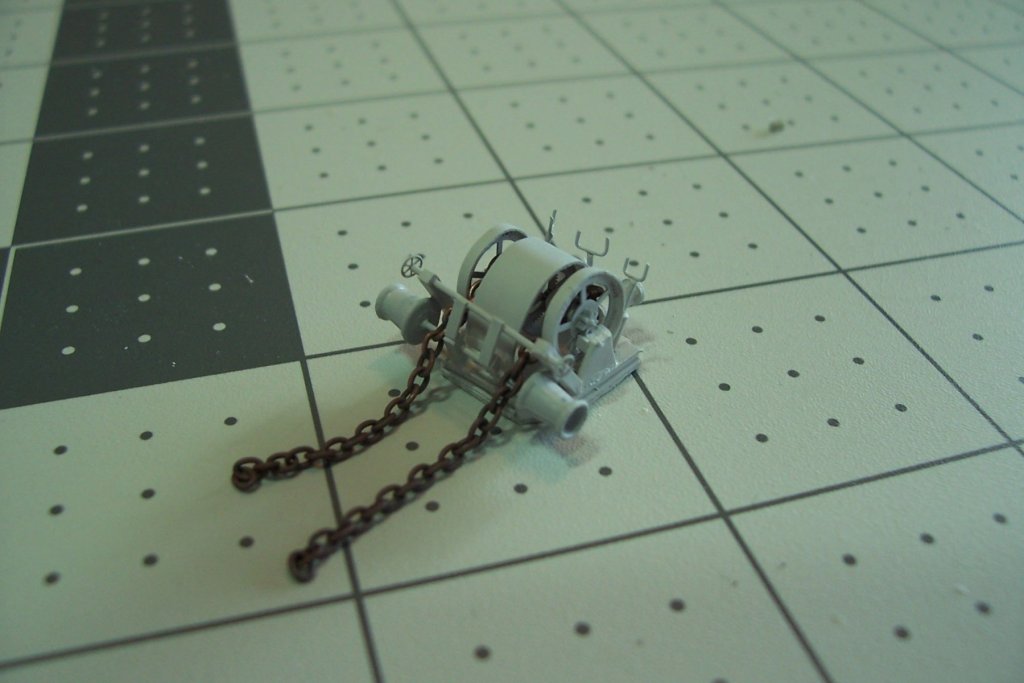
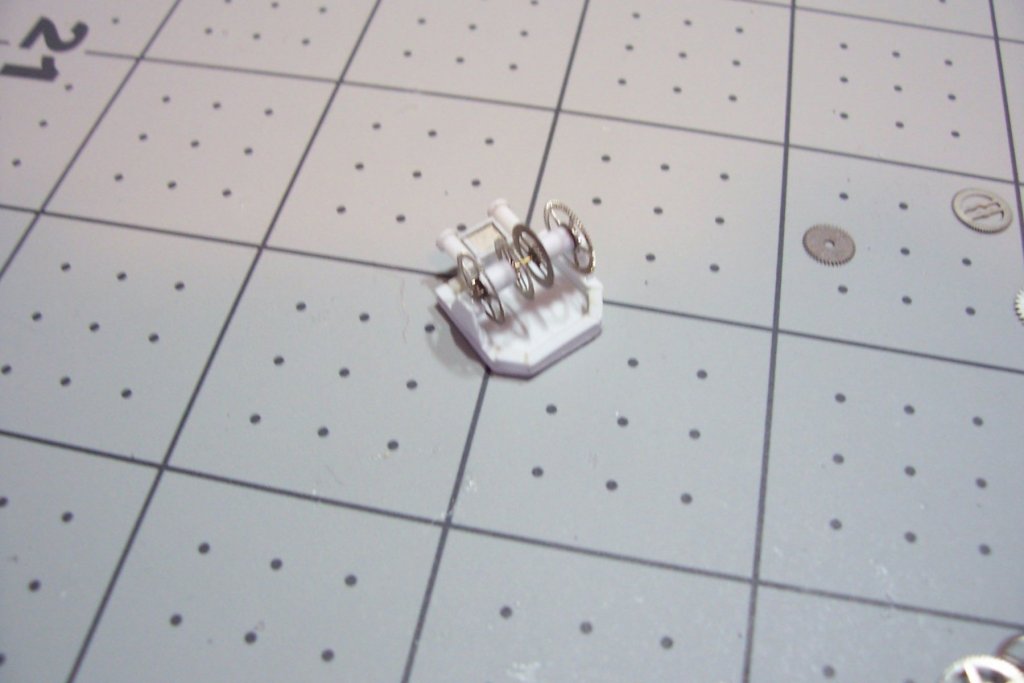
Anchor Windlass - final The final details have been added to the windlass. The capstan heads and hand wheels are after-market, the brake bands, hand cranks and other stuff are scratch.
- 227 replies
-
- 11
-
-
- BlueJacket Shipcrafters
- Stephen Hopkins
- (and 2 more)
-
Hi Carl, The difference is between 2 feet for the kit casting and about 4 3/4 ft for my scratch one. Tim
- 227 replies
-
- 2
-
-
- BlueJacket Shipcrafters
- Stephen Hopkins
- (and 2 more)
-
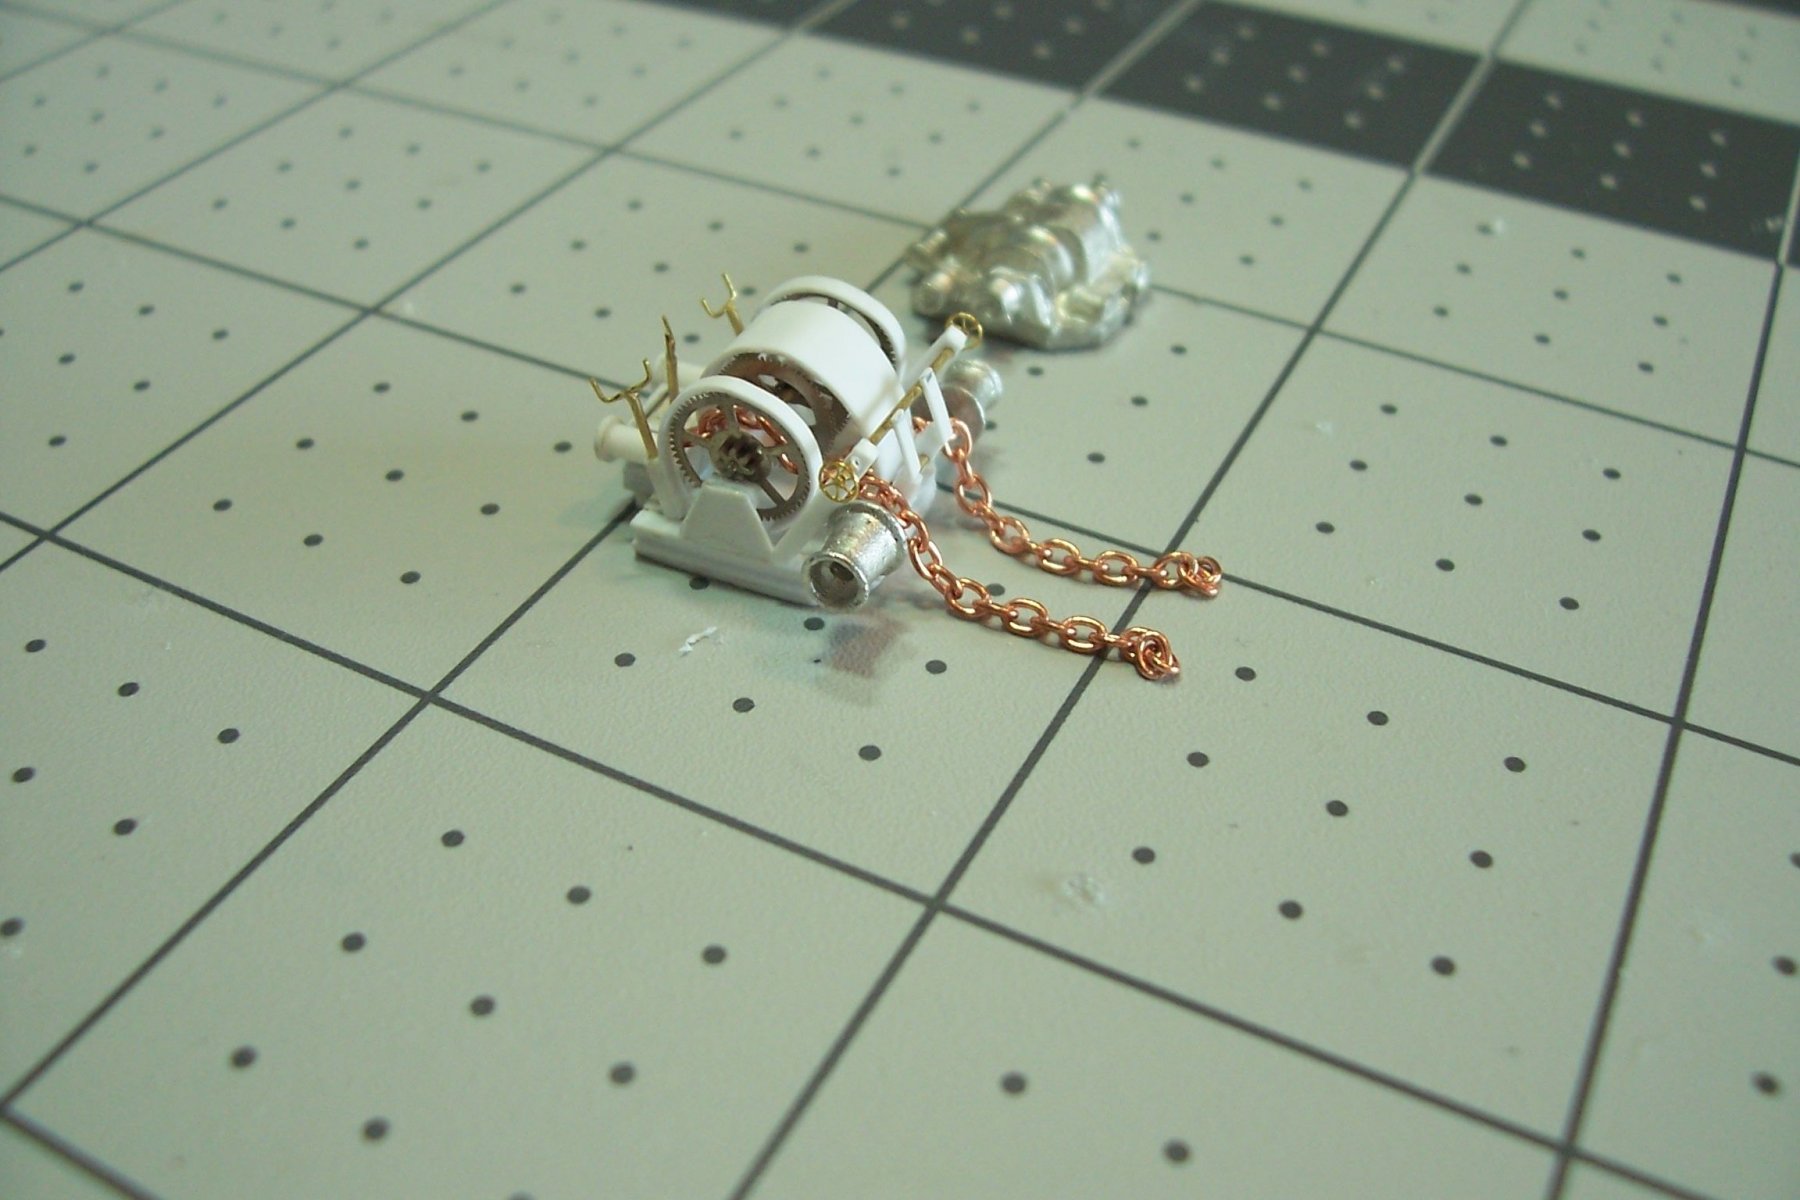
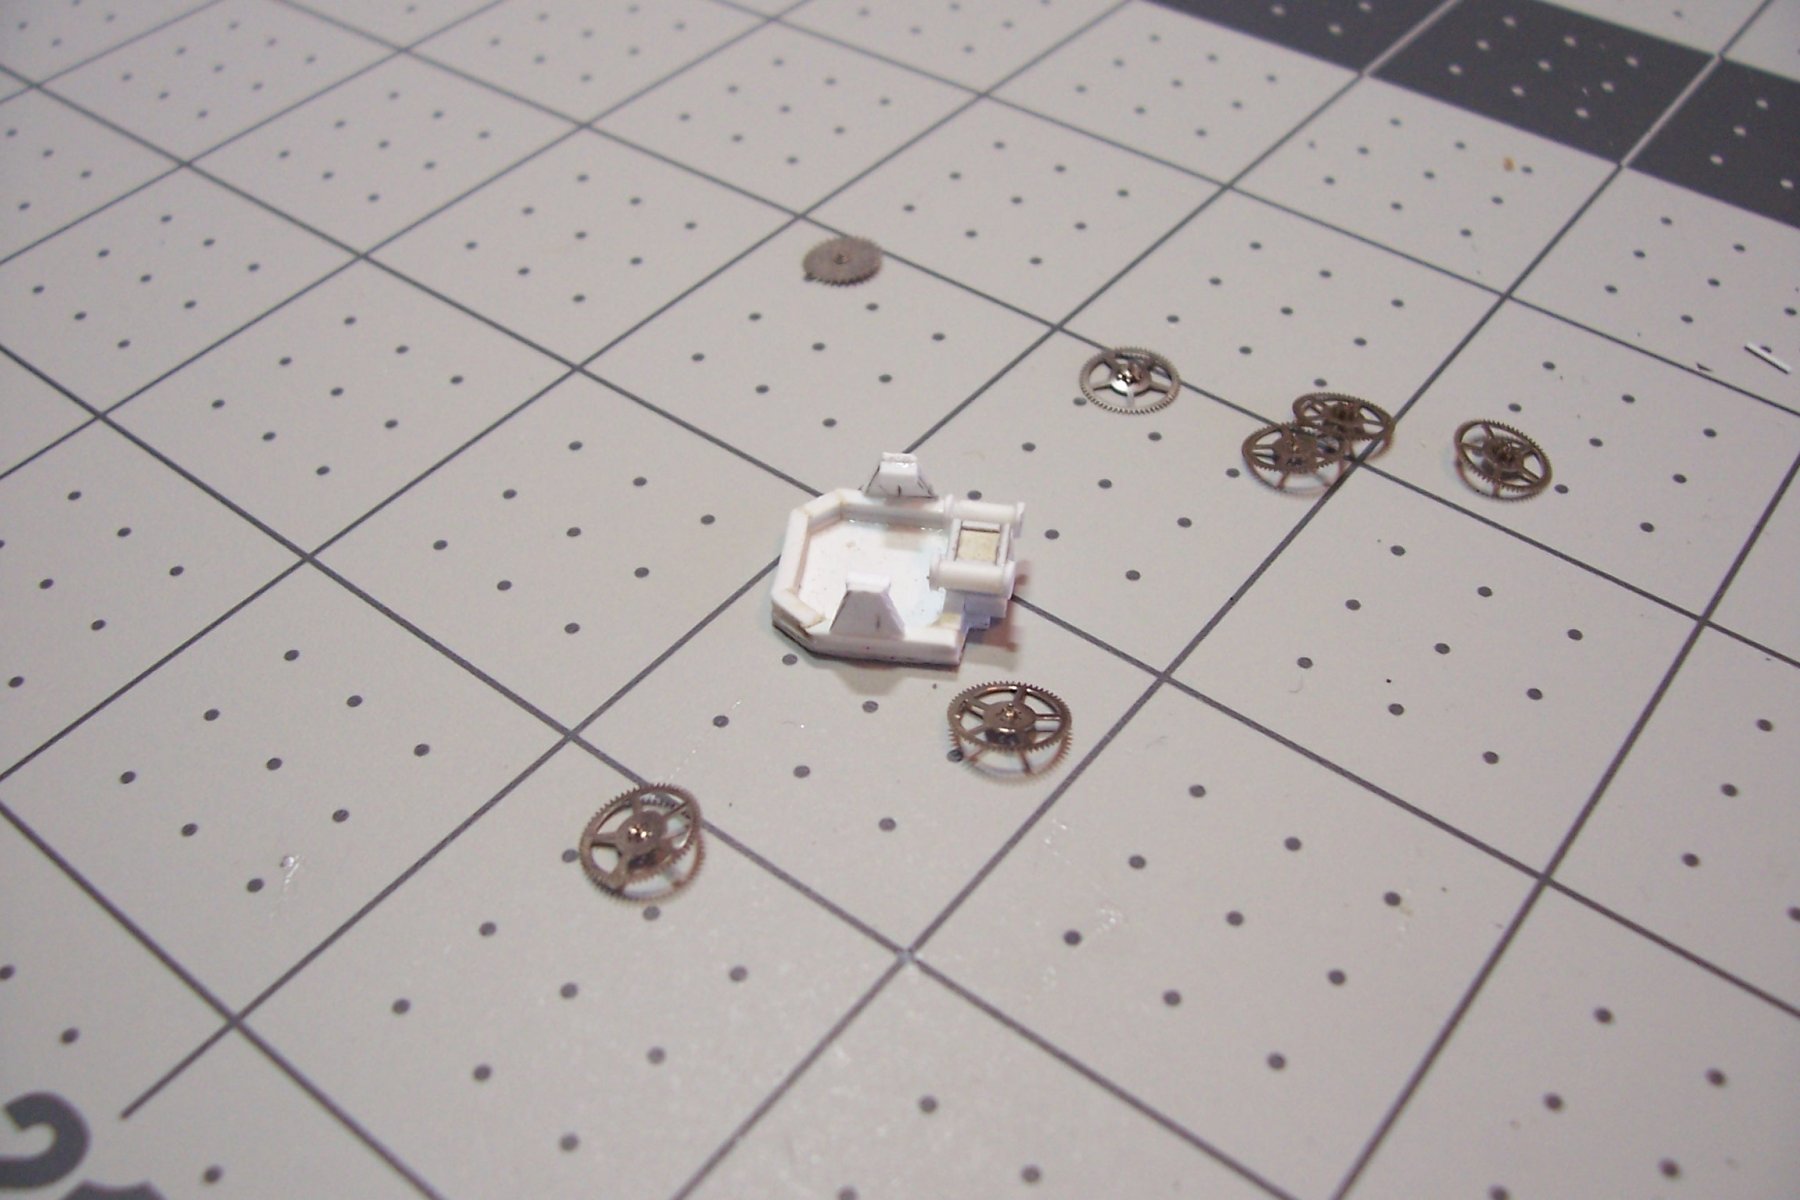
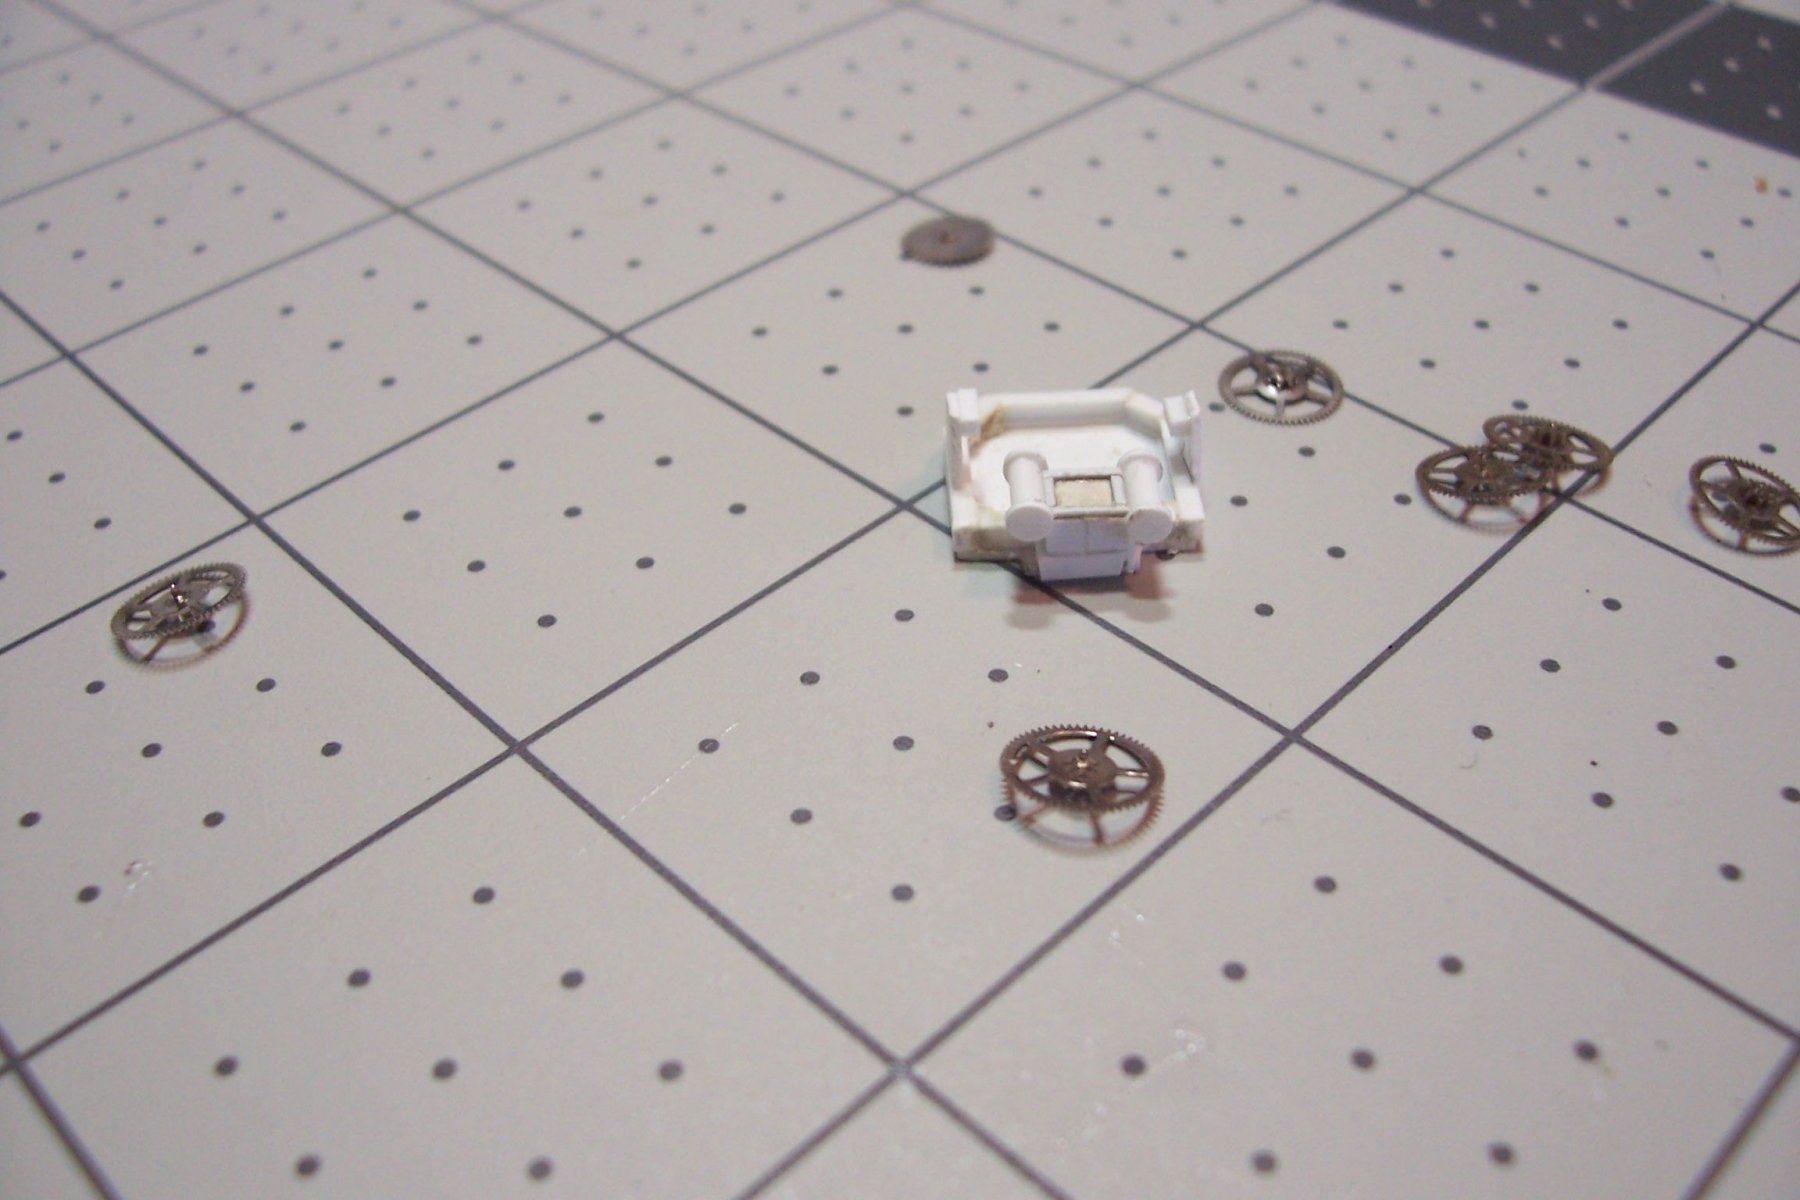
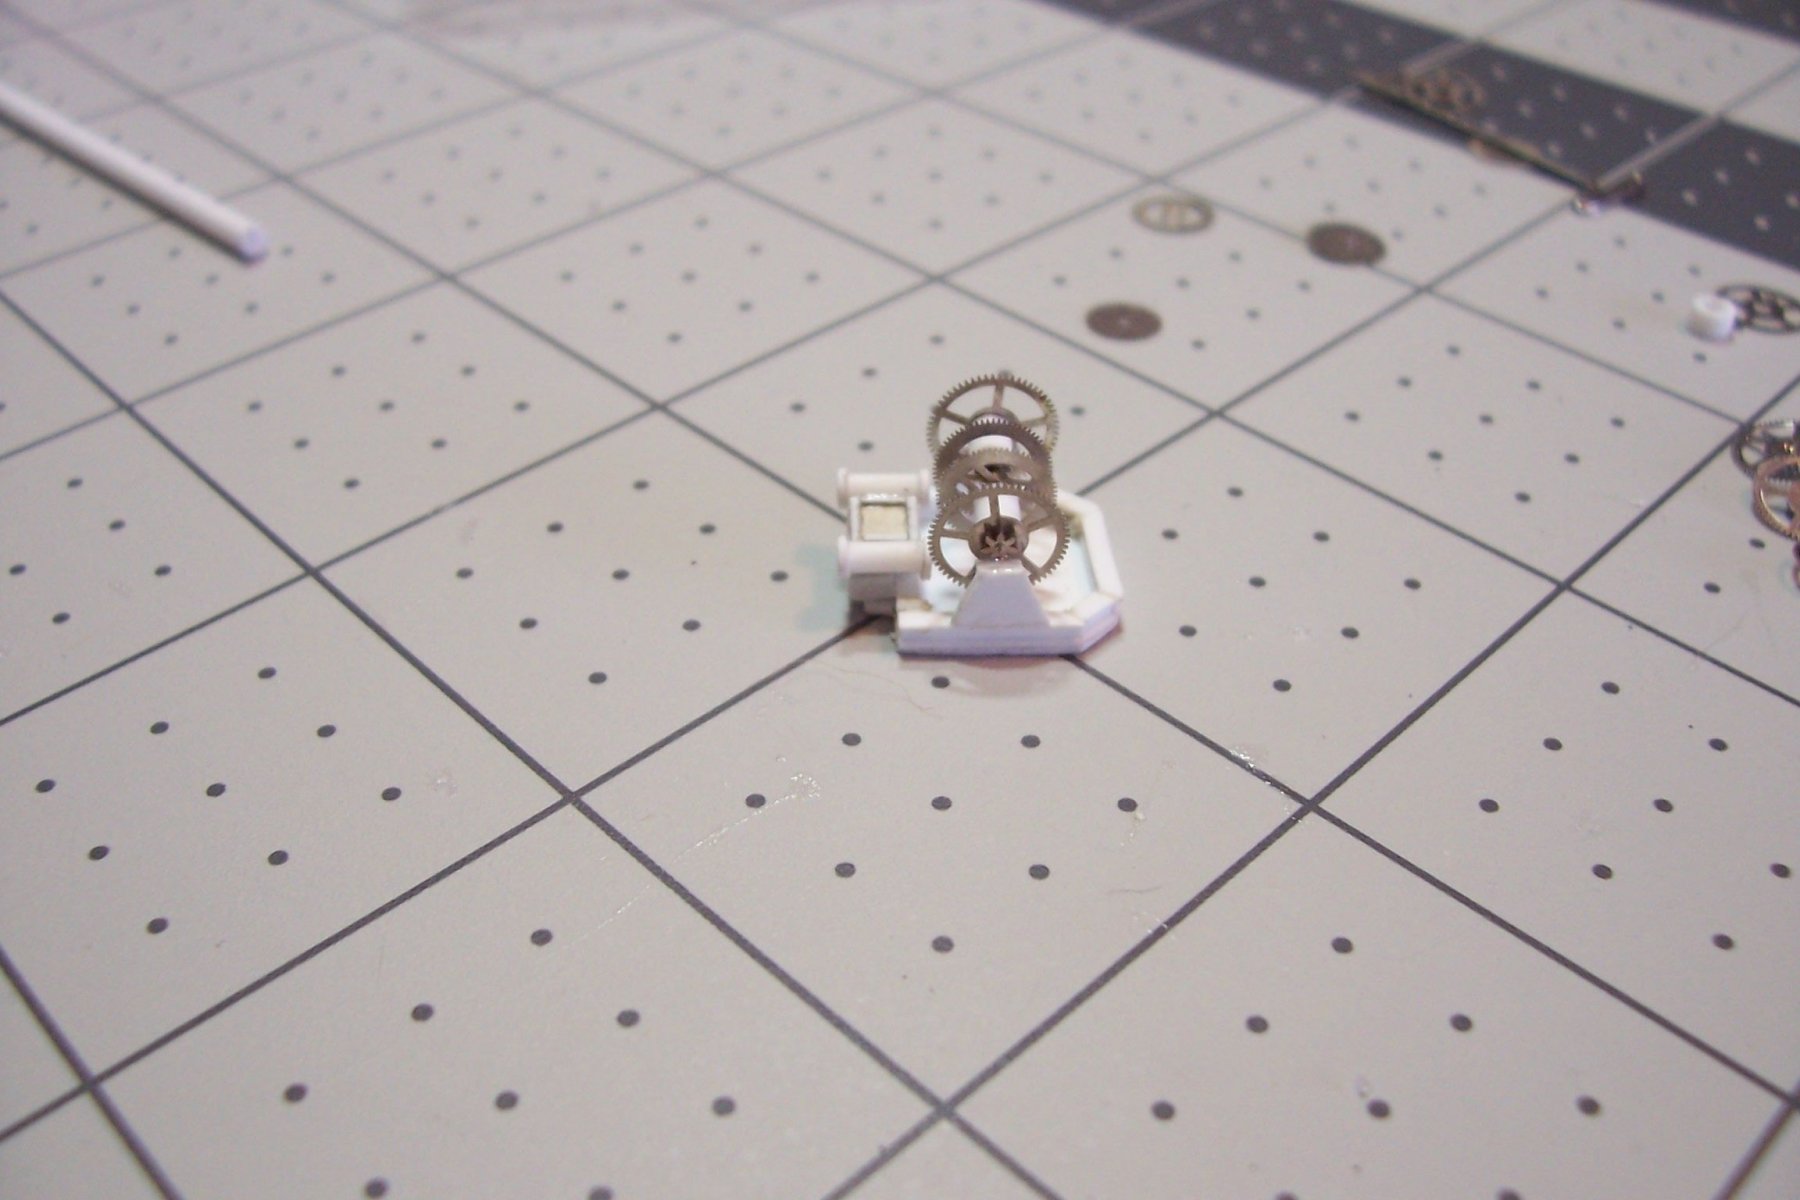
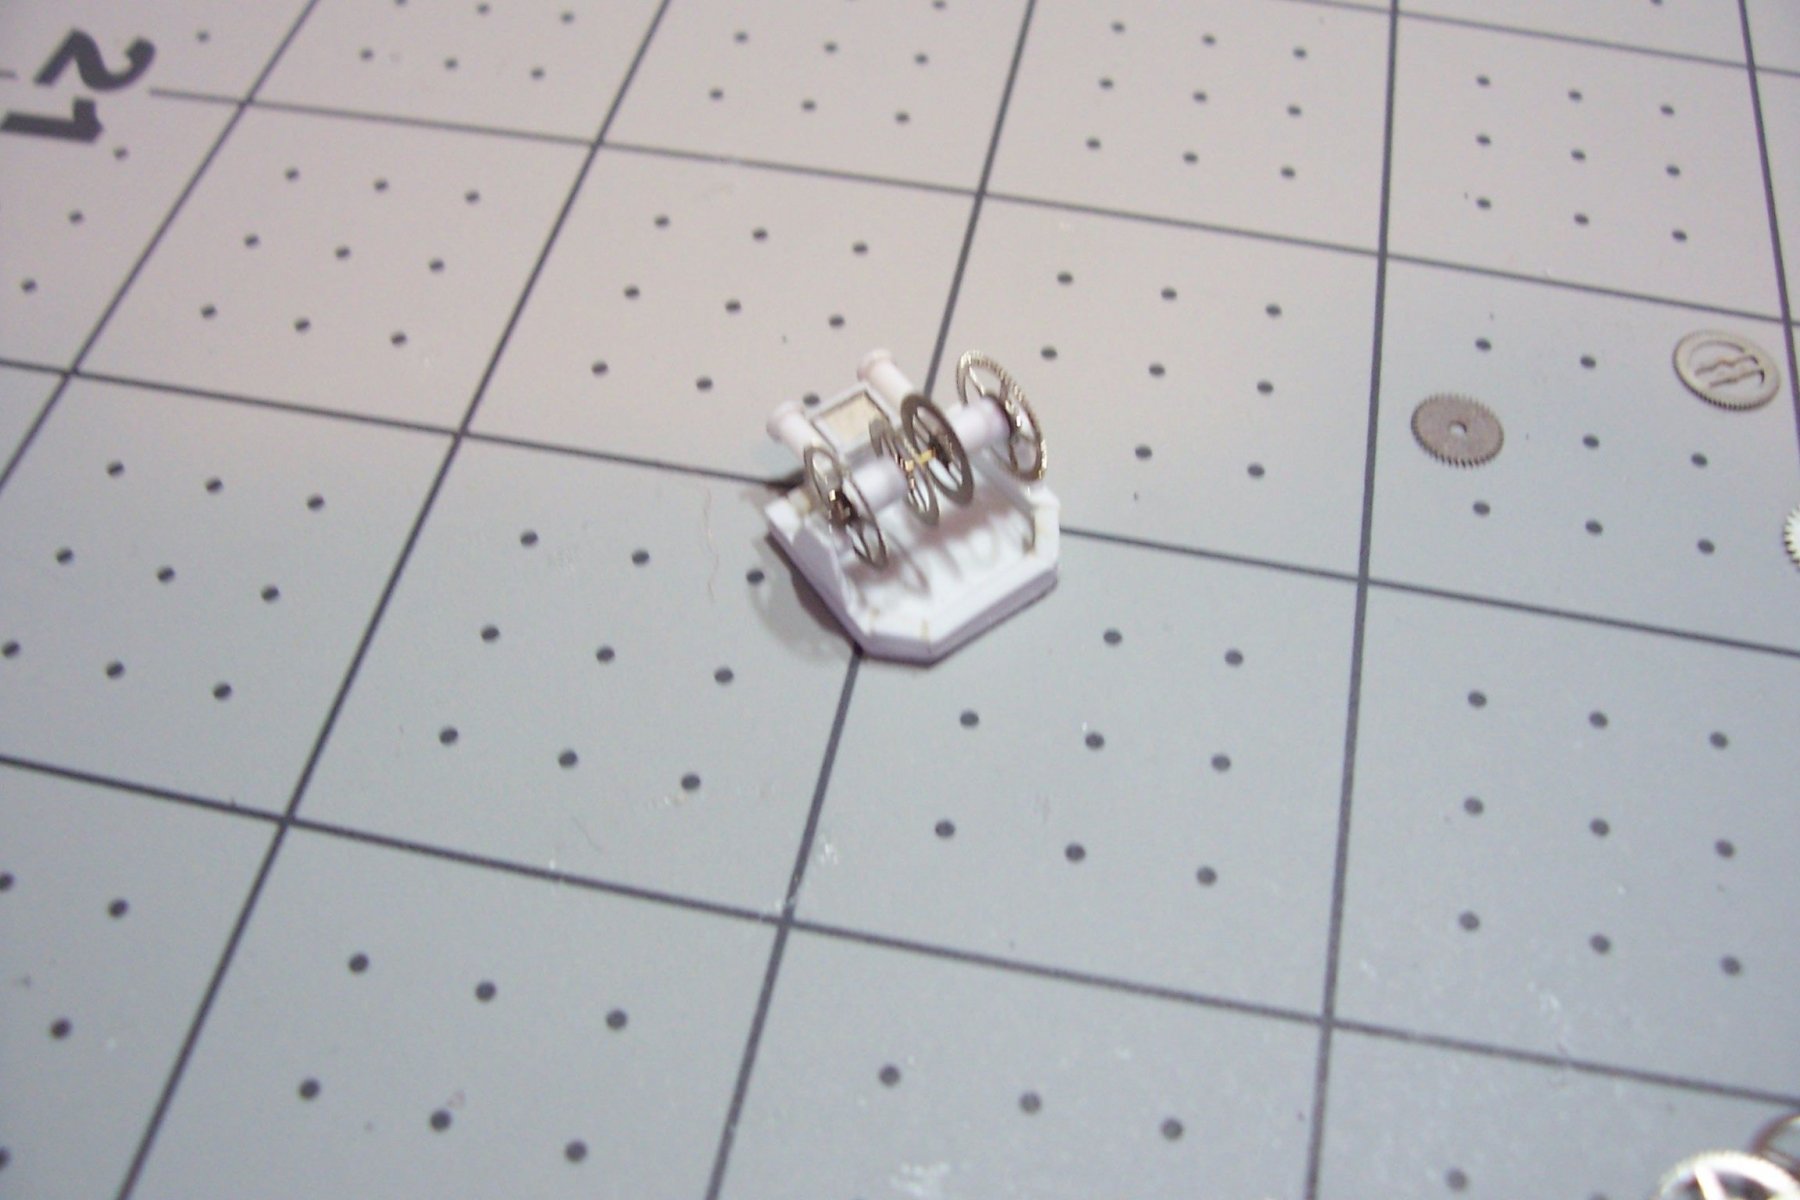
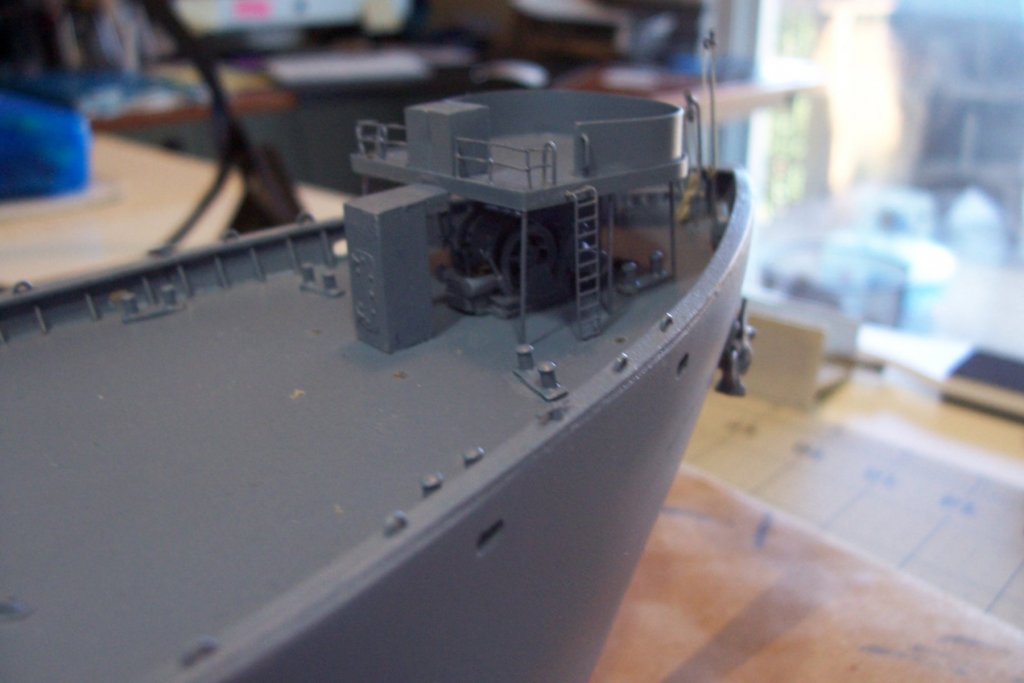
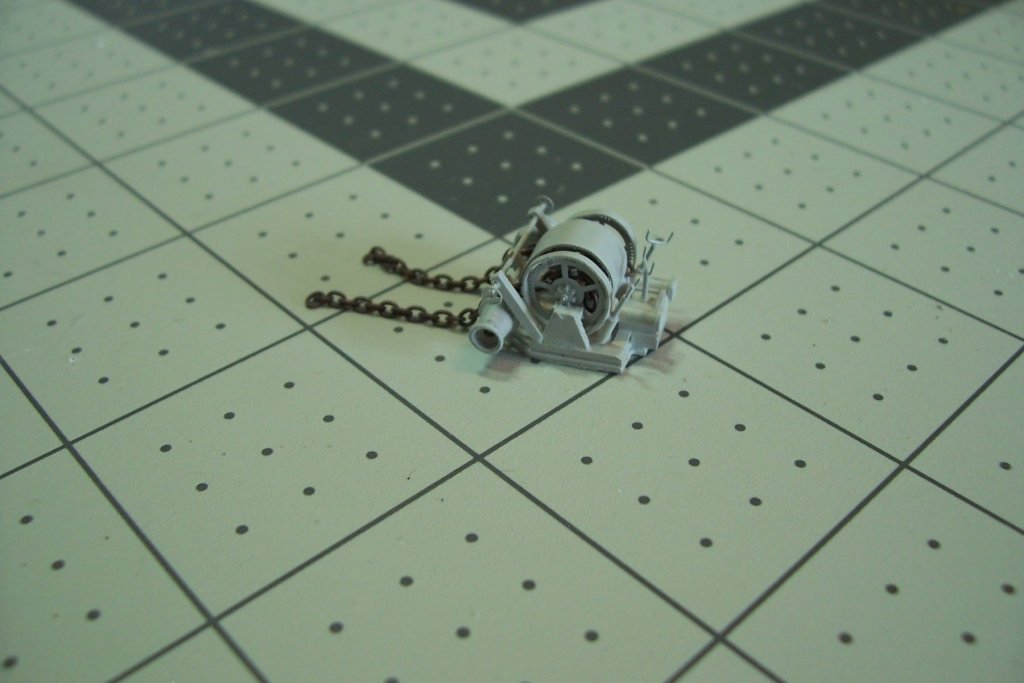
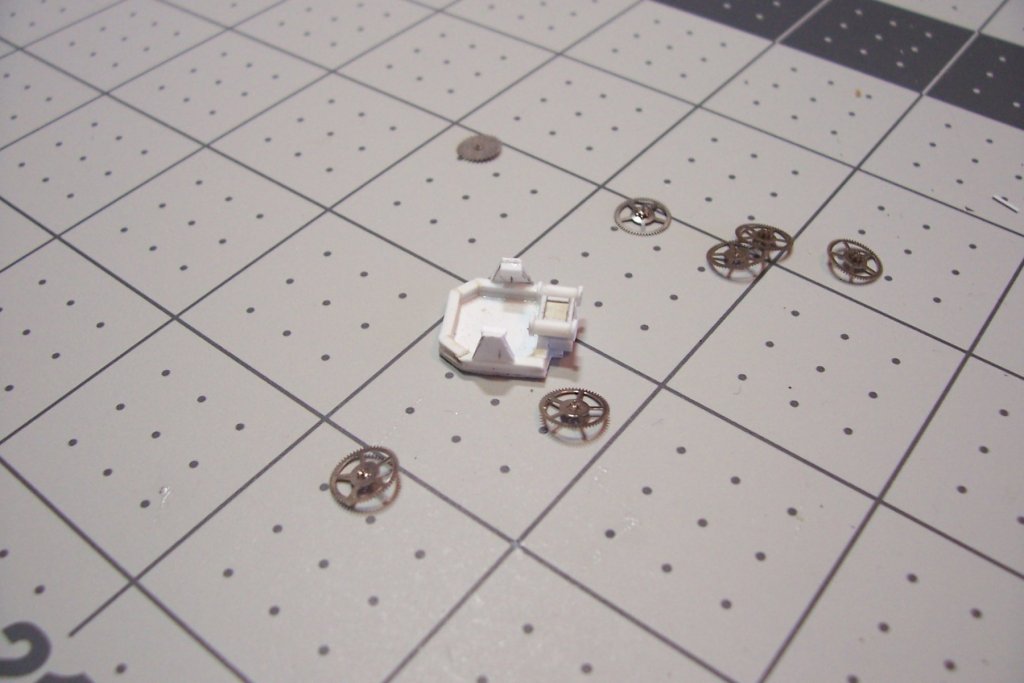
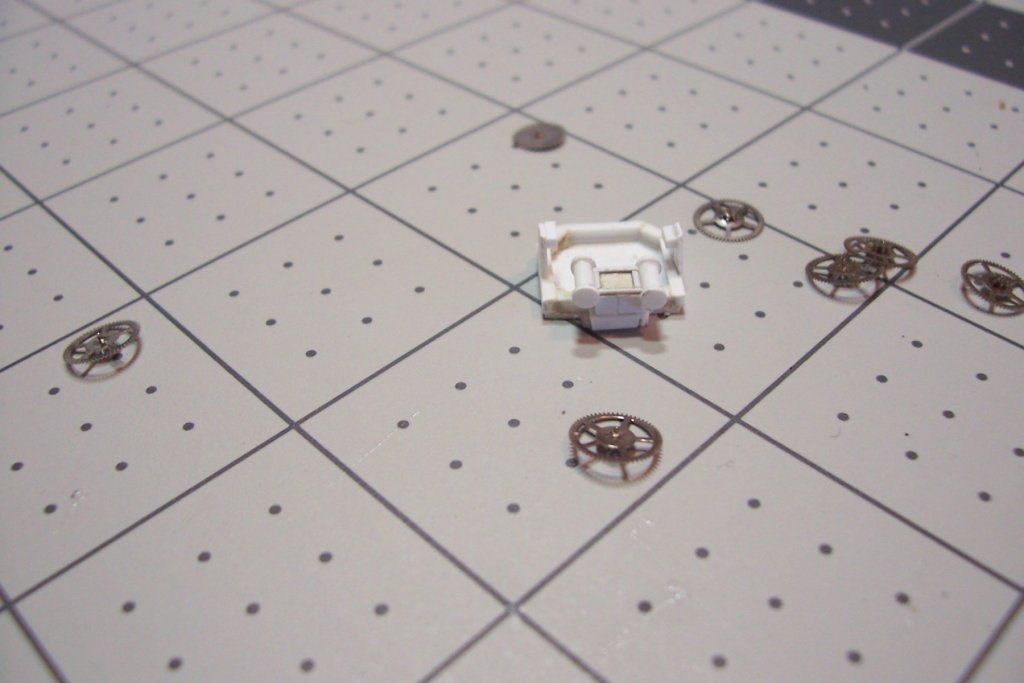
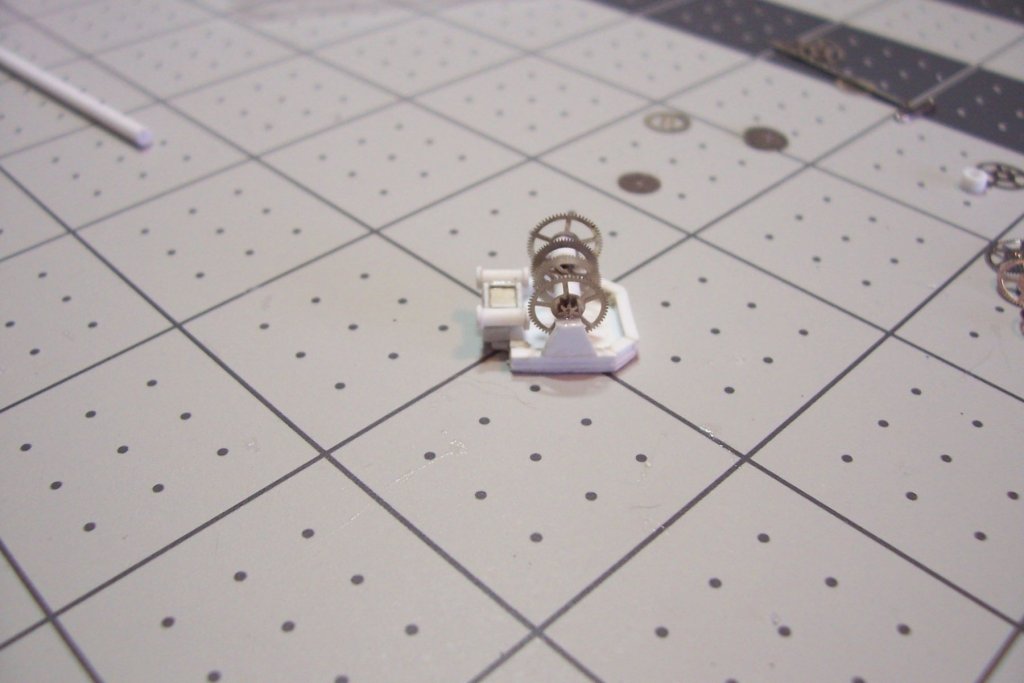
Anchor Windlass After a hectic 3 months we are now settled enough in the new house that I can break out the model and get started again. As I said in my last post, I wanted to replace the kit-supplied windlass with a scratch one that would be more to scale with regard to height. I made the bedplate, steam chest and pistons out of sheet, rod and I-beam styrene. The main shaft and gear wheels are a combination of tubing, rod and a bag of watch gears I found on the internet. Next up will be the capstan heads, brake controls and gear controls.
- 227 replies
-
- 16
-
-
- BlueJacket Shipcrafters
- Stephen Hopkins
- (and 2 more)
-
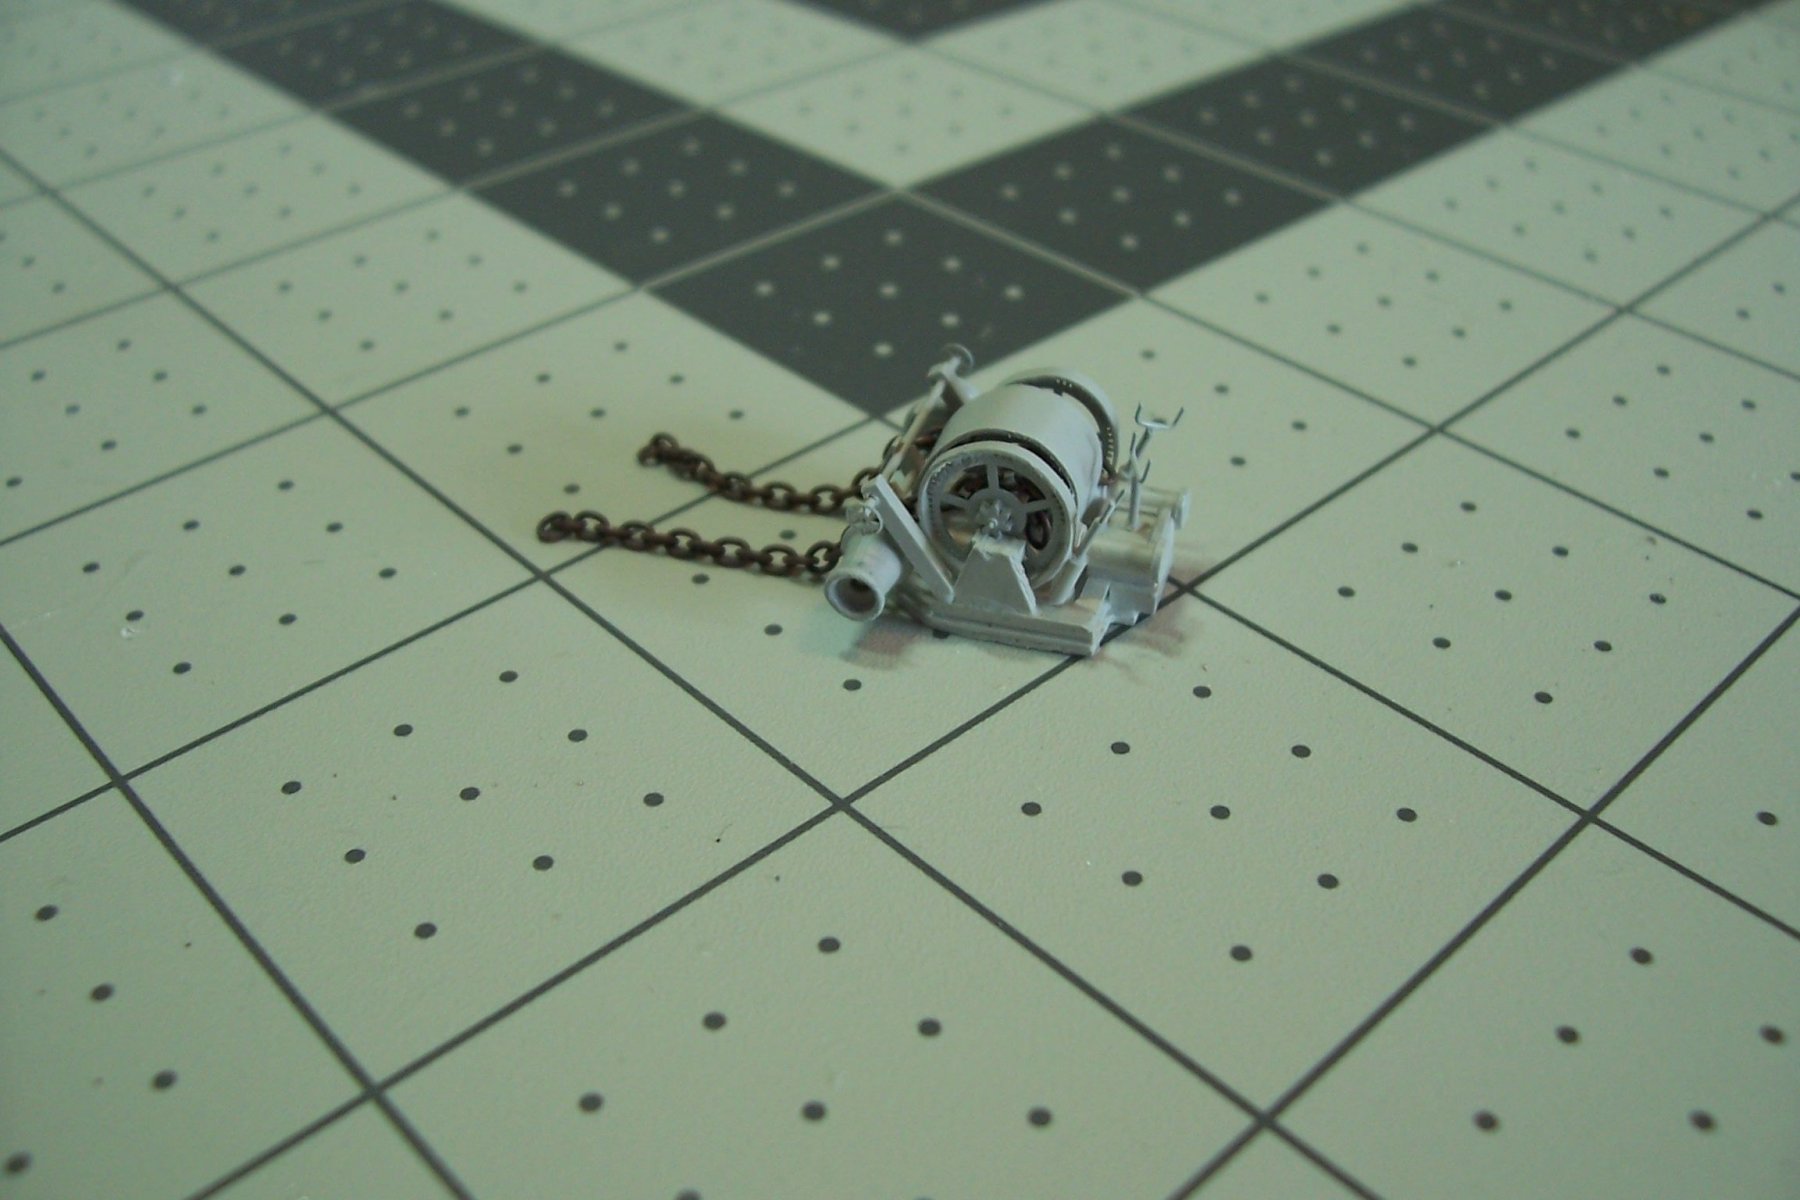
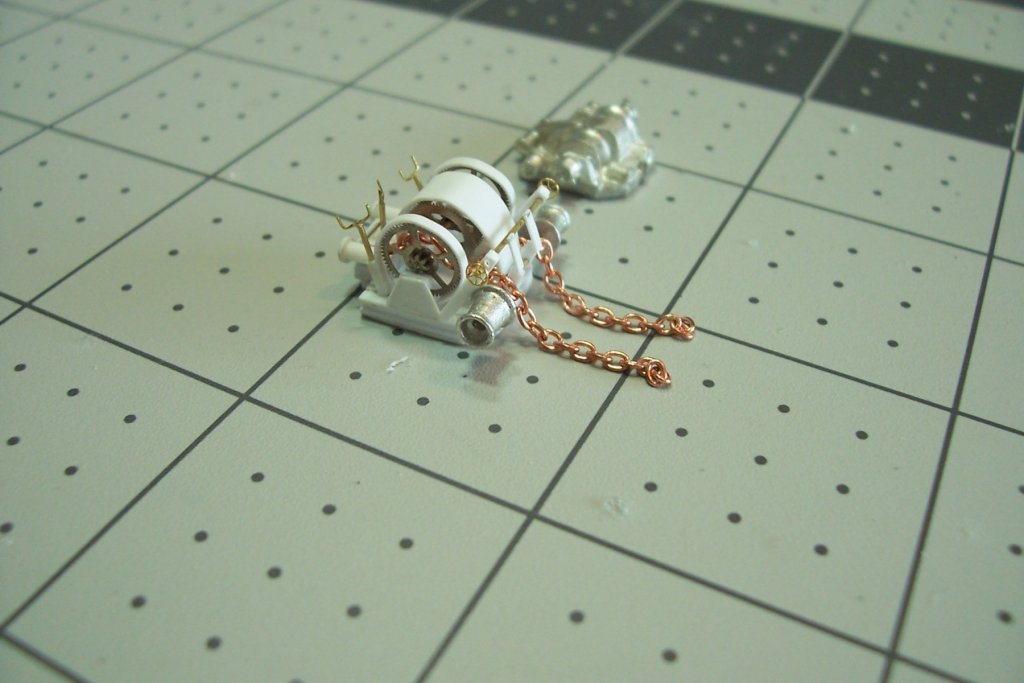
Anchor Windlass (and last post for a while) The kit provides a 1-piece Brittania casting for the anchor windlass, nicely detailed: I was all set to go with it when looking over my pix from my visit to the John Brown I noticed that the real thing stands about 4-1/2 feet high whereas the kit version, while correct for length and width, scales out at only a little under 2 feet high as you can see by the comparison photos (BTW my model will not be red - I just have not painted the hull its final color yet - the red is overspray form the red, underwater section): I hope to be able to scratch build a new windlass and that job was made easier after I found a bag of used wristwatch gears online for about $2, with some plastic I-beams for the foundations it should hopefully turn out OK. This will be my last post for a couple of months since we are in the process of moving to North Carolina and all my model stuff needs to get packed up. Hopefully I can resume work in April or May.
- 227 replies
-
- 10
-
-
- BlueJacket Shipcrafters
- Stephen Hopkins
- (and 2 more)
-
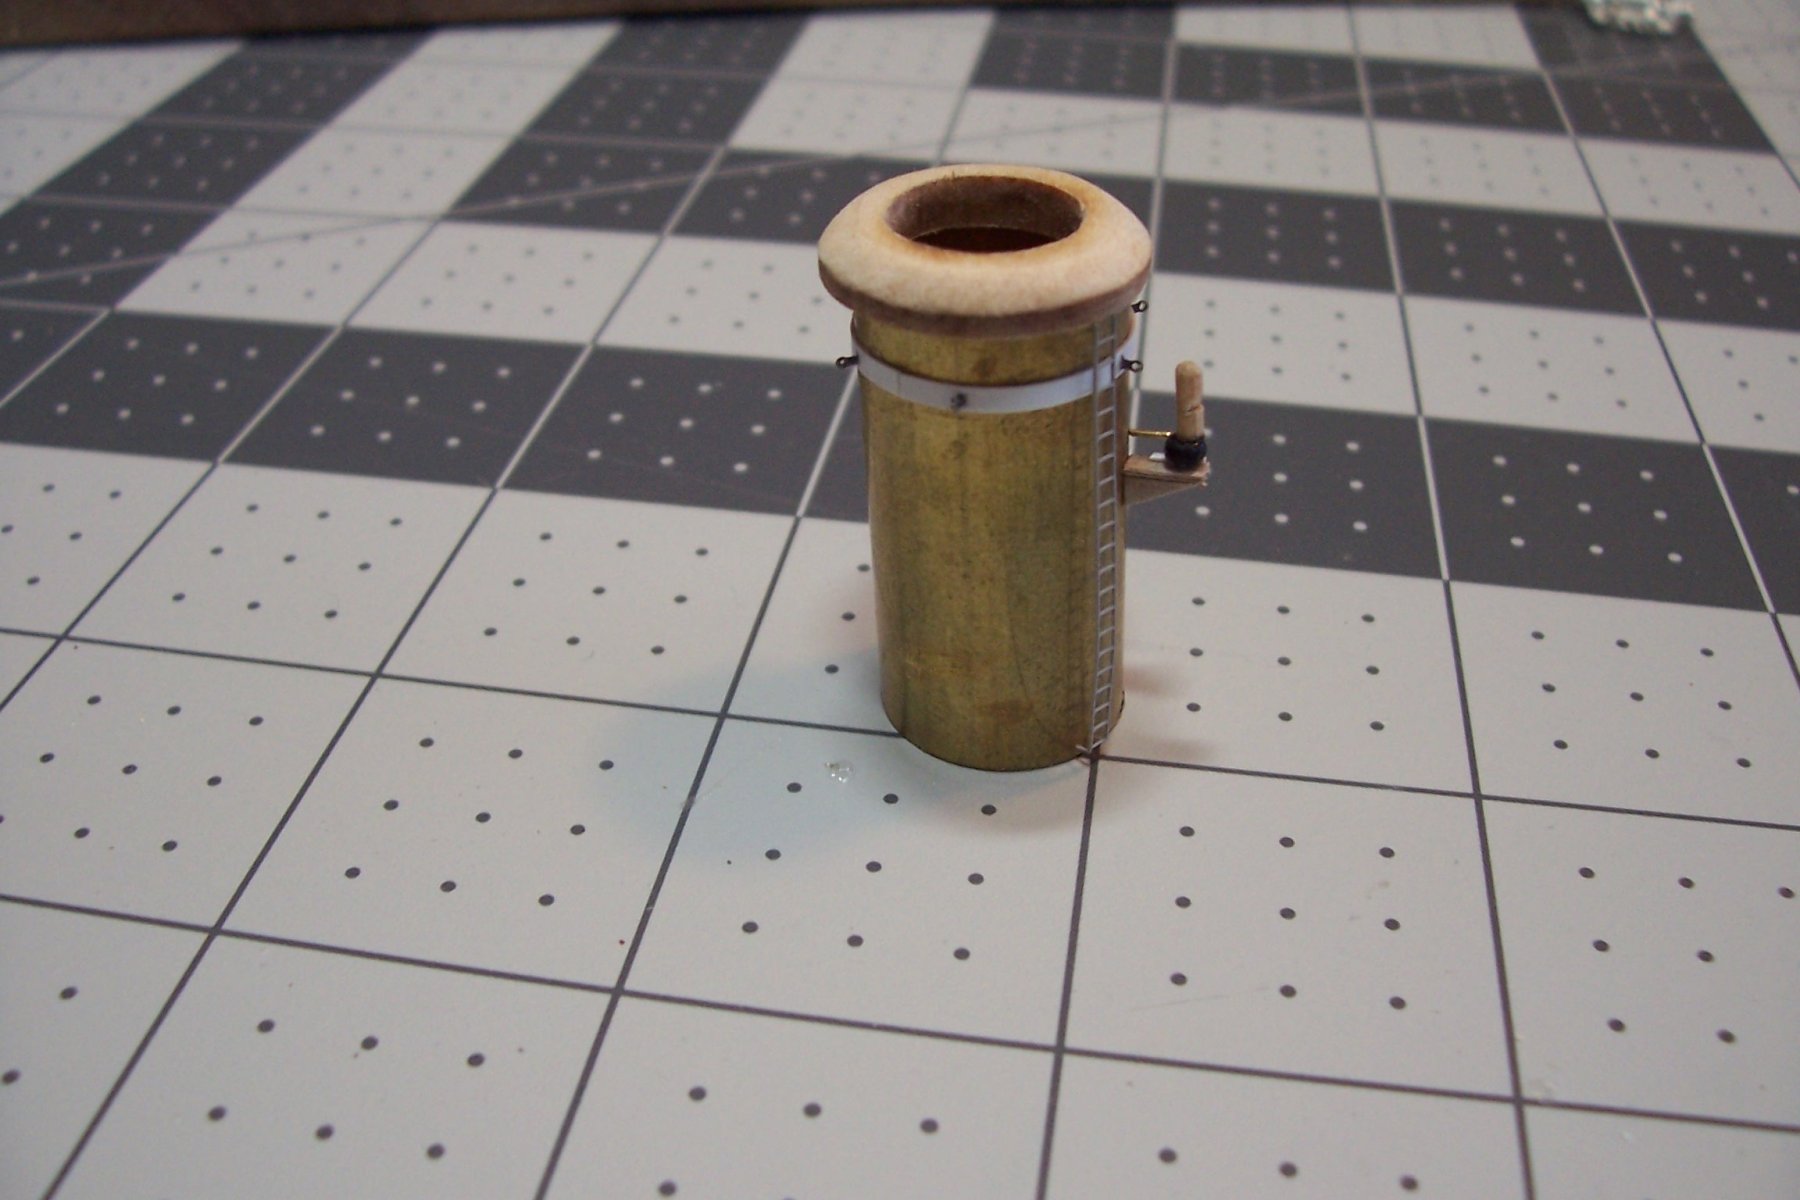
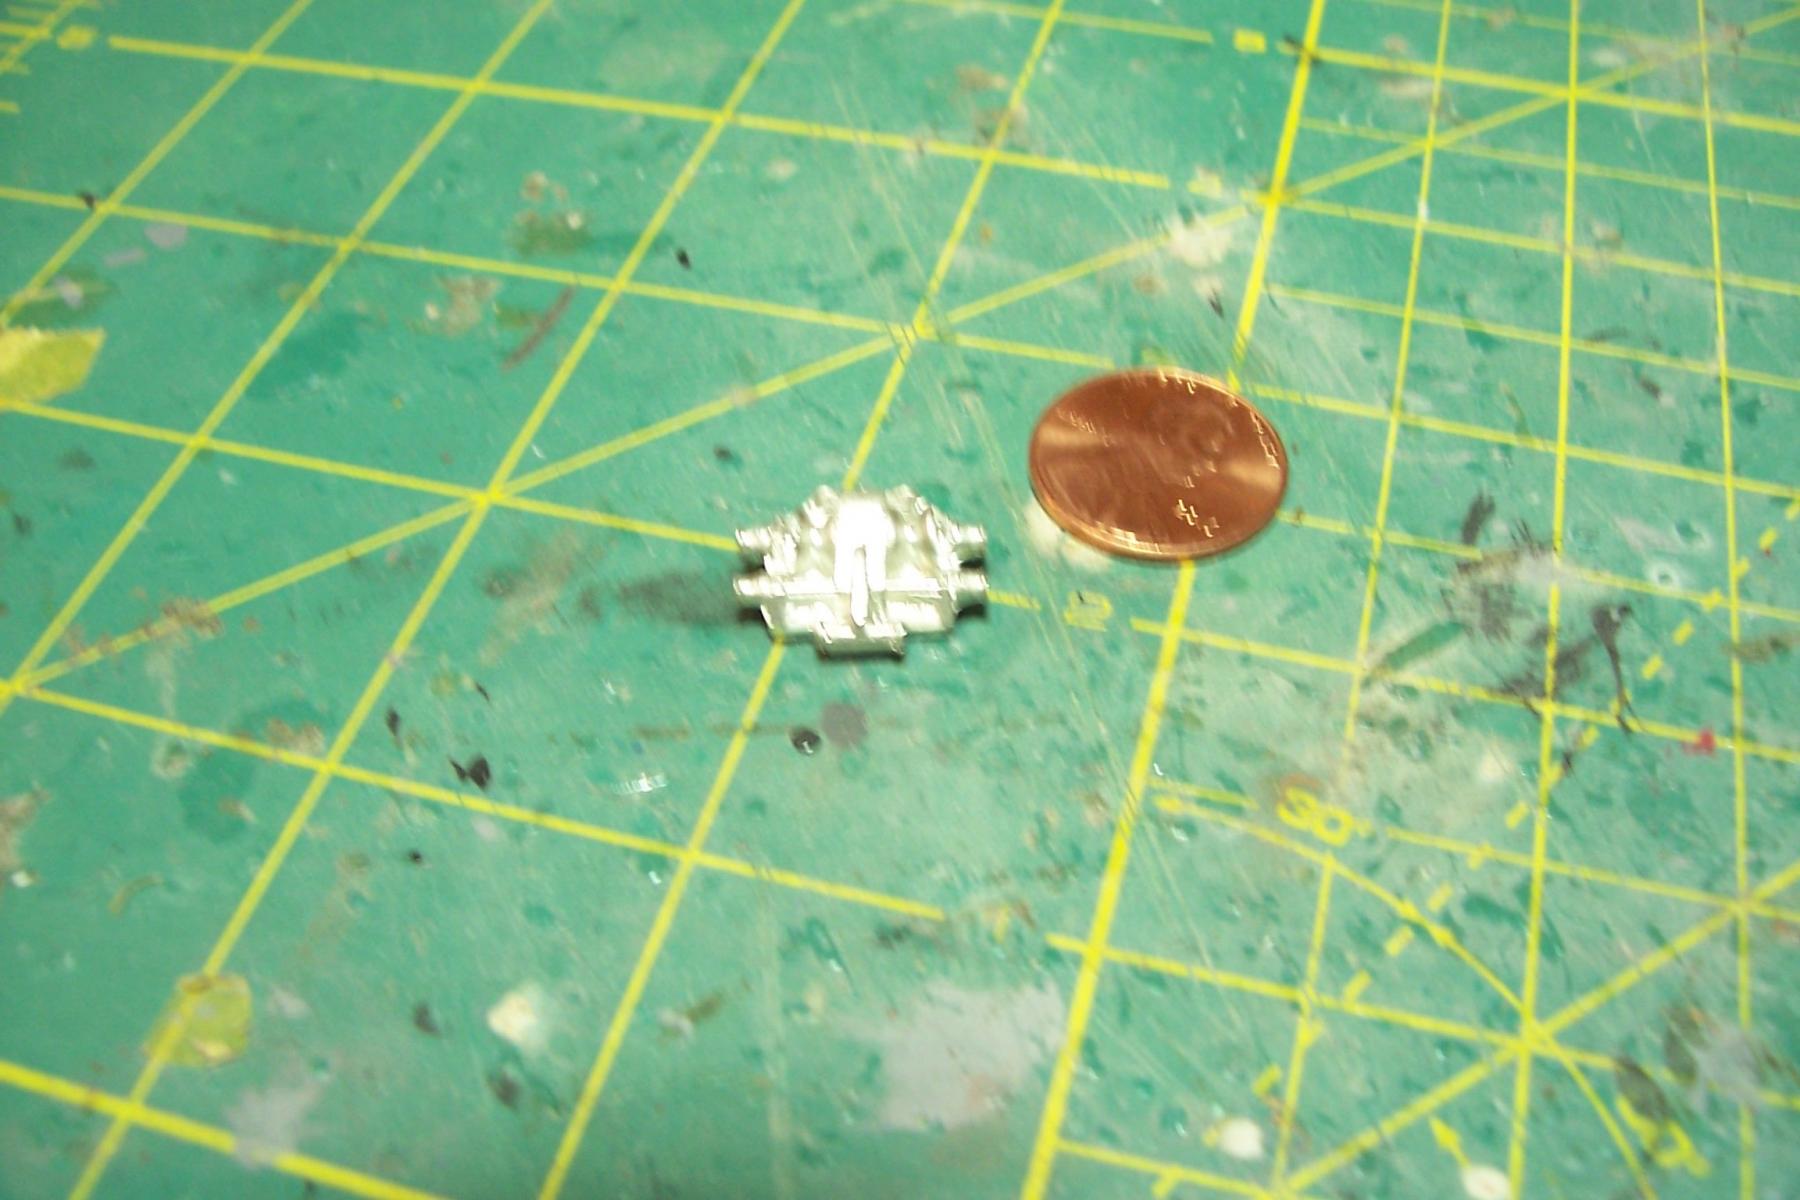
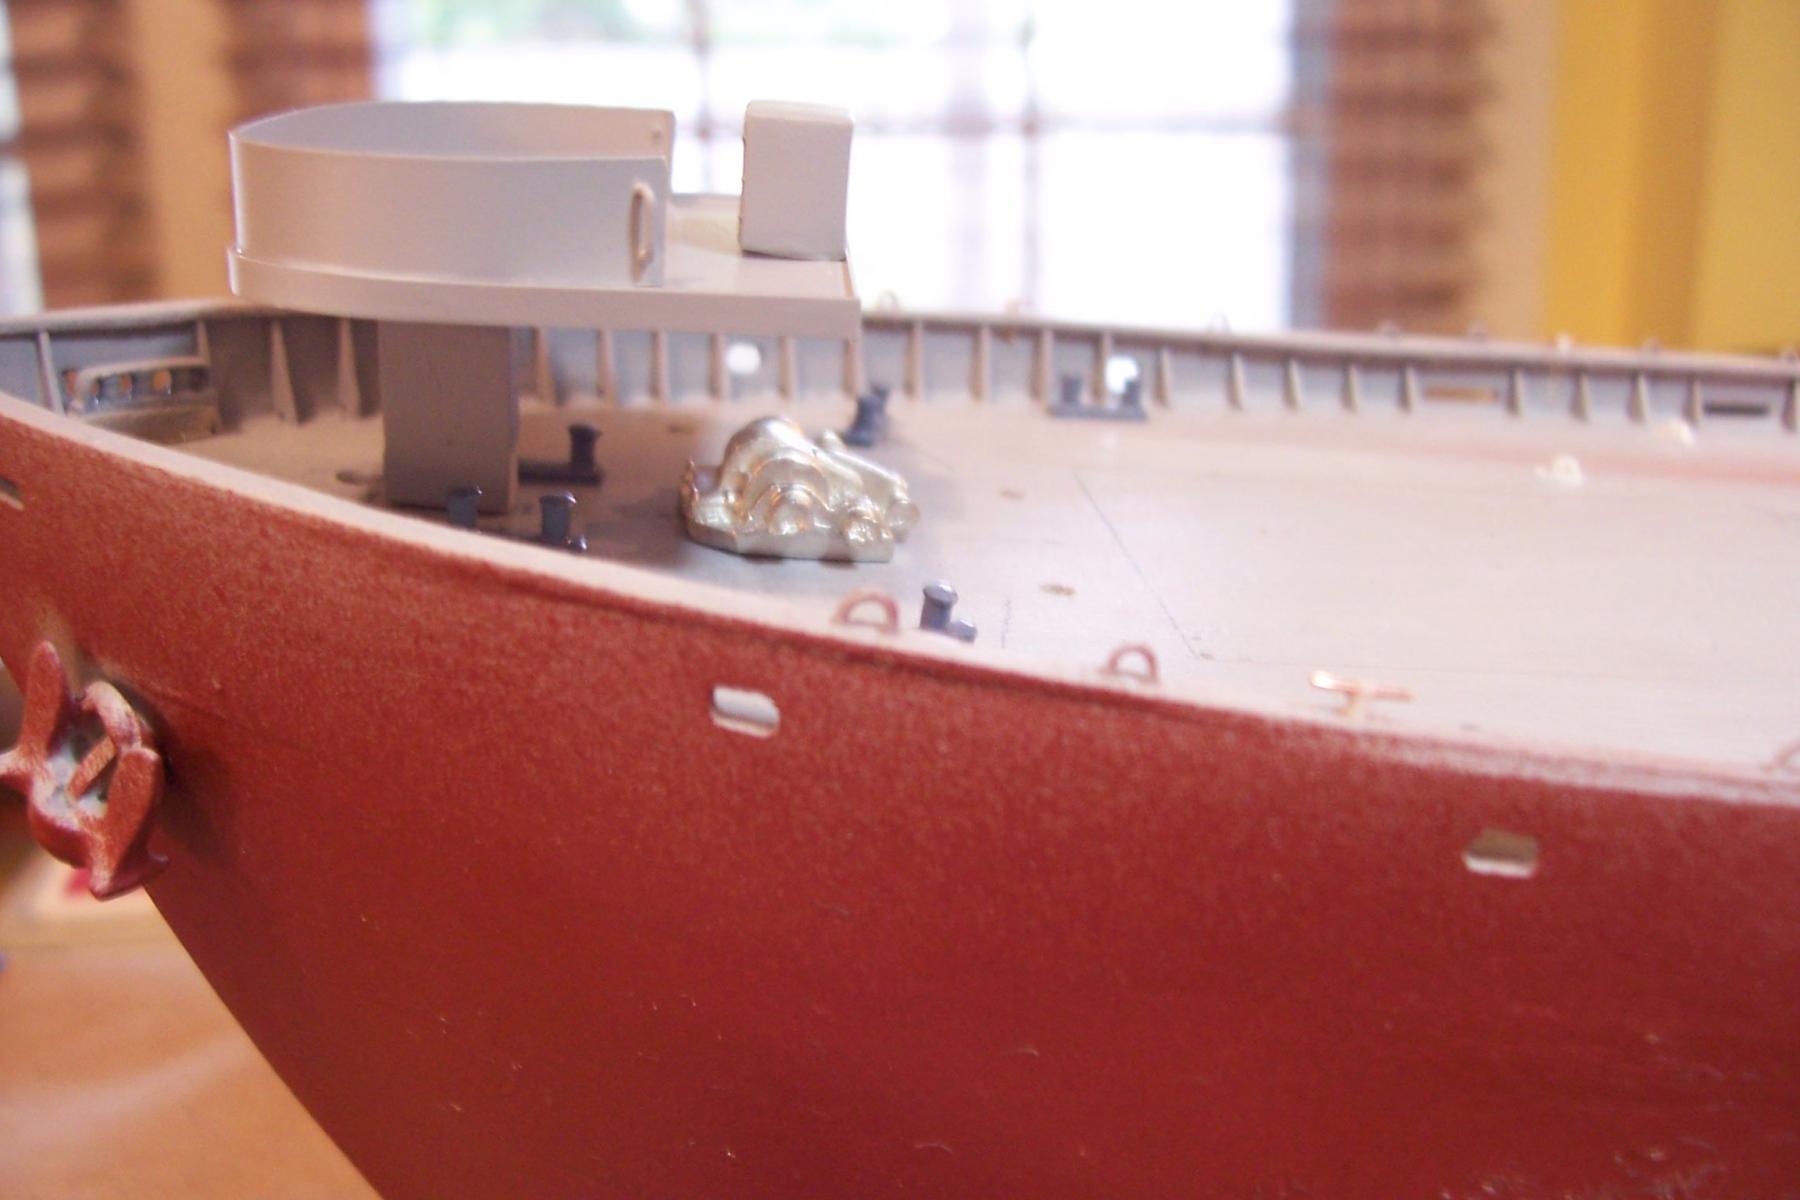
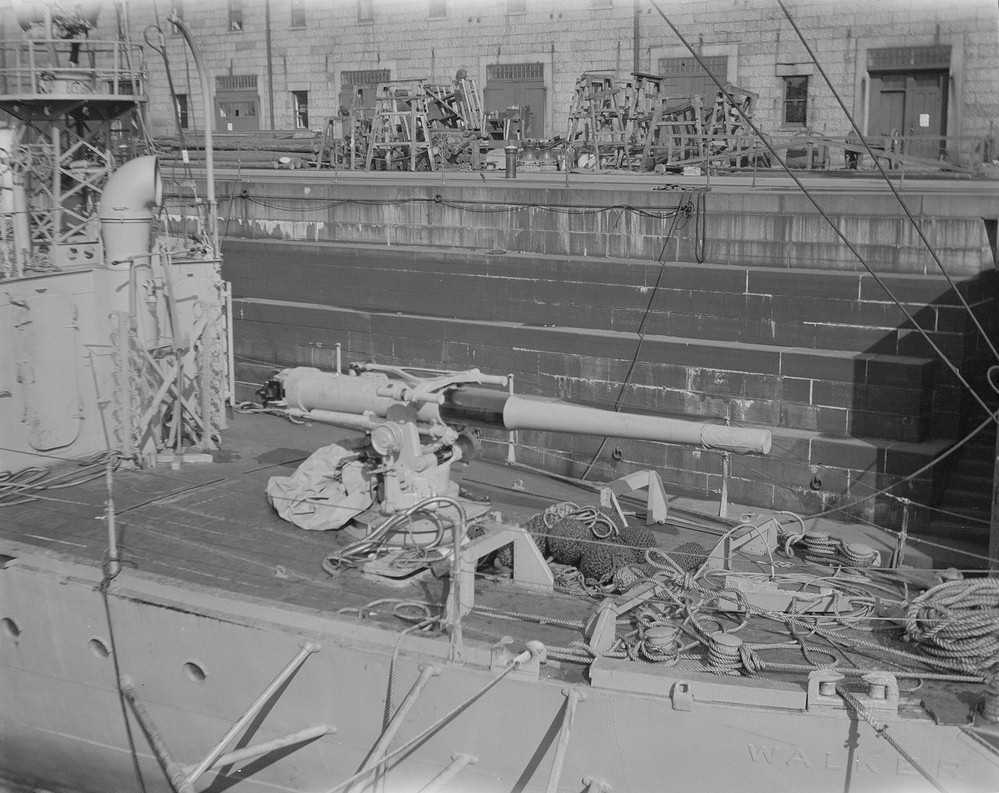
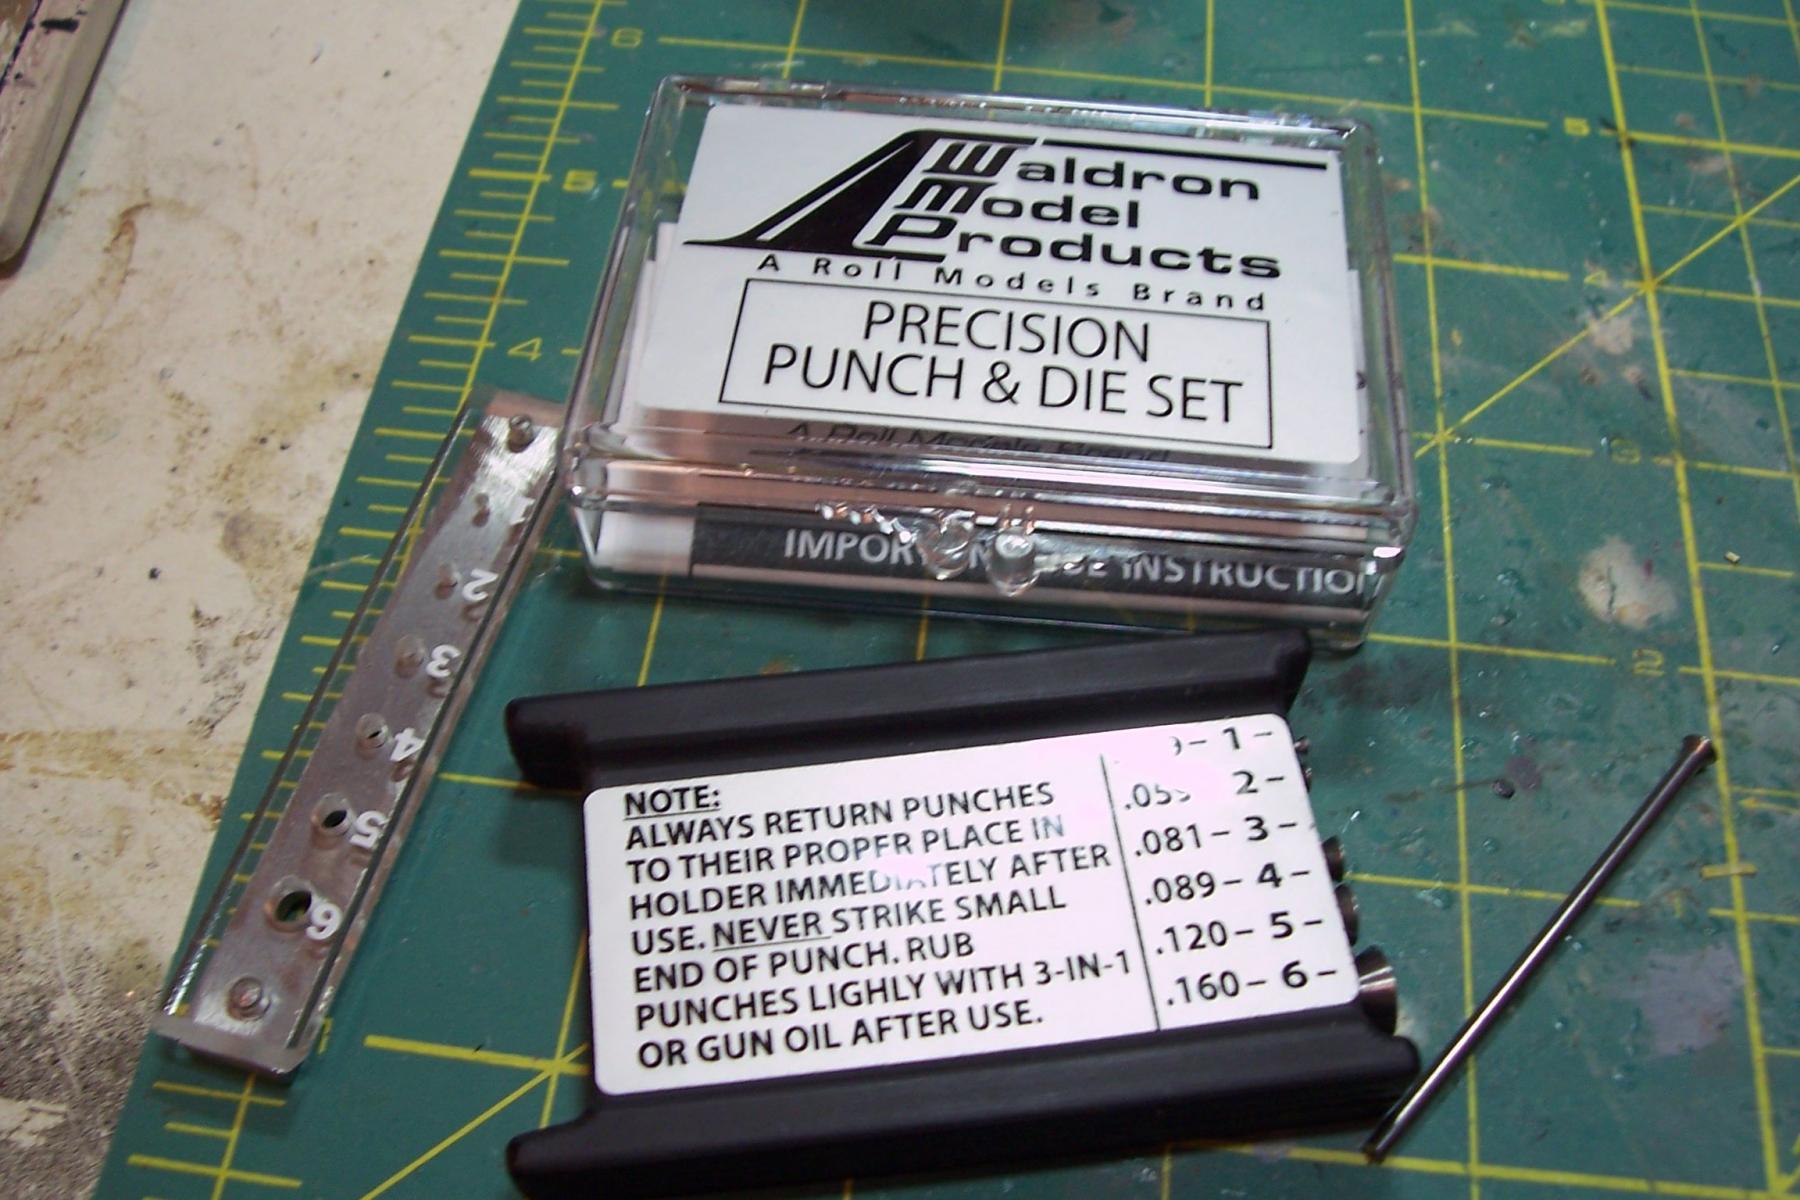
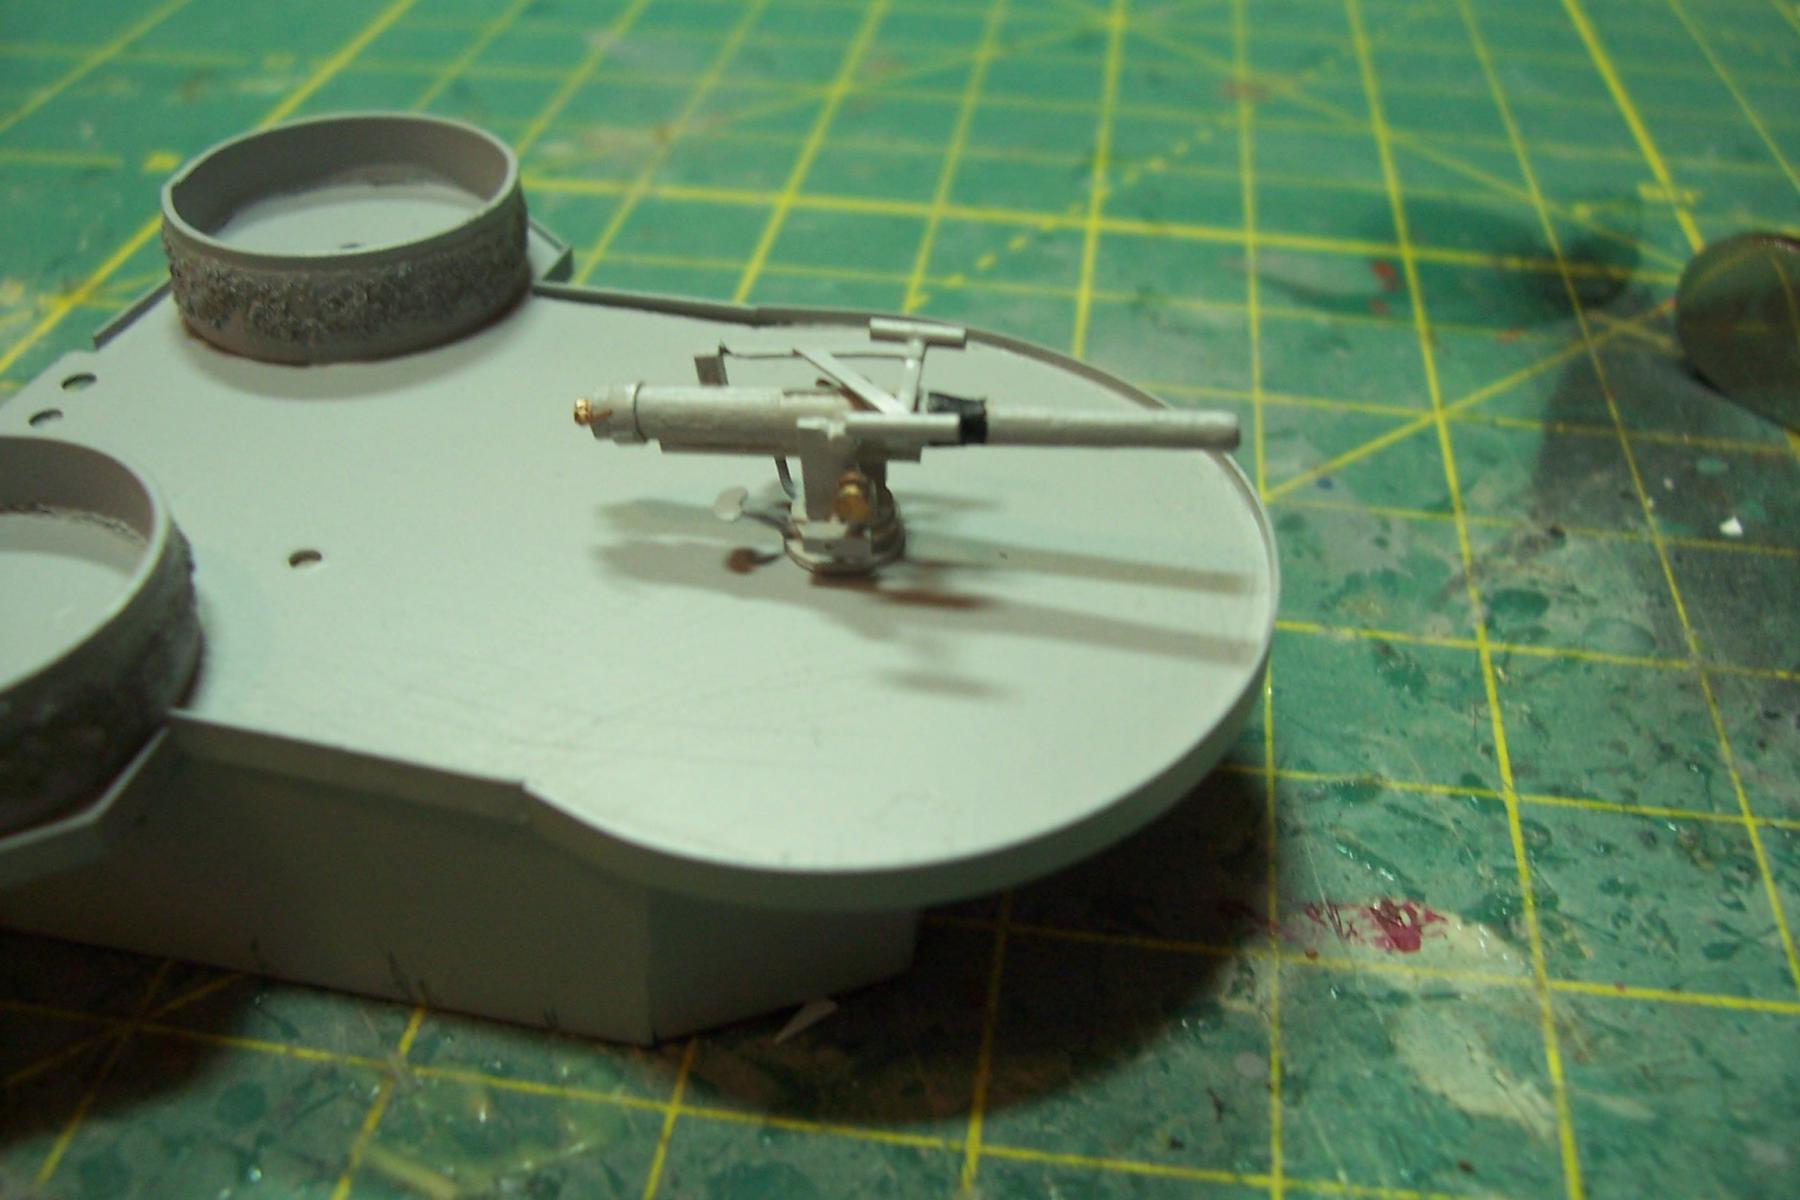
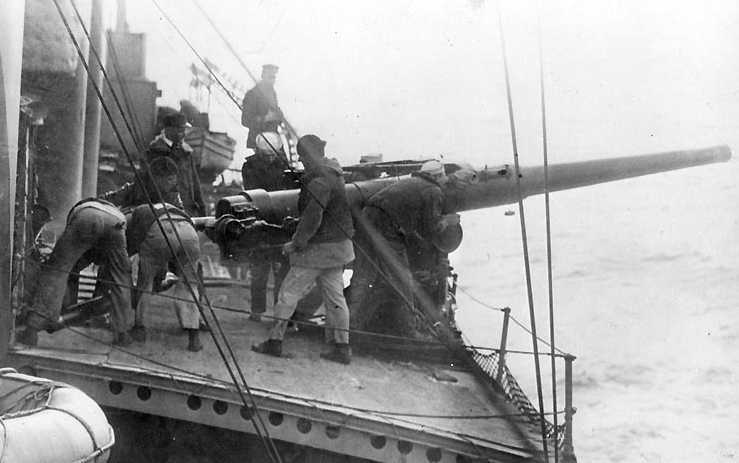
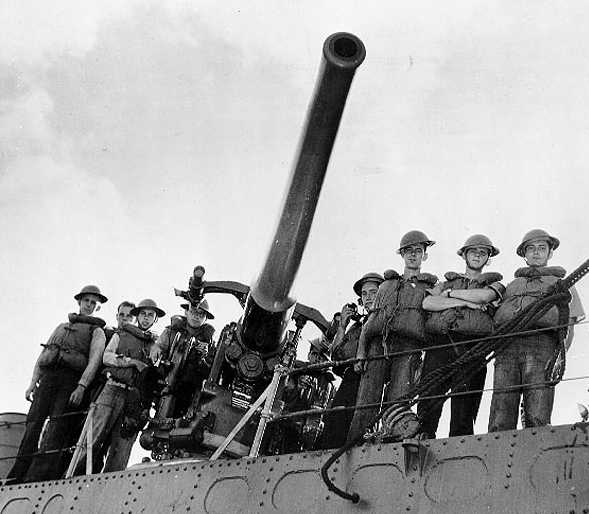
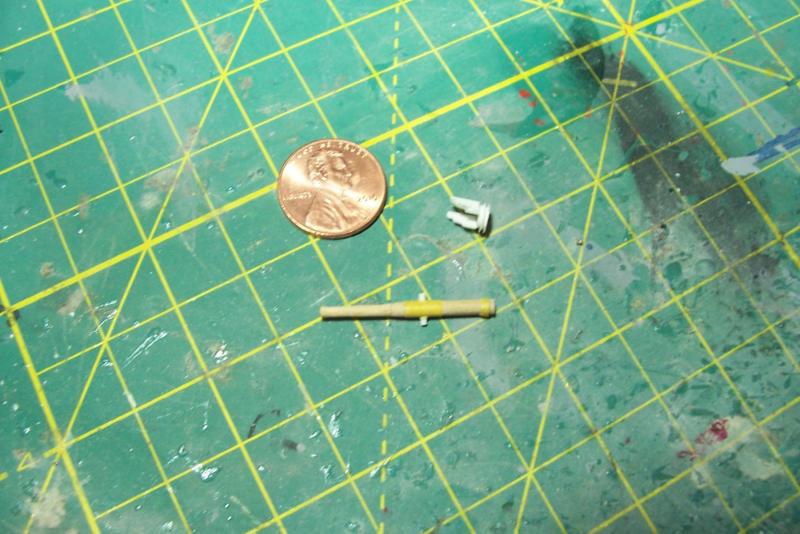
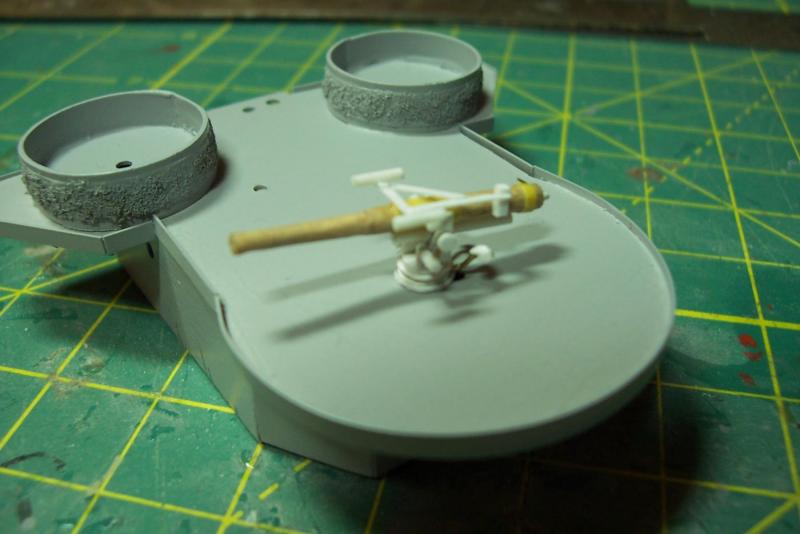
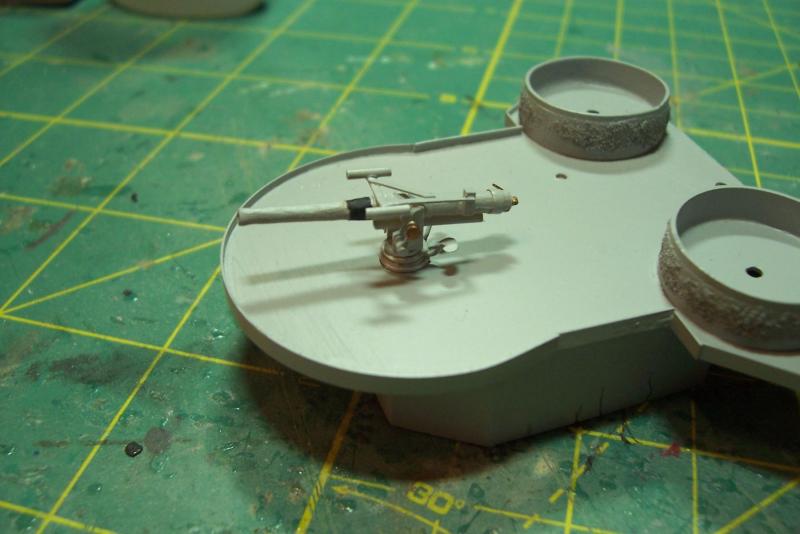
4-inch gun With the exception of the earliest Liberty’s (like the Hopkins), almost all of them were fitted out with a 5”/38 gun for their main battery. The gun was power-operated, fast firing, and when paired with a fire-control system and VT-fused ammunition it was very effective against aircraft. Installed on virtually every class of US warships it was widely considered to be the best naval gun of the war. The kit provides a nicely cast Brittania metal gun. Unfortunately for the Stephen Hopkins, the 5/38 production line was still working up when she was launched so she had to make do with a WWI leftover. The 4”/50 was mass produced after 1914 and was primarily fitted on the “4-piper” flush-deck destroyers. It was manually trained and elevated and did not have the capability to fire anything but basic point-detonating ammo, making it useless against aircraft. However, as I pointed out in my first post, with a trained crew it could be deadly against an unarmored ship at close range. When looking around for materials to scratch build one I found that toothpicks scale out perfectly for the barrel, assuming it could be narrowed near the muzzle and built up near the center and breech. I chucked one up in a Dremel and tried to trim it down but it quickly splintered. Soaking it in diluted white glue did not work. I tried thin CA and with some trial and error, reapplying CA after the surface layer was filed off I was able to get what I wanted. The CA also allowed for the drilling out of the muzzle - something that an unreinforced toothpick won’t stand up to. The areas that needed to be built up were wrapped with thin tape as needed. The rest of the mount was assembled with sheet and rod plastic and brass rod. One item that I have found very handy for scratch building is this little set of punches for making discs. I had been using a set of hollow punches but they always produced ragged edges - this set does not. Here’s the finished gun:


- 227 replies
-
- 14
-
-
- BlueJacket Shipcrafters
- Stephen Hopkins
- (and 2 more)
-
After seeing this I can never whine about tiny PE again! As far as tweezers go, I've had some luck wrapping the tips in 1 wrap of masking tape (sticky side toward the tip - not the work piece) helps keep small parts from being propelled into a parallel universe when I squeeze too hard at just the wrong time.
-
Small deck fittings I added the bitts and roller chocks and replaced all the scratch cleats along the cap rail since they were not secure. Some of them will be under tension from the rigging so I made new ones and drilled holes for them in the cap rail rather than just glueing them. The small white things on the deck are scratch pad eyes for the mast shrouds and stays, most of them are pinned in place since they too will be under tension. I had hoped to paint the hull today but the temp in my garage is now in the 20’s so I’ll have to find more small work to do while waiting for the weather to improve.
- 227 replies
-
- 12
-
-
- BlueJacket Shipcrafters
- Stephen Hopkins
- (and 2 more)
-
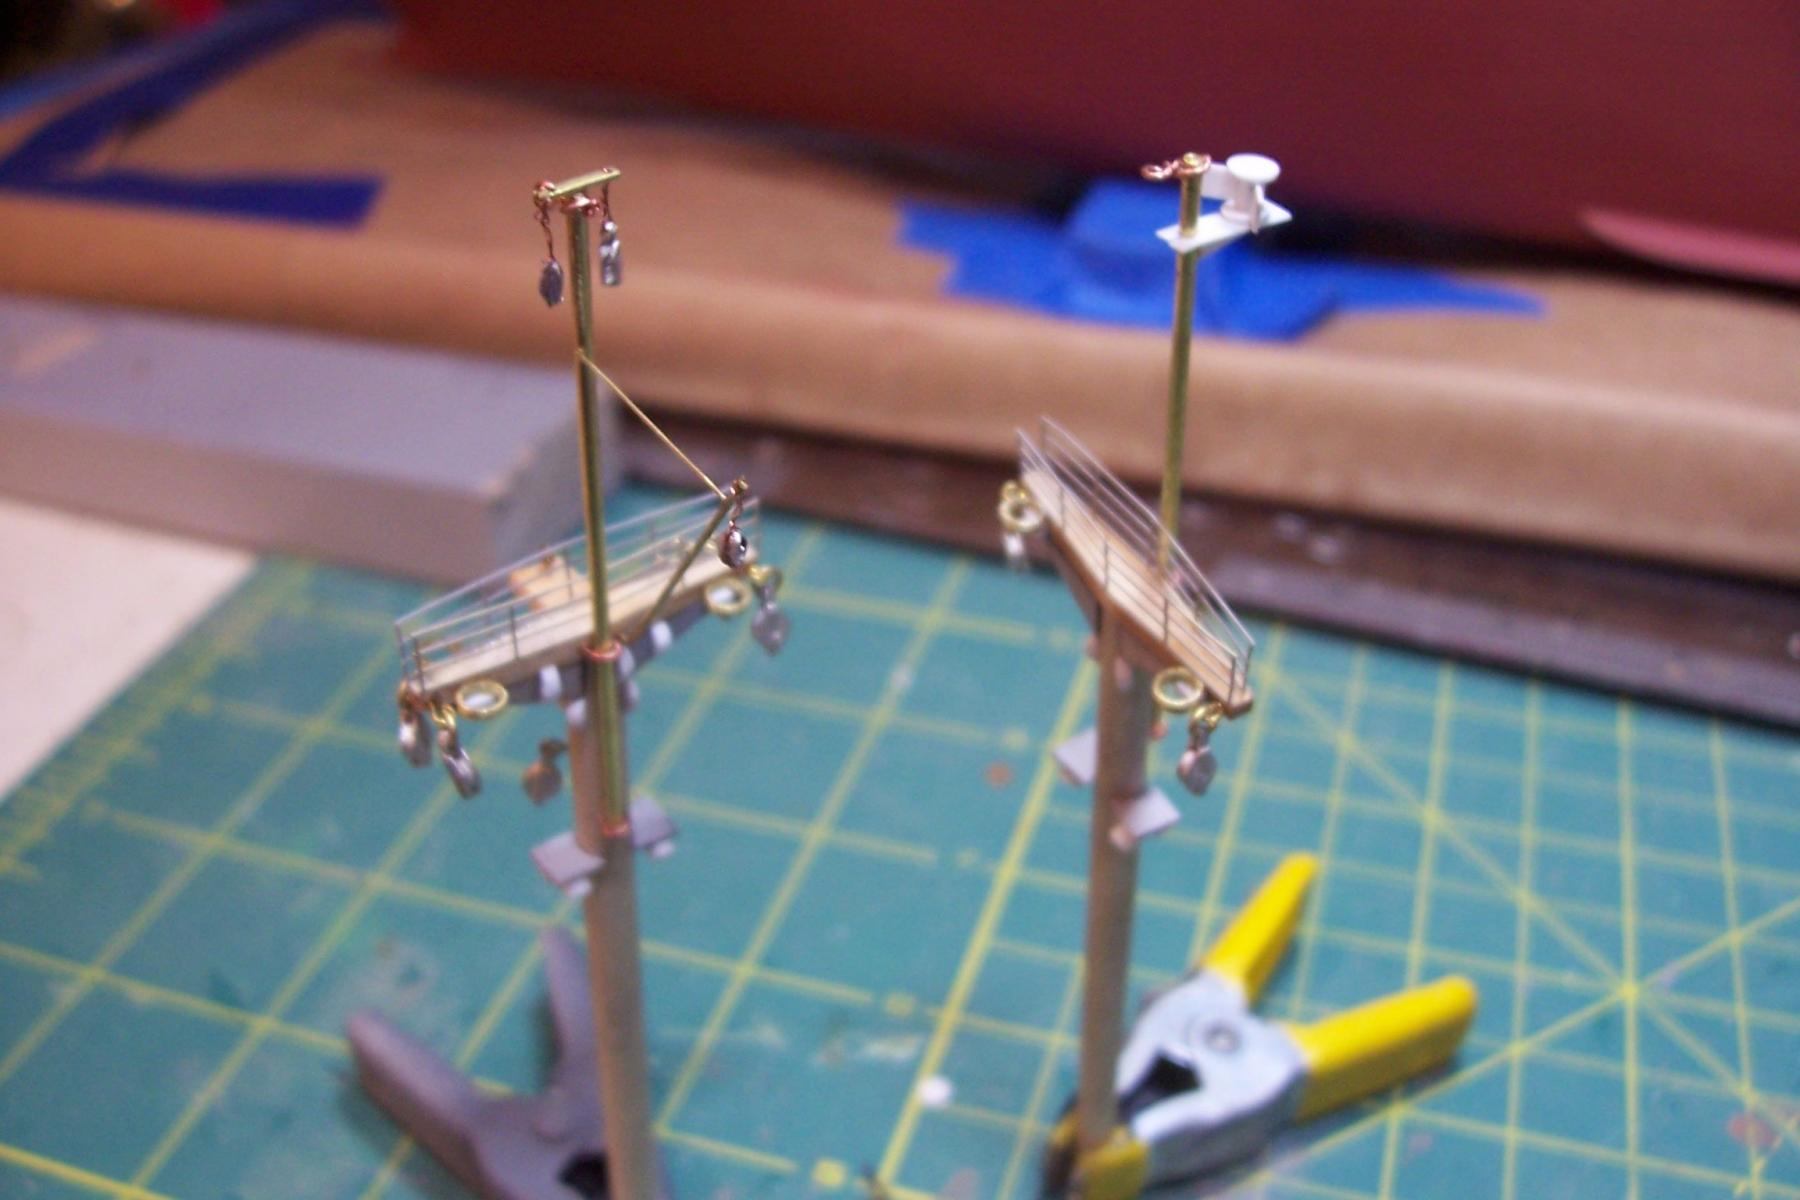
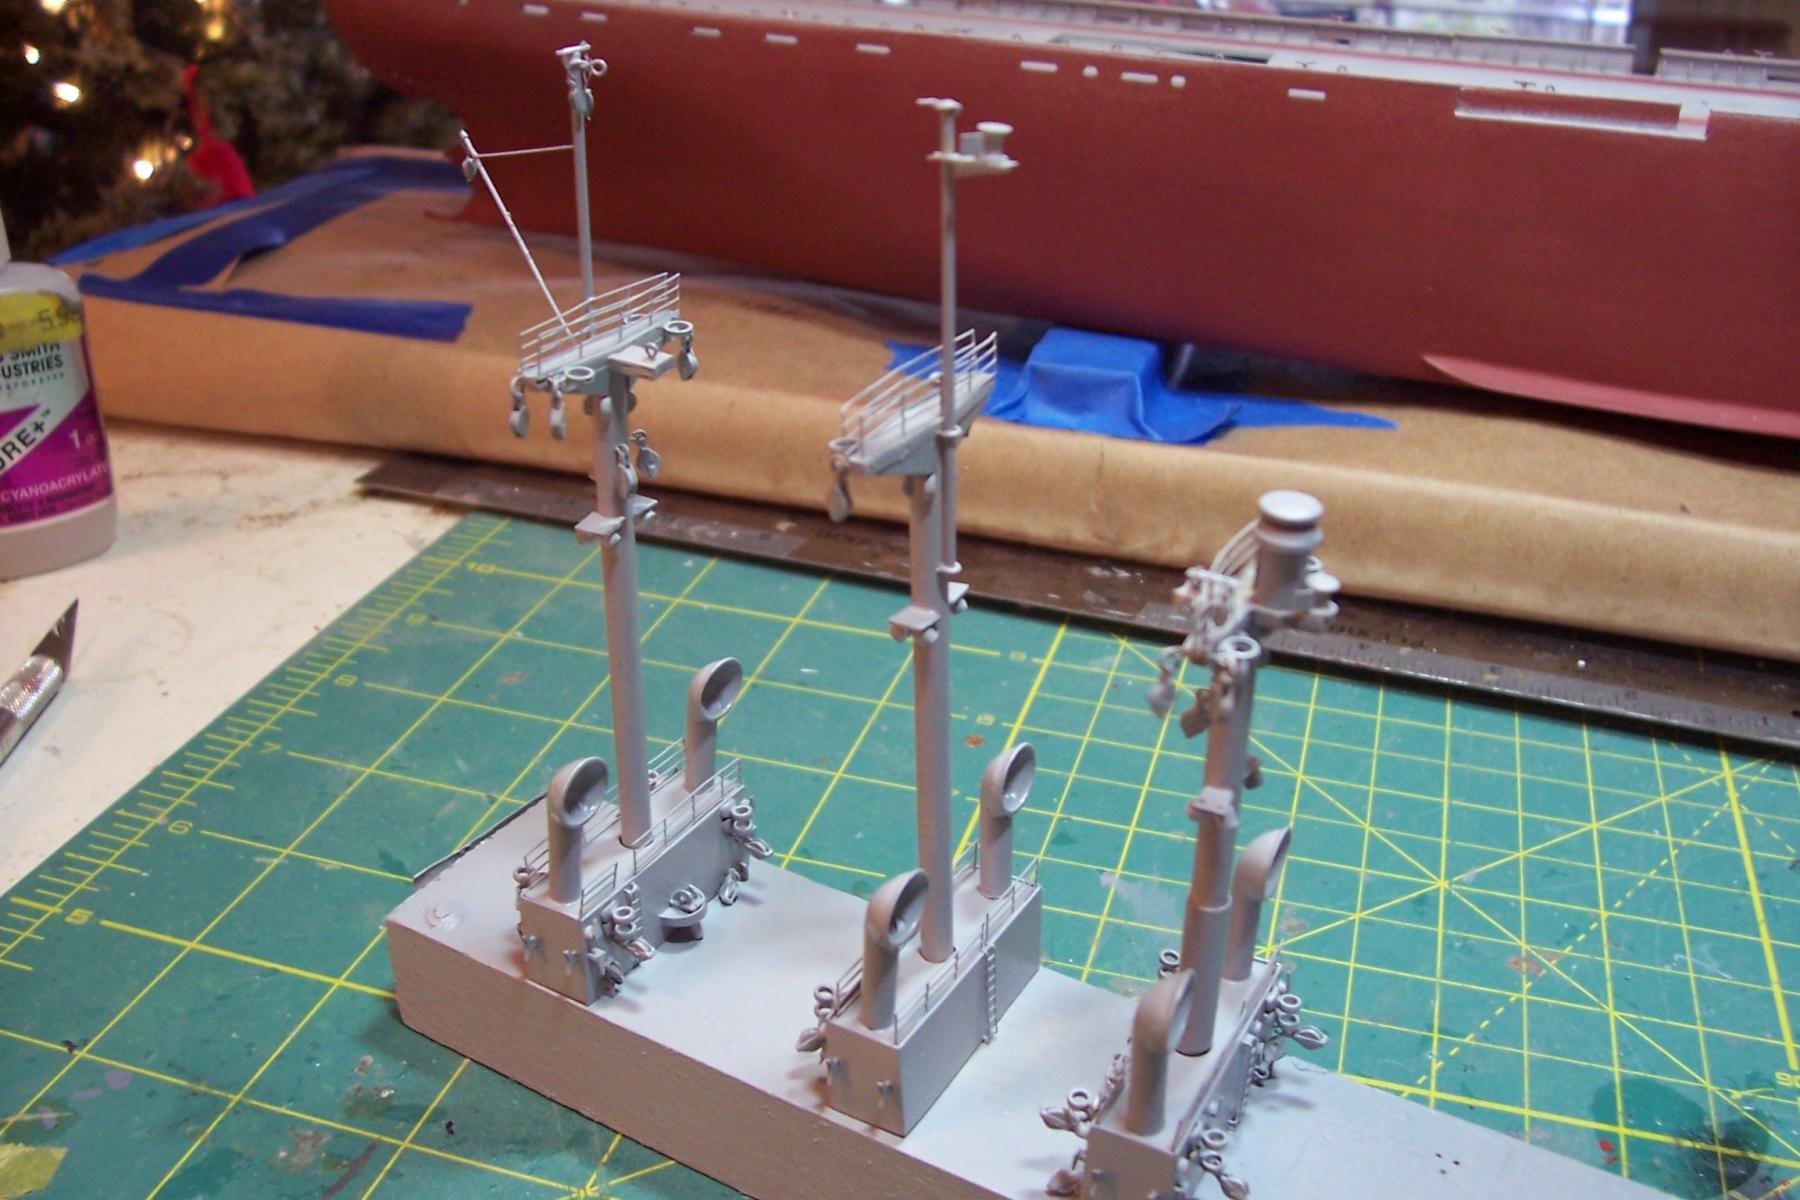
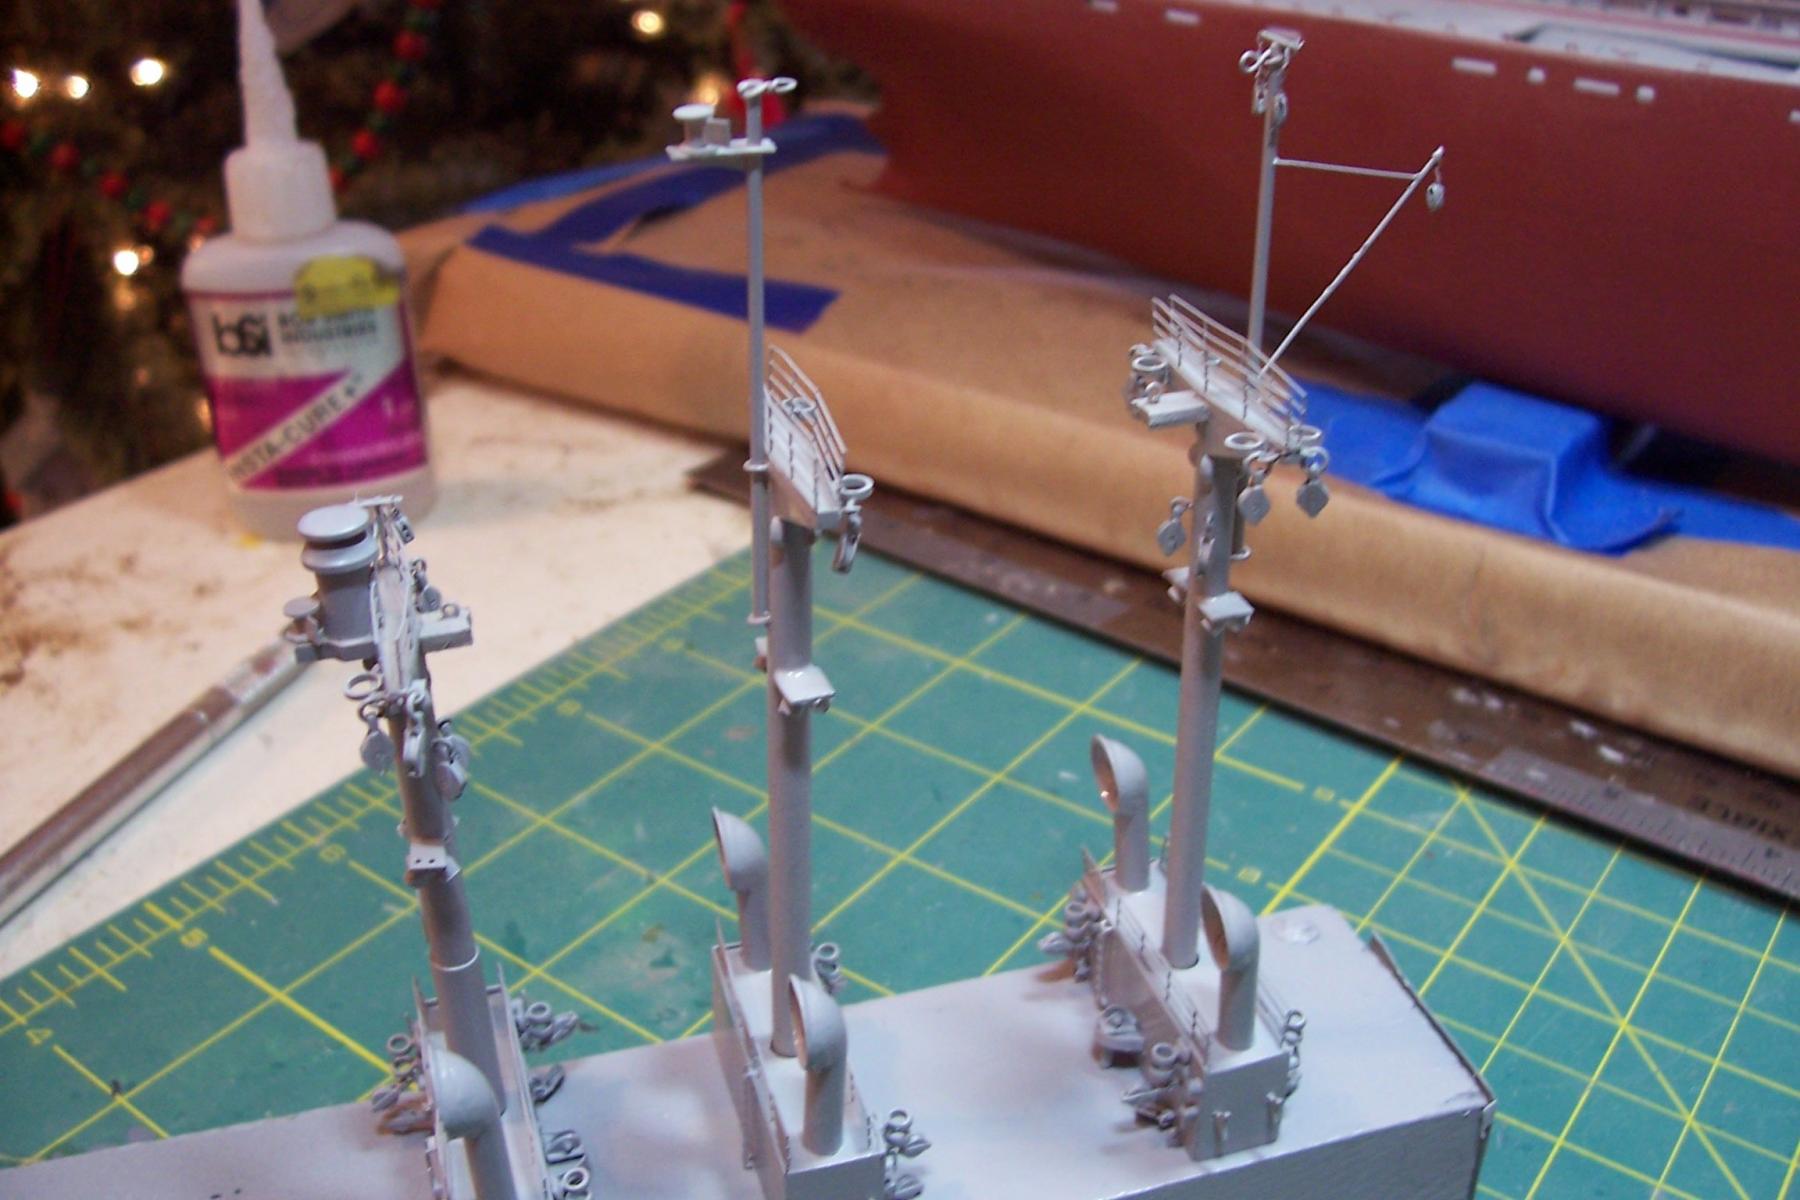
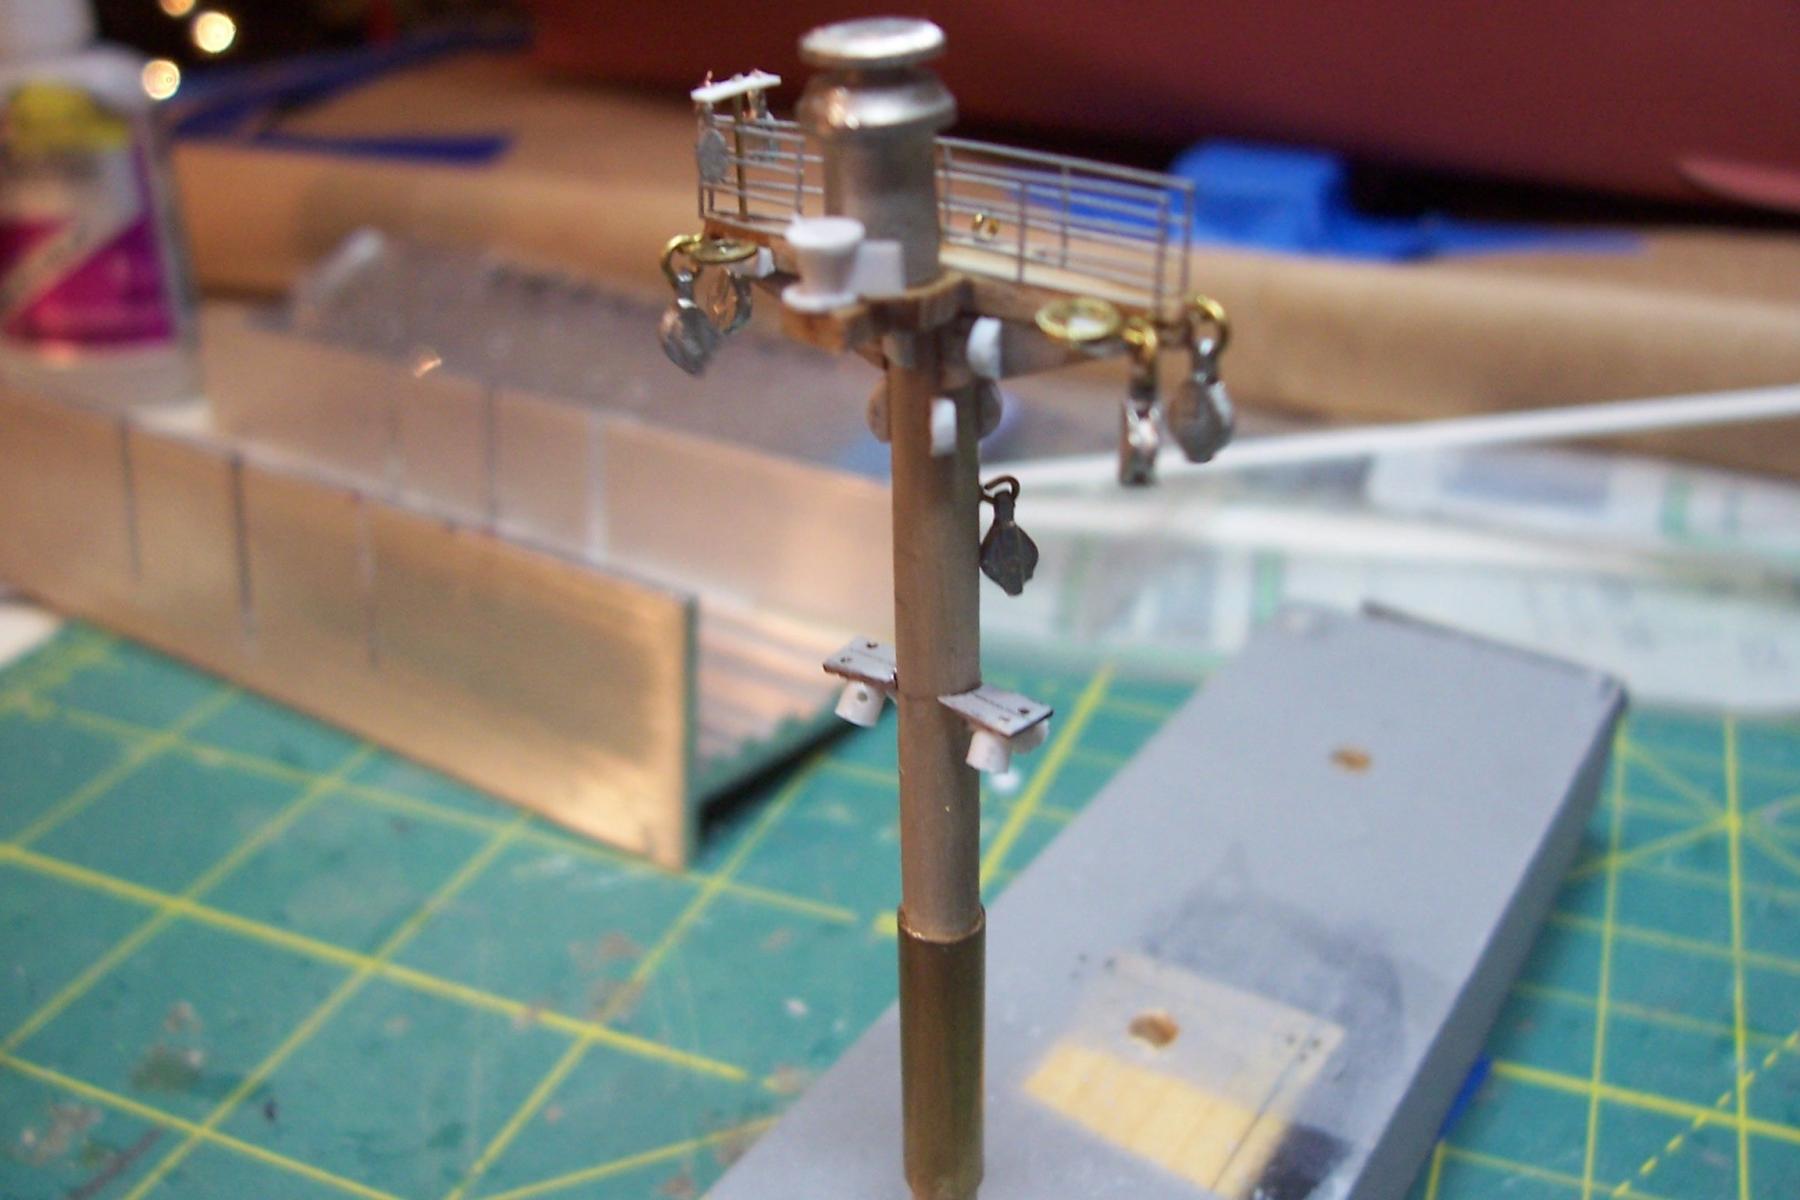
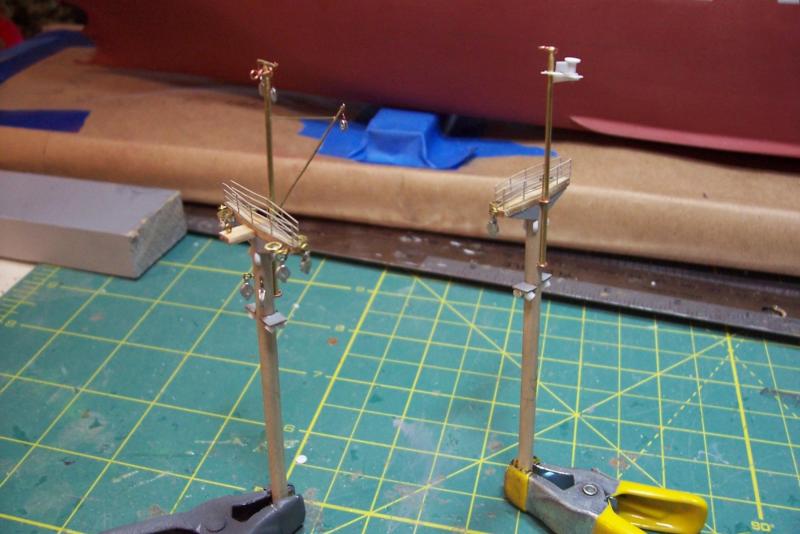
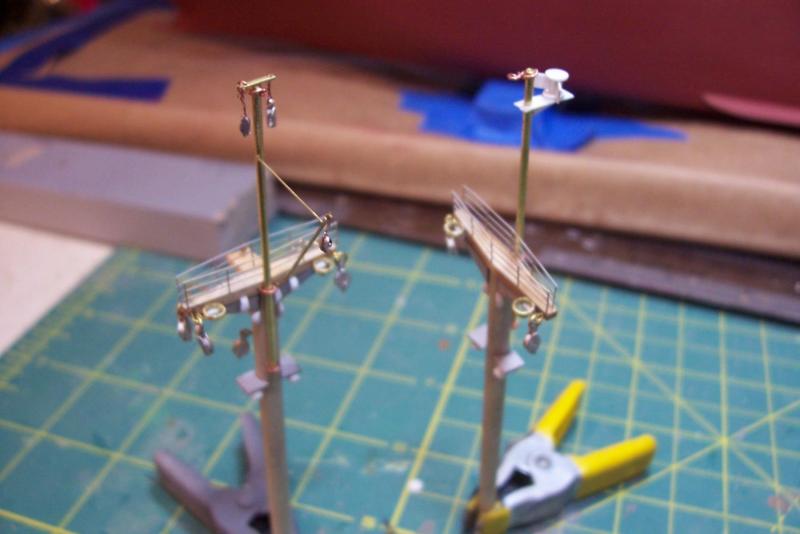
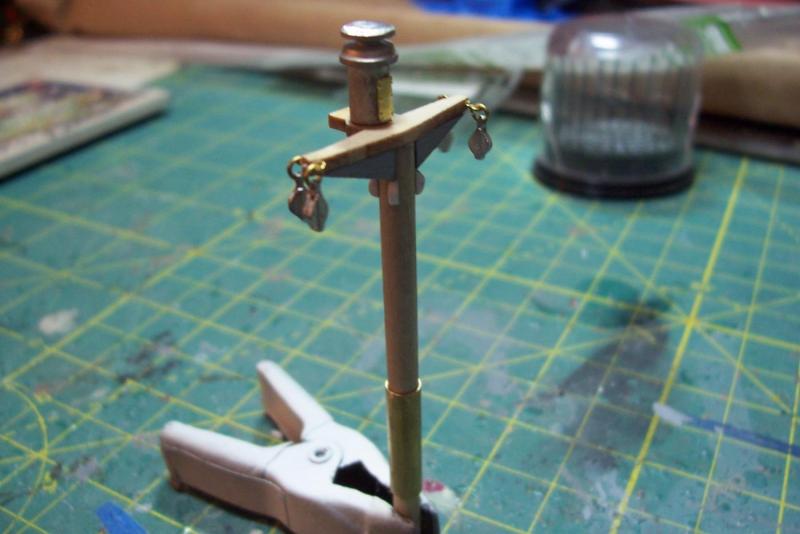
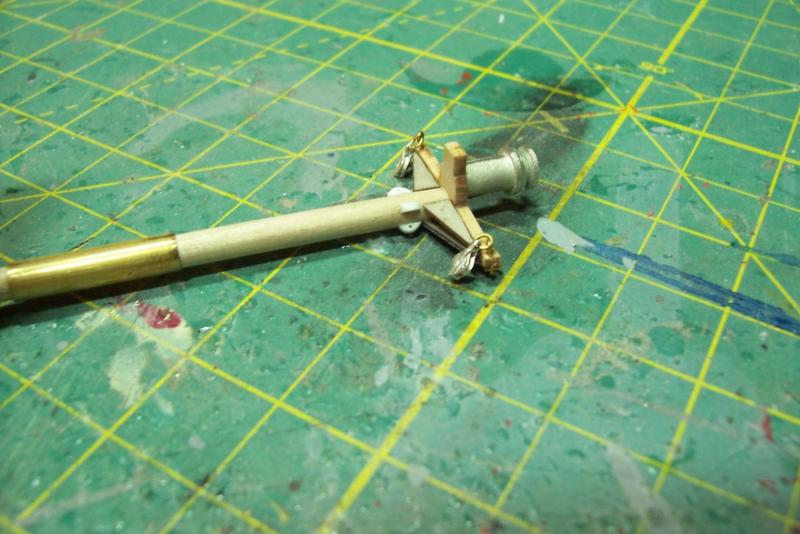
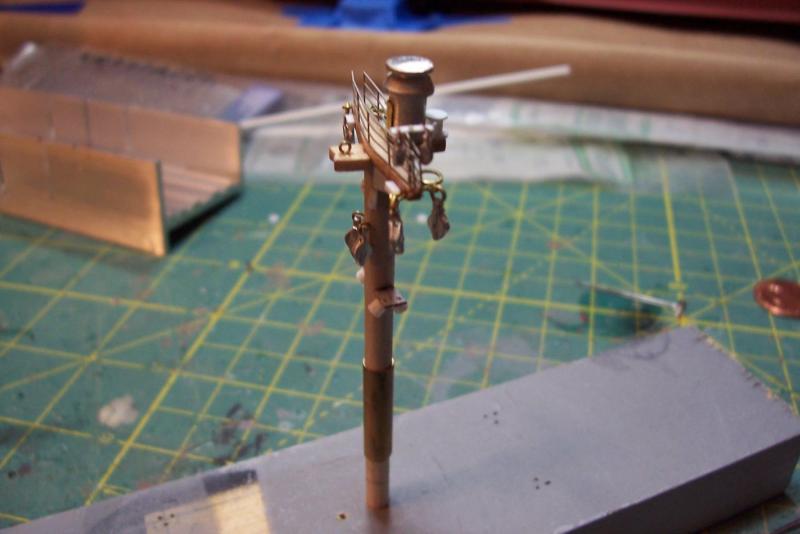
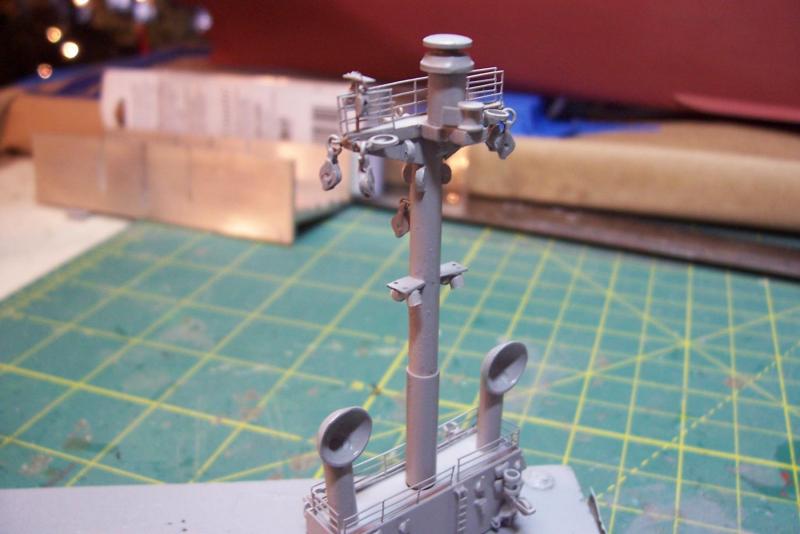
Main & Mizzen Masts Just like for the Fore Mast the kit provides dowels, laser cut wood, blocks, vertical ladders and eyes to make up the masts. They are basically the same except for the addition of the topmasts. Here’s what the masts, minus the ladders which will be added later, and the eyes which I replaced with scratch pad eyes: I added additional details to include railings, the Aft Range Light, jib for the flag, pad eyes for the stays and shrouds, cargo blocks for routing the jumbo boom rigging, rings for stowing the 5-ton booms in the vertical position, and working lights (lenses for the lights will be added after the final painting).


- 227 replies
-
- 15
-
-
- BlueJacket Shipcrafters
- Stephen Hopkins
- (and 2 more)
-
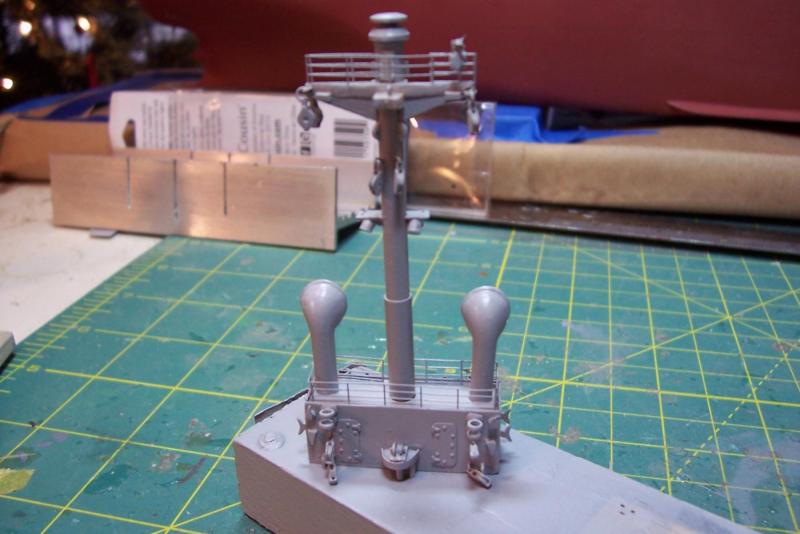
Masts The kit provides dowels, laser cut wood, crow's nest, blocks, vertical ladders and eyes to make up the masts. Here’s what the Fore Mast looks like, minus the ladders which will be added later, and the eyes which I have replaced with scratch pad eyes: I added additional details to include railings, the Forward Range Light, halyard blocks, pad eyes for the stays and shrouds, cargo blocks for routing the jumbo boom rigging, rings for stowing the 5-ton booms in the vertical position, and working lights (lenses for the lights will be added after the final painting). Here’s the finished mast dry-fitted to its mast house:

- 227 replies
-
- 18
-
-
- BlueJacket Shipcrafters
- Stephen Hopkins
- (and 2 more)
-
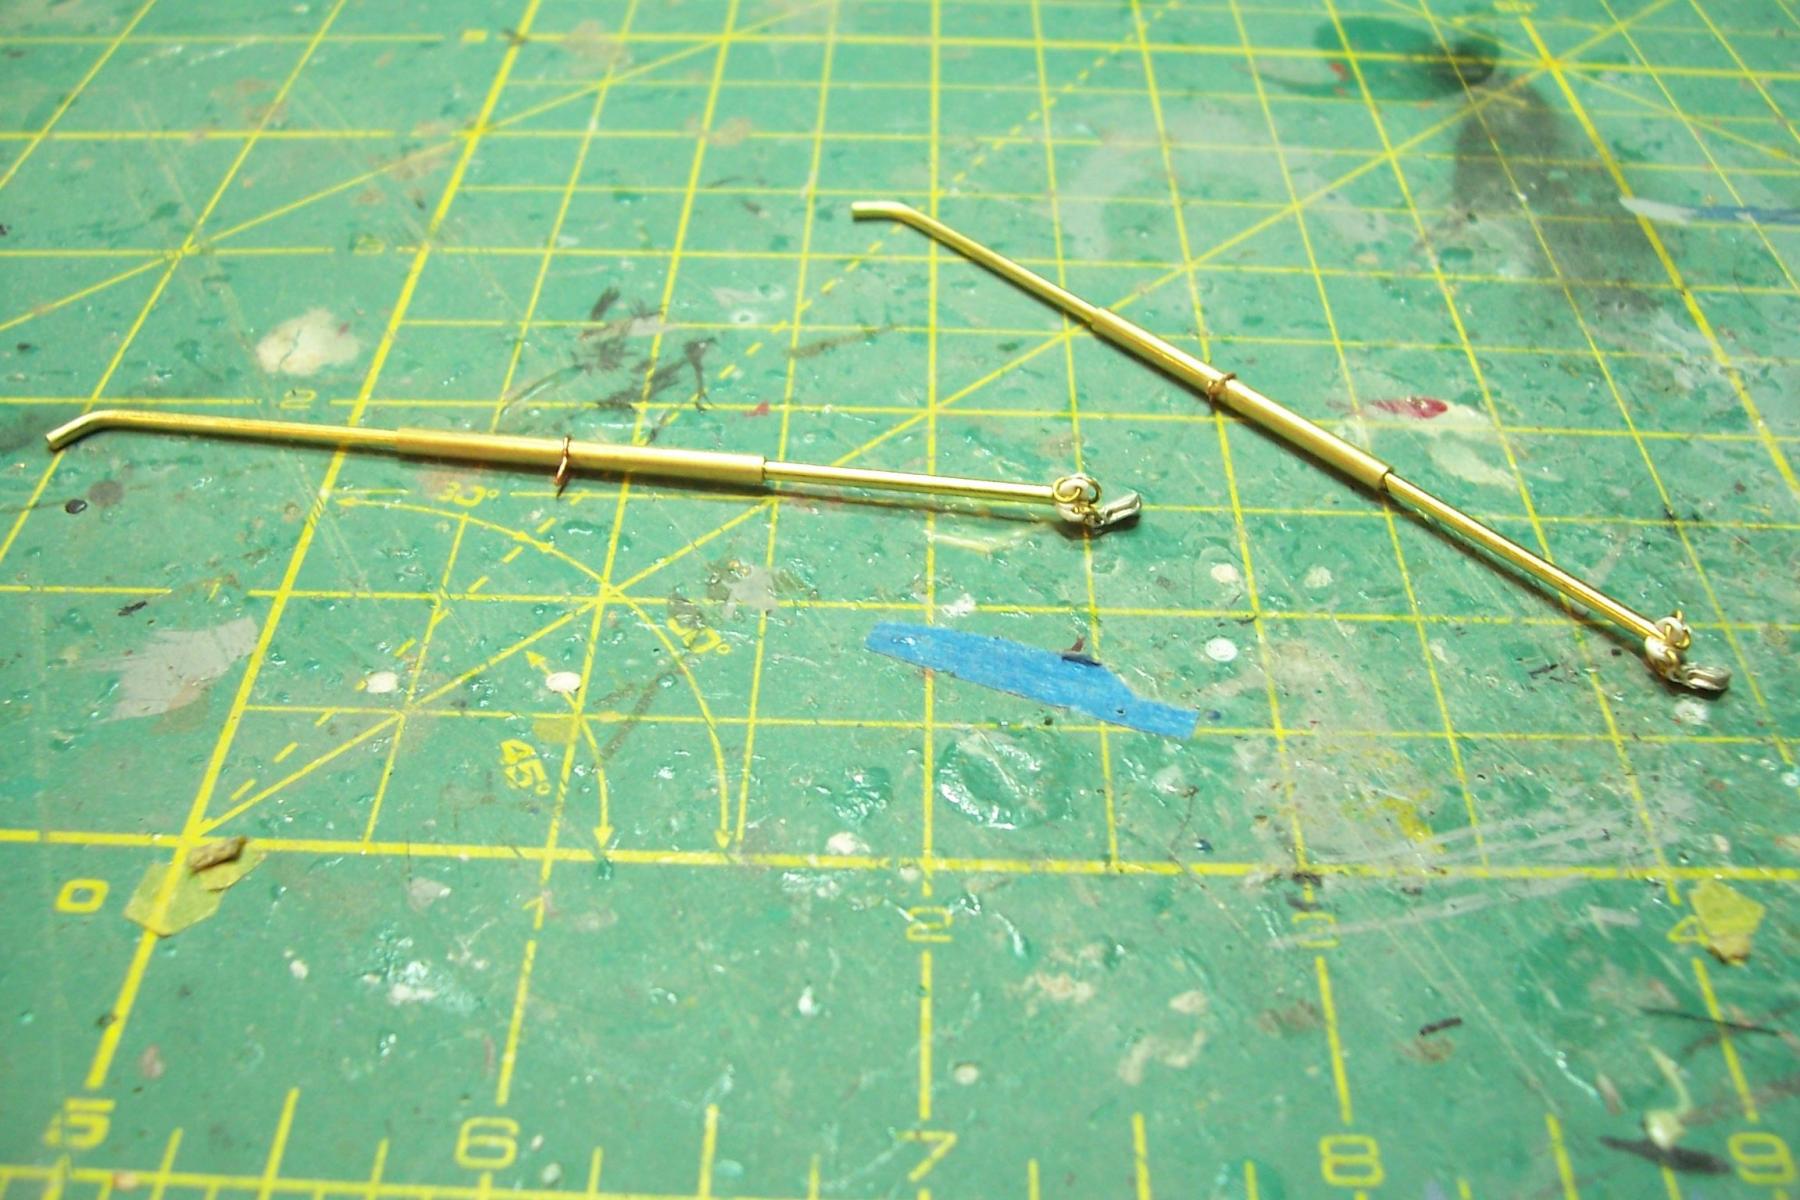
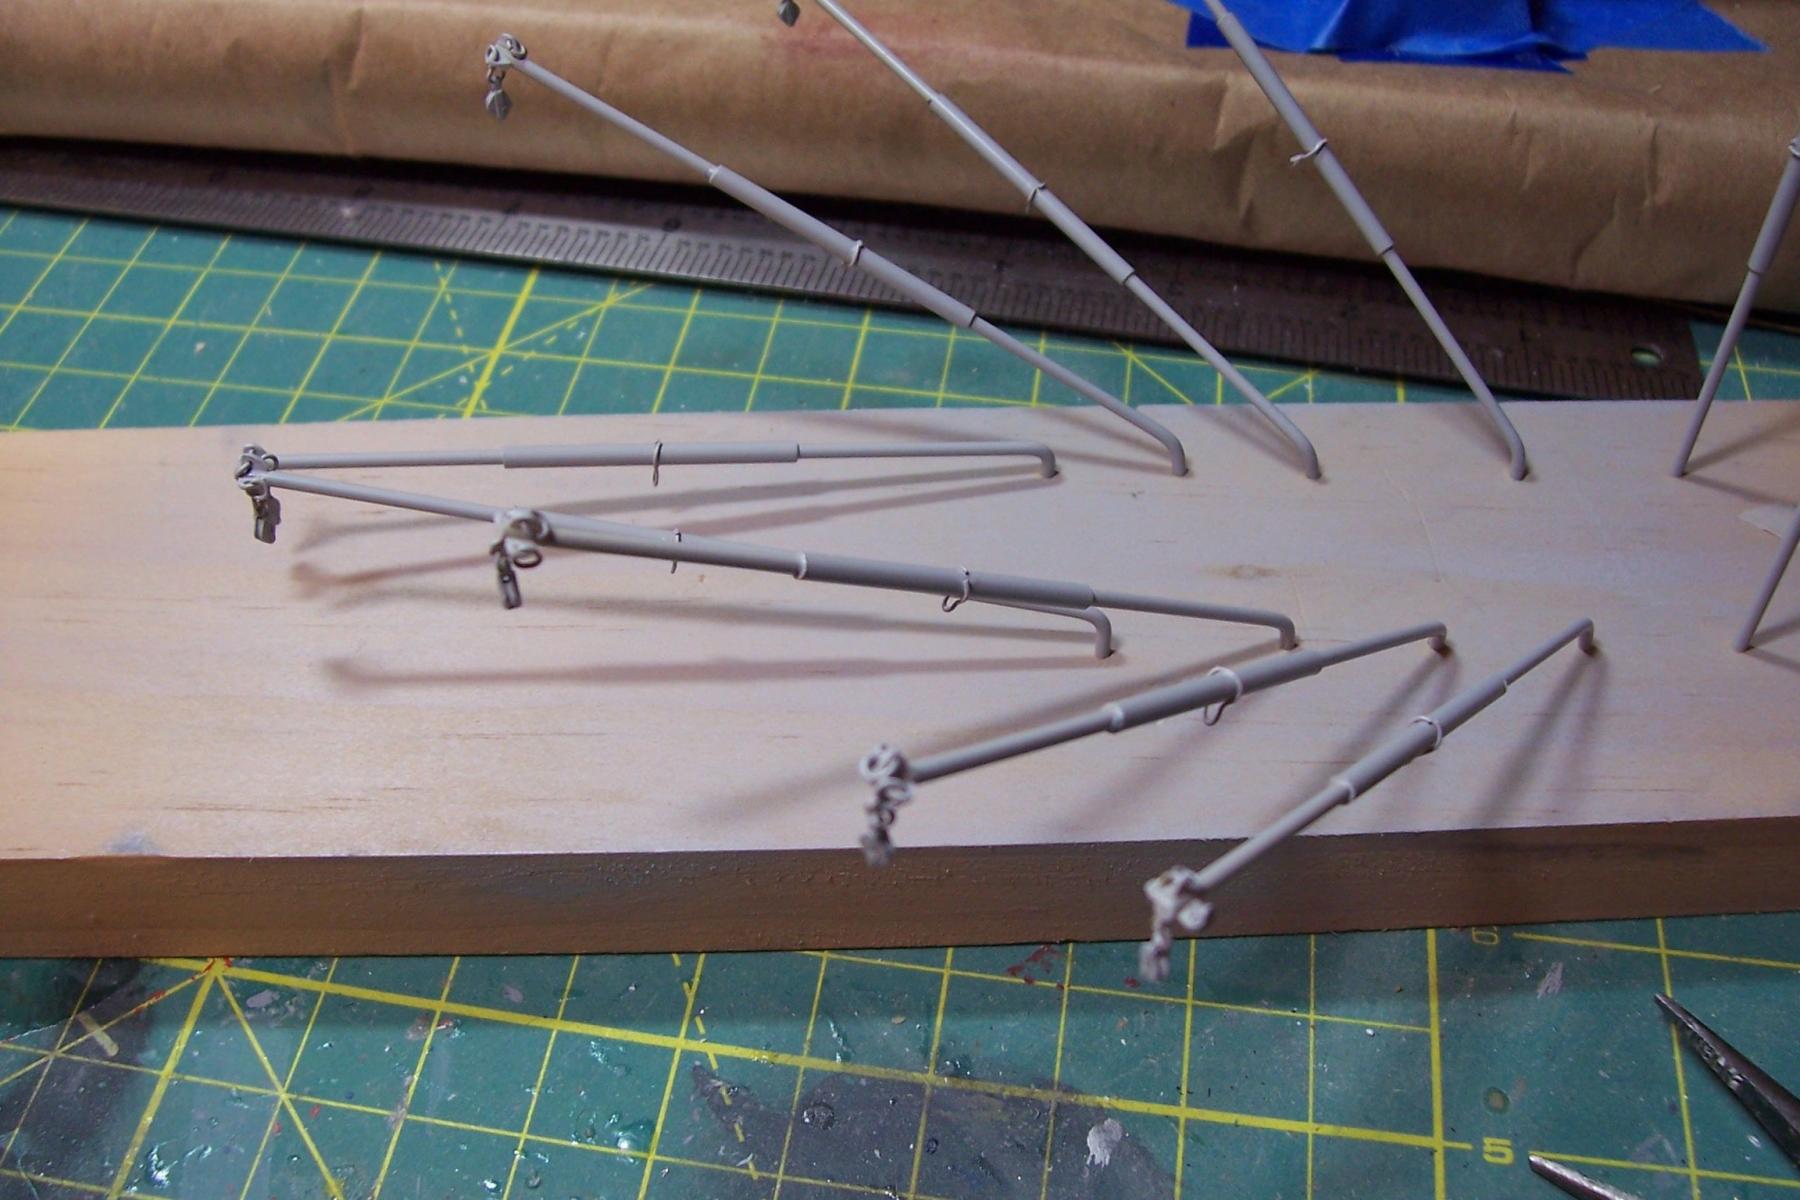
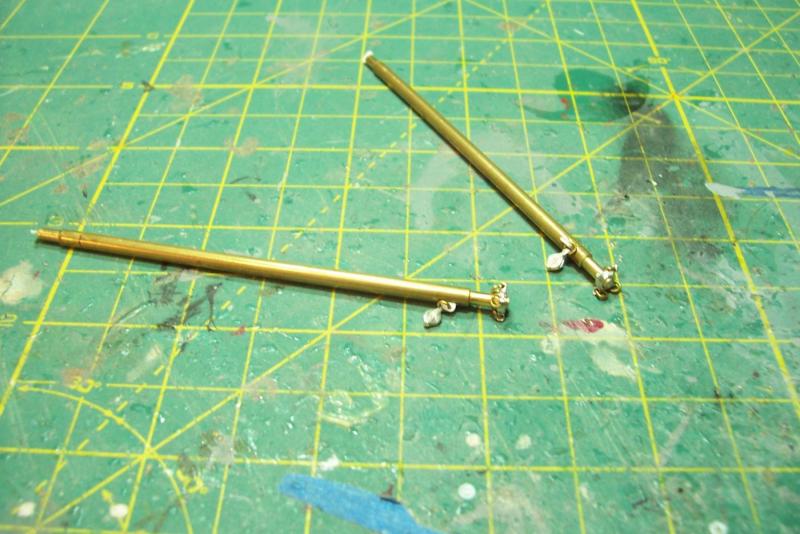
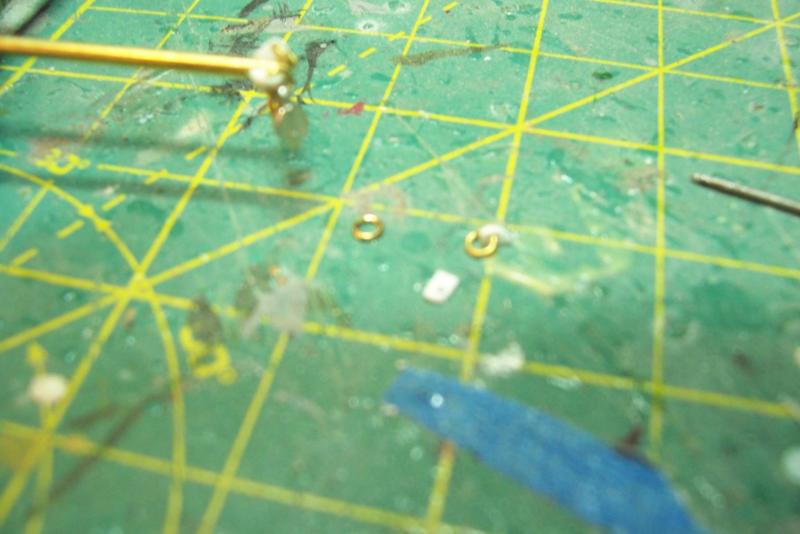
Thanks for all the likes and comments. Cargo Booms The two “Jumbo” booms (50 and 30 tons) are made up of nested tubing. I departed from the plans by making mine thicker for most of their length, which is how they look on the SS John Brown. The plans call for 2 eyes on the end of the boom but since I hope to go totus porcus on the rigging I will need 4. The eye bands available from BlueJacket work well so after drilling out the flanges they were easy to add. The ten 5-ton booms are also made up of nested tubing. Here I also need 4 eyes on the ends but the eye bands looked oversize so I made individual ones from strip plastic and 3/32 split rings. It got pretty tedious to drill, cut, shape, assemble, glue, drop into the carpet, cuss, and repeat 39 more times but I’m happy with the outcome. One less happy discovery was that the 5-ton booms would not fit into the kit-provided eyes that I had already attached to the mast houses. Even when opened up with pliers they still did not work. I found that the pad eyes from the BlueJacket catalog worked fine. The only problem was that their circular bases were too wide but they were soft enough that I was able to trim them with a Dremel sander. Here’s the replacements on the left, the original eyes are on the right:


- 227 replies
-
- 15
-
-
- BlueJacket Shipcrafters
- Stephen Hopkins
- (and 2 more)
-
Stunning work Rod - your build is one of the few that can stand up to close-up photos. The stand is a nice finishing touch - doesn't distract from the model. So, what's next?
- 68 replies
-
- 4
-
-
- Arleigh Burke
- BlueJacket Shipcrafters
- (and 1 more)
-
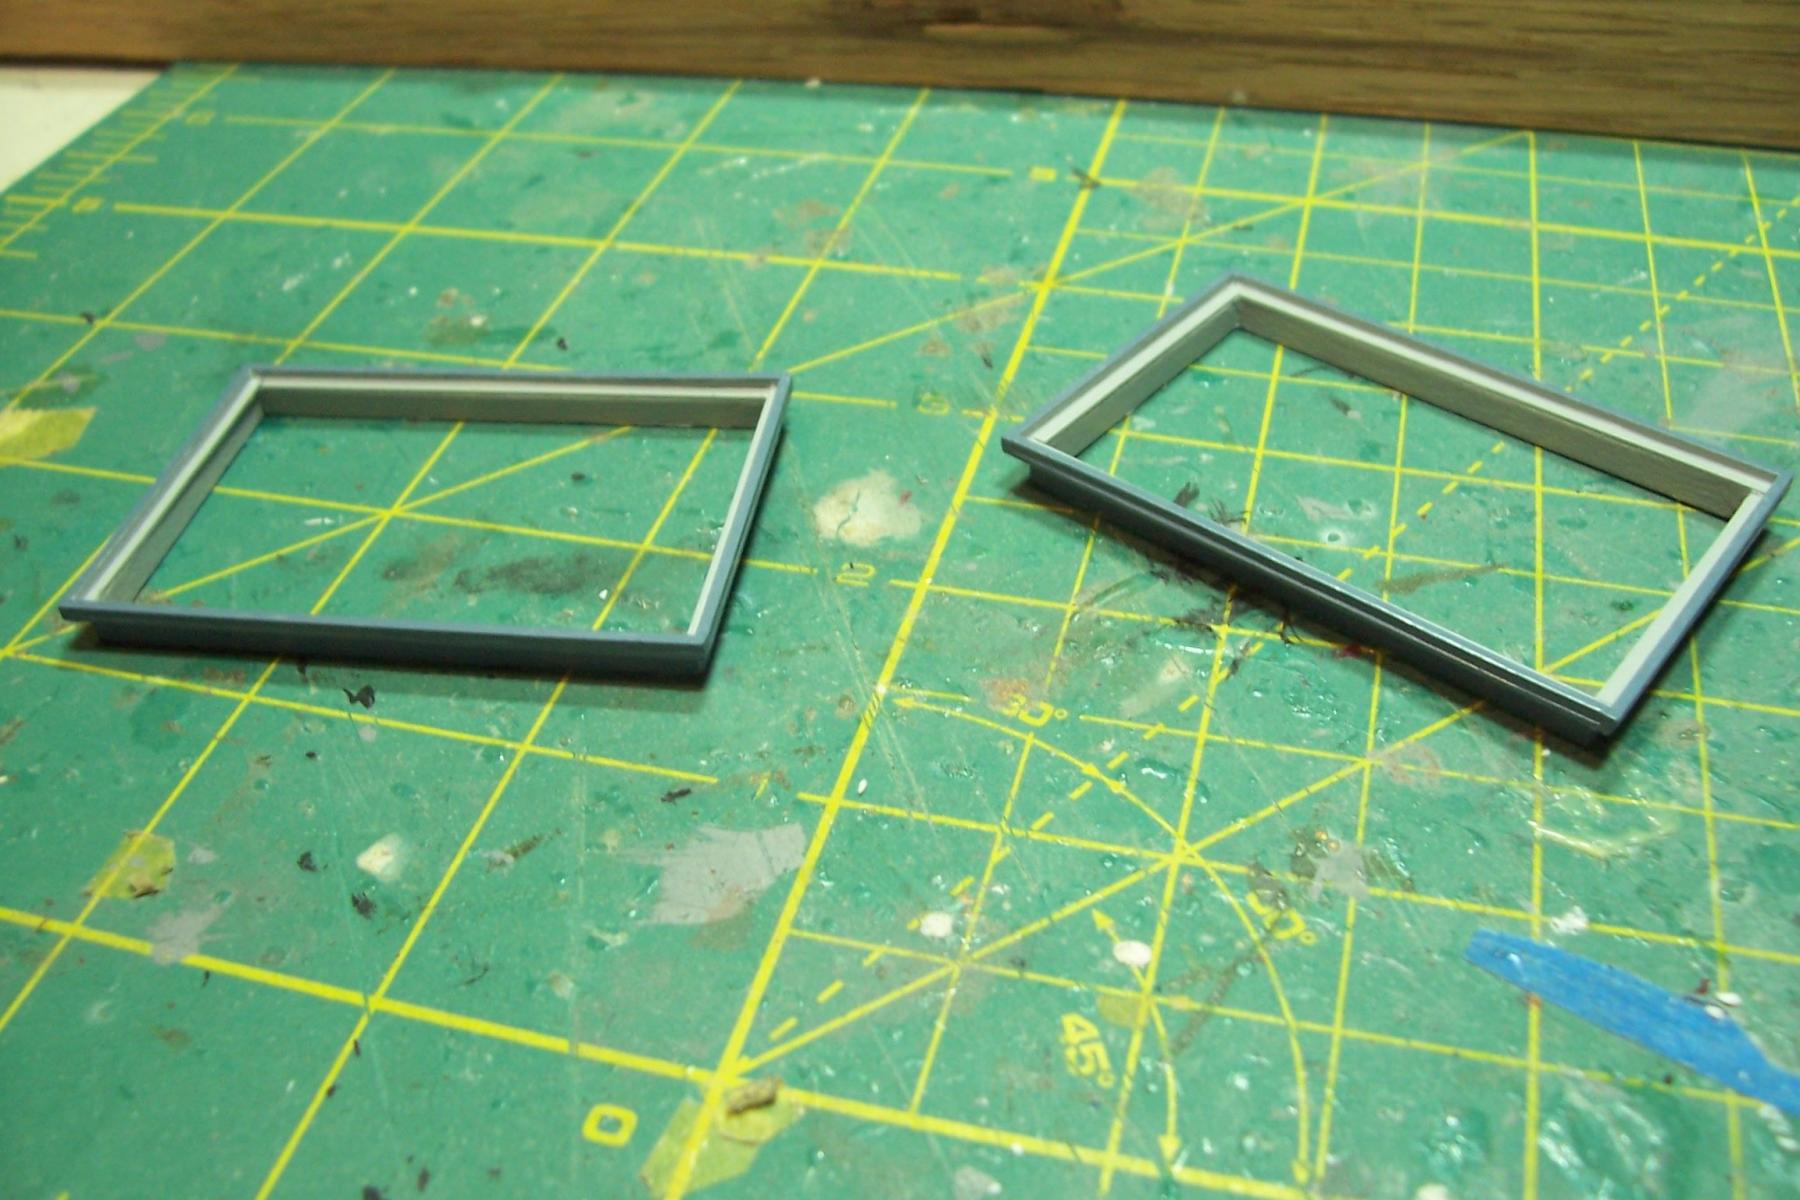
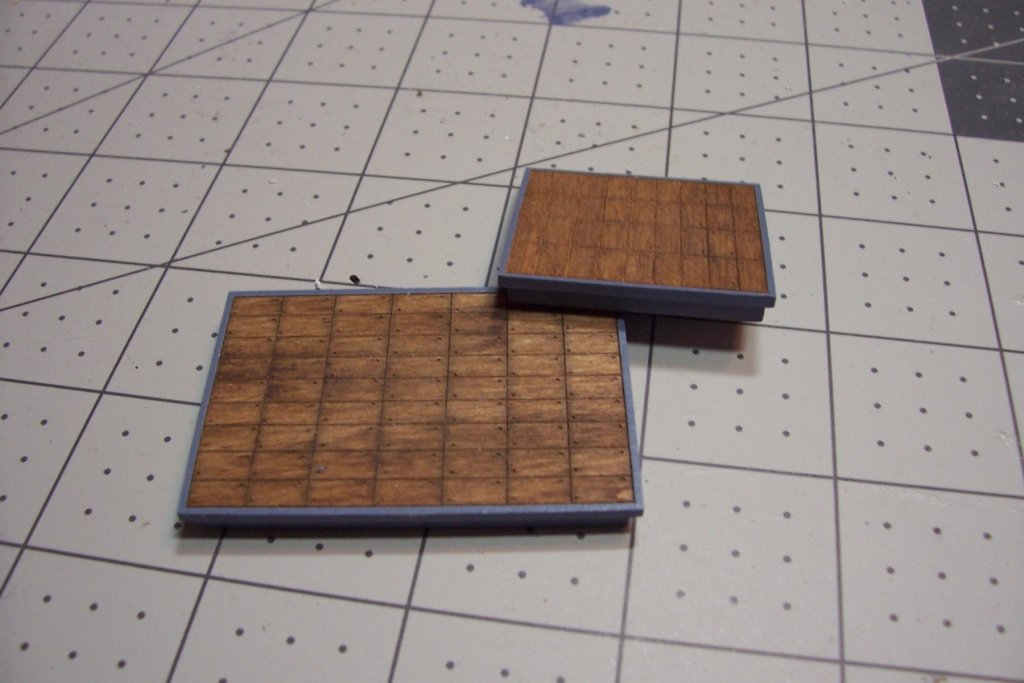
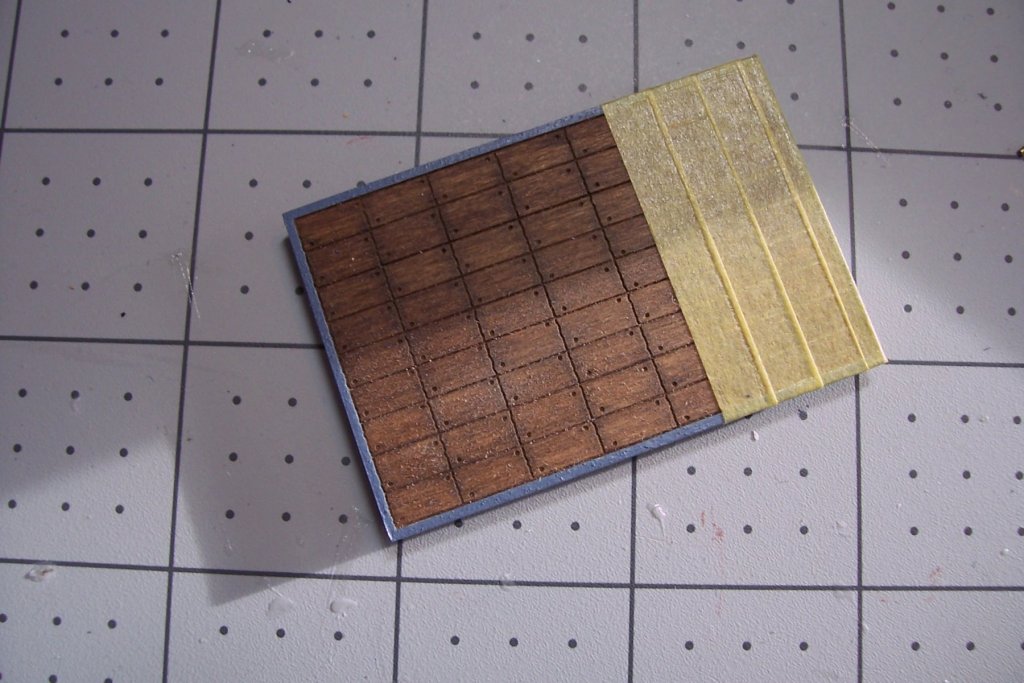
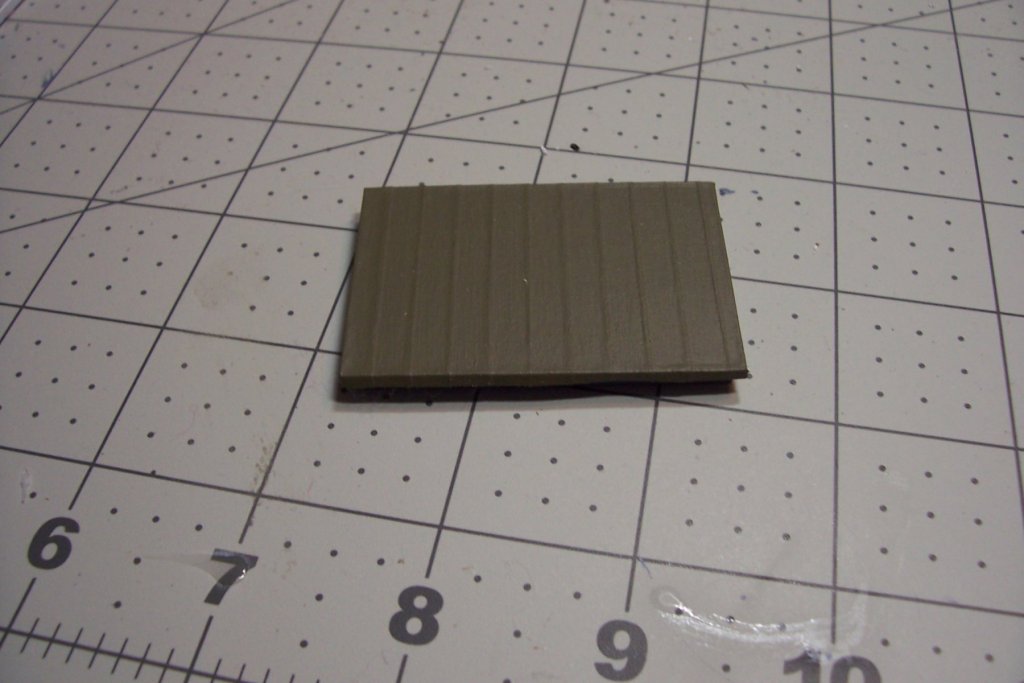
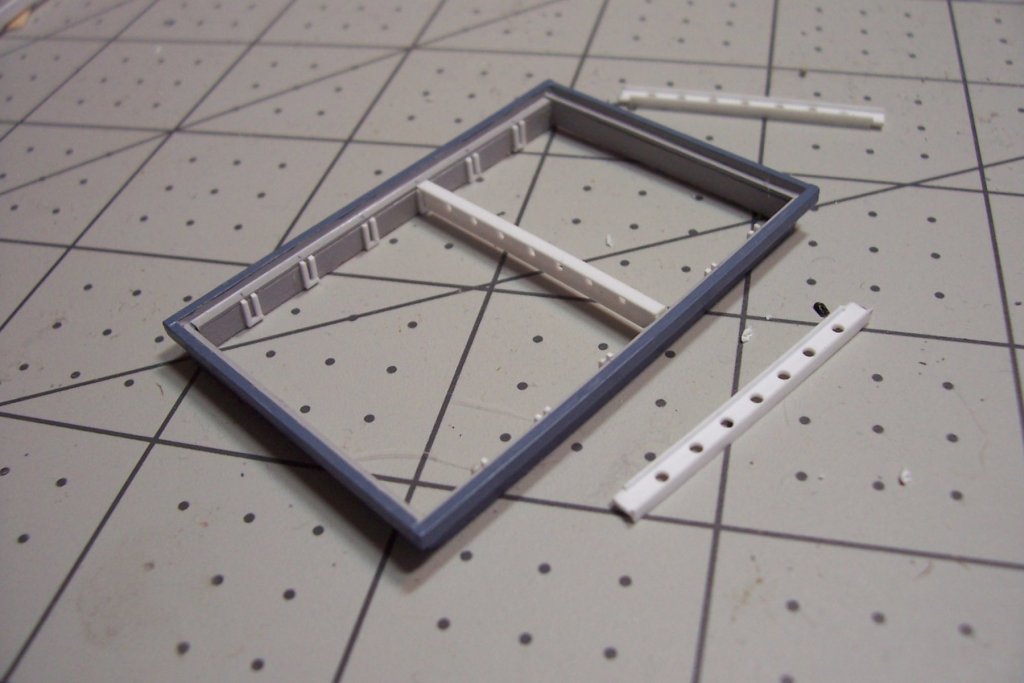
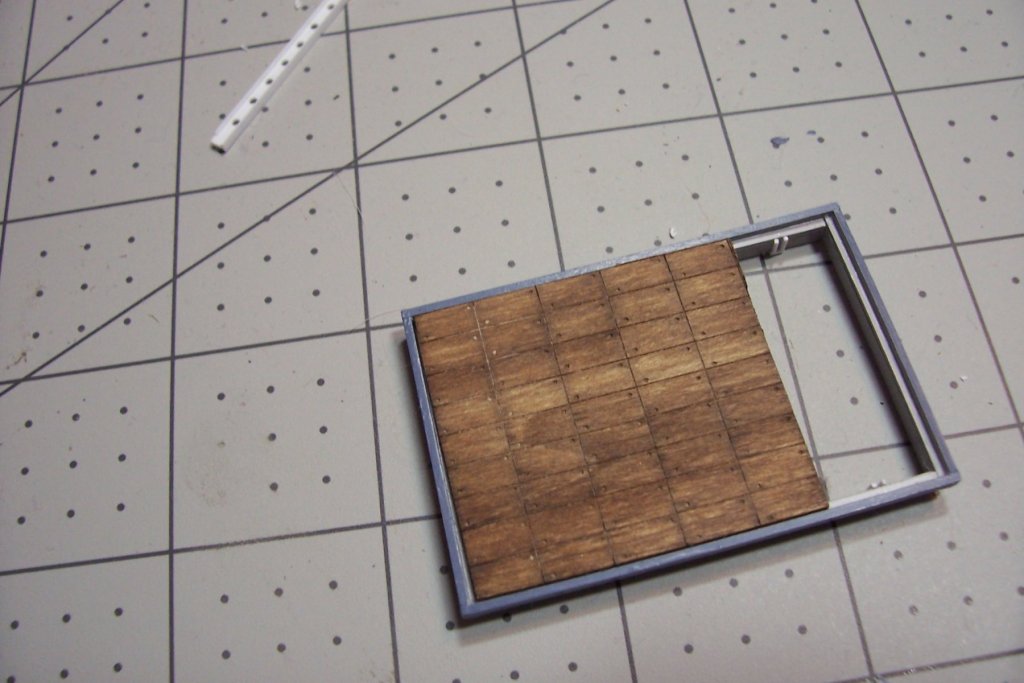
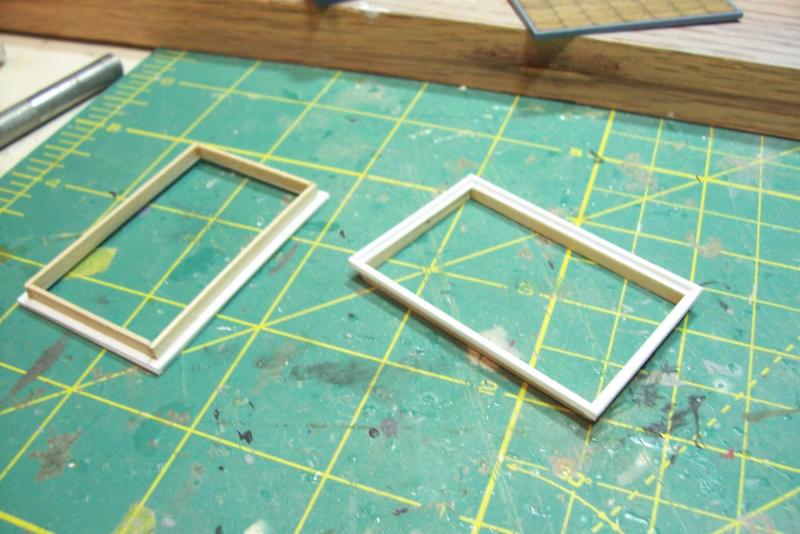
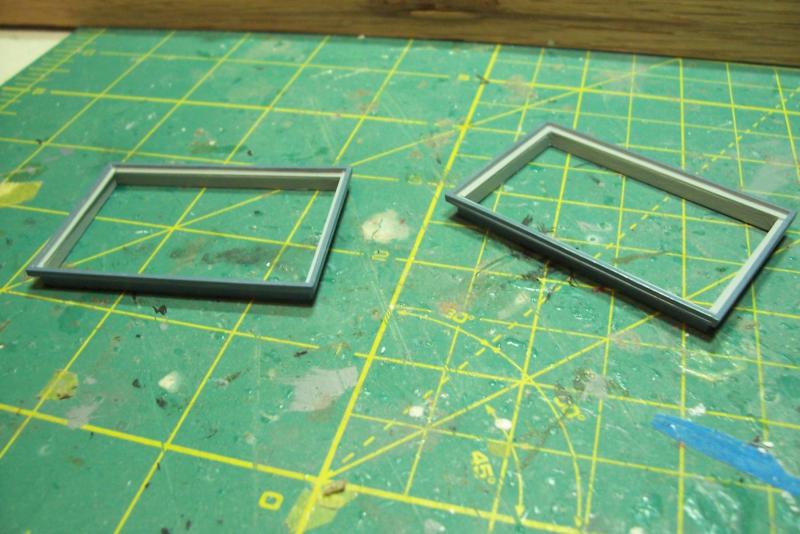
Hatch Covers Not much progress on the model itself lately. I've been building and finishing the display board and running it out to a plastic company who made the display case for me. I needed the display board done this early because right after I paint the hull I'll mount it on the board so I don't have to handle it anymore. The kit provides 2 laser cut pieces to form each hatch coaming and cover, the covers are etched to show the individual hatch covers - you can find them as tables in the cocktail lounge of every cheesy seafood place with a name like “The Rusty Scupper.” I built up 3 of them for the 3 hatches that I will leave closed/covered. For the 2 hatches that will be (hopefully) either full or partially open I had to scratch the coamings. After several attempts I got 2 that are square and the right dimensions. I’ll add details like hatch beams, etc, later on. Next up will be the final sub assemblies and then it will be time to paint the hull.

- 227 replies
-
- 18
-
-
- BlueJacket Shipcrafters
- Stephen Hopkins
- (and 2 more)