schooner
-
Posts
741 -
Joined
-
Last visited
Content Type
Profiles
Forums
Gallery
Events
Everything posted by schooner
-
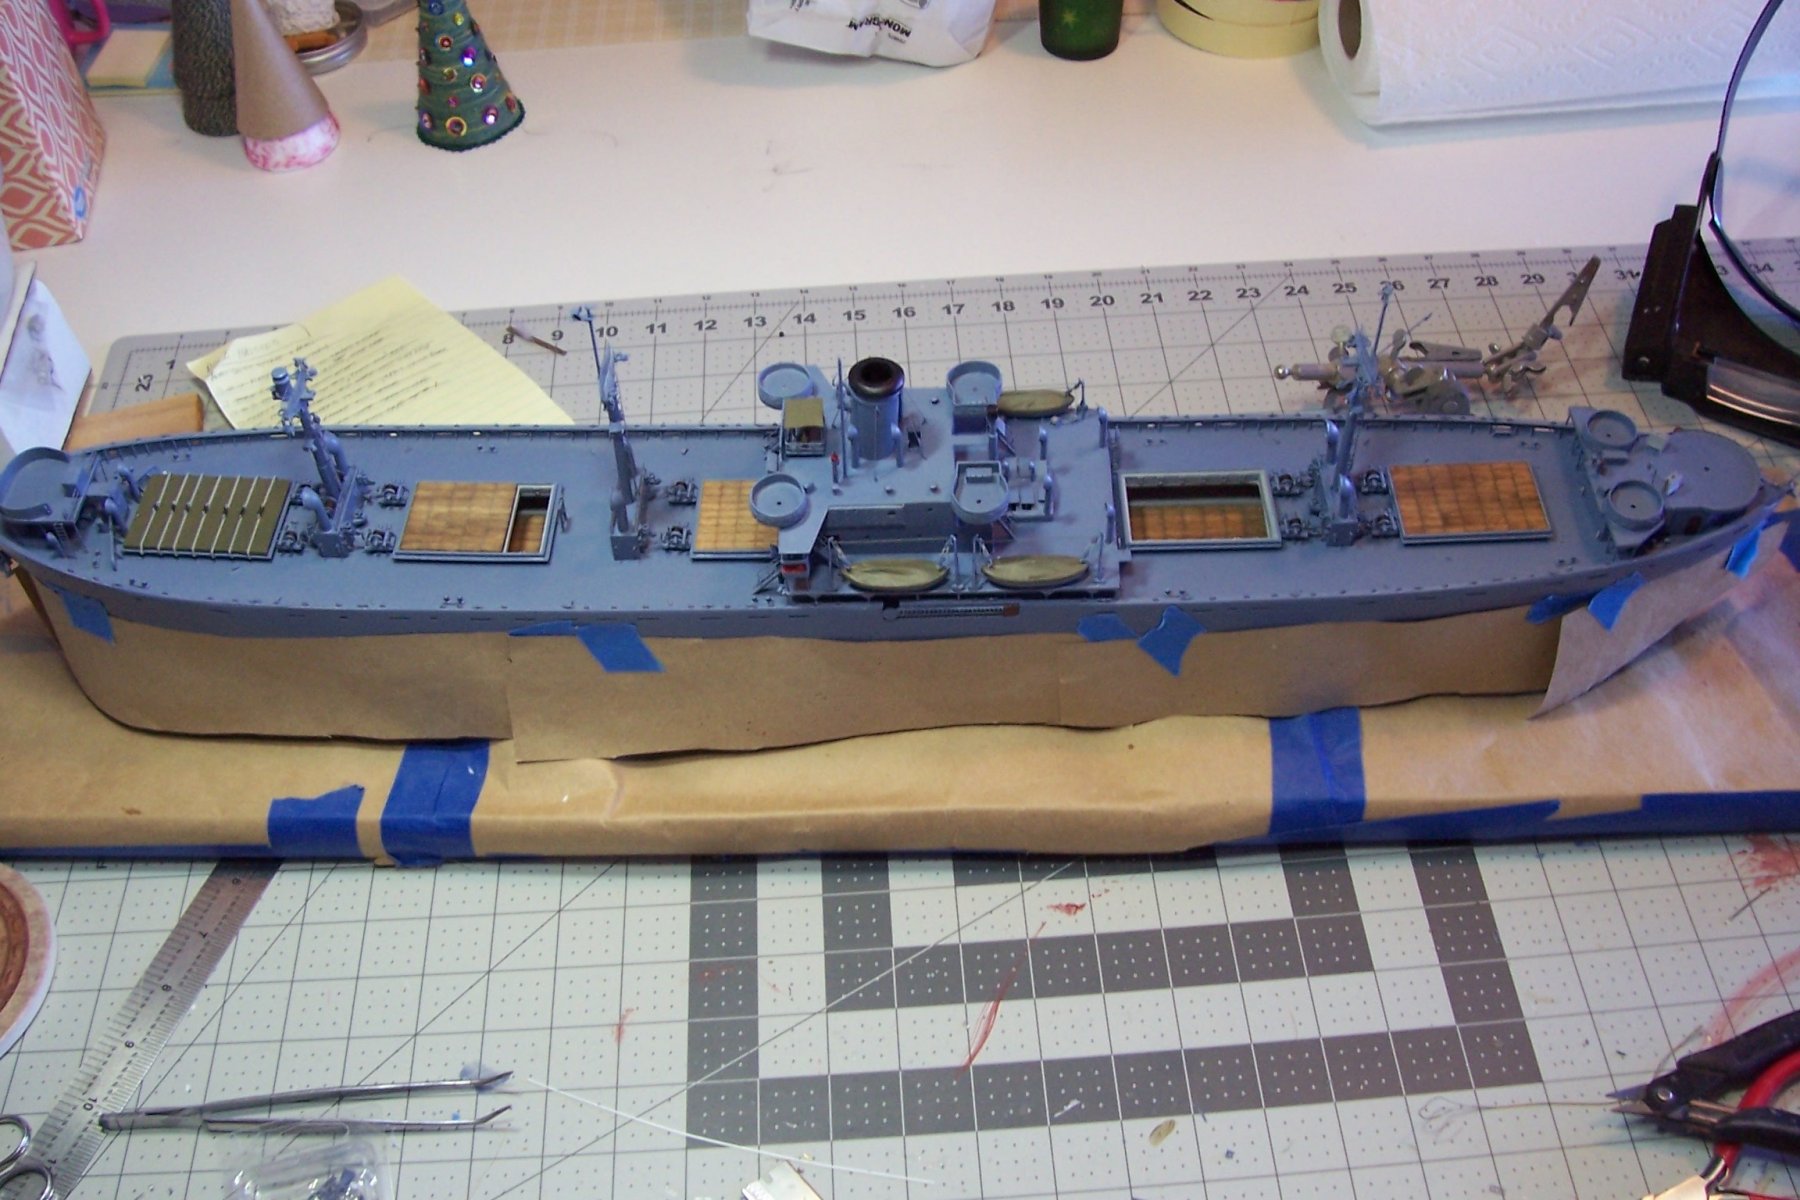
 Deck Details Although I have been spending a fair amount of time on the build lately there isn’t much to show for it since it has all been detail work with small strip plastic and wire. Anyway, the steam and fireman piping/shielding is all in, the fire stations installed (most are on the port side), and about 80 pad eyes are almost all in along the hatches and in the waterways. The pad eyes will be important when rigging the booms but since I'm not sure which ones I will be using at this point they are all pinned to the deck for additional strength. The fireplugs and hose racks are from BlueJacket’s catalog, the fireplug hand wheels are from Northstar and the rest is scratch. I’ll probably fabricate the 50-cal machine guns next.
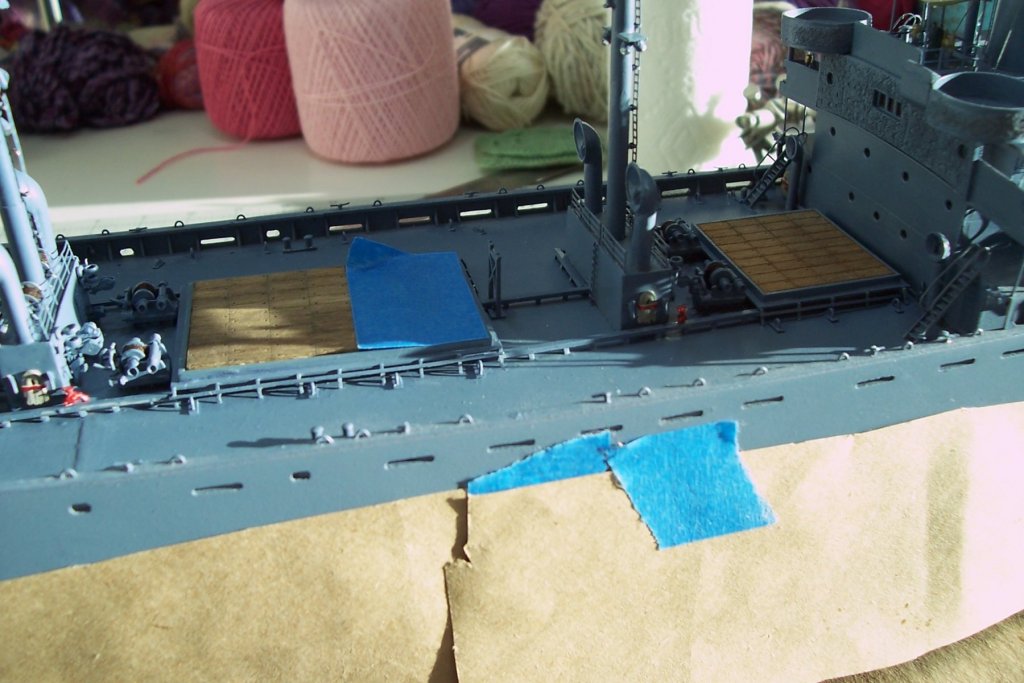


- 227 replies
-
- 8
-

-
- BlueJacket Shipcrafters
- Stephen Hopkins
- (and 2 more)
-
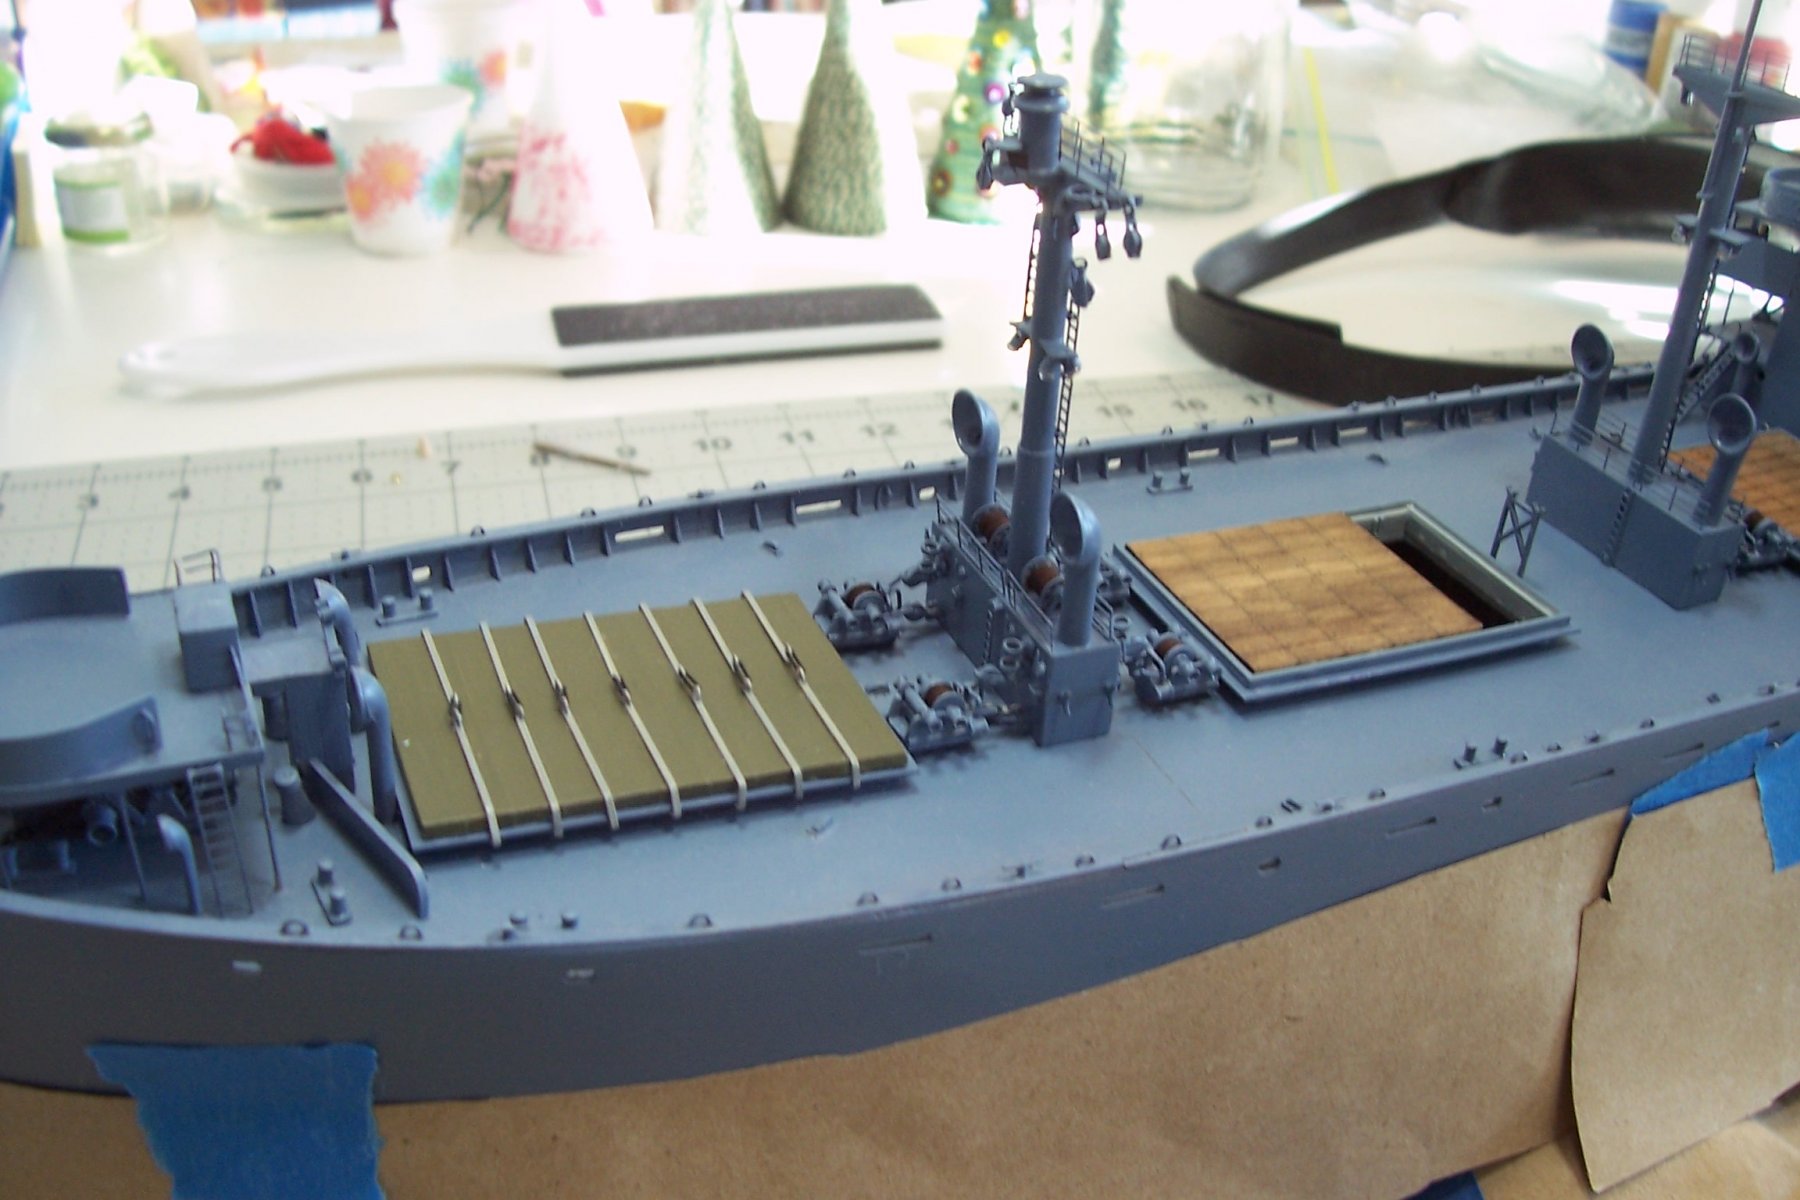
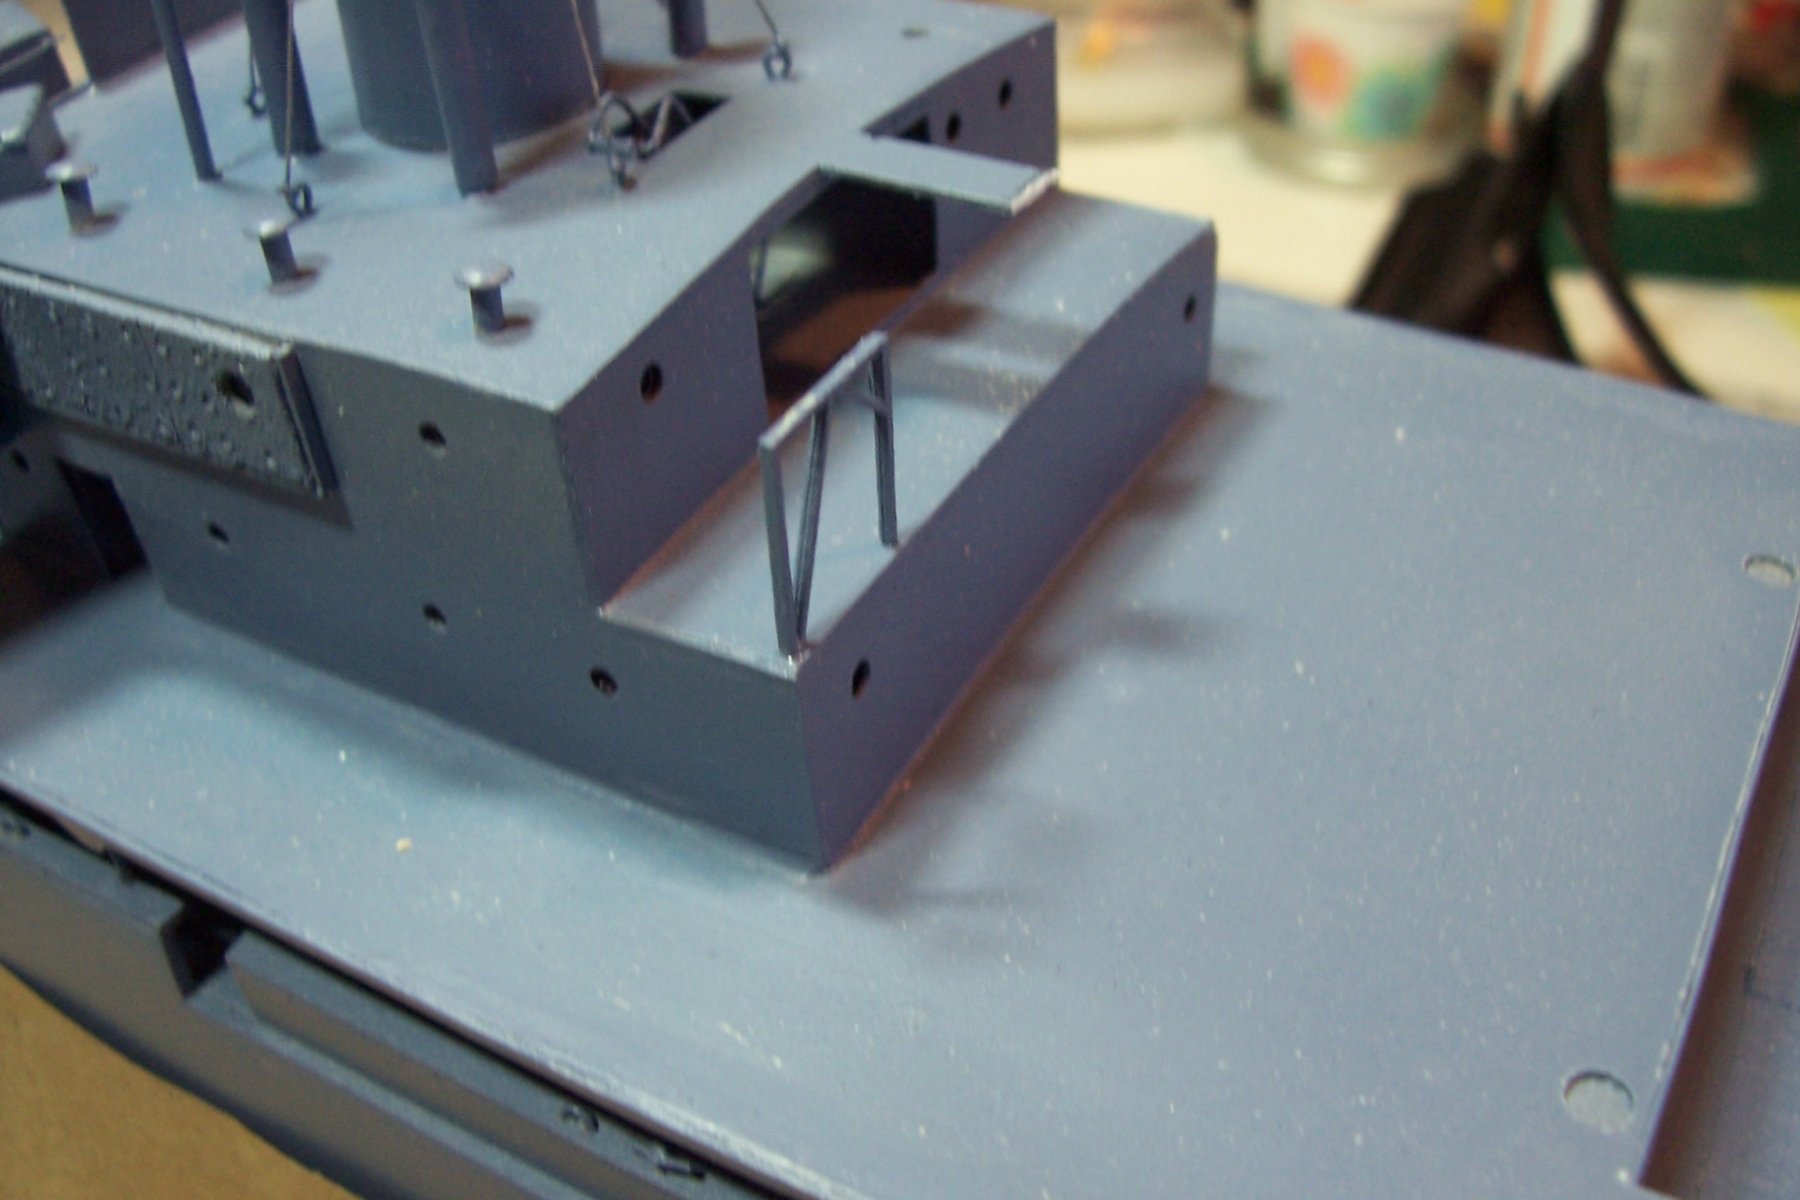
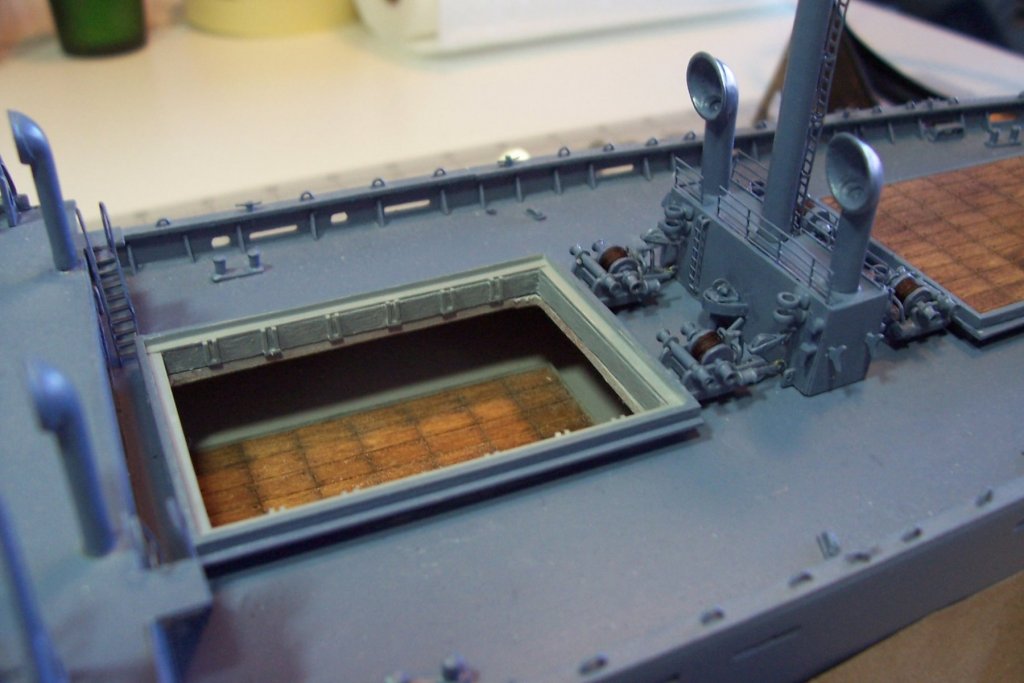
Steam Piping As I said in my first post for this log, one of the techniques used in the design of the Liberty ships to reduce costs and simplify building was to run piping outside the skin of the ship, mainly steam and fireman lines. The steam lines ran along the stbd side of the ship and the fireman lines along the port. Because any exposed piping on the main deck would be a high risk of getting squashed by a load of cargo, they were protected either by “fencing” along side the cargo hatches, or by overhead shielding in other areas such as between the hatches and the pipe runs to the winches and windlasses: I used small strip plastic to imitate both types-here the hatch on the left has the fencing: And here both types are done: I’ve still have a little more of the steam piping to go and then I’ll tackle the fireman - which will look the same except there will also be fire plugs and hose racks.


- 227 replies
-
- 7
-
-
- BlueJacket Shipcrafters
- Stephen Hopkins
- (and 2 more)
-
Hey Jack, nice to see another Lib build underway, I've got a build log here for BlueJackets 1/192 scale Liberty. If you are interested in some onboard photos of the Brown this site has been a big help for me in detailing: http://www.geoghegan.us/brown/JWB-walkaround.htm best of luck
- 106 replies
-
- 7
-
-
- trumpeter
- john brown
- (and 2 more)
-
Thanks Nic, You have put out a great kit that would look super out of the box, but at this scale, and with plenty of online photo references, it is irresistible for an OCD type like me to detail to it the point of absurdity!
- 227 replies
-
- 1
-
-
- BlueJacket Shipcrafters
- Stephen Hopkins
- (and 2 more)
-
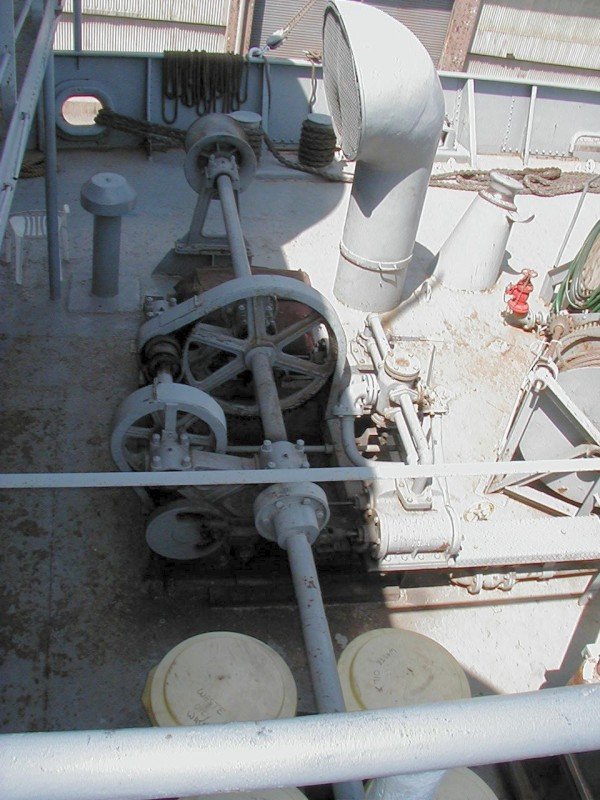
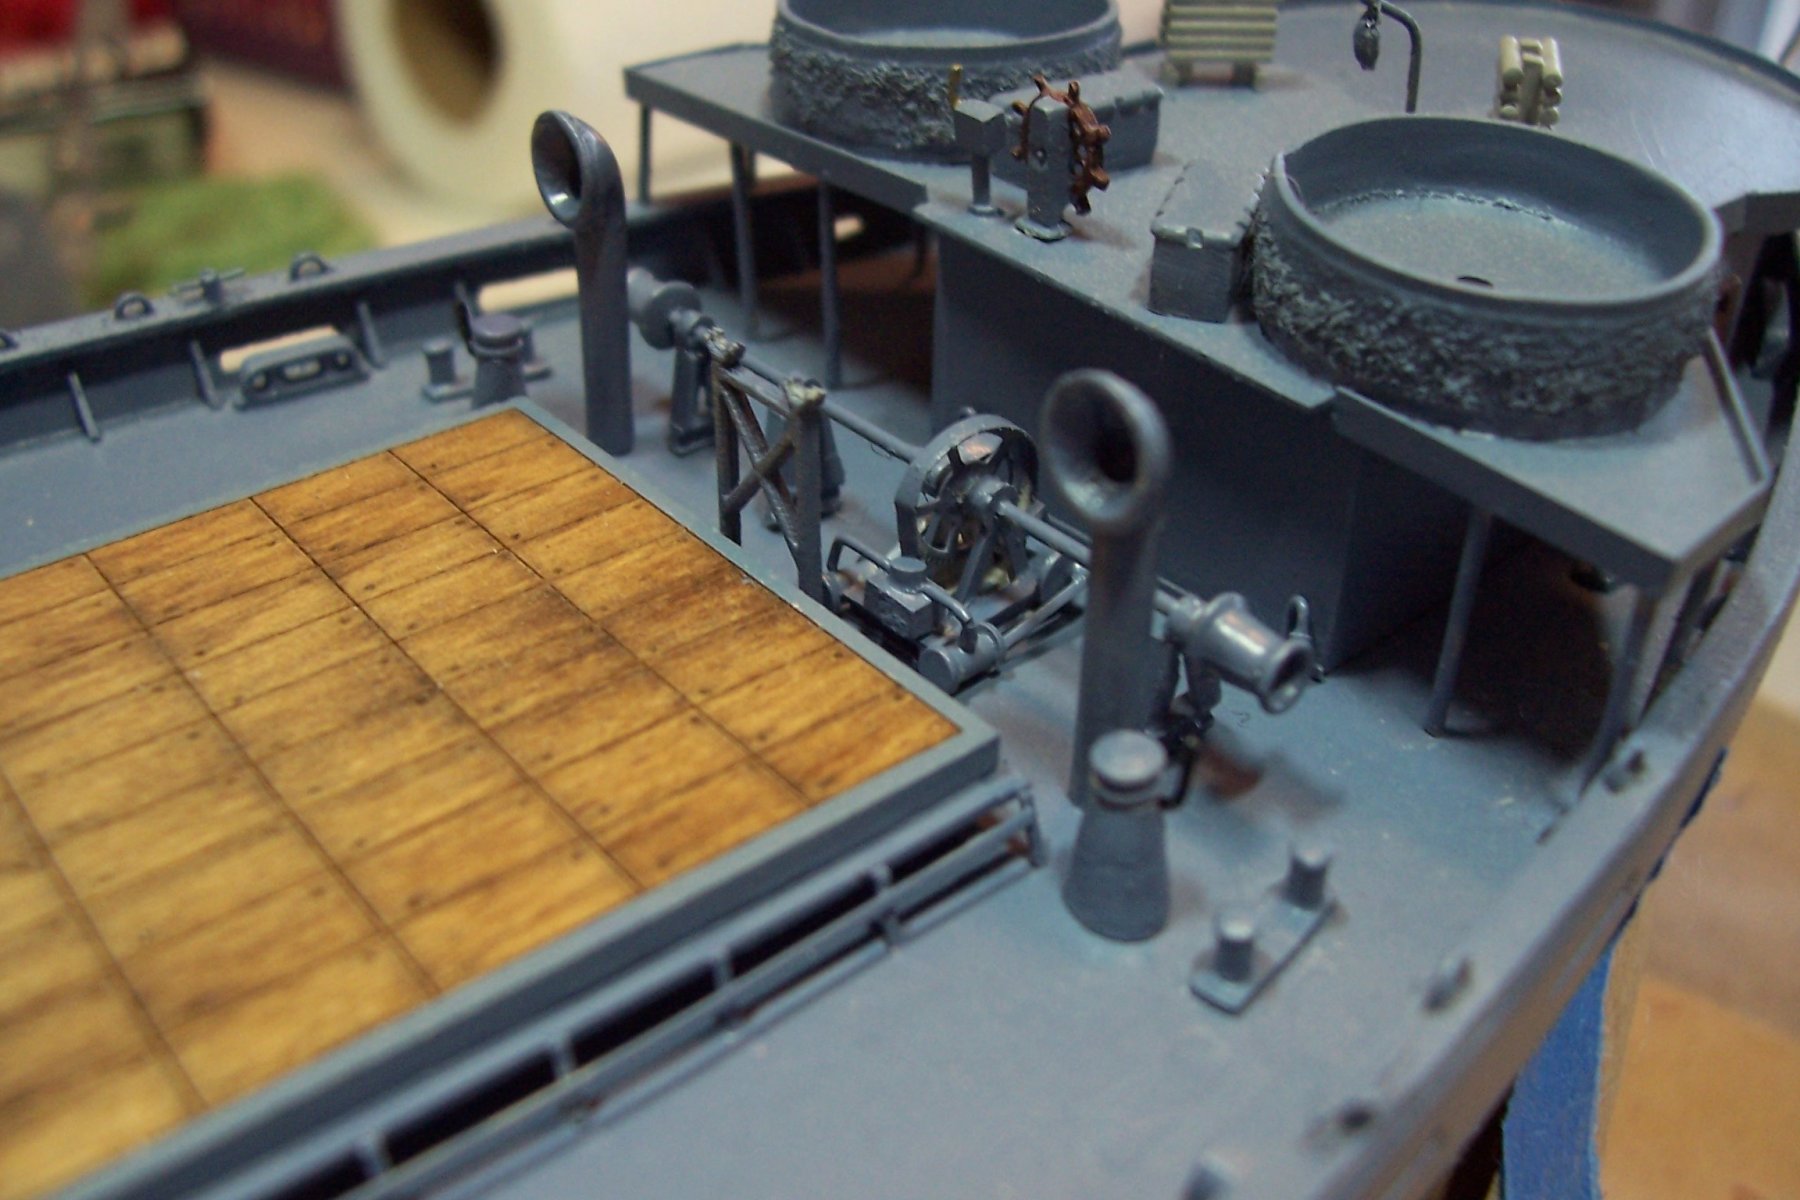
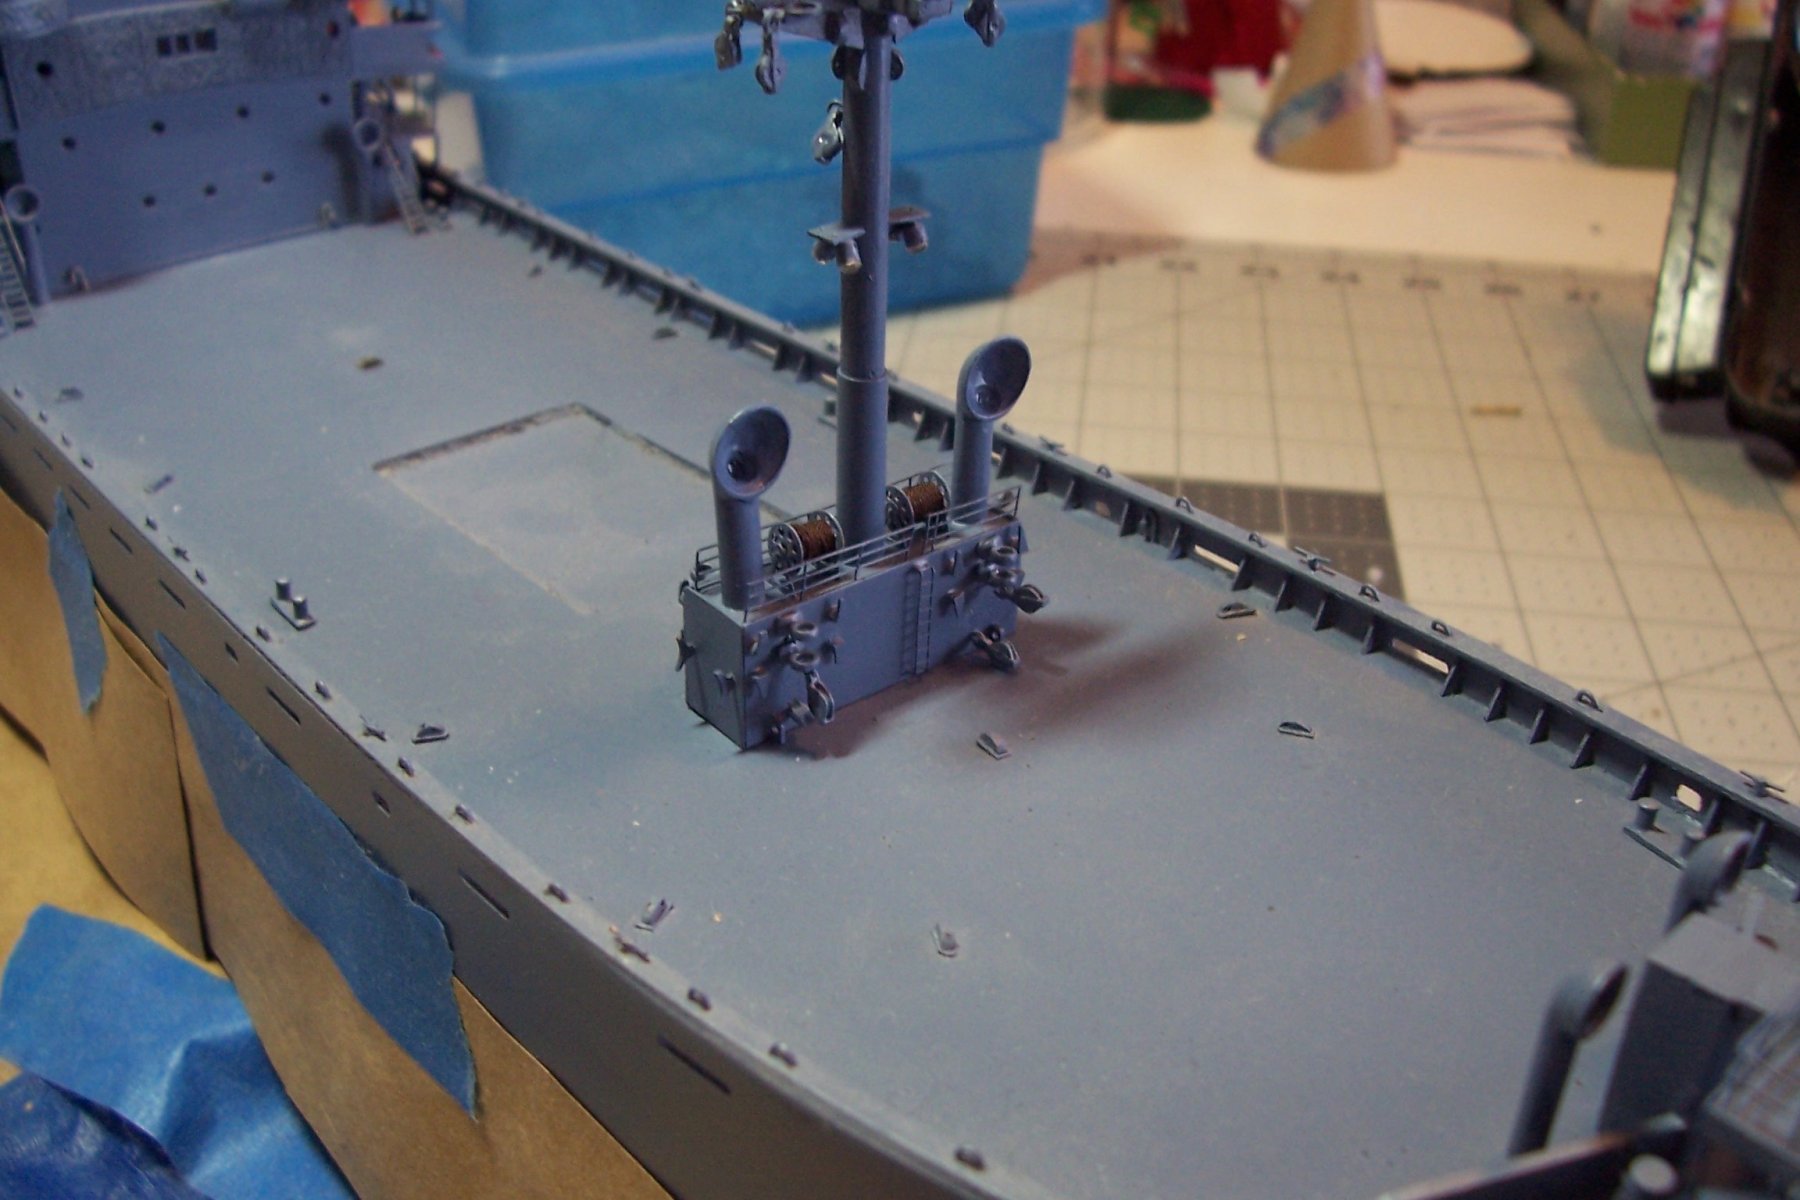
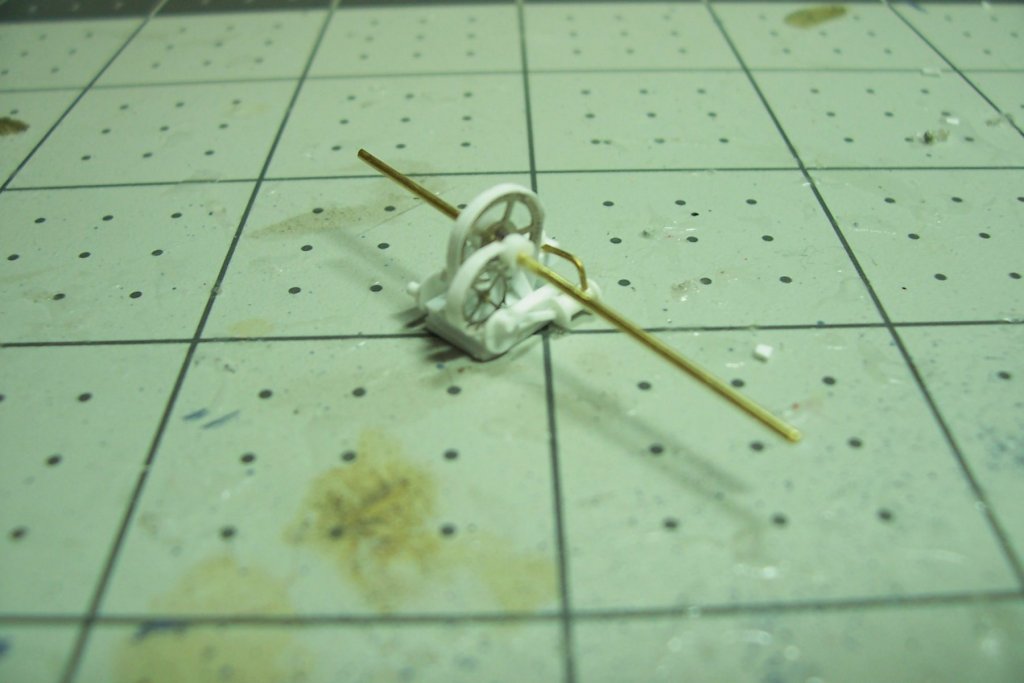
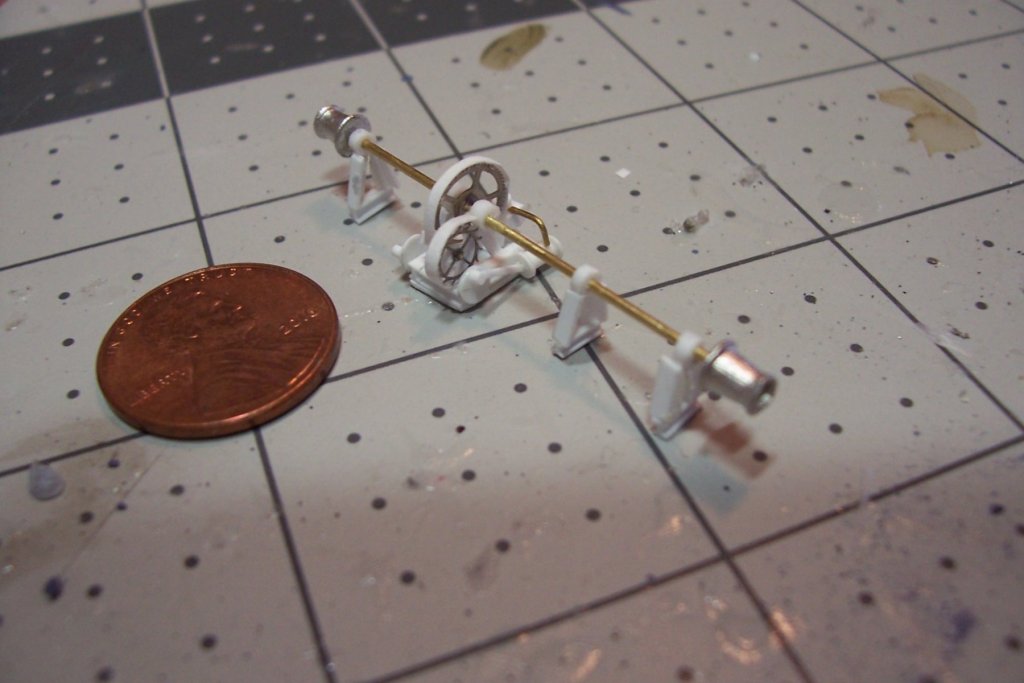
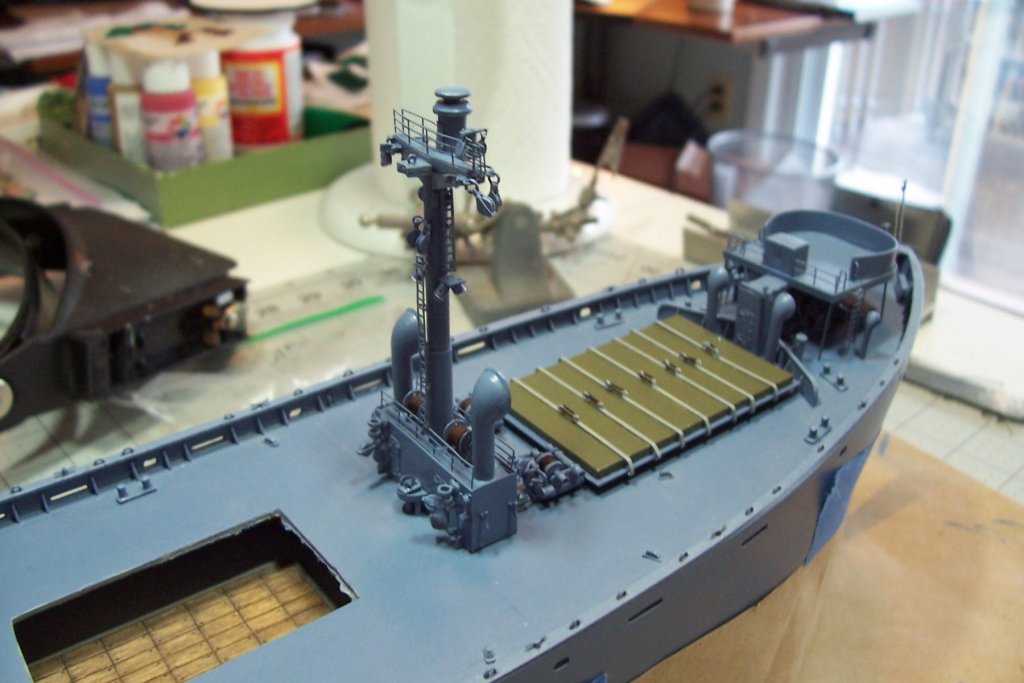
Warping Engine The Lib ships had a steam-powered engine on the after deck that was used to drive two capstan heads which were used to take the slack out of mooring lines or even to pull the ship into a pier if no tugs were available (the same thing could be done by the anchor windlass up forward). It was a simple two-step reduction gearing. Interesting feature was that there was no crankshaft - the piston rods were connected to the outer edges of two discs on the outside of the bedplate. The kit provides a simple drum winch of britannia metal to serve as the warping engine. It is a little under scale for height and I thought I might be able to scratch build something more realistic. Here is the the kit and what I started out with: Here’s after the gears (from a bag of old watch parts) , guards and shaft have been added: And the finished product with the shaft supports. The capstans are after market from the Bluejacket catalog. The kit provided slightly smaller ones which I had planned to use but then I got careless while sanding them and squeezed one out of round too badly to repair, I forgot just how soft britannia can be. Here it is installed on the model with the canted fairleads in place:


- 227 replies
-
- 13
-
-
- BlueJacket Shipcrafters
- Stephen Hopkins
- (and 2 more)
-
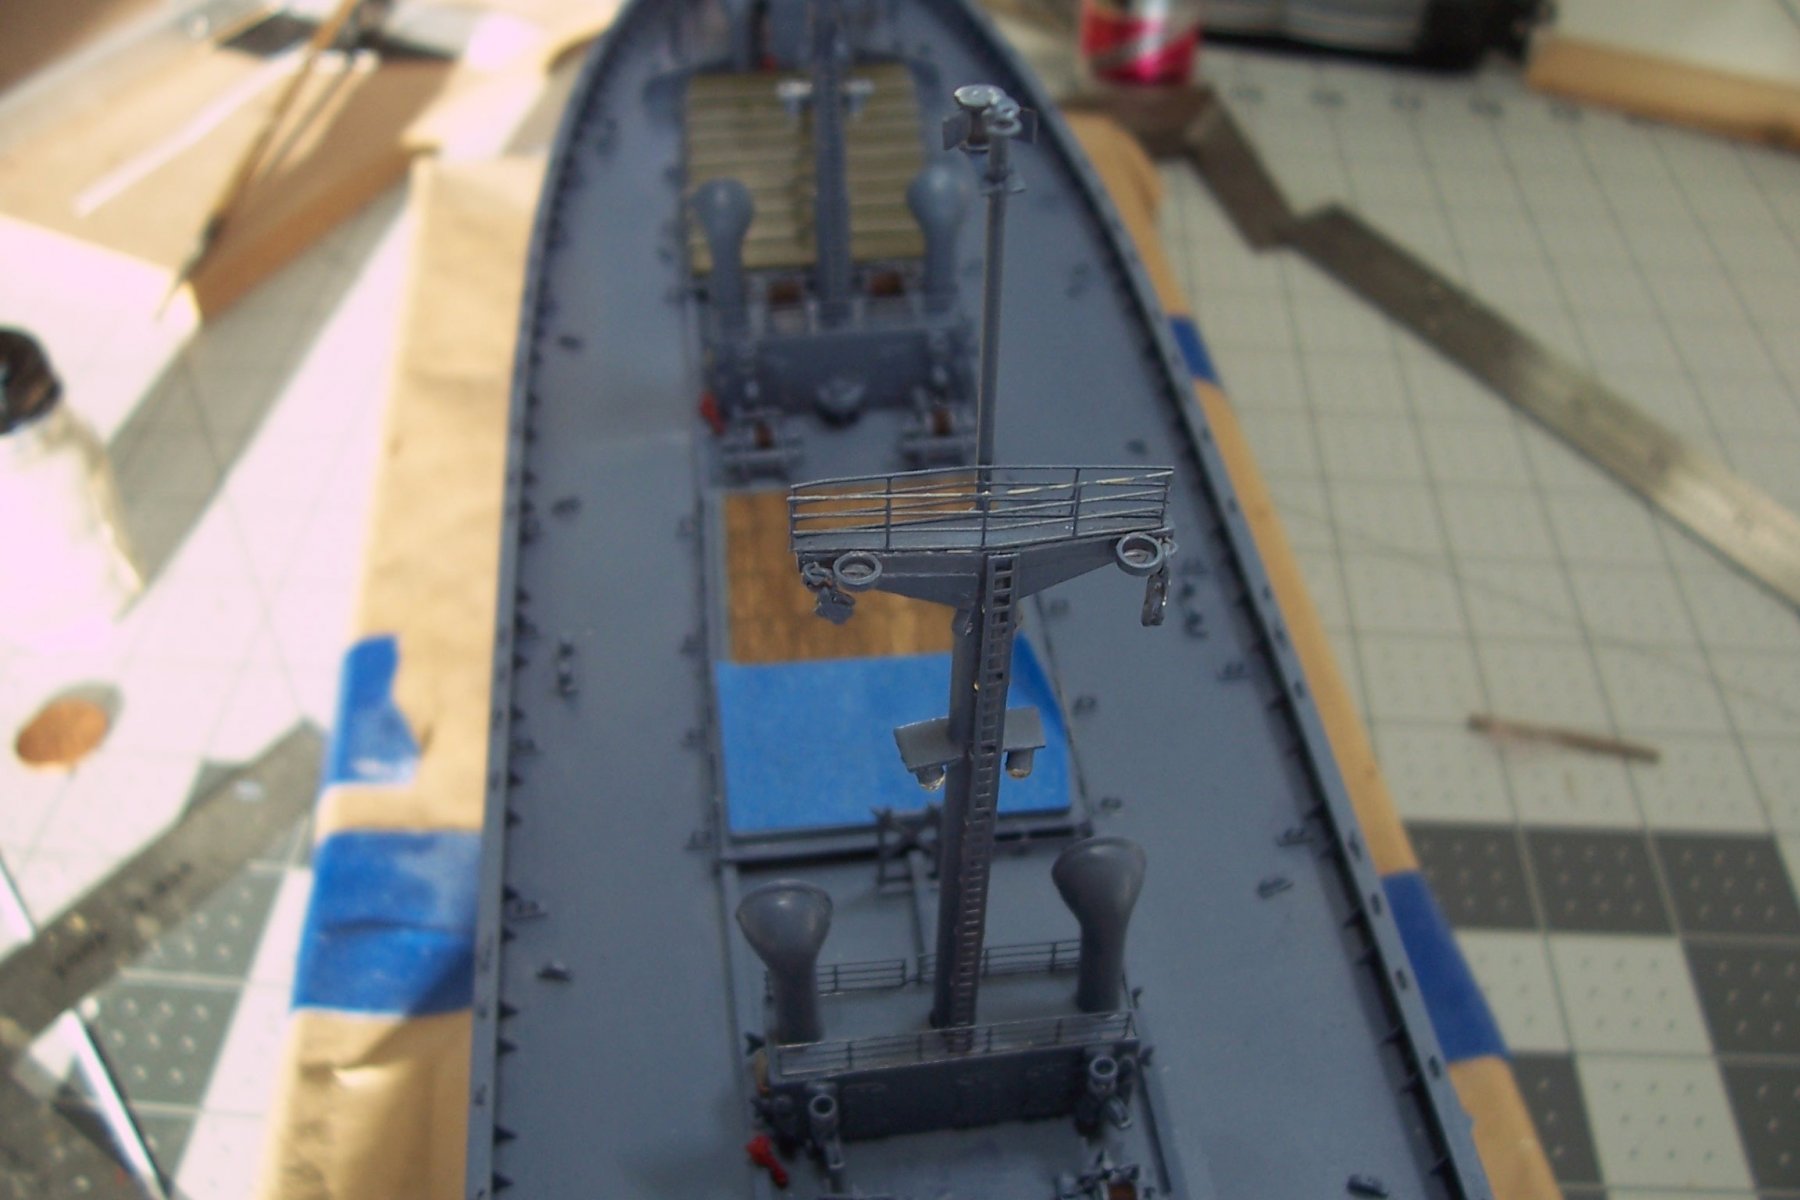
Aft Hatches With the installation of the mizzen mast, the hatches and their winches all the major pieces are now in place:
- 227 replies
-
- 8
-
-
- BlueJacket Shipcrafters
- Stephen Hopkins
- (and 2 more)
-
Nr 2 & 3 Hatches The rest of the big items for the other forward hatches are in place.

- 227 replies
-
- 10
-
-
- BlueJacket Shipcrafters
- Stephen Hopkins
- (and 2 more)
-
Tom, I just came upon your build - nice work! Are the carronades you are using the ones that came with the kit or are they aftermarket?
-
Main Deck I’ll fit out the main deck working fore to aft and bigger to smaller. Hatch Nr1 has the big pieces in place:

- 227 replies
-
- 8
-
-
- BlueJacket Shipcrafters
- Stephen Hopkins
- (and 2 more)
-
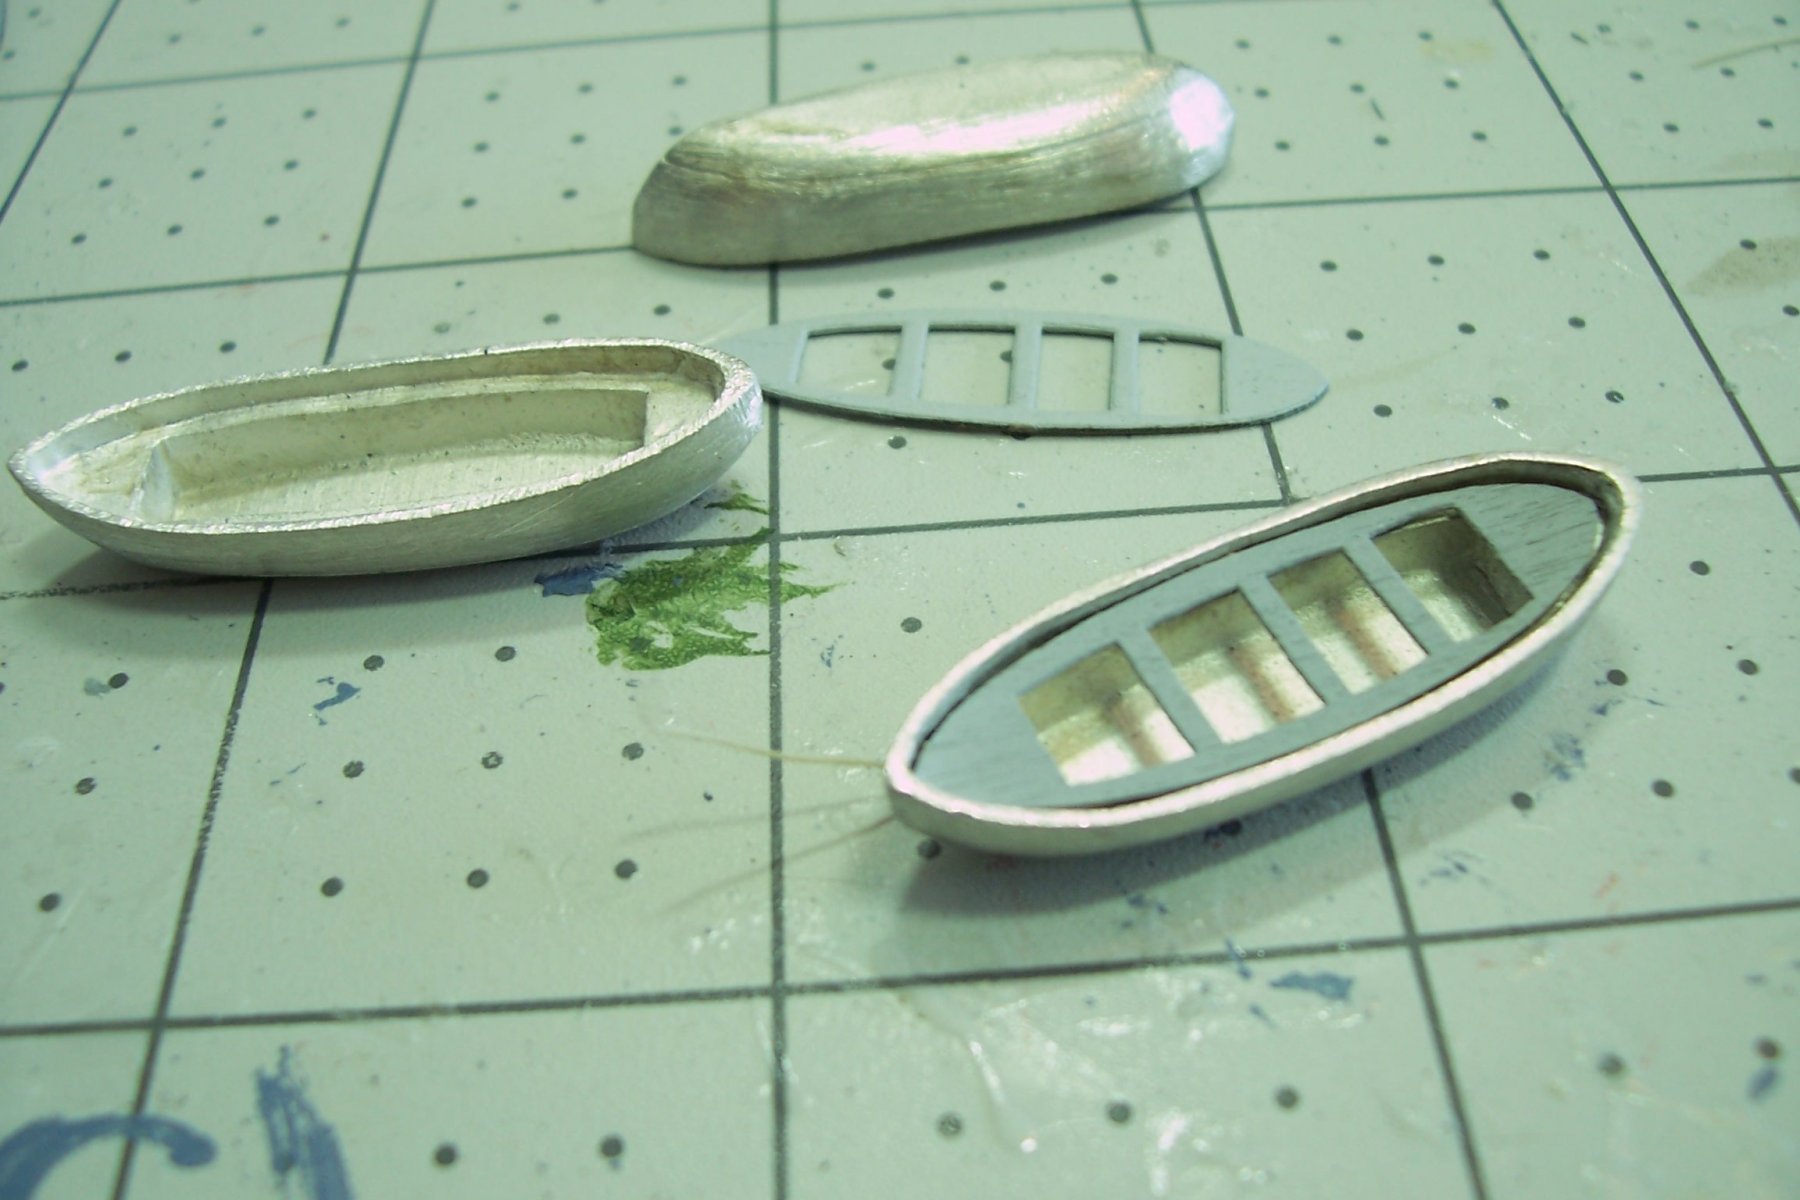
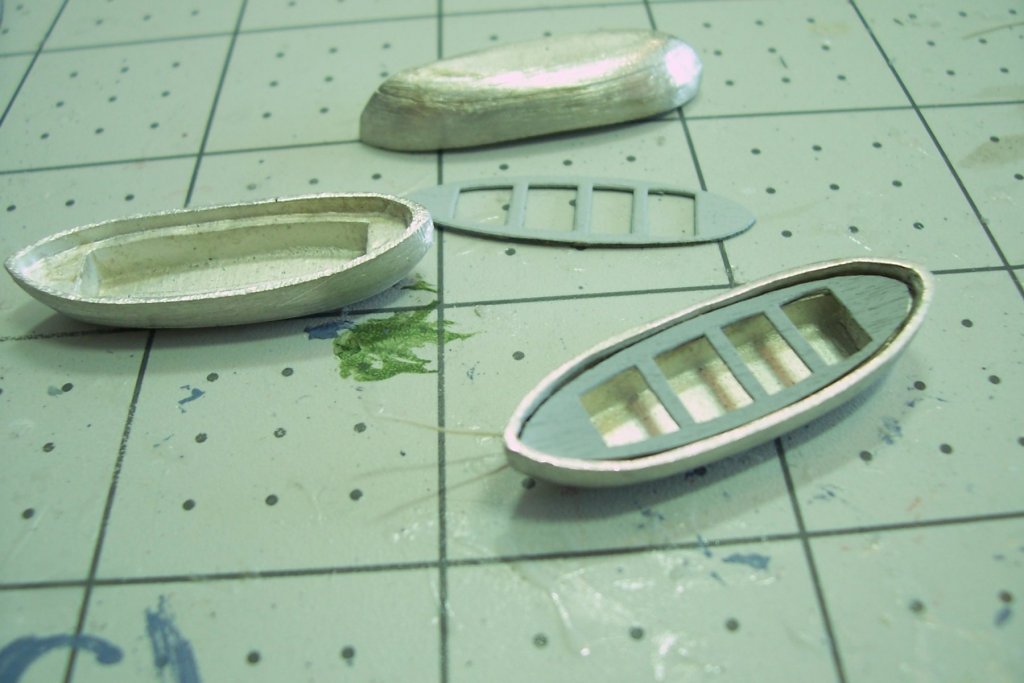
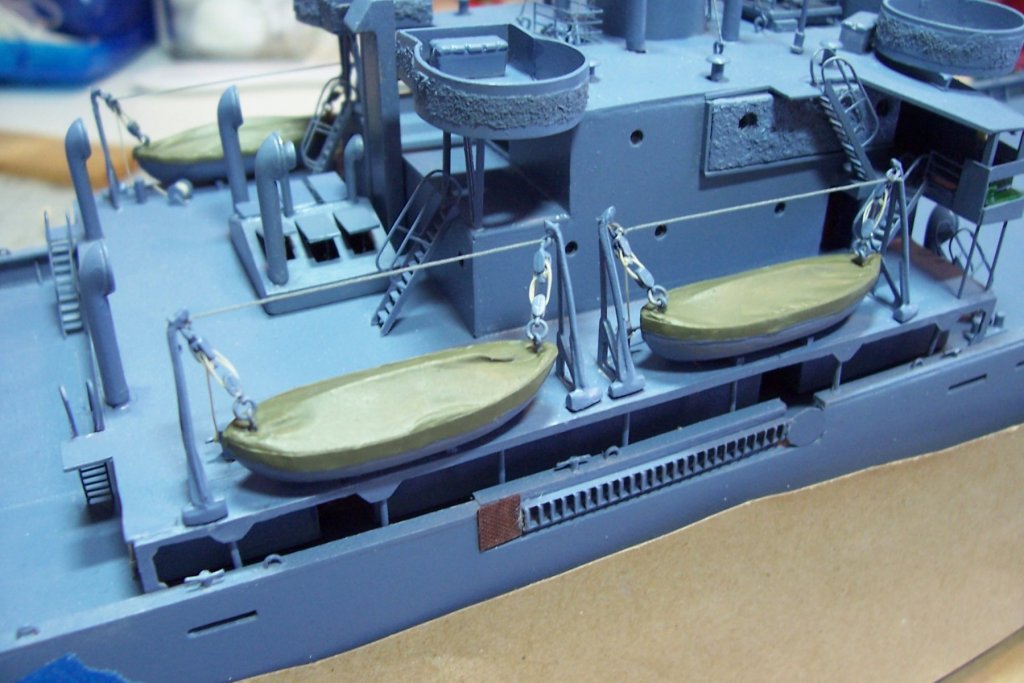
Thanks John! And thanks for all the likes Lifeboats The kit provides boats in britannia with laser cut inserts for the thwarts. I decided to show the boats with their canvas boat covers in place. I used a piece of wire as the internal brace for the covers. I tried to make the covers out of tape but that did not work very well so I used diluted white glue brushed onto tissue paper -you can see it one one of the boats here (it dries almost transparent): After trimming and painting I was satisfied with the “canvas” look of them. Here they are rigged in place: I’ll add coiled up monkey lines later but they are real dust magnets so I’ll wait to the end of the build for those. This finishes up the deck house except for the railings. Now it’s time to move to the main deck and start making this look like a cargo ship.

- 227 replies
-
- 6
-
-
- BlueJacket Shipcrafters
- Stephen Hopkins
- (and 2 more)
-
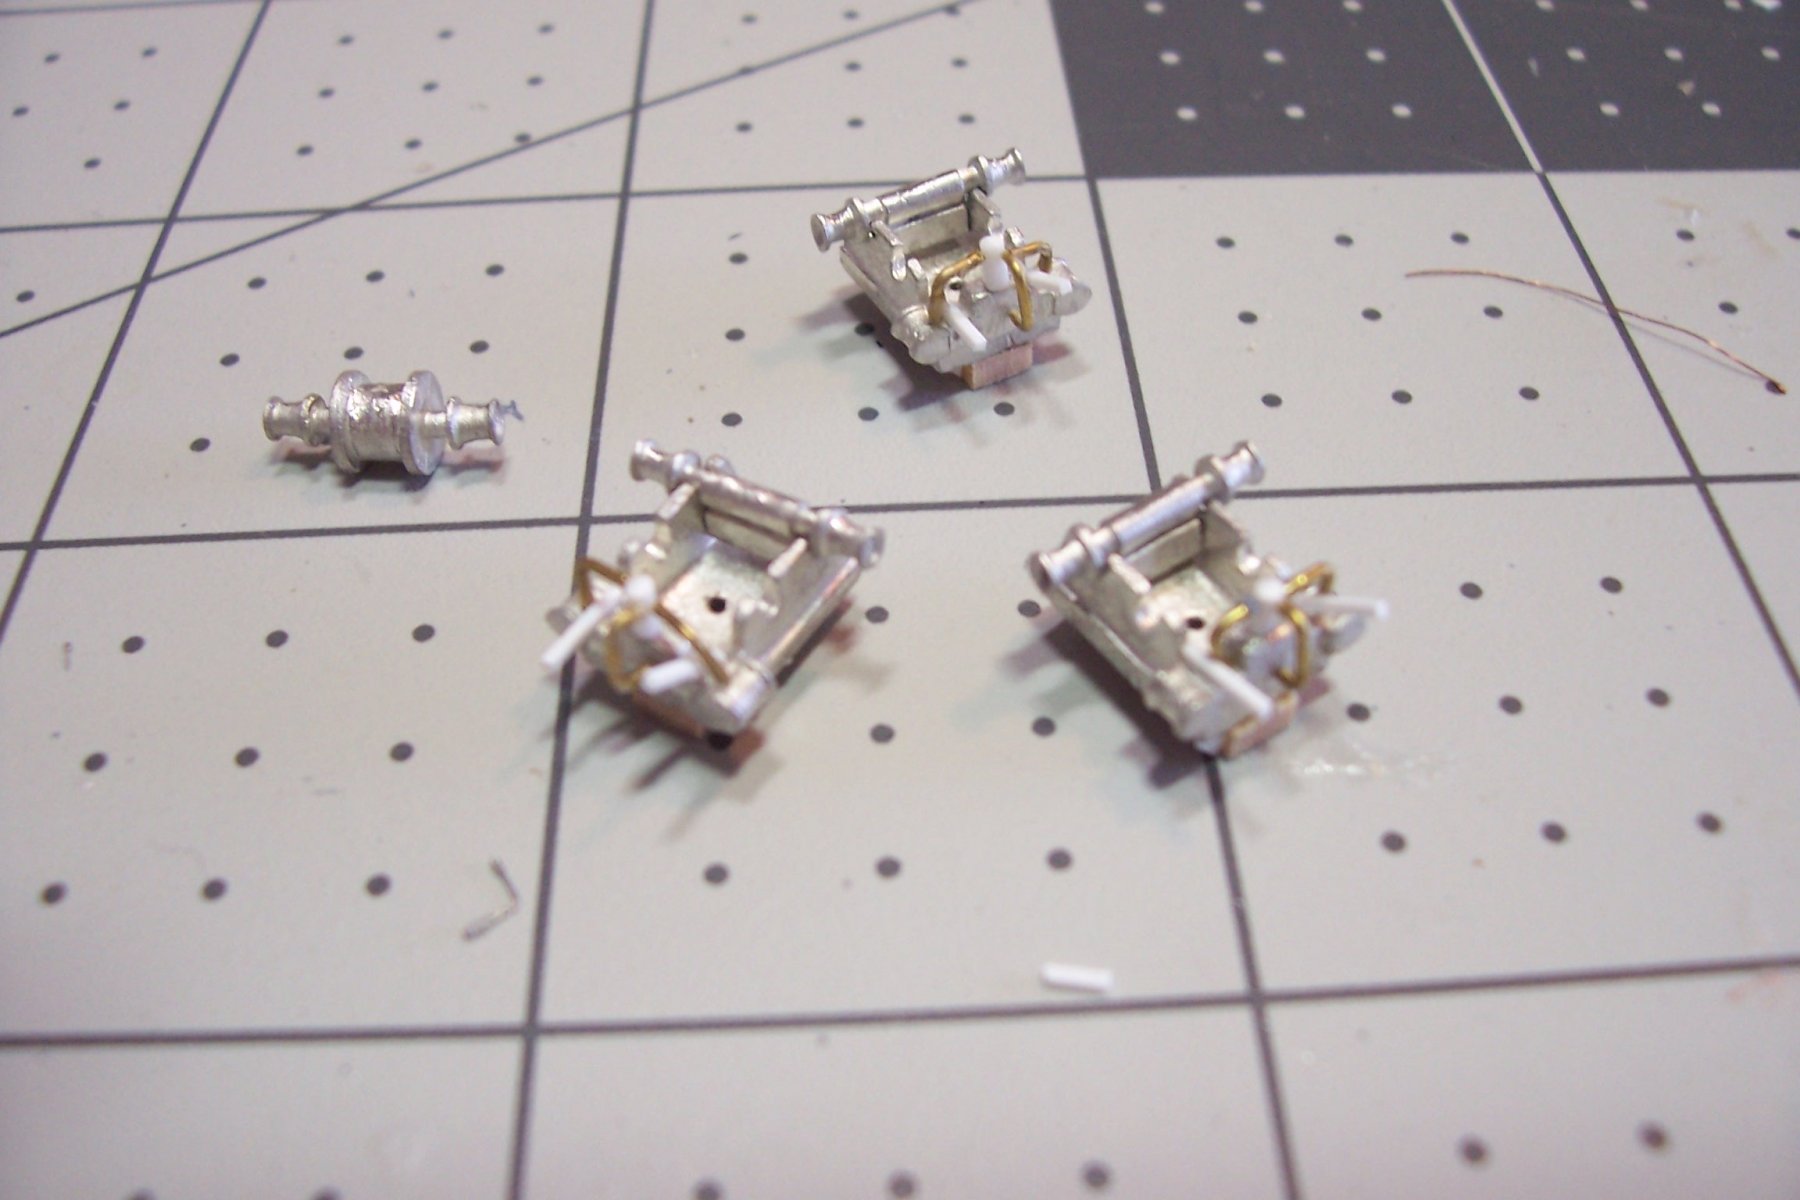
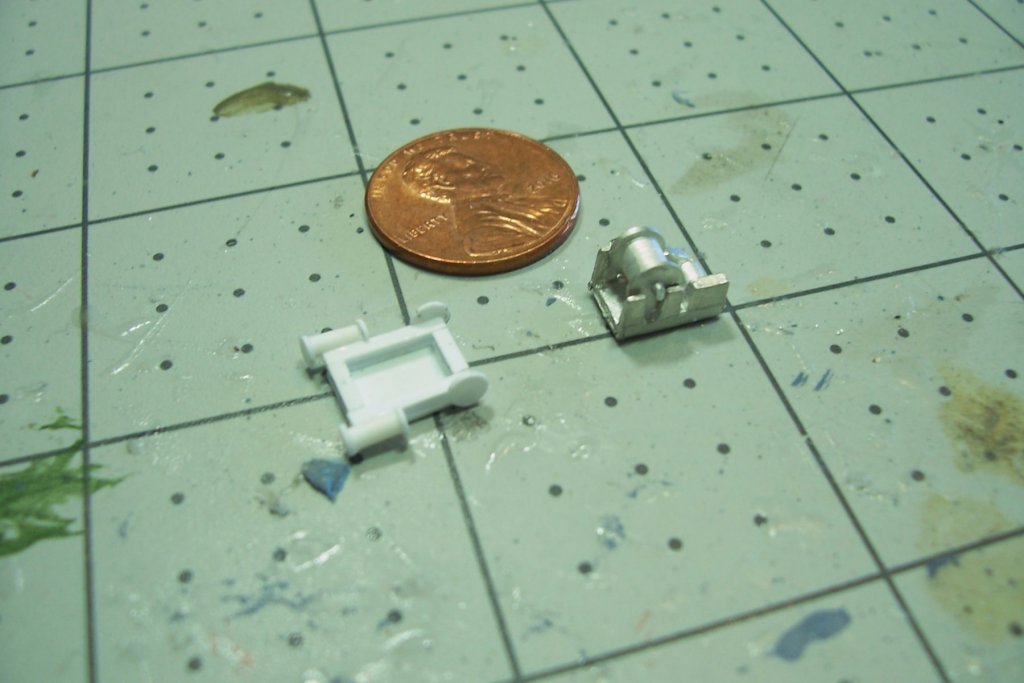
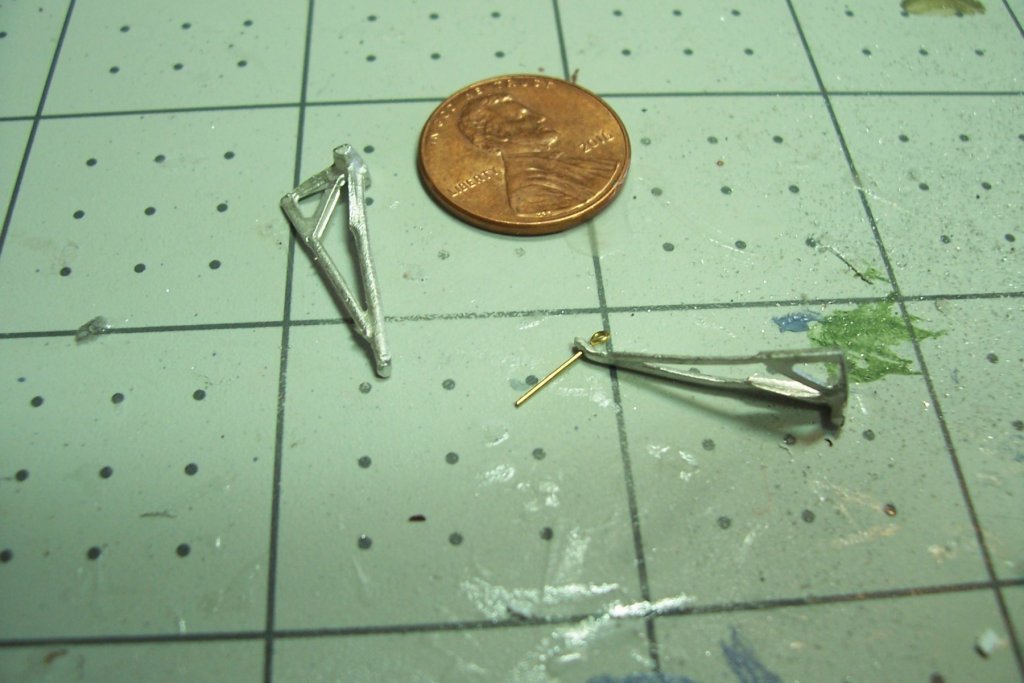
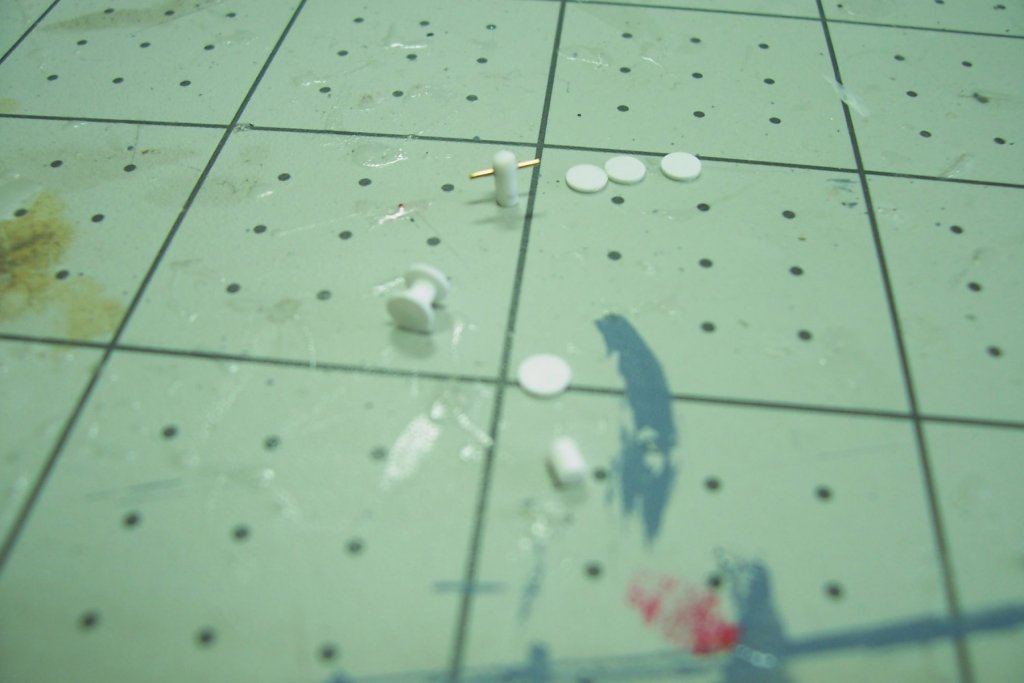
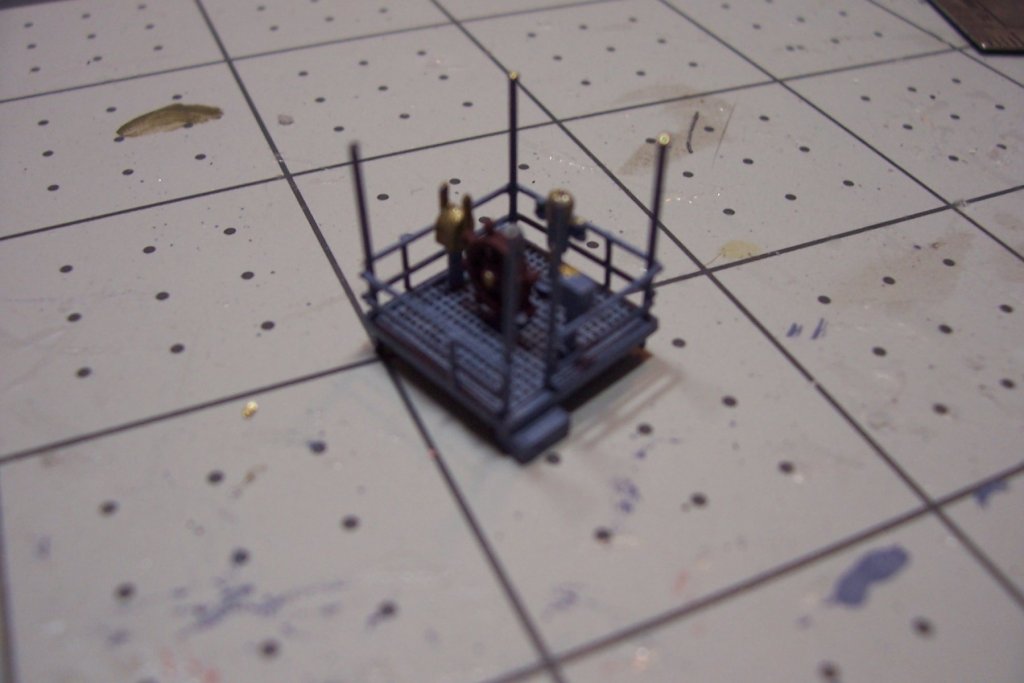
Thanks Kevin Boat Davits The kit provides britannia davits. I had planned to drill out the tops and insert 1/16” split rings as the attachment point for the upper block of the boat falls and the span wire that runs between the davit pairs but there was not enough material (room) up there to support drilling a hole big enough for a split ring to run through. I thought about flattening the tops with a pair of pliers to provide more drilling surface but I was worried that the metal would become too brittle. Looking through my parts locker I found my stash of .75mm Backstay Eyebolts from Model Shipways. Although I have never used them for their intended purpose they have been invaluable every time I needed to anchor a small eye. They will work with a #77 drill bit which is about the smallest I have. There was enough room to put them in place: The line handling gear associated with the davits consisted of a T-bitt and a small line reel for each davit: The kit shows both items on the plans but does not provide any material or mention them in the instructions - just an oversight I guess. The T-bitts were easily fabricated out of plastic rod and wire for the cross piece. I also drilled them for pinning to the deck since they will be under tension. The reels were a little more work. They are quite small so 1/192 scale aftermarket line reels would be much too big. I have some 1/350 scale PE reels that would have worked but I did not have enough to build 8 so I ended up making them out of rod with sheet plastic supports: Here is everything in place: When I rig the davits I’ll snub the inboard end of the falls around the T-bitt and then pass it under the reel, draw up the slack and glue it in place. I’ll have to finish the STBD side and then fit out the lifeboats.
- 227 replies
-
- 6
-
-
- BlueJacket Shipcrafters
- Stephen Hopkins
- (and 2 more)
-
Nic, could you explain, or post a pic, of what you mean by a 4" Grinder? It certainly seems to make quick work of hull shaping.
- 356 replies
-
- 3
-
-
- red jacket
- finished
- (and 1 more)
-
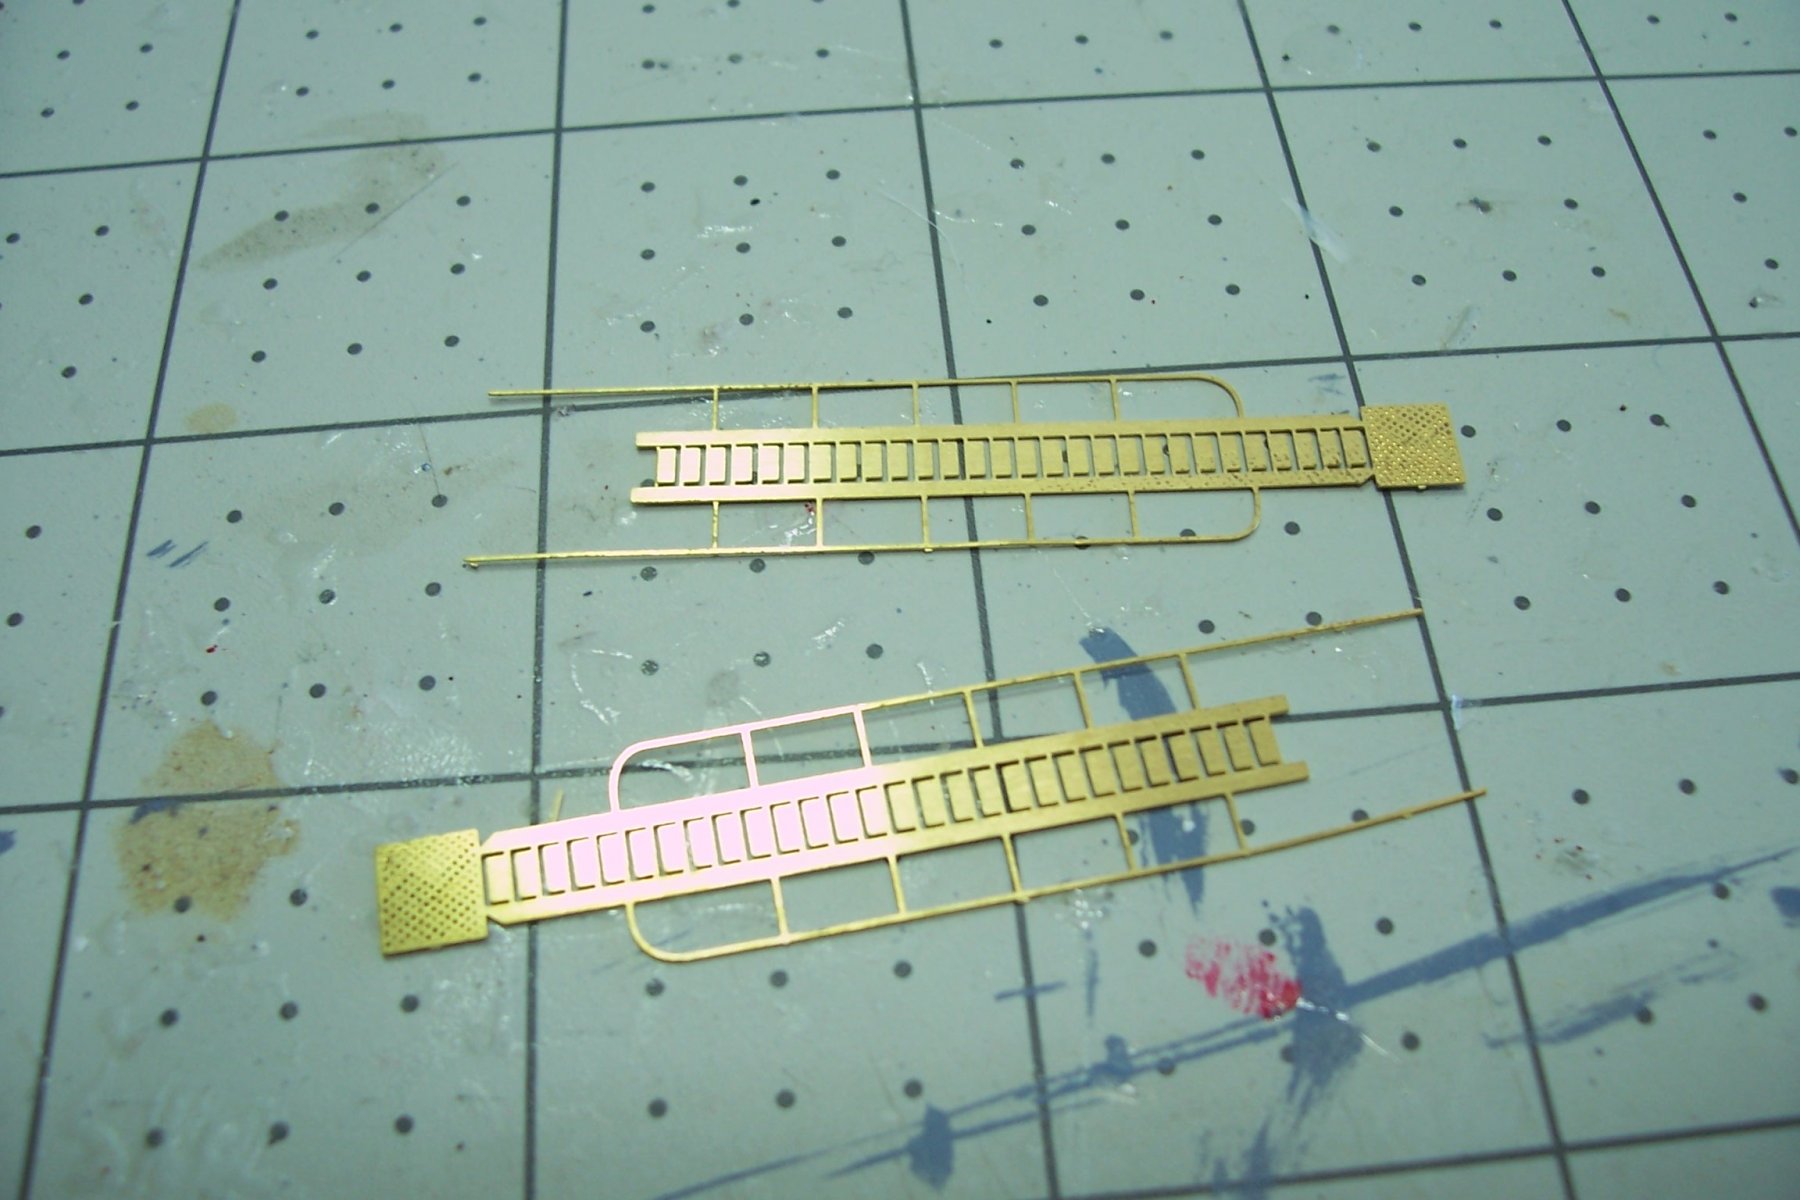
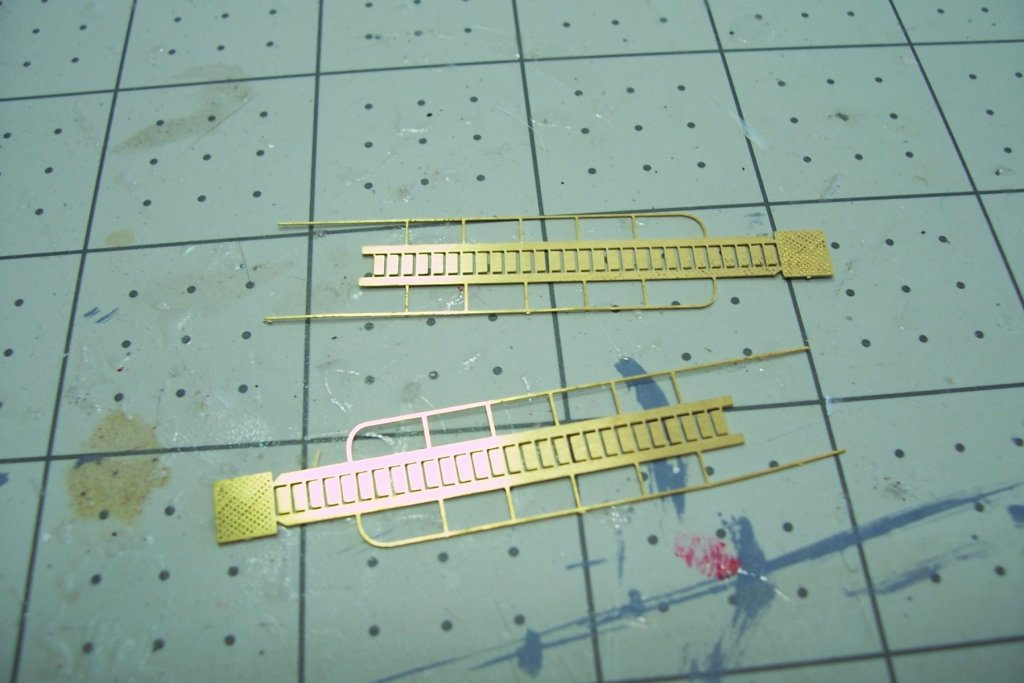
Superstructure (cont) The kit does not provide accommodation ladders but when I checked the BlueJacket 1/192 Merchant Ship PE fret that I had bought a while back there were 2 of them on there which fit fine on this build: The remaining details were the engine room skylight, pelorus’, sidelights and the incline ladders. The kit provides solid-backed britannia ladders but I prefer the look of PE. I have a nice set from Tom’s Modelworks which have worked fine on 1/192 warships but they were a little under scale for this build - too narrow and a little short. Fortunately the BJ PE fret I just referred to has plenty of ladders that are more than long enough, just trim them to fit and they are good to go. Next up will be the lifeboat davits and their handling gear.

- 227 replies
-
- 9
-
-
- BlueJacket Shipcrafters
- Stephen Hopkins
- (and 2 more)
-
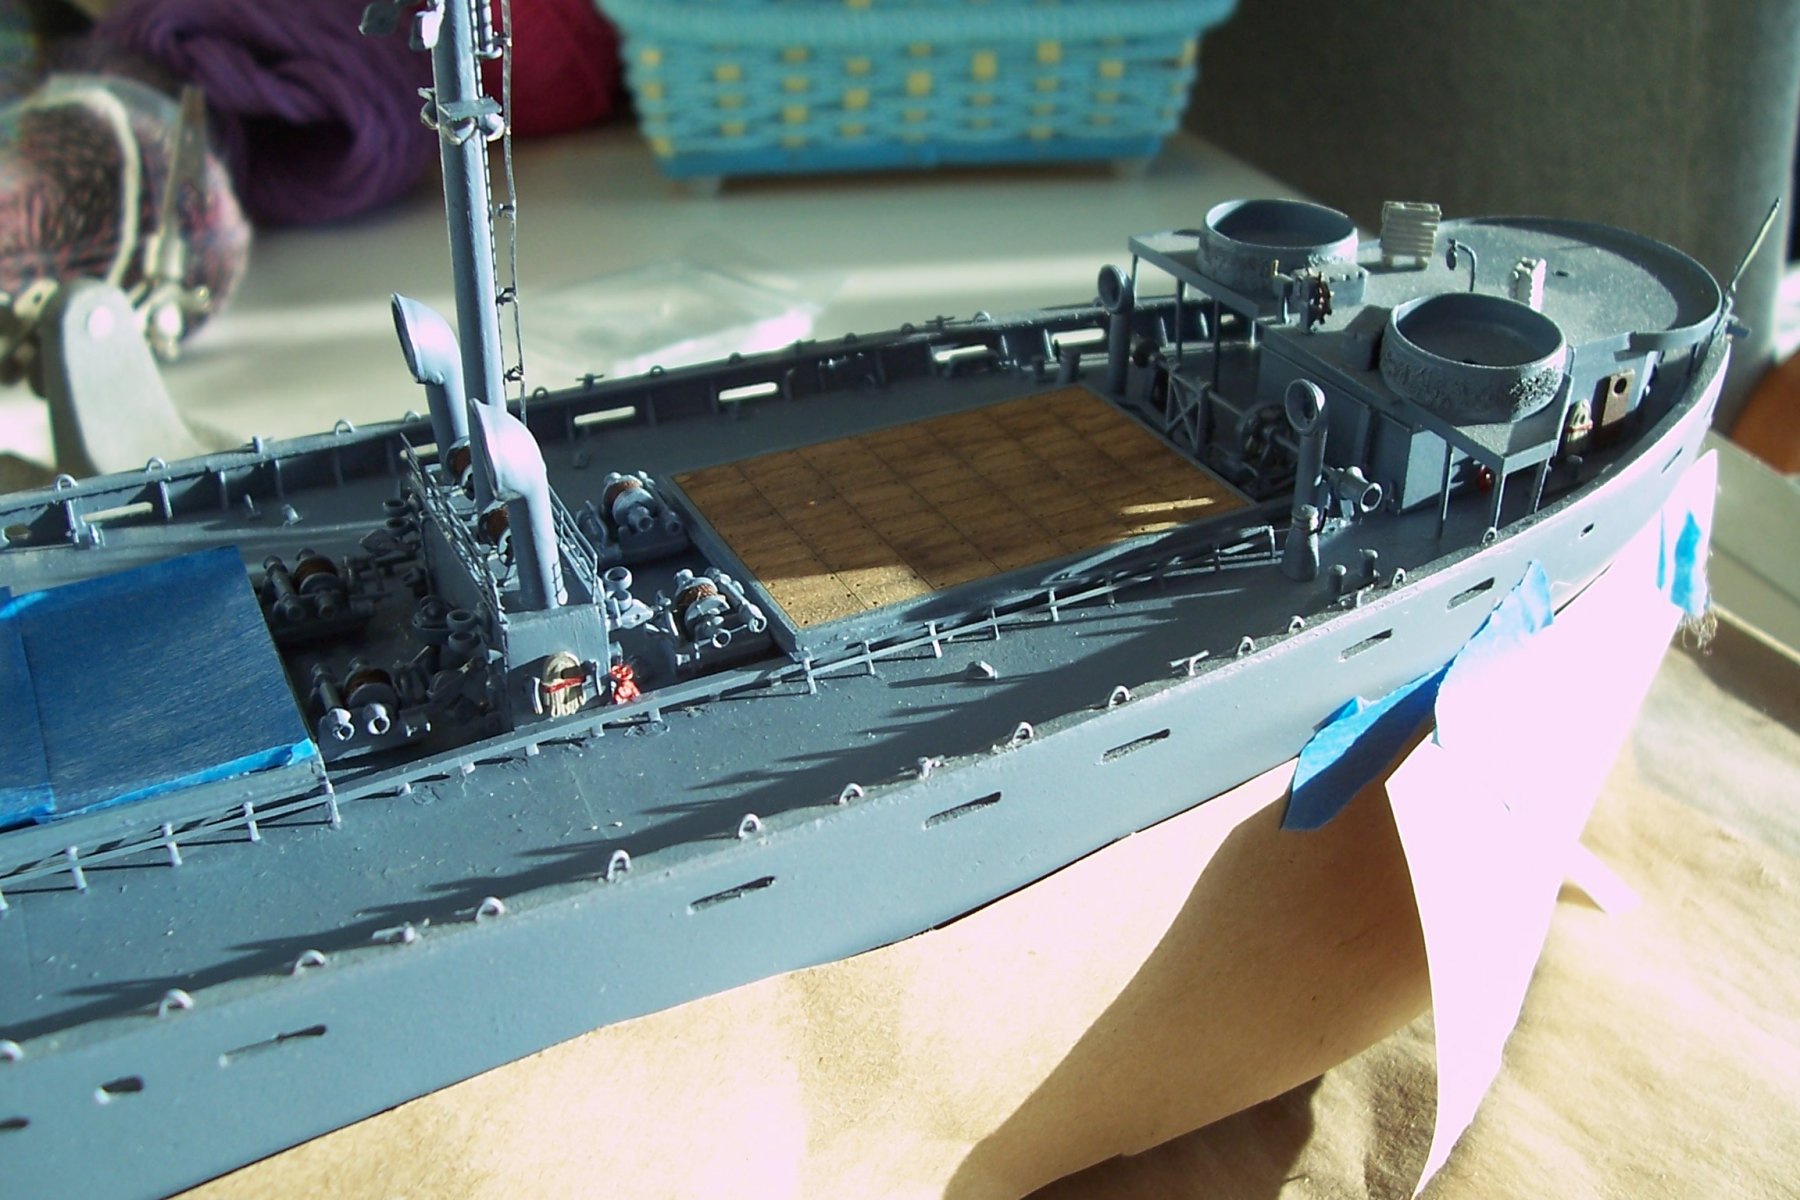
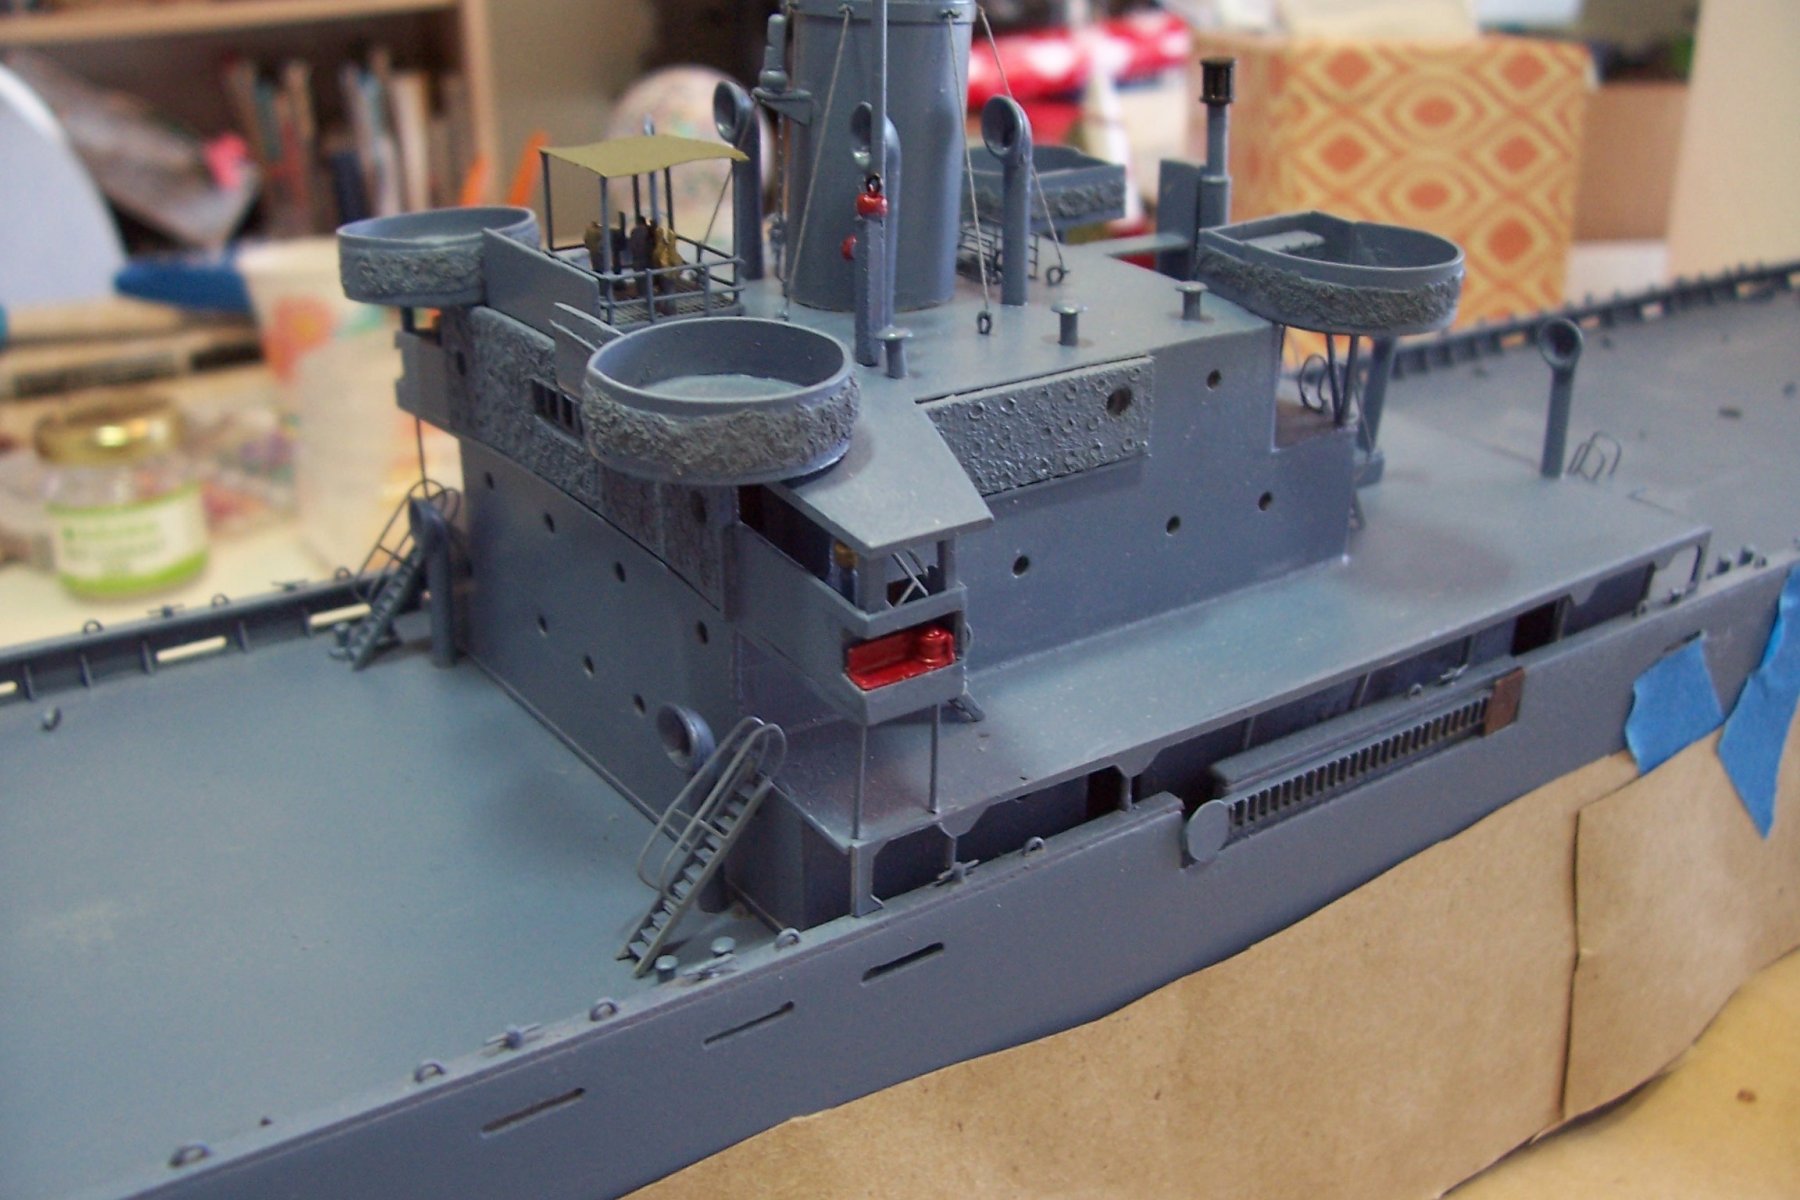
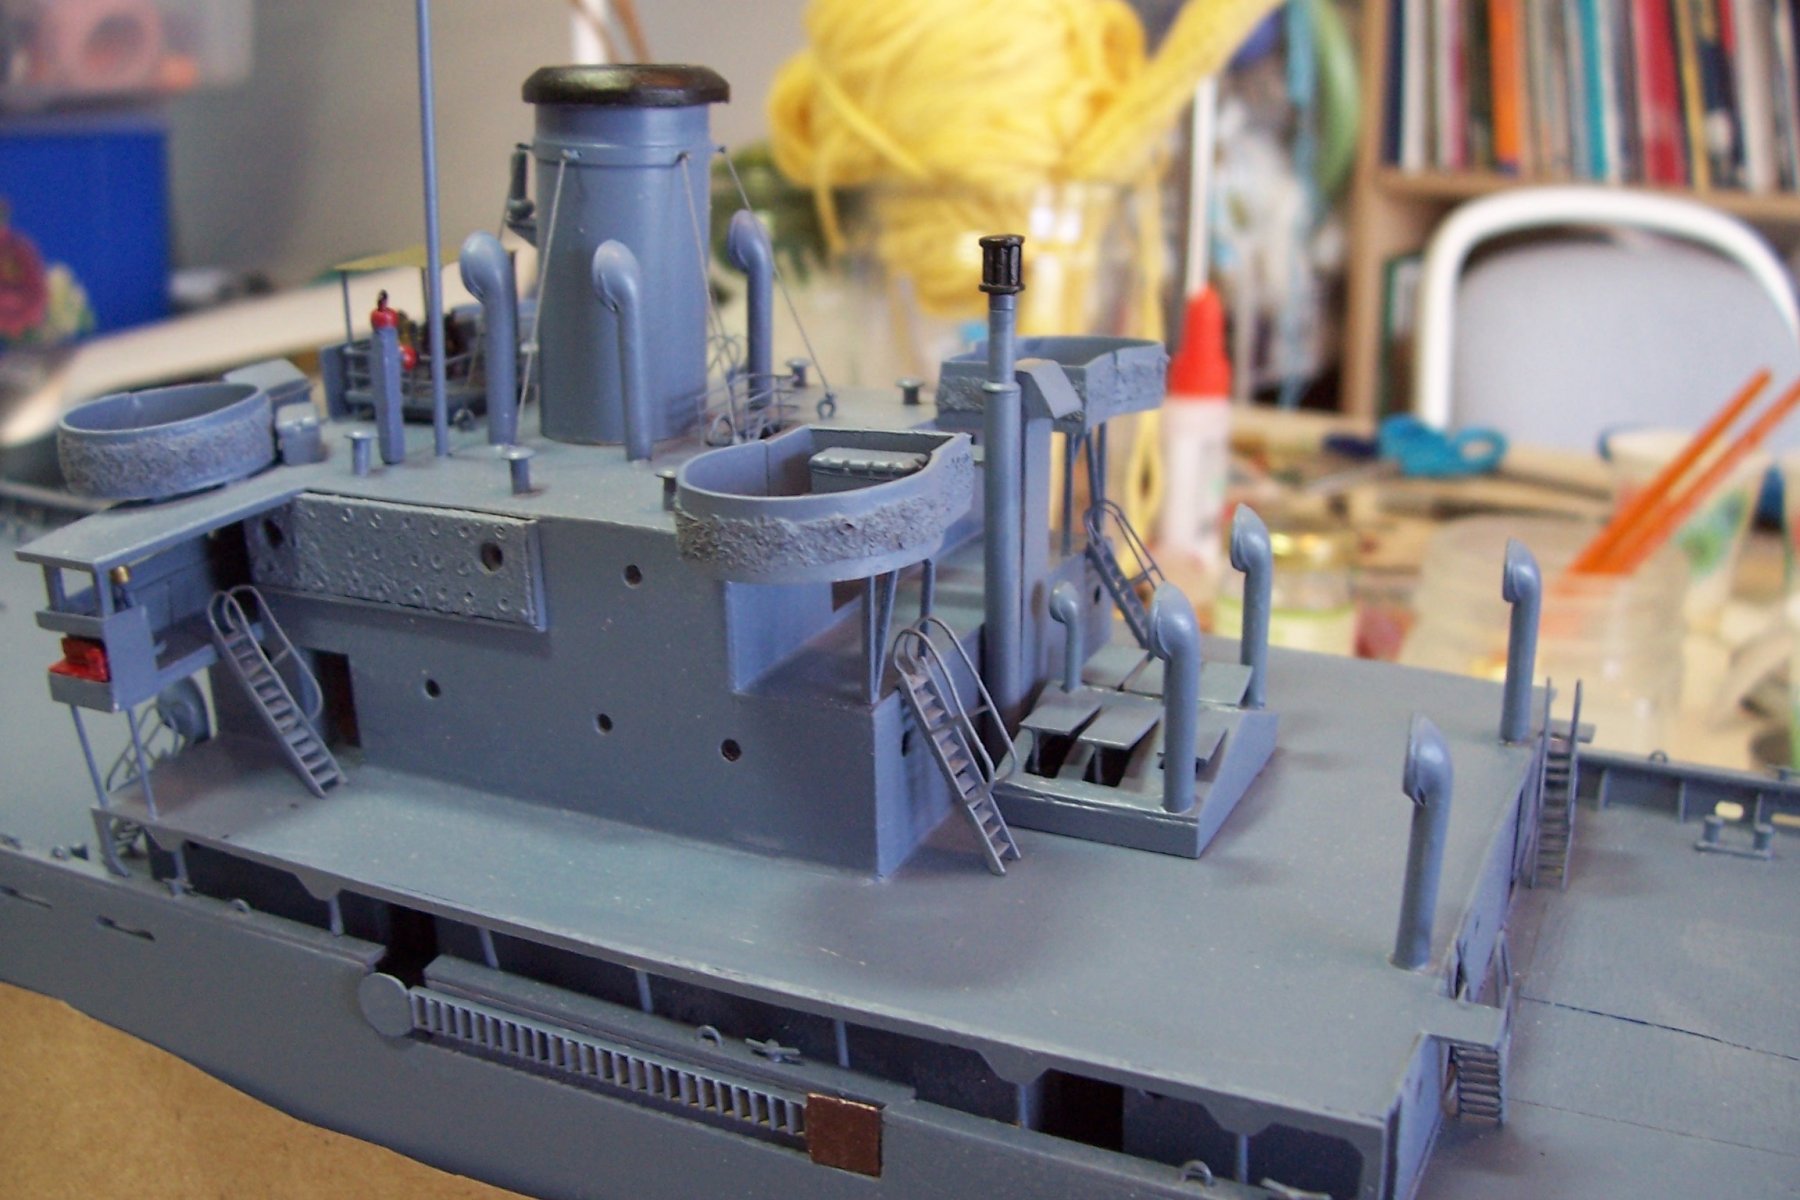
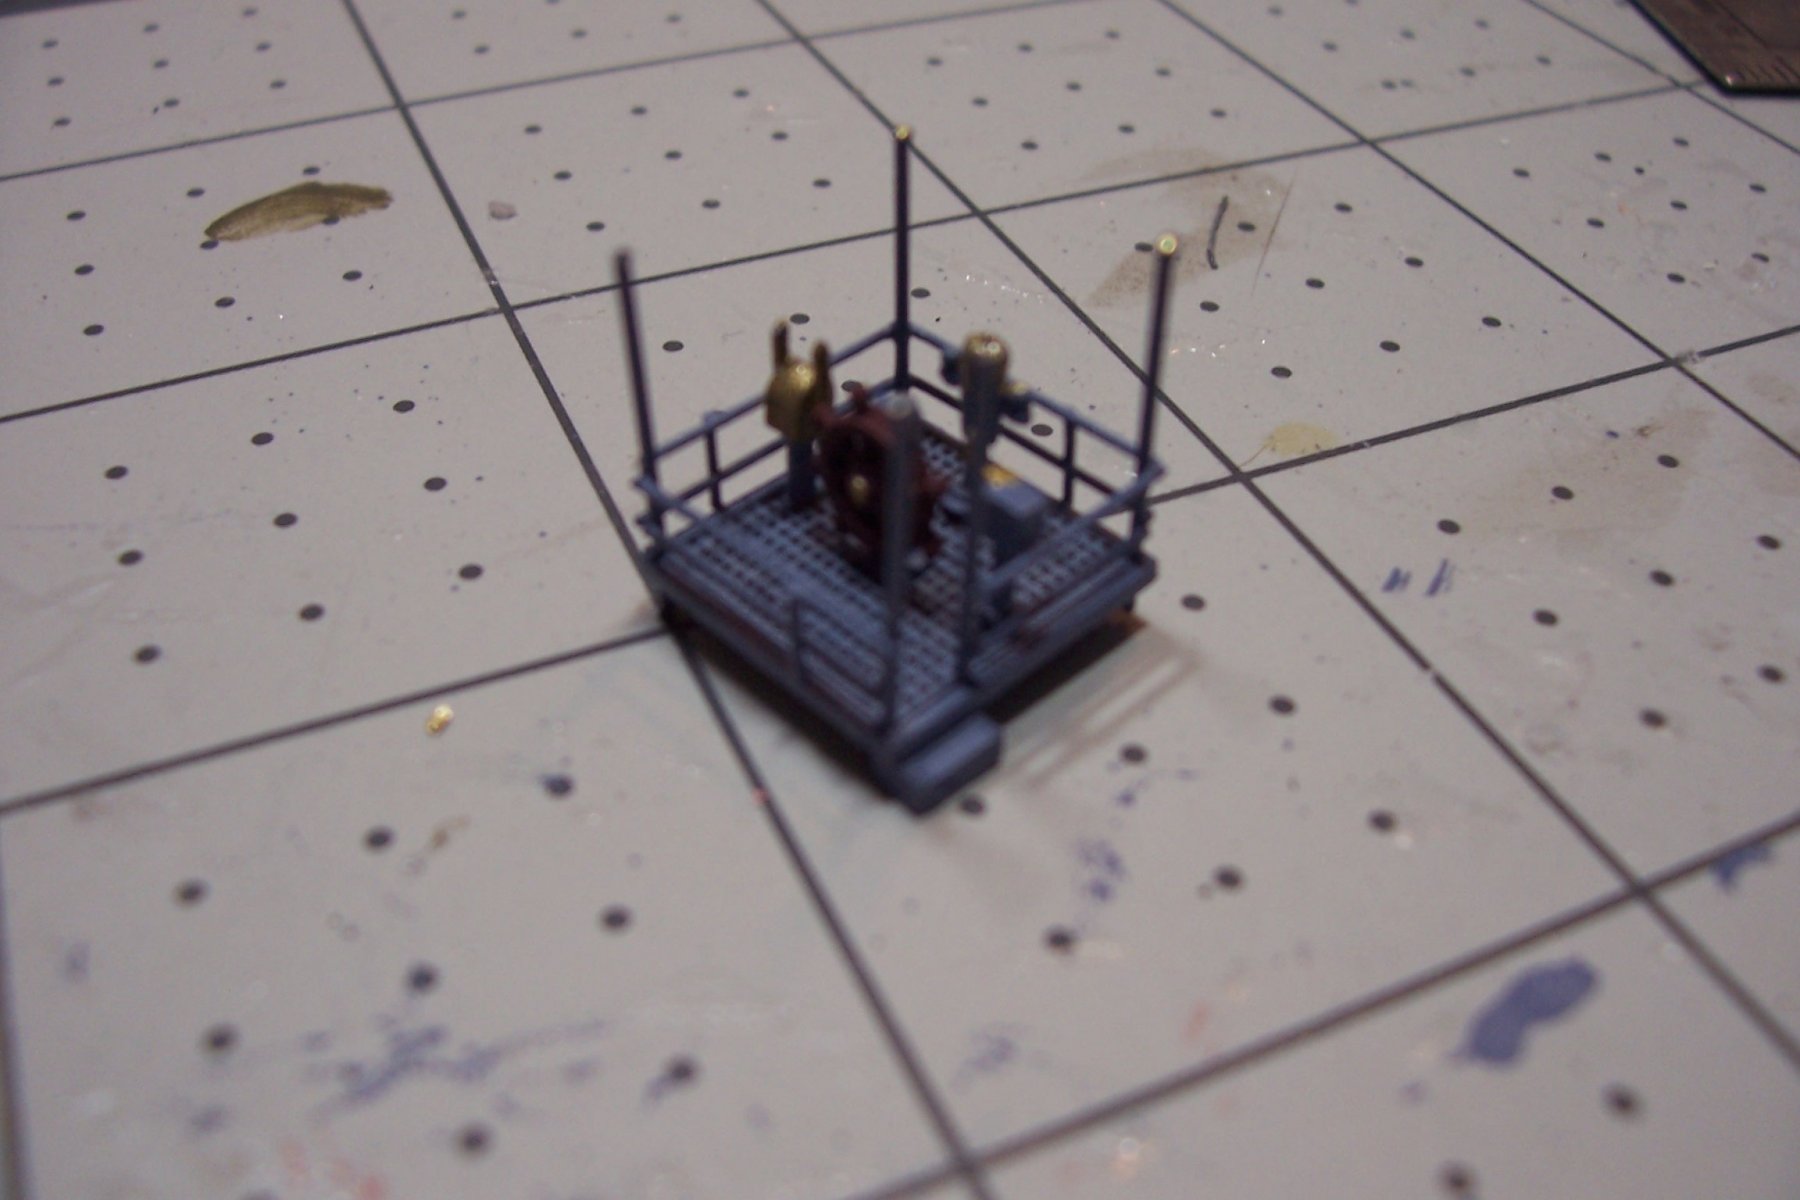
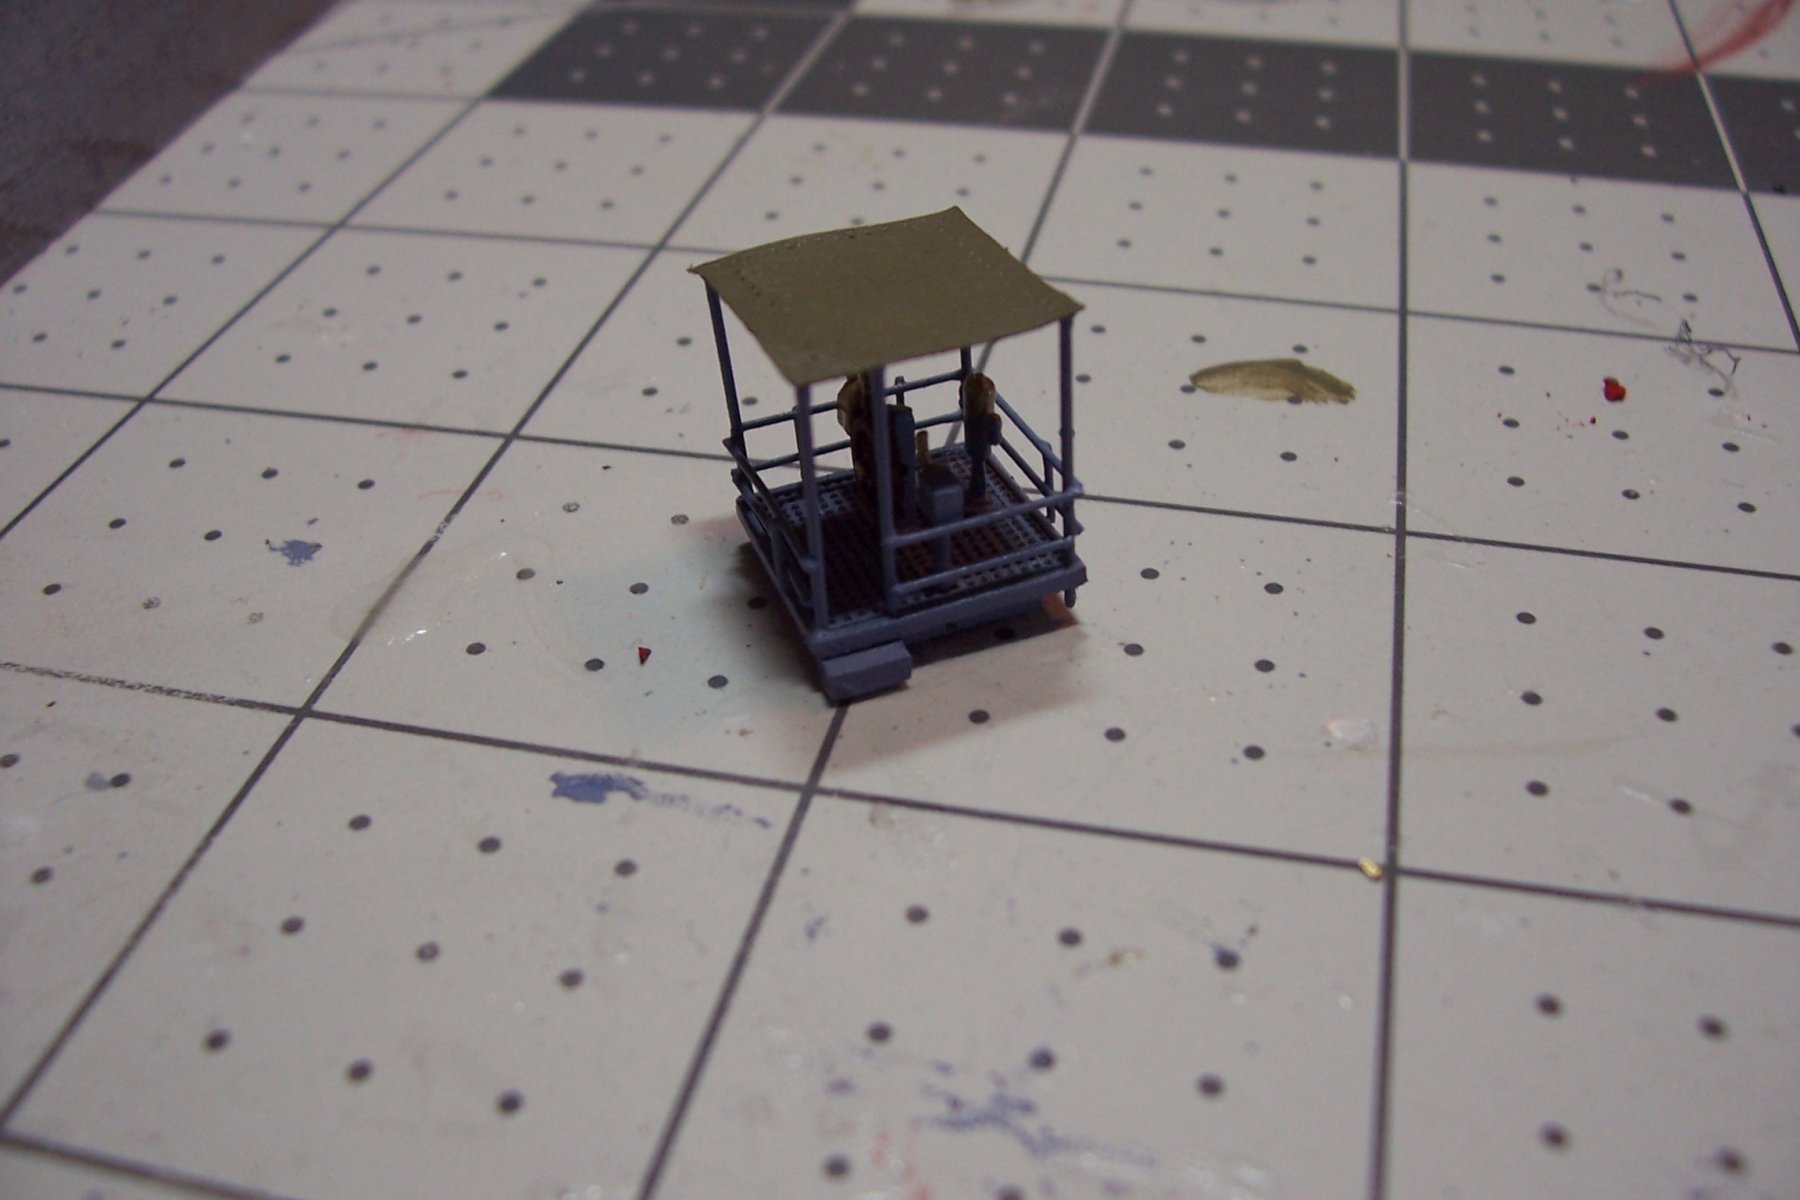
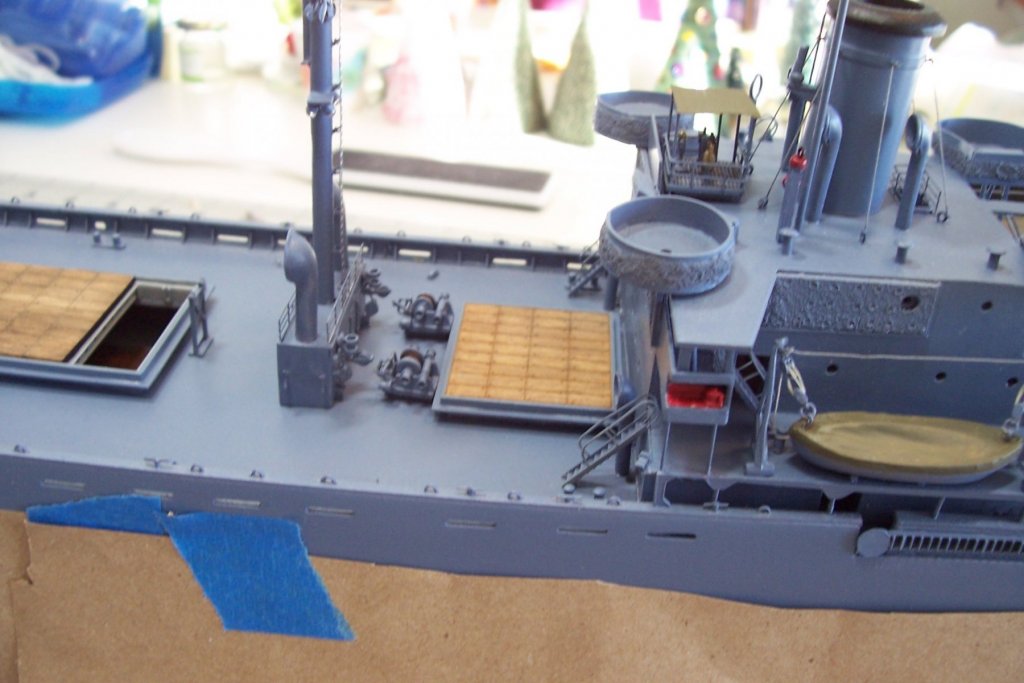
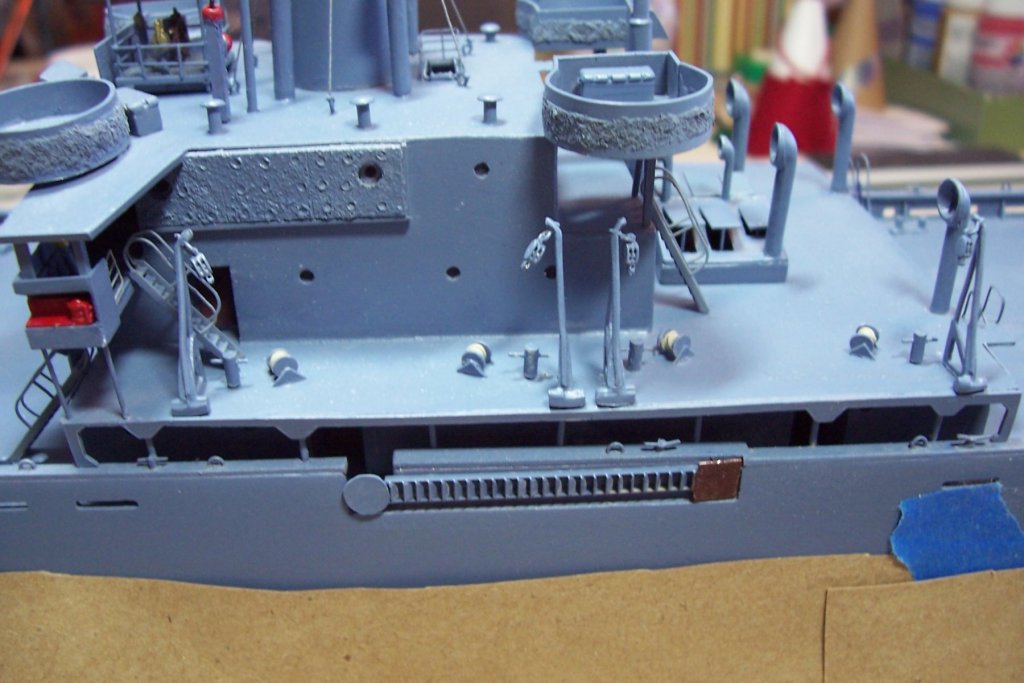
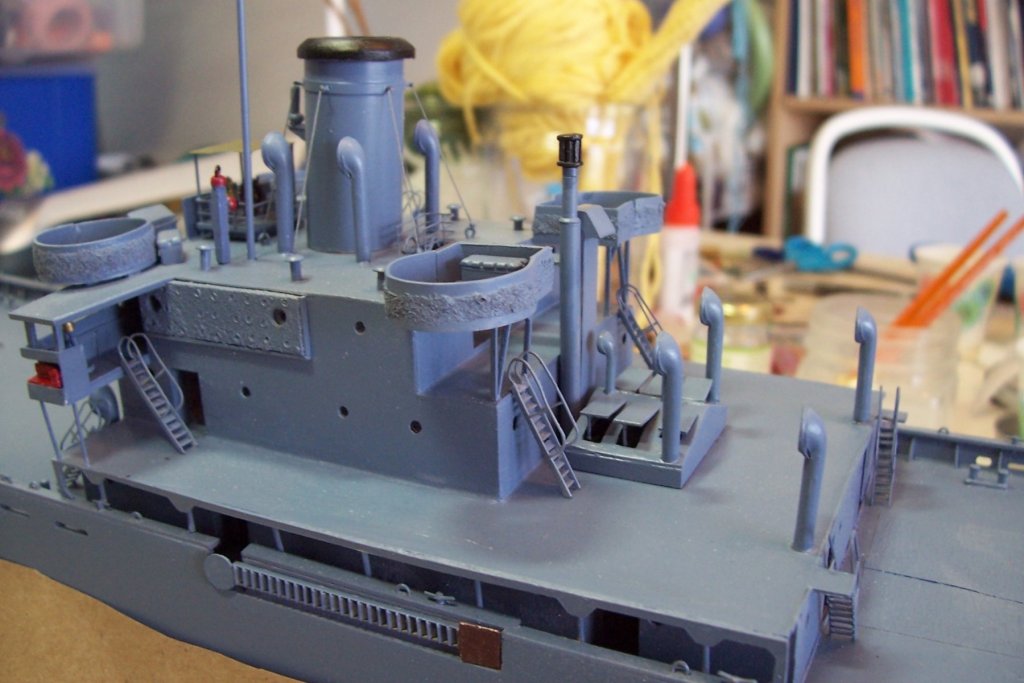
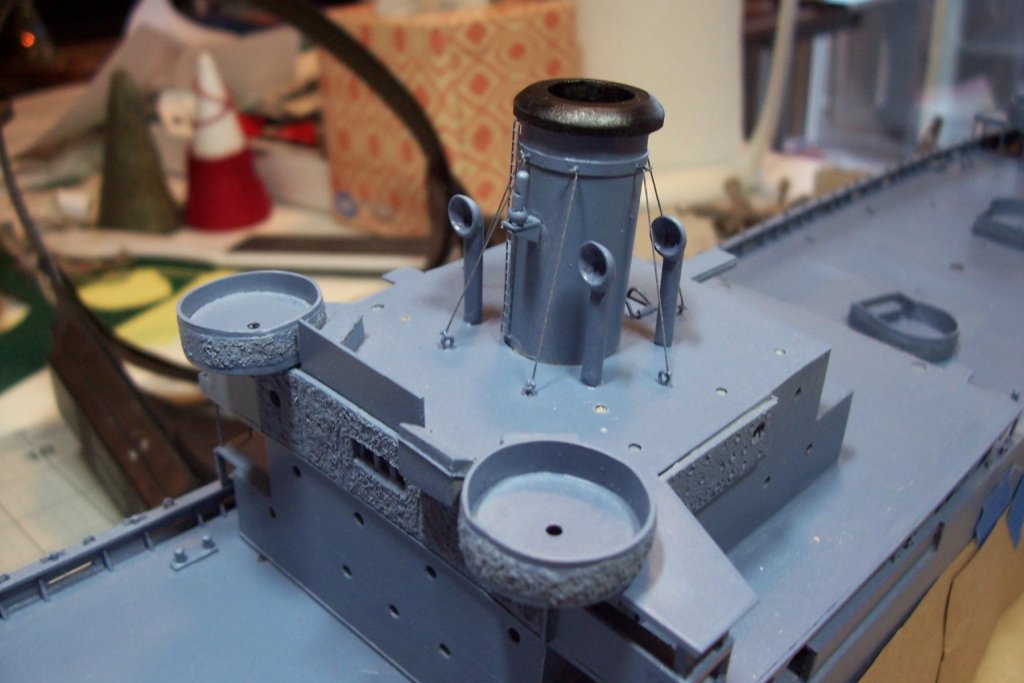
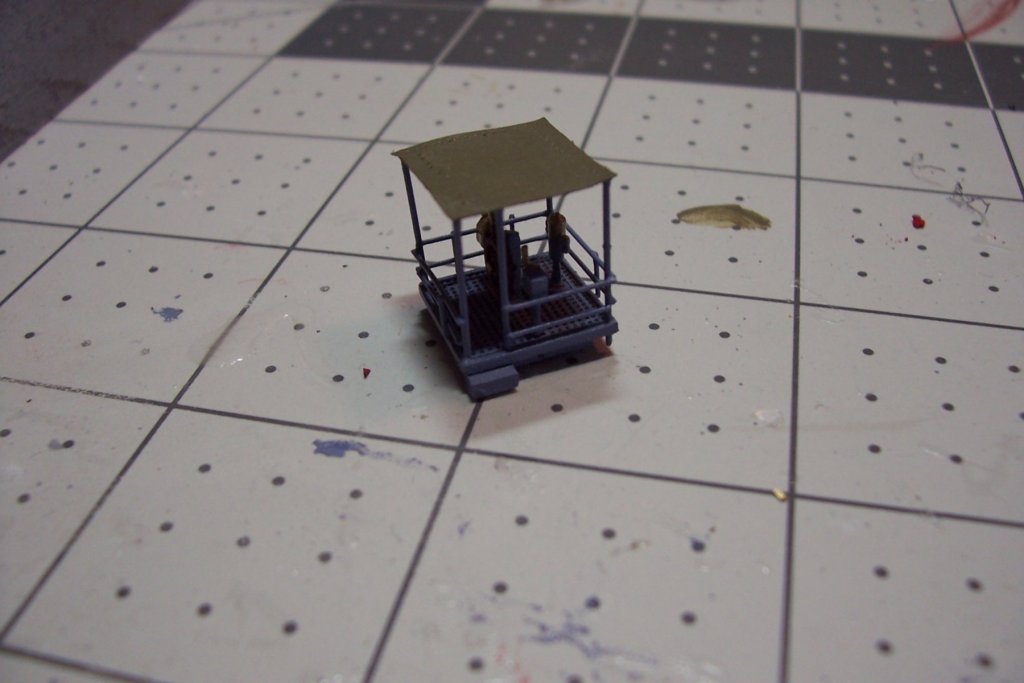
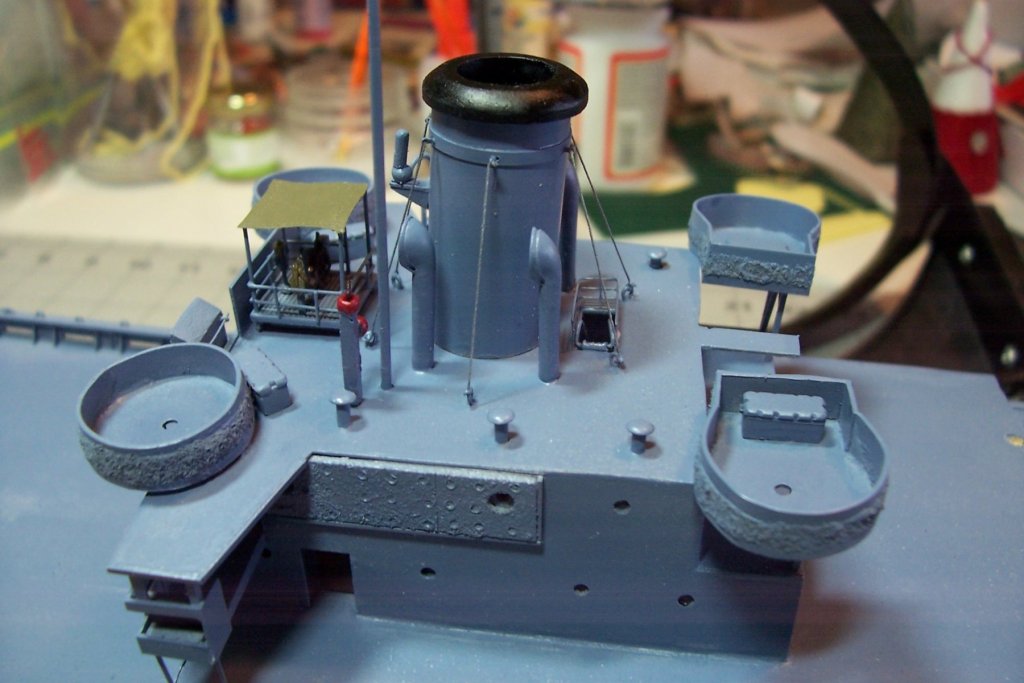
I decided to add most of the fittings to the deckhouse at this point, working from top to bottom. The Stack and cowl vents went on first: The open conning station was made up of a kit-provided grading, fittings and the railing and sunscreen supports were fabricated out of wire. The canvas sunscreen is painted paper with some pinpricks around the edges to imitate where the tricing would have gone: I’m adding this photo for anyone who decides to build this kit. The instructions say to add the aft gun tub supports but do not show them on the plans. After some online photo research and looking at the inclined ladder placement I decided this is the best fit - the large opening needs to go inboard to allow for the ladder and leave enough along the outboard and aft deck edges to allow PE railing to be placed. The 03 level is basically done except for the railings which I will leave off until the build is almost done because it is a lot easier to dust the model without those in the way.
- 227 replies
-
- 9
-
-
- BlueJacket Shipcrafters
- Stephen Hopkins
- (and 2 more)
-
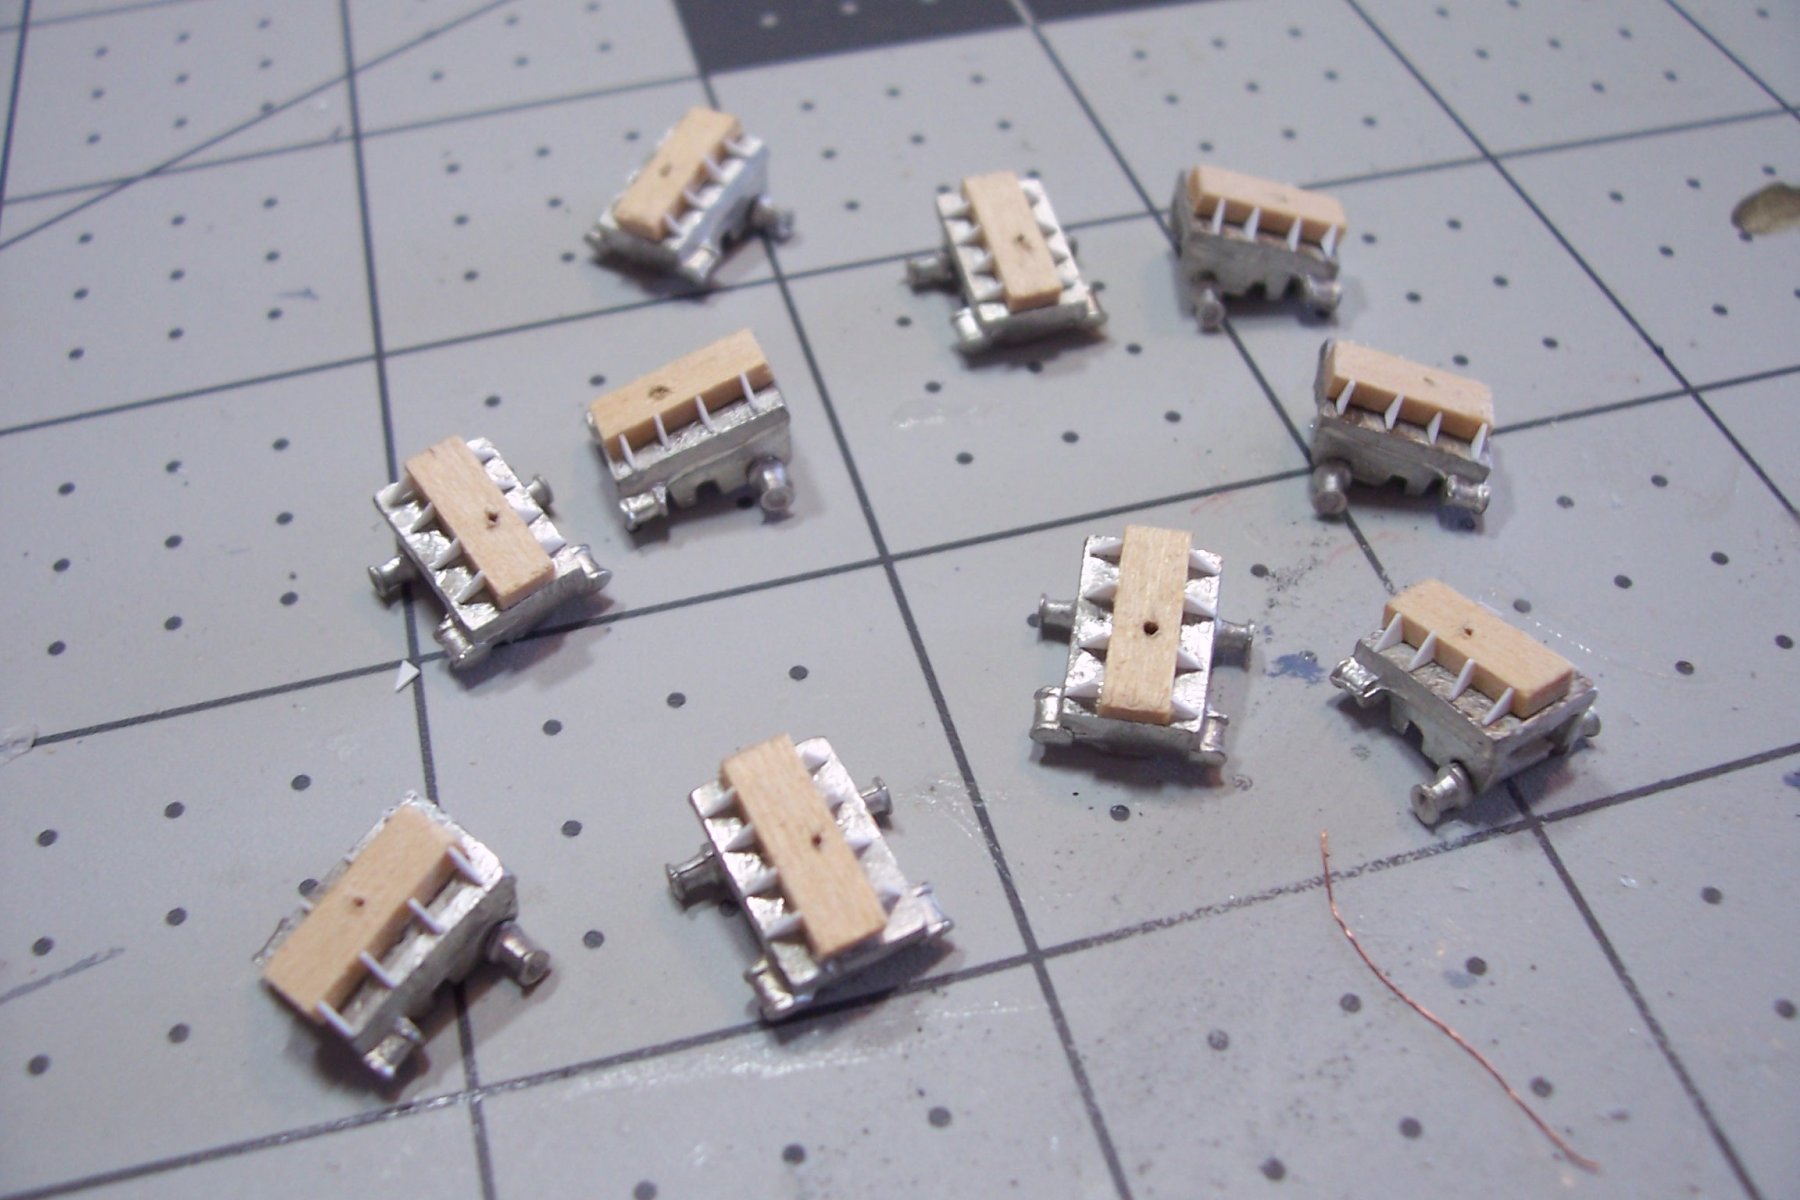
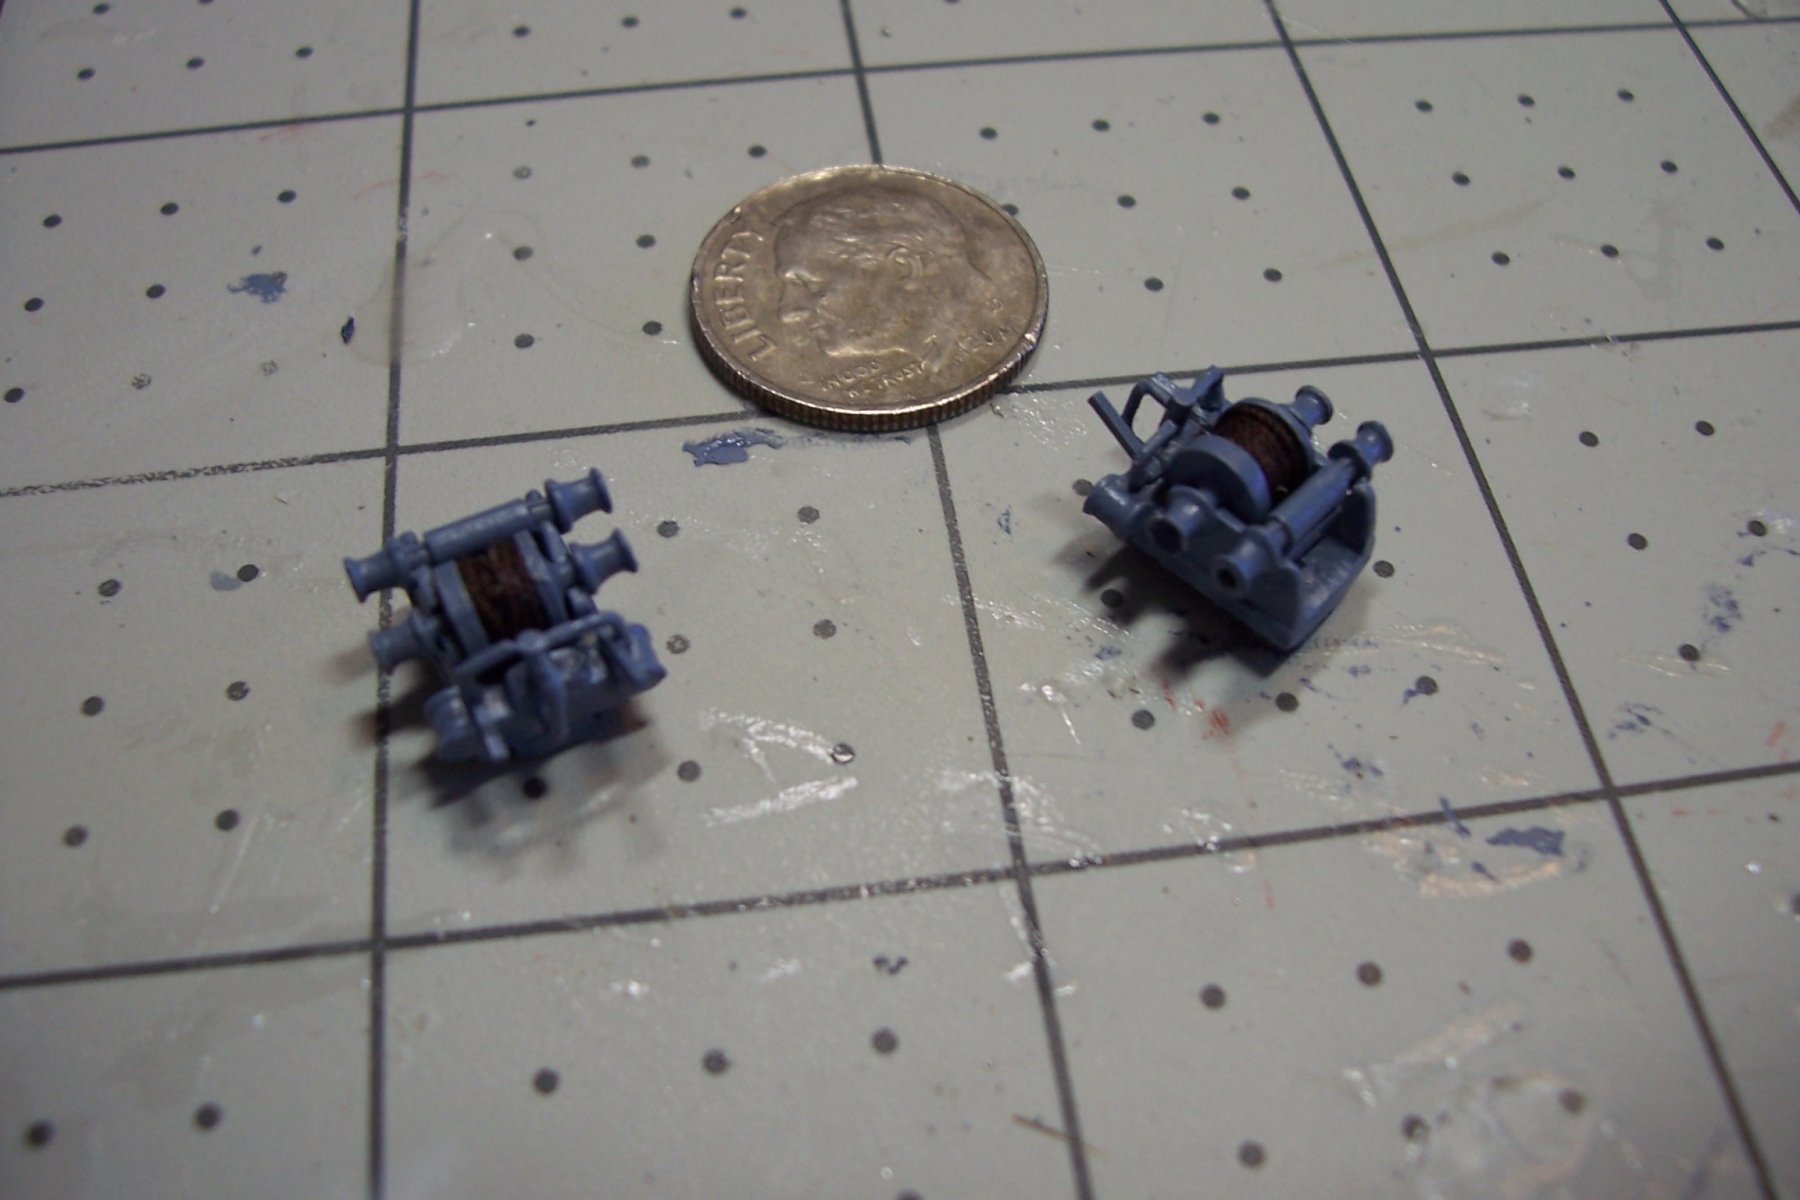
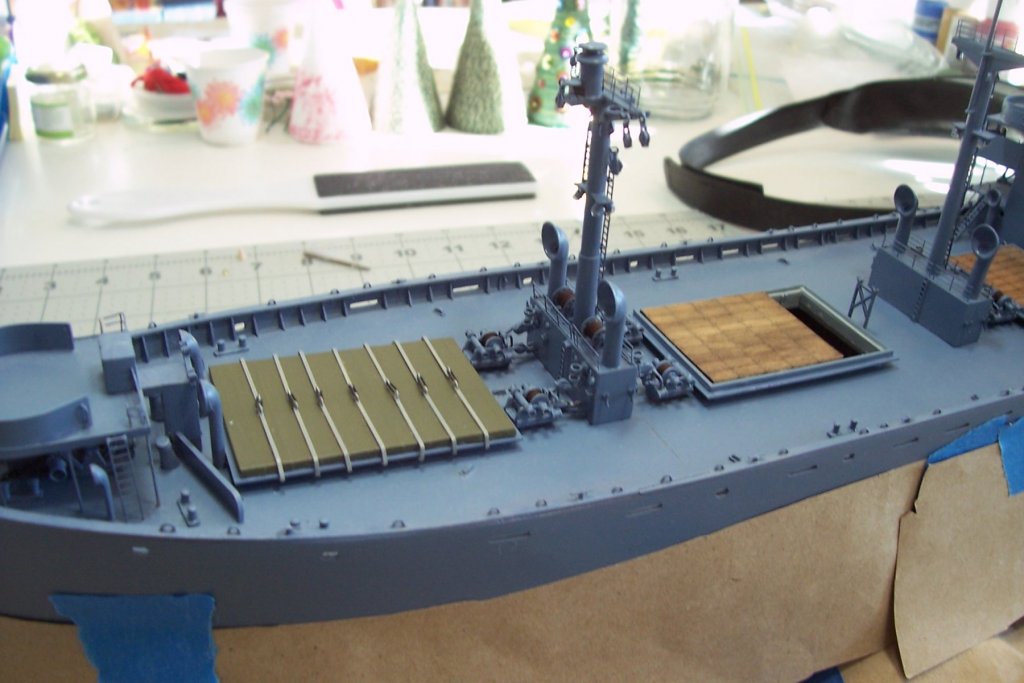
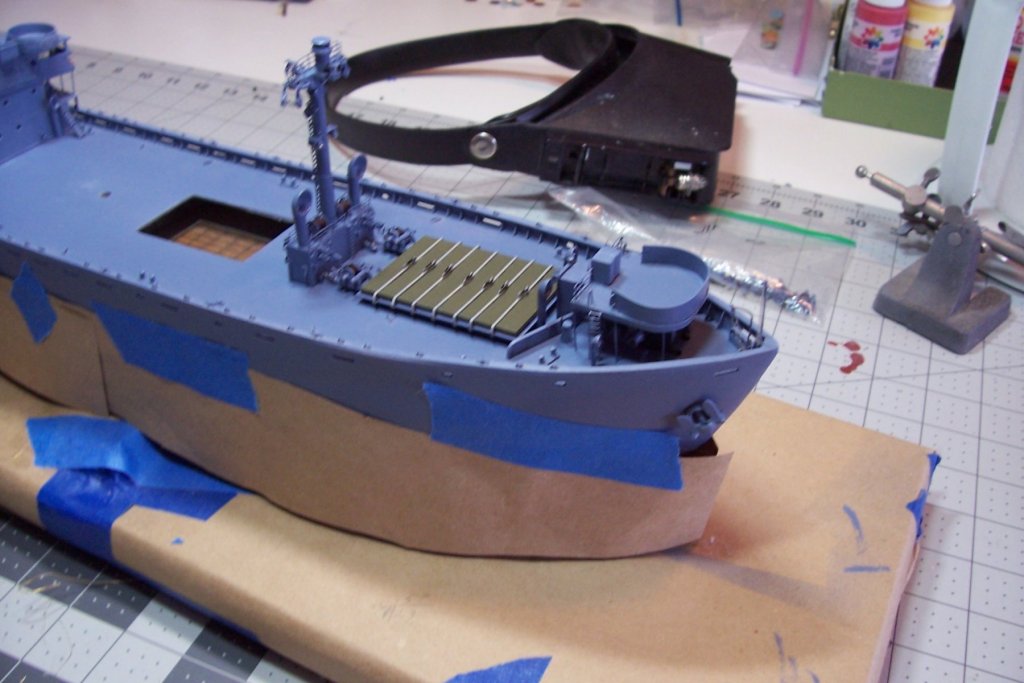
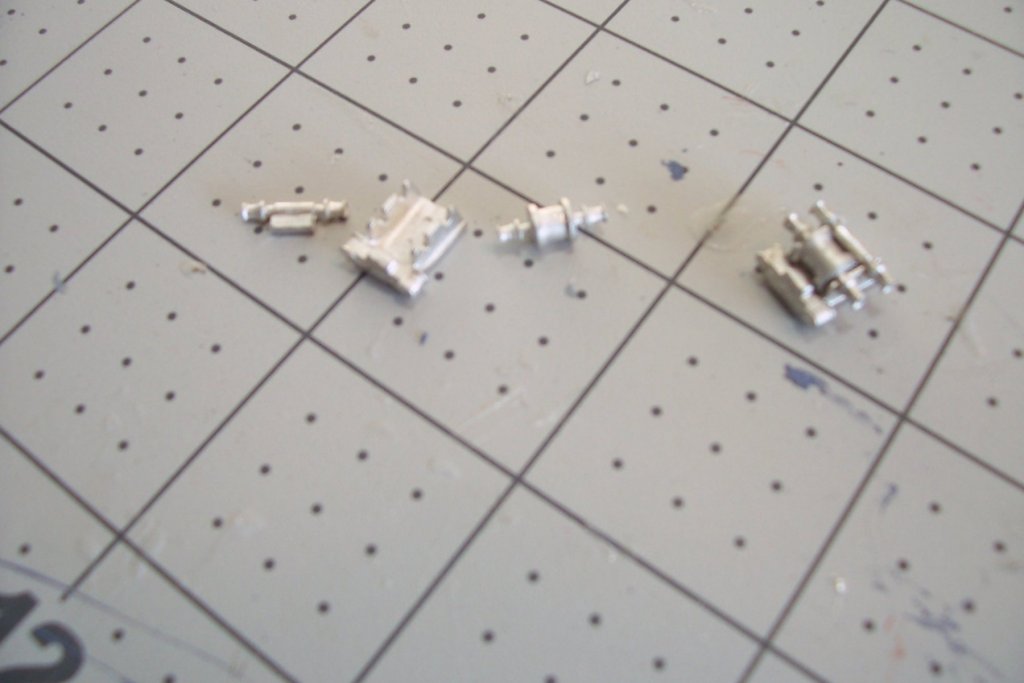
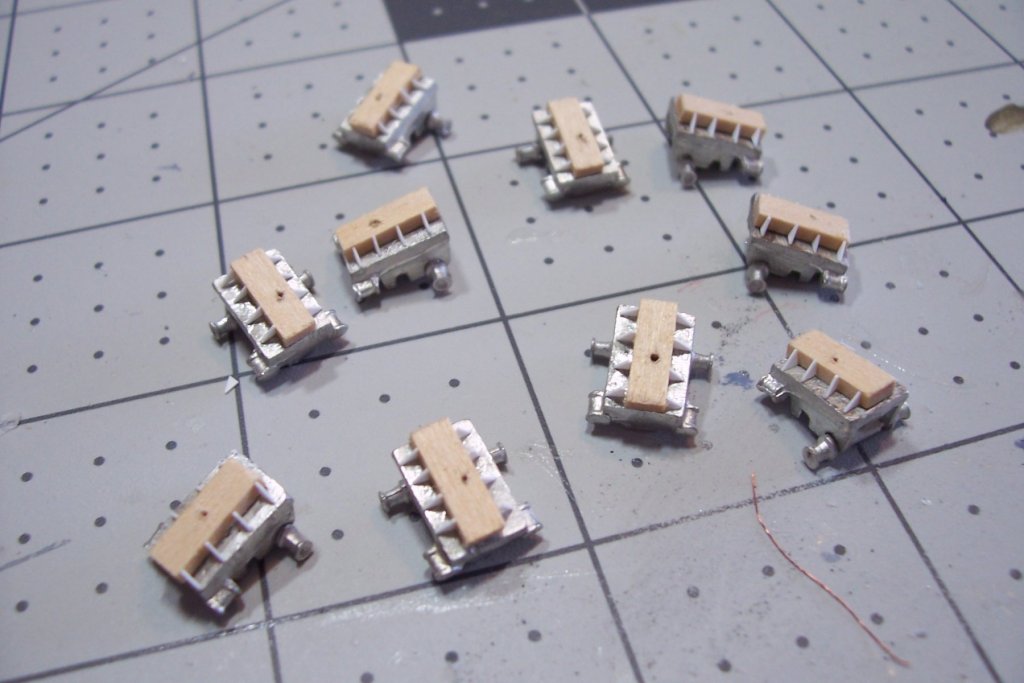
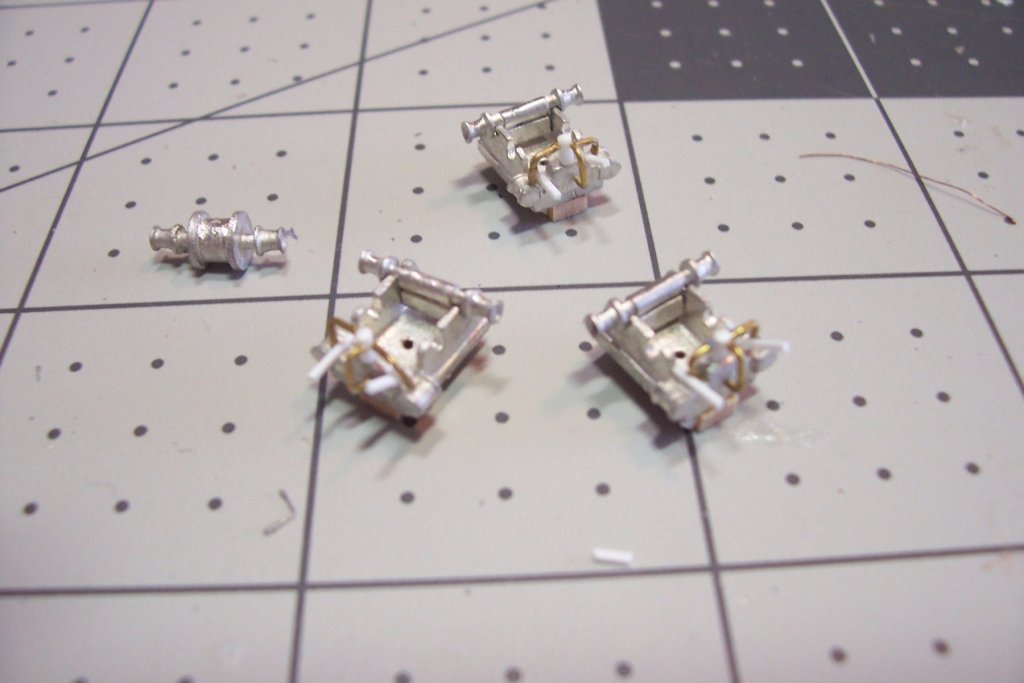
Cargo Winches The kit provides some nice castings for the winches, although they are pretty small they still provided 3 separate parts which makes them much more realistic: The casting are dimensionally correct for length and width but when I placed one next to a cargo hatch I realized that I would have to raise them a bit so that the capstan heads are at least as high as the top edge of the hatches. A piece of 1/16” wood glued to the bottom raised them 1 scale foot which was just right. I made the wood slightly narrower than the bottom of the winches so that I could add some triangular gusset plates for a little more detail (the holes are so I can pin them to the deck since they will be under tension): The only detailing I did on these was to add the vertical steam manifold, some associated piping, the throttle lever and the drum brake lever. Their small size and the fact that there are 10 of them kept me from spending any more time trying to detail them - they are good enough: After painting I placed on wrap of the rigging thread I will be using for wire rope on each winch drum since I could not wrap them in place. I will not glue the drums in place until I rig the associated boom, then I can just lay the rigging under the drum, glue the drum to the winch and then draw the thread tight and glue it in place.

- 227 replies
-
- 9
-
-
- BlueJacket Shipcrafters
- Stephen Hopkins
- (and 2 more)
-
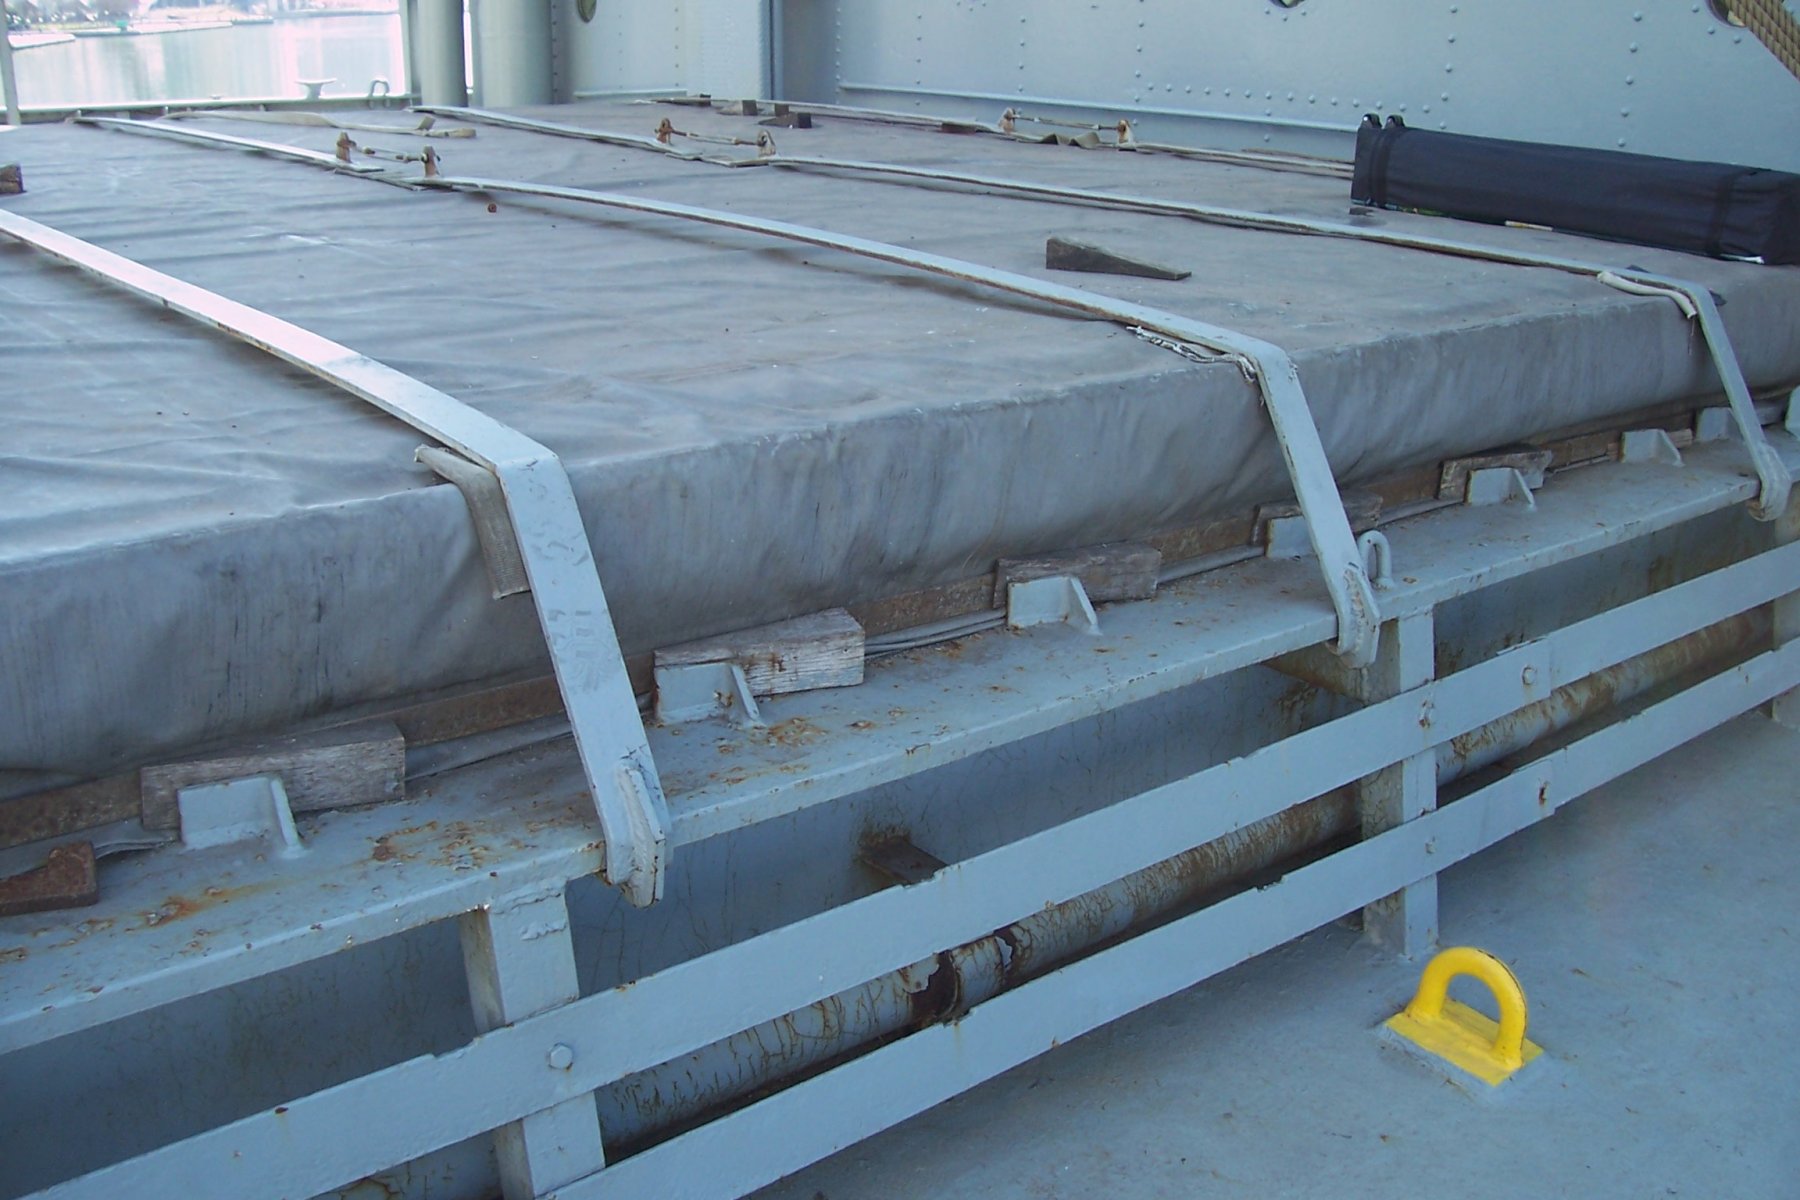
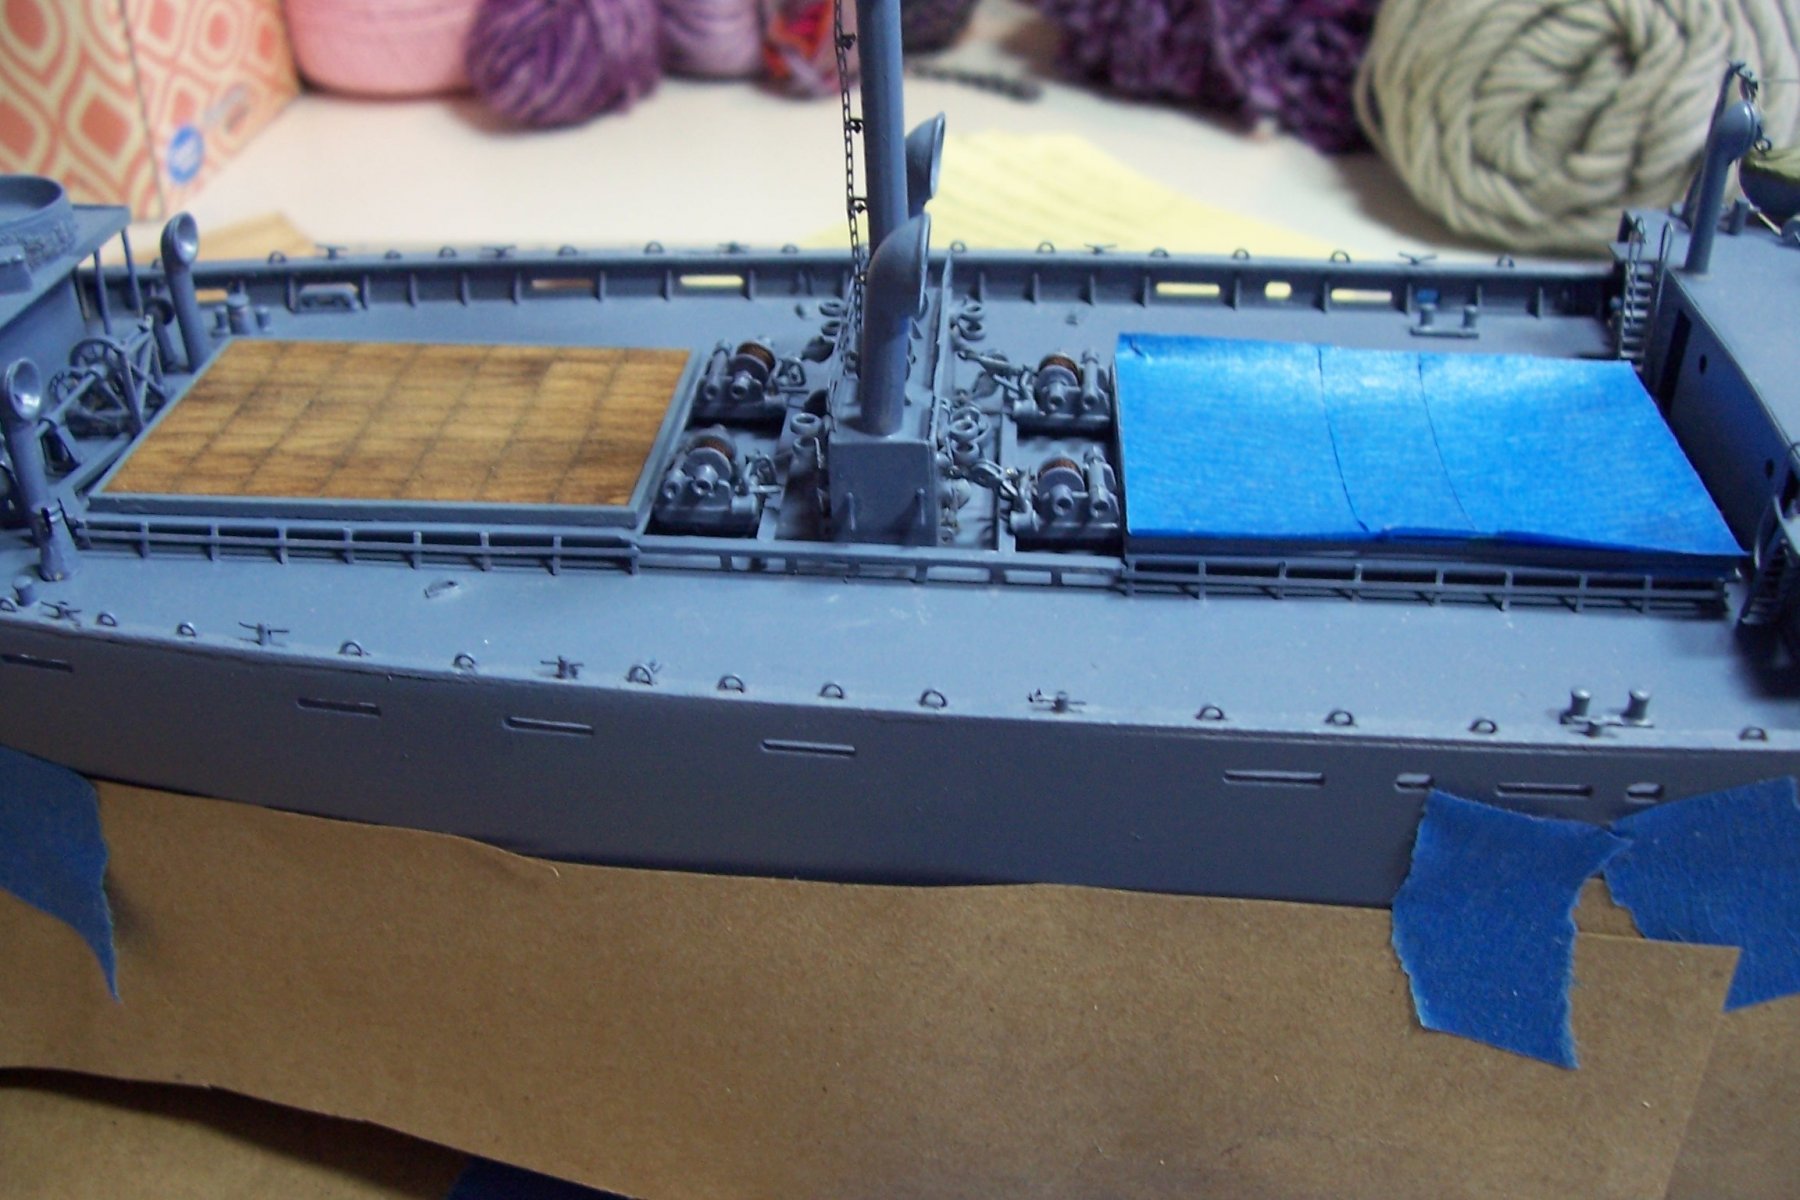
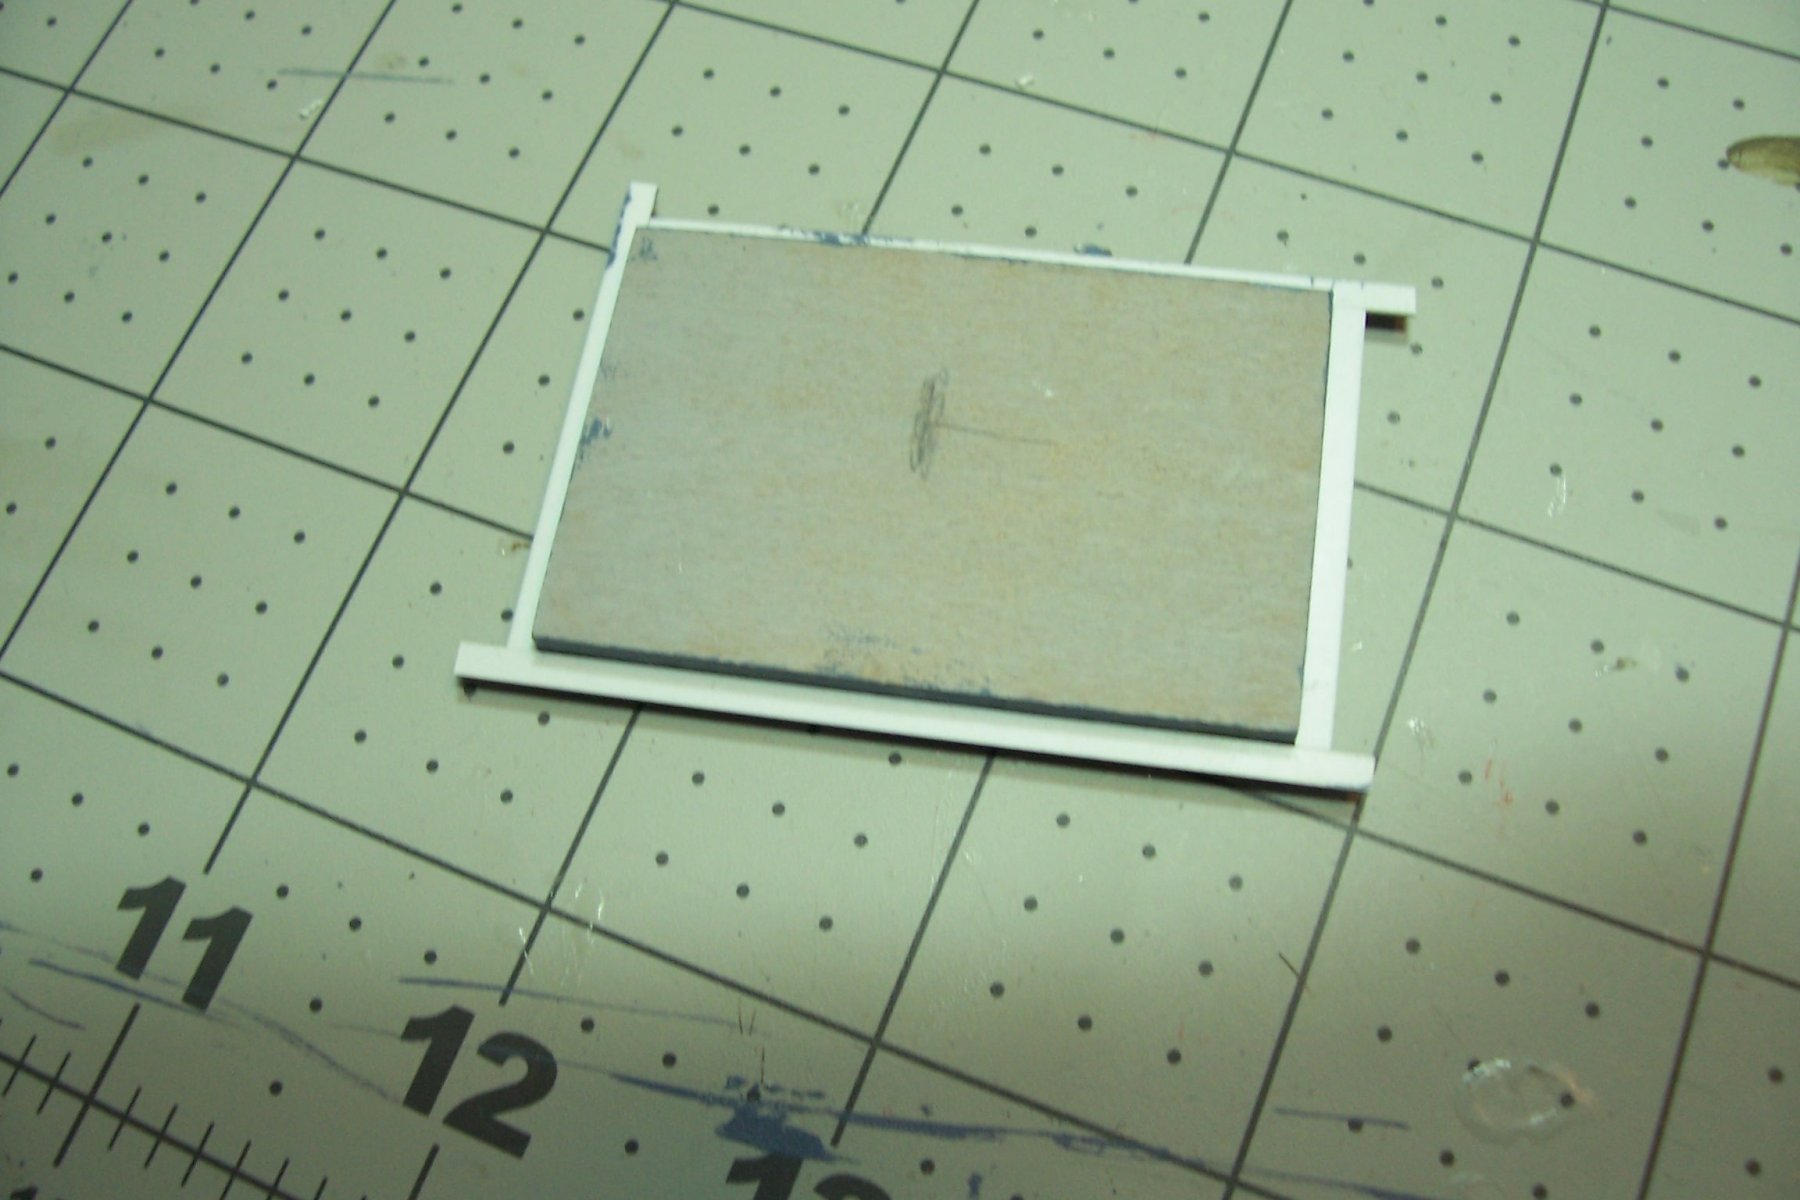
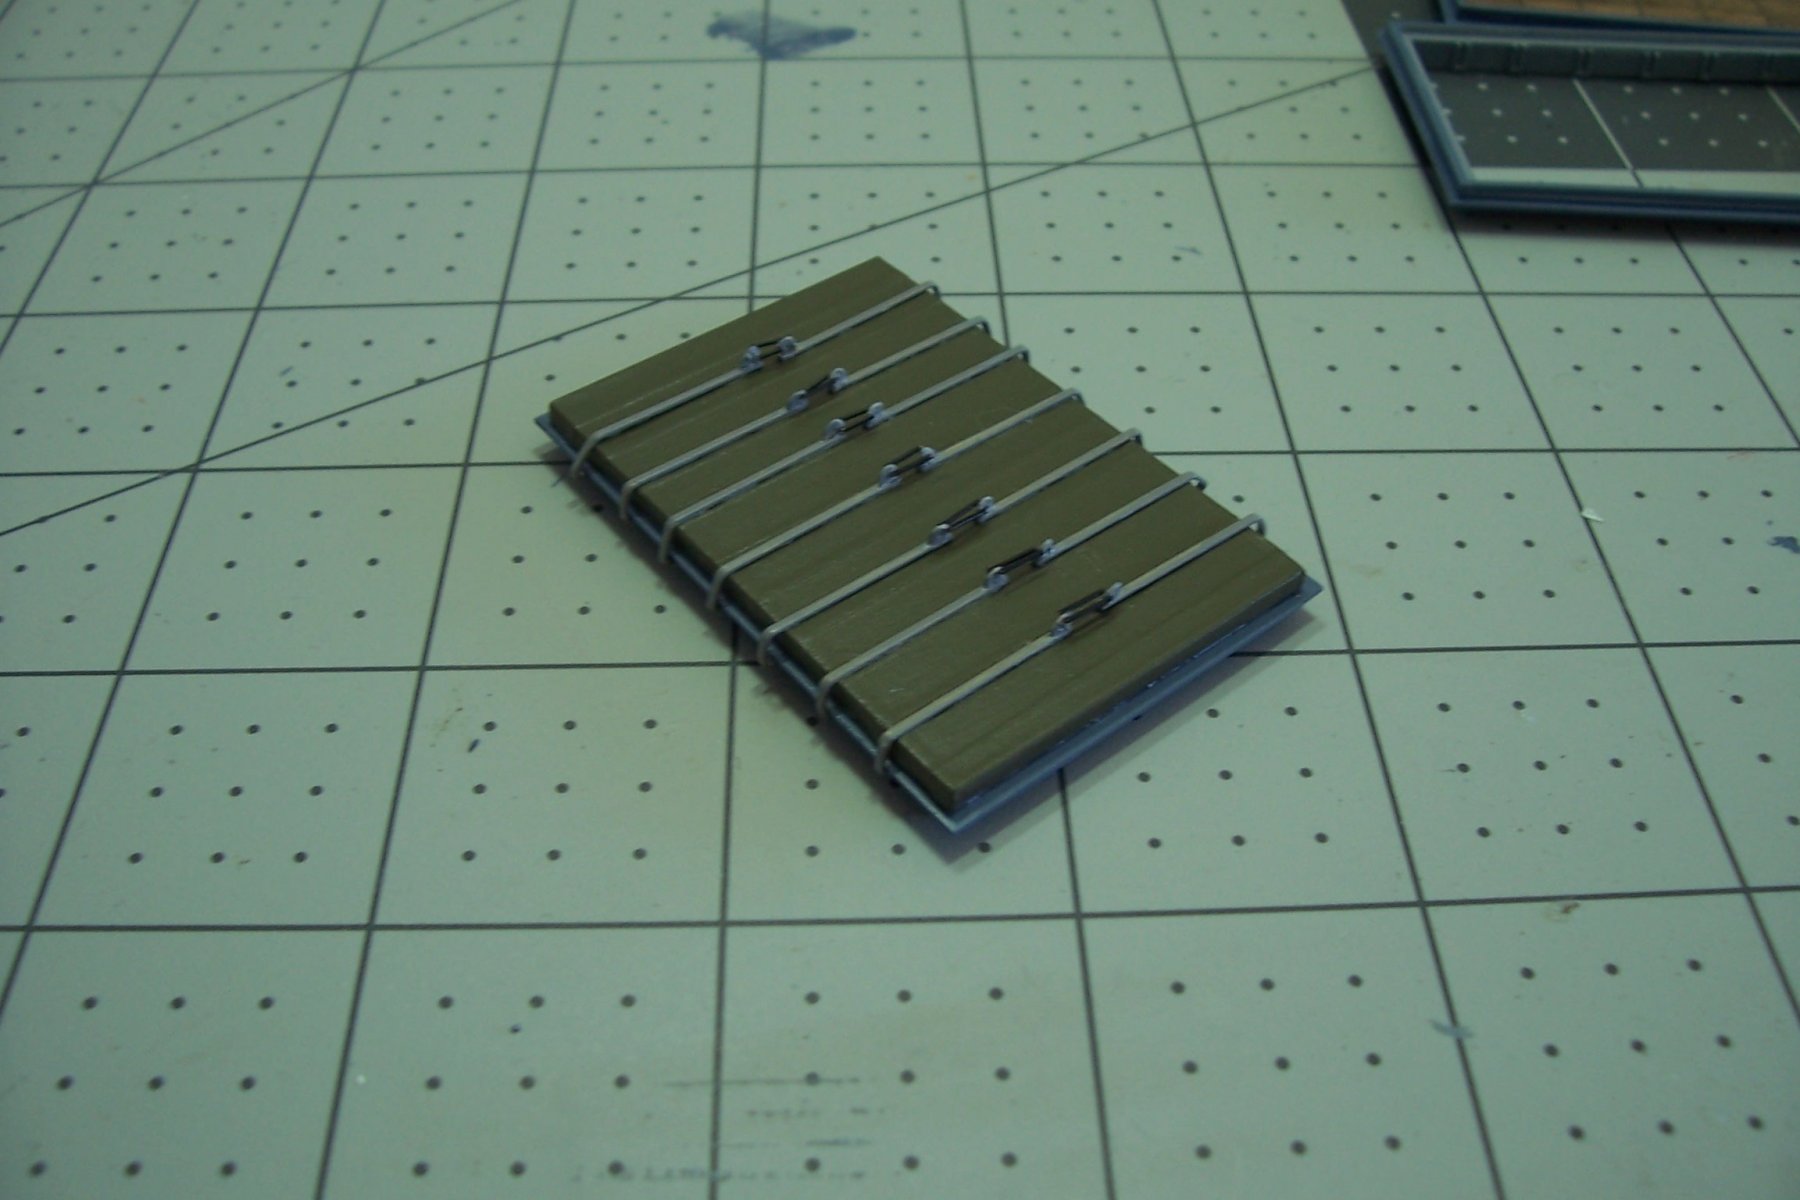
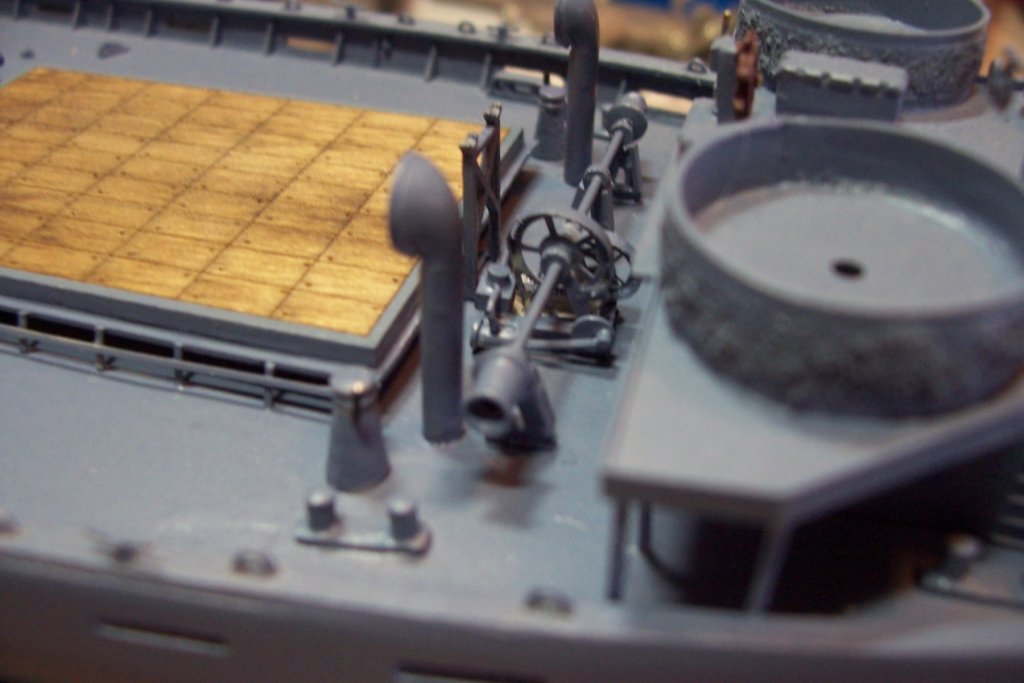
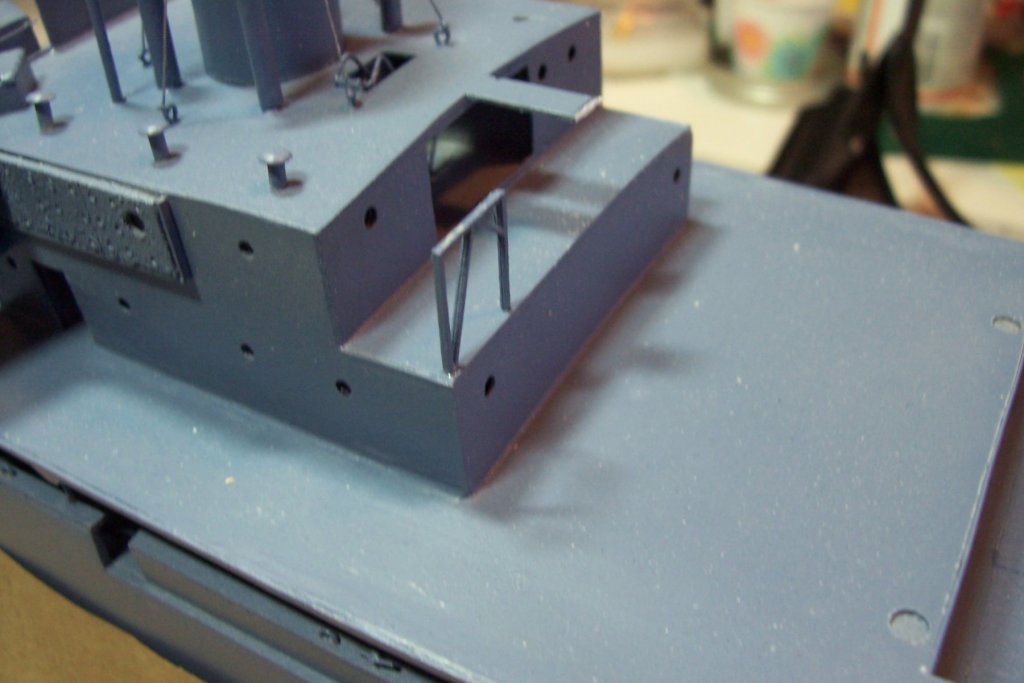
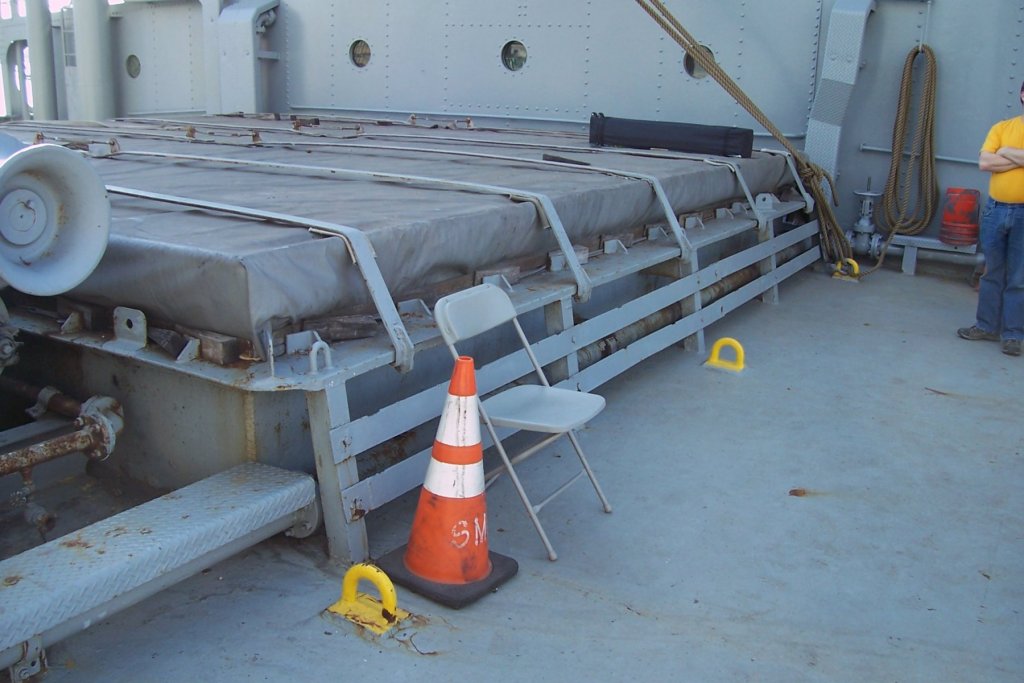
Final Hatch Details The final detail for all the hatches is the “shelf” that runs around their perimeter, just below the hatch combing. It serves as the anchor point for the straps that hold down the tarp when the hatch is secured for sea and also as the attachment point for the strap metal “fence” that protects the steam and fireman piping from being mashed by a load of cargo. You can see them here just behind the folding chair: They were easy to fabricate out of strip plastic and the upper piece of the hatch assemble provided a great gluing surface: Here are some of the finished ones: The last item is the straps to cover the tarp on Hatch Nr1, I fabricated the out of brass, plastic and wire: Next up will be the 10 cargo winches.

- 227 replies
-
- 6
-
-
- BlueJacket Shipcrafters
- Stephen Hopkins
- (and 2 more)
-
Very interesting build Steve. I'm working on BlueJacket's Liberty ship and it is intriguing to see what is the same on this version. I'm going to watch your RC work closely since you have given me some food for thought. I live on a lake and may take the RC plunge myself for something different.
- 446 replies
-
- 2
-
-
- zebulon b vance
- deans marine
- (and 3 more)
-
Thanks Kevin, I'm glad you chimed in because your post led me to your Fife & SD-14 builds, I'm going to have several pleasant hours working my way through them. I was wondering how anyone could have the patience to work thru your problems with the hanger on the Fife until I saw your SD-14 build with thousands of pieces of card and I realized just how patient you must be. Wonderful work.
- 227 replies
-
- 2
-
-
- BlueJacket Shipcrafters
- Stephen Hopkins
- (and 2 more)
-
Thanks Steve. I just got caught up on your Cudahy - amazing work, I've never seen anything like your engine room details, brings back memories of working on the Virginia V as a teen with her big triple expansion engine.
- 227 replies
-
- 2
-
-
- BlueJacket Shipcrafters
- Stephen Hopkins
- (and 2 more)
-
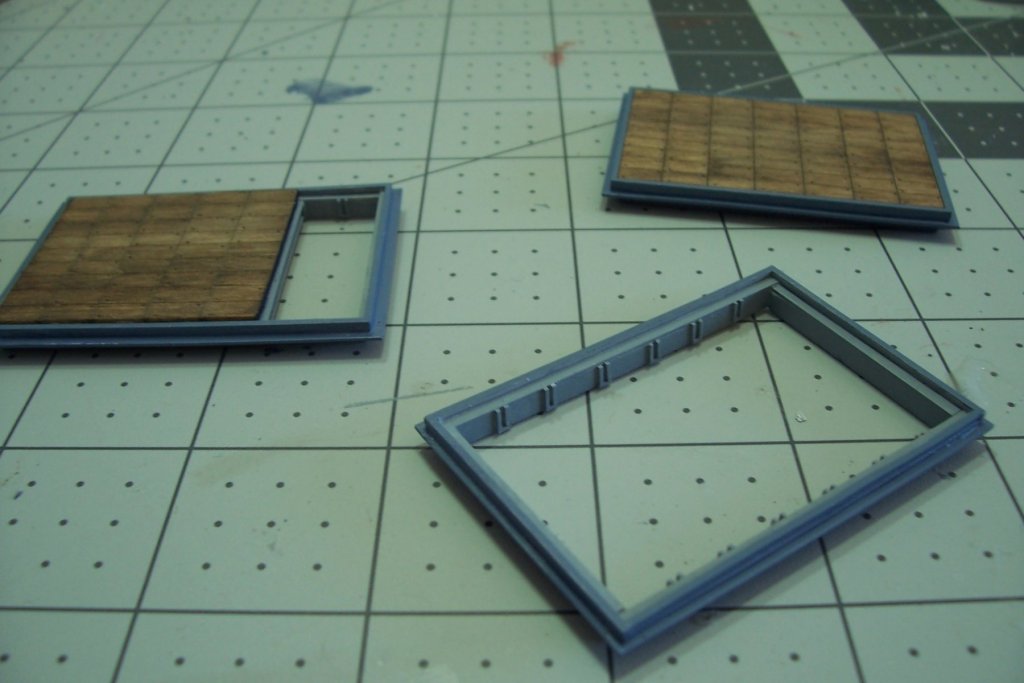
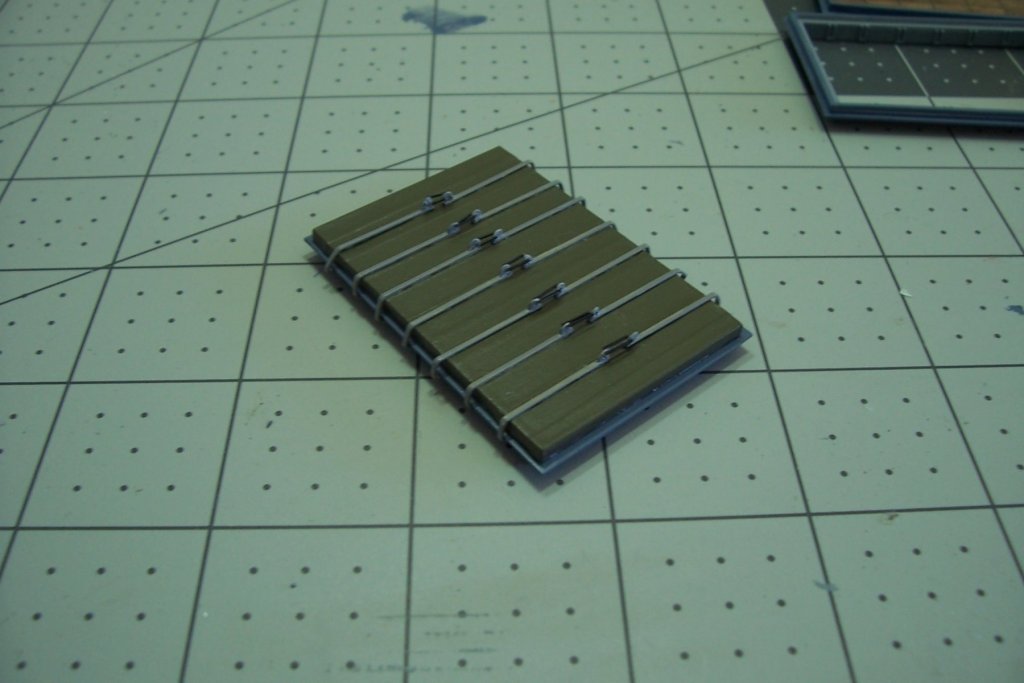
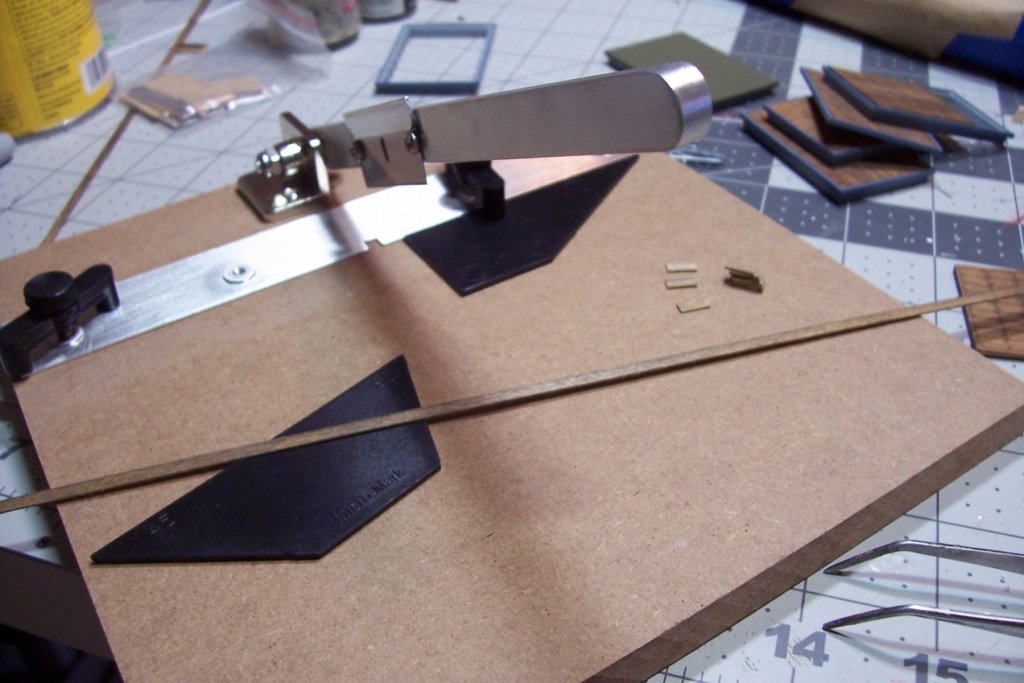
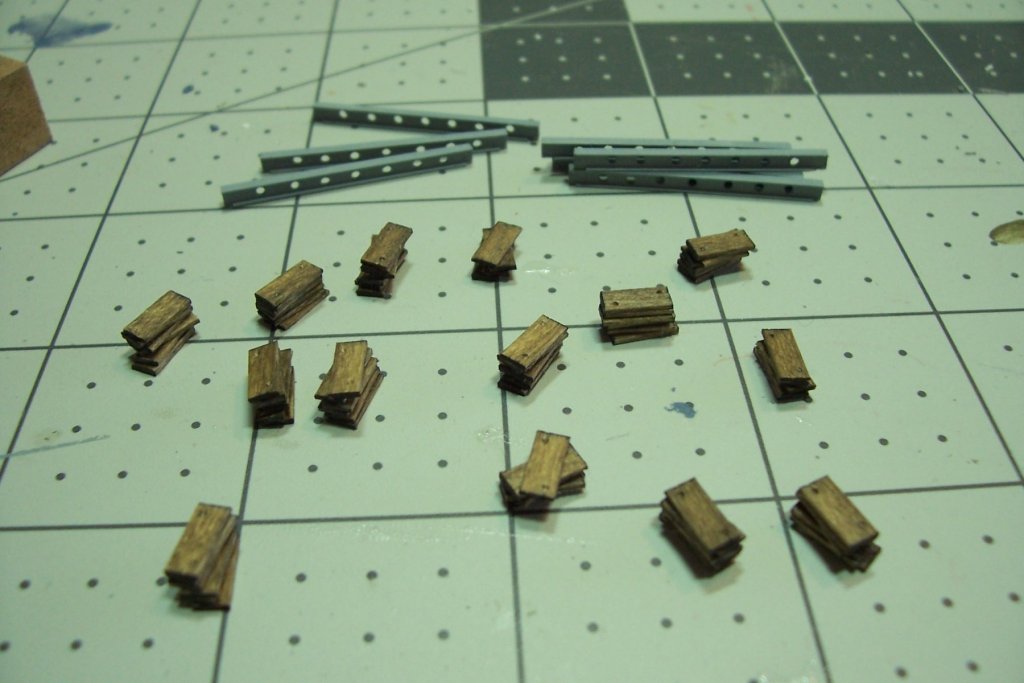
Individual Hatch Covers I needed to make 81 individual hatch covers to account for the ones removed from the open hatches. I dragged my feet on it because I knew it would be pretty tedious but then I found this tool, the Chopr, from Micromark for about $20 and it did the trick for me: It was just a matter of finding some strip wood of the right width, sanding it down to a scale thickness of about 4”, staining it and then chopping it to length with my new toy. It only took about 5 minutes and the cuts were so smooth that no sanding was required. I blackened the ends with a Sharpie pen to simulate the angle iron reinforcements and used a piece of wire to press the 2 corner depressions for the lifting straps in the ones that would be on top of the stacks and then glued them together in sloppy stacks. It must have been hairy work removing those covers in the rain where one man had to walk on a slick hatch beam over the hold. These stacks will be placed in the scuppers near the open hatches in a random fashion.
- 227 replies
-
- 6
-
-
- BlueJacket Shipcrafters
- Stephen Hopkins
- (and 2 more)
-
WOW, very nice build. Great idea on painting decal paper - I never would have thought of that!
-
Bill, VERY nice looking build, your paintwork is excellent. I didn't know that there were such nicely detailed kits from way back when.
-
Thanks for the kind words and glad to have you aboard.
- 227 replies
-
- 1
-
-
- BlueJacket Shipcrafters
- Stephen Hopkins
- (and 2 more)
-
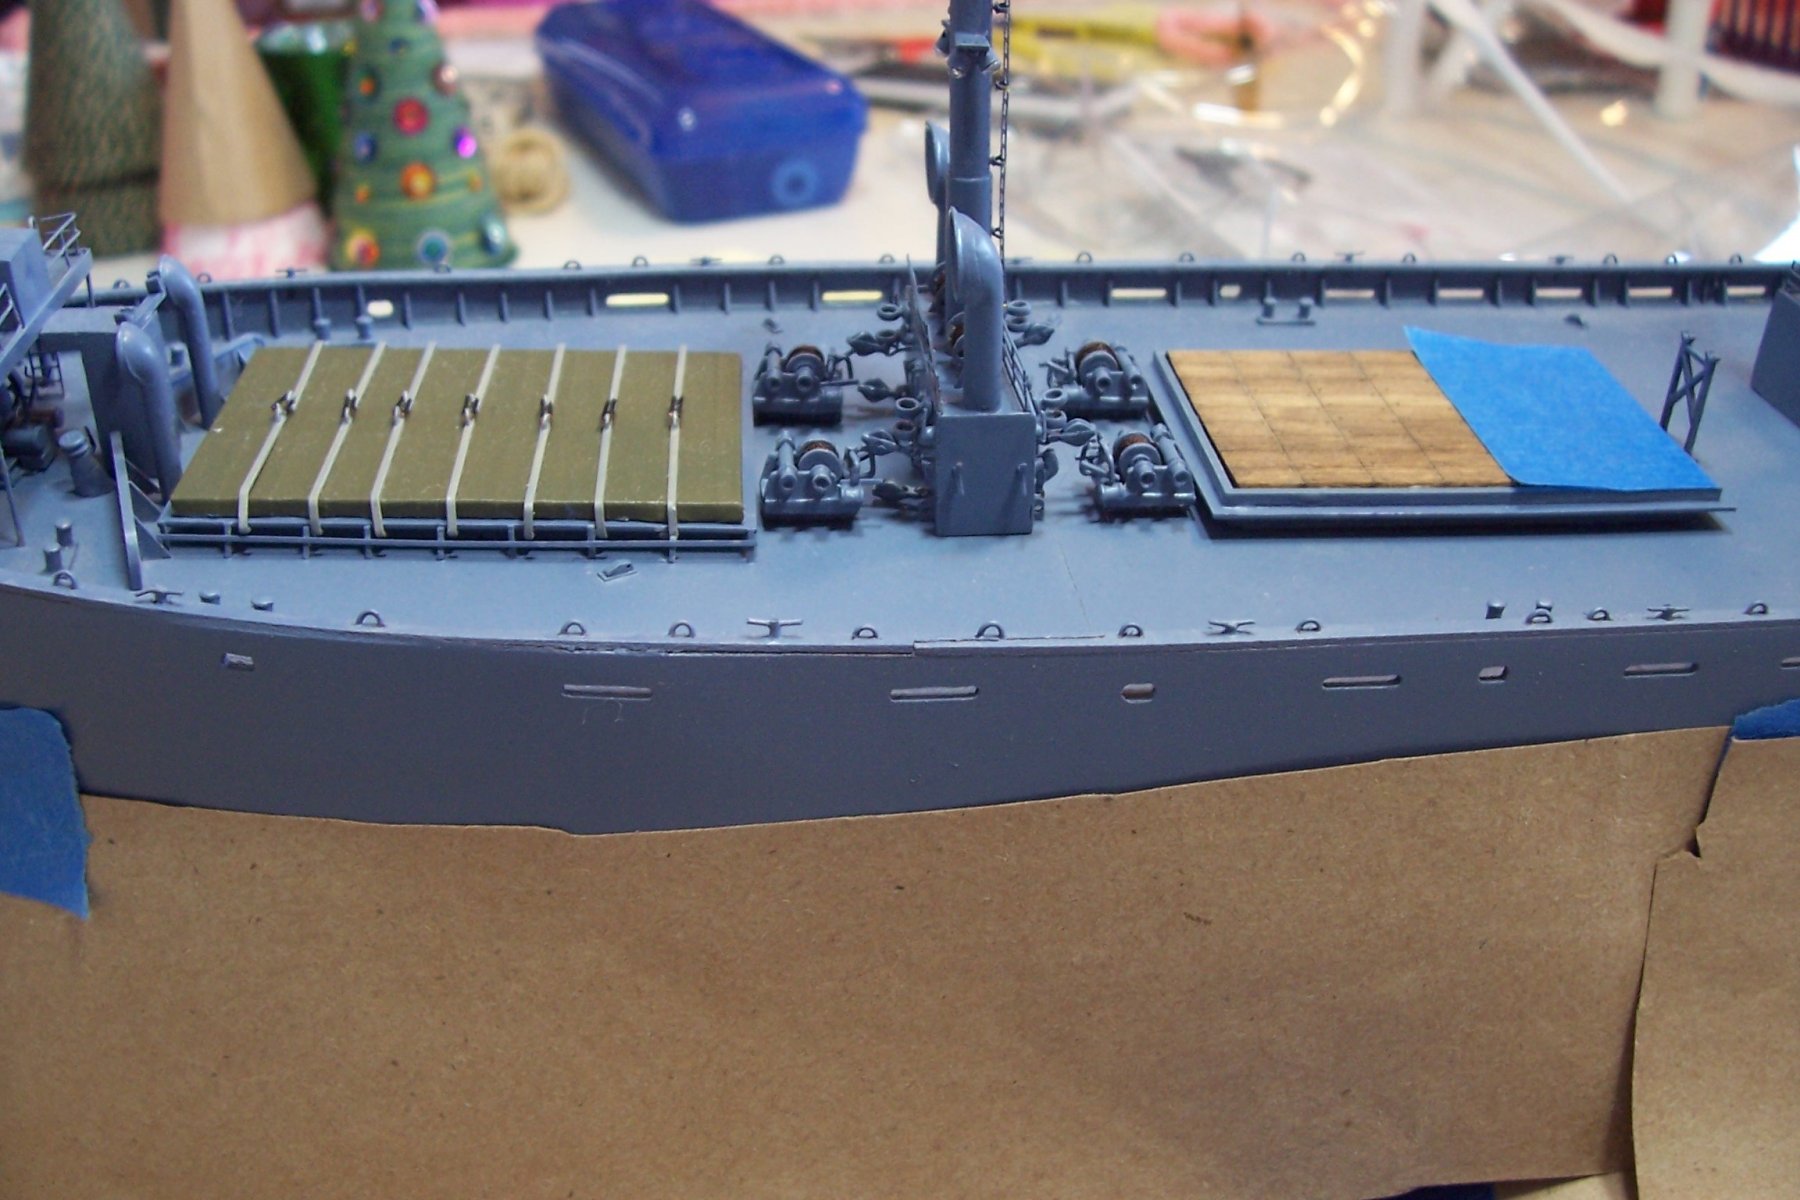
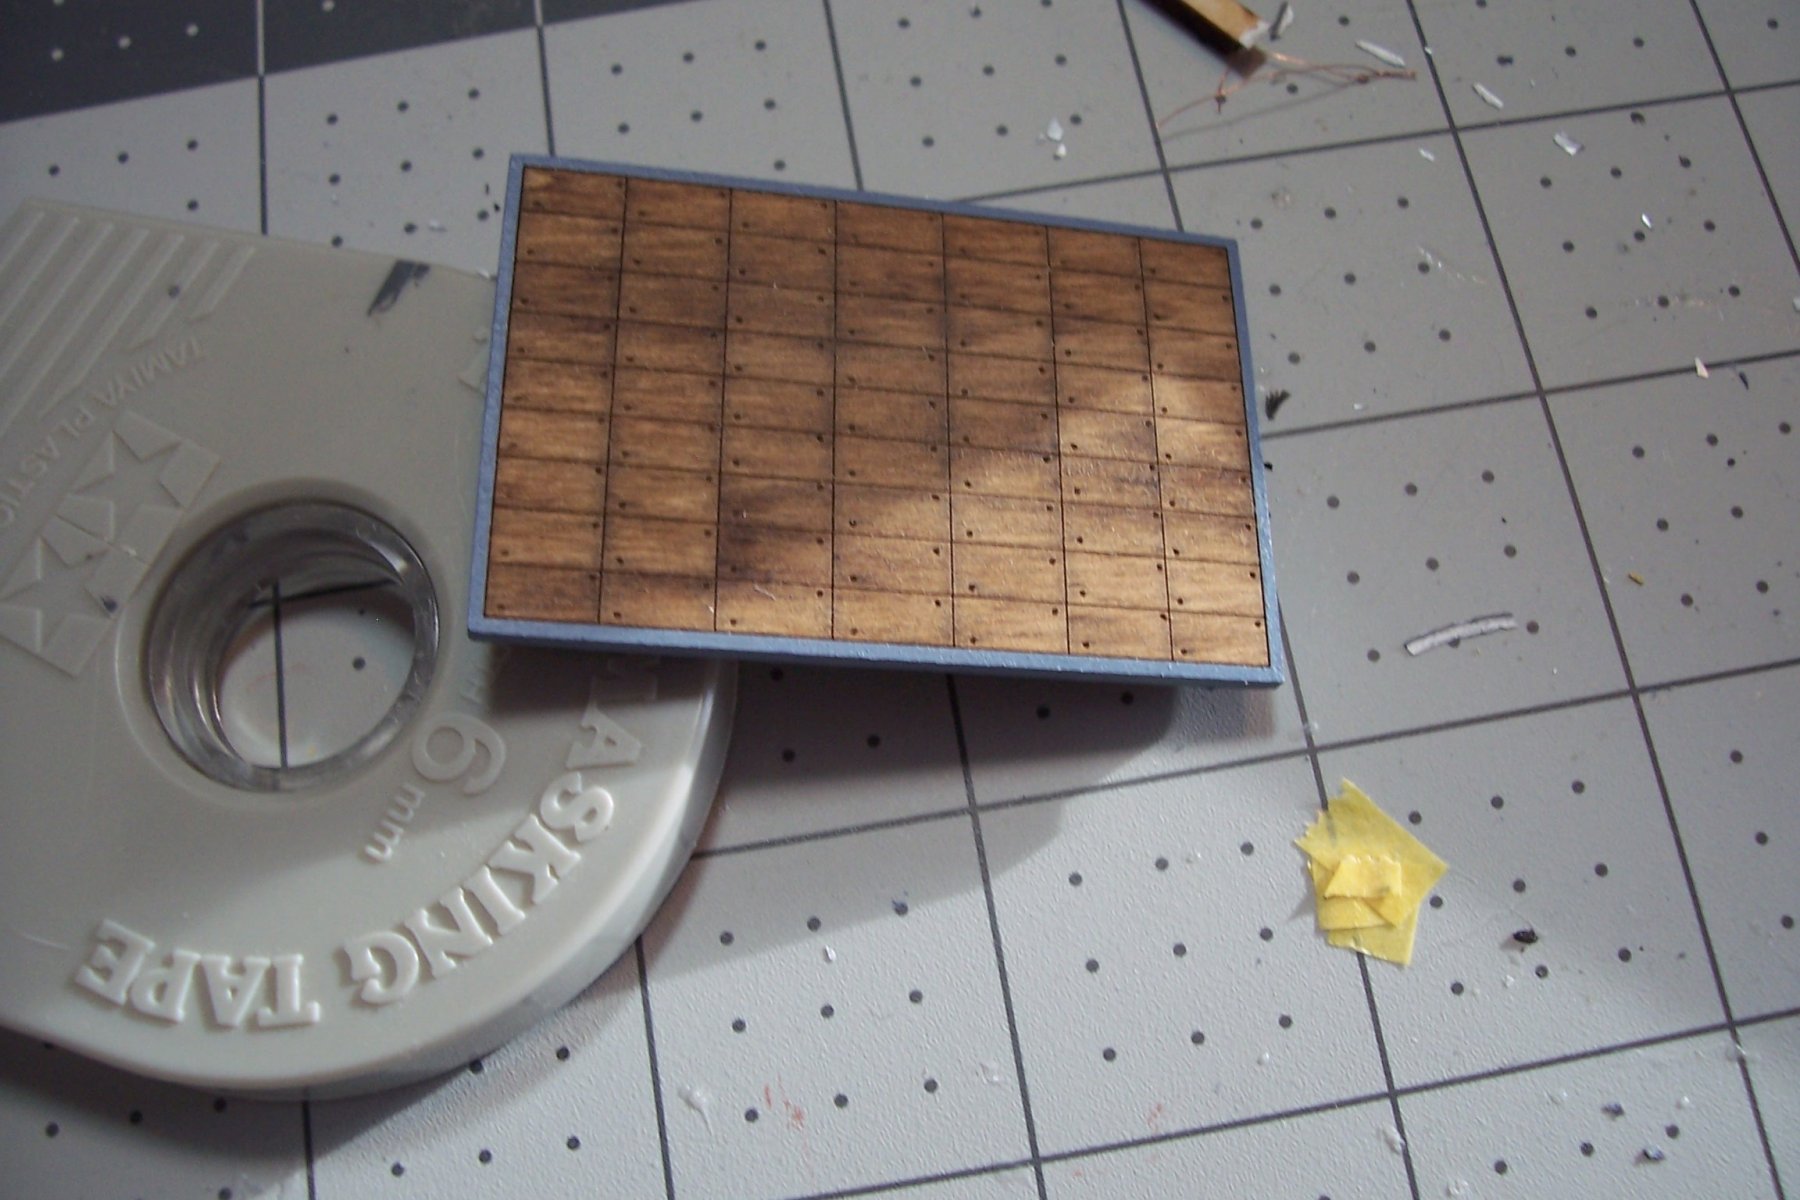
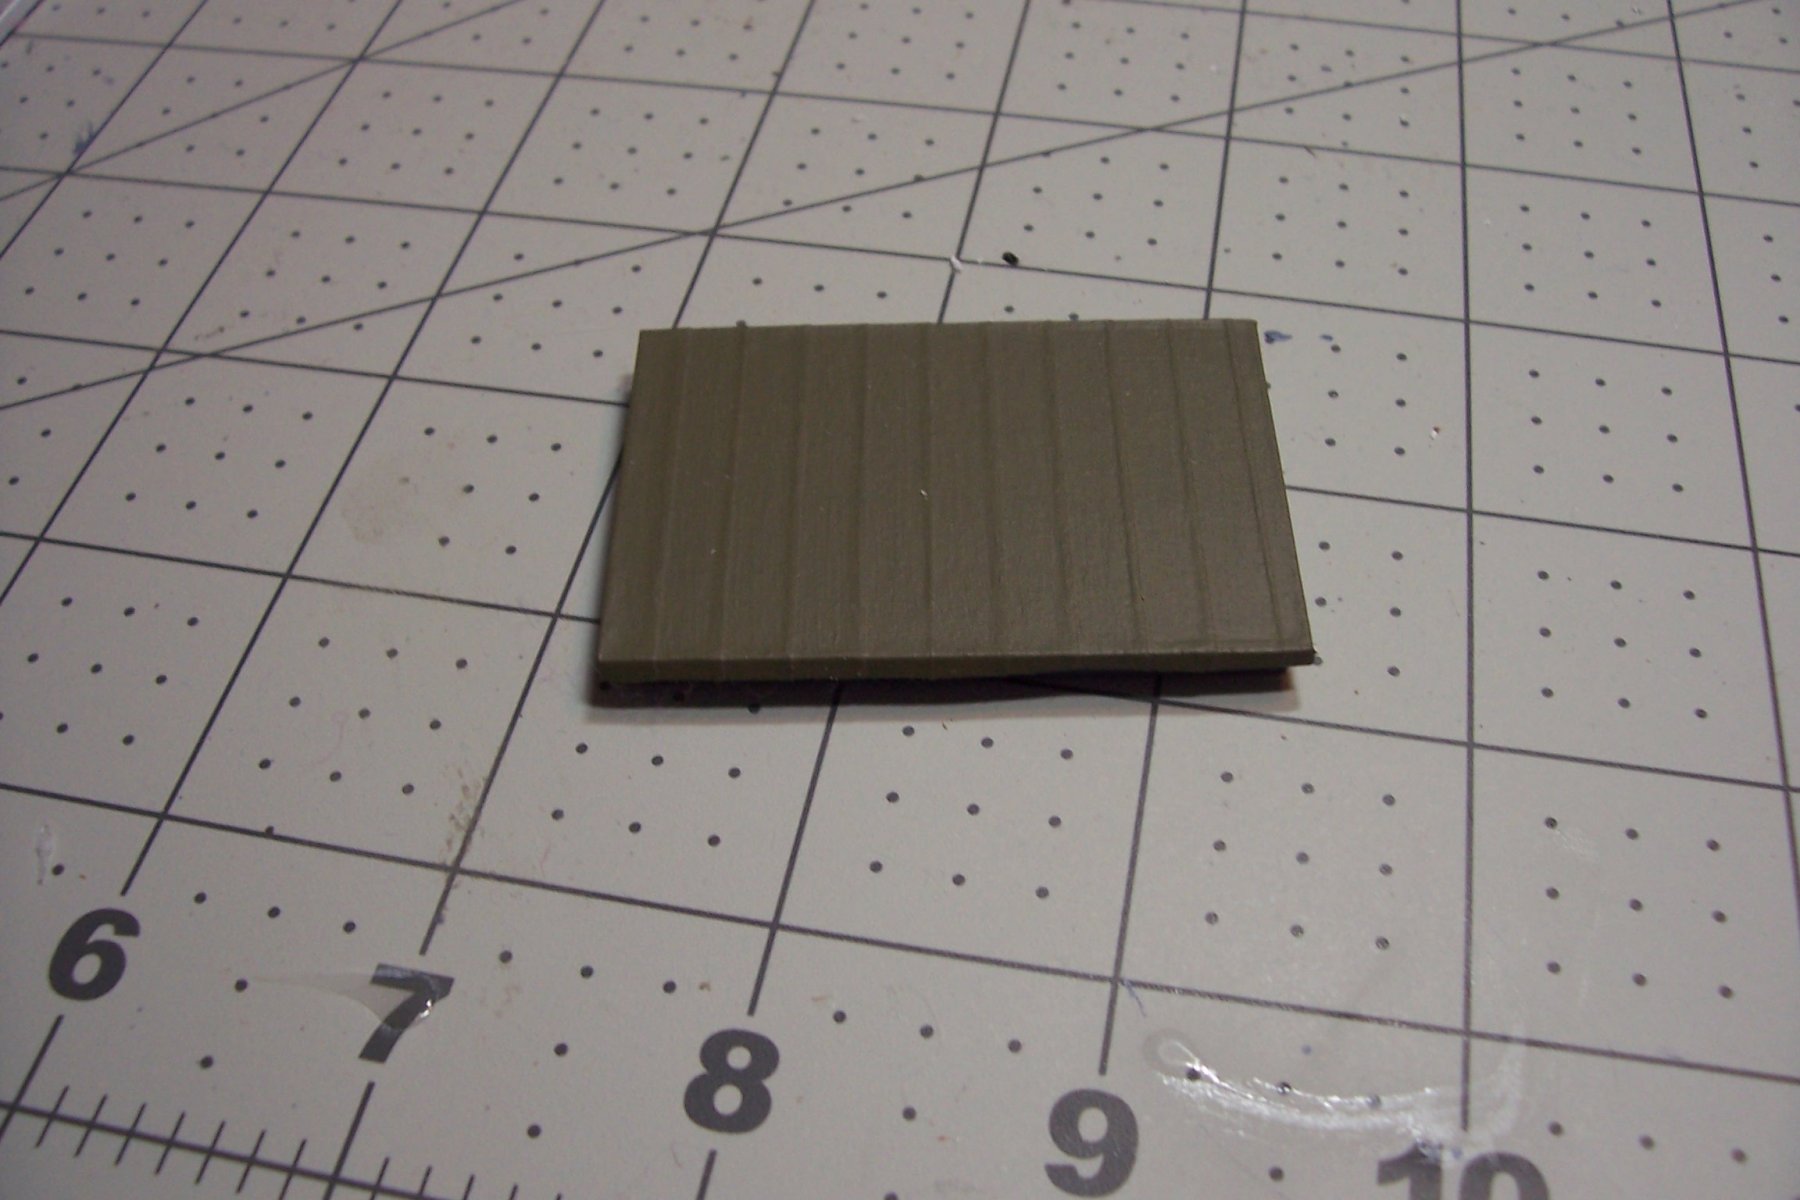
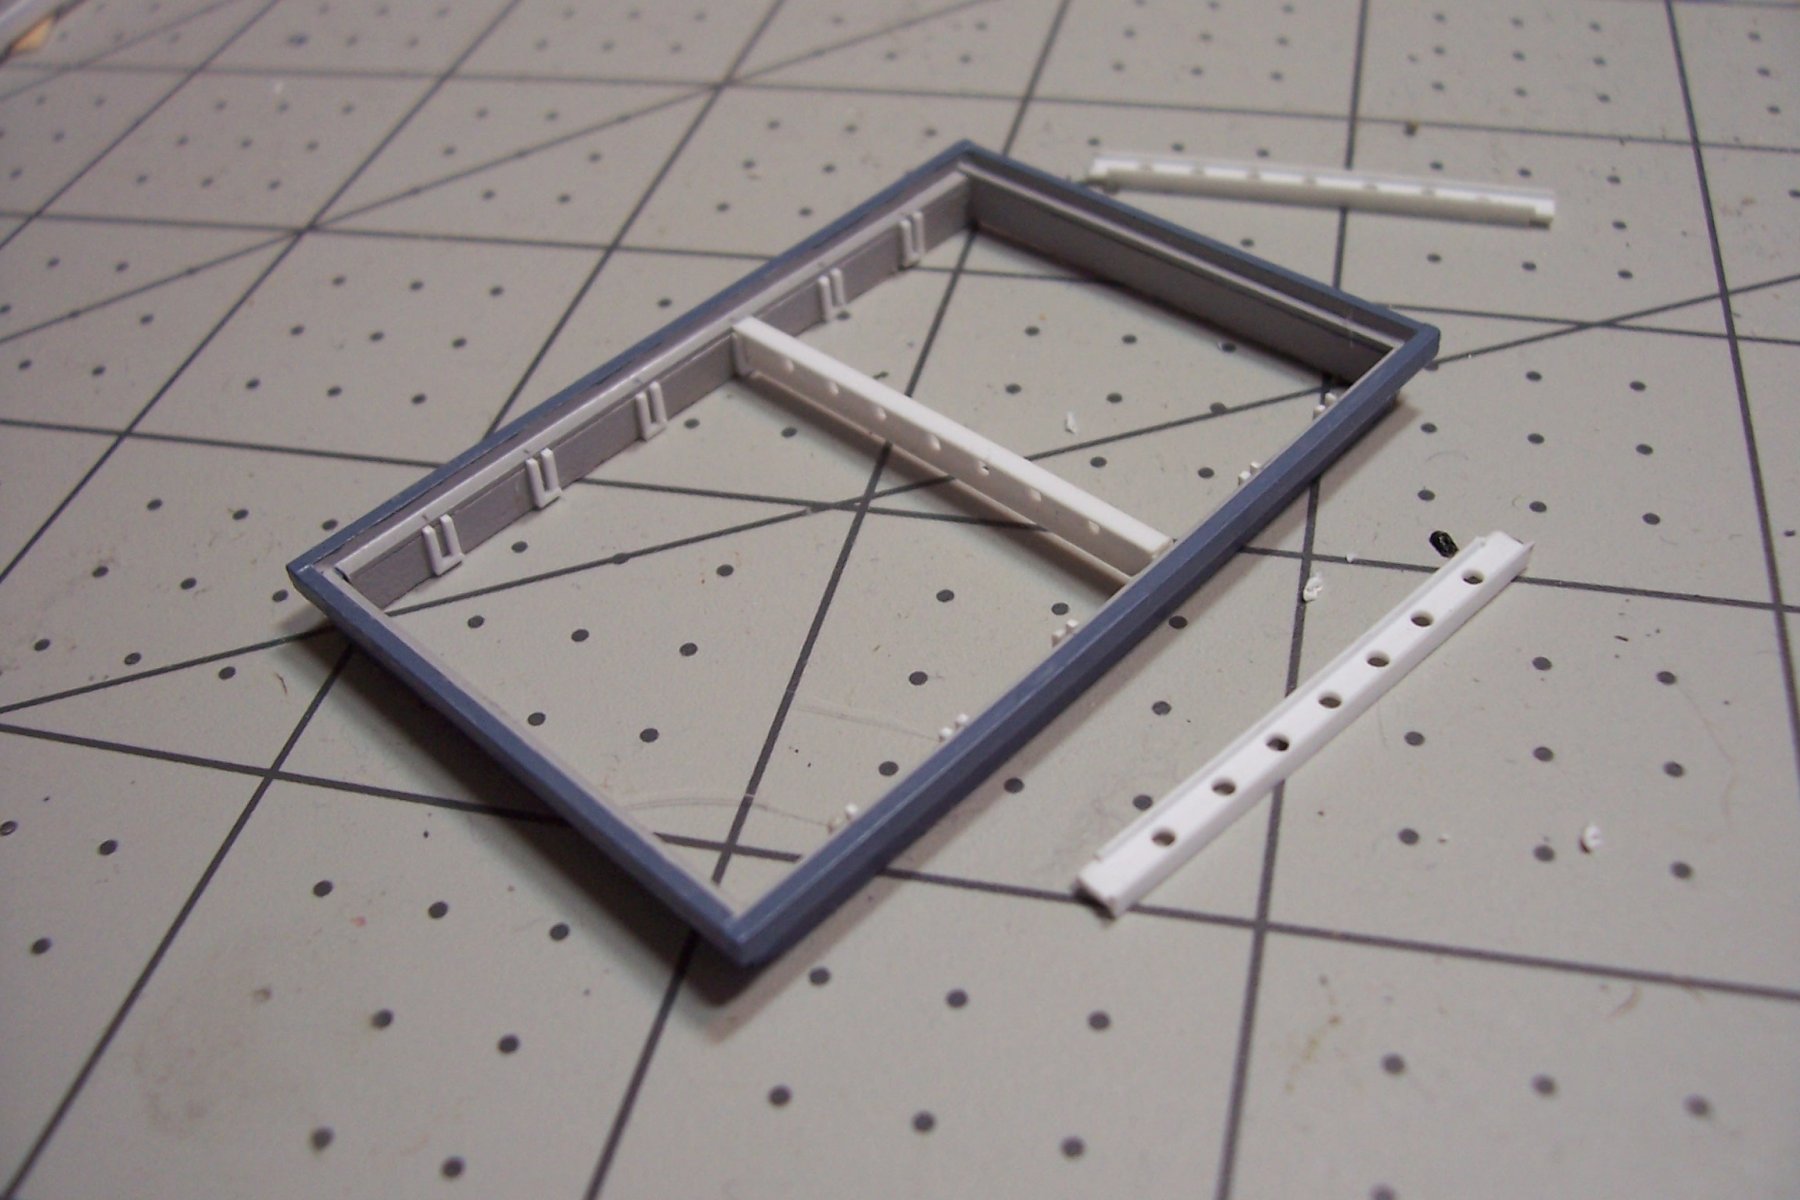
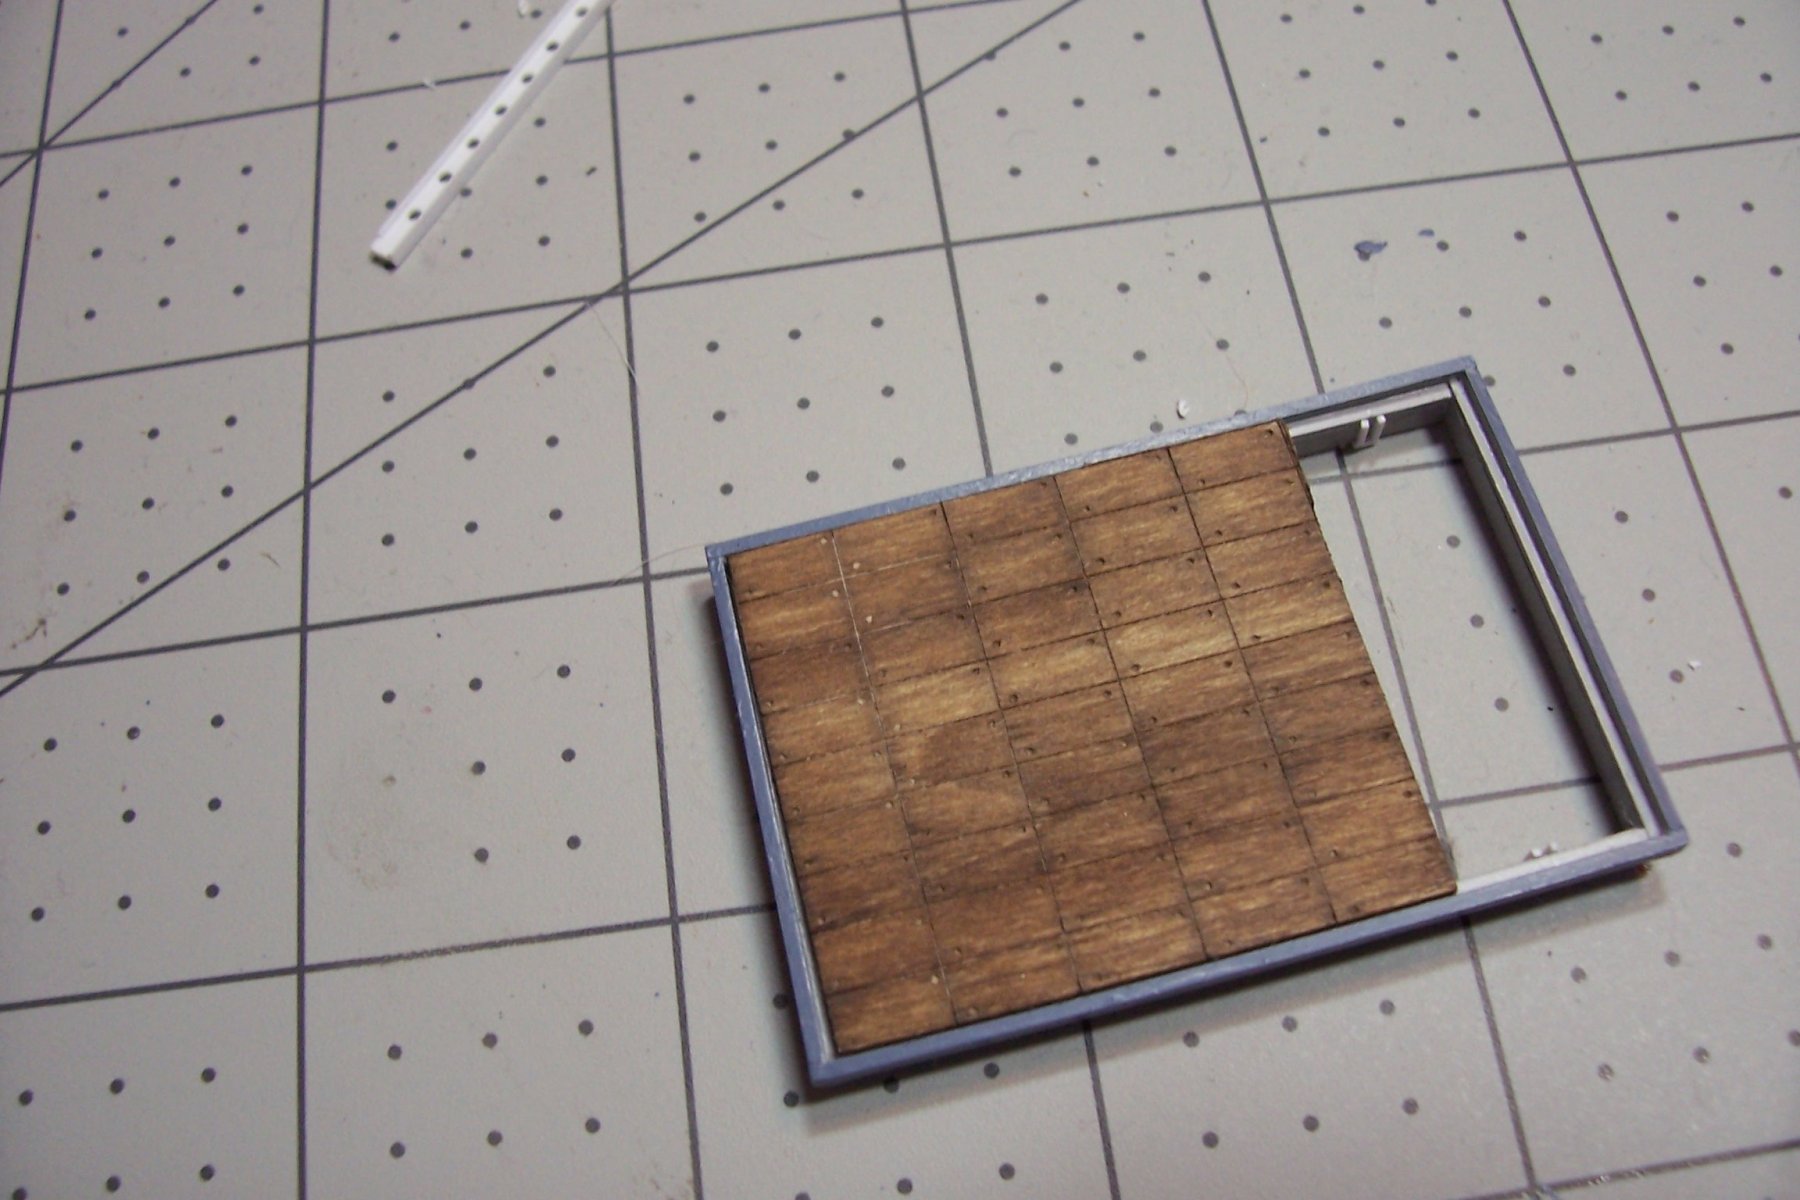
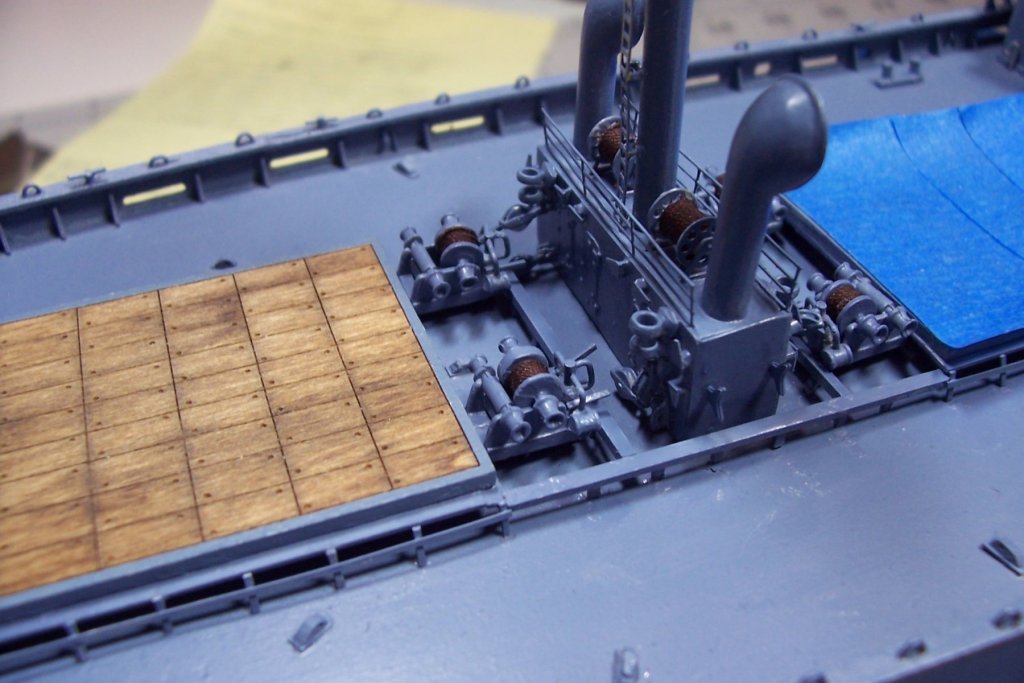
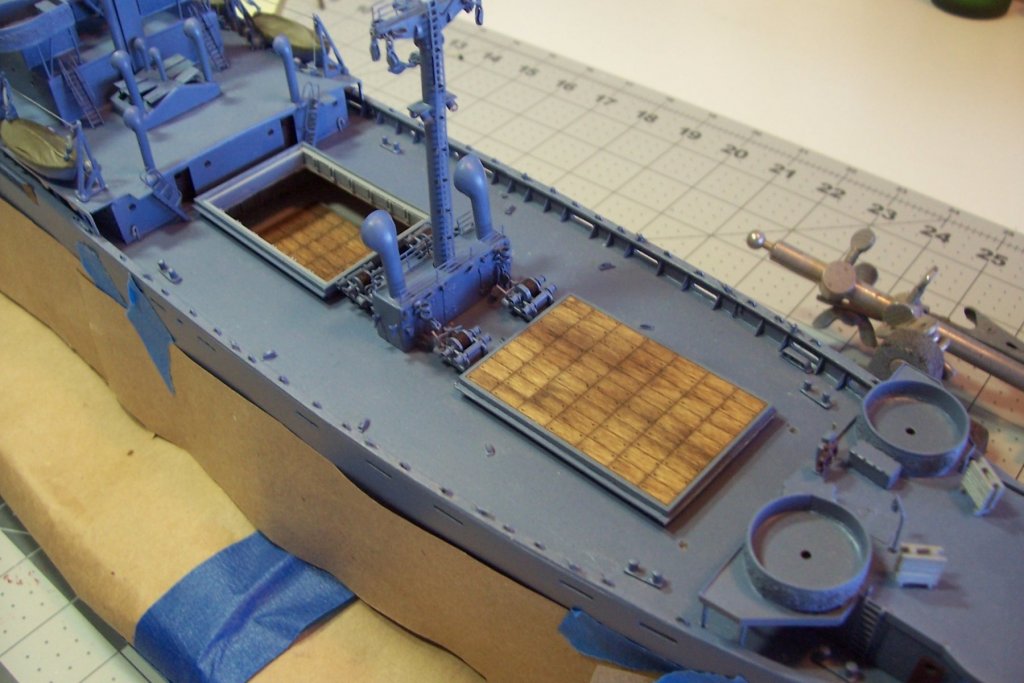
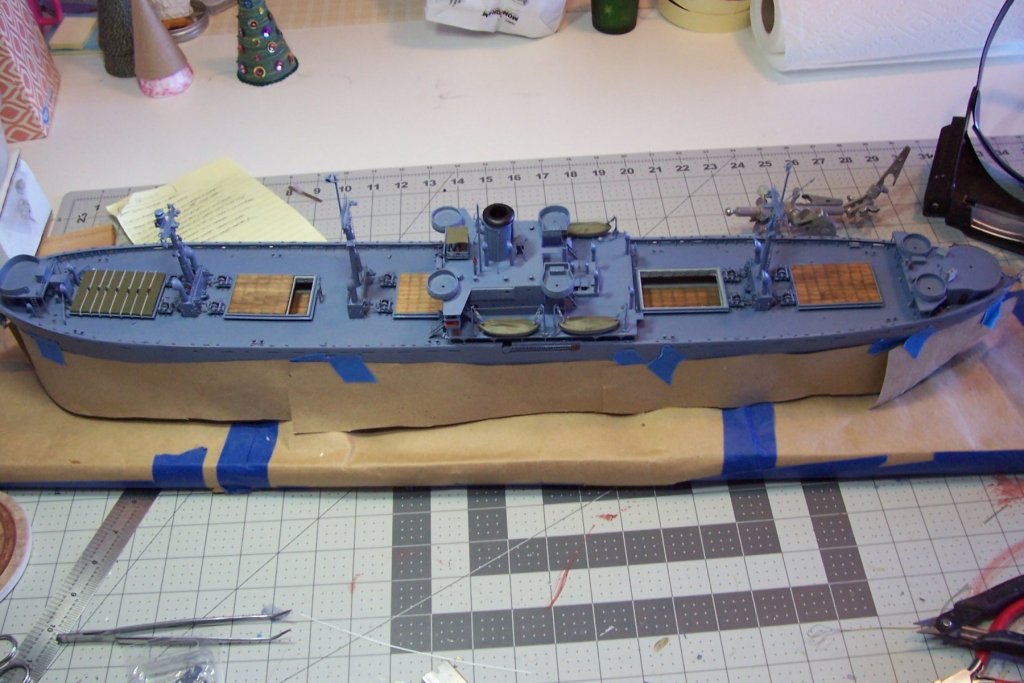
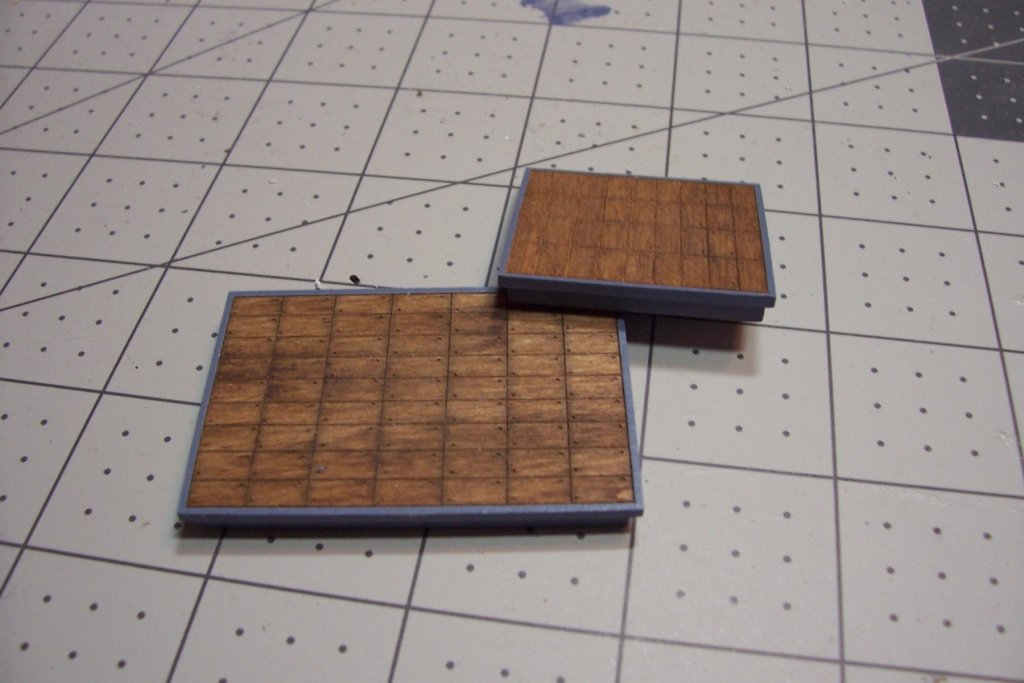
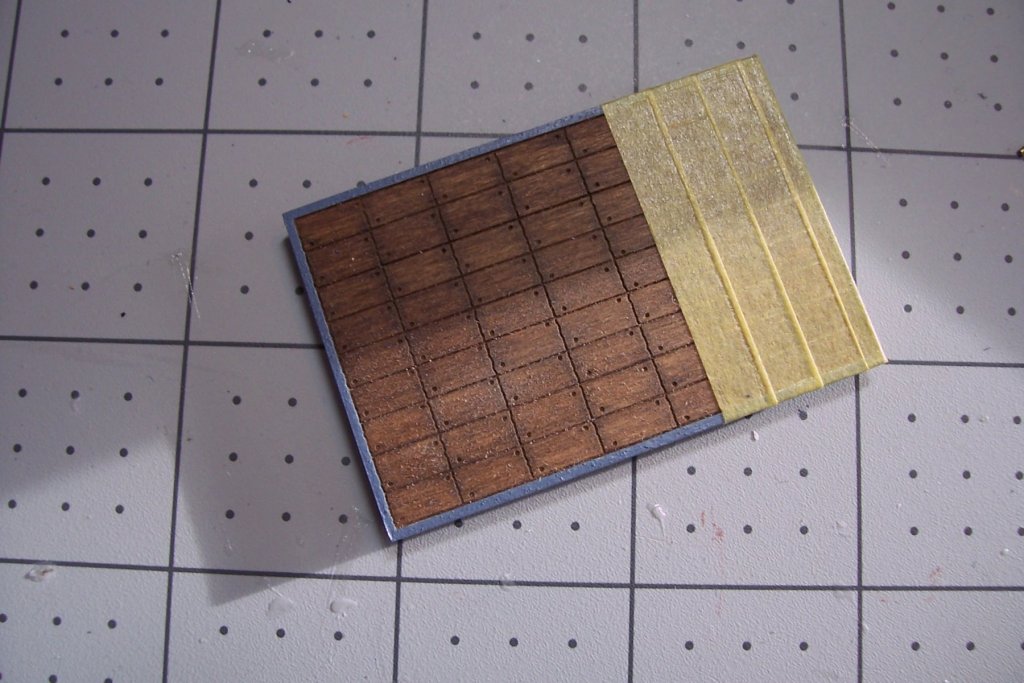
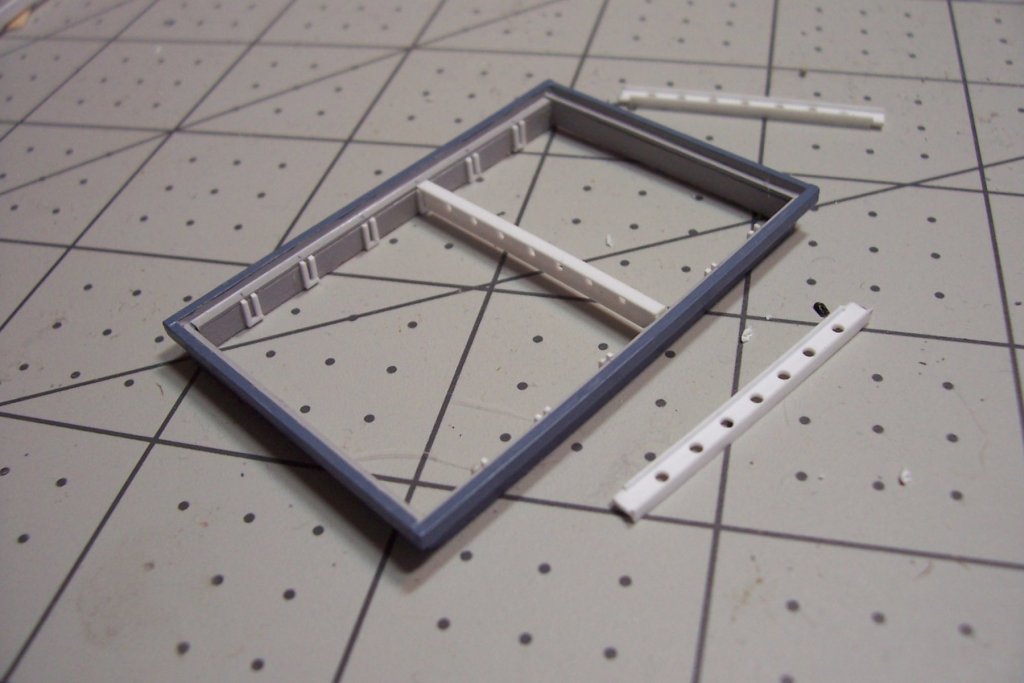
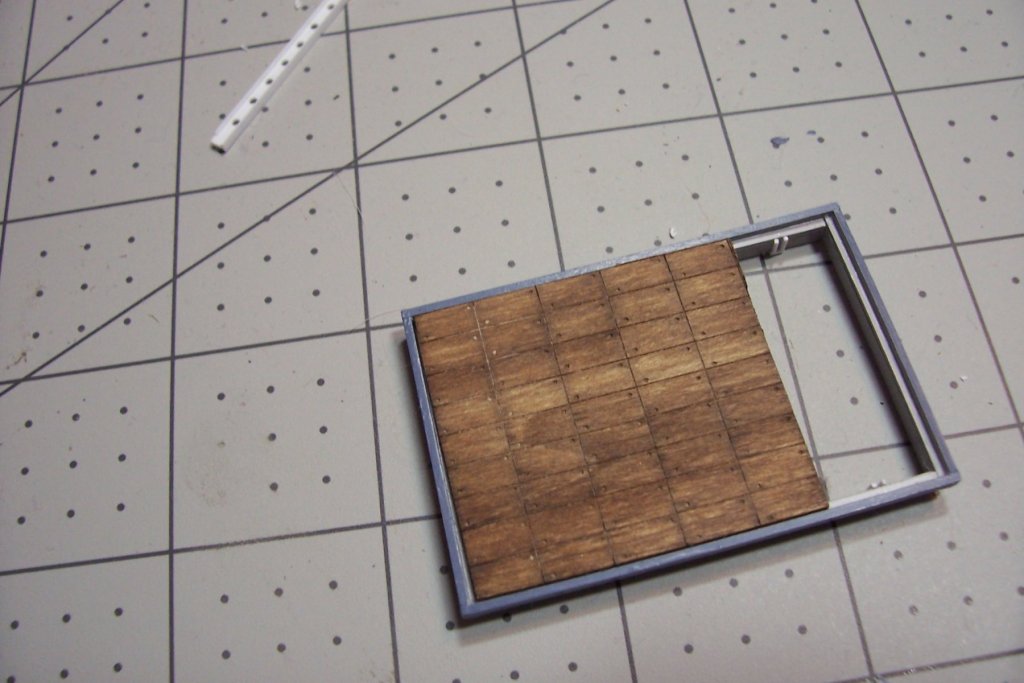
Cargo Hatches After too long away from this build it’s time to get back to work so I’ll start with some modifications to the cargo hatches. The kit provides some nicely laser-etched wood that replicates the individual hatch covers, they are mounted on a smaller supporting piece: I’m going to show hatch nr1 as “secured for sea” with the hatch covered by it’s tarp. Using the appropriate width of Tamiya tape, with each piece overlapping the previous one to the smallest degree possible, I was able to get the effect I was looking for - a tarp with prominent seams. There is more to do on this hatch to include the straps that hold the tarp in place but I’ll get to that later. Hatch nr2 will be partly open with 2 rows of hatch covers removed and hatch nr4 will be completely open with all the hatch covers off. During my photo research I came across a lot of different styles for hatch beams to include oblong weight reduction holes, beams shaped like trapezoids, and some with bars and rod braces. Fortunately for me the ones used on the Hopkins were about as simple as possible; I-beams with circular holes and the ends notched to fit into the beam brackets so it was simple to fabricate them out of plastic I-beam stock. With the exception of 1 beam left in place on hatch nr2 the rest will be placed on the deck, where with the hatch covers they were just stacked on the unengaged side while the hatch was open. The beam brackets are just plastic strip. Next I will fabricate the individual hatch covers that will be shown in stacks and modify the hatches some more.

- 227 replies
-
- 11
-
-
- BlueJacket Shipcrafters
- Stephen Hopkins
- (and 2 more)