schooner
-
Posts
741 -
Joined
-
Last visited
Content Type
Profiles
Forums
Gallery
Events
Everything posted by schooner
-
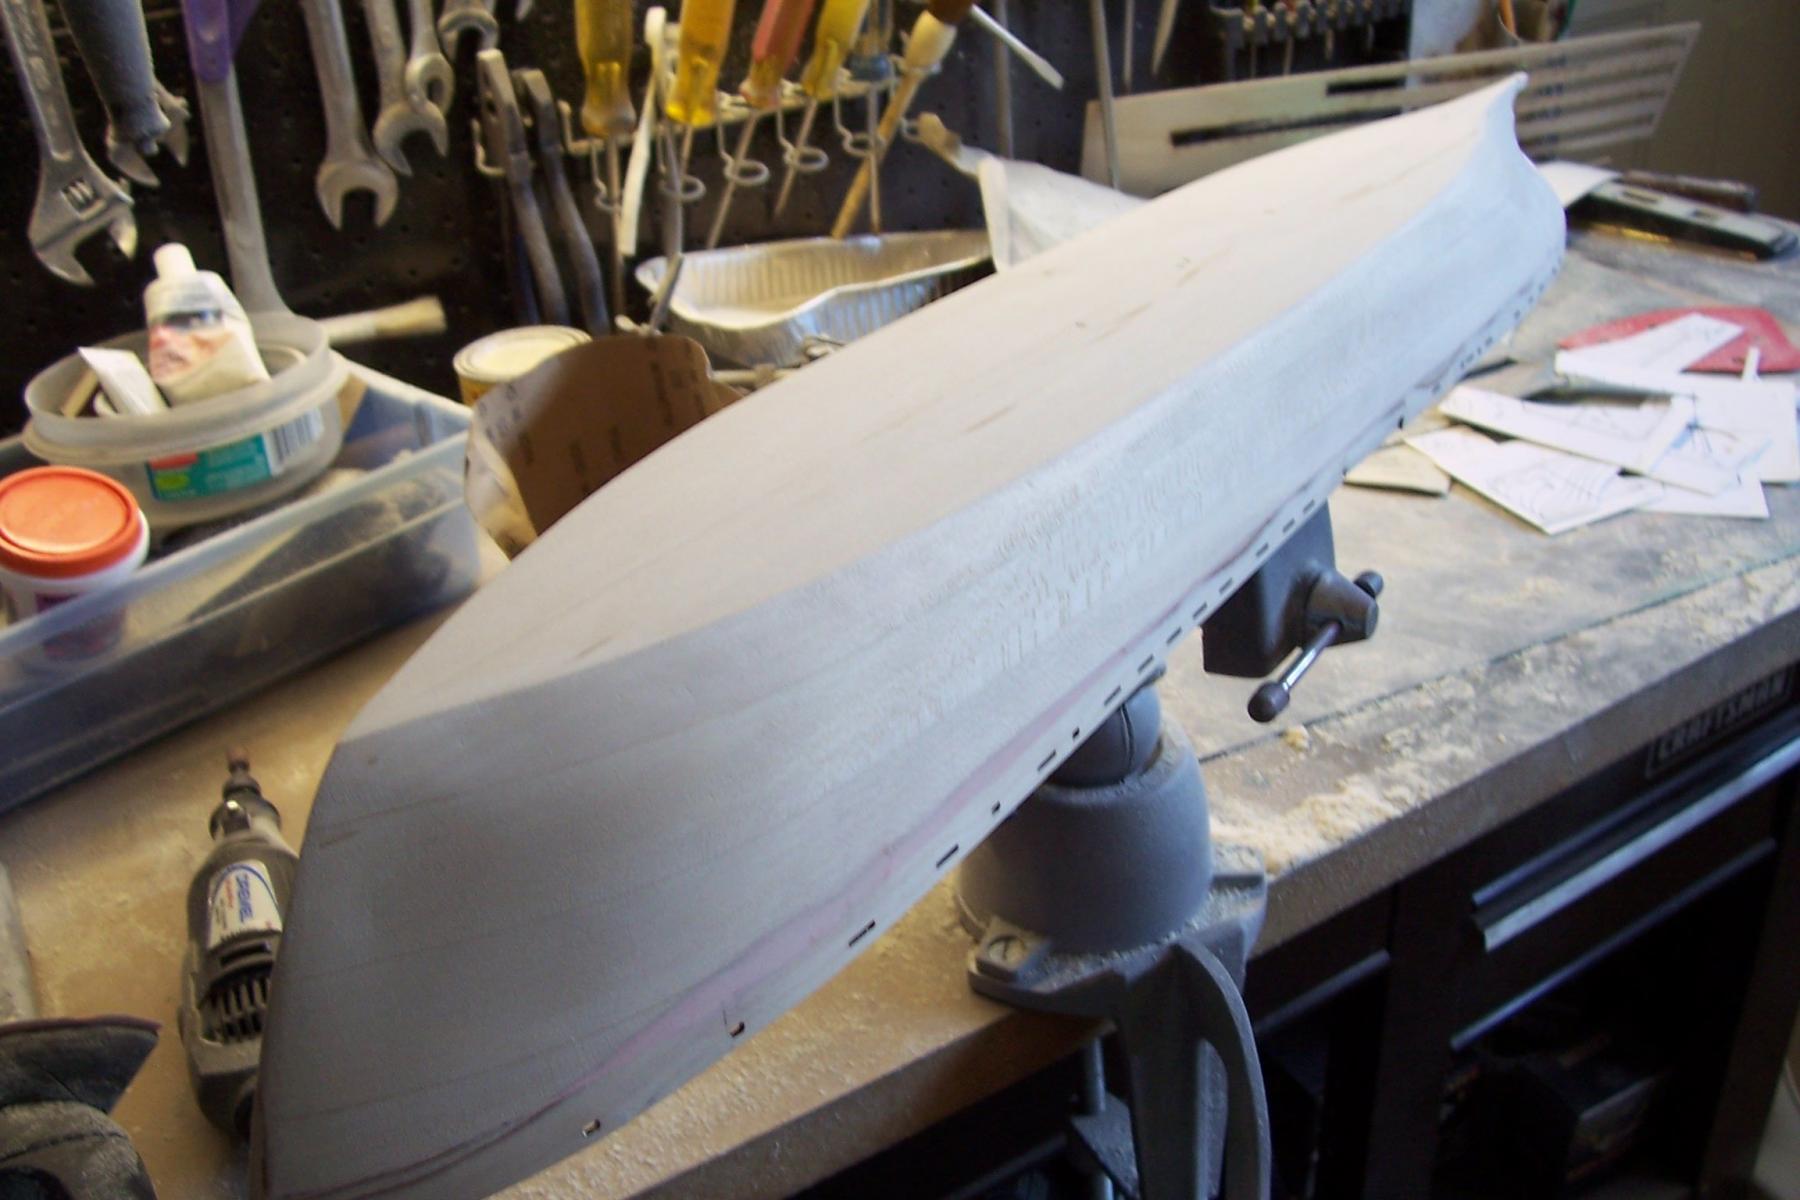
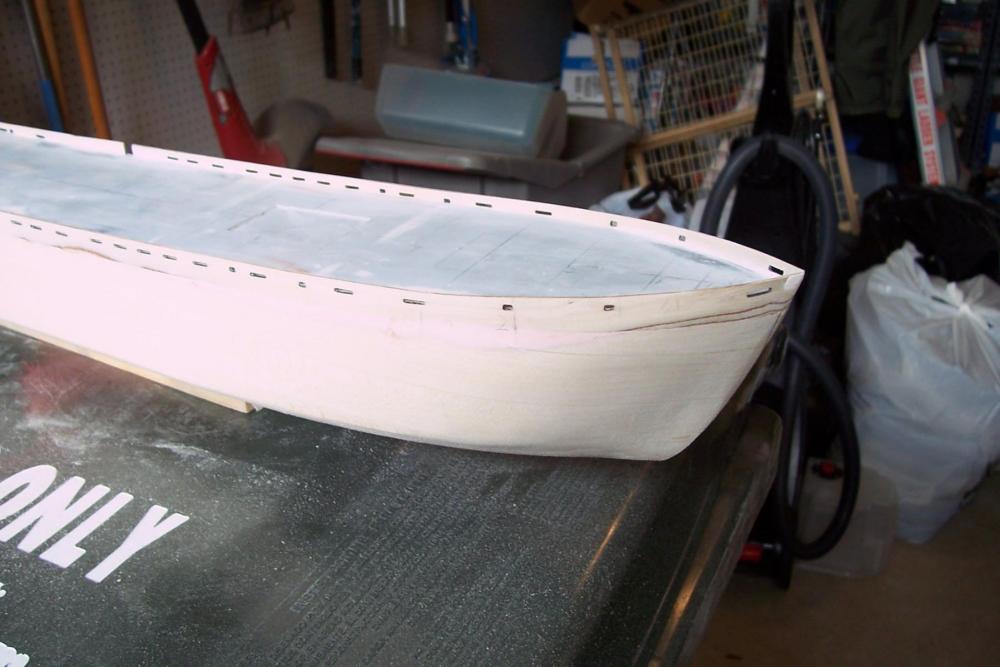
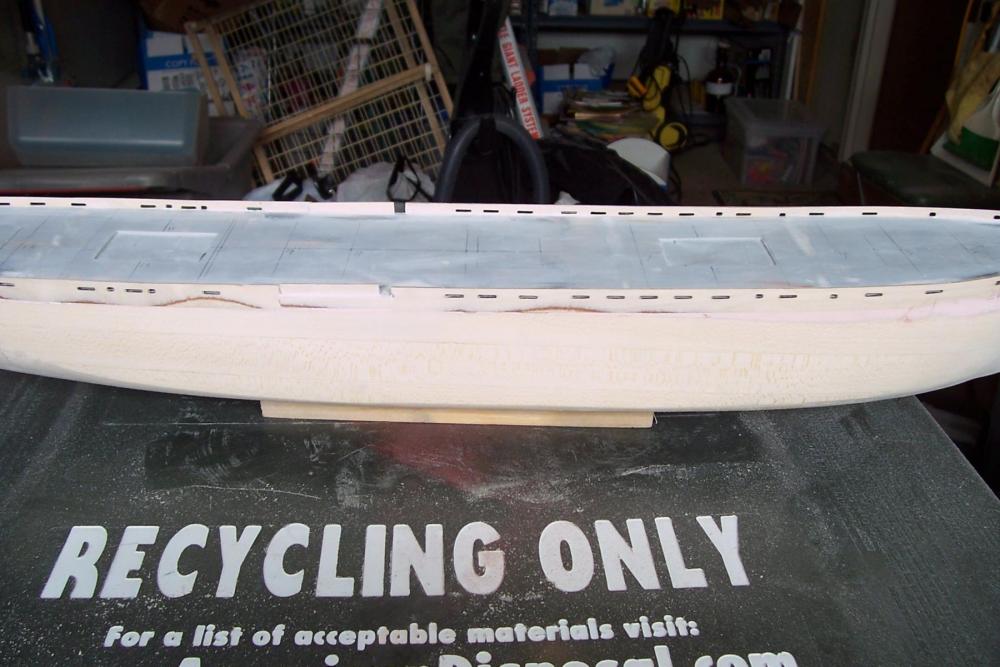
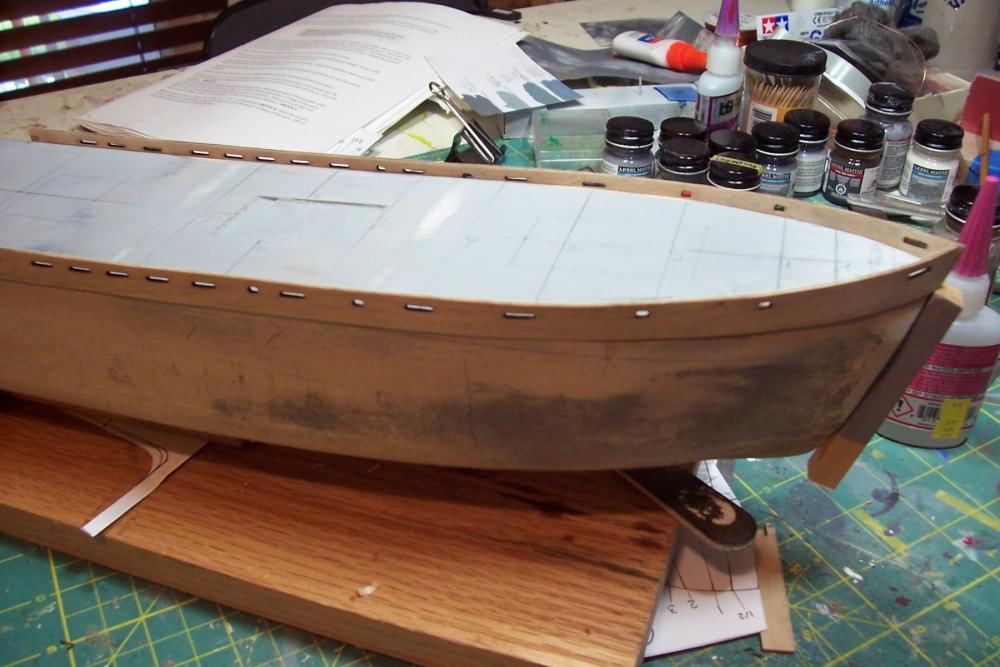
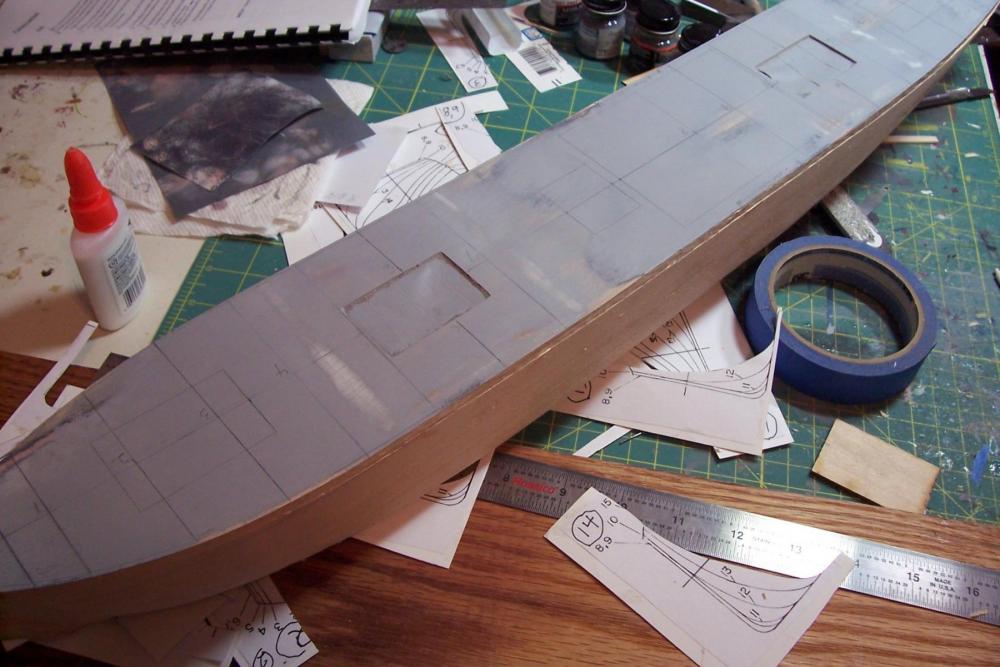
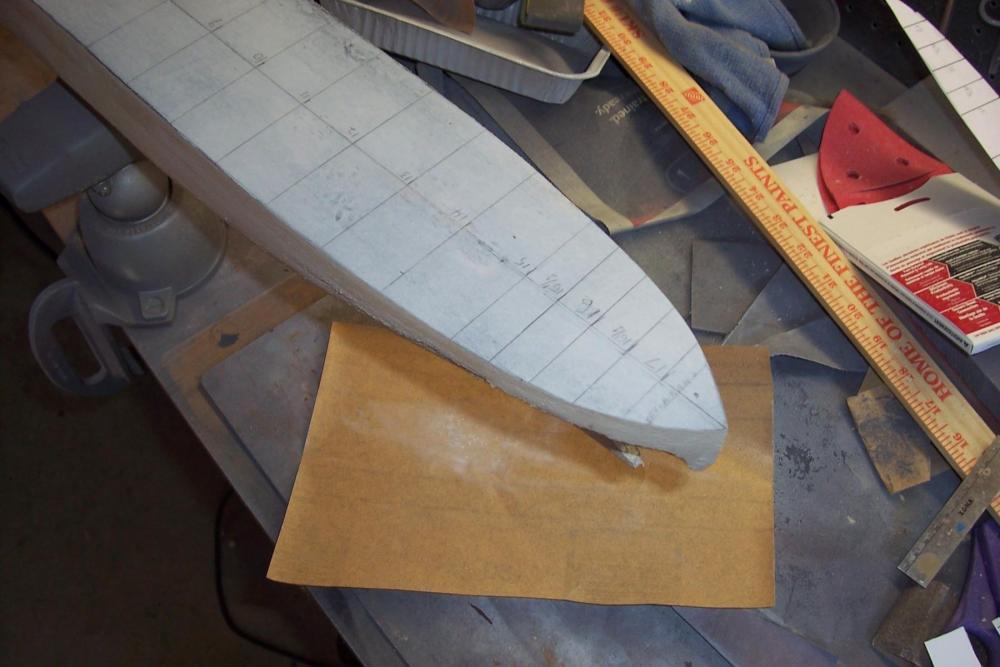
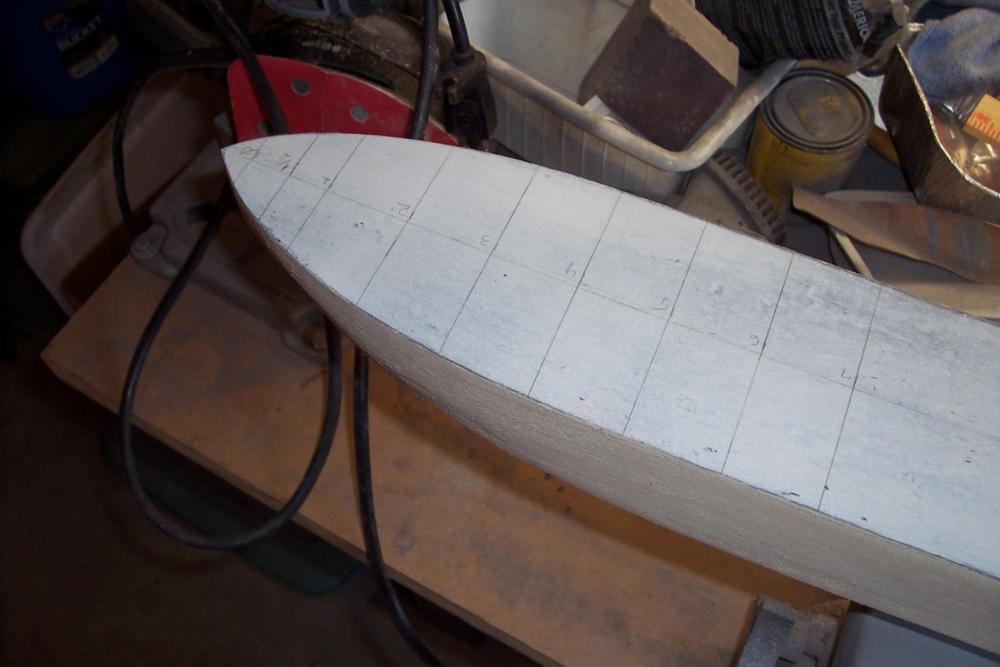
 Hull shaping done I’ve finished the initial shaping the hull using the templates (adjustments may be needed based on what the primer shows). Some minor file and hobby knife work remains to be done around the rudder post and shaft housing to make sure the prop and rudder fit OK. The first smooth sanding is done, now it’s a matter of priming and resanding, repeated as needed to get a smooth “steel” finish.

- 227 replies
-
- 14
-

-
- BlueJacket Shipcrafters
- Stephen Hopkins
- (and 2 more)
-
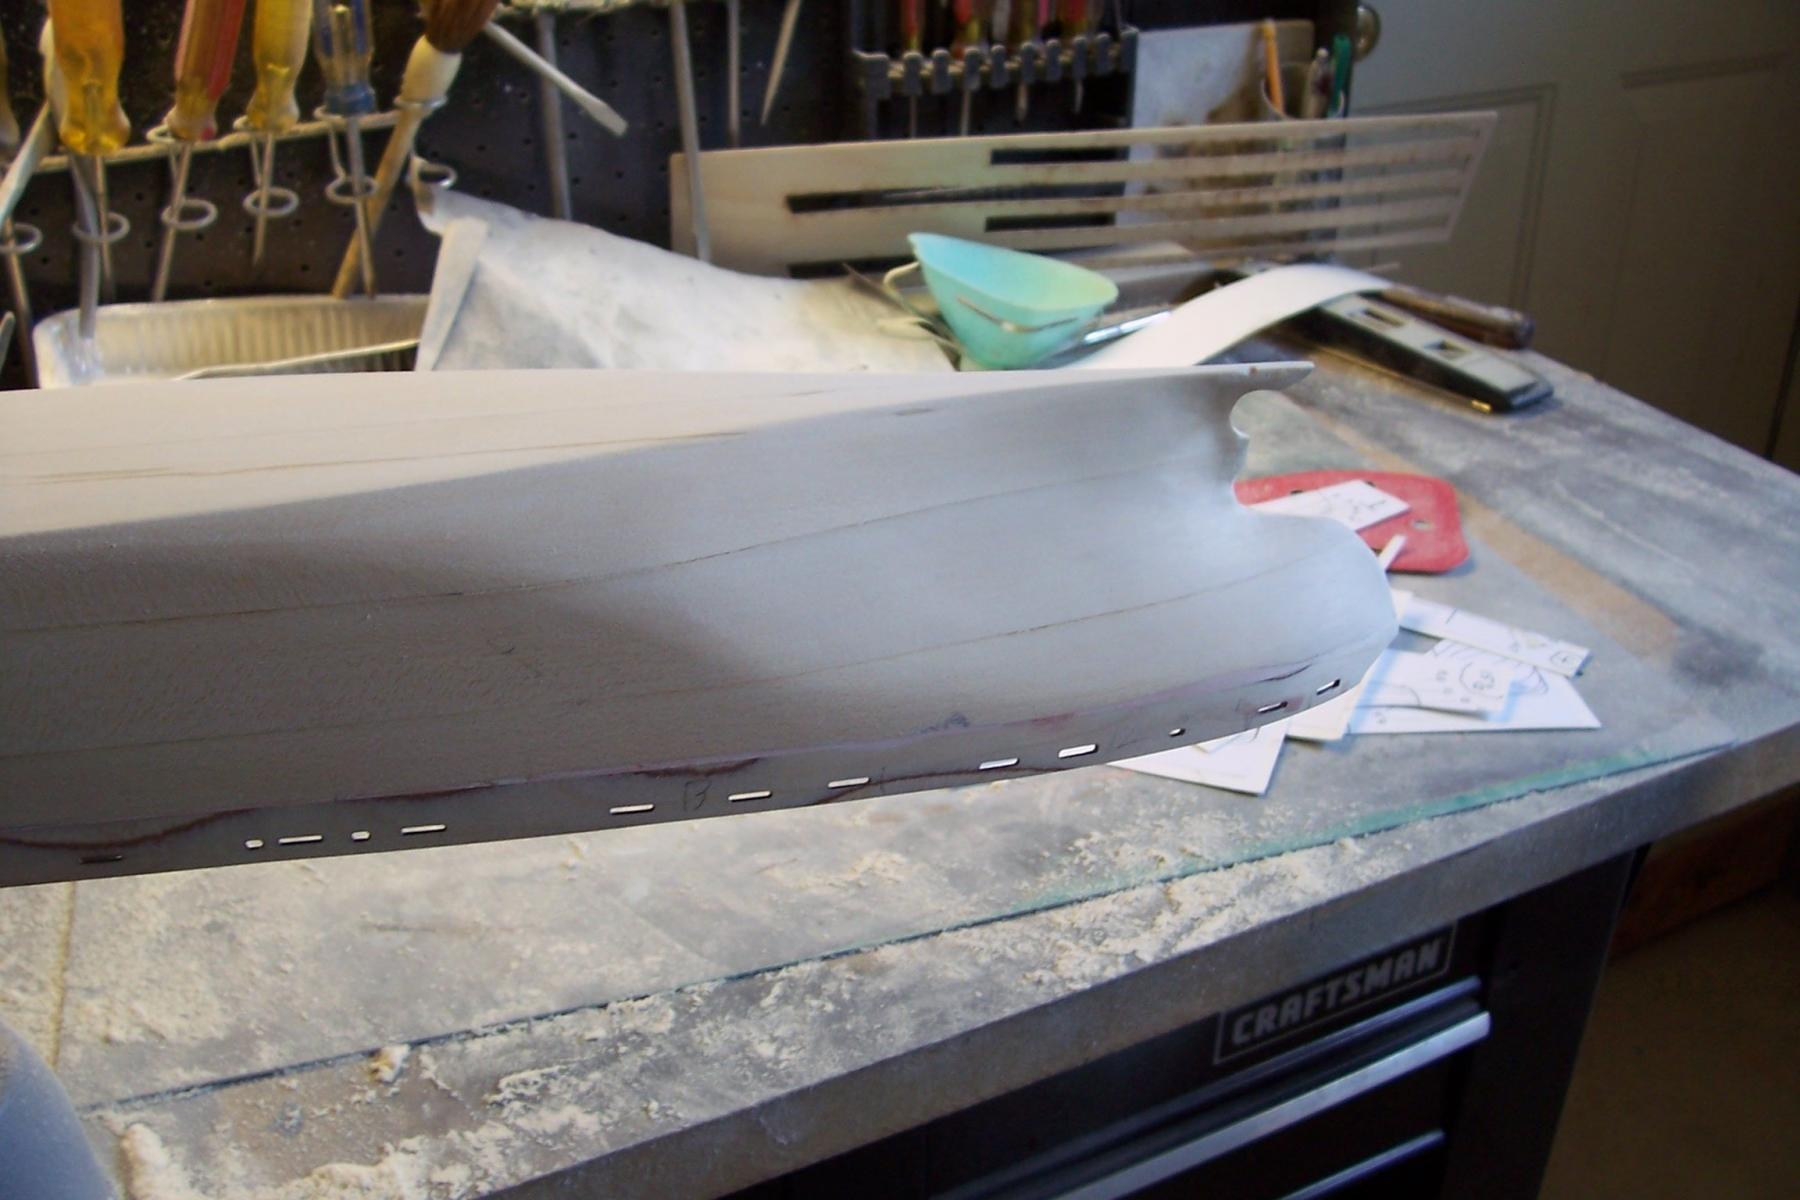
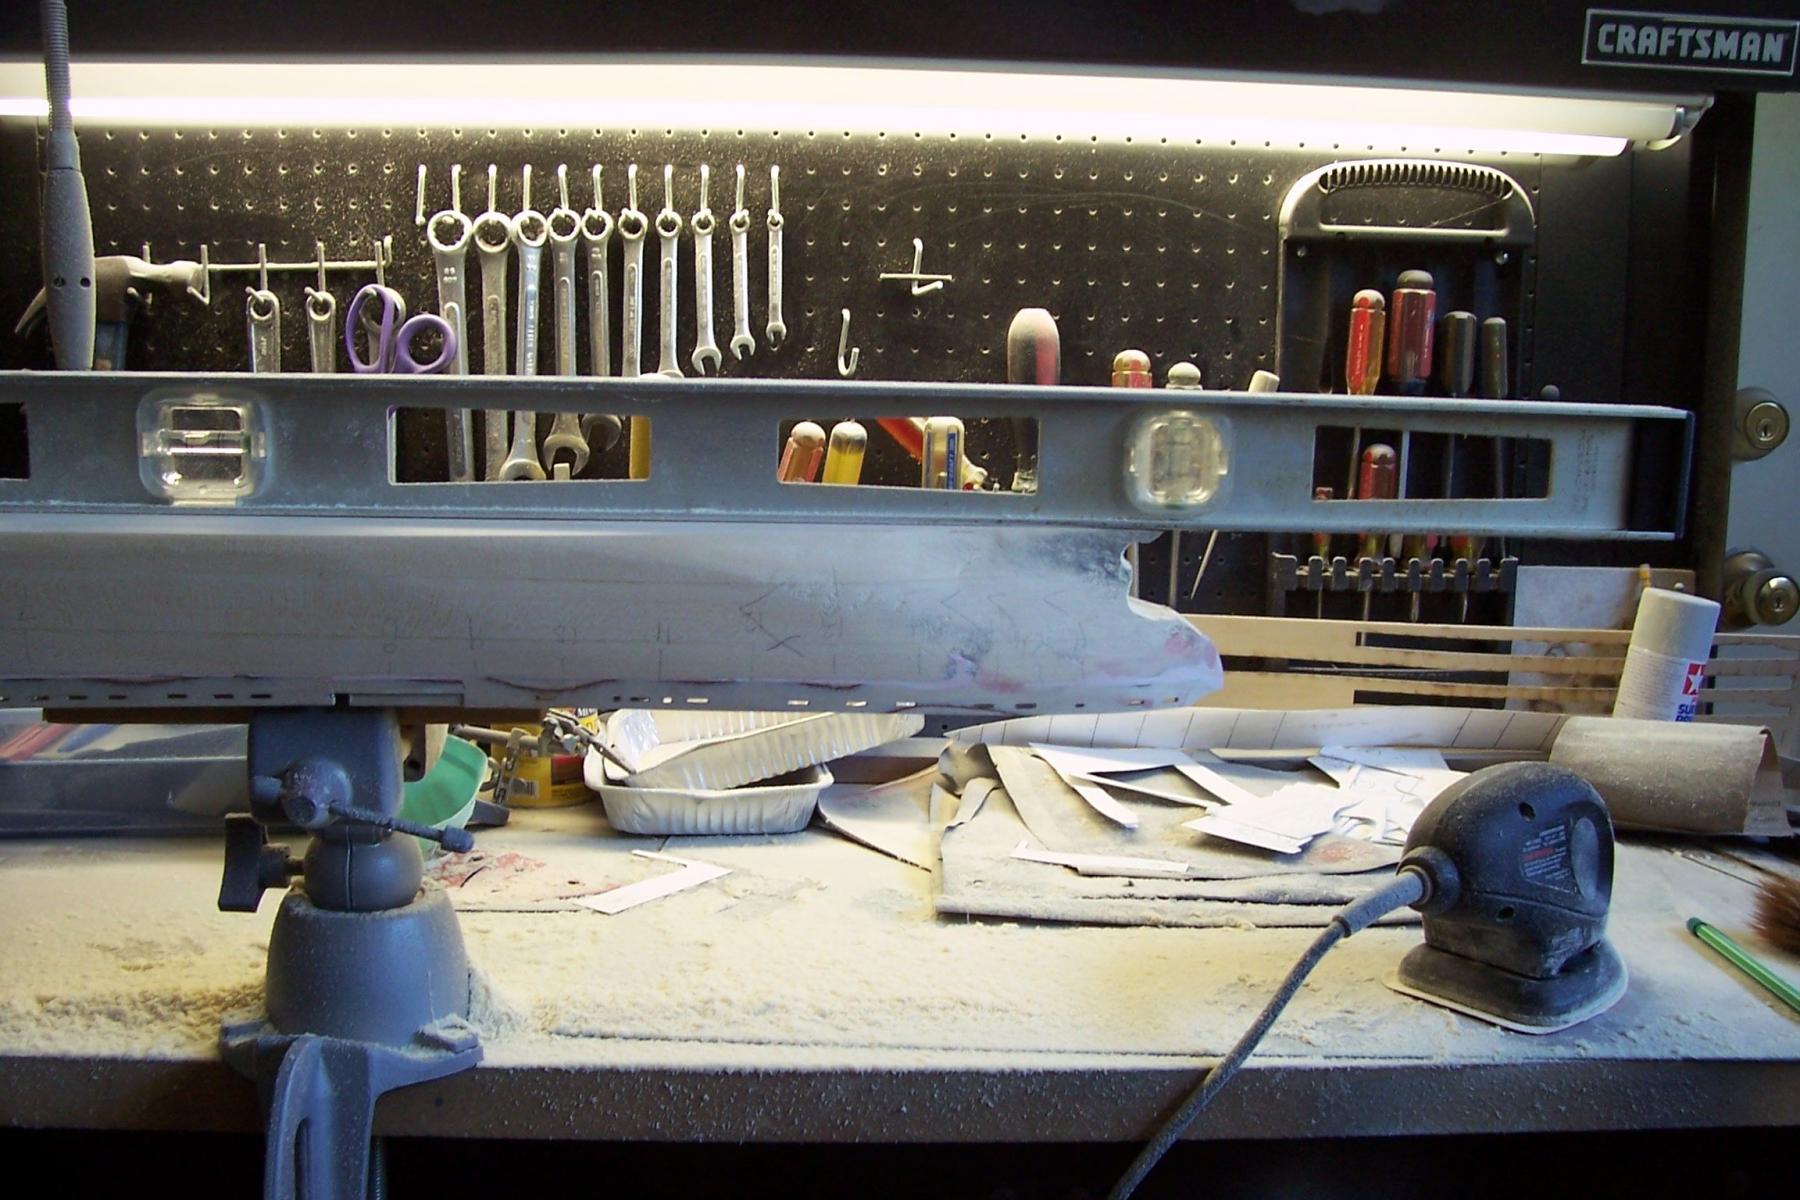
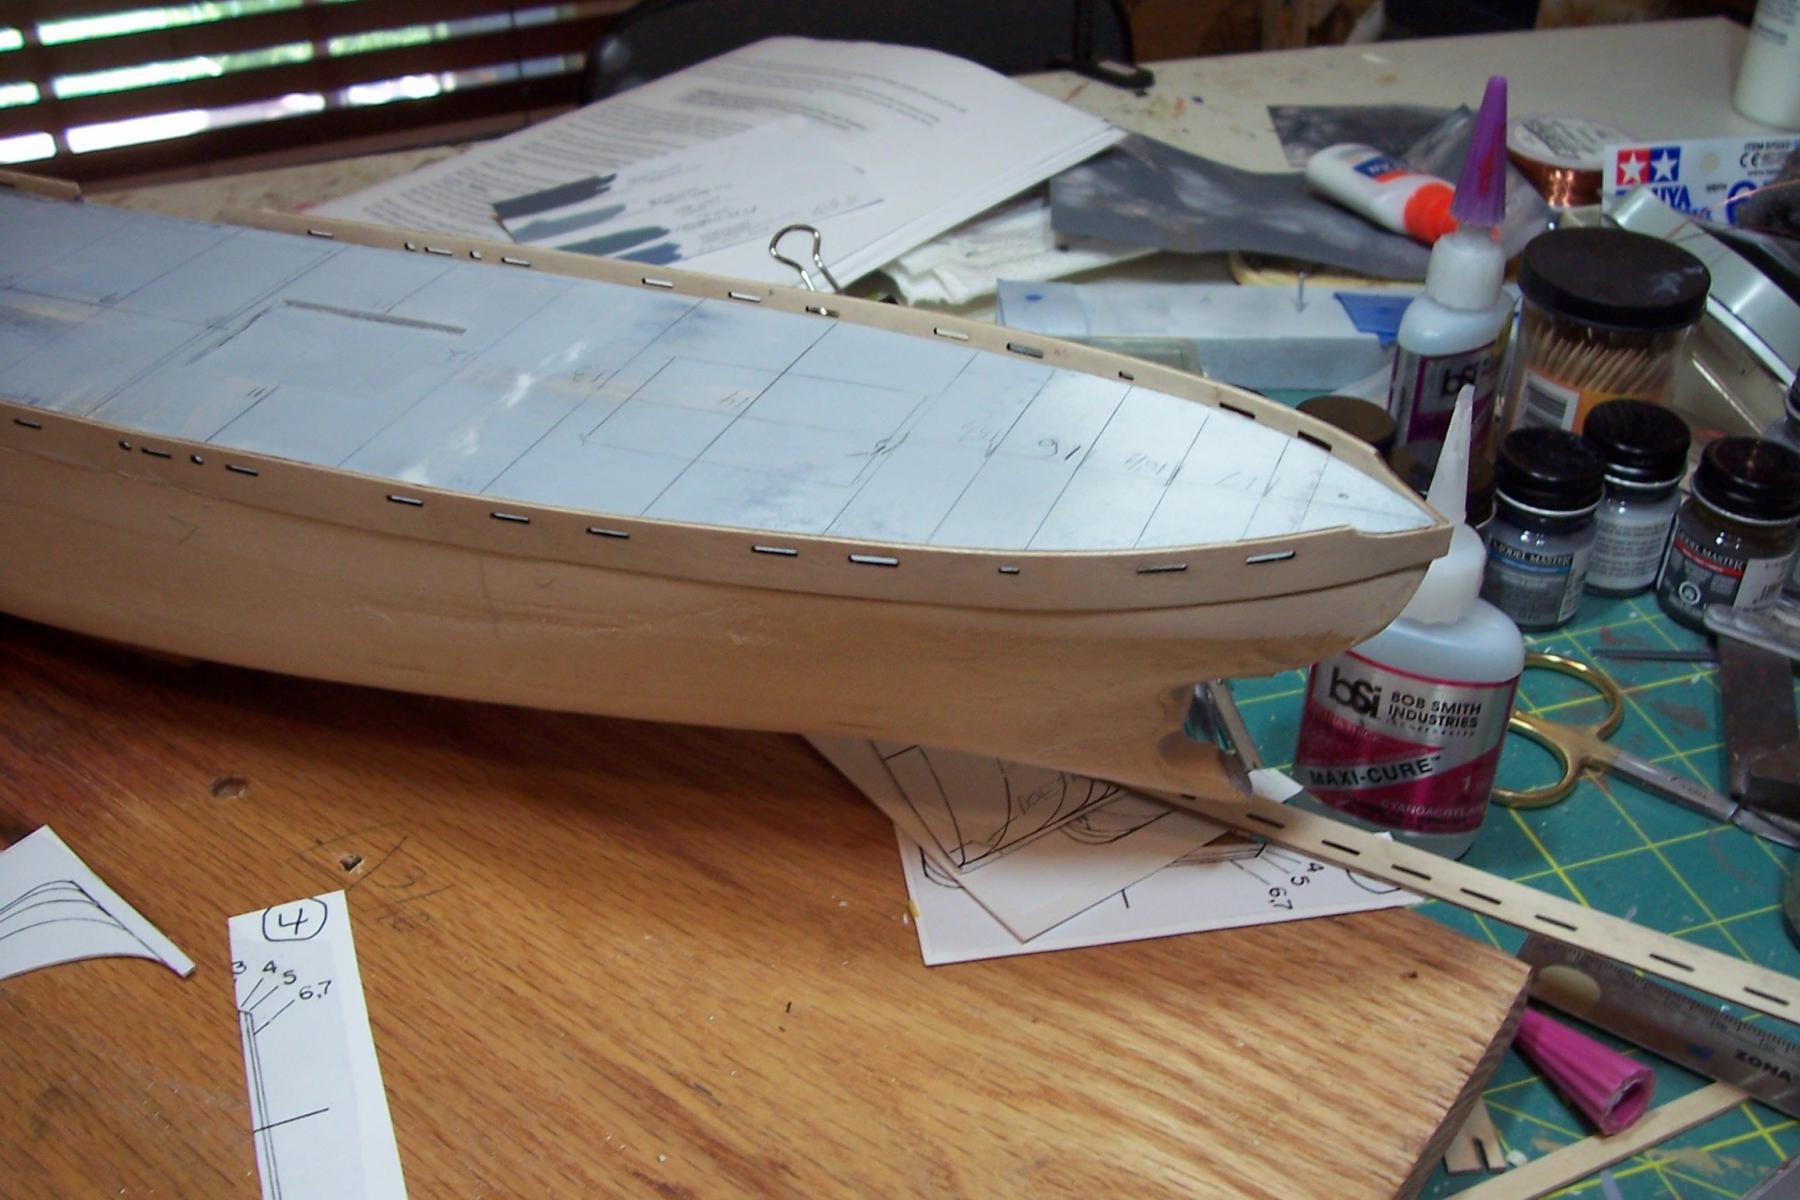
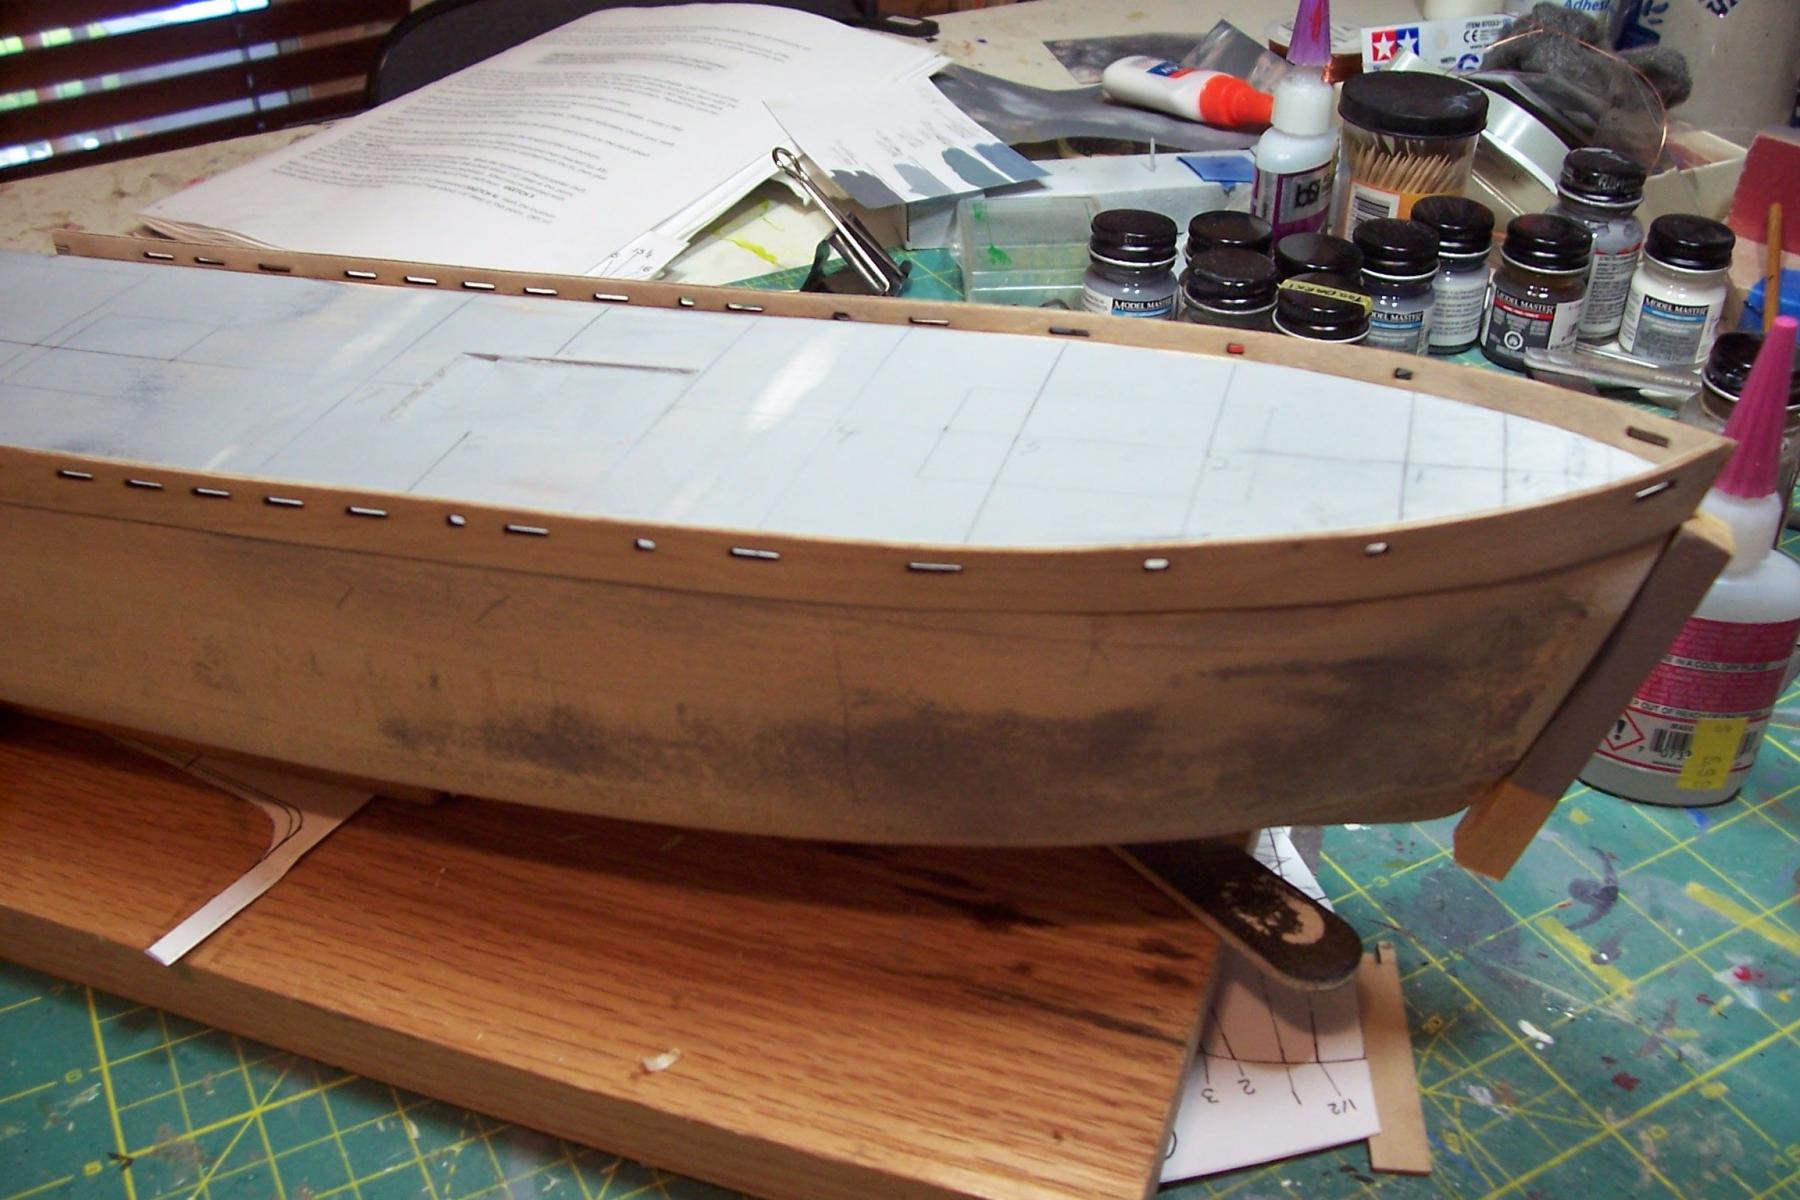
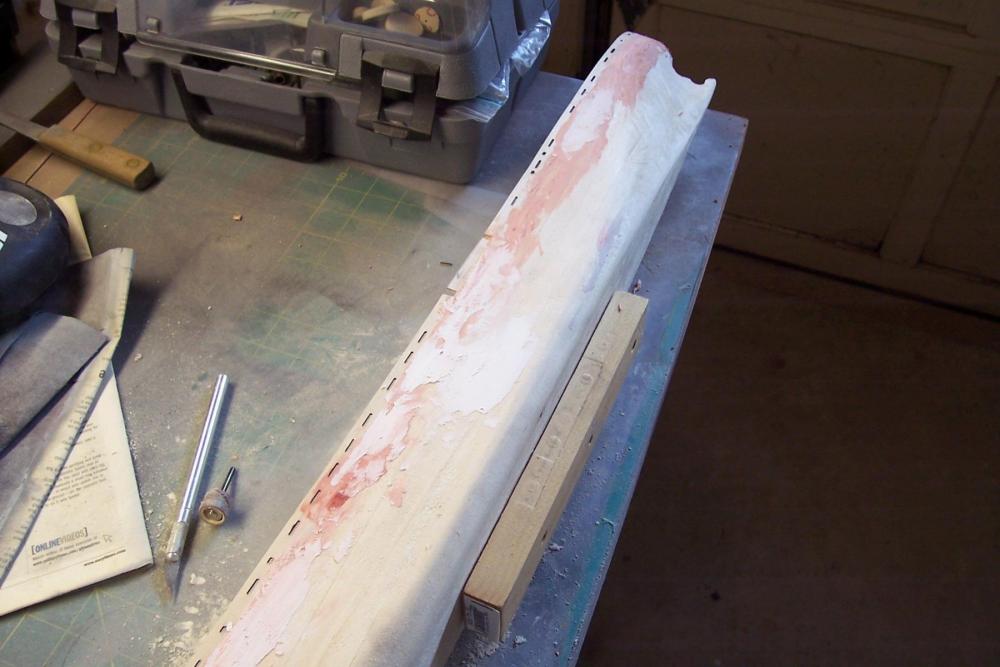
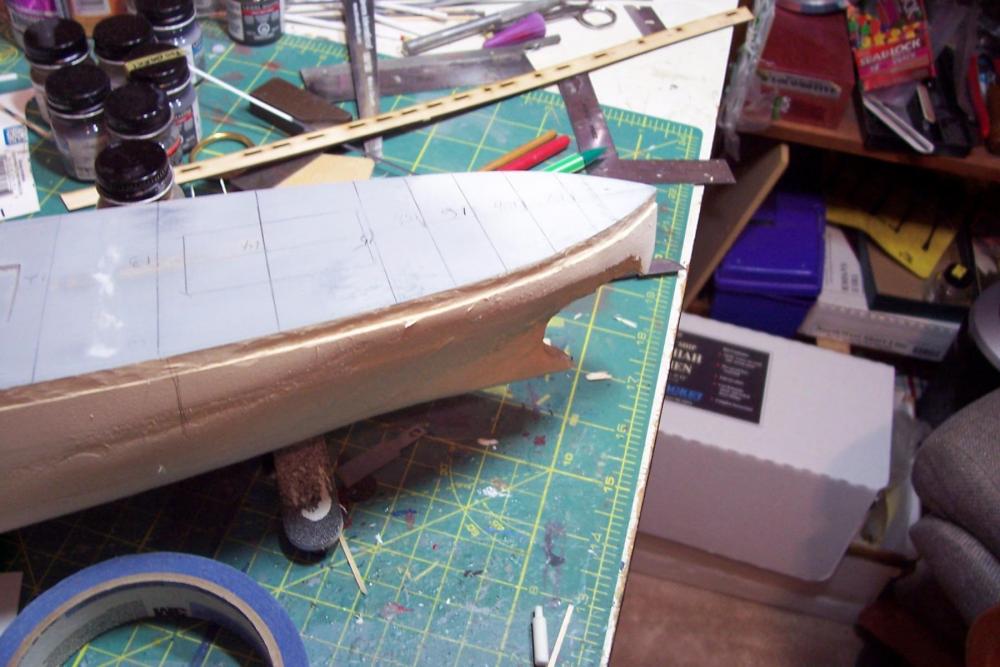
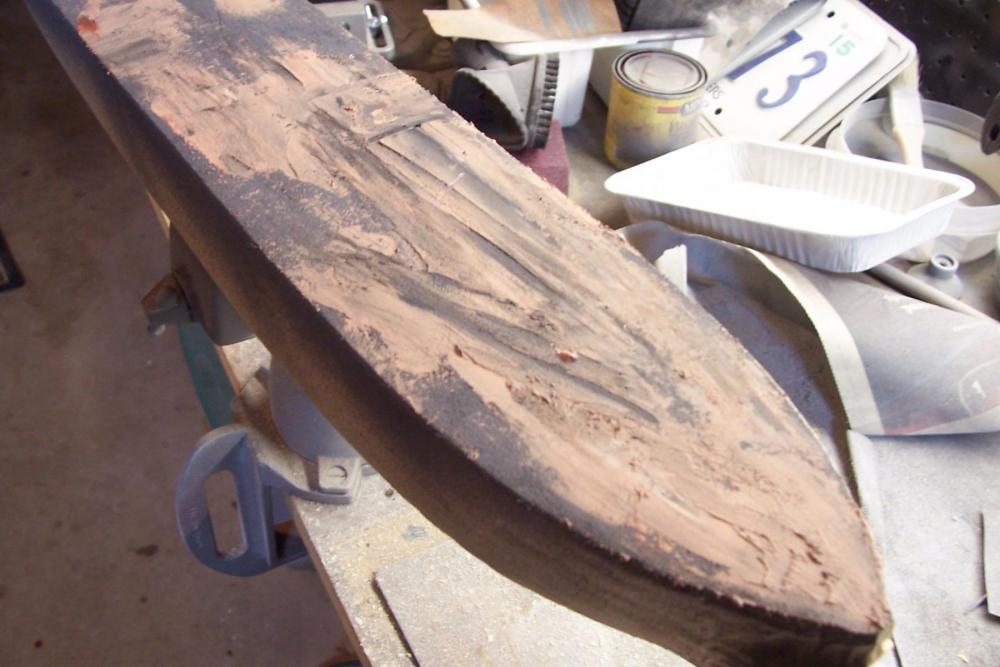
The hull bottom This is the 4th solid hull kit I’ve worked on and the first where I have had to give any thought to the bottom of the hull. With “traditional” hulls you shape the sides, which extend to the keel. Any discrepancies between the main deck to keel height on the plans and what comes out of the box is usually taken care of by taking some wood off the main deck (i.e. lowering it), although I have never had to do that. In the hull design of the Liberty ships the bottom of the hull is really a separate, distinct area. For most of the length the hull is a box shape with vertical sides and a flat bottom. After shaping the sides I was not happy with the curve of the hull between the bottom and sides - it should be a very small radius curve, basically a 90-degree angle that is rounded. The rough hull in the kit has a much larger radius curve, leaving a gap at the corner of the templates. There are only 2 options to address that; take more off of the sides or off the bottom. The sides cannot be reduced anymore without affecting the dimensions of the main deck or inaccurately slanting the sides toward the keel - they would no longer be perpendicular. So the answer was to take wood off the bottom. To find out how much I had to play with I compared the keel to bulwark measurements with the plans (something I should have done earlier) and found that the my hull was 3/16 to 1/4 inch too tall. Obviously the hull was machined to allow for this - I just didn't think to check it. Taking off that amount of wood would solve 3 issues: it would reduce the radius of the turn of the bilge, it would make the hull match the plans and it would fix a problem with the bottom - it should be dead flat from the foot of the stem to the tip of the rudder rest but as you can see below mine had a rise towards the stern: After several boring hours running a hand-held sander back and forth across the bottom everything fell into place. The curve at the turn of the bilge is good, the hull height matches the plans and the keel is flat. Next will be shaping the stern area, priming the hull and then resanding to remove rough spots and low areas (like the ones you can see in the photo above).


- 227 replies
-
- 10
-
-
- BlueJacket Shipcrafters
- Stephen Hopkins
- (and 2 more)
-
David, It's neither. The bulwarks fit tight, inboard and outboard and are flush to the hull. I think what you are referring to is that the bulwarks are made out of 5-layer (very thin layer) plywood and as I sanded the outboard sides some areas had to give up more wood than others so what you see is the 2nd, and in some areas, the 3rd layer (they alternate between light and dark wood for some reason.) When I prime them the bulwarks will appear as part of the hull without seams. Any variations in the bulwark thickness will be hidden by cap rails which i intend to install, both for accuracy and to provide more drilling/glueing surface for the 100+ pad eyes and eyes that will sit on them along most of its length.
- 227 replies
-
- 5
-
-
- BlueJacket Shipcrafters
- Stephen Hopkins
- (and 2 more)
-
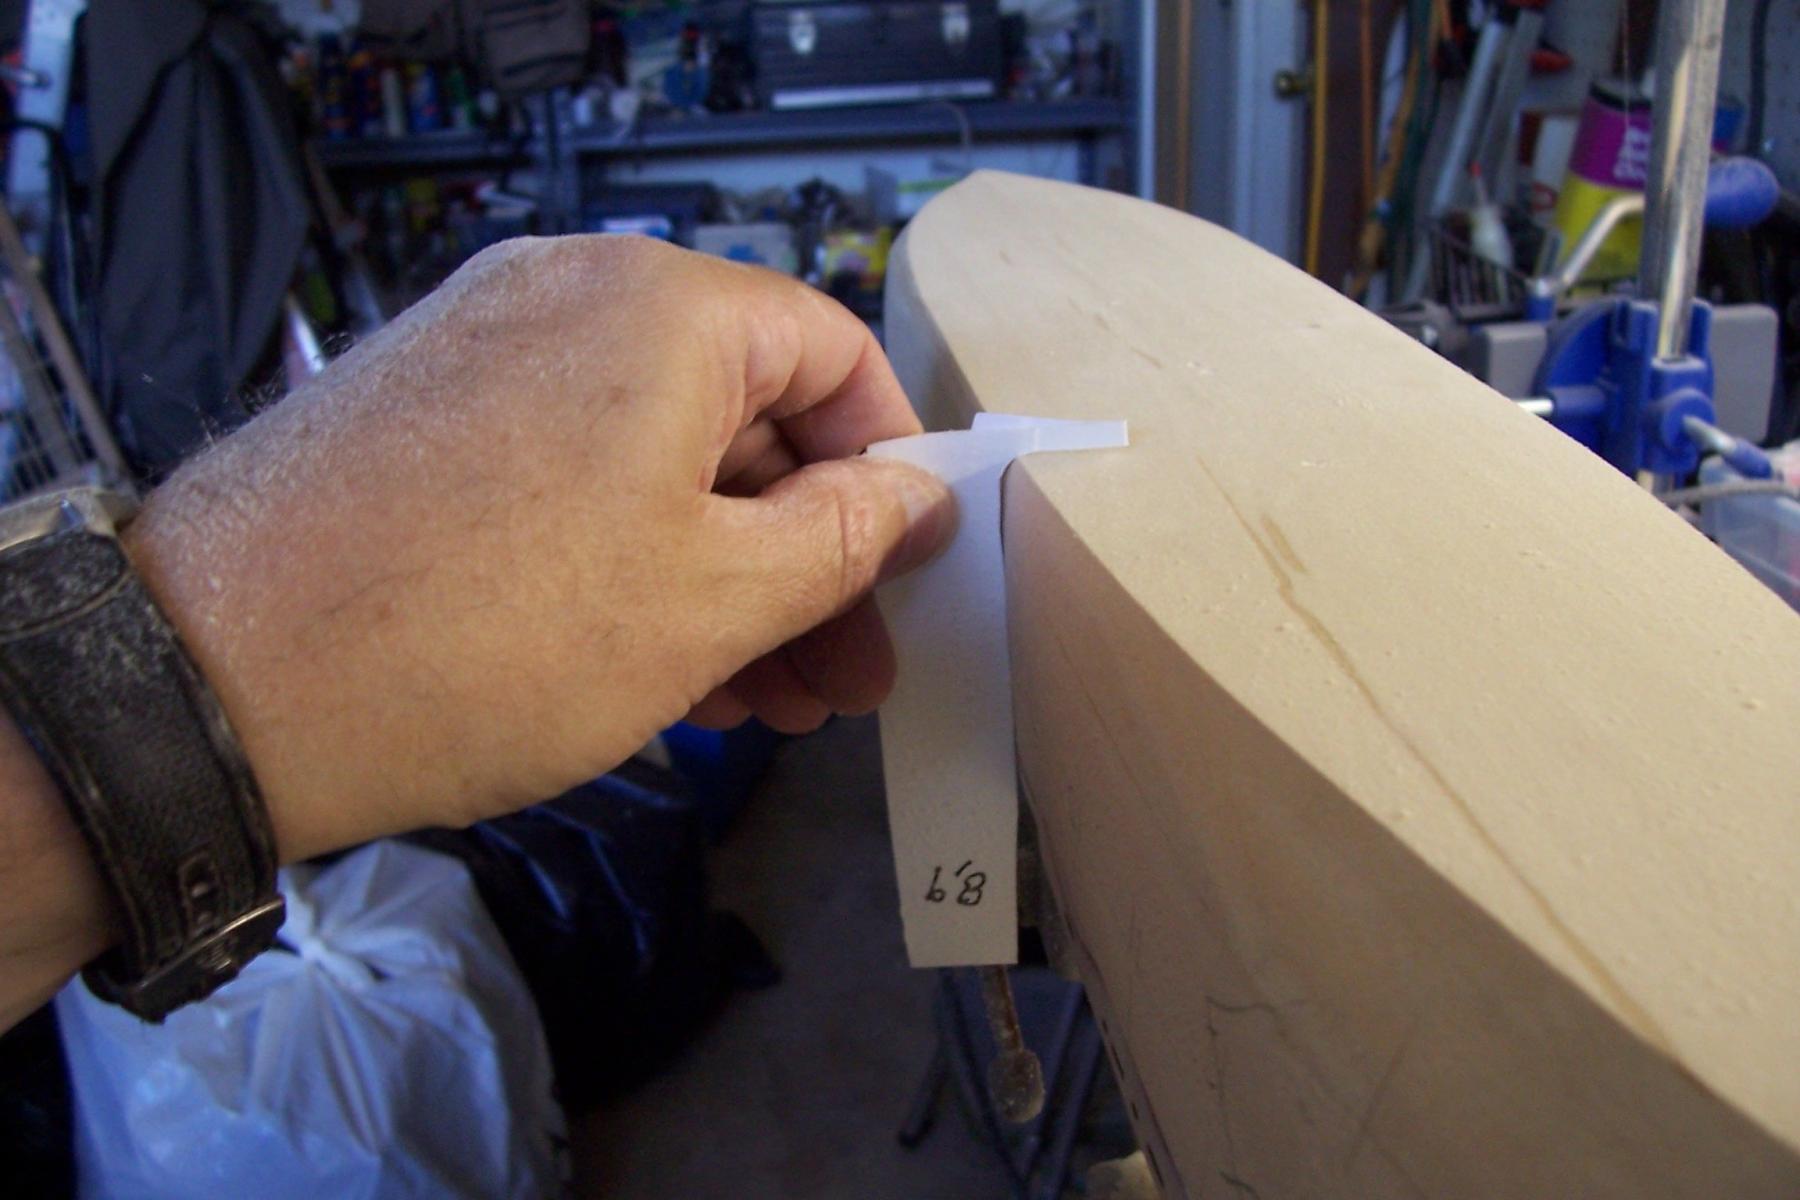
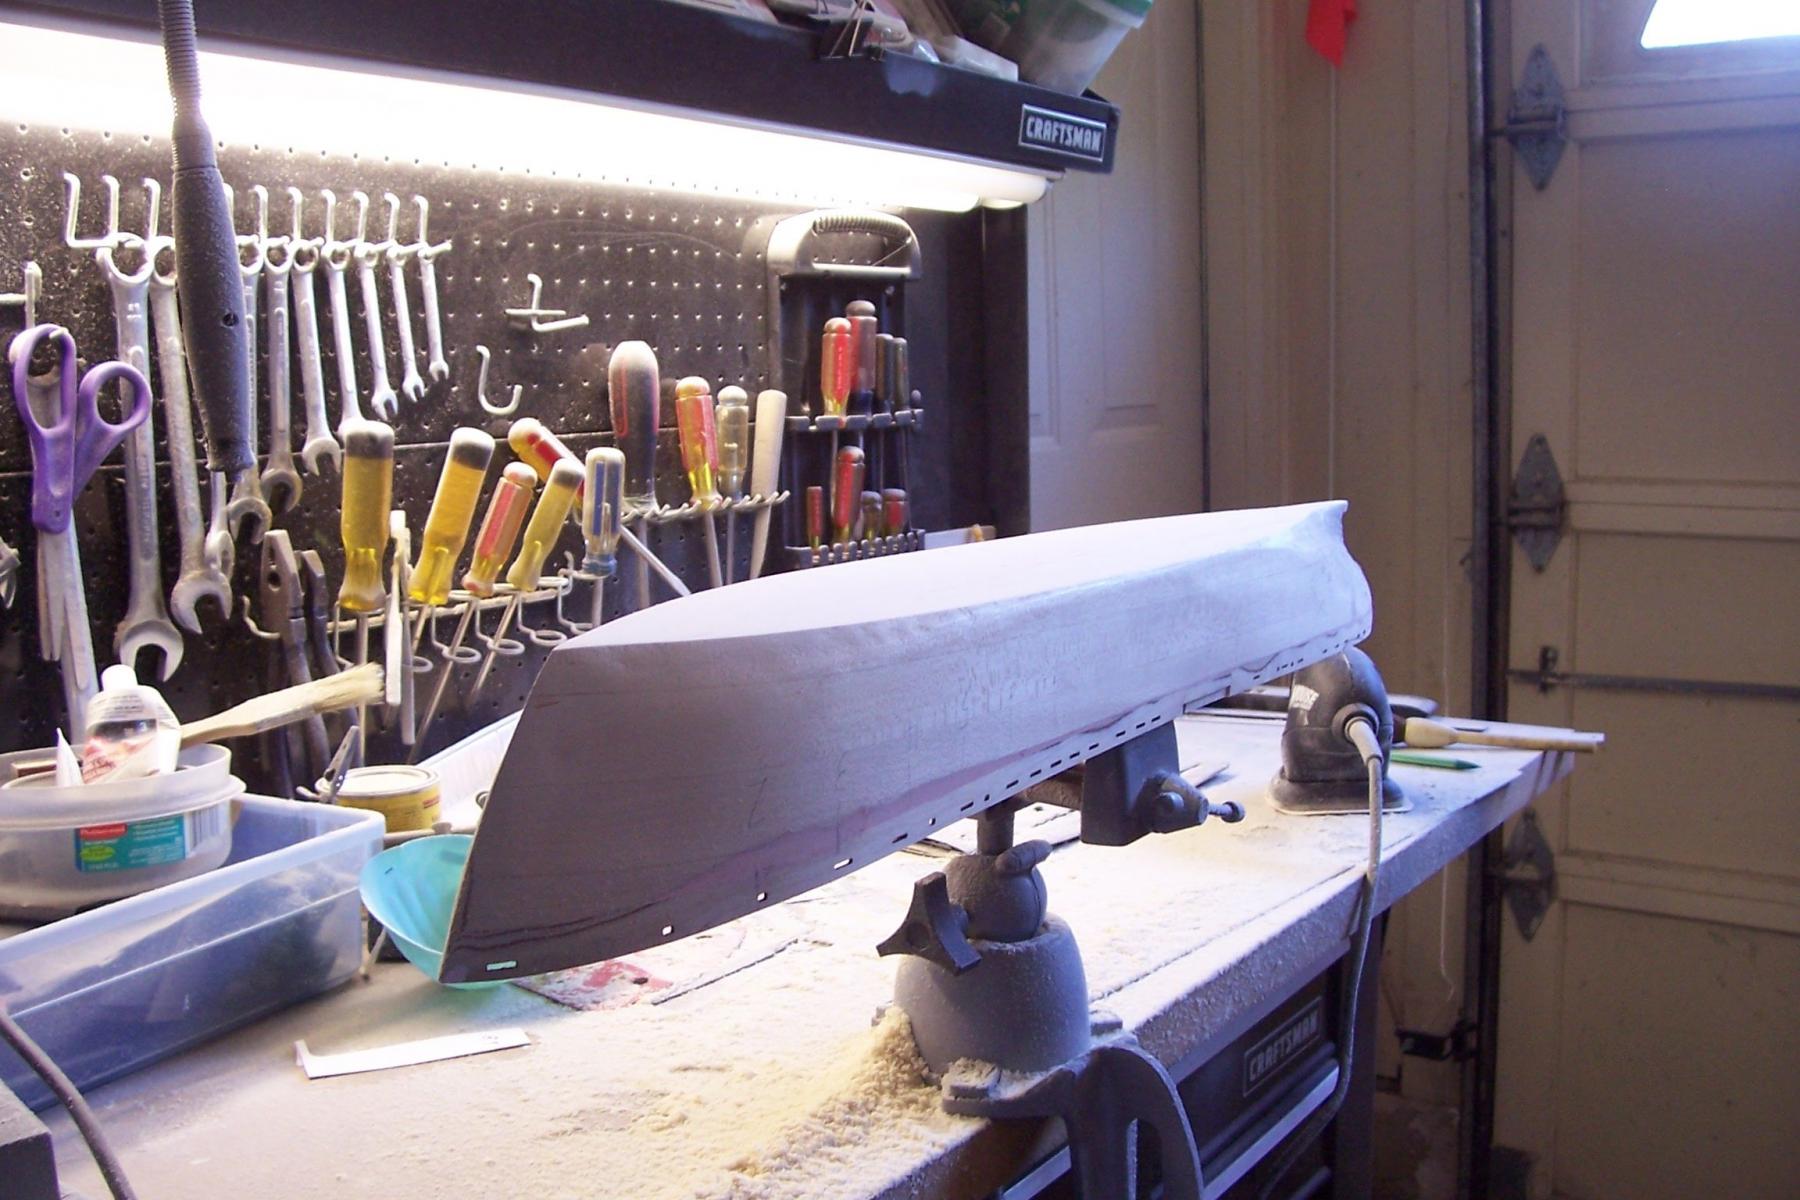
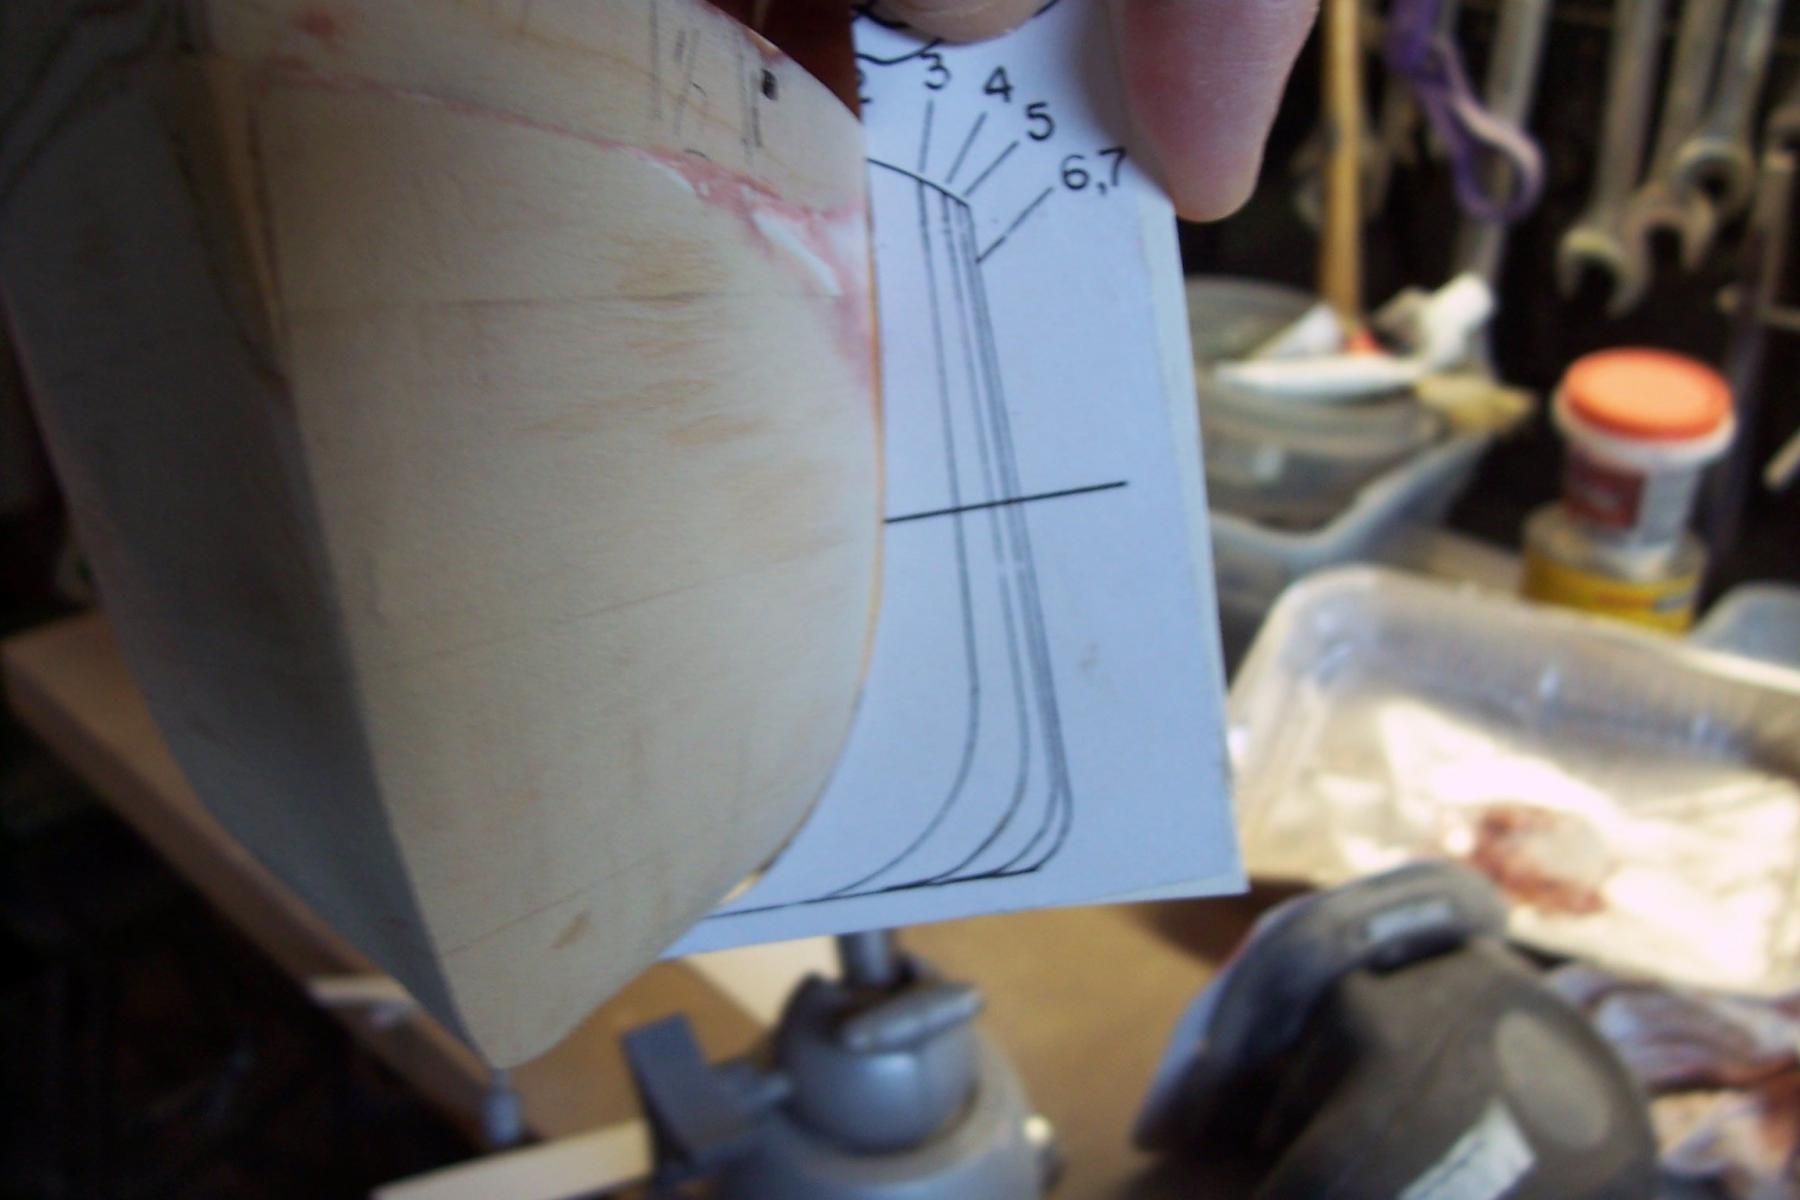
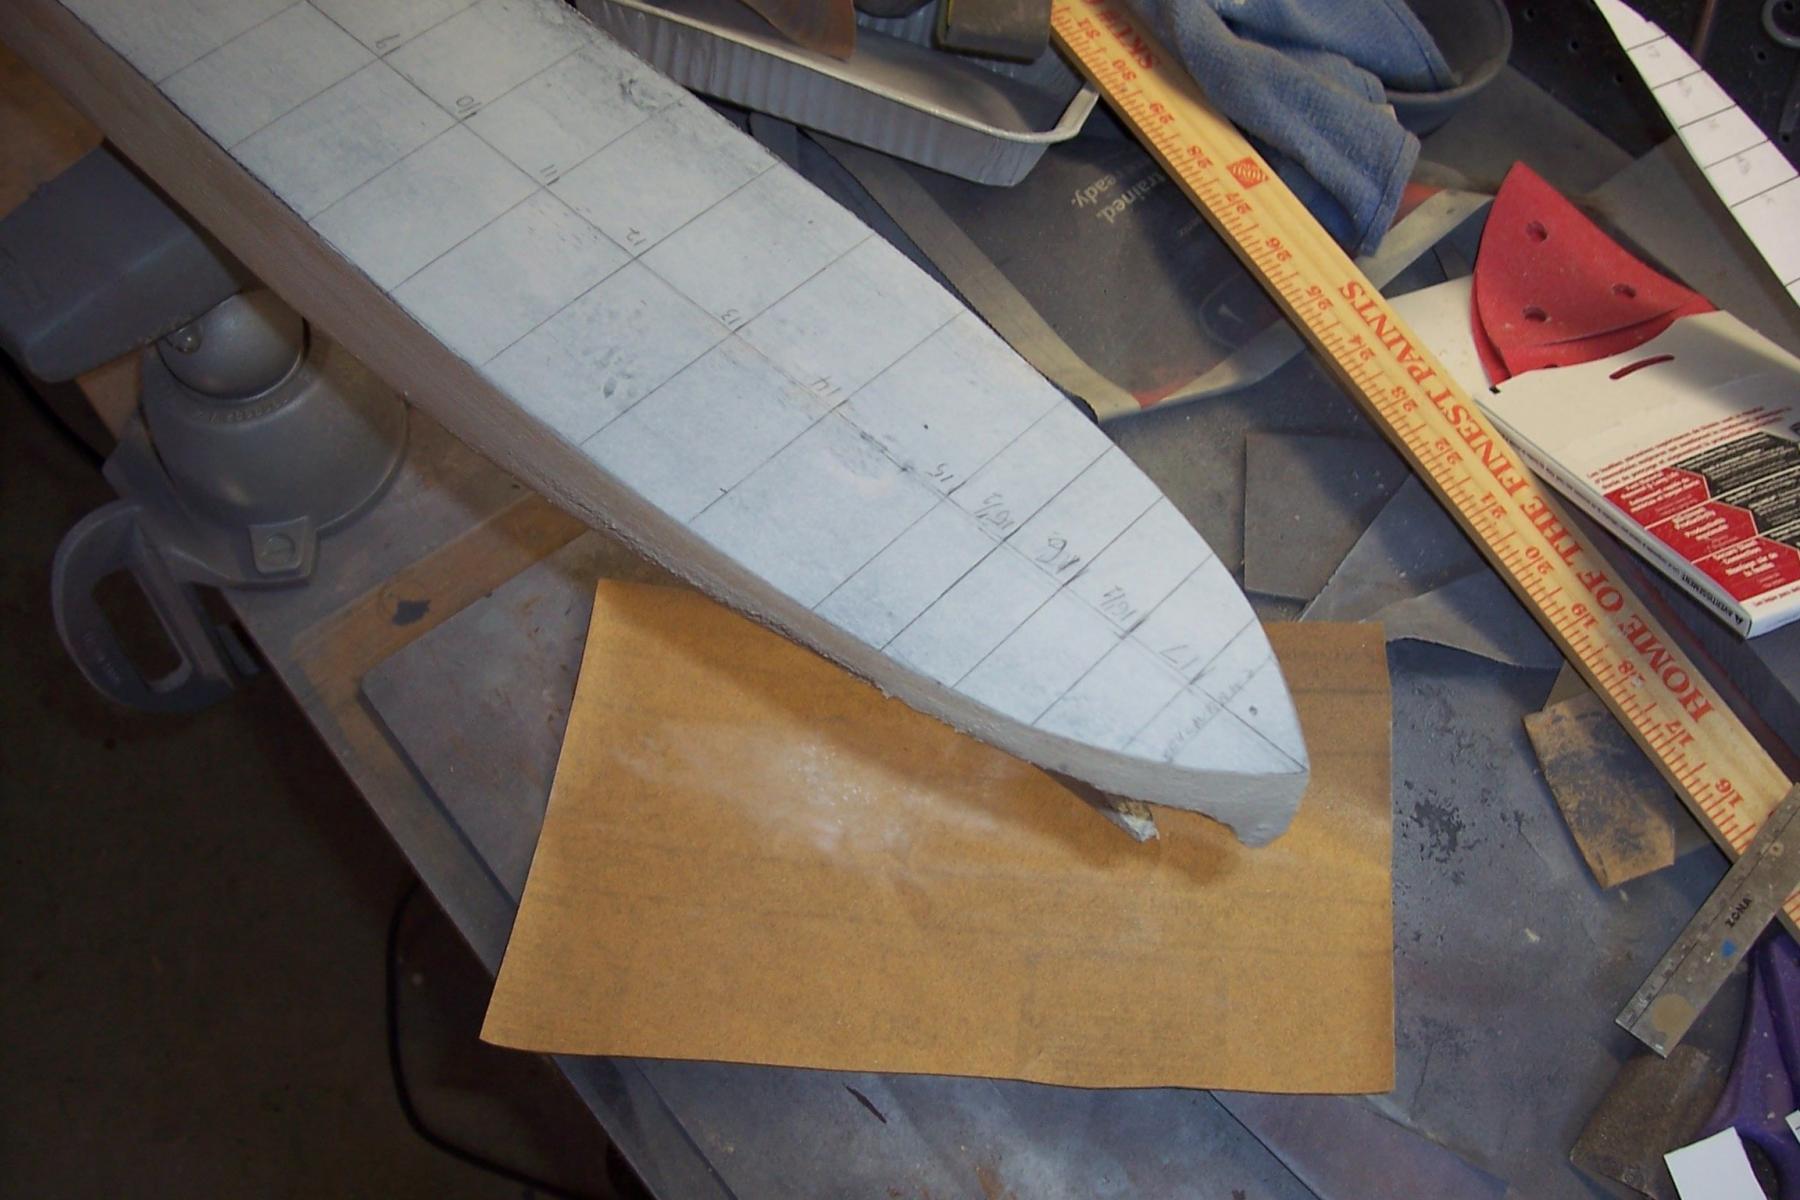
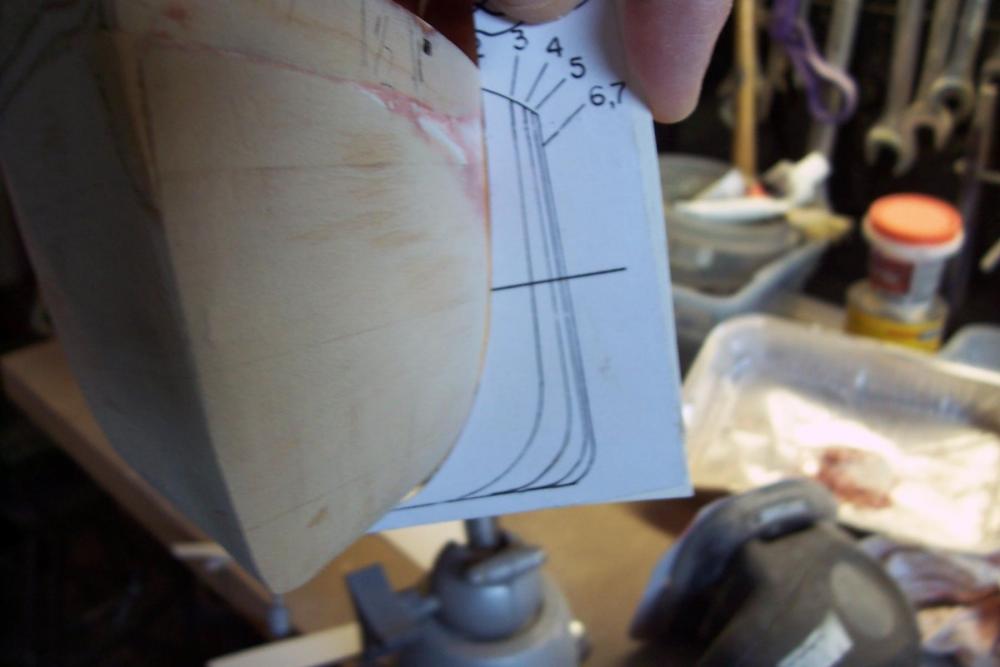
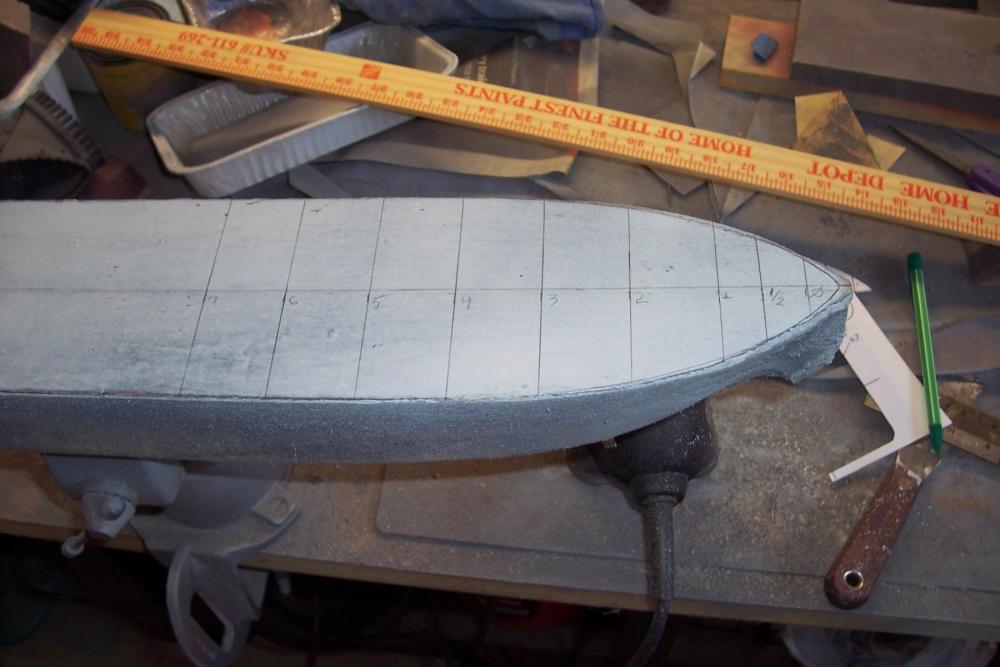
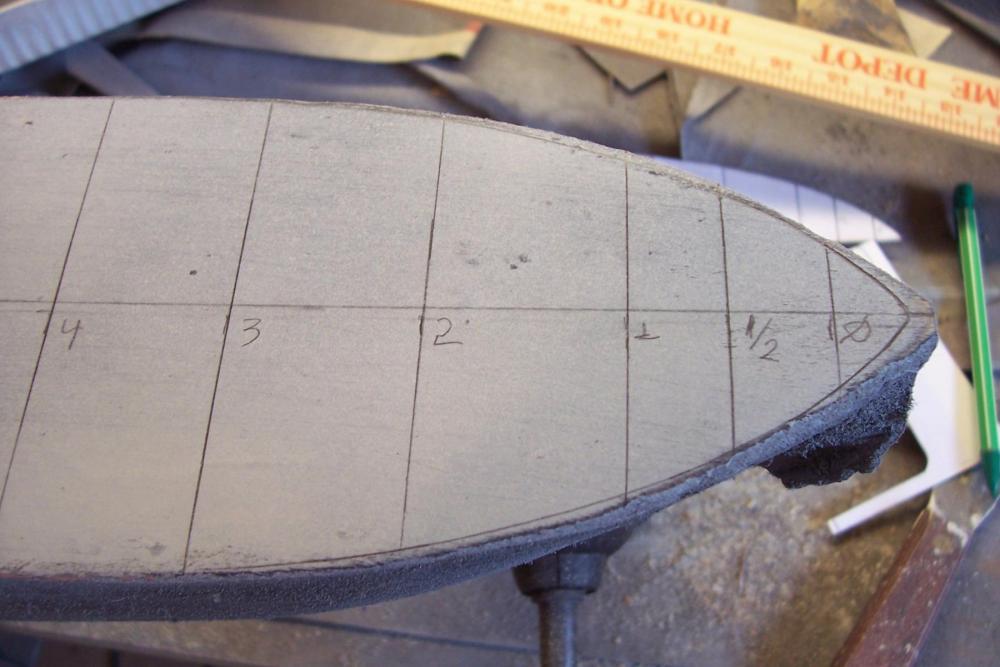
Hull shaping When I first read through the directions I was surprised to see that the bulwarks were attached before the hull was sanded - I thought they would be fragile and would complicate the hull shaping but I pressed the “believe” button and went with the kit’s building sequence - I’m glad I did. Trying to add them after shaping the hull would have led to inevitable “knuckles” at the joint, requiring even more sanding and they probably would still have not looked right. By adding them first they are treated as an integral part of the hull and after sanding they are fair with the hull. The design and depth of the rabbet also makes for a very secure joint so I have no more worries about them. The sanding to shape of the hull is going relatively quick and easily, mainly because of the simple shape of the hull (bluff bows with no flair, slab sides amidships). Here's an example of how the templates are used to check the shape of the hull: At this point the forward 75% of the hull has been shaped and rough sanded, the stern area is next and will probably take as much time as the rest of the hull combined because of its shape and the need to thin it. This basswood sands very easily yet keeps an edge, nice stuff to work with.
- 227 replies
-
- 12
-
-
- BlueJacket Shipcrafters
- Stephen Hopkins
- (and 2 more)
-
David, they were pre-cut, one of the laser-cut improvements to the kit - it would have been pretty tedious to do that many. If you look in the post I did about the kit contents you can see them there. Tim
- 227 replies
-
- 4
-
-
- BlueJacket Shipcrafters
- Stephen Hopkins
- (and 2 more)
-
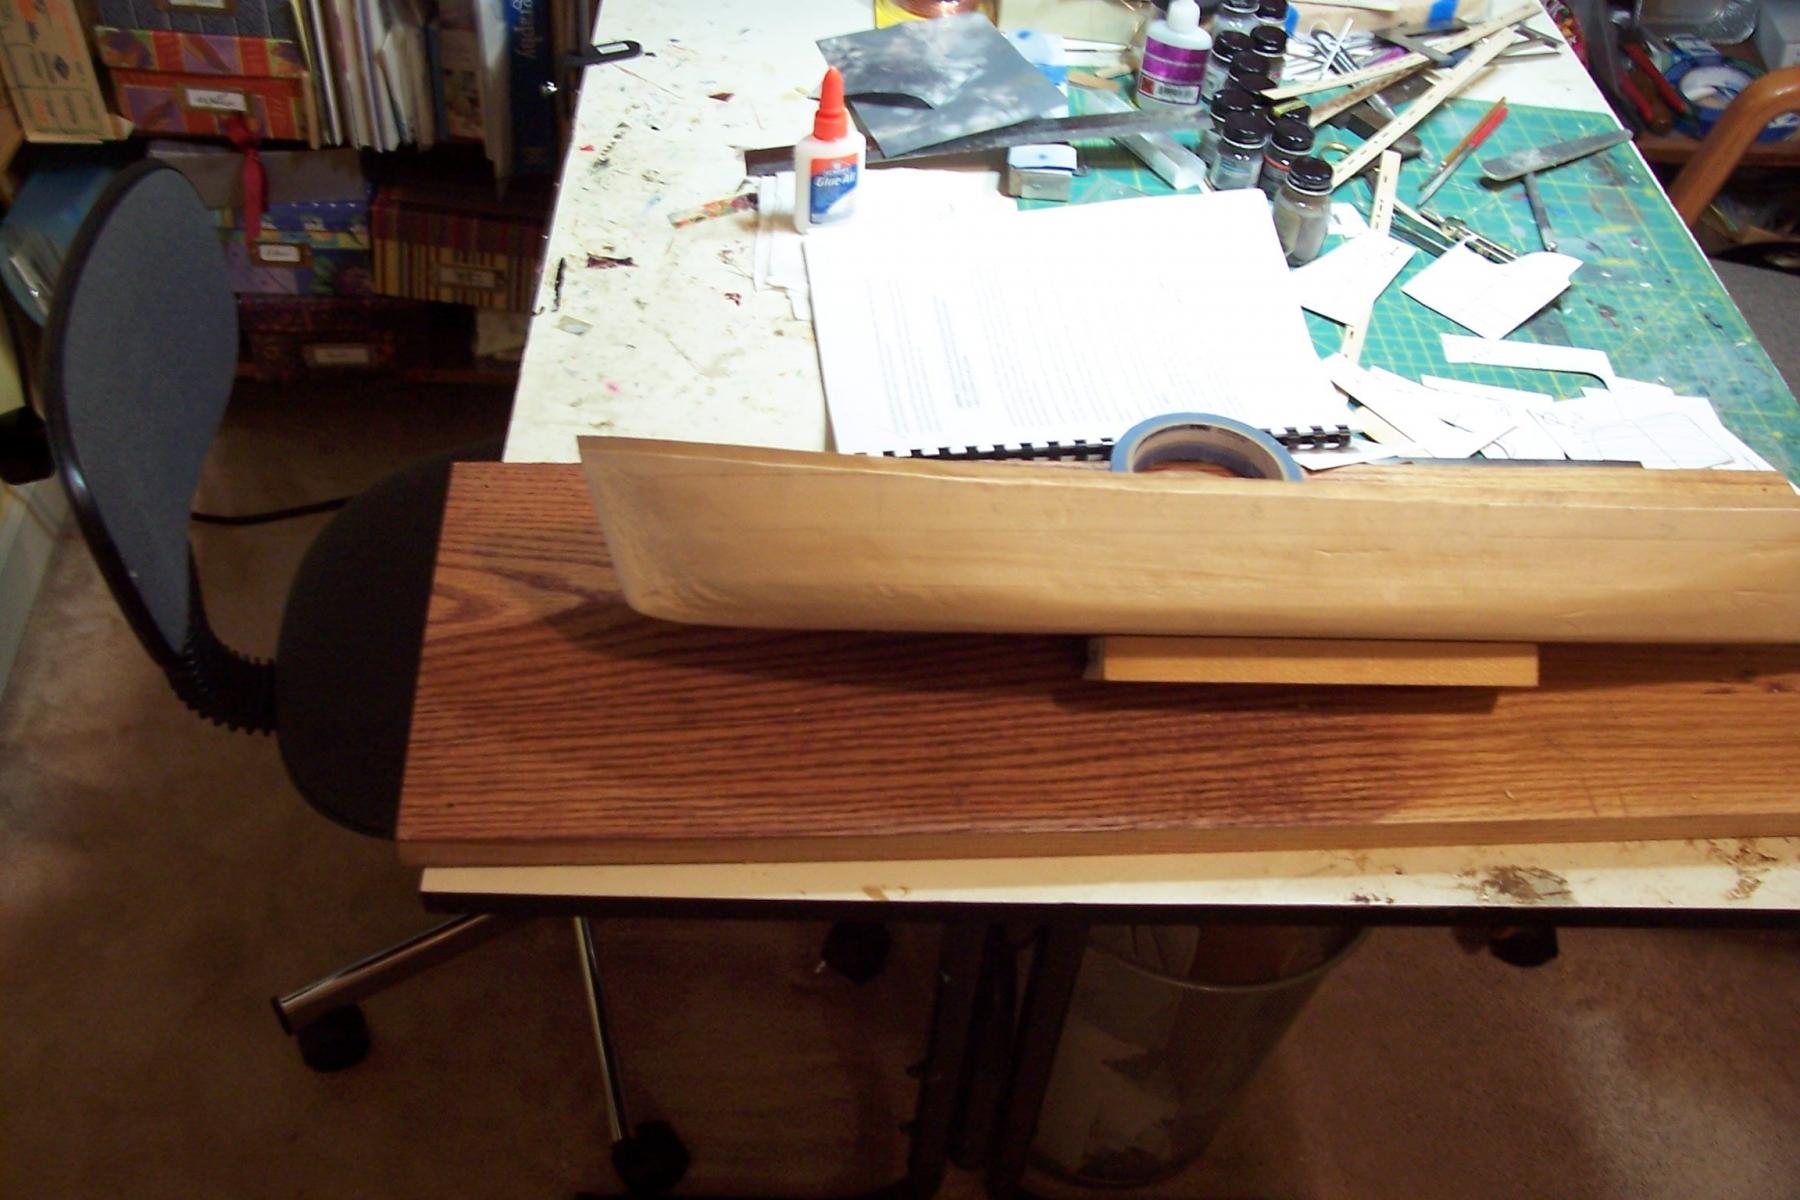
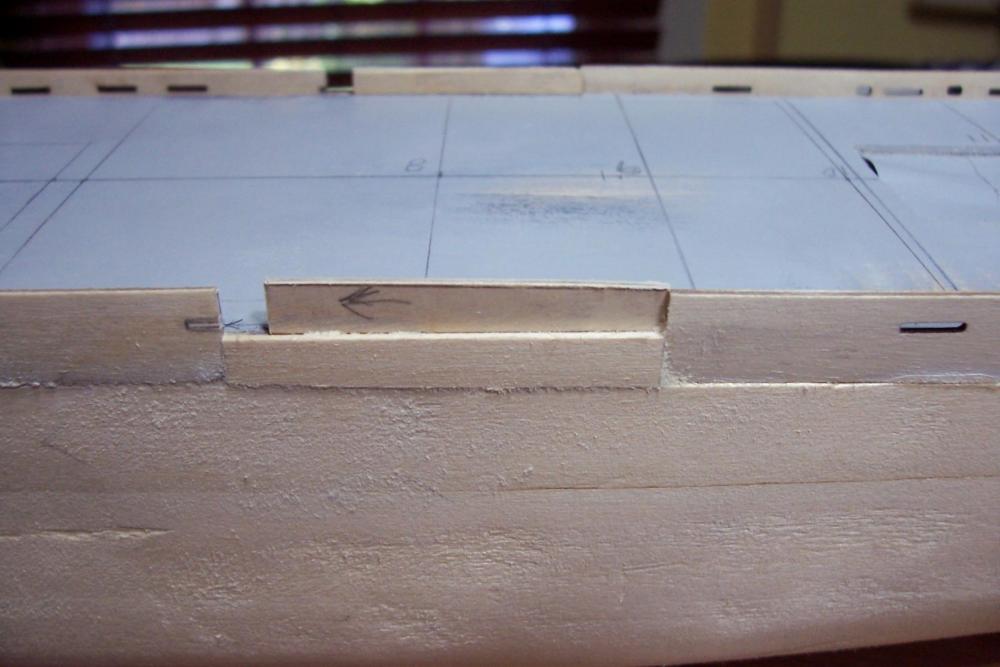
Bulwarks installed The fore and aft bulwarks have been glued in place and a piece of square stock added to the stem to ensure there is enough wood there when the hull gets shaped. I probably will end up sanding all of it off but it is easier to attach now then when the stem gets narrow so better safe than sorry: The midships gap (indent) is where the accom ladder will go. Scrap wood was used to fill the unused section of the rabbet: Wood filler has been added to the seams and everything is ready for the hull shaping:


- 227 replies
-
- 13
-
-
- BlueJacket Shipcrafters
- Stephen Hopkins
- (and 2 more)
-
Rabbet finished Cutting in the bulwark rabbet along the deck edge with a hobby knife went OK. The bow and stern profiles have been shaped using templates (the shaping of the hull itself has not started yet. This is a good place to break while I head out of town for a week and a half. When I get back it will be time to add the bulwarks and then shape the hull.
- 227 replies
-
- 12
-
-
- BlueJacket Shipcrafters
- Stephen Hopkins
- (and 2 more)
-
Welcome aboard Carl! As you follow along please bear in mind that this is the updated version of the kit (which happened in 2009 I think) if you got yours before 2009 your kit may not have as much laser cut wood as you will see here. If that's the case you could always order those parts you want from BJ when you are ready.
- 227 replies
-
- 3
-
-
- BlueJacket Shipcrafters
- Stephen Hopkins
- (and 2 more)
-
Cargo Hatches finished and rabbet started After sanding and priming the deck fill sheets blend in nicely: Progress will be slow for a bit while I cut the rabbet for the bulwarks around the circumference of the main deck (given the size of the hull it works out over 4 linear feet). I was going to try using the Dremel tool but after practicing on scrap wood I discovered that while it can deliver accurate and consistent wood removal in one dimension, the second dimension is not as good so I’m going to go with the kit directions and take it slow with a hobby knife. Another reason for using the knife is that I want to angle the rabbet around the bow and stern so that the bulwarks will "tilt" out slightly and so be fair with the angle of the sides of the hull in those areas. The rabbet is 1/4” high and will be 1/16” deep.

- 227 replies
-
- 14
-
-
- BlueJacket Shipcrafters
- Stephen Hopkins
- (and 2 more)
-
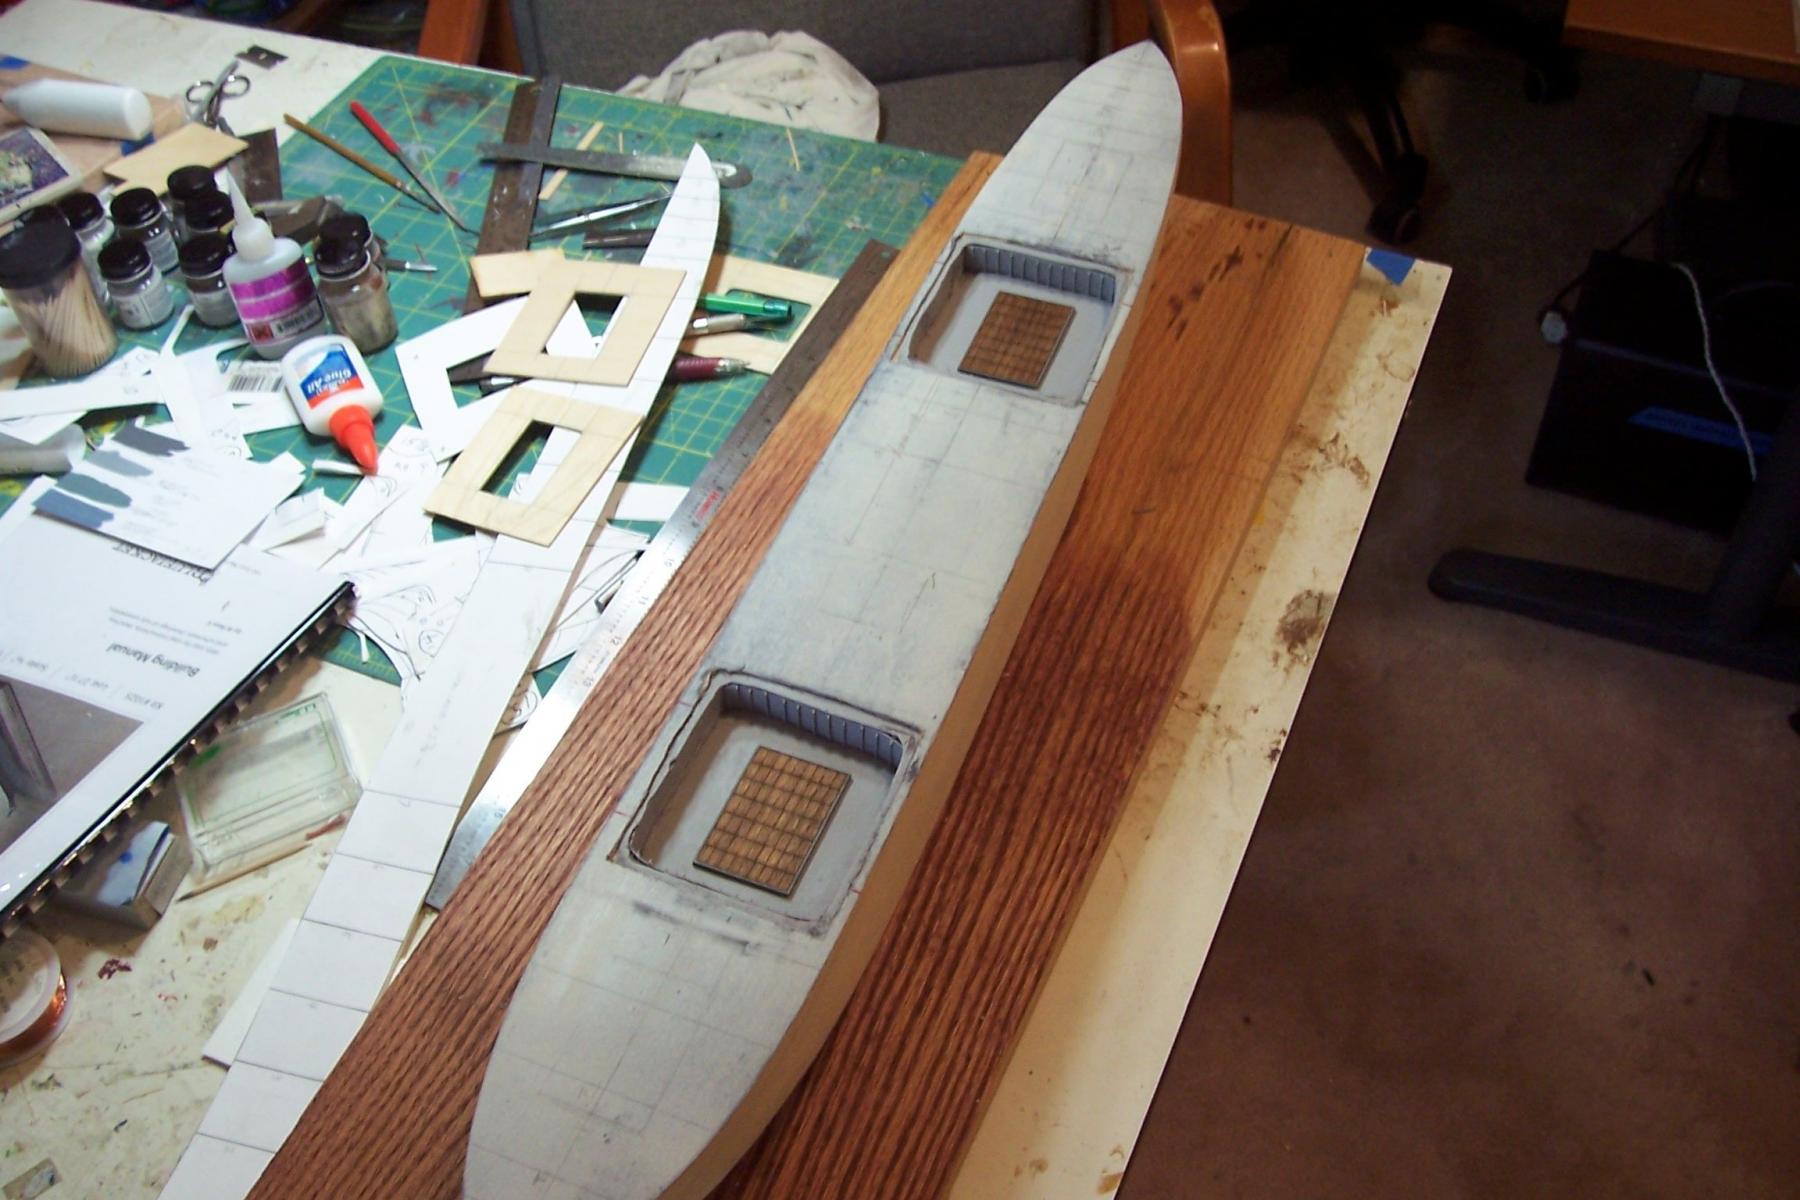
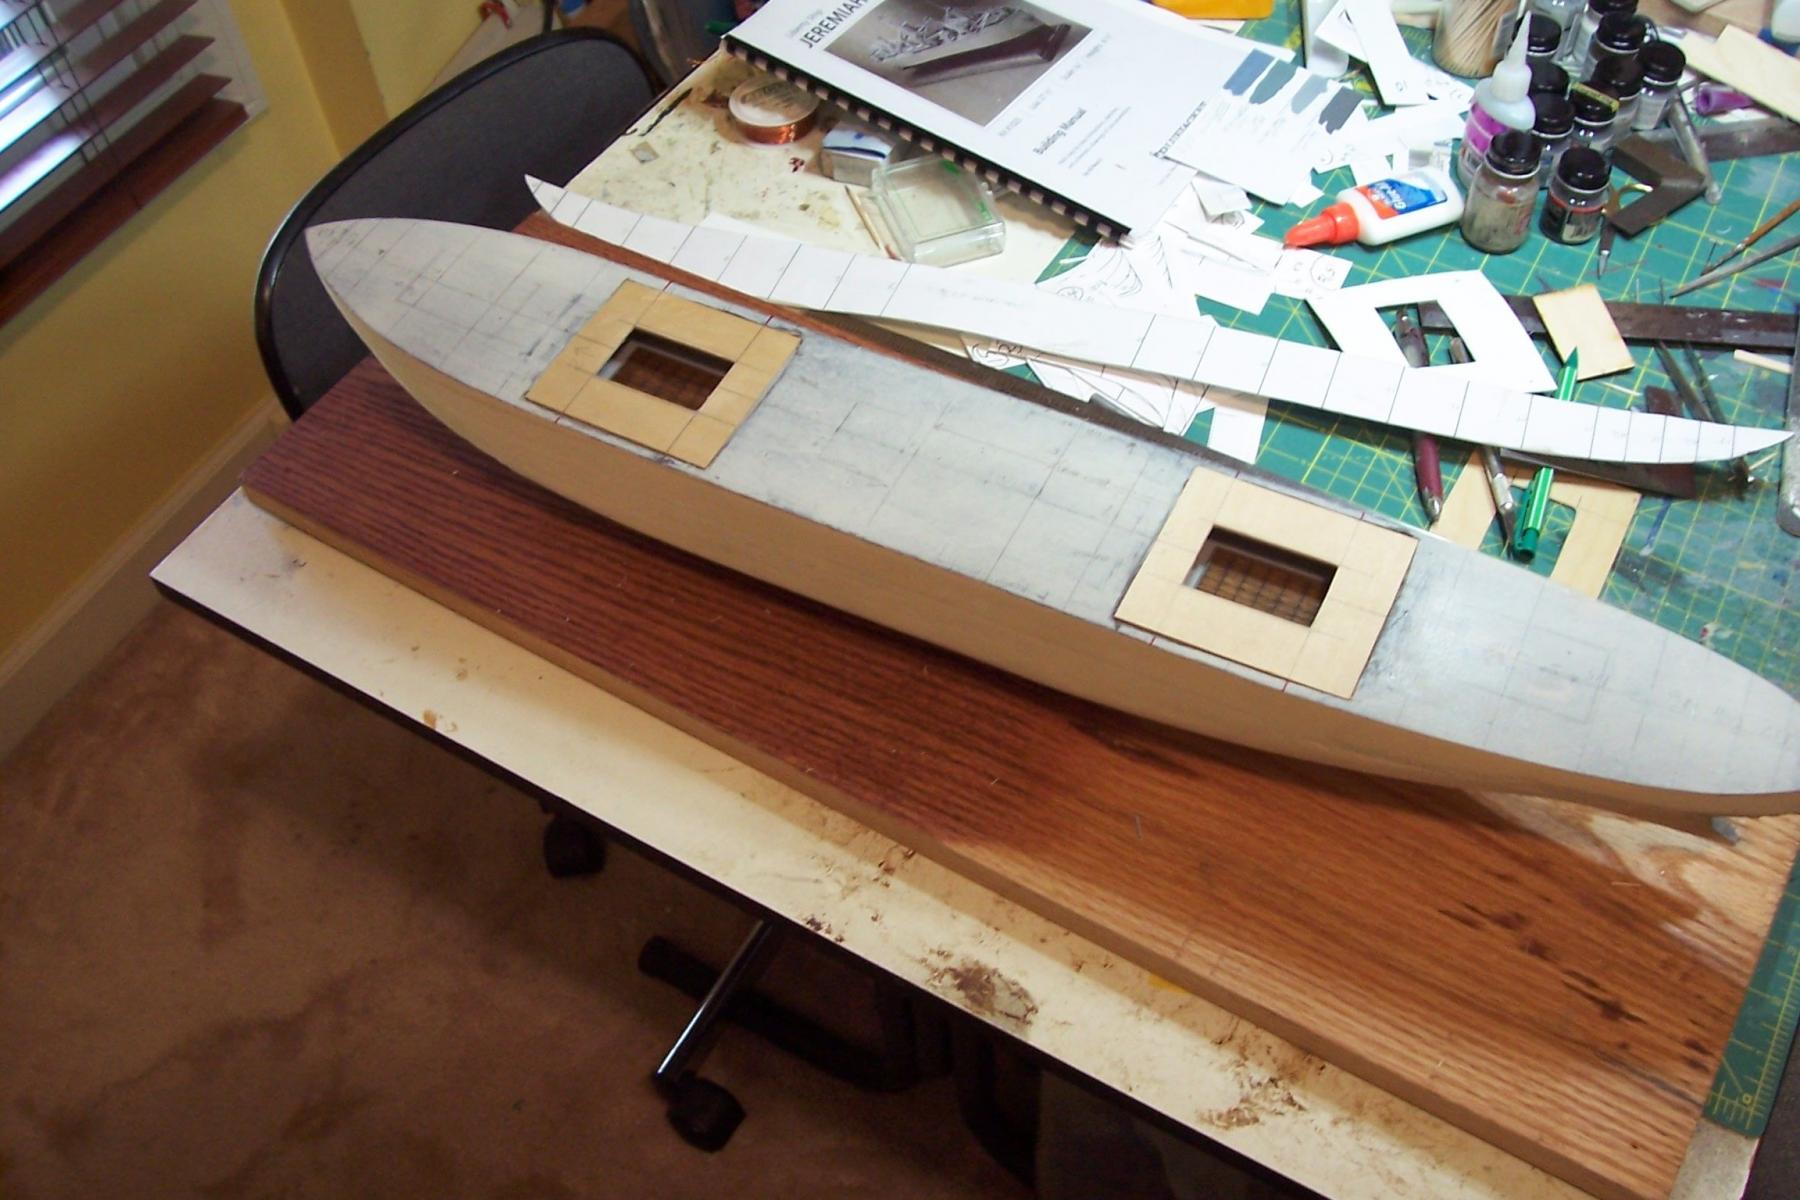
Cargo Hatches (cont) Fake bulkheads with stiffeners were added to the fore and aft bulkheads since they can be glimpsed thru the main deck hatches. I decided to just order a couple of extra hatch covers from BlueJacket for the Tween Decks rather than make my own so they would be consistent with the main deck ones: The main deck fill pieces were easy to fabricate and fit snug enough that they do not move around. Next steps will be to glue the fill pieces in place, fill the gaps with Bondo, sand and prime.


- 227 replies
-
- 14
-
-
- BlueJacket Shipcrafters
- Stephen Hopkins
- (and 2 more)
-
Welcome aboard John, good luck on the Portland, I've always thought she works up to a great looking model. Understand how time gets away from you on a build but 2 years isn't really all that long for a ship like the Portland, plus the fun is in the work not the finish.
- 227 replies
-
- 4
-
-
- BlueJacket Shipcrafters
- Stephen Hopkins
- (and 2 more)
-
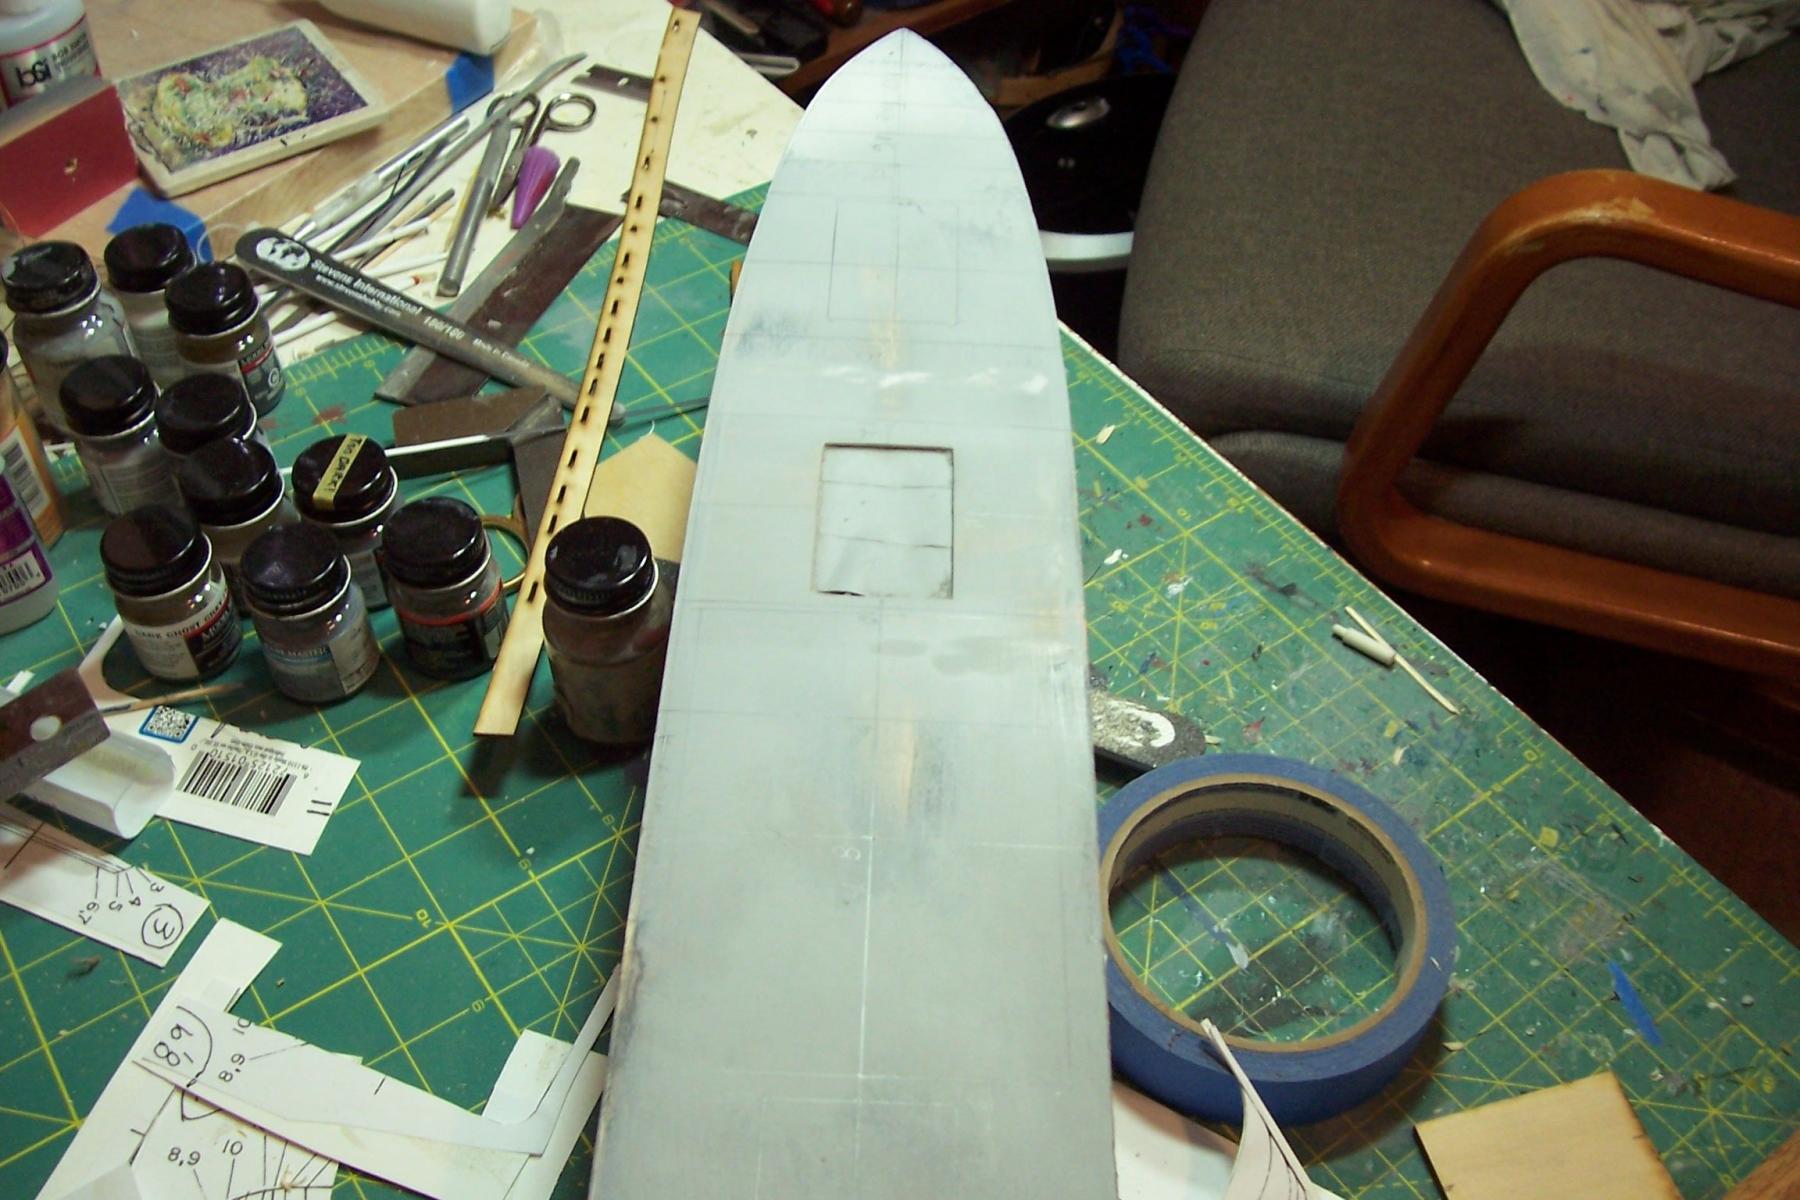
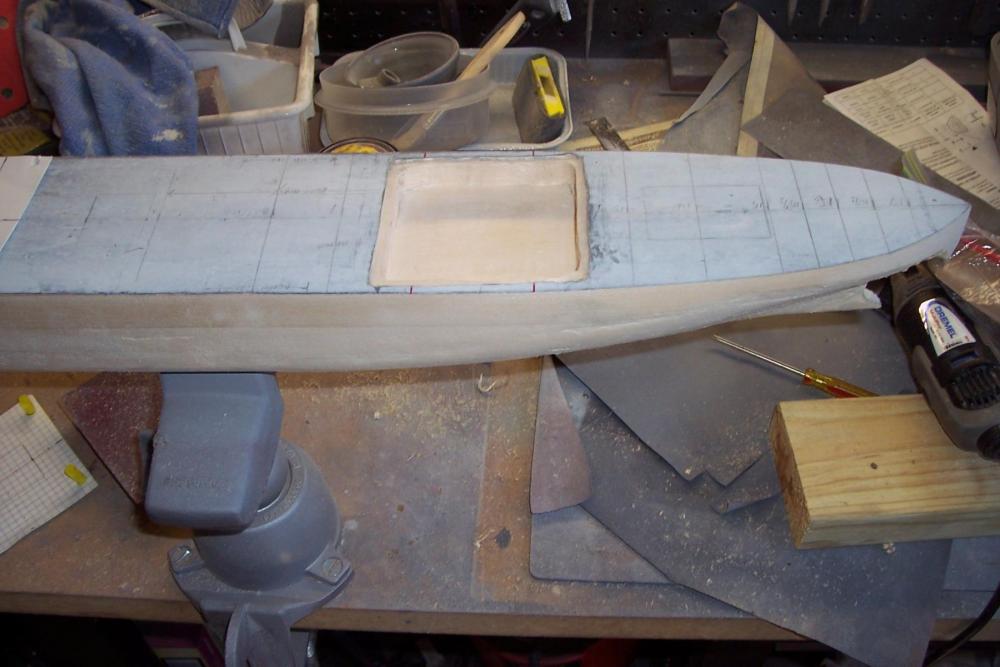
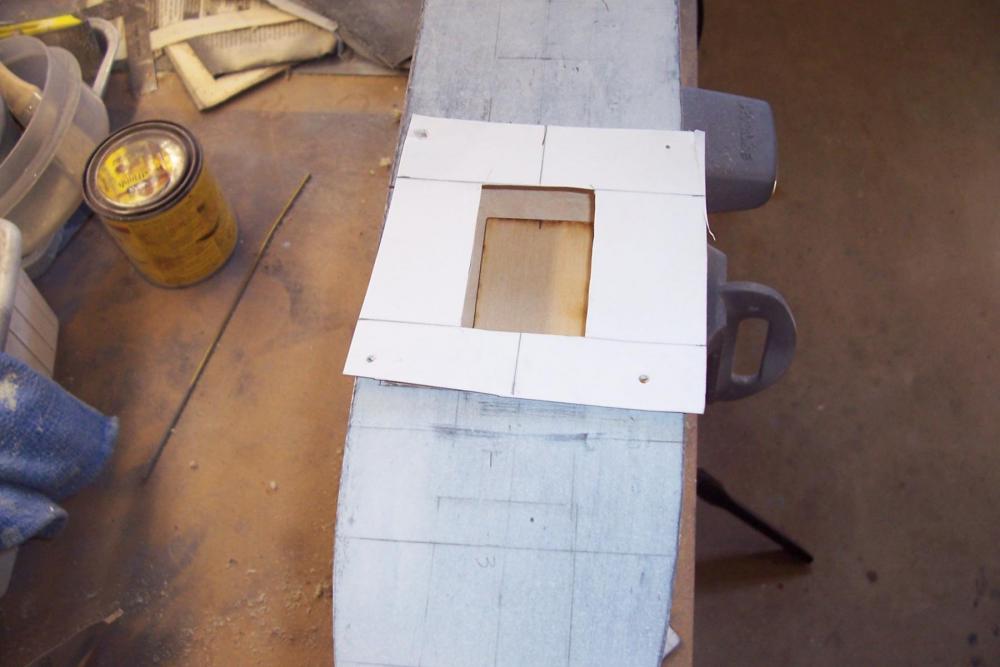
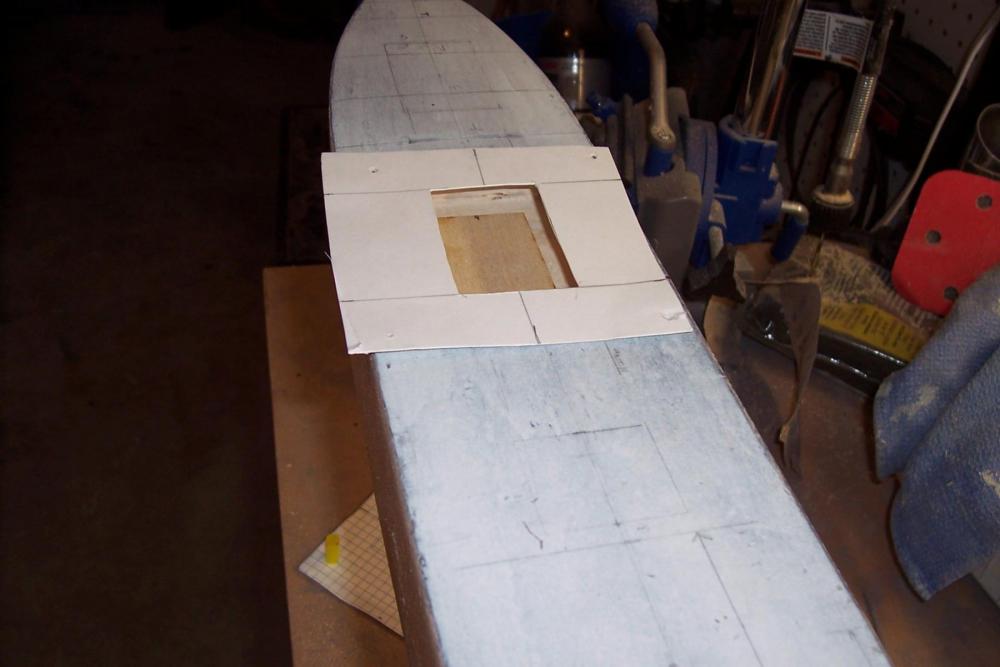
Cargo Hatches at final depth The # 2 and # 4 cargo hatches are now at their final scale 10ft depth and a 1/16” deep rabbet has been added around the edges for the ply deck replacements to sit in. The paper mockup resting on the deck gives some idea of how much of the interior will be visible. Since a little of the fore and aft bulkheads can be seen I will detail those with stiffeners, the sides on the hull are not visible so I won’t have to do anything there. The wood square on the deck is a placeholder for the Tween Deck hatch that I will make to match the main deck hatches.
- 227 replies
-
- 10
-
-
- BlueJacket Shipcrafters
- Stephen Hopkins
- (and 2 more)
-
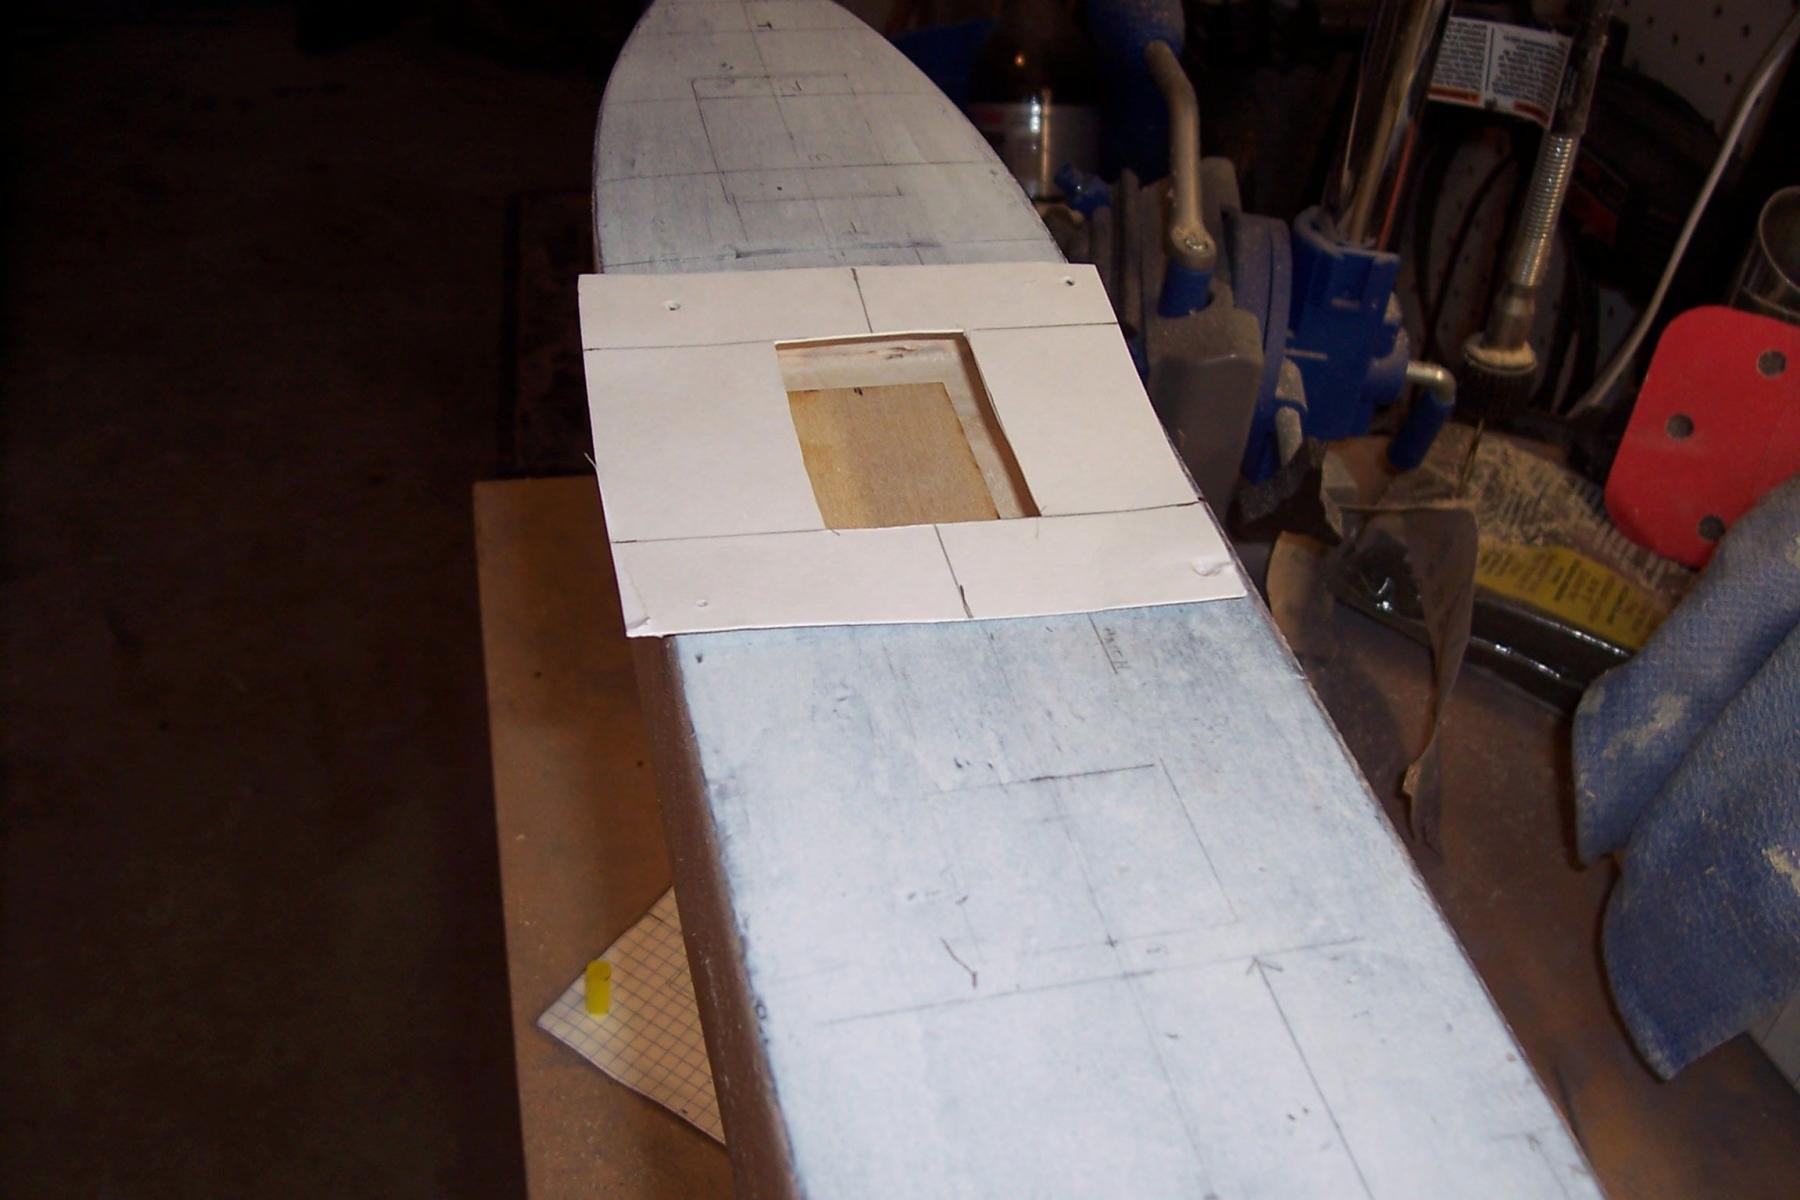
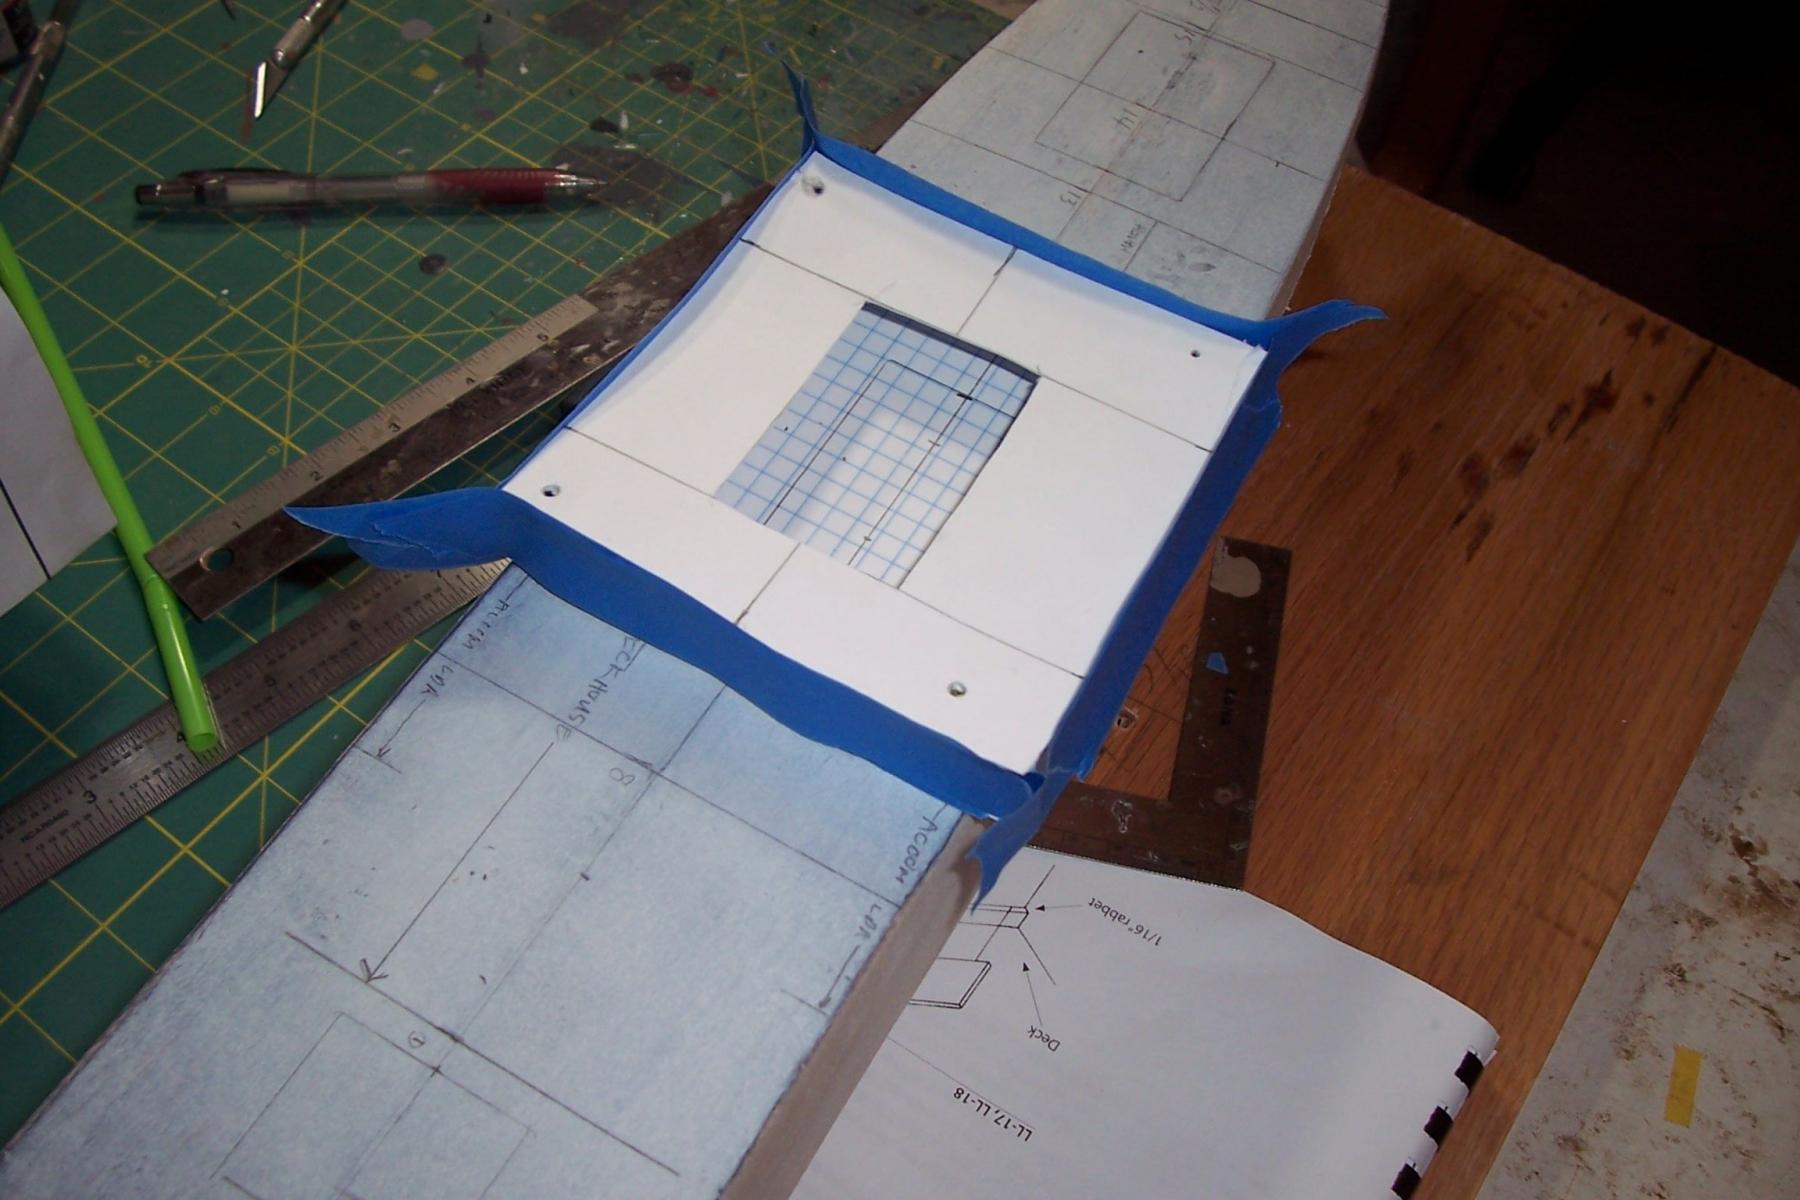
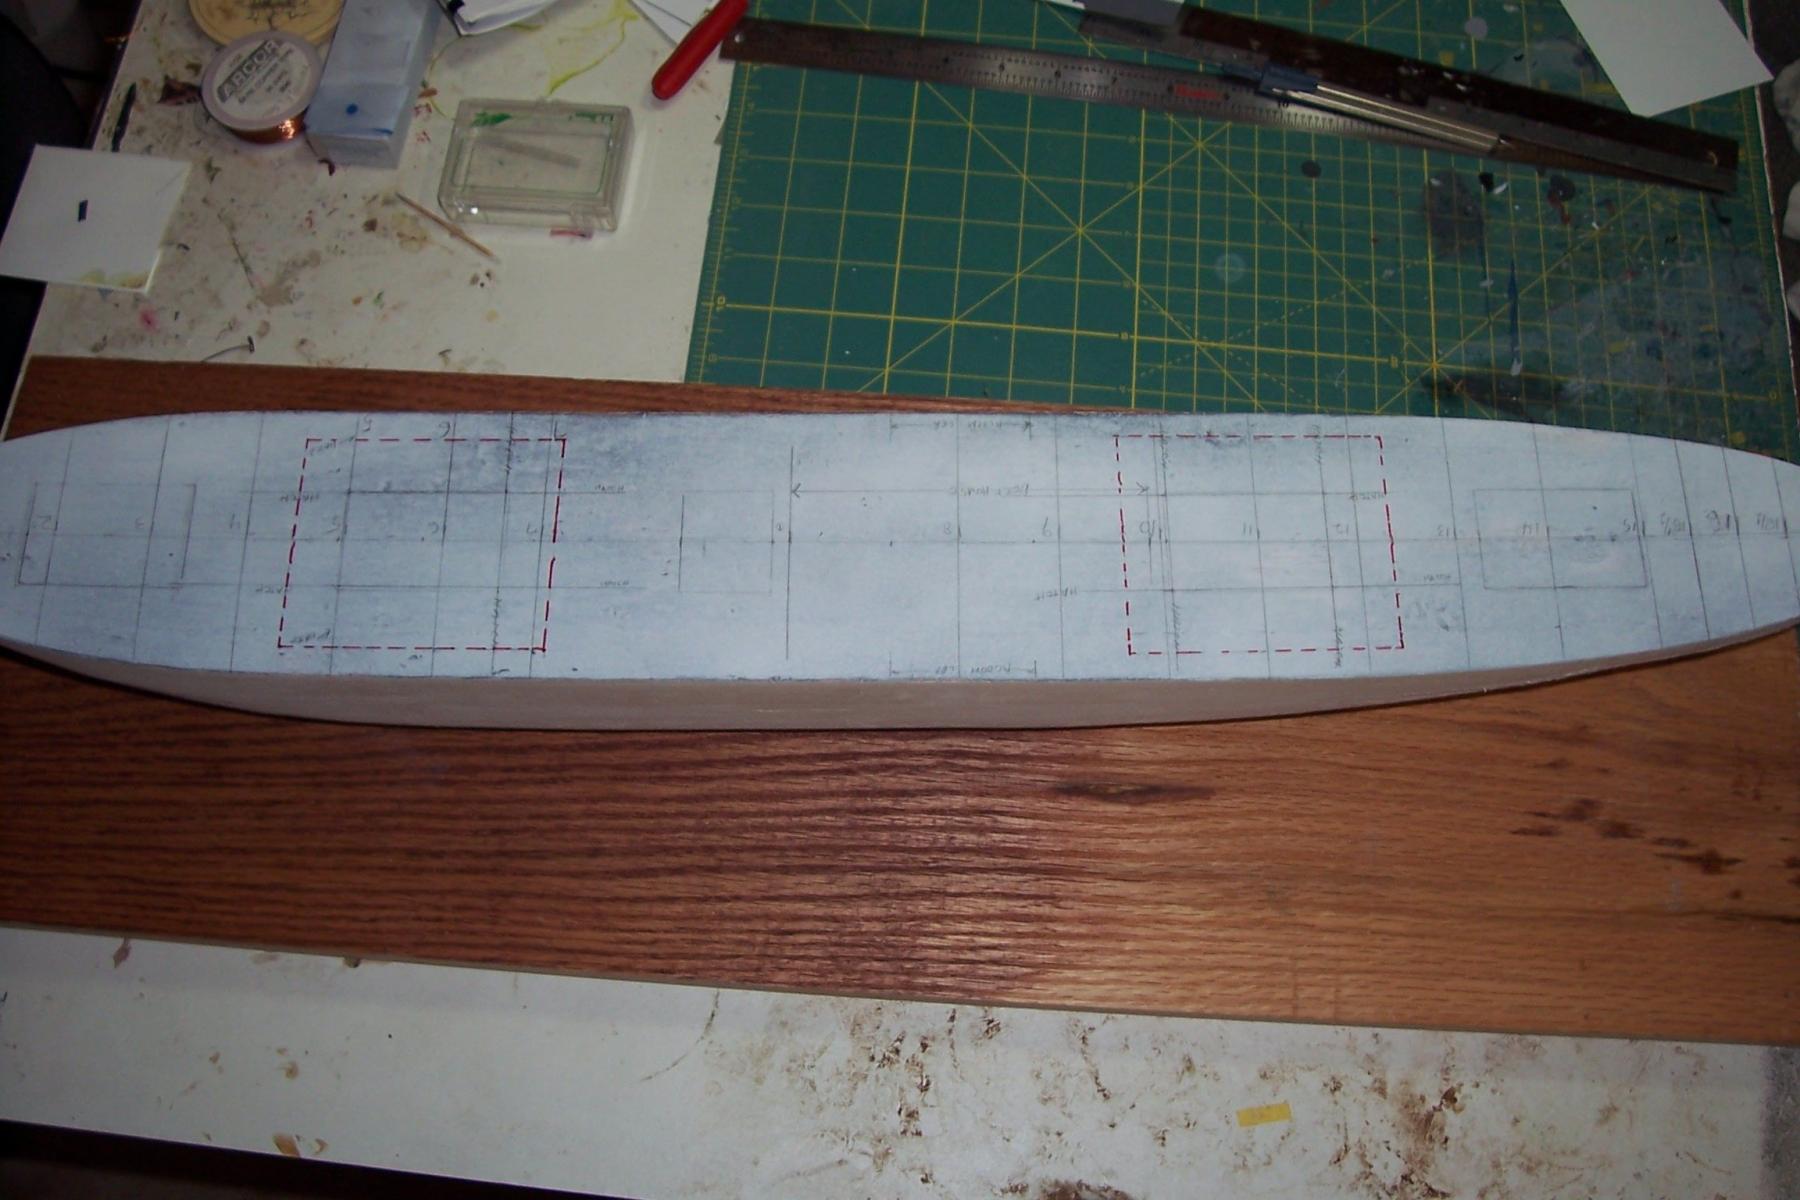
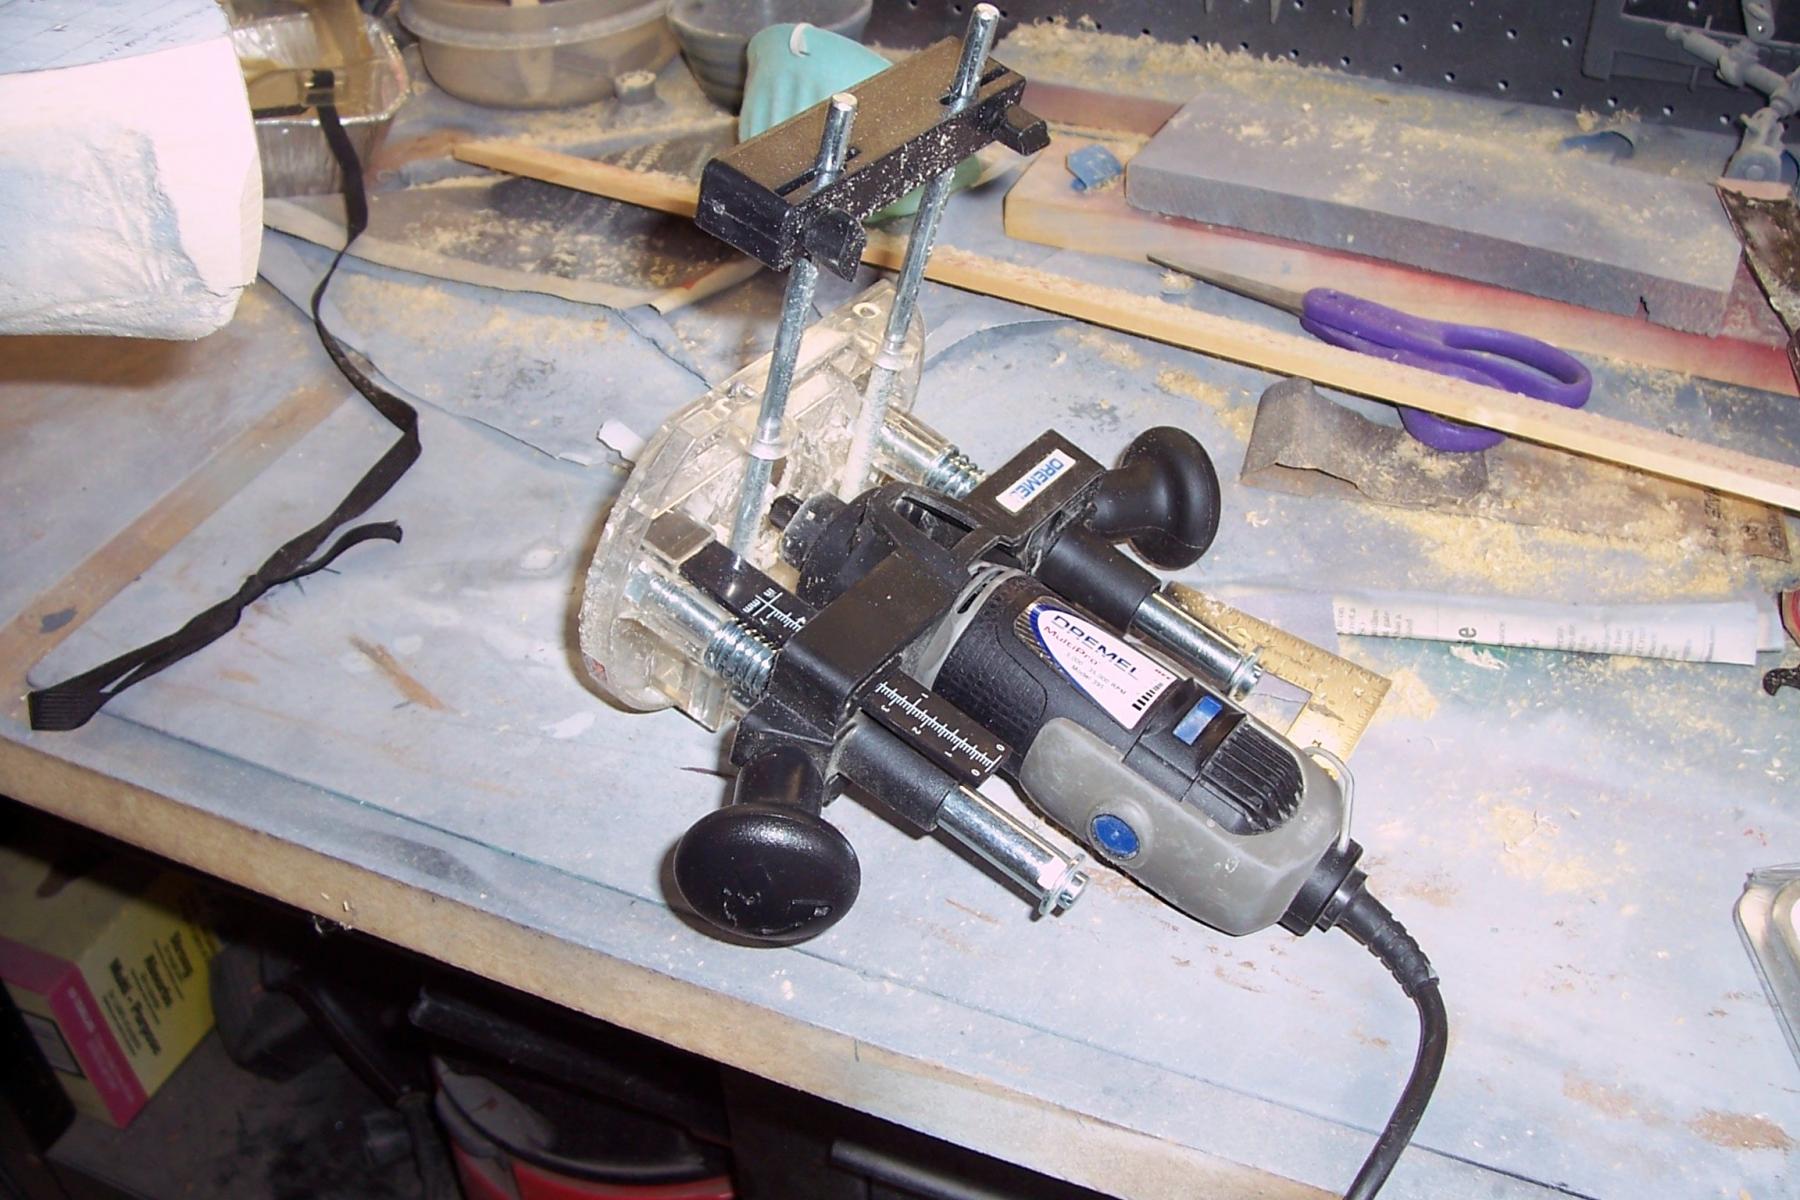
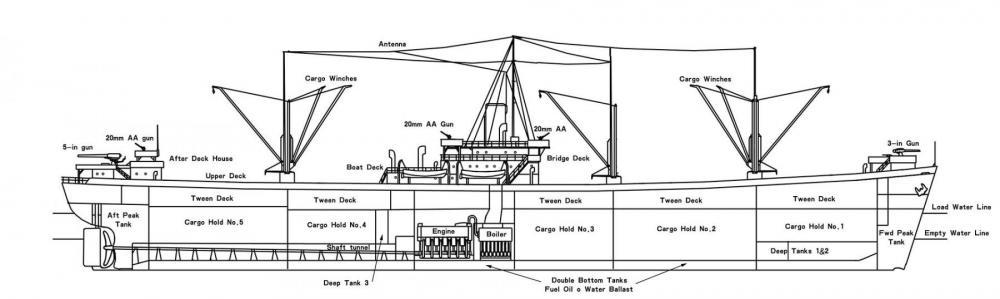
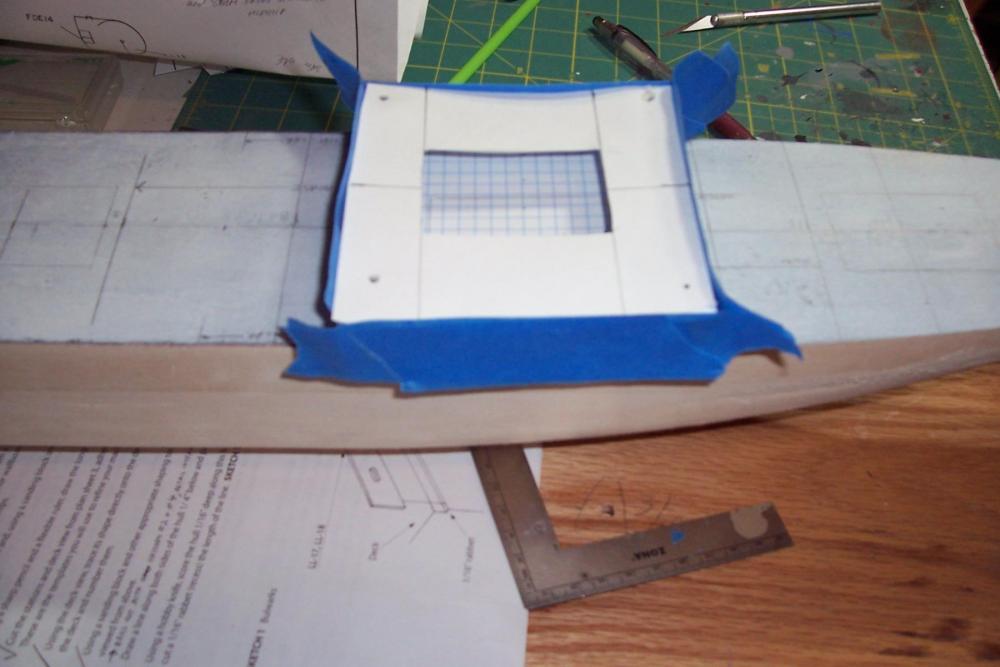
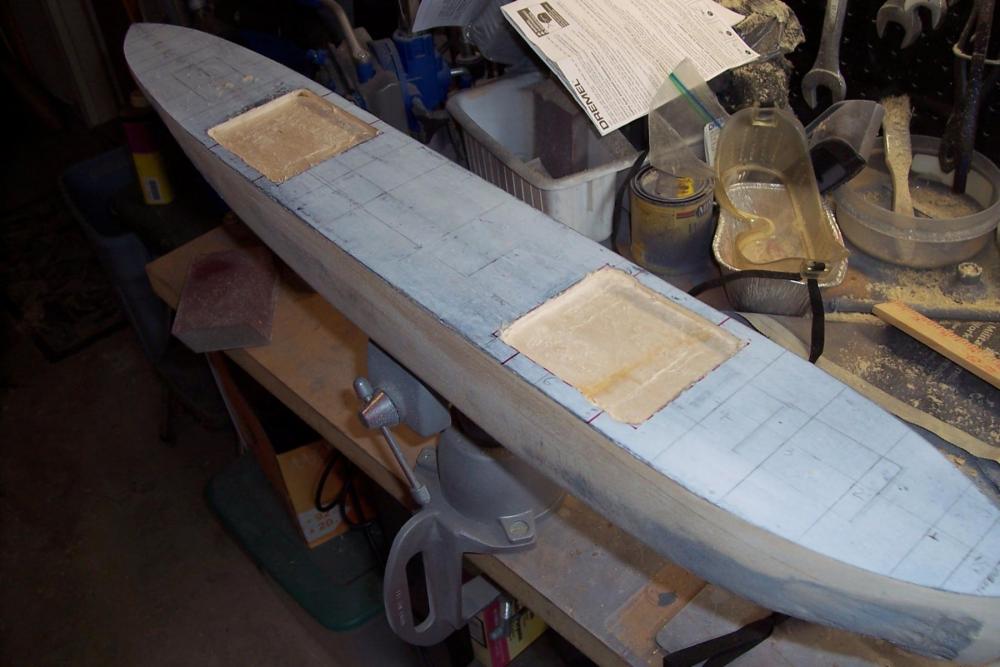
Opening up some cargo hatches In thinking about how I want the finished model to look I decided that rather than have each of the 5 cargo hatches and their associated booms looking basically the same I will try to rig each one with a different style of rig and also show at least one hatch with the hatch covers removed. I decided to open up the #2 and #4 hatches. Each cargo hold consisted of an upper and lower hold, divided by the Tween deck. I will only go down as far as the tween deck since anything below the tween deck hatch would definitely be too dark to see. As you can see in this drawing the upper holds were only about 1/3 the size of the lower holds: The hatches were relatively small in comparison to the size of the holds so in order to give them some depth I wanted to remove as much wood as needed horizontally so that the holds are visible when looking down through the hatch at various angles (this is assuming there is enough light to see in there, if not then no harm done - at least as much as can be seen will be somewhat realistic). In order to figure out how far back from the hatch combings I would have to “excavate” I made a simple mockup from cardboard with the upper hatch cut out and 4 straws cut to the scale 10ft length to separate the decks. The graph paper on the lower piece allowed me to figure out how much of the Tween Deck could be seen. After getting my estimates and adding a little fudge factor I marked the deck in red with the areas to be excavated: Fortunately I already had a router attachment for a Dremel tool so it was much easier than chiseling, although it will take multiple passes since it can’t handle taking off much more than 1/8” of wood at a time (the final depth will be 5/8"): Here’s the progress so far, both holds are at about 1/3 of their final depth: I’ll hopefully be taking off a few days for a fishing trip. When I return I’ll bring the holds to their final depth, add the tween decks and lower hatches, add the fore and aft bulkheads (if they can be seen) and then start fitting 1/16” ply to cover the openings, cut-out the upper hatches and then move on to other things.


- 227 replies
-
- 13
-
-
- BlueJacket Shipcrafters
- Stephen Hopkins
- (and 2 more)
-
Thanks for the input Pete & Dgbot, that's great stuff about the differences between building yards and it helps explain why the plating is easily seen on some photos but invisible on pix of other ships, even with good photo definition. I'm going to play around with the tape on some scrap lumber and see how it looks after priming and painting. If I end up doing anything on the model I will keep it subtle. thanks again.
- 227 replies
-
- 6
-
-
- BlueJacket Shipcrafters
- Stephen Hopkins
- (and 2 more)
-
You bet Kevin. Your Victory and Bismarck are impressive, especially to have both going on at the same time. Wish I could tackle something that big but I'm afraid the wife would tell me "There is room for you or the model but not both ... "
- 227 replies
-
- 6
-
-
- BlueJacket Shipcrafters
- Stephen Hopkins
- (and 2 more)
-
I'm going to try to plate it. I've never done it before. The plating on the Libs was pretty subtle compared to a riveted hull, or even to a welded warship hull. On some photos it is invisible but on most you can at least see the strakes, although the vertical weld lines are hard to pick out since they were butt welded with no overlap. I'm going to try to use aluminum tape for the "out" strakes and leave the hull bare for the "in" strakes and then scribe the weld lines. If it doesn't work I'll just strip it off and paint it.
- 227 replies
-
- 4
-
-
- BlueJacket Shipcrafters
- Stephen Hopkins
- (and 2 more)
-
Glad to have you aboard Frank. Your Dunbrody build is amazing! each frame looks like a work of art.
- 227 replies
-
- 4
-
-
- BlueJacket Shipcrafters
- Stephen Hopkins
- (and 2 more)
-
Main Deck in Final Shape The main deck is now in its final dimensions, so far only as much of the sides of the hull were done as needed to shape the deck. The directions next call for cutting a rabbet around the deck circumference where the bulwarks will be fastened but before I do that I’m going to think over a little kit bashing associated with a couple of the cargo hatches - work that would best be done before the bulwarks are attached and exposed to damage while handling the hull.

- 227 replies
-
- 9
-
-
- BlueJacket Shipcrafters
- Stephen Hopkins
- (and 2 more)
-
Thanks Bob. Your Pequot build brings back memories of another fine old workhorse, the USCGC Fir, which was based just down the street from my house while I was growing up in Seattle. She served 51 years.
- 227 replies
-
- 4
-
-
- BlueJacket Shipcrafters
- Stephen Hopkins
- (and 2 more)
-
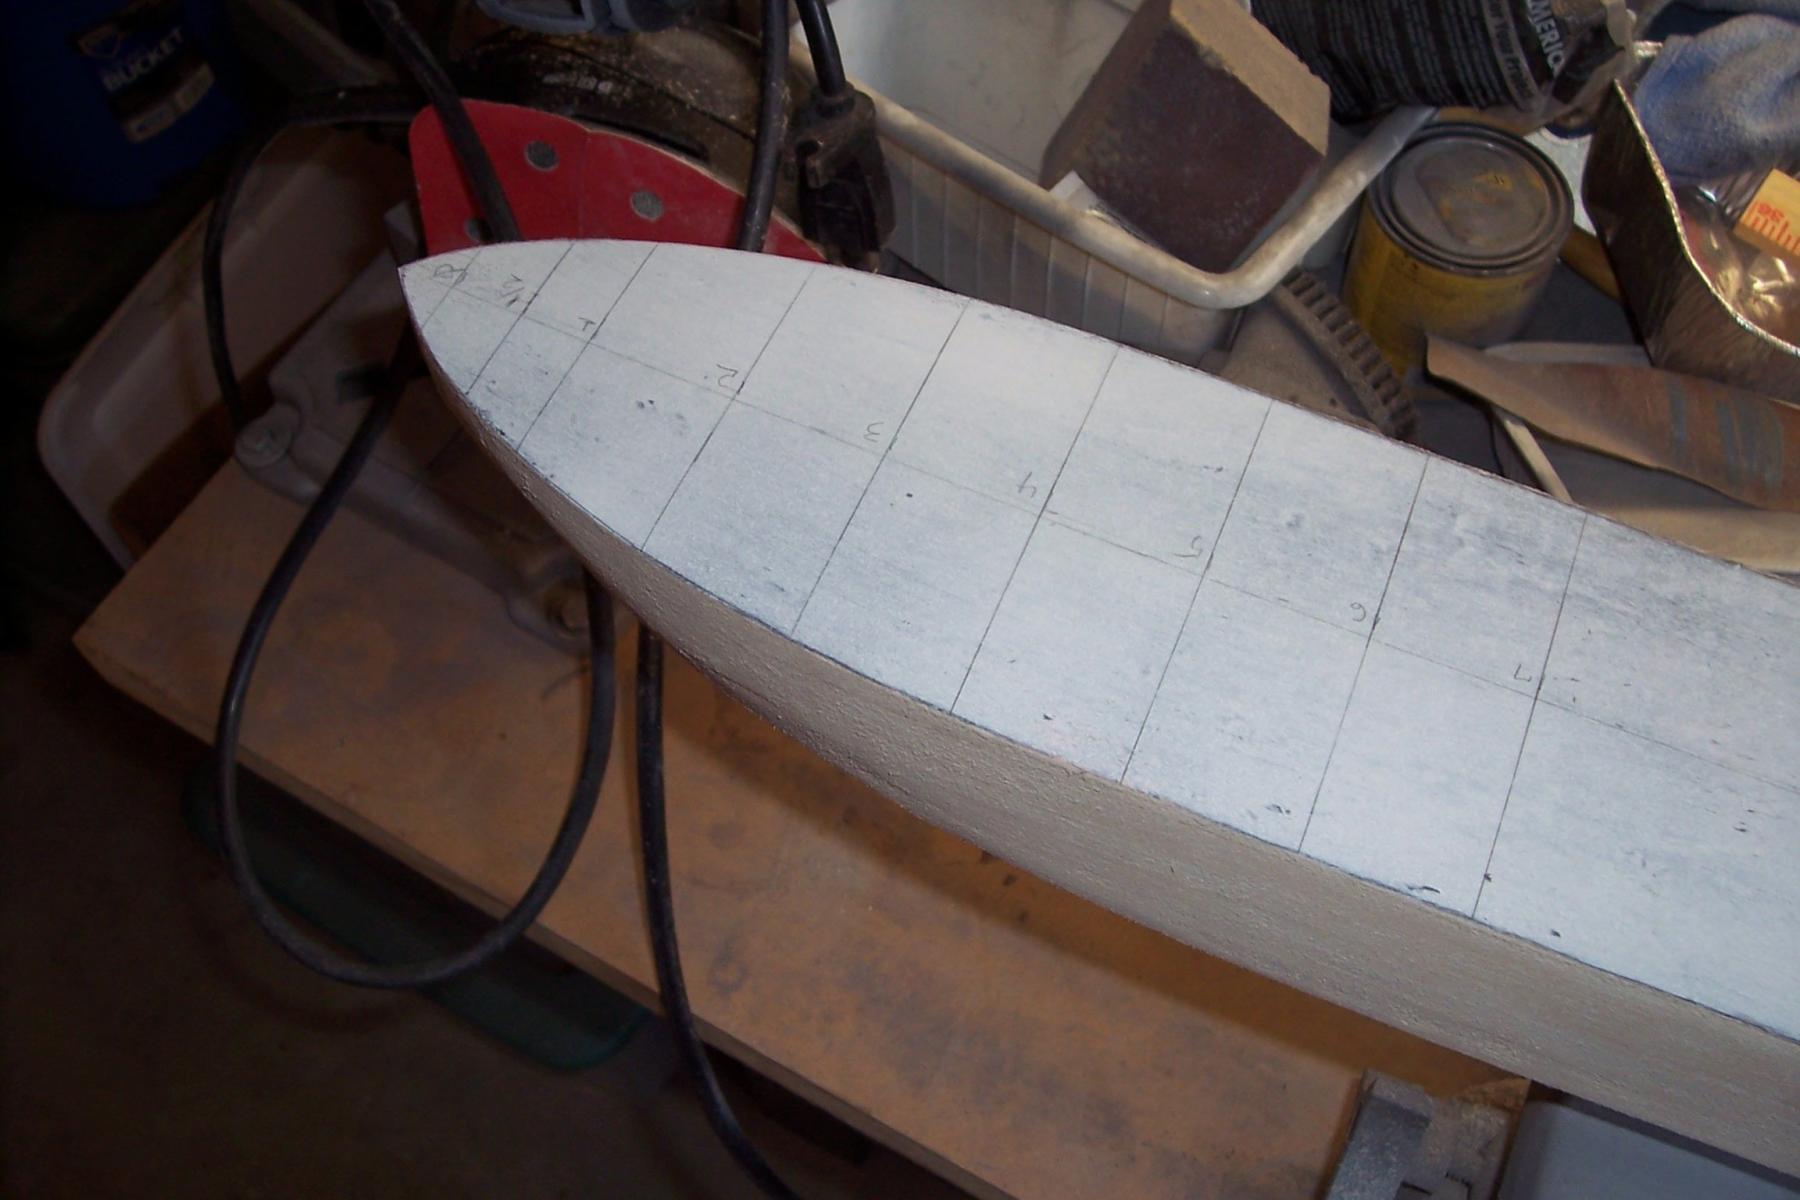
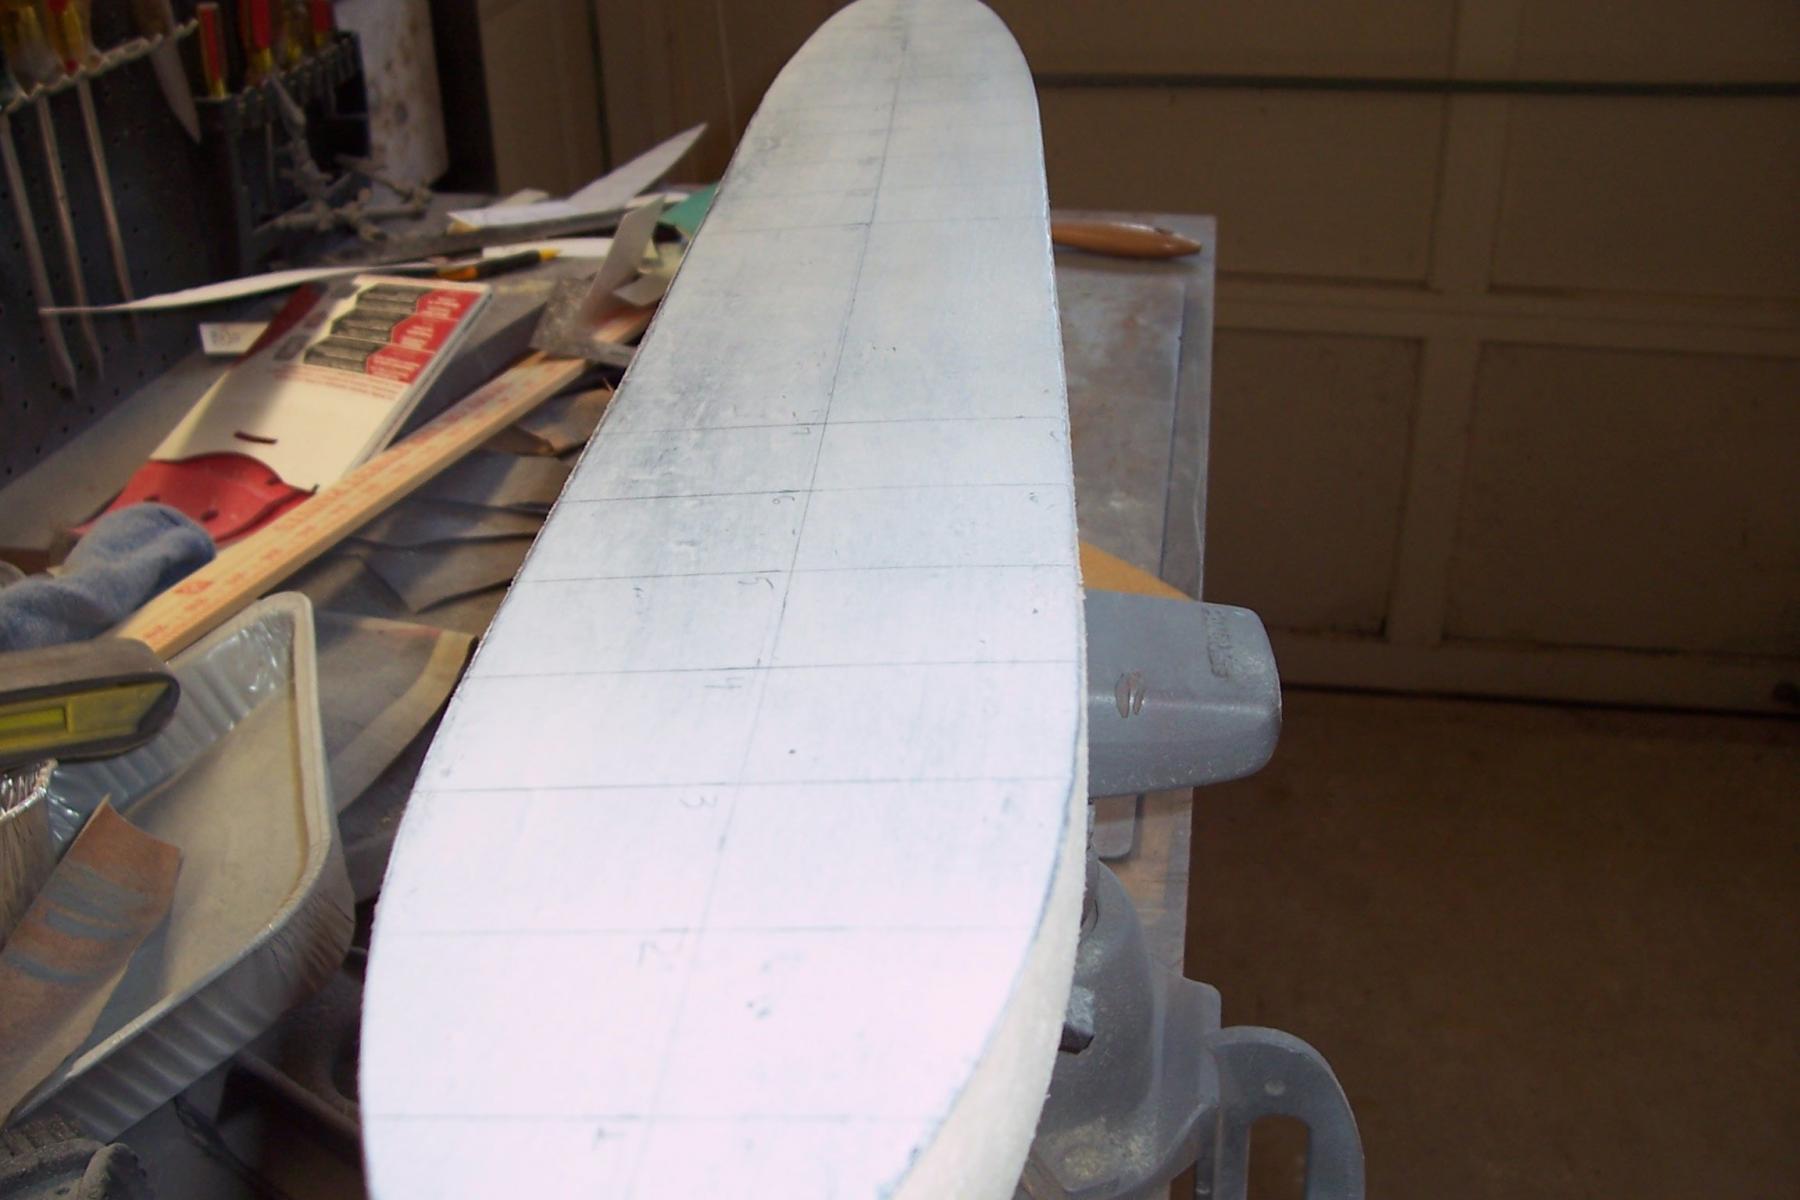
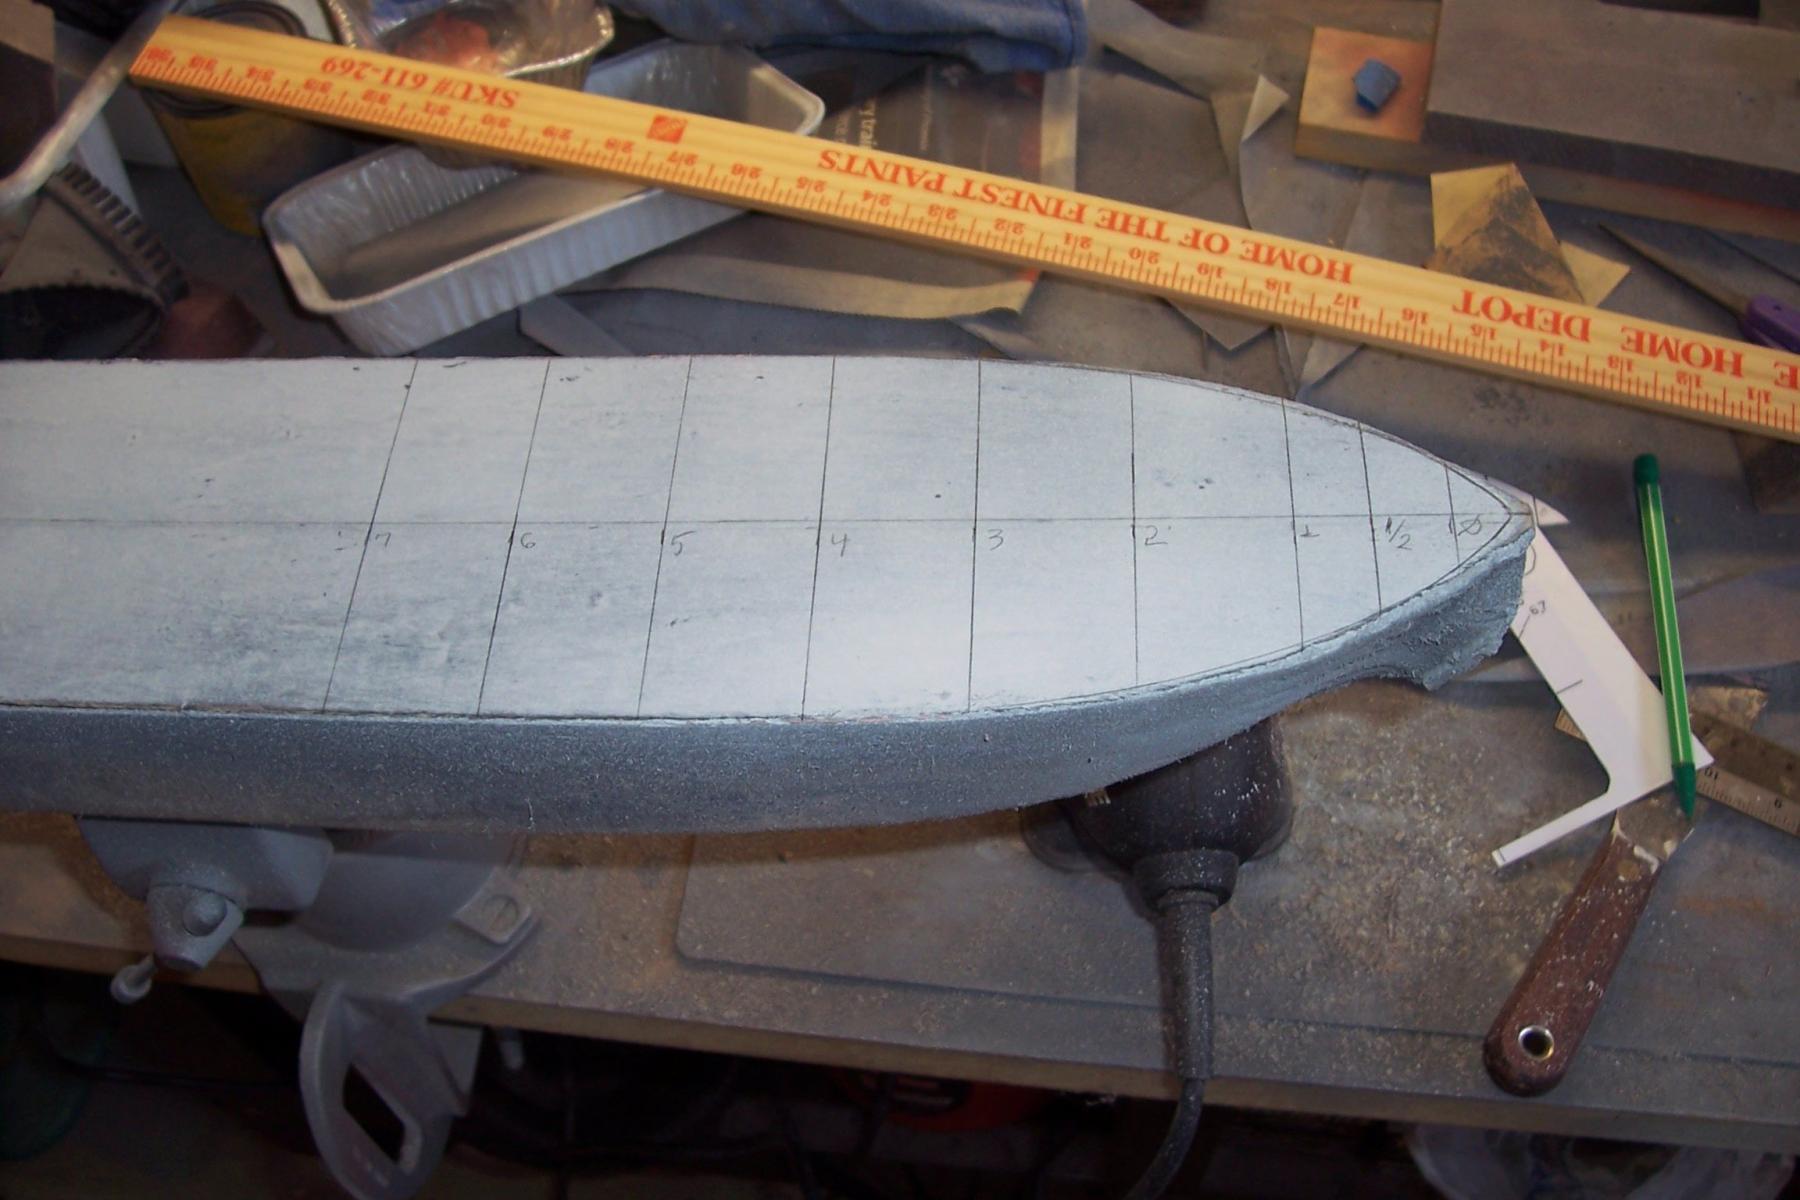
Laying out and shaping the main deck After marking the centerline down the main deck the stations for the templates are marked, I’ll show how the templates are used when I get to that point. The deck outline is then traced on both sides of the centerline. As you might be able to see below, there will be a little to take off around the bow and stern but along the majority of the hull almost nothing needs to come off, which is fine with me since I hate to sand. Next step will be sanding the deck edge to shape.


- 227 replies
-
- 11
-
-
- BlueJacket Shipcrafters
- Stephen Hopkins
- (and 2 more)
-
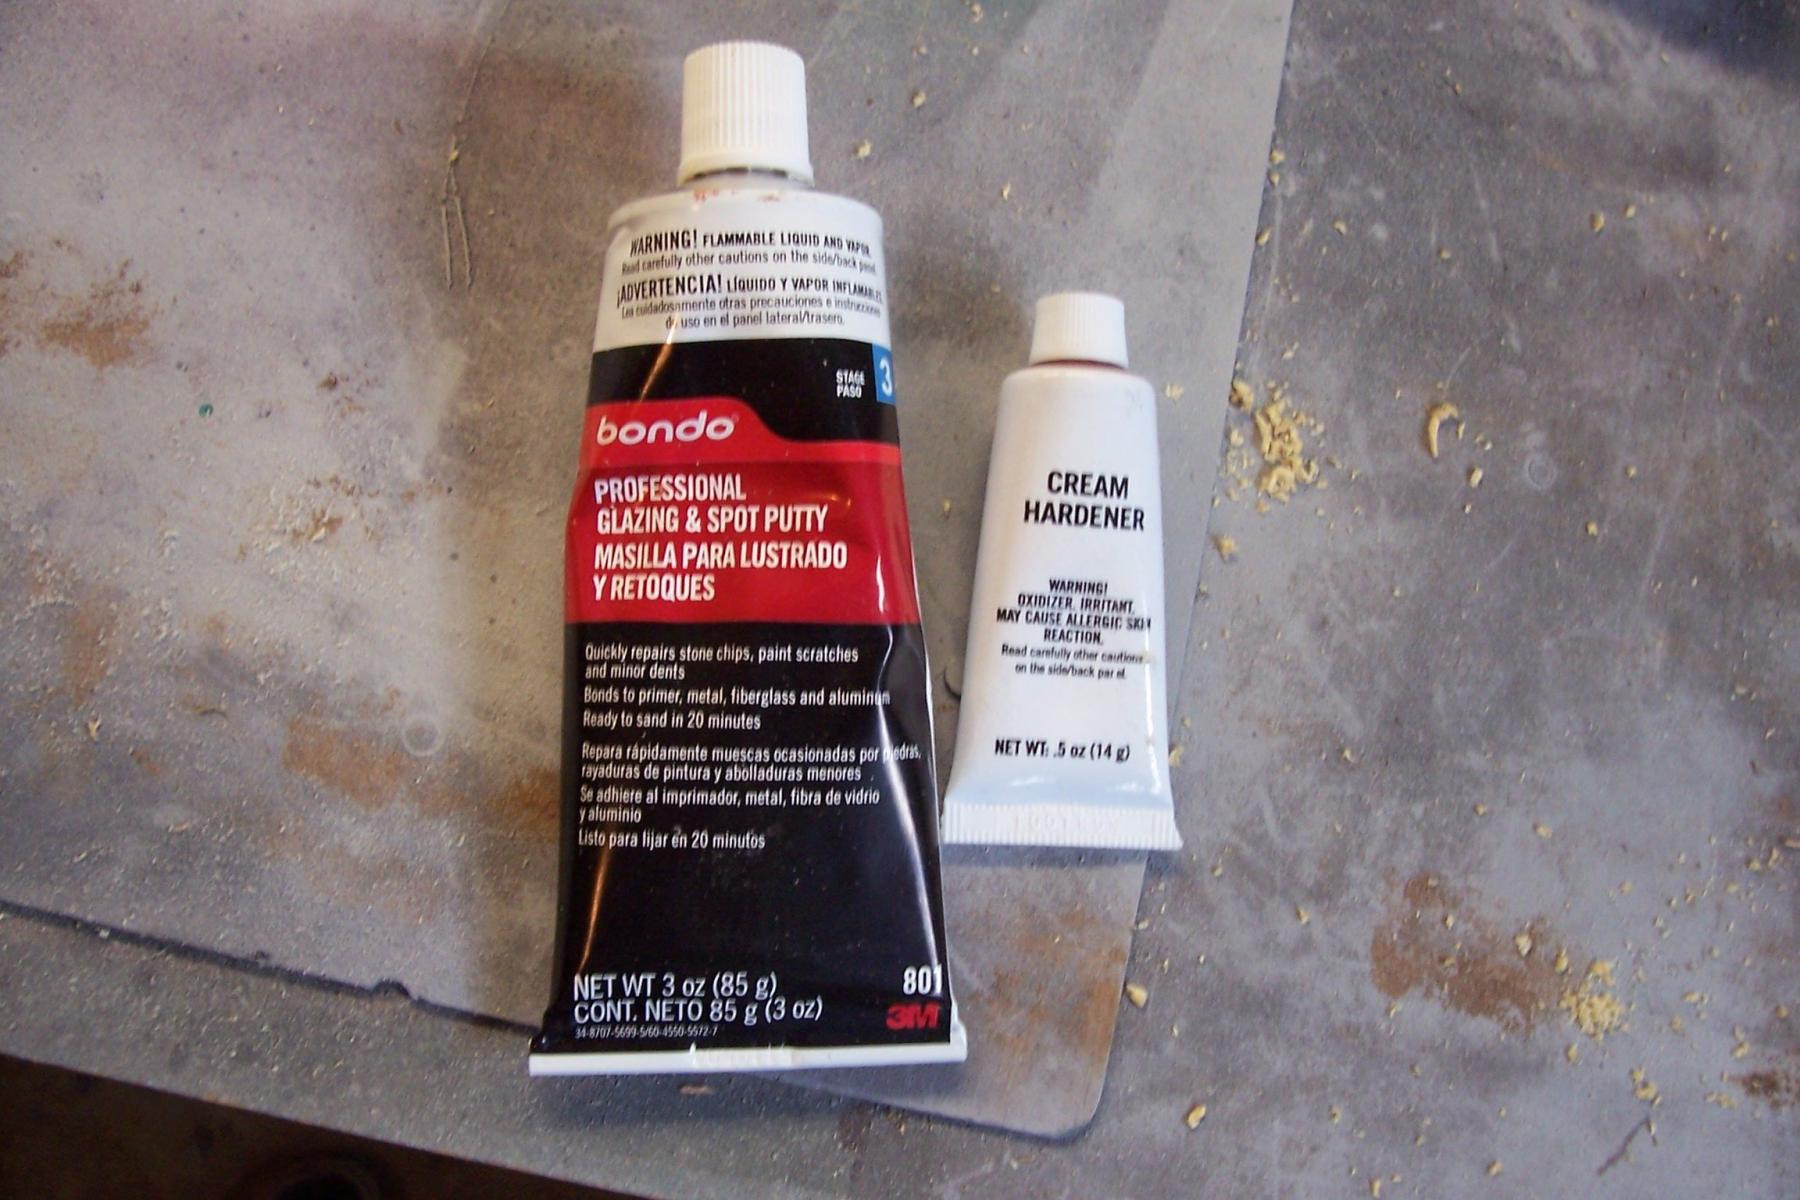
Sanding the main deck It’s time to start making sawdust. The first step is to sand the main deck smooth. I’m no fan of sanding so I do it in 10 minute increments or I get careless and sloppy - those who don’t mind it would make much quicker progress. After using a sanding block and getting what looked and felt like a nice smooth surface I sprayed some primer on to see if if everything was good to go - it wasn’t. There were still low spots and some machine marks so it was time to break out the Bondo auto body filler which is my preferred wood filler since it dries quickly and sands well. My only problem with regular Bondo is the cost since so much of it is wasted. It comes in quart cans but has only 2 small “pills “ of the hardener mix so you really can only mix it twice and a half a can is far more than you can use on an entire model and it can’t be saved because it hardens quickly. Fortunately somebody on this site mentioned Bondo’s Glazing and Spot Putty, which is also sold in auto part stores. It works just like regular Bondo but you can mix just as much or as little as you need since the hardener is in it’s own resealable tube - pretty neat. After applying the filler it will just be a matter of getting a smooth deck then it will be time to play with glue and scissors when I cut out the hull form templates and get ready to bring the deck to it’s prescribed dimensions.

- 227 replies
-
- 11
-
-
- BlueJacket Shipcrafters
- Stephen Hopkins
- (and 2 more)
-
Greg, After seeing the start of this build and being amazed at the detail you put into the guns I somehow "dropped track" on it, to use a gunnery term, around New Years (I forgot about the "follow" button). Thank God I found it again today before it is done and slips into digital deep freeze. I've had a very pleasant hour and a half catching up. This is amazing work at any scale but particularly at 1/350. You've overcome many problems that would have defeated me. Wonderful work and I can't wait for the Dreadnought.
-
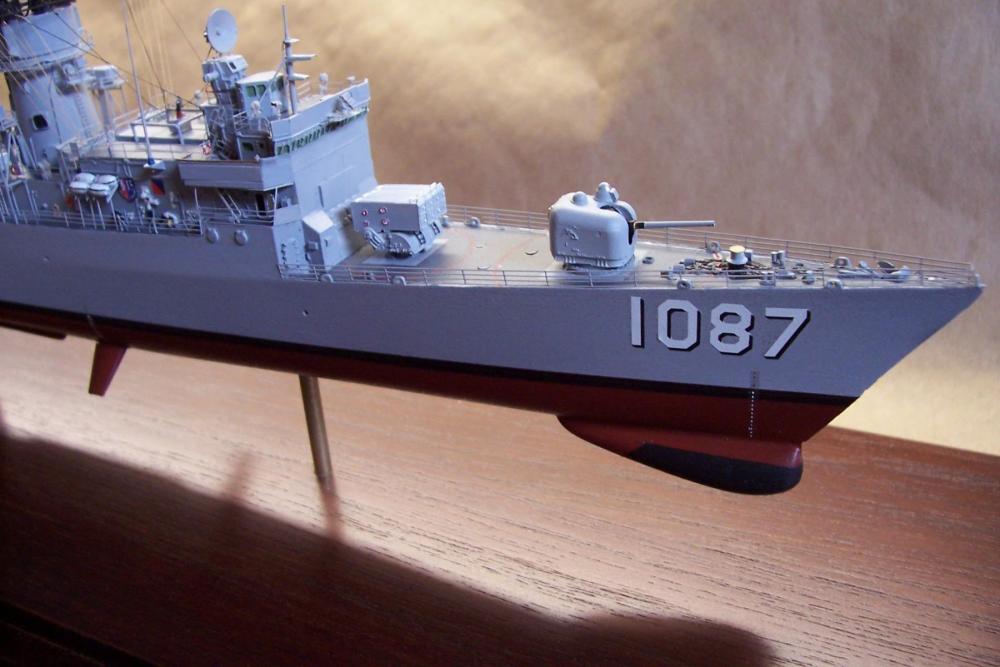
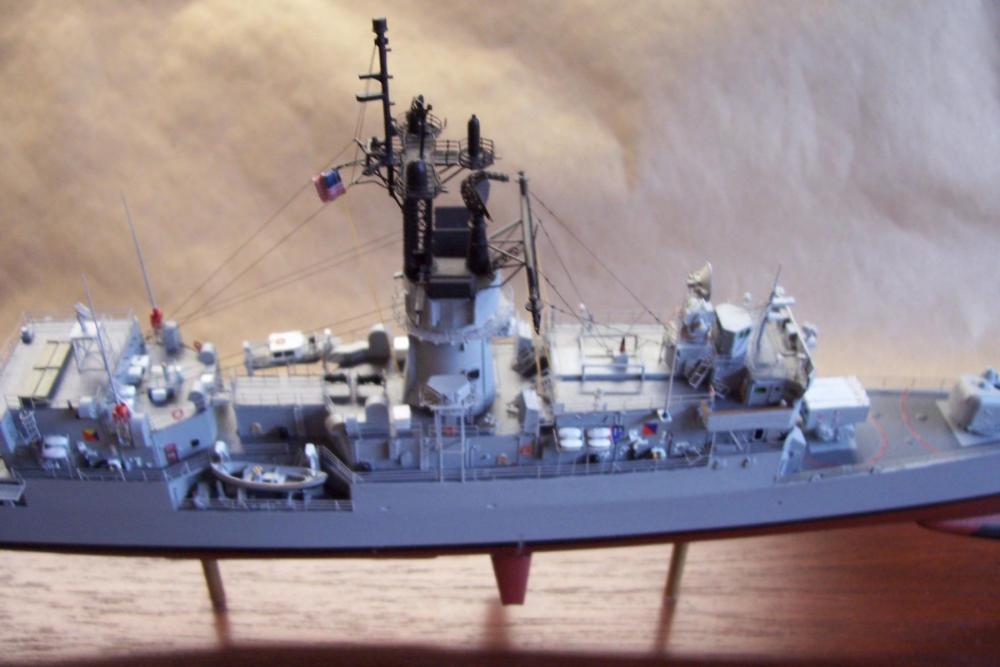
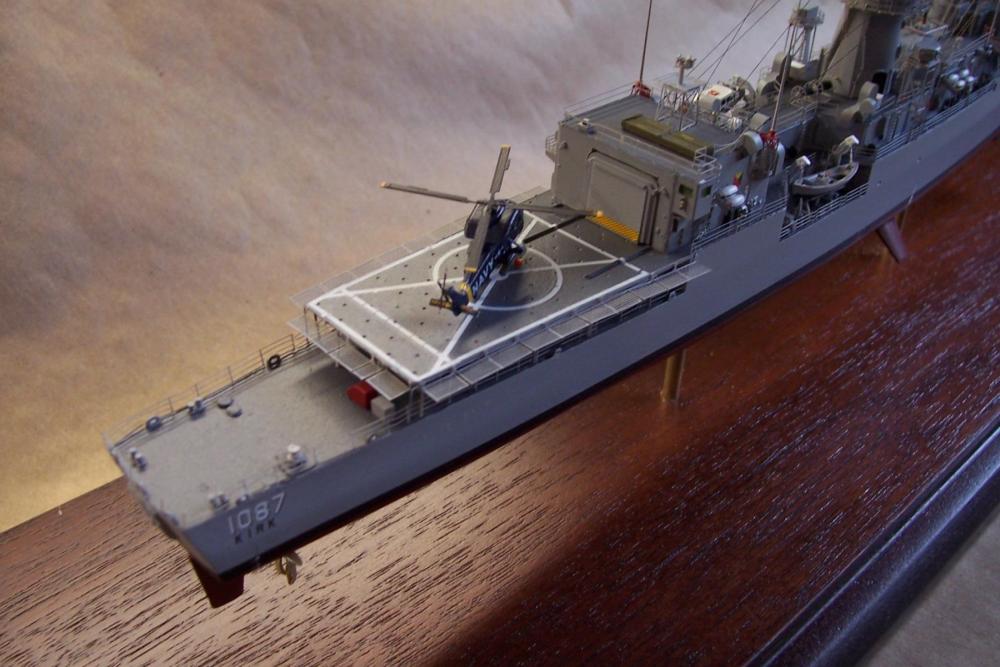
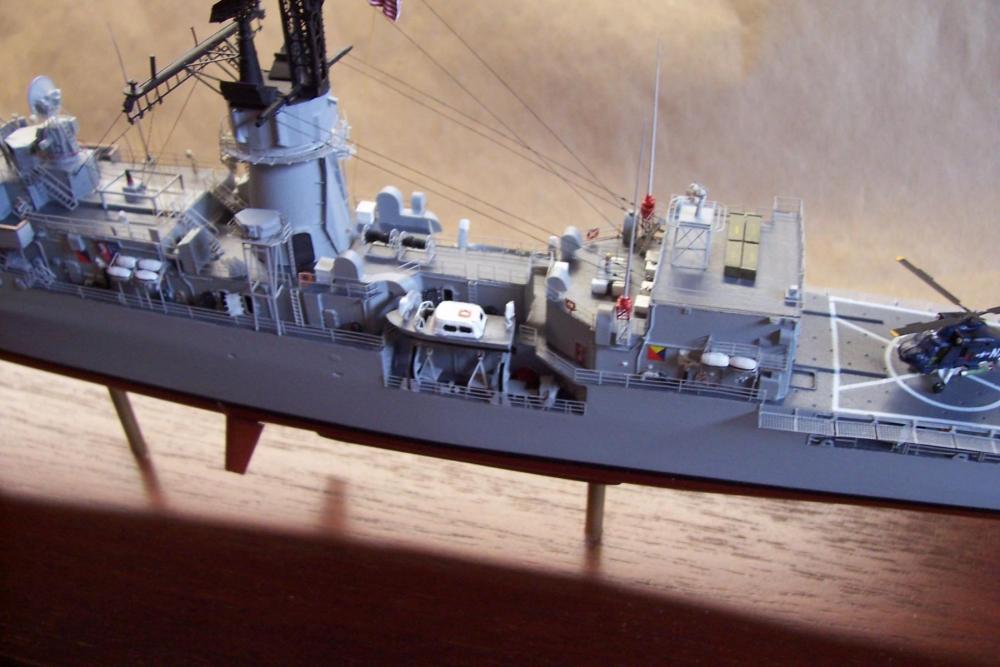
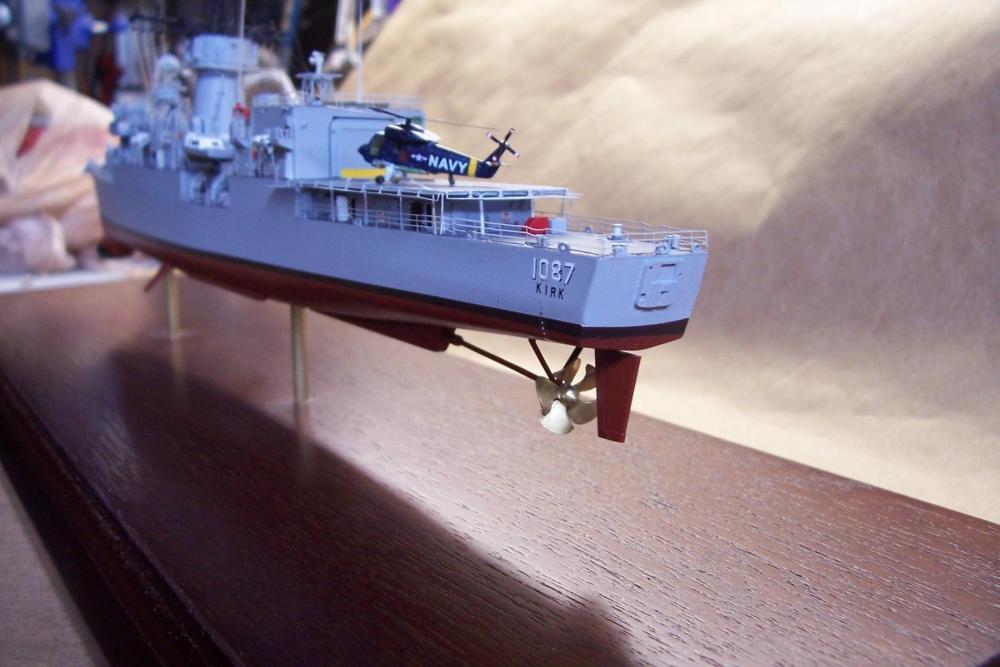
After adding the MACK, the rigging and the HF whip antennas this one is ready to go on the shelf. Time to get back to making sawdust on a wood model.


- 22 replies
-
- 15
-
-
- kirk
- orange hobby
- (and 4 more)