HOLIDAY DONATION DRIVE - SUPPORT MSW - DO YOUR PART TO KEEP THIS GREAT FORUM GOING! (Only 20 donations so far - C'mon guys!)
×


mobbsie
-
Posts
1,493 -
Joined
-
Last visited
Content Type
Profiles
Forums
Gallery
Events
Everything posted by mobbsie
-
 Hi Denis, And we think wood is difficult, I'm sure you can overcome all the problems faced so far, and those in the future. Good start so far, I'm gonna follow along mate. Be Good mobbsie
- 133 replies
-
- 7
-

-
- jeanne d arc
- heller
- (and 2 more)
-
Hi Guys, Thank you gents very much for your very kind comments and the likes. She is now encased and on display in my lounge. All I have to do now is to work out how to show the heading as " complete ", I have tried but with no success yet. Pickle has arrived and will be on the slipway soon. Be Good mobbsie
- 129 replies
-
- 8
-
-
- armed launch
- panart
- (and 1 more)
-
Hi Wayne, Nice to see you back at it mate, E.C.B has been sidelined for far too long. I'm confident that your game plan for the planking will work out just fine. Be Good mobbsie
-
So far so good mate, I'm liking what I see. Are you sure it's a flying machine ? could be a mouse trap but I think it might be an Oriental snow shoe. Be Good mobbsie
-
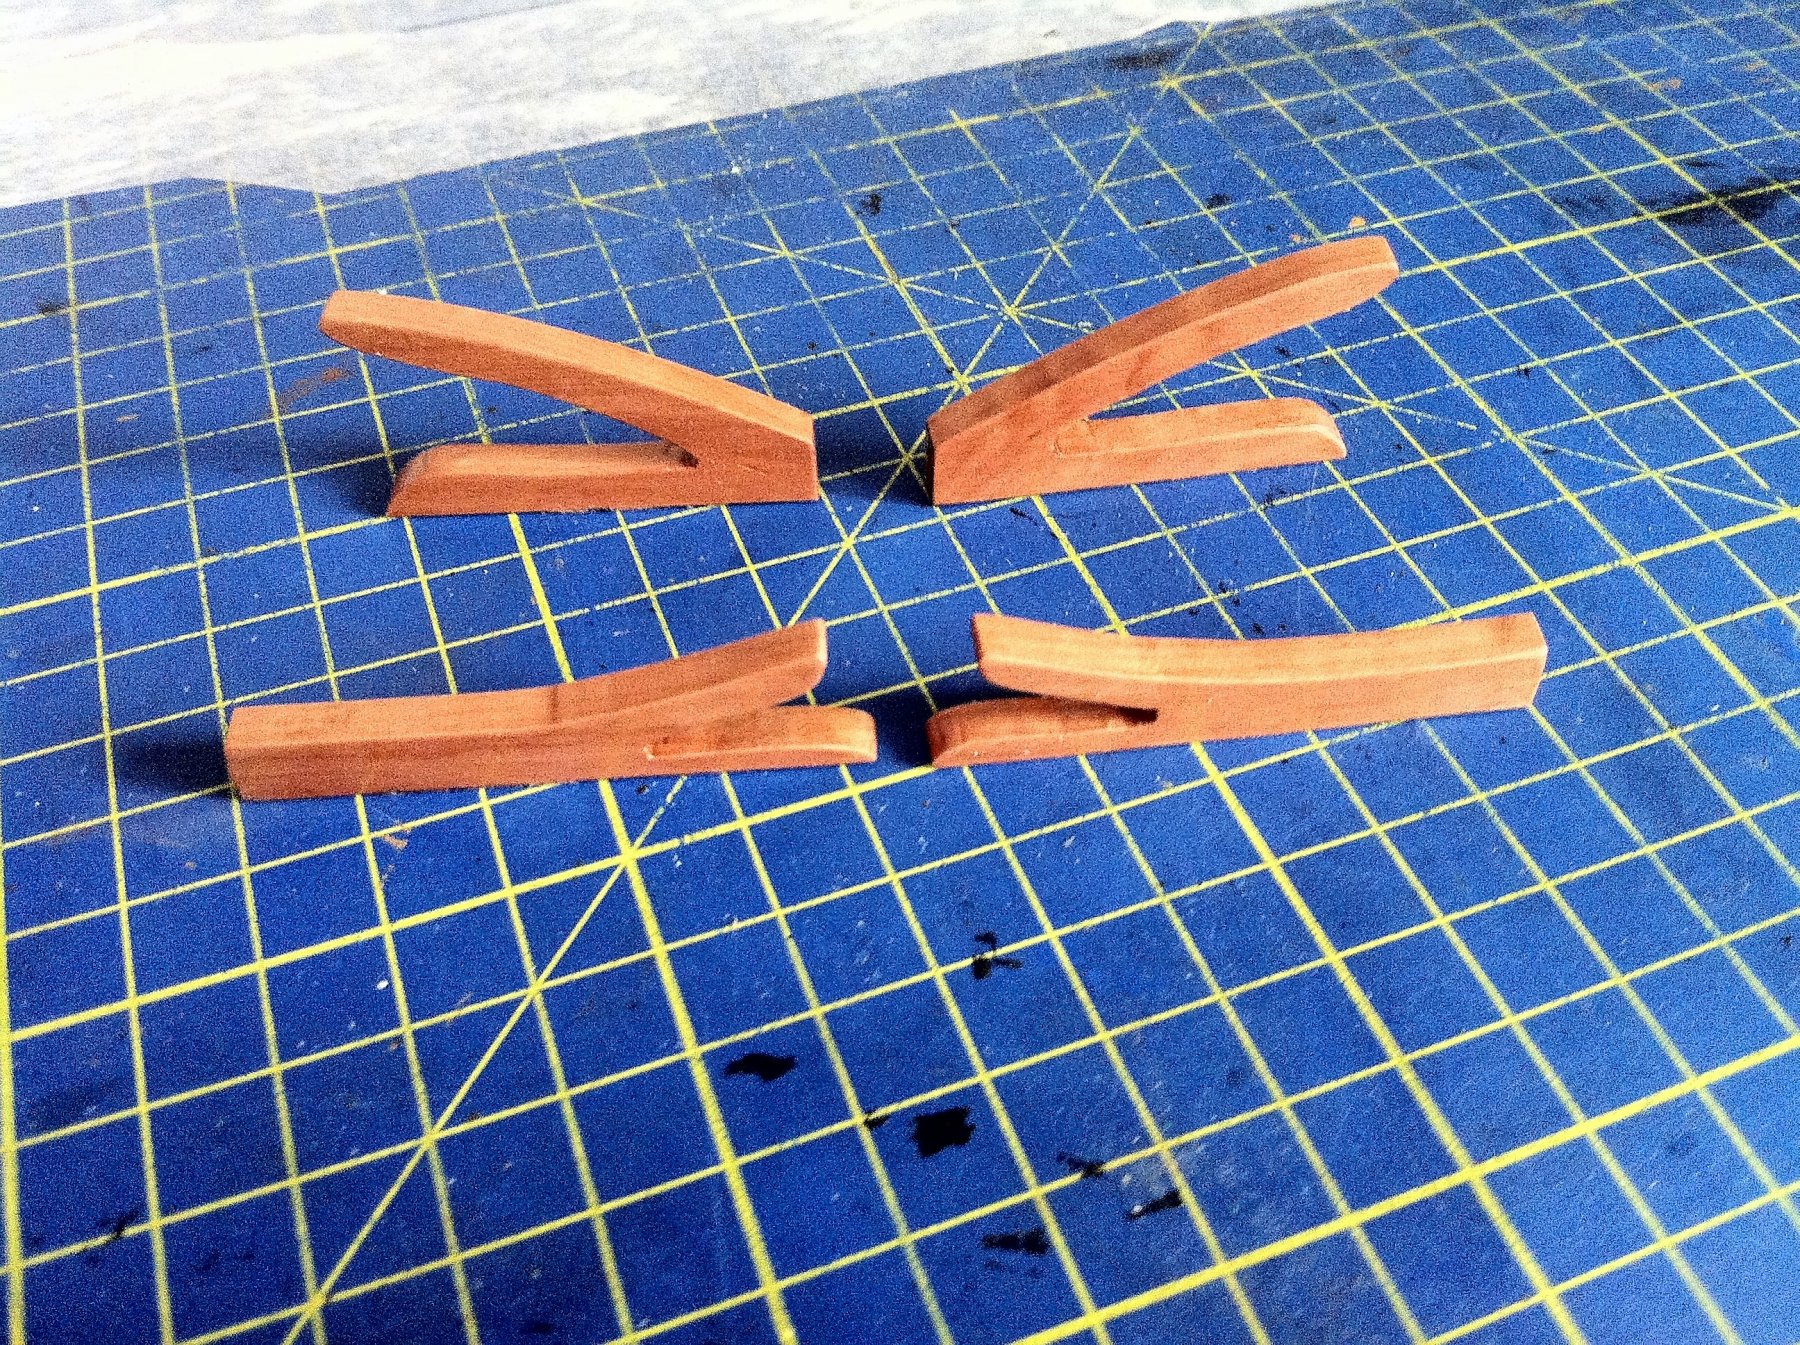
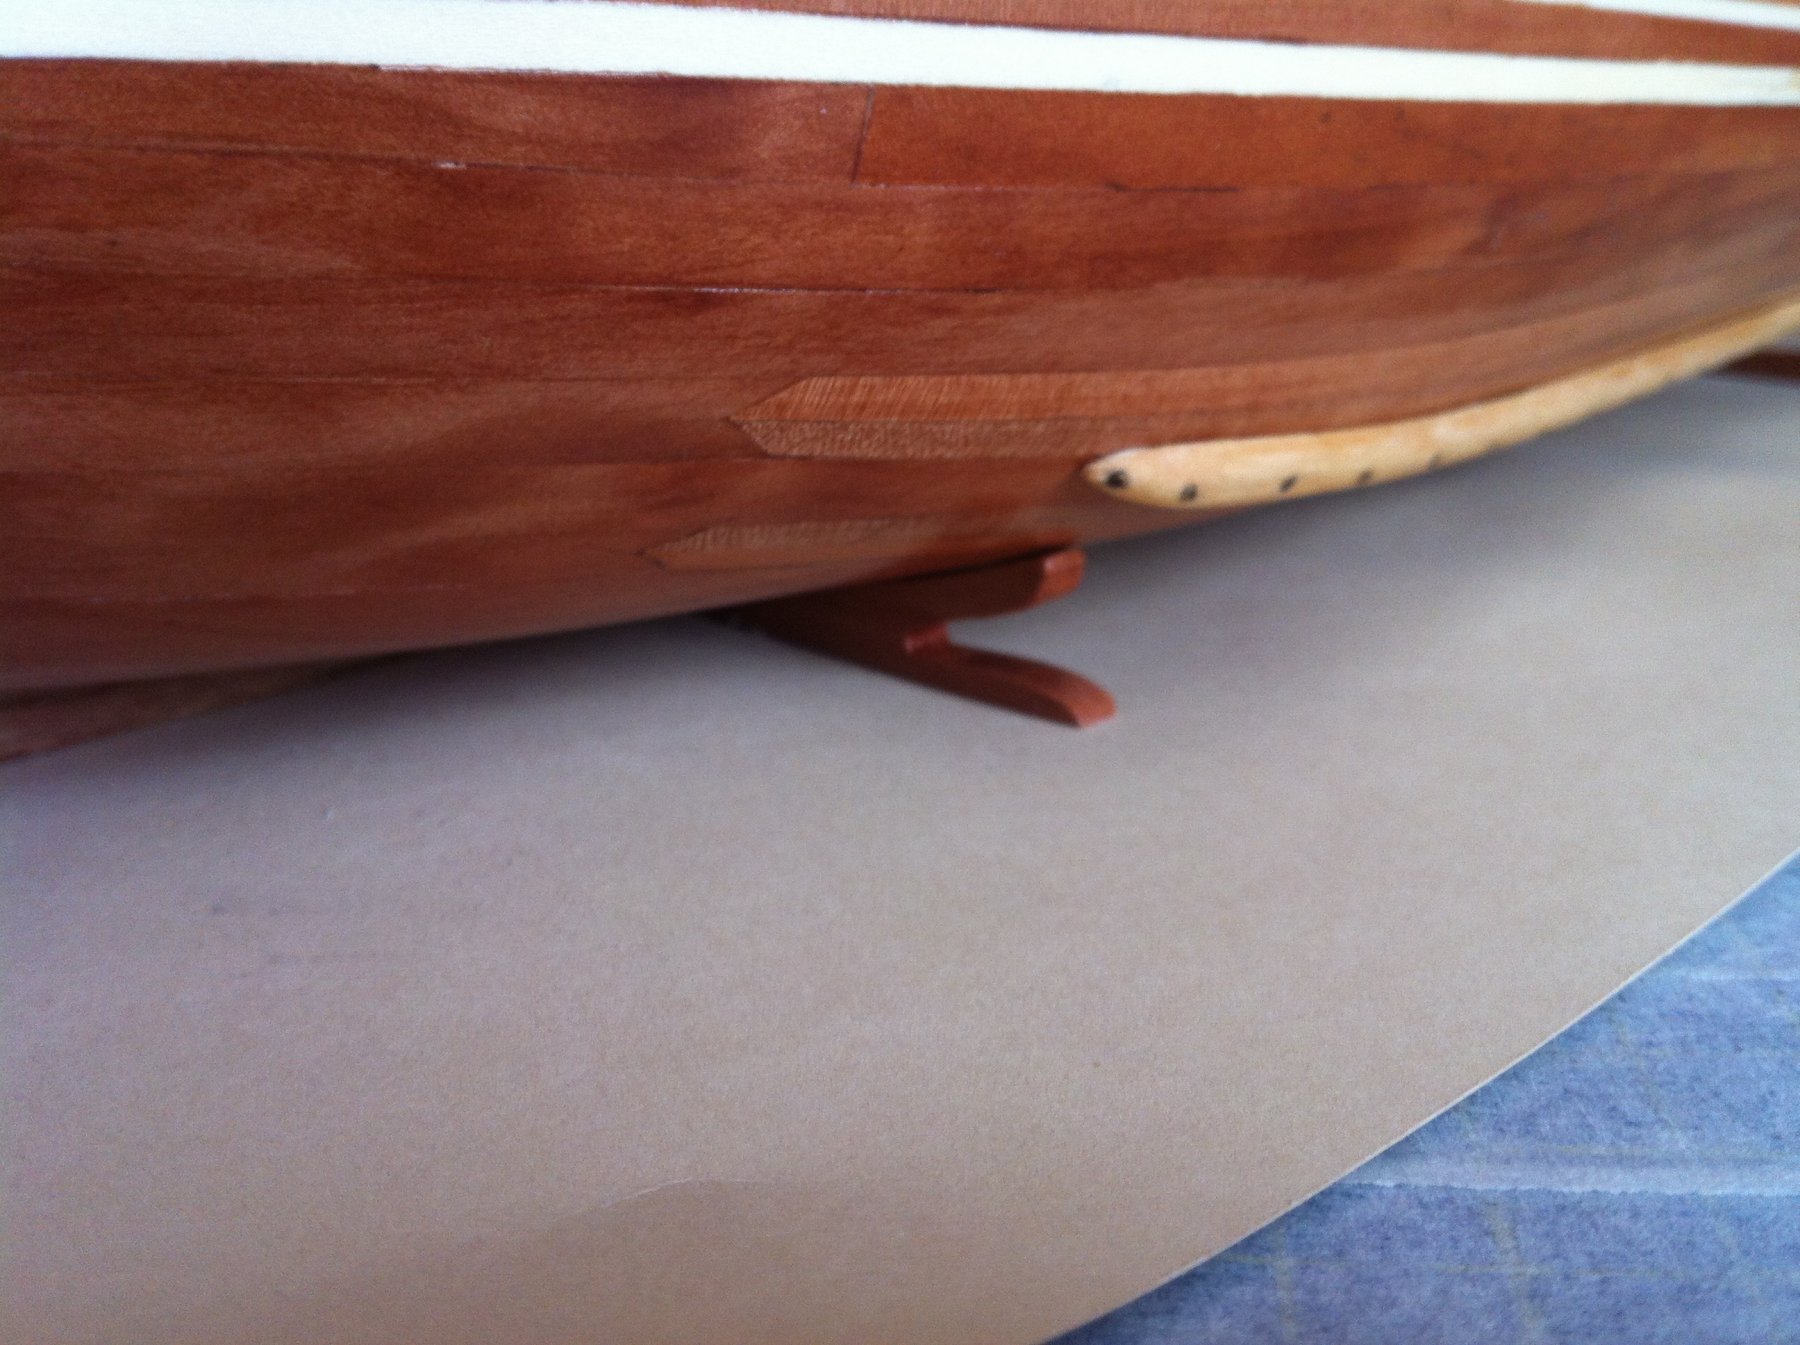
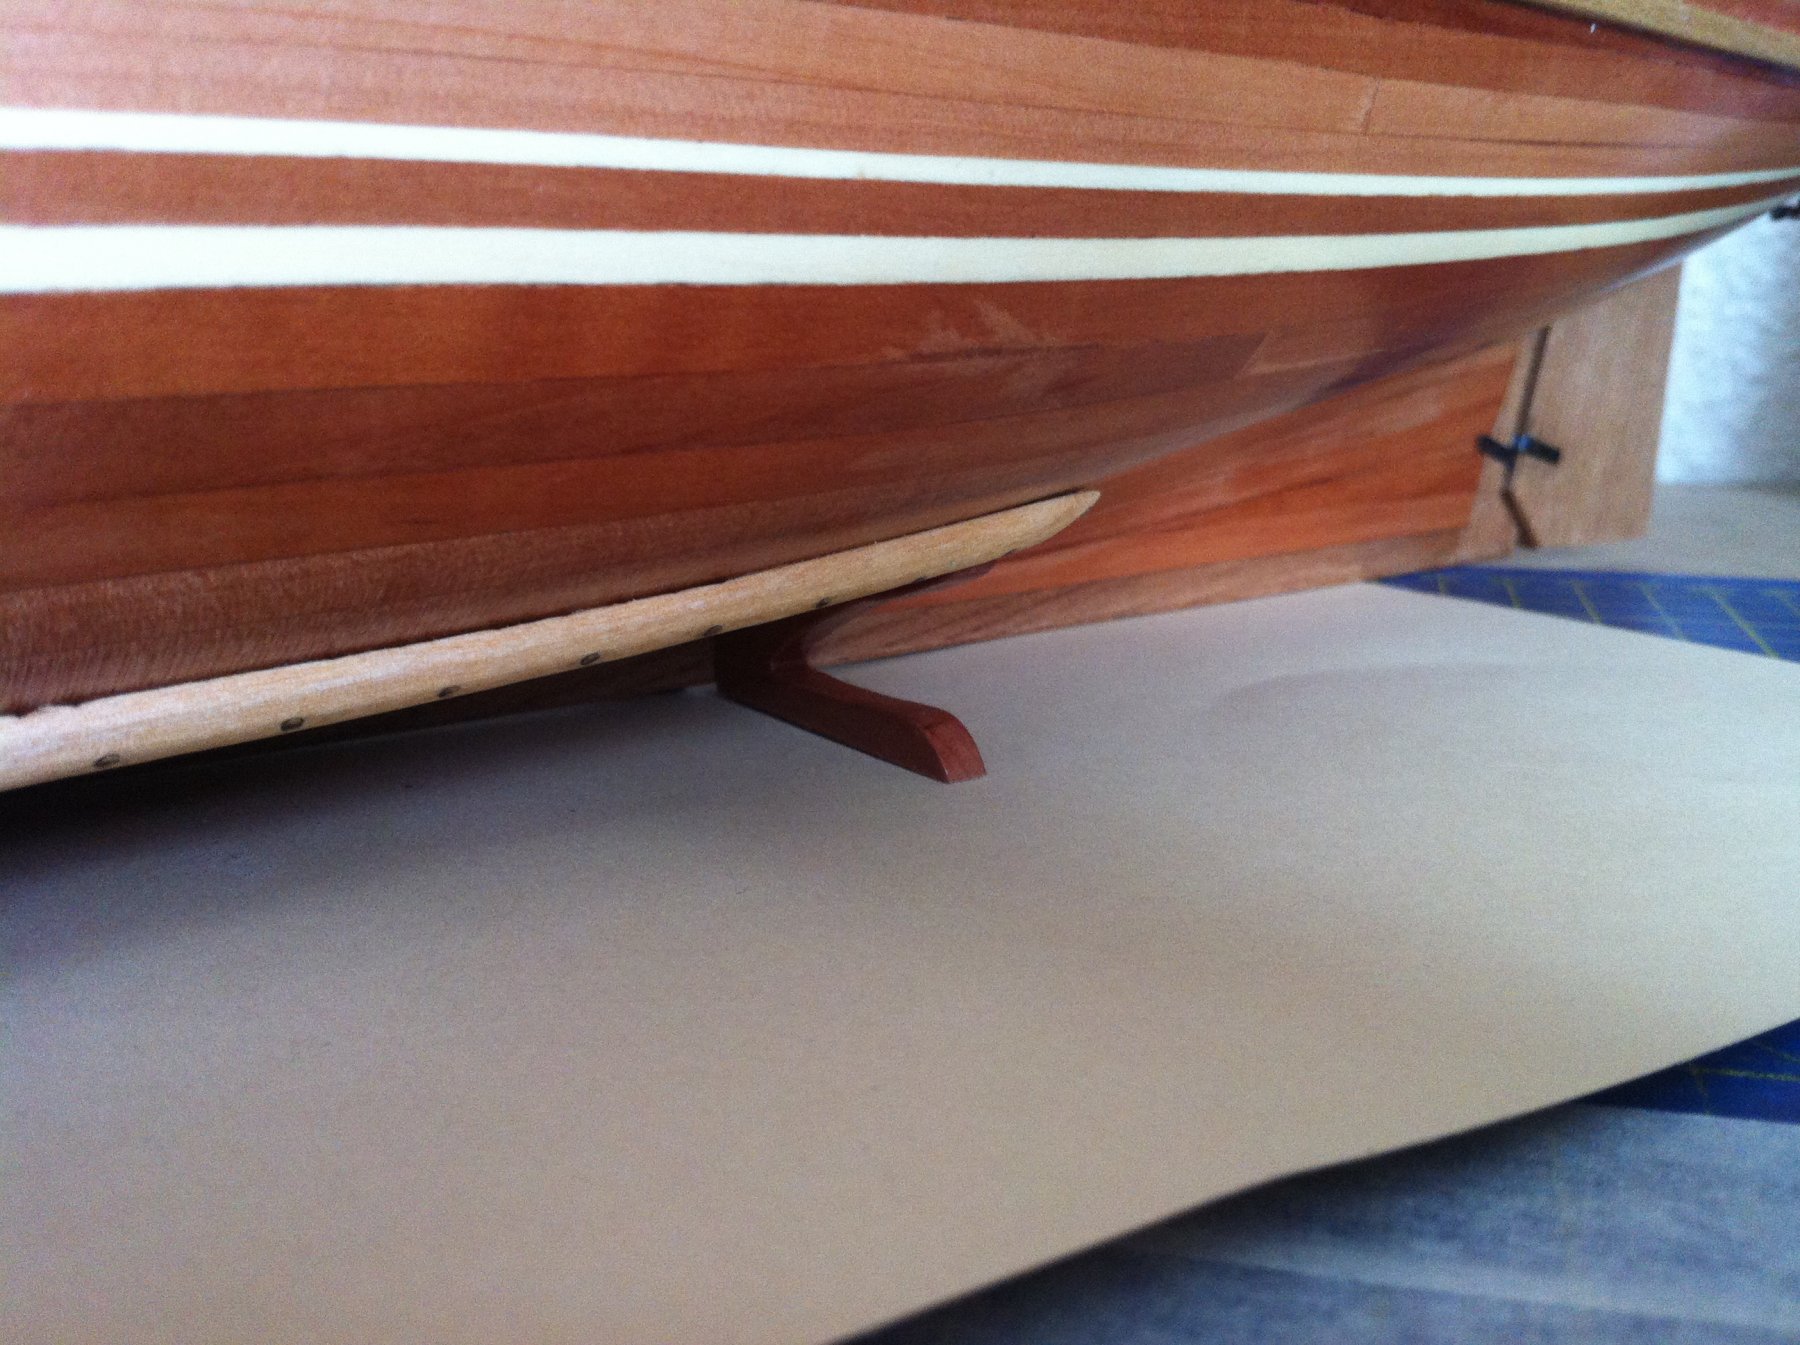
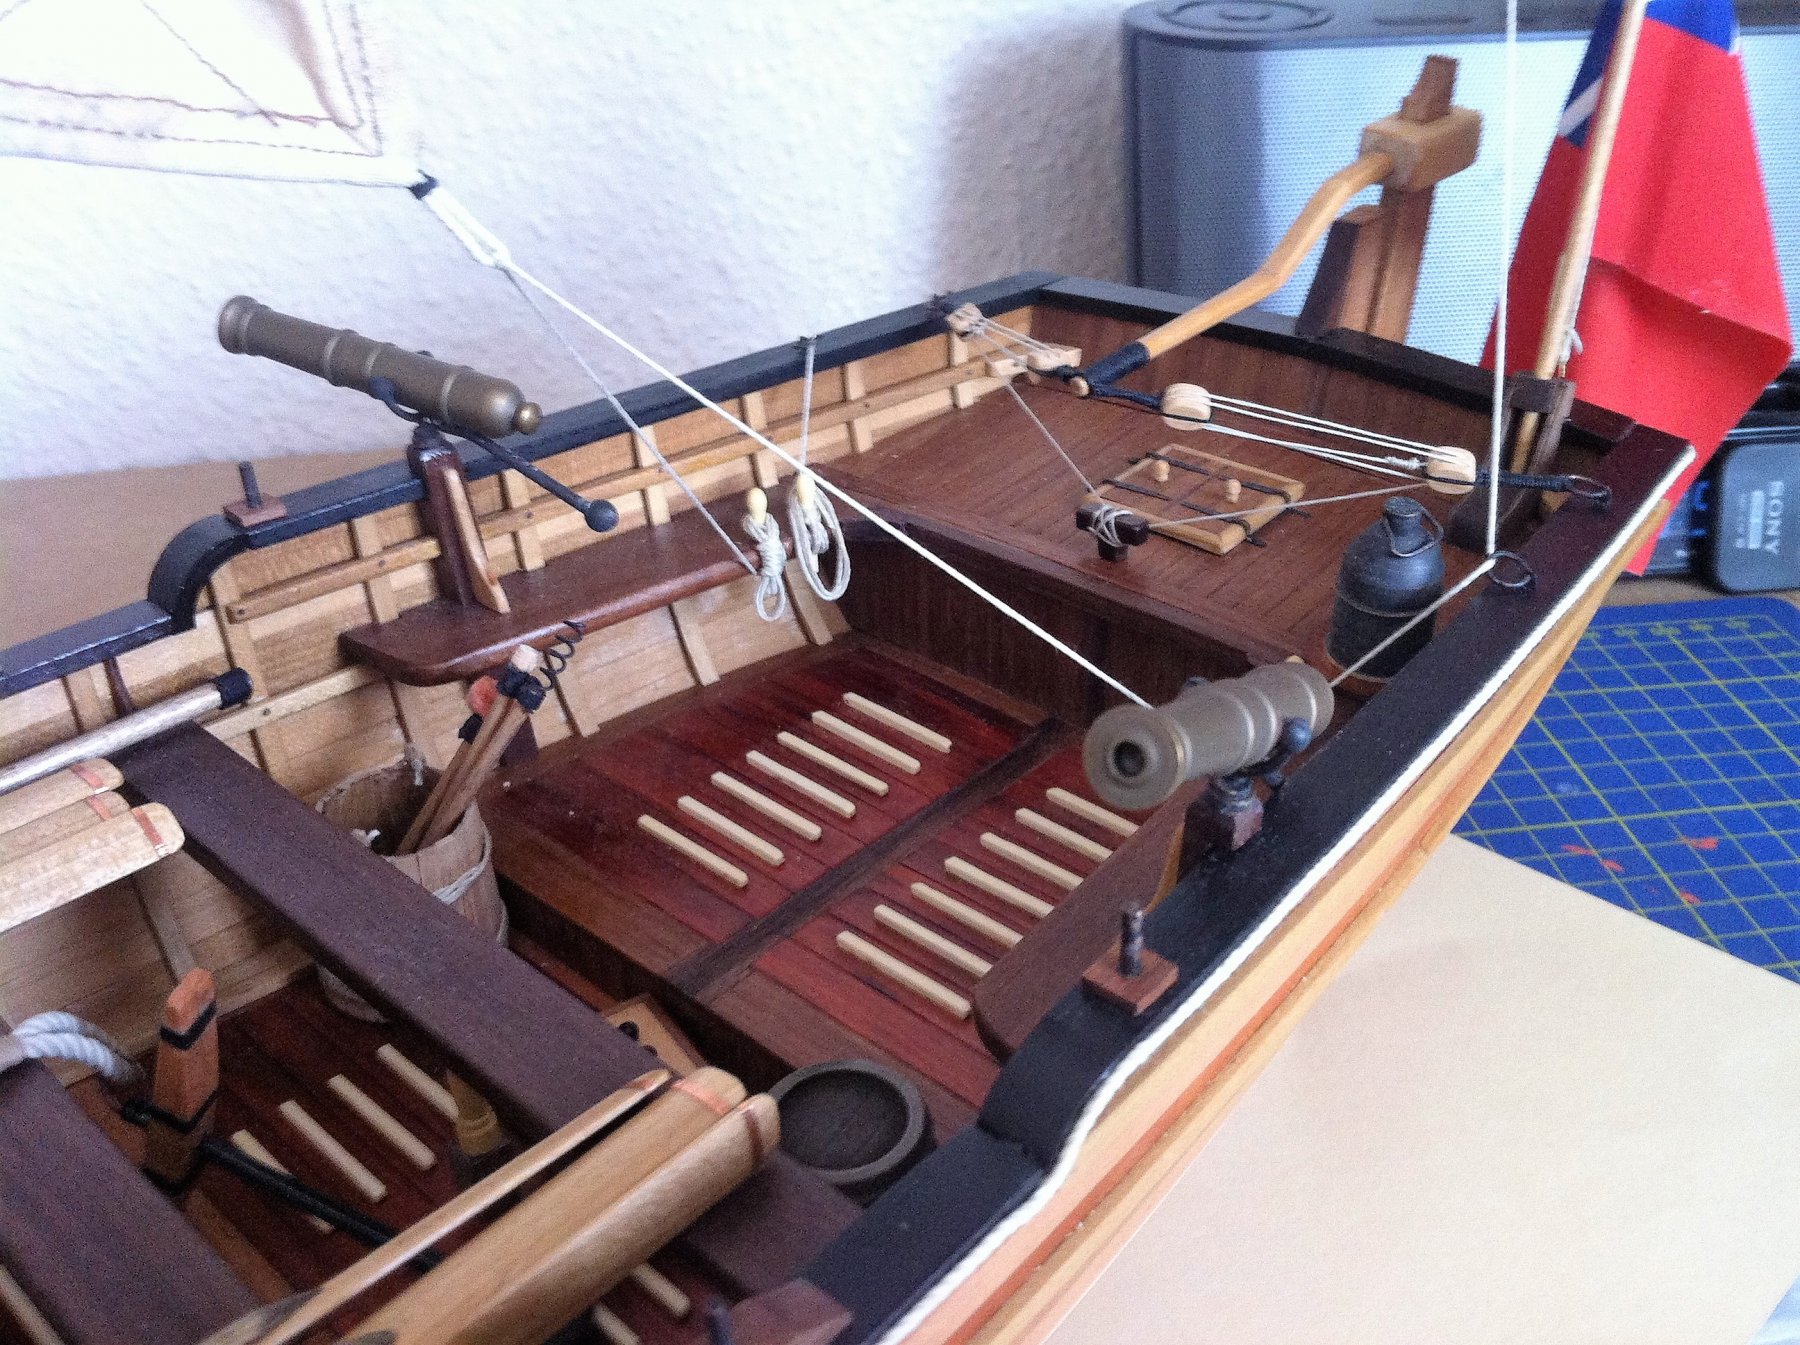
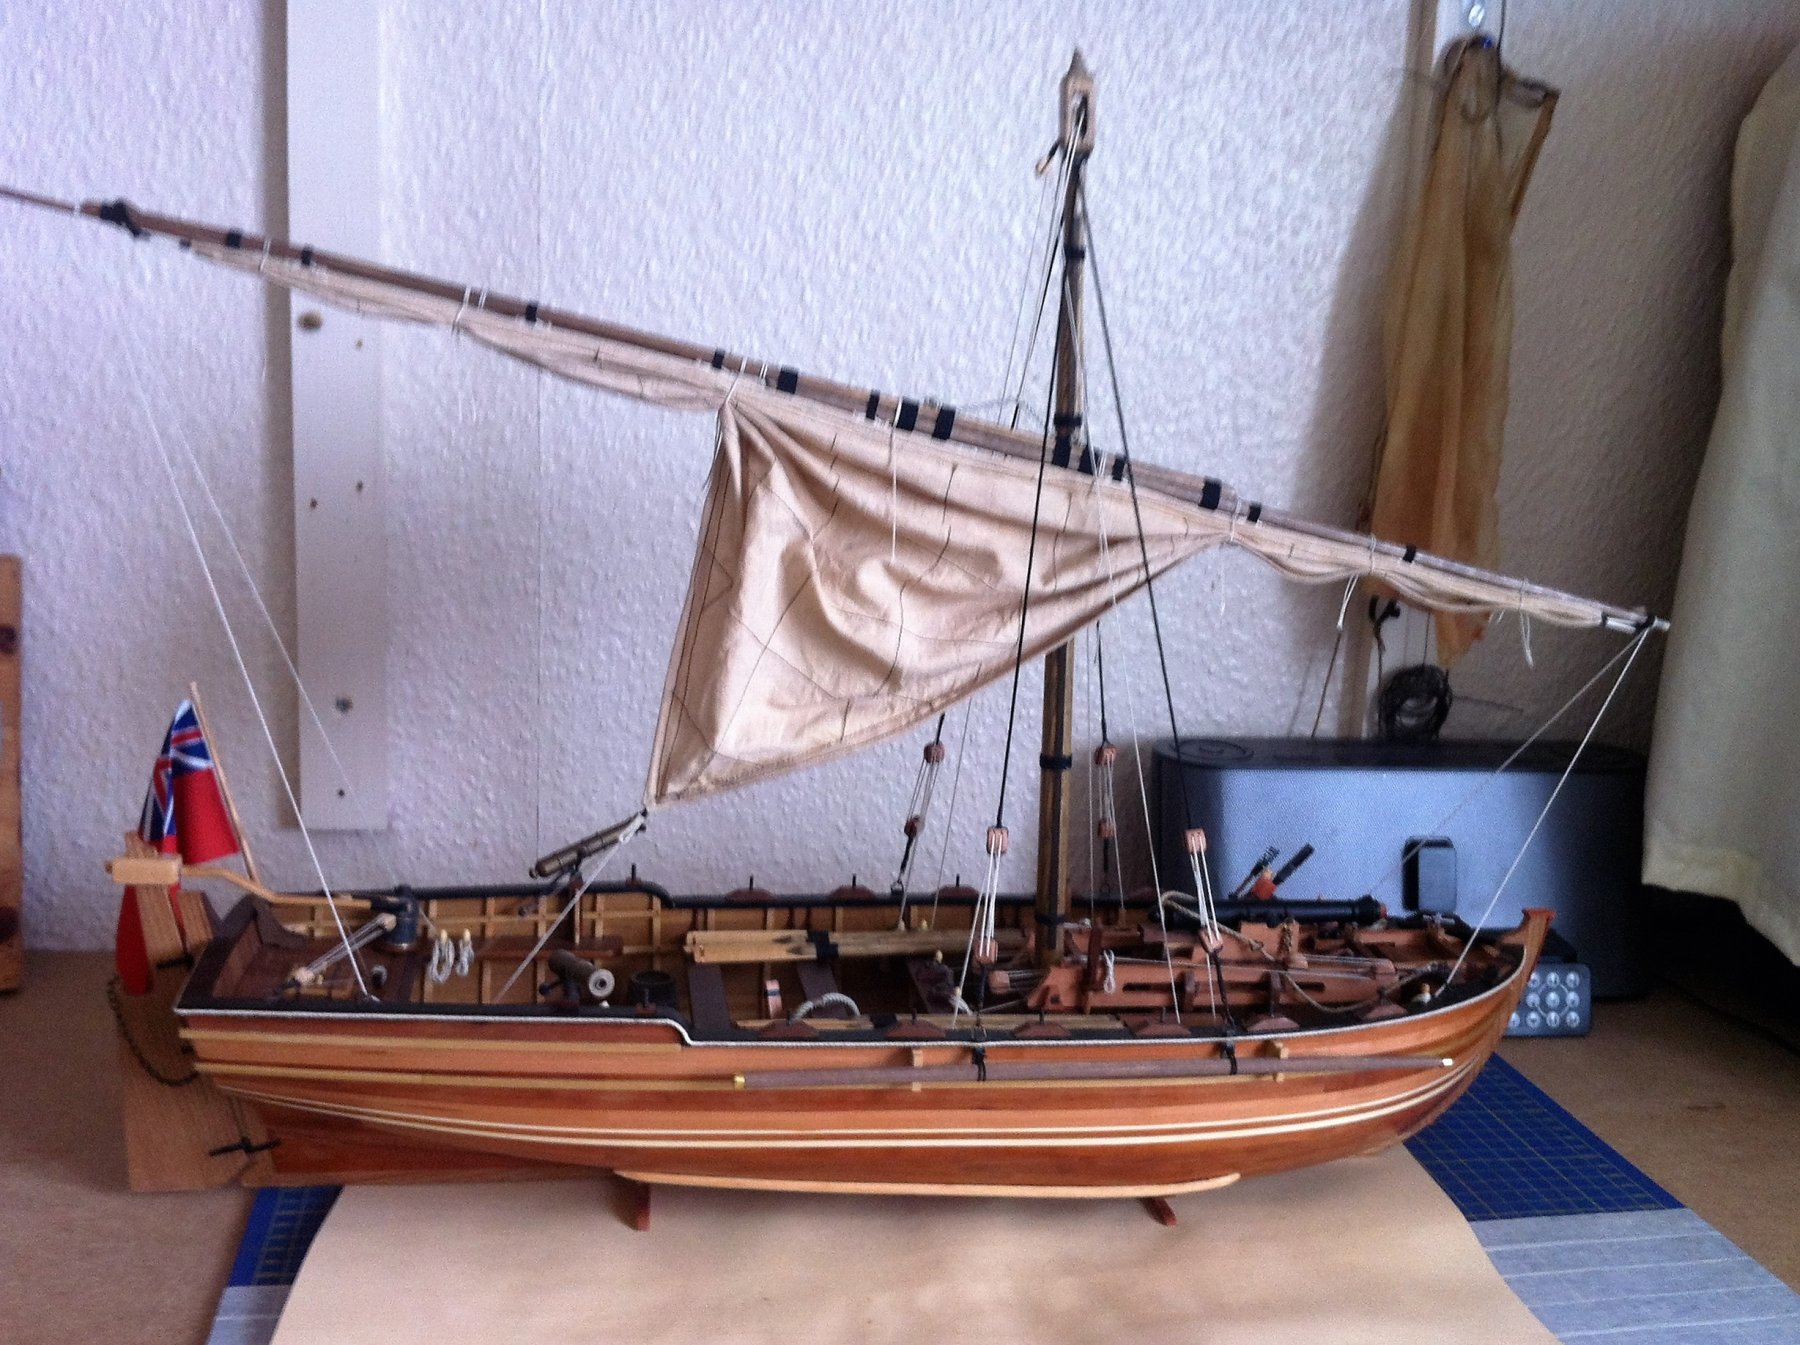
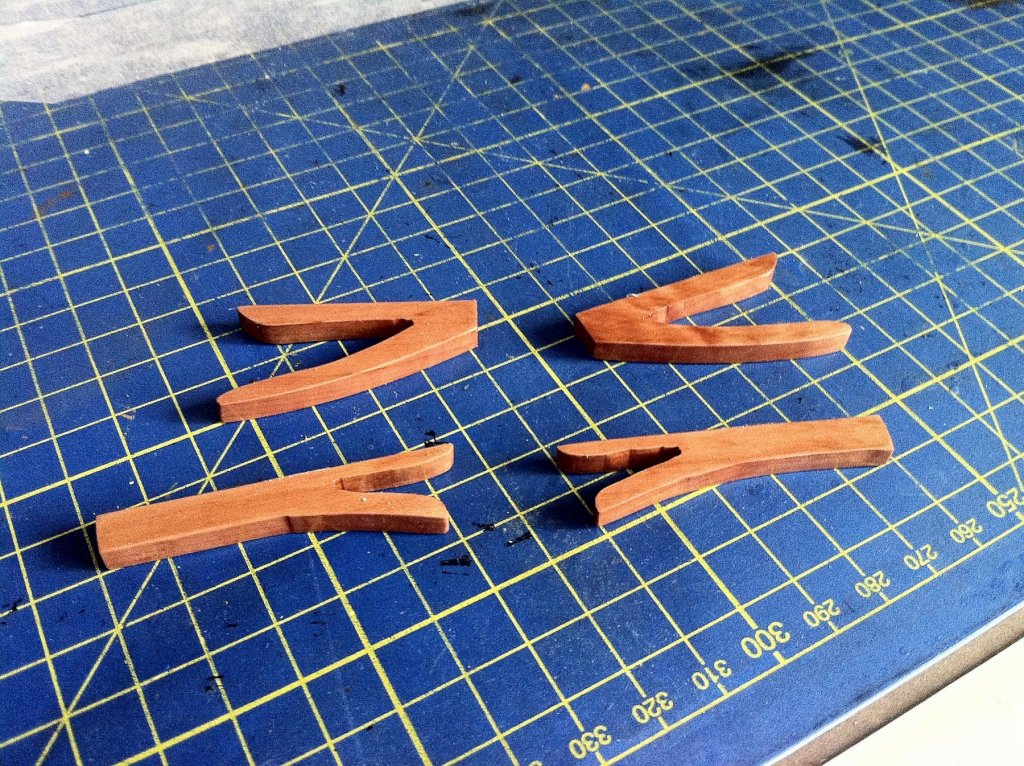
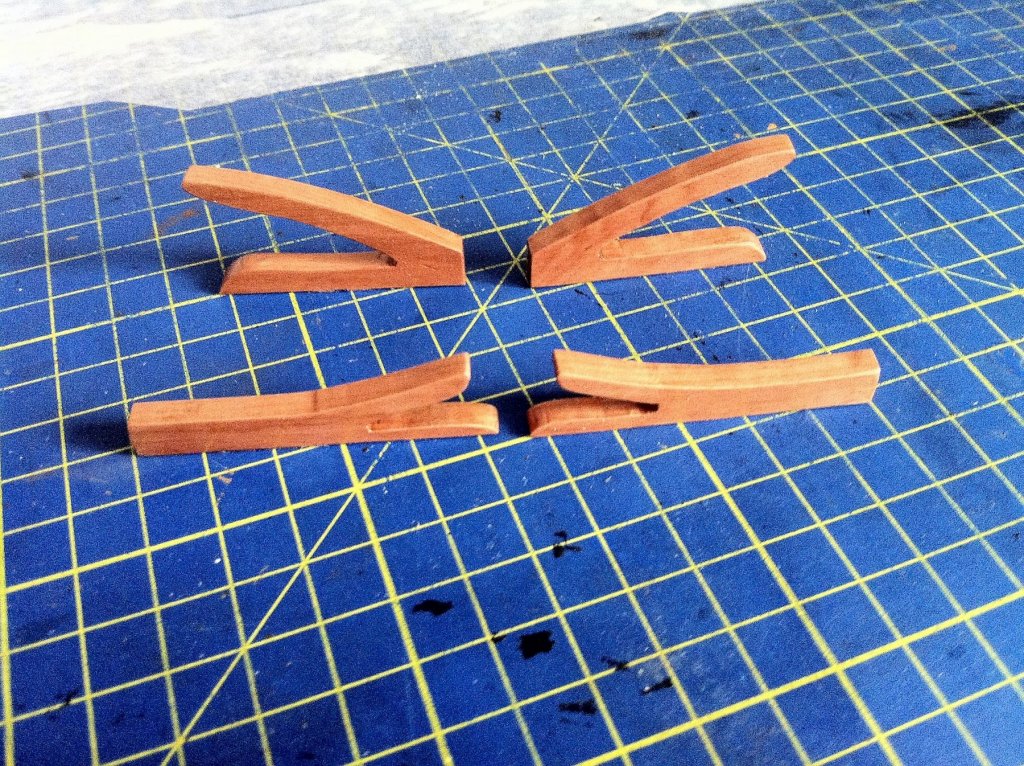
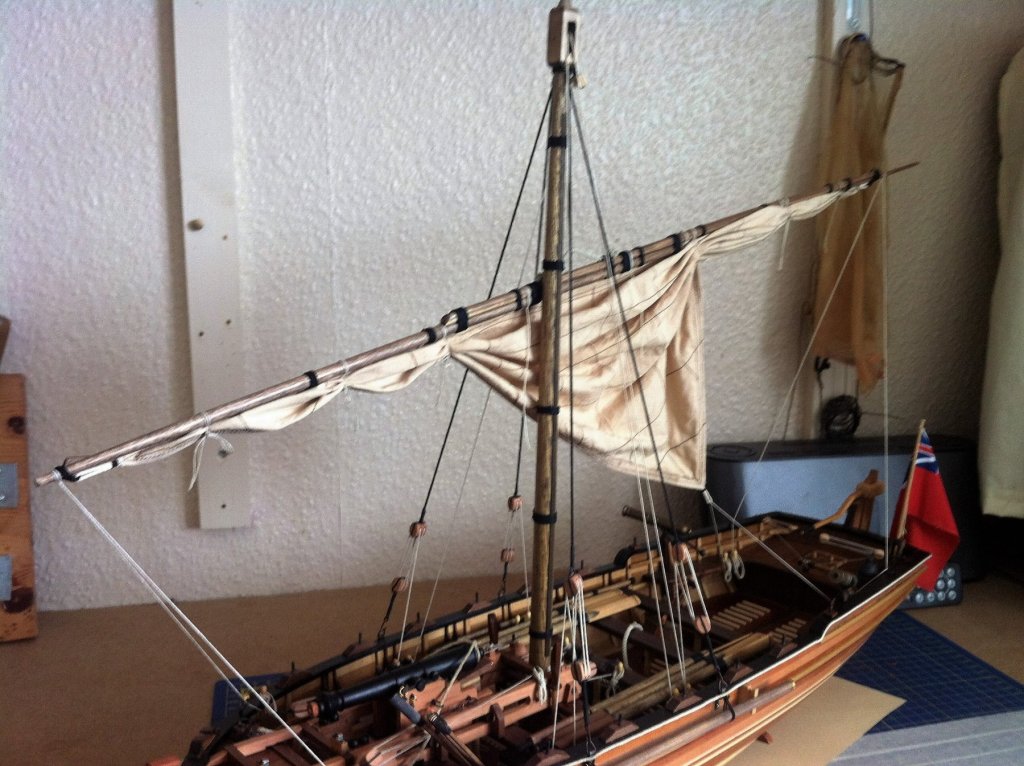
Hi Guys, Back from the Hols this time and ready to finish this rather long winded log. The next thing for me to ponder was the type of stand to put her on, I didn't want the kit stand as it seemed a bit chunky. I decided to make what I can only call "feet". I cut a paper template and cut the feet from 6mm Swiss Pear, I quite like them as they are unobtrusive and they serve the purpose The Bow "Foot" in place. The stern "Foot" in place, I think they fit quite nicely and do not draw the eye. Only remains to put all the parts together and complete the rigging, the rigging was very simple and did not take long at all, various ropes were used such as Morope, Caldercraft and the local haberdashery shop. Unfortunately I didn't take enough pictures of the methods used and so there is a big jump. The mast has been stepped and fully rigged This rig is really simple, no Ratlines ( lovely ) Bow on, all the little bits have been placed inside, none are fixed. I've just noticed the ensign, it's the Red Ensign (Red Duster) which is for the Merchant Navy, I will have to get a White Ensign. The knots on the Yard are correct and quick release. The final picture, it's done, I did enjoy building this boat and would recommend it to anyone. I hope you enjoyed what turned out to something of a long journey and I thank you for your patience. Next up will be HMS Pickle, I love the story behind this little boat. Be Good mobbsie


- 129 replies
-
- 24
-
-
- armed launch
- panart
- (and 1 more)
-
She looks to be an intriguing build Grant, gonna follow along for sure. You've made a good start mate and I like the look the Shellac gives the wood. Be Good mobbsie
-
Hi Grant, Heh Heh, we know don't we !!!!!!!!!!!! mobbsie
- 129 replies
-
- 6
-
-
- armed launch
- panart
- (and 1 more)
-
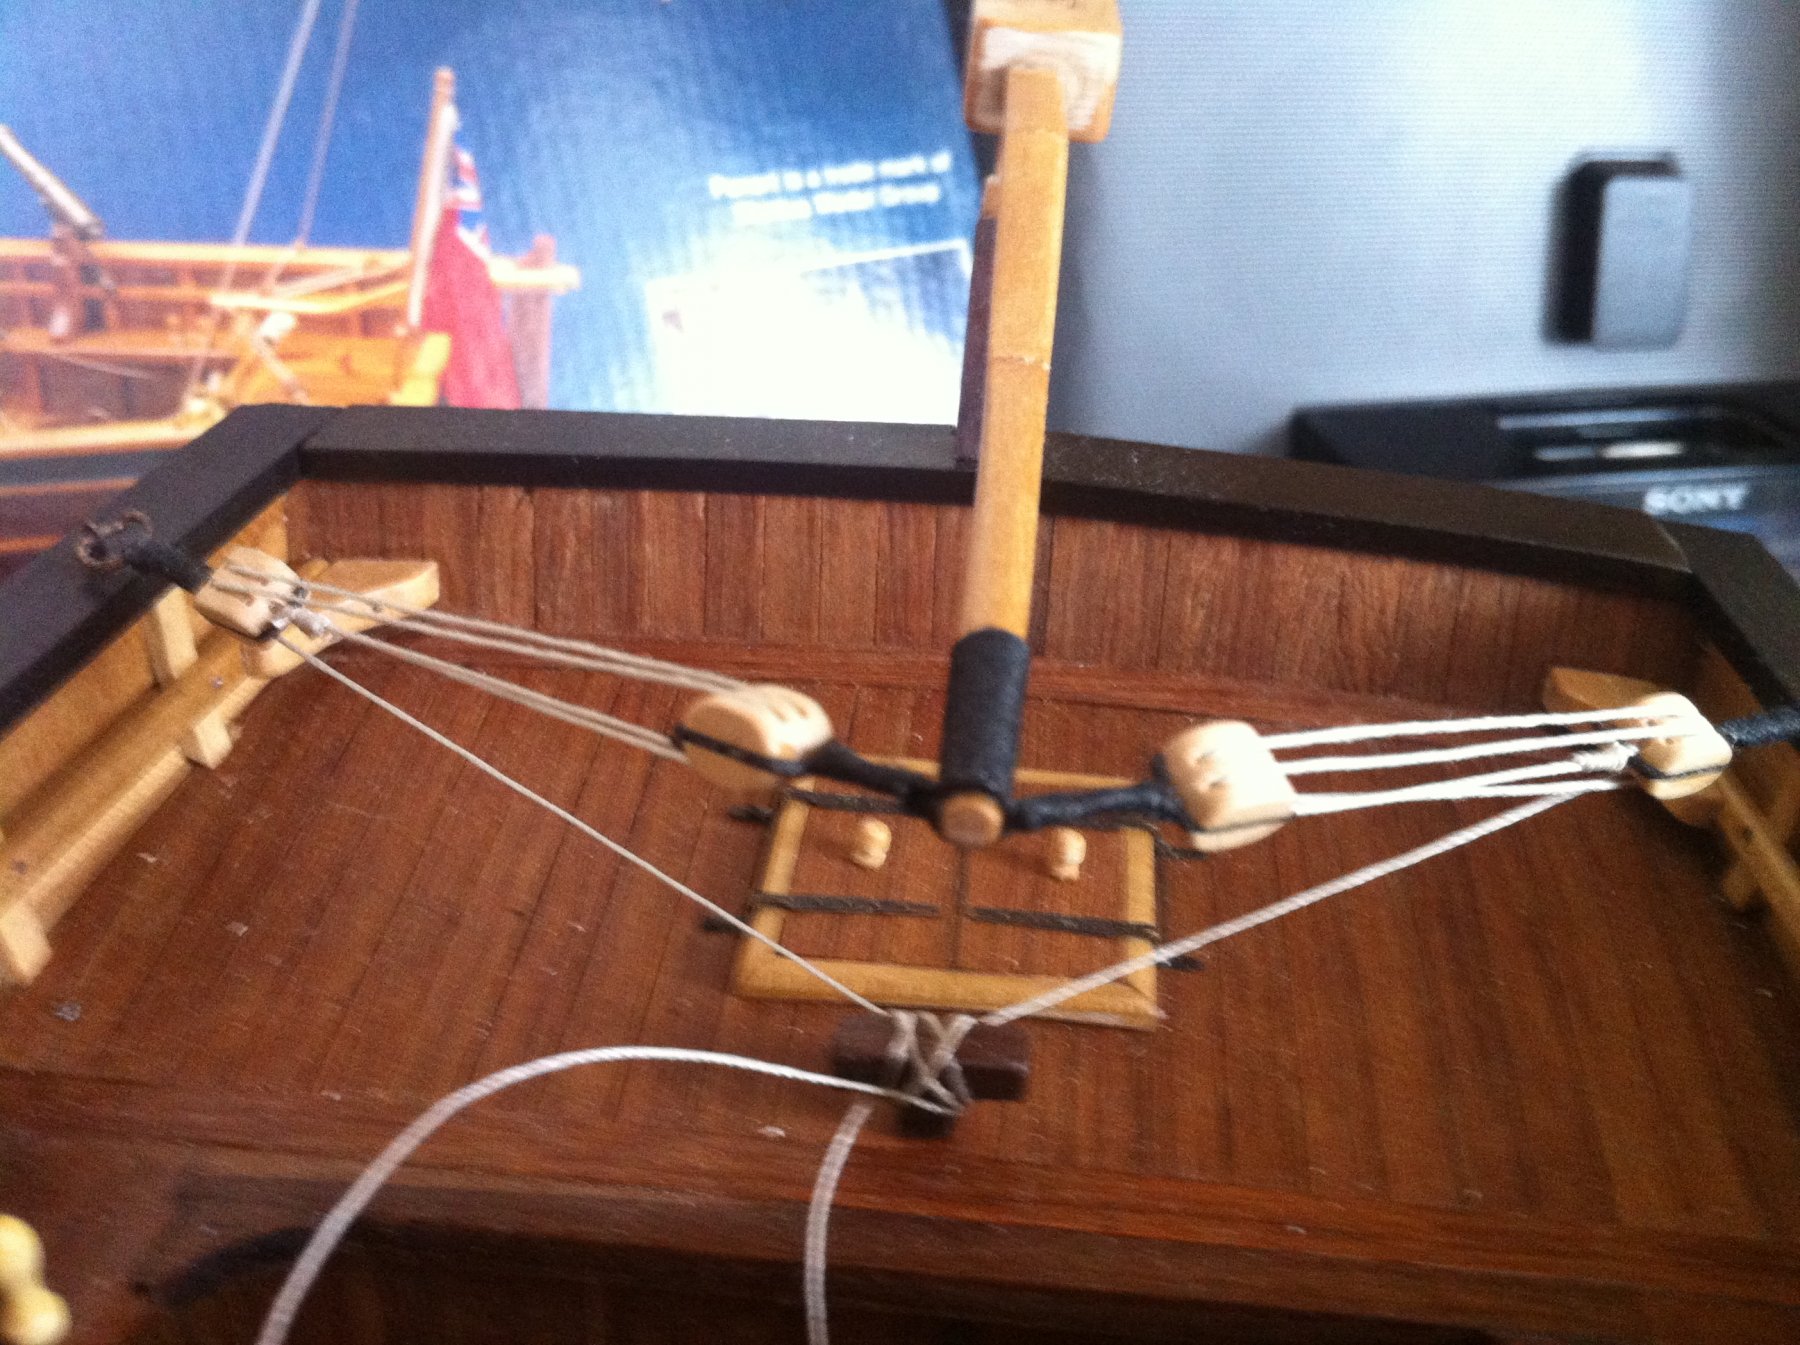
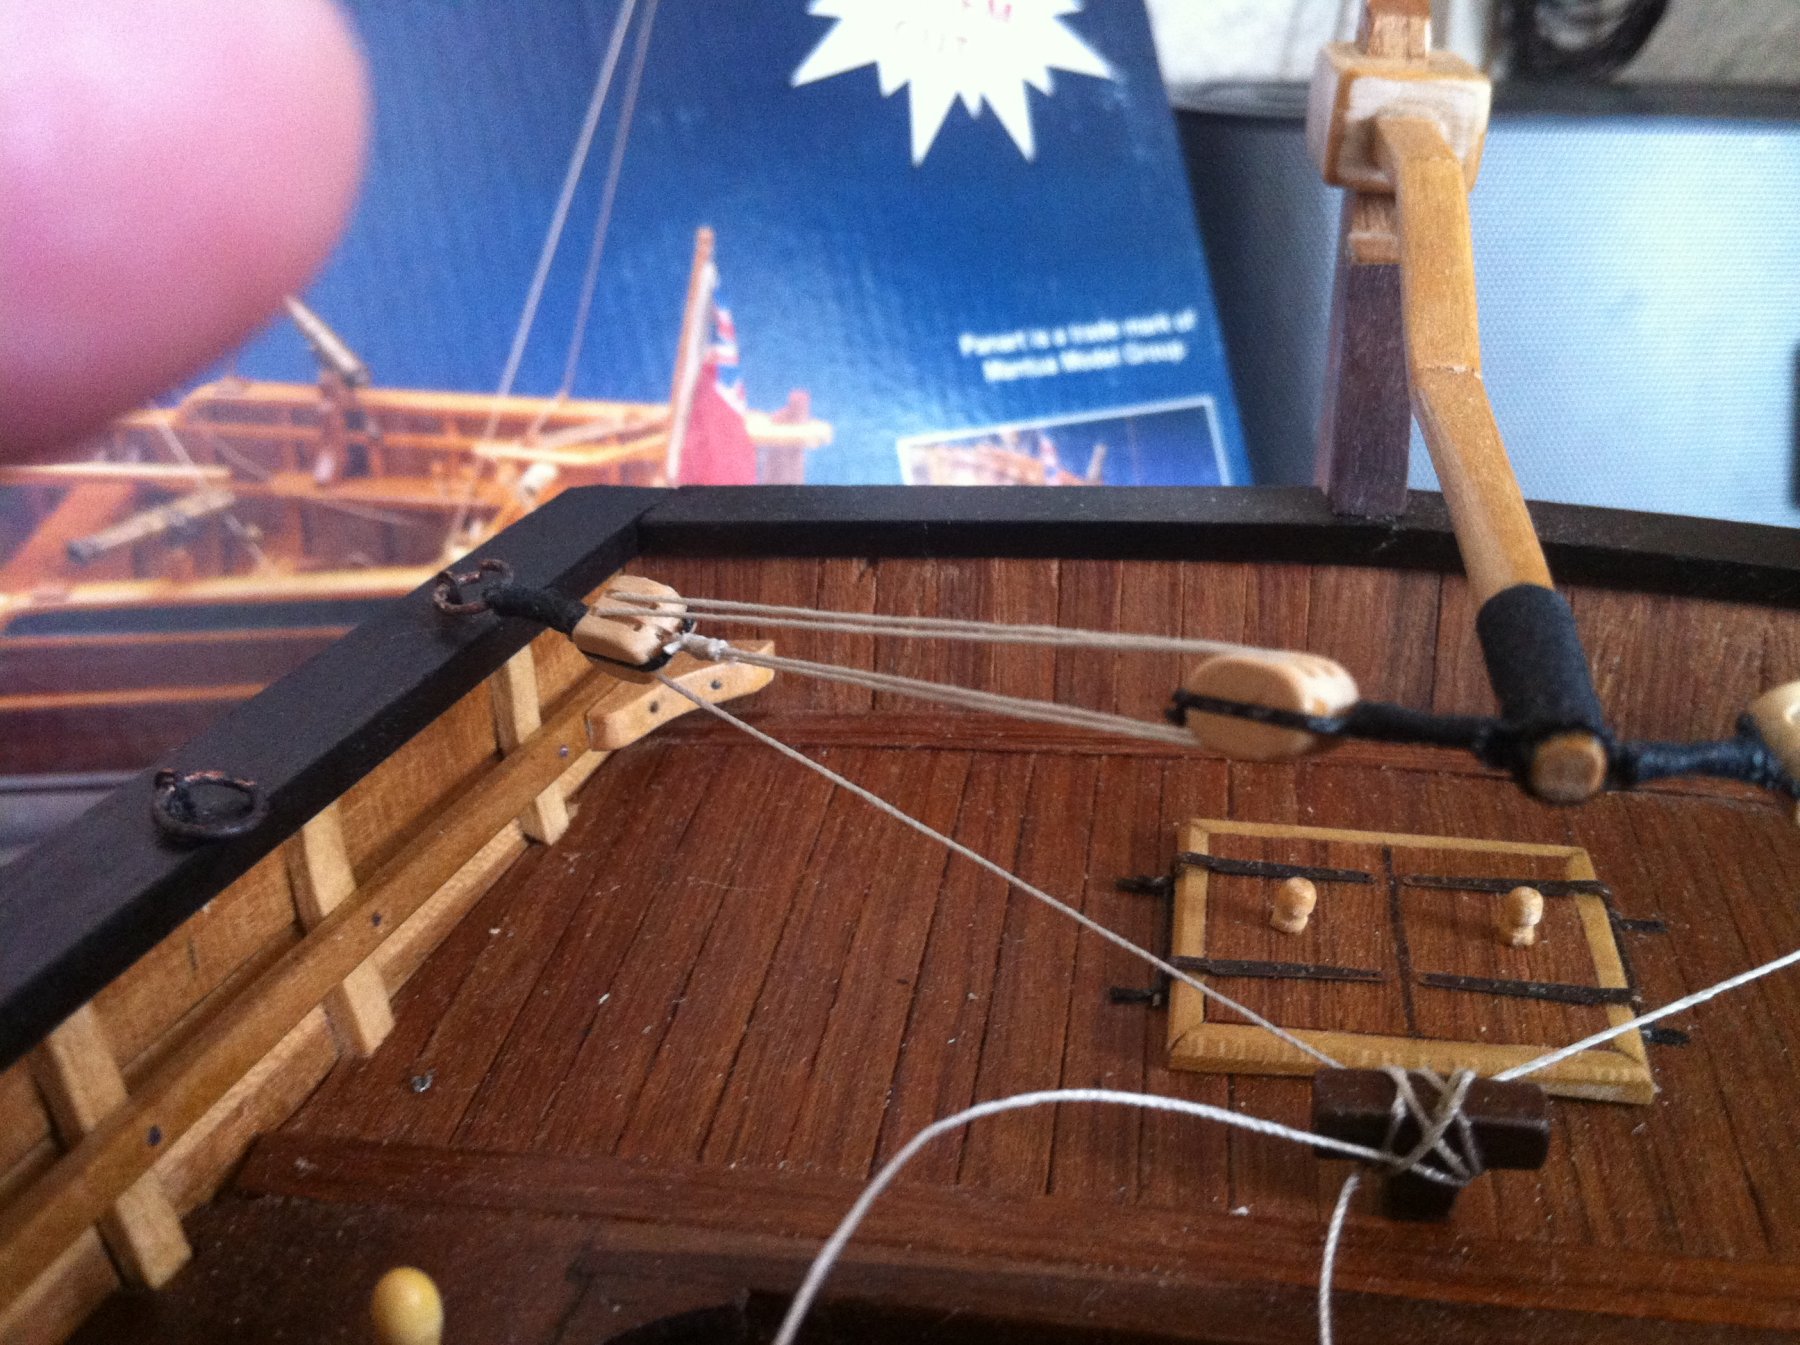
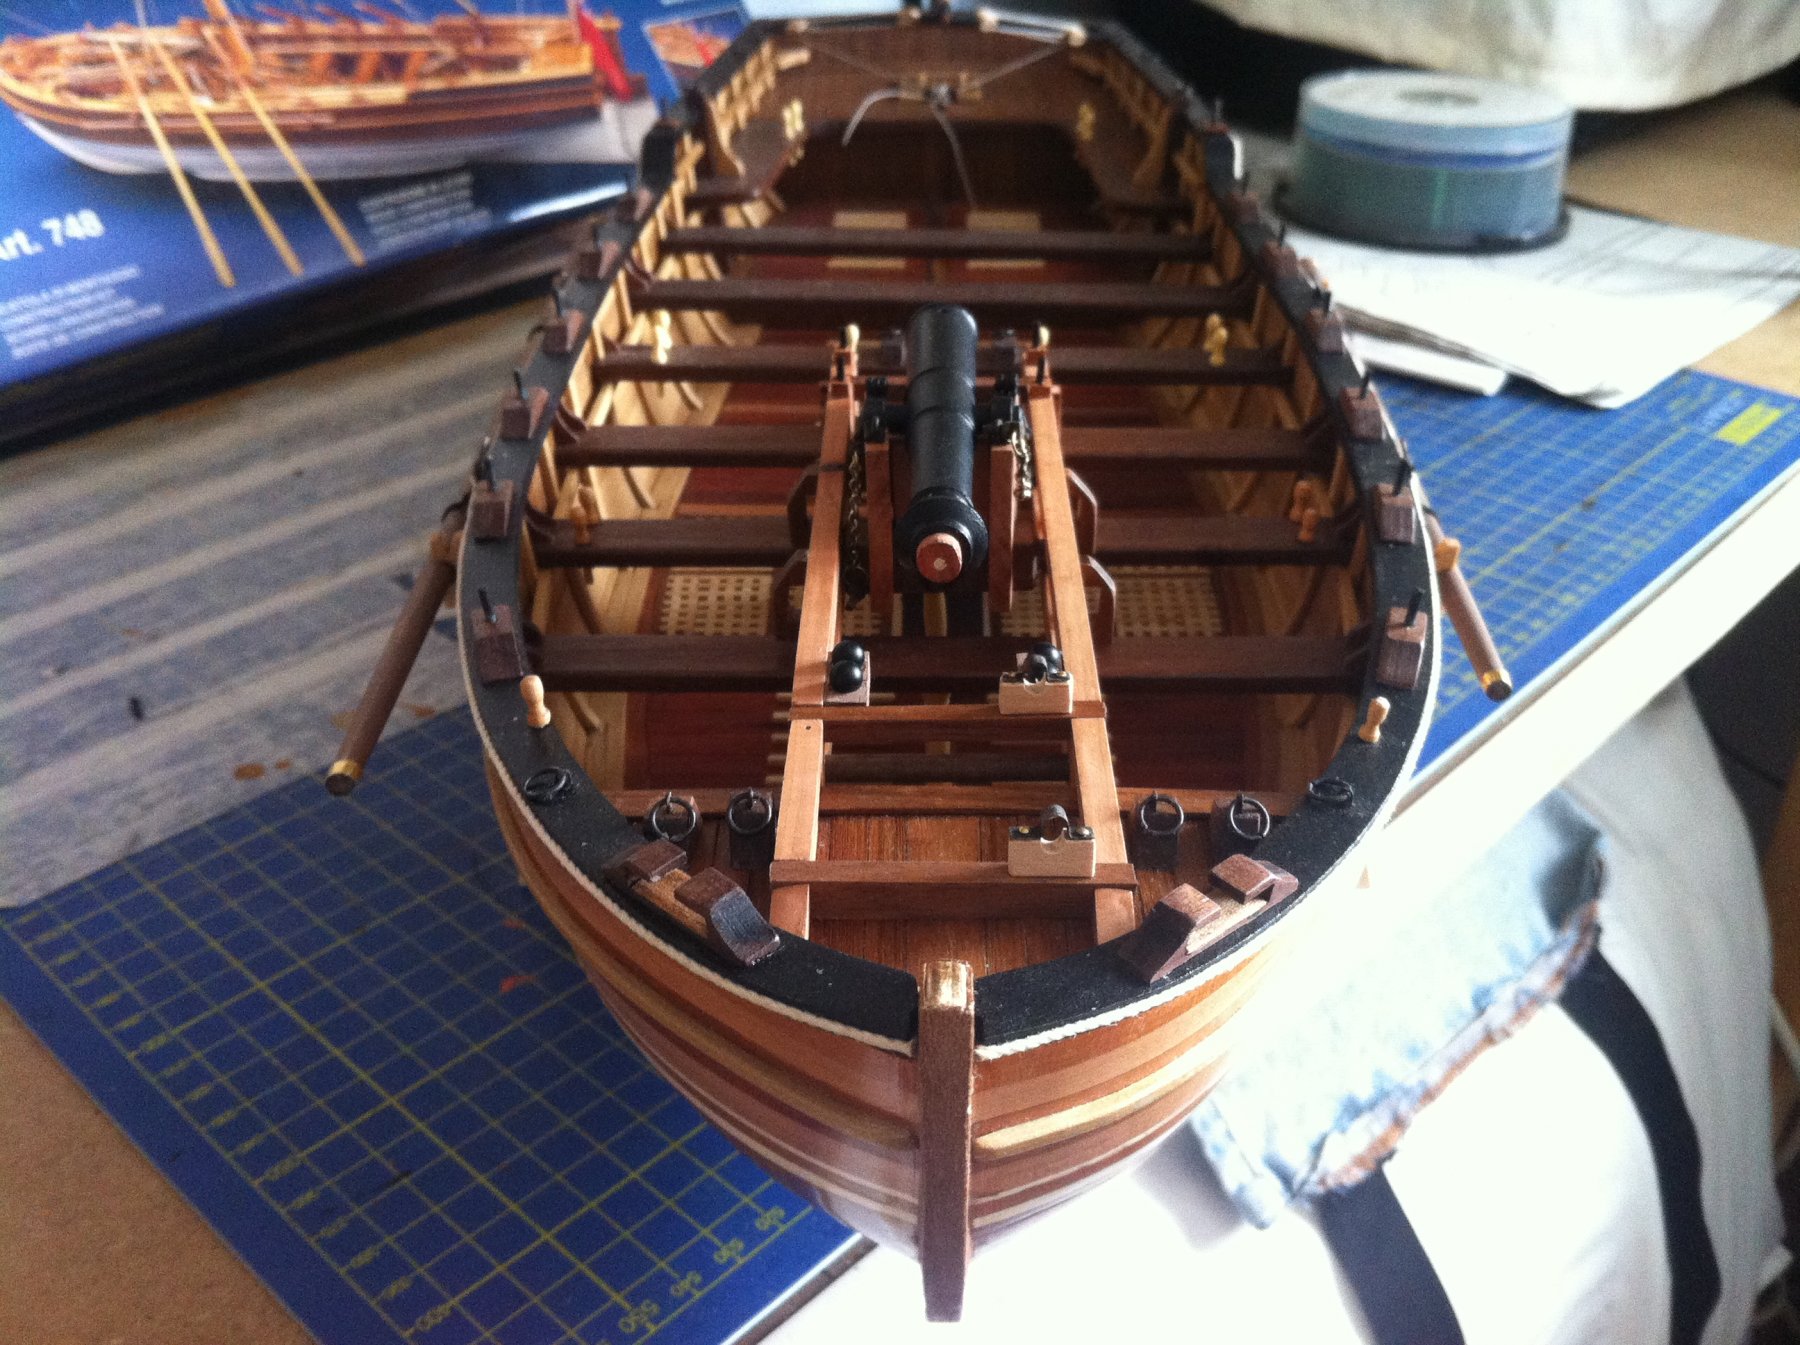
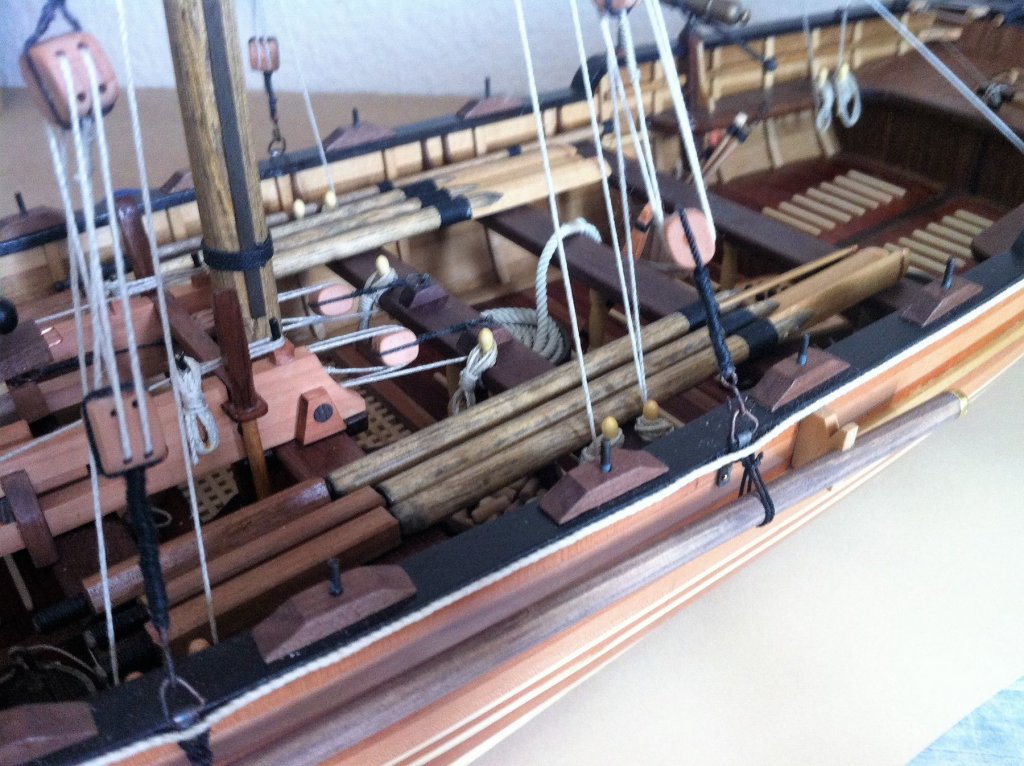
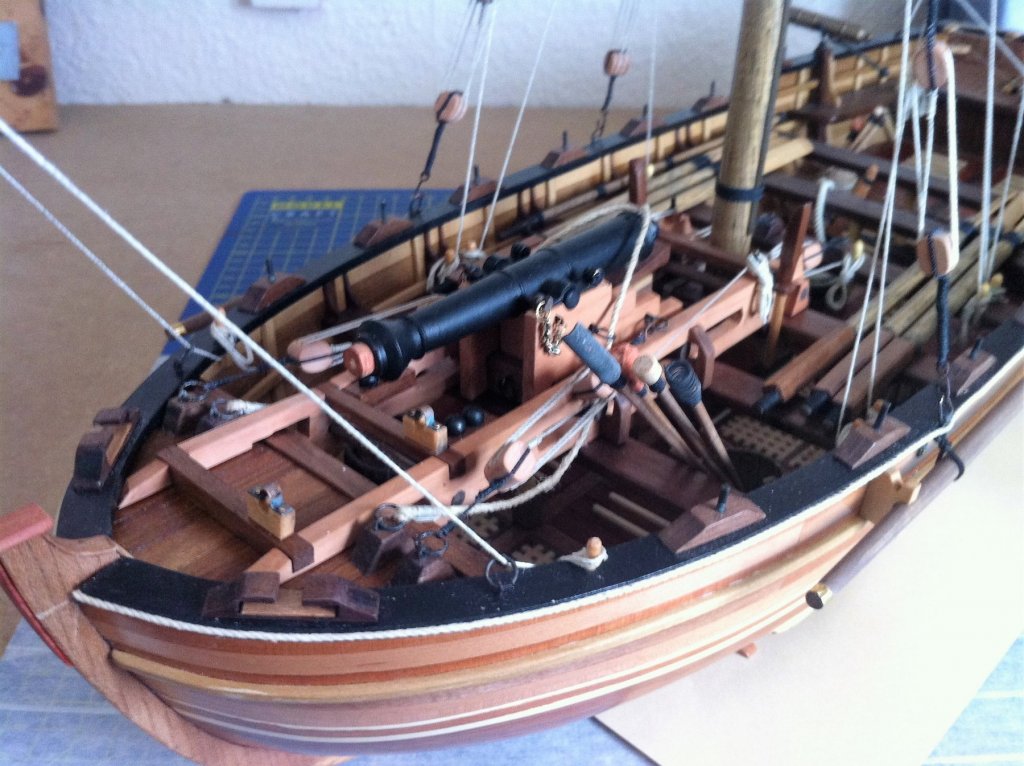
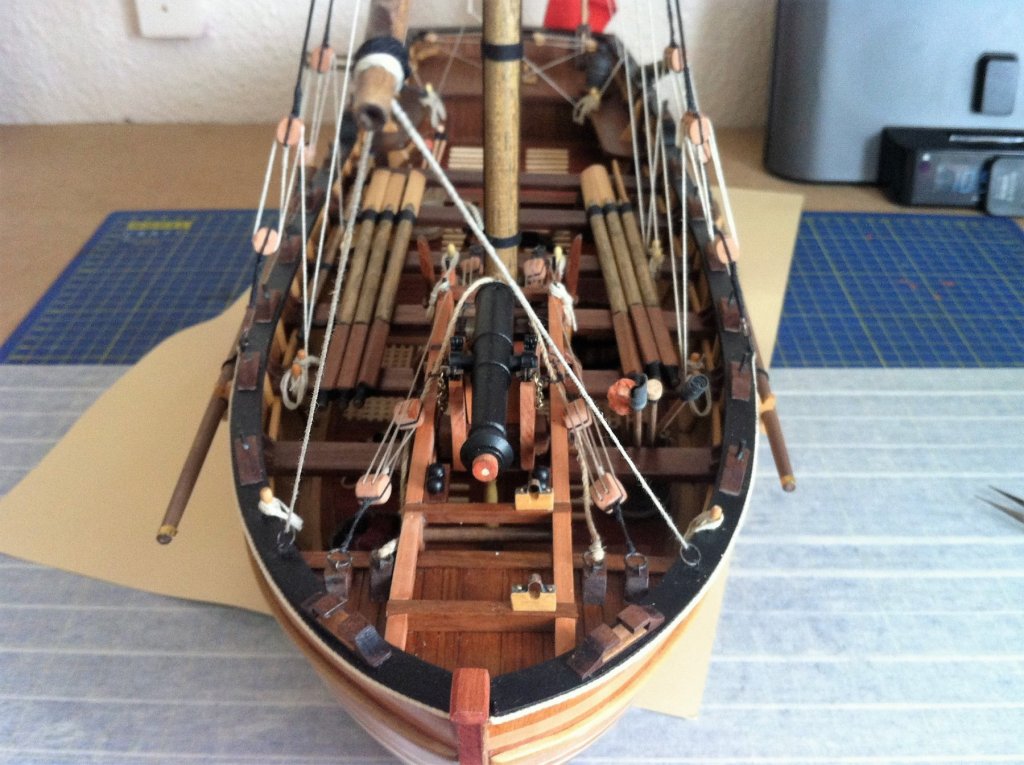
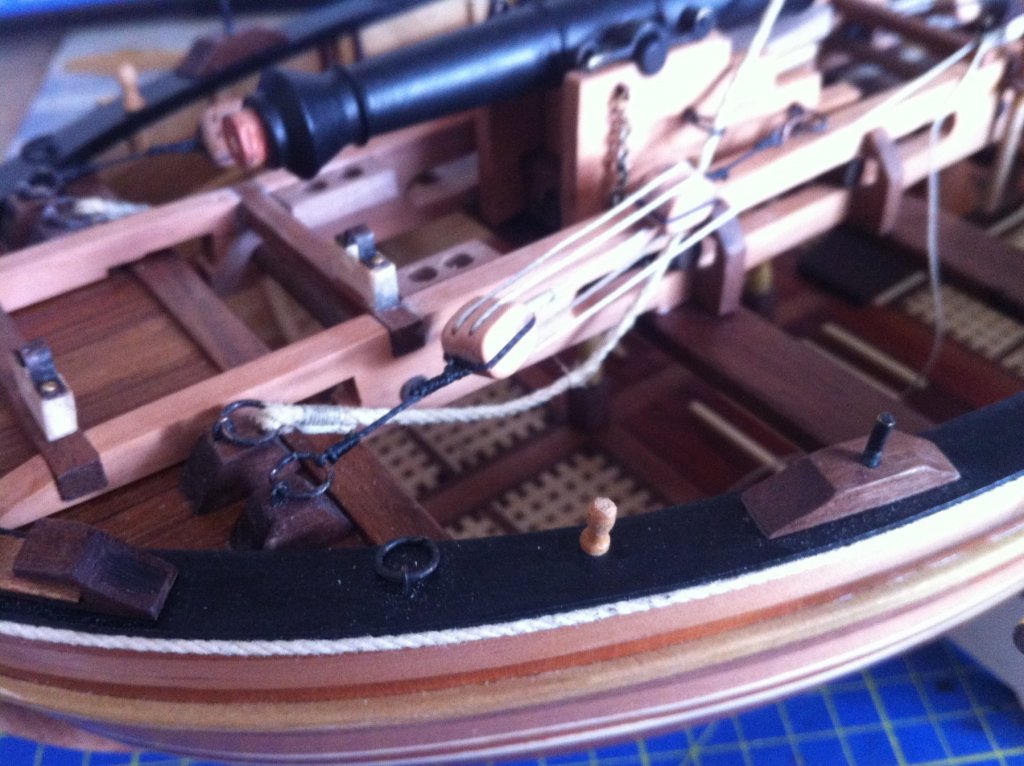
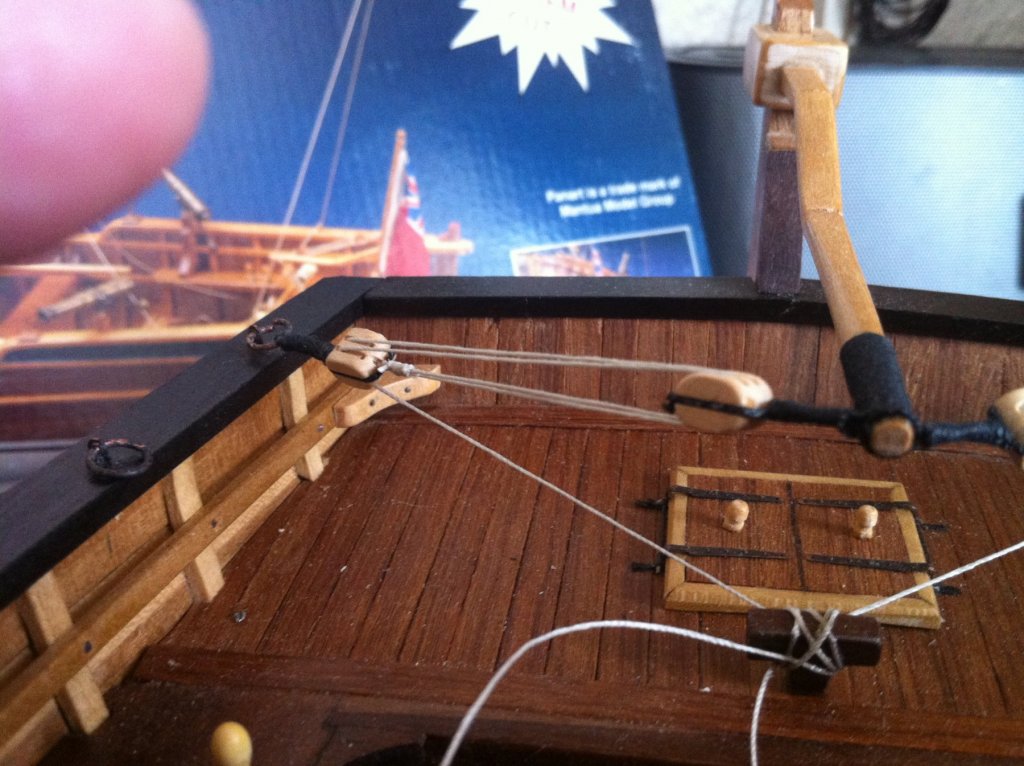
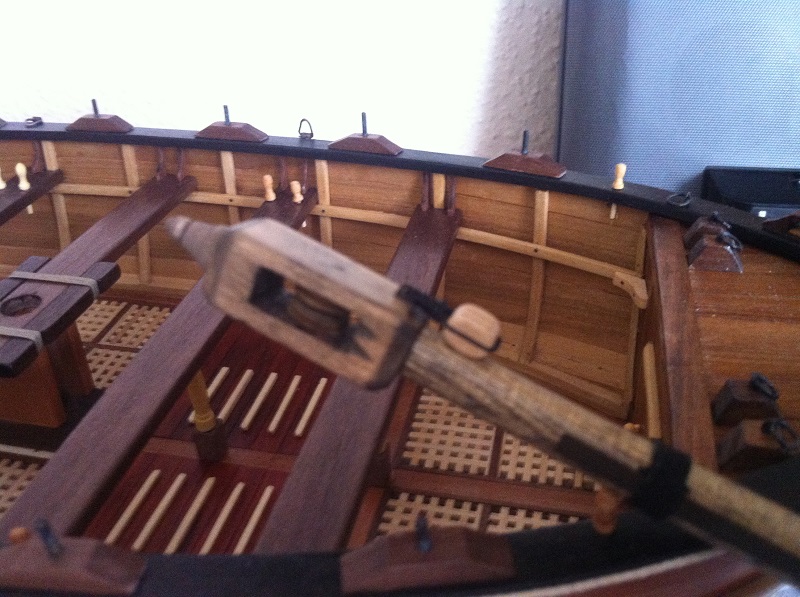
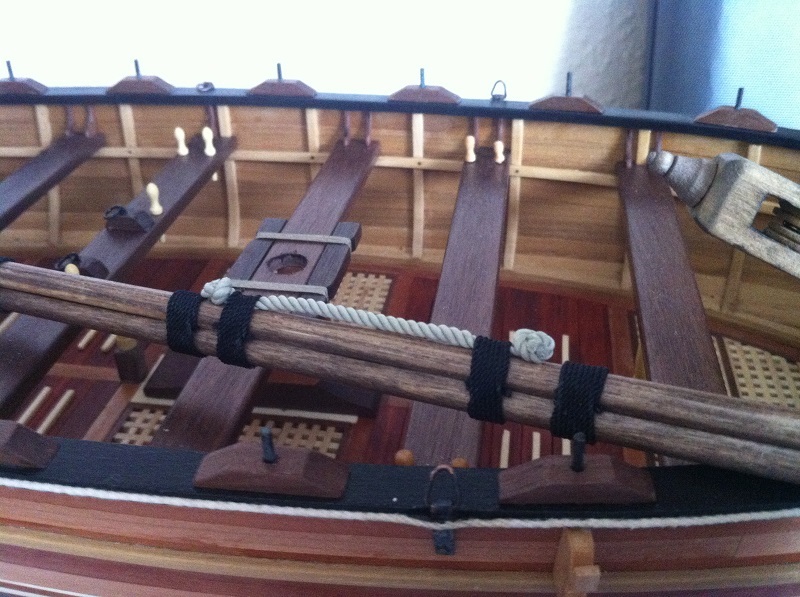
Good Morning Gentlemen, Thank you very much for the warm welcome back messages and comments on the boat, It seems as though I've never been away, what a forum this is. Going on with the boat, the next step was to rig the gun and tiller bar. I substituted the 5mm kit double blocks for a far superior block which came to me from Australia, so much better, thanks mate. The rope used was from a previous Caldercraft kit. This is such an easy rigging system. Just a little bit of trimming to do, the Breech rope is meant to be that way round otherwise it fouls the Quoin. I can only assume that the Cox'n or Bosun were standing most of the time, I've never seen a configuration like this before. It looks as though the tiller is bent, it's purely optical, again a bit of trimming and that bits done. OK that's me done for now, I invite all comments either good or bad, I only ask that your gentle with me. Be Good my Friends mobbsie

- 129 replies
-
- 16
-
-
- armed launch
- panart
- (and 1 more)
-
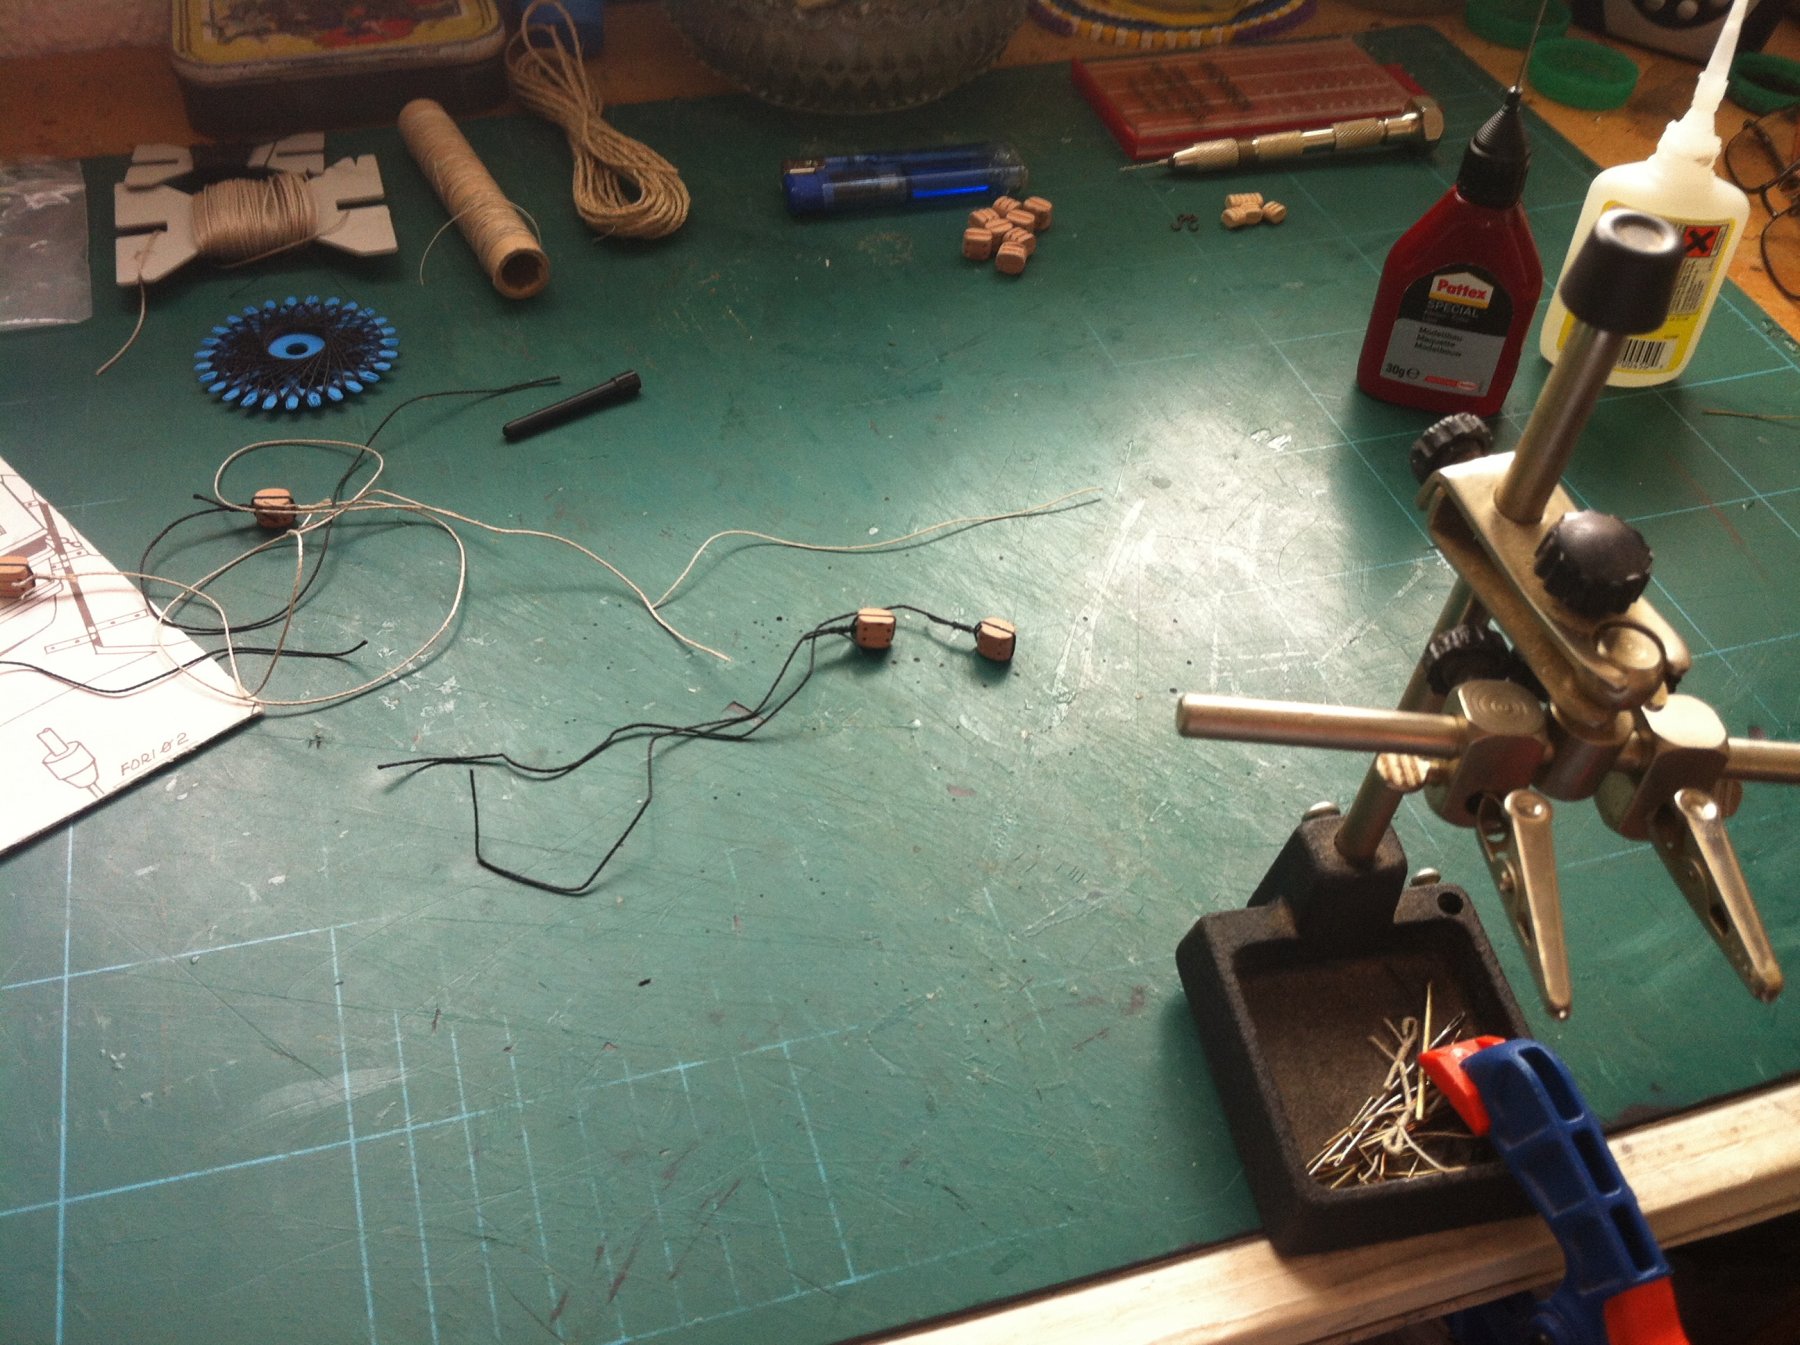
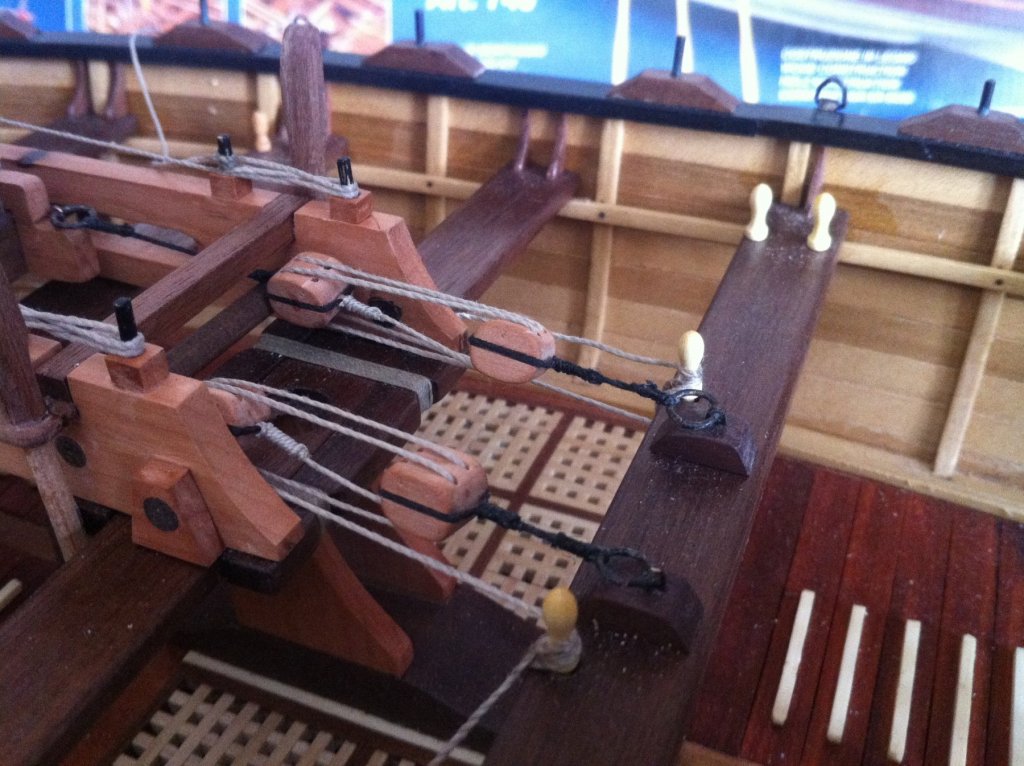
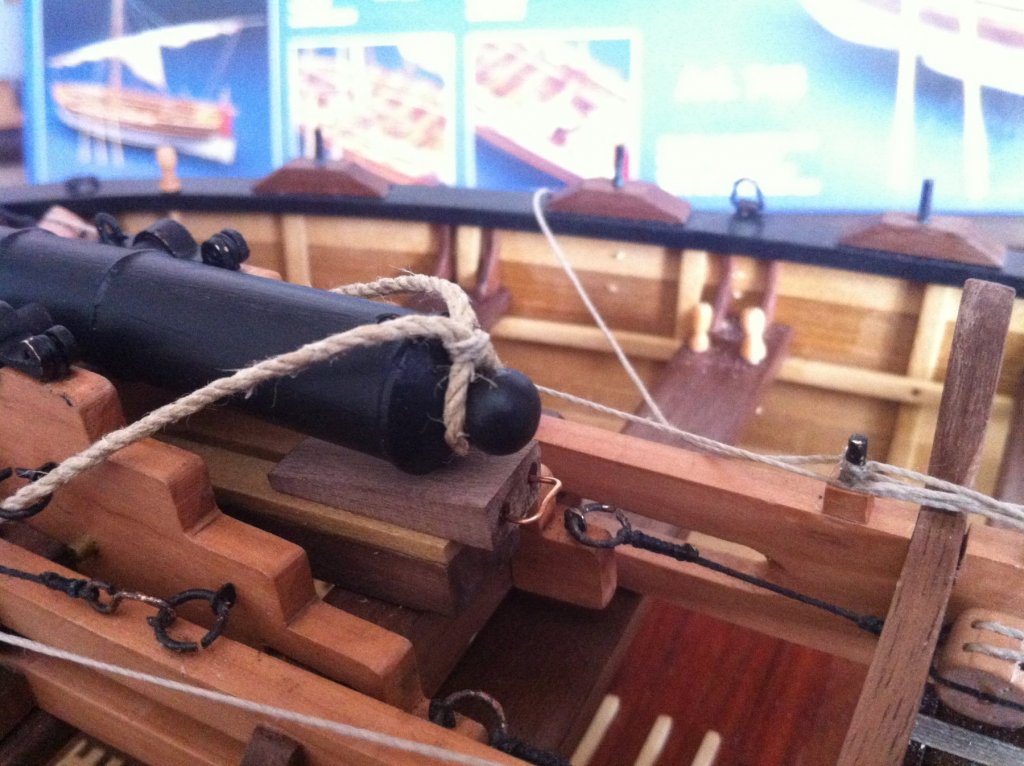
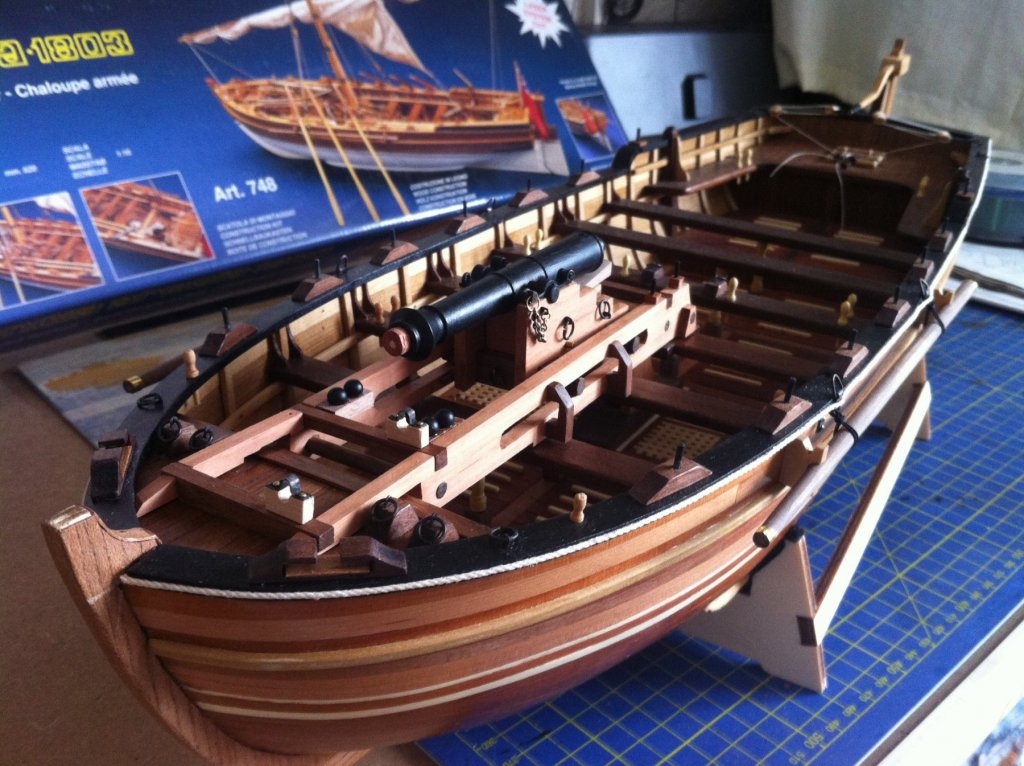
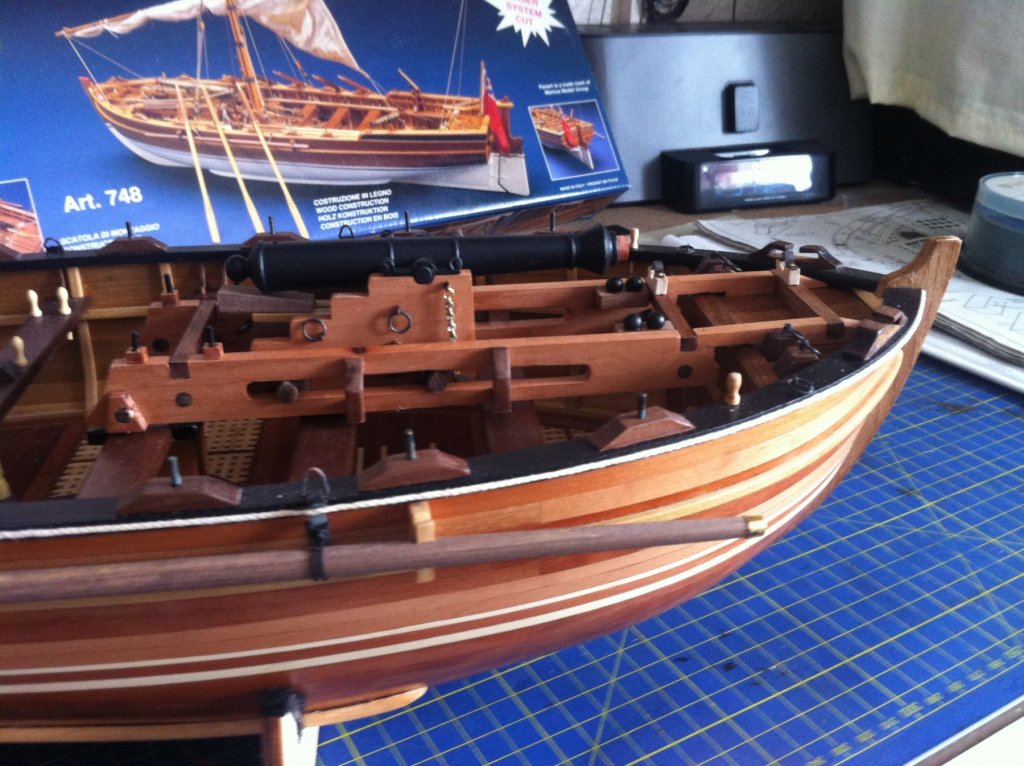
Hi Guys, Pav, I think your little rescue boat is for the ships cat mate, as Grant has suggested copious amounts of isopropyl alcohol should do the trick. If it's a CA type glue then you could try some nail polish remover, just depends how long it's been cured. Now if I can remember how all works I will try to download or should I say upload ( never sure which it is ) some pictures. Unfortunately the pictures aren't as comprehensive as I would have liked. The kits gun carriage timbers were substituted from ply to Swiss Pear, the kit parts were used for template purposes only, they went together quite well and on fitting suspended by either end and nothing in the middle. A bit of jiggery pokery and we have the semblance of a fit. The gun was fun, whatever I tried to blacken it, it would just come out mottled, I cleaned it to within an inch my life but it wasn't having any of it, out came the trusty paint pot, something I didn't want to do on this build. Just tying up a few blocks and tackles for rigging the gun. I'm going to call it a day there as I want to see if the pics upload ok, I will post some more later. Be Good my Friends mobbsie


- 129 replies
-
- 15
-
-
- armed launch
- panart
- (and 1 more)
-
Hello One and All, It's been almost a year since I last visited my log and it's about time it was resurrected. Life has it's ups and downs and unfortunately I have been on a bit of a down, without going into any detail I basically lost me mojo. The boat has been completed and I will be posting the remainder of the progress pics very shortly. Thanks to all who have enquired after my well being and showed concern, it's really very heart warming. Watch this space guys. mobbsie
- 129 replies
-
- 8
-
-
- armed launch
- panart
- (and 1 more)
-
Hi Grant, Simply stunning mate. Dan is right, take her to the Canberra show and recieve and accept the plaudits owed to you. She really is a work of art. mobbsie
- 339 replies
-
- 6
-
-
- dumas
- Chris-Craft
- (and 3 more)
-
Now that really is a fine piece of work mate, a lot of effort and thought gone into that wheel. So that's the practice wheel out of the way now you can start on the final piece. Very well done Grant that wheel is truely fabulous. Be Good Mobbsie
- 339 replies
-
- 8
-
-
- dumas
- Chris-Craft
- (and 3 more)
-
That's some truley great work Grant. The wheel is going to look fantastic when completed, so hurry up, I wonna see !!!!!!!!!!!!!!!!!!!!!!!!!!!!!!!! I've never seen a cutwater done like that before, I just love it. Altogether very well done mate Be Good mobbsie
- 339 replies
-
- 4
-
-
- dumas
- Chris-Craft
- (and 3 more)
-
No words of wisdom or questions mate !!!!!!!!!!!!!!!!!!!!!!! Just Gob-Smacked. Still watching Be Good mobbsie
- 339 replies
-
- 4
-
-
- dumas
- Chris-Craft
- (and 3 more)
-
WOW, your definately moving up to the next level of skills here mate, that is some really good engineering. Is there any difference in the weight of the original wheel and the new one. ? just thinking about ballasting and overall weight of the boat. Makes me wonder if your ever going to find satisfaction in the general kits available, the skies the limit mate. I am watching. Be Good mobbsie
- 339 replies
-
- 5
-
-
- dumas
- Chris-Craft
- (and 3 more)
-
Hi Grant, I'm intrigued to see how you develop the cutwater, I've never seen this before mate, looks interesting. Good luck on getting the wheel centred, that's not going to be easy but I think I know how your going to tackle it. Just don't make it too complicated though, you know I don't do complicated !!!!!!!!!!!!!!!!!!!!!!!! Watching with great interest my friend. Be Good mobbsie
- 339 replies
-
- 5
-
-
- dumas
- Chris-Craft
- (and 3 more)
-
Hi Grant Graphics look great mate and are a very nice touch, bit of a romantic really aren't you. The stand looks functional and will not detract from the boat if used in your final display, simple yet very effective. I'll also wish you a Very Happy Birthday my friend, still a young pup at 56. Be Good mobbsie
- 339 replies
-
- 6
-
-
- dumas
- Chris-Craft
- (and 3 more)
-
Hi Grant, Just checking in mate and WOW, she is coming along in leaps and bounds. A wise move mate to treat the underside of the hull, bearing in mind who is going to be driving it. ( I would never dream of saying a thing like that mate, but I was told to by the boss, honest). She morphing into a thing of beauty Grant, be very proud mate. Be Good mobbsie
- 339 replies
-
- 6
-
-
- dumas
- Chris-Craft
- (and 3 more)
-
Hi Grant, Having seen the damage to the hull after your first repair mate you can heartily slap yourself on the back, a first class repair job my friend, well worth going the extra mile. That decking is really going to look stunning when sanded an polished up. Altogether mate a bloody good job all round, well done. Stay safe at work mate. Be Good mobbsie
- 339 replies
-
- 4
-
-
- dumas
- Chris-Craft
- (and 3 more)
-
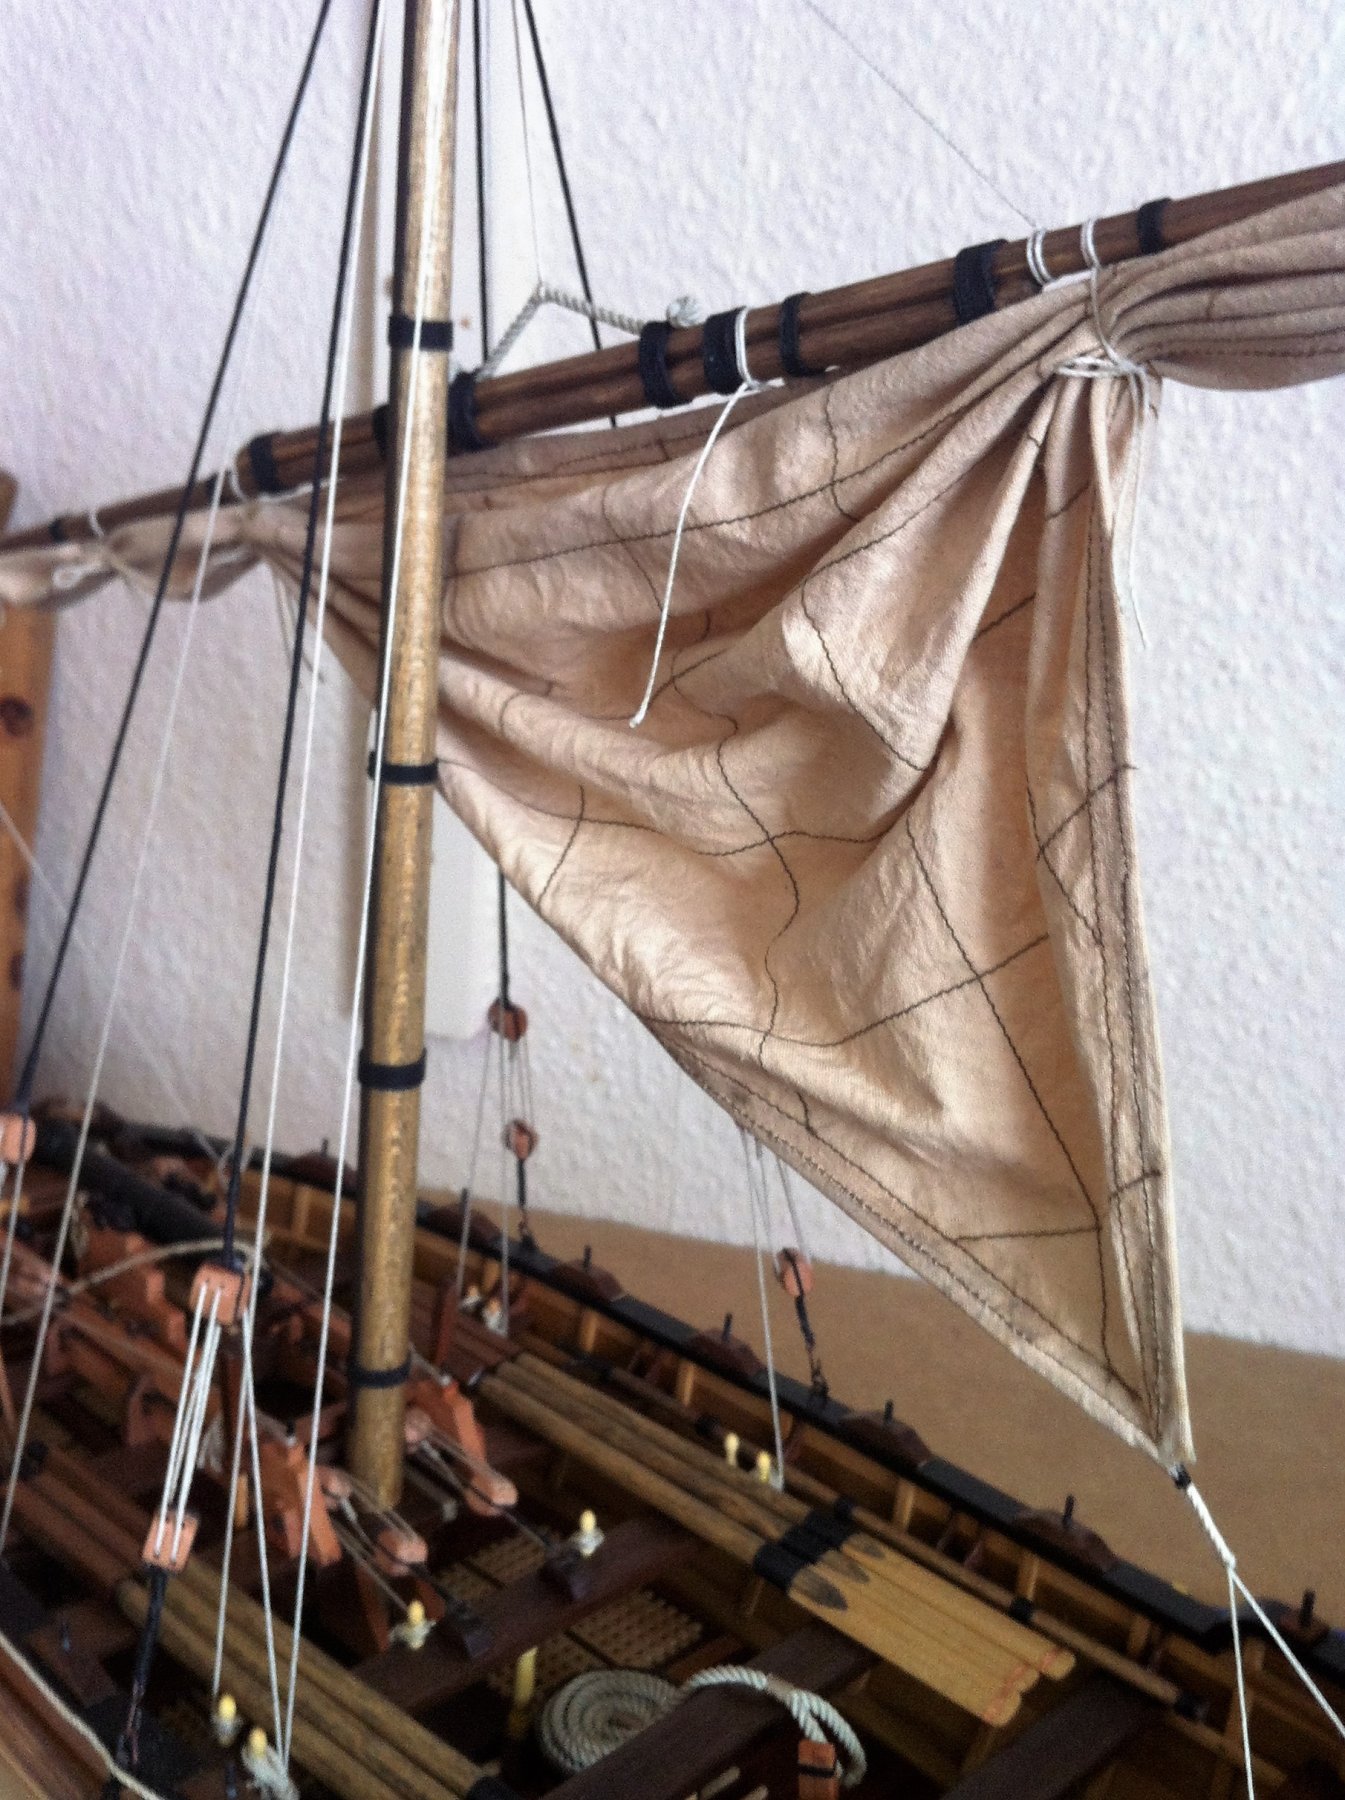
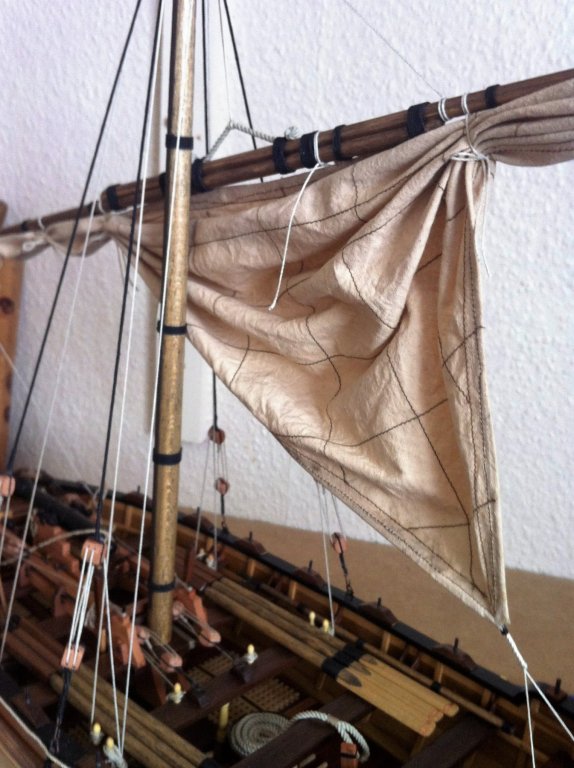
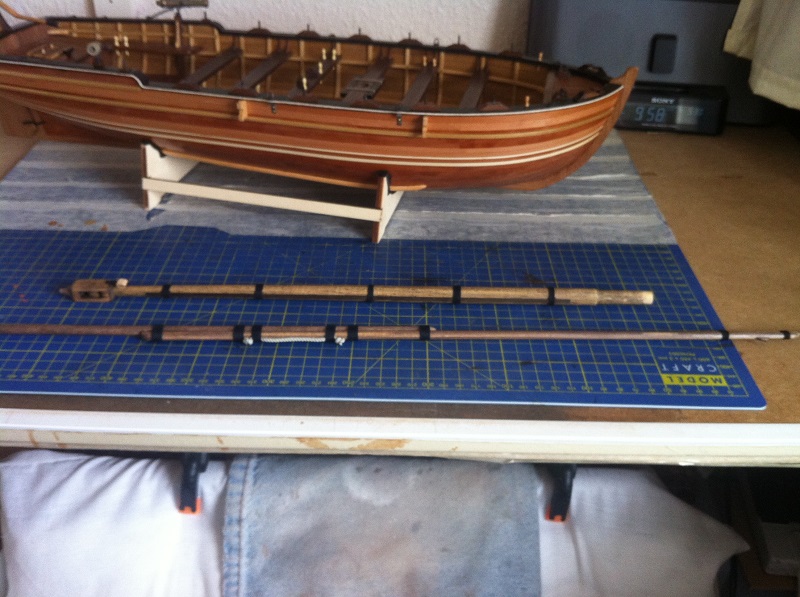
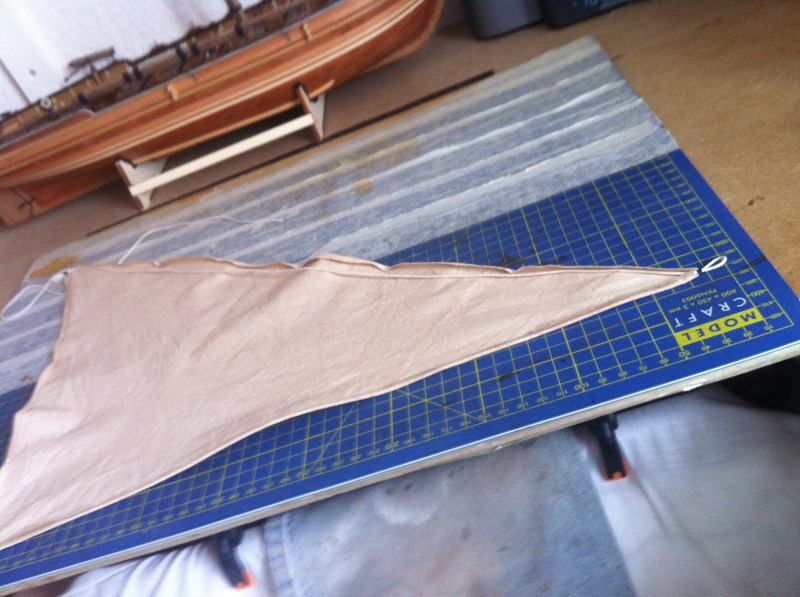
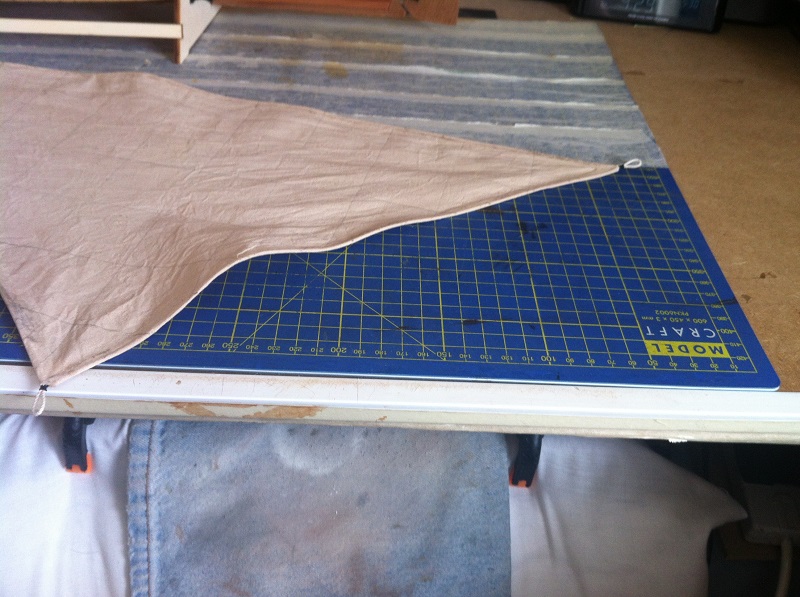
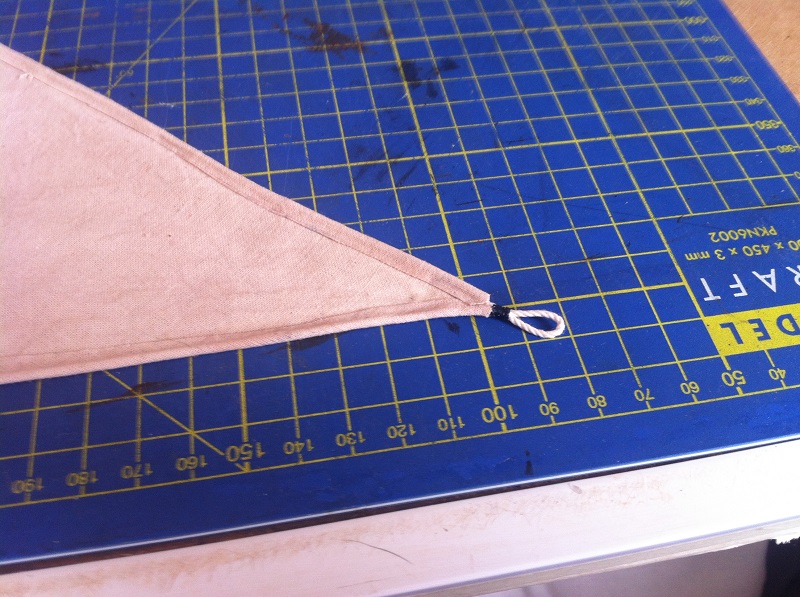
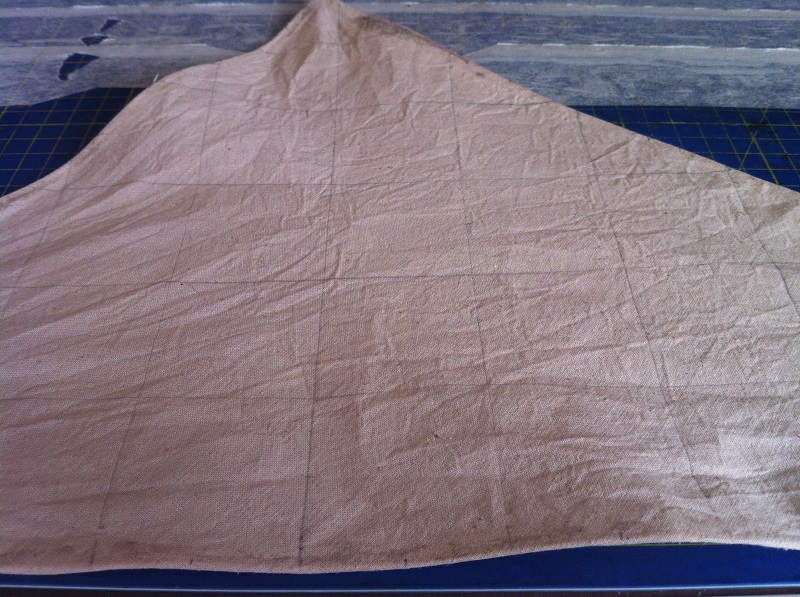
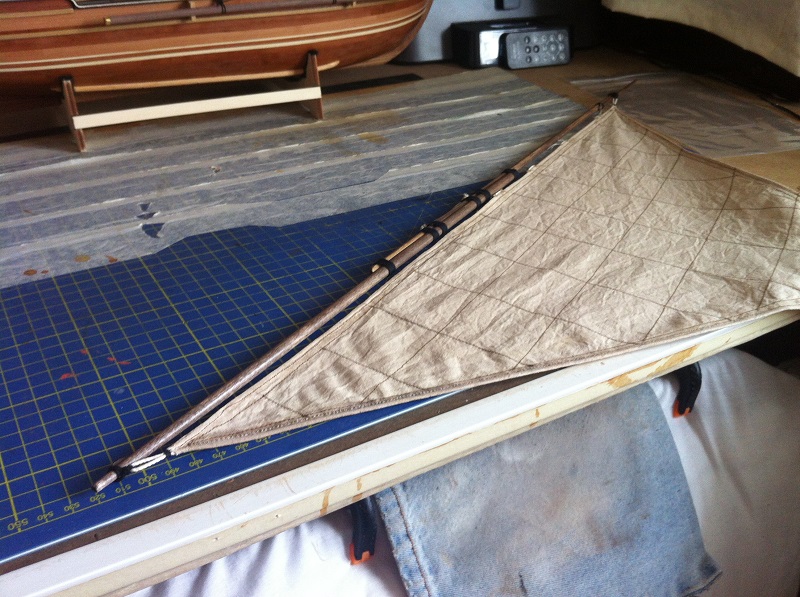
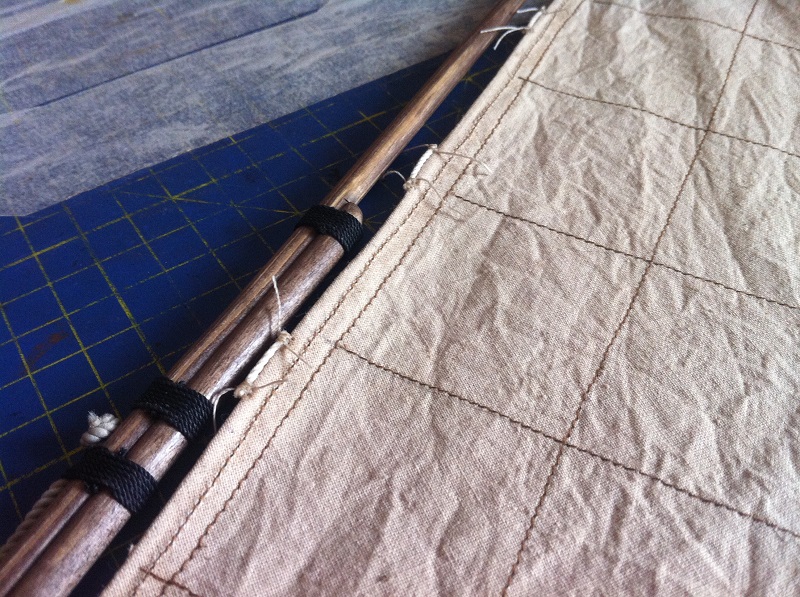
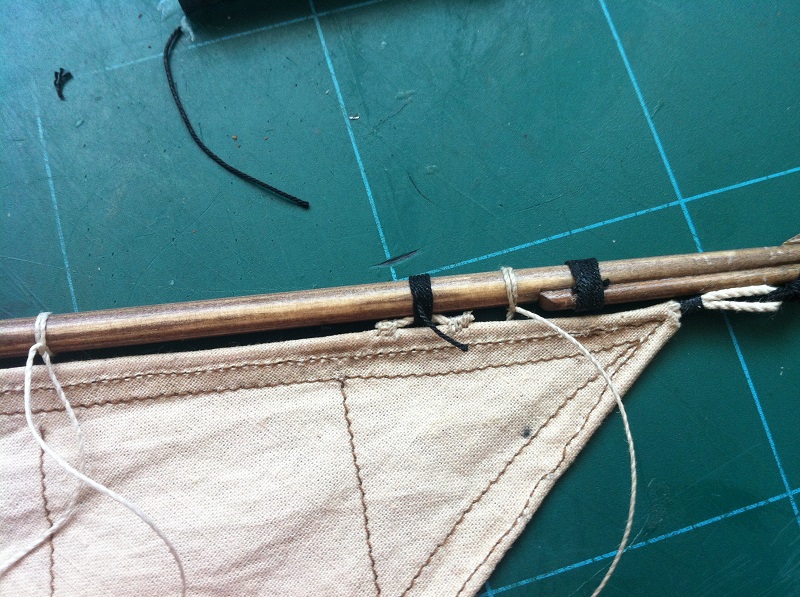
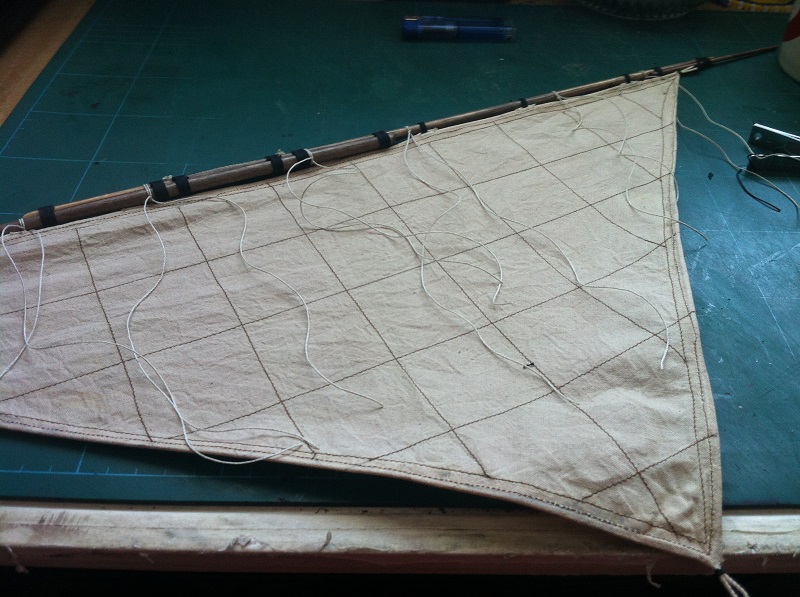
Hi Guys, I'm back, I haven't been around lately for several reasons, the main reason being that through my own stupidity my Laptop crashed, I wont go into detail but suffice to say it stopped working. Through the help of several friends I am now back on line and raring to go, I have at this stage got to thank Carl ( cog ) for all his help and assistance, it's down to you that I'm back ( you can get him later guys ). A big THANK YOU Carl, your a diamond. A lot of progress has been made since my last post so I will be doing a few post in succession to try and catch up. The hull with the mast a yard to the front, these were quite simple to build due mainly to there being no fiddly bits, all that I changed were the pulley wheels in the masthead, The Hull with Mast and Yard in the fore. The Mast Head, with the replaced pulleys. This is the main fixing point for the Yard, 3mm Morope seized on with .75mm black thread. Now for some Sail Making The sail is made from a sheet of kit supplied Calico, this was first washed and ironed then cut diagonally from corner to corner, then I stained one piece with 4 teabags in boiling water, this was left for several hours until it got to the colour I wanted. When dry it was ironed again the edges were brushed with diluted PVA. The Bolt-rope was made from 1mm Caldercraft rope, the lengths were measured and Becket's tied in. the Bolt-rope was laid on the edge of the sail and the edge was then folded over the rope and again given a coat of PVA. The bolt-rope is now fitted and the PVA has dried. One of the three Becket's The sail has now been marked up with pencil and is now ready to go to the seamstress. The seamstress has done her job and a nice job at that. ( think I'll keep her on ). Next up was to stretch the sail and fix it to the yard. The Becket's were tied using .5mm black thread. I then started to stitch fixing loops onto the sail. With all the loops stitched on the sail was bent to the yard using .75mm black thread. The sail has now been completely bent to the mast and the Reev's also attached. The completed sail. That's it for now guys, a further update will follow very shortly. Be Good mobbsie
- 129 replies
-
- 21
-
-
- armed launch
- panart
- (and 1 more)
-
Hi Hennie, The fleet grows ever larger mate, nicely done. Be Good mobbsie
- 214 replies
-
- 4
-
-
- agamemnon
- caldercraft
- (and 1 more)
-
Hi Grant, Slow but good progress mate, glad you didn't get any damage when removing the planks you put on. Looking forward to seeing more progress my friend. I believe my Laptop is now fixed so I will be posting very soon. Gotta catch up mate. Be Good mobbsie
- 339 replies
-
- 5
-
-
- dumas
- Chris-Craft
- (and 3 more)
-
Hi Guys, Help required please, I'm having trouble with my P.C. My laptop crashed a while ago and as a result I'm now operating Windows 10, I'm experiencing trouble downloading my pictures in my log for an up-date I know for a fact that some have experienced the same, can you come to the aid of an old git who needs help. Thanks Guys mobbsie
- 129 replies
-
- 3
-
-
- armed launch
- panart
- (and 1 more)
-
I love it when you do the paintwork Denis, it's so clean and precise. You always seem to get such a good finish on it too. Keep it up mate. Be Good mobbsie