HOLIDAY DONATION DRIVE - SUPPORT MSW - DO YOUR PART TO KEEP THIS GREAT FORUM GOING! (Only 20 donations so far - C'mon guys!)
×


mobbsie
-
Posts
1,493 -
Joined
-
Last visited
Content Type
Profiles
Forums
Gallery
Events
Everything posted by mobbsie
-
 Nicely done Piet, you have a very good set of skills and you make the most of them. Anchors are going to look terrific when finished. Be Good mobbsie
 -
Hi Denis, Here I am again, popping up to check that you haven't gone completely of the rails and I must say I have no need to worry. There's far too much progress to mention all at once but I have to say that the windows, lights, shingles, paintwork and drip rail all look absolutely great. I wonder just how the warming cabin effects the boats stability though. I do have a suggestion for the roof, have you thought about putting Solar Panels on, might work. Just a thought. Be Good mobbsie
-
Hi Mark, Don't you find that working upside down all the blood rushes to your head I love what your doing here mate and thanks for the step by step, the clear glazing is really quite authentic in it's shape, they look really good. Working through the failures isn't it satisfying when it all comes together and you achieve those results. Well done mate. Be Good mobbsie
-
Certainly got the WOW factor for me. Those Vent Ports look great, a good decision to include them mate. Planking looks pretty darn good too. Be Good mobbsie
-
Hi Christian, I don't know how the hell I missed your build until now, I'd like to pull up a bench and follow along if you don't mind, ( better late than never ). Your whole build is looking fantastic mate and those ships boats are great. I generally use Admiralty paints, they give me the pigment I'm looking for without having to go over the object again, but each to their own and as long as were happy with our choices what does it matter. Be Good mobbsie
-
Hi Grant, Nicely done mate, the ladders have come out well and look great. If you continued to make the Mortar Pit Covers you could add them to the base of the display case as an extra item, sometimes the display base needs that little extra to fill a void, just a suggestion mate. Monograms really do add that finishing touch to the Mortar and Guns, pity their not straight, but you most likely have seen that already.!!!!!!!!!!!!!!!! Can't help the dust mate, good thing is it doesn't take much to remove. Be proud of her, she's lovely. Be Good mobbsie
- 456 replies
-
- 6
-

-
- finished
- bomb ketch
- (and 2 more)
-
Hi Mark, Well worth the effort mate, the difference is noticeable and a great improvement. You've still got the guts to take apart and renew what you don't like, well done mate. Be Good mobbsie
-
Nice fix mate with excellent results, :im Not Worthy: it all looks rather spiffing. Last leg mate, Entry Ladders that's all and of course the dusting and any last minute adjustments and of course the final display base and case. Seriously, a very good job and one to be proud of, very well done. Be Good mobbsie
- 456 replies
-
- 7
-
-
- finished
- bomb ketch
- (and 2 more)
-
Only Me, What can I say, the Chain Plates were looking really good and the concept of construction clever, it's just that one area of failure that's a bummer. All I can suggest is that the Chain Plate loops are formed cold, then when you solder the Deadeye Slings in place there will be a certain amount of creep by the solder which will secure the loop. By the time you read this you would most likely have thought of a solution mate, good luck with it my friend. Enjoy the challenge !!!!!!!! Be Good mobbsie
- 456 replies
-
- 8
-
-
- finished
- bomb ketch
- (and 2 more)
-
Wow, that's a nice set of Deadeyes mate. Cut-outs on the Channels are much neater now, looking forward to part 2 of the update. Be Good mobbsie
- 456 replies
-
- 7
-
-
- finished
- bomb ketch
- (and 2 more)
-
Could you not use a spirit based solution on the Black Strikes to try and draw out the Tung oil, I've never tried it but it may work. Beautiful works as always mate. Be Good mobbsie
- 1,215 replies
-
- 2
-
-
- sloop
- kingfisher
- (and 1 more)
-
Hello Jack, My solution would be to make a loop of 0.5mm wire, place your deadeye into the loop and tighten with two twists, the loose ends after the twist I would pass through the loop of the chain and pull thight, these can then be glued with resin or soldered. Cut off the remaining wire. Just my meanderings mate, hope that helps. Nice boat rack by the way. Be Good mobbsie
- 203 replies
-
- 7
-
-
- artesania latina
- marie jeanne
- (and 1 more)
-
Bloody hell John, how on earth do you expect to follow that, the whole diarama / display is truly wonderful. You showed great vision and skill to achieve such a great build, well done my friend.
- 2,250 replies
-
- 4
-
-
- model shipways
- Charles W Morgan
- (and 1 more)
-
Hi Jack, ( that sounds so wrong ) Just found your log, read through it and your certainly on a roller coaster ride of discovery mate, with the lack of instruction and guidance from the plans I think your doing a great job. If you have no objections Jack, I'll pull up a pew and follow along, I don't par-take in the fall over fluid so I'll bring a few Pepsi's with me. Be Good mobbsie
- 203 replies
-
- 4
-
-
- artesania latina
- marie jeanne
- (and 1 more)
-
Hi Gents, I've been modelling for just on four years now and only just found out about this stain, if it helps one person then I will consider it to have been a worthwhile trial. Mark, I've just put some wipe on Poly on some dry wood and from what I can see it will take a finish really well, there doesn't seem to be any deteriation in the base colour and none of the stain came off onto the brush. I will say this though, I'm not too happy with the result on applying the stain with a brush, so far I've only soaked the wood in a bath and it's worked fine, when applied by brush you don't get the real dark colour associated with Ebony, again I have only tried this with Walnut both with and without the Tea, so the trials continues. Per, Frank, Bob, Ken, the jury is still out with regard to the full usage of this stuff but for aging wood it's a perfect aid, have you guys taken the application any further than aging and if so what are your thoughts, it would be interesting to know. Jack, Welcome to the log mate, if you have any questions please don't hesitate to ask, if I cant answer, help is never very far away. Thanks for the good words and the "likes", there always welcome. Be Good mobbsie
- 129 replies
-
- 8
-
-
- armed launch
- panart
- (and 1 more)
-
Nicely done Grant, the Swivels and Yokes are looking really good, nice bit of soldering as well. The Channels and Pedestals have come out well and I am looking forward to seeing them grace the boat. Keep going mate, not long before completion. Have you decided what your going to display her in, Glass or Poly. Be Good mobbsie
- 456 replies
-
- 7
-
-
- finished
- bomb ketch
- (and 2 more)
-
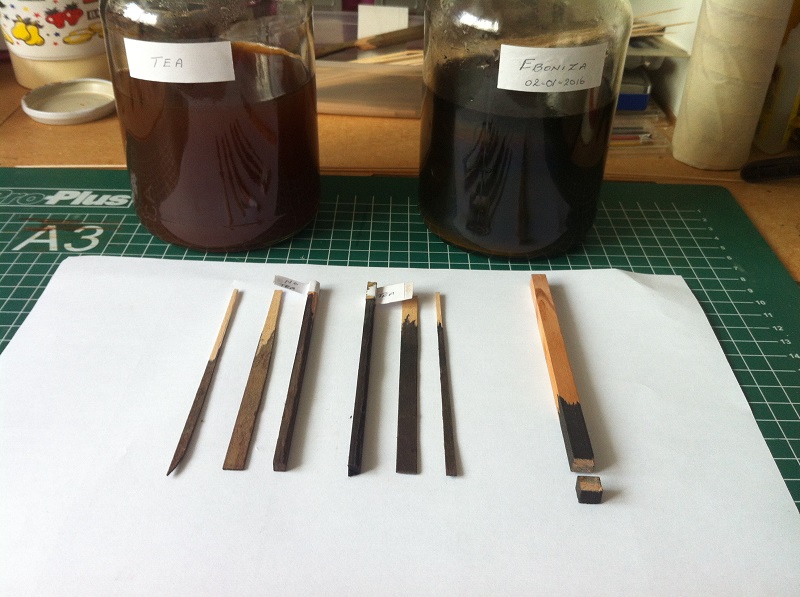
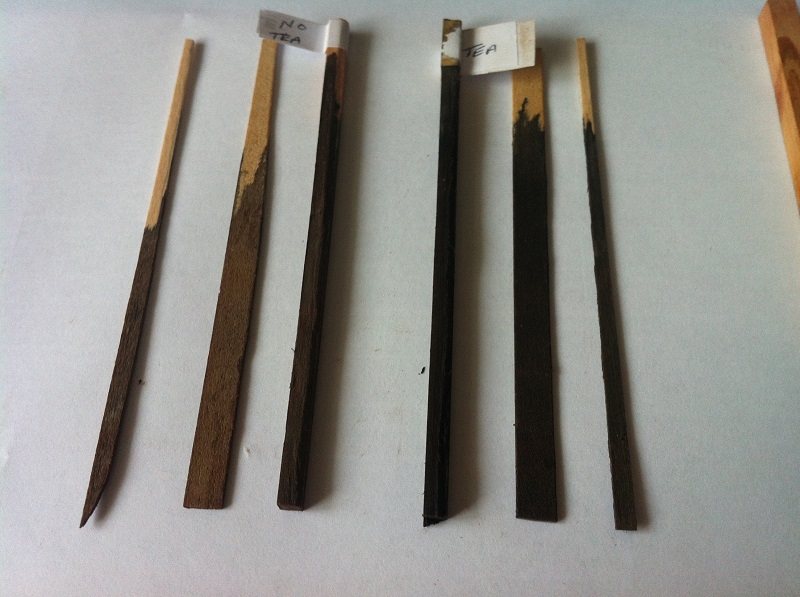
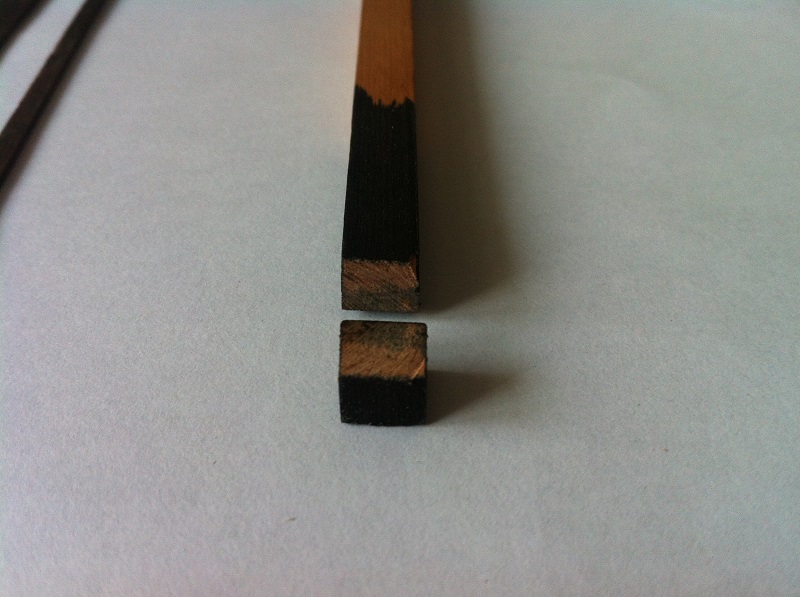
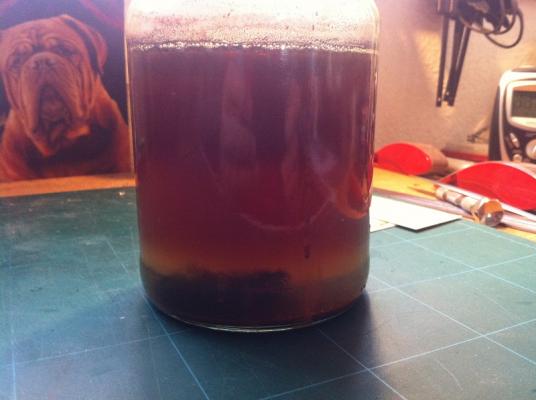
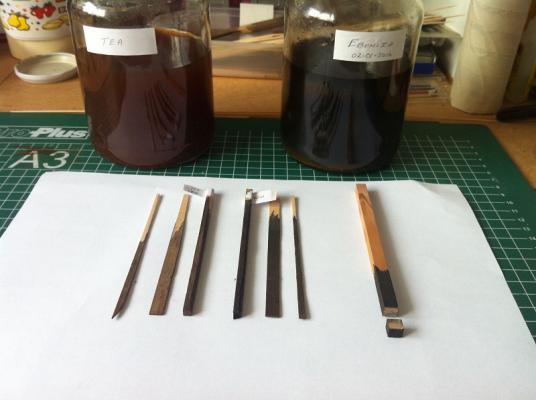
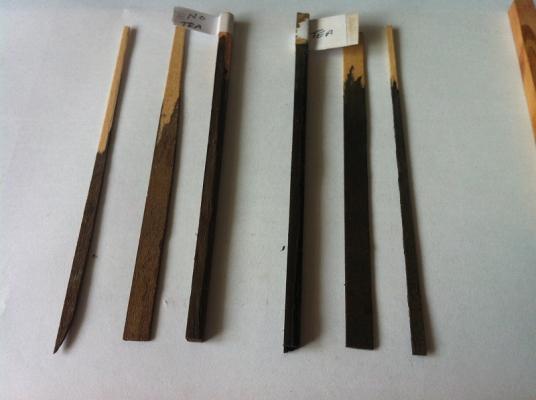
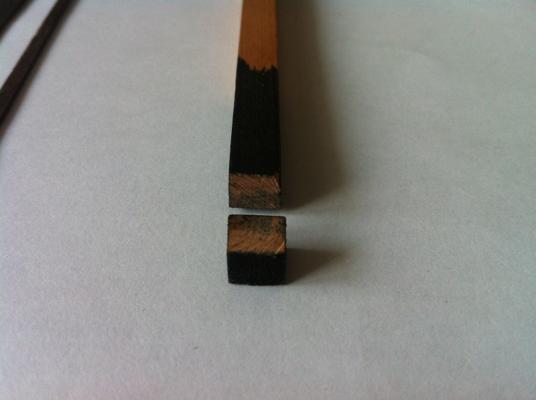
Hi Guys, Thanks for your comments and likes gents, very much appreciated. As I have already said in my last post that I was experimenting with an Ebonizing solution and I would like to share my findings. The solution is as easy as breathing to set up, there are two parts which make up the process, firstly there is the Tea, this is a standard tea mix and either loose or tea bags can be used. My made my Tea using 4 x Teabags put into an old coffee jar and hot water from the tap, this was then set aside to brew giving an occasional shake up. The Ebonizer is a solution made from Distilled White Malt Vinegar and fine Wire Wool, place a good quantity of the wire wool into a jar and fill with the Vinegar, after a couple of hours bubbles start to form within the wire wool, this is the start of the chemical reaction, don't worry it's not explosive and although a gas is produced it's totally harmless. Set the solution to one side and forget for a couple of days. It is possible to speed the process up by removing the wire wool after a couple of days, place some old rags in an old ice cream tub and cover with paper, place the wire wool onto the paper and let it oxidise ( rust ). When a good covering of rust has formed replace the wire wool back into the solution and allow to steep for another five days or until the wire wool has disappeared. Your solution will now have become brown in colour, it is now ready for decanting, using the neck of a plastic bottle, another jar and a coffee filter, place the filter into the top of the plastic bottle and put it into the jar, pour the solution into the filter and allow to drain. Your Ebonizer is now ready to use but it will mature over the next few days. Depending on the amount of Tanning in the wood you want to stain you may have to soak the wood in the tea, if this is the case allow a day for the tea to soak in, remove and allow this to dry. To Ebonize the wood pour the solution into a tub and place the wood into it. The depth of colour depends on what you are after and the time left to soak, a longer soak will result in a darker colour. If you want an aged look to your wood just soak without the tea until you achieve the desired look. It is recommended that all work on the wood be completed before staining as the stain is very much on the surface, I'm now doing a check to see what the penetration is after a few days of soaking. I hope that you can understand the process and that my explanation is clear, if you have any questions please ask. I have a few pictures with my results. The first picture is of the solution after six days, the wire wool has all but disappeared Both the Tea and Ebonizer with some examples Samples, the three pieces on the left have not been soaked in tea and the Tanning is quite low Far Left to Right= Lime, Walnut and finally Swiss Pear. Second Part, the three samples on the right have been soaked in tea so the Tanning is higher Far Right to Left= Lime, Walnut and finally Swiss Pear. The next picture is Swiss Pear after about a four hour soak, very little penetration. So there we are, an alternative to Ebony, some experimentation on your part will be required to meet your needs. The finer the Wire Wool the better it melts and it can be washed in soapy water to remove it's preservatives to also help to speed up the process. I will pass on my result for the long soak when their ready. Give it a go gents, it's safer than using Ebony and you'll be helping safe the planet. Be Good
- 129 replies
-
- 14
-
-
- armed launch
- panart
- (and 1 more)
-
My favourite bit of a build, riggings starting to look Peter. Be Good mobbsie
- 293 replies
-
- 1
-
-
- pickle
- caldercraft
- (and 1 more)
-
She's every part a veteran of the seas Frank, she's looking just like a dirty old scuz bucket that's in dire need of a home port and a complete re-fit. A proper old workhorse, well done my friend, just the effect you were after. Be Good mobbsie
-
Hey Grant, you aint bad at this boat building thingy are ya. With so many firsts in this build you must be so pleased with the outcome so-far. She's looking absolutely great, crisp and clean, a real super job. Looking forward to your next up-date mate. Be Good mobbsie
- 456 replies
-
- 7
-
-
- finished
- bomb ketch
- (and 2 more)
-
Hi Mark You must be so pleased to see her from a different perspective. The colour of the hull is beautiful mate. Here's hoping that both Janet and you enjoy the NY celebrations and my very best wishes to you both. Be Good mobbsie
-
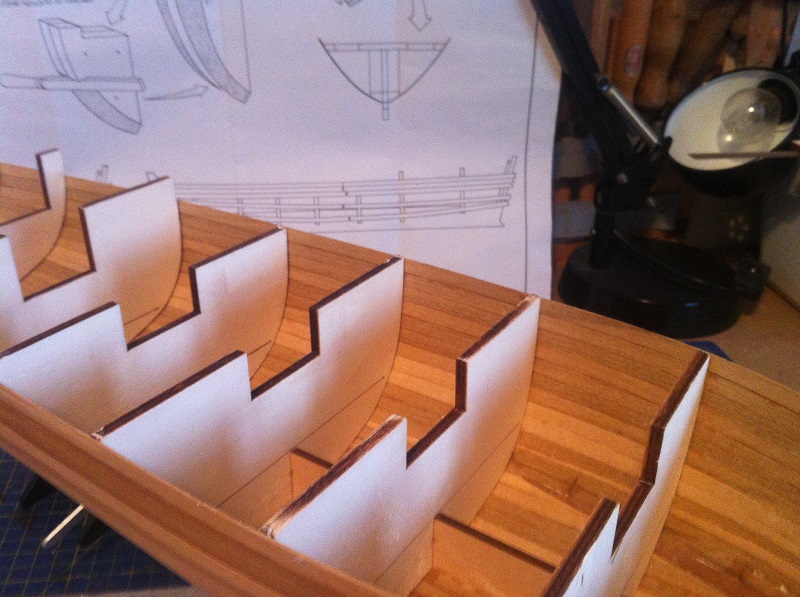
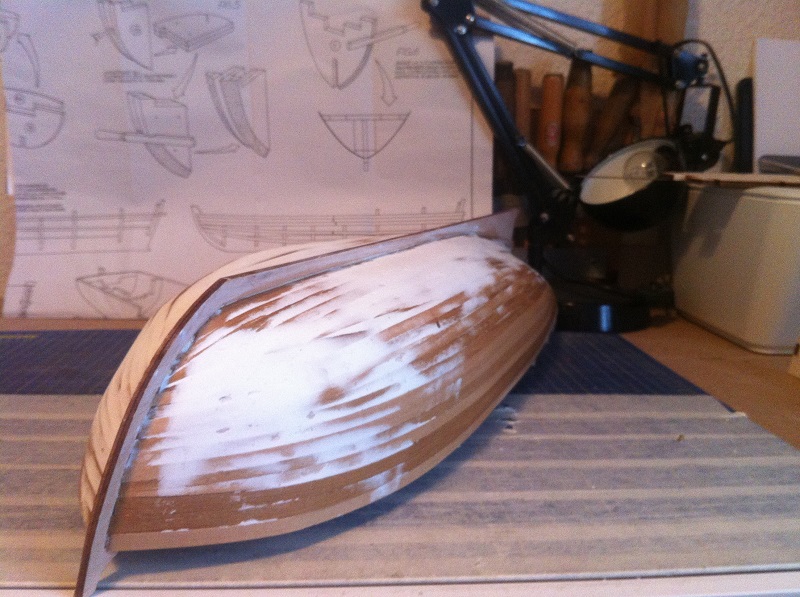
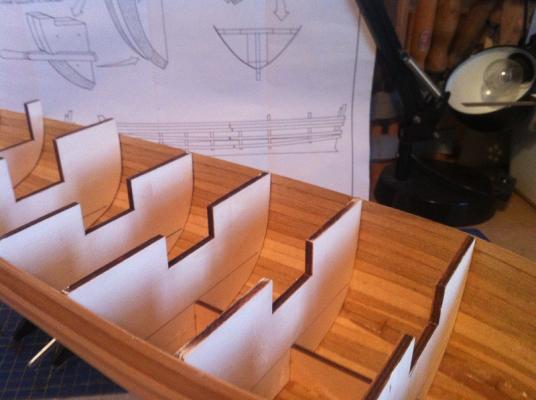
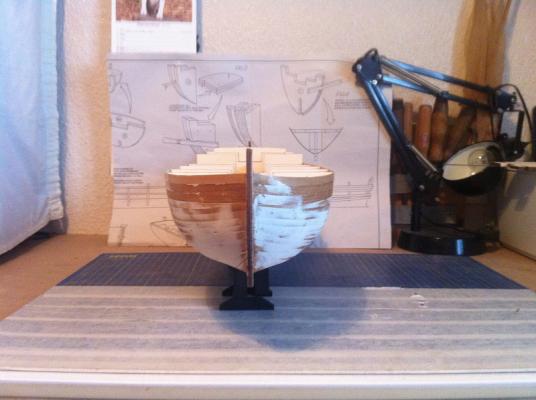
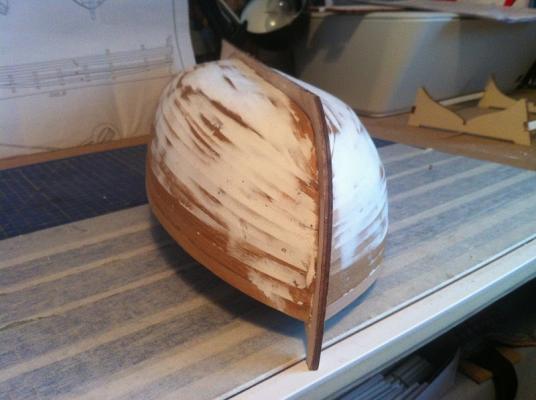
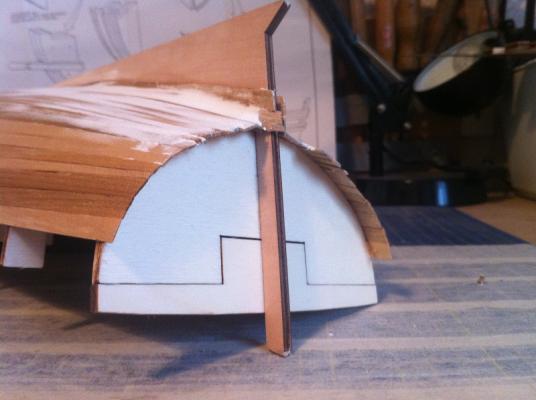
Hi Guys, Its been a while since my last post but thankfully the festivities are almost over and I am able to get back into it. All problems are solved on the domestic front, cars fixed, toilets working again, TV's all sorted so the boss is happy again and that makes me a happy chappie. Since my last post the first planking is now done, I didn't post any progress pics mainly because I was so embarrassed with the result, it honestly looked like a real dogs dinner with so many patches and fill-ins, believe me it was a mess. I have filled and sanded down and given a single coat of diluted PVA, so as far as the second planking is concerned and although it's only Lime I will be using it to practice on in readiness for the final planking which will be Swiss Pear. I am studying Keith Harris's tutorial on planking and am determined to get it right so Wayne, I'm coming your way. I was given a link into ebonizing wood by Grant and so am in the process of making up an experimental batch, I want the Sheer Rail to be Ebony and I want it in one piece, but as Ebony is the devil to try and bend and I would be trying to bend a 10mm x 4mm piece, it's not going to happen so an alternative is needed. OK, I have some pics, they are of the completed 1st planking with filler, except for inside the boat which will be in full view once the bulkheads are removed. As I have said guys, apologies for not posting progress shots. The first two pics are of the inside of the boat which as you can see is looking ok. Now we come to the dogs dinner, almost more filler than wood. So thats it for now, next job is to put a couple of rows of planking at the top and the Garboard planks then take a few measurements, my heads starting to hurt already. Sorry it's not much gents, hopefully it will get better. Be Good mobbsie


- 129 replies
-
- 16
-
-
- armed launch
- panart
- (and 1 more)
-
Hi Ken, These are all important lessons for me and my Armed Pinnace. Regarding the bending of planks, I also use some old curling tongs the wife discarded, seems to work a treat. Keep it up mate, I'm watching. Be Good mobbsie
-
Hi John, I like your idea on the base mate, definitely different and as you say will have a nice flow about it. It will certainly fit in nicely with the Morgan. Well done John, you certainly have a ship to be proud of. Be Good mobbsie
- 2,250 replies
-
- 4
-
-
- model shipways
- Charles W Morgan
- (and 1 more)