

minimini
-
Posts
56 -
Joined
-
Last visited
Reputation Activity
-
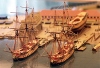
 minimini reacted to EdT in Young America 1853 by EdT - FINISHED - 1:96 - POB - extreme clipper
Young America 1853 – POB 1:96
Part 16 – Garboard Strake
The planking of the lower hull begins at the keel with the installation of the garboard strake, heavy (7” X 18”) members, bolted through the deadwood and edge bolted into the keel. At the ends of the ship the garboard strake is expanded into two strakes to begin the upward sheer of the bottom planking and to further strengthen to narrow deadwood at these points.
In the first picture the aft section of the garboard has been fitted against the post and is being marked for the insertion of the second strake “stealer”.
In the next picture the strake was cut to receive the second section and is being held in place to check the final fit..
This strake members were then glued in place as shown below and over the entire length of the hull with a similar joint for a second strake at the bow.
Because this strake twists to fay against the curving hull, a lot of clamps were needed. The next picture shows the aft section after the piece of second strake was installed.
I did not use dark glue for any of the hull planking since the intention is to paint and sheath the hull later. Hard maple was used for all of this planking.
The last picture shows the forward part of the garboard, with the joint lines emphasized on the image to show the configuration.
In this picture, it can be seen that the line of the rabbet runs just aft of the joint line between the stem and false stem.
Note that in the last two pictures the garboard thins down to match the depth of the rabbet in the stem and sternpost. The garboard was, of course, installed on both sides of the hull at this stage. Since it is intended to sheath this lower hull, I did not install any of the bolts, as I would have done on the fully framed version – if I had installed the garboard on that model.
Above the garboard, the planking thickness drops to 4”. The beginning of that work will be shown in the next part.
Ed
-
 minimini got a reaction from GrandpaPhil in HDMS FREYA 1789 by minimini - scale 1:48 - 40-gun Danish frigate
Hi all
just a few pic.
Michael
-
 minimini got a reaction from Erebus and Terror in HDMS FREYA 1789 by minimini - scale 1:48 - 40-gun Danish frigate
Hi all
this will be my attempt to start a build log for my model of the 40 gun danish frigate FREYA as build in 1789
She was Designed by the Ernst Wilhelm Stibolt and was one of 4 frigate that he build between 1789 - 1795
most of her career under the Danish flag, she was used on convoy duty.and on july 25 1800 she was escort for a convoy of six merchant ships. when she was stopped by four English frigates in the English Channel. The captain
opposed the referral of the convoy in compliance with its orders.
Freya had with its 40 guns no chance against the English 130. and after 30 min. The captain chose to strike the flag
but she was given back later that year.and on Sep. 7th 1807 she was Captured along with the rest of the Danish fleet
Michael
-
minimini reacted to Gaetan Bordeleau in Le Fleuron by Gaetan Bordeleau - FINISHED - 1:24
Here are the pictures I would have enter in a 2015 Contest ; but I forgot to enter.
I took what they considered weak points in the 2013 Contest and turned it in strong points:
CONSTRUCTION D’UN MODÈLE D’UN VAISSEAU DE 74 CANONS FRANÇAIS À BREST EN 1780 POUR L’INSTRUCTION DES GARDES DE LA MARINE SELON LES ORDONNANCES NAVALES
You will enter in an Innotive approach for the construction of this 1/24 scale model, 8 feet long. This bigger scale made possible the discovery of new opportunities and provided another layer in Hull construction techniques. Here are some words of wisdom from the Great Master Builder SJSoane : « All details should be considered in light of the overall artistic effect of the model as a whole. Building the details helped me understand how these ships were made, and how the parts functioned » Underline part is similar in essence to what Jean Boudriot said about when determining the shape of the rail that in a sense the shape had no specific shape but it must perfectly blend with the whole model when making the main, middle and lower rail.
New scale means new problems : How to bend ½’’ of ebony? You must cut it from blocks. The model weighs 125 pounds. How do you adjust the working height of the model? Quite easily in fact, with an electric modified dental chair.
Bigger scale means larger wood grain. Cherry wood is a good example at 1/24 scale. When carefully selected, nice wood grain patterns appears. Woods for this build are also chosen for their color. The rarest wood used is Bocote. Other than his distinctive nutty odor when cutting it, this wood quickly darkens in presence of air. On the model, outside planking above the wales shows this wood as if it has been aged for 100 years. No paint is use, only Tung oil, a finer oil than linen seed, clearer with no deposit. Whenever greater aged look is required, natural Bitumen in powder is added.
This work was inspired by ‘’Naval Ordonnances’’ for Marine Guards in Brest, France. It is intended to be built as an instructionnal model, which could be use by Naval officers to teach the aspiring officers. Instructions were grouped in 2 categories : Masting and Rigging, the standard methods according the ship size and category. For this build, the other category was deeply explored : Hull construction is unique for each ship according to his own decorations and sculptures. Big cares are taken to build the inside and it would be a shame not to show it. Decks are left open as much as possible to facilitate inside looks.
Port side is left open to show the double framing structure. Cannons are installed on 1 side only, so that construction methods can be emphasies the other side. Oversized recoil pulleys, standard french navy procedure, increasing the diameter to reduce the number of men required.
-
minimini reacted to mtaylor in Licorne 1755 by mtaylor - 3/16" scale - French Frigate - from Hahn plans - Version 2.0 - TERMINATED
A minor milepost in the overall build but a major one for me...
Six strakes have been added and to check how the tuck planking went, I taped the sternpost into position and took a few extra shots. Roughly sanded (sorry about the sawdust) and there's some gaps need filling. Overall, I'm feeling pretty good at this point. At the stern area, I'm off by about 3" (scale) which could be tolerance buildup or one side was of the transoms was off by that much. I'm thinking it has more to do with some tolerance buildup and the angle the planks came into tuck. The bow is about 2" (scale) off.
I do like the way the lines are shaping up with planking.
I need to re-mark off the hull and re-check the measurements and then do a few more strakes before putting the garboard back on. And sand, sand, sand.... <cough><cough>: Luckily the air filter system I've added to the workshop is doing it's job.
Comments, questions, abuse is always allowed. Ok.. maybe not the abuse part...
-
minimini got a reaction from GrandpaPhil in HDMS FREYA 1789 by minimini - scale 1:48 - 40-gun Danish frigate
finished with the first two layers of paint on the starboard wall
Michael
-
 minimini got a reaction from aykutansin in HDMS FREYA 1789 by minimini - scale 1:48 - 40-gun Danish frigate
finished with the first two layers of paint on the starboard wall
Michael
-
 minimini got a reaction from tadheus in HDMS FREYA 1789 by minimini - scale 1:48 - 40-gun Danish frigate
finished with the first two layers of paint on the starboard wall
Michael
-
 minimini got a reaction from Mirabell61 in HDMS FREYA 1789 by minimini - scale 1:48 - 40-gun Danish frigate
finished with the first two layers of paint on the starboard wall
Michael
-
 minimini got a reaction from Tadeusz43 in HDMS FREYA 1789 by minimini - scale 1:48 - 40-gun Danish frigate
finished with the first two layers of paint on the starboard wall
Michael
-
minimini got a reaction from GrandpaPhil in HDMS FREYA 1789 by minimini - scale 1:48 - 40-gun Danish frigate
Hi all
I think it's time for a little update on the HDMS FREYA. the main wall on the starboard side is finished , but it took a few attempts before I it was done rigth.
the first time I used the wrong wood ( boxwood not E-beech ) and it was the wrong size to. 6.5mm x 3mm and not the 7 x 3.2mm that I need.
but it has now been corrected
Michael
-
 minimini got a reaction from dvm27 in HDMS FREYA 1789 by minimini - scale 1:48 - 40-gun Danish frigate
finished with the first two layers of paint on the starboard wall
Michael
-
 minimini got a reaction from Fam in HDMS FREYA 1789 by minimini - scale 1:48 - 40-gun Danish frigate
finished with the first two layers of paint on the starboard wall
Michael
-
 minimini got a reaction from paulsutcliffe in HDMS FREYA 1789 by minimini - scale 1:48 - 40-gun Danish frigate
finished with the first two layers of paint on the starboard wall
Michael
-
 minimini got a reaction from druxey in HDMS FREYA 1789 by minimini - scale 1:48 - 40-gun Danish frigate
Hi all
I think it's time for a little update on the HDMS FREYA. the main wall on the starboard side is finished , but it took a few attempts before I it was done rigth.
the first time I used the wrong wood ( boxwood not E-beech ) and it was the wrong size to. 6.5mm x 3mm and not the 7 x 3.2mm that I need.
but it has now been corrected
Michael
-
 minimini got a reaction from Bobstrake in HDMS FREYA 1789 by minimini - scale 1:48 - 40-gun Danish frigate
finished with the first two layers of paint on the starboard wall
Michael
-
 minimini got a reaction from archjofo in HDMS FREYA 1789 by minimini - scale 1:48 - 40-gun Danish frigate
finished with the first two layers of paint on the starboard wall
Michael
-
 minimini got a reaction from mtaylor in HDMS FREYA 1789 by minimini - scale 1:48 - 40-gun Danish frigate
Hi all
I think it's time for a little update on the HDMS FREYA. the main wall on the starboard side is finished , but it took a few attempts before I it was done rigth.
the first time I used the wrong wood ( boxwood not E-beech ) and it was the wrong size to. 6.5mm x 3mm and not the 7 x 3.2mm that I need.
but it has now been corrected
Michael
-
 minimini got a reaction from GuntherMT in HDMS FREYA 1789 by minimini - scale 1:48 - 40-gun Danish frigate
Hi all
I think it's time for a little update on the HDMS FREYA. the main wall on the starboard side is finished , but it took a few attempts before I it was done rigth.
the first time I used the wrong wood ( boxwood not E-beech ) and it was the wrong size to. 6.5mm x 3mm and not the 7 x 3.2mm that I need.
but it has now been corrected
Michael
-
 minimini got a reaction from RichardG in HDMS FREYA 1789 by minimini - scale 1:48 - 40-gun Danish frigate
Hi all
I think it's time for a little update on the HDMS FREYA. the main wall on the starboard side is finished , but it took a few attempts before I it was done rigth.
the first time I used the wrong wood ( boxwood not E-beech ) and it was the wrong size to. 6.5mm x 3mm and not the 7 x 3.2mm that I need.
but it has now been corrected
Michael
-
minimini got a reaction from GrandpaPhil in HDMS FREYA 1789 by minimini - scale 1:48 - 40-gun Danish frigate
Hi All
so on to the main wale,decided to nail a strip of wood on the hull to get the run of the wale, next I will glue 2 out of the 3 rows of 7 x 3 mm on. I do the third one after I rebuilt a few of the gun port.
Michael
-
 minimini got a reaction from JohnE in HDMS FREYA 1789 by minimini - scale 1:48 - 40-gun Danish frigate
Hi all
I think it's time for a little update on the HDMS FREYA. the main wall on the starboard side is finished , but it took a few attempts before I it was done rigth.
the first time I used the wrong wood ( boxwood not E-beech ) and it was the wrong size to. 6.5mm x 3mm and not the 7 x 3.2mm that I need.
but it has now been corrected
Michael
-
minimini got a reaction from Fam in HDMS FREYA 1789 by minimini - scale 1:48 - 40-gun Danish frigate
Hi All
so on to the main wale,decided to nail a strip of wood on the hull to get the run of the wale, next I will glue 2 out of the 3 rows of 7 x 3 mm on. I do the third one after I rebuilt a few of the gun port.
Michael
-
minimini got a reaction from GrandpaPhil in HDMS FREYA 1789 by minimini - scale 1:48 - 40-gun Danish frigate
Hi All
the stern start getting its shape, next is to sand the wing transom and the top filling pieces and when I'm done with that , I think I will plank the lower counter.
Michael
-
minimini reacted to Chuck in HM Cutter Cheerful 1806 by Chuck - FINISHED - 1:48 scale - kit prototype
Thanks,
Today I started making the coamings for the hatch gratings. There are three, but only two need coamings. The main hatch is shown here. The second smaller grating will be just aft of the windlass.
The gratings were made using the Syren grating kits with camber already built in them.
Then the coamings were built up around the finished gratings. Too often I see folks build the coaming following the plans and then when it comes time to add the grating it wont fit. Sometimes you end up with holes along the coaming or have to shave down the grating too much to fit it into the coaming. By building the coaming around a finished grating I wont have this issue. Now my grating may end up being a hair larger or smaller than the plans but that is less important than having it look correct. We are talking about maybe .025" larger or smaller...thats acceptable.
The coamings were made with the usual lap joints. Note the fore and aft sides have a roundup. These coamings are 1/4" high. Others will be less and not as thick...they are all different but for the two gratings the coamings are 1/4" high x 3/32" thick. But dont forget that the planking will go around them so only 3/16' will be above the planked deck.
Then a right angle jig was used to round off the corners except for what will be the bottom 1/16". The jig is 1/16" thick which will be the same thickness as the planking. I added a strip inside the coaming on the port and starboard sides to create a lip to support the grating as well.
To finish it off I softened the hard corners all around the top edge of the coaming. I may or may not paint the coaming red and leave the grating bright. But I dont know yet. I have seen Cutter models done both ways. There will be a lot of other deck fittings painted red so I dont want to go overboard... . Tomorrow I will make the coaming for the smaller grating behind the windlass.
Chuck