
HOLIDAY DONATION DRIVE - SUPPORT MSW - DO YOUR PART TO KEEP THIS GREAT FORUM GOING! (Only 24 donations so far out of 49,000 members - C'mon guys!)
×


bogeygolpher
-
Posts
107 -
Joined
-
Last visited
Content Type
Profiles
Forums
Gallery
Events
Everything posted by bogeygolpher
-
Floyd, I have used strips for two models and they are thin enough that you can overlap them. If doing that. you want to leave one of the edges (top or bottom) smooth so you won't have rivets on rivets when applied. I personally did not like the look because I was not able to overlap the plate beside as those seams are simulated except at the ends of the tape run.. Another thing is I have found it easier to use strips no longer than about four plates long. Any longer than that and it became unruly and hard to manage on the curves. I like the look and as is pointed out it obviates the need for using CA which I try to minimize at all costs. That's not a purist reference, just my discomfort working with it. Further, the adhesive on the tape is quite good but one needs to be careful at the edges of the hull as any mishaps might pull the tape away. To prevent that, I did use a small bit of CA along the outside edges. Which ever method one chooses make sure you get a protective coating on as soon as possible unless you want the tarnished look.
-
Hamilton, I suggest you use the web site Steve provided. Be prepared to wait a while for replacement parts from them. They will eventually ship them to Model Expo who will forward them to you. On the Model Expo site you will find this information under their warranty/guarantee information.
-
marking water line
bogeygolpher replied to ross's topic in Painting, finishing and weathering products and techniques
Lisa, I have successfully used what is called "Chart Pack Tape" for the waterline. You can find it on-line and in most office supply stores. It comes in a myriad of colors and sizes. The 1/16" white is what I used on the Bluenose II. After painting the colors above and below the waterline I applied the tape exactly on the waterline and covered it with clear lacquer. That was almost 25 years ago and I have never had to replace the tape, it remains as white as when I put it on. Trying to mask a consistent 1/16" spacing all the way around the ship I consider to be a daunting, if not just about impossible, task. That's what lead to this solution. Of course, I'm always looking for easier methods. Building ships is complicated enough without trying to find ways to make it more difficult. Good luck. -
Rope Diameter-USS Constitution
bogeygolpher replied to Jamey39MI's topic in Masting, rigging and sails
You might be interested in this link that provides the specs for a lot of the materials purchased for the restoration of the Constitution in 1993 - 1995. The rope specs are quite a ways down the page but there none the less. Theses are obviously real sizes not scaled. I'm not sure it is specific enough for your effort. http://www.maritime.org/conf/conf-otton-mat.htm You might also want to look at this which might be closer to what you are looking for http://www.digitalhemp.com/eecdrom/HTML/EMP/02/ECH02_18.HTM -
Is that the Testors enamel or one of their other brands? It looks great.
-
Bend cast metal parts
bogeygolpher replied to bogeygolpher's topic in Metal Work, Soldering and Metal Fittings
Isn't this typical? You ask about something and it almost always leads to something else. Thank you for your answers to my question. I tried the heating thing and it did not work. I do not think I got it hot enough in the oven or in the hot water because it still snapped. To be honest, I'm not sure exactly what these castings are made of, and if it contains any lead I really do not want to raise the temperature to the melting point. So I may have wimped out in getting enough heat on the castings to be able to bend them. What I still do not understand is how the castings (railing posts) got bent in the first place without breaking. I guess it really doesn't matter because the fact is they are bent. That said, the suggestion to make resin copies intrigues me and seems to be a great solution. I found the resin materials are available from the hobby store or on-line. What do you use to make the mold, and are there any other tricks one should know if attempting this? Is there a how to on this process somewhere? Thanks again. -
Does anyone have any suggestions on how to bend cast metal parts? Whenever I have tried in the past to either bend them or straighten them I managed to break them and then had to make substitutes, usually out of wood because I am much more comfortable working with wood than metal. I hope I am using the correct terminology when I say cast metal. I am referring to the white metal parts supplied in most kits that usually have a little bit of flashing on them and are quite brittle. Thanks in advance.
-
I agree that normal seizing is really an issue in scale. I use a common pin to make the loops and merely tie the rope/thread secured with a touch of CA to hold it. Away from the block wrap a piece of thread around a common pin, tie it and place a spot of glue on the knot then remove the pin. Run the ends of the thread down each side of the block and secure the thread to the block on the sides using CA. At the end of the block wrap both ends around a common pin, tie the ends pulling the common pin to the end of the block, and secure with a spot of CA then remove the pin and trim the excess thread. It is actually harder to explain than it is to do. Good luck.
-
I have never considered it. All of my ships are double planked and I figure that after applying two layers of planking using PVA it is highly unlikely that anything is going to move. I also try to make sure that the second layer of planking staggers over the seams in the first layer. I build kits and after gluing the bulkheads in place the next thing I do is install the deck to ensure the keel remains straight and rigid while planking. Doing that makes it almost impossible to put any coating on the inside of the hull once the first planking has been completed. My first ship was built over 20 years ago and there is not even so much as a hairline crack anywhere in the hull.
-
Based on my experience it is much more important that the bulkhead fit correctly at the deck (upper) level. The outside edges of the bulkheads will either be reduced or have materiel added in order to true the hull prior to planking.
-
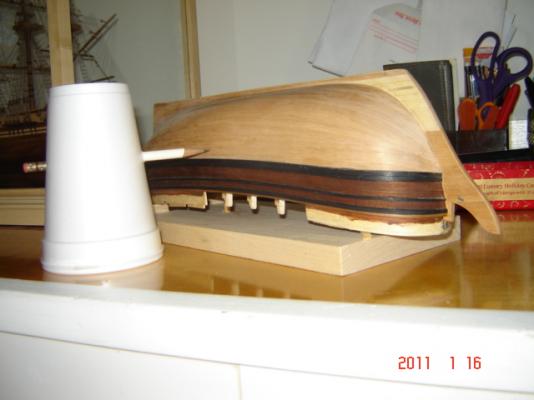
Chuck, Certainly not expensive, and the base (board) the ship is setting on was also used for the planking. I actually found it easier to do the planking with the ship in this position. There are dowels placed into the base jig that fit into the mast holes in the deck to hold the ship in place. I also used wedges of scrap wood glued to the base jig to level the ship all around. Without any difficulty I could take the ship off of the base jig and put it back on as needed. It worked very well but I have to admit that standing on my head for extended periods was a bit tedious..
-
Another option.
-
The problem, as you are fully aware, is the glue gets down into the grain of the wood. Once the pores of the wood are clogged with glue, the stain will not be able to penetrate it. You might get lucky and be able to get it off with sanding or using steel wool but if it really sunk into the wood you will have to resort to other methods. You may be able to get rid of it using nail polish remover for the CA or water for PVA. I use a Q-tip or cotton ball and apply a little at a time. Dab it on and let it sit for a little bit, then try to remove the glue with a dry Q-tip or cotton ball. You may have to repeat this a number of times. Another option is to use a gel stain. Gel stains are almost the same as painting in that most of the stain sits on the surface rather than penetrate the wood. It is much easier to get a uniform finish with them. As to preventing it, I use PVA for my planking and use CA instead of clamps or pins as is suggested by Mastini in Ship Modeling Simplified. I put a very small drop of CA on the end of the plank, then a few inches of PVA on the plank, then using a sewing needle I place another very small drop of CA followed by another few inches of PVA, etc. The CA holds the plank in place while the PVA cures and very little is required. I also wipe the surface of each plank with water after applying it to make sure I have removed any excess glue. However, as is obvious from my response, I too have shared the same malady as you and there is really no perfect resolution to the problem other than to try and minimize the occurrences and deal with them when it happens.
-
Absolutely no problem. For most of us building ship models required learning an entirely new set of terms. Welcome to the club.
-
The problem with this thread from the outset is that the title says "Bulwarks" yet the discussion seems to be about "bulkheads". 2 entirely different issues as I see it. Most Bulwarks do indeed bend to follow the shape of the deck in my experience. Therefore, whatever material is used needs to be able to bent. The opposite is true for bulkheads. You usually do not want that material bending, meaning plywood is a very good choice.
-
Gene's article covers all the methods I have seen used. Even when he inks the lines, note that he usually does it on an overlay, then glues that on the original deck. In all probability you will end up purchasing some additional lumber regardless of which method you choose. Good luck.
-
Glueing varnished wood
bogeygolpher replied to Spiff's topic in Building, Framing, Planking and plating a ships hull and deck
The clouded/frosted issue could be just one of the problems associated with using CA. CA has to be used sparingly (less is more), If used in excess it will leave you with the white cloudy/frosted problem. There are numerous references to this problem here in MSW. After trying to scrape the white away, without much success, I finally used de-bonder and took the joint apart, sanded it and started over using a small amount of CA (I applied it using a sewing needle) and it turned out just fine. As Brian C said, you need to remove the varnish where you intend to put glue, especially if using PVA. I have successfully used PVA on varnished surfaces if I took the time to scrape/sand the area prior to gluing. Applying any finish after gluing is preferred if possible. Enjoy -
Intro to Card Models Intro and Table of Contents
bogeygolpher replied to ccoyle's topic in Card and Paper Models
Thank you for developing this series. After having built 8 wooden ships I was looking for something different and started building card models last year and thoroughly enjoy it. The engineering and levels of detail are amazing. Further, being able to download files and print them at home is very convenient as well as providing a great means to correct errors. Make a mistake, re-print the part and start over. It was a task to find out information about techniques as well as materials. It will be nice to have that information available in one place. I look forward to your series. I went to the HMV site and noticed that their ship kits all seem to be in a scale of 1:250. Is that a standard scale for ships built with card? Paul. -
Richard, Sorry, my answer was completely out of line. You are asking about bulkheads and I'm thinking bulwarks. DUH! Indeed, you do want to use plywood for the bulkheads as was said because there is less chance of warping and because of multi-grain direction the plywood is much stronger. Most of the kits I have built used plywood for the middle part of the bulwarks and it was necessary to bend them to follow the contour of the ship. That is the basis for my incorrect answer. I'm getting close to where I will soon be able to hide my own Easter eggs.
-
If possible you might want to try to make a number of kerf cuts on the back side of the parts. Make the cuts parallel to each other about 1/16" apart cutting halfway through the thickness of the material. Then fill the cuts with PVA glue, place them between a few straight boards, and clamp them together (surround them with waxed paper to keep them from sticking to the straight boards) so they will remain flat. Leave them to dry overnight and when removed they should be straight and remain that way. The surface with the glue on it can be painted but not stained. I've used that method many times with models as well as when making furniture. Good luck.
-
Both very good answers. A disadvantage is that it tends to be difficult to bend. Soaking and steaming for bending causes the layers to de-laminate unless you are using outdoor grade plywood.. I have used basswood to make bulkheads by using thin pieces and laminating them together using a mold I built from scrap wood to achieve the desired curve.
-
Mike, I just completed the Corel Eagle and on three different occasions I had to contact Model Expo for missing or broken parts. If it had not been for the Model Expo guarantee I probably would not have finished the Eagle. They are fairly inexpensive kits for a reason. Good luck.
-
One final thought. Regardless of what you use to fill the areas, make sure you mask the surrounding area unless you intend to paint the surface. It really doeas not matter what you use for filler it needs to be confined to only the spot being filled. The filler material will get into the pores of the surrounding wood and you will have tremendous difficulty applying a uniform stain. Sanding will not help because the material will be in imbedded into the grain. If it cannot be prevented, I have found that using a gel stain will produce the best results. Gels do not absorb like liquids and using them is almost like painting on a finish.
-
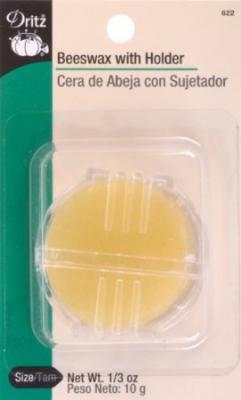
My wife gave me this and I have been using it for years. She had it in her sewing kit. Just run the line through one of the slots. Available in the sewing section. About $1
-
Slowing down the Dremel Rotary tool
bogeygolpher replied to JPett's topic in Modeling tools and Workshop Equipment
I use a Solid State Solder Iron Control to manage the speed of my Dremel 100.


