Check out our new MSW Sponsor Innocraftsman
×


captainbob
-
Posts
3,498 -
Joined
-
Last visited
Content Type
Profiles
Forums
Gallery
Events
Everything posted by captainbob
-
Great job. Without anything in the pictures to give scale, it looks like a 1:48 scale boat instead of 1:300. Bob
-
Thanks Carl and Mark. If I were modest I wouldn't even show what I build. The pictures are my way of bragging. Bob
- 348 replies
-
- 8
-

-
- pequot
- cable ship
- (and 1 more)
-
Model building is like all other arts in that it is a matter of, "now how do I make it as my mind sees it?" I so enjoy watching you go through this process and Know that what you finish with will be beautiful. Don't rush, it all takes time. Bob
-
Thanks Nils and Patrick, I've always enjoyed problem solving and as you both know model building has a lot of, "Now how do I do that?" When we come up with an Idea and it works . . . ah that's the joy fulfilled, and MSW lets us show it. Thanks again Bob
- 348 replies
-
- 8
-
-
- pequot
- cable ship
- (and 1 more)
-
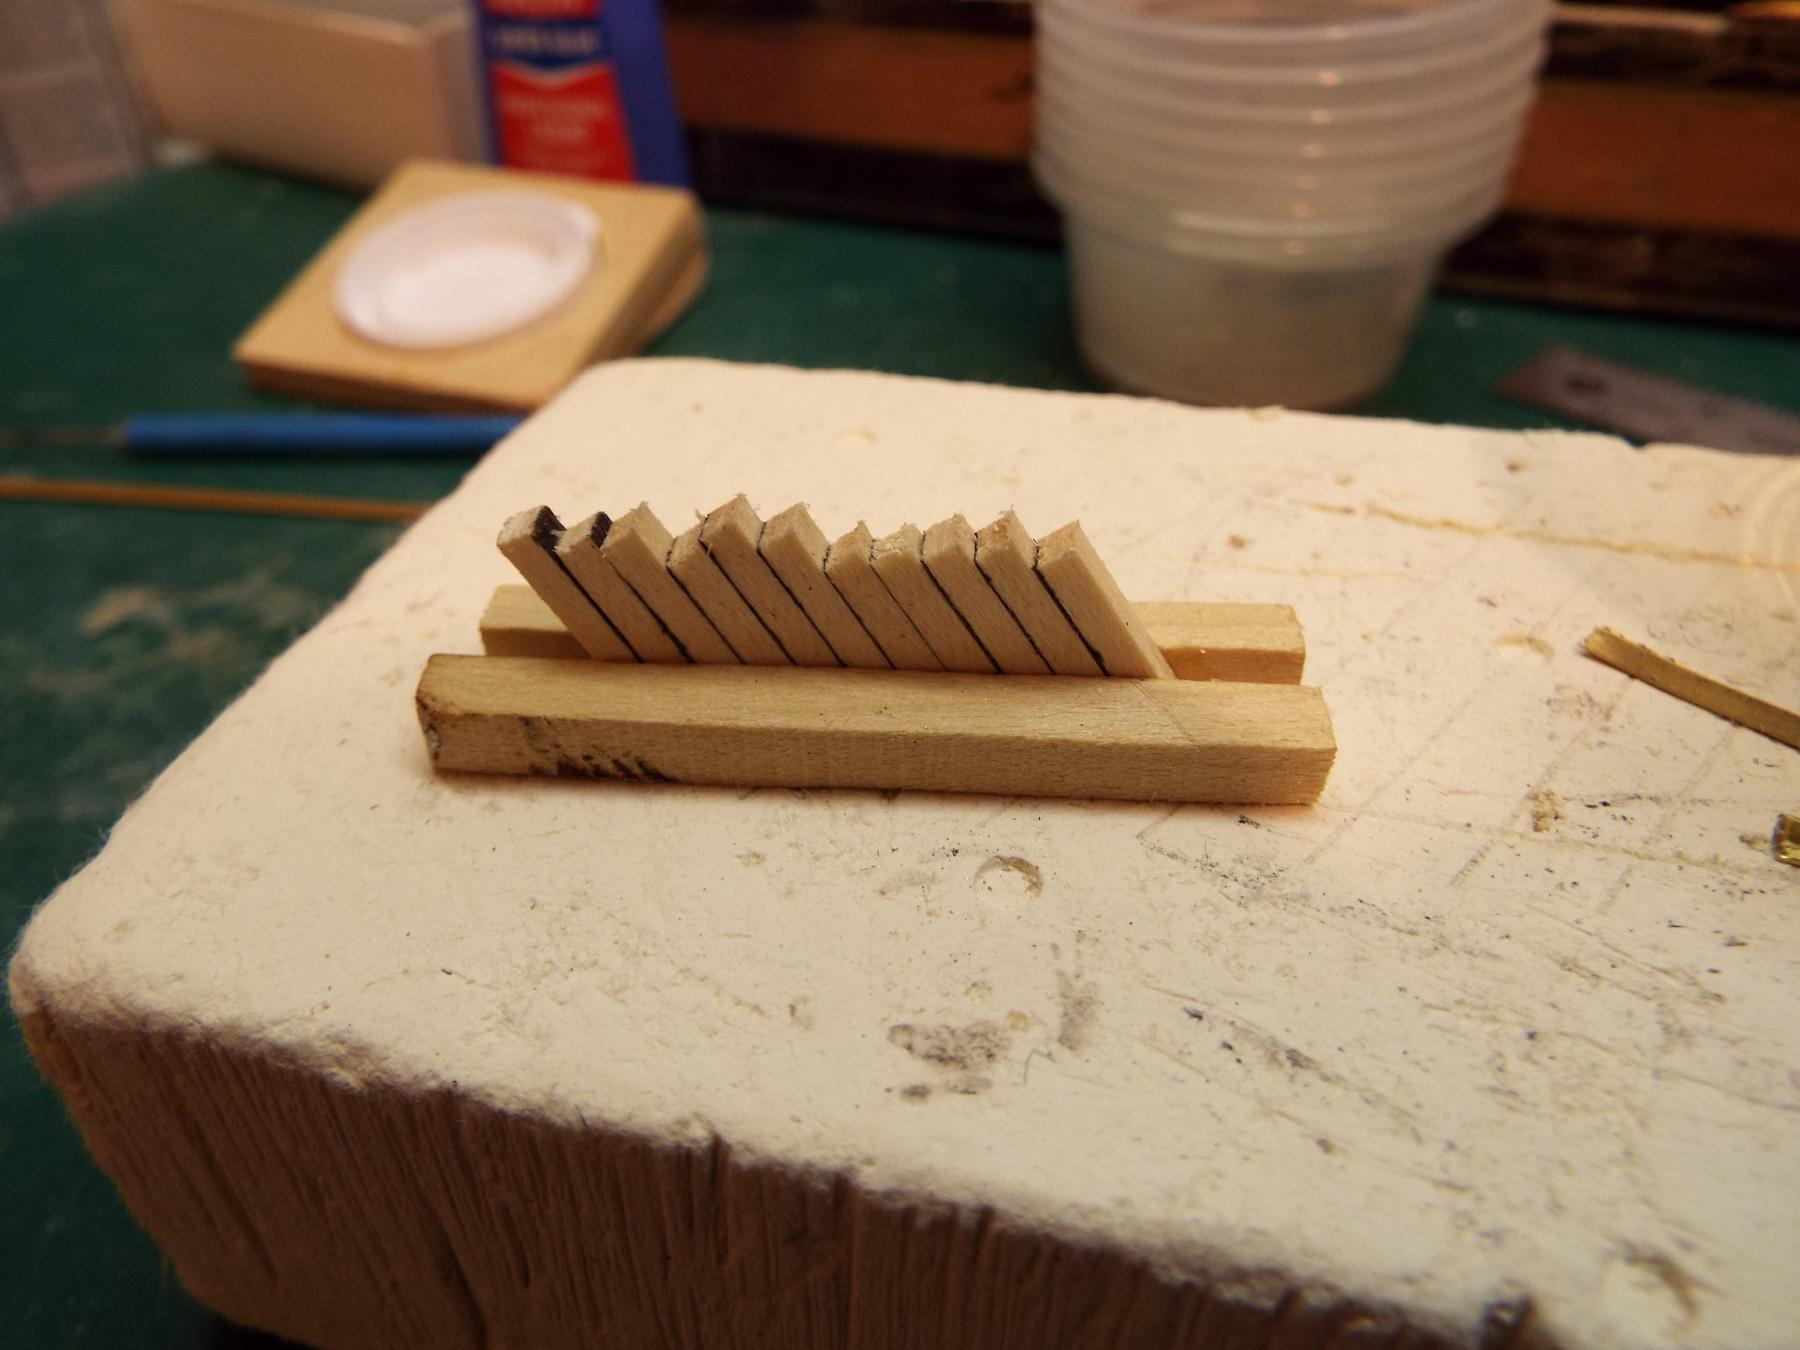
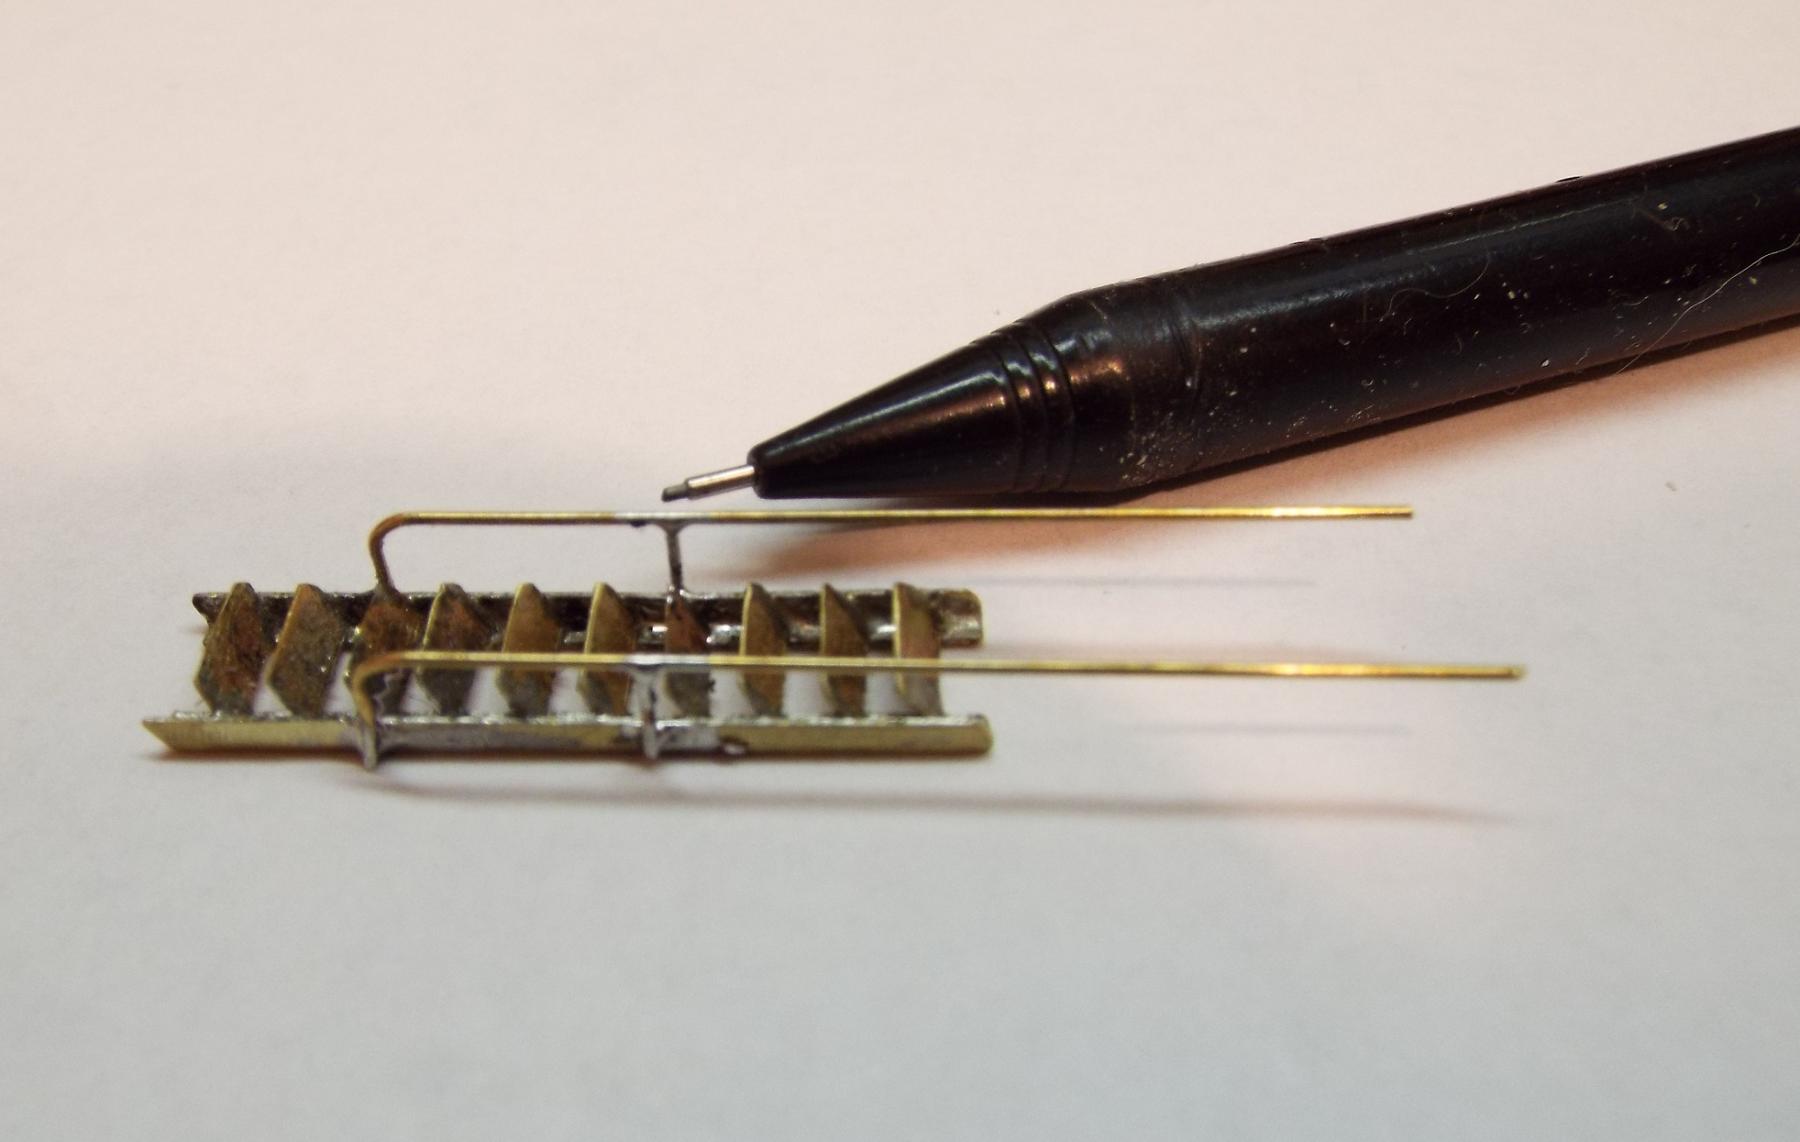
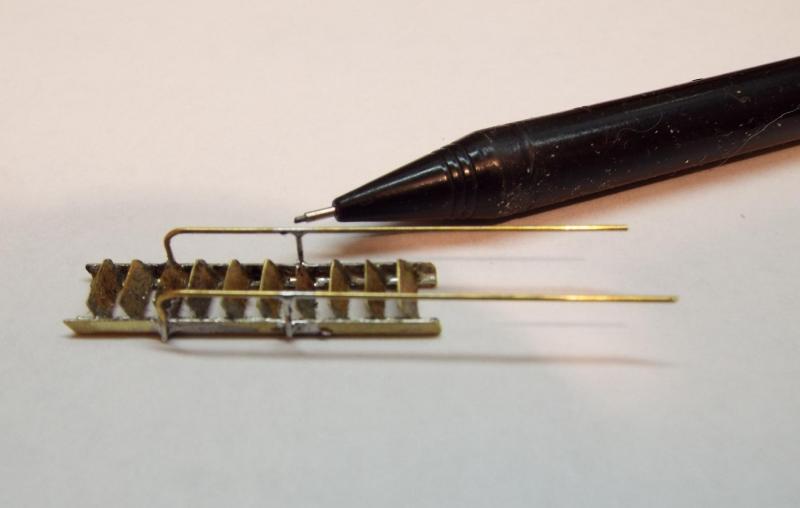
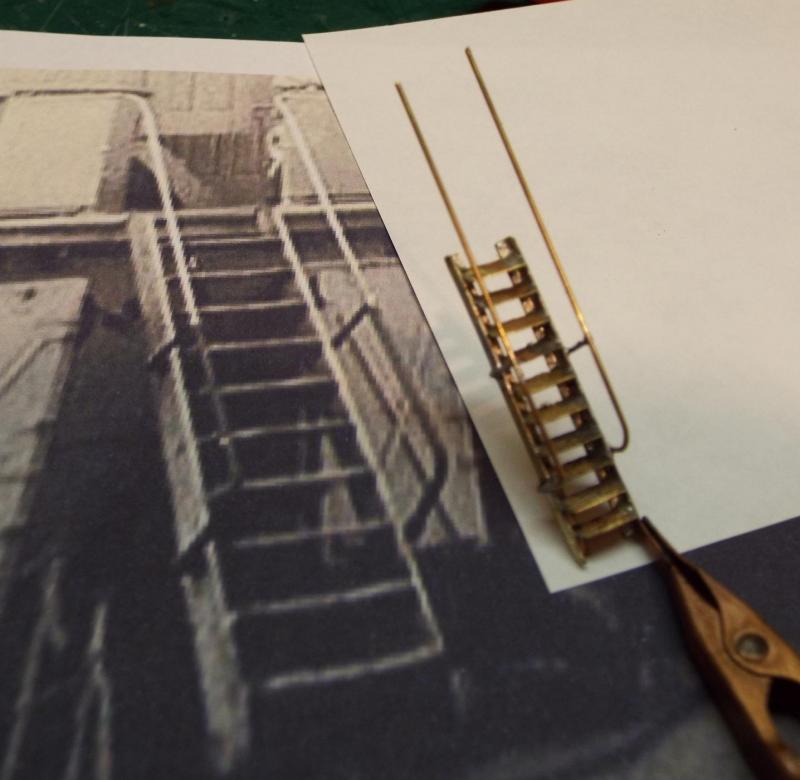
There’s a ladder that goes from the pilot house down to the main deck. I know that there are companies that make photo etched ladders but I don’t know which ones make good parts or how to order the one that I want. Then I would have to wait for it and hope it is the right size when it gets here. I’m just not up to that kind of stress. So I made my own. The photo I am following shows the ladder with ten treads. Measuring the model makes the treads .090 inch. So I sanded a 3/32 square strip down to .085 inch on one side. To make the fixture I used a .005” brass sheet as a spacer and glued the square strips between two supports. The treads were cut from the .005” sheet and squeezed into the fixture. The sides are 1/16” brass angle. Sorry I didn’t get a picture of the ladder mounted in the fixture. But here is a picture of the fixture and the a couple of the finished ladder. Bob

- 348 replies
-
- 19
-
-
- pequot
- cable ship
- (and 1 more)
-
Thanks Nils, Frank and Patrick. The stanchion ends will be inside but touching the white curbing. Bob
- 348 replies
-
- 6
-
-
- pequot
- cable ship
- (and 1 more)
-
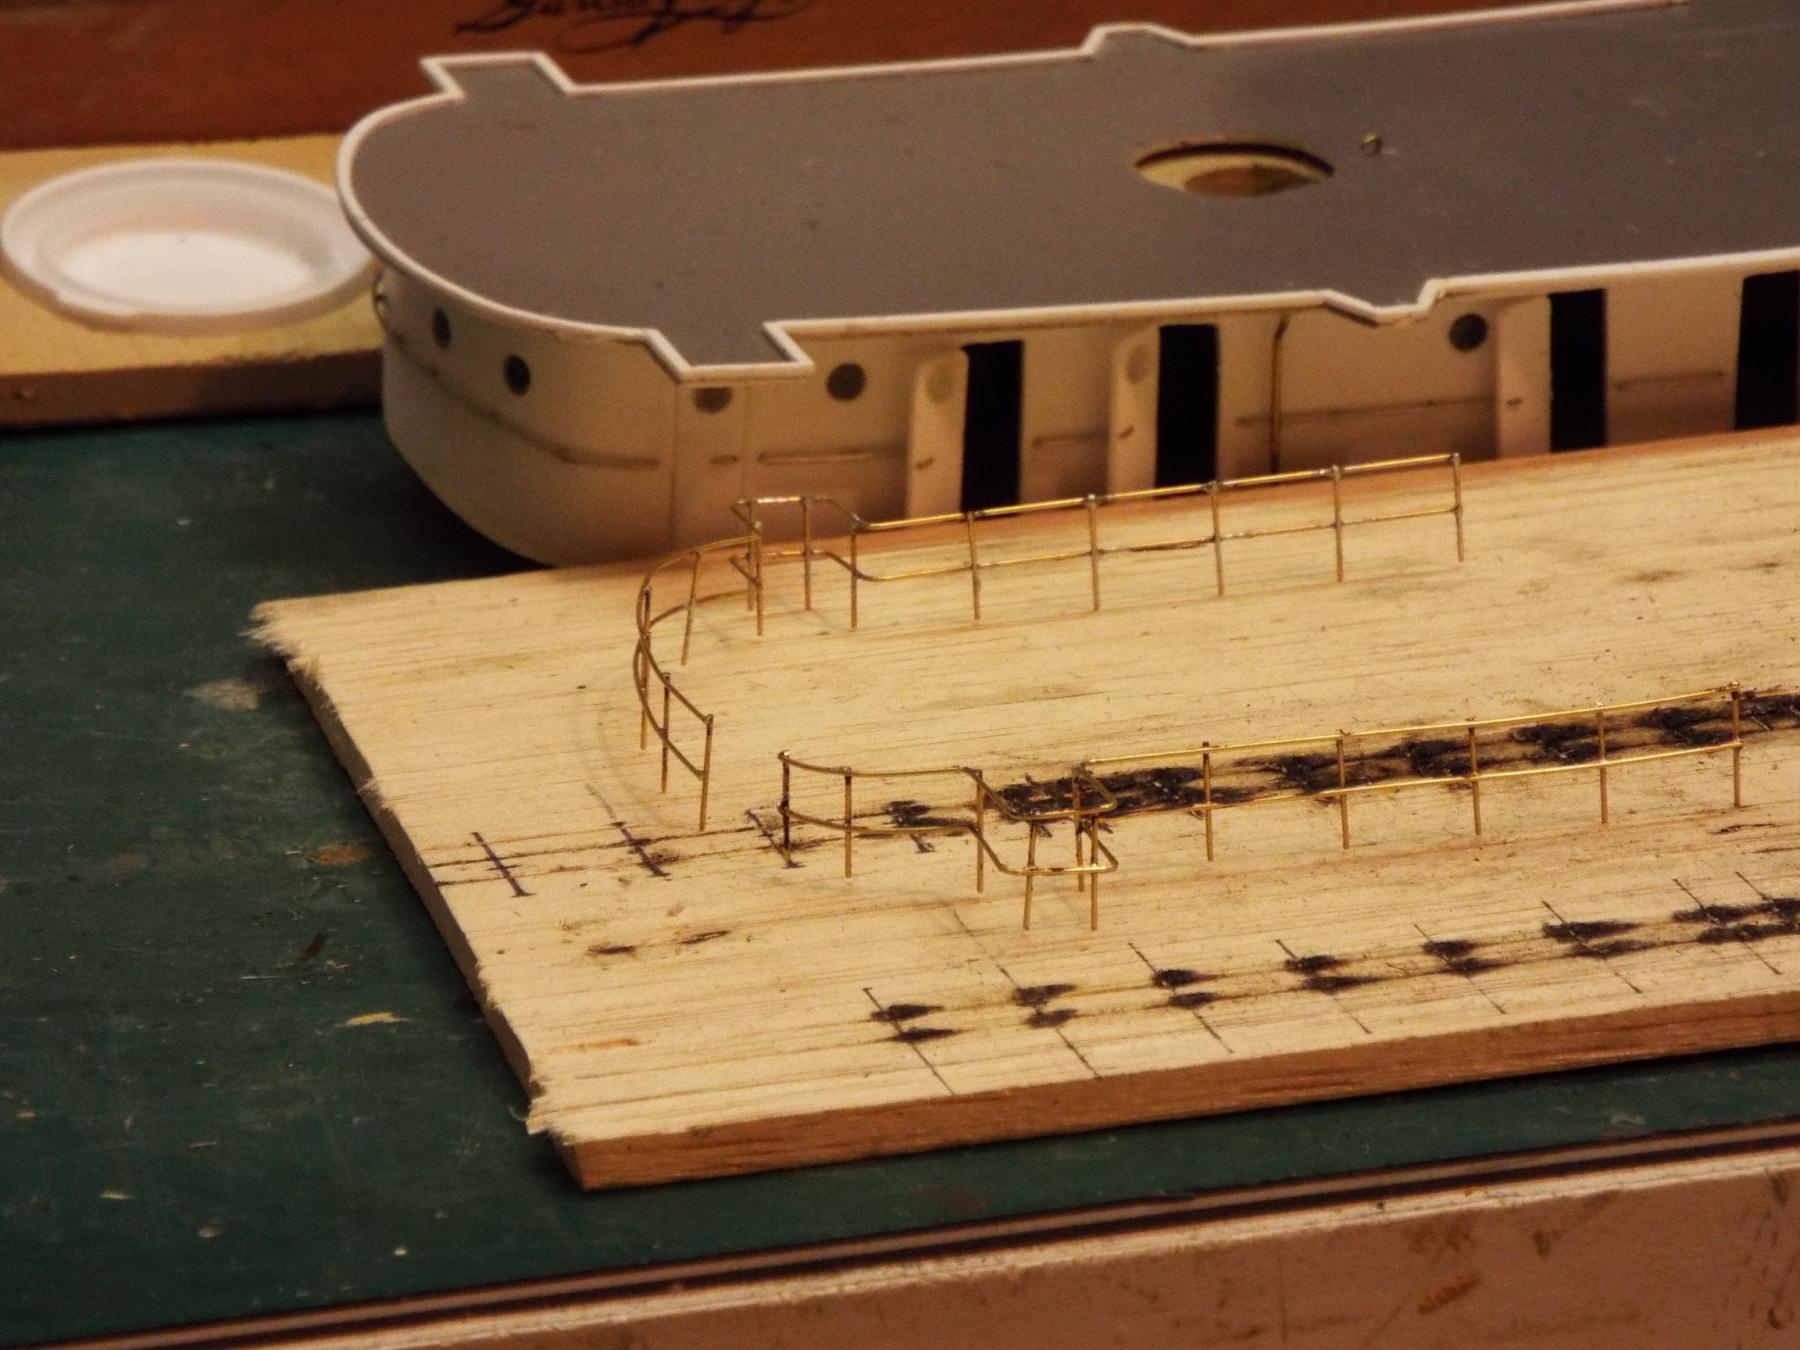
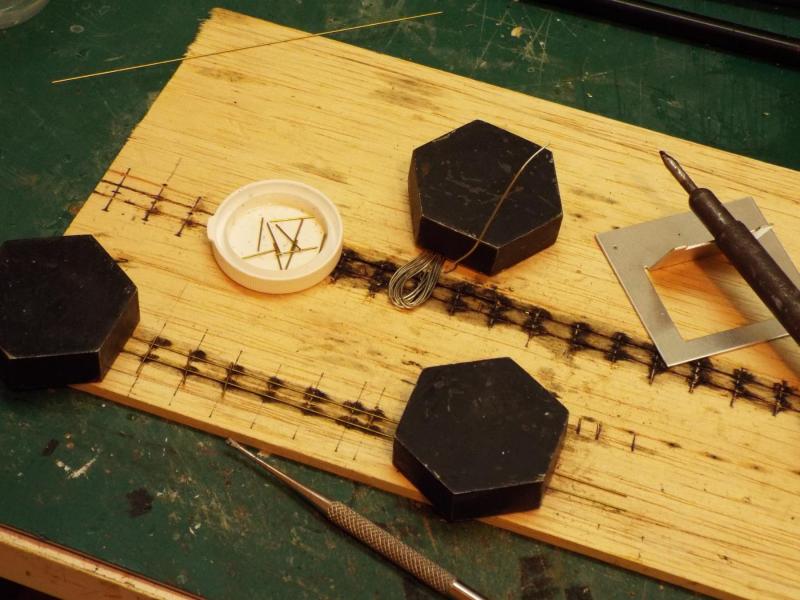
Well here I am again. I’ve been working on the railings for the upper deck. I made them from .020” (.05mm) brass wire, 2” (50mm) scale. You can see in the pictures the sheet of balsa I used to solder on. Using a straight edge I scribed two grooves in the balsa to hold the long pieces parallel. I cut the stanchions to .5” (12mm) and put them in a container with liquid flux. I then wiped the long pieces with flux. The solder was placed on the board and arranged so that the free end was in the air. I would touch the soldering iron to the solder to pick up a small amount. Then touch the joint until the solder flowed to both parts. I found early on that I needed something to hold the stanchion while soldering, I cut a .020” slot in the end of an old tool for the job. Now all I have to do is paint and mount them. Oh, yes. The new railings look so much better than those on the pilot house. I’ll have to redo those. Bob

- 348 replies
-
- 14
-
-
- pequot
- cable ship
- (and 1 more)
-
Just finished reading your build log. I love listening to your thought process as you go from one Idea to another. You are doing a wonderful job. Bob
-
It was done to improve the shape of the upper part of the sail to make the boat go faster. Bob
-
She's looking good, Frank. Thanks for all the pictures. Bob
- 649 replies
-
- 5
-
-
- dunbrody
- famine ship
- (and 2 more)
-
I put flux on the parts even though I'm using flux core solder. It seem to help. But like everything else soldering takes practice to make it look good. By the time you finish the eight inches the solder should look pretty good. Then you'll want to go back and redo the start. Bob
-
Oh boy, Popeye's going to do it again. What will happen to this poor little flattie? Bob
-
Thanks Lawrence, I'll need all the luck I can get. But if Patrick can do it on Majellan, . . . Well I hope I can. Bob
- 348 replies
-
- 8
-
-
- pequot
- cable ship
- (and 1 more)
-
Patrick, those props are great. What material are they made of? Usually, but not always, on twin prop boats/ships there is one clockwise and one counter clockwise prop arranged to turn up in the middle. So the clockwise prop would be on the starboard side. But like I say that is not always done. Bob
-
Frank, your work is outstanding and I know you are trying to build as accurately to the original as possible. I understand why, in today's world, the replica has safety rails around the hatches, but I wonder if the original ships had safety in mind when they were built. Bob
- 649 replies
-
- 4
-
-
- dunbrody
- famine ship
- (and 2 more)
-
At the time I asked the question I had not considered the beam of the boat. But if you have a great room in the center with a cabin on each side and then a walkway outside of that the boat would have to have at least a 28 feet wide beam and probably more like 32 feet minimum. What is the width of the Heroine? I find the length at 140 Feet but I have not found a measurement of the hull width. Bob
-
Nice demonstration. If you find a better blade let us know. Bob
- 553 replies
-
- 1
-
-
- sloop of war
- constellation
- (and 3 more)
-
Making Fire buckets
captainbob replied to steamschooner's topic in Metal Work, Soldering and Metal Fittings
That took some mighty creative thinking to come up with the method to build those buckets. Well done. Bob