Mike Y
-
Posts
1,543 -
Joined
-
Last visited
Content Type
Profiles
Forums
Gallery
Events
Everything posted by Mike Y
-
For a newbie, what is special in "Hahn method"? I read a number of build logs. it looks like any other admirality style model. Well, yes, you use a jig and start building upside down, but probably there is something else that I totally miss.
-
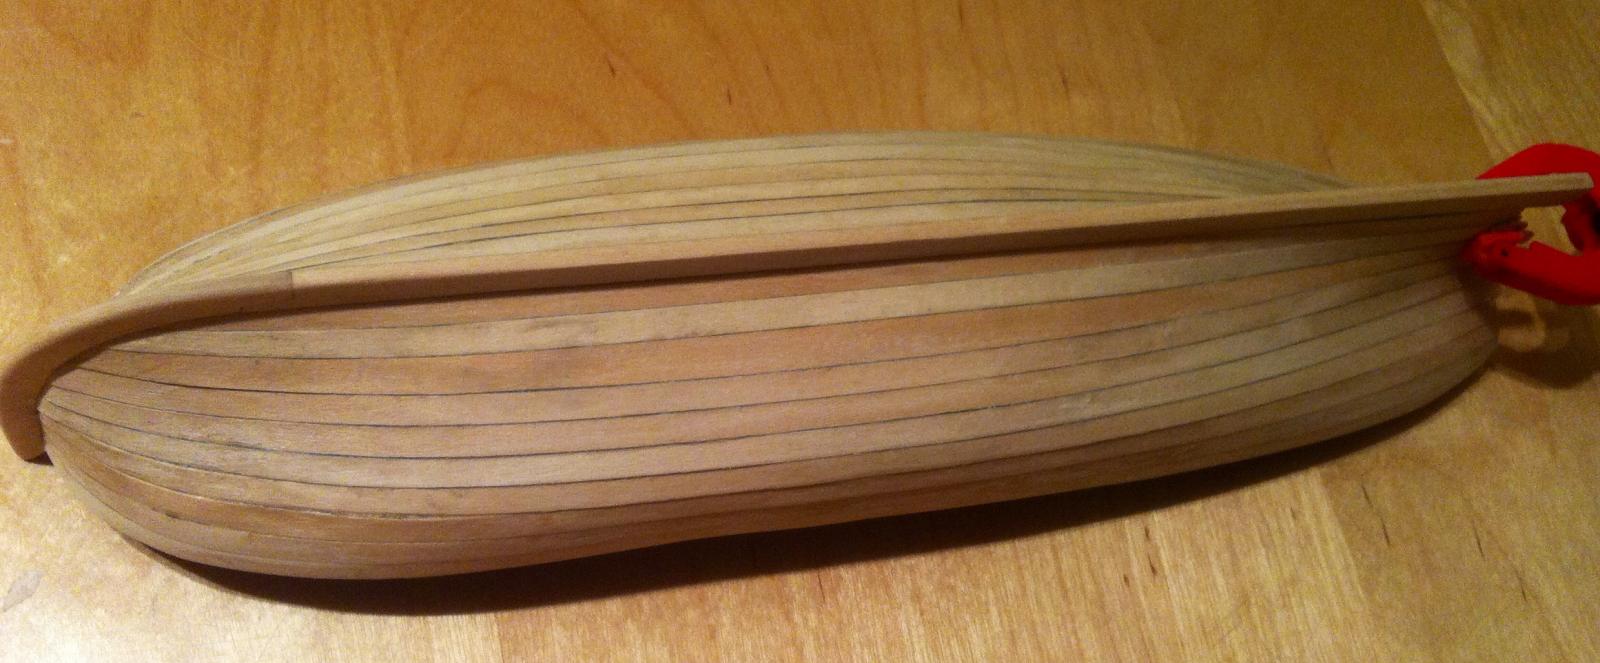
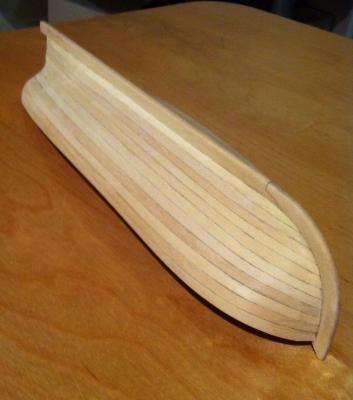
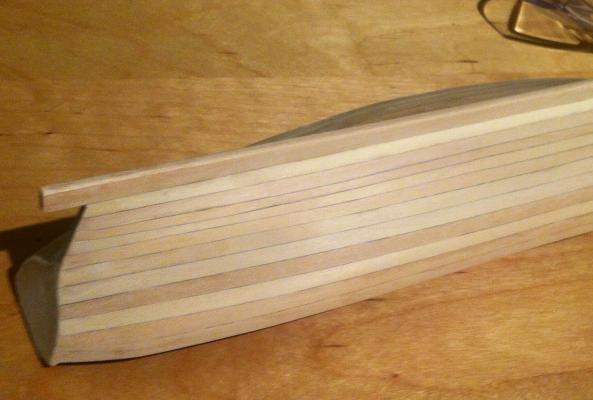
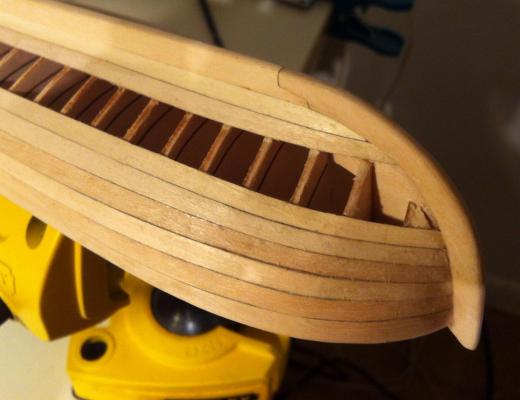
 Yahoo! Finished the hull planking! Looks ugly before sanding: (Yes, wood is of different color, no more basswood!) But much better after sanding: Final sanding would be done after a treenails imitation. Planks are quite thin, dont want to sand them too much Now it really feels like a boat!
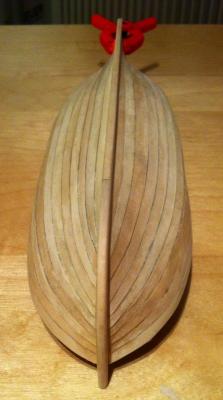

- 137 replies
-
- 8
-

-
- finished
- model shipways
- (and 1 more)
-
Installing final planks. Gaps for remaining plank have a bit different width, so on one side I will have two thin planks based on regular strips, and one other side - one plank made from a wider strip. Shaped that strip, bit after soaking it obviously become larger and do not fit into the gap anymore. Another illustration why one shoild never glue soaked planks :
- 137 replies
-
- 2
-
-
- finished
- model shipways
- (and 1 more)
-
Thanks, Chuck! Really looking forward for a hull "birth", when it would be sanded and frame fillers removed
-
Installed gardboard planks. That was quite easy, but more time-consuming then regular planks. Result on a "good" side: Gap for remaining planks is quite consistent, looks ok. And here is the other, "bad" side. Planks are overtapered on this side. The gap is widening closer to the front part of the hull. Will try to slowly fill it by a weirdly shaped remaining planks, let's see if it is fixable, or I will need to tear down the whole side of the ship and re-plank.
- 137 replies
-
- 5
-
-
- finished
- model shipways
- (and 1 more)
-
Jaha! Thanks!
-
By the way, what shop do you mean? I'm quite new in Stockholm, would appreciate any hints!I only know Materialbutiken on Södermalm, they have some wood and tools, but they are quite universal. Is there a better shop, more focused on modelling?
-
Hm, maybe we have a different defitions of "plywood". In my kit, shields are on a single-layer sheet of some wood, there is no other layers and no glue. They are quite thin, 1.5mm probably.
-
Sorry for interrupting, just to finish the discussions about various kit versions. Just got my BB720 kit, with wooden shields. That's what inside: Wooden shields, really nice one: Plywood bulkheads, plywood looks really low quality, but not warped. Let's see how it will behave: Bow decorations, they are laser burnt, really good quality, no burn marks. You can paint it any way you want.


-
You have the best Vasa build I ever saw! Jattebra! Well, maybe except a crazy guy who scratchbuilt Vasa using same technology as for original ship
-
Slowly moving, not sanding the hull yet (sonce planks are really small), so sorry for bad surface and glue stains. One side looks ok, while other side is too much bent. Was always trying to keep the hull symmetrical, but failed. Probably its not fixable, except replanking from the scratch. Any kind of stealer plank would be too visible. But now I gained a lot of experience how to plank it. Maybe strip it totally, remove all planks and plank with boxwood, because now I know how? Good side: Bad side:

- 137 replies
-
- 2
-
-
- finished
- model shipways
- (and 1 more)
-
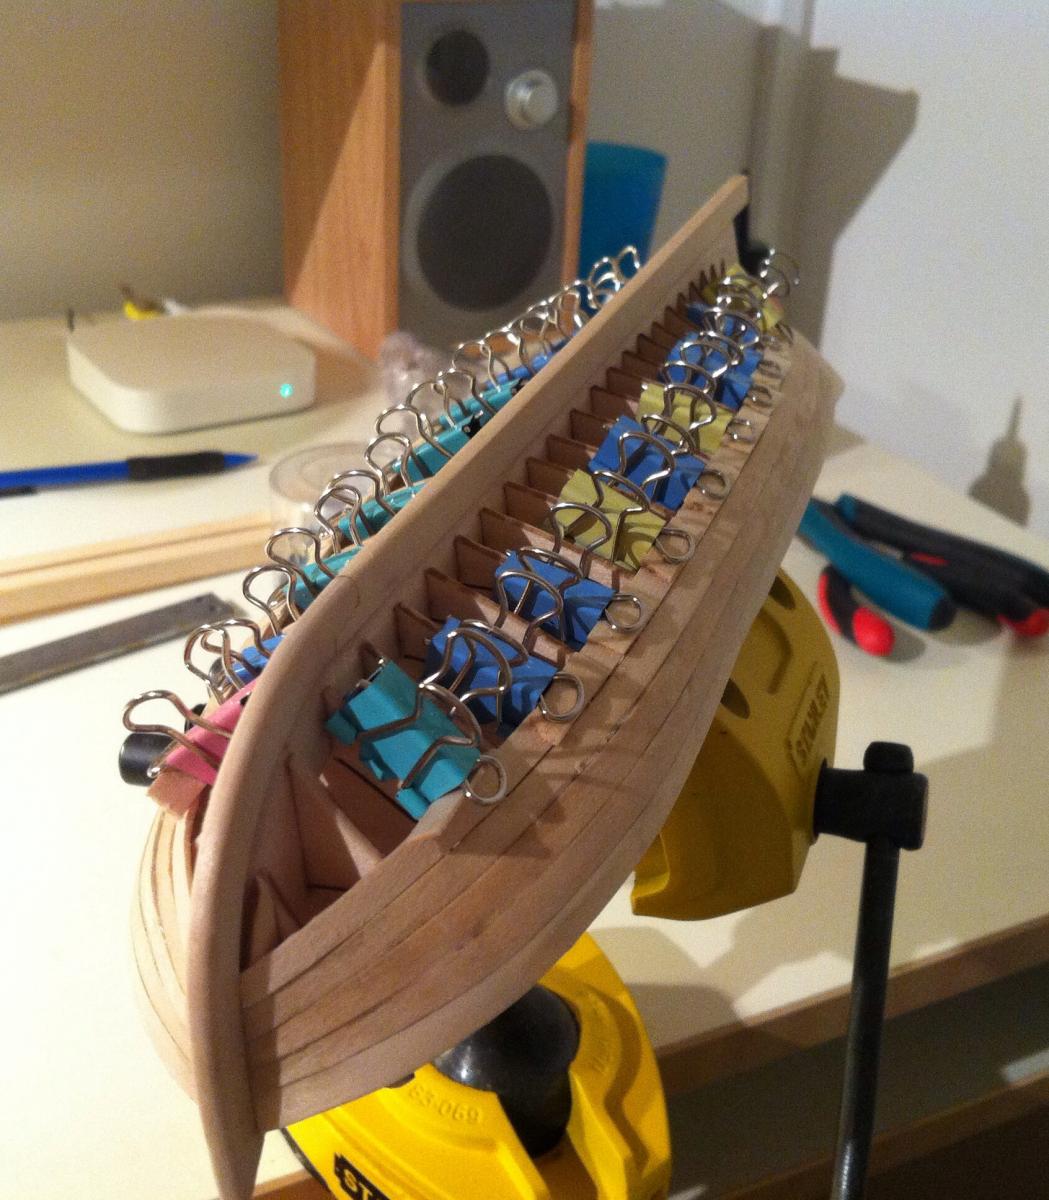
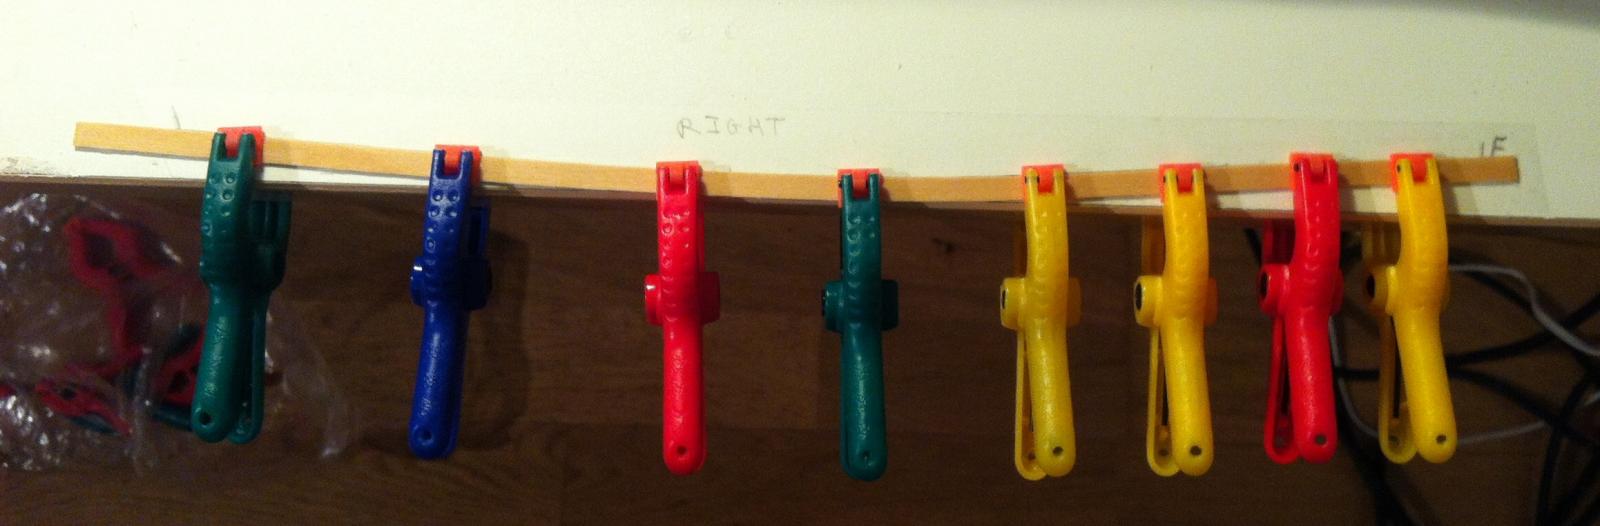
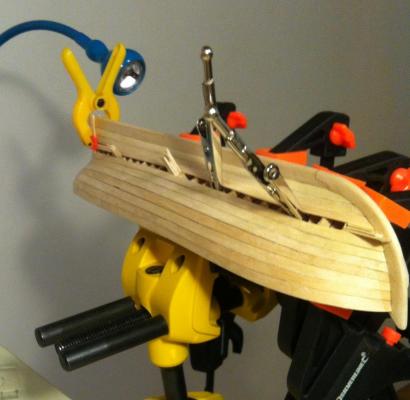
Now I dry fit soaked planks using a paper clips, they dry overnight, and next evening I glue them. One pair of planks per day, but turned out to be easier then bending and drying! Dont forget to put some scrapmpieces between the clip and the plank, otherwise it will leave an ugly traces. Soaked basswood is much softer then I thought

- 137 replies
-
- 4
-
-
- finished
- model shipways
- (and 1 more)
-
In a meanwhile, added a third planking level and made a base for a slipway-style model stand. It would be painted black and I will add some diagonal supports for the boat when the planking would be completed. Still not sure how that stand will look in reality, so maybe there would be a second iteration.

- 137 replies
-
- 9
-
-
- finished
- model shipways
- (and 1 more)
-
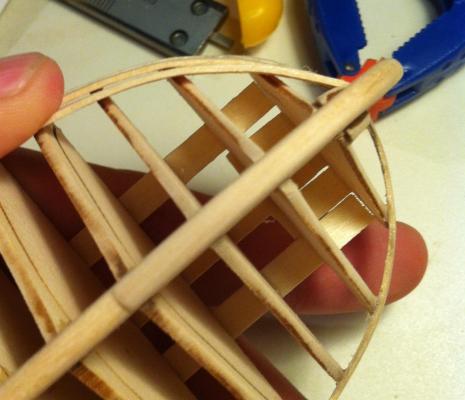
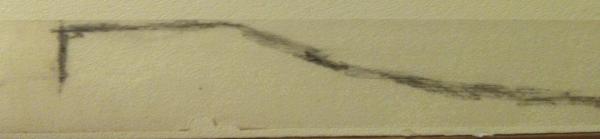
Don't mind a bit dirty hull, I will remove the glue traces and sand the hull later, when it would be completed. Also, thanks BobF for a nice way of making a plank bending templates - attach the sticky tape to the previous plank, paint the pencil line like you are simulating the caulking, bend the plank according to that template:


- 137 replies
-
- 5
-
-
- finished
- model shipways
- (and 1 more)
-
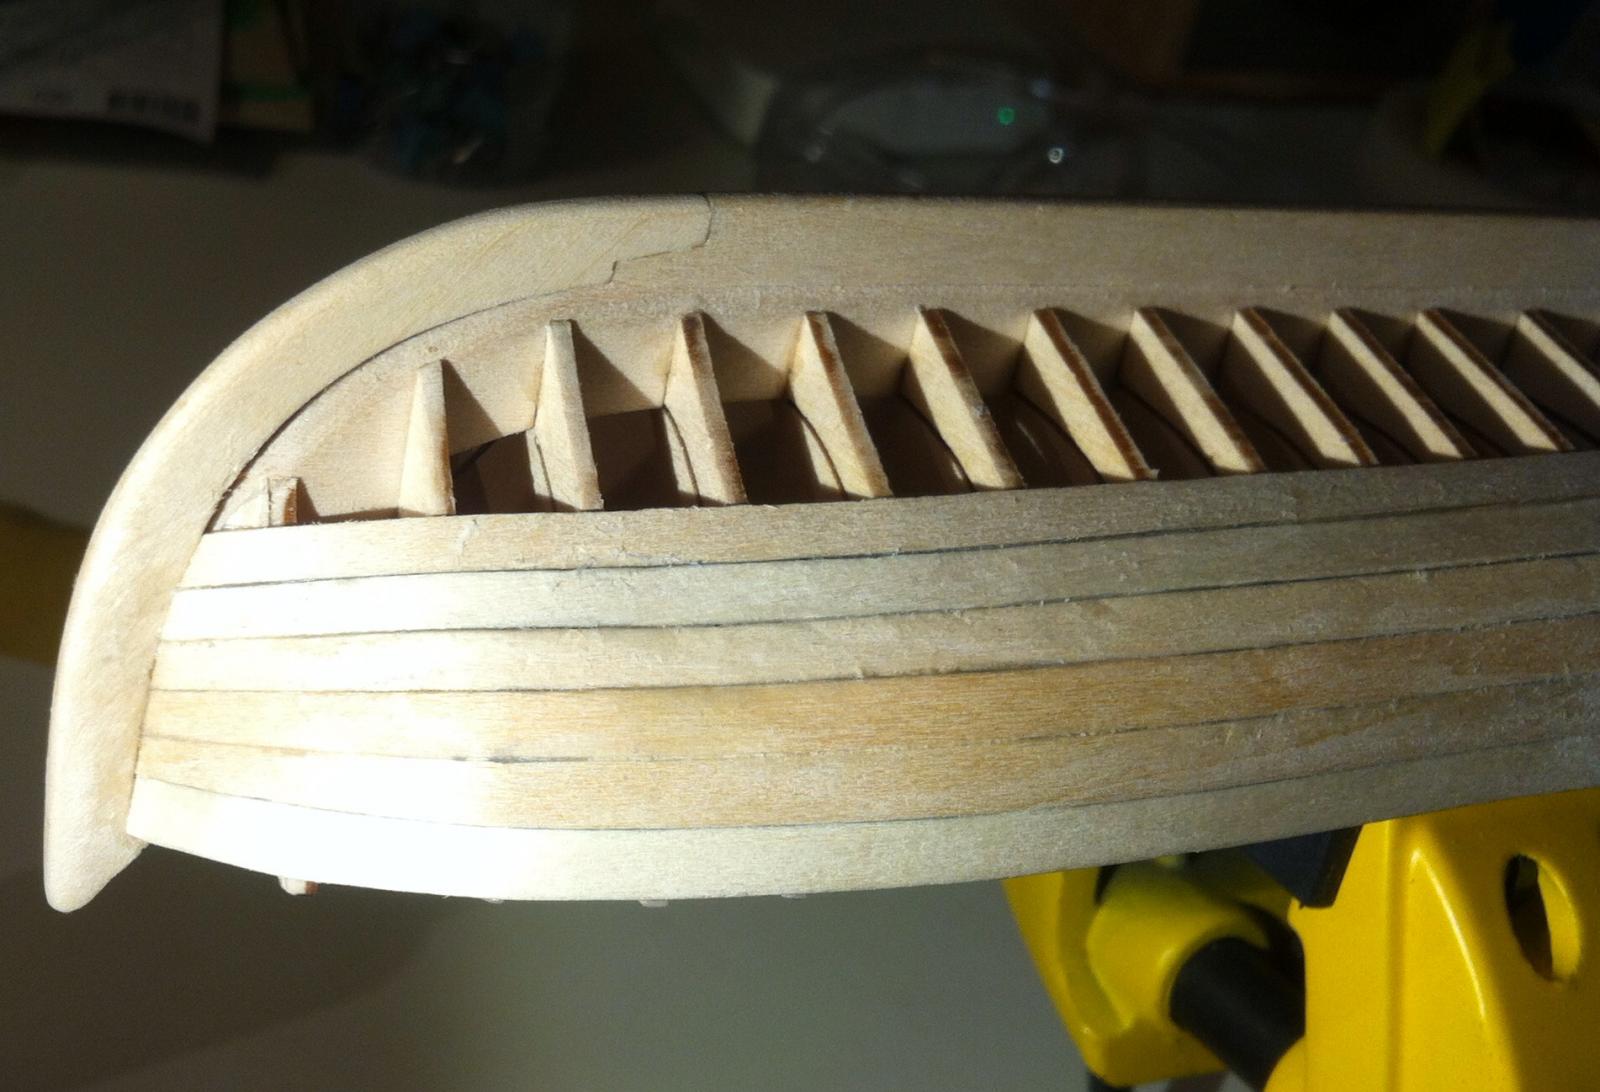
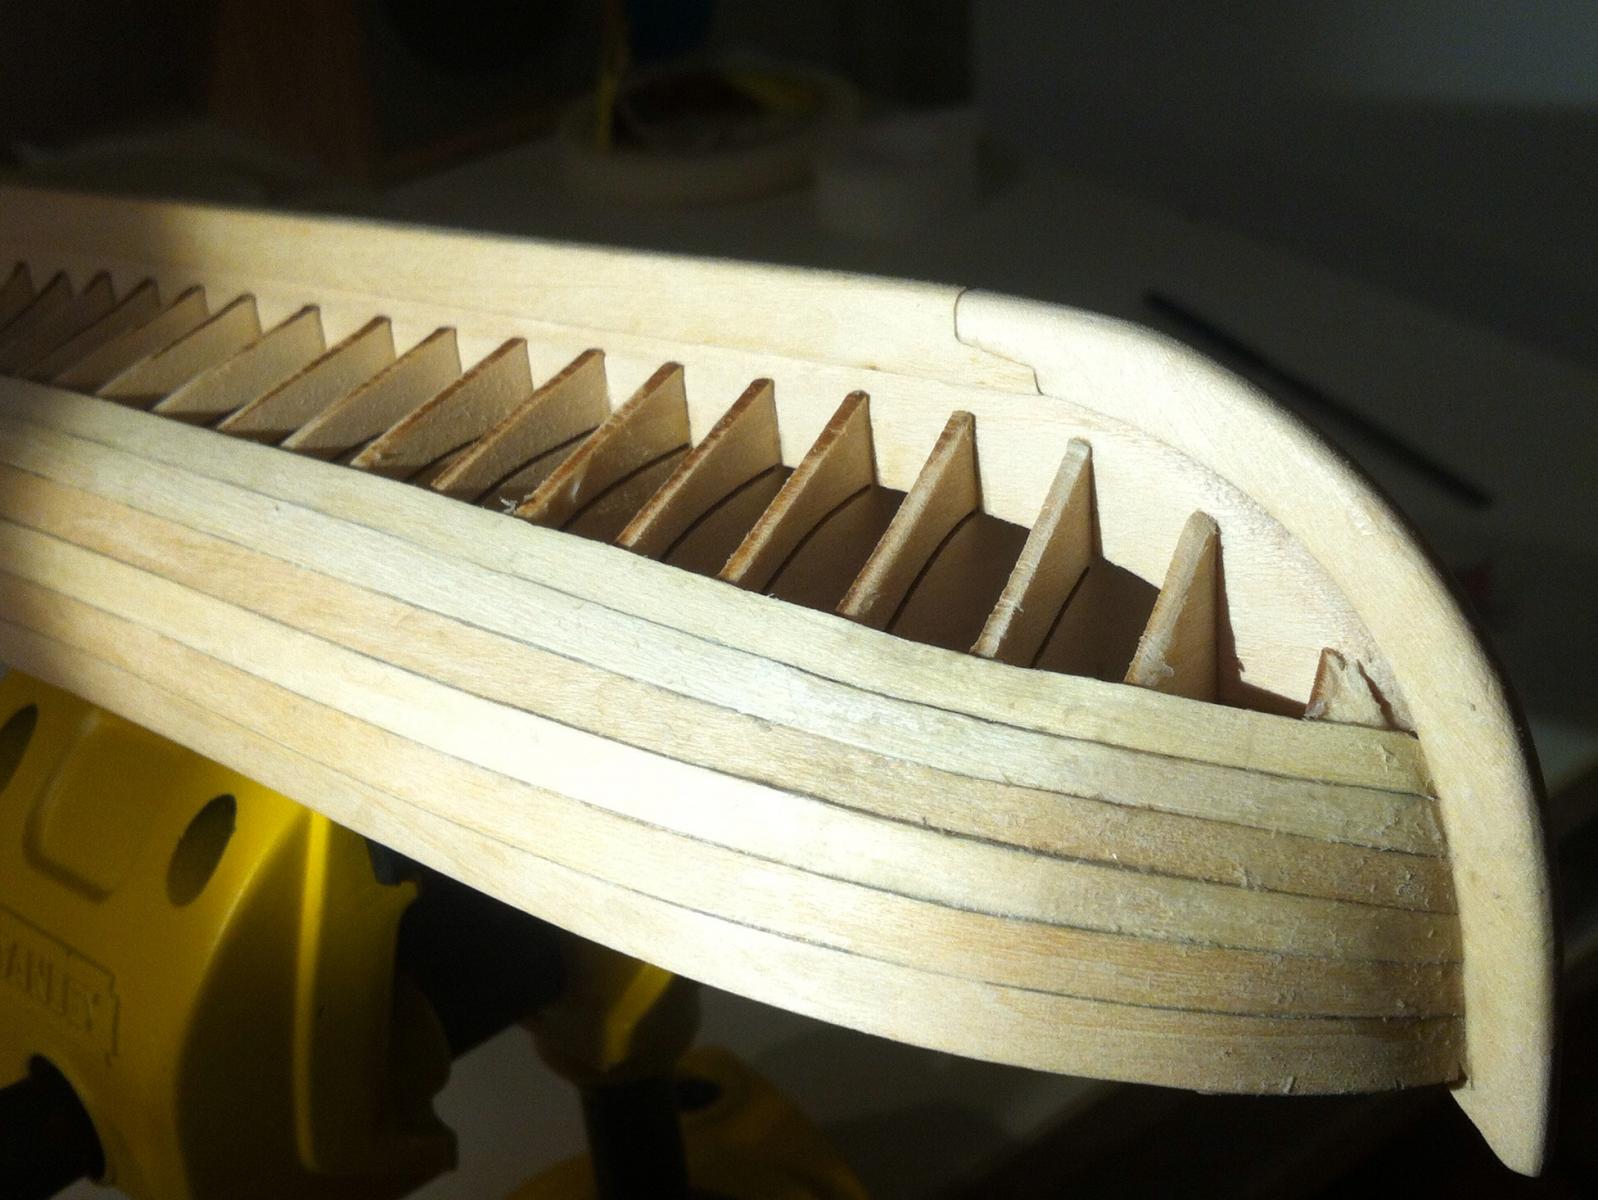
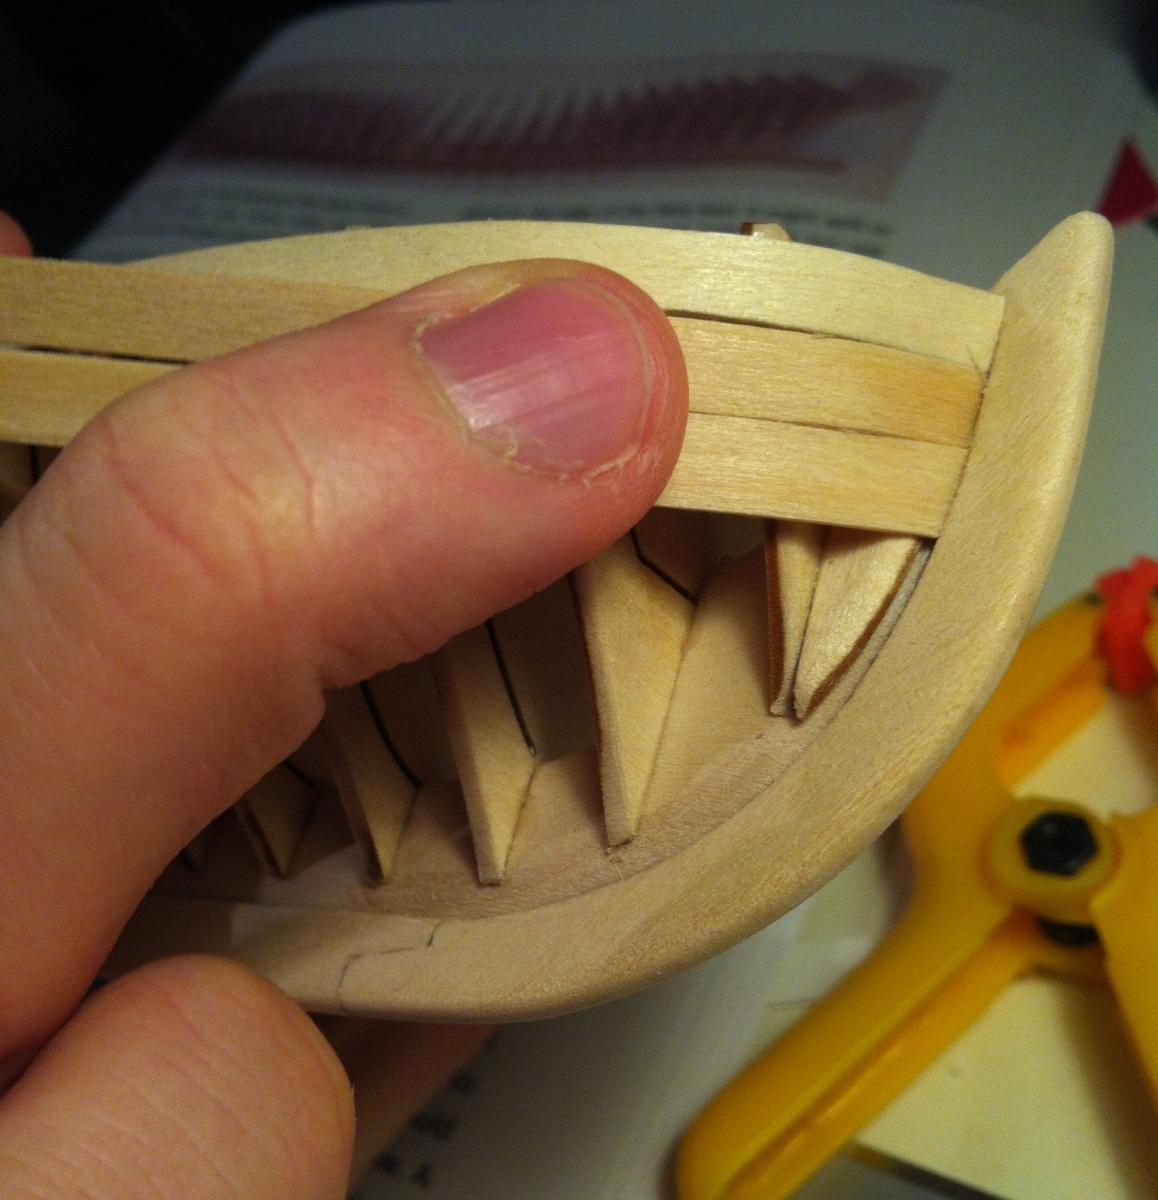
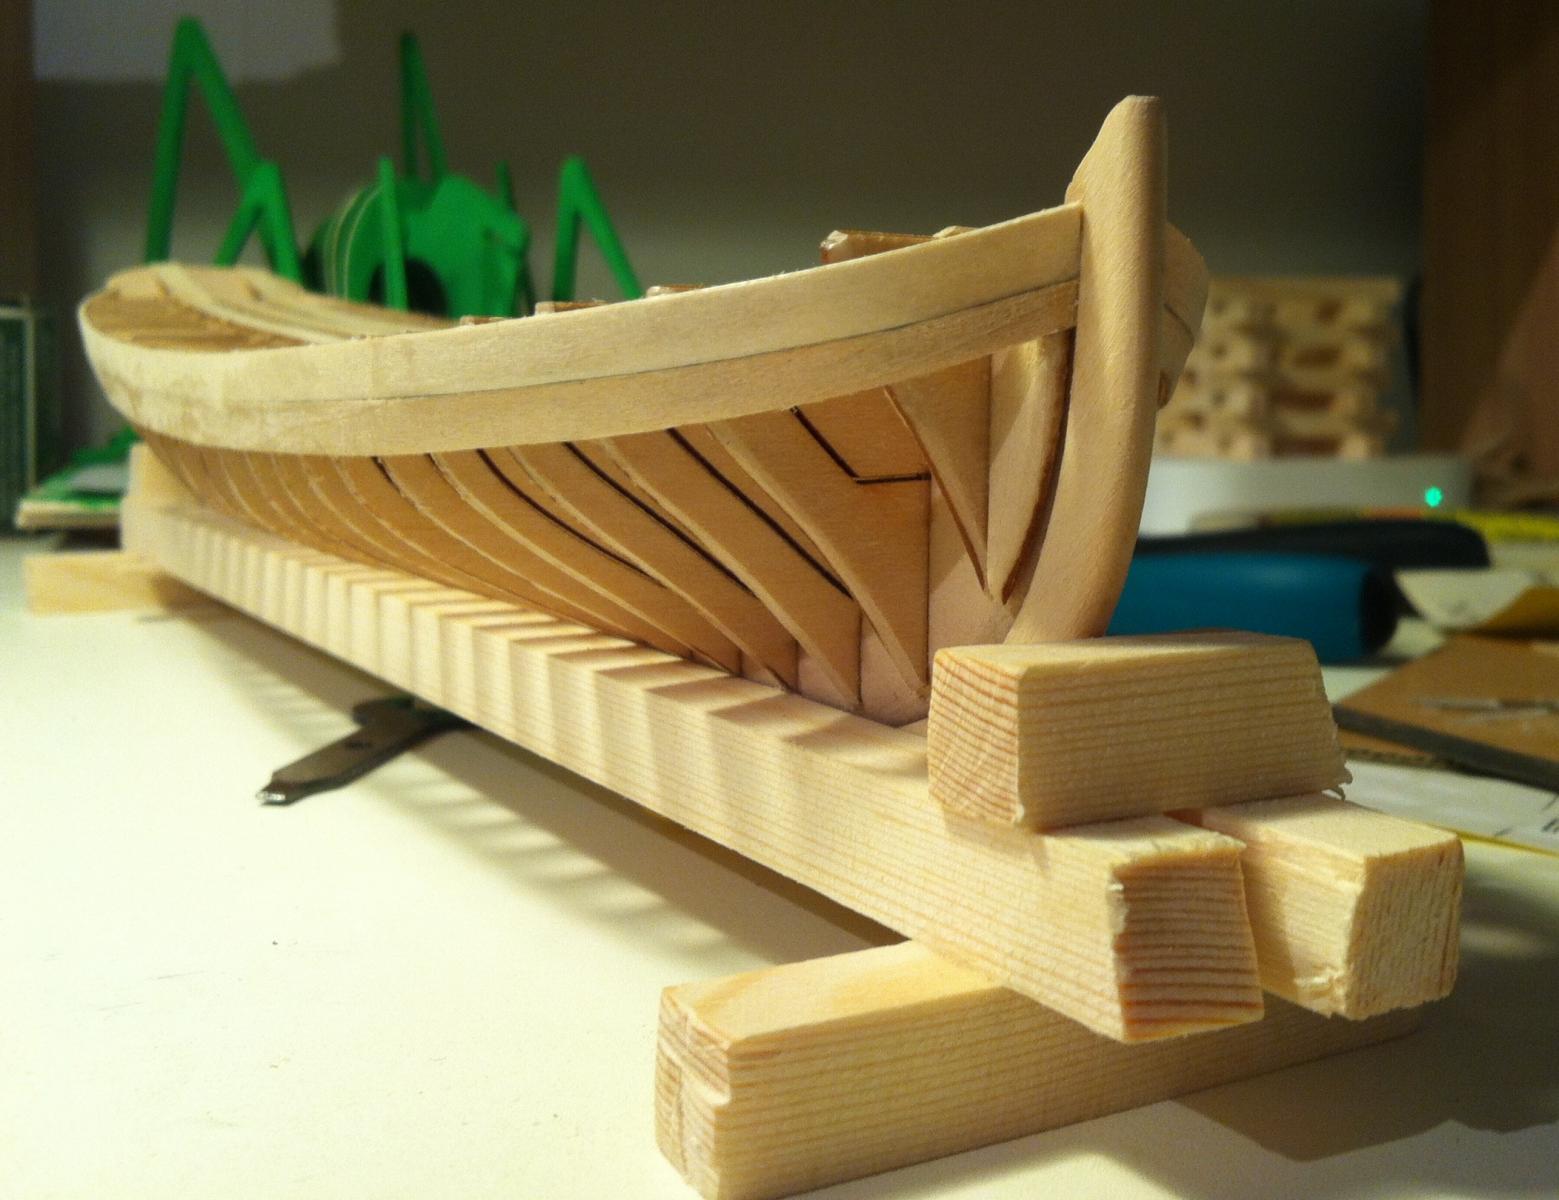
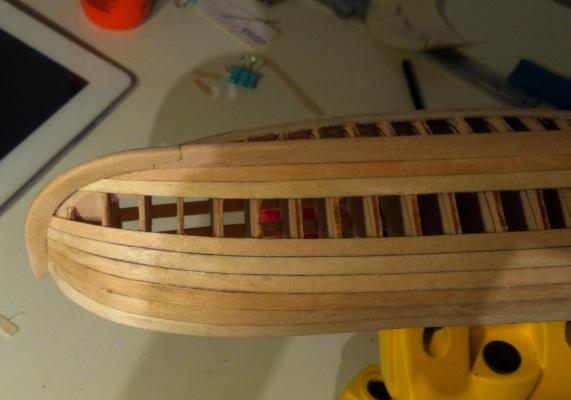
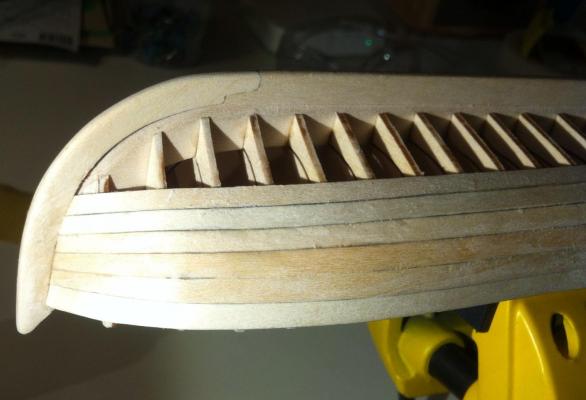
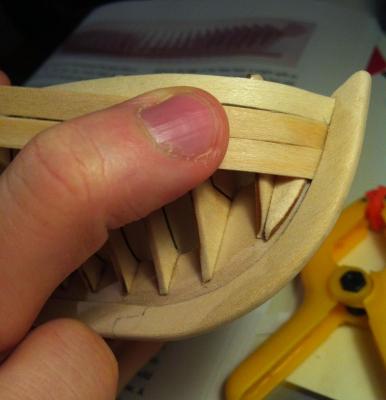
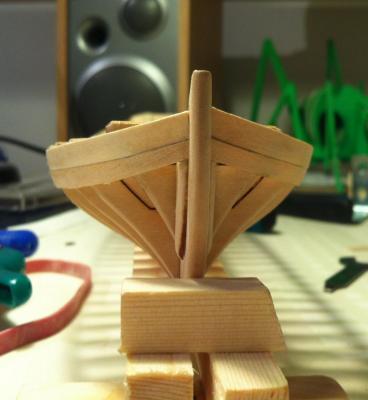
It was trickier then expected If you just put the top plank into the bow "slot", then it's just going vertical, without following the hull shape: To make planks follow the shape of the hull, I lifted to top plank a bit higher on the bow, and tapered the second plank. In hindsight it's pretty obvious, no matter how you bend the planks, they should be tapered. But I was too much following the instructions, and surprised that it was not mentioned there (or I was not reading carefully?) So that's how the bow looks like when second plank tapered and first plank lifted higher (it's just halfway inserted into the bow slot): The second plank was also a bit tapered on the stern:
- 137 replies
-
- 5
-
-
- finished
- model shipways
- (and 1 more)
-
Aha! Ok, will relax and cut off the poking pieces of top frame after planking Thanks for a quick reply!
-
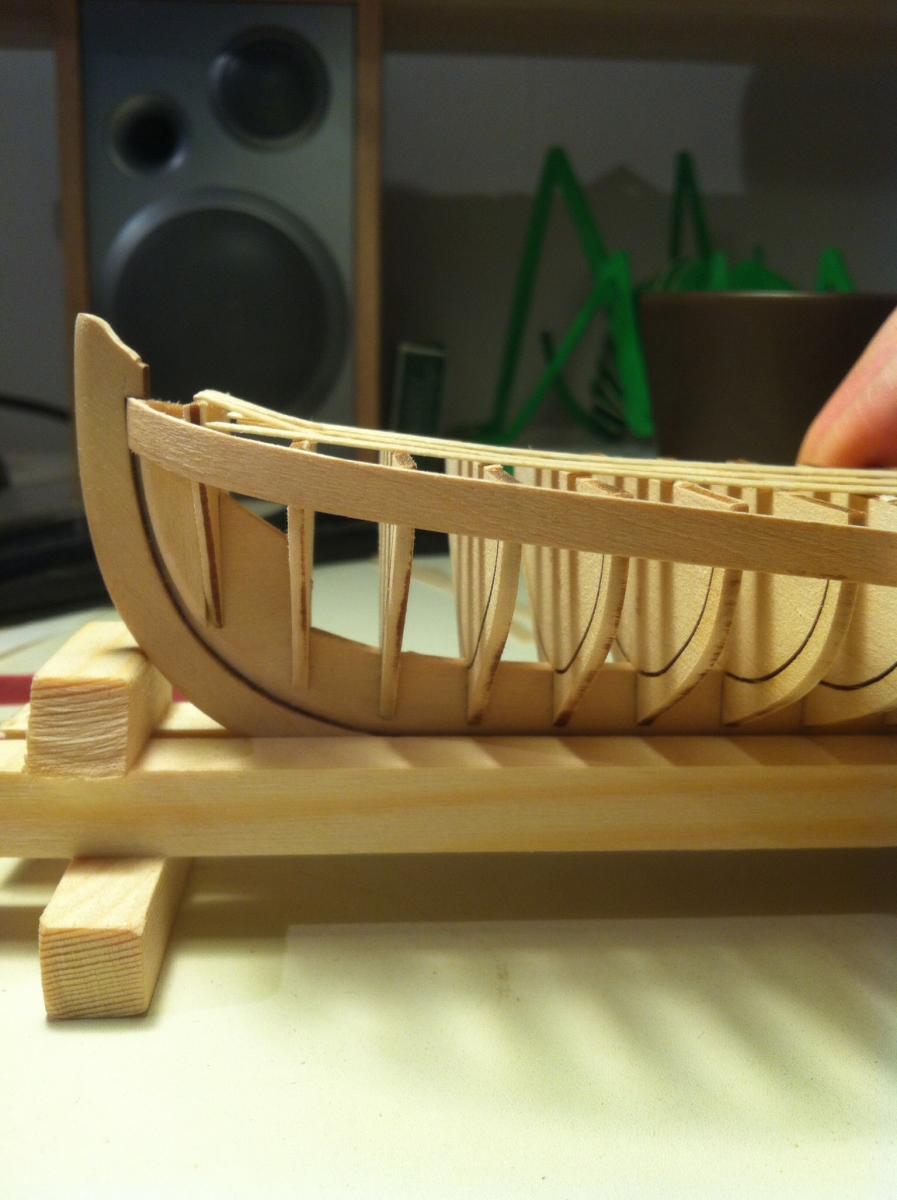
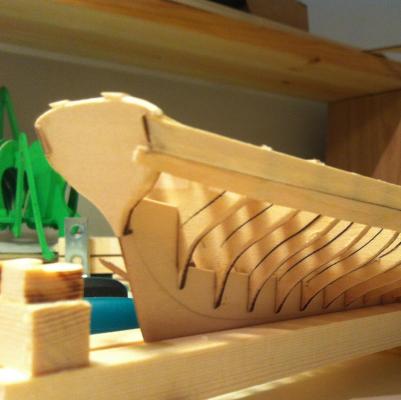
Started a planking, found a problem. The first frame (K) looks mounted too high. The top plank do not follow a smooth curve. On a drawings there is no sign of a higher front frame, so I thought that I did not inserted it on a full length while glueing. But then I checked the photos in a manual, page 5 (top and left photos), and they also show the front frame mounted higher then next frames. If you draw a plank line on a sticky tape, front frame creates an ugly step: If I want a plank to make a smooth curve - then top frame pokes a bit and should be shortened. Not a big deal, I do not think it would be bad for the hull, but want to doublecheck before cutting. Chuck, I would appreciate your advice, what is a better option? Or am I really made a serious mistakes and glued the front frame higher then it should be?

- 137 replies
-
- 2
-
-
- finished
- model shipways
- (and 1 more)
-
Your "simplified" variant is much more elegant then the "original" one! Colors are brighter, and that weird transom on original boat that looks like it should fall off if you accidentally step on it Weird question, but did you ever considered designing a beginner-level models, like for kids? Something that you can use to introduce a 10yr old kid to modelling, but instead of using a cheap chinese crap - you pay twice more, but get a well thought through kit, that is a pleasure to build?
-
Speaking of a wood dust - what kind of a mask is most effective against it? I have a problem with a wood dust while sanding - coughing after that, dust in a nose, etc. Sometimes you even feel it next morning. So some mask would be definitely useful.
-
Temporarily switched to a side project (small English pinnace by Model Shipways ). Will come back to SF2 build after a month or so.
-
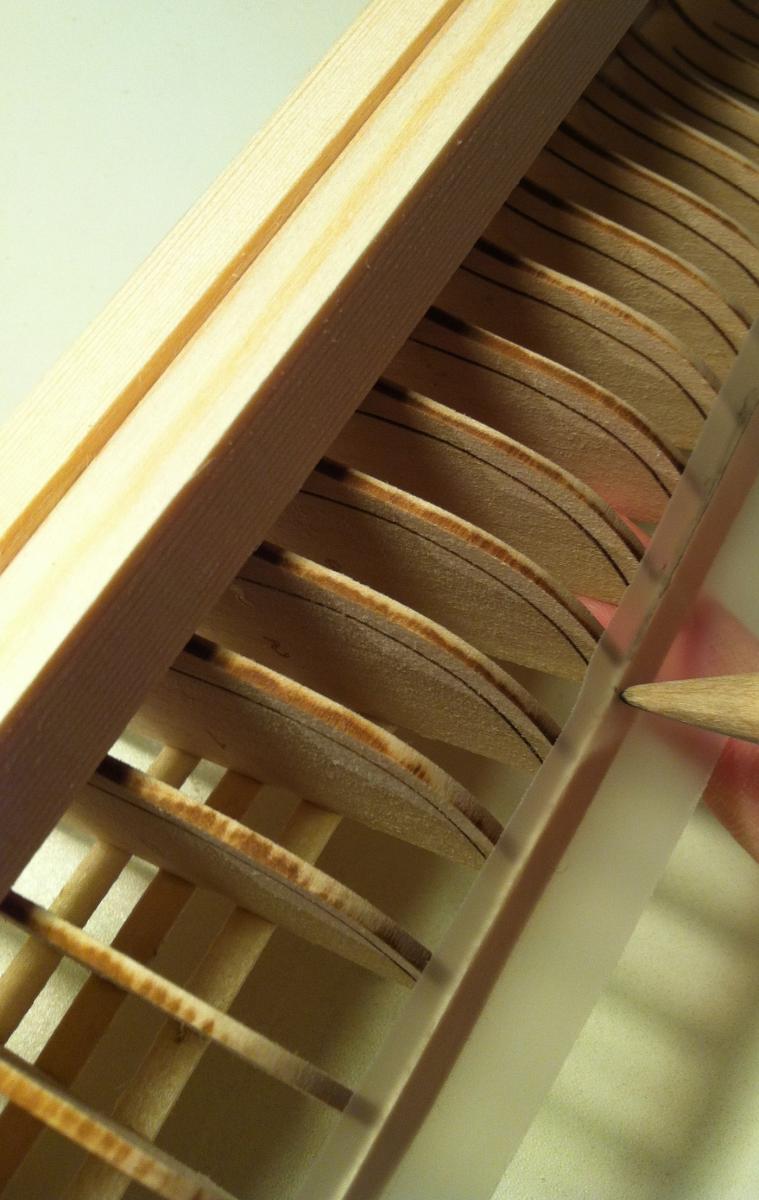
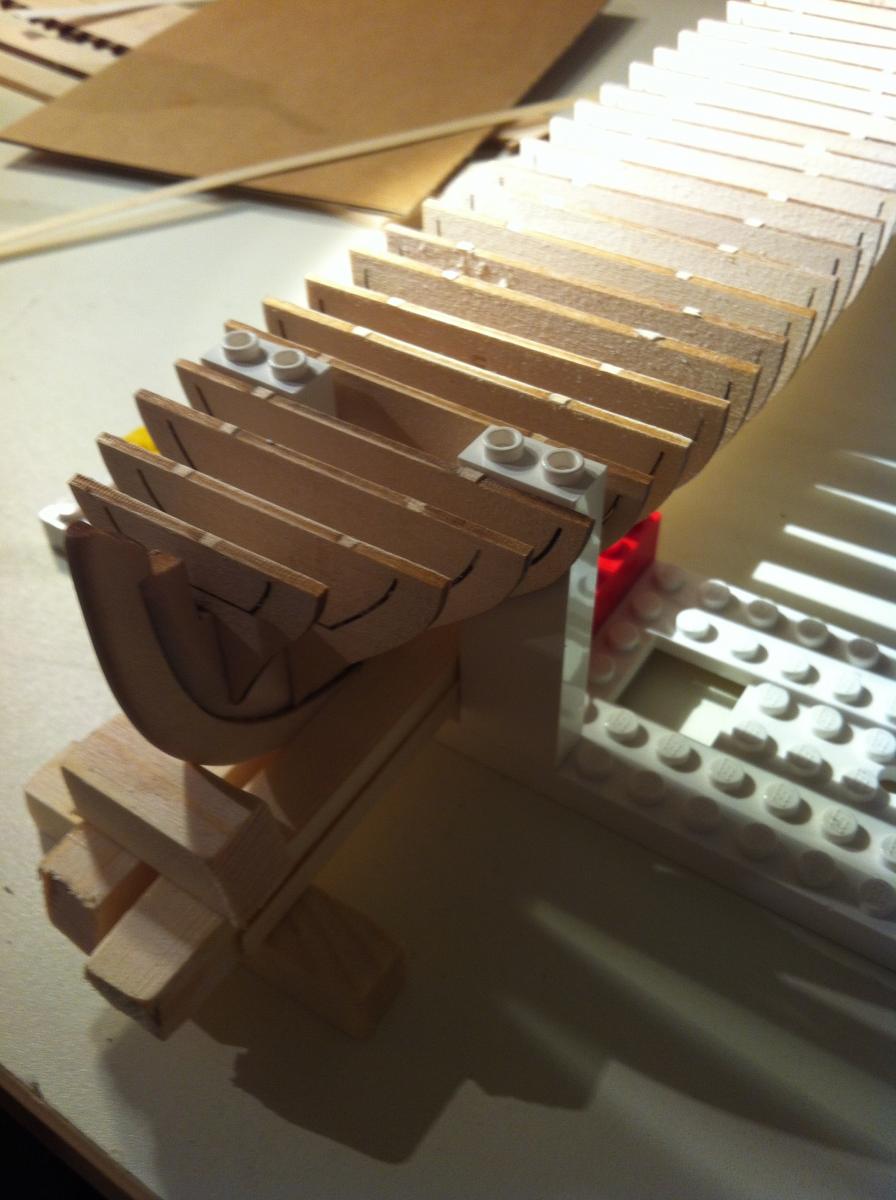
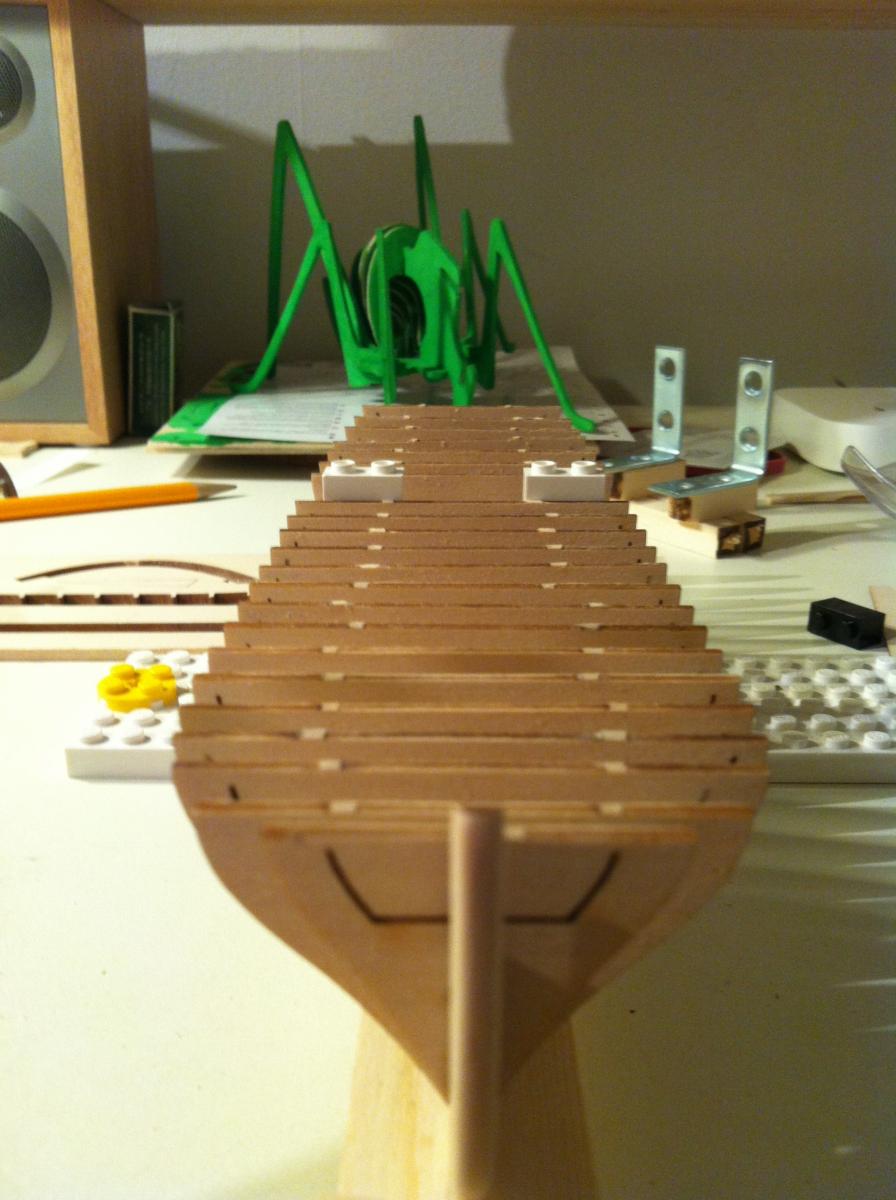
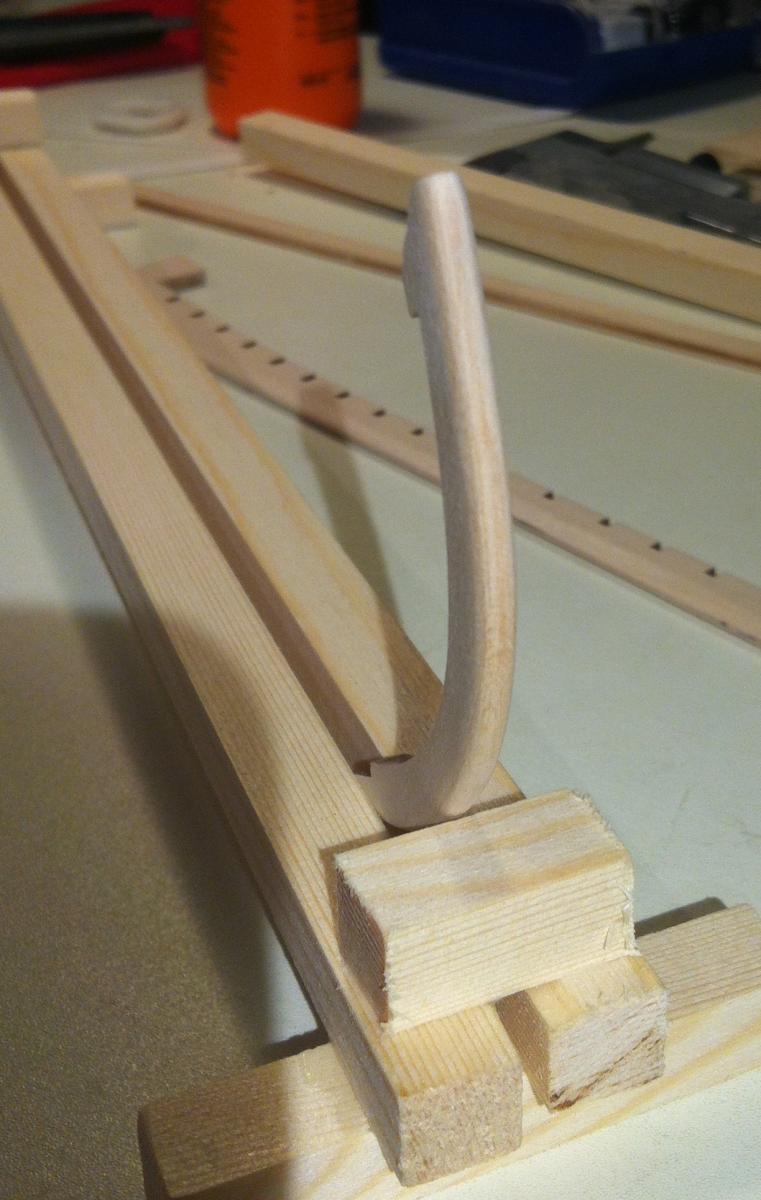
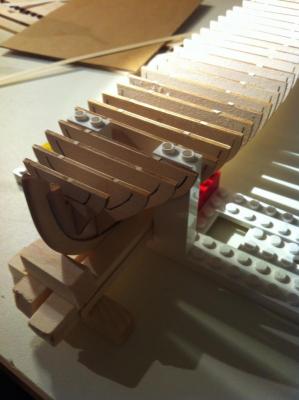
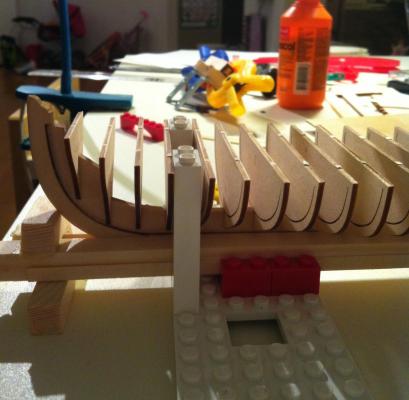
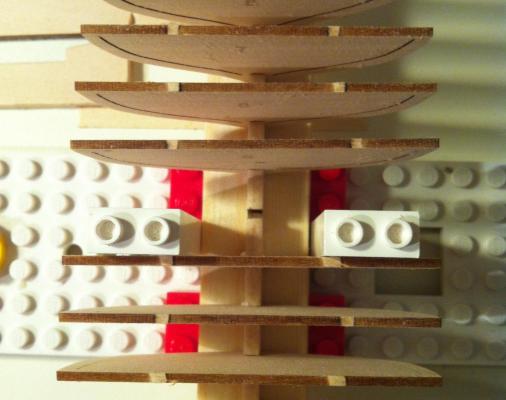
Made a simple, but practical tool that helps to align frames properly. Lego allows you to build some small helping constructions that are quite strong, parallel and easy to modify on a fly. This is the dry fitting phase, so don't mind that frames are not aligned yet. I align one frame, glue it, then go to the next one. It's also easy to control the horizontal alignment: And the perpendicularity to the keel: The lego frame slides tightly along the building construction. Result of a first evening (nevermind the bush cricket on a background, as I said I share that table ):


- 137 replies
-
- 3
-
-
- finished
- model shipways
- (and 1 more)
-
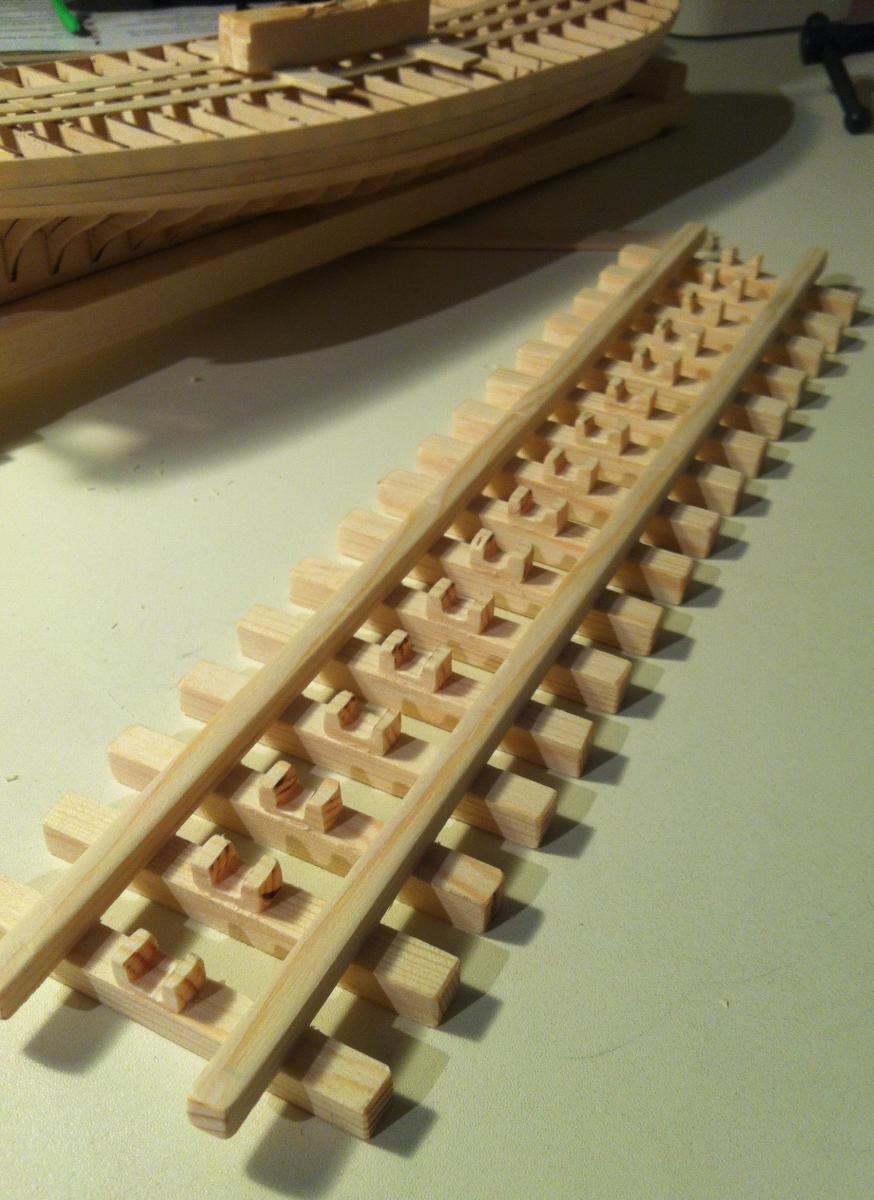
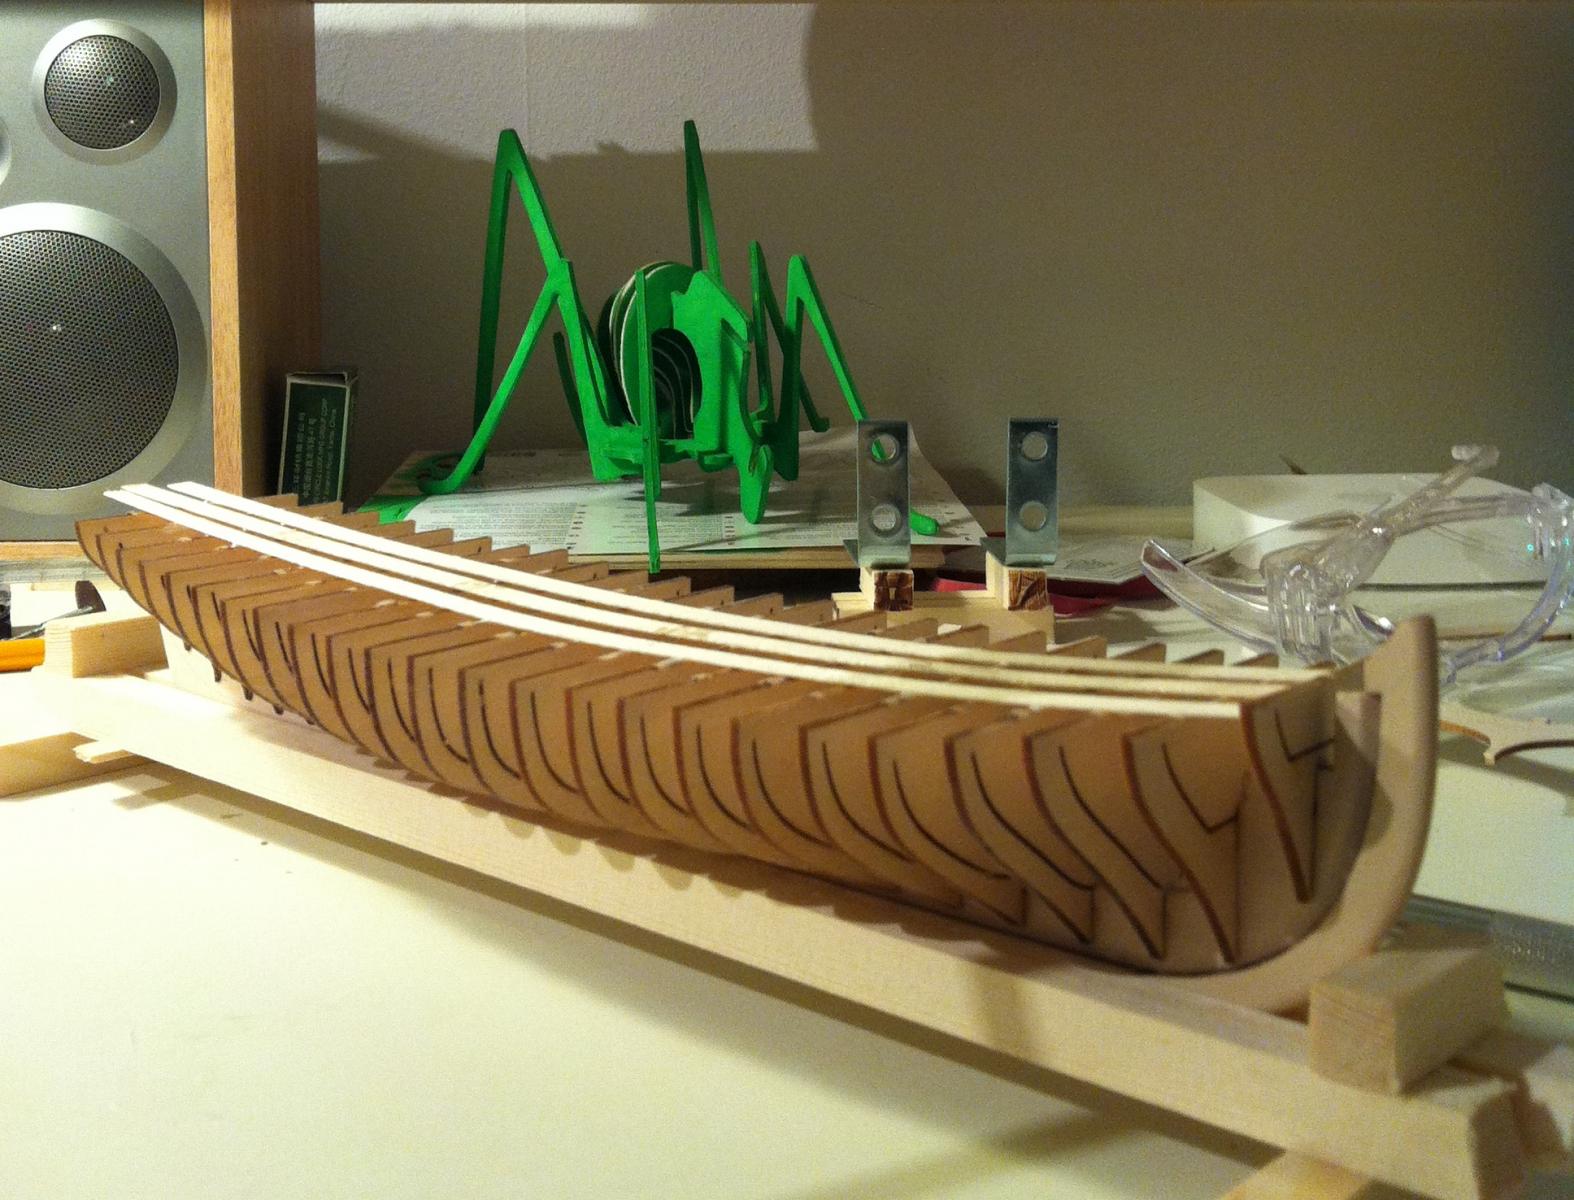
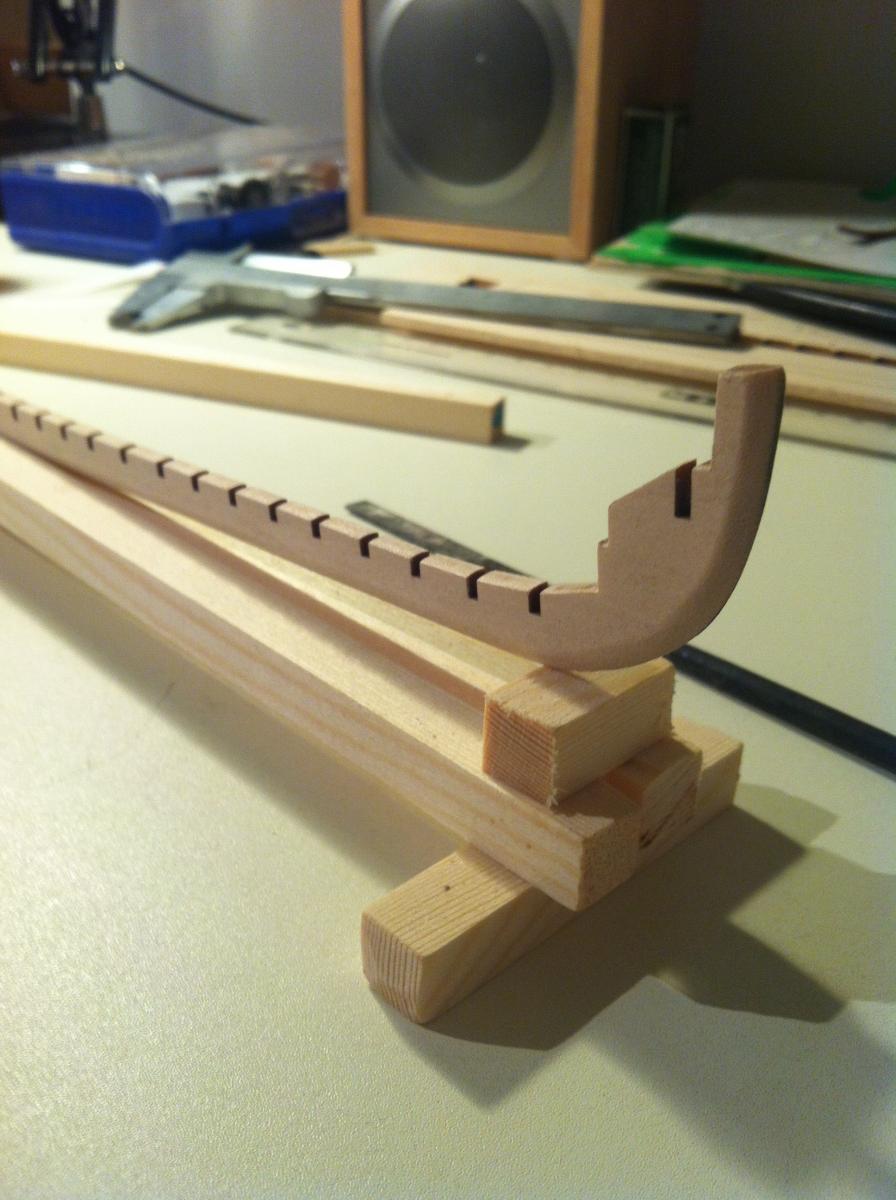
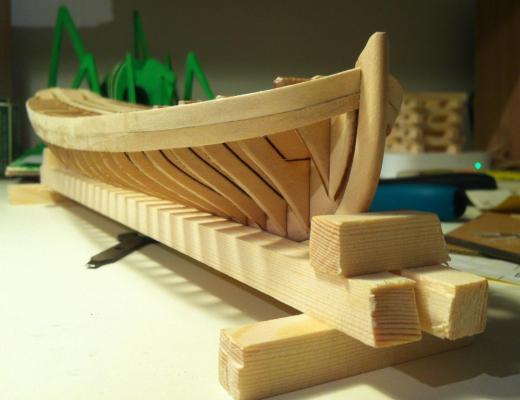
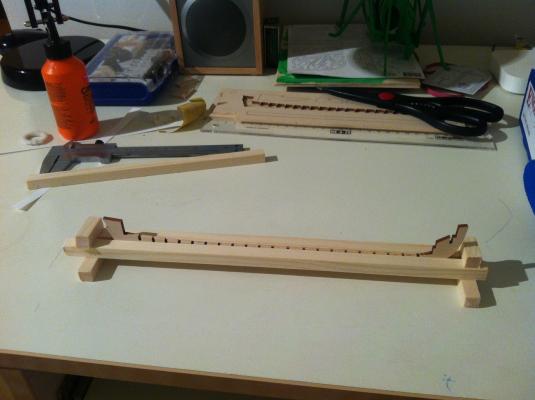
First of all, such nice boat requires a solid, but light dock. I don't have a dedicated space for modelling, so I share the table with my kid, and need to quickly rollout all my stuff and then hide it back: Tapered the false keel, and also a bit tapered the real keel (just for a sake of beauty):


- 137 replies
-
- 2
-
-
- finished
- model shipways
- (and 1 more)
-
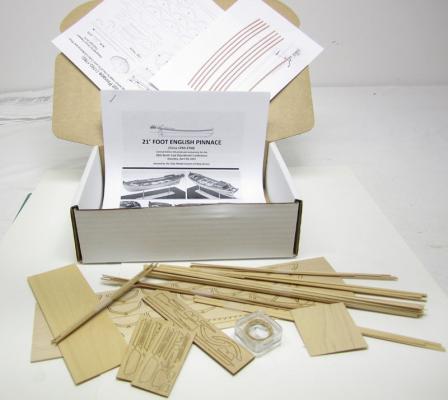
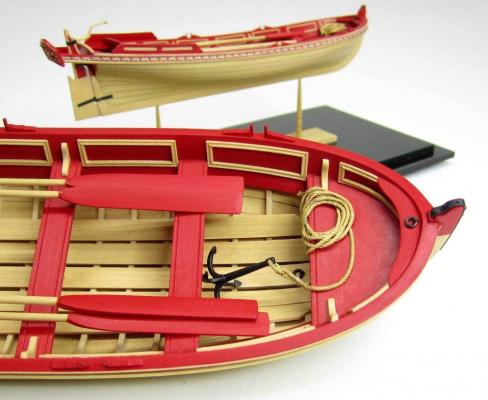
First of all, thanks to Chuck for designing that amazing kit. It's really a pleasure to build, everything is so well thought through! Especially after AL kit, not so well designed and with idiotic instructions If you care not only about the result, but a relaxing process - then buy that kit, you would not regret. The kit content quite standard - manual, laser cut details, various basswood strips for planking: End result should look as close to this teaser as possible: What's in between? Let's look in the manual: No, really not, the manual is the best I ever saw, you can take a look here: https://dl.dropboxusercontent.com/u/6432389/Pinnace/MS1458-Pinnace-Instructions.pdf I do not plan to make any interesting adjustments to the build, but will try to build it as accurate as I can. So maybe it would be interesting to beginners, nothing more. Would appreciate any kind of feedback and advices from a more experienced builders!
- 137 replies
-
- 2
-
-
- finished
- model shipways
- (and 1 more)
-
That thingy looks like a perfect candidate to be a hidden easter egg button, that turns on some electronic circuit deep inside the ship