-
Posts
1,557 -
Joined
-
Last visited
Content Type
Profiles
Forums
Gallery
Events
Everything posted by Mike Y
-
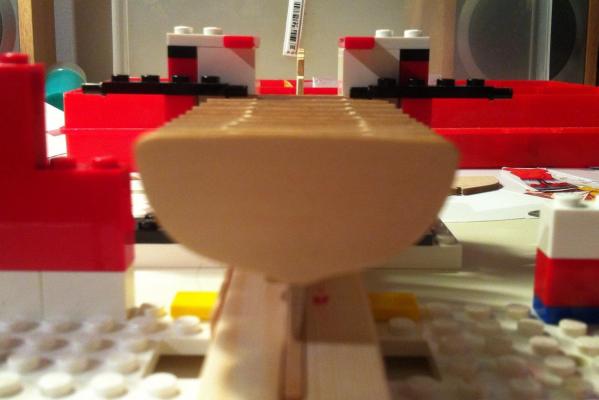
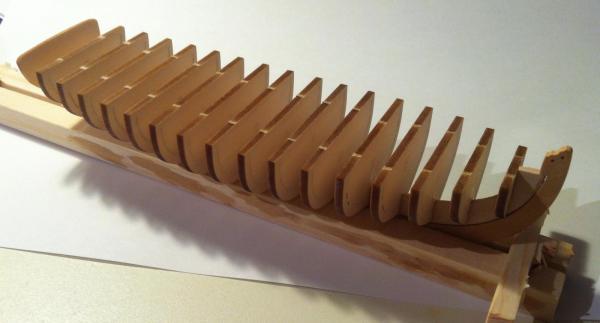
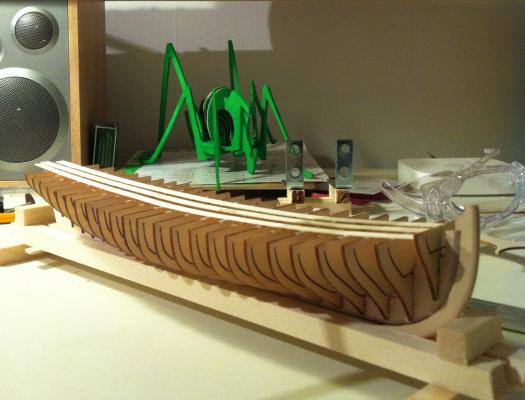
It was faster then expected Small black levers on my lego jig are quite handy to make a fine adjustments of a frame angle and hold it in that state: Now all frames are in place! Perfectly straight, I could not find any problems while remeasuring angles and distances. There is a weird place around frame 0 - A - B, the spacing between frames suddenly changes. Not much you can do, the false keel is cut that way. Strange, but not a big deal. The difference is just around 1mm.
-
The most silent disk sander
Mike Y replied to Mike Y's topic in Modeling tools and Workshop Equipment
I already have dremel, and even a belt sander from proxxon My main usecase for disk sander is to form some shape with a precise angle. -
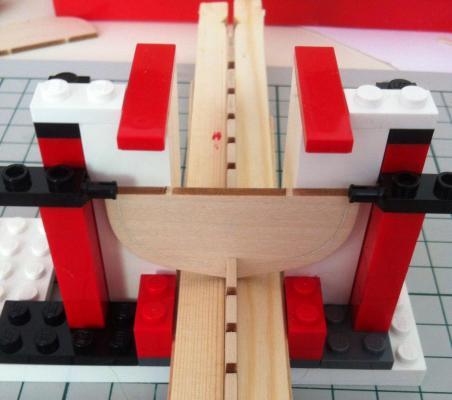
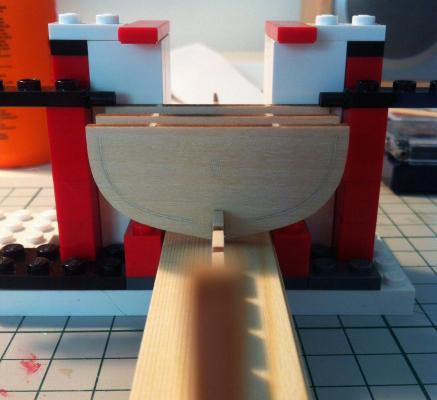
Used following checklist when mounting the frames. It all sounds very obvious, but would be good to repeat again. Bitter lesson from Pinnace build... * connection between frame and false keel should not be too loose * but it should not be very tight - tight connection will push away the glue and skew frame position. Light adjustments should be possible * all angles - must be perfect 90/180 degrees. Do not trust your eye, it lies when it comes to angles or parallelism. Use jigs and measurement tools. * frame must be inserted fully. Which is also easy to fail if frame connection is tight. * repeat all measurements multiple times. * after each correction - check all angles again. And again. * be pedantic! * let the glue set before gluing next frame, it is easy to skew alignment by accidentally touching freshly installed frame. * false keel should sit tight in the jig, use strips of wood or paper to achieve that. No wobbling allowed If I see that some frame is not perfectly fit - then drop of water weakens the glue, and I reinstall the frame. It's the case where saying "it is ok, nobody will see it" is not acceptable. Imperfect eye, measurement tools and light wood warping when glue sets will add a deviation, don't worry about it My jig was again made of lego - parts are perfectly square, make a strong construction, but easy to rebuild if needed (for example, for stem frames): Hope to glue all frames during next week, the weather is toooo good to be inside on a weekends
-
The most silent disk sander
Mike Y replied to Mike Y's topic in Modeling tools and Workshop Equipment
I also thought of buying Byrnes sander, but it is too big, and do not justify the cost (incl shipping plus custom taxes). If I ship something outside of EU - it is ridiculously expensive in the end. I don't need any precision or fine adjustments from disk sander - I just need it to be small and quiet, that is all. Table saw is another story, and I will definitely buy Byrnes table saw. I need a precision from the saw, plus lots of tilting tables and adjustable angles. It is expensive, but justifies the cost. -
Frame alignment is really critical to have a smooth shape of the hull, better fix it now, not fixable if planking is done. I had just one single frame a bit out of line on Pinnace, it was hardly visible when model is not planked. Result - skewed hull shape. Nobody sees it except me, but I know it's there
- 335 replies
-
- 18th century longboat
- Finished
-
(and 1 more)
Tagged with:
-
The most silent disk sander
Mike Y replied to Mike Y's topic in Modeling tools and Workshop Equipment
Thanks for a feedback! Probably I just looking on a wrong youtubes. Will try proxxon. -
I'm looking for a small and not powerful disk sander. Feature-wise, it should have a tilting table. Proxxon is a perfect match, but according to youtube videos, it's quite loud. (http://www.amazon.com/Proxxon-37060-Disc-Sander-125/dp/B002XZMJZ4/) I have proxxon belt sander, and it's disgustingly loud. I use it very rarely due to that. Is there some sander that is reasonably quiet? And small? I don't need lots of power to sand frames, for example. I can go with time and grits instead of pushing detail hard, loading the motor.
-
Hej Per! I'm in Stockholm. If you too - I would be happy to invite you for a grill & beer I'm not a native swede though, moved here just 2 years ago. But pretty much enjoy people and unspoken rules here P.S.: Do you know some shipmodelling clubs in Sweden? Apart from a Boat Builders on Skeppsholmen, who build 1:1 models.
-
Stuntflyer, you are right. Thanks for noticing that! Really appreciate it. It got rounded when I unglued keel from false keel and was sanding away remainings of the glue. I made a very big bevel on Pinnace and it was a mistake - caused a tiny gap between plank and keel. So on Longboat I opted for a small bevel. If it's too small - easy to fix with a sharp hobby knife
-
Per, maybe it's no need to worry? That parts would be sanded away when the planking is done, so it should not be a big deal, if it do not stop you from installing frames or planking. Making false keel of boxwood could be tricky (cuts for frames must be on a precise 90 degrees).
- 335 replies
-
- 18th century longboat
- Finished
-
(and 1 more)
Tagged with:
-
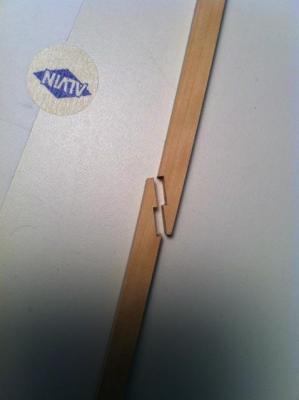
I used this photo from somebody's build log (sorry, forgot which one): When doing that scarf, the trick to avoid misalignment is to use a constant and predefined cut depth, because it will affect not only the "cutoff" parts, but the edges of the planks. And keep in mind that it's a fully mirrored joint, so both sides could be cut clamped together. Here is the sketch, notice that all red lines are equal (representing the cut depts). But maybe there is some easy trick to cut that scarf quick, clean and precise. I did just a few scarfs, and hope that some experienced builder can share a trick to make such scarfs fast and easy
-
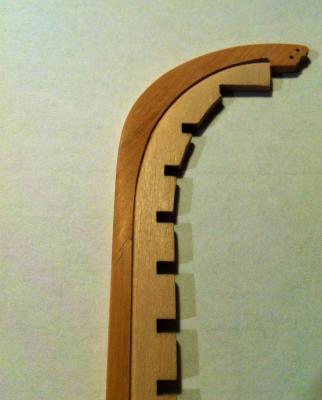
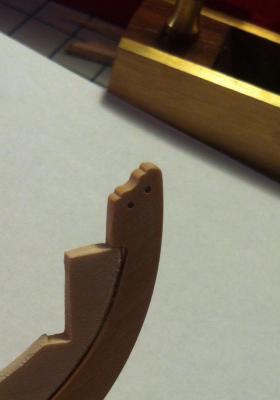
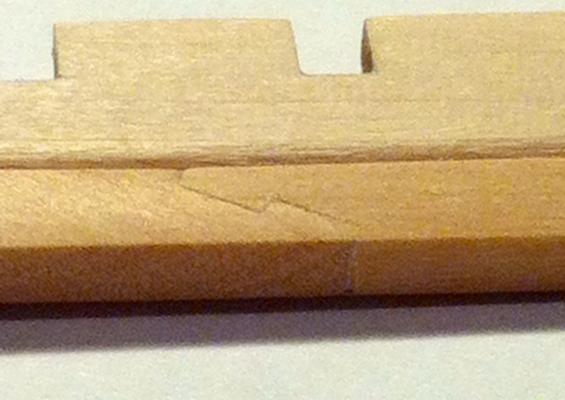
Ok, boxwood stem and keel looks really better, I actually did not expected how better! Sanded it with 400 => 600 => 1200 => 2000 grits. After 2000 grit castello starts to change the color to a deeper yellow, and starts to have a shine. Really interesting transformation! Need to experiment a lot when it would be a time to apply some protective finish: Used another kind of scarf joint for keel. I know it is not the joint that should be really used on a keel, but it just looks nicer, and just wanted to practice that tricky joint on such scale. Looks ok, or maybe I should have made it longer? Right now joint is done on an angle around 60deg, but maybe something closer to 70-75 would be better (if joint length is three times joint width). What is the golden rule of thumb for such joints? Close-up: Next step is frame fitting. Frames are gently sanded, and ready to go!
-
Floyd, maybe we had kits from different production batches, in my kit the stem have a proper grain direction, and it's not fragile at all. But thanks for a heads up! Actually decided to make stem and keel out of boxwood. The reason is different - stem is a bit grey, and it's not something you can sand away. It's just how basswood looks like when it's cross grain: It's quite visible on a contrast with keel, which have another grain direction. Looks dirty. So making it out of boxwood.
-
Stuntflyer, thanks for coming! Your build log is one of my references! Understood the idea, will try. However, question still applies. What is the benefit of mounting the gardboard plank early on? I installed it quite late on Pinnace, and failed to find any problem caused by it. Or I'm probably just missing something, because lots of experienced builders mount it as early as possible, so it should make some sense. Would appreciate your thoughts!
-
Floyd, no, I didn't applied poly. I will apply it later when things are done. No feeling that it's fragile. Of course, you should handle it with care.. Plus the layer of poly is sooo thin and not so strong, that it will not protect stem from breaking if I, say, hit it with the hand. But also there is no load on a stem. While planking, I clamp the hull using temporary piece of wood glued to frames on top, and frames are connected with each other: I don't have exact photo, but imagine a piece of scrap wood glued right on a center. It's quite a strong construction, hull is flipped upside down and clamped in a table vice, and then only way to break stem is to hit it accidentally
-
Actually never understood the idea of mounting the gardboard plank first. It is quite difficult to get its shape right. I planked pinnace from top to the bottom, and the gardboard was shaped only when I had just 3-4 plank layers left. Then you clearly see remaining width, have enough planks to make fine corrections, and can easilly shape the gardboard as needed. Installing gardboard plank right on the start will require a really good calculations and intuition.. But, again, disclaimer - I'm not a planking expert.. Sorry..
-
Sure! However, I'm also not a planking expert, and will use methods described in some other build logs on that forum, like http://modelshipworld.com/index.php?/topic/1465-18th-century-longboat-by-bobf-ms-148-tri-club/ or http://modelshipworld.com/index.php?/topic/4930-18th-century-longboat-by-stuntflyer-mike-model-shipways/
-
Just in case somebody is interested - I started the longboat build log - http://modelshipworld.com/index.php?/topic/6801-18th-century-longboat-by-mike-y-model-shipways-148/ Nothing interesting there (yet), but a warm welcome to all subscribers of this log, I will try to make it as interesting as possible. Popcorn, beer, sandwiches, sawdust!
- 137 replies
-
- finished
- model shipways
-
(and 1 more)
Tagged with:
-
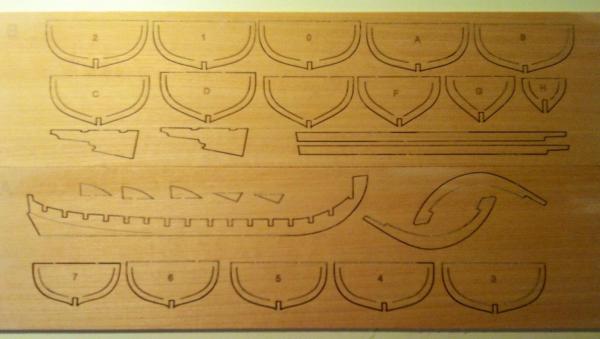
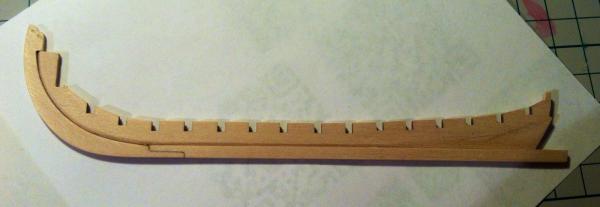
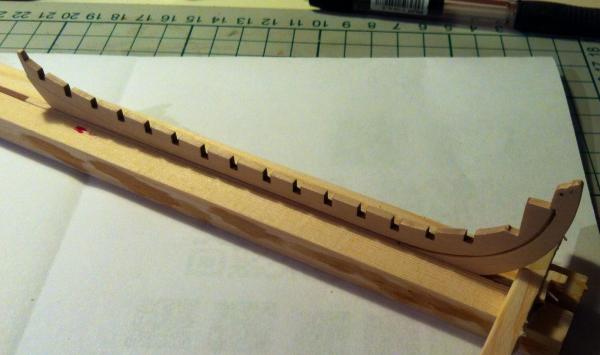
It is second build, first one was a similar model - English Pinnace This time I will make it slower, no rush. And will try to avoid all mistakes done on Pinnace I will use kit details for frames and keel, and boxwood for everything else. No paint, no stain, only natural wood colour. No friesers, and no paintings on a transom also. Instead, it would be planked and treenailed. Sorry for skipping the decorations, I just prefer the simple design. For a start - traditional photos of every longboat builder - parts sanded from laser char, keel and falsekeel, simple building jig to hold it straight. First pinnace mistake avoided - bevel on a false keel is smaller, different angle, to gently handle a plank on an angle specified by frames. Sounds obvious, but on a pinnace I made a bevel with a wrong angle, and there was a small gap between garboard plank and keel. First impression - it is sooooooo small! Very nice scale, it is big enough to make it with a good precision (I hope), but fits into a palm. Should be very cute when done
-
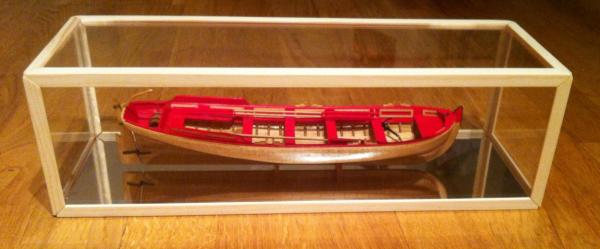
Thanks for that wave of comments! Finished the display case. I made it out of plexiglass sheets and L shaped furu wood. Looks so-so, CA is not the best way to glue plexiglass, and frankly I failed to cut accurate glass rectangles with required precision. So next time will buy a manufactured case. It sounds ridiculous, but I have no place to put the model on display. This problem slightly crossed my mind before, but I preferred not to think where to put model before it's finished. So now it is going to the drawer, until I move from rental to my own apartment, where I can easily mount a nice shelf on a wall Next build would be a scratch Oliver Cromwell using Hahn's method, but I just ordered it from Lumberyard a few weeks ago. So will start a Longboat build while waiting. Hope that Oliver Cromwell will arrive in a matter of a month or so, hence Longboat would become a side build - when I will feel bored with cutting big pieces into small pieces to make a big pieces to cut them into small pieces to make a big pieces © mtaylor.
- 137 replies
-
- finished
- model shipways
-
(and 1 more)
Tagged with:
-
Remco, thanks again for sharing your knowledge!
- 1,215 replies
-
- sloop
- kingfisher
-
(and 1 more)
Tagged with:
-
Depends on a glue, but with PVA-based wood glues usually one surface is enough. Applying it to two surfaces you will most probably have too many glue, which you will need to remove later. But try your glue on a scrap pieces, the best answer is just an experiment.
- 132 replies
-
- 18th century longboat
- model shipways
-
(and 1 more)
Tagged with:
About us
Modelshipworld - Advancing Ship Modeling through Research
SSL Secured
Your security is important for us so this Website is SSL-Secured
NRG Mailing Address
Nautical Research Guild
237 South Lincoln Street
Westmont IL, 60559-1917
Model Ship World ® and the MSW logo are Registered Trademarks, and belong to the Nautical Research Guild (United States Patent and Trademark Office: No. 6,929,264 & No. 6,929,274, registered Dec. 20, 2022)
Helpful Links
About the NRG
If you enjoy building ship models that are historically accurate as well as beautiful, then The Nautical Research Guild (NRG) is just right for you.
The Guild is a non-profit educational organization whose mission is to “Advance Ship Modeling Through Research”. We provide support to our members in their efforts to raise the quality of their model ships.
The Nautical Research Guild has published our world-renowned quarterly magazine, The Nautical Research Journal, since 1955. The pages of the Journal are full of articles by accomplished ship modelers who show you how they create those exquisite details on their models, and by maritime historians who show you the correct details to build. The Journal is available in both print and digital editions. Go to the NRG web site (www.thenrg.org) to download a complimentary digital copy of the Journal. The NRG also publishes plan sets, books and compilations of back issues of the Journal and the former Ships in Scale and Model Ship Builder magazines.


