HOLIDAY DONATION DRIVE - SUPPORT MSW - DO YOUR PART TO KEEP THIS GREAT FORUM GOING! (89 donations so far out of 49,000 members - C'mon guys!)
×


Mike Y
-
Posts
1,557 -
Joined
-
Last visited
Content Type
Profiles
Forums
Gallery
Events
Everything posted by Mike Y
-
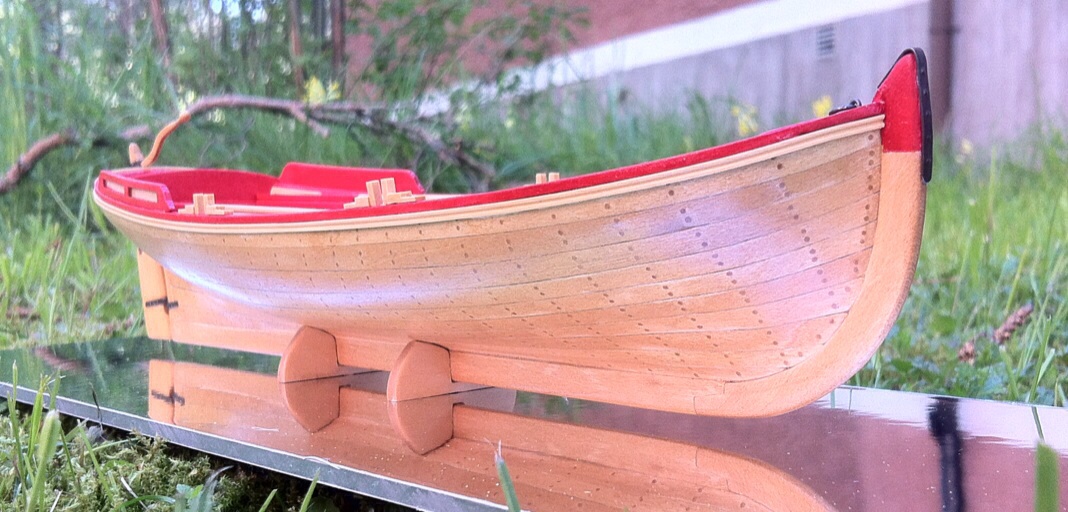
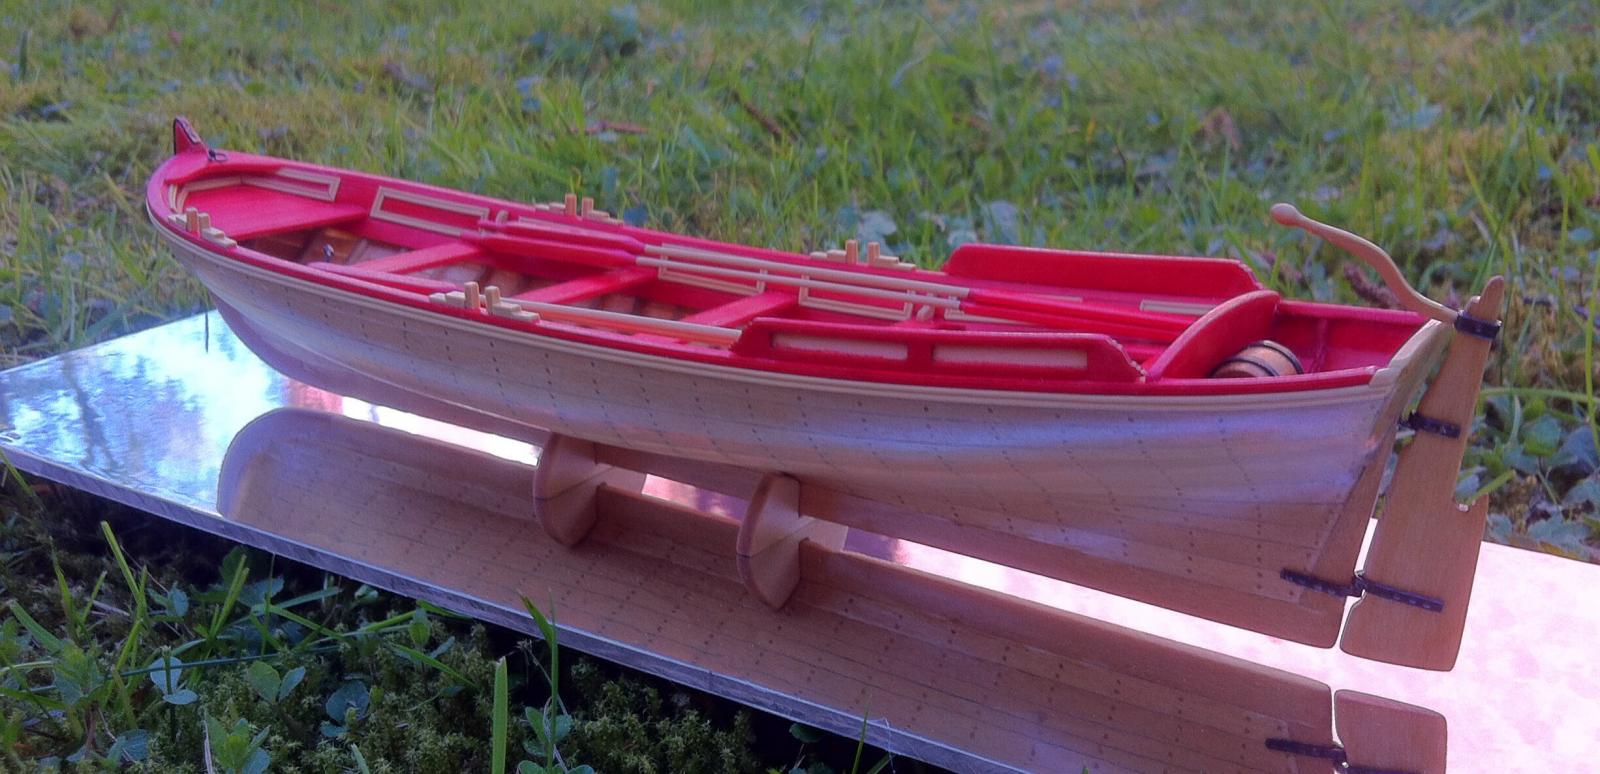
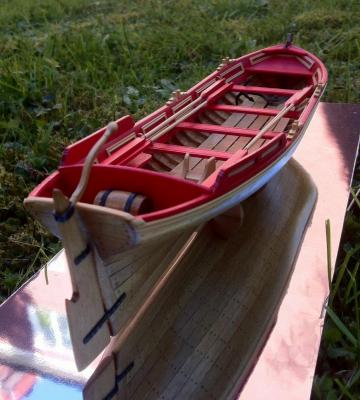
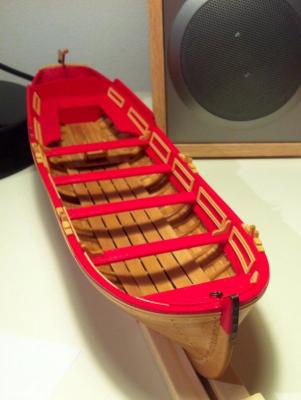
 But now the good part. Quoting Chuck's manual - "That completes the model!!!" I'm still in progress with the display case, but she is completed! Yahooo! Chuck, thanks again for that fun build, that looks simple, but actually forces to learn new techniques and go to the next level of accuracy. Next buid would be a Longboat, since my wife really thinks it looks better with sails, and I want to make a better planking with boxwood Ok, in reality I just want to make a pinnace again, this time avoiding all mistakes I did, but making the same model again is kind of silly, and I really love the look of longboat. Also, longboat build would be much slower - I will not rush things to complete it quicker. Thanks everybody who watched, helped and commented - it is quite fun, much better then just modelling without being able to share!


- 137 replies
-
- 19
-

-
- finished
- model shipways
- (and 1 more)
-
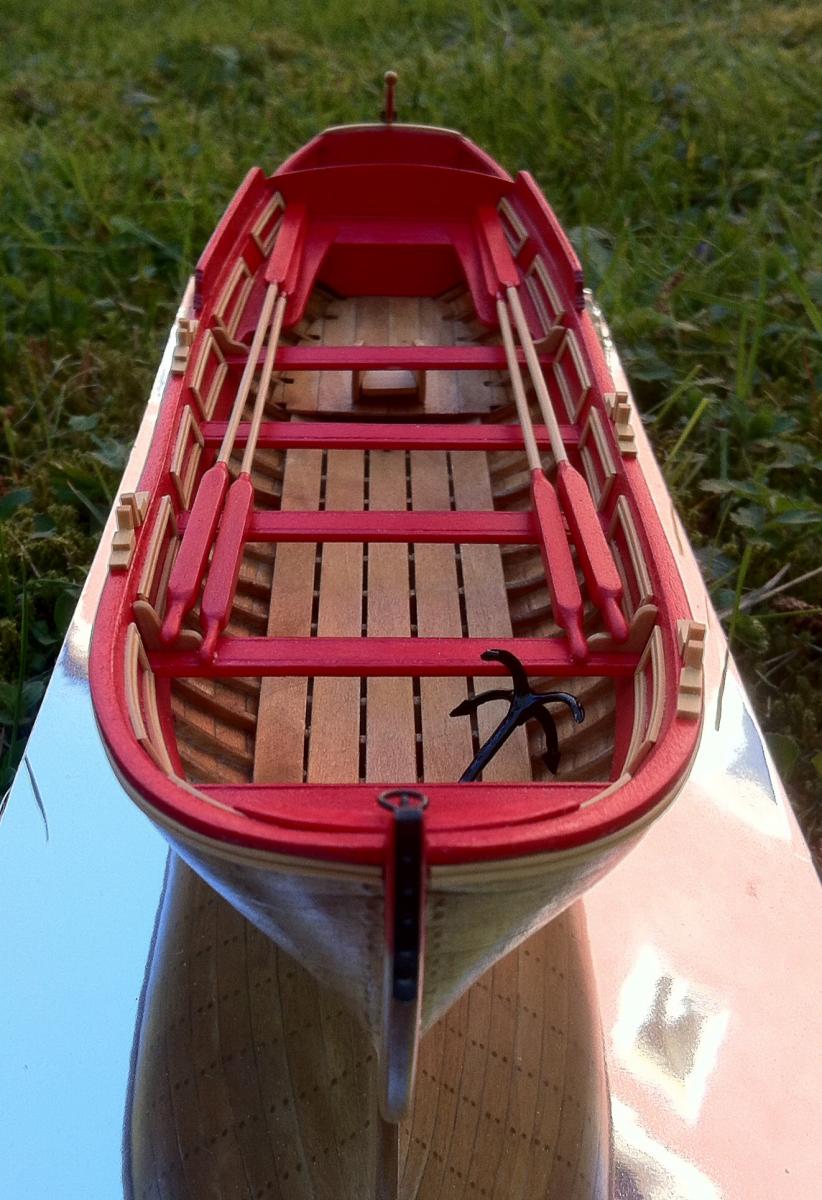
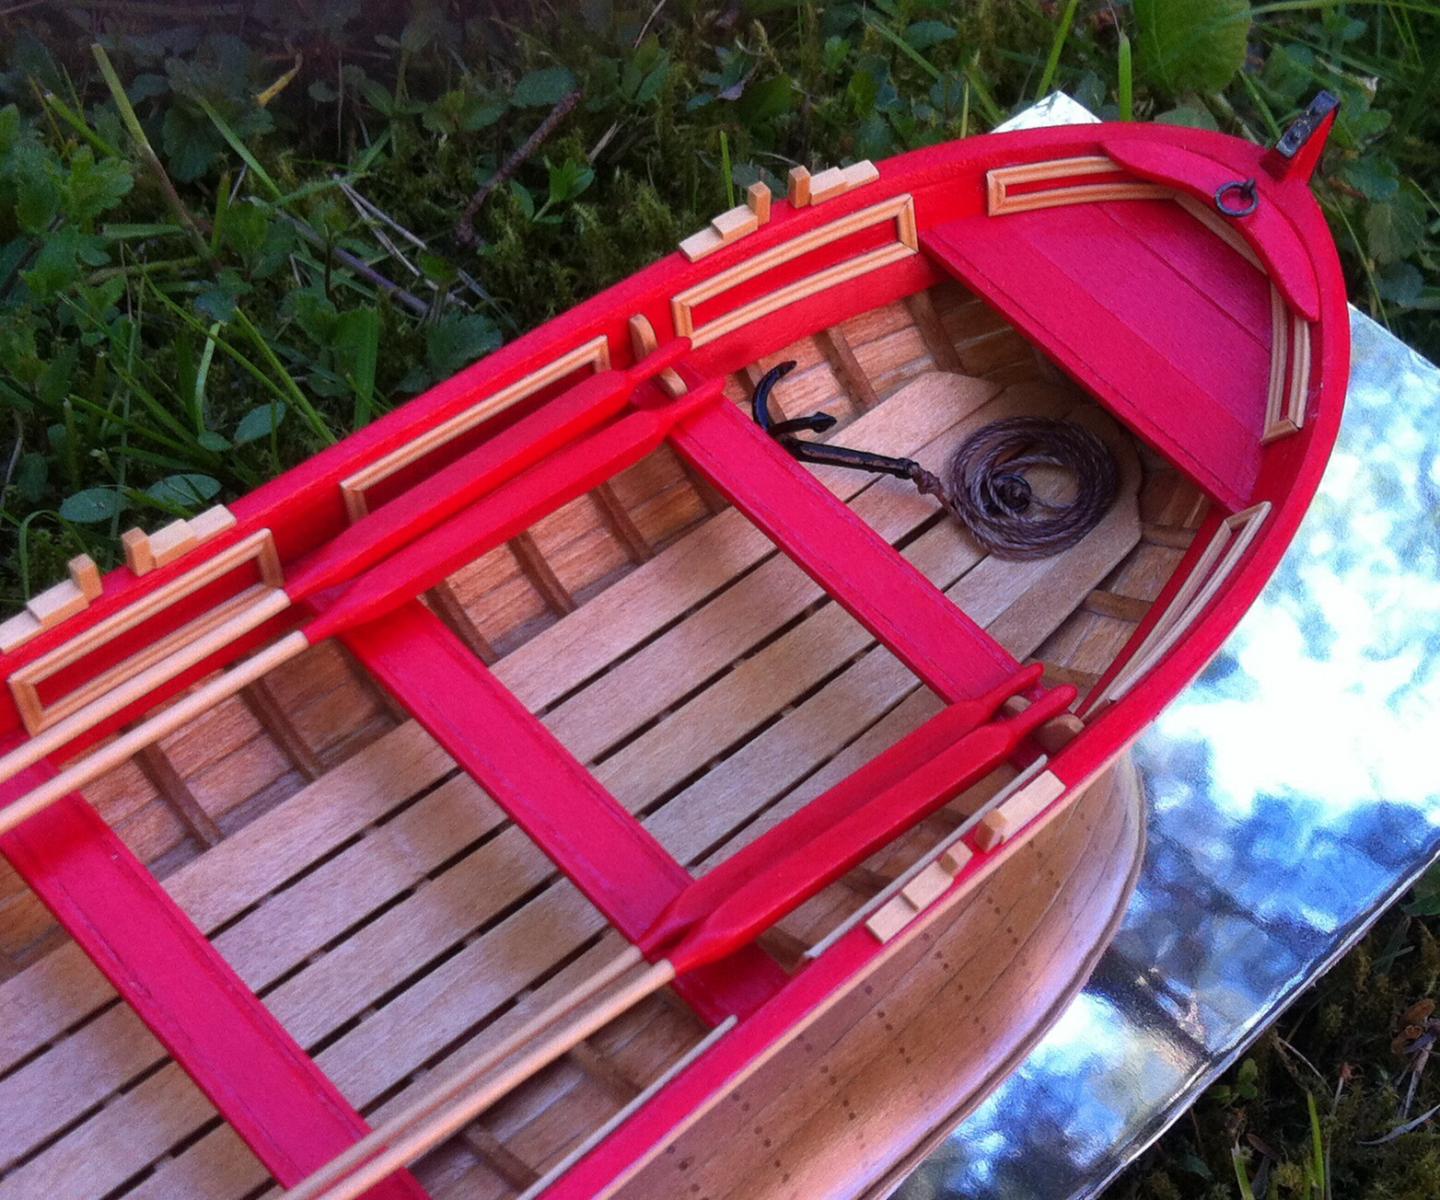
Anchor rope in the kit is definitely not as gourgeous as on Chuck's prototype. Frankly, it looks very cheap and definitely not like a rope (more like a wire), but since it is the last bit of a model - I gave up, and decided not to bother with ordering a proper one.
- 137 replies
-
- 5
-
-
- finished
- model shipways
- (and 1 more)
-
Remco, would you mind if I bother you with a next batch of questions regarding finish? it is one of the best I ever saw, so I am trying to learn on best examples! What is the benefit of microcrystalline wax comparing to tung oil, why do you prefer it now? And all that comparing to wipe-on-poly? Do you apply finish to a tiny pieces, like the beds, closets, etc? What finish have you used for frames? And the last one - what is your tactics for when to finish? Do you apply it before gluing, or after? Thanks for all advices!
- 1,215 replies
-
- 2
-
-
- sloop
- kingfisher
- (and 1 more)
-
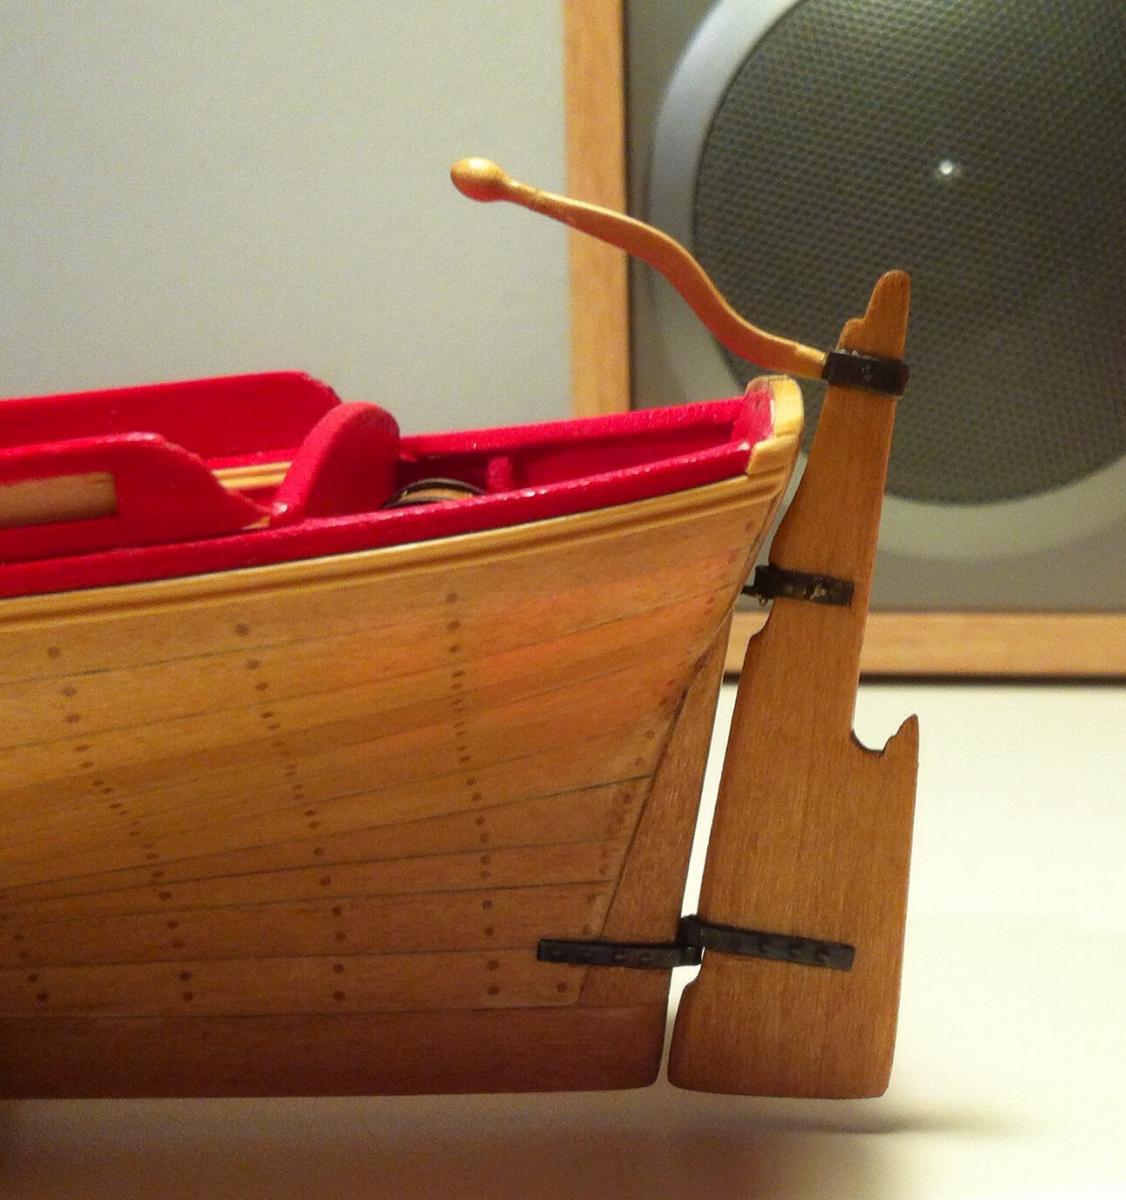
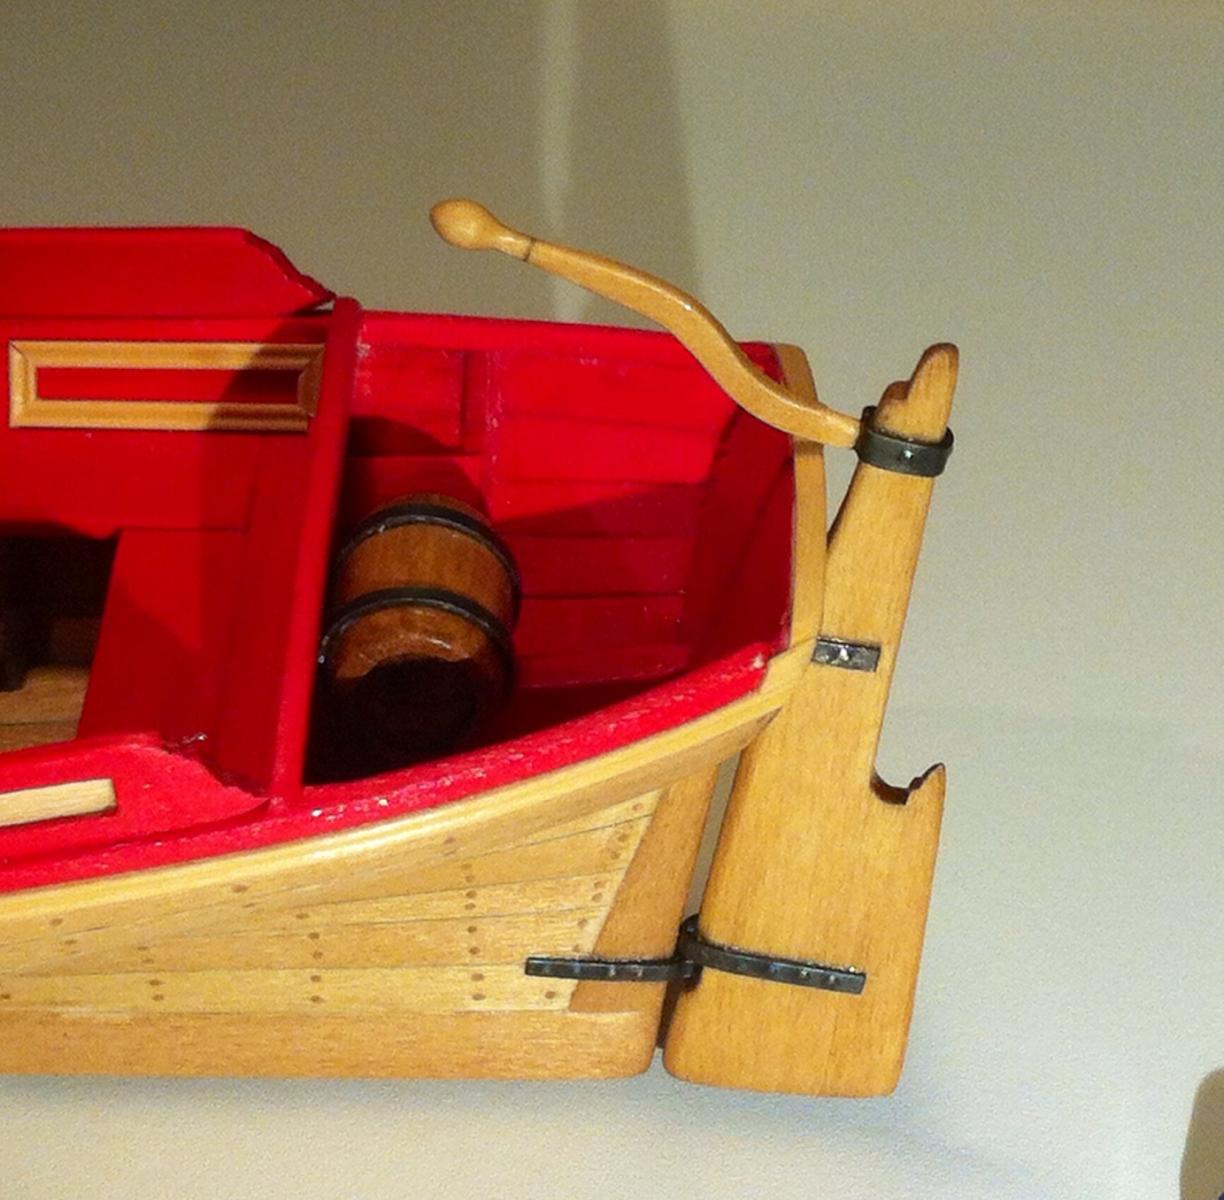
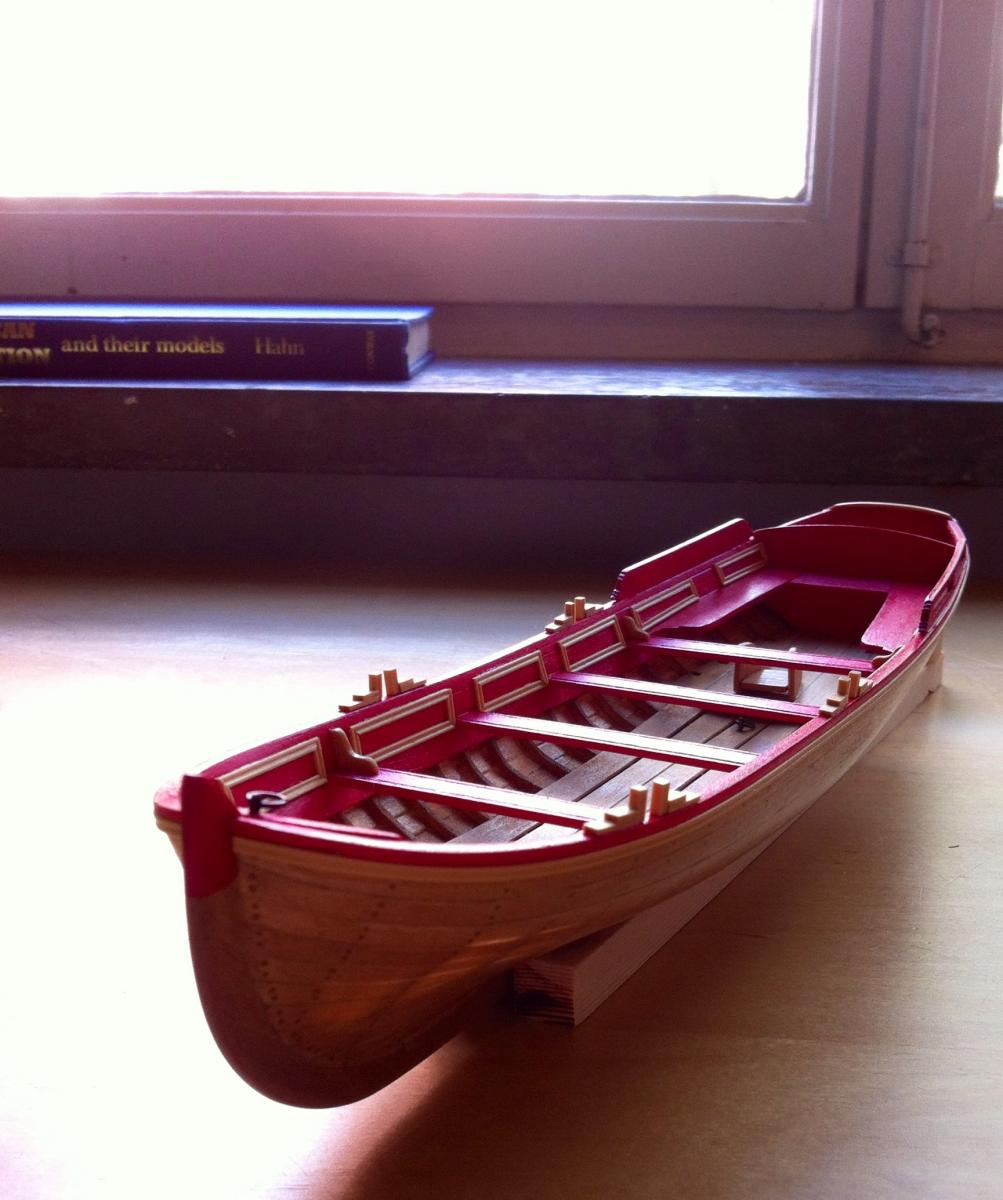
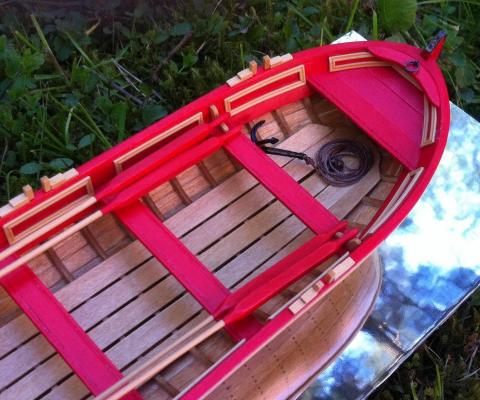
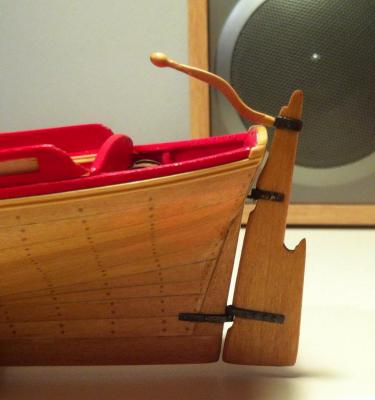
Hooray! I finished all the messy part of gluing metal parts onto wood parts. Damn CA! Hate it! Metal bumper looks much better then a paper one. Or I probably just cant work with the paper (some build logs of ships from card totally changed the view on paper) Rudder tiller have a brass rod inside to make a stronger joint with a rudder: And here is the rudder installed. Fully functional, you can rotate it gently Trunk of the pinnace looked too empty. Then I started to think... What could be there? It is a flashy pinnace, not the one that is used to carry food supply. It is intended to transport officers. What they could carry with them?? Aha! Some high quality booze, to make sure it will not disappear while officers are on the shore. So here is a tiny booze tank: SKÅL!


- 137 replies
-
- 15
-
-
- finished
- model shipways
- (and 1 more)
-
Works now! No acetone, just a mechanical force of a metal circle brush

- 137 replies
-
- 4
-
-
- finished
- model shipways
- (and 1 more)
-
Cracked the reason. My brass was covered with a layer of something transparent, for a nice shiny look. Brushed it away with a metal disk brush, to expose a bare brass. Now it blackens immediately, as expected! Awesome!
-
Got it, will experiment with cleaning/sanding/vinegar before blackening. Thanks!
-
Thanks Dan! Maybe I should not dilute the blackening agent then? After 10min, parts were not black at all. Fist sign of blackness appeared after 30min or so.
-
Blackening liquid arrived (Birchwood Casey), but the first blackening was an epic fail Blackening just falls off, it do not stick at all. I cant take a piece with fingers or tweetzer, the black patina just sticks to fingers, thats it: What has go wrong? My workflow was: 1) put brass parts into acetone for 30min to degrease 2) rinse with water 3) put into blackening liquid diluted with water 1:8 4) wait for 30-60min 5) Actually blackening stopped after 30min, so I added a bit more liquid, maybe it ended up close to 1:6 ratio. 6) removed after 2 hours in liquid 7) rinsed with water 8) left to dry overnight. Maybe I should use another ratio? Or use distilled water instead of tap one? Or? Would appreciate any hints!

- 137 replies
-
- 1
-
-
- finished
- model shipways
- (and 1 more)
-
177x ships - British vs US design, what are the differences?
Mike Y replied to Mike Y's topic in Nautical/Naval History
We should be also careful with comparing that, measurement standards could be different (internal/external could be messed up, for example) -
177x ships - British vs US design, what are the differences?
Mike Y replied to Mike Y's topic in Nautical/Naval History
Thanks druxey! It is a big relief, then I can look on similar ships of that period, ignoring their geographical origin (I'm not a historical correctness maniac anyway ) -
Probably the most efficient way would be to remove all frames, and glue them again using some jig to guarantee a proper alignment. I did a jig with lego bricks, some people use card templates, or evenly sized spacers, etc. It's very hard to do a proper alignment without a jig.
-
Also, it may sound obvious, but not mentioned in a manual. Shape the inner edge of the plank with a file, to have a better contact between planks, to avoid gaps. No shaping, there most probably would be a gap: Shaped planks, no gaps: P.S.: and, again, do not count on sanding to level your hull and hide planking mistakes. It is purely cosmetic, in that build planks are too thin to be significantly sanded. P.P.S.: good luck, and just start it!


-
You wipe off all excess water when you pull the soaked plank from the water. So it would be just damp, but not dripping wet. I had no problems with getting moisture into the bulkheads. However, you will need lots of small clamps. There was a nice topic somewhere, about making a simple clamps from a paper clips. Looks like this, and very handy: But always put a small pieces of scrap wood or card between clamp and plank, basswood is so soft that it would be smashed otherwise. P.S.: don't overthink it, just get started! There are spare planks in the kit, you have a room for a mistake, especially if you use a glue that could be dissolved with water or alcohol. Planks are attached incorrectly? Not a big deal, tear them away, glue again. I used PVA-style glue, just add a water, glue joint is getting weak, you remove the plank and reuse it again.

- 132 replies
-
- 1
-
-
- 18th century longboat
- model shipways
- (and 1 more)
-
The basswood strips from the kit are soft after 10sec soaking in a boiled water. You can bend them with a bare hands, or clamp, etc. Just don't glue a wet strip, it will shrink when dried, so you will end up with gaps. I usually used a slow technique - soak the plank, pre-bend with fingers, clamp it to the frames to have the same shape as needed, leave it overnight to try, next evening - glue that planks, and soak and fit next pair. As a result, you glue just 2 planks per day (one on each side), but bending is easy, plank is perfectly fitted when try.
-
Amazing! Is there a video? How do you control her? Rotating the masts?
-
Matti, with your skills, have you thought about actually making a mast from a multiple pieces, like on a real ship?
-
Now it's a true engineering approach! The future deck clamps (red arrows on a first photo) woud be removed later, or they would carry some weight?
-
Floyd, it would be even better! Looking forward for photos in your log
-
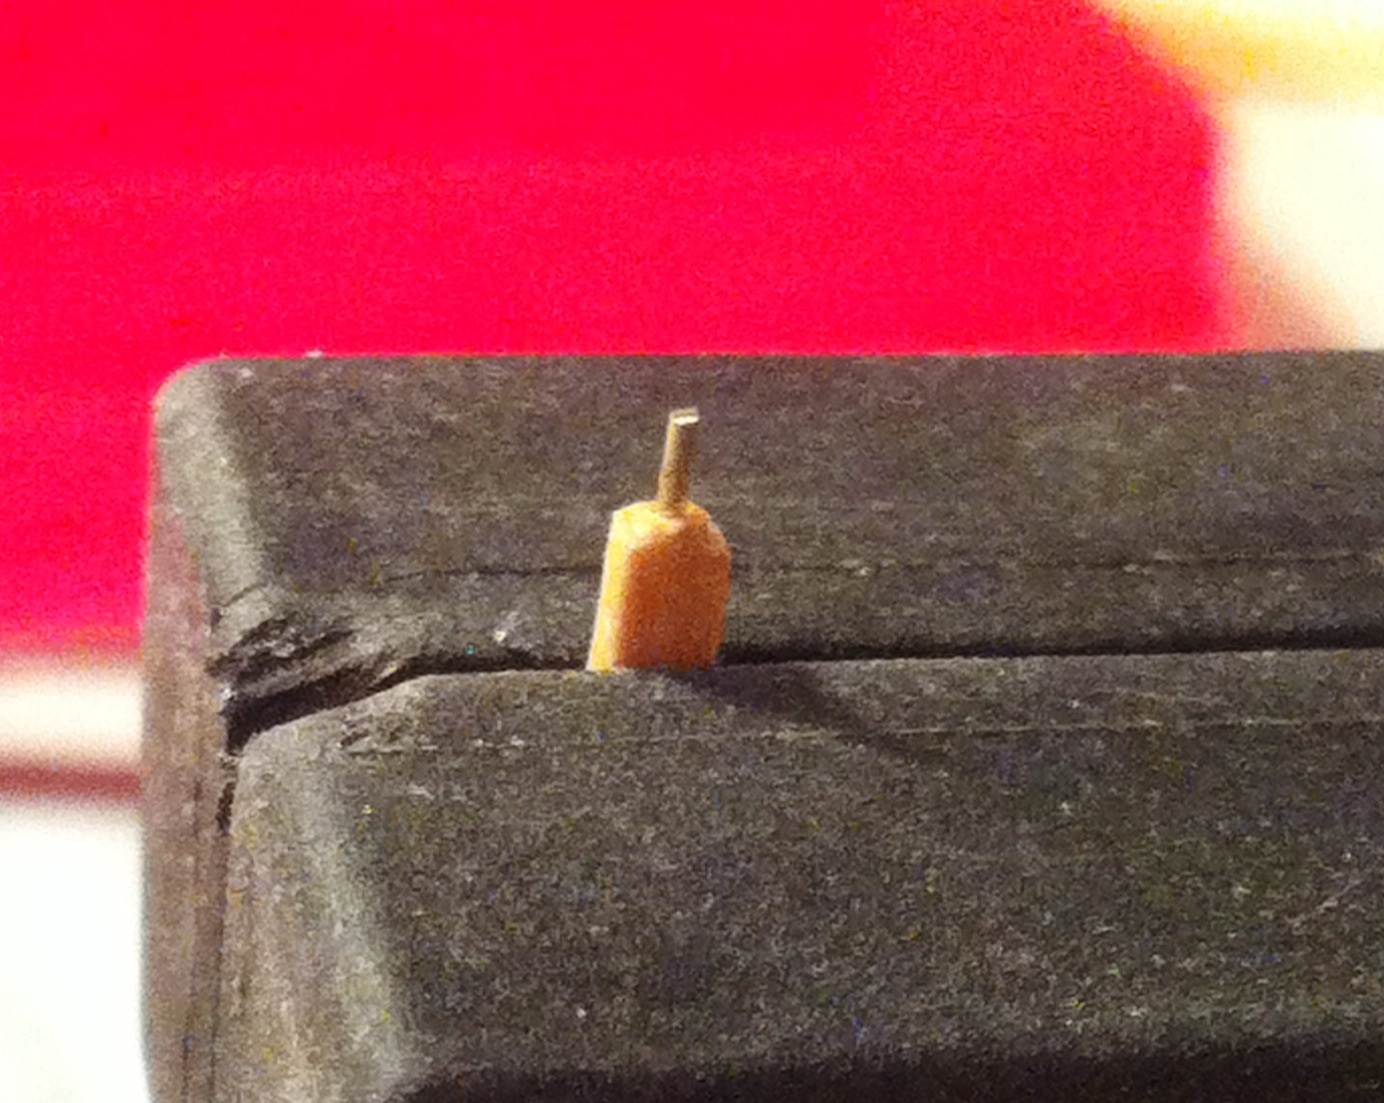
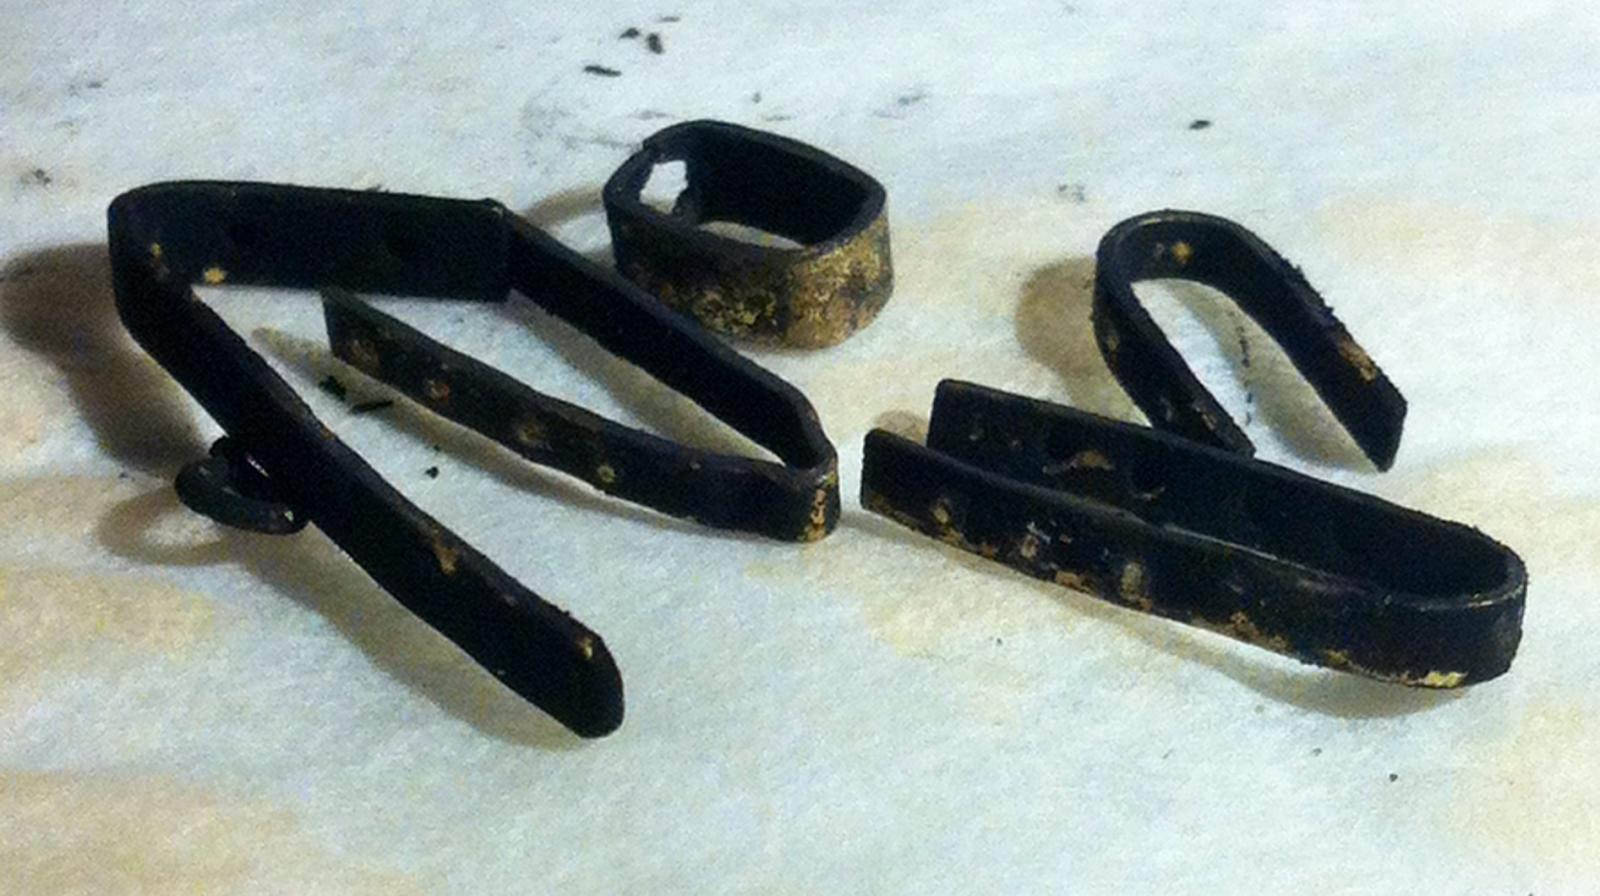
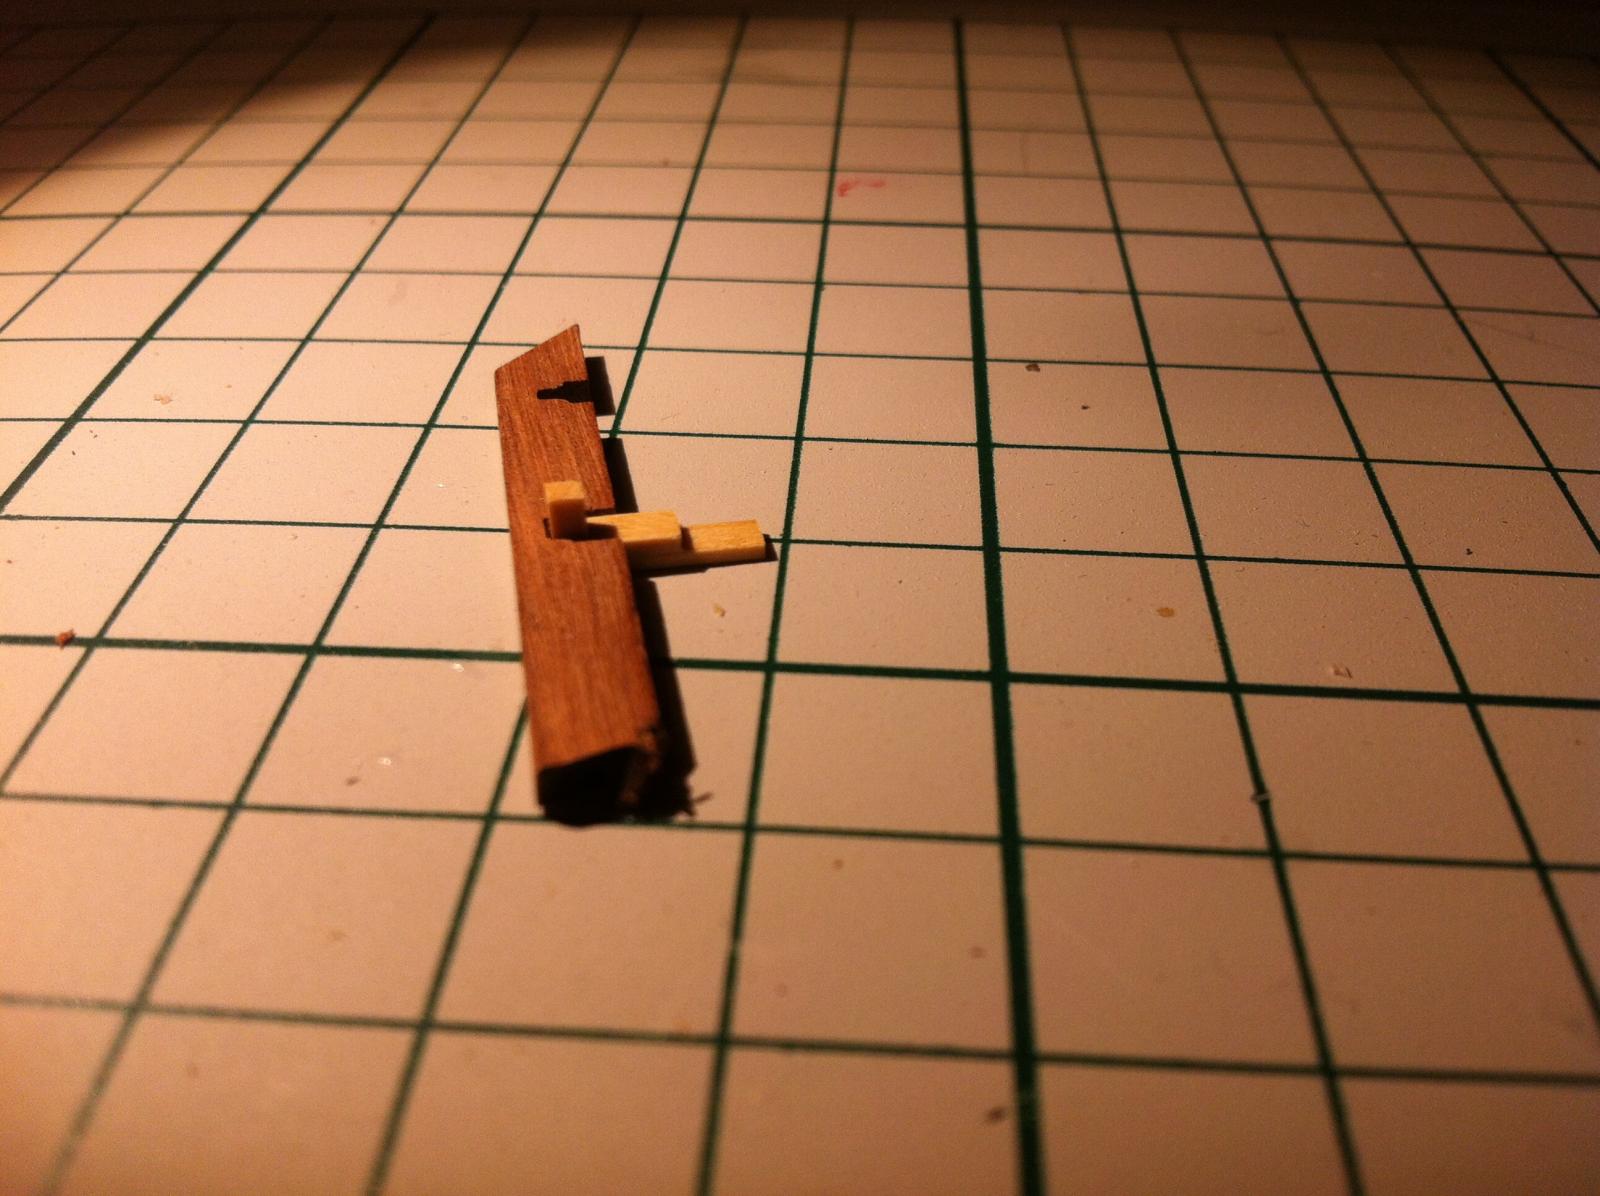
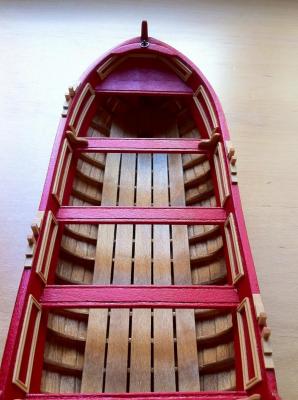
Installed oar locks. Their crisp edges a bit in contrast with a smooth hull. I tried to smooth them, but on that scale I can't make it accurately. So let's call it a feature While making a photos saw how innacurate is the twart moulding... I should have make it from boxwood, but. I had no boxwood back then... And it is deeply in a boat structure, can't find a way to replace twarts without traces. Well, I will blame that drunk rowers, who was trying to hide contraband in that mouldings!

- 137 replies
-
- 10
-
-
- finished
- model shipways
- (and 1 more)
-
Congrats on a new tools! Nice model, that contrast of dark hull and very bright deck looks interesting!
-
Would be nice to leave a short info - why exactly this book is good Reading a short description on Amazon give no info about a book content. Blah blah, something about shipmodels, aha, ok, clear
-
Thanks everybody! Dave, please keep in mind that I did some things not according to instructions, original Chuck's pinnace will look a bit different. It is all about individual preferences... Floyd, will start it right after pinnace, but on a slower speed, since it is summer
-
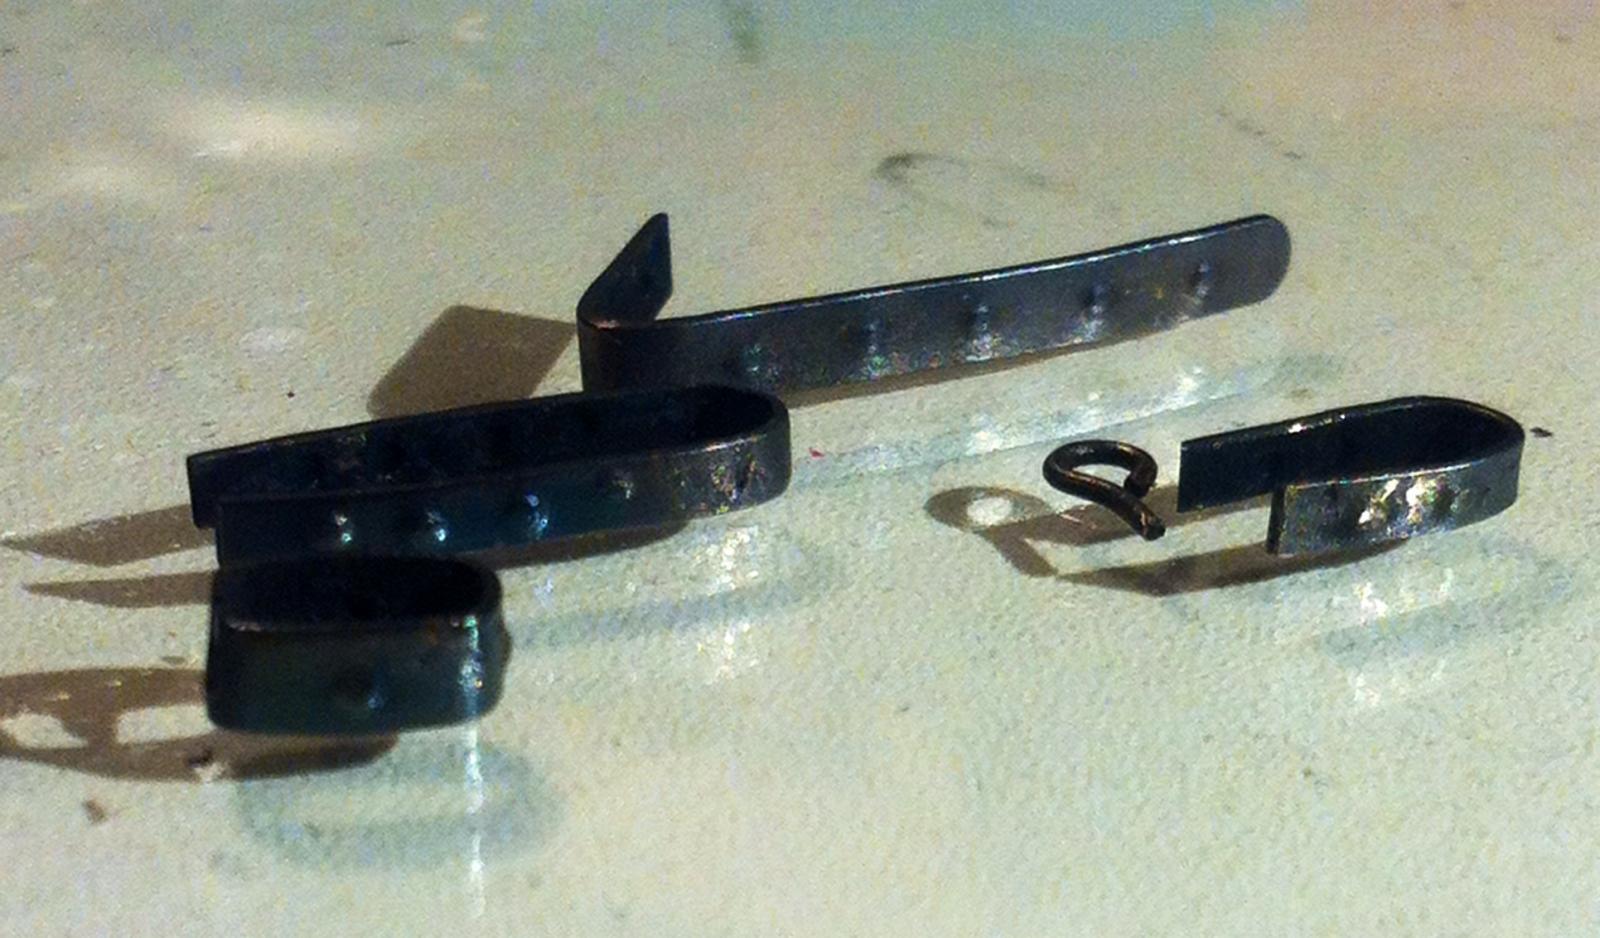
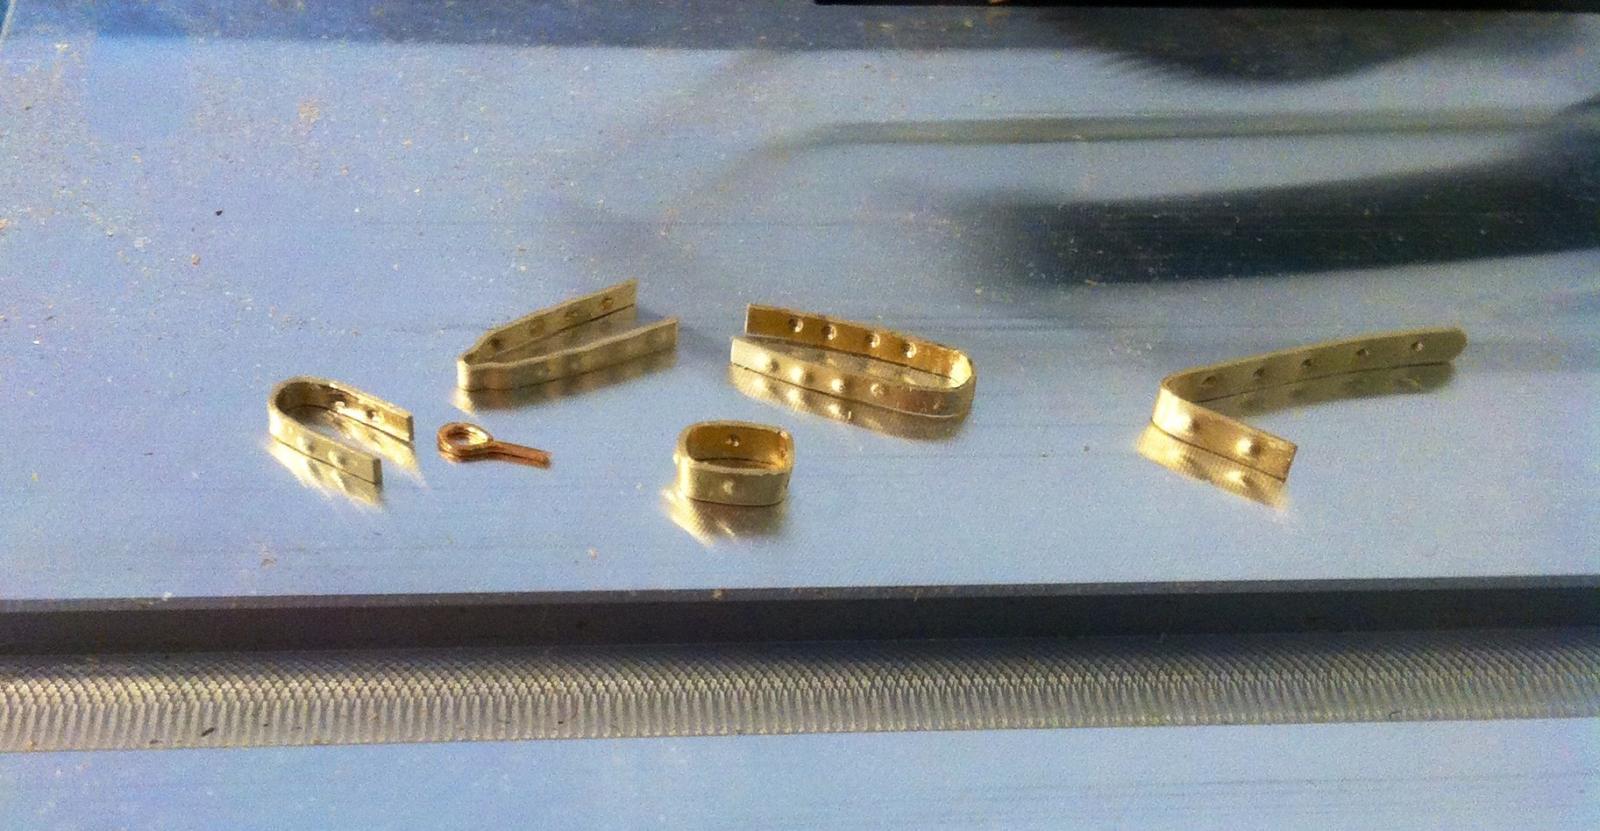
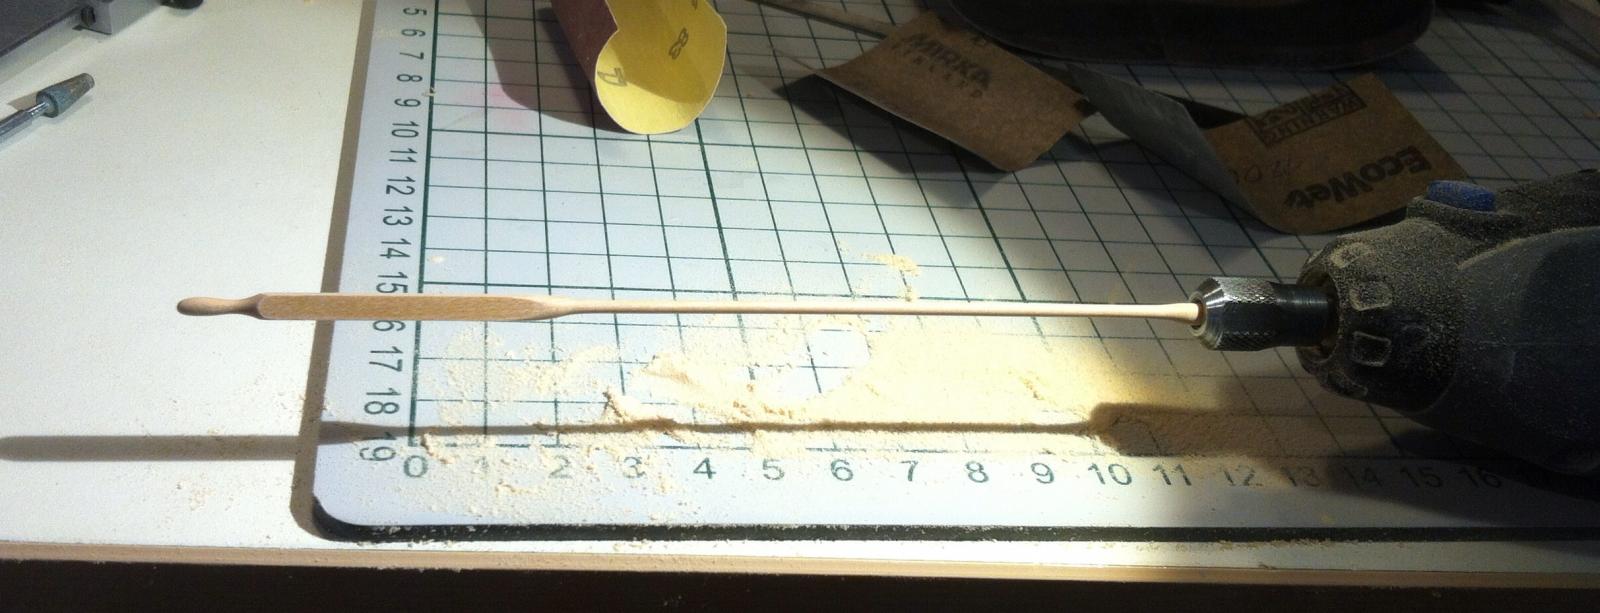
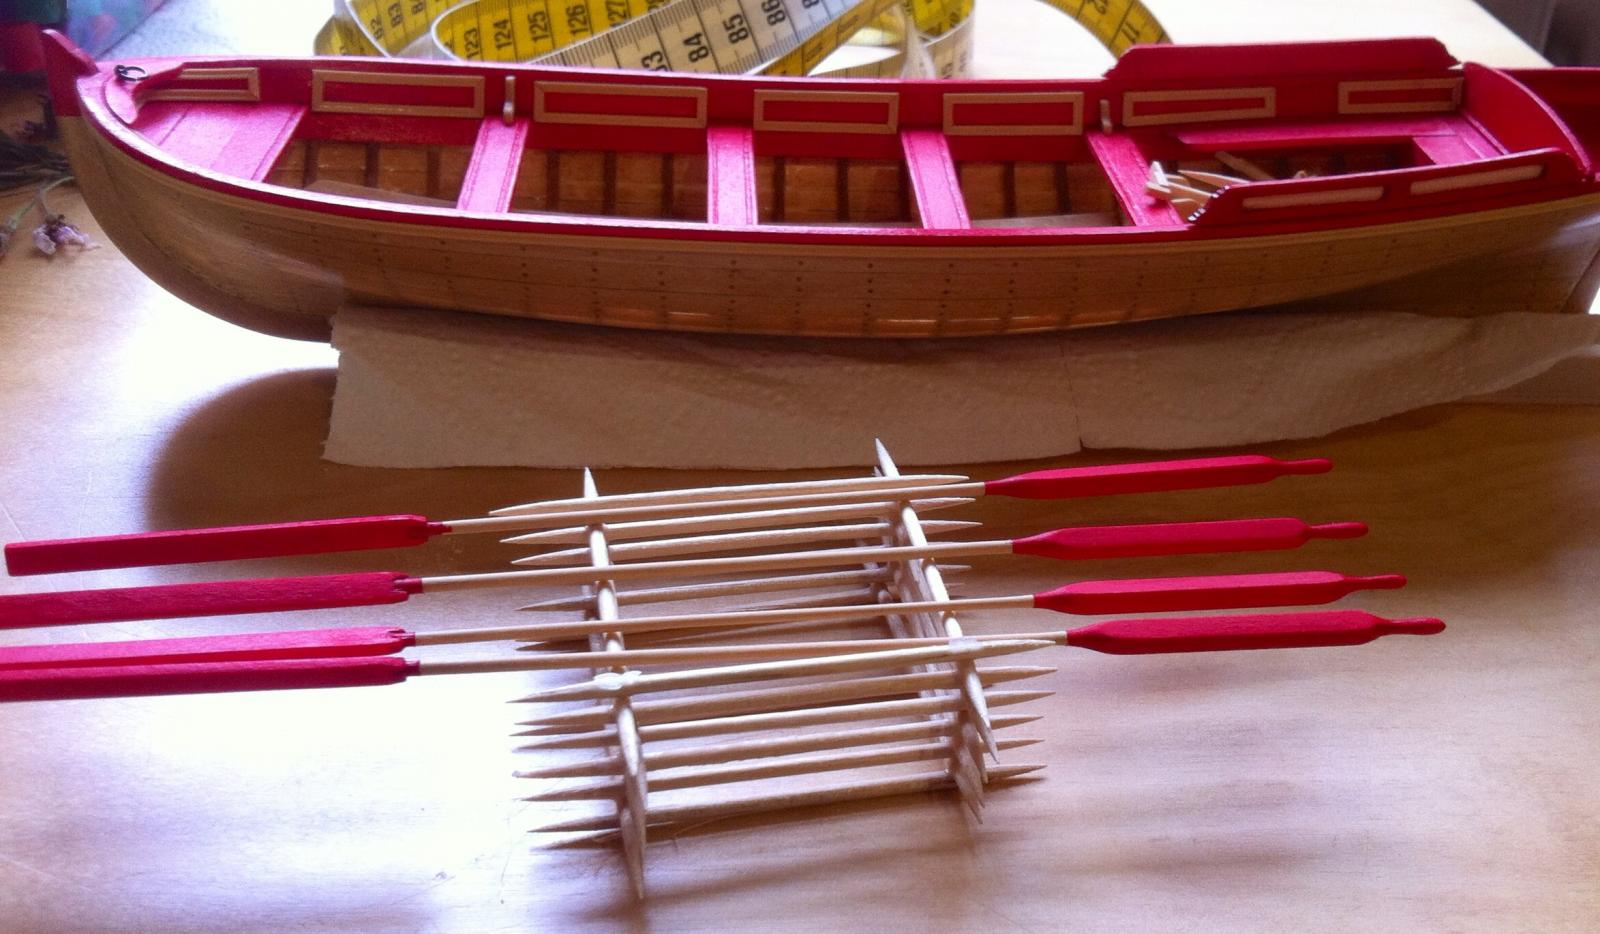
Prepared all metal parts. Manual suggests to use black paper, but it looks so-so, will use blackened brass instead. Imitation of bolts is done by bumping it with a dull nail. Waiting for a blackening liquid to arrive... Rest of the day was spent on oars. Tricky little things, if you don't have a lathe. I turned them from a square boxwood stock, holding it with bare fingers. Even on a minimum speed it was hard, now I don't have a fingerprints on a few fingers anymore When painted, they look cute (no poly yet, will be better after a coat of poly):


- 137 replies
-
- 11
-
-
- finished
- model shipways
- (and 1 more)
-
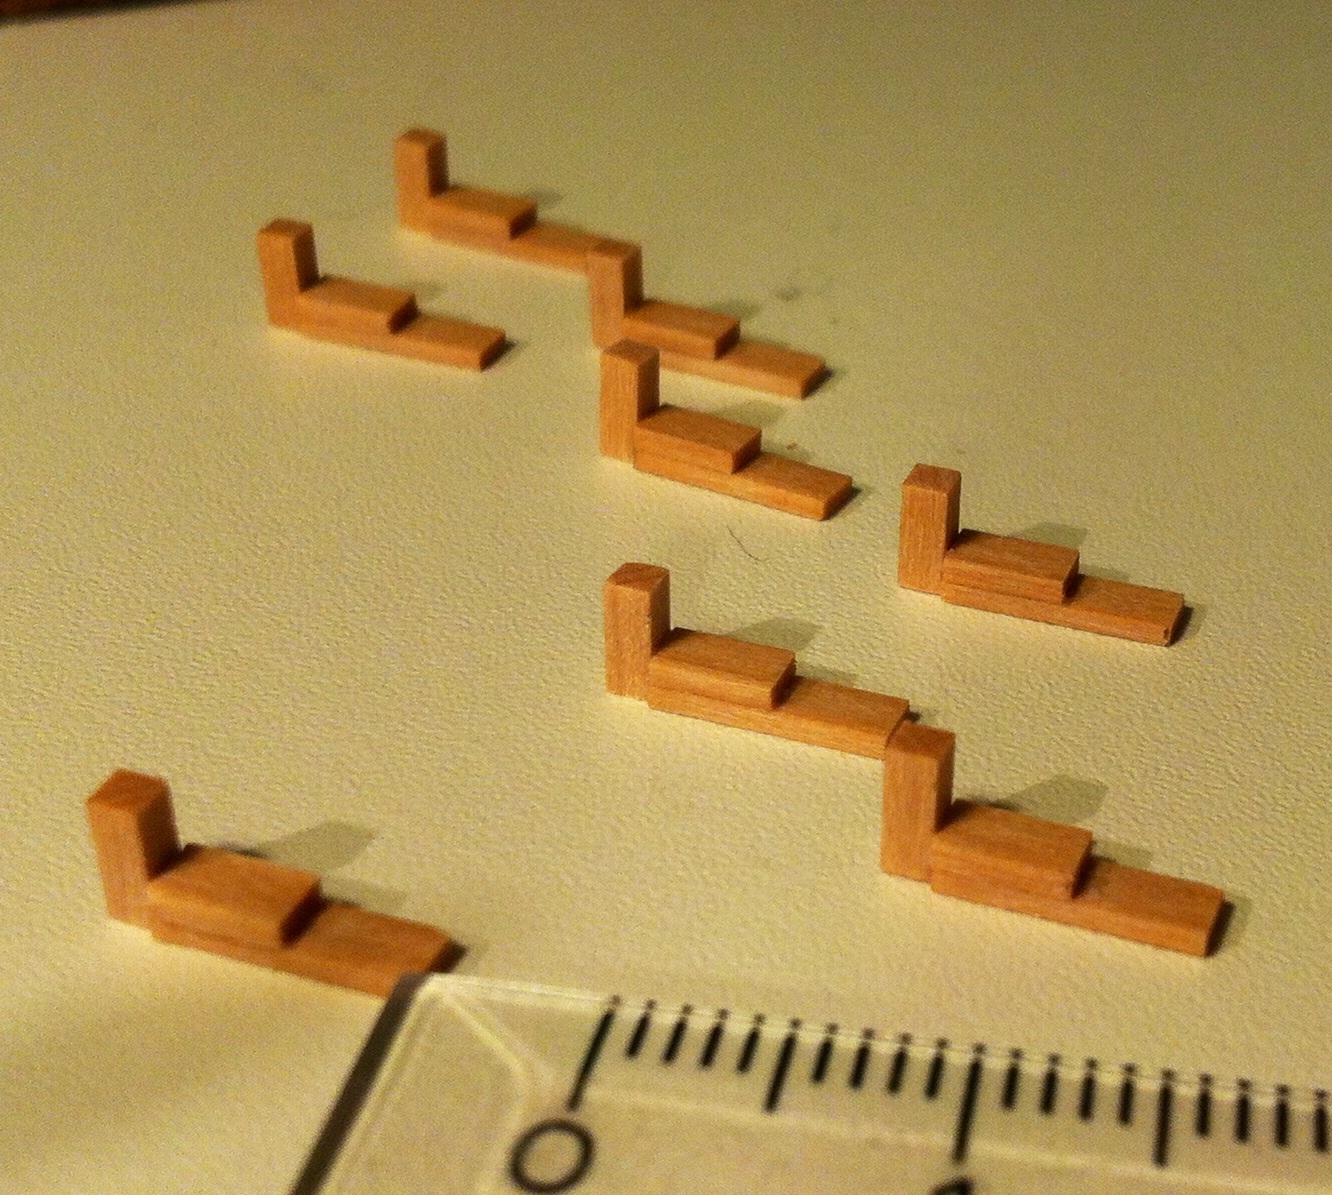
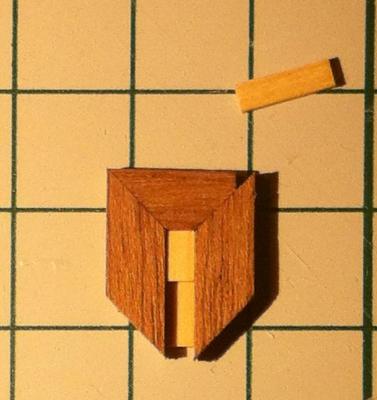
Today worked on oar locks. There is a mismatch between photo in instructions and the ship plans, preferred version from plans. Inspired by Remco build log, decided to switch to "treat every detail as a model" philosophy and no sanding, make things good straight away, do not count on sanding to hide mistakes. And - want to make a tiny thing - make a jig first! Now I wonder how to apply poly to that tiny pieces... And ideas?


- 137 replies
-
- 8
-
-
- finished
- model shipways
- (and 1 more)