HOLIDAY DONATION DRIVE - SUPPORT MSW - DO YOUR PART TO KEEP THIS GREAT FORUM GOING! (Only 53 donations so far out of 49,000 members - C'mon guys!)
×


Boatsinc2000
-
Posts
108 -
Joined
-
Last visited
Content Type
Profiles
Forums
Gallery
Events
Everything posted by Boatsinc2000
-
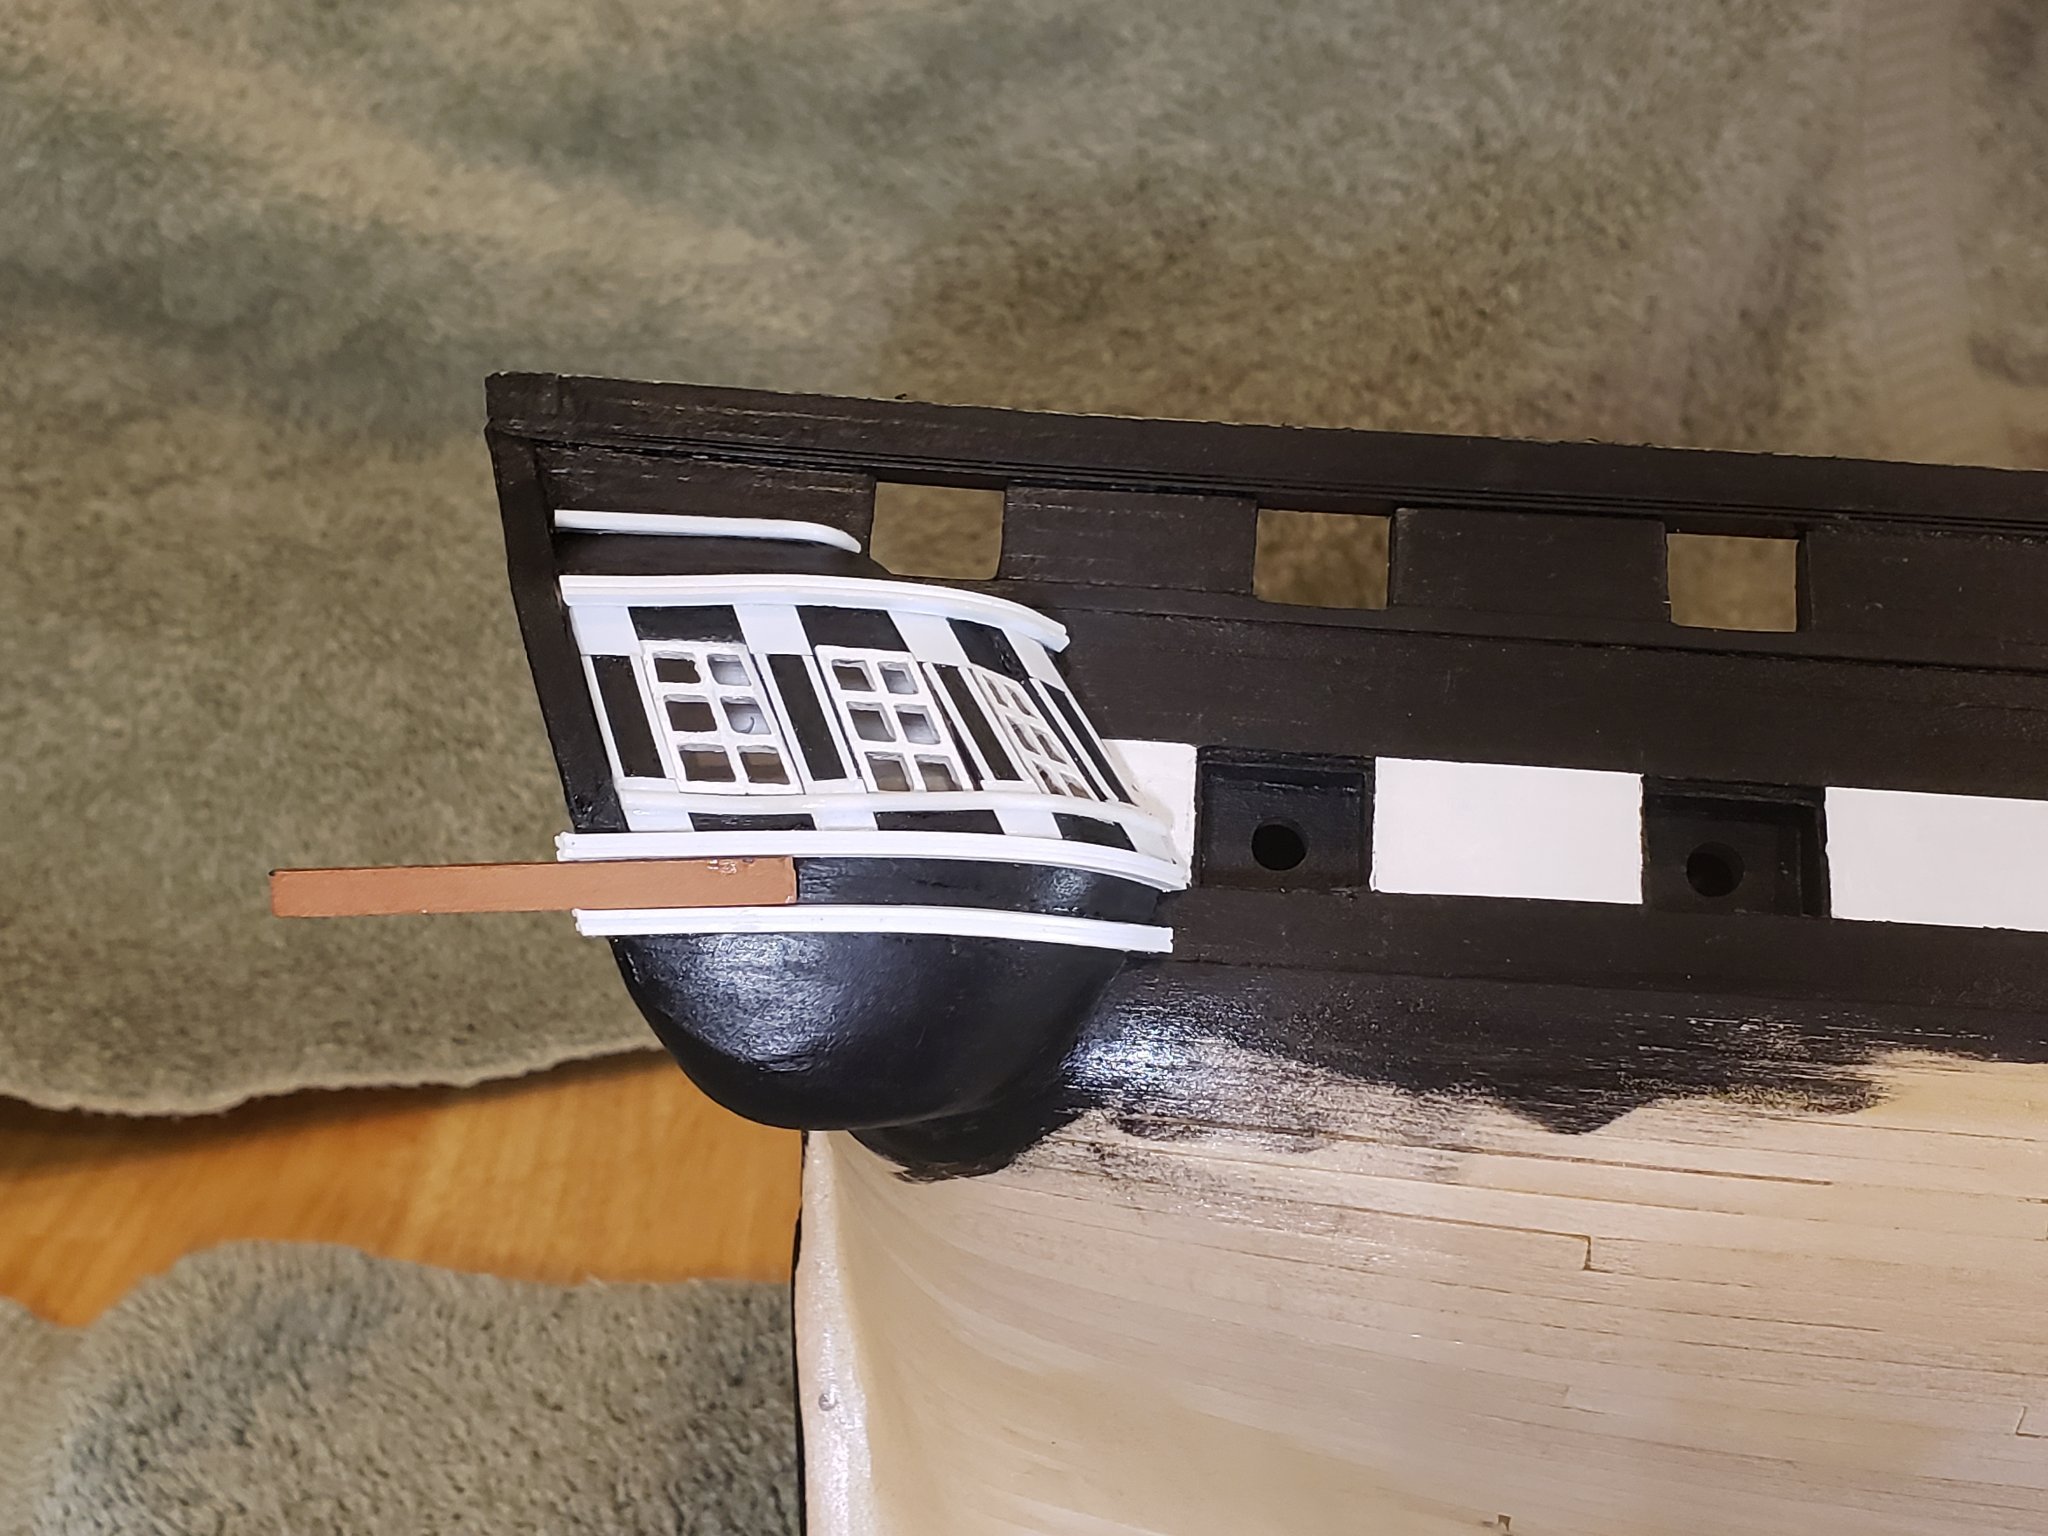
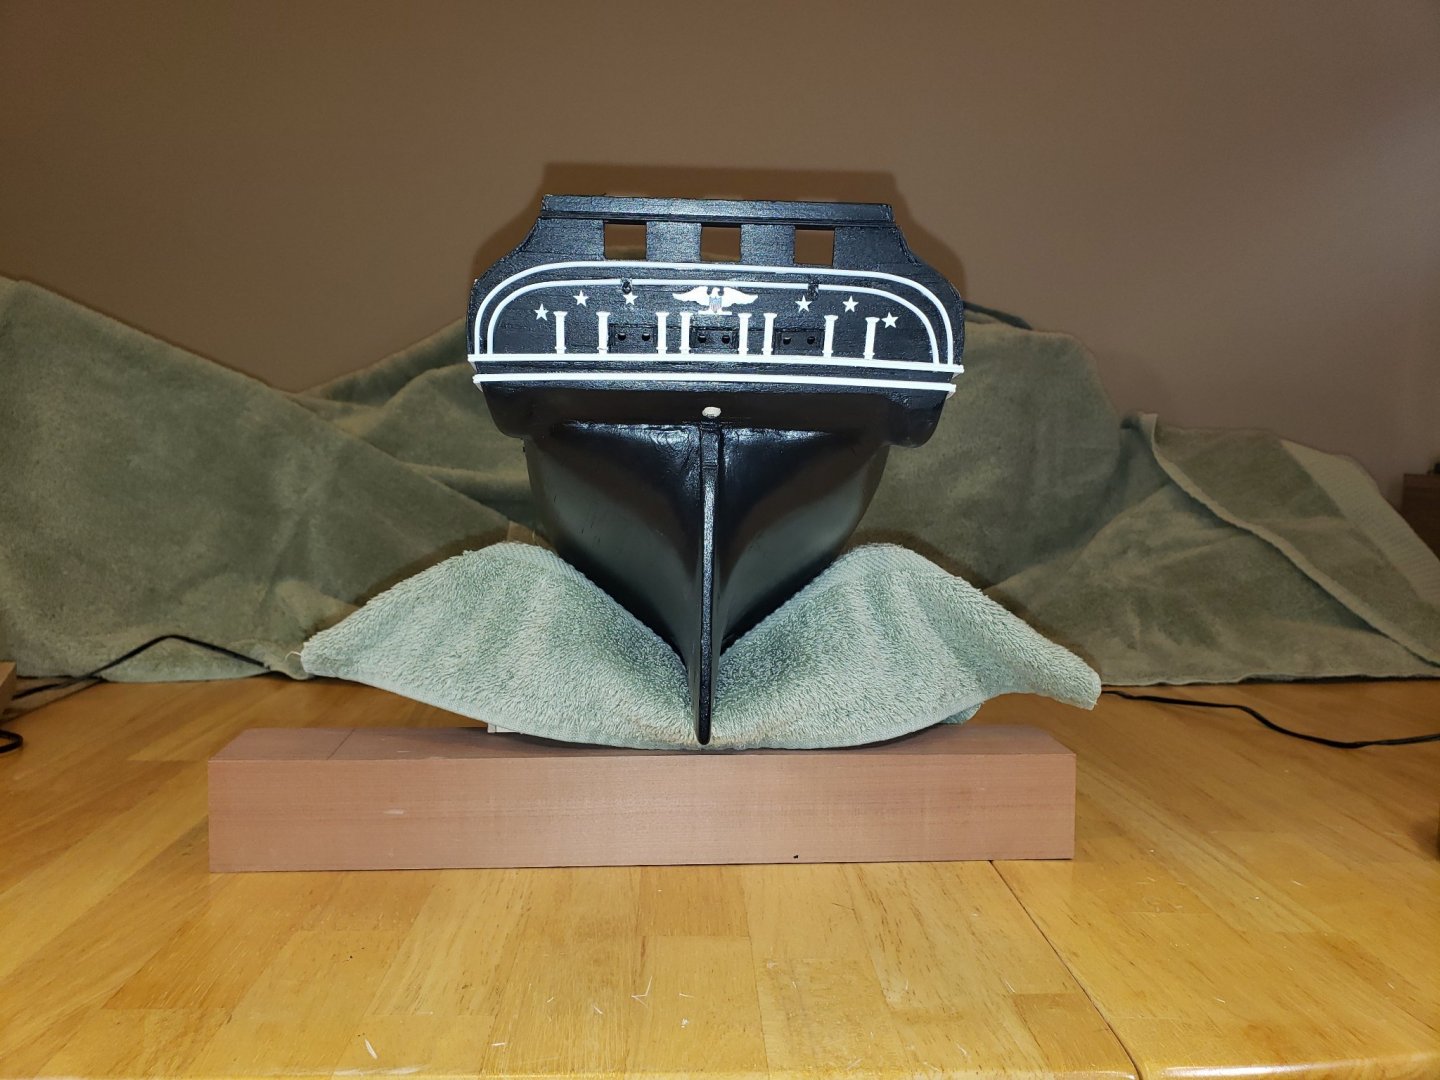
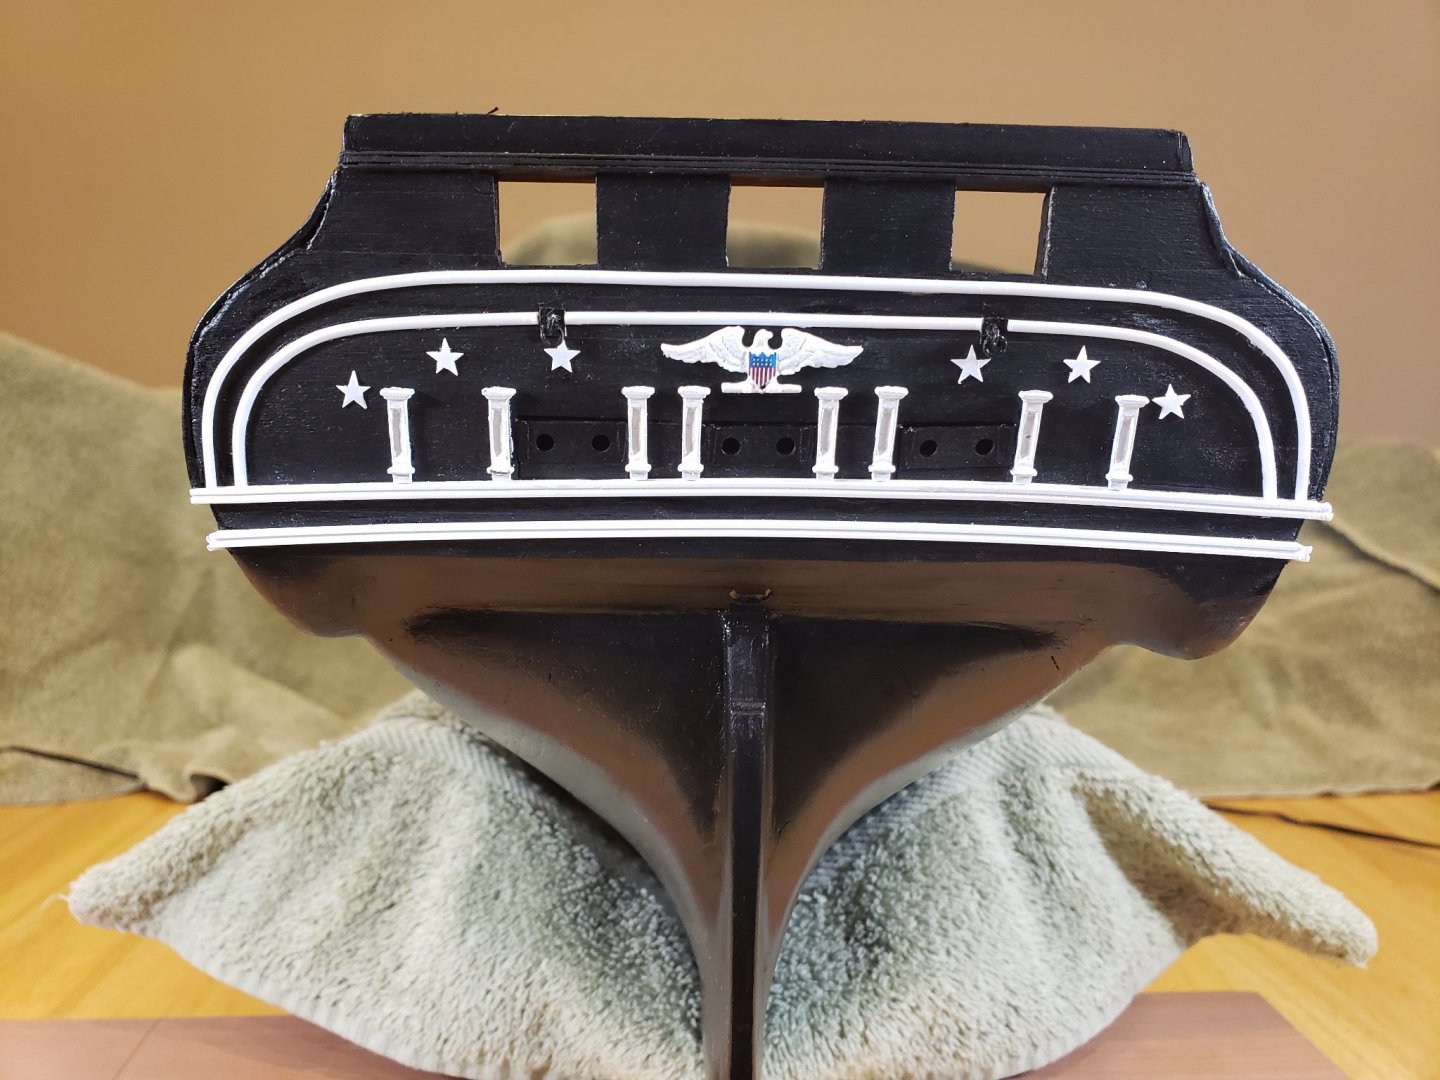
Thanks to all for the likes! Gregory, those are really helpful. Thank you so much. Jon, eagle is supplied with kit and Bob includes shield with practicum. Start at 72% when printing. Sealed with polyacrylic. Stars cut from styrene using #18 x-acto. Star pattern in practicum. Attached the copper piece to the transom. Can't believe how fragile that stuff is. My tweezers scratched it just picking it up. Glad to hear that you liked the transom. Thanks for looking in.
-
Hi Everyone and thanks for your replies. Vahur, Thanks, I did see the thread on the Russian micro carving set started by Druxey and that was what got me interested in some additional tools and I may pursue that route. Does anyone know if they are still available? Jim, thanks for taking the time from your busy schedule to respond. Great to see a pic of your Conny and your wonderful workmanship. I've often wondered if you had continued that build. If you wouldn't mind letting us know which ones that you use the most, that would be really helpful. I'm tempted for both sets, but if you mainly use only 1/2 of them then that might be a little pricey at my skill level. Jack and Hsae, thank you for helping out! A lot of information for me to digest and I really appreciate your taking the time to help a novice. Thanks,
-
Thanks, for now I'm going to hold off on doing much with that portion of my Conny build, but I'll be following your solution very closely. In an ideal world, right now my preference would be raised lettering and I may try to carve it just as an intro to carving and for the experience. High probability that it will look like my grandchildren did it or I end up cutting myself. Best of luck!
-
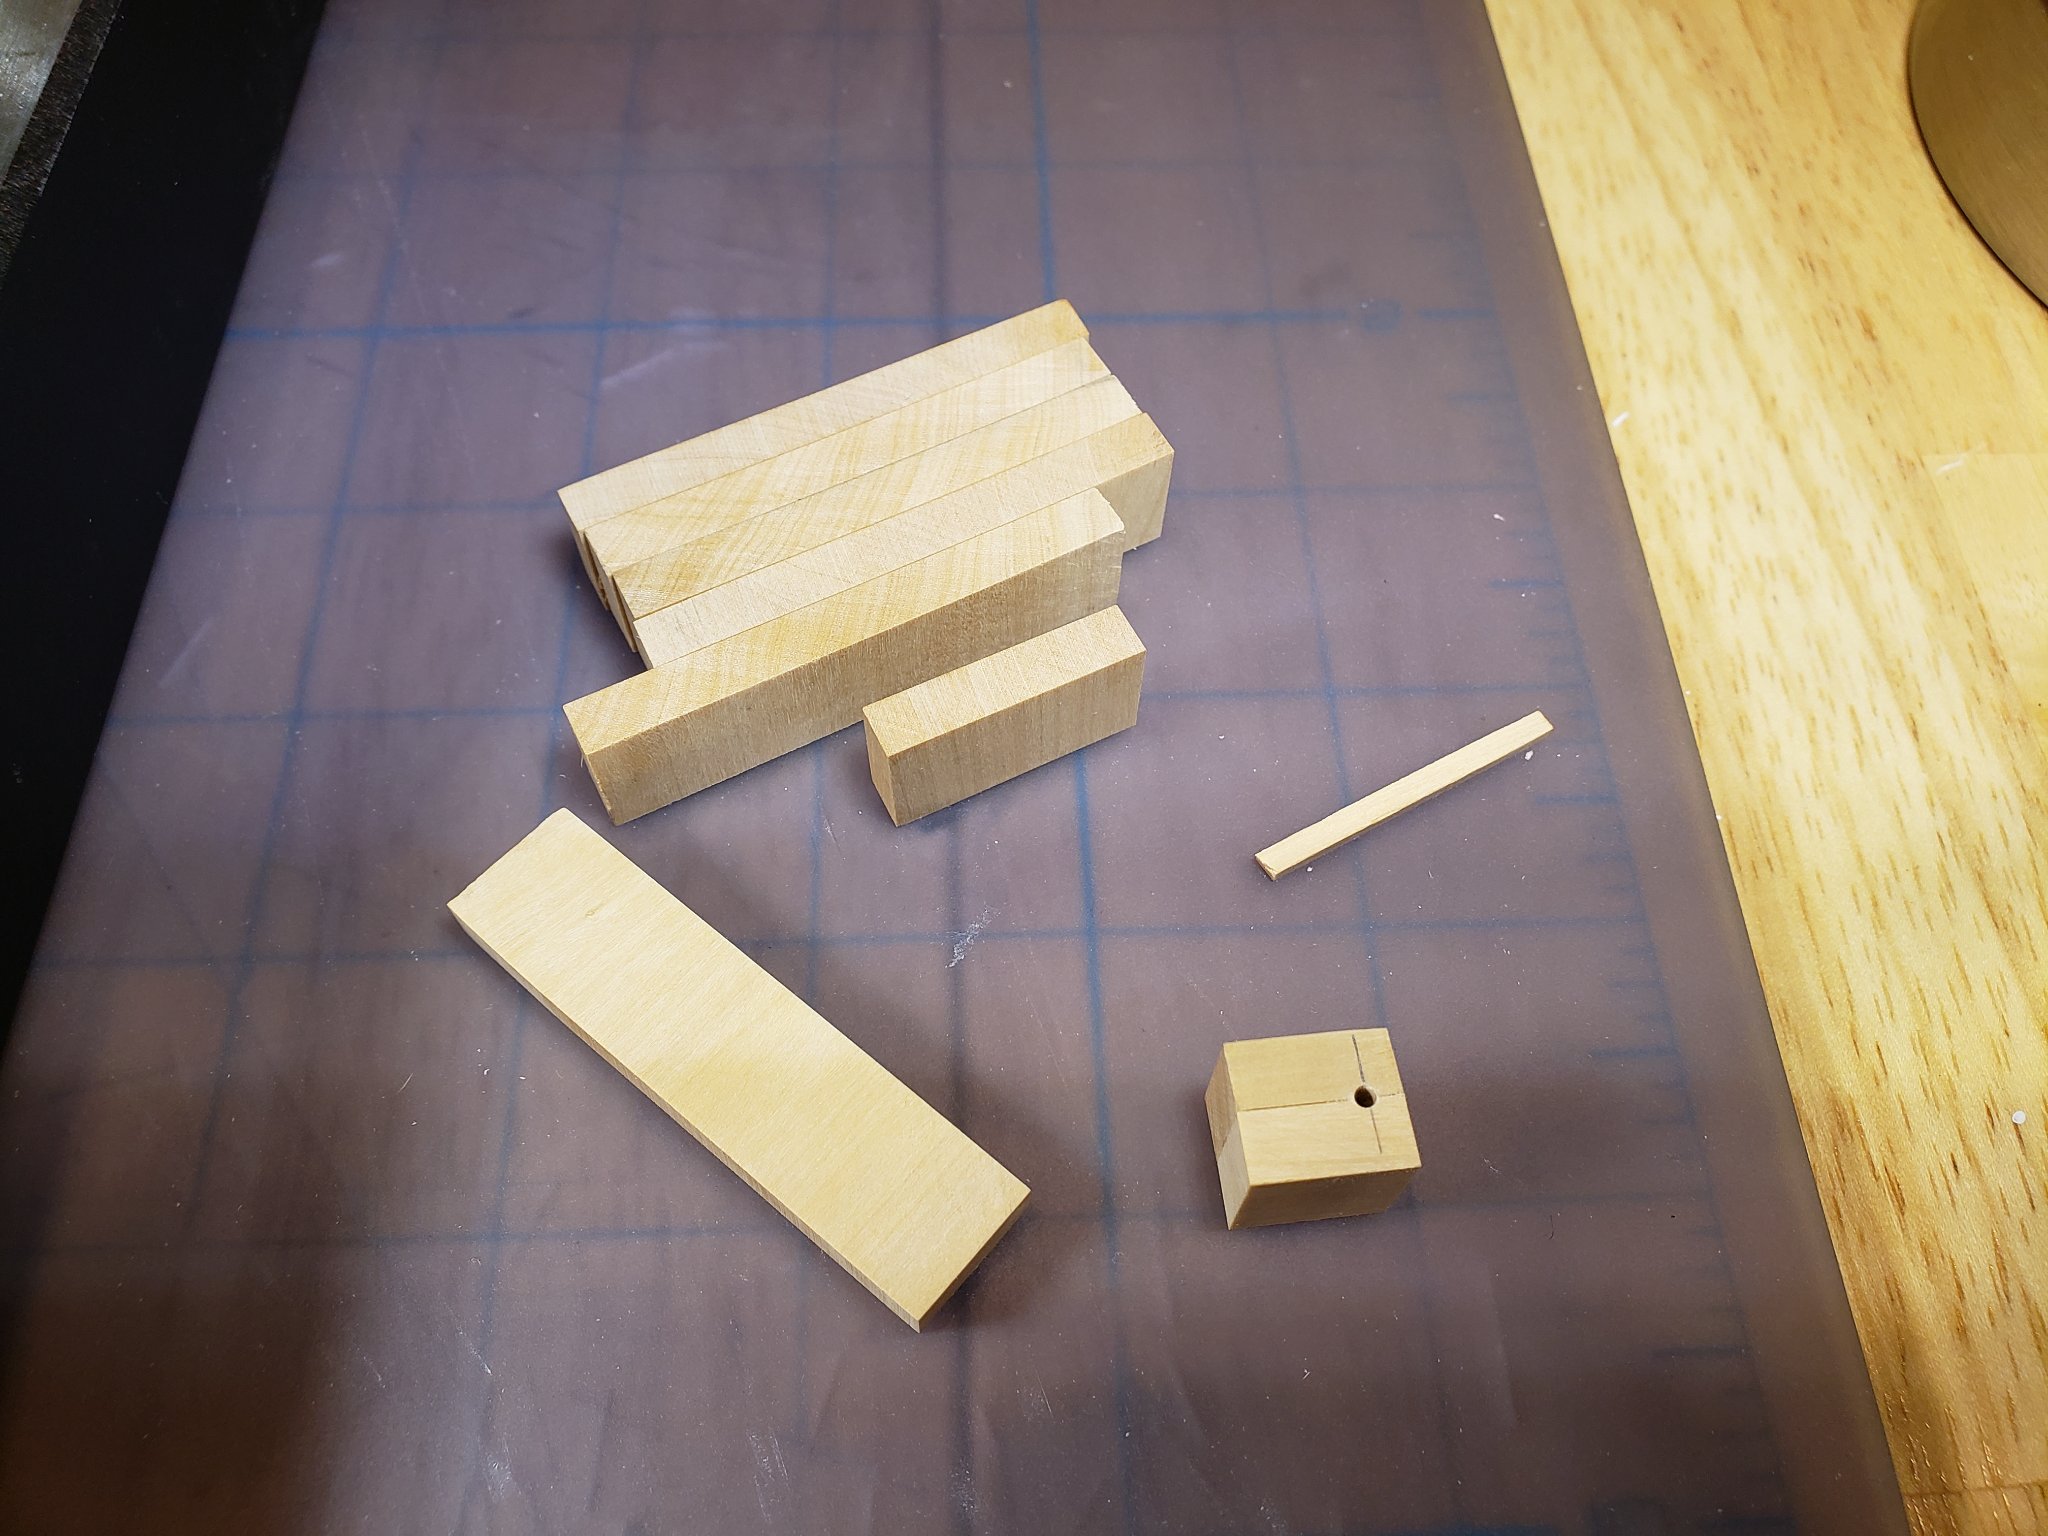
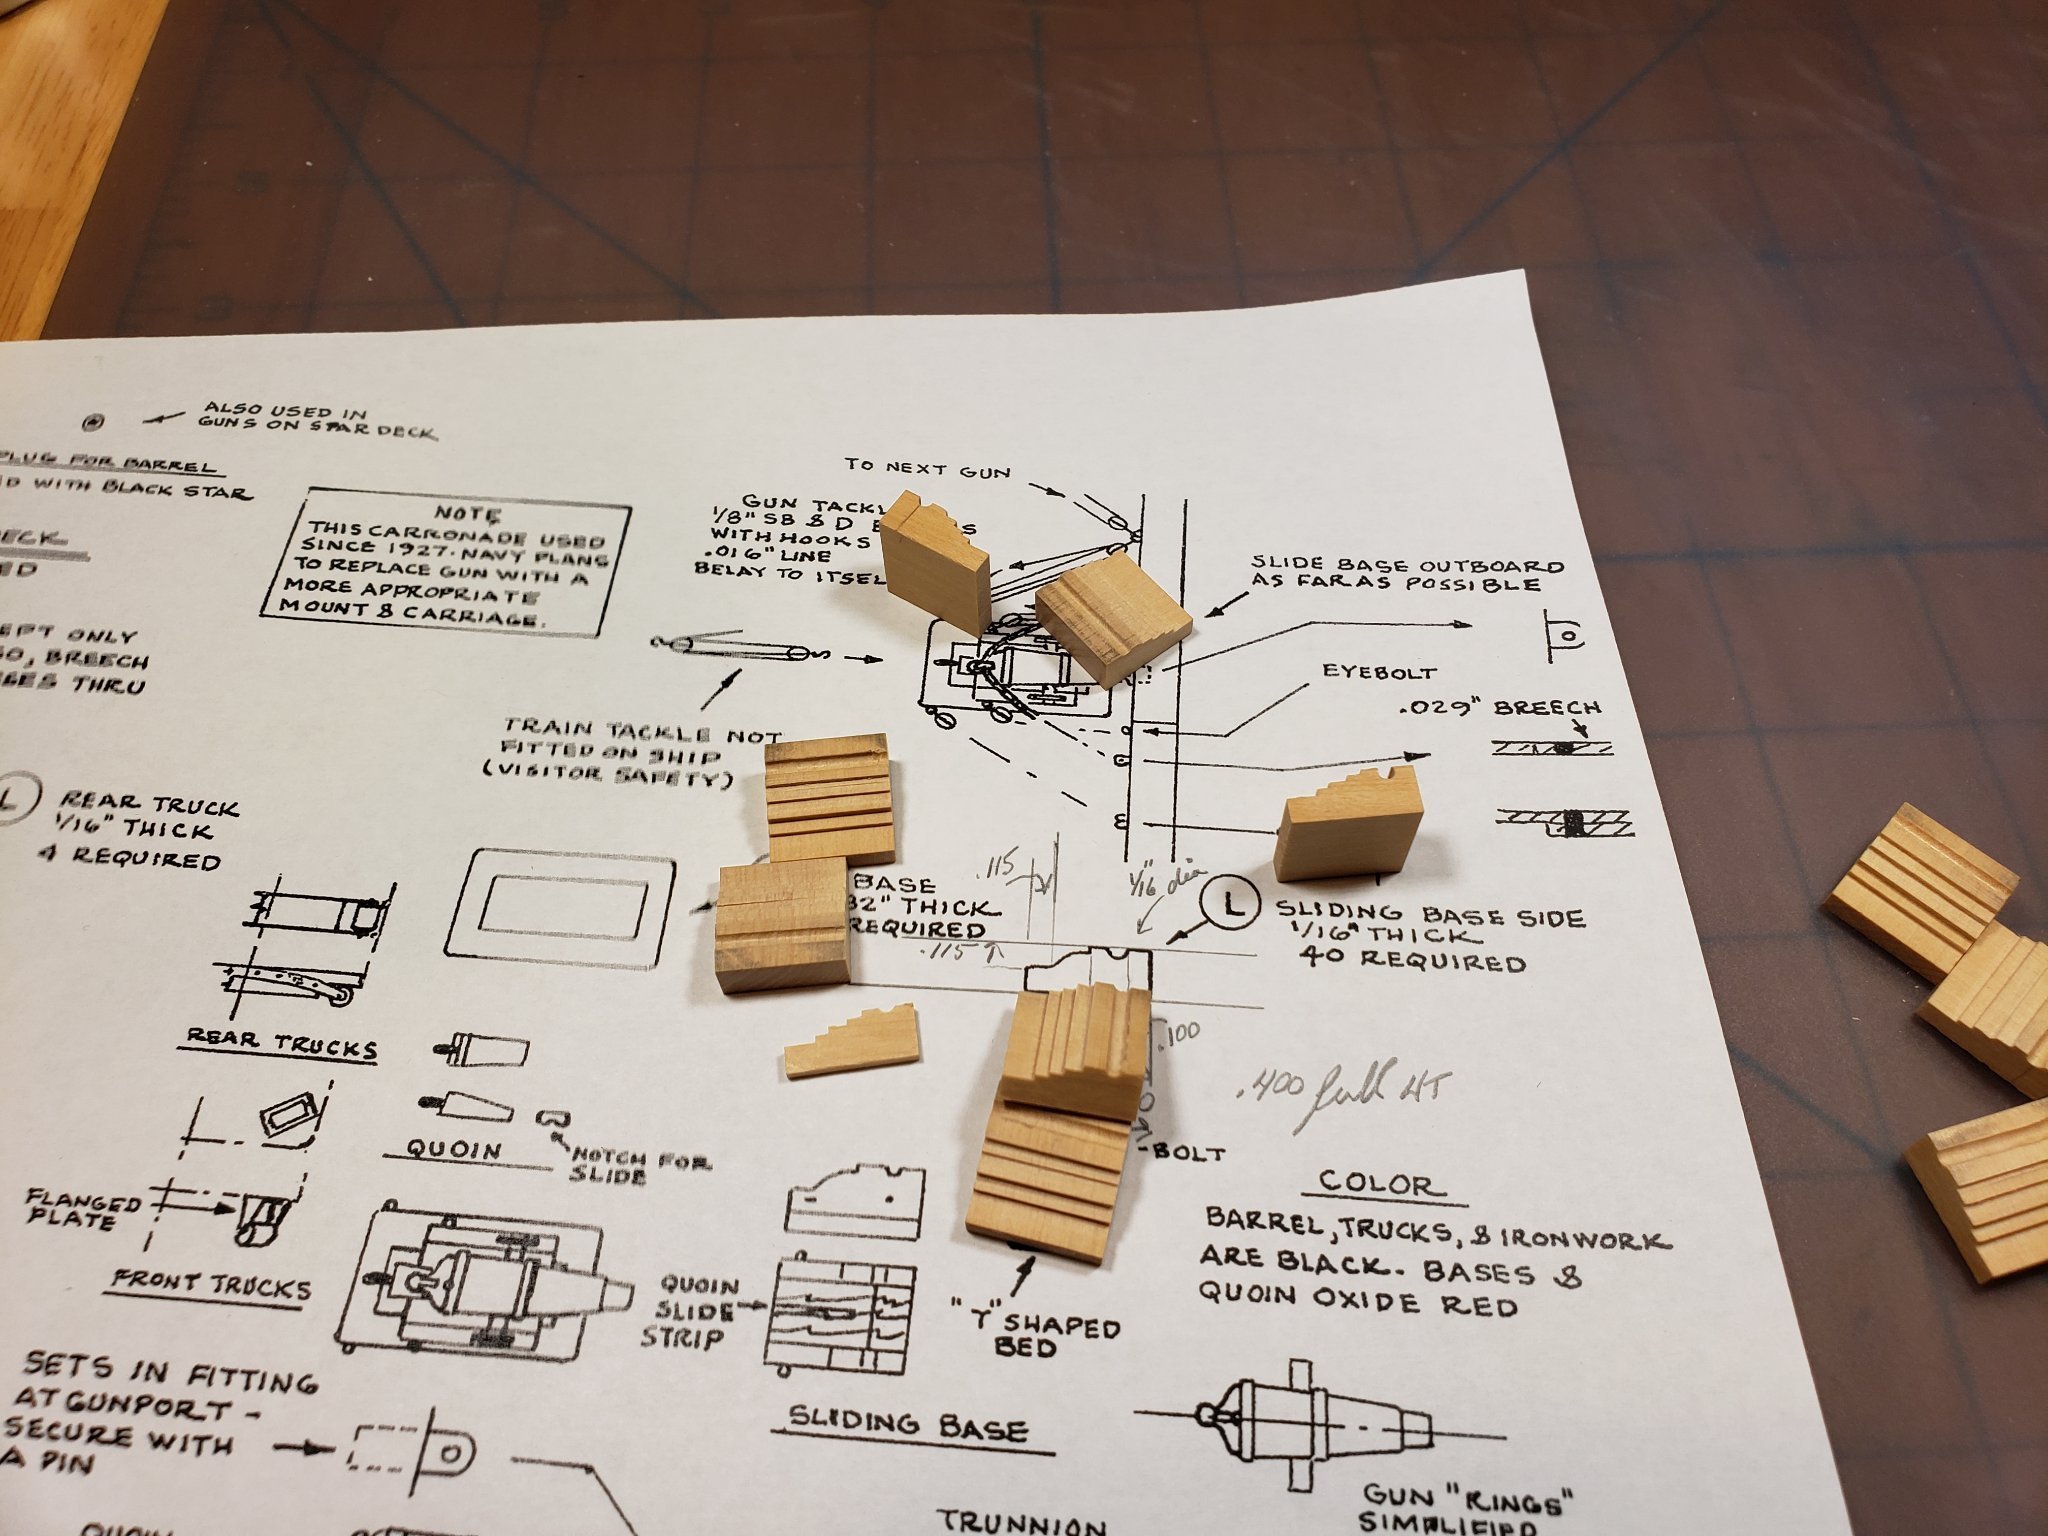
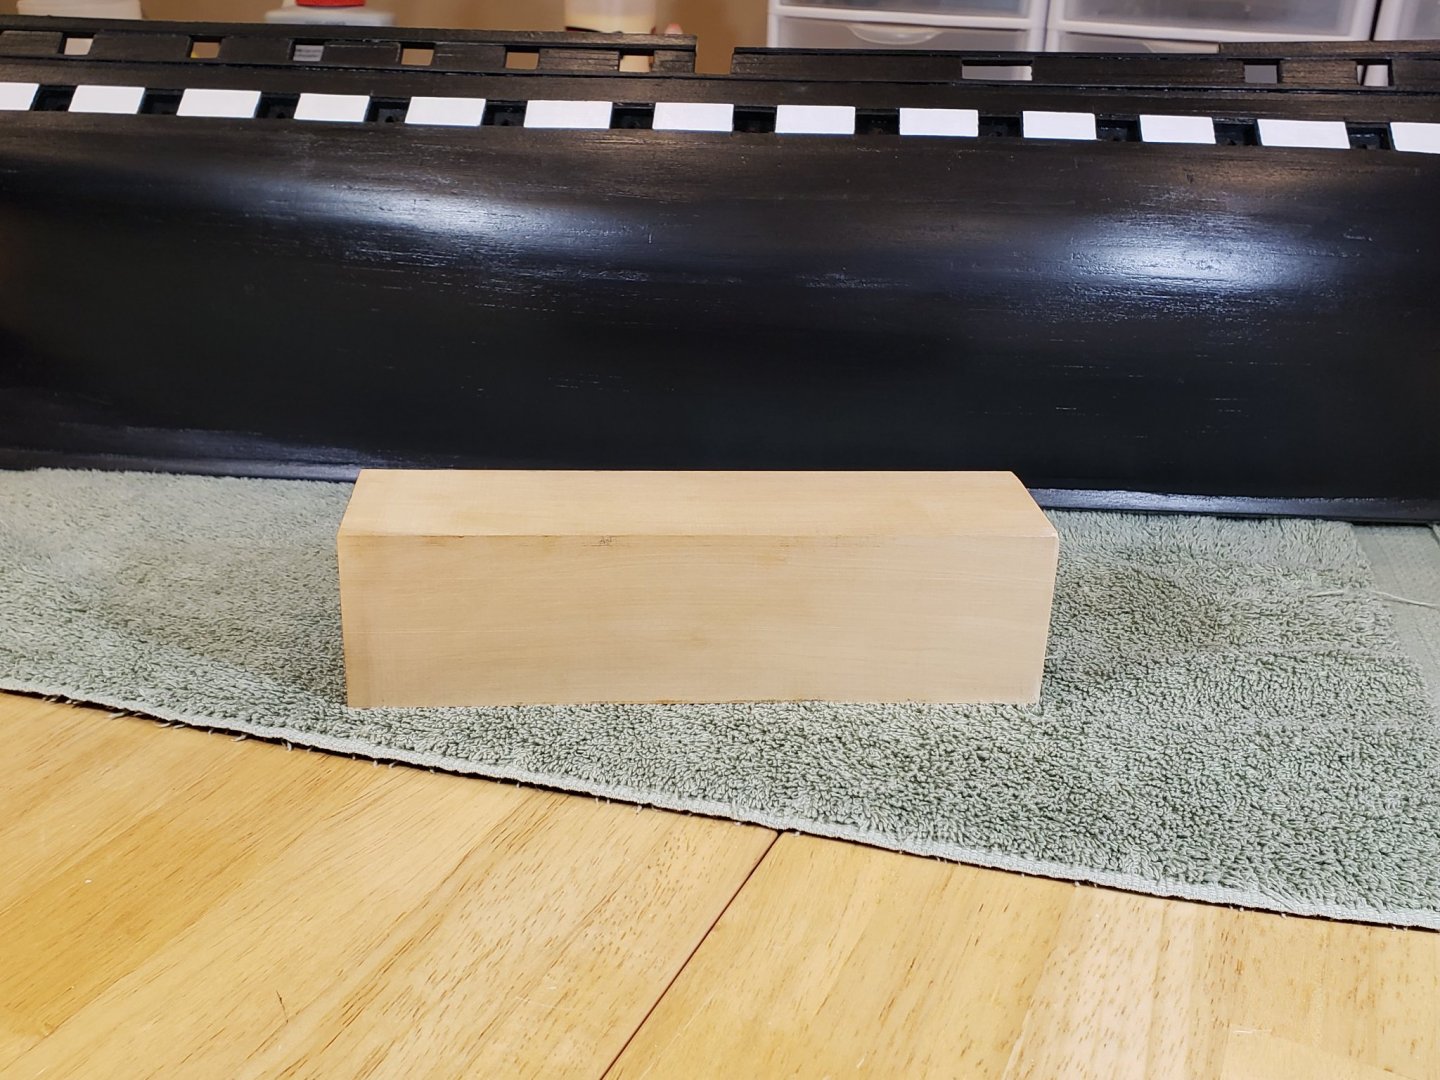
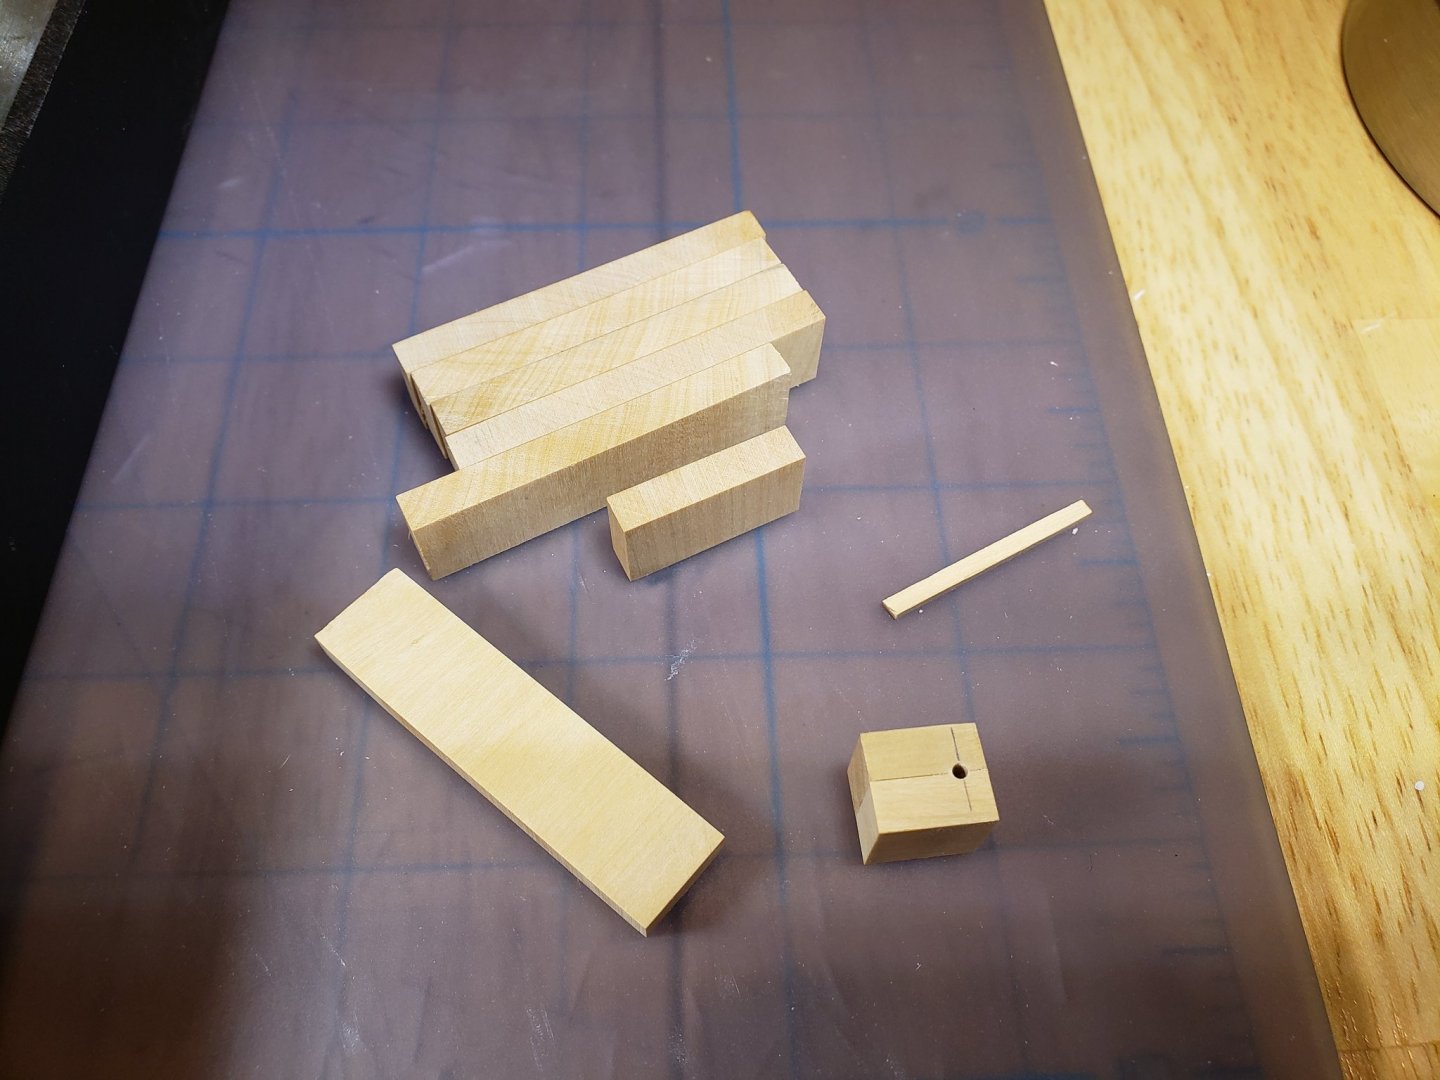
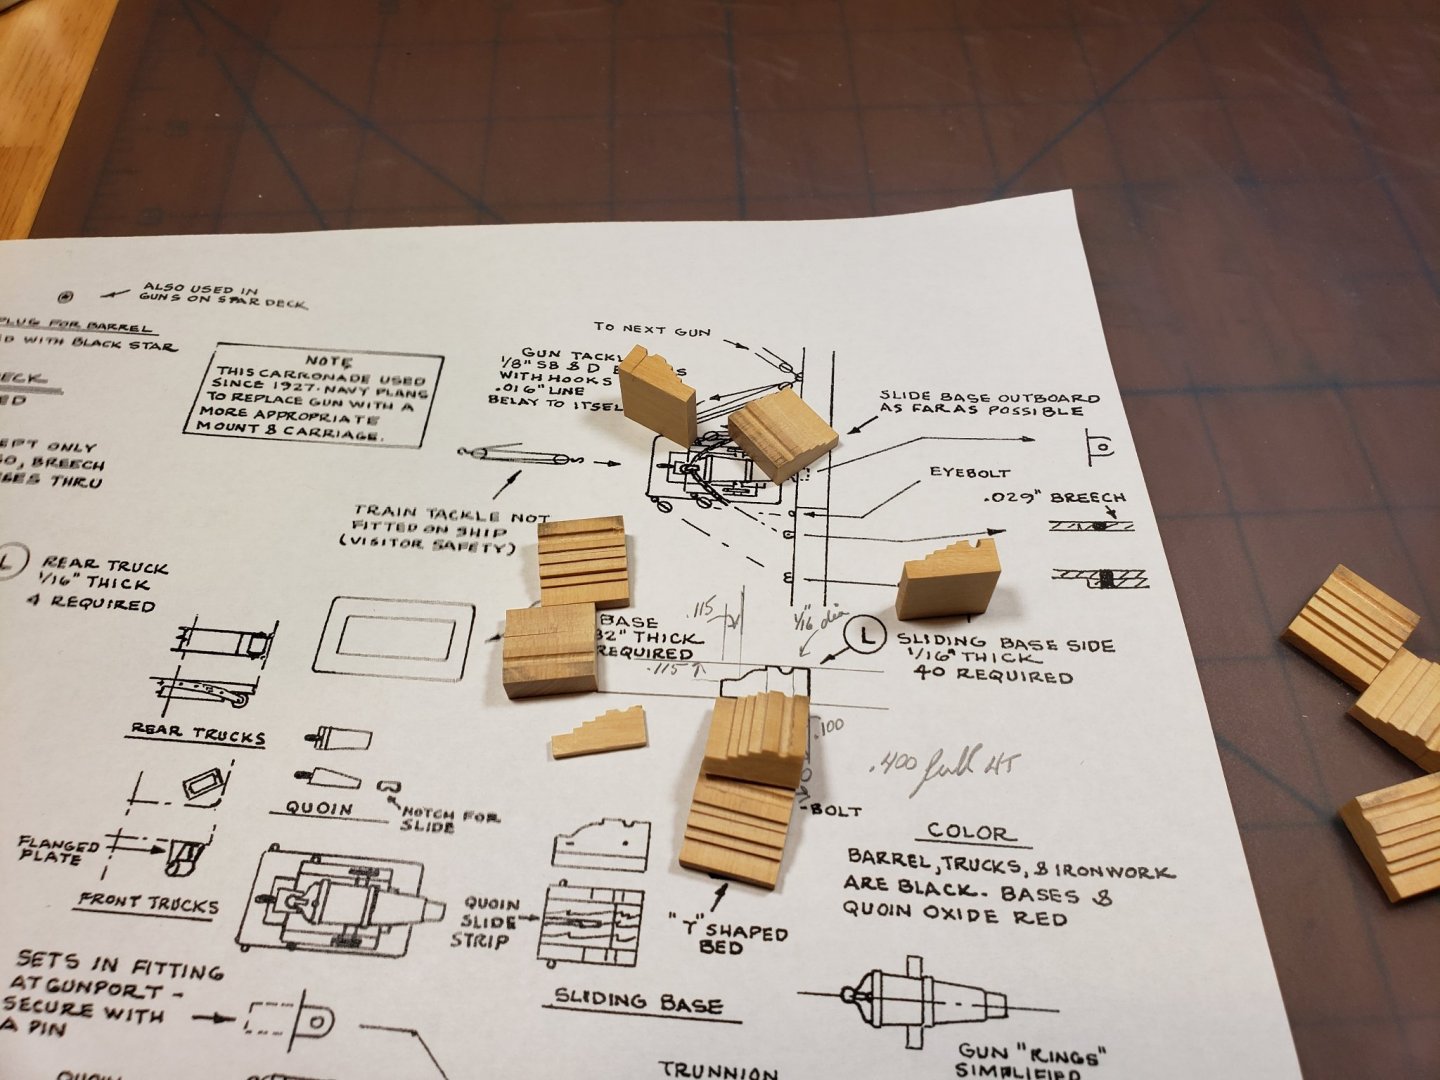
While I was working on the styrene, I decided to take a break and work on some wood milling. So far, aside from the pear hatch combings, everything in this build has used the kit supplied basswood. One of the objects of this build is to gain some more experience so that I can use traditional modeling woods...box, pear, and holly, in the future. Probably should have used boxwood to plank the 2nd side of the hull. In any case, while I was doing HobbyMill I tended to save some of the very best stock for my own use and I have a huge stash of wood. So from now on my plan is to mill the remaining portions of this build from some of that wood. Pulled out a piece of boxwood that was an end cut-off and started to mill the carriages for my carronades. Hard to believe, but there was a time when I couldn't give these end pieces away. Also hard to believe how far a small piece goes. Only needed less than 1" off of this 2x2 piece of stock. Milled into some 1/4x1/2x2 pieces on my Byrnes and scroll saws. Cut the pieces into some smaller ones so that I could drill through them and then mated them into pairs. Finally used the height adjustment on the saw to mill the steps in the carriages. I'm looking into getting some chisels so that I can cut the radius's or leave the step pattern. Eventually will just slice 1/16" pieces off of the blocks to make the carriages. Each small block will yield 6 pcs or 3 carriages which is about 2x's as many as I need. It was enjoyable to begin making my own parts from my wood stash. Thanks for checking in!
-
Mike, Had a chance to see how the ebony worked out and it's impressive. You're a better man than me for working with it. Looking forward to seeing your solution for the lettering. I'm stuck with the same issue on my Conny, but for now will continue as I should be able to add it later.
-
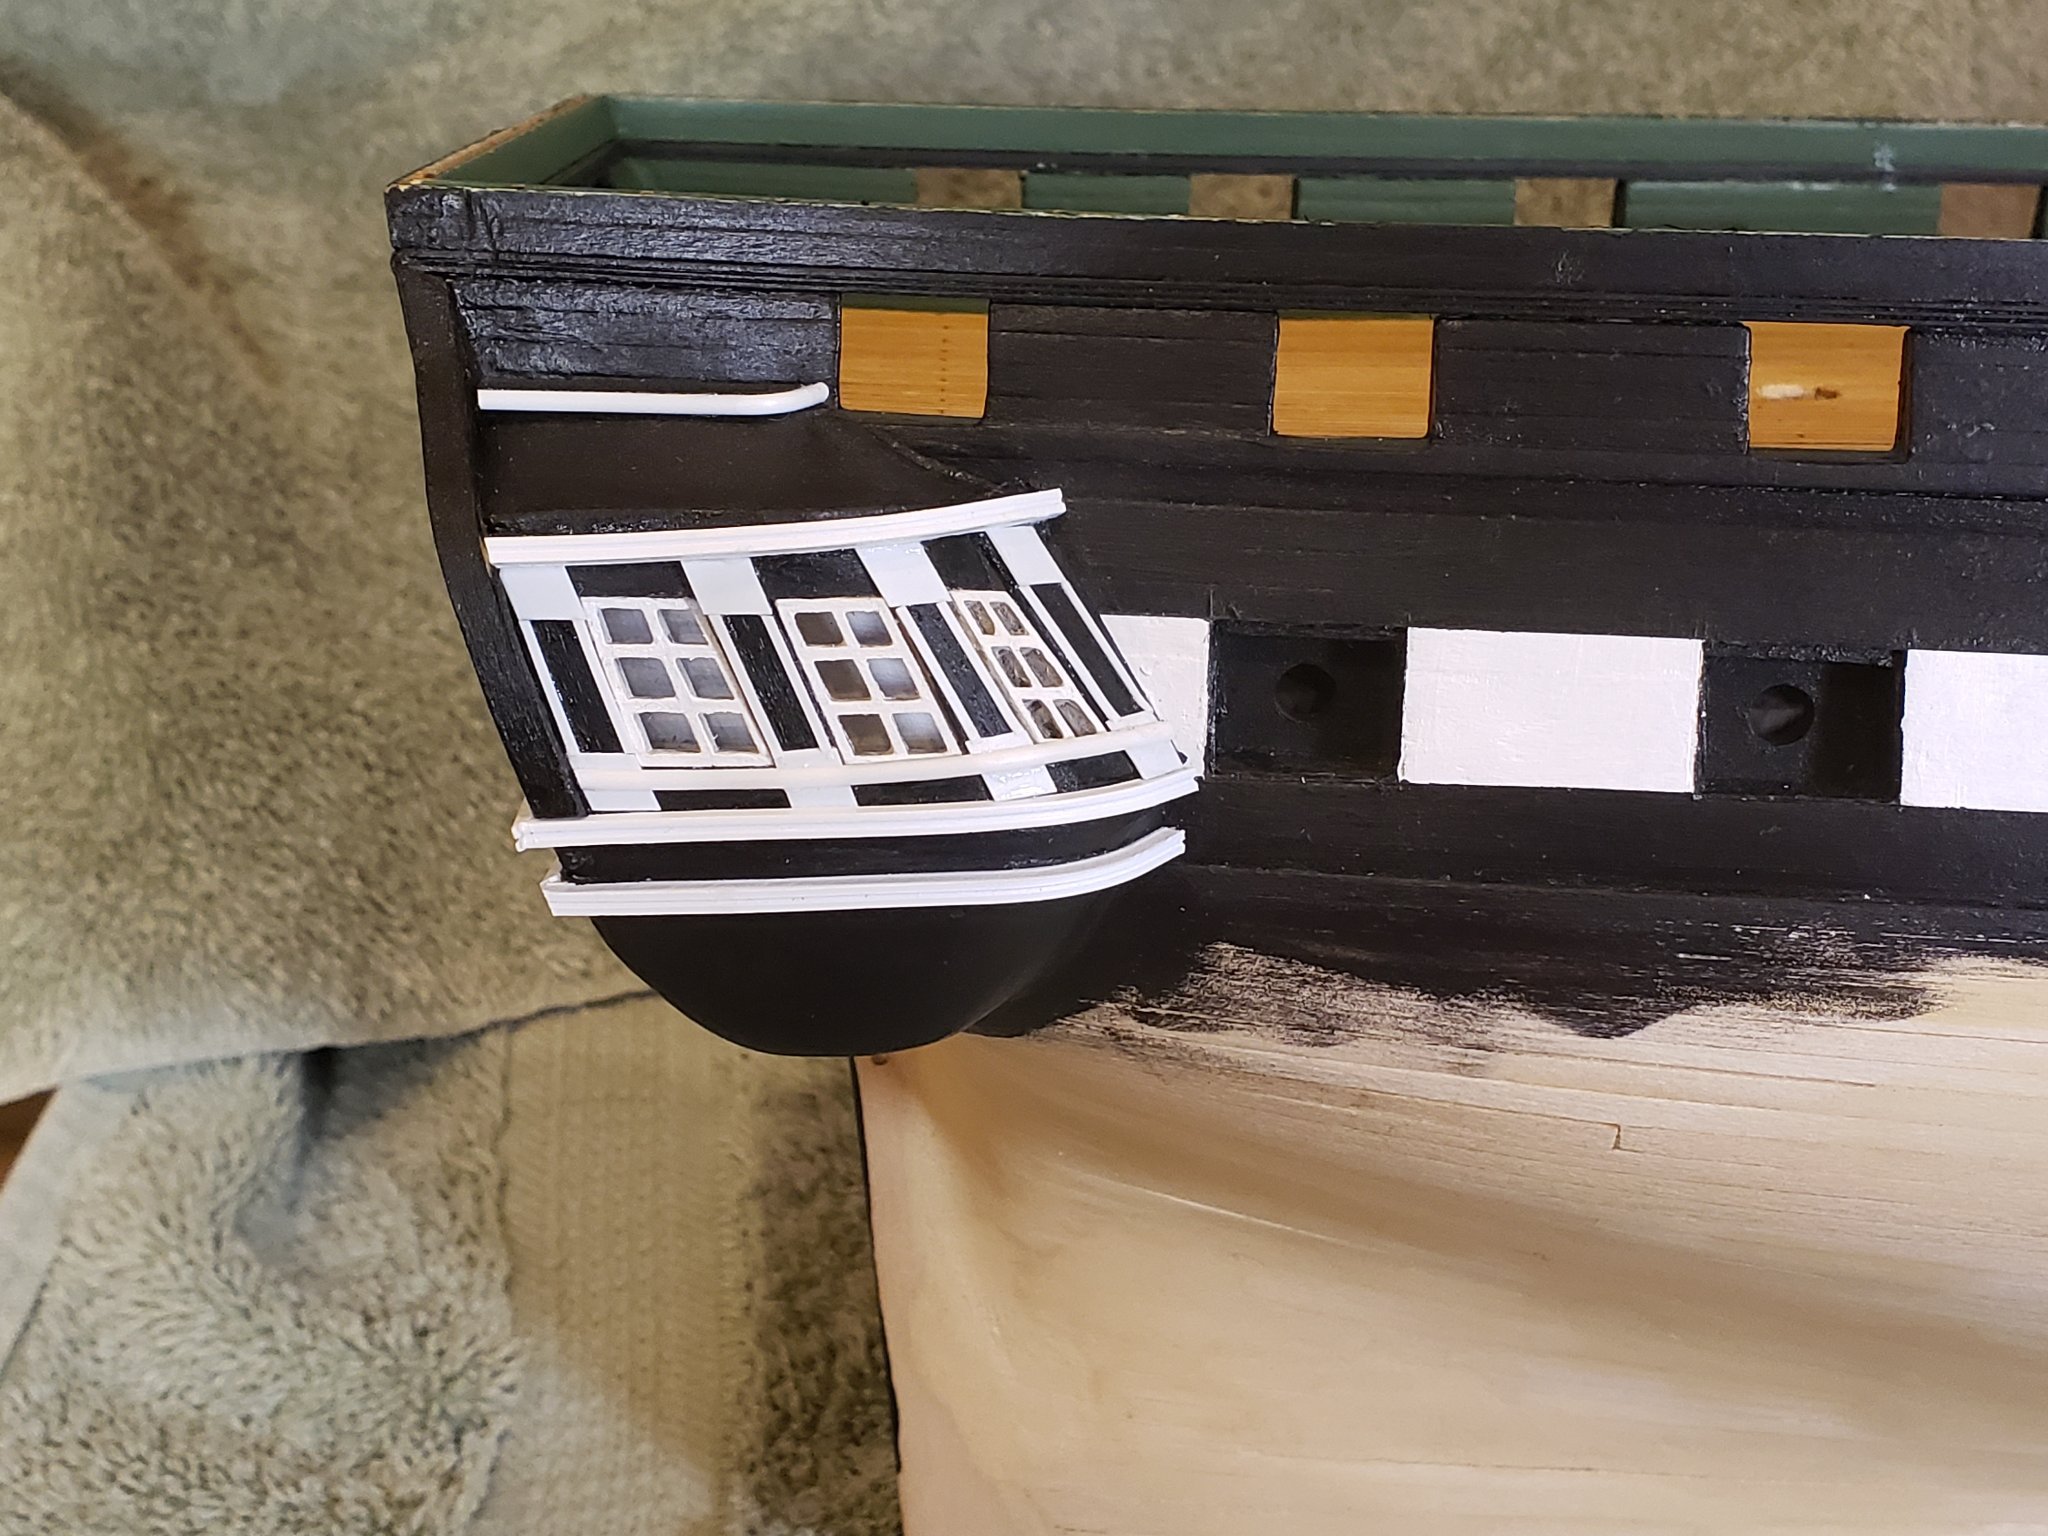
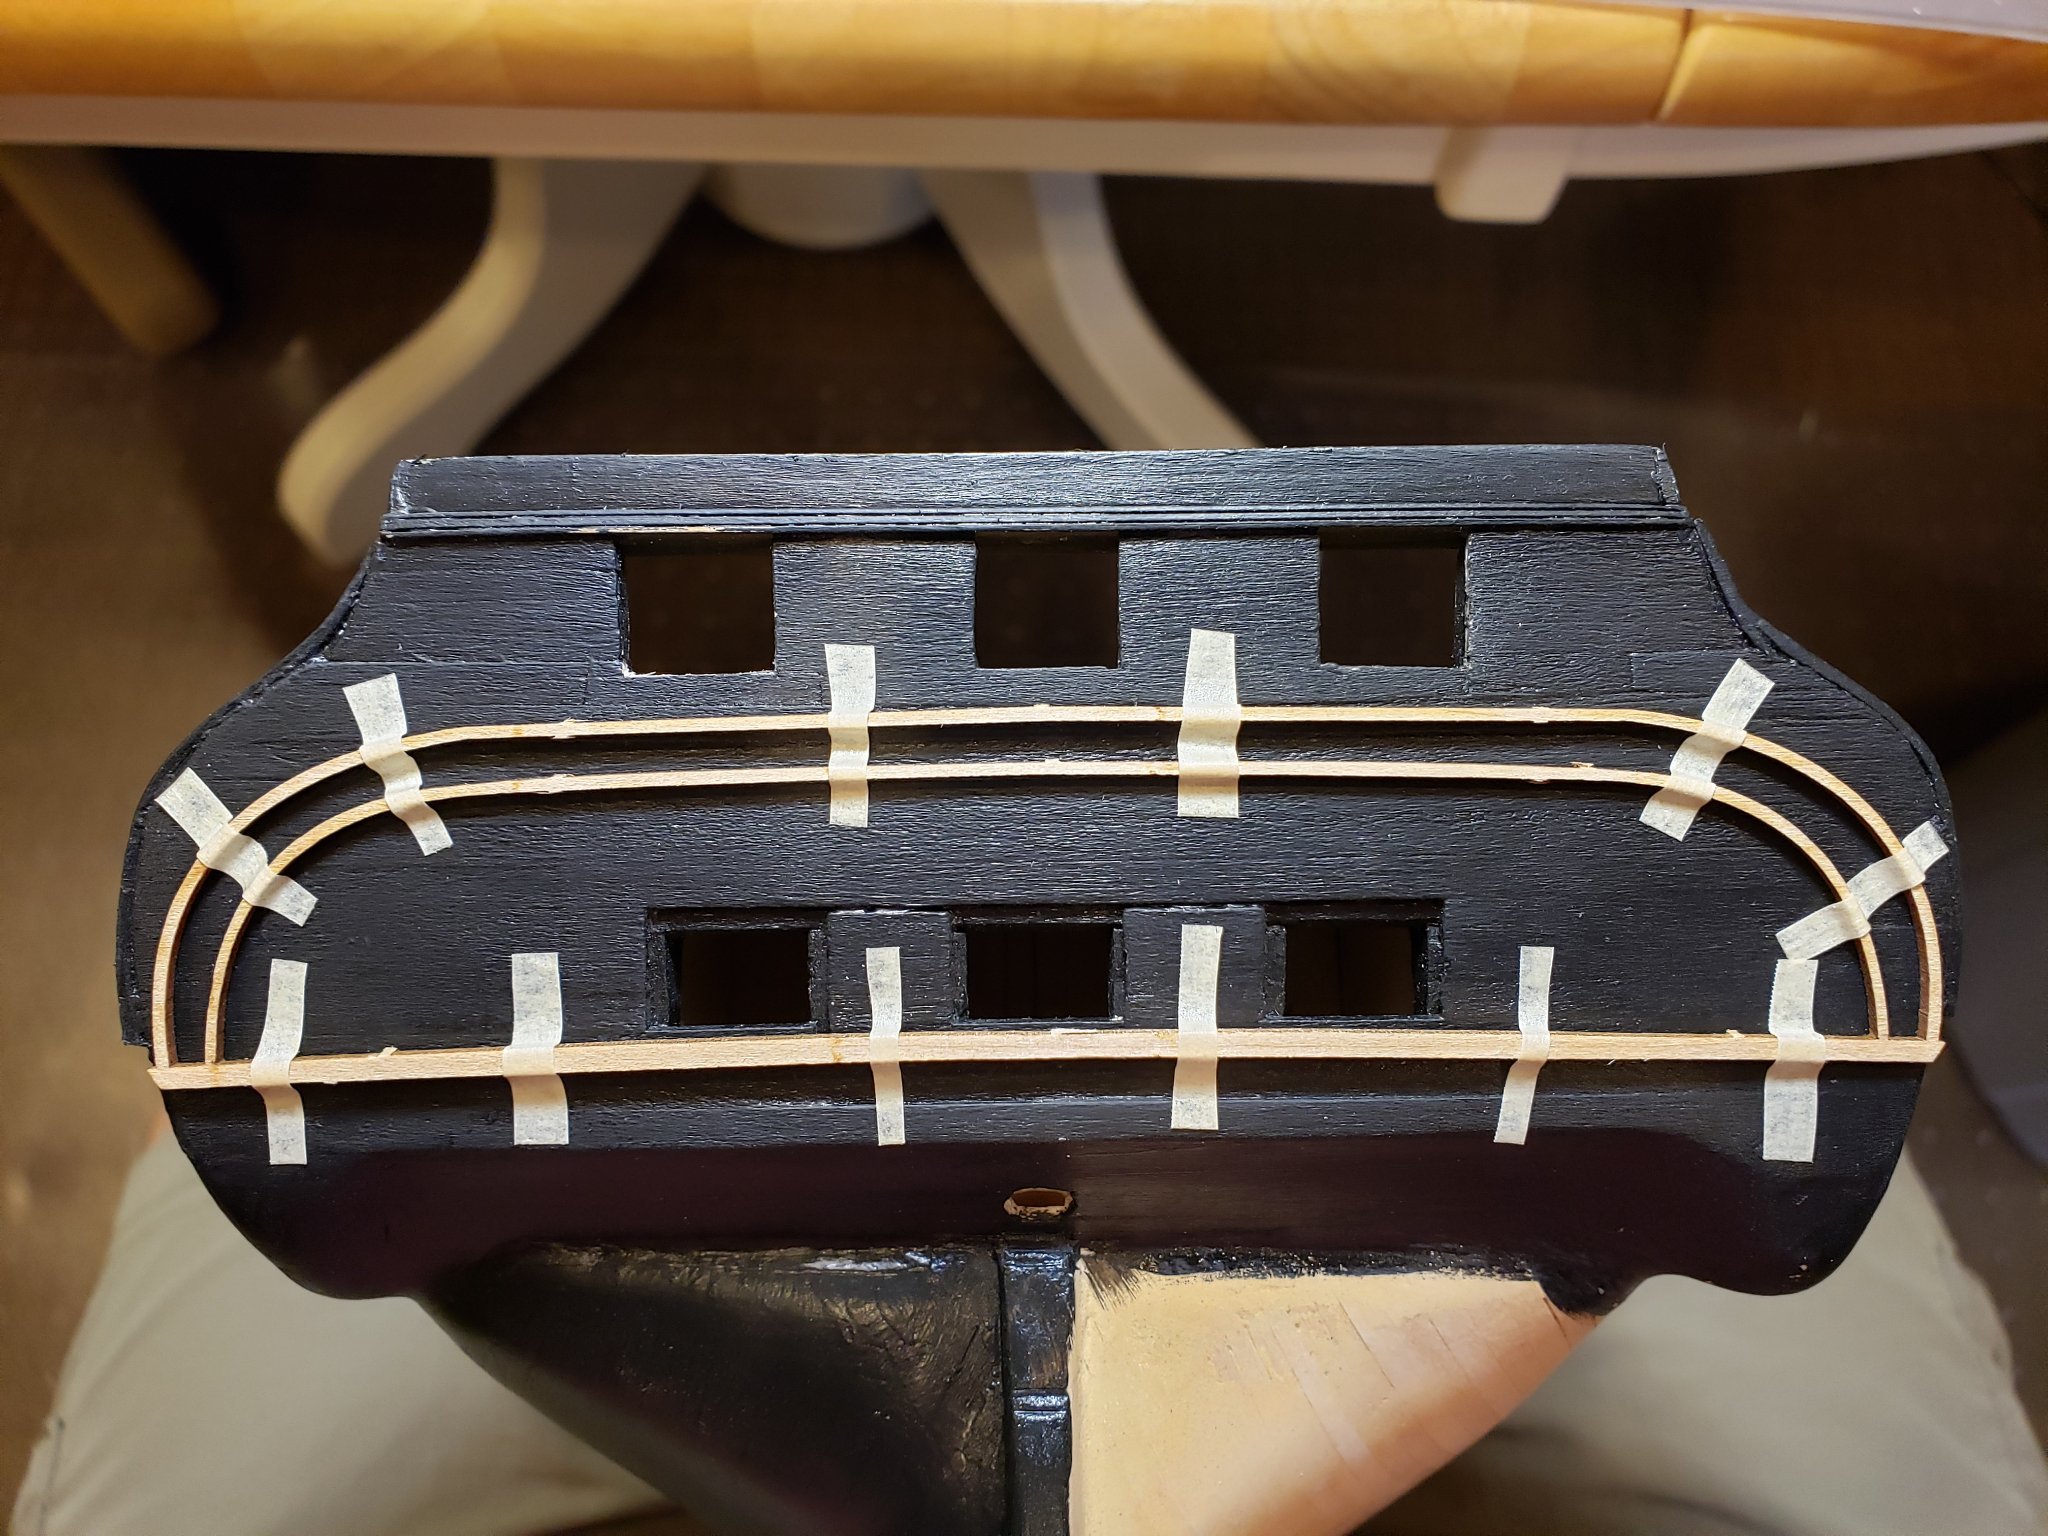
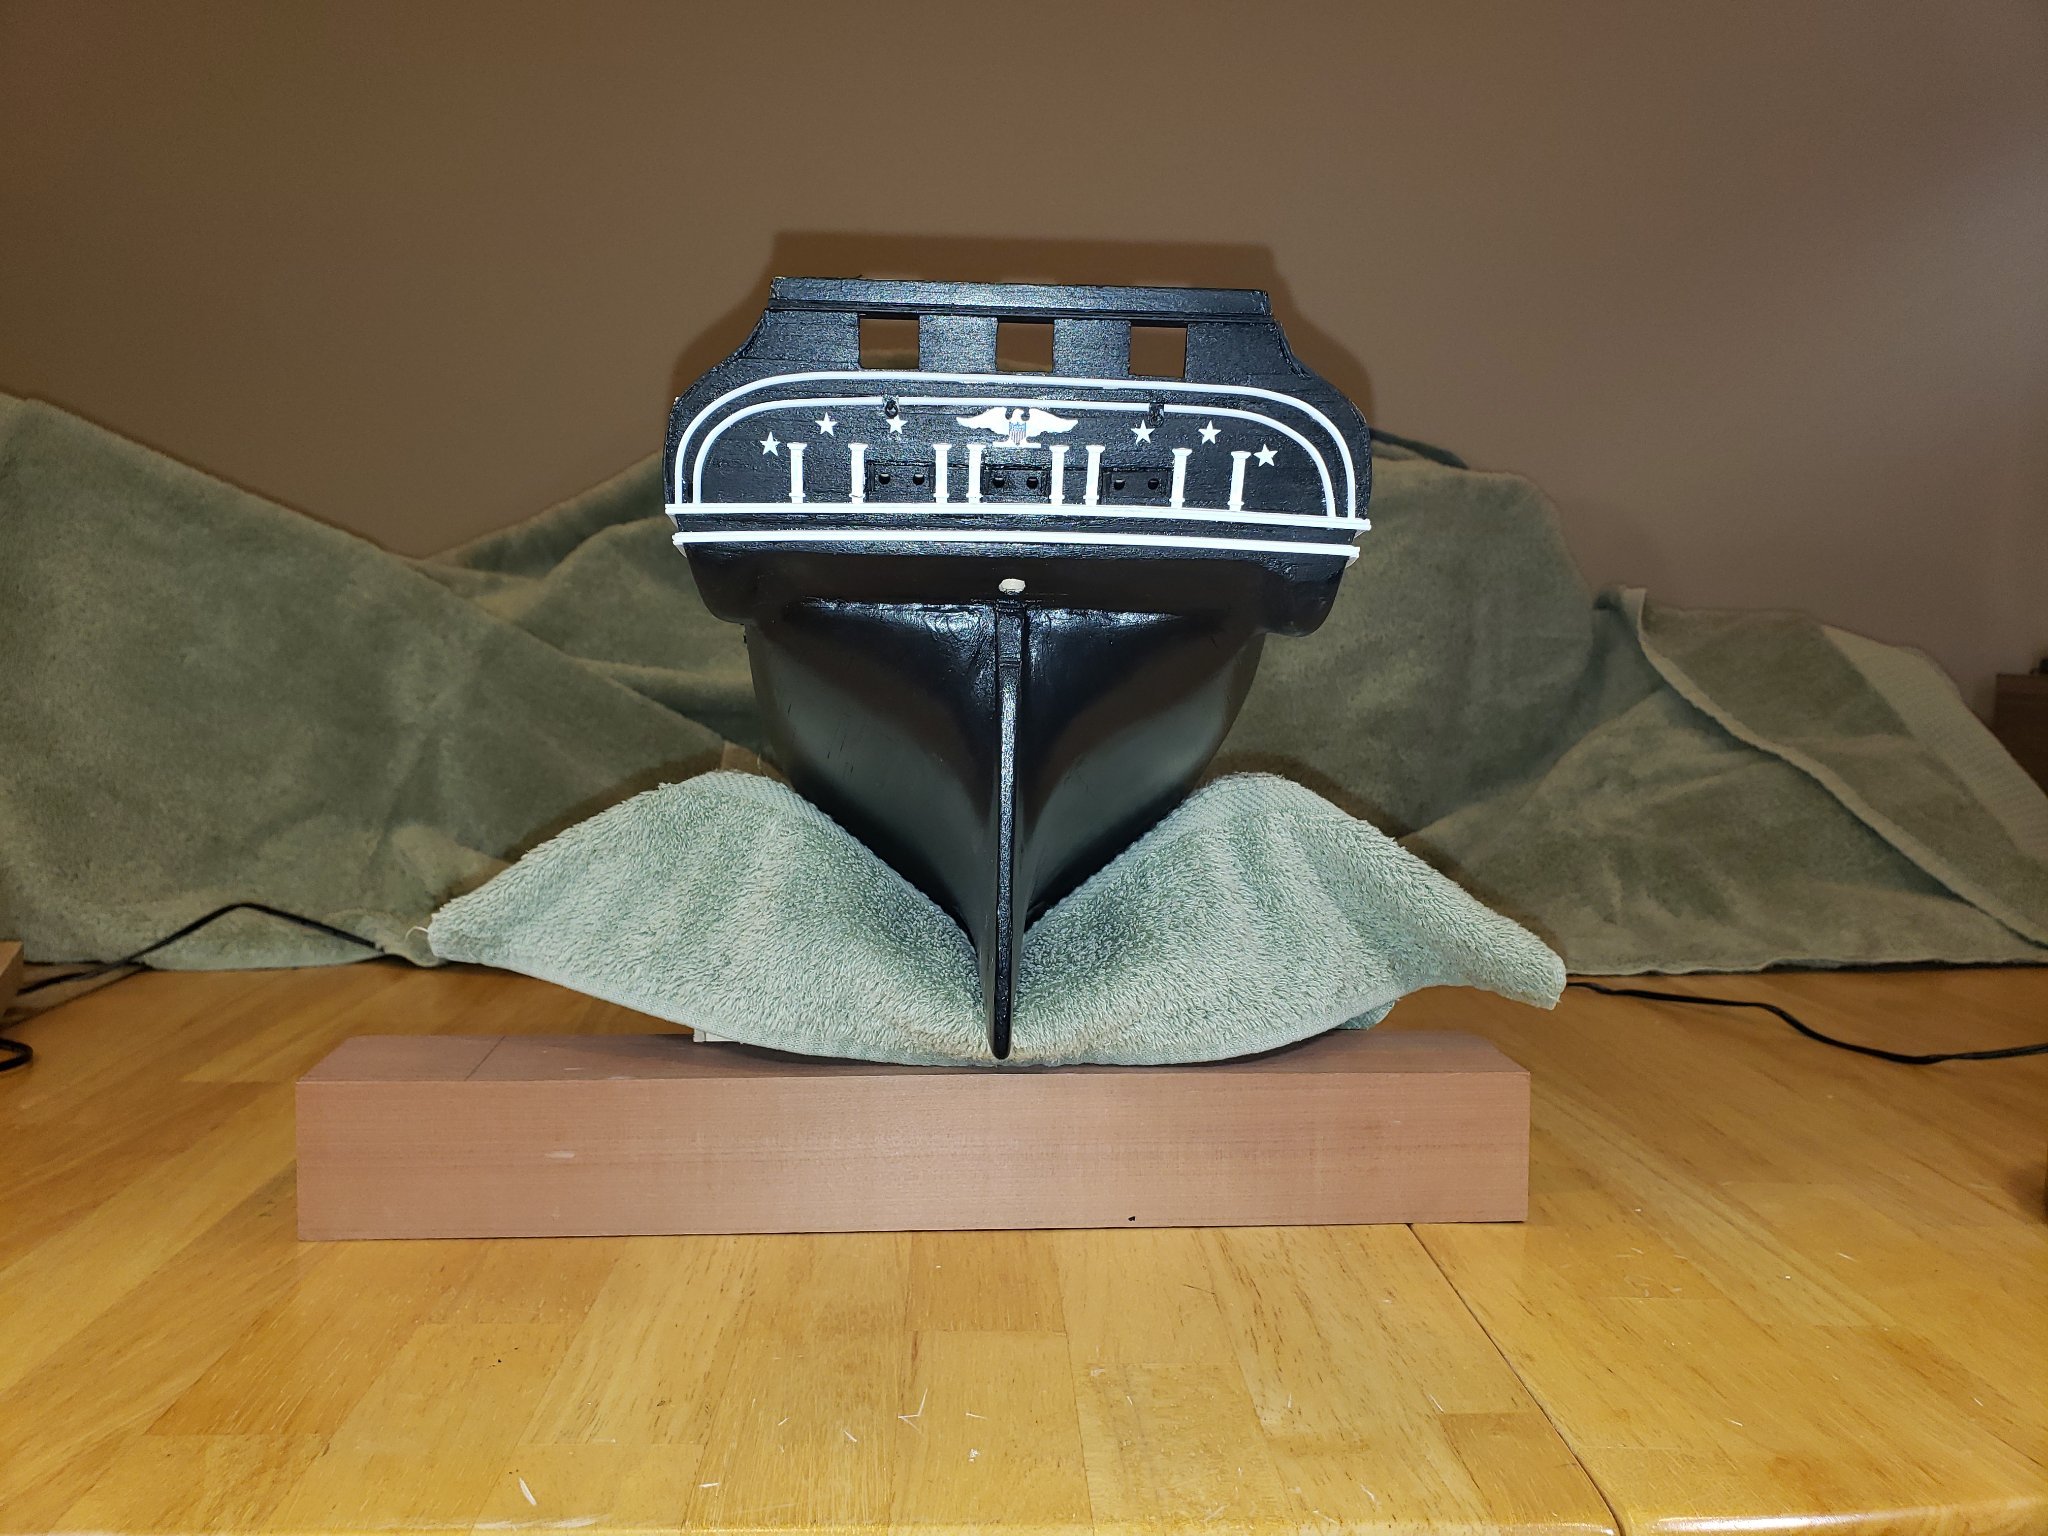
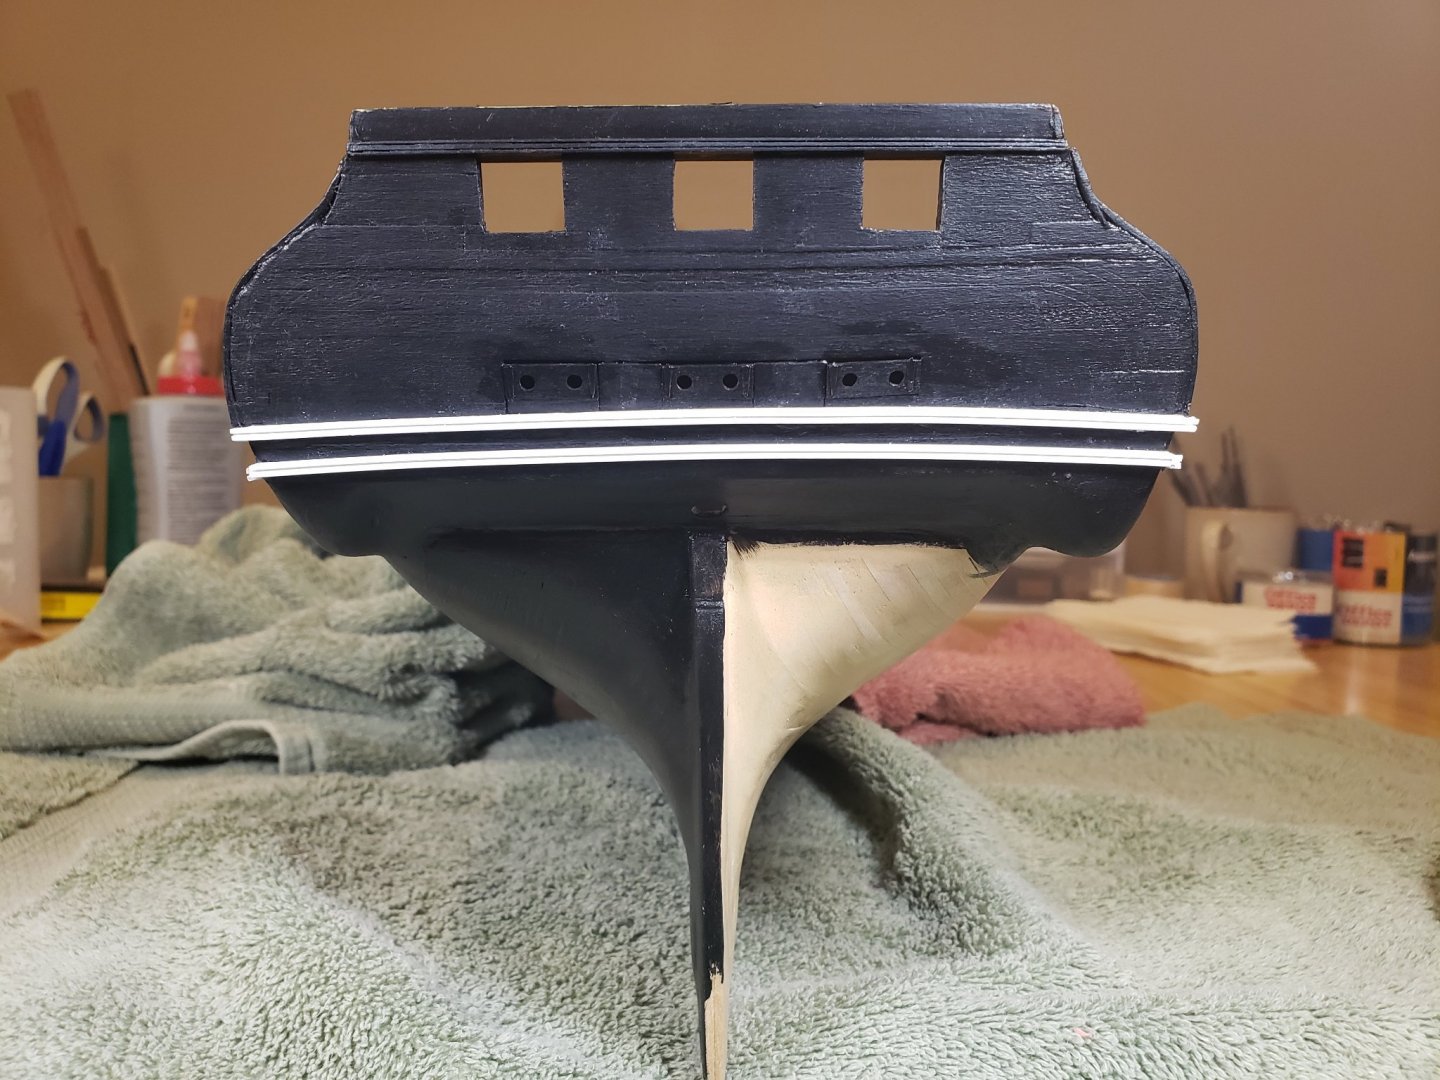
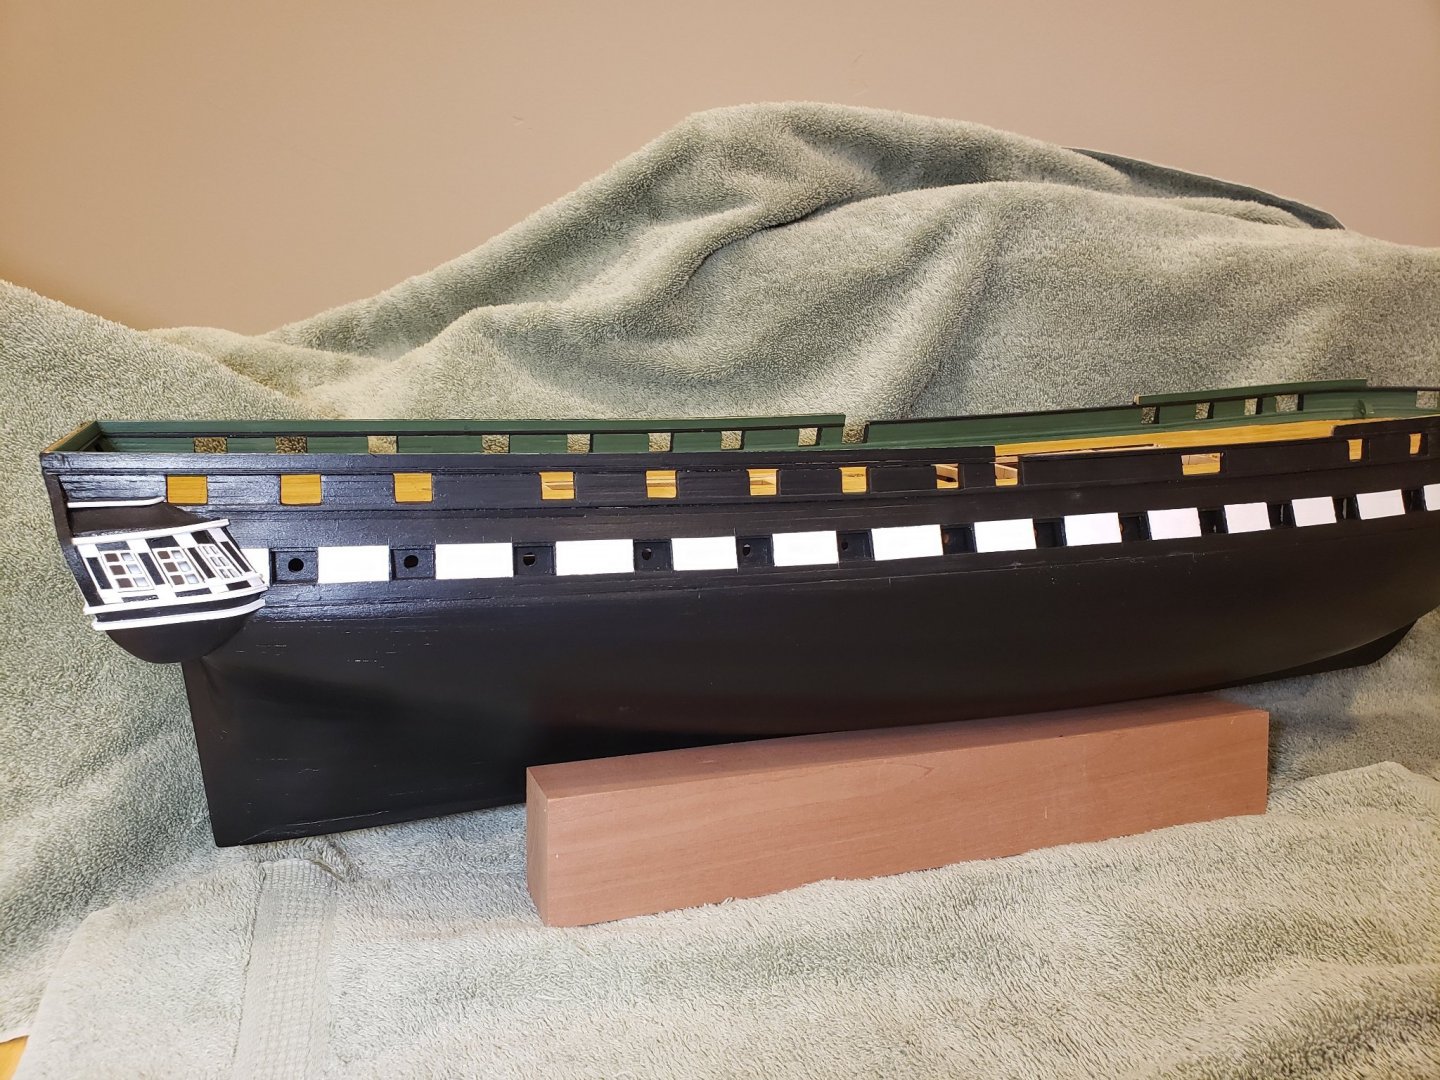
Was able to spend some time on the stern, so here's an update. Continued adding the styrene trim to the lower portion of the quarter galleries. The more trim that I add the better they seem to look: Then I moved to the transom. The practicum had suggested using the outline of the laser cut transom trim to pencil in locations for the styrene. Used a scrap piece of pear for the spacer to align the lower strips with each other and with the ones on the quarter galleries. That worked well for the two lower trim pieces, but decided on a different approach for the upper curved pieces as it was difficult to see the pencil and manage the curve of the styrene. Made a template out of a sheet of 1/16 scrap boxwood. Wanted to use boxwood instead of basswood as I was afraid that the basswood would act as a sponge for the CA. This way I could press the strips up against the template as I was gluing them in place. Continued to add the columns, stars, eagle, and towing rings. Finally got the starboard side of the hull painted black after some more filling that showed up in the pics. One rookie note is that the stern ports are too small. Didn't notice this until I was looking at the stern template and adding the columns. I even had to trim the lower port lids to fit and didn't think about it. I now vaguely remembering that this was an issue 14 years ago, but thought that I would fix it down the road. There's something in the practicum but I didn't understand at the time that having an interior support beam in the wrong place was going to make the correction difficult. Decided to chalk that up to a learning issue and moved on as I would need to do major surgery on the stern to fix. I've been reading a lot about the coppering process and received an education. Seems like using a ponce wheel is way out of scale and several builders recommended omitting that step. Another concern are builders who have trouble with the copper coming off or where fingerprints or other coloring issues appear months after doing the hull. Really raises some concerns? At sometime I need to build a display stand as I did not add the screws for the pedestals. This is a piece of pear from my inventory in case I decide not to copper and then use pear for the stand. Any input on coppering and / or using pear for the stand? Thanks for looking in!


-
I have a set of chisels and would like add some palm gouges and would really appreciate suggestions. I'm a novice here, so I don't know if I should buy individual tools or a set? Also would appreciate specifics on which set or individual tools. Right now I'm building a kit, but have plans to continue to scratch building with hardwoods. I tend to purchase good quality tools so I was thinking of Pfeil or similar tools as appropriate ones. Thanks for your help!
-
Really a wonderful job which you should be very proud of. You made Chuck's kit shine!
- 263 replies
-
- 1
-

-
- Medway Longboat
- Syren Ship Model Company
- (and 1 more)
-
Thanks to everyone for the likes! Hey Ben, Thanks for the encouragement! Hope you had a good vacation! Miss your trips to my shop...if only I still had a shop. 😒 Bill, thanks for the inquiry and for looking in. Jon's summary is pretty accurate and I agree with his sentiments. I probably knew Bob better than most folks as I was the wood supplier for all of his kits for around 10 years. His customer service is well documented on this site, but as his sole supplier of wood he treated me a little differently. His practicums are very detailed and as a novice builder myself I've found them invaluable. There are some issues in some areas of his practicums but the build logs on MSW help you get over those rough spots. I have all of his kits, except one, so you will probably see more builds from me using his kits. I haven't been in touch or followed any of Bob's work for a very long time so I was not aware that he had started to do a practicum on a Chinese kit. Hi Mike...one of my all-time favorite customers! Thanks for stopping by and for the compliment. My work will never be as good as yours and you always made my wood look wonderful, thanks. I will say that you always gave me a few things to ponder and that made my milling more interesting. If I recall at one time we were thinking about doing a lot of ebony on your Morgan? That's really tough stuff to work with!! Cheers,
-
Thanks for the likes! Jon, I had missed xKen's log...thanks for the link as that will be a great reference as well as humbling. Jeff, I've already forgotten them!
-
Thanks Druxey! Really makes a lot of sense and saved me a tremendous amount of time on my Conny coppering.
-
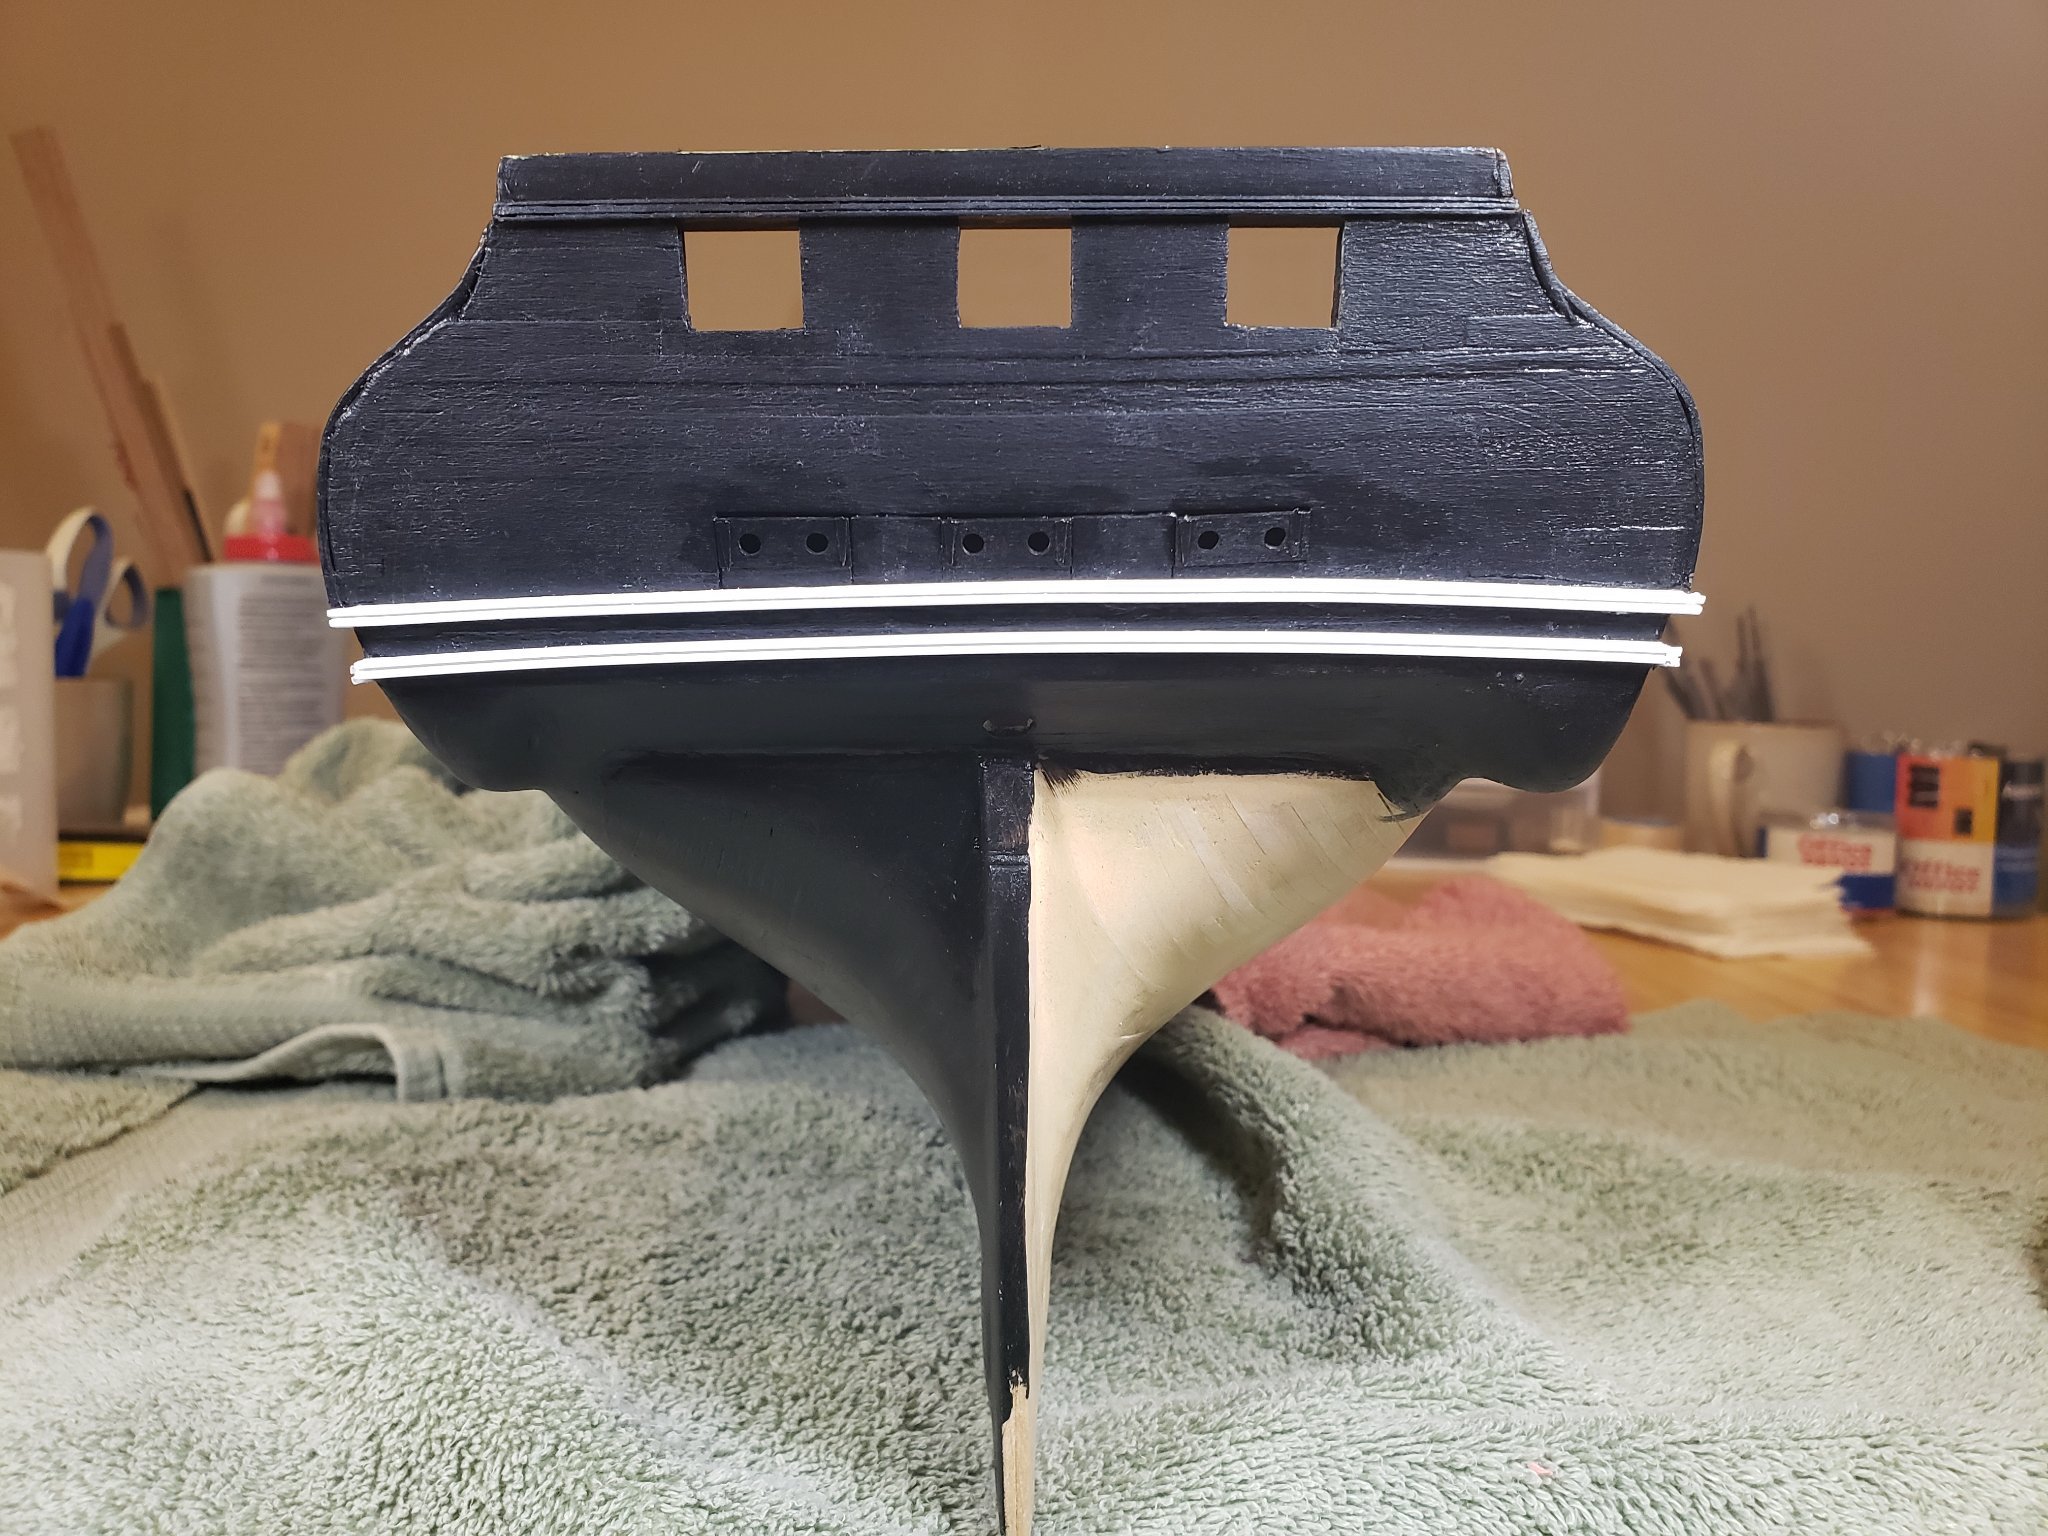
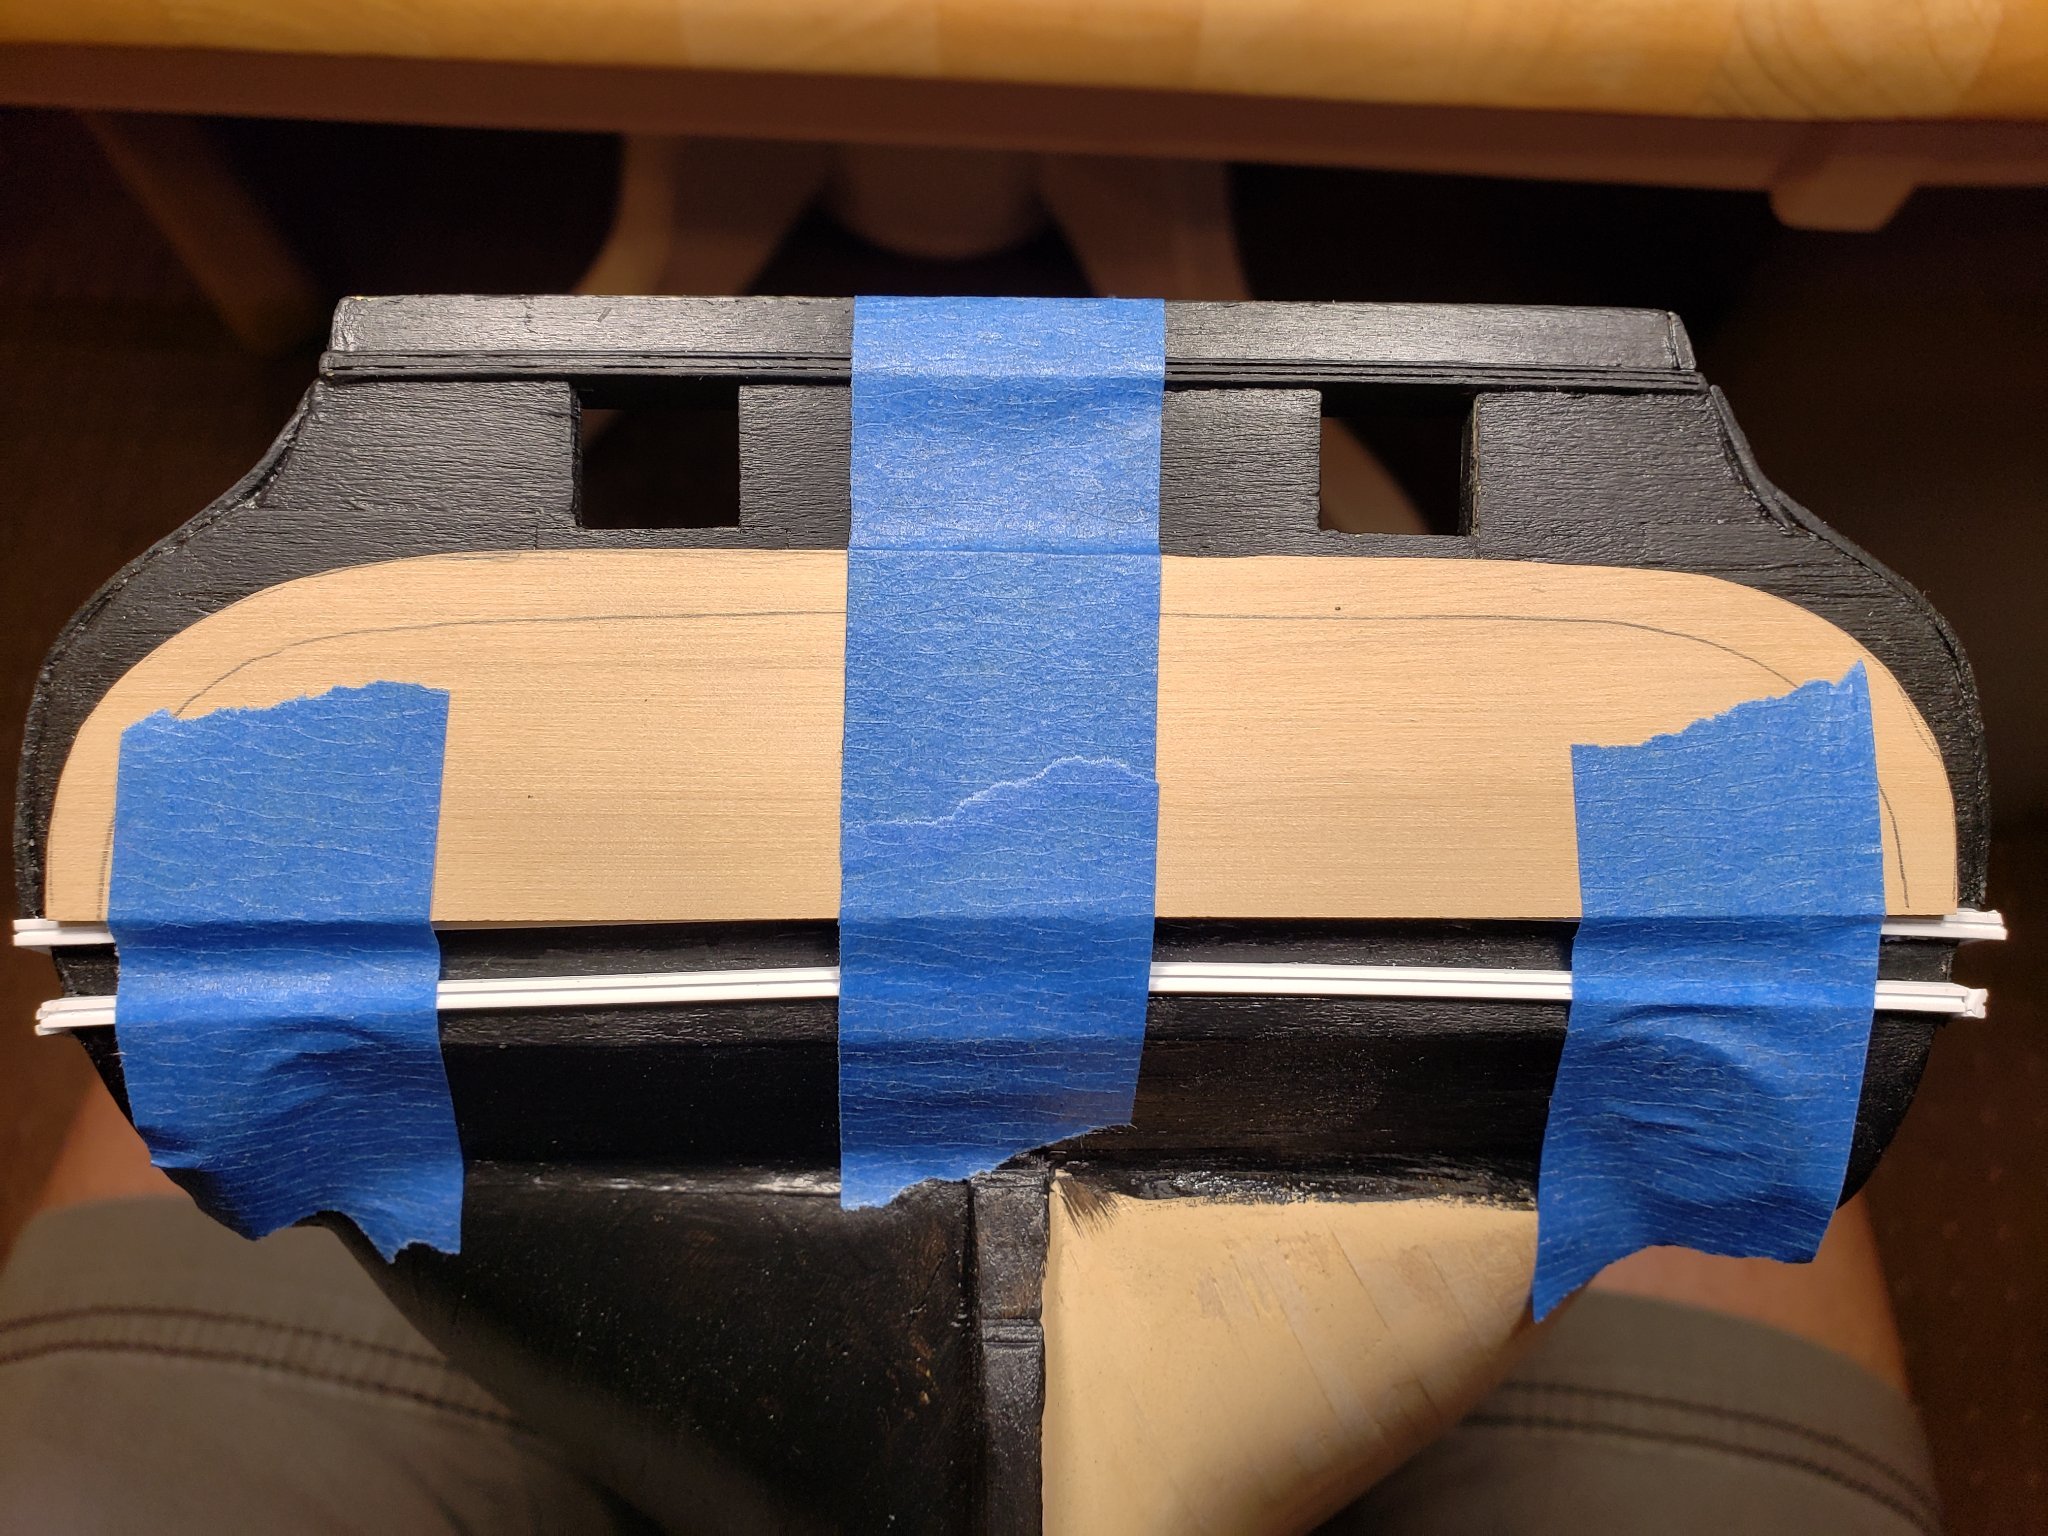
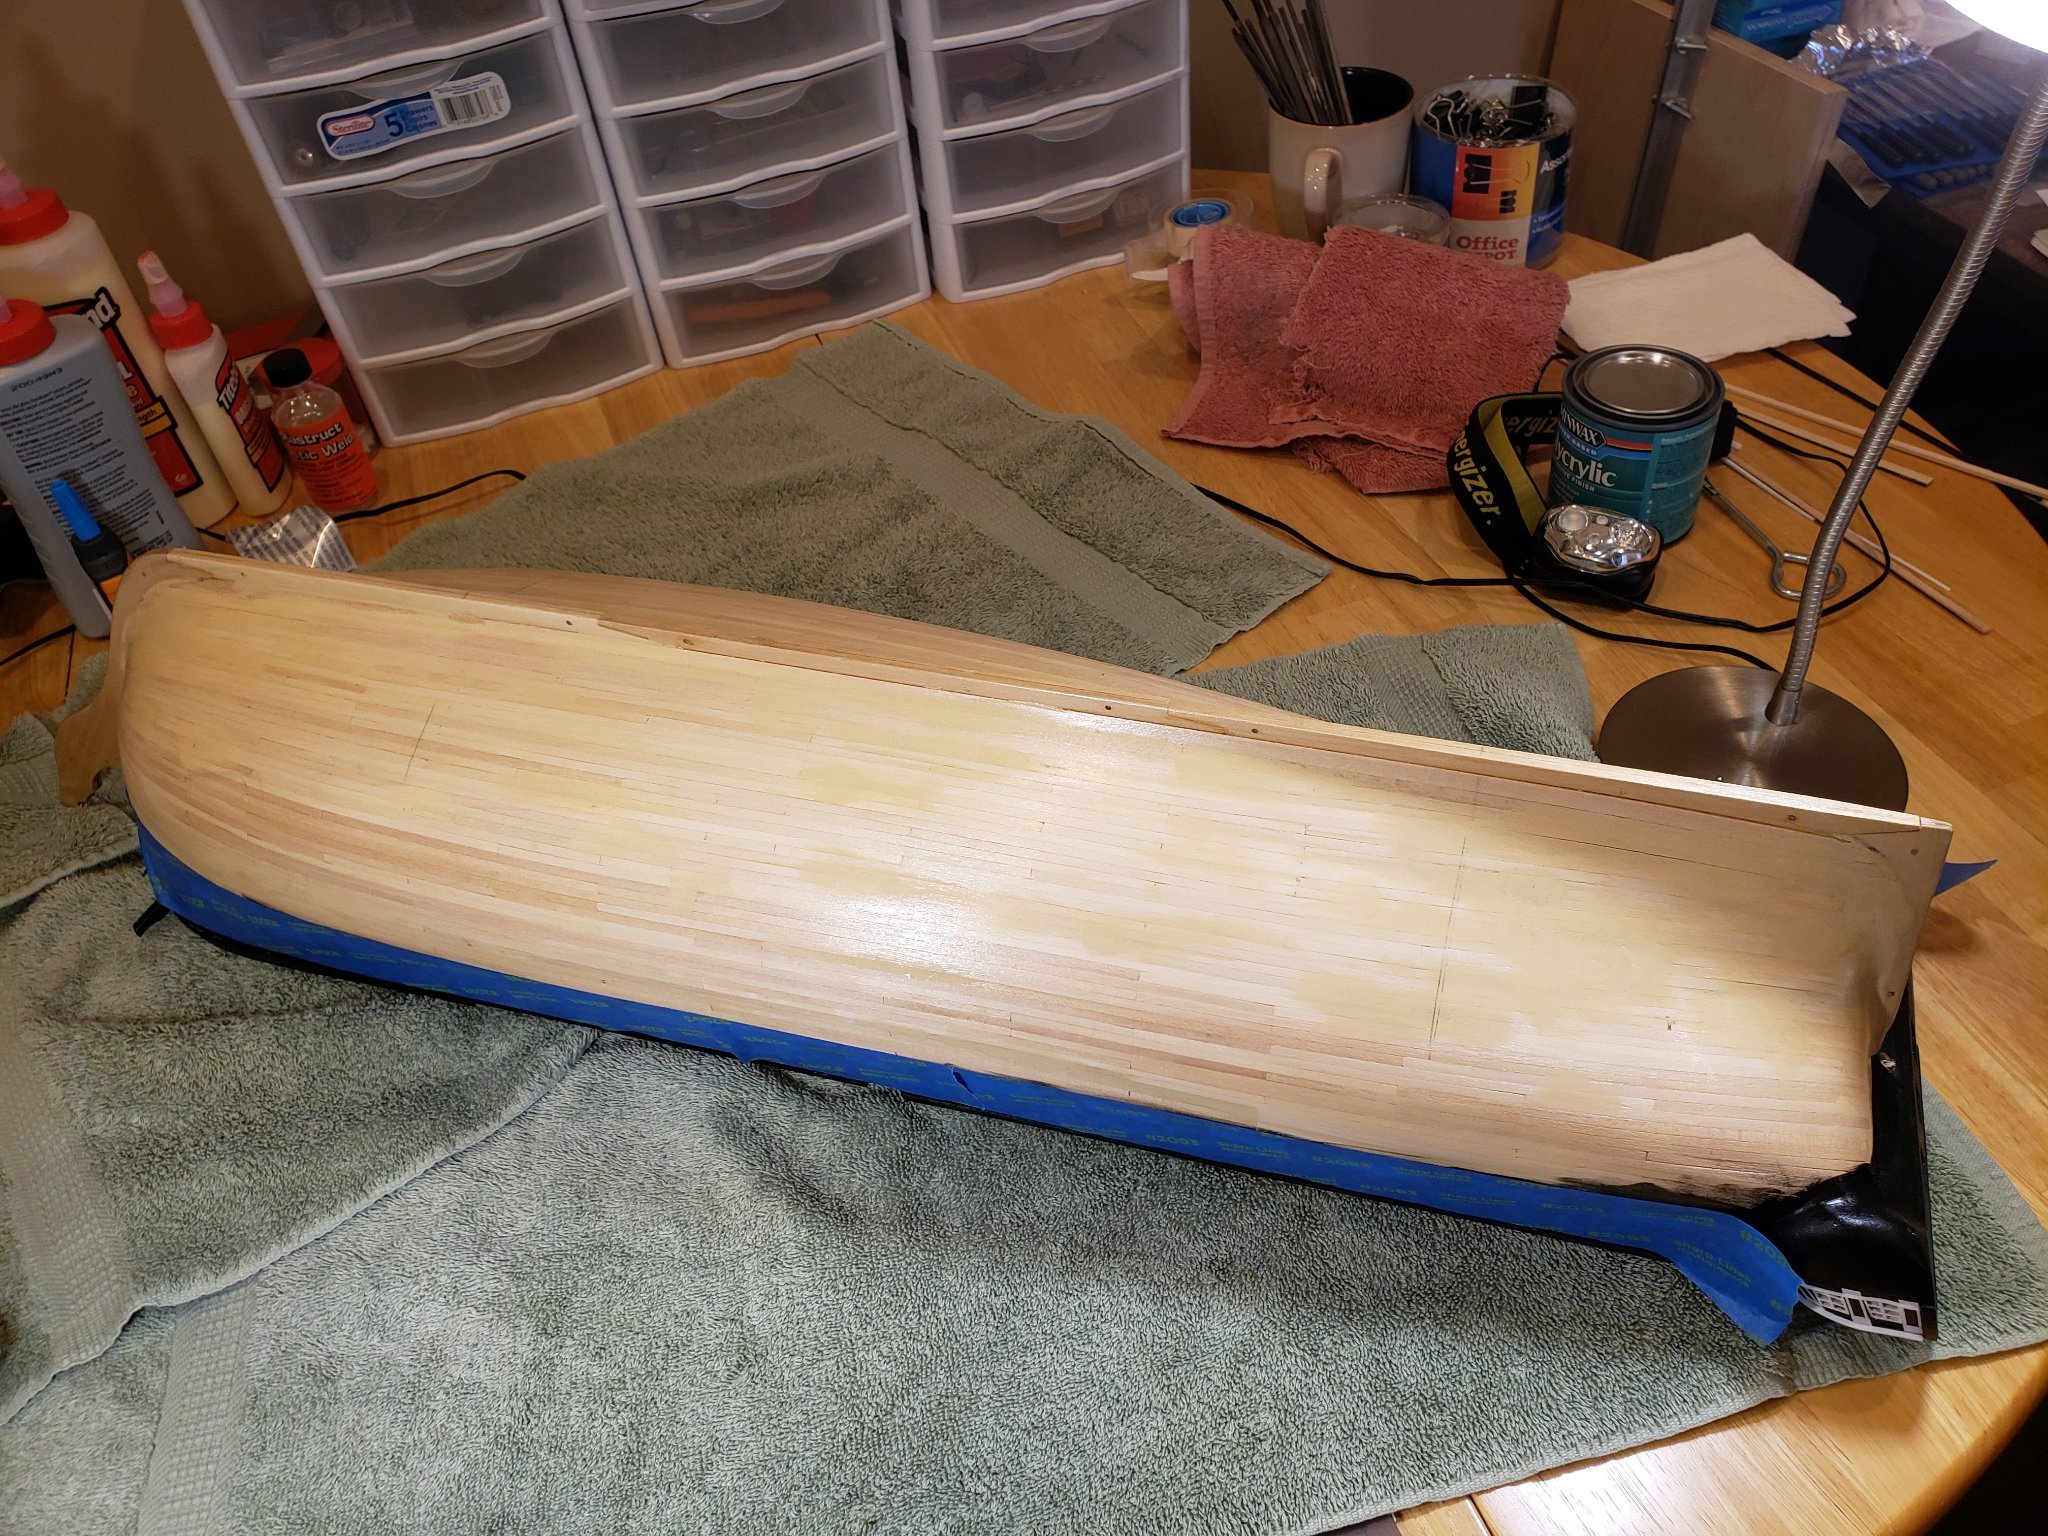
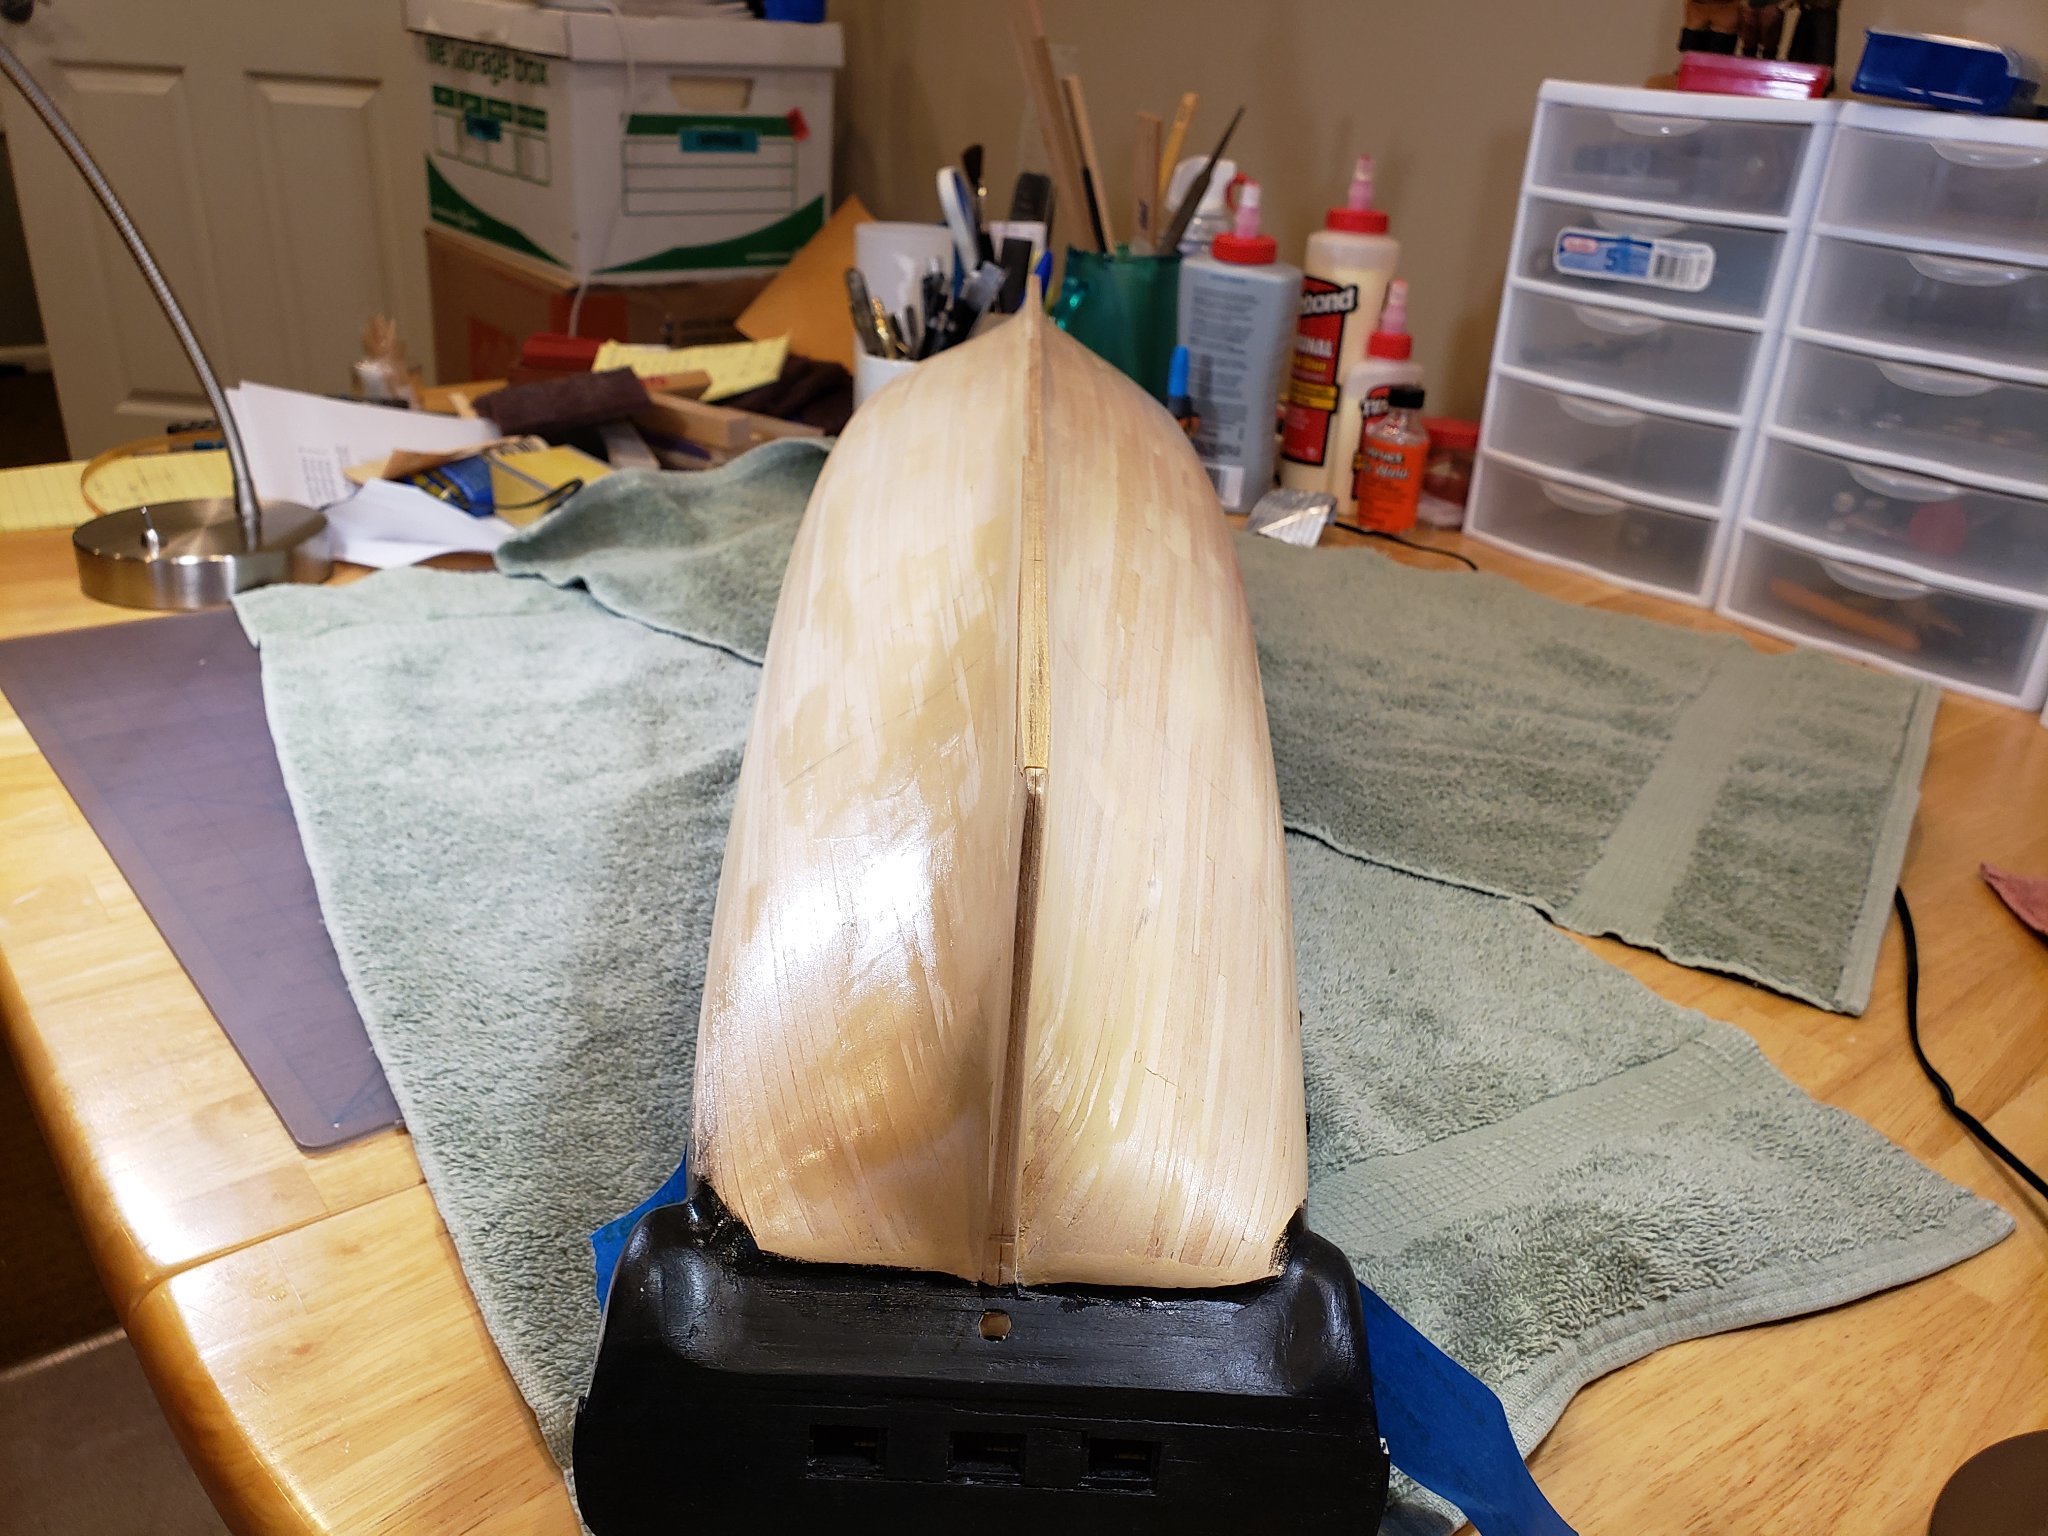
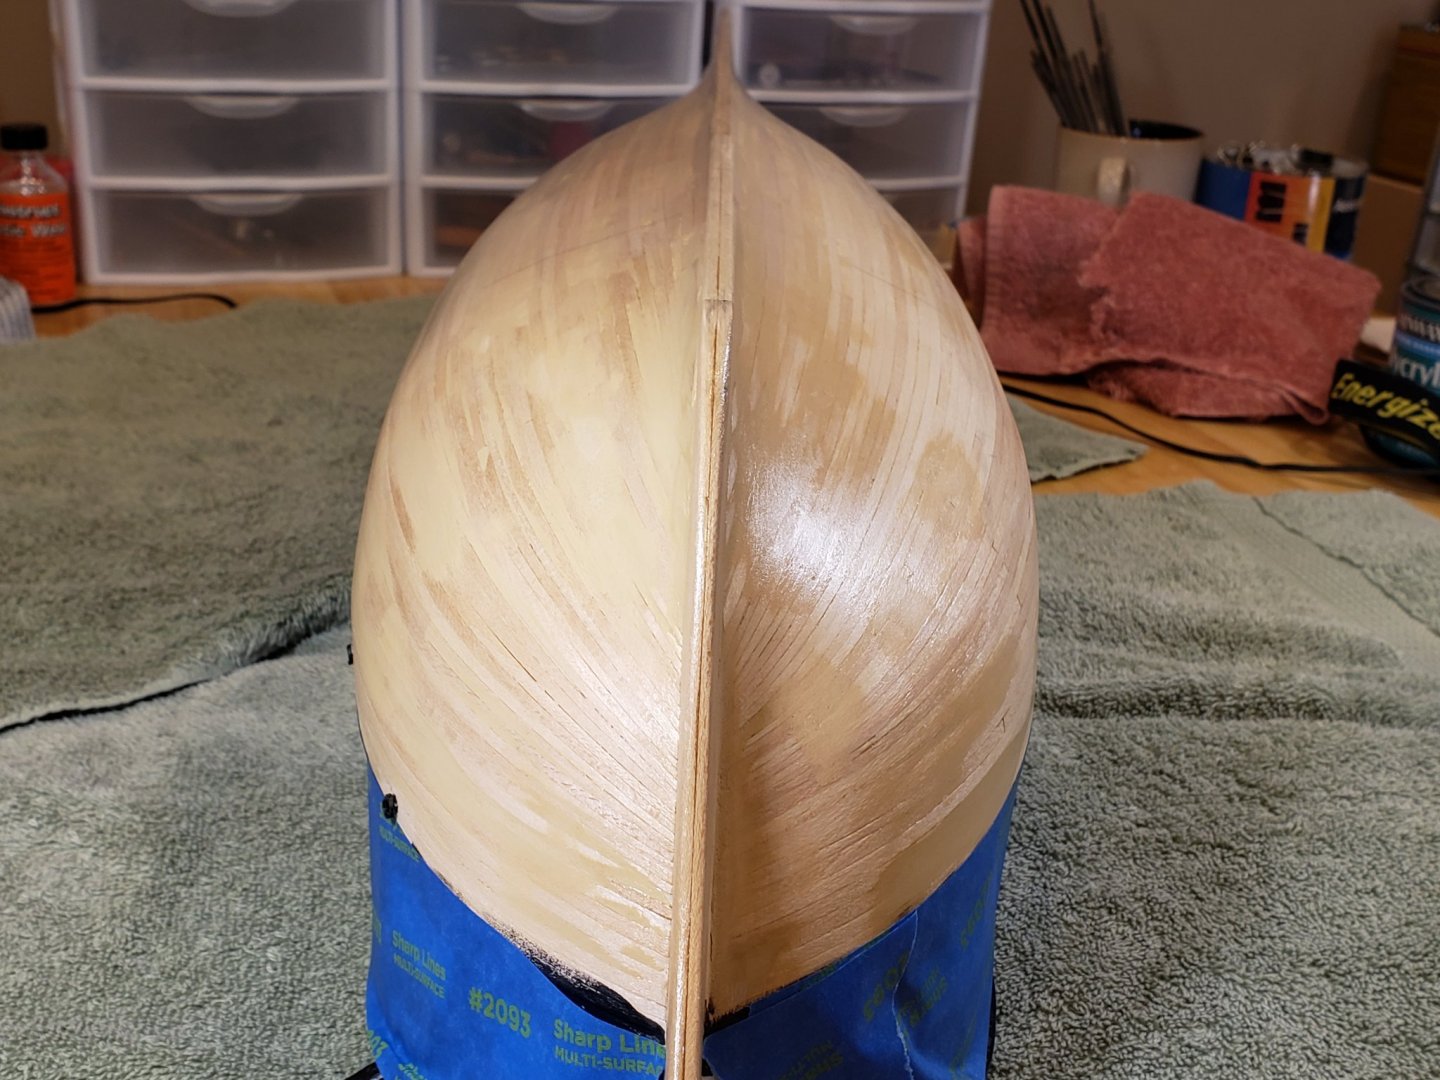
Working today on sealing the hull using 3 coats of Poly Acrylic Matt finish. Using ScotchBrite between coats. Will then extend paint below waterline where the top of the copper comes up before moving over to transom and adding port lights to other side of hull. Started with a bristle brush and the poly really wasn't going on well. Switched over to a higher quality synthetic "wash brush" about 3/4" wide and that really made a difference. Use a headlamp and go over it with long strokes when its nearly dry makes a difference and avoids leaving any heavy areas. Was considering gesso, but never worked with it. I really liked that suggestion though, thanks! Have decided to try to copper the hull. Because my roll of copper that came with the kit is over 20 yrs old was planning on purchasing new rolls of copper. Any input on the thickness of the copper? Is thicker better than thinner? Kit supplied was 1.5mil, looks like 1.25mil is available and was thinking that I saw some that was 2.5mil. Will get multiple rolls. Thank goodness for Amazon! Last pics of hull with initial coat of poly. After reworking it multiple times I think that it will copper up pretty well. Thinning the wood filler and using my fingers really helped to smooth out everything. Also sanding the filler with pretty fine paper made a difference.


-
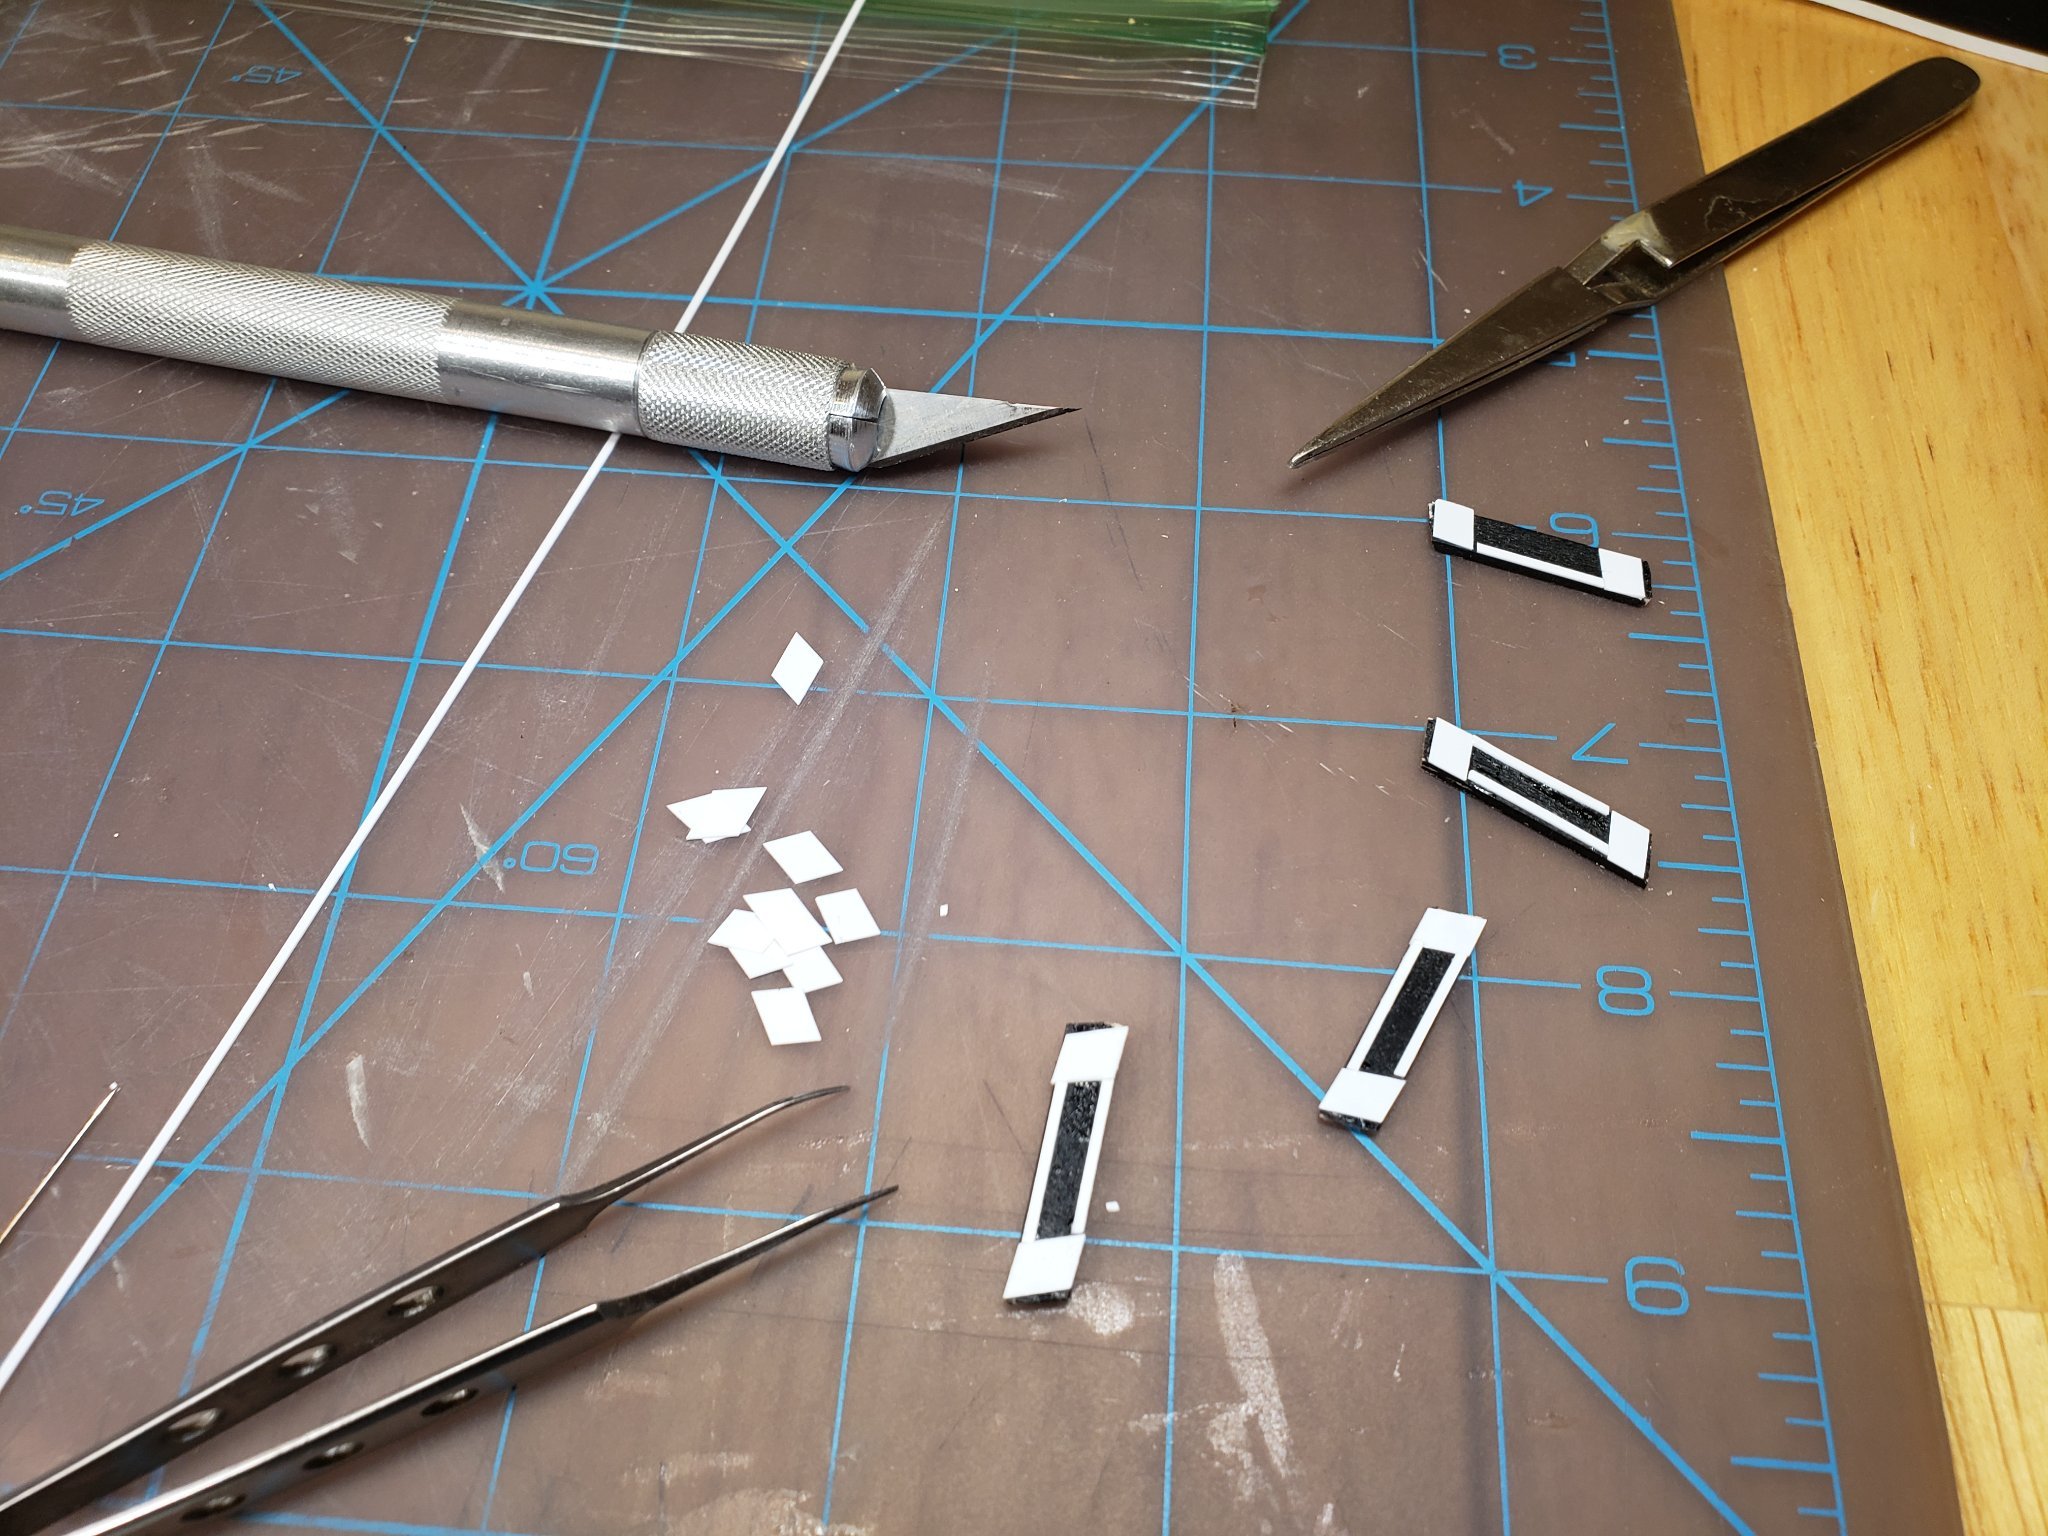
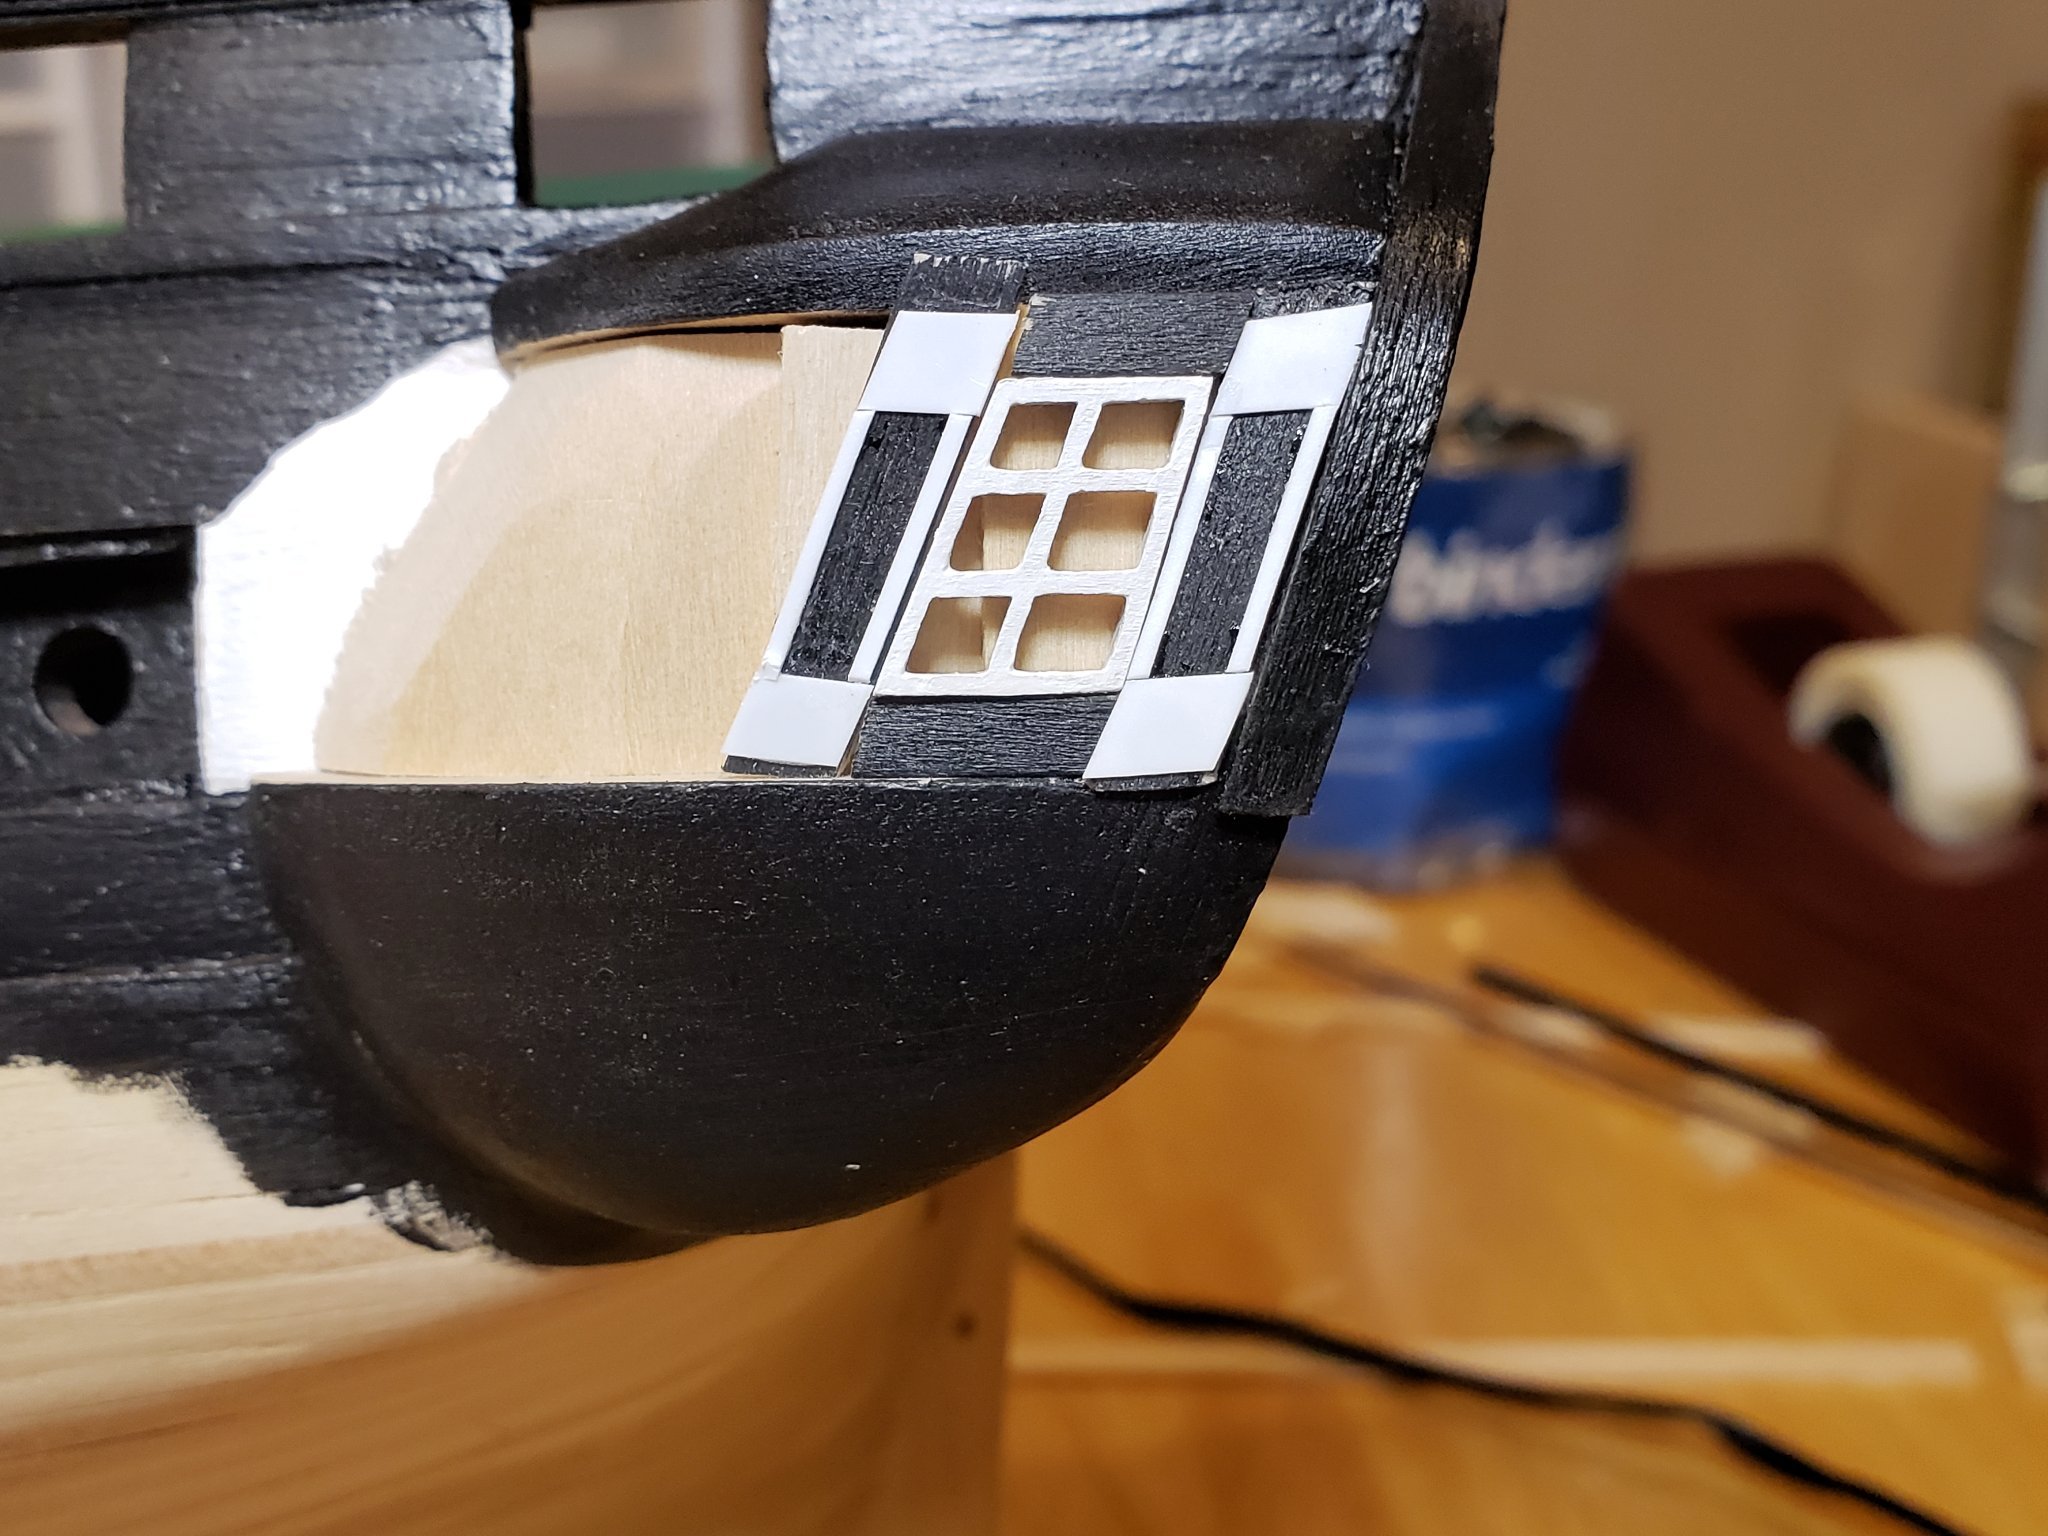
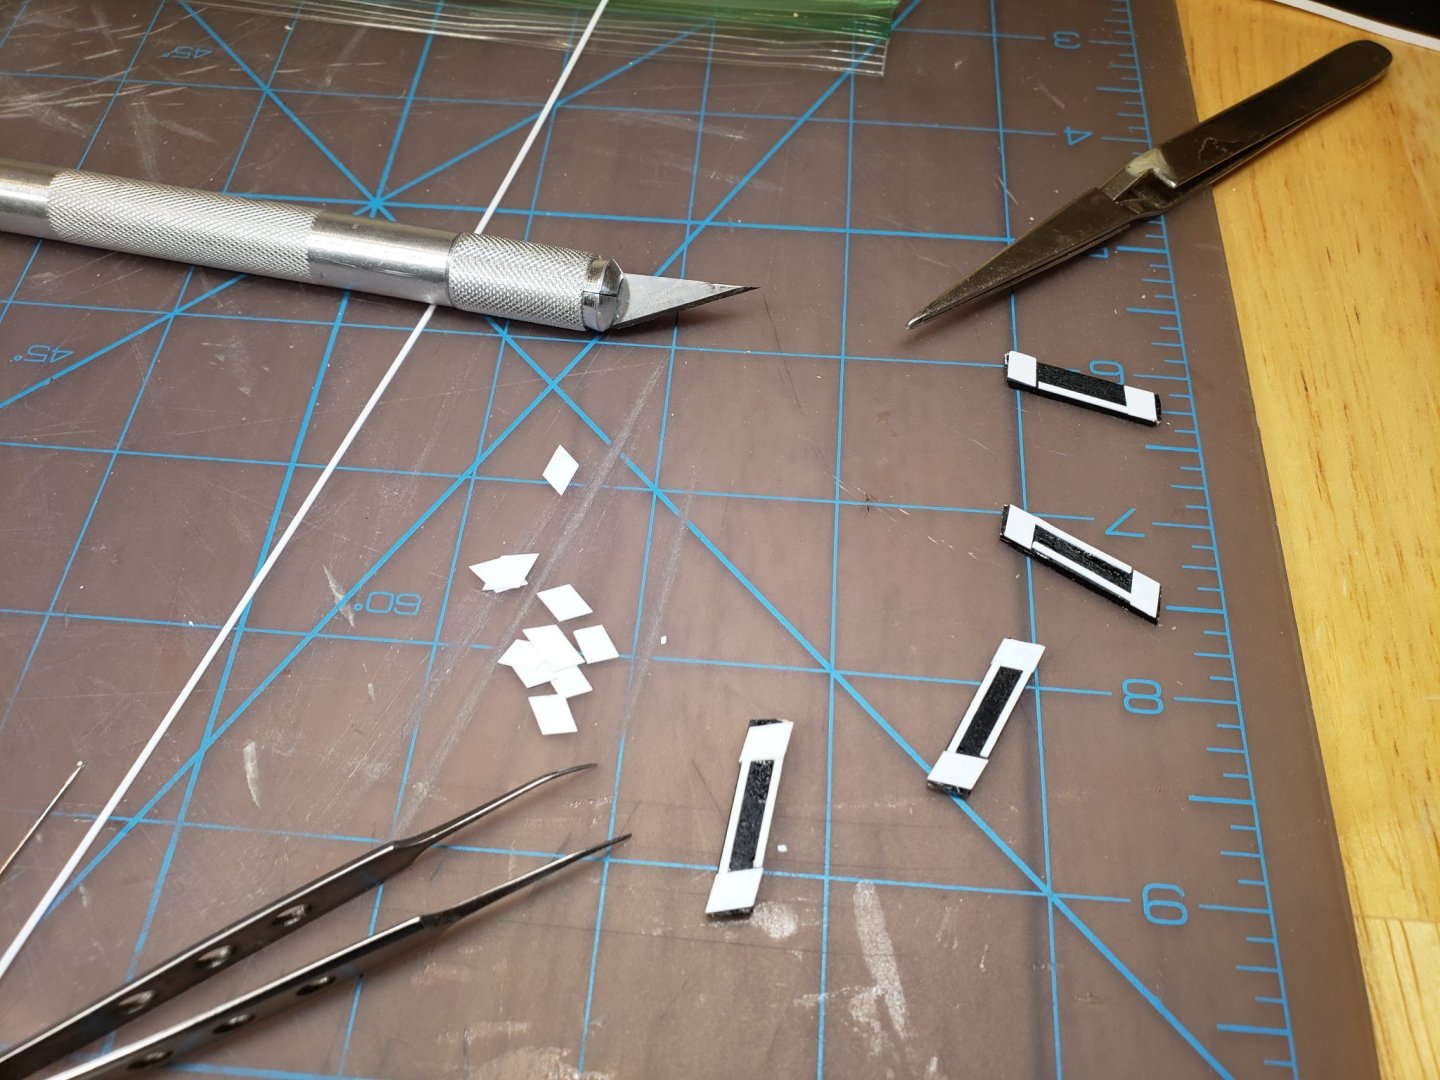
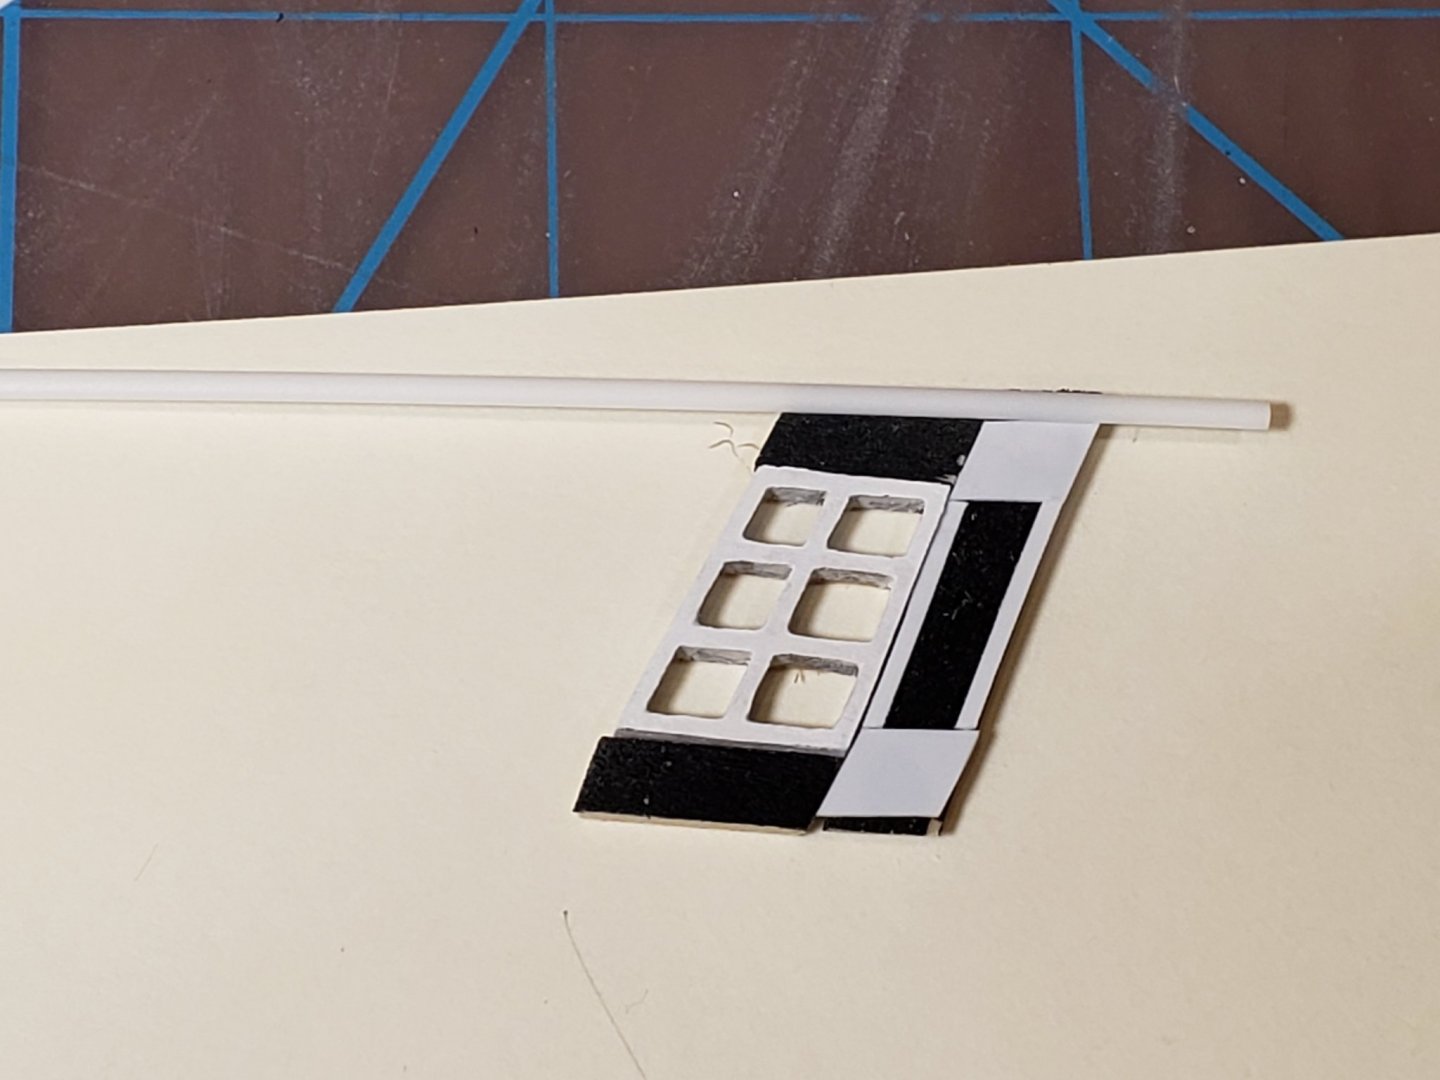
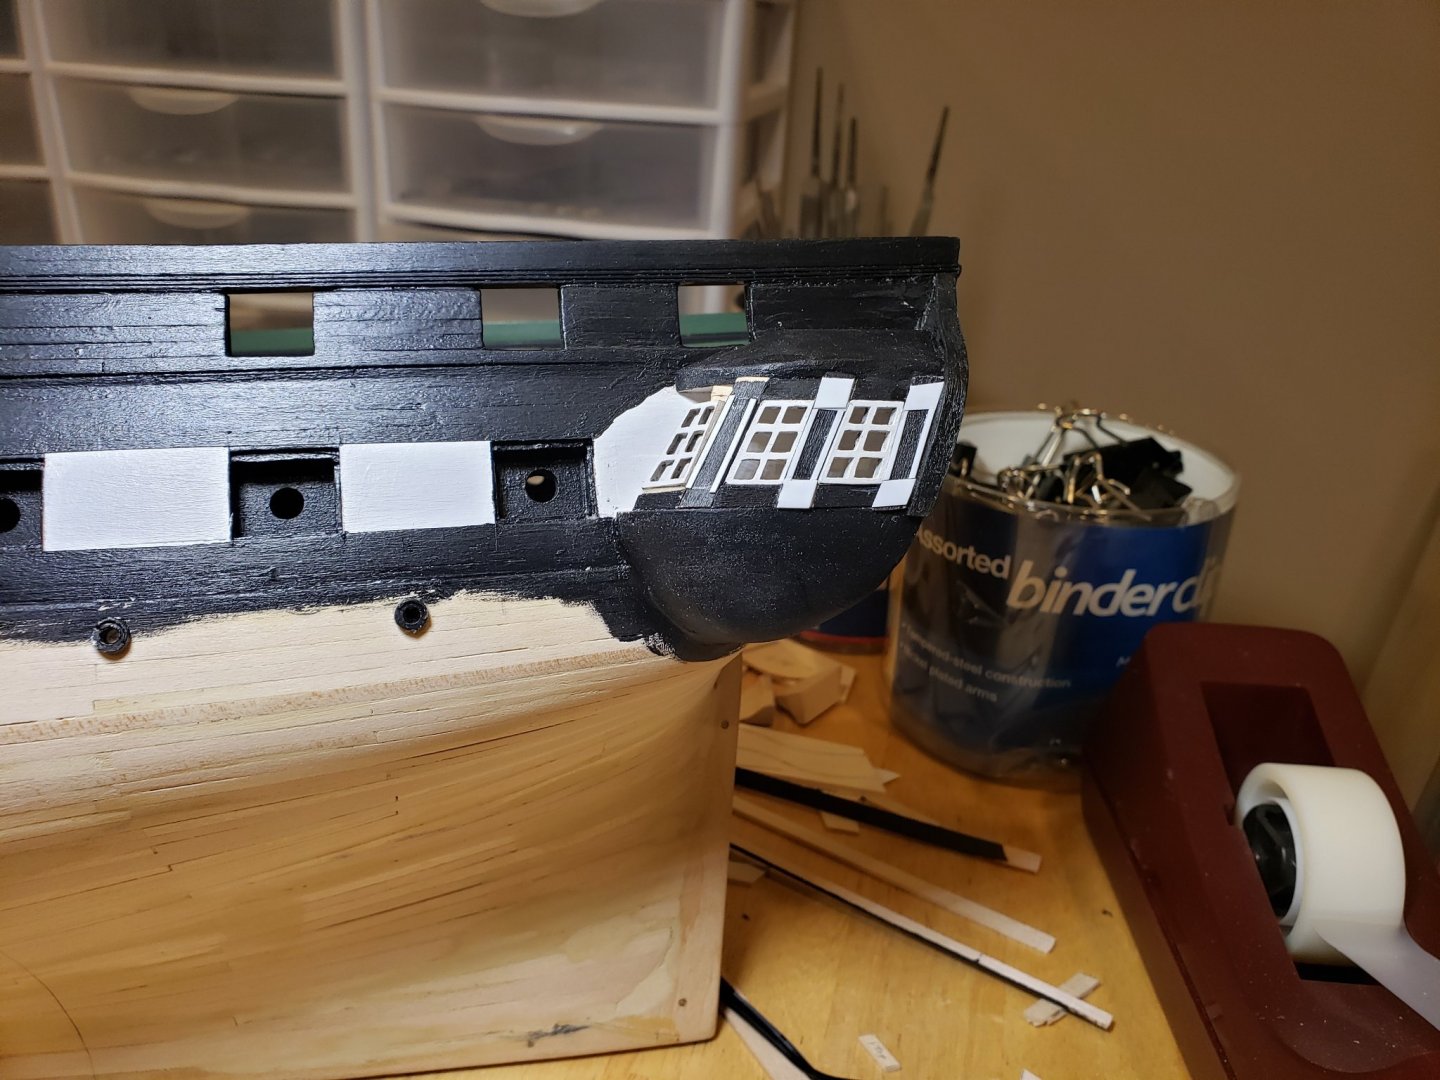
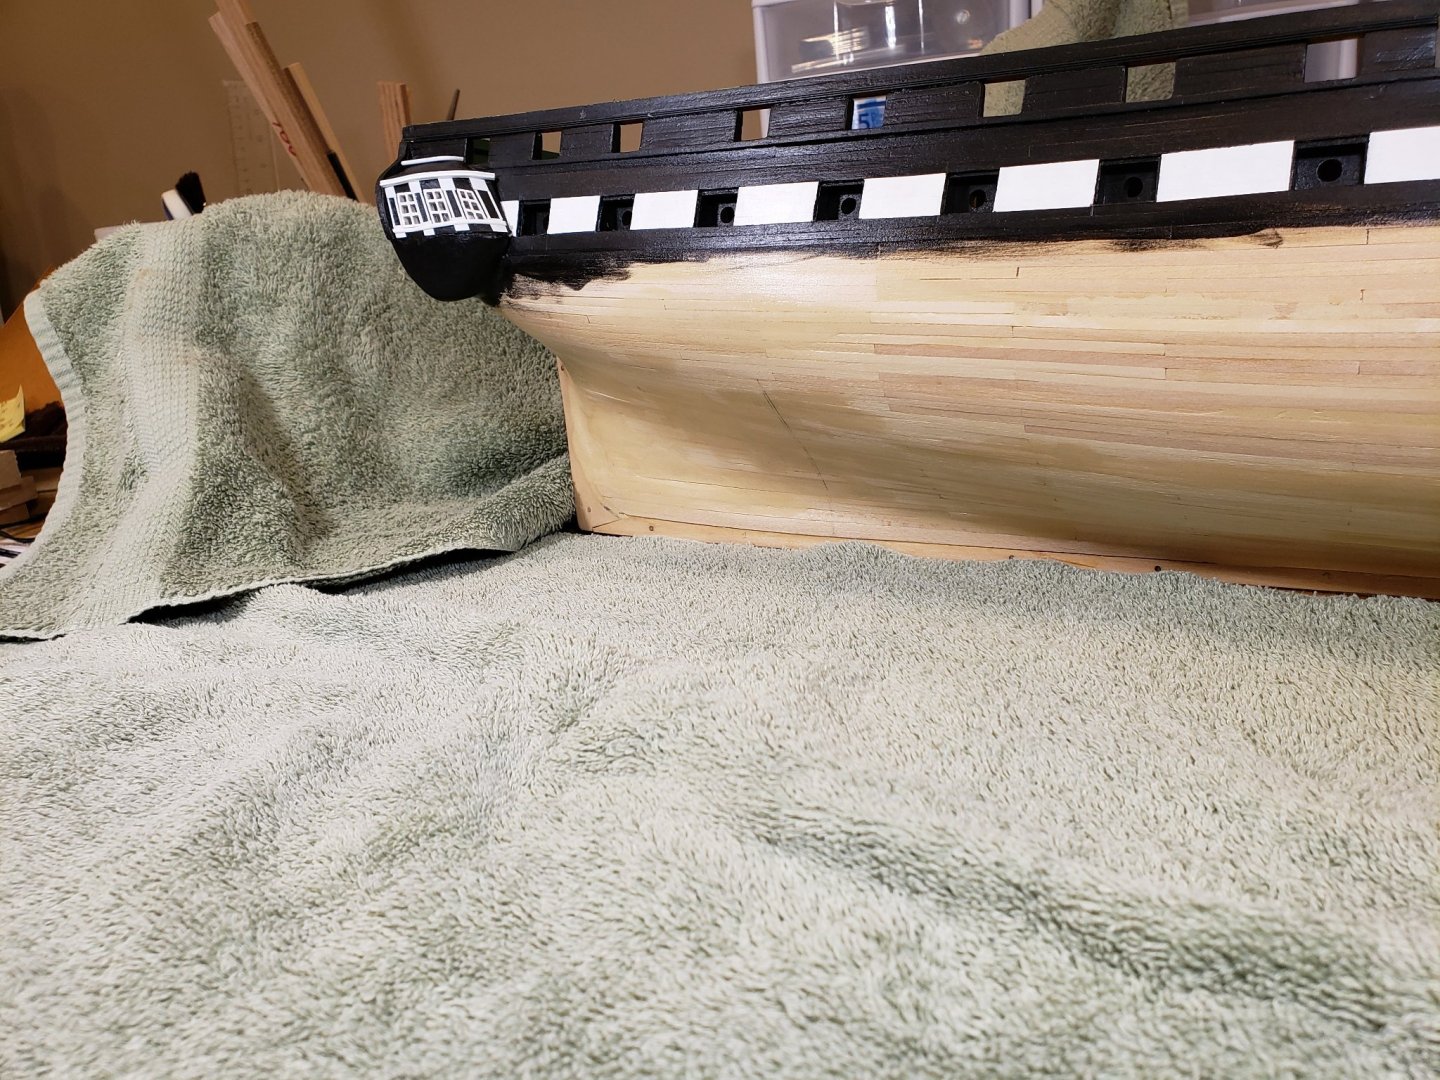
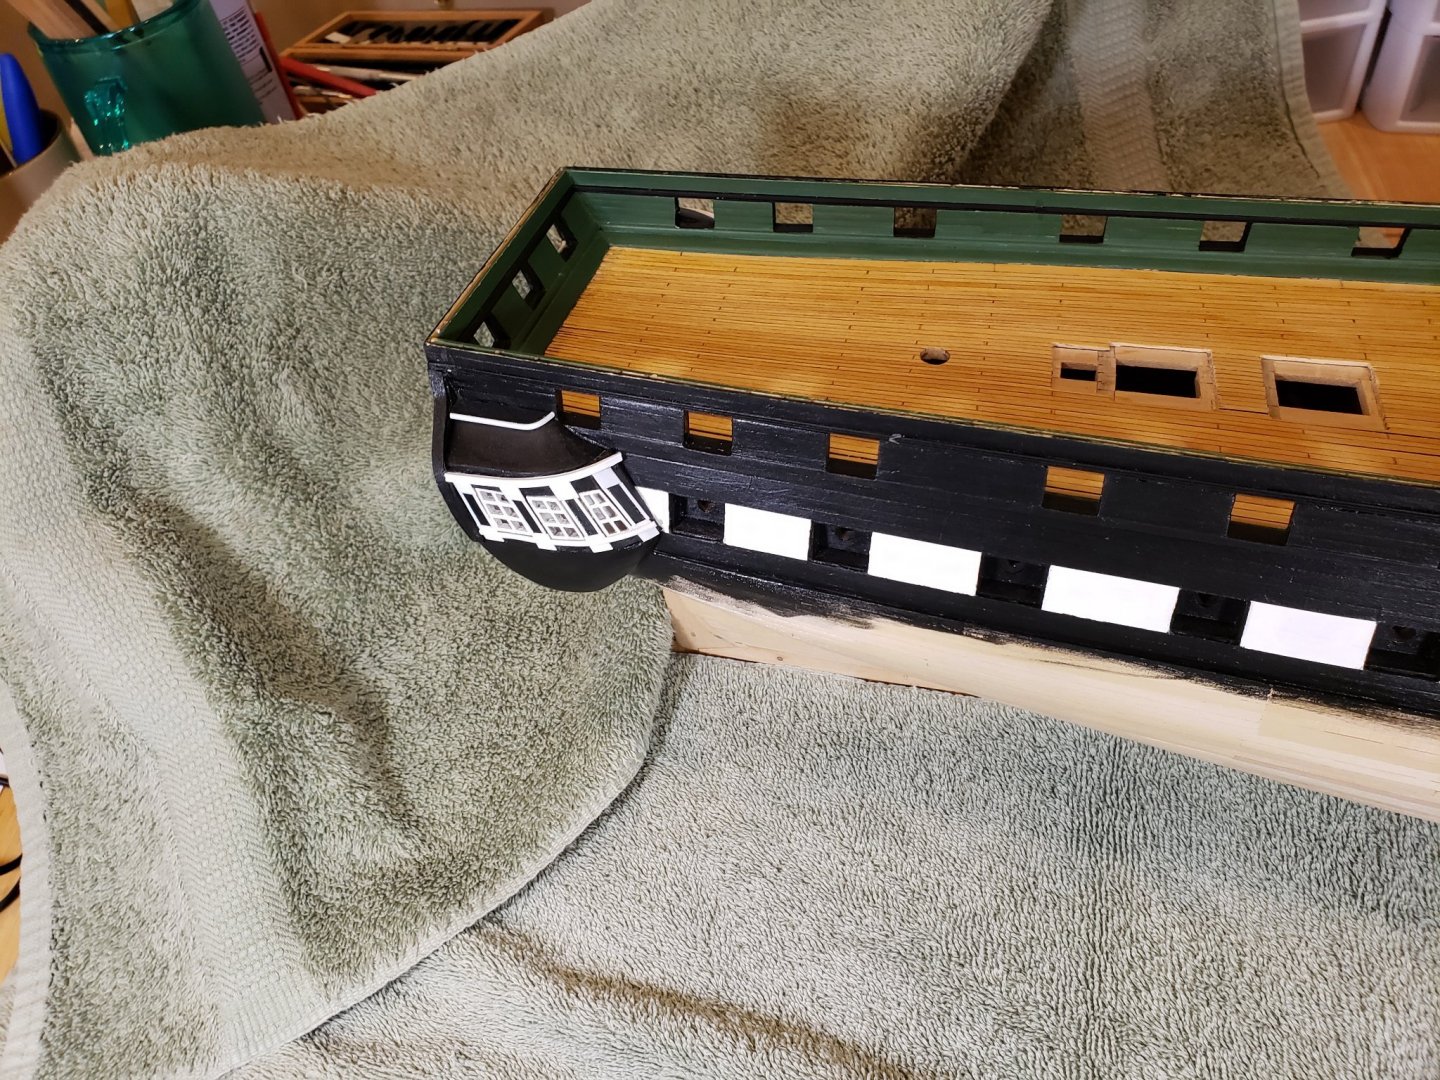
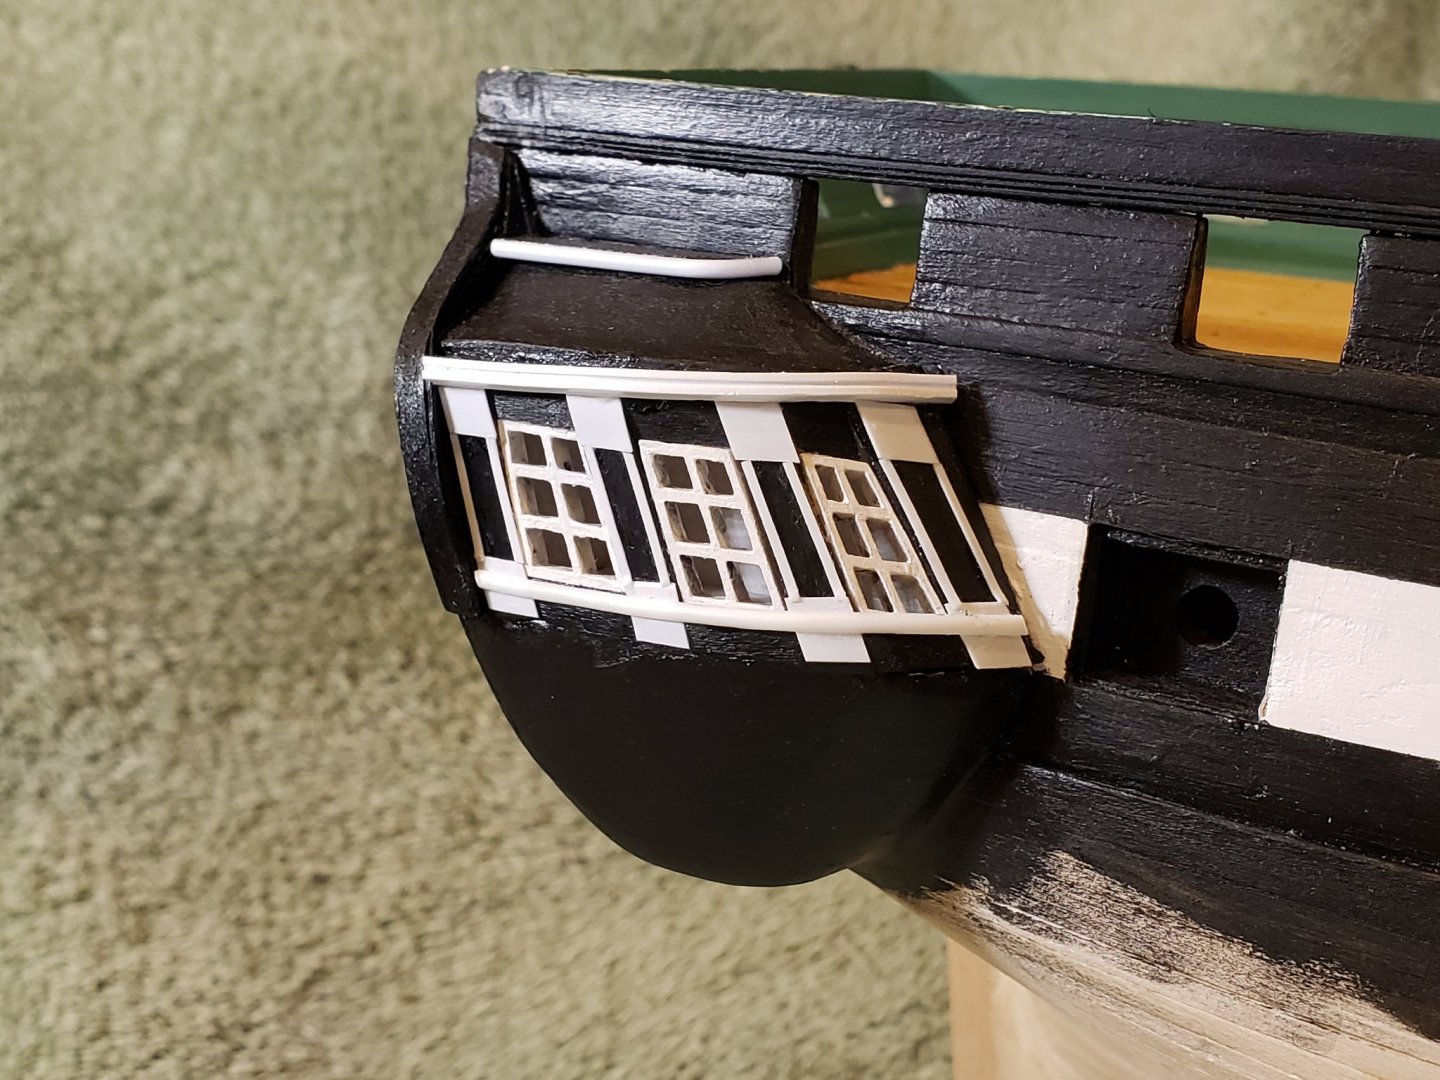
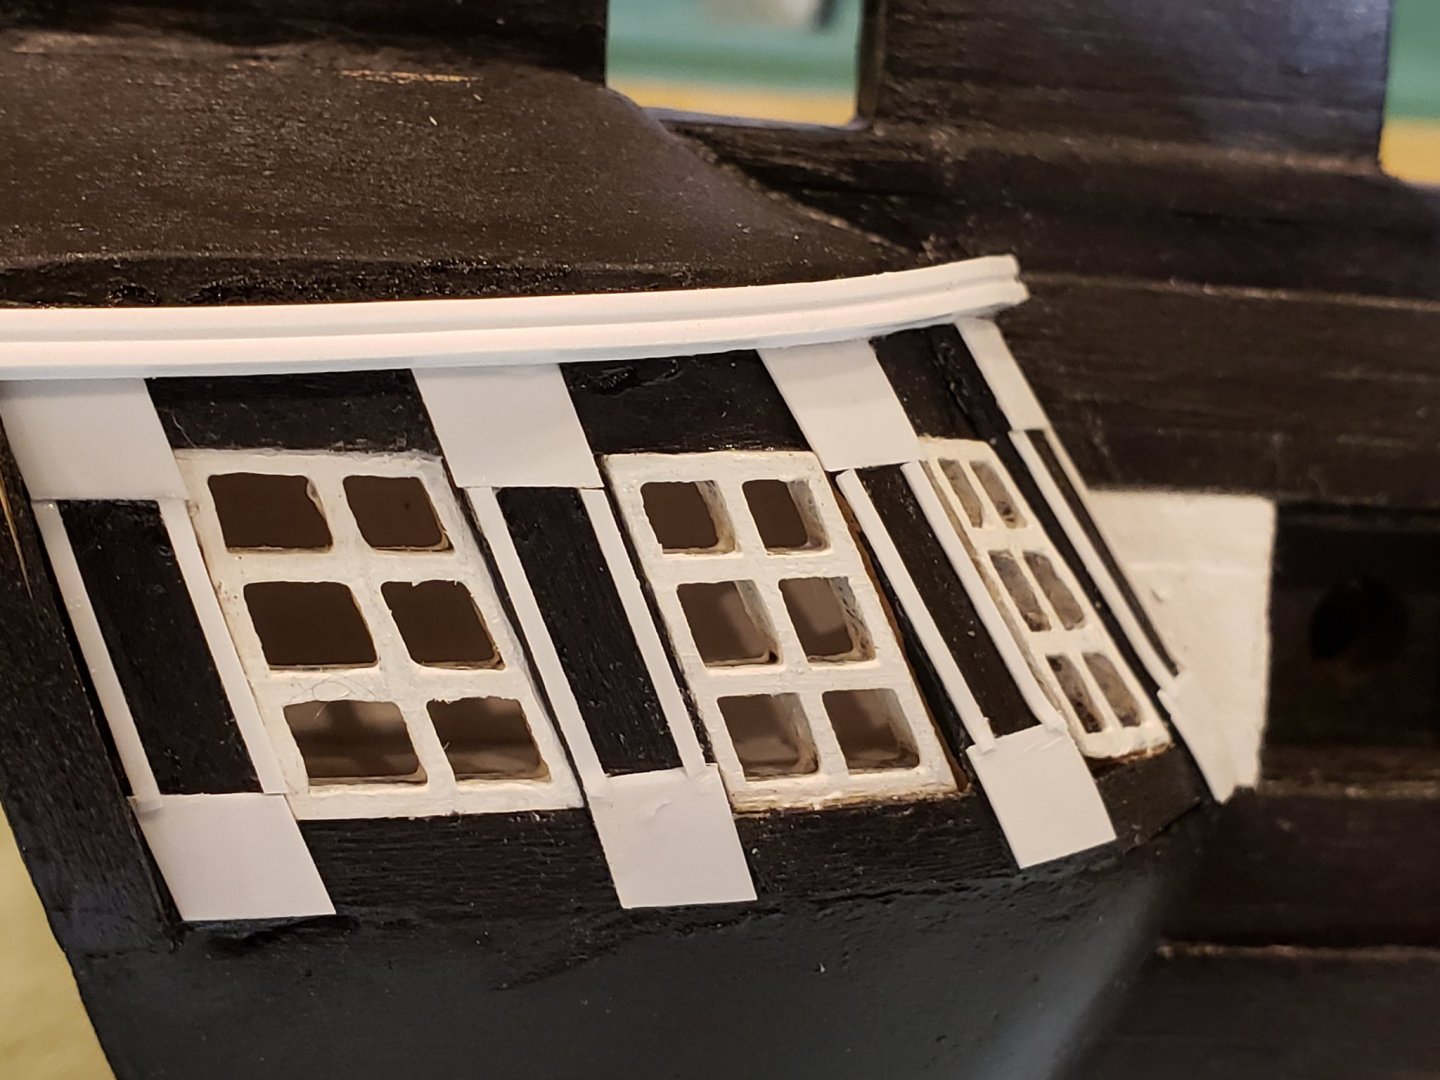
Well I guess it's time for an update on my galleries. As a reminder, this is my first build so I can't give a lot of good suggestions, but perhaps I can point out a few errors to avoid. First, the practicum recommended setting the roof 25/32" higher than the gallery floor. That really worked well for me and I milled a block of basswood to that size for placement of the roof. I could also slip that block behind the windows to help support them in place as I was gluing them in place. Benefit was that for the height I could use the same size wood as the practicum. For both the roof and lower gallery pieces I followed the plans and per the practicum I needed to extend them to align with the gun ports. Picked up some extra sheets of thicker basswood as the kit didn't supply enough and I had to remake them several times. Cut them using my scroll saw (had one that I had purchased when I was milling wood with the intention that I would use it for modeling, but it was still in the original box moved from Ohio). Used my Byrnes disc sander to do fine shaping for the profiles and a Dremel to shape the roof. Everyone probably does this, but whenever I make a part and have the sizing completed, I always mark off another piece on the raw stock assuming that I may need to create another part. With respect to the windows and the remainder of the gallery build, I had the same issues as everyone else... I was also intimidated by trying to add the styrene strips using CA directly on the model. So I started out by trying to build the pieces off of the model and then gluing them in place. Here are some of my early attempts. It was good for some practice. Found that by placing a drop of CA and anchoring one end of the strips works really well. Wait a minute and by just taking a toothpick and touching the backside of the strip I could direct and put the other end in place. Will use this technique for all of the styrene trim. Before the CA dried I used another toothpick to wipe up any excess glue. This really worked well. When you trim the strip always cut it a little long because you can come back and trim it again. Only took me 4 tries to figure it out that too short really looks nasty! I also wanted to use the kit supplied windows and here is an early attempt to build off of the model. The problem with the windows is that the angle of the windows is wrong and it is not consistent between windows, especially with the forward smallest window. It has very different slants on fore and aft portion. So this makes it tough to determine size and shape of the pilasters. The changing angles also plays havoc with trying to align the simulated column pieces off of the model. The windows are laser cut from 3/32" stock, which make them a little too thick. That does help if you want to add some curvature, but they are too fragile for much sanding. Here is an early attempt to make the pieces off model and then adding them. In the first pic the brown interior is some support pieces inserted to help with placement and gluing. It looks pretty rough and what you can't see very well is that there are a number of issues with that forward window. So after several attempts and almost giving up here's what I came up with: 1) If you use the kit supplied windows, make the first 3 pilasters a little smaller. I used 3/16" and having all of them the same size made the proportions come out a little better. The 3rd pilaster needed to be trimmed a little at the top...1/64+" starting at the base of the window to the top. The 4th pilaster just filled the area to the hull. 2) There is a lot of rounding needed for the 4th pilaster so I needed to use my Dremel on the inside top of that piece and just round the edges on the exterior. 3) Wait and place the styrene trim until the after the pilasters and windows are in place. 4) For the columns I didn't try to add the extra pieces at the top. On my final build, I created a little template and cut all of the column tops and bottoms the same size for symmetry. 5) I picked up one of those AL scrapers for shaping the .060 x .080 styrene trim. Suggest pre-bending that piece over the edge of your workbench as its a little too stiff for the CA to hold it without some pre-shaping on tight bends. 6) Started to mill some new windows from holly, but the odd angles were going to be an issue for me. If I had started initially making my own windows it may have about as fast as redoing this multiple times. Didn't think that I would like building them from styrene, so I never tried. The white would match better with the styrene. 7) There needs to be some rounding, especially at the top with the horizontal pieces. In some cases I went with 3/32 stock so that I had more thickness to work with to do the rounding. 8) On my last attempt, I added a 1/16 insert on the floor to have something to support from the inside. Could do the same at the top, but I just used the roof edge and thinned the pilaster tops. And some closer pics...really ugly. Overall I wouldn't give myself high marks on the galleries, but hopefully my experience will help someone else. While I was waiting for things to dry I started to add port lights and sculpers to one side. Suggest waiting until you have sealed the hull and at least extend the black paint below them as it makes everything easier to paint.

-
Hi Jon, Thanks for looking in too! I recognized you right away as a past customer. Don't remember the issue with the Rattlesnake, but just glad that it worked out. Been following your Conny log and refer to it often. Great job and I'm really impressed as to the extra details that you've been adding. I'll just be happy to get this build completed following the kit, let alone all of your modifications. Thanks again for your comments and for the Conny log! Anytime that you would like any tips on the Byrnes saw just PM me.
-
Hi Gary, thanks for looking in. Always feel free to chime in. The site has grown tremendously and it can be a bit overwhelming so I would suggest that you review some of Mark's comments, but don't let them deter you from participating. That's the only way that we learn all of the in and outs. There are a few builds currently in process on the Conny and several that were completed a while ago, so I would search for them under this general section on kits from 1751-1800 for a lot of information. Jon, who posted just ahead of you and then provided some links to the museum has done a lot of research on the Conny so I would defer to his advice. Sorry, but I can't help you on the history of the armament. You're probably aware of this, but many of us have a link to our build logs in our signature. Currently Jon is building the MS version of the Conny with numerous scratch enhancements. Suggest too that you click on the Conny link in his signature to go to his really great log. Cheers,
-
Really like your shop layout. Reminds me of my shop back in Ohio. Great job on the carlings!
-
Hi Tom, thanks for looking in. I really appreciate your wonderful log and refer to it often...just spent a few hours reading through it and picked up several ideas. Thanks so much for taking the time to fully document your build and the suggestion of the gesso. Bob, your work is always exquisite and I have been a long time admirer of your work. You've always made my products look wonderful. Took a break for some overdue visits with the grandchildren but now back working on things. After 4 tries I'm getting closer on one of the galleries and hope to post an update soon. Thanks again for looking in.
-
Just a Conny for now. Lots of stuff, hopefully, in the future.
- 399 replies
-
- 3
-

-
- winchelsea
- Syren Ship Model Company
- (and 1 more)
-
Ben, Somehow I missed your reply. I milled all of my pear before the move with alot of it going into a Naiad package. Hope I have a chance to do that build. Seems like it was getting harder and harder to find good pear. I collected what you purchased over a couple years of cherry picking. Your piece looks really good to me! Really like your reveal. Picked up some wonderful ideas from your log. Thanks for doing it. Keep up the great work. Jeff
- 399 replies
-
- 2
-
-
- winchelsea
- Syren Ship Model Company
- (and 1 more)
-
Great job, Dave Really looks neat and tidy. Really like how the tree nails turned out.
-
Grant, Congratulations on your build and retirement! Great job and I thoroughly enjoyed your log. Sorry to be a little late catching up. Jeff
- 109 replies
-
- 2
-
-
- medway longboat
- Syren Ship Model Company
- (and 1 more)
-
Thanks Jeff. Had similar thoughts. Hey Grant, Great to hear from you. Thanks for looking in. Milling was a whole lot easier than this, but modeling is a lot more enjoyable. I too enjoyed those conversations and have sorely missed that portion of HobbyMill. Starting work on the gallery windows so that will keep me occupied for awhile. The practicum suggests using styrene for the trim throughout the build. I'm a little skeptical as to how that will look. If not then I can always mill some holly as a fallback.
-
Glenn, Superlative job! Something for me to really aspire to! Spent a couple hours last night just reading the first portion of your build log. Really like and appreciate your writing style in your logs...it makes them very educational as well as a great way to illustrate your build. Your photography background really shows through as all of the photos are excellent. In just the first few pages I picked up several ideas and I'm really looking forward to reading the remainder and use it as a reference for my builds. Glad to see that you've mastered your Byrnes saw. Had I been following earlier I would glad to give you any tips. Really like the workshop with the wooded view. Way too clean though! Looking forward to your next build. Jeff
- 778 replies
-
- 2
-
-
- cheerful
- Syren Ship Model Company
- (and 1 more)
-
Painting: This is the first time that I've done any significant painting. The paint from the earlier portion of the build was all Floquil, which I had to pitch when we moved cross country. Have read nearly all of the painting section on MSW and was still uncertain as to which paints to choose. In my case, I'll be limited to brushing. In the end I picked up some tubes of Grumbacher titanium white and lamp black and used about a 50%+ dilution. Also discovered that using some fine bristled synthetic brushes helped a lot. For this type of painting I mainly used flat brushes and went back over everything one last time very lightly just before the paint dried with each coat. Somewhere I think that was one of Chuck's suggestions? In any case after about 5 or so coats it seemed to work out pretty well. In bright light there is still a satin sheen. The Floquil is definitely a flat finish. Bob Hunt had also recommended using Minwax PolyAcrylic as a primer, so everything above the wales had 3-4 coats of that before I started painting. Was wondering if anyone has any suggestions if I should continue to use the PolyAcrylic with my acrylic paints or skip it as I paint the remainder of the hull? So the above is what I did. Are there better methods or products that I should be using and what about the PolyAcrylic? Any thoughts or suggestions would be really appreciated. I realize that this isn't the best place to ask these questions, but I wanted to document what I've been using in my log. If no suggestions, I'll post in the painting section. Thanks!