


pirozzi
-
Posts
843 -
Joined
-
Last visited
Content Type
Profiles
Forums
Gallery
Events
Posts posted by pirozzi
-
-
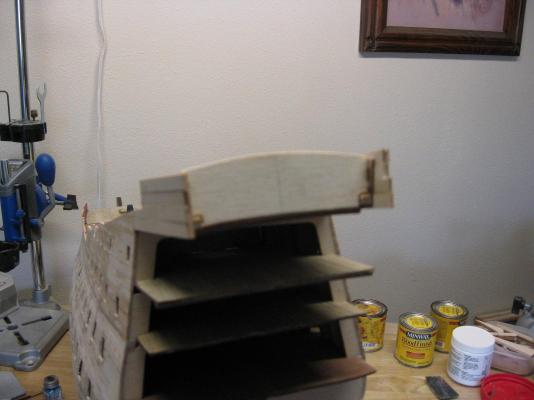
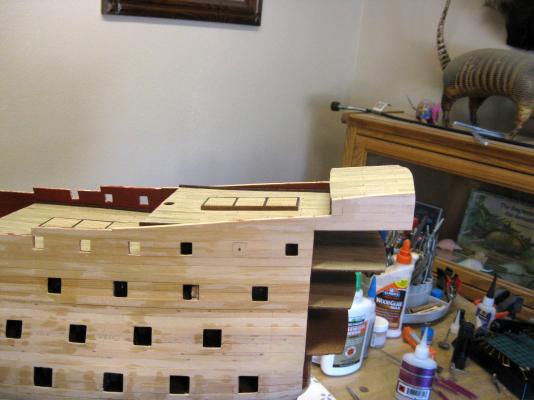
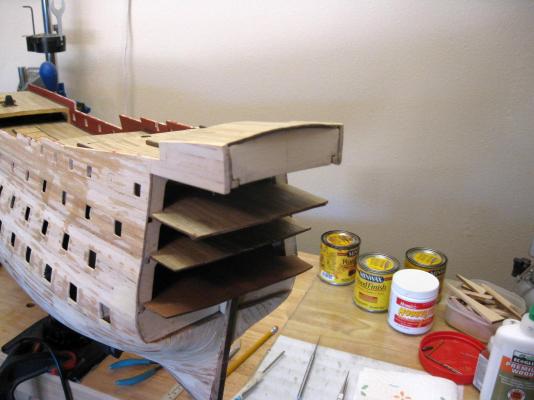
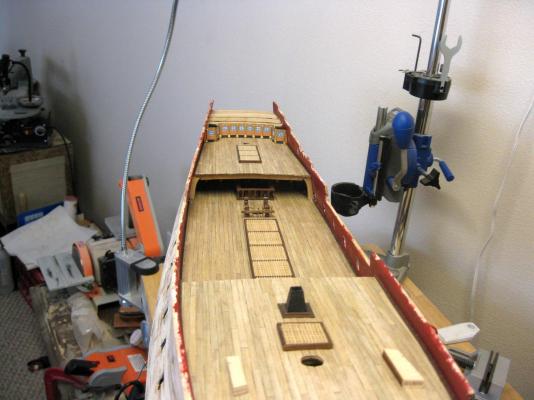
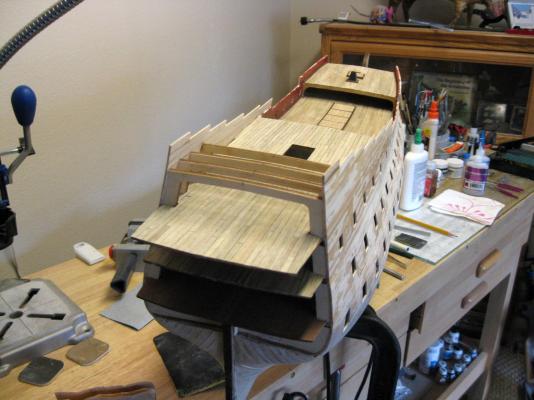
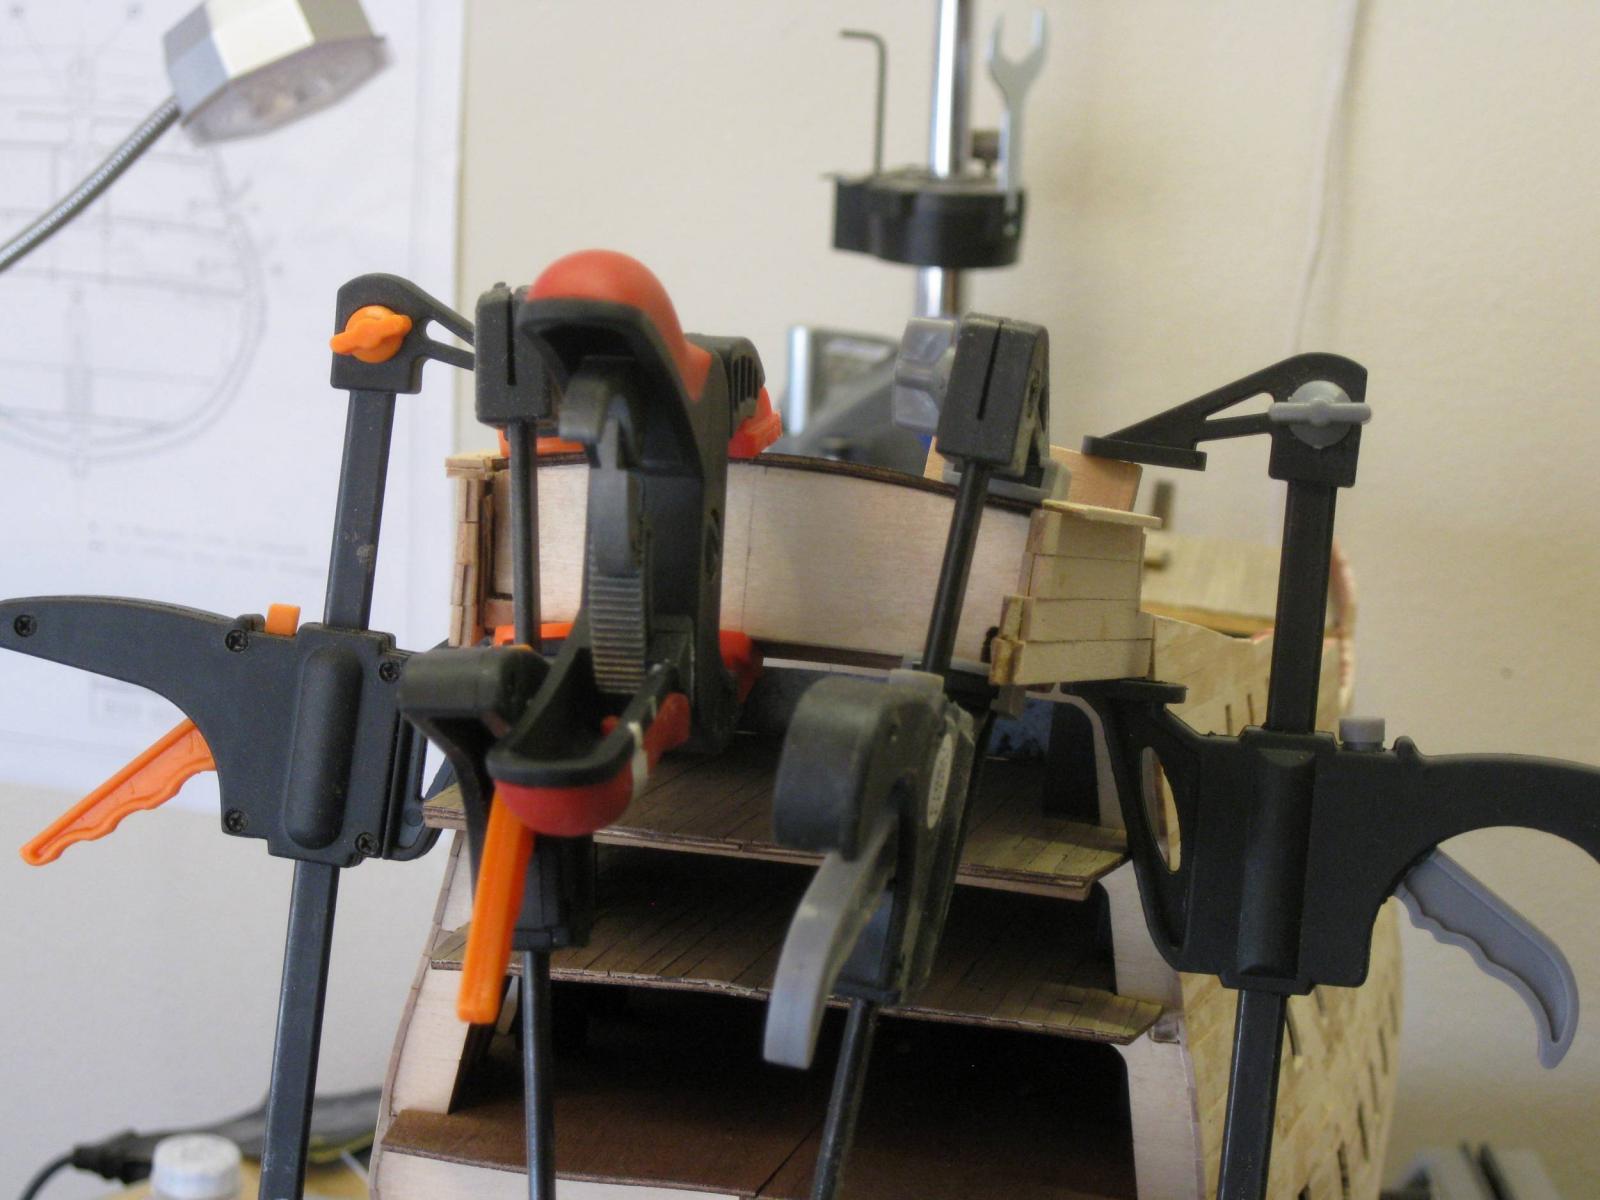
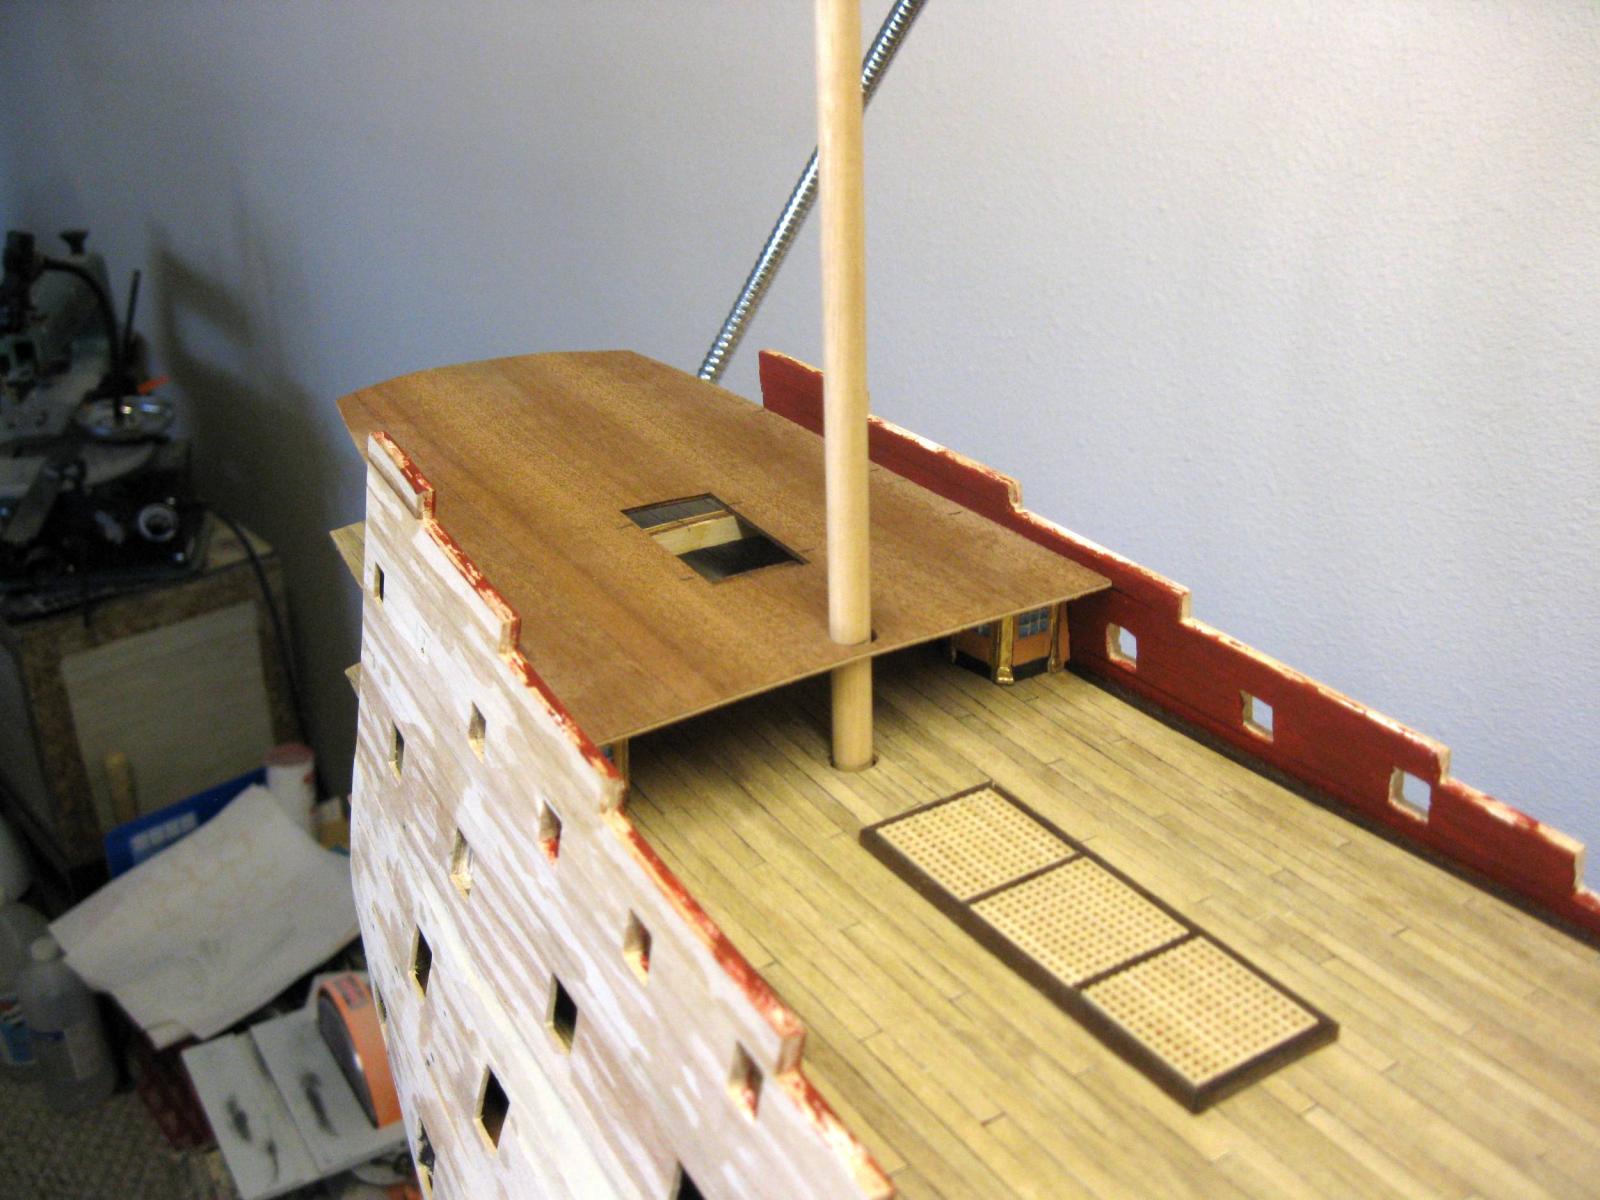
Working on and finishing the last deck, the poop deck. This was by far the most difficult part of the build so far. Unlike all of the other decks that are supported by the bulkhead frames, this deck has no real support. The kit comes with 2 small pieces of plywood made from the same wood as the false decks. These are to be glued in a vertical position on the upper quarterdeck to support the poop. That to me was not a satisfactory option, as it offered little support to the deck.
I constructed a bulkhead for the aft end and side supports to link the forward metal bulkhead and aft bulkhead . When I planked the hull at the aft end at the level of the upper quarterdeck and above, I should have extended the planks past the last hull bulkhead by at about 100mm. I cut them off flush with the last bulkhead, which meant I had to extend them aft to support the poop that hangs over the aft edge of the upper quarterdeck for most of its length. Oh well, you live and learn.

The exact horizontal location of the deck, its height from the upper quarterdeck below, the vertical slope, and the camber all required considerable measurements between plan sheets 2 and 17. These sheets do not exactly agree, so a compromise had to be made, and I hope I guessed correctly.
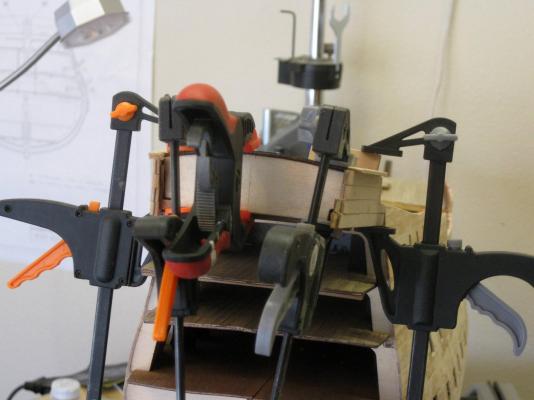
The false deck and the metal forward bulkhead had to be modified considerably in length, height, and shape. Once the false deck was placed on the frame, it had to be bent considerably at both ends to provide the heavy camber and required some serious clamping.
Also on another note: If you are planning on using the larger dimensions for the deck gratings as the plans show and not the smaller sizes as per the cutouts on the decks, you will not have enough grating pieces. There are enough to do the decks, but not to do the quarterdeck overhang and the heads at the bow. More will have to be aquired.
Next up is to prepare the hull for the finish layer of second planking. Since the finish layer is only going up to the bottom edge of the metal hull decorations from bow to stern, all of the pieces have to be placed temporarily in their exact locations to mark the upper boundary for the planking layer.
Vince P.


-
Hi Mates,
I subscribe to "Seaways - Ships in Scale " magazine. It is a great magazine for model ship builders of all flavors. In the issues of Nov-Dec 2013, Jan-Feb-2014, Mar-Apr 2014, and May-Jun 2014 there is a 4 part tutorial by Robert E. Hunt on planking a hull. It is one of the best I have seen and really hits the spot on how to plank a hull perfectly from start to finish. I would really recommend getting a hold of these magazine articles if you want to learn how to plank.
Vince P.
-
The knot to use is a sheep shank with a half hitch. You can adjust it up and down to make it as tight or loose as you want and it will not slip. This knot is used to tighten and hold tent stake lines.
Vince P.
-
Hi Mike,
"Ages of Sail" has the most and best selection by far. Also give "Historic Ships" a look. They have a good selection too.
Vince P.
-
Very nice backdrop Andy. She looks great. Now to keep the dust off.

Vince P.
-
-
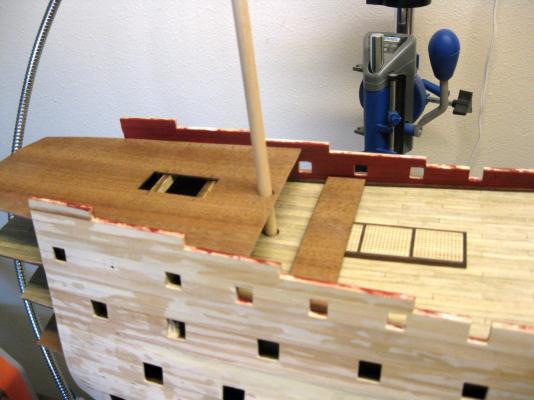
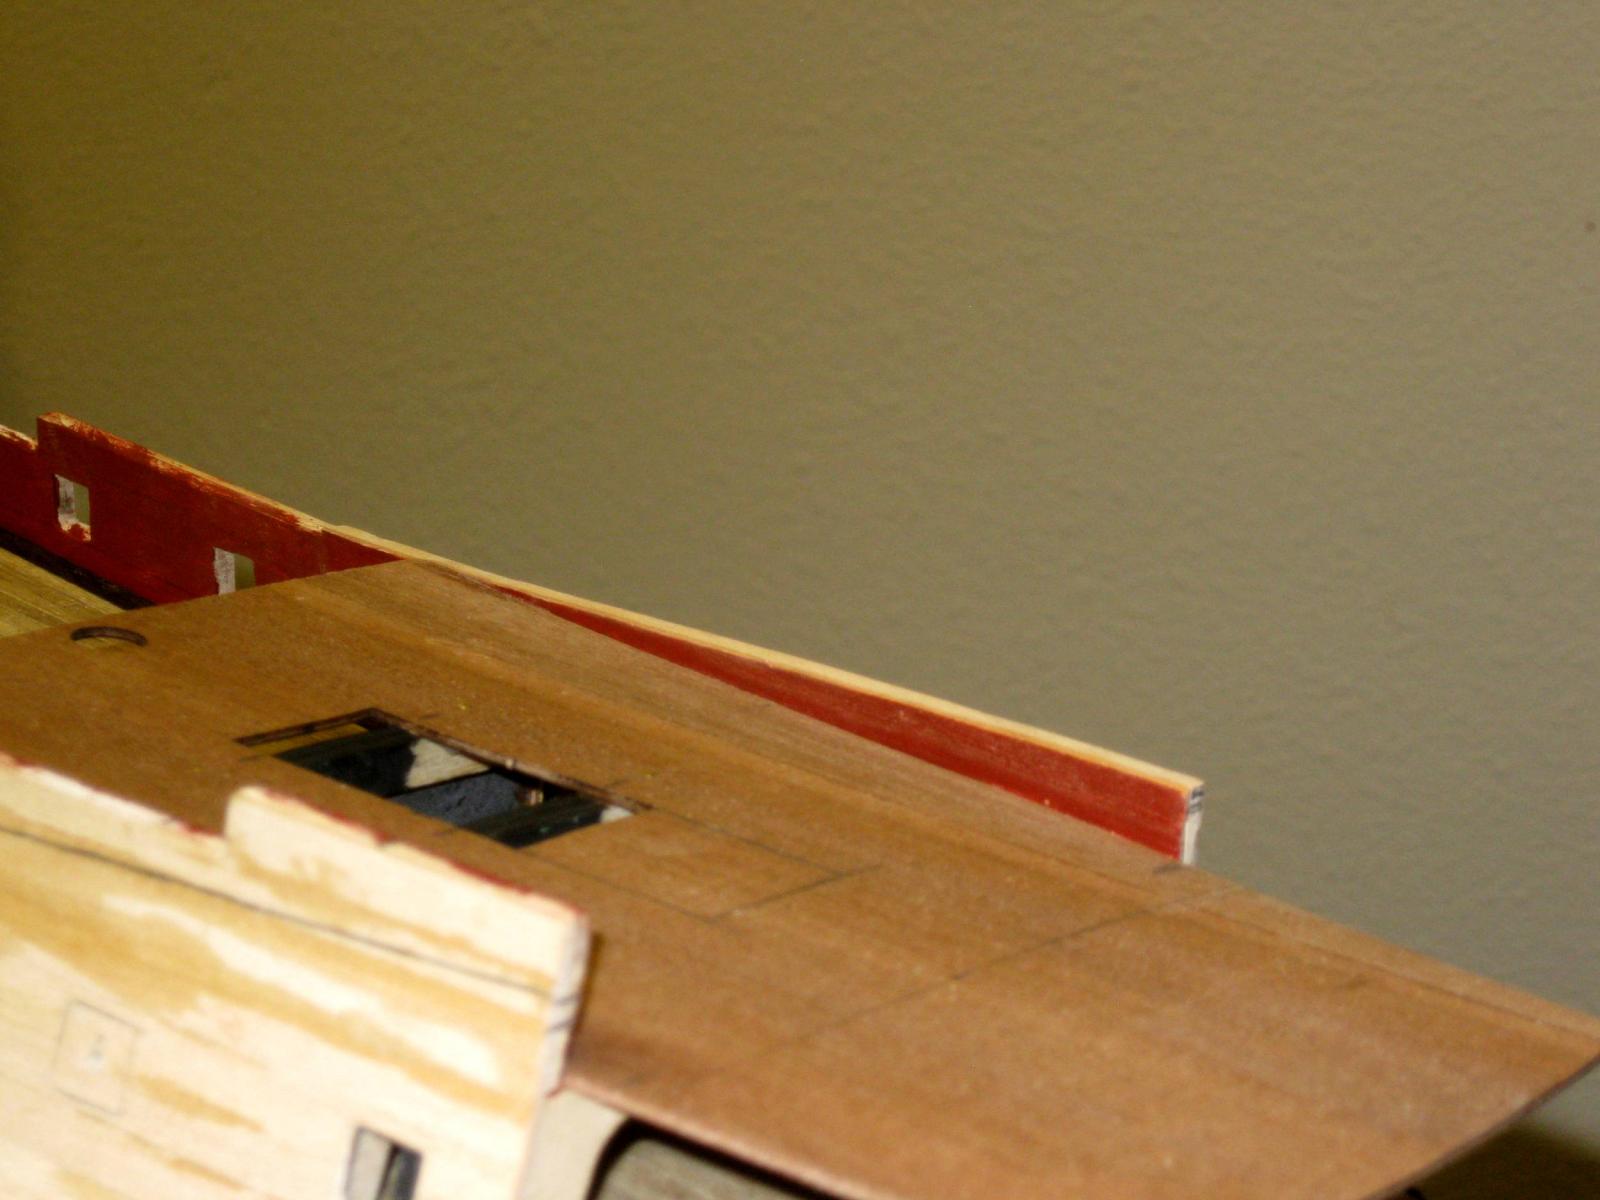
The upper false quarterdeck is secured in place. Before planking it, the bulwarks that run partially on this deck need to be cut back substantially because the forward end actually falls slightly below the deck surface itself.
This is where you really have to pay attention to the plan drawings. Sheet #17 shows the run of the decks and the hull detail in scale. Making careful measurements off the drawing is needed to mark the bulwarks for cutting.
The first photo shows the bulwark before and the second after cutting back.
Vince P.


-
Hi Leo,
While I am not familiar with that kit, it does not surprise me about the scale being off. It is common for kits of many makers to be off considerably from the published scale on their kits. Not sure if the problem is with original data on ships or poor measurements, but it is seen frequently with kits and plans.
Vince P.
-
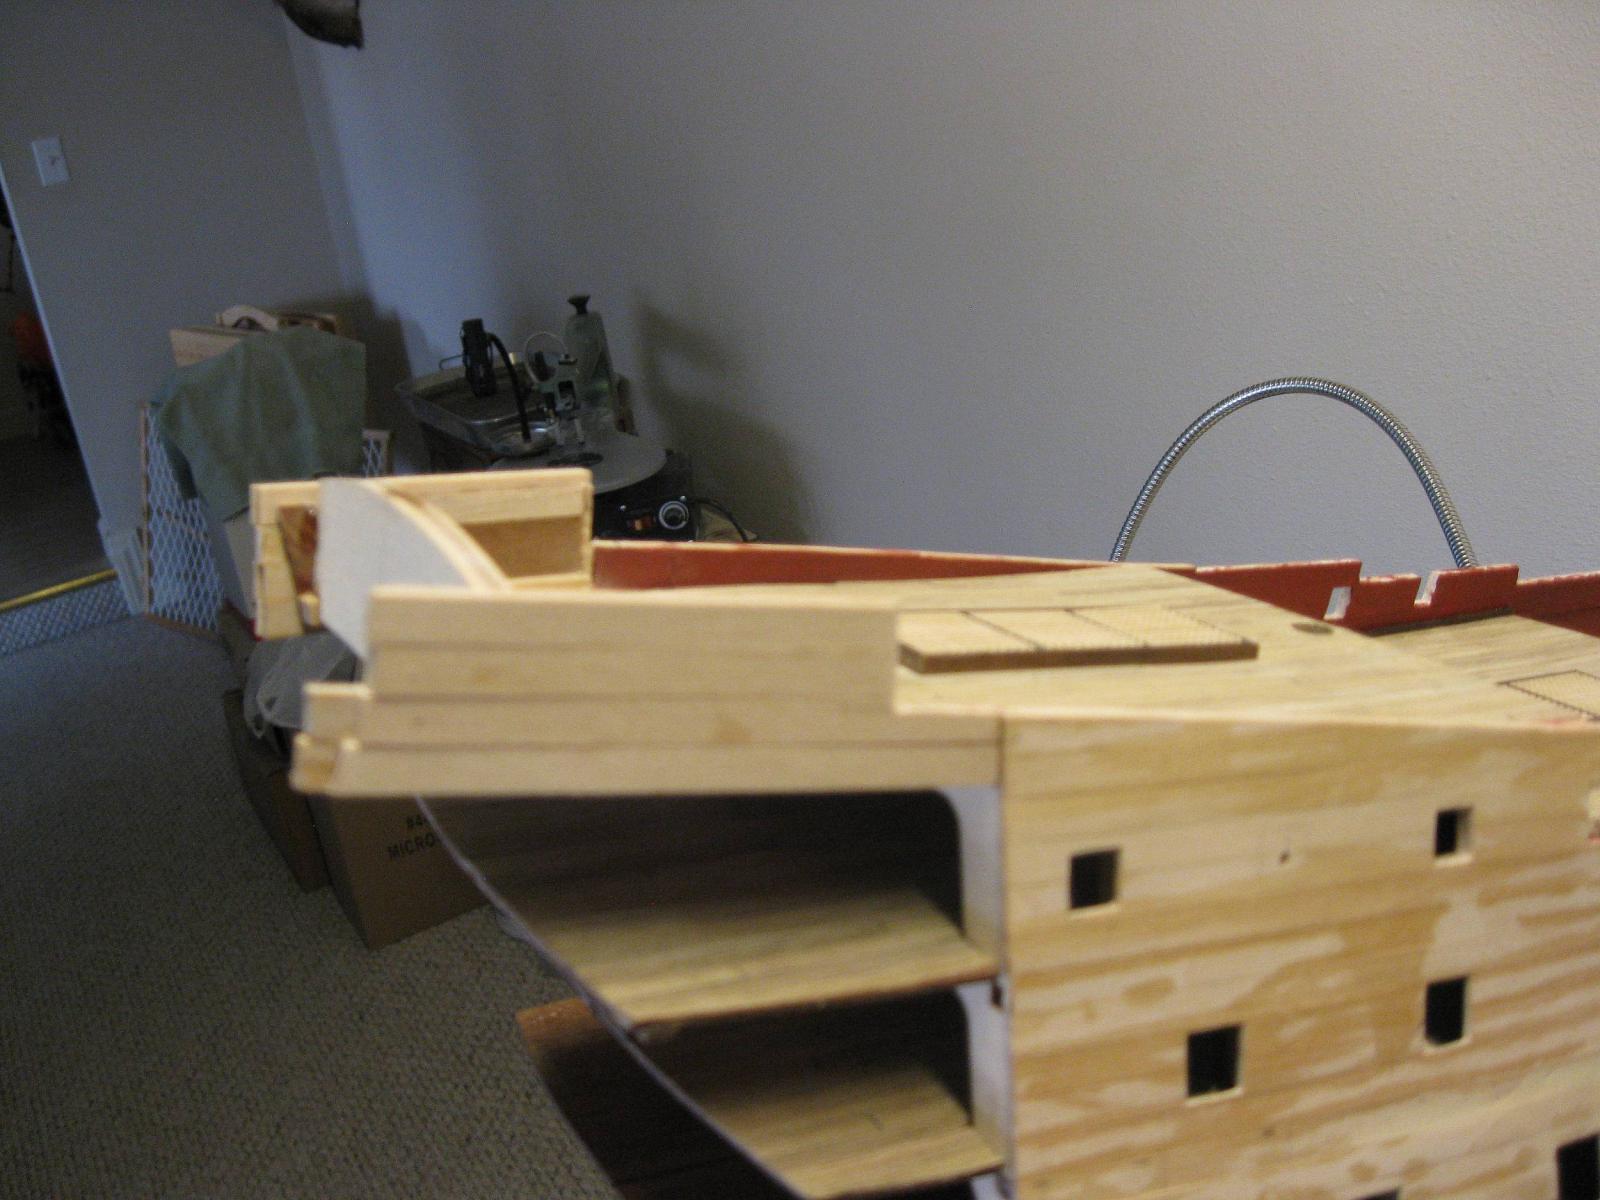
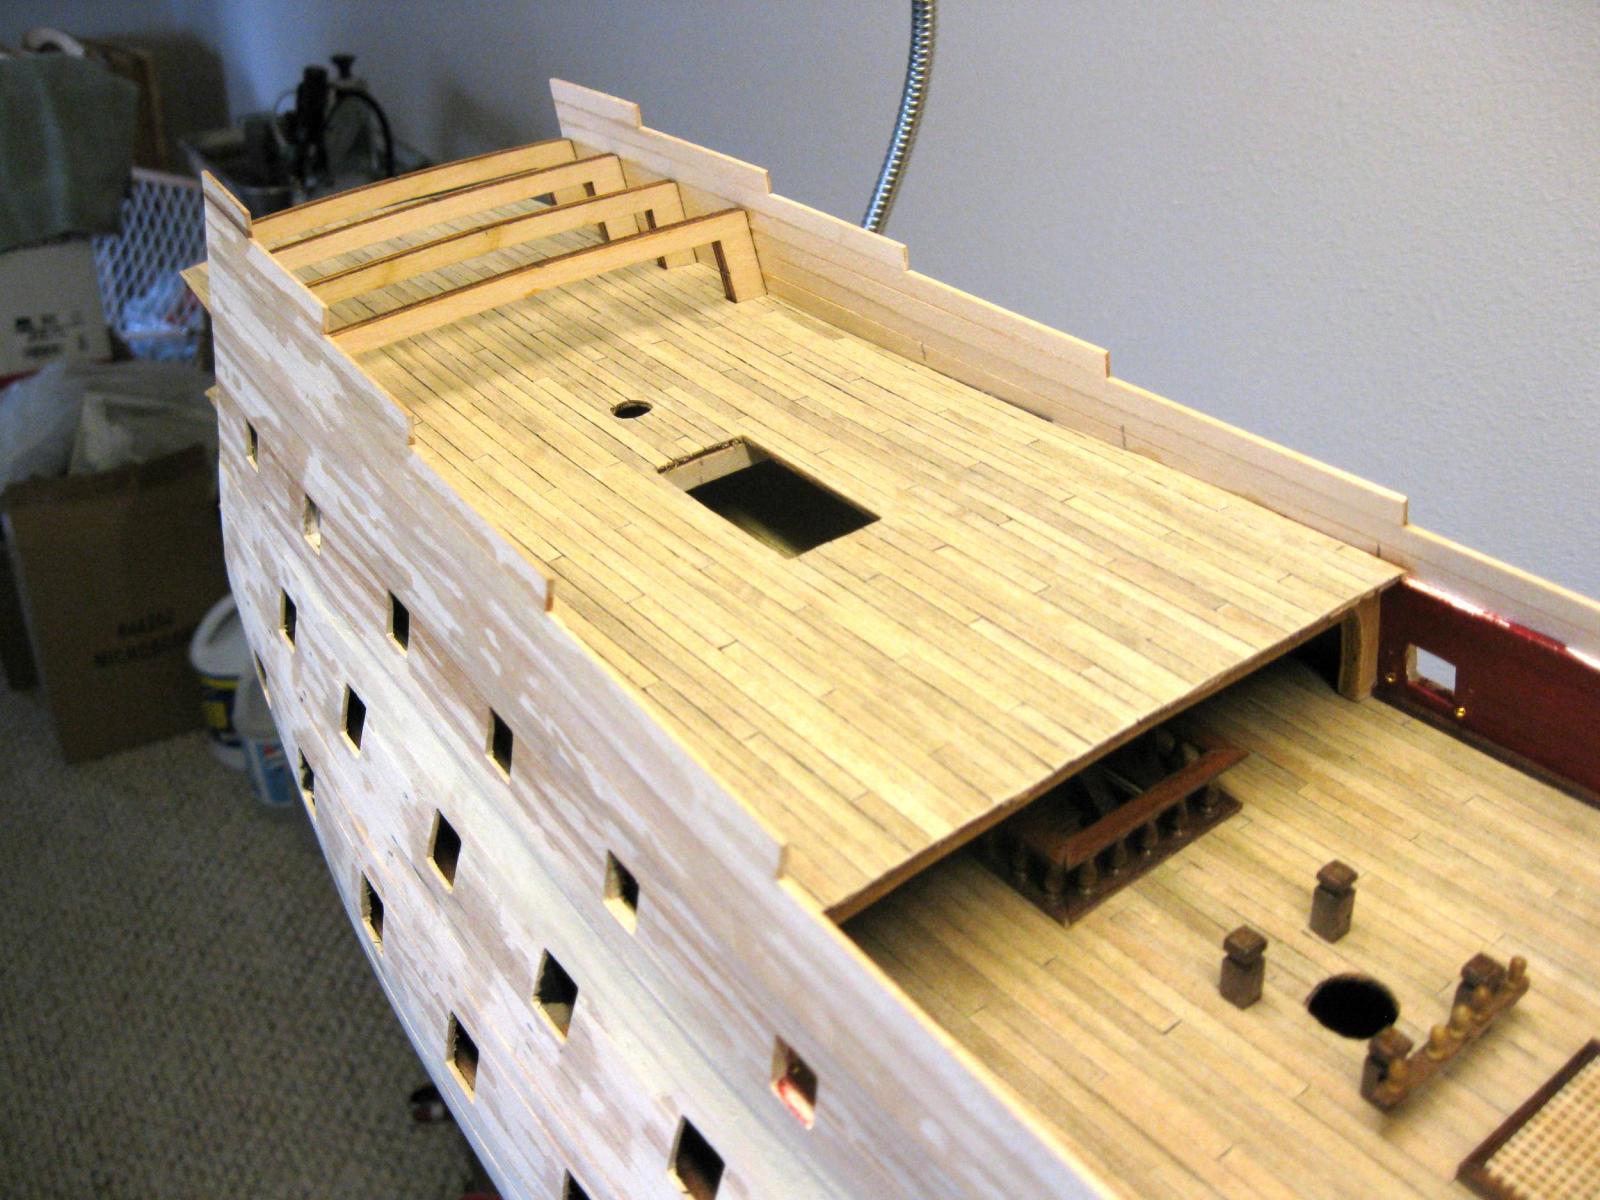
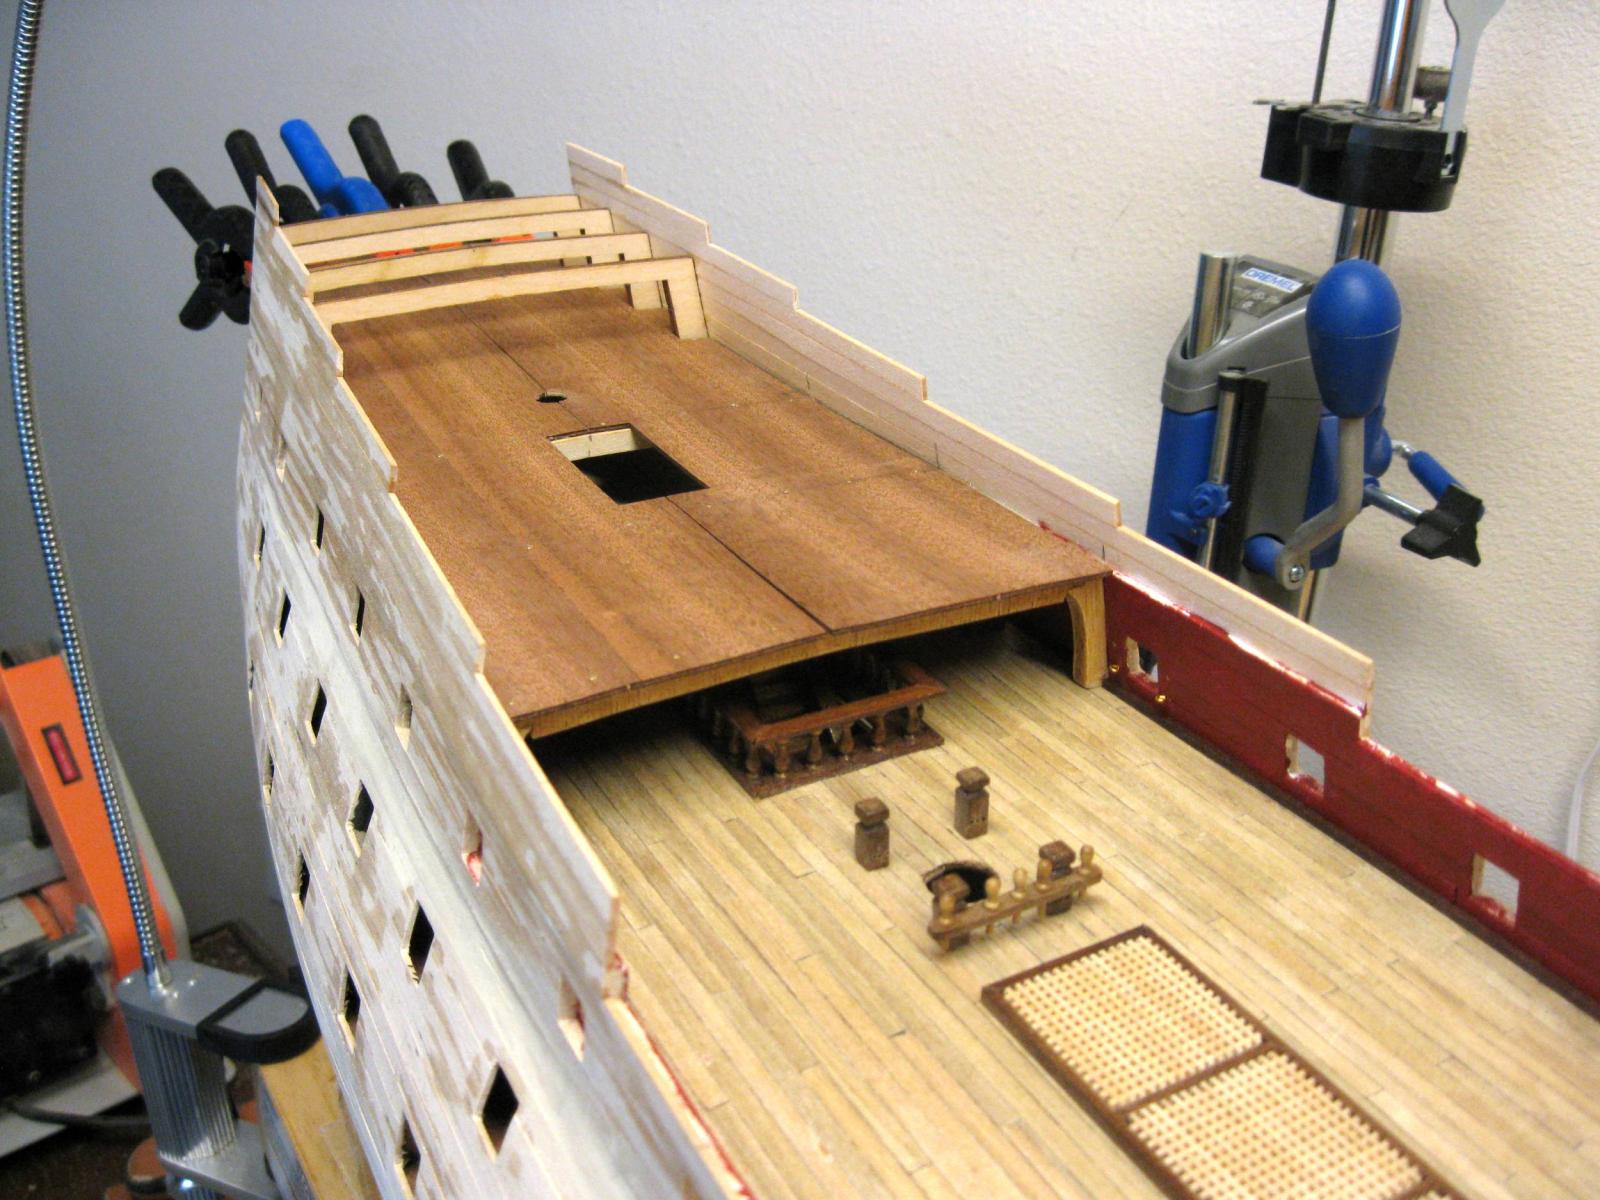
Ok, here is what I mean by differences between the plan drawings and the provided parts. The first photo shows the false upper quarterdeck laying in place with the piece cut off of it to match the plans.
I trimmed the side edges so it makes a clean fit along the bulwarks and placed the mizzen mast to make sure it is positioned through the hole properly with the correct cant.
The deck is just laying on the frames at this point. According to the plans, the bottom of the forward edge needs to be 23.5mm from the top of the quarterdeck below. A breast beam needs to be fabricated and placed just aft of the edge to support the deck and secure the correct height.
Vince P.


- maddog33, Vivian Galad, Bindy and 6 others
-
 9
9
-
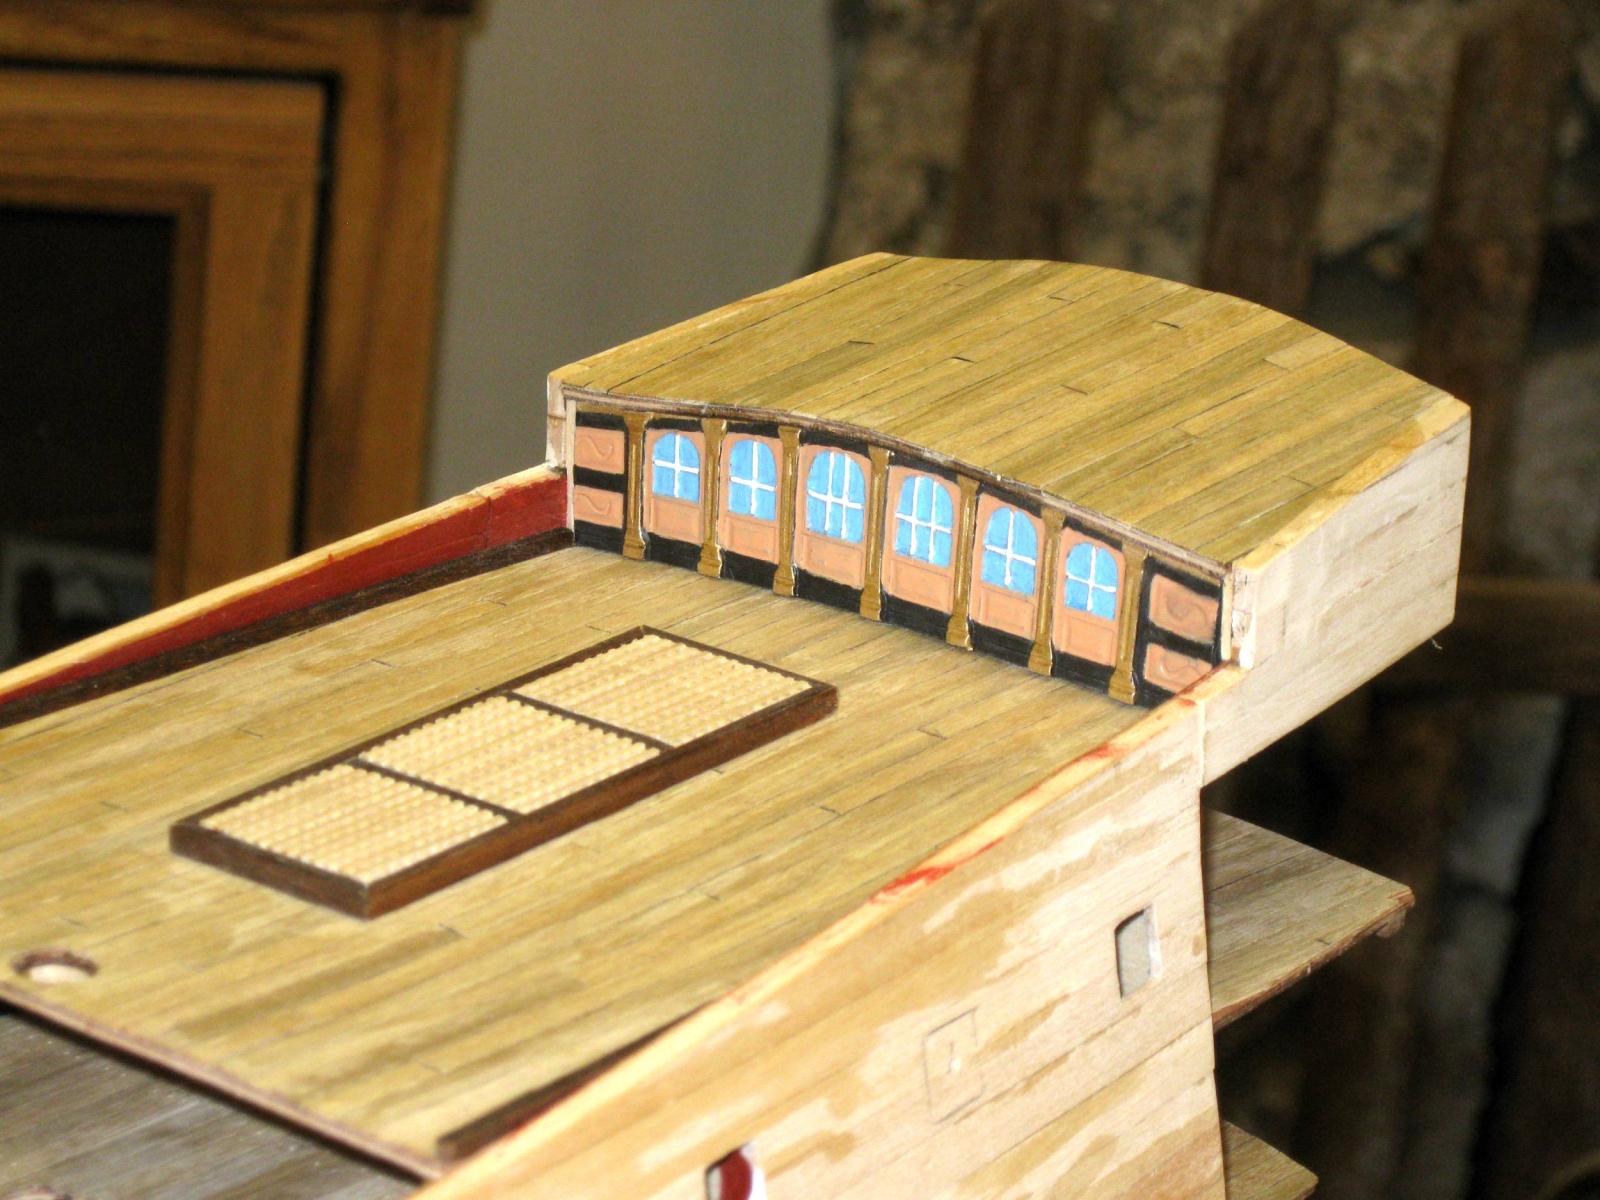
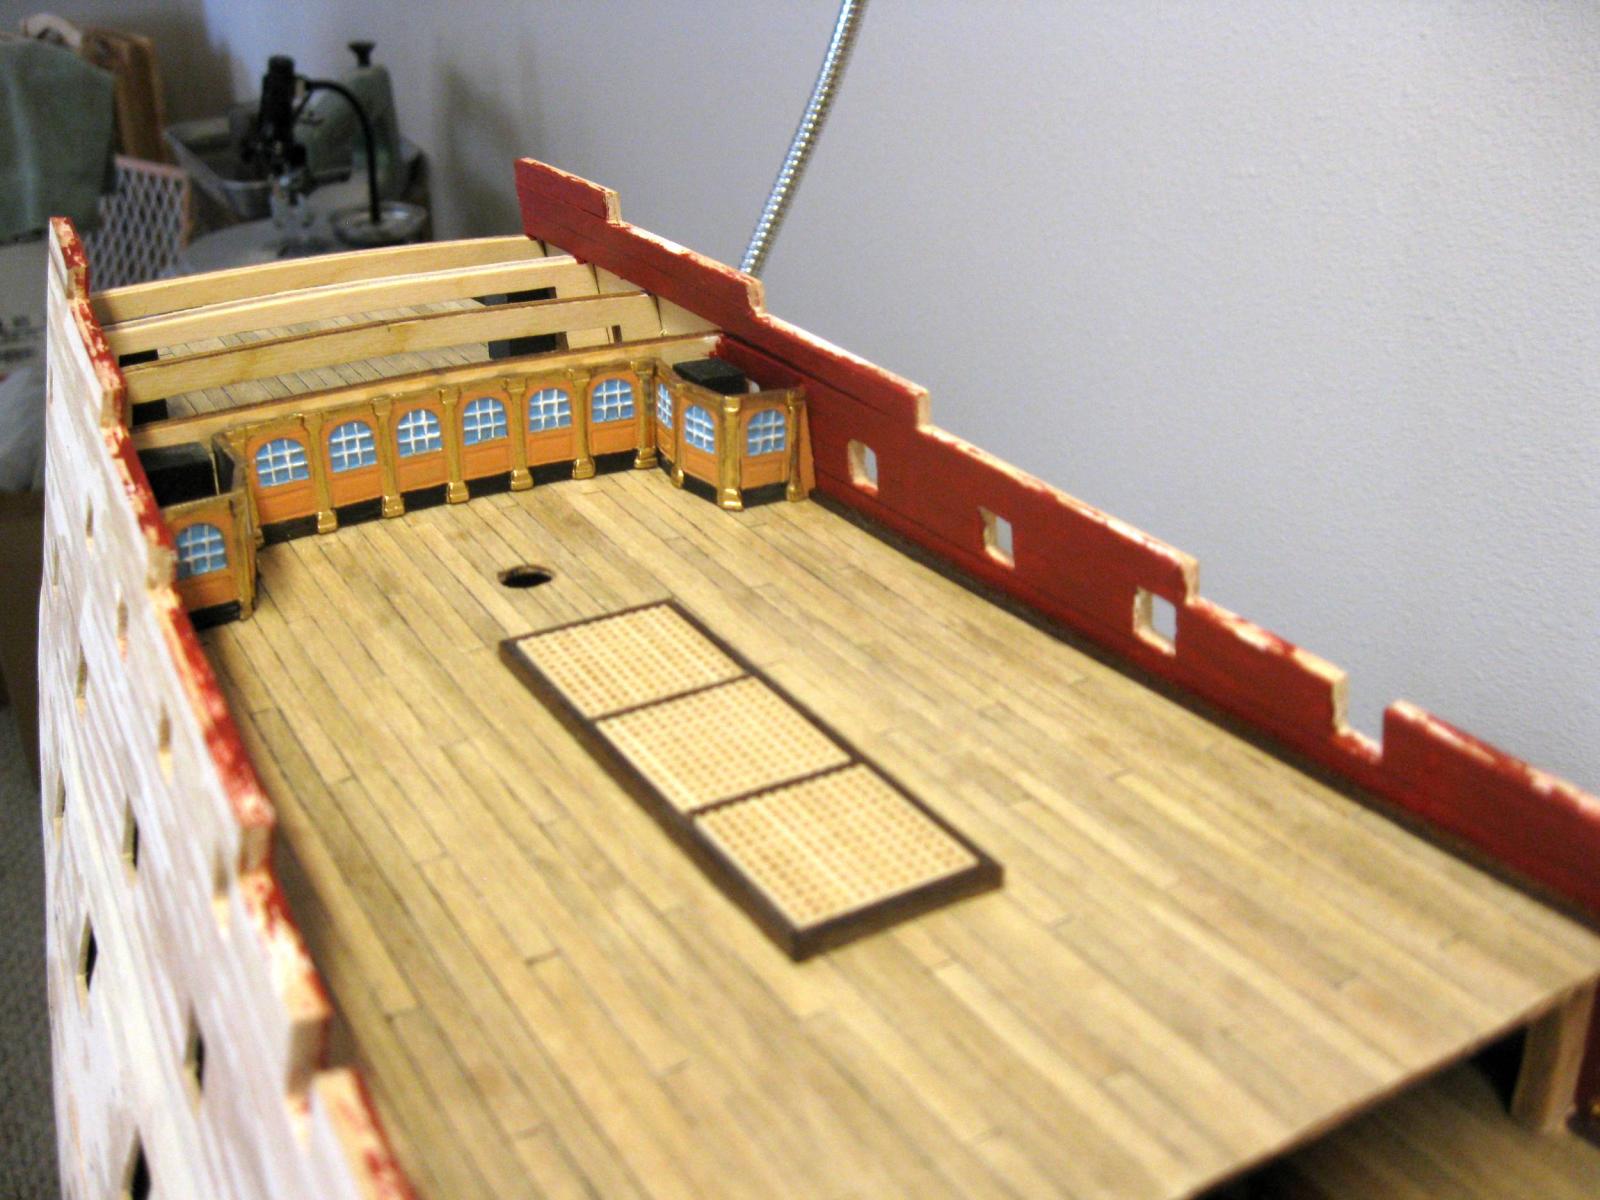
The quarterdeck is complete with gratings, waterways, and gunport cutouts. The bulkhead to support the upper quarterdeck is also painted and installed.
Next up is the upper quarterdeck.
In this area and further in is where things get a little foggy with this build. There are many discrepancies between the plan drawings and the parts supplied. It is going to take some research to figure it all out. Then comes the dreaded "Round Staircase". There are so many versions out there and all very difficult to construct. I am working on a plan as we speak.

Oh, I got a promotion! I am now a Lieutenant Commander. Not sure what I did, but I must deserve it.
Vince P.

-
Hi Mike,
I find the need for several different light sources when building ships. Because of the close in work on very small parts in tight places, it is necessary to have different auxillary lighting. First I use a good quality fluorescent hanging lamp for the overall lighting. There is no flickering and the light is bright but soft. I then have an LED hi-intensity lamp with a bendable shaft that can be tilted in any direction or height for closeup lighting. This can be clamped anywhere on the bench where it would be needed. I also have LED handlights that can be used to look into tight places, and lastly an LED head lamp that frees up the hands. I use all of these at different times depending on what I am doing. All of these can be had for under $100 total.
Vince P.
-
Hi Denis,
Very nice job. You are so close to finishing her.
 That is quite an accomplishment.
Vince
-
Thanks for posting that link Keith. I think I will look into this kit for my next build after the RW. I do want to build the Prince since she is related to the RW. It would be a nice touch to see them side by side.
Nice job Spirerpig.
Vince P.
-
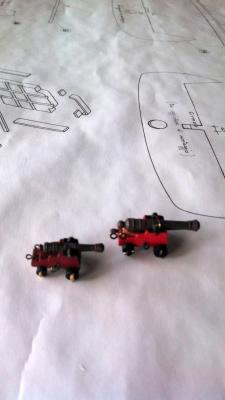
I have put my gun carriages on my disc sander to remove the outer thickness of the wood a tiny bit, they are a bit chunky for my liking.
Hi Brian,
You can't see it in the photos, but I tapered the carriages along the length and at the front like the real thing.
Vince
-
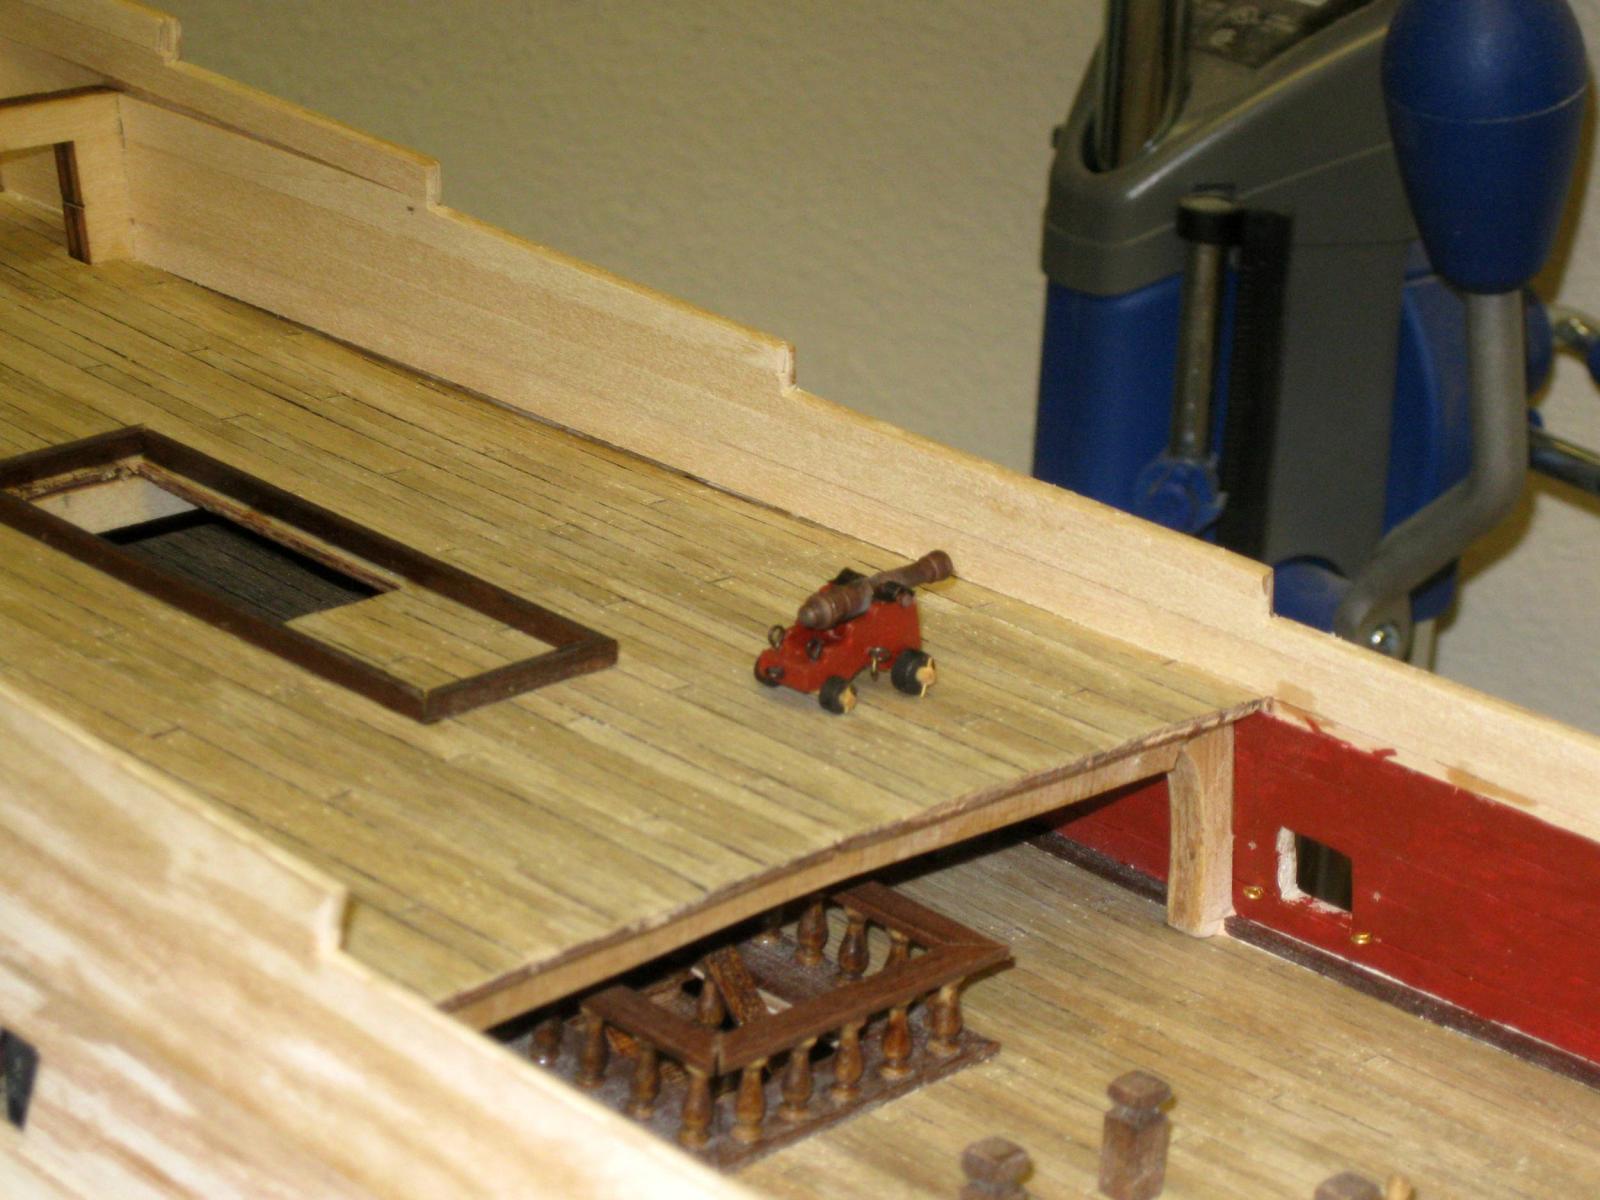
Before making the gunport cutouts on the quarterdeck and forecastle, it is necessary to make up at least one deck gun in order to get the correct height of the ports off the deck. You can not just use the plans, although they were right on at 11.5mm from the deck to the center of the ports.
These guns are smaller than the main deck guns and somewhat of a challenge to construct. If you are going for detail such as the cotter pins in the trucks, drilling such small holes without splitting the wood was a fun project. I used the pieces of brass pin cut off the eye bolts, as they were a perfect size (0.5mm) diameter. The drill size was a #76.
Next up is to make the gunport cutouts.
Vince P.


- mtaylor, WackoWolf, CaptainSteve and 4 others
-
7
-
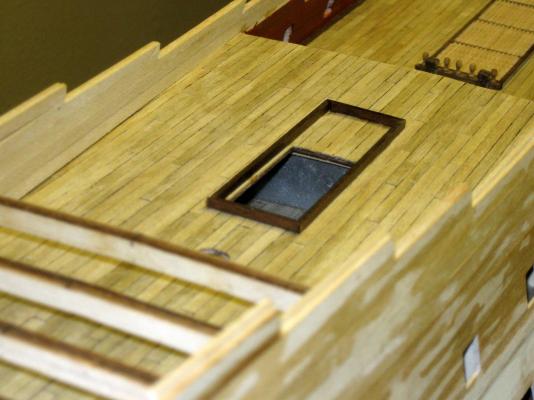
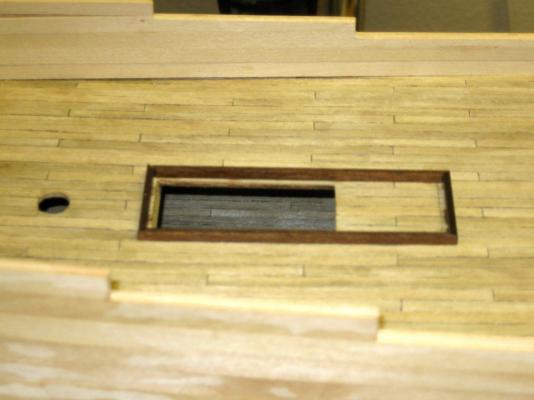
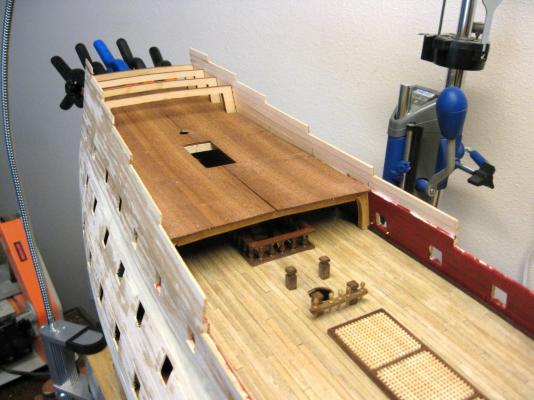
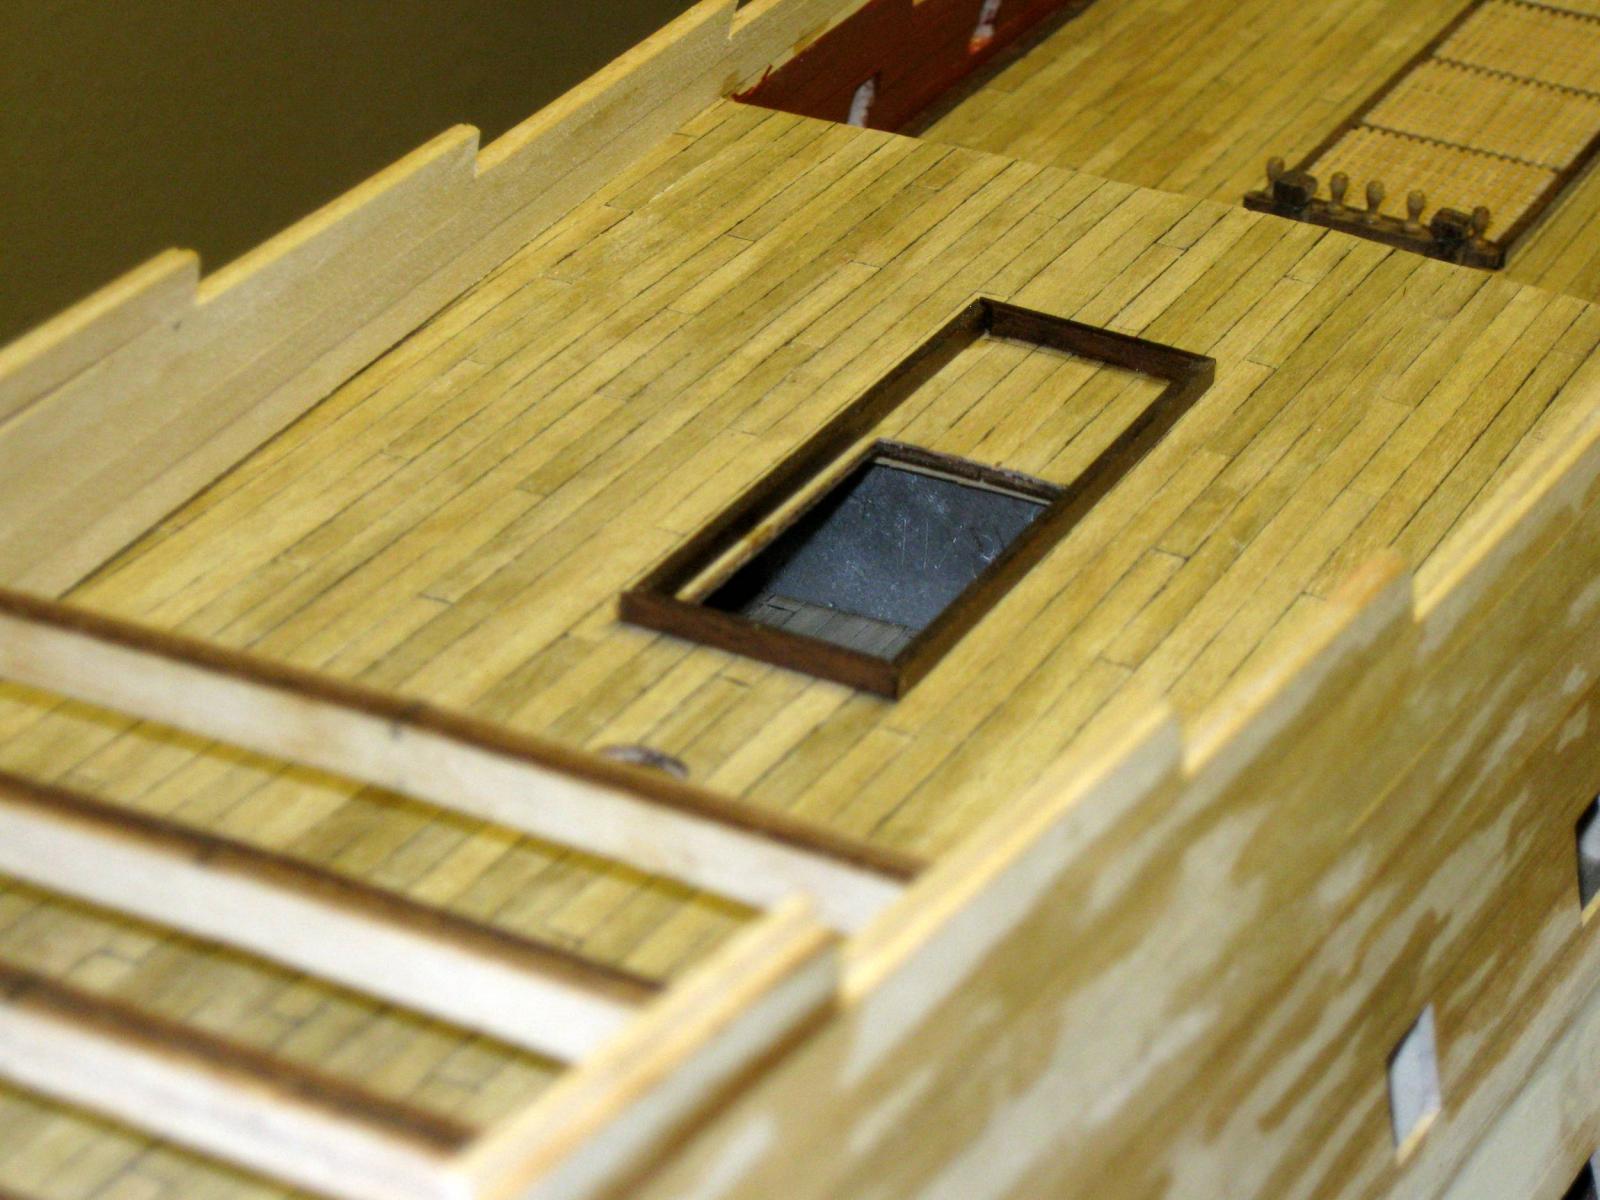
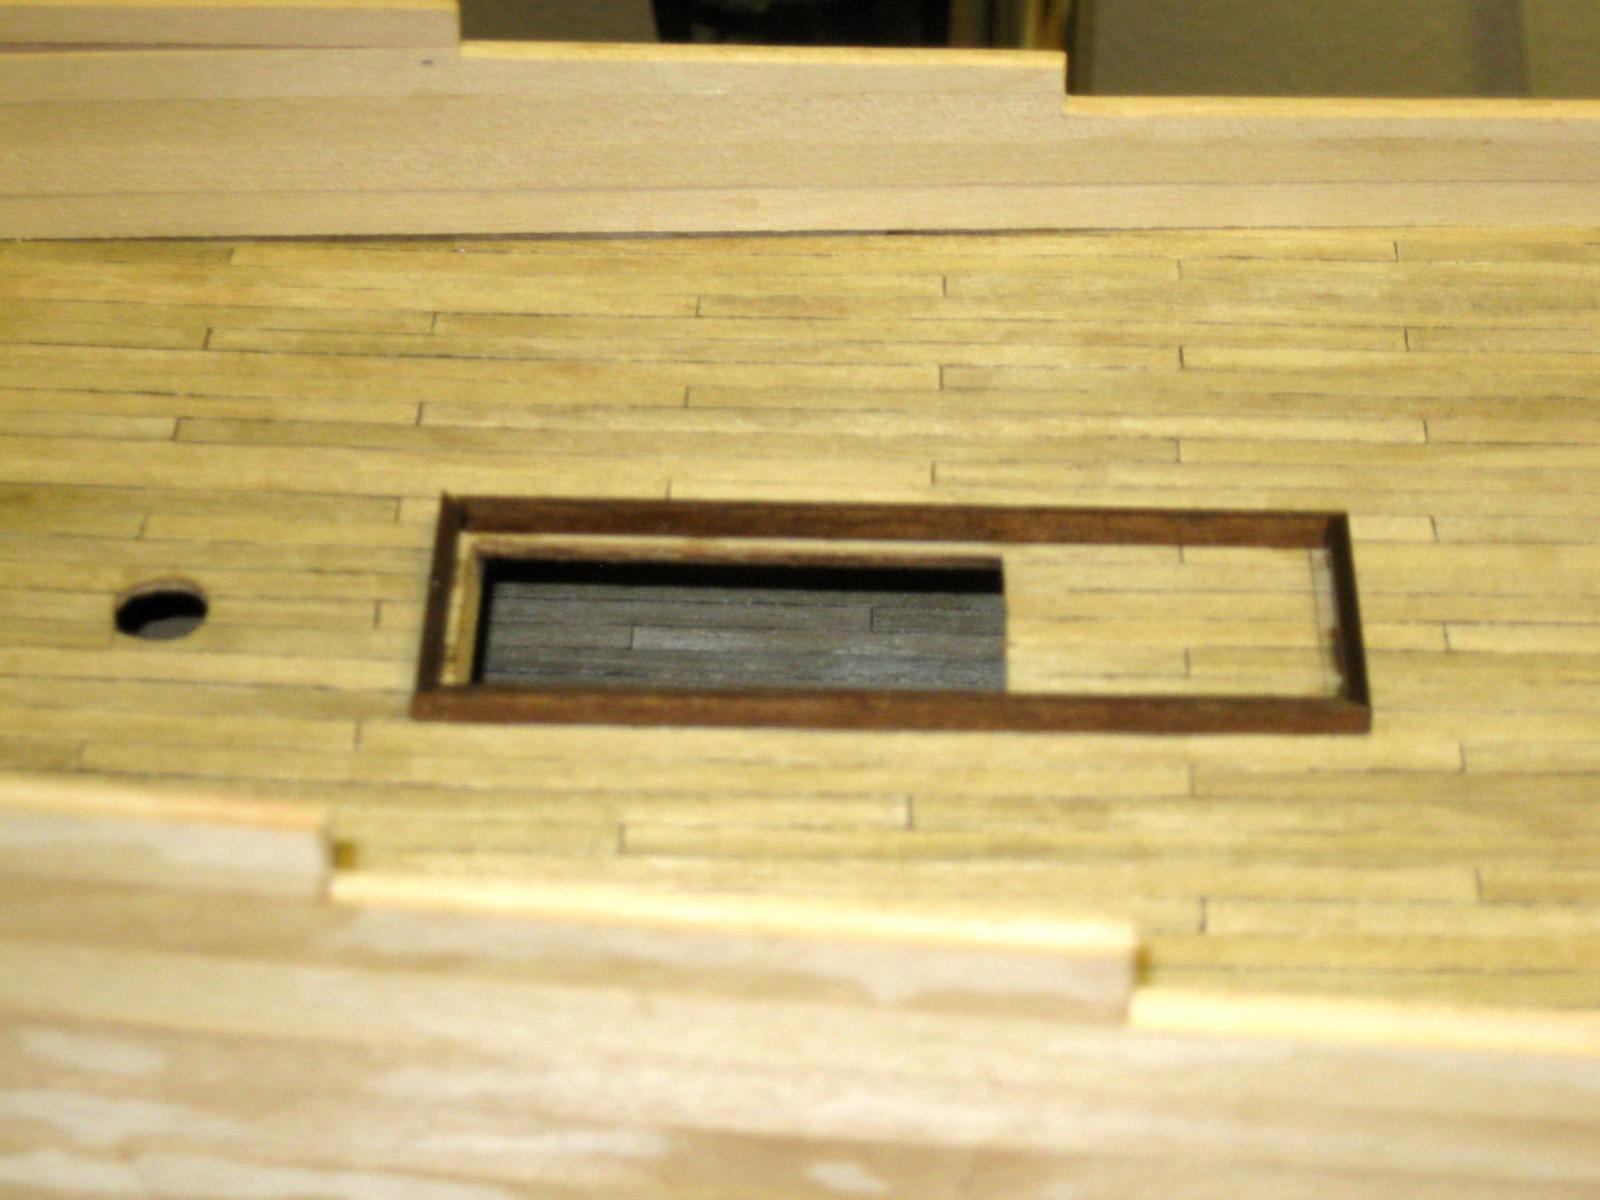
There is a huge difference in the dimensions of the grating opening on the quarterdeck, between the plans and the cutout provided in the false deck. As you can see by the photos, the cutout is much shorter than the frame I installed. The frame matches the size in the plans, which I chose to follow. The grating will be seperated into 3 equal sections. I also noted that the grating on the upper quaterdeck has the same issue.
Vince P.
-
Hi Keith,
I have done quite a bit of research on the RW. I also have many photos of museum quality models and for what it is worth, none of them show copper plates on the hull. About half show natural wood color and the rest painted white below the water line. I am going paint mine white.
Vince P.
-
The quarterdeck has been planked.
Next up is to add the double first layer of planking to the quarterdeck bulwarks.
Vince P.

-
H Chris,
Bring on the Prince, please. I am now building the Royal William and want very much to build the Prince since they are related.
Vince P.
-
Hi Brian
I don't know yet but I don't think the admiral will not let me put it any place in the house with out one.
I cannot find any display cases this large for the SOS and I am not that good at making that sort of thing.
I may end up giving it to some one
.Denis.
Denis,
Model Expo does sell a case that will fit the SOS. That is what I put mine in.
Vince
-
-
Hi Denis,
Thanks for the compliments, but you donx't give yourself enough credit. You got this far on your own abilities. You are a first class builder and I learned from you as well.
Vince
As I am getting to the end of the build of my SOS although it will be some weeks away yet.
I wish to take this opportunity to say a big thank you to my MENTOR Vince P without him I would never have got as far as I have.
So thank you Vince you are a good friend and well respected in the modelling world .
Denis.
-
Hi J,
I have a huge storage of strip stock. I keep the long plastic bags that the stock comes in and label the size and then place all that size in the bag. Every size and wood type has its own bag. The size and type is marked on the top of the bag. All of the bags are stored upright in a tall bucket. It is easy to find what I need this way. If you have different types of wood, you can also have different buckets. I have several buckets.

Vince P.
-
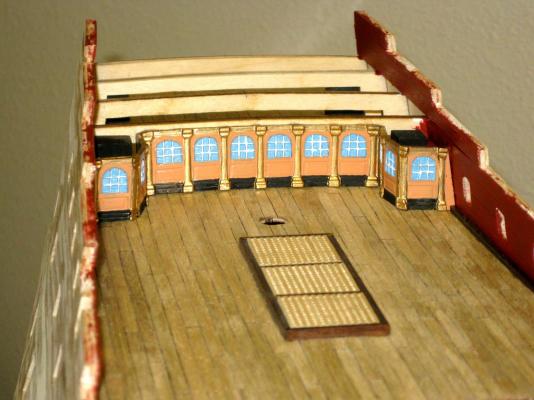
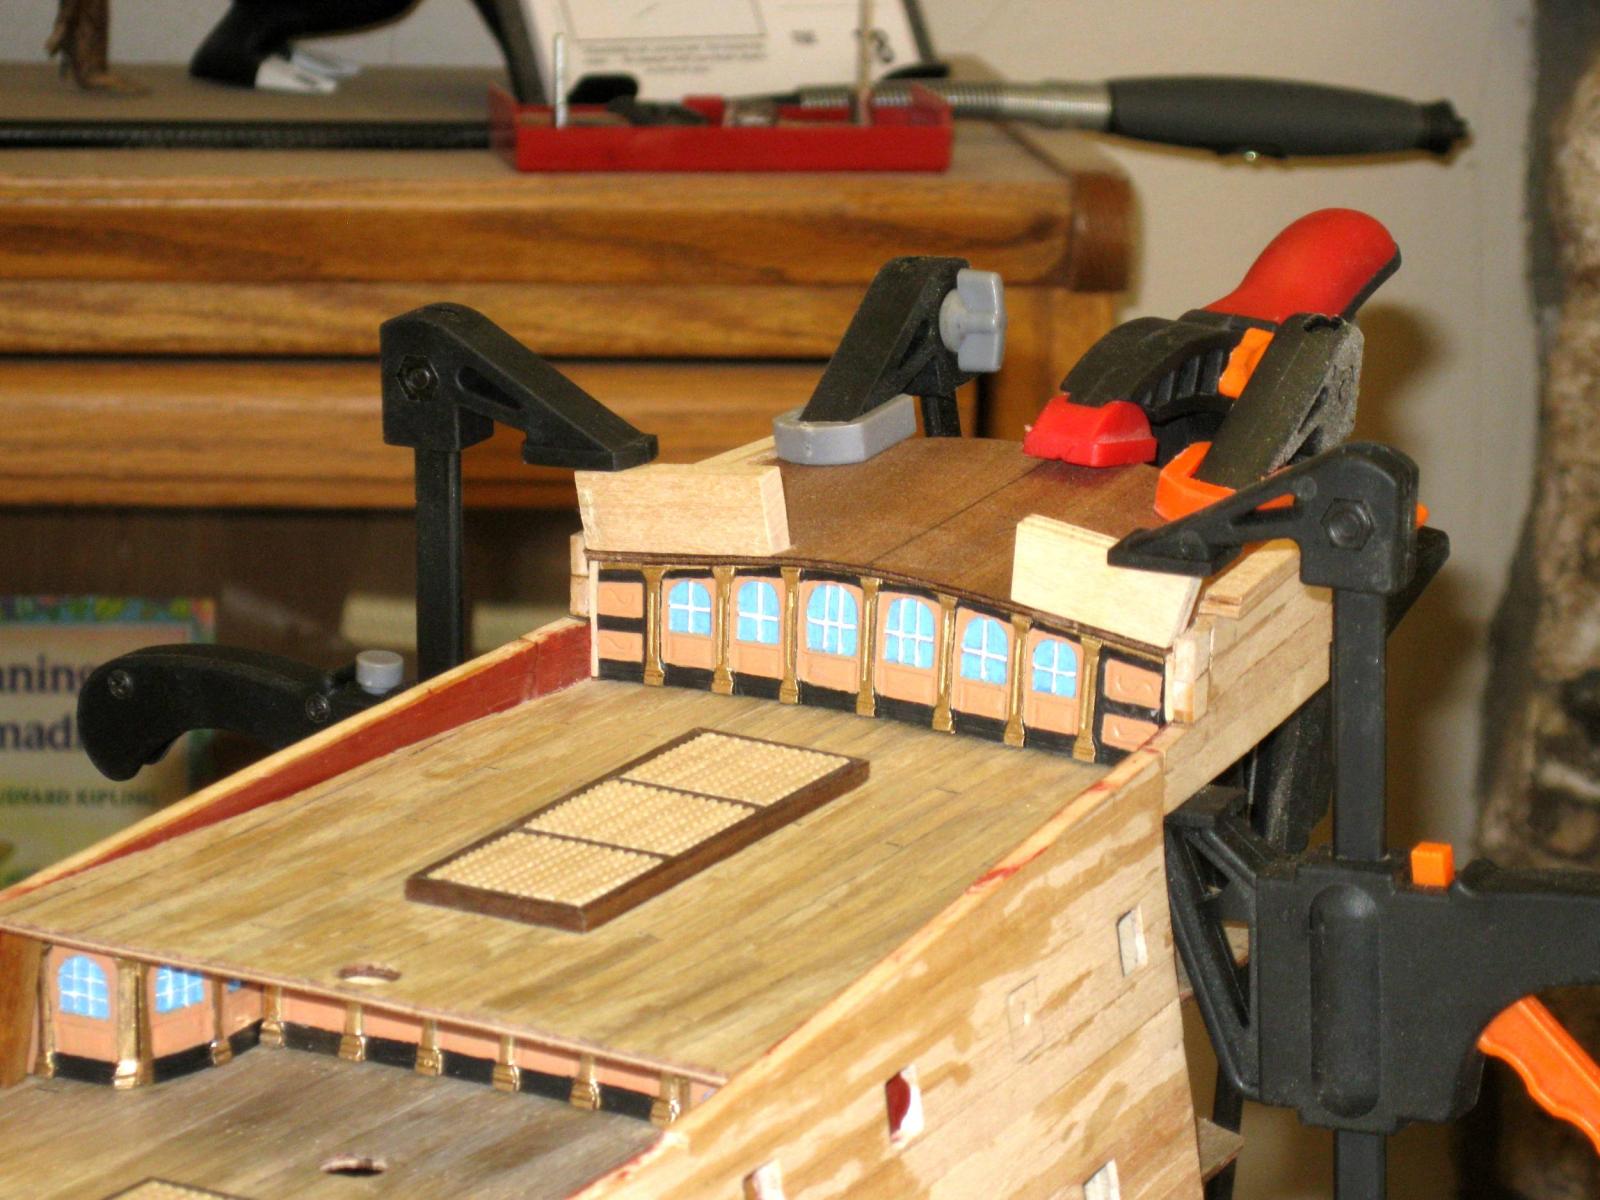
The false quarterdeck has been placed. As you can see, that lovely staircase and fancy painted bulkhead are all but covered up now. If you wanted to take shortcuts, you could eliminate the staircase and fancy bulkhead. The kit allows you to add or skip as much detail as you would like. If you do add the details as outlined in the plans though, you have to supply your own materials. I plan to add as much detail as possible.
Next up is to plank the quarterdeck.
Vince P.

- CaptainSteve, maggsl_01, fnkershner and 4 others
-
7


 You also look very distinguished next to your ship. You should be very proud of your accomplishment.
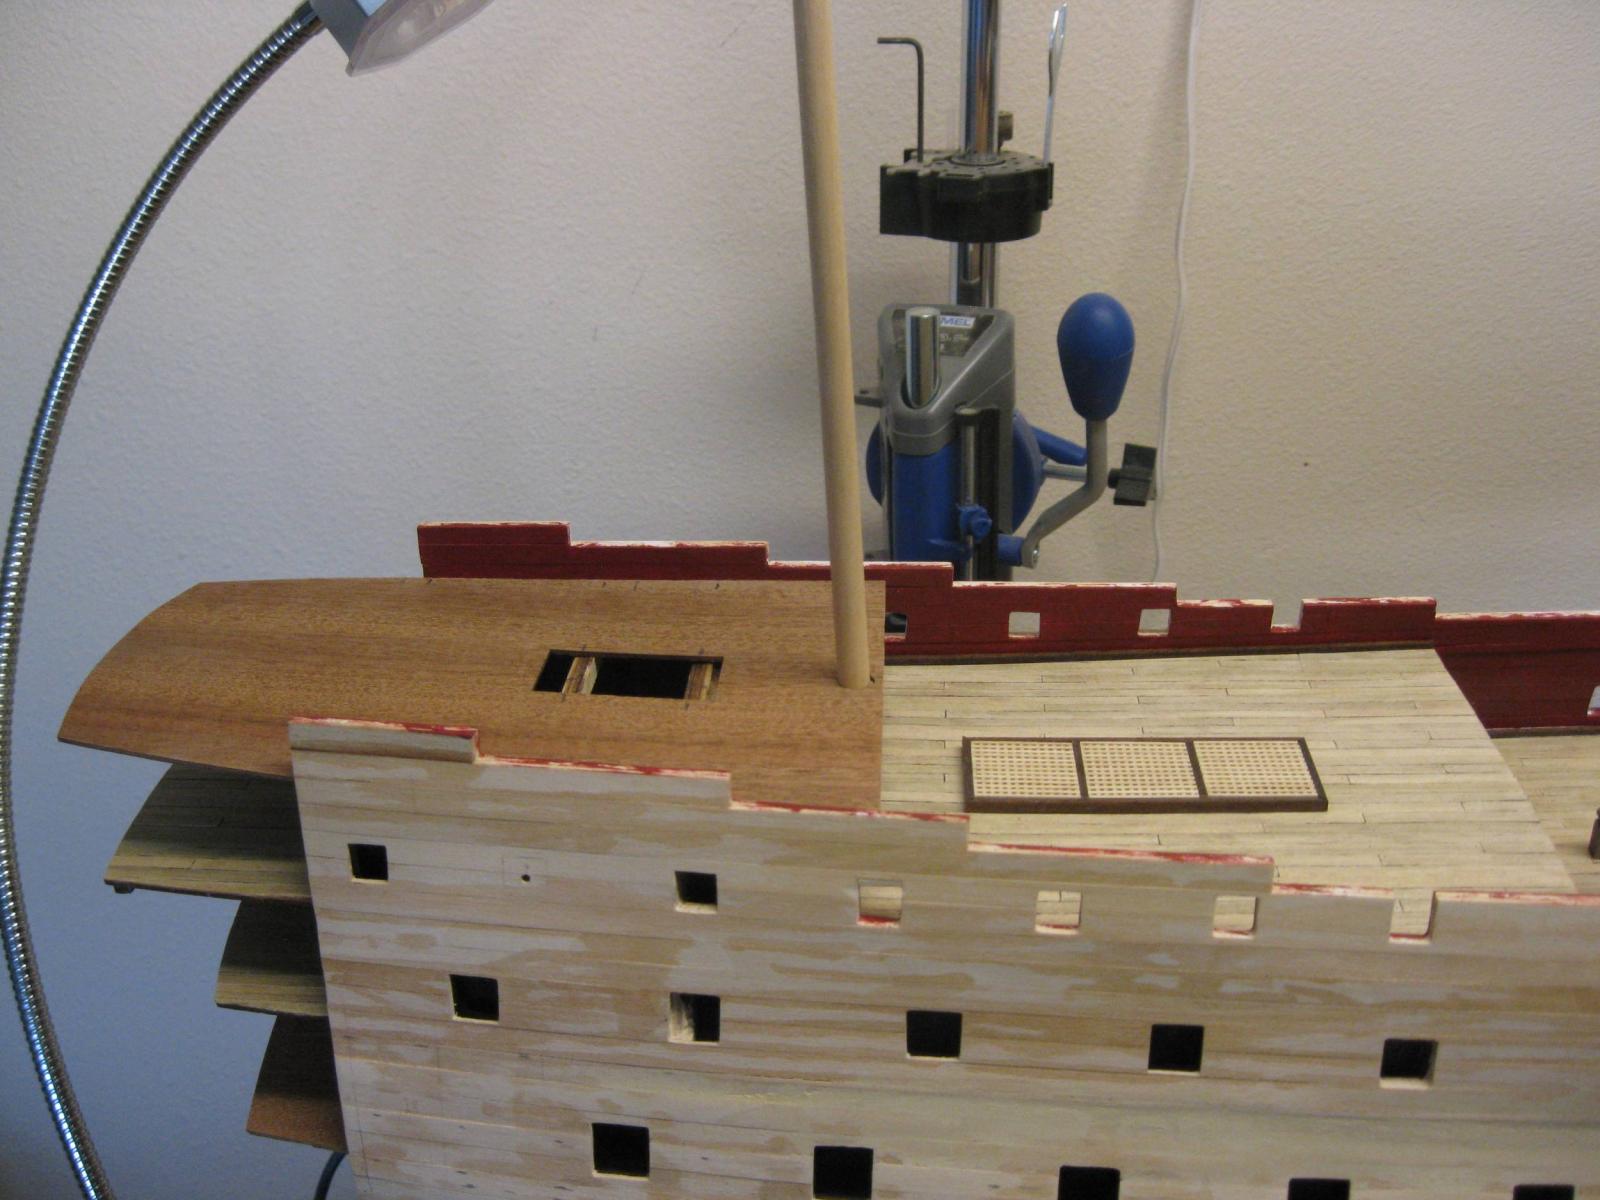


Royal William by pirozzi - FINISHED - Euromodels - 1/70
in - Kit build logs for subjects built from 1501 - 1750
Posted
Hi Brian,
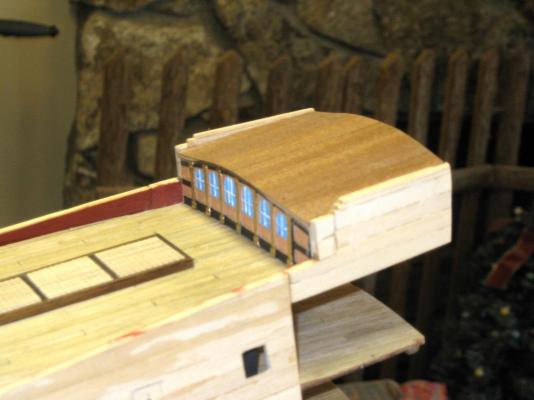
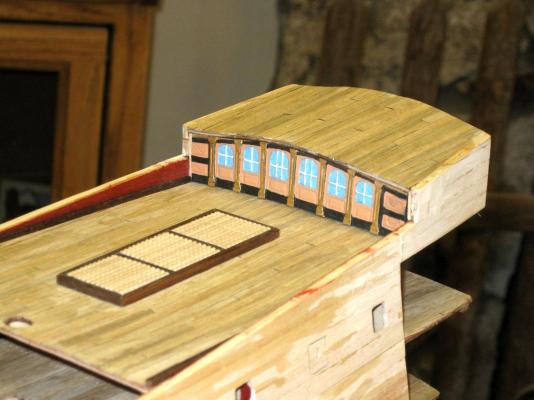
I really don't like the way the windows look in the metal castings and would like to make them better since they will really show on the stern galleries. As I recall, you cut them out and filled them with a clear plastic filler. I was thinking of doing the same but placing a clear plastic sheet behind them like used in bubble wraps. How did you cut the openings out? I am not sure I have the proper tools to do it cleanly. When you cut them out, did you leave the window frames and just cut out the panes? That would seem to be quite a chore.
Thanks,
Vince