pirozzi
-
Posts
843 -
Joined
-
Last visited
Content Type
Profiles
Forums
Gallery
Events
Everything posted by pirozzi
-
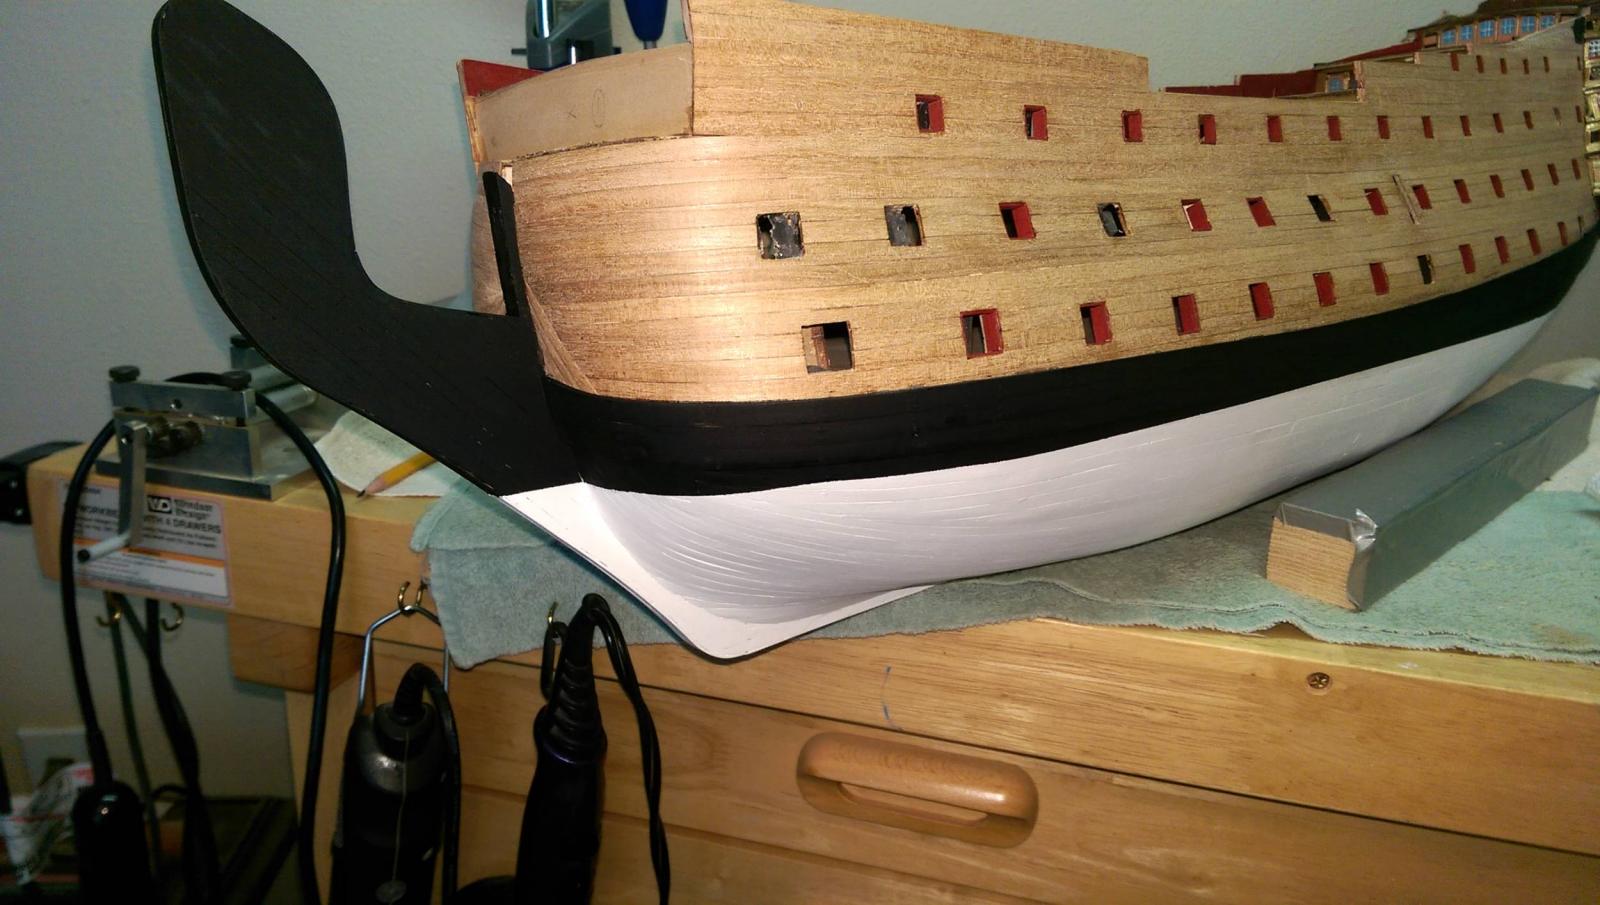
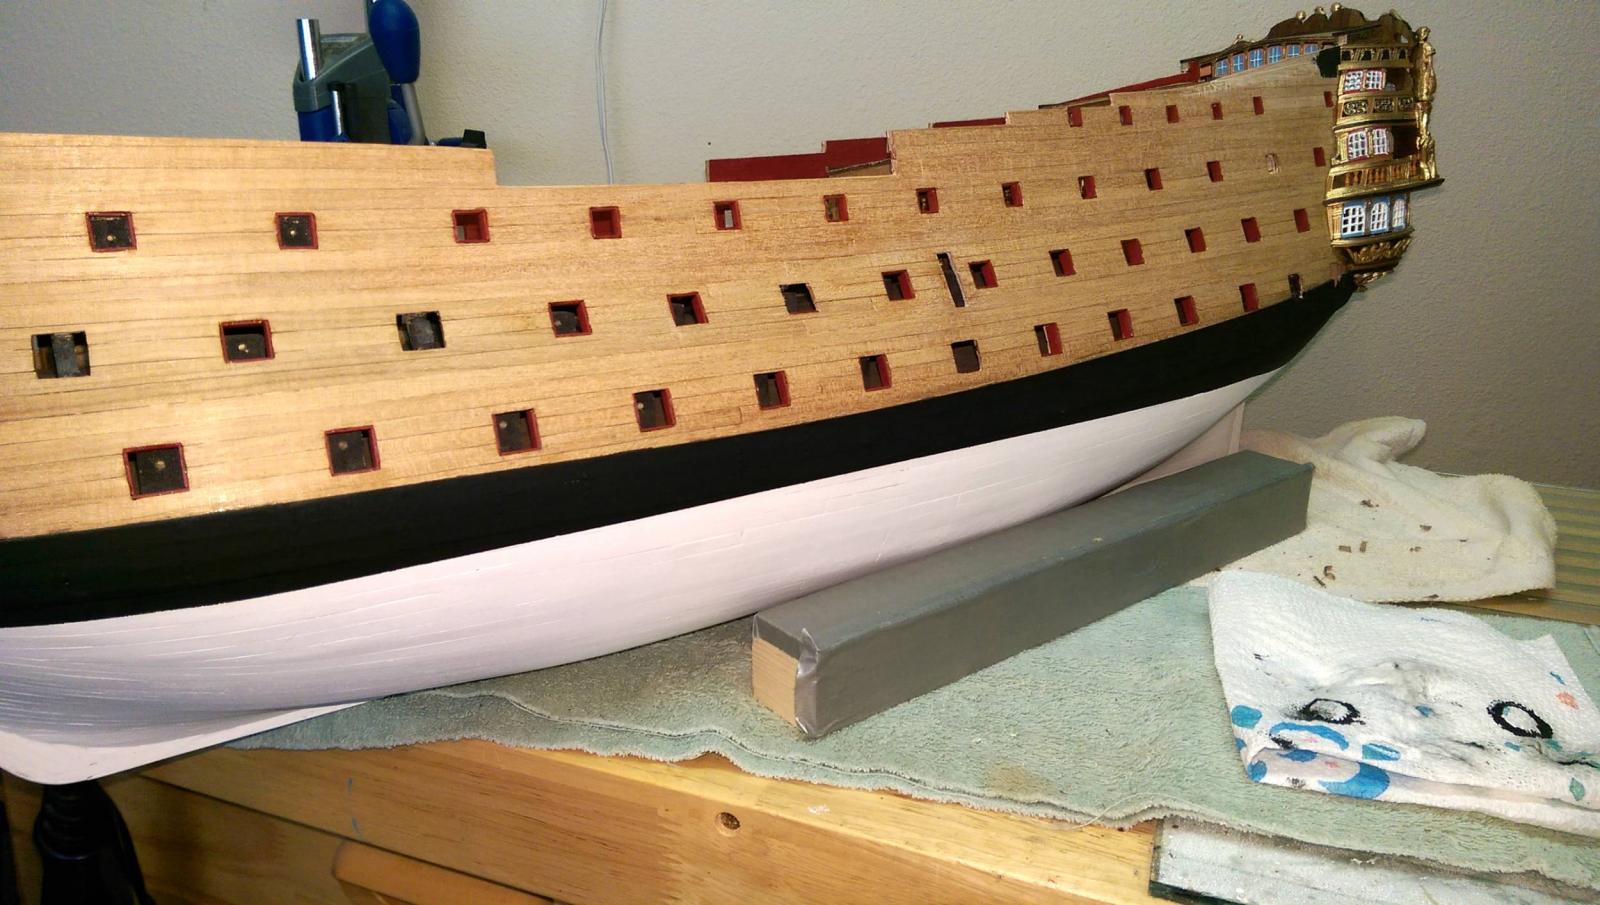
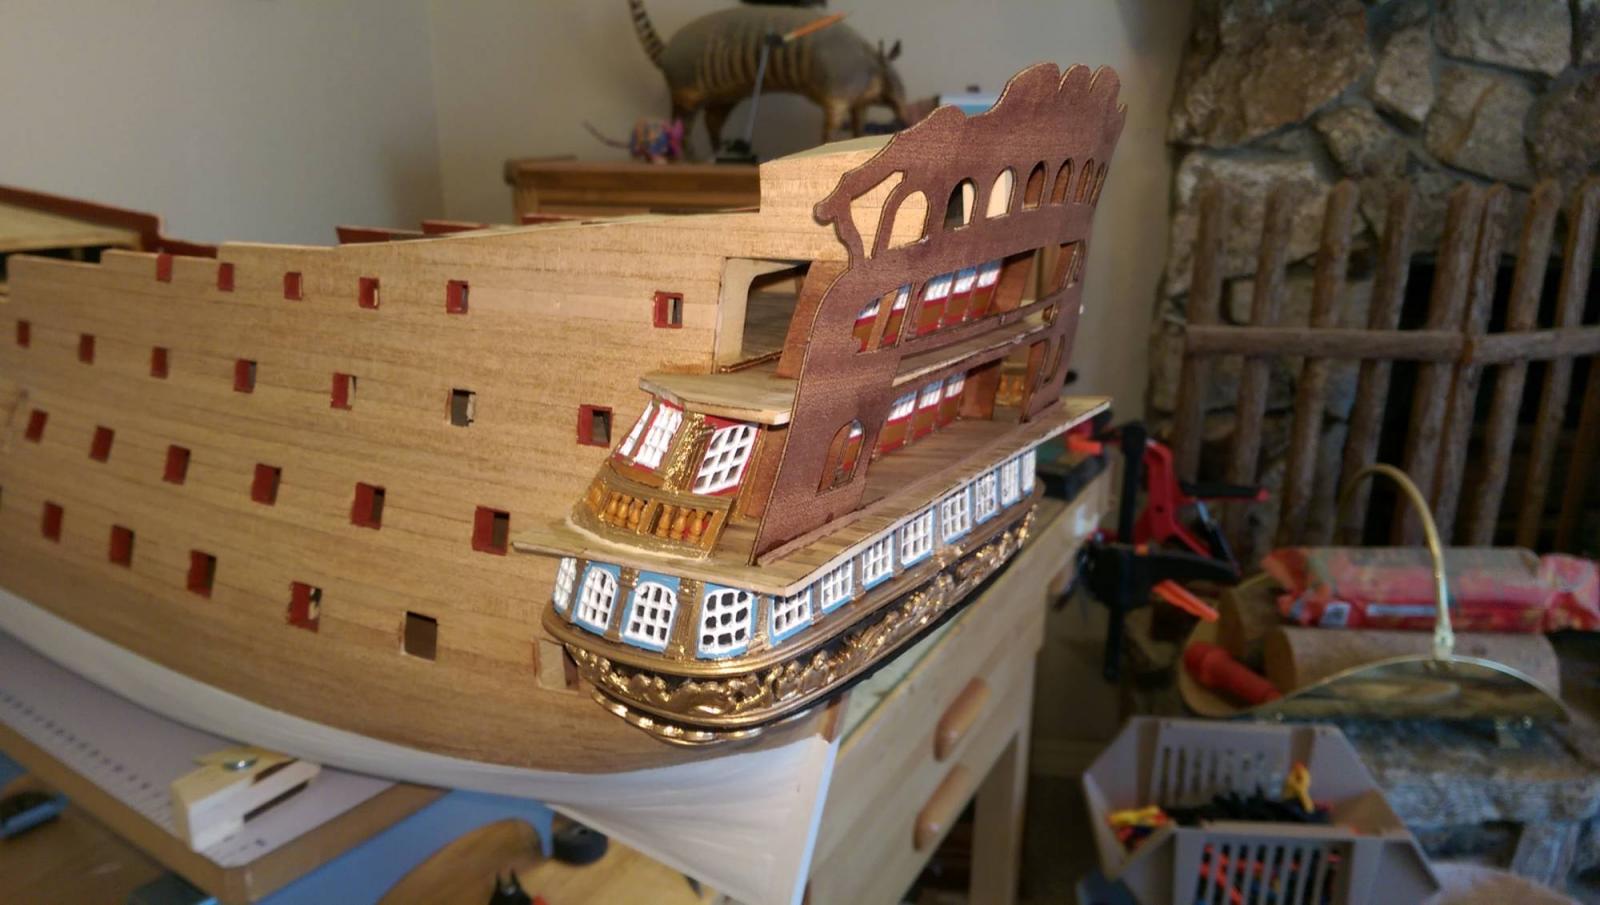
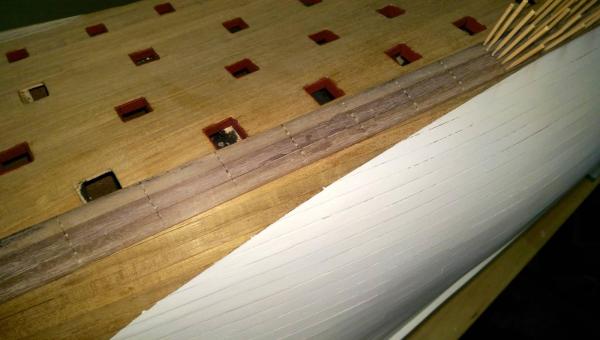
 The main wales are completed and the hull painted accordingly from the wales down. Next up are the middle wales which run across the hull above the main wales. Vince P.


- 593 replies
-
- 16
-

-
- royal william
- euromodels
- (and 1 more)
-
I prefer to bend it first and then taper it. Sometimes tapering first messes up the fit. If the bend is made first, then the taper can be filed true to the bend. I simply use a sanding disk in a rotary tool to make the taper. This method has always worked for me, but other builders might have different ways to do it. Once you get some experience experimenting, you develop ways to do things that work for you. I learned from others and experimented myself. Vince P.
-
Hi Chuck A. I first soak the wood to get it soft and then use the hull itself as a frame. I make the bends gradually while placing it on the hull to measure. It never comes out exactly, but close enough. The wood will still have some pliability and will allow you to form it up when pinning it to the hull finally. Vince P.
-
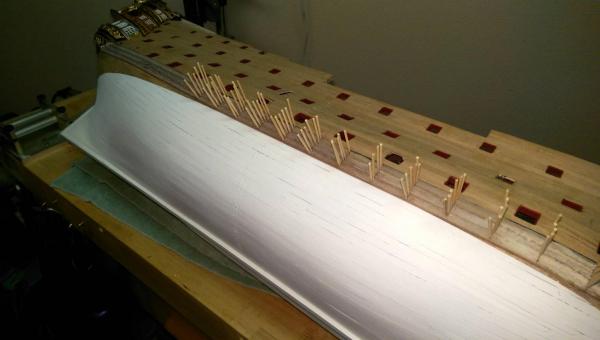
Working on the main wales. The stock used on these is 7x2mm walnut. This is pretty hard stuff and requires a severe bend and curvature at the bow. I had to use a mechanical bender as well as soaking in ammonia solution and heating to make the bends without splitting the wood. Once the planks were fitted to the hull, holes were drilled and toothpicks inserted for simulating the trennels. After drying, everything will be painted. Vince P.
- 593 replies
-
- 10
-
-
- royal william
- euromodels
- (and 1 more)
-
Nice planking job. Neatest one I have seen yet. I have planked several ships and have not done such a nice job yet. Vince P.
- 652 replies
-
- 1
-
-
- royal william
- euromodel
- (and 1 more)
-
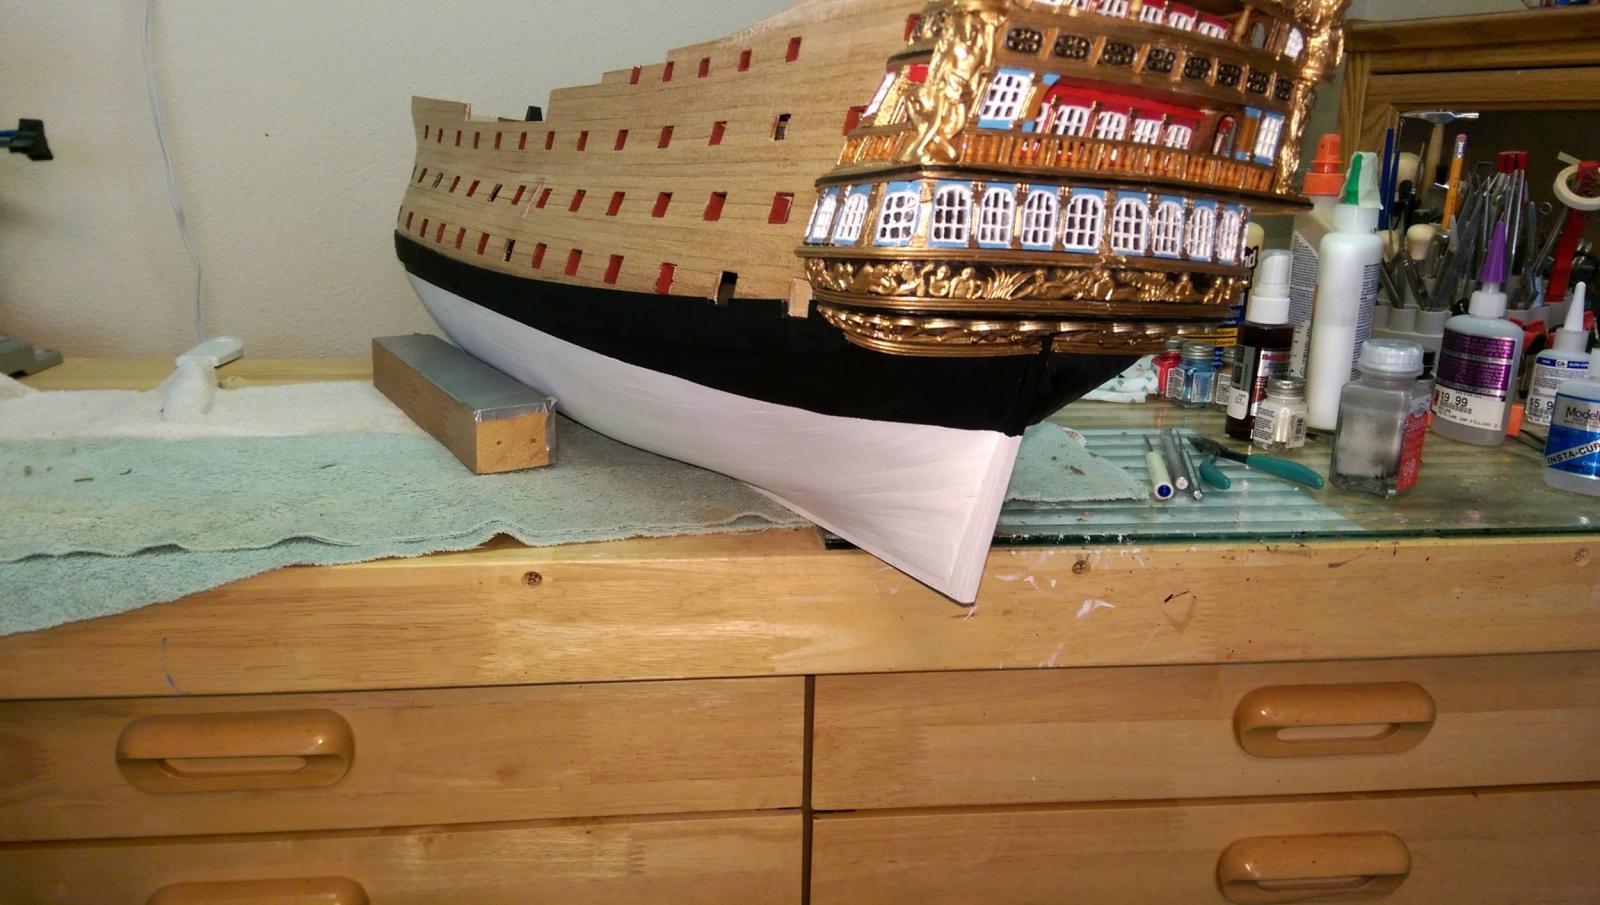
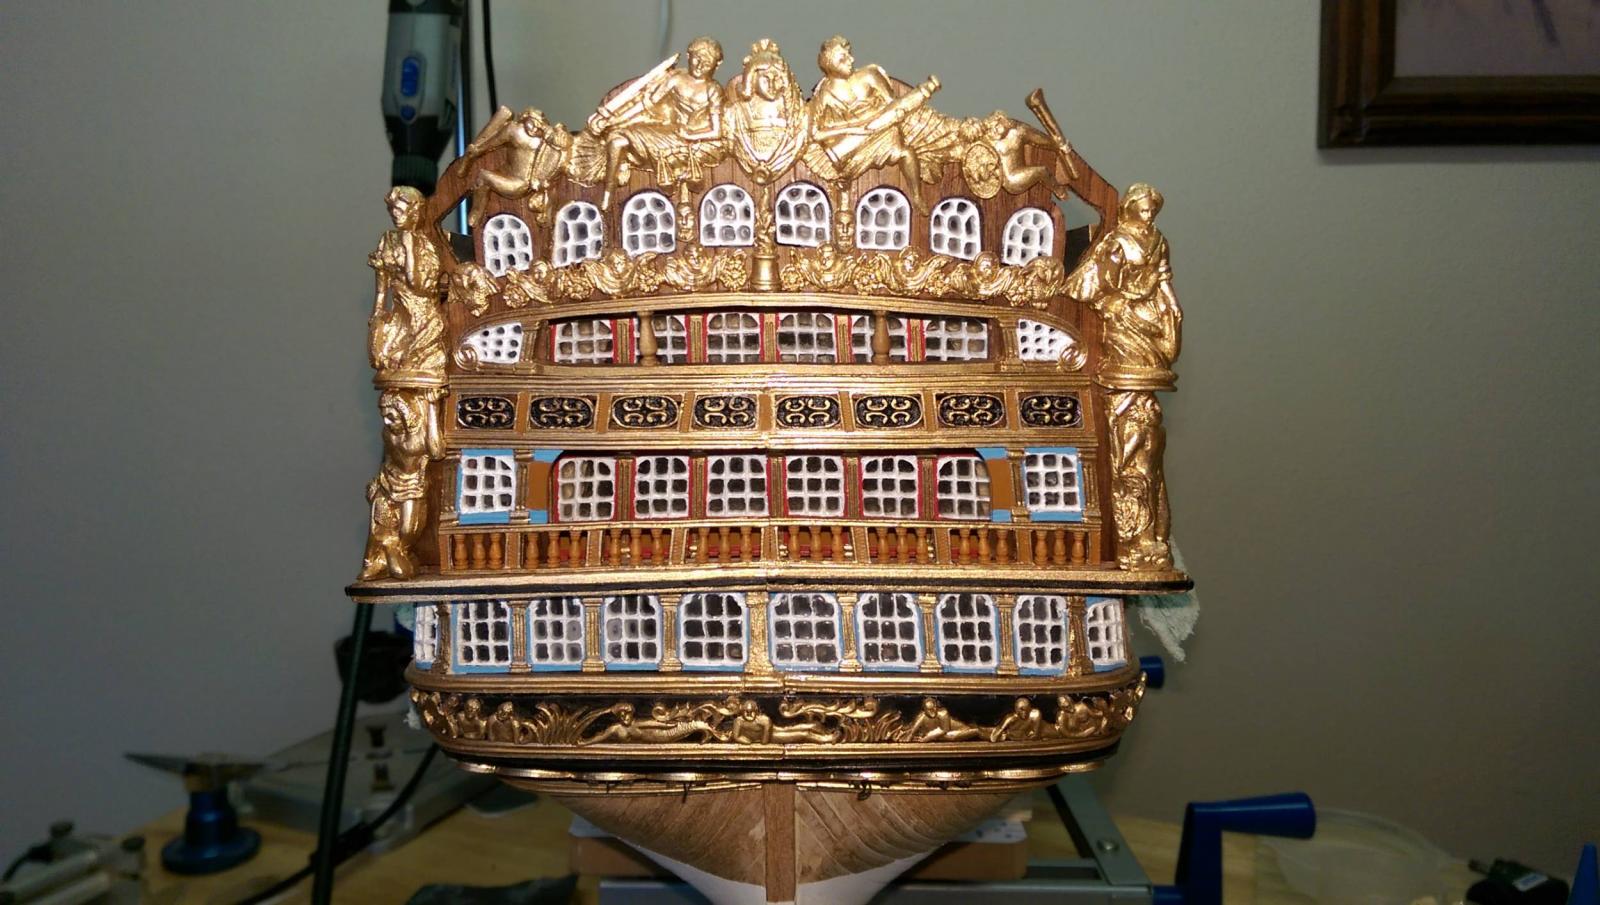
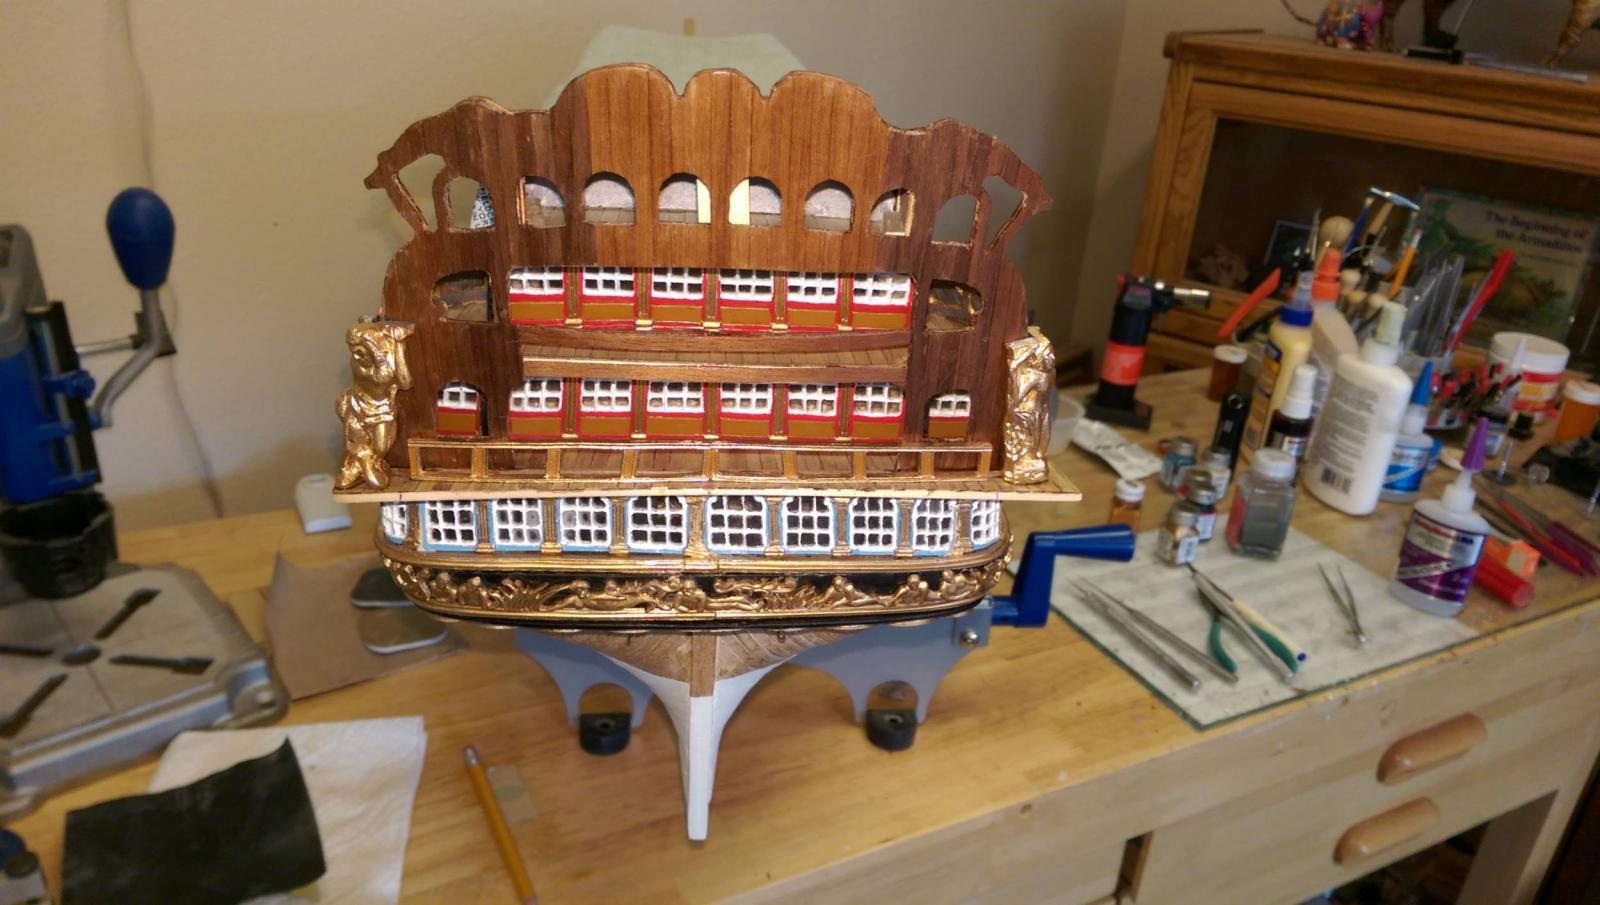
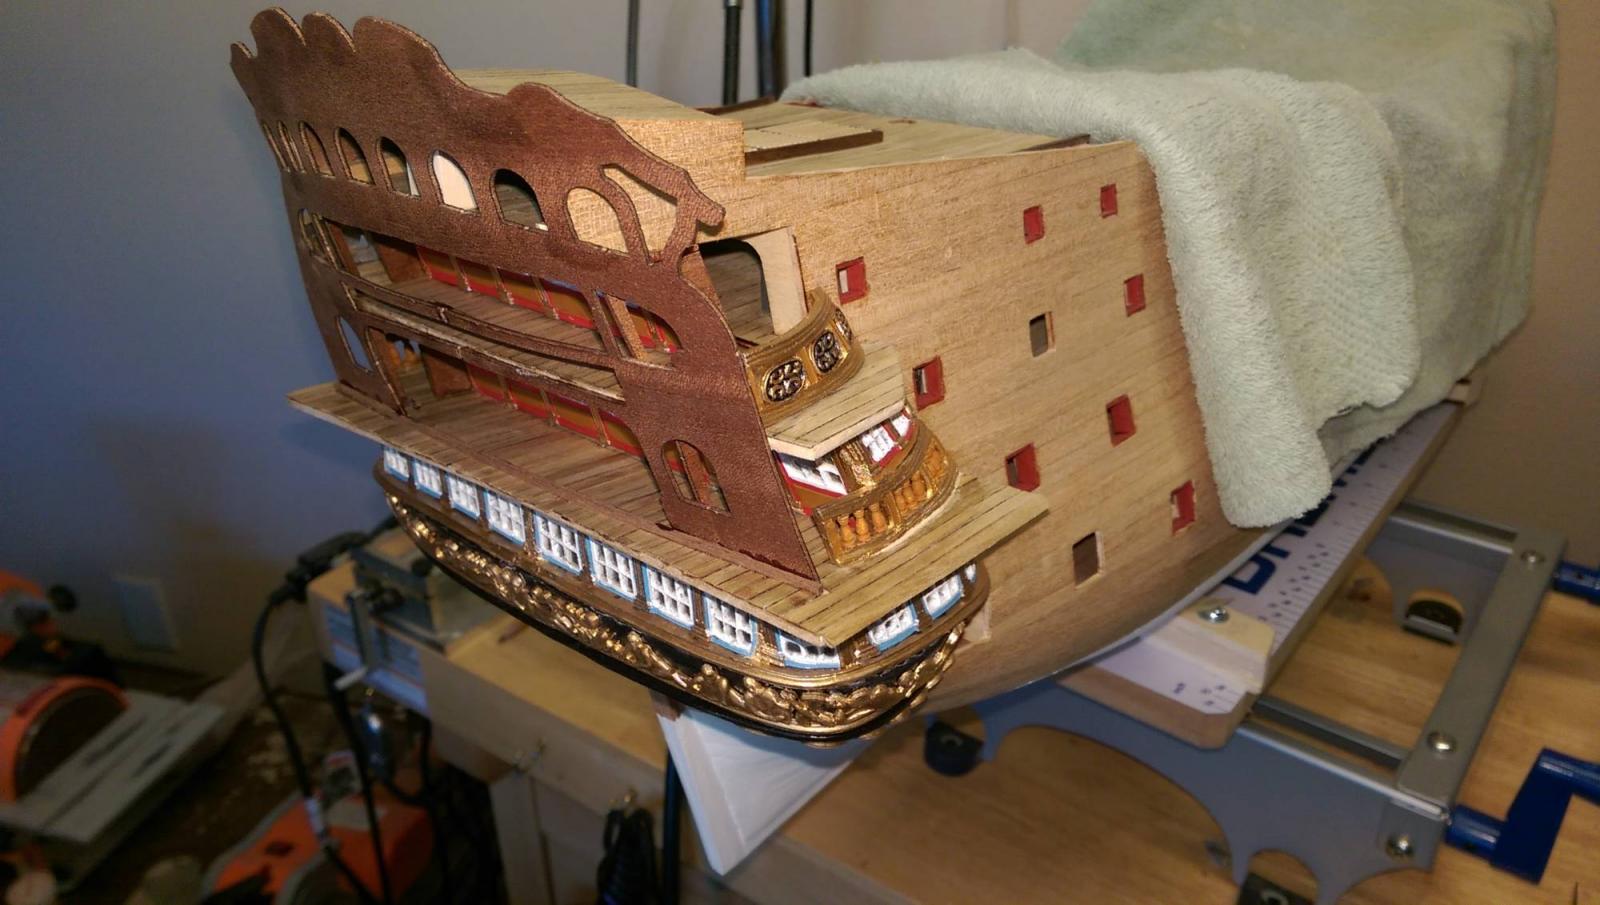
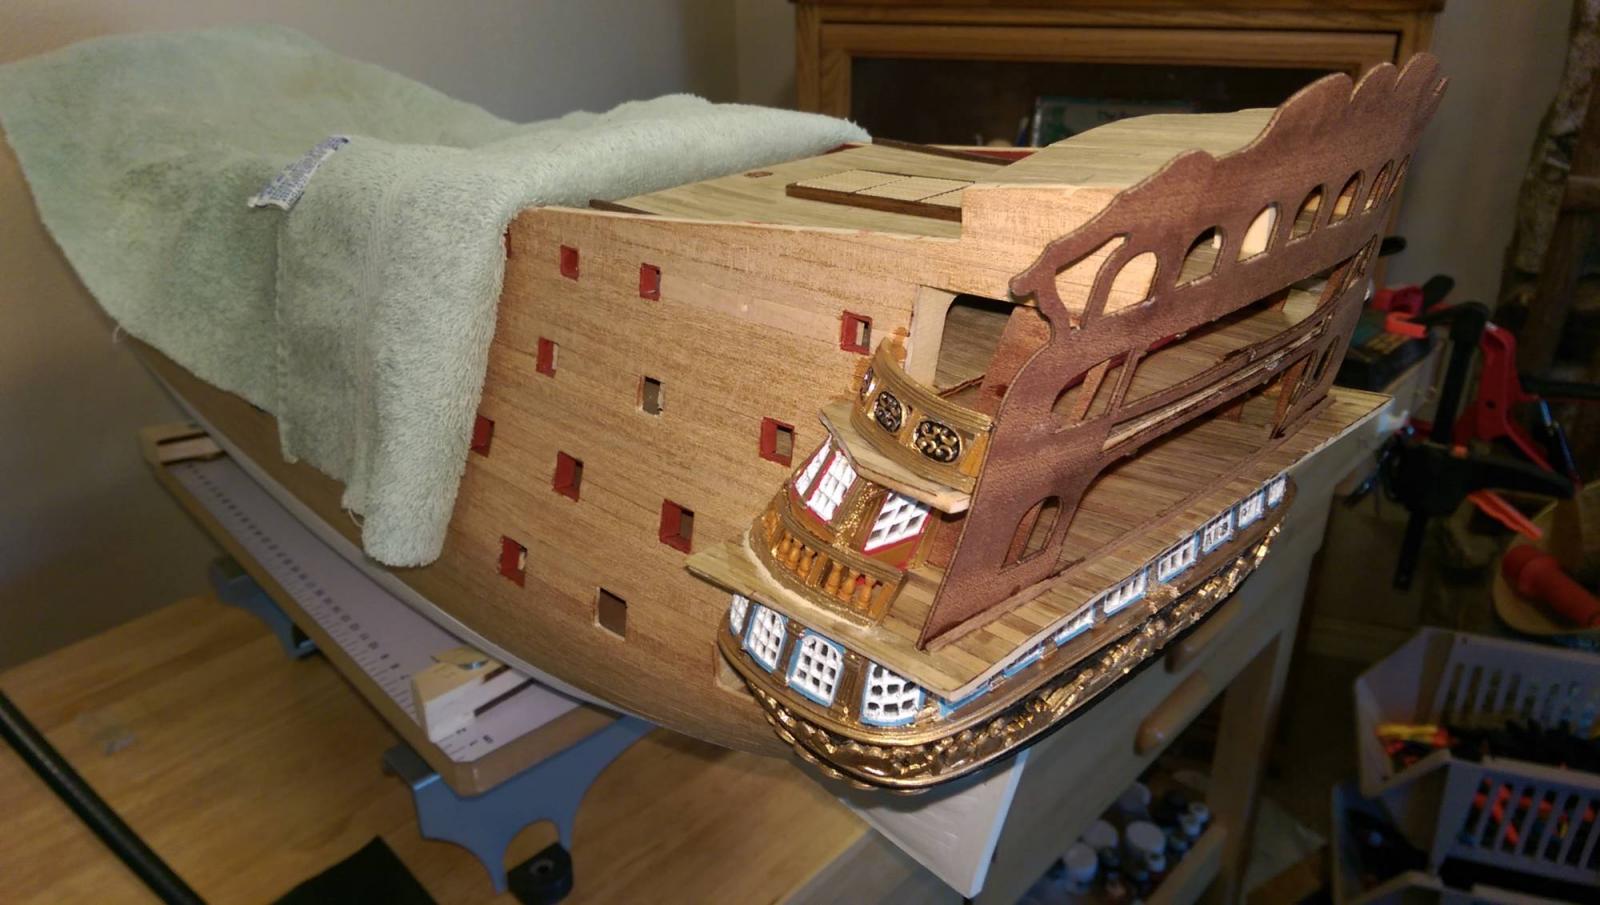
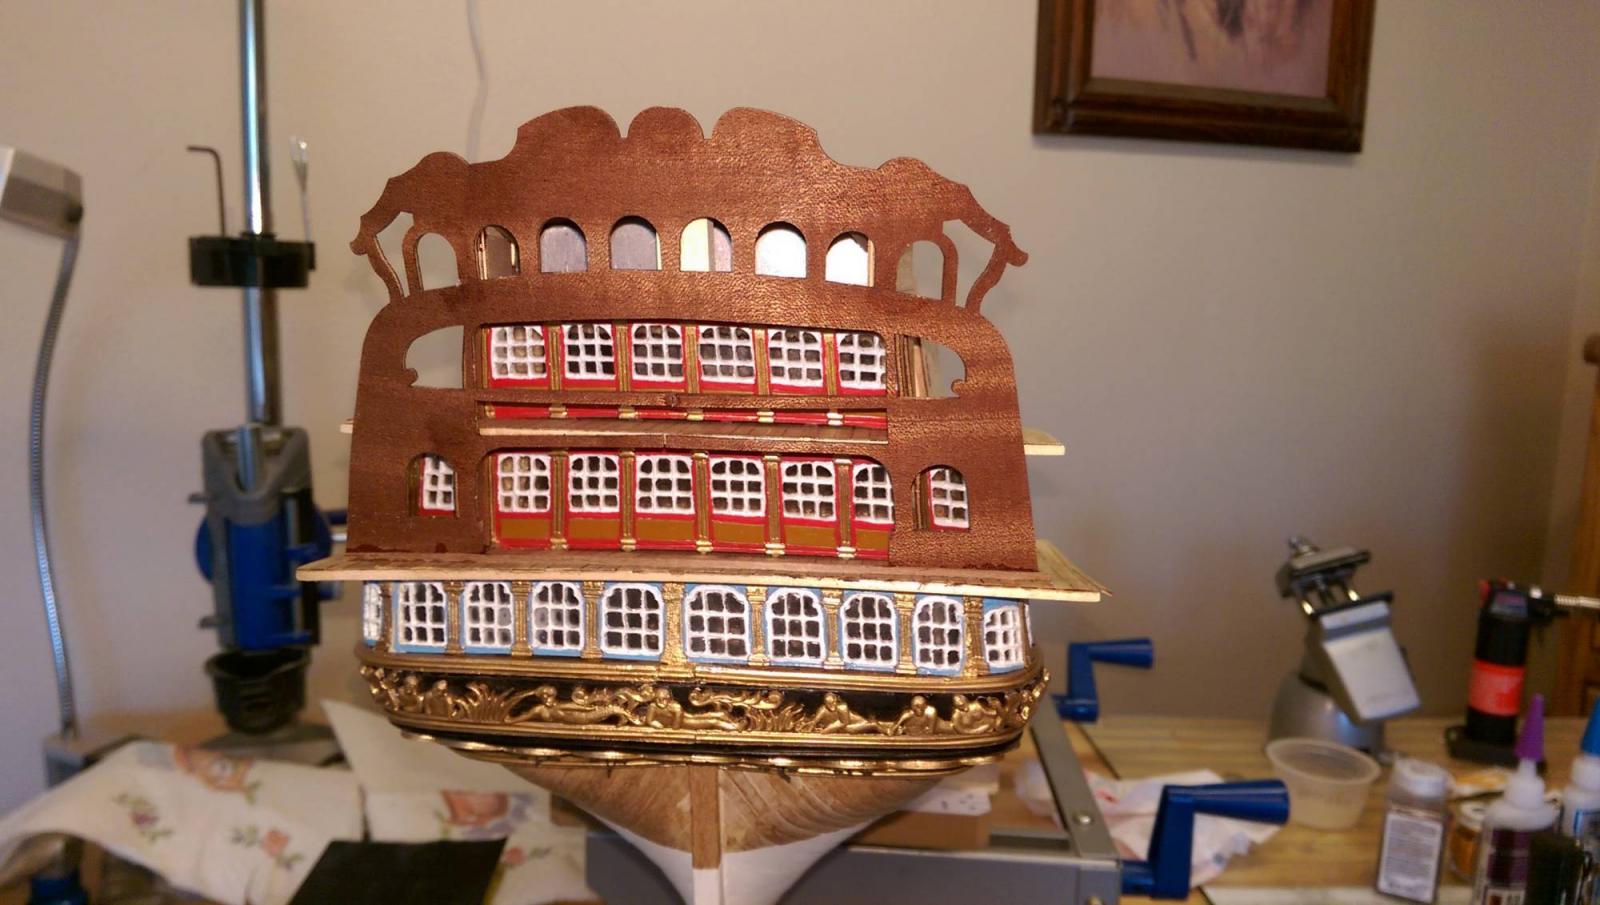
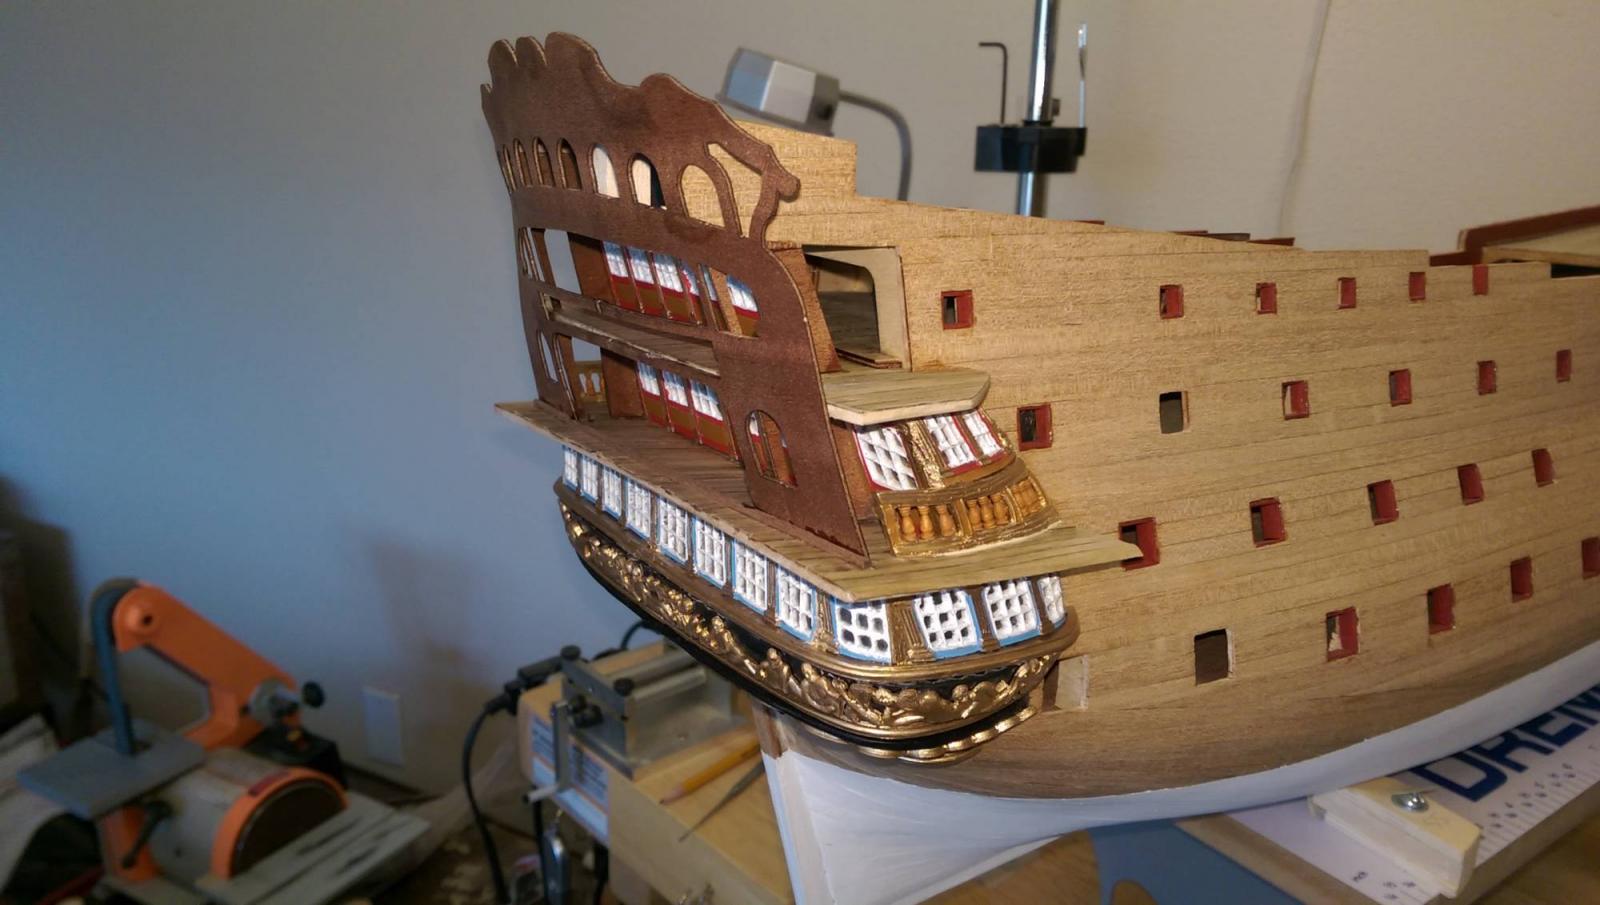
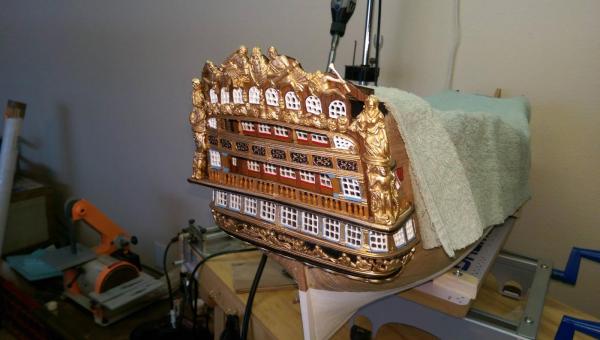
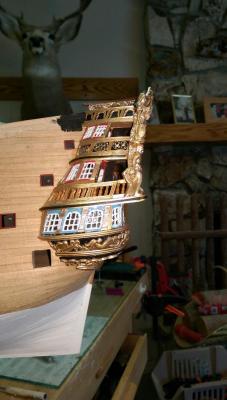
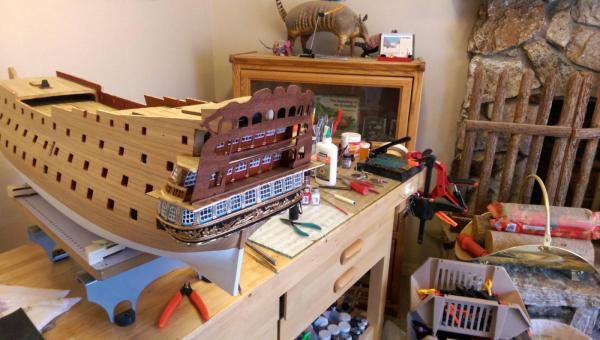
The transom and stern galleries are finally completed. While there has not been any easy steps yet in building her, I believe the transom to be the most difficult and tedious part of the entire build, but we will see. I am glad it is done and it took me several months and a couple hundred hours to do. It is not perfect, but I am happy with the results. Next up will be the wales, I think. Vince P.

- 593 replies
-
- 10
-
-
- royal william
- euromodels
- (and 1 more)
-
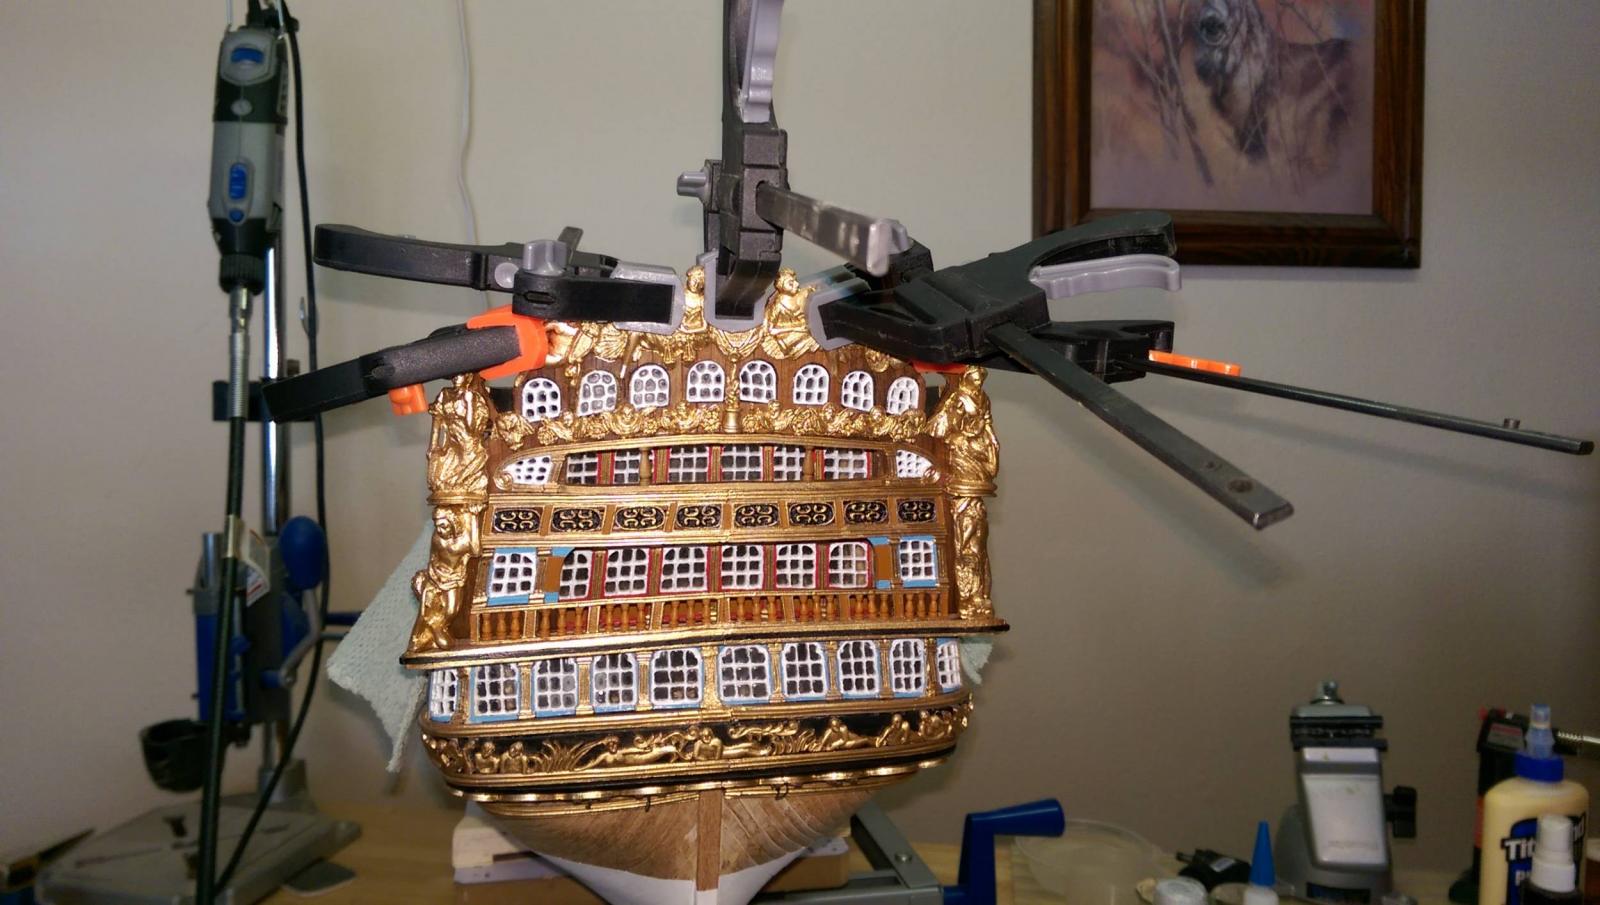
The large heavy casting that makes up the top decorations is all in one piece and goes across the top of the entire transom. The one in my kit was cracked about in the middle. It did not break in half, but any rough handling would have done it. Since this piece has to be heated and bent to match the curvature of the transom, the crack had to be repaired first. Some thick CA and pressing the crack closed, and placing in a clamp for a few days did the trick. Once it was heated and bent, it was painted and clamped in place on the transom. Vince P.

- 593 replies
-
- 4
-
-
- royal william
- euromodels
- (and 1 more)
-
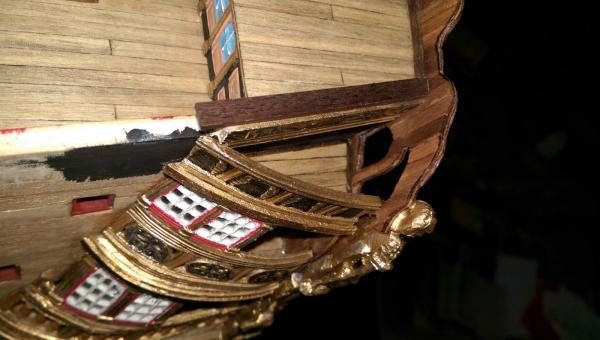
The plans don't really show how to place the little upper windows on the transom. I have seen them just placed over the openings and also reset into the openings. I decided they look better if reset into the openings, especially because the two end windows can be seen from both front and back. They are exposed on the backside in one of the little balconies. Also, these metal window castings are only detailed on the front side and blank on the back. I had to detail the backs of the two end ones and paint them accordingly. Vince P.
- 593 replies
-
- 4
-
-
- royal william
- euromodels
- (and 1 more)
-
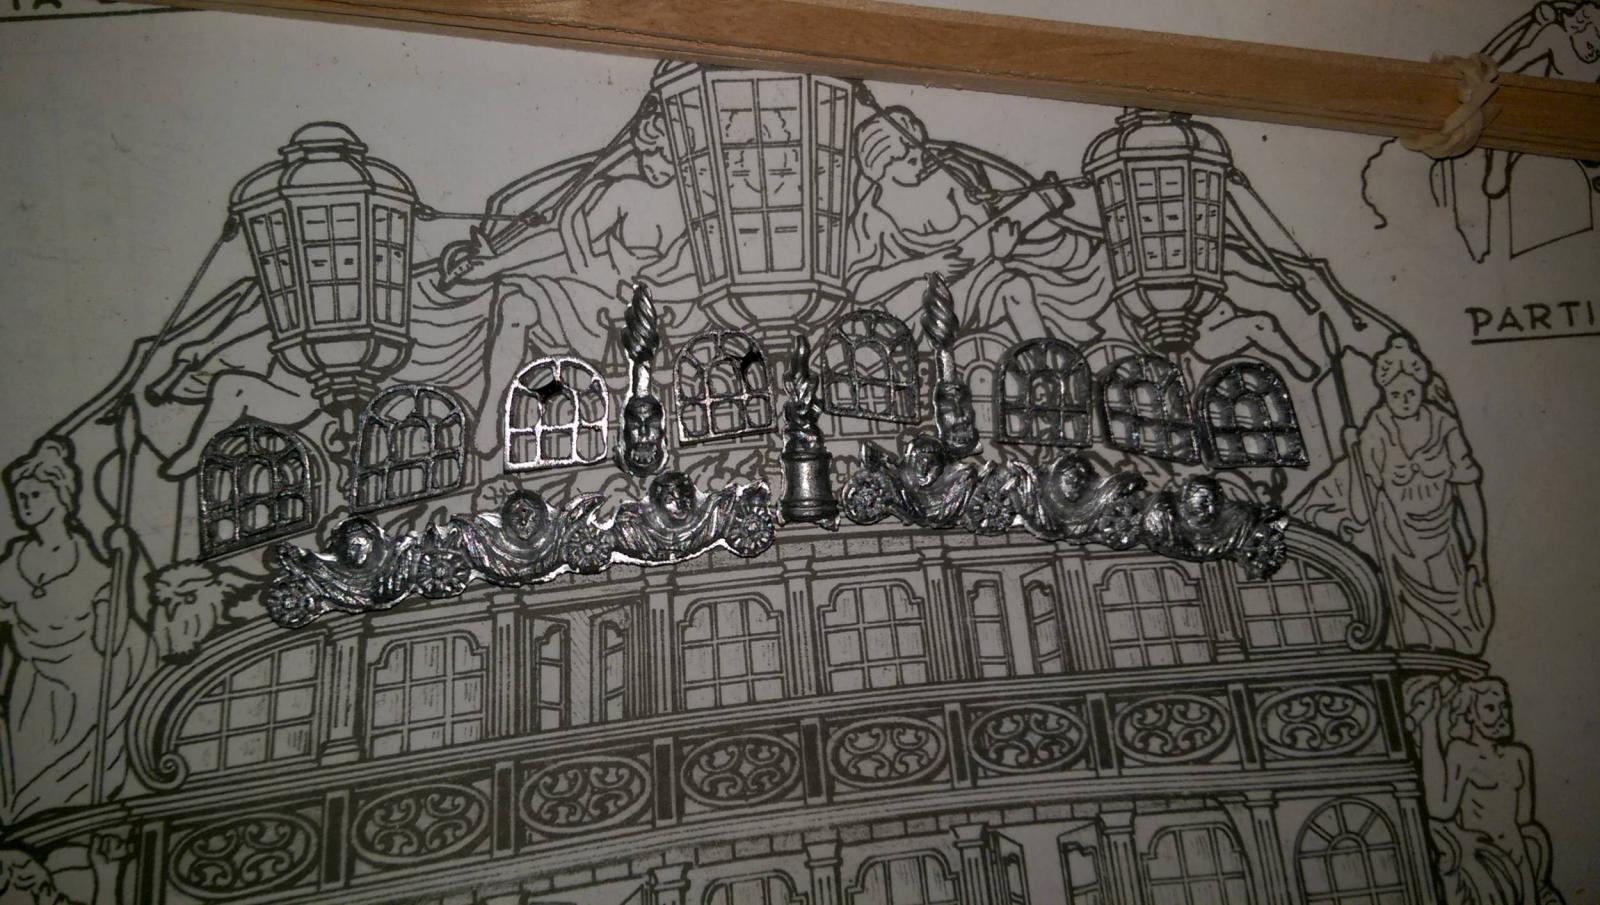
There are 8 tiny windows that make up the upper gallery. Each one has a unique shape to match the cutouts in the transom. It is easy to mix them up. They are numbered on the plans and on each piece. Once I cut out the window panes and adjusted the cutouts in the transom, I placed them on the plan drawing to keep them in the correct place. Vince P.
- 593 replies
-
- 8
-
-
- royal william
- euromodels
- (and 1 more)
-
Start amidships and square 4 bulkheads to each other and the keel. Support each of them with wood blocks and glue them secure. Once that is done, you have a solid base that is true and square. Then work out one bulkhead at a time forward and aft, squaring them with blocks and gluing them as you go. Remember, squaring means up and down as well as right and left. Good luck, Vince P.
-
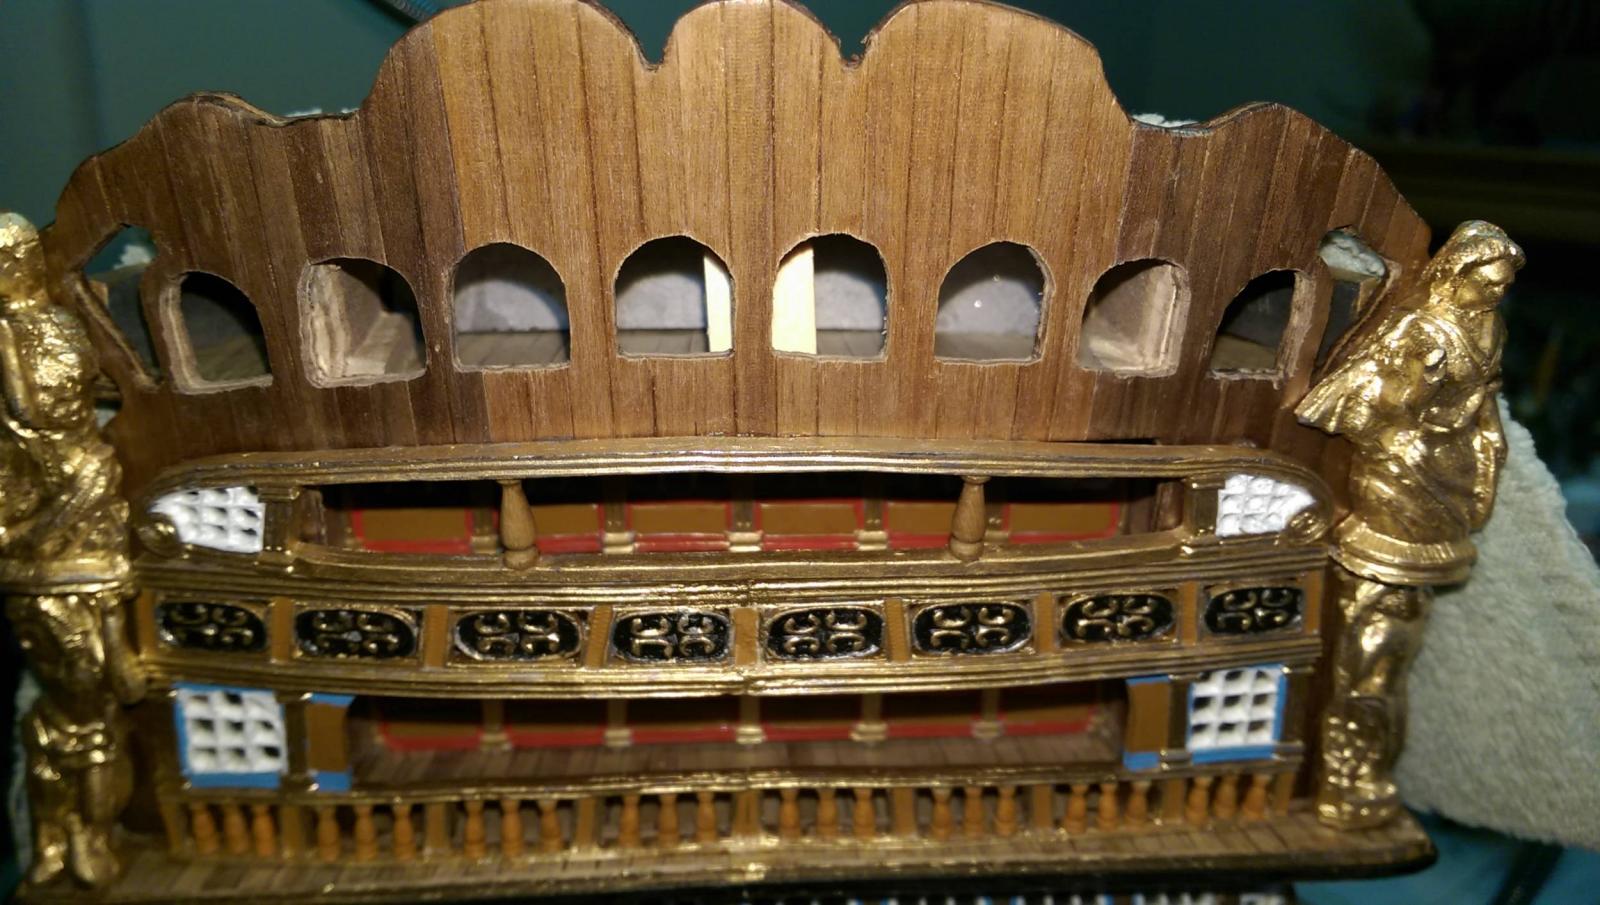
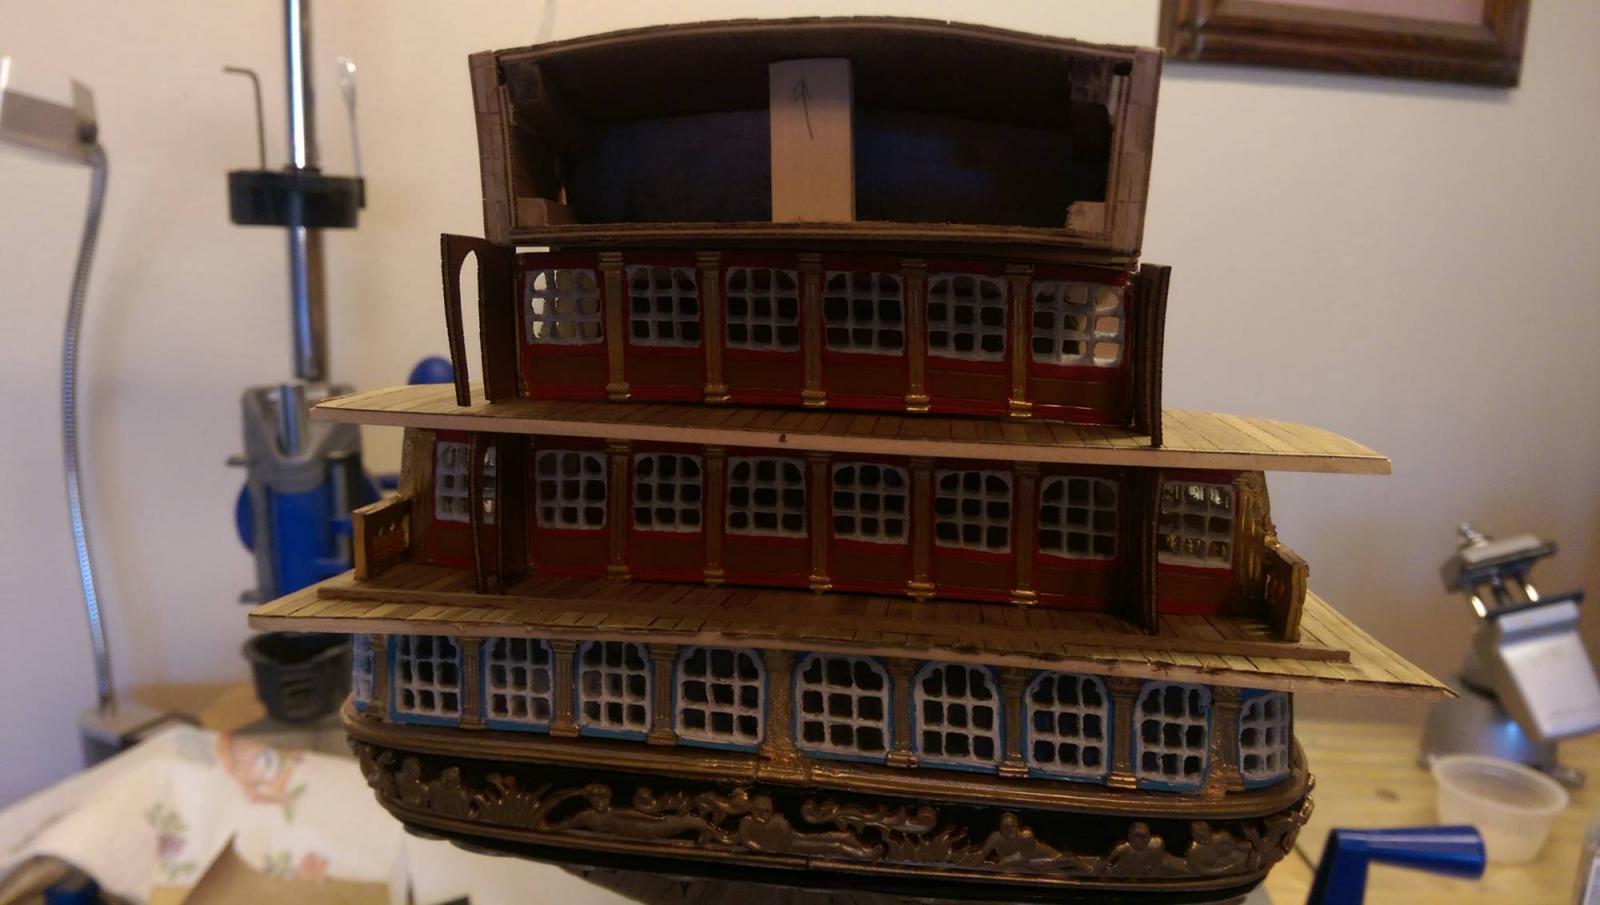
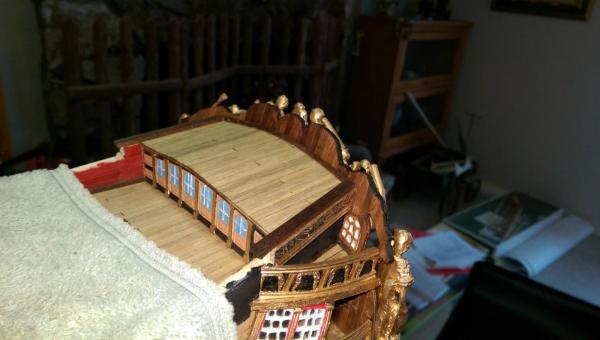
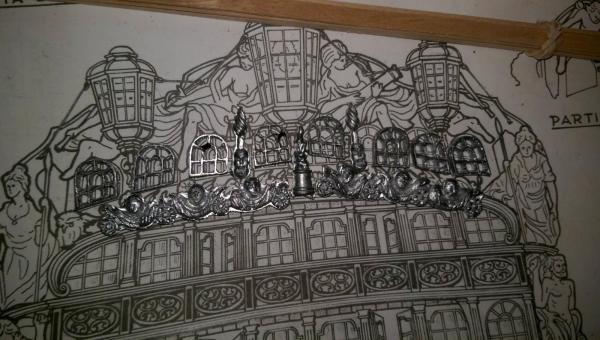
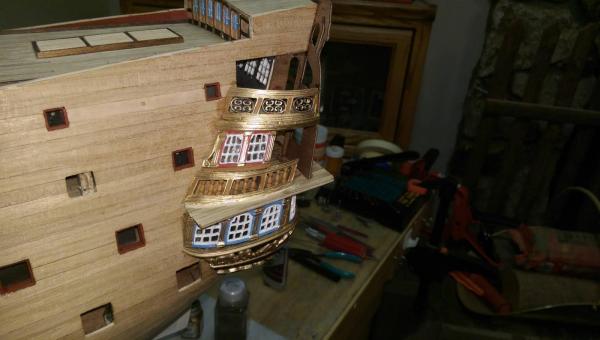
The upper transom balcony bezel with the scroll end windows has been added. Two stantions have beed added to support the long ceiling opening. This is not part of the kit, so I used a couple of 12mm walnut stantions from my stash. Vince P.
- 593 replies
-
- 8
-
-
- royal william
- euromodels
- (and 1 more)
-
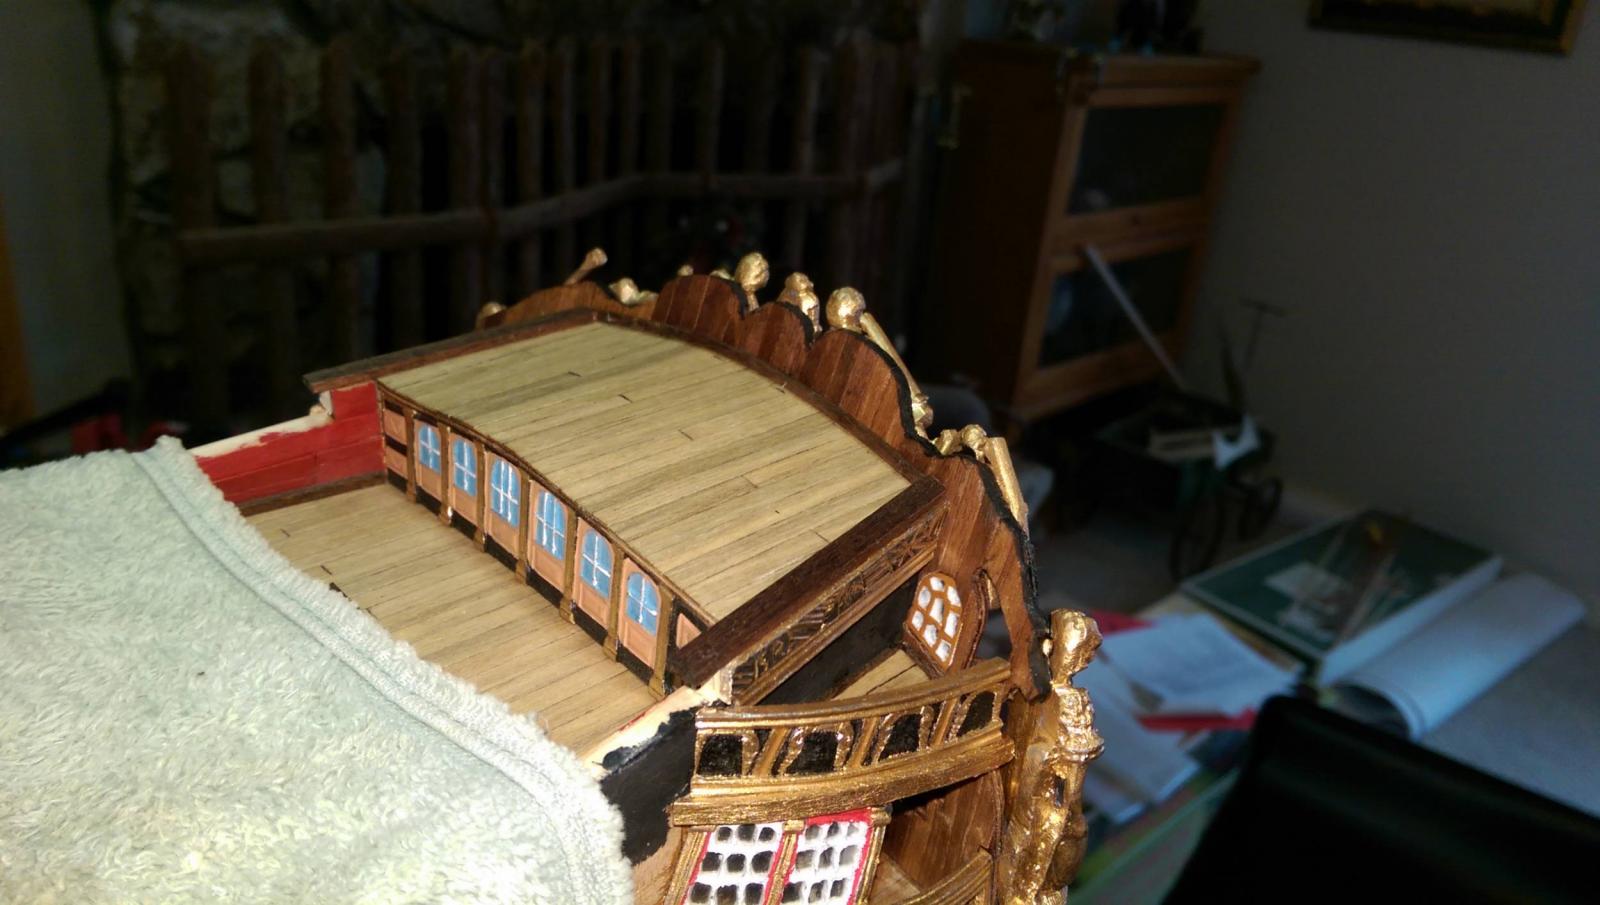
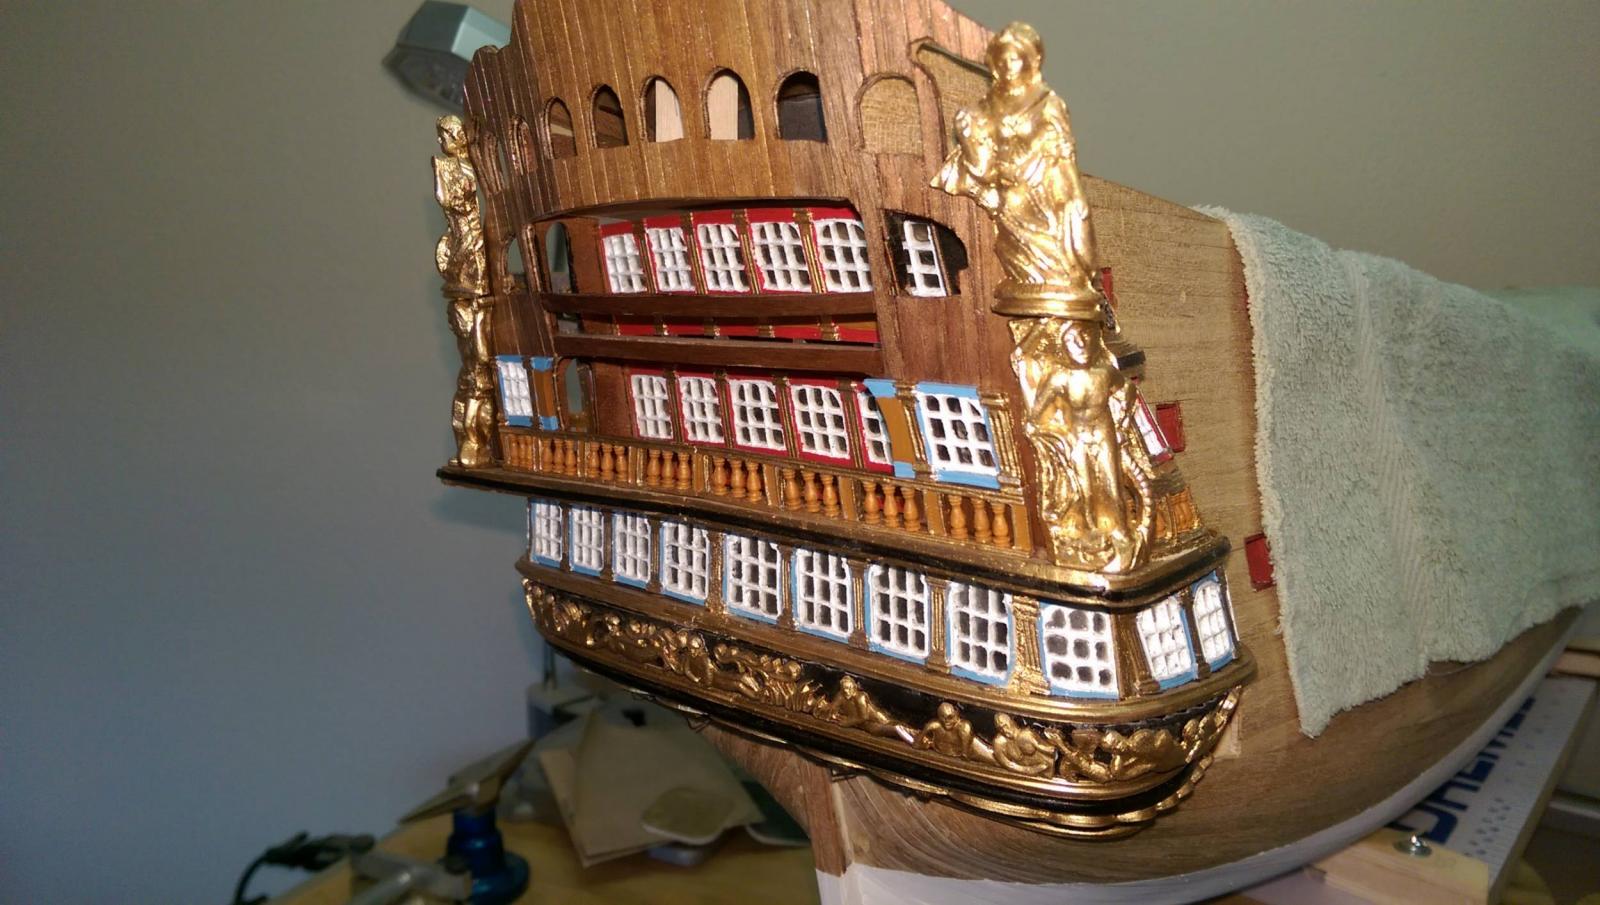
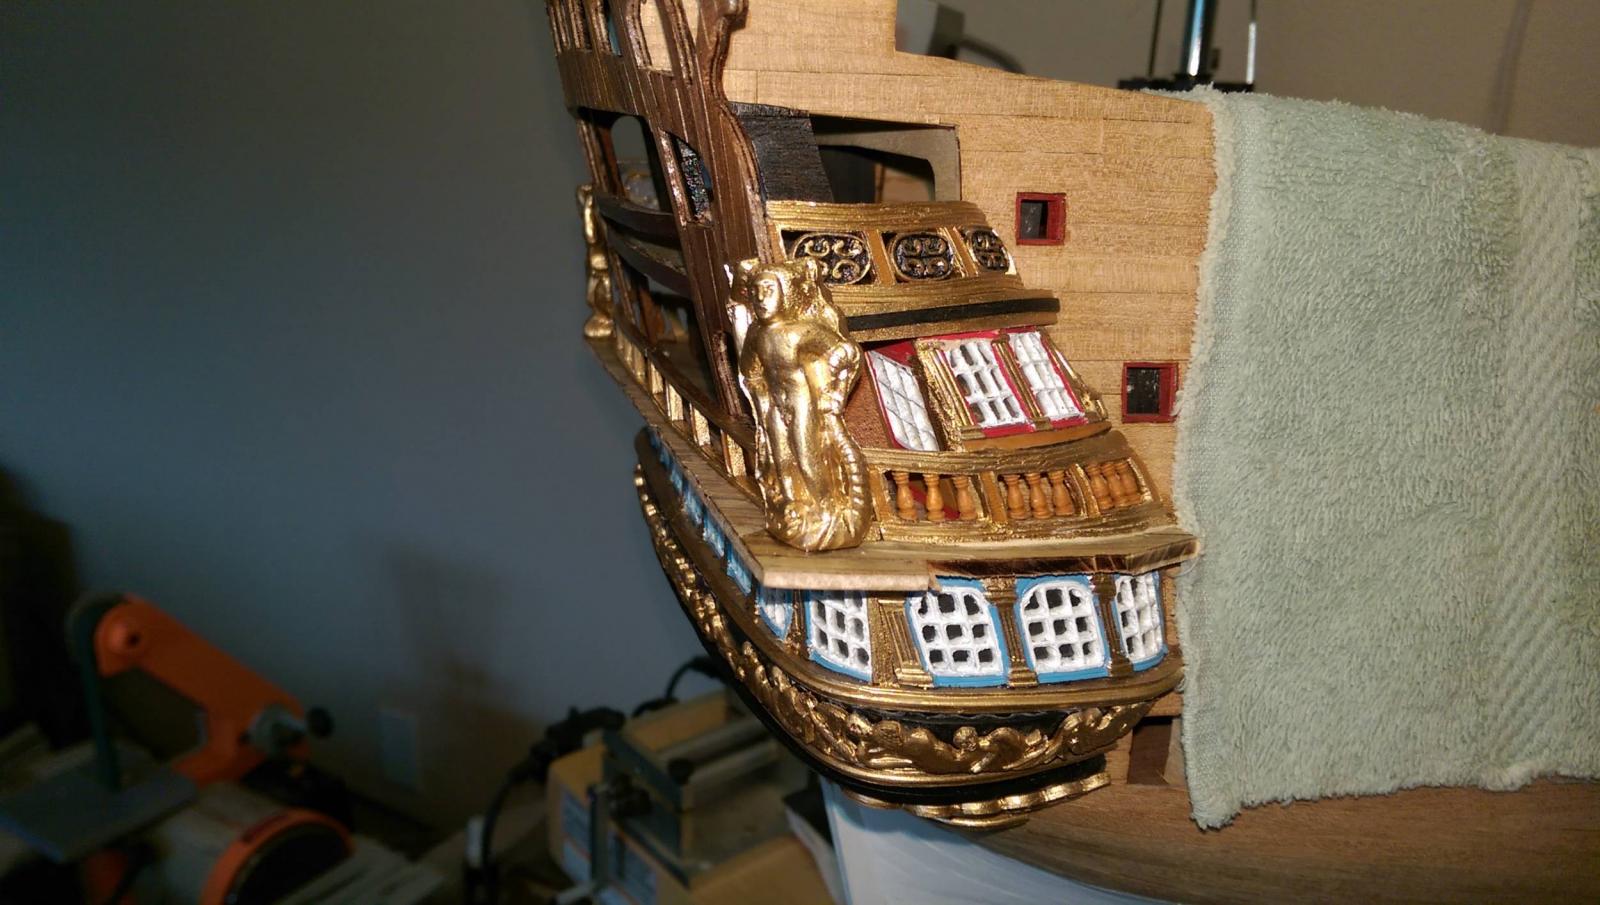
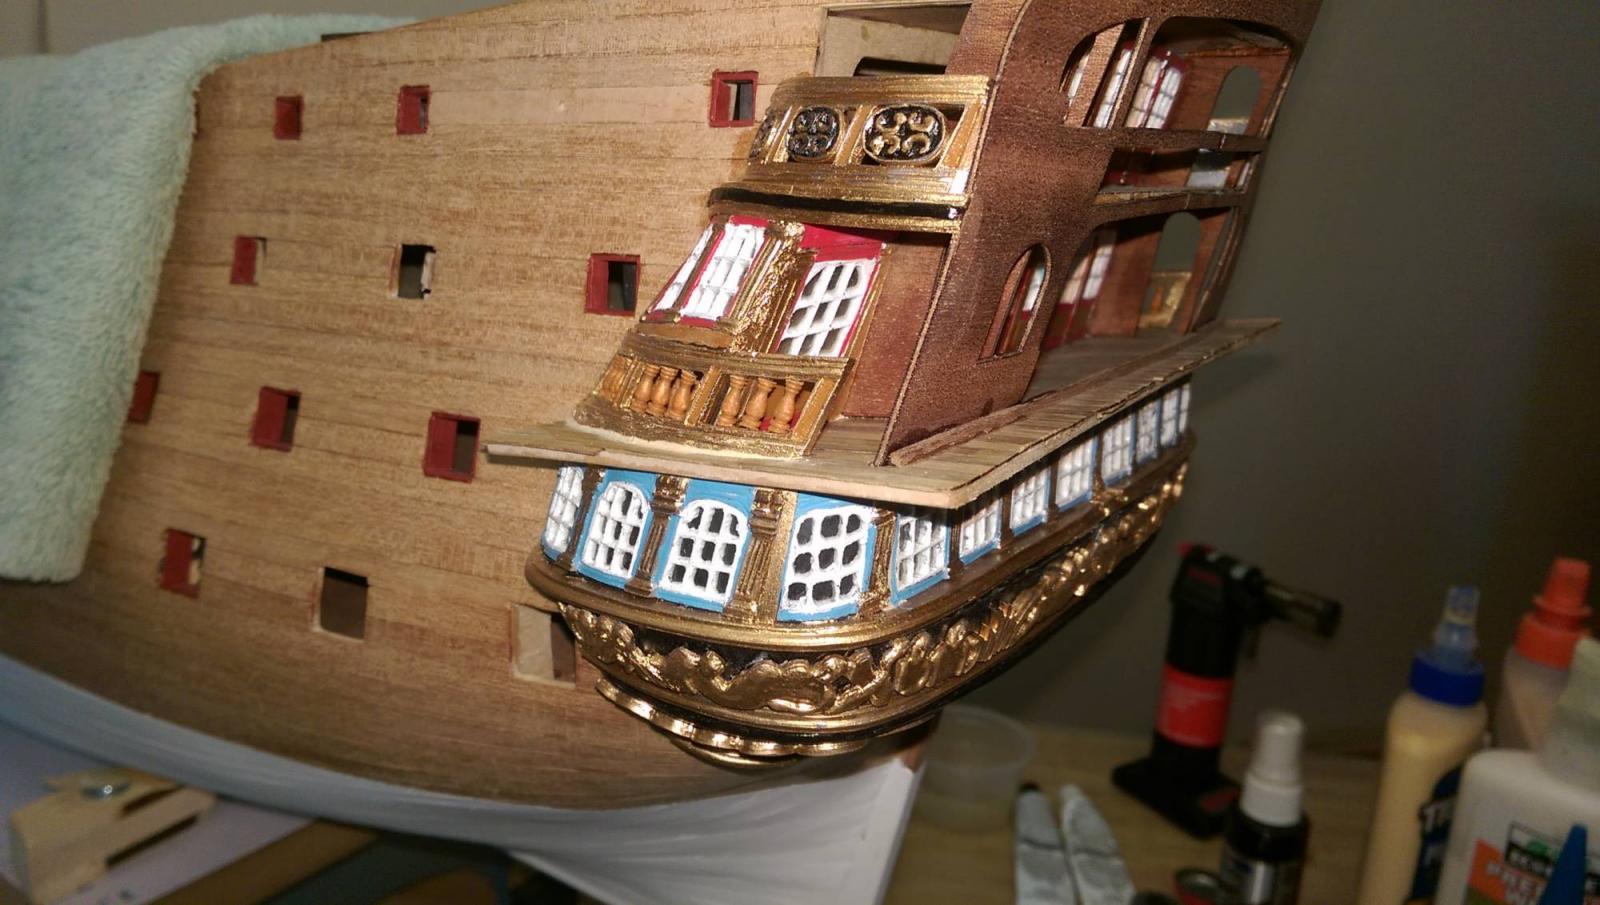
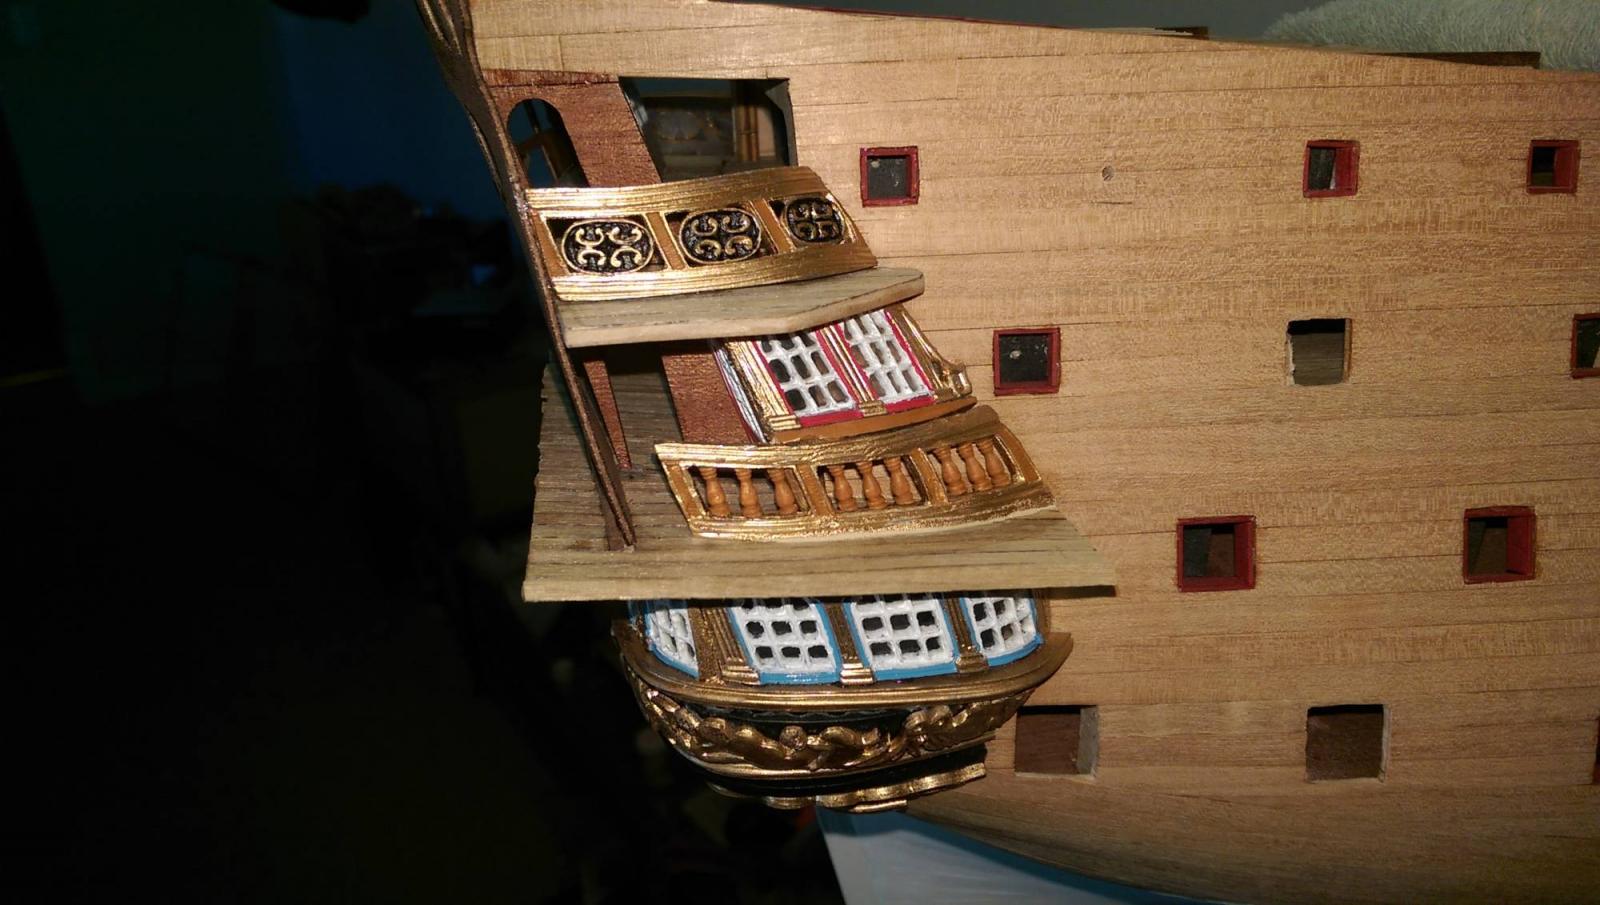
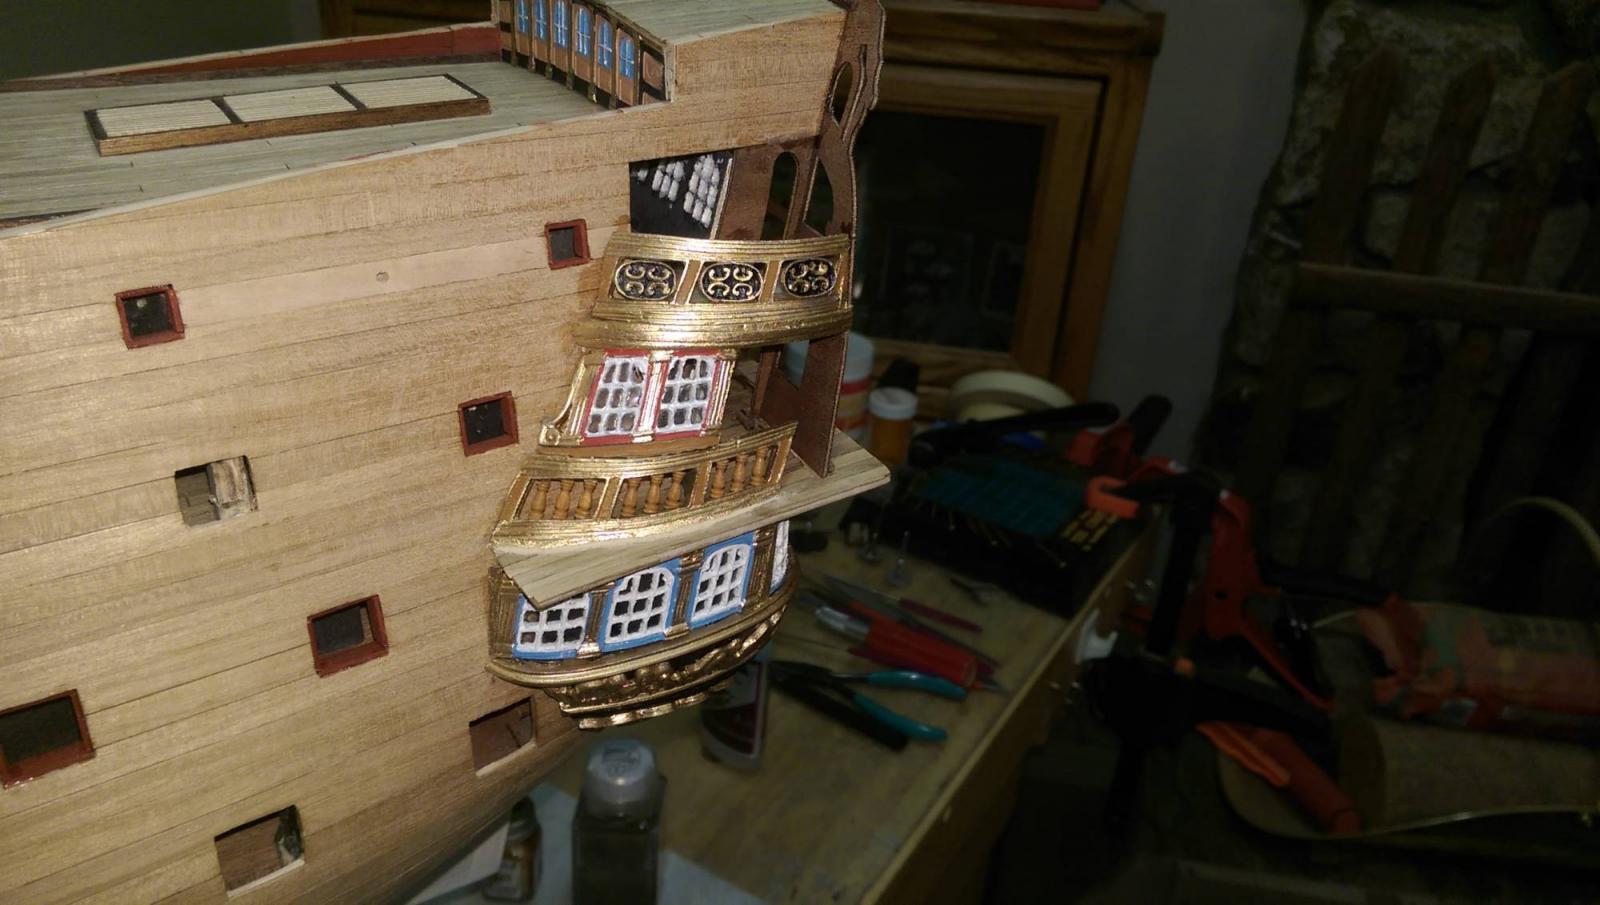
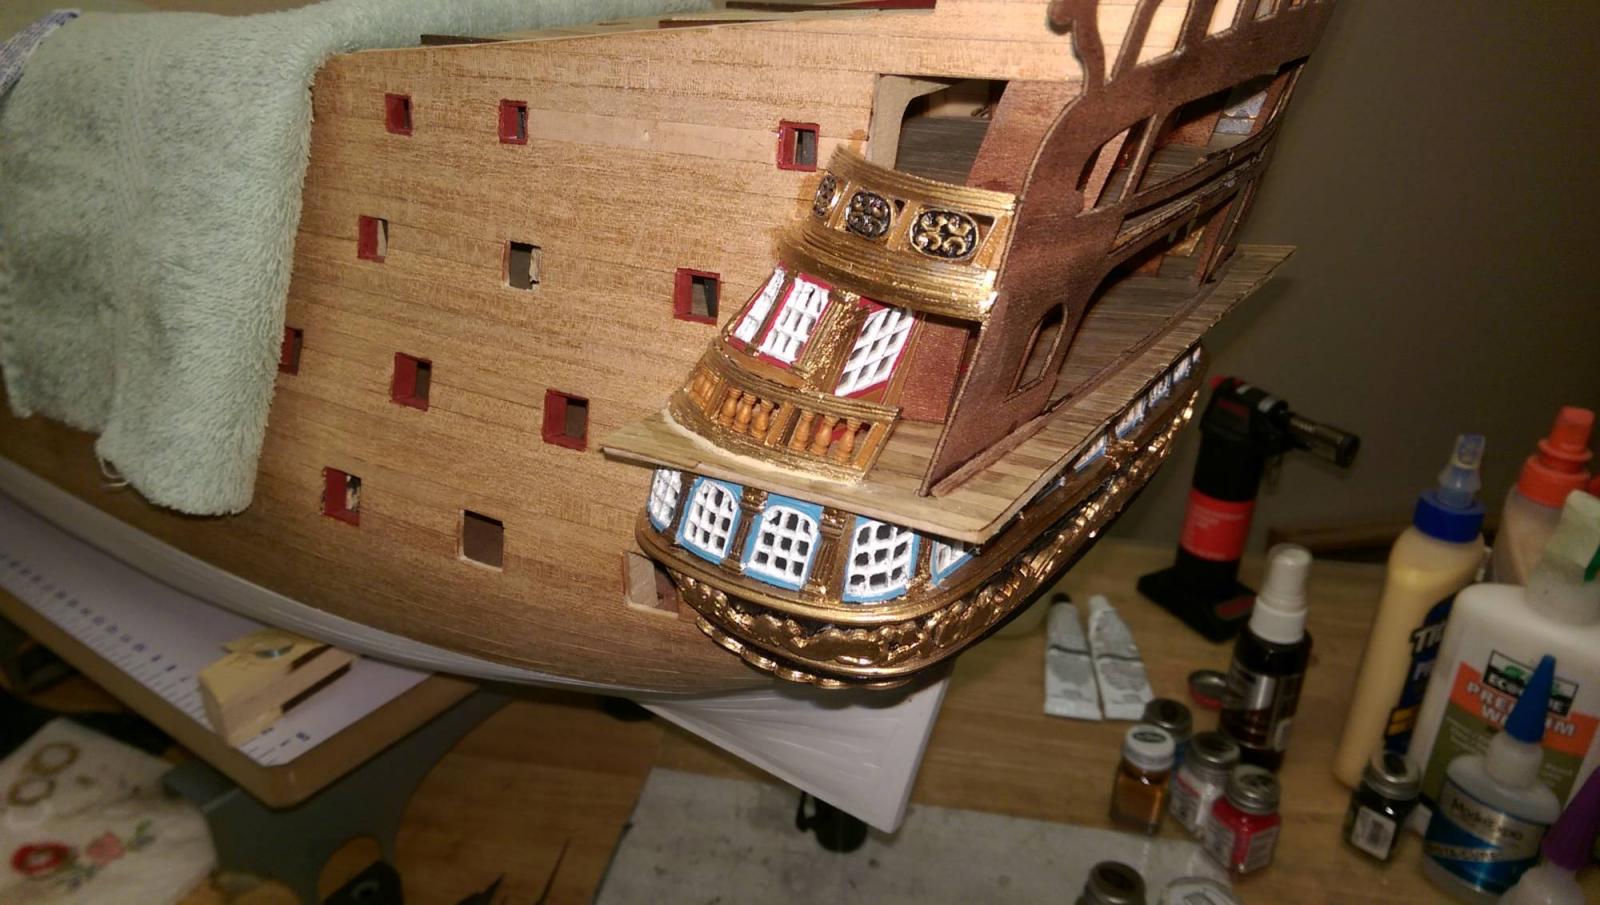
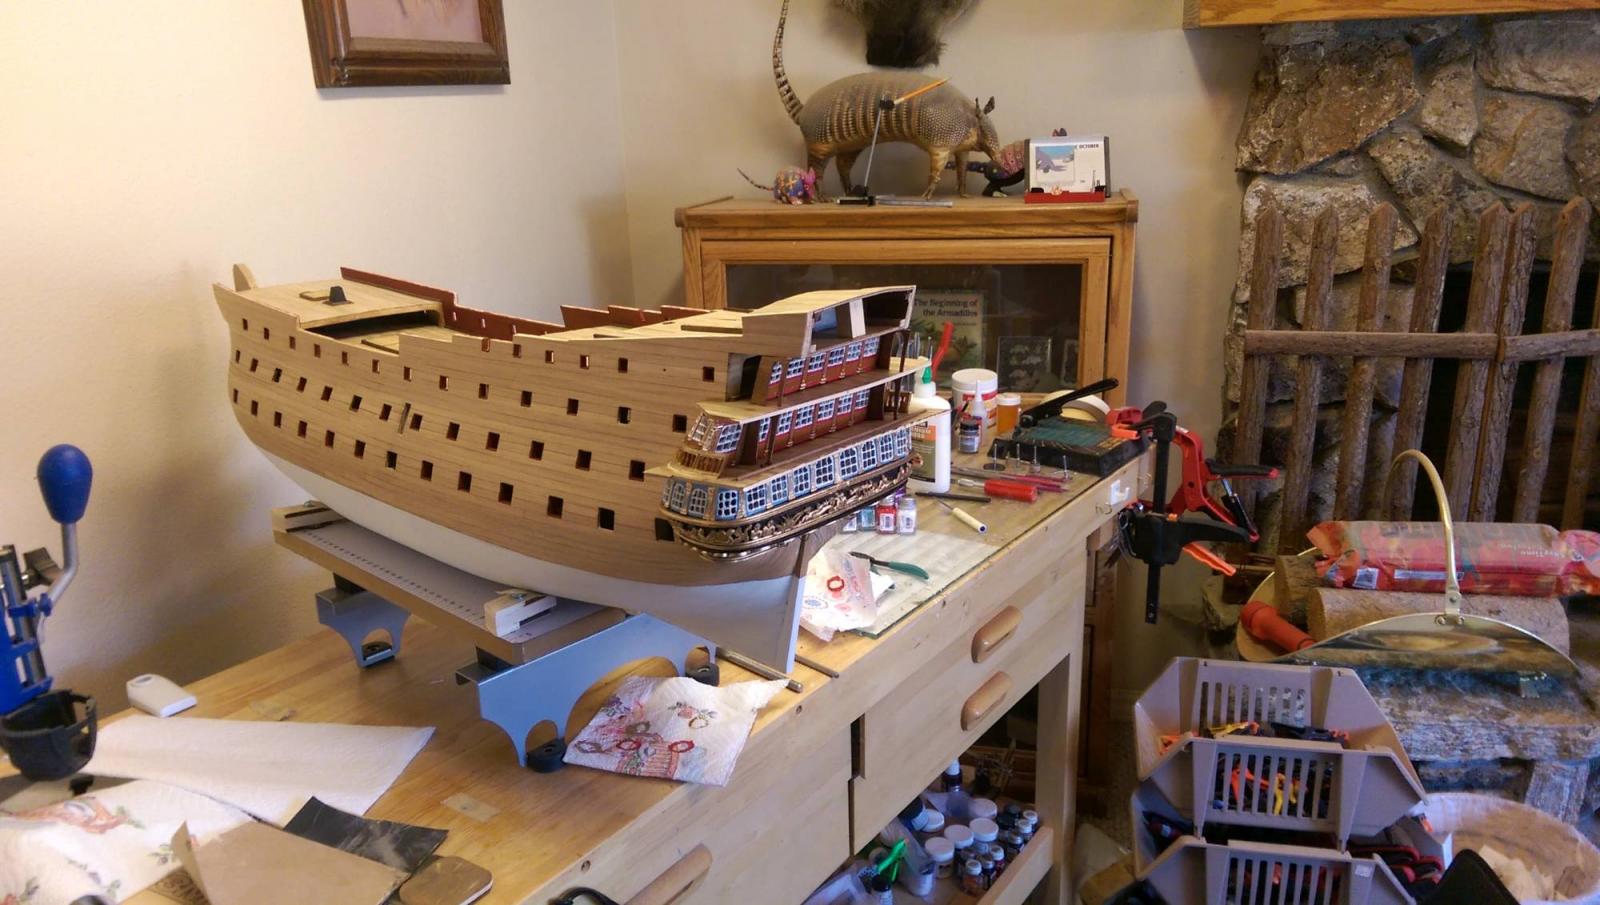
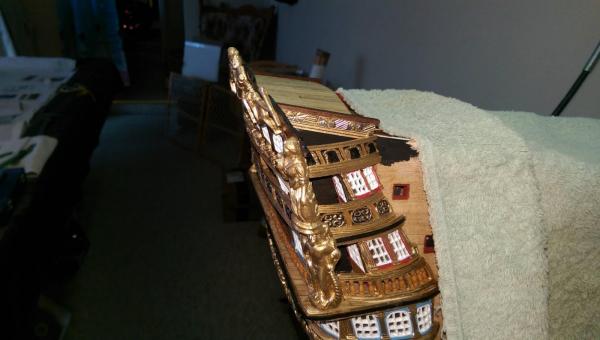
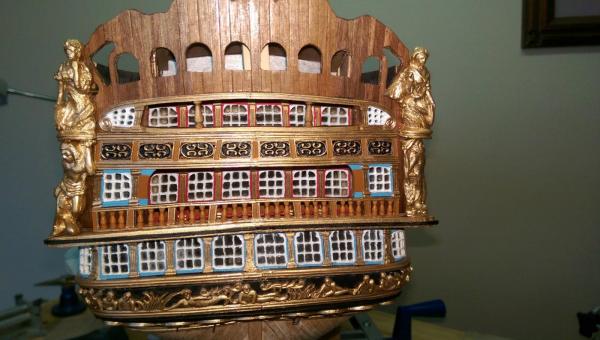
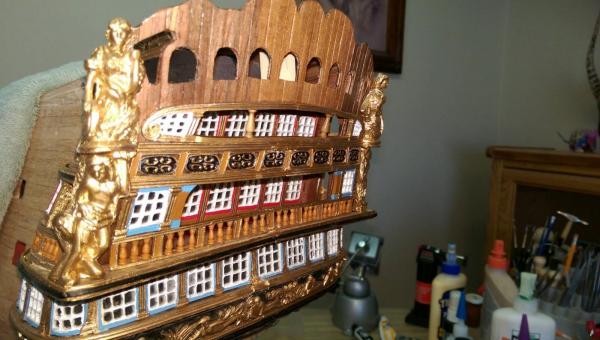
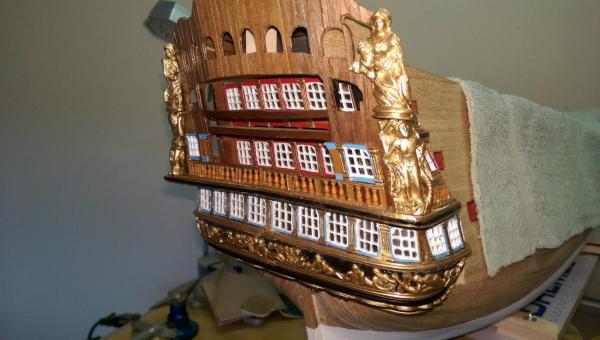
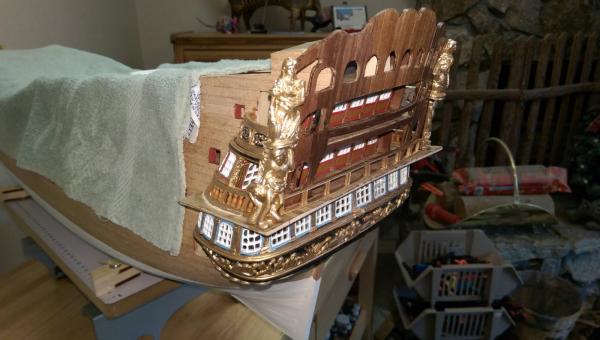
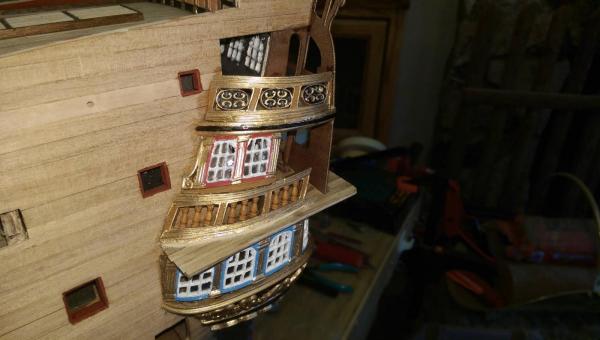
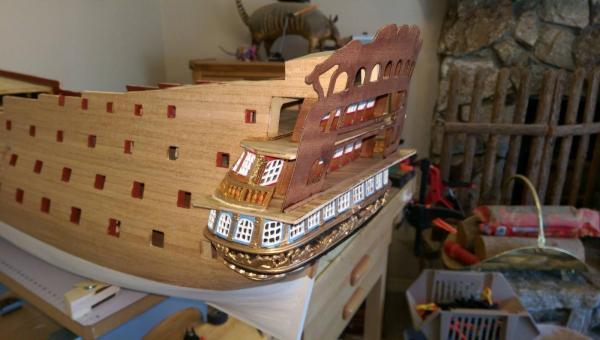
Still working on the transom and stern galleries. The upper side windows are added and the upper side balconies are compete. One of the side metal decoration strips (the last one) has to be added now and the the side wall of the hull in the area has to be painted black now. The metal strip is painted black and the raised pattern is washed in a gold tinted solution. This actually completes both sides of the galleries right up to the poop deck. According to the plans, there are no railings whatsoever around the poop deck. With the camber of the deck, the wind at sea, and the rolling of the ship, a sailor would just fall over the side with no support. I am choosing to add side and forward cap railings later on. The bases for the side rails have been added to the deck already. Vince P.

- 593 replies
-
- 7
-
-
- royal william
- euromodels
- (and 1 more)
-
Anyone Use A Pin Nailer?
pirozzi replied to Julie Mo's topic in Modeling tools and Workshop Equipment
I don't know what powers this tool, but the amount of nailing force needed on models must be very small. Can it be adjusted? Also, can it get into small spaces as well? Good luck if you try it. I would be interested to know the results. Vince P. -
Hi Denis, That is the new Chris Watton kit. A beauty. Does this mean you are going to build her along with the RW at the same time? If so, you are a better man than me. I can barely keep sane working on just the RW. Vince P.
-
Hi Mark, It is good to see another builder working on the RW. A word to the wise. Euromodel purposely adjusts the dimensions of some parts to allow for some later fitting, and they don't mention it. They expect the builder to figure it out. Like you noticing the false keel was smaller than the stem and stern post. That was actually done to allow for tapering later on and also as a rabit for butting the planks. If you find something off by a little, it is best to leave it alone until later on when you might find it was done intentionally to account for another issue later in the build. All of us working on her have found this out the hard way. Also, it you have not gone on to their website and downloaded Pete's notes, you should, because they will be invaluable as you progress. Vince P.
- 652 replies
-
- 1
-
-
- royal william
- euromodel
- (and 1 more)
-
Constructing and installing the upper transom railing. The railing itself comprises of 2 halves. The plans call for placing the half # 11223 on the port side and #11222 on the starboard side. By virtue of the shapes of these pieces, part # 11223 needs to be on the starboard and #11222 on the port side. The plans have the parts numbered incorrectly on the drawings. I still have to fill in the center seams of both the lower and upper railings with some filler to make the joints less visible. Vince P.


- 593 replies
-
- 10
-
-
- royal william
- euromodels
- (and 1 more)
-
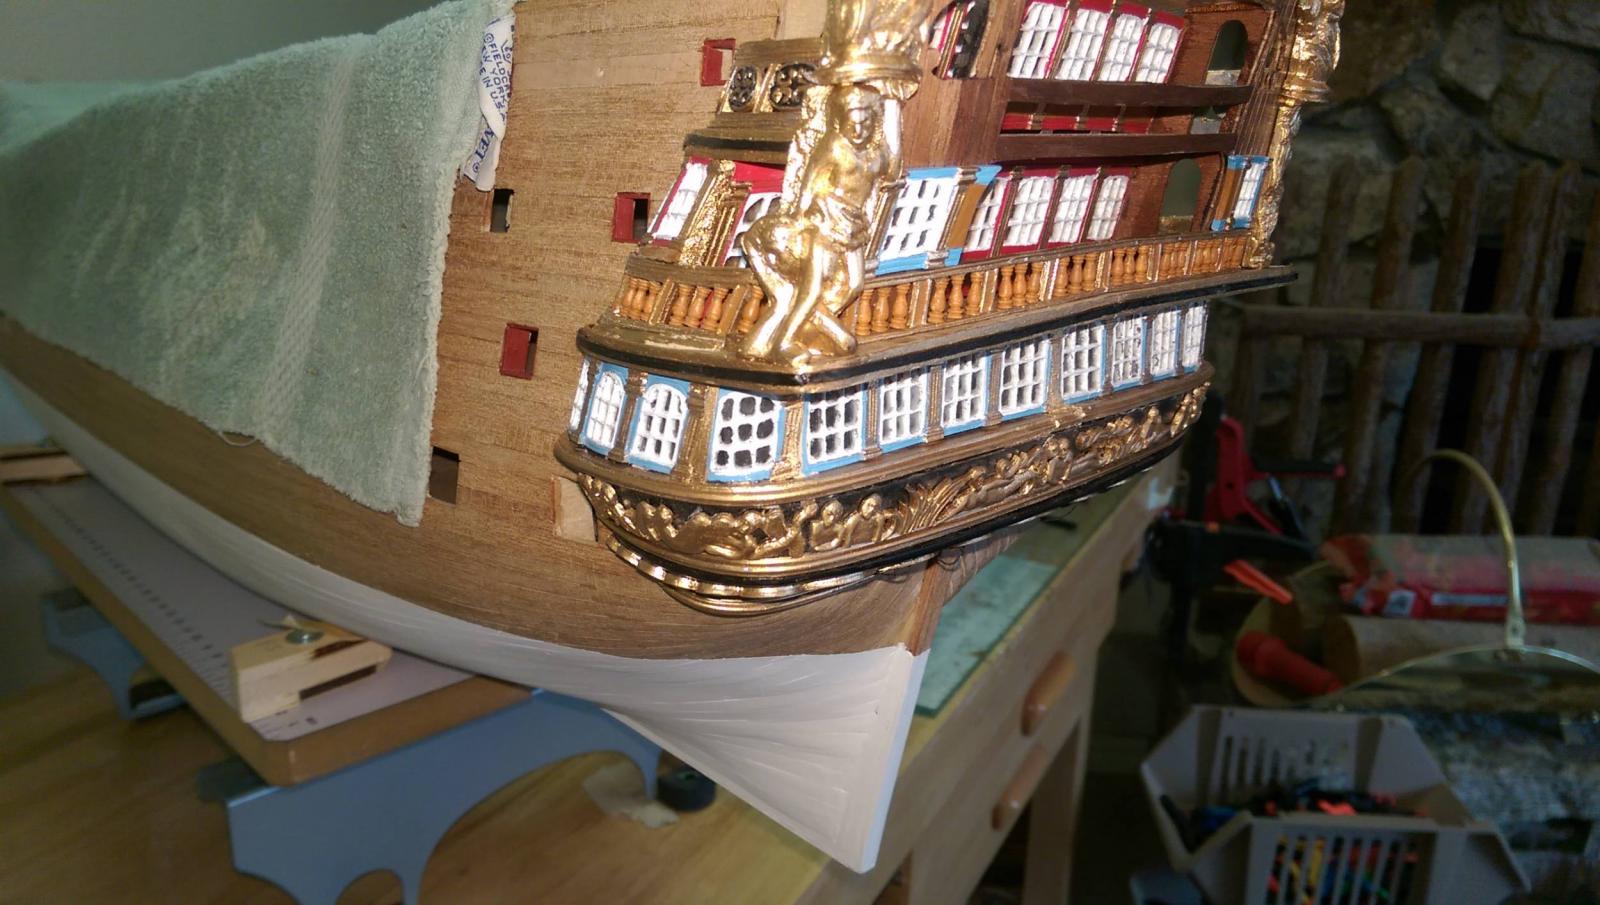
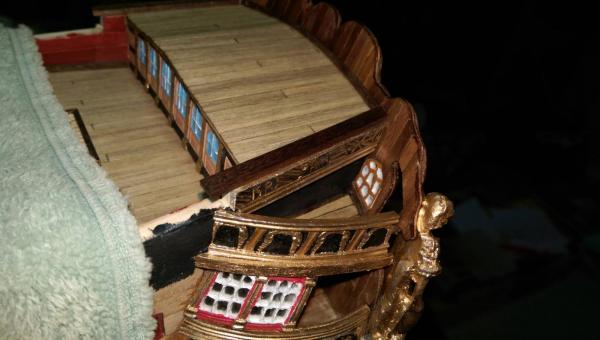
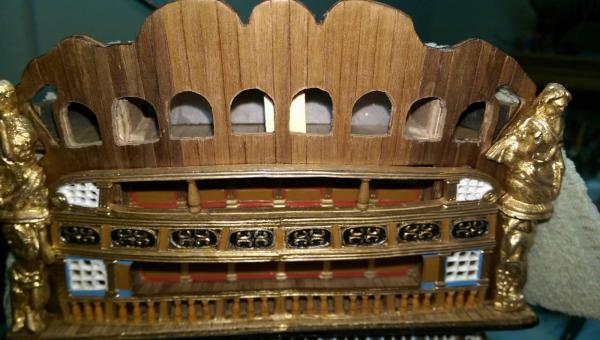
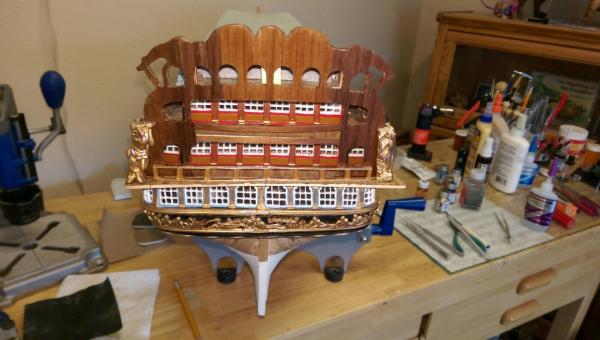
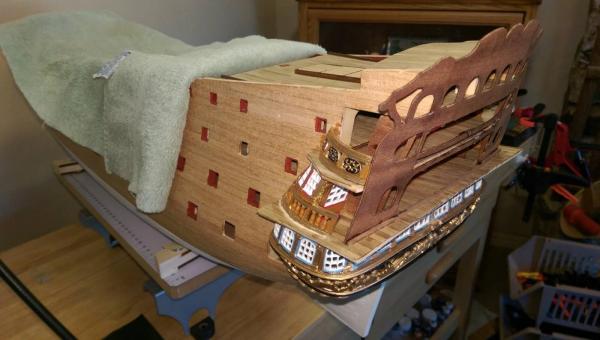
The lower deck extension has been trimmed and contoured and a decorative strip has been added all around the edge. The strip is made from a piece of 4mm x 1mm walnut and enhanced with a 2mm x 1mm painted black. The lower railing has stantions added. I did not use the metal strips supplied by the kit, even though they are OK. I used wood 8mm stantions from my stash. The 2 sattelite windows are added to the top of the ends of the railing. It is finally getting to look like the fancy stern of the RW. I still have a long way to go with the transom and galleries. Vince P.

- 593 replies
-
- 11
-
-
- royal william
- euromodels
- (and 1 more)
-
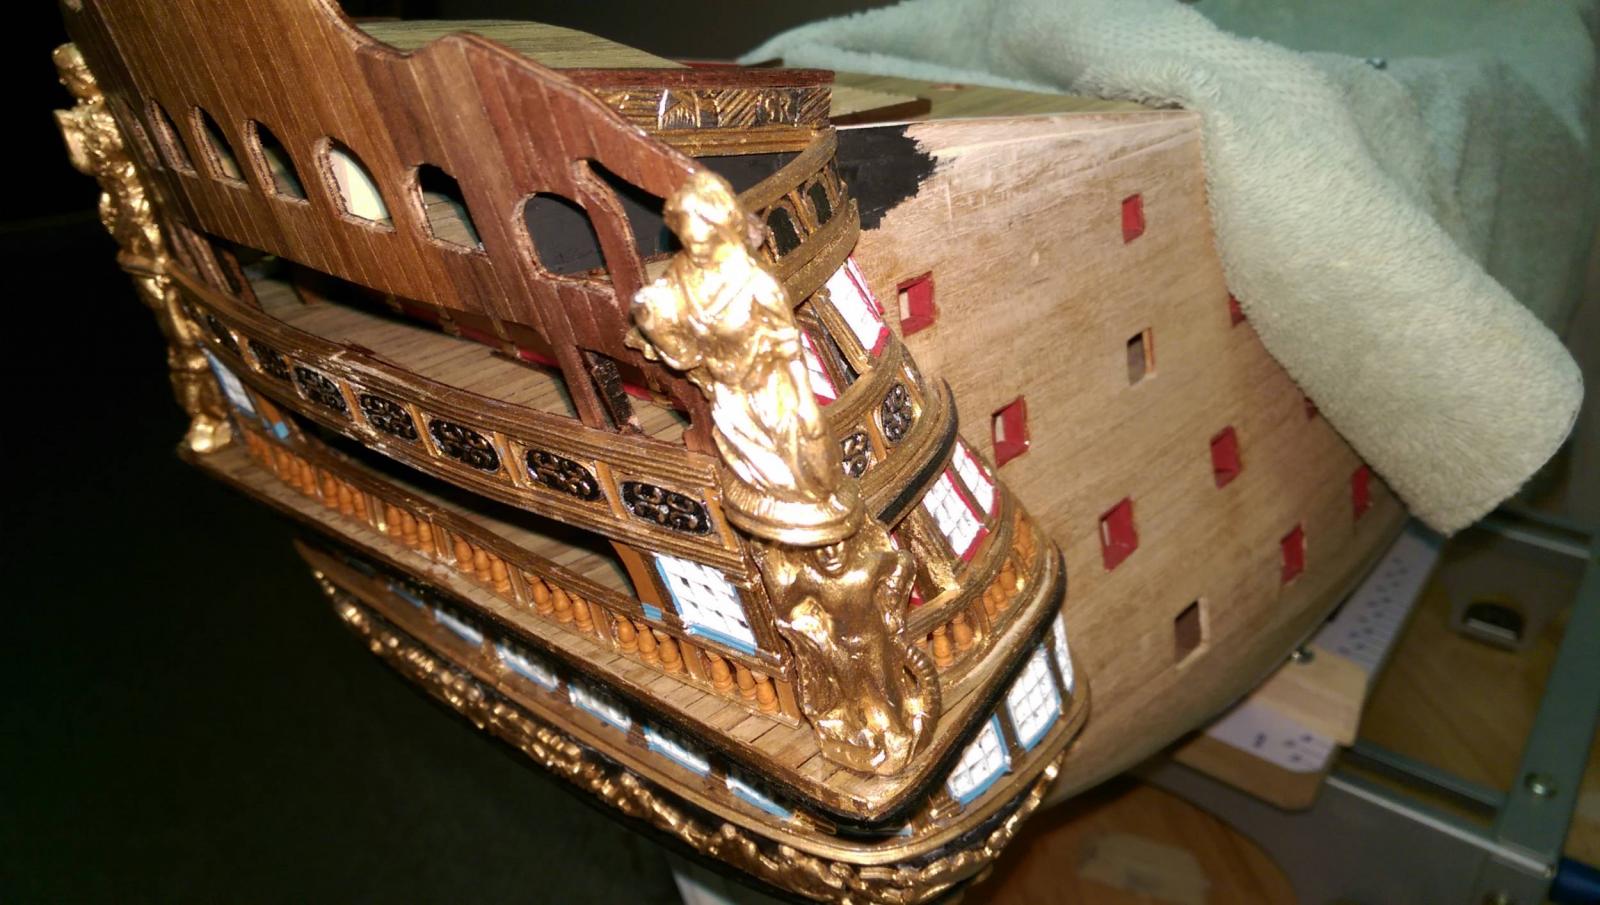
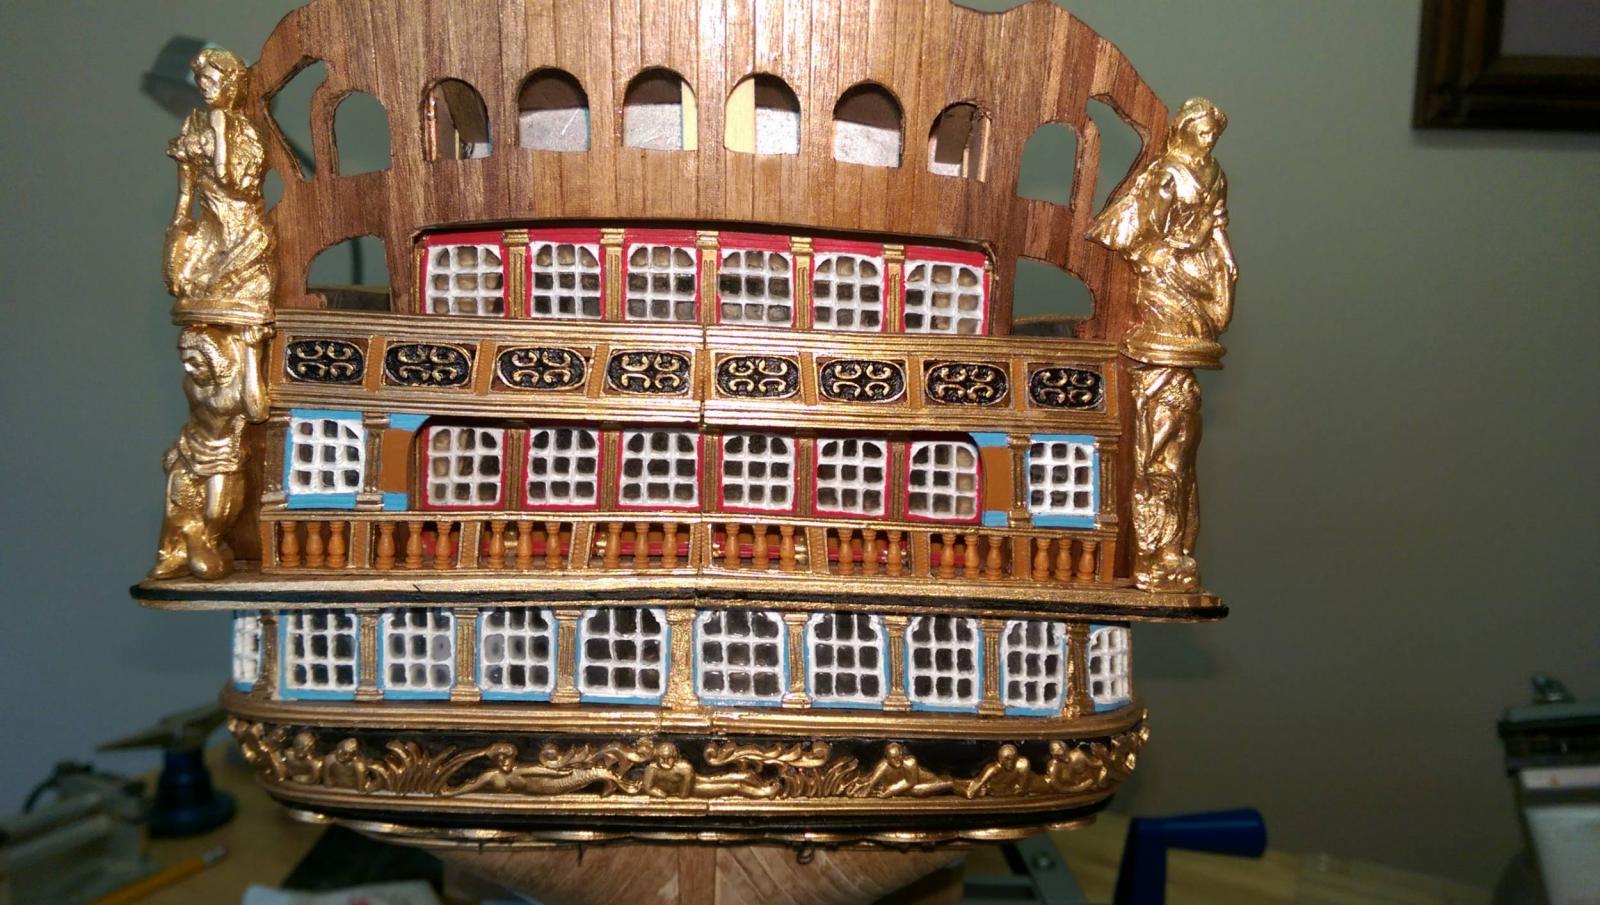
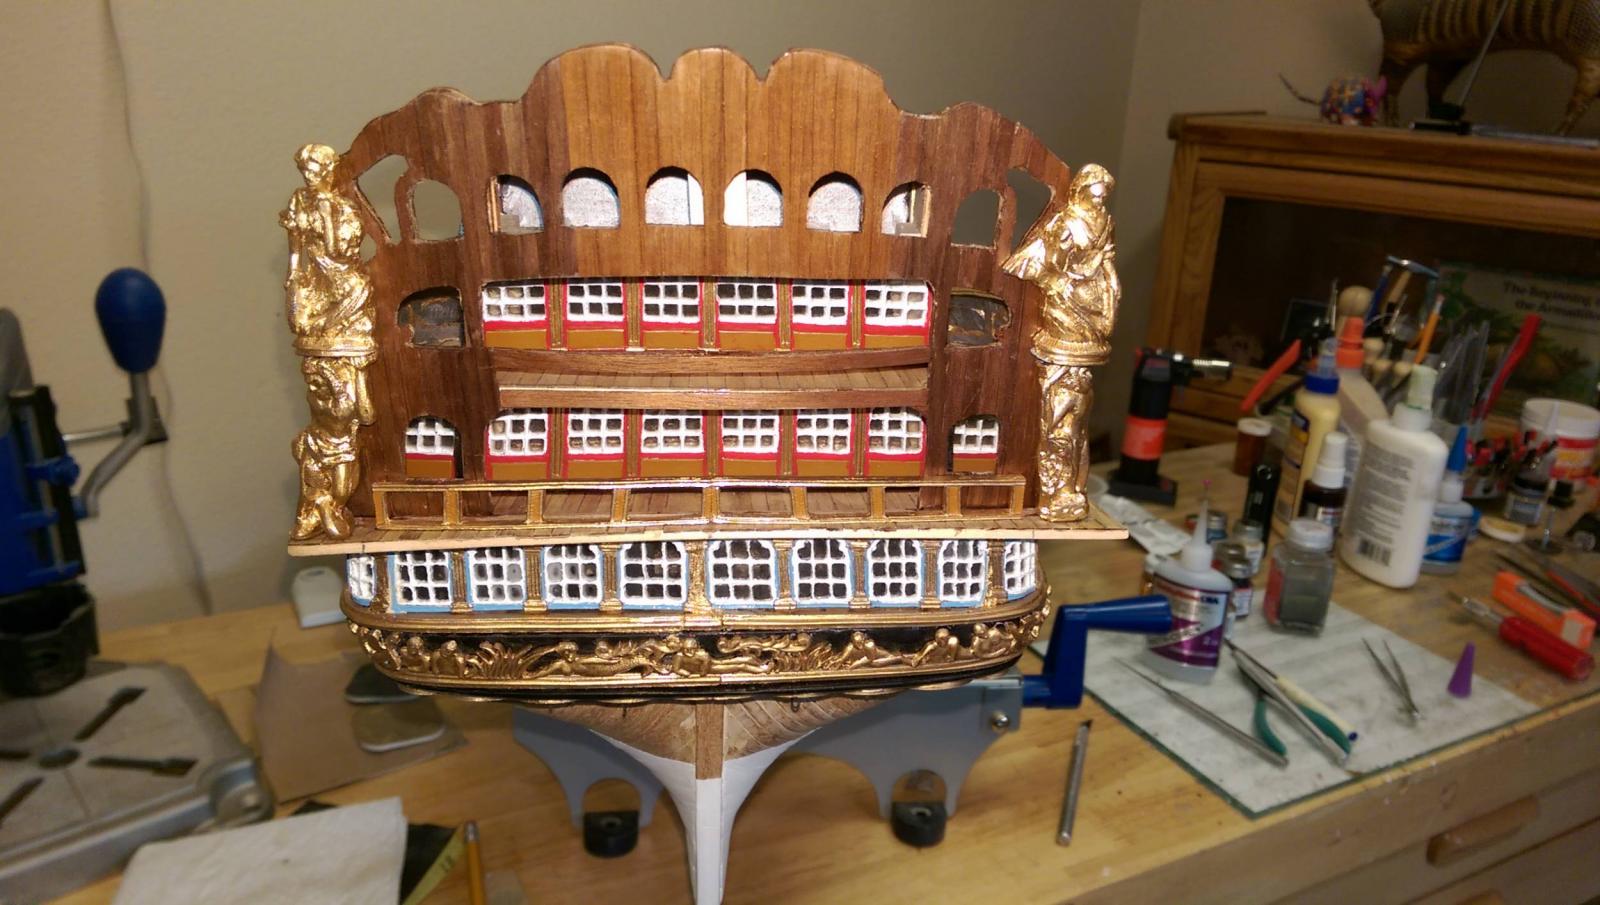
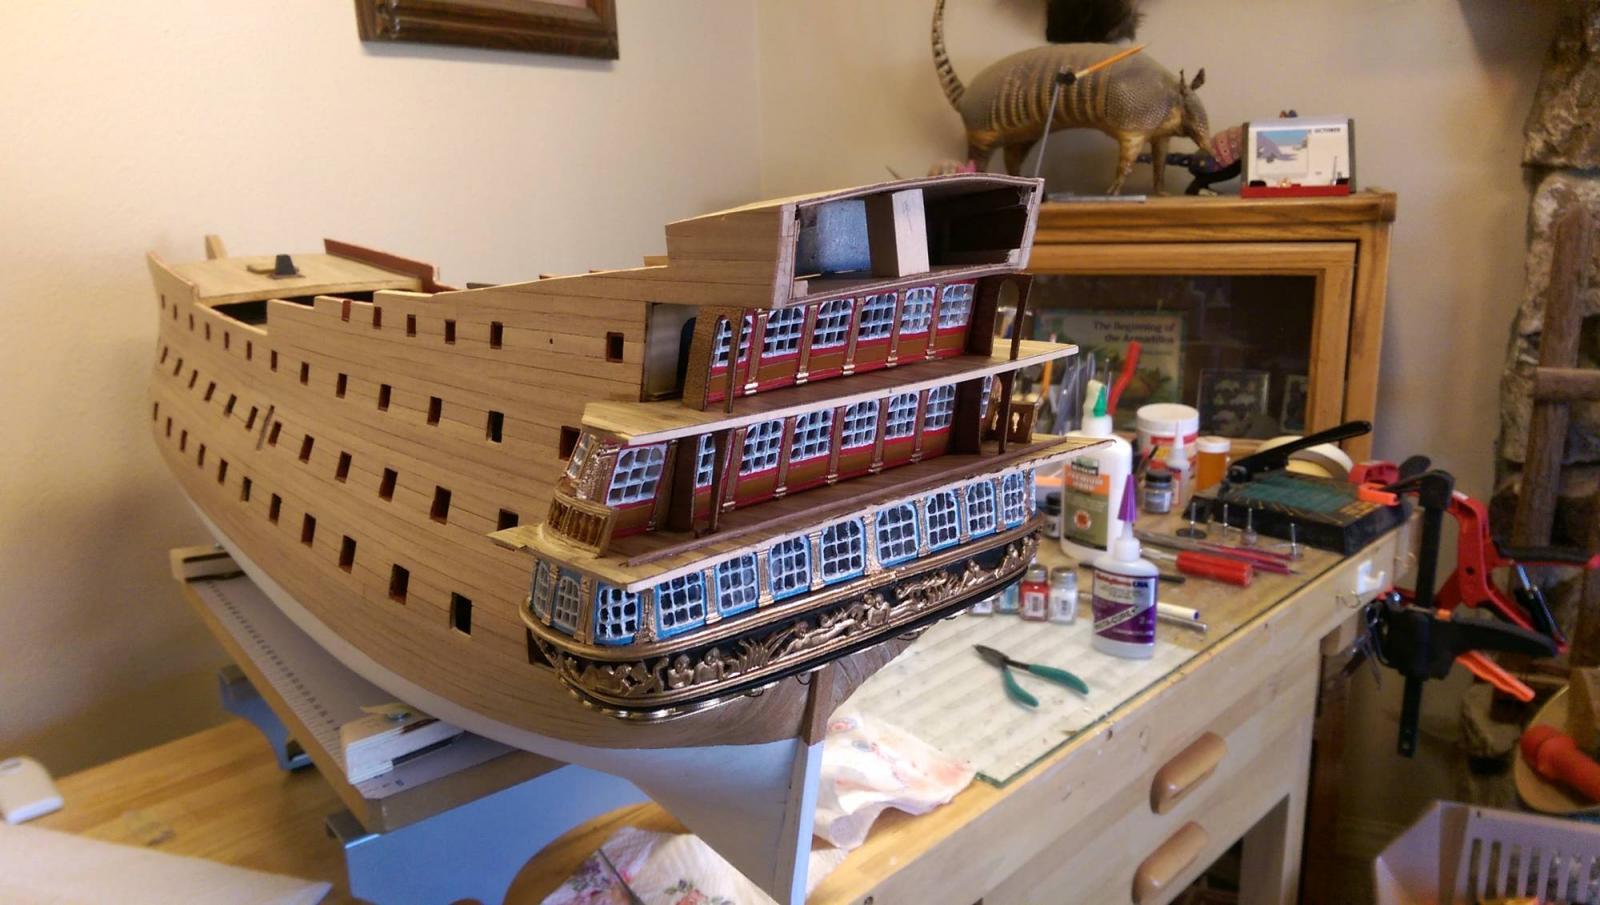
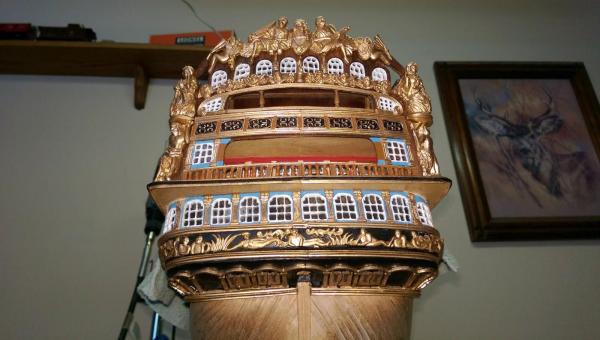
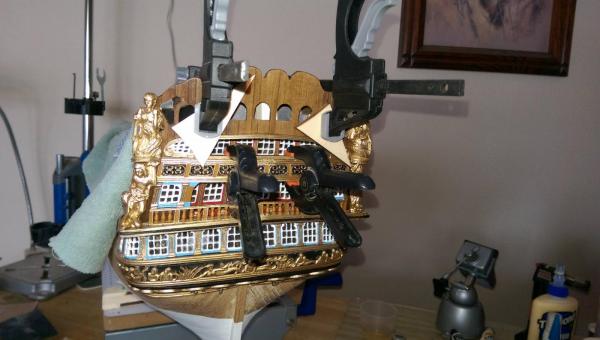
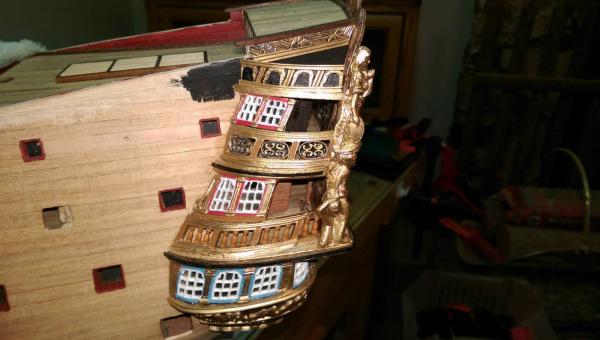
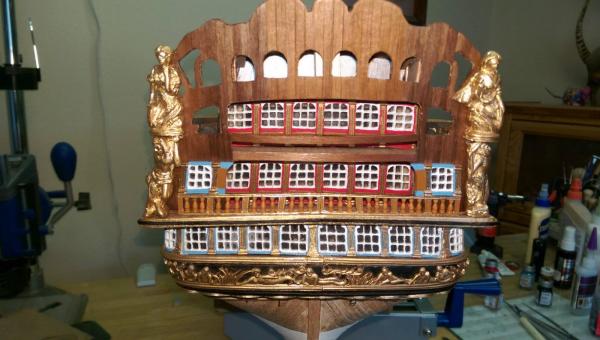
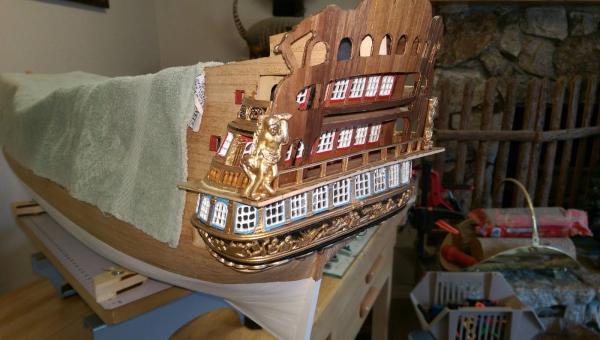
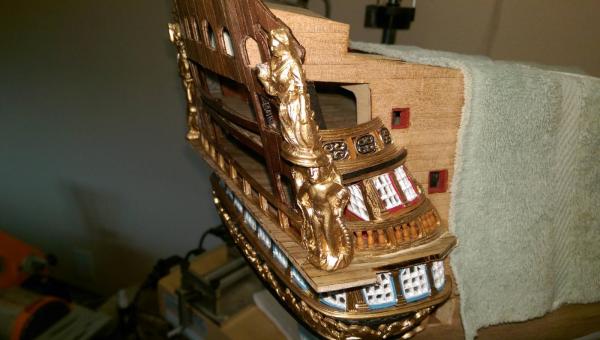
Still working on the transom and stern galleries. There are so many parts that make up this section of the ship. Since there are no instructions on the assembly, the order in which to place parts requires much study. Many of the parts require other parts to be installed first in order to get a proper location and fit. I would have thought that the large decorative statues would be somewhere near the end, but in order to place railings and windows, they need to be placed early. Here, the four statues are placed and the balcony railing is placed. Vince P.


- 593 replies
-
- 9
-
-
- royal william
- euromodels
- (and 1 more)
-
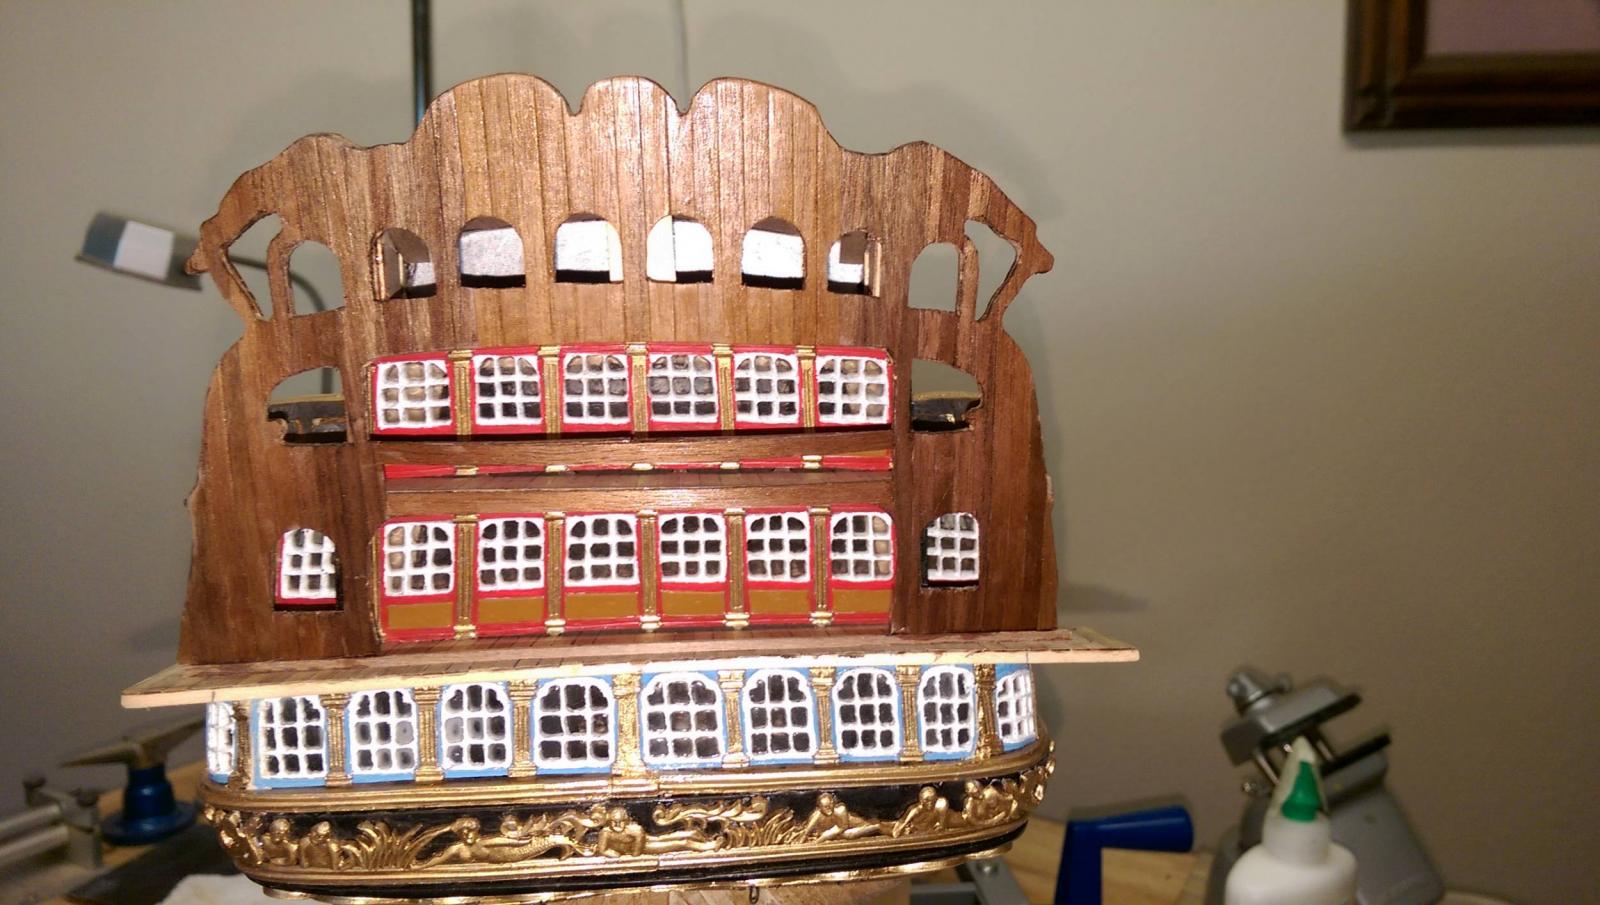
The transom has been planked on both sides because some of it in small spots will be seen in between the metal ornamentation to come. A whole lot of cutting and carving was needed to cut the planks around all of the odd shaped holes. This is why the transom and galleries are taking so long to complete. I have probably 100 hours in this part already and I am not half done. Next up is to start adding the decorative railings and many more windows. Vince P.

- 593 replies
-
- 7
-
-
- royal william
- euromodels
- (and 1 more)
-
Sorry Greg, I have been away the last 2 weeks on my annual hunting trip. No communications or ships. Just got back today and saw your message. I will be posting again in the next day or two with new updates. Vince P.
- 593 replies
-
- 1
-
-
- royal william
- euromodels
- (and 1 more)
-
I decided to paint the raised srip of the trim black. It looks better to me. Vince P.

- 593 replies
-
- 8
-
-
- royal william
- euromodels
- (and 1 more)
-
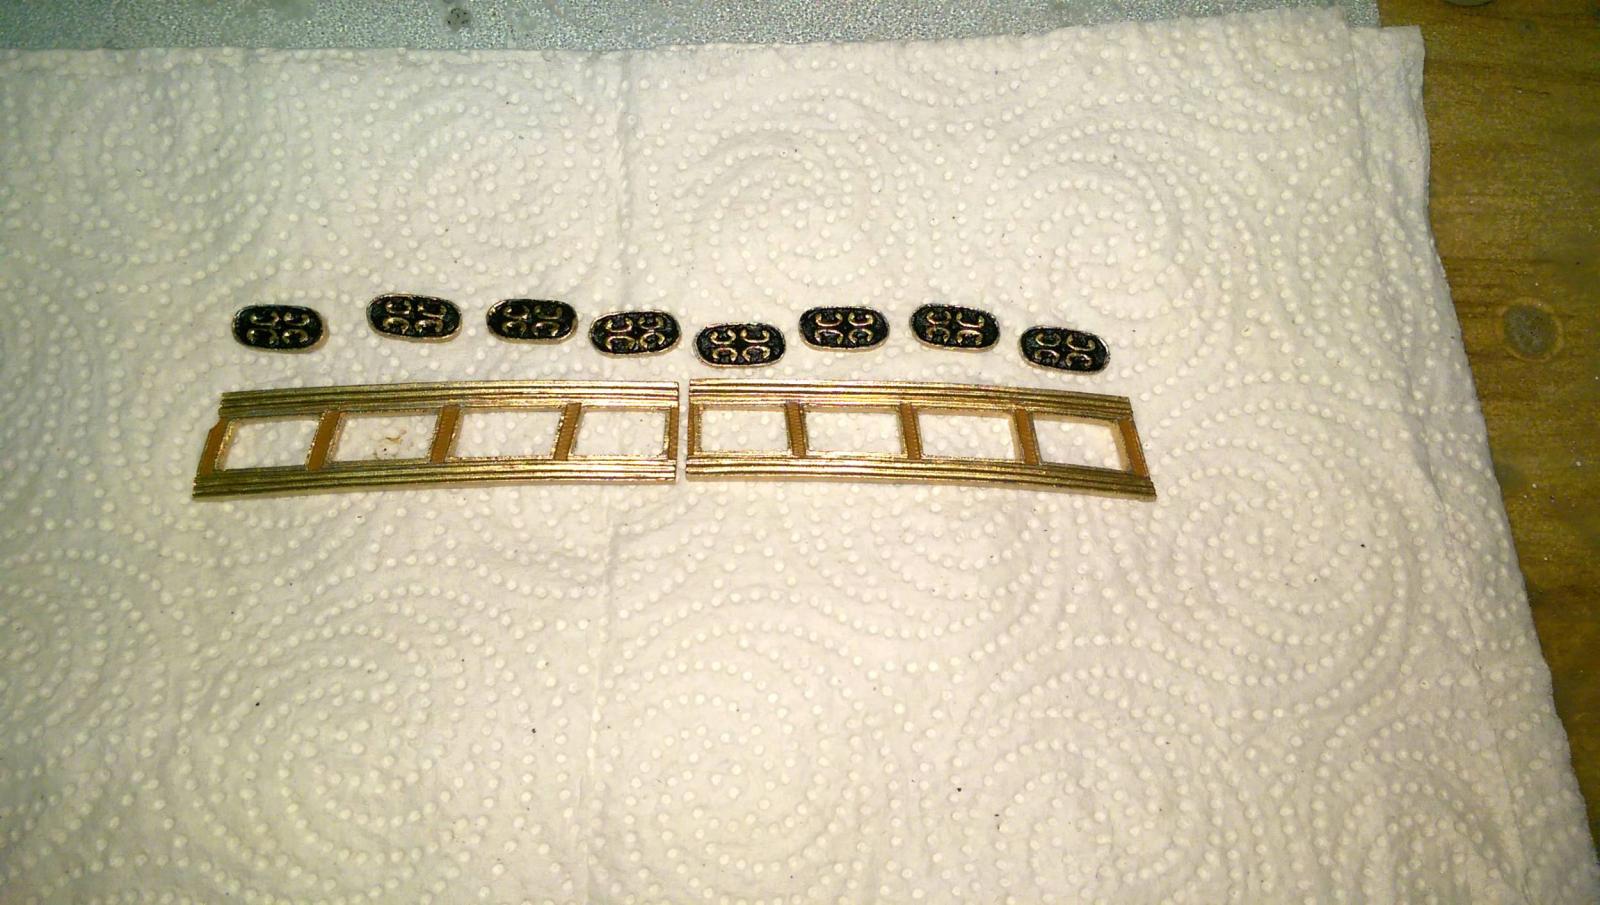
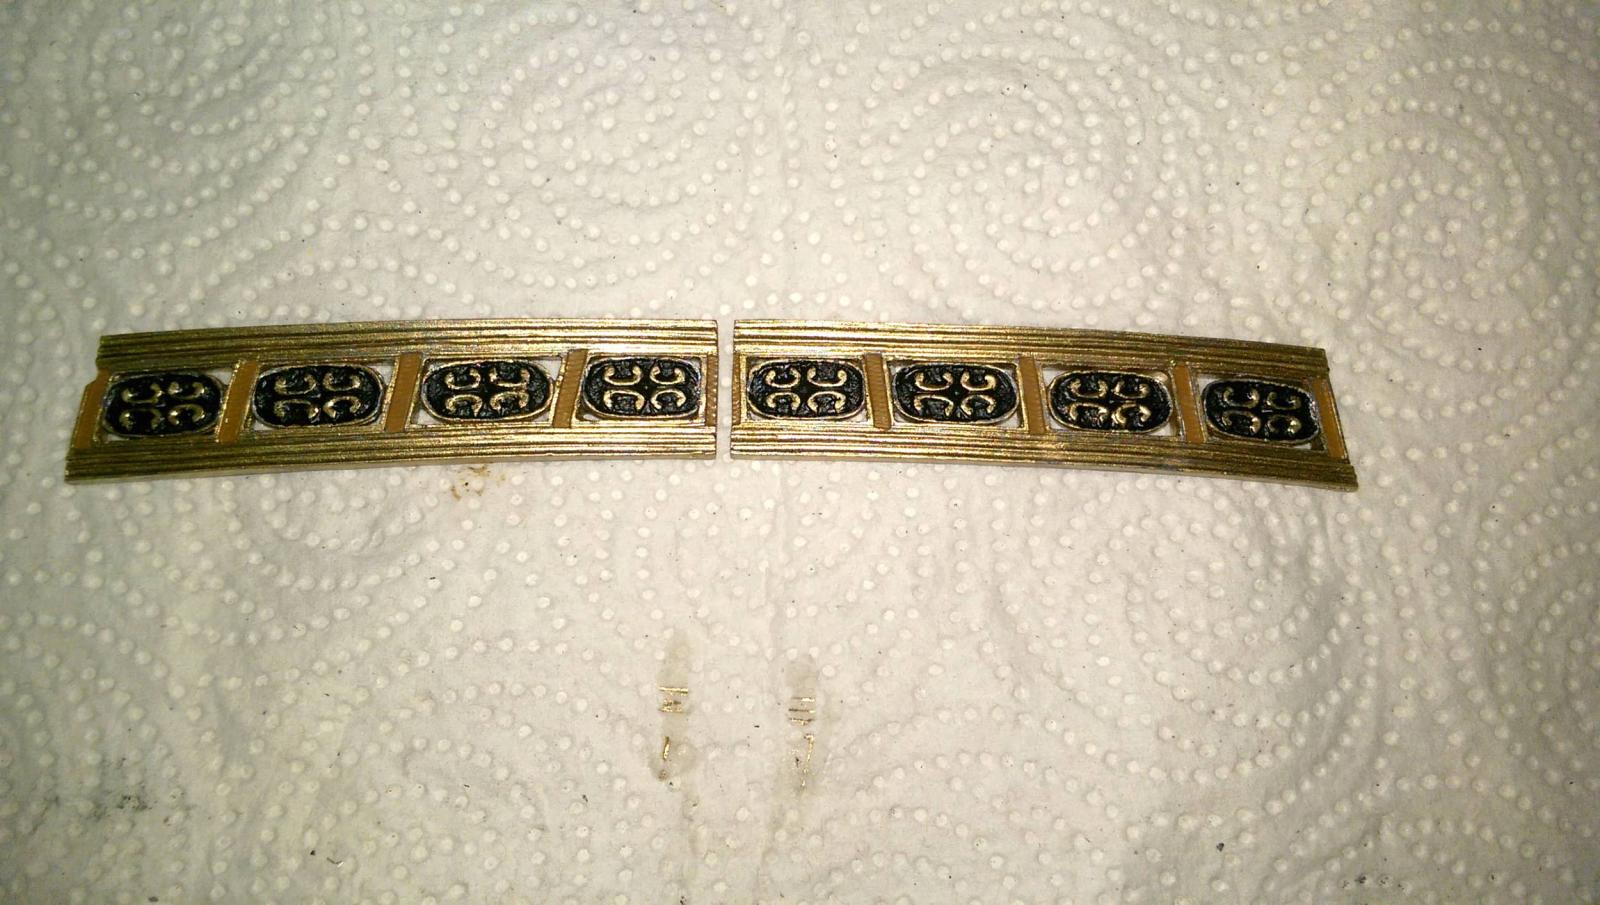
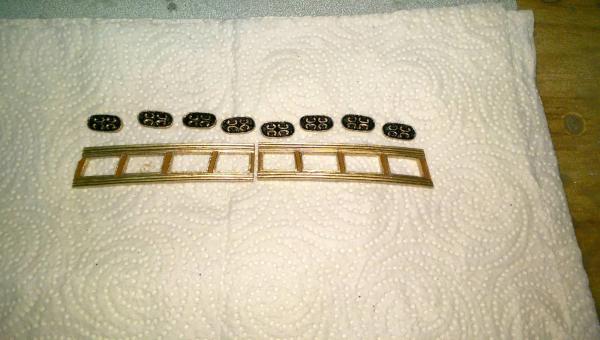
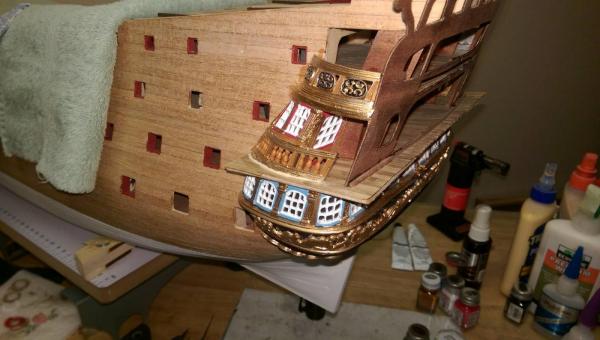
The railing with the decorative ovals has bee placed. The quaretdeck has been trimmed to follow the curve of the galleries. The kit comes with metal trim for the lower gallery decks but not for the uppers. Pieces of 4x1mm and 2x1mm are bent and glued together to make the trim, and then painted gold. Vince P.


- 593 replies
-
- 4
-
-
- royal william
- euromodels
- (and 1 more)
-
The gallery quarter deck railing. As the galleries go up, the bends needed in the metal pieces get more severe and complicated. Using a torch really helps but then having to use plyers to make the twists creates another problem. The metal gets so soft that the plier jaws marks up the castings. A couple of layers of tape wrapped around the jaws does help. Vince P.
- 593 replies
-
- 3
-
-
- royal william
- euromodels
- (and 1 more)
-
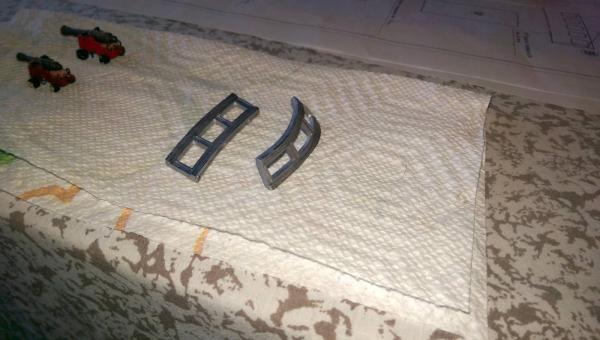
The transom piece has been placed. The curve I steamed into it previously, really made a difference. It wrapped around the curvature on the ends of the decks with no problems. It was easy to glue into place. I used CA glue to tack it on and some instant bonder to keep the ends firmly against the edge of the decks. I now have to plank the transom on both sides where it will be exposed under the metal decorations. I am getting on with this part of the build and still have a long way to go before the transom and stern galleries are completed. Very tedious work trying to get things to fit. Had to remove parts and redo them numerous times, but it is taking shape. I don't think any other part of this build will be as difficult as this section. Vince P.


- 593 replies
-
- 7
-
-
- royal william
- euromodels
- (and 1 more)
-
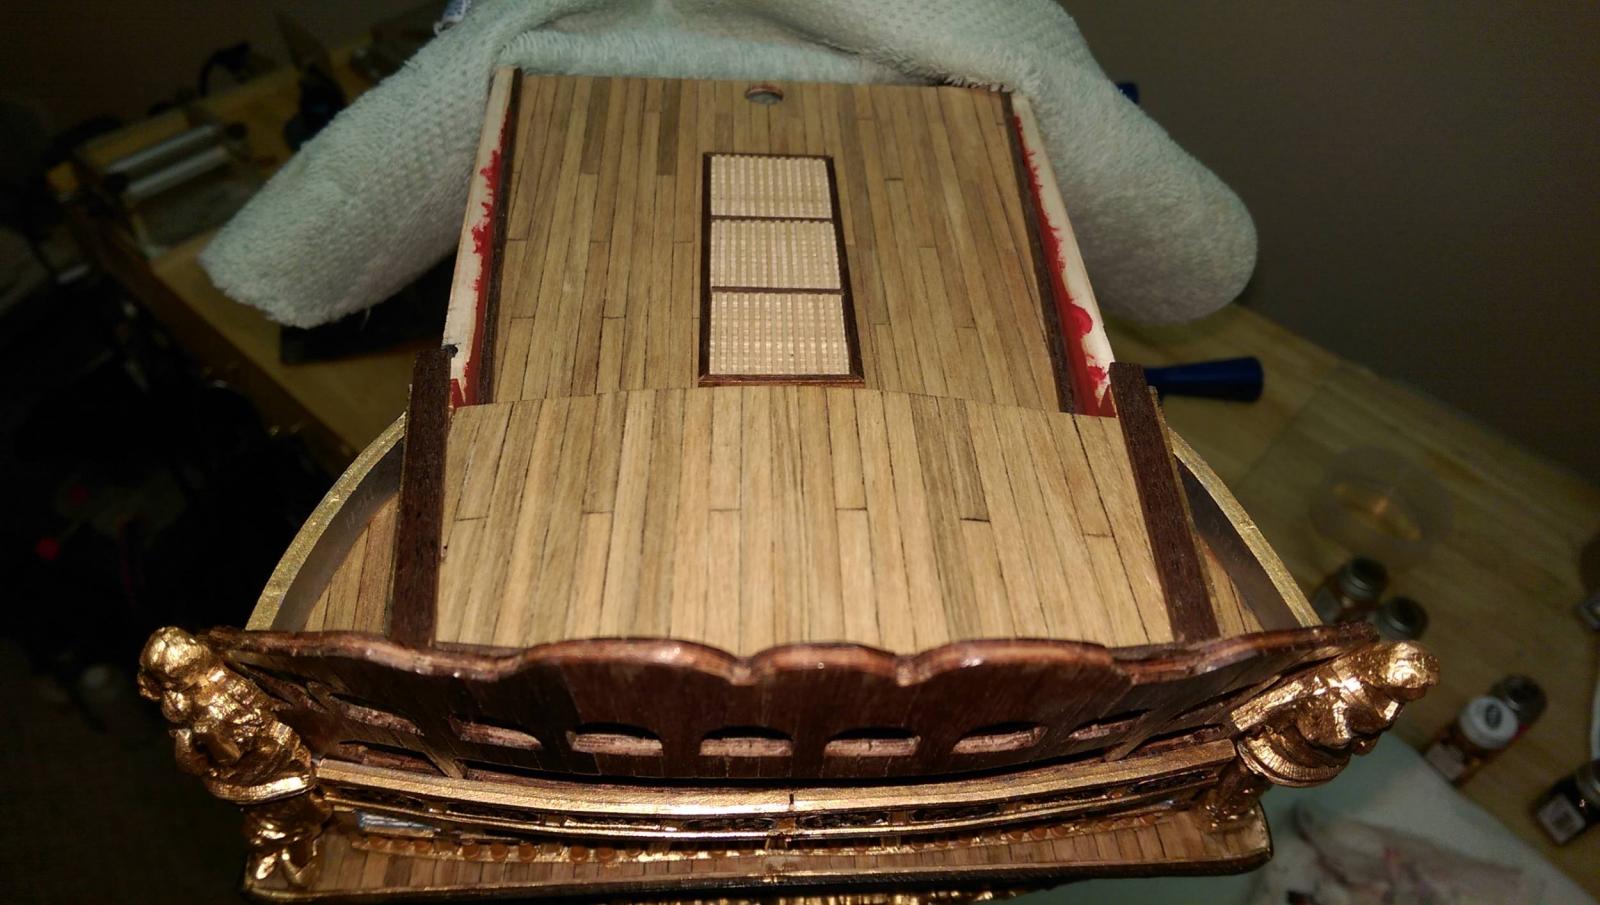
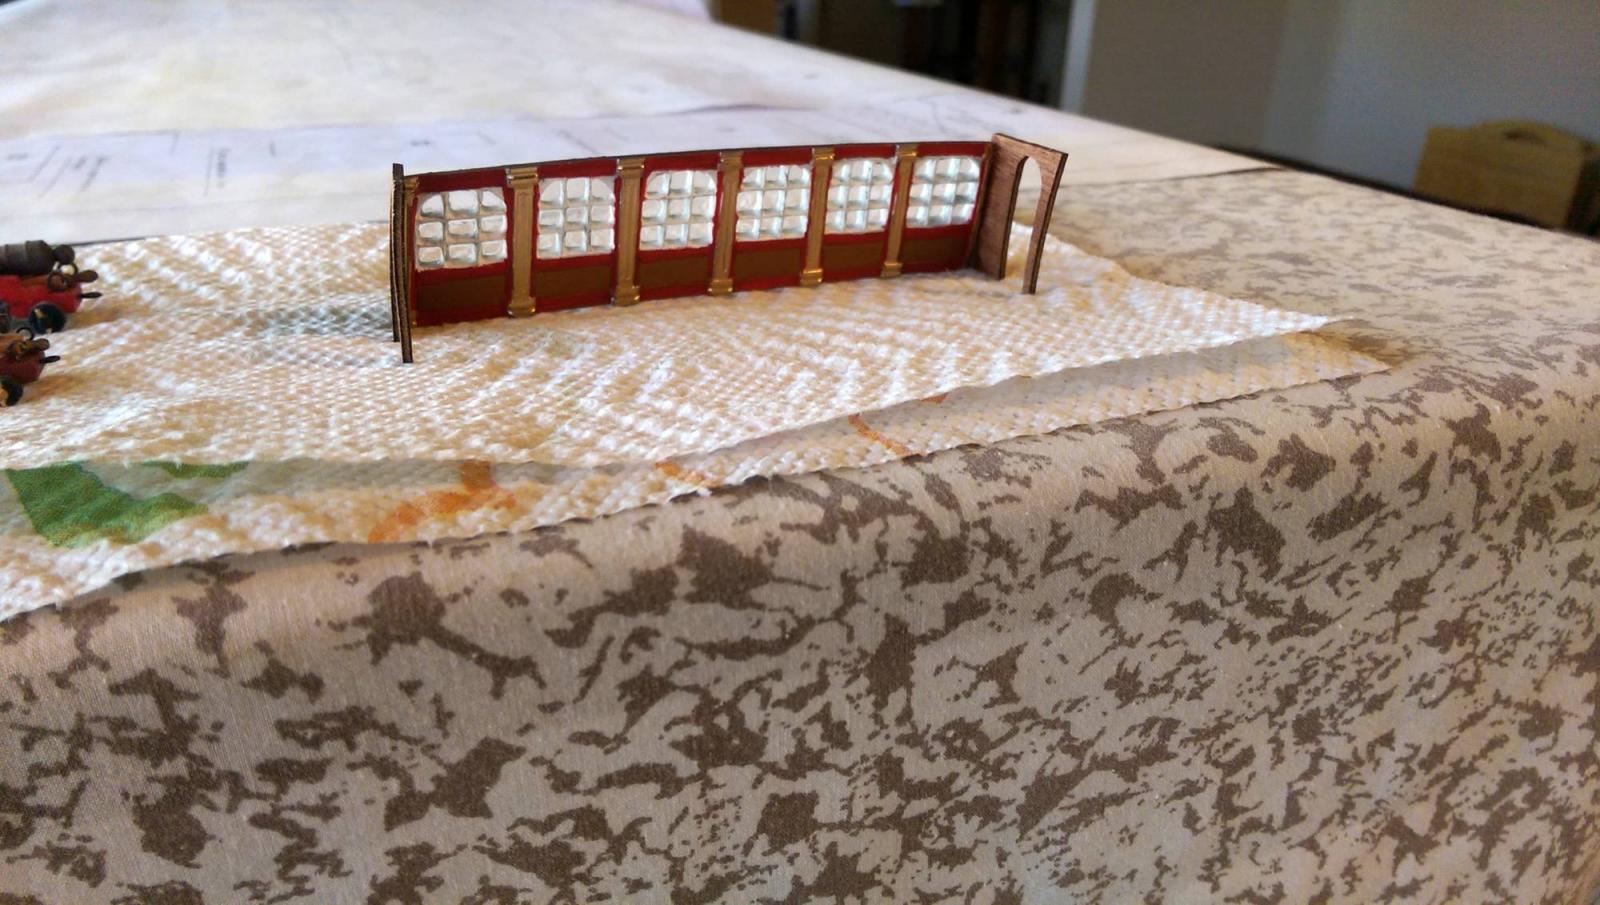
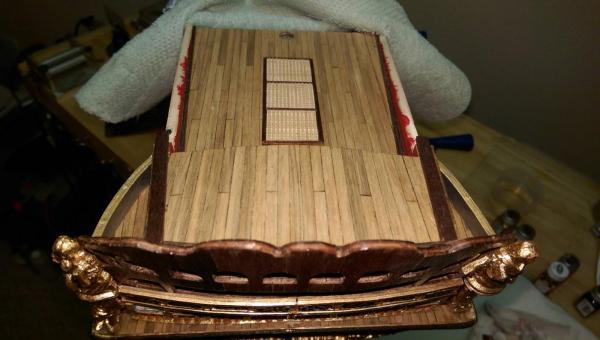
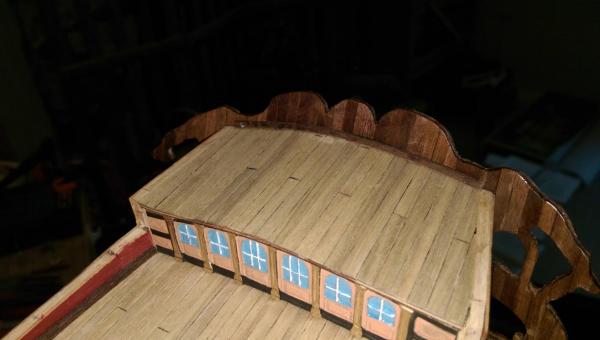
The quarterdeck windows have been constructed and placed on the deck. The next step is to place the transom itself. Vince P.


- 593 replies
-
- 5
-
-
- royal william
- euromodels
- (and 1 more)