pirozzi
-
Posts
843 -
Joined
-
Last visited
Content Type
Profiles
Forums
Gallery
Events
Everything posted by pirozzi
-
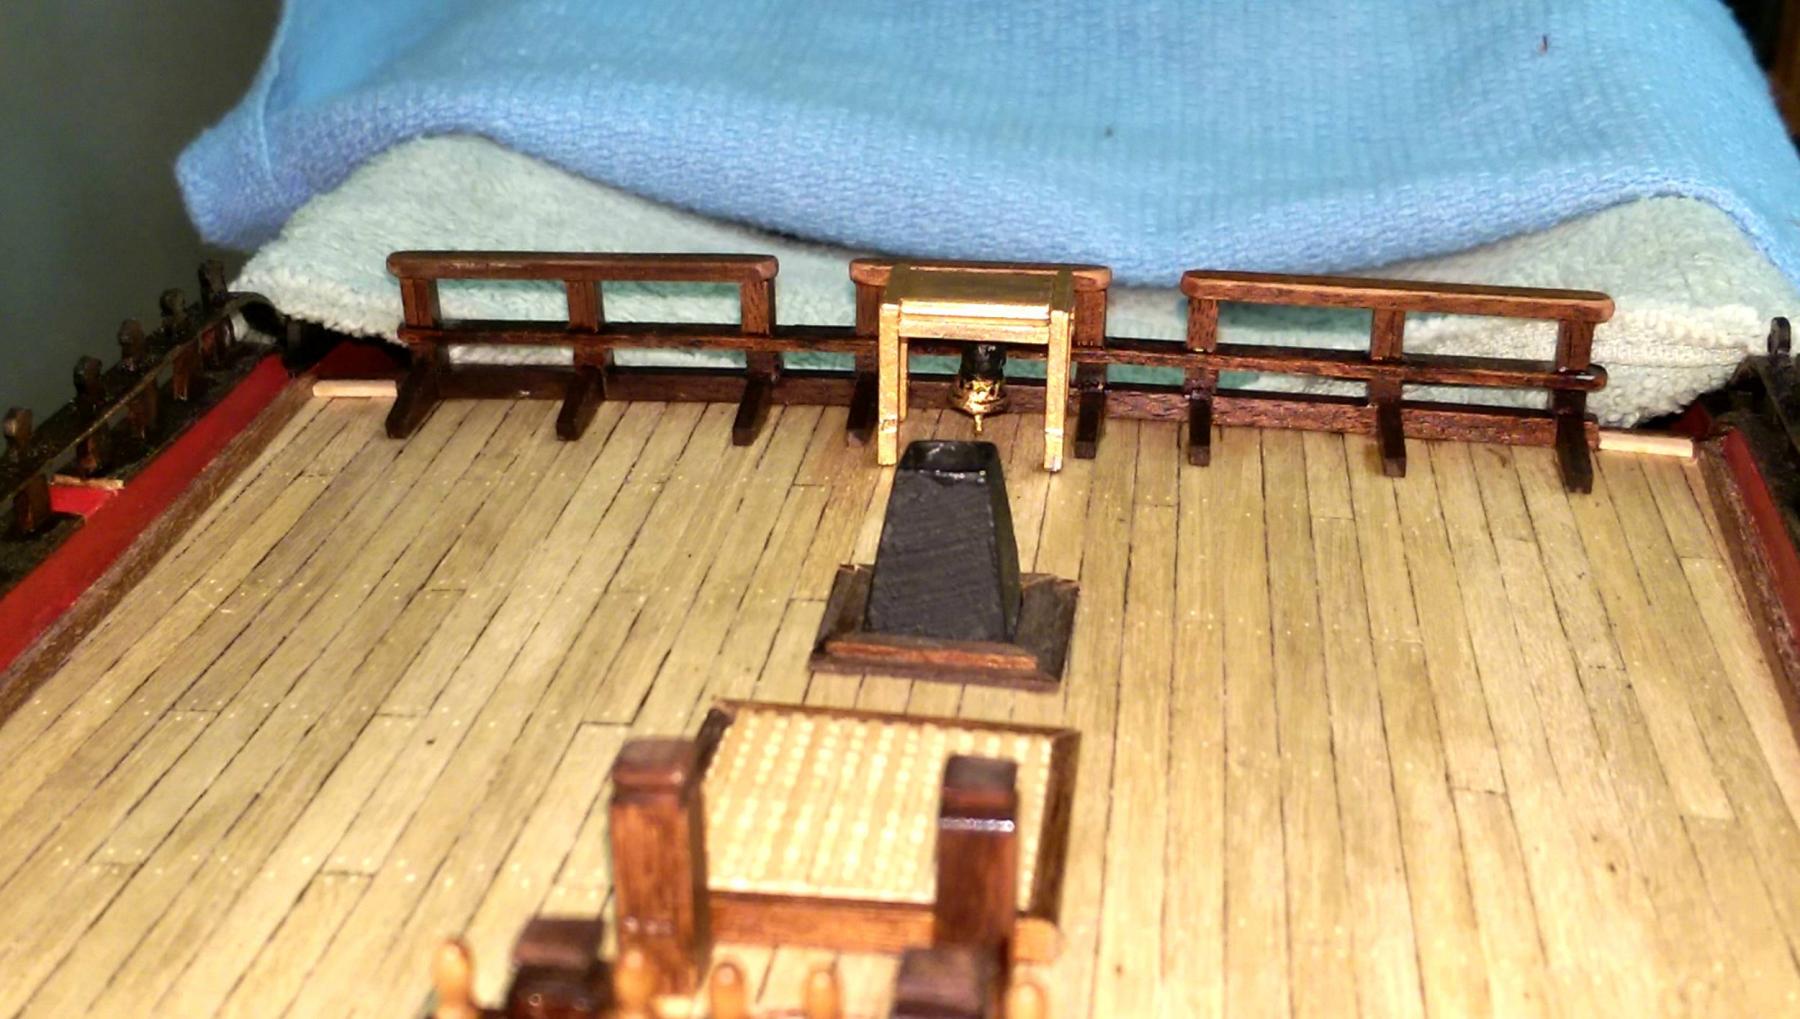
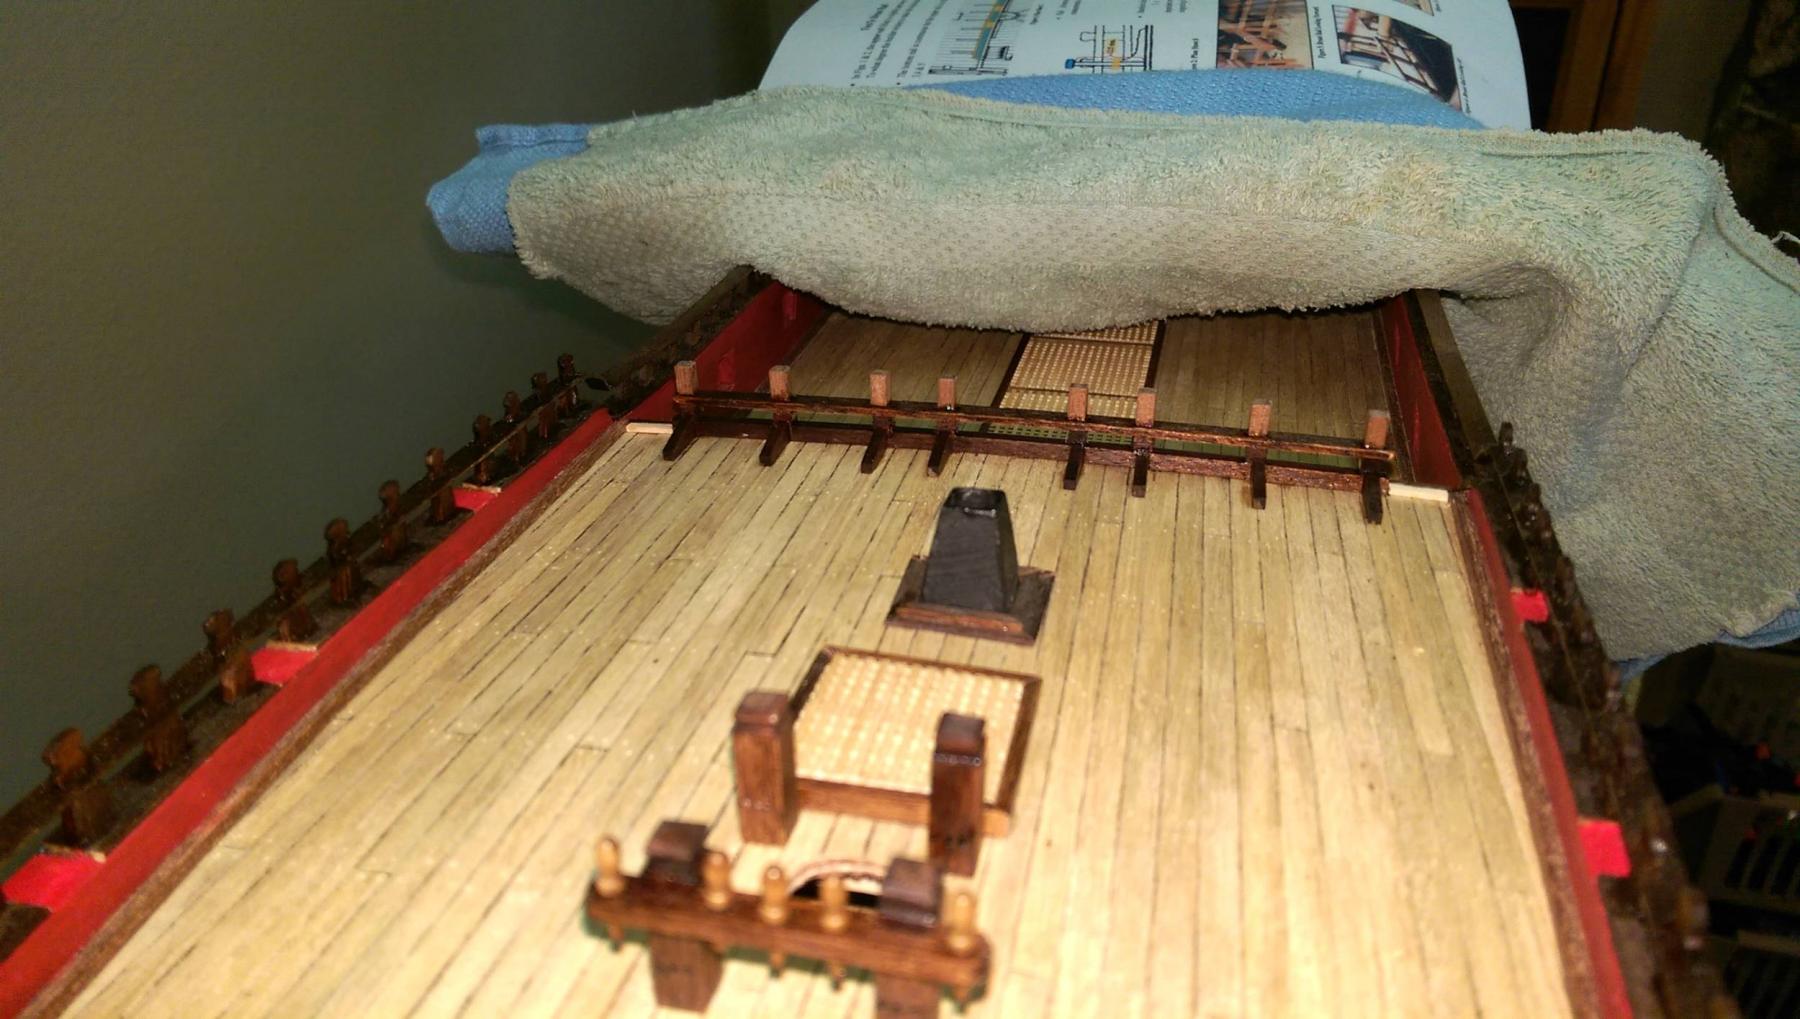
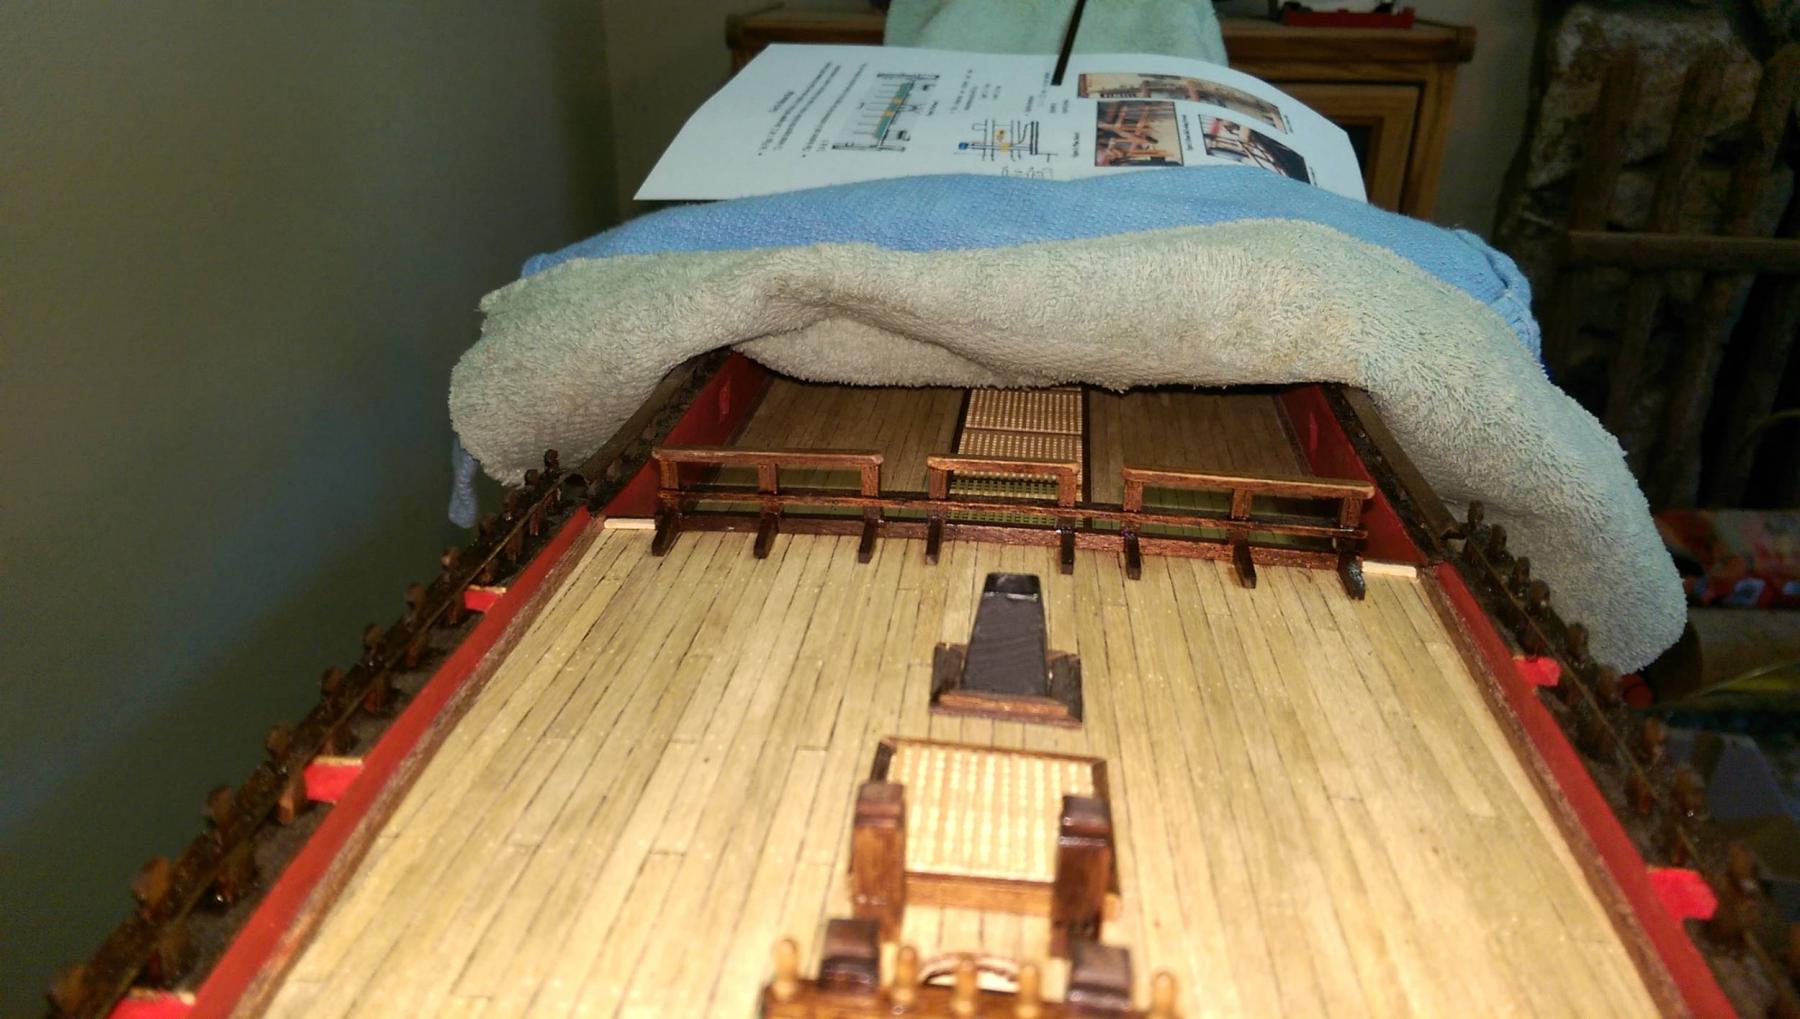
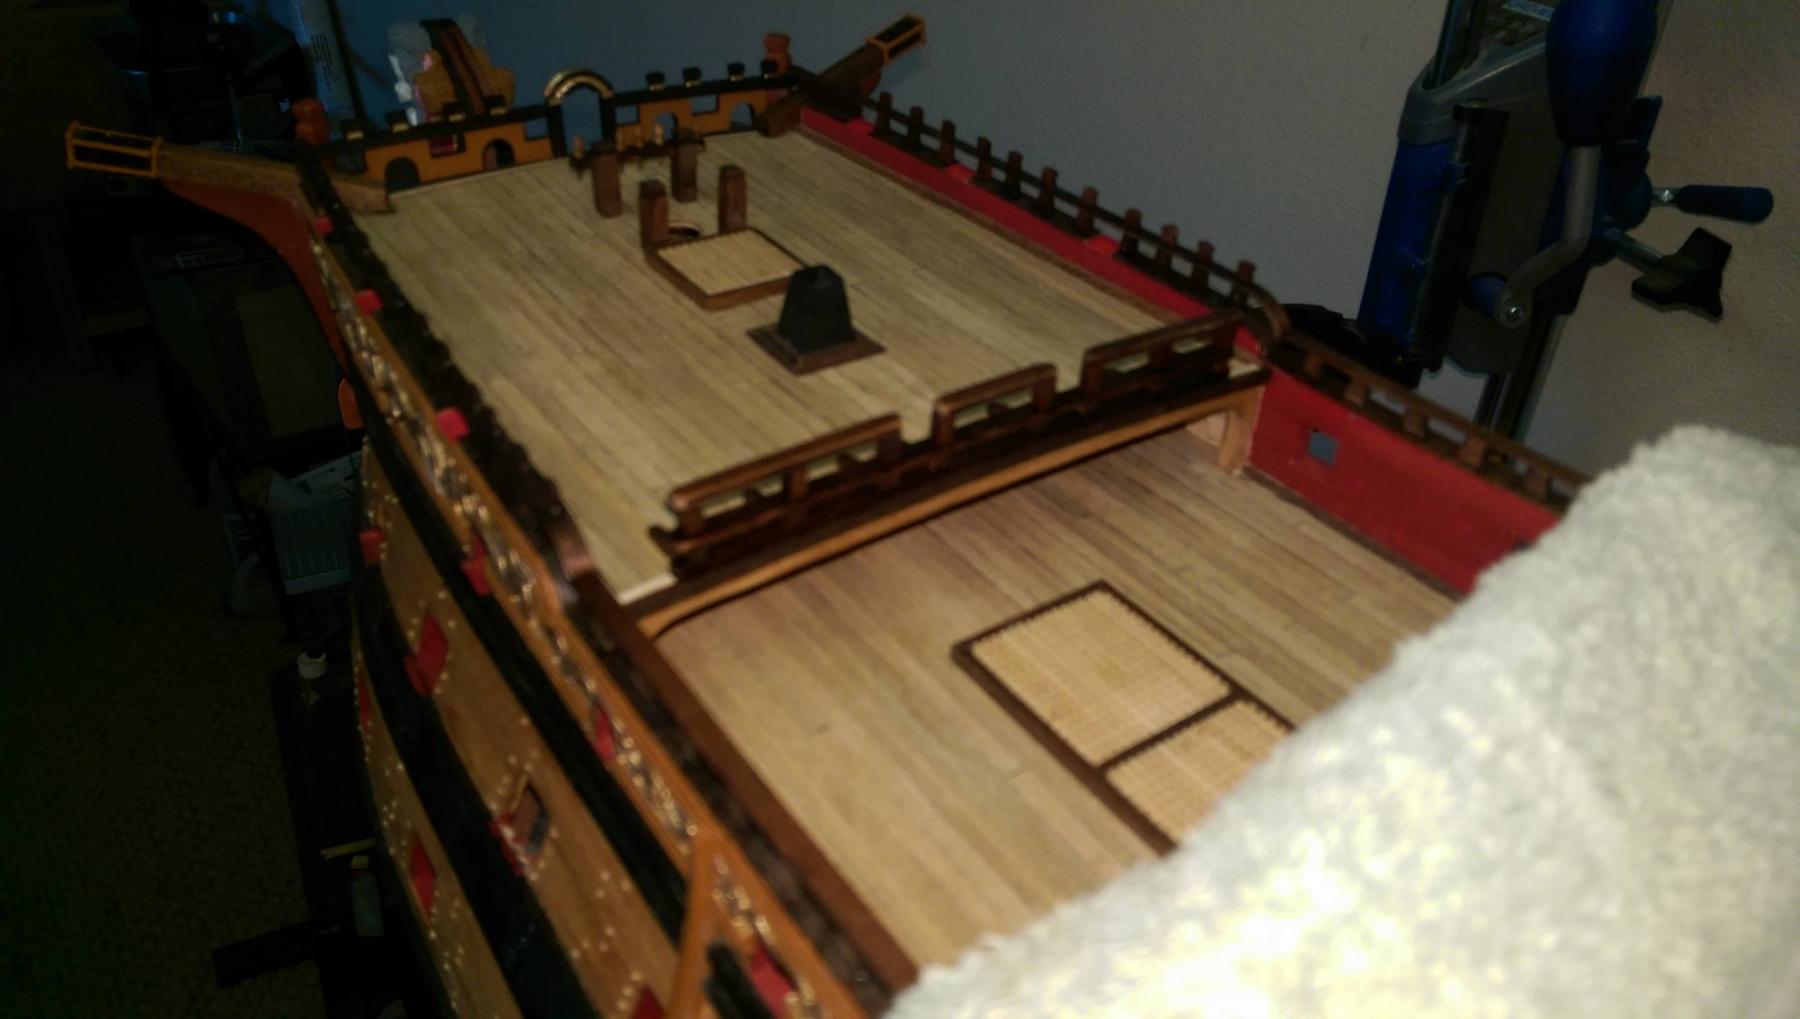
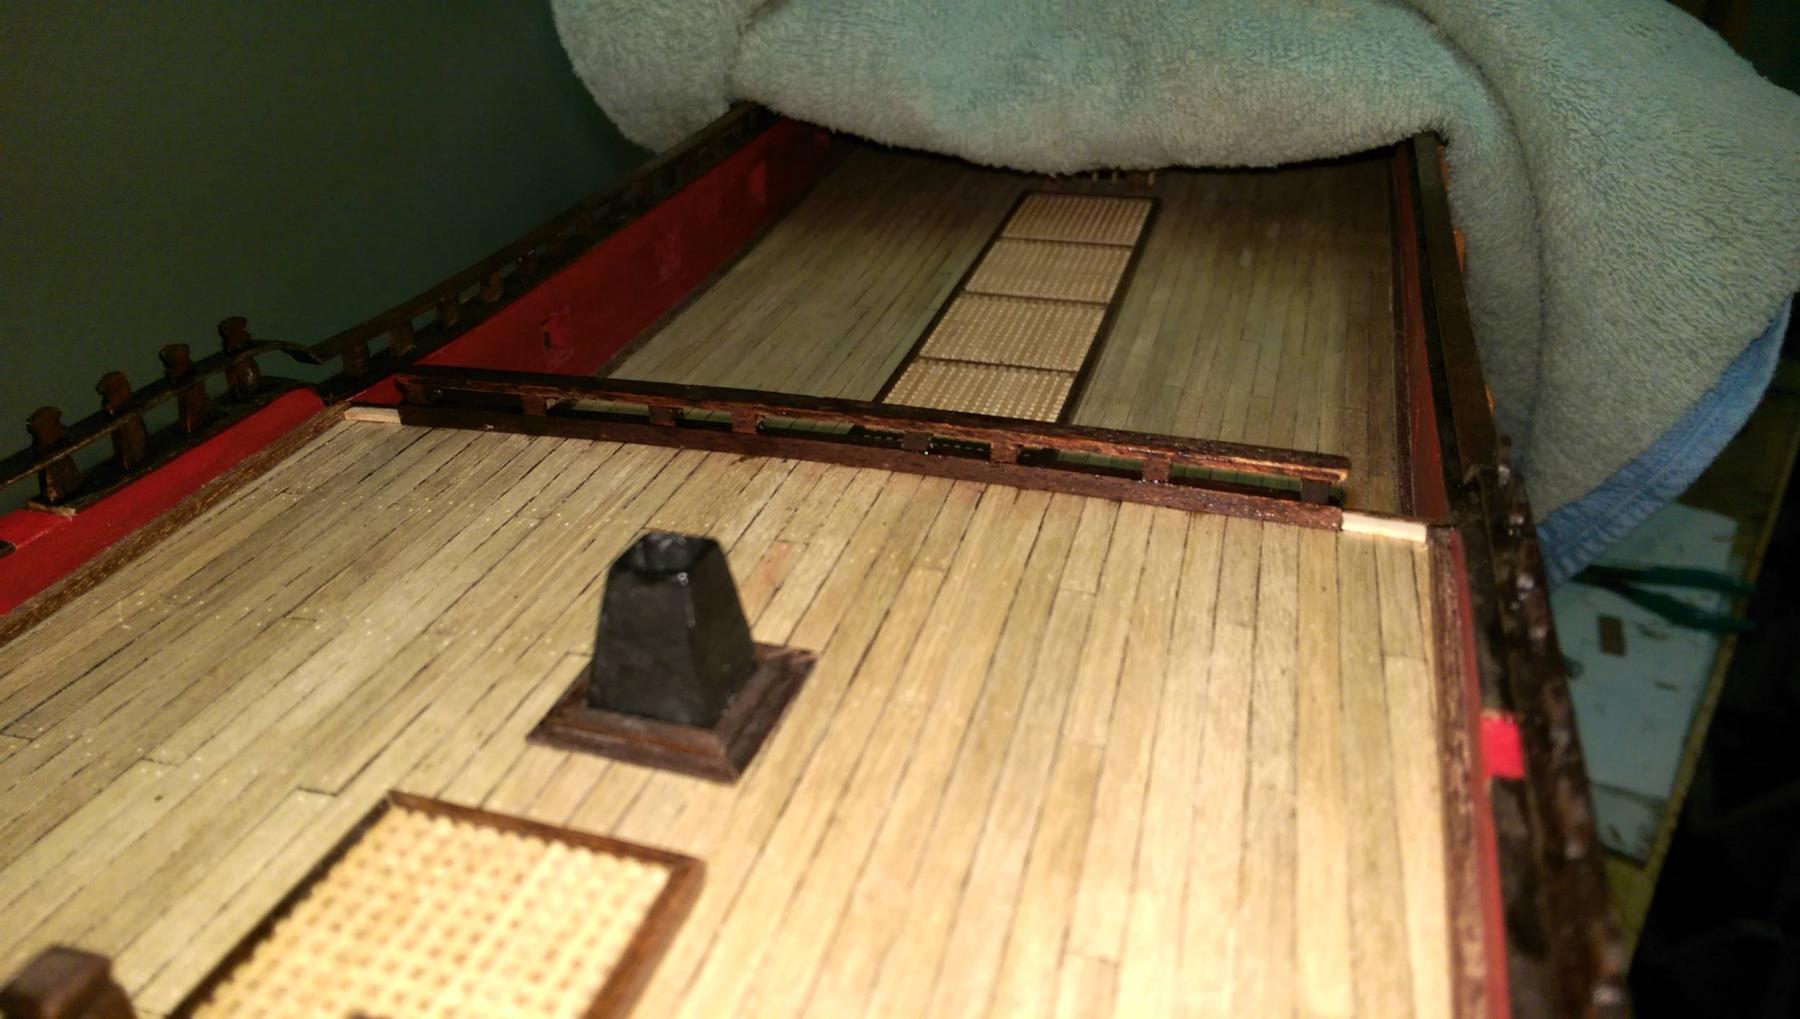
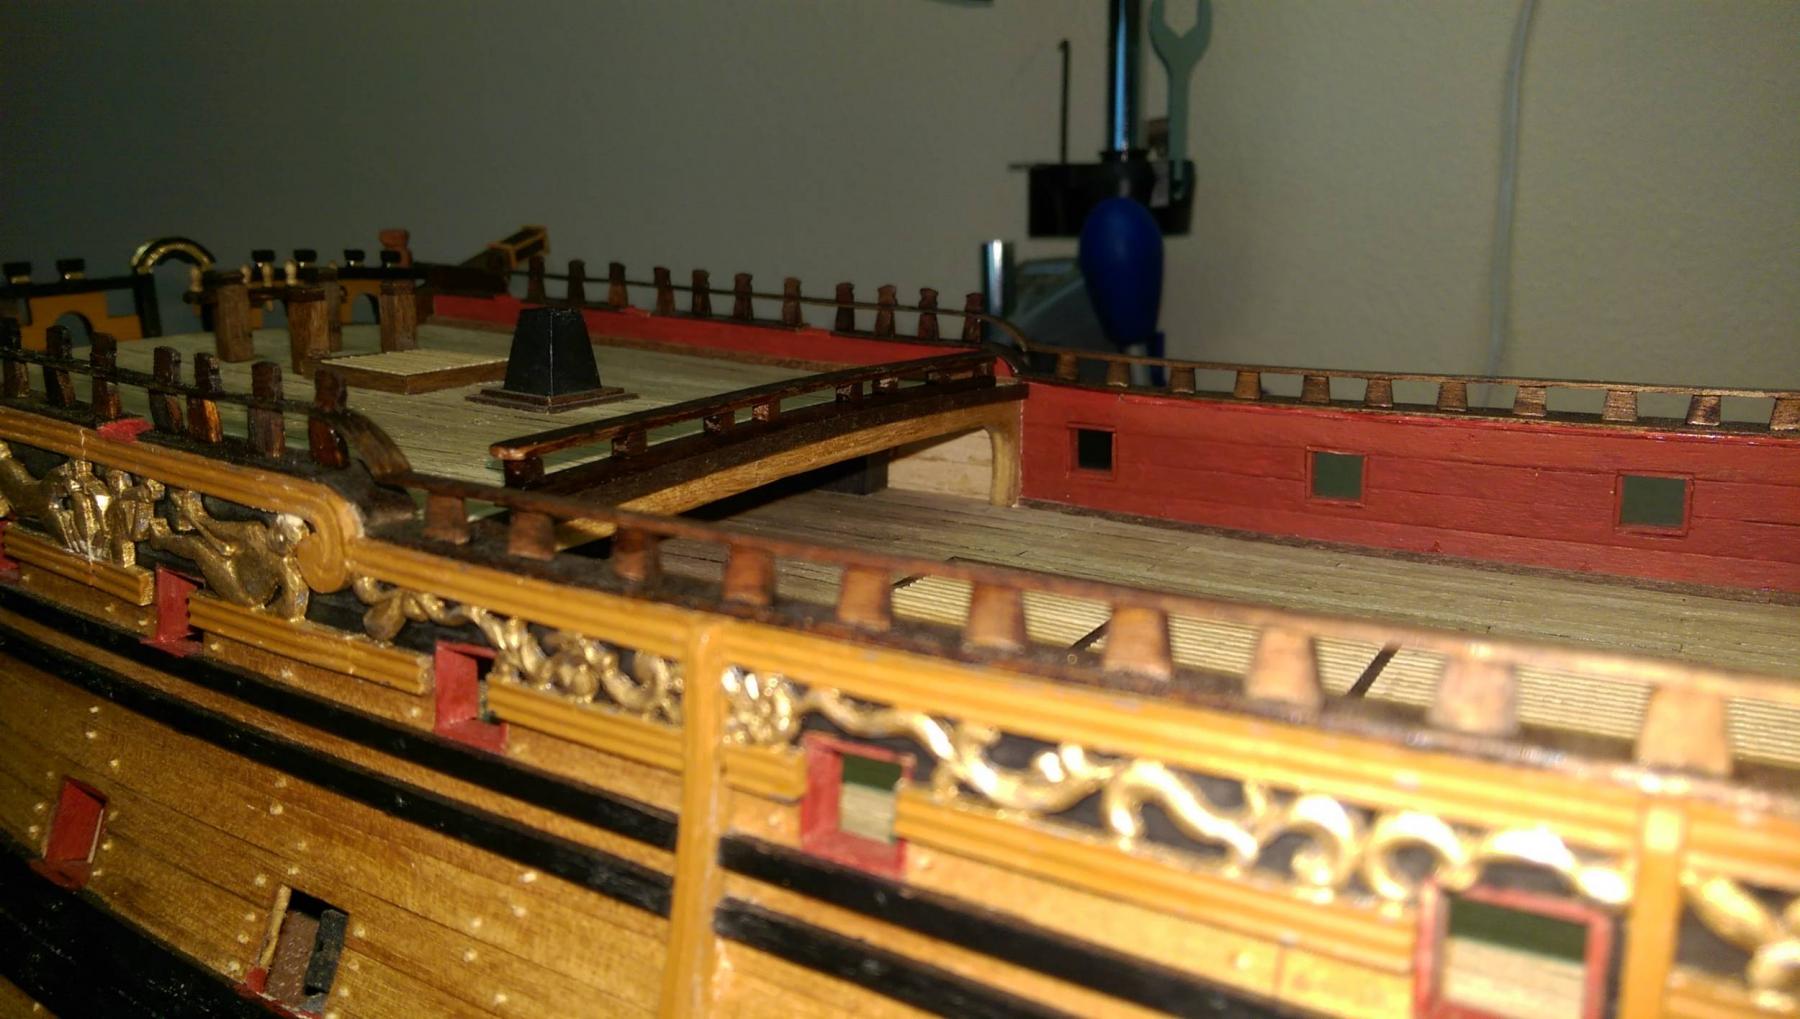
 The gangways between the quarterdeck and forecastle along with the ladders and stairs are completed. Next up is the maindeck anchor bits and quarterdeck breast rail. The breast rail will be a challenge with all of the curved railings. The railings could be made with a more squared off look and would still be fine, but I am going to attempt to include the decorative curves. Vince P.

- 593 replies
-
- 9
-

-
- royal william
- euromodels
- (and 1 more)
-
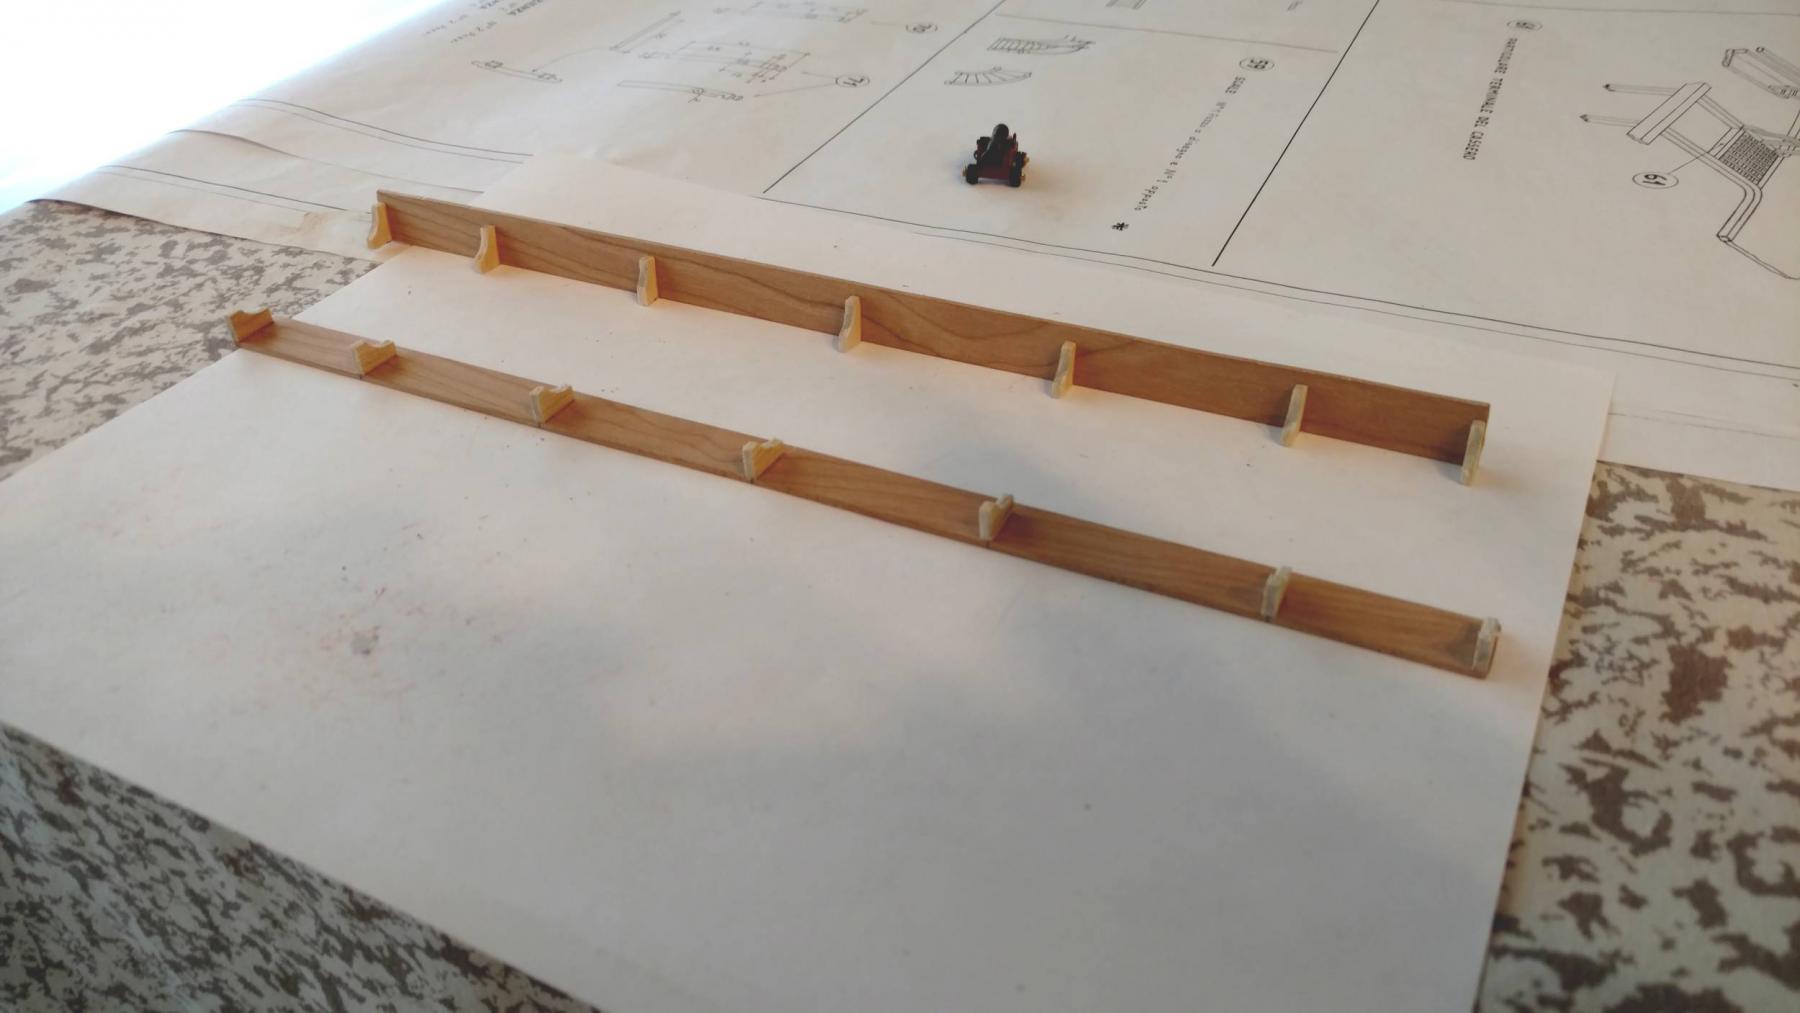
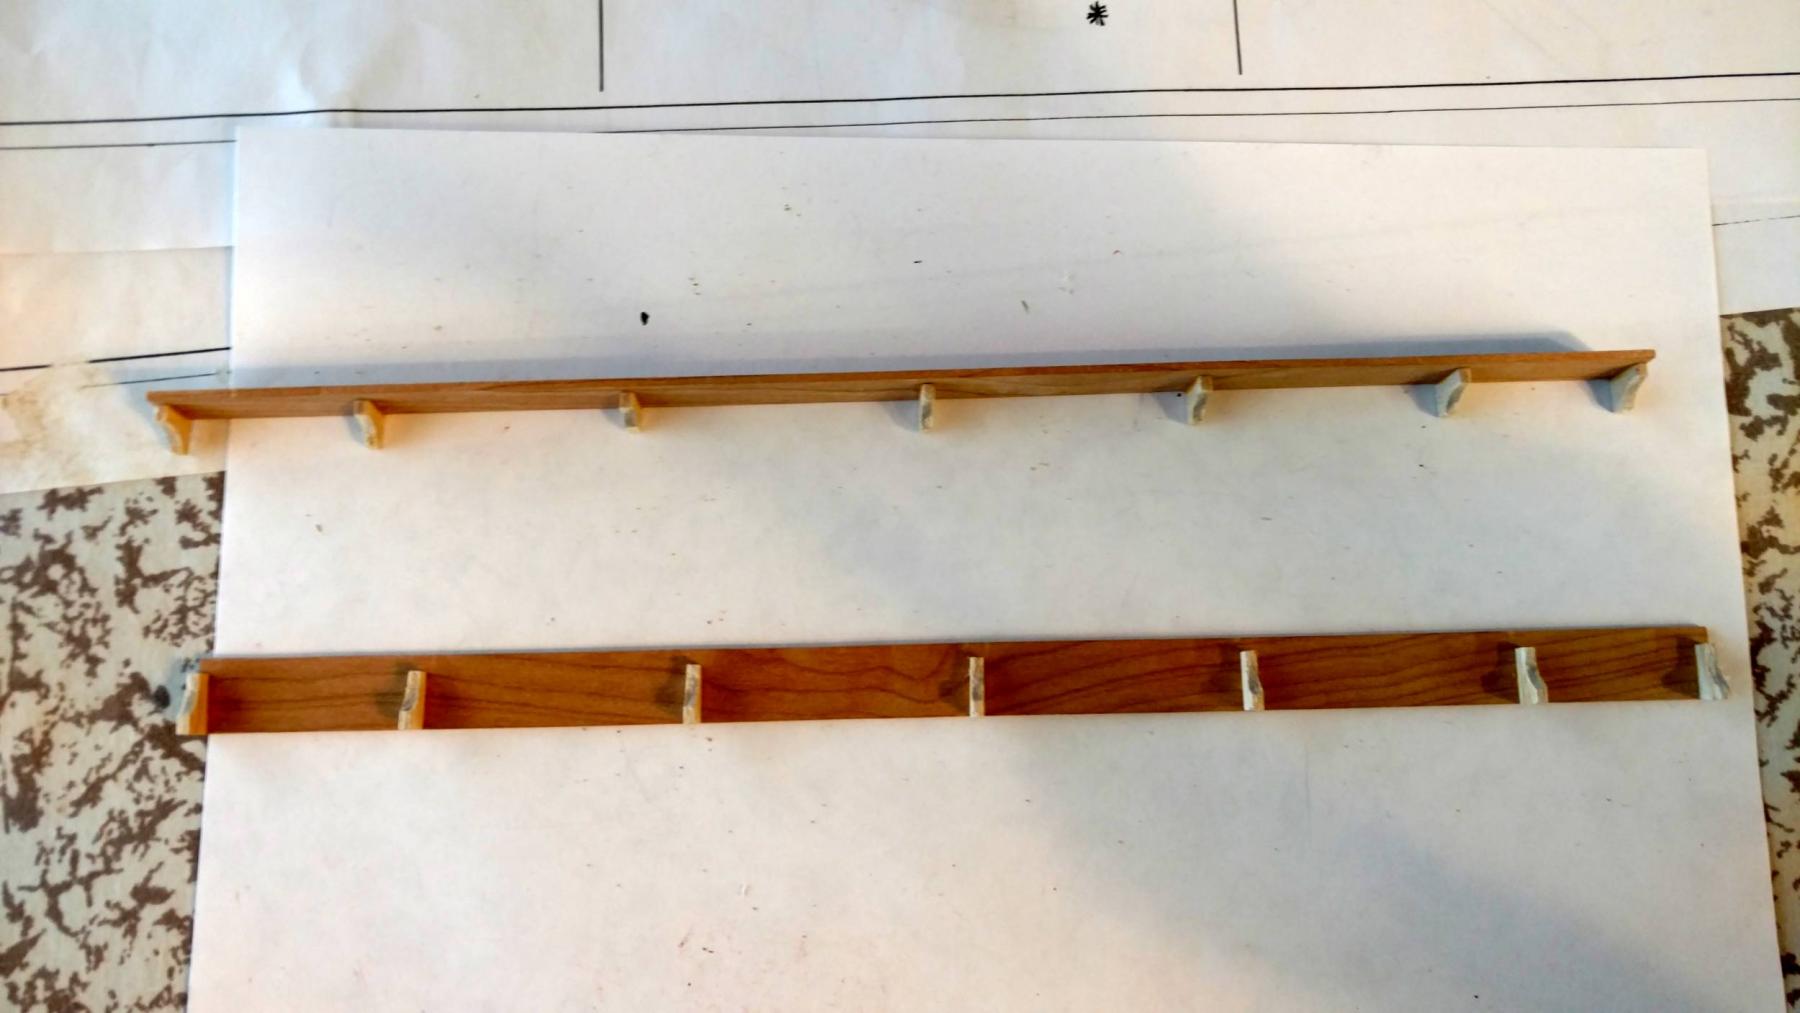
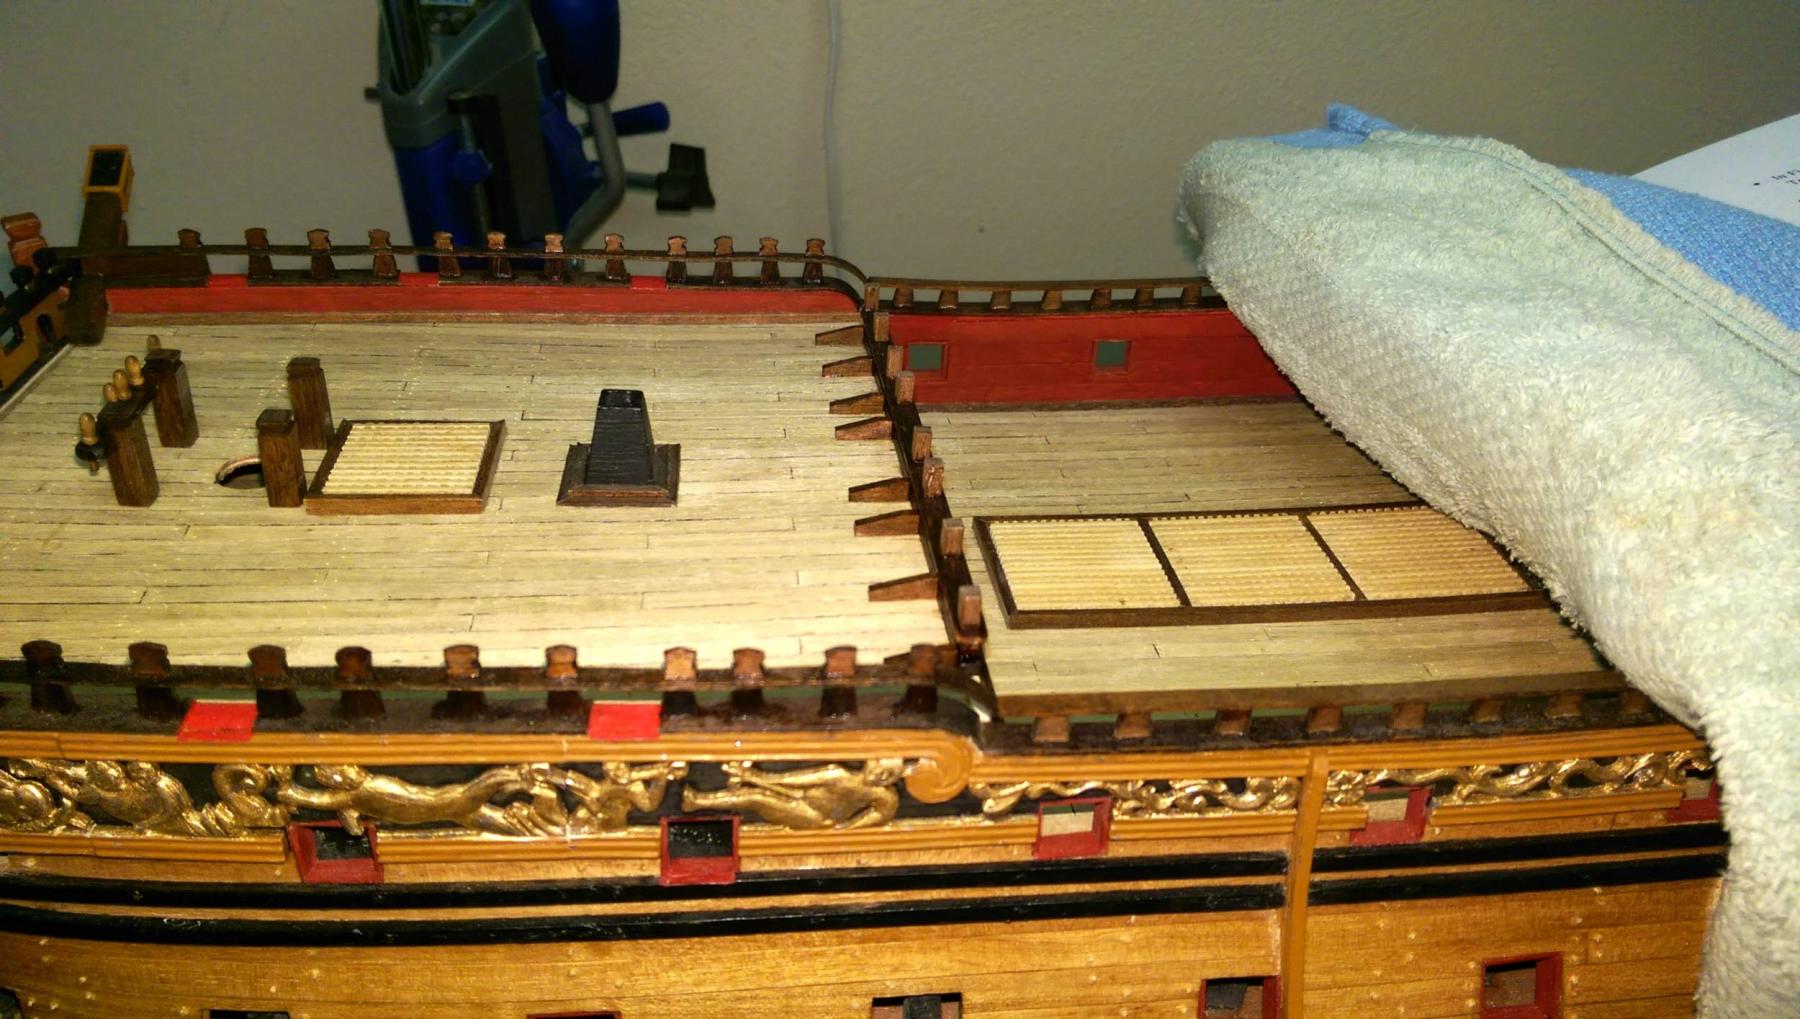
Constructing the gangways. I used a nice piece of 1/16 " walnut sheeting from my stash. I cut the strips 13mm wide and used some leftover planking wood for the hanging knees. Vince P.


- 593 replies
-
- 9
-
-
- royal william
- euromodels
- (and 1 more)
-
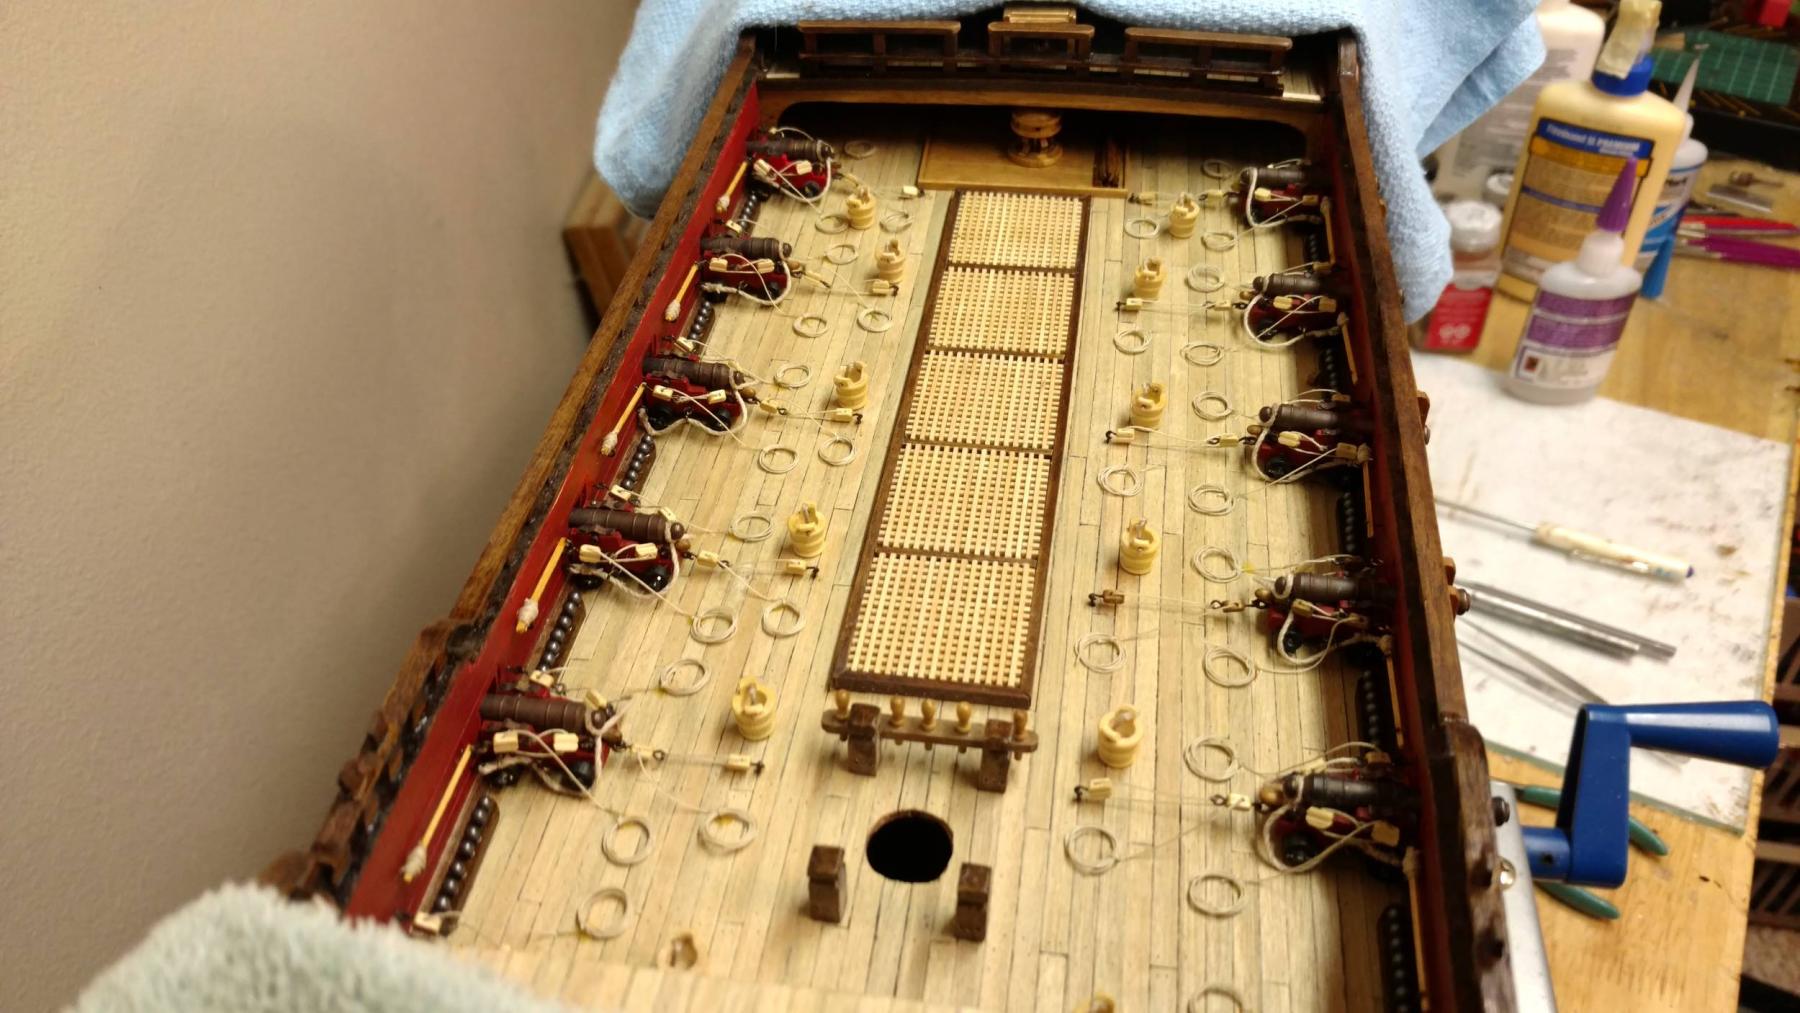
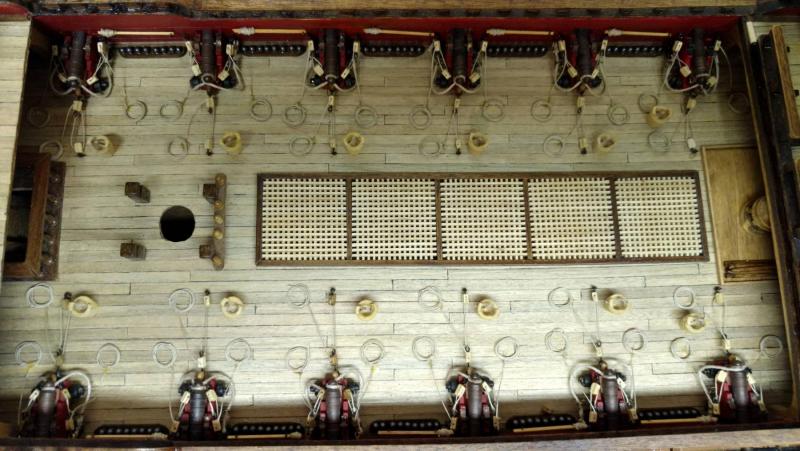
The maindeck gun battery is completed. A lot of busy work here. Next up is the gangways between the forecastle and quarterdeck. Vince P.
- 593 replies
-
- 11
-
-
- royal william
- euromodels
- (and 1 more)
-
The member we know as Pirate Pete 007 has asked me to clarify something. I often refer to him as being from Euromodel. While he does do some consulting and has created fabulous build notes for most of their high end kits, he does not work for them and is not directly affiliated with the company. As far as I am concerned, he is the guru when it comes to building their kits, and I have and will continue to rely on his invaluable help when needed, provided he continues to make himself available to people like me. He also asked me to mention that Euromodel is offering huge discounts right now if any one is interested is buying any of their kits. They are usually expensive, especially their high end kits like the Royal William. Thanks, Vince P.
- 593 replies
-
- 3
-
-
- royal william
- euromodels
- (and 1 more)
-
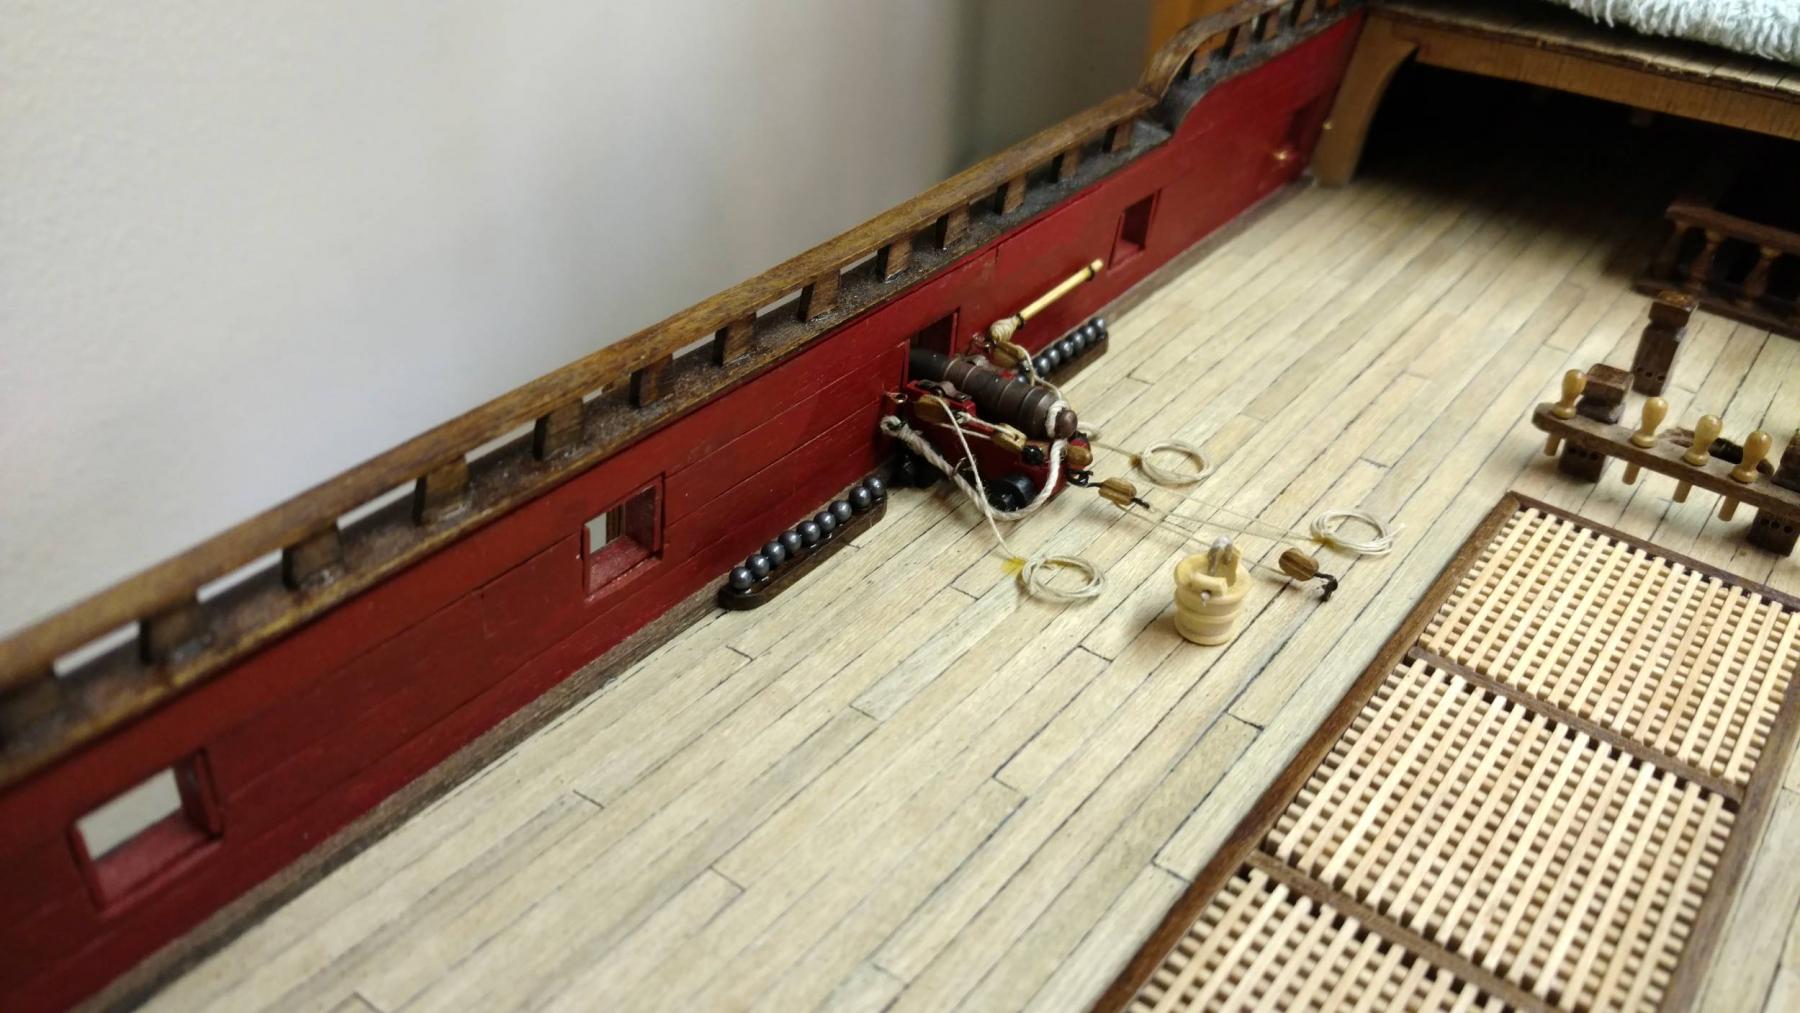
Hi Denis, The heavy ropes were premeasured because the eyebolts and rings have to be attached before they are placed on the bulwarks. As for the blocks and rigging, I have a little jig that I place the blocks in and then rig them. I set up the jig for the correct length and then made all of the tackle. The rope coils were made separately on another jig.
- 593 replies
-
- 1
-
-
- royal william
- euromodels
- (and 1 more)
-
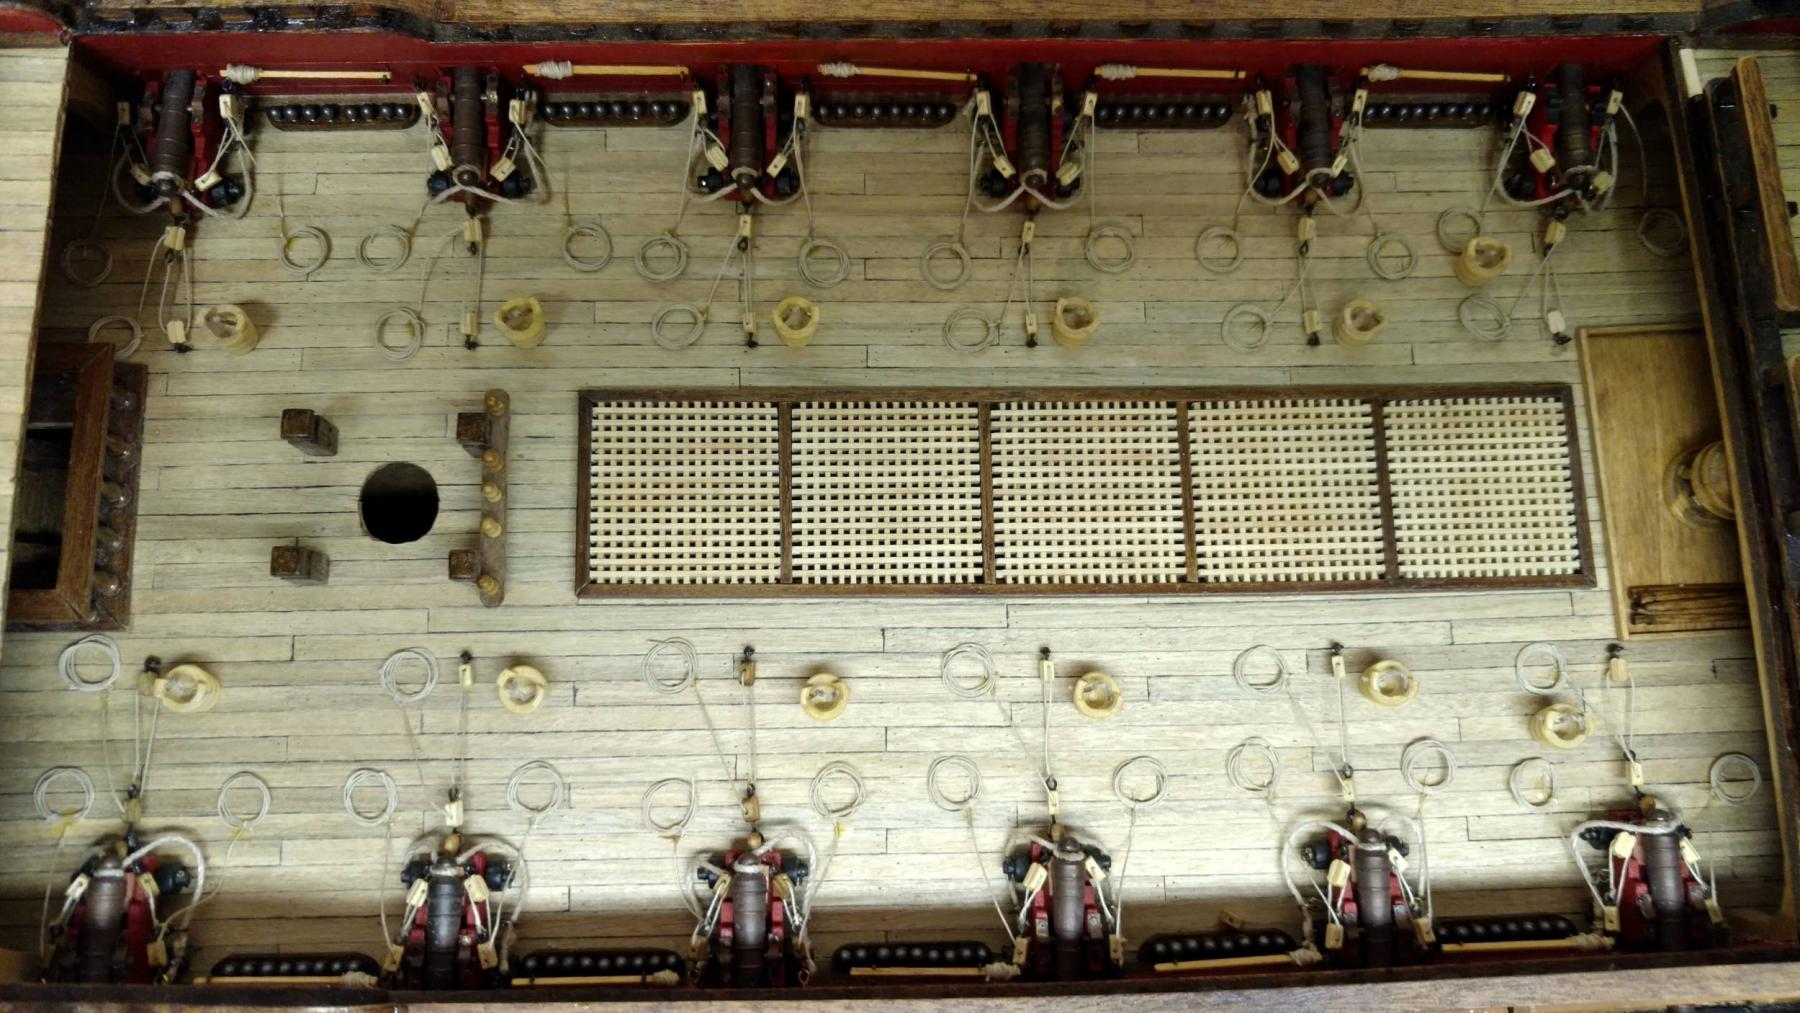
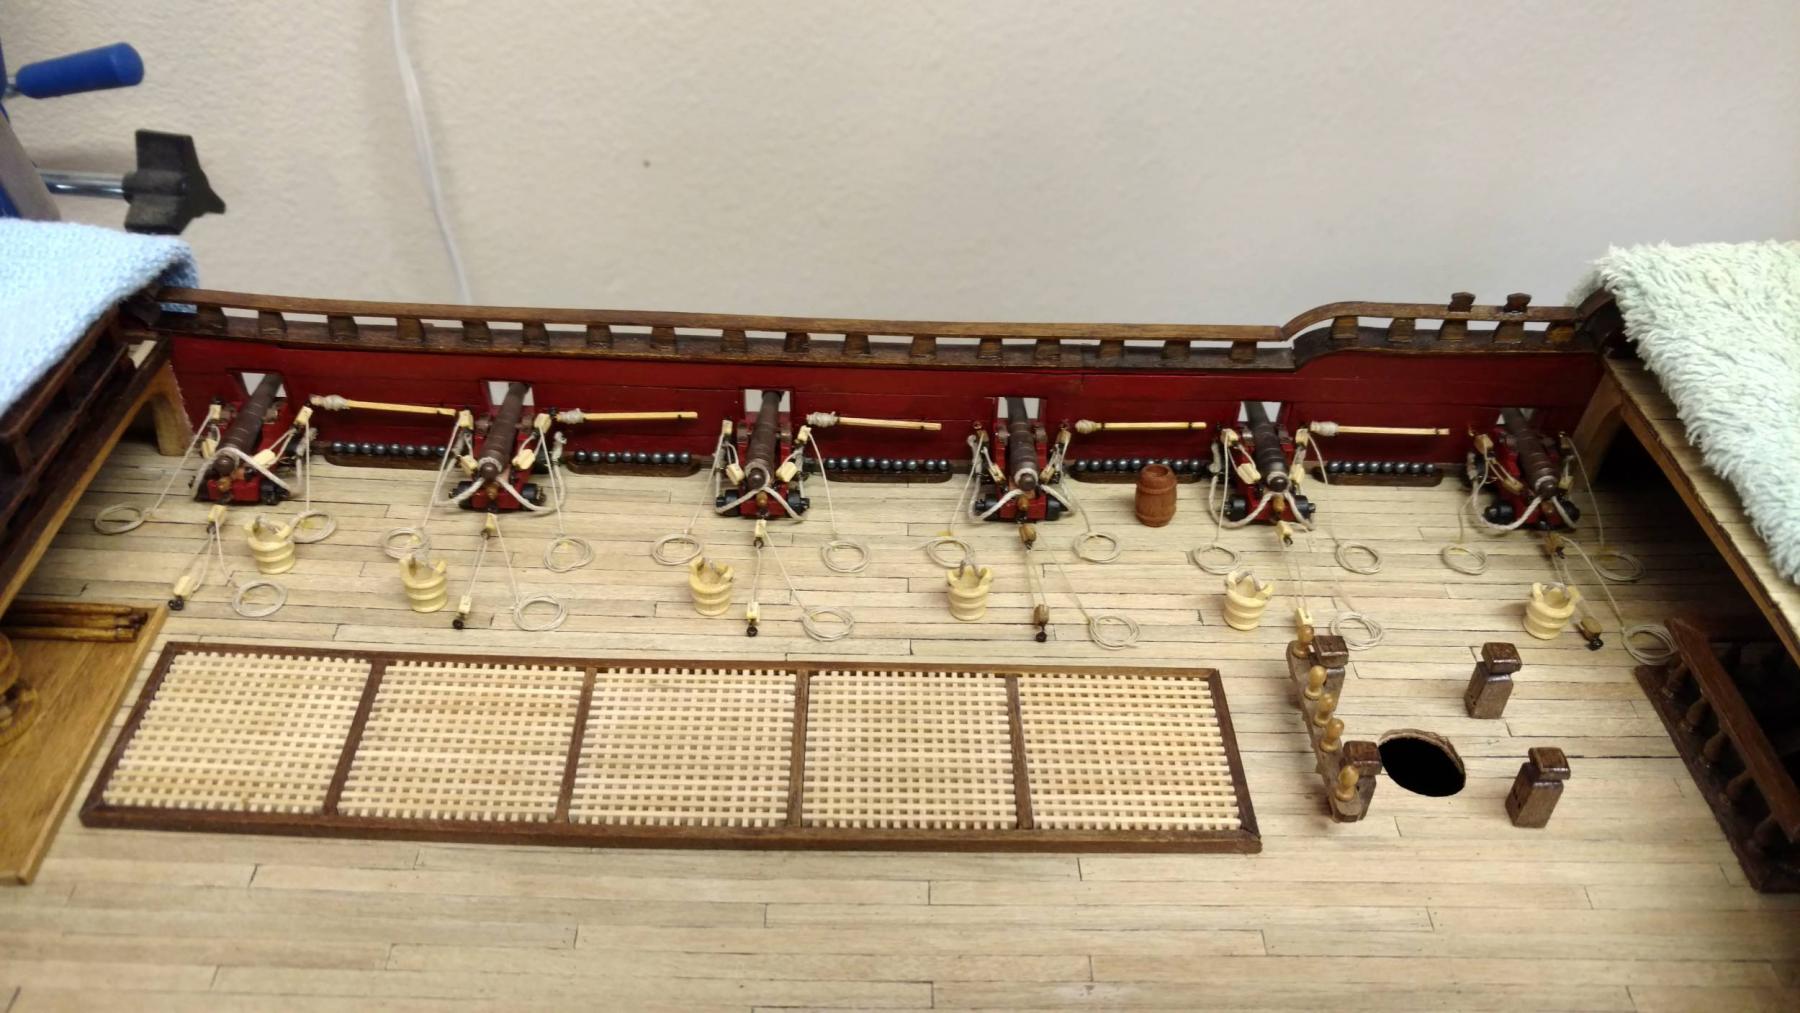
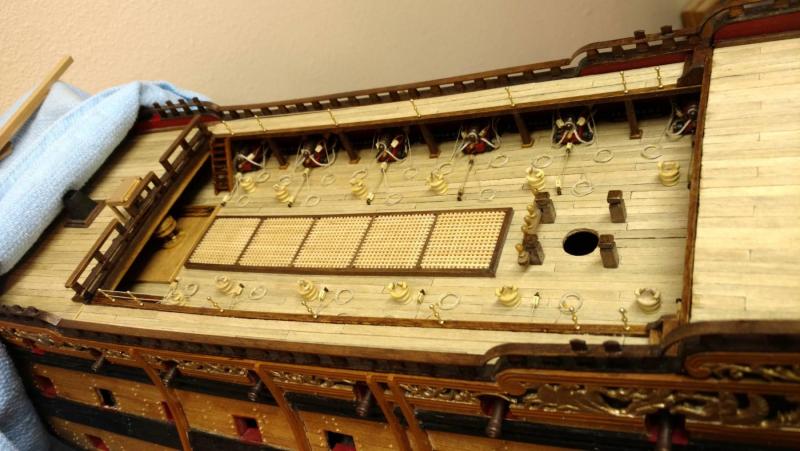
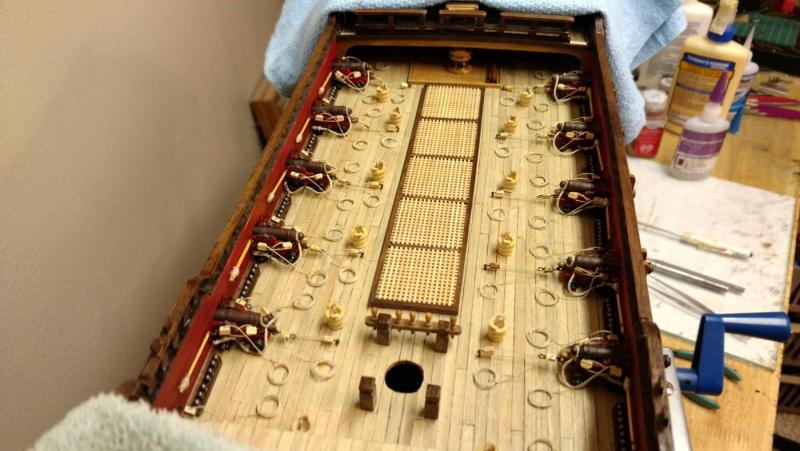
The starboard main deck gun battery completed. Putting this much detail is very time consuming. I have completed several ships with complex rigging, which is my favorite part, but rigging these guns is tougher. The close quarters and short lengths is a real challenge. I still have to do the port side. The quaterdeck and forecastle guns are even smaller. Vince P.
- 593 replies
-
- 8
-
-
- royal william
- euromodels
- (and 1 more)
-
Welcome aboard mate! Don't worry about your ship being perfect. There is no such thing. If you are satisfied then it is good. Start a build log and display your work. We all do that here. You can help us and we you. This site is noted for positive feedback and not being critical. Vince P.
-
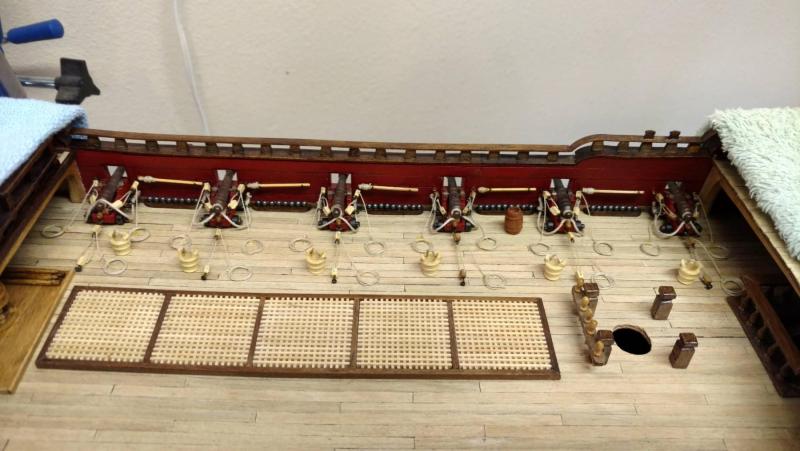
One main deck gun station completed. I am trying to put as much detail in as possible. It is fun making all of the items from scratch. Vince P.


- 593 replies
-
- 9
-
-
- royal william
- euromodels
- (and 1 more)
-
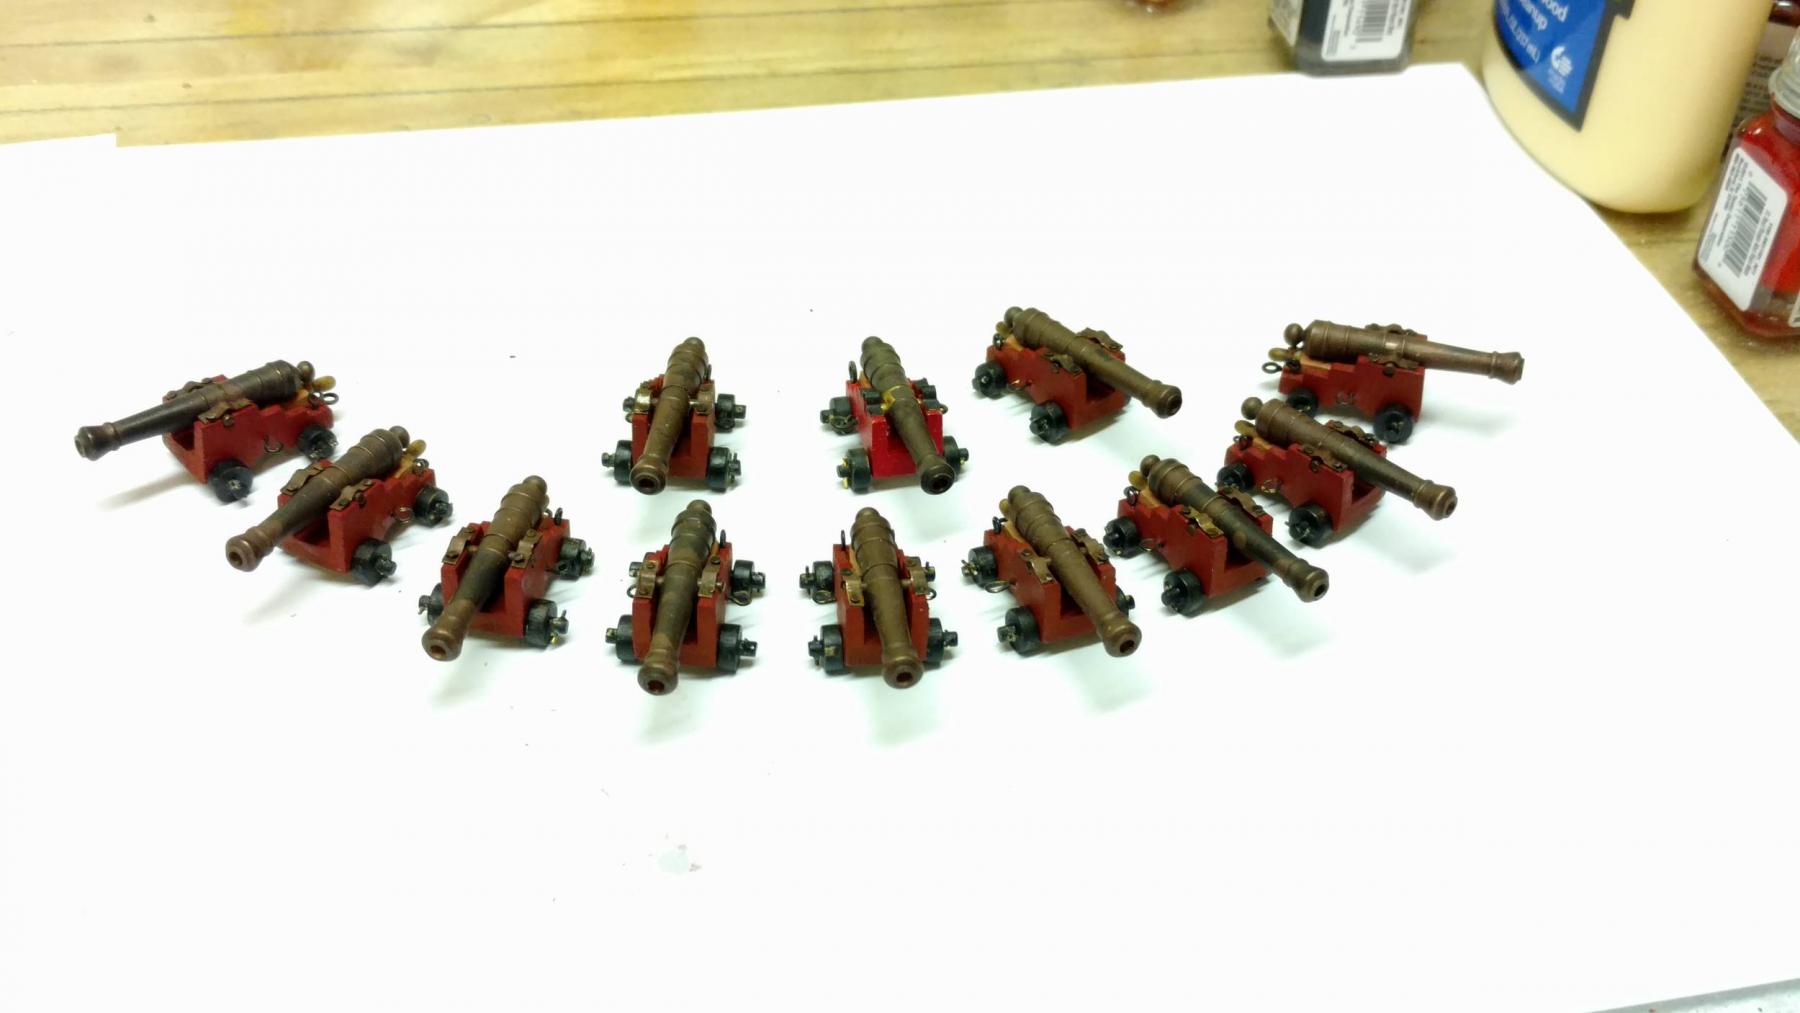
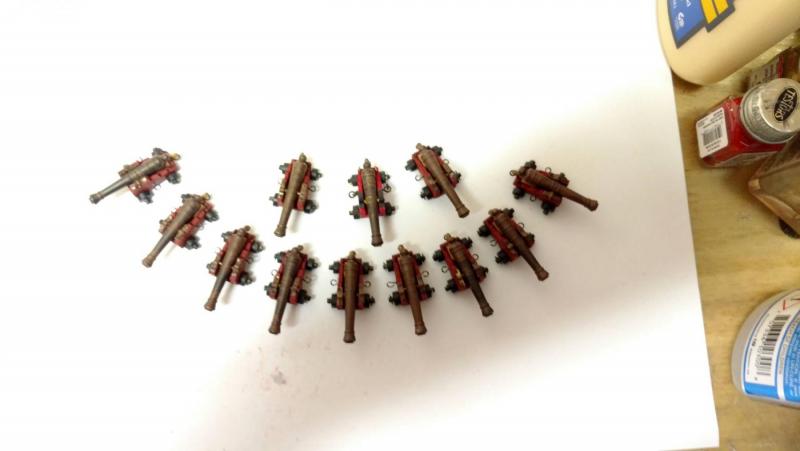
The main deck guns are complete. Next up is to mount them on the deck. I am going to full rig them. Vince P.

- 593 replies
-
- 6
-
-
- royal william
- euromodels
- (and 1 more)
-
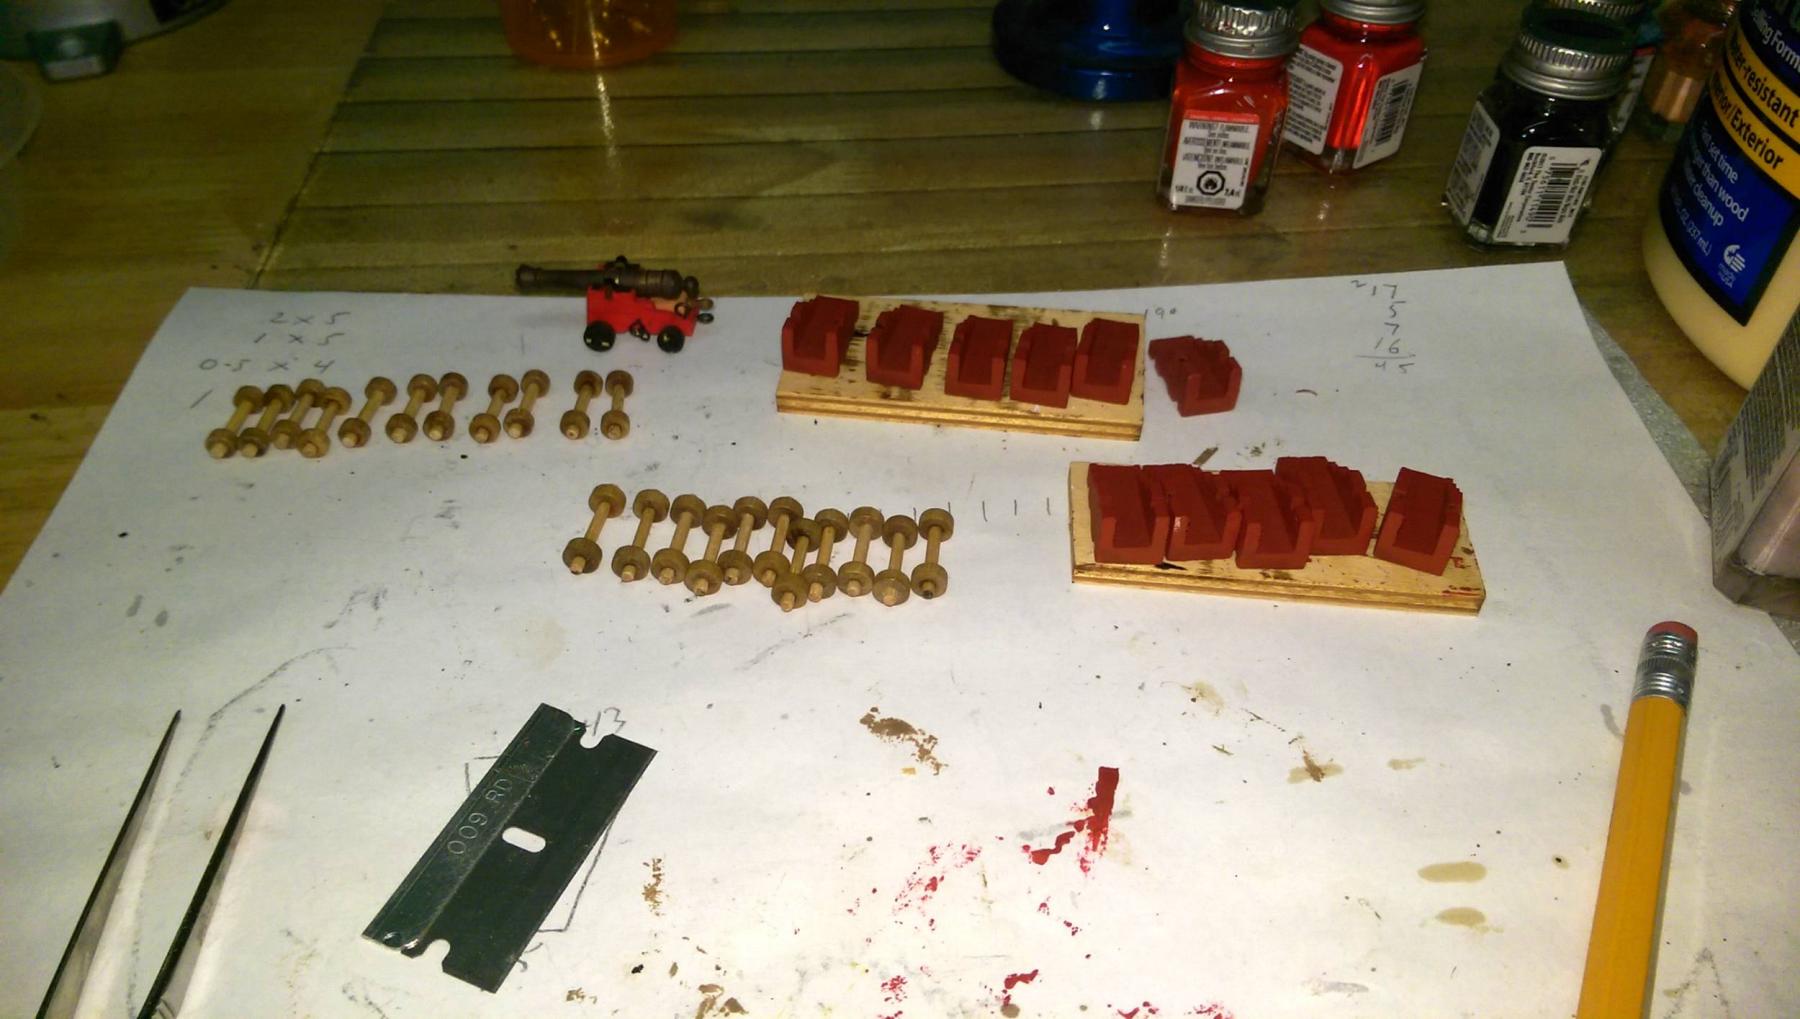
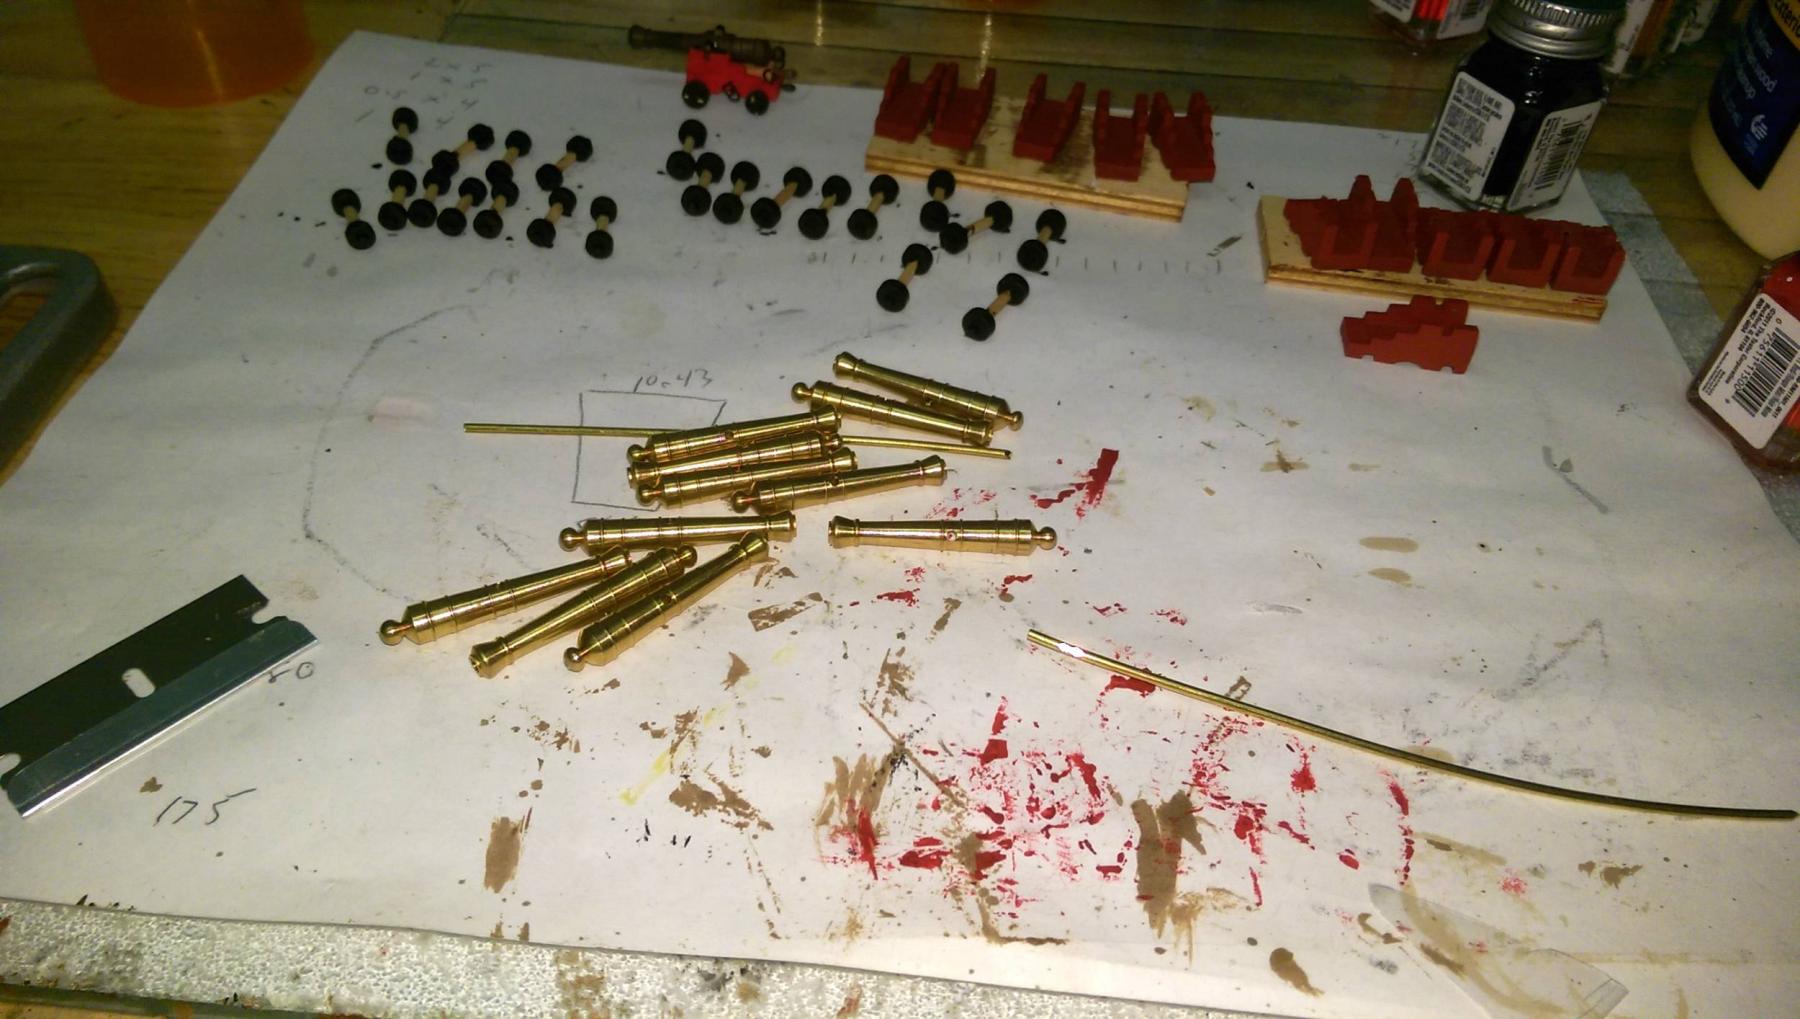
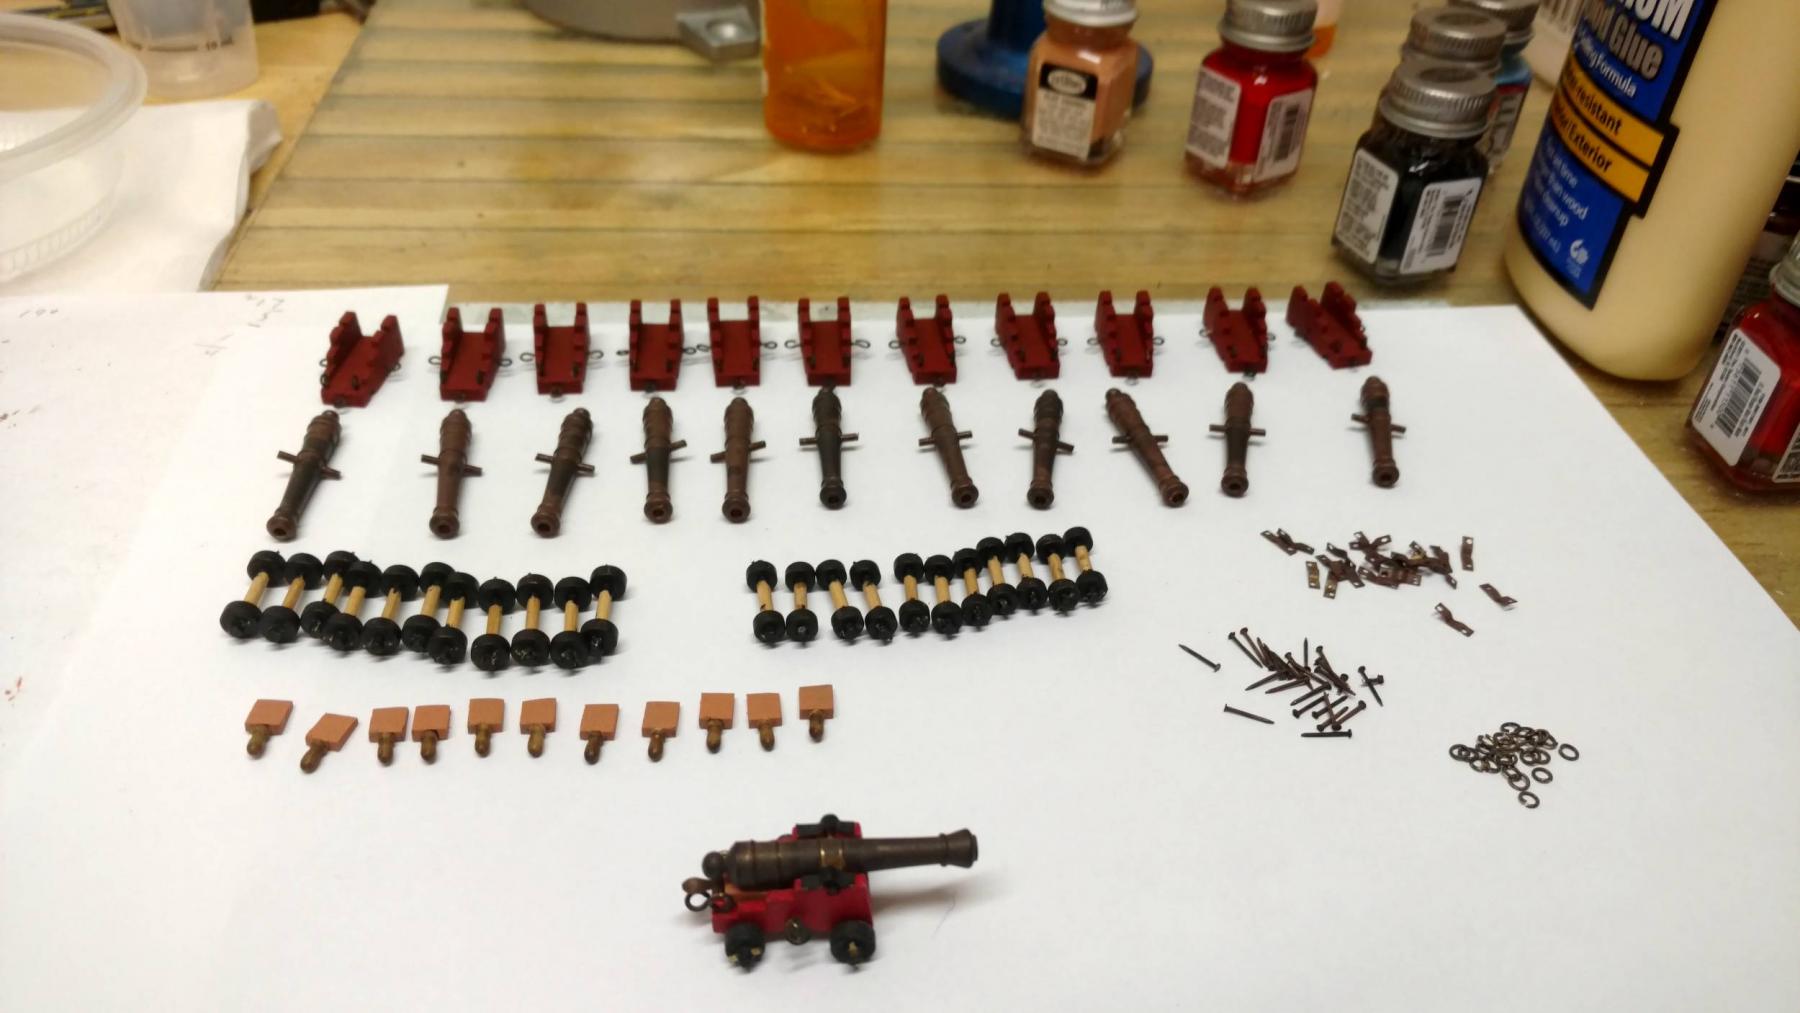
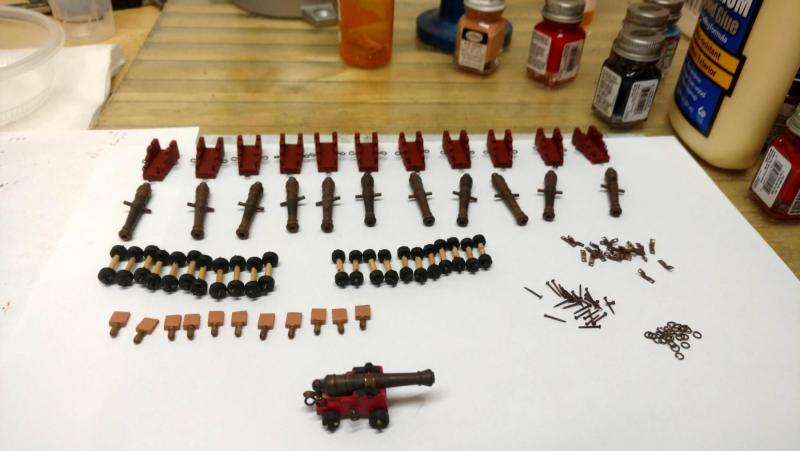
Working on the main deck guns. Many tiny parts have to be made and assembled. I tried to go into the most detail by including parts like the quions and wheel spikes, all of which had to be made from scratch. All of the shiny brass pieces were blackened to give a more realistic look. The last photo shows all of the pieces ready to assemble into the guns. Vince P.


- 593 replies
-
- 10
-
-
- royal william
- euromodels
- (and 1 more)
-
Thanks, Chris. I know you are working with Amati. When I started this ship, I knew that the Royal William was created from a rebuild of the HMS Prince. I wanted to eventually have a before and after display. I knew Amati had a great kit many years ago, but there were none around the same scale now. Well, I searched the whole country hoping to find an original Amati kit. I lucked out and found one complete in the original wooden case. I will build her after the Royal William. By then you will probably have the new one from Amati finished. Vince
- 593 replies
-
- 3
-
-
- royal william
- euromodels
- (and 1 more)
-
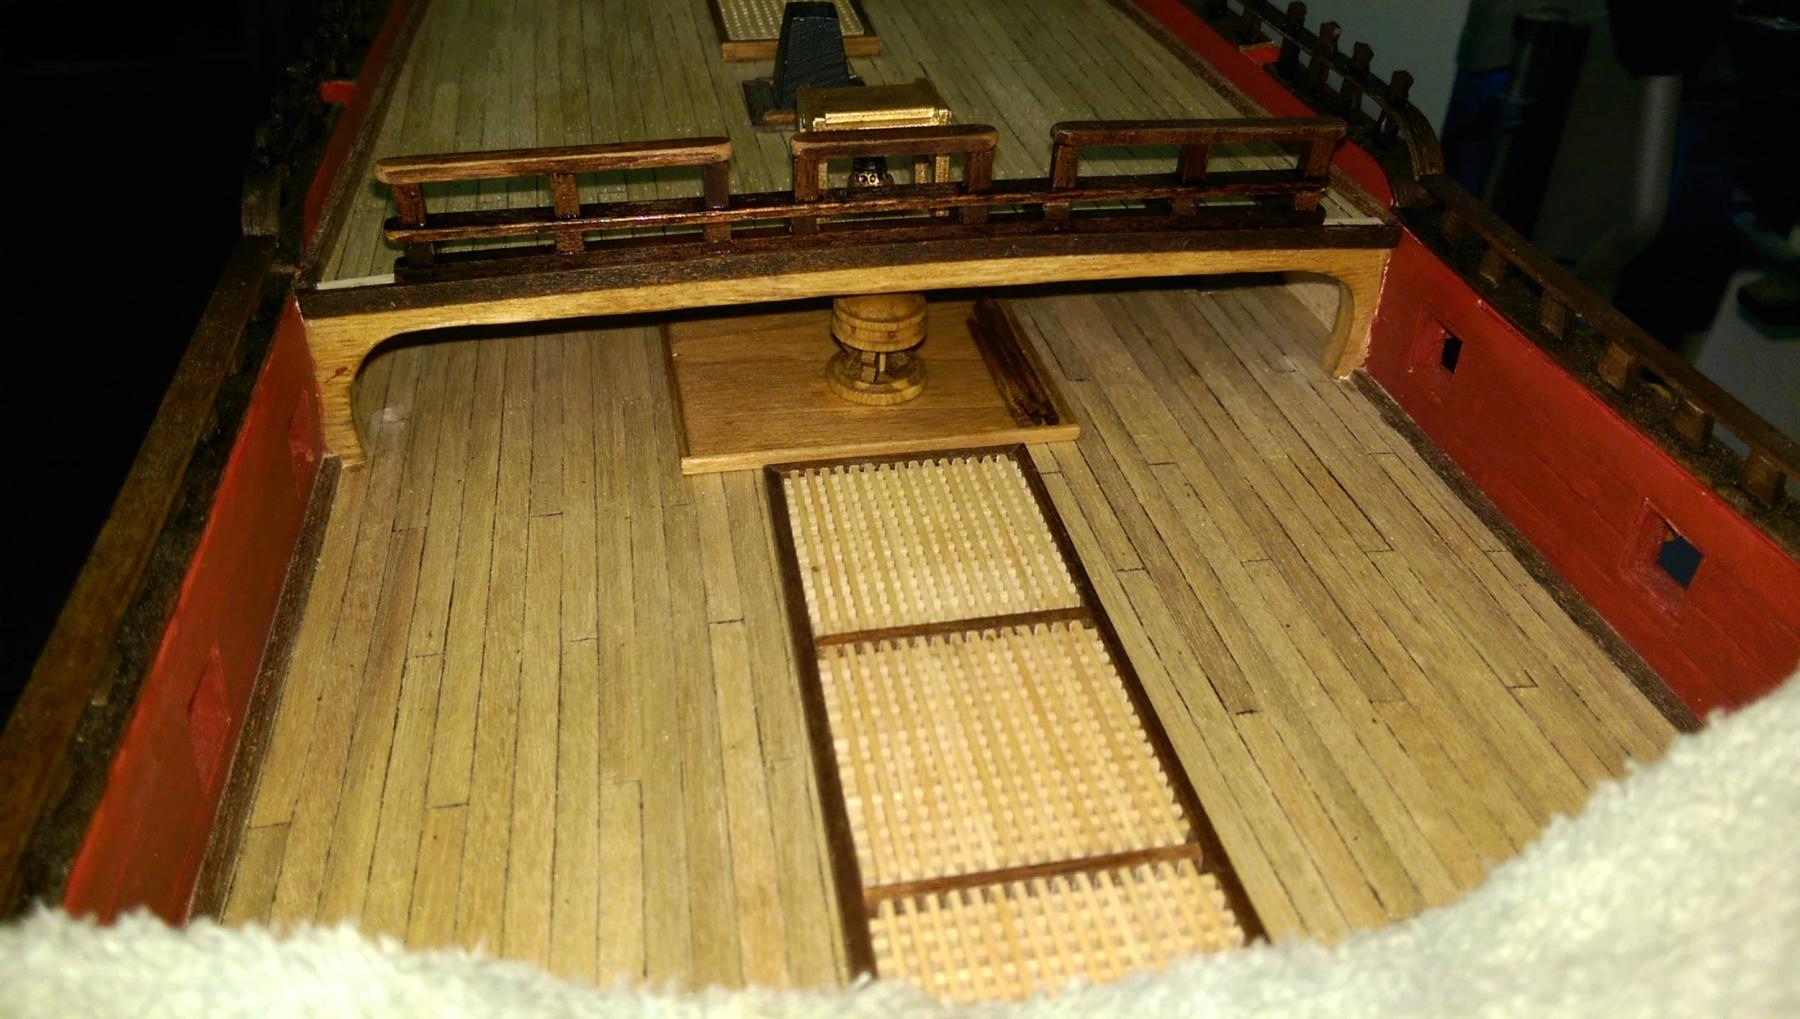
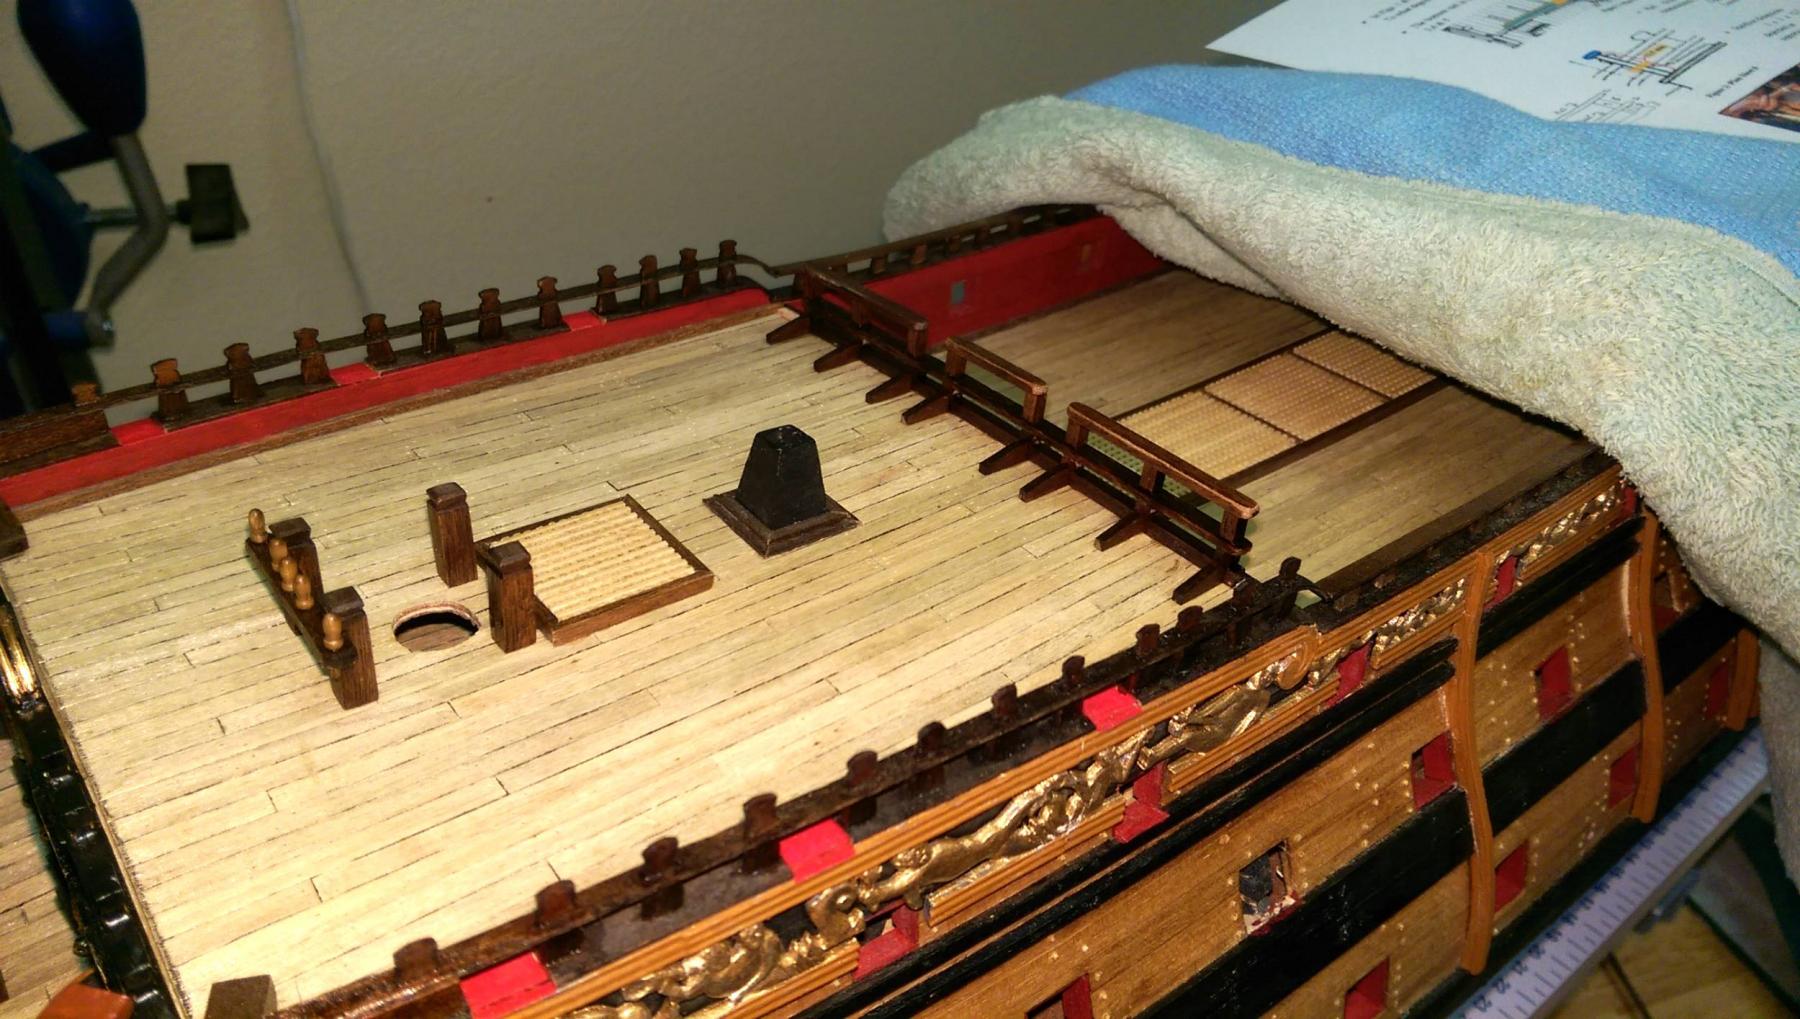
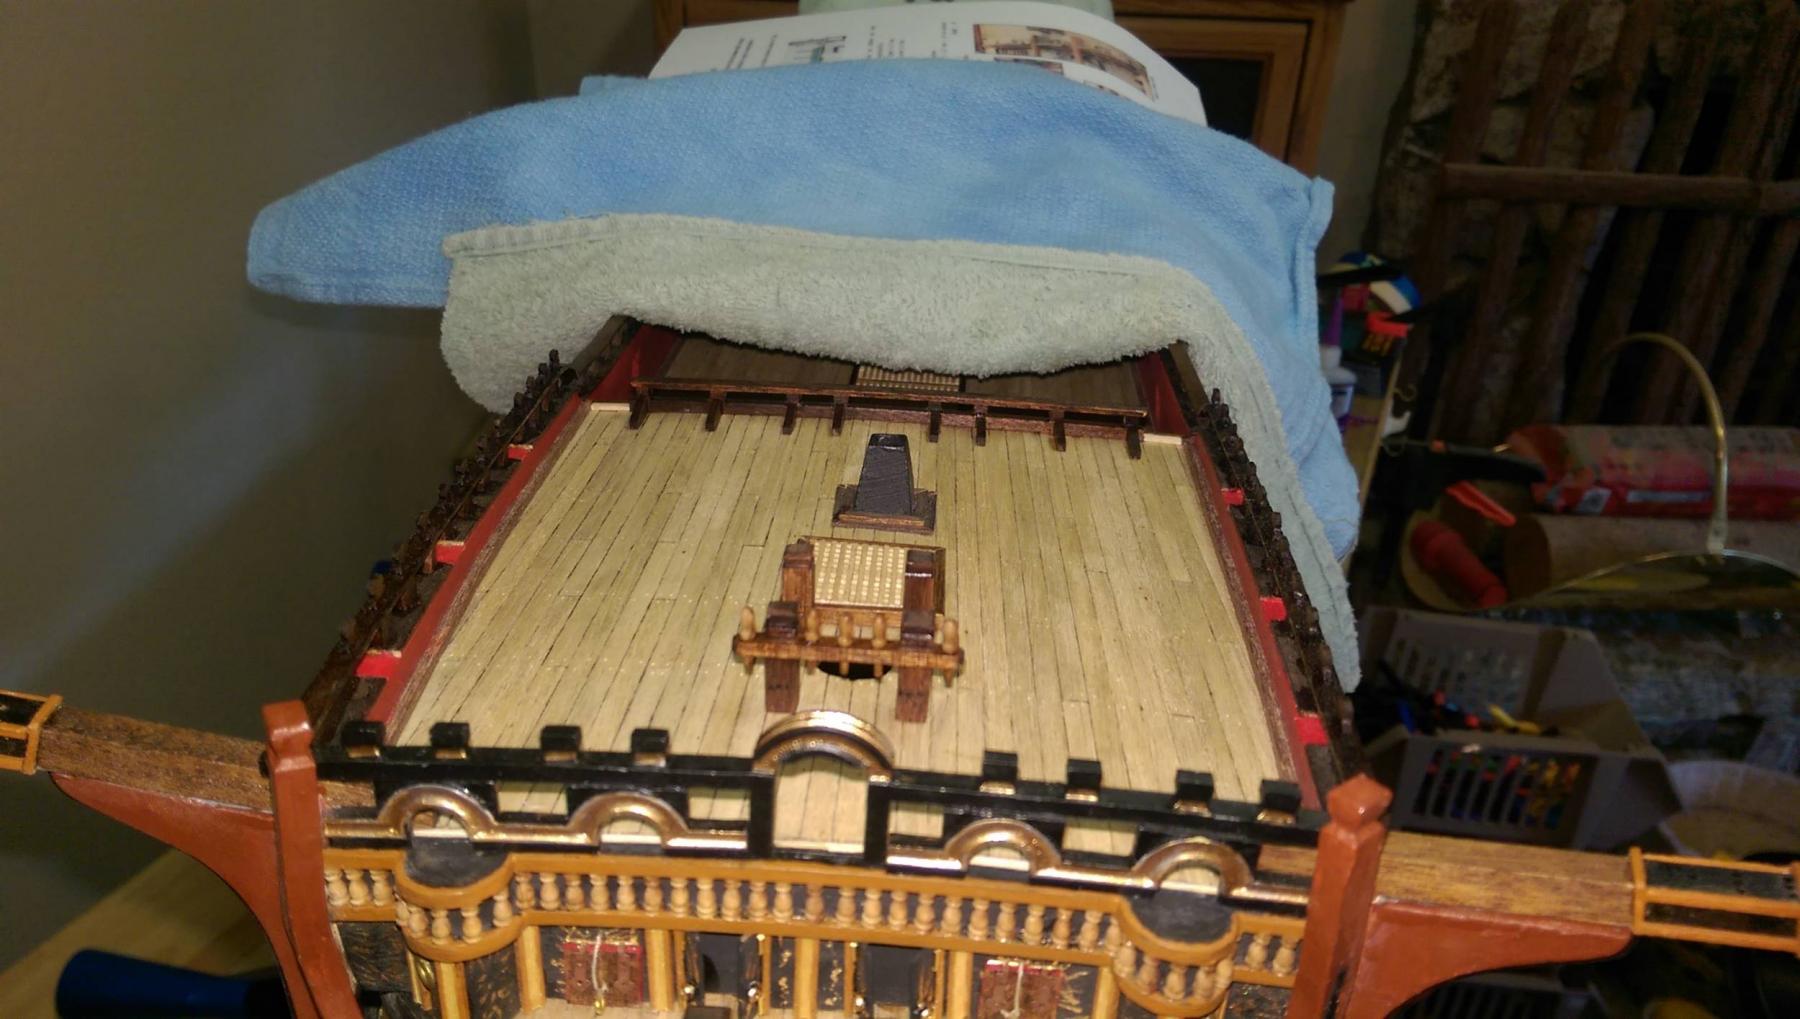
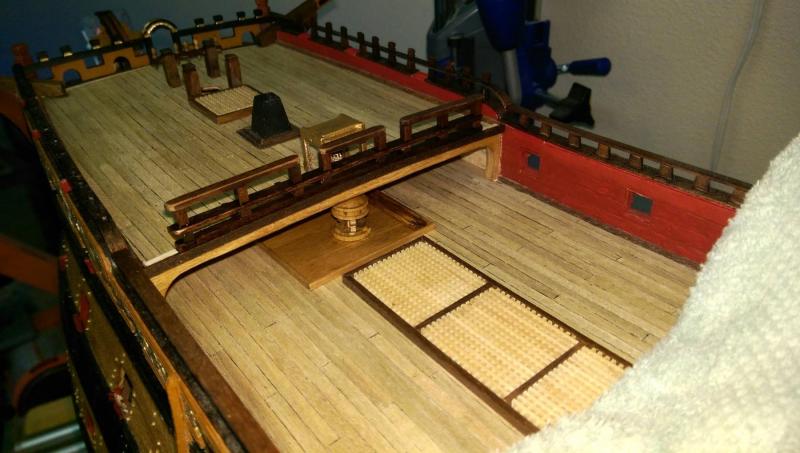
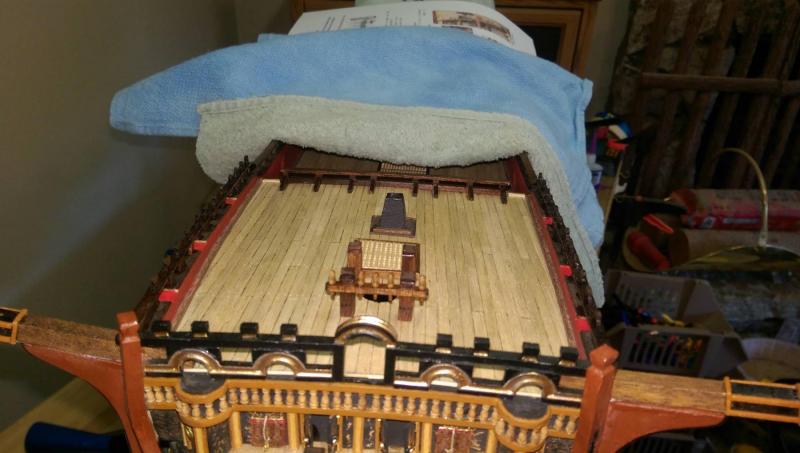
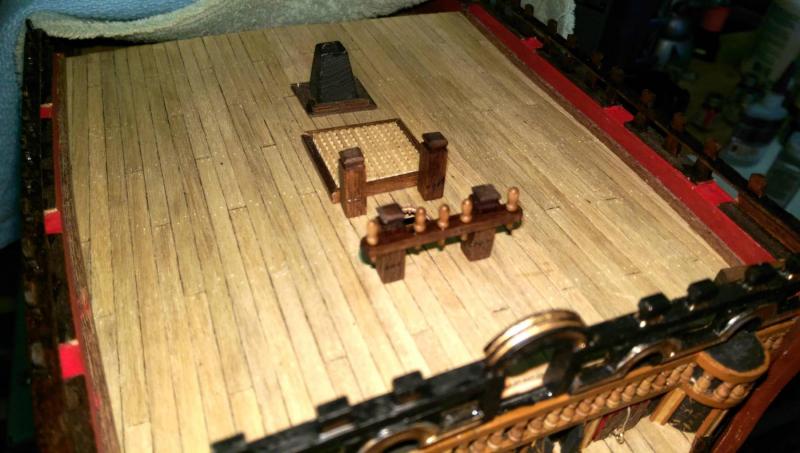
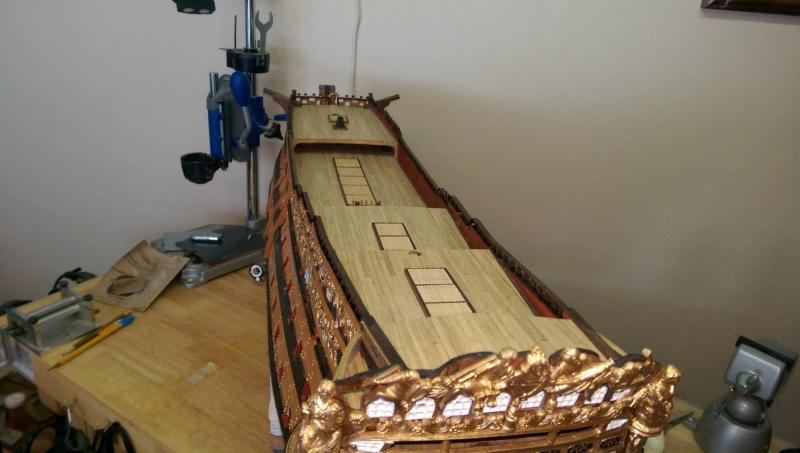
The main deck capstan is installed. The one provided in the kit is 15mm in diameter and 20mm tall. The diameter is right, but the height is too tall. Not only does it just barely fit under the forecastle breast beam, by scale it would have been too tall for the crew. The plans call for a height of 15mm, which is just about right. I just cut off 5mm from the center spindle and glued it back together. That preserved the shape of the base and curved top. Since I am rigging her in full sail, this would represent a working deck, so the arms for the capstan would not be in place. I stored them on the deck next to the capstan. Next up is to build and install the main deck guns, so that things like the gangways and ladders can be placed. These will hamper access to the guns for installing the rigging and such. Vince P.

- 593 replies
-
- 10
-
-
- royal william
- euromodels
- (and 1 more)
-
The bell tower is placed on the forecastle deck. The metal pieces provided were very nice and did not require and modification, only a little cleanup to remove burrs. Vince P.

- 593 replies
-
- 3
-
-
- royal william
- euromodels
- (and 1 more)
-
I for one, would pay more for top quality materials. In the long run, you wind up paying more anyway, to replace poor quality materials. Vince P.
-
Hi Mark, You are moving along very fast and are about to overtake my build. You must have a lot of time available to dedicate to your project. Very nice job by the way. I wish I had more time to work on my ship, but with my busy schedule I get maybe an hour or so a day. Vince P.
- 652 replies
-
- 1
-
-
- royal william
- euromodel
- (and 1 more)
-
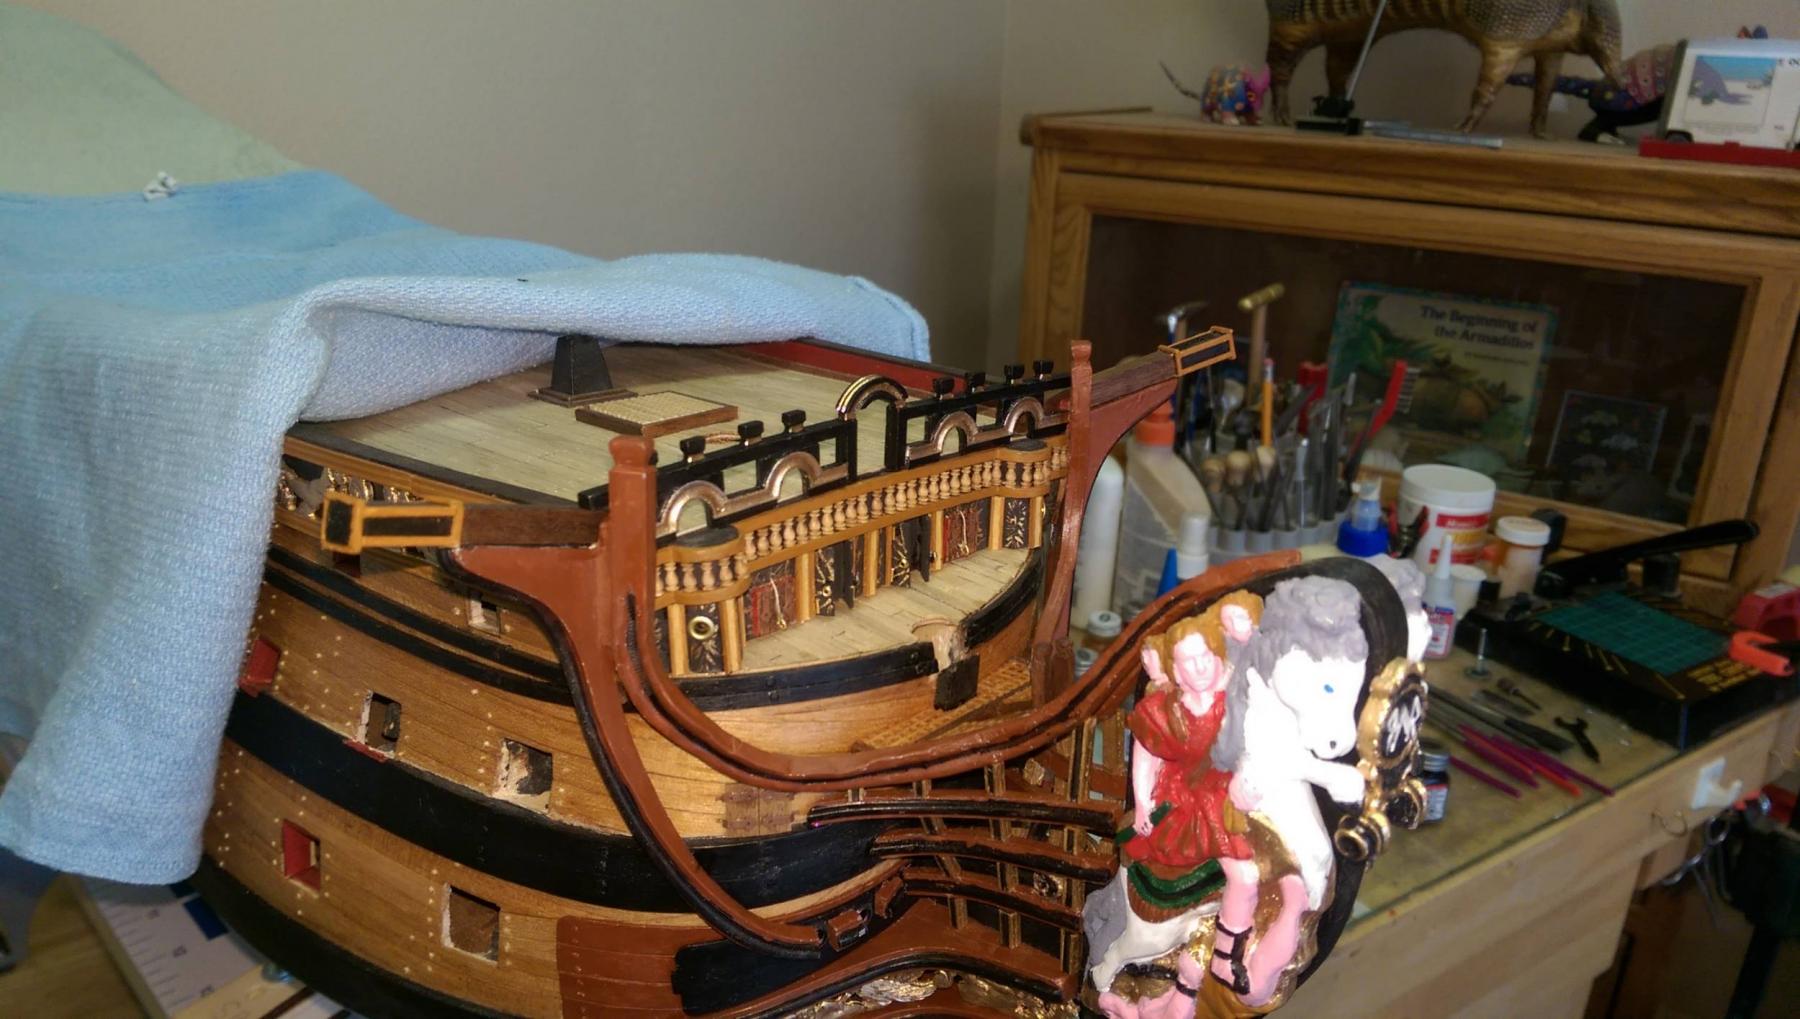
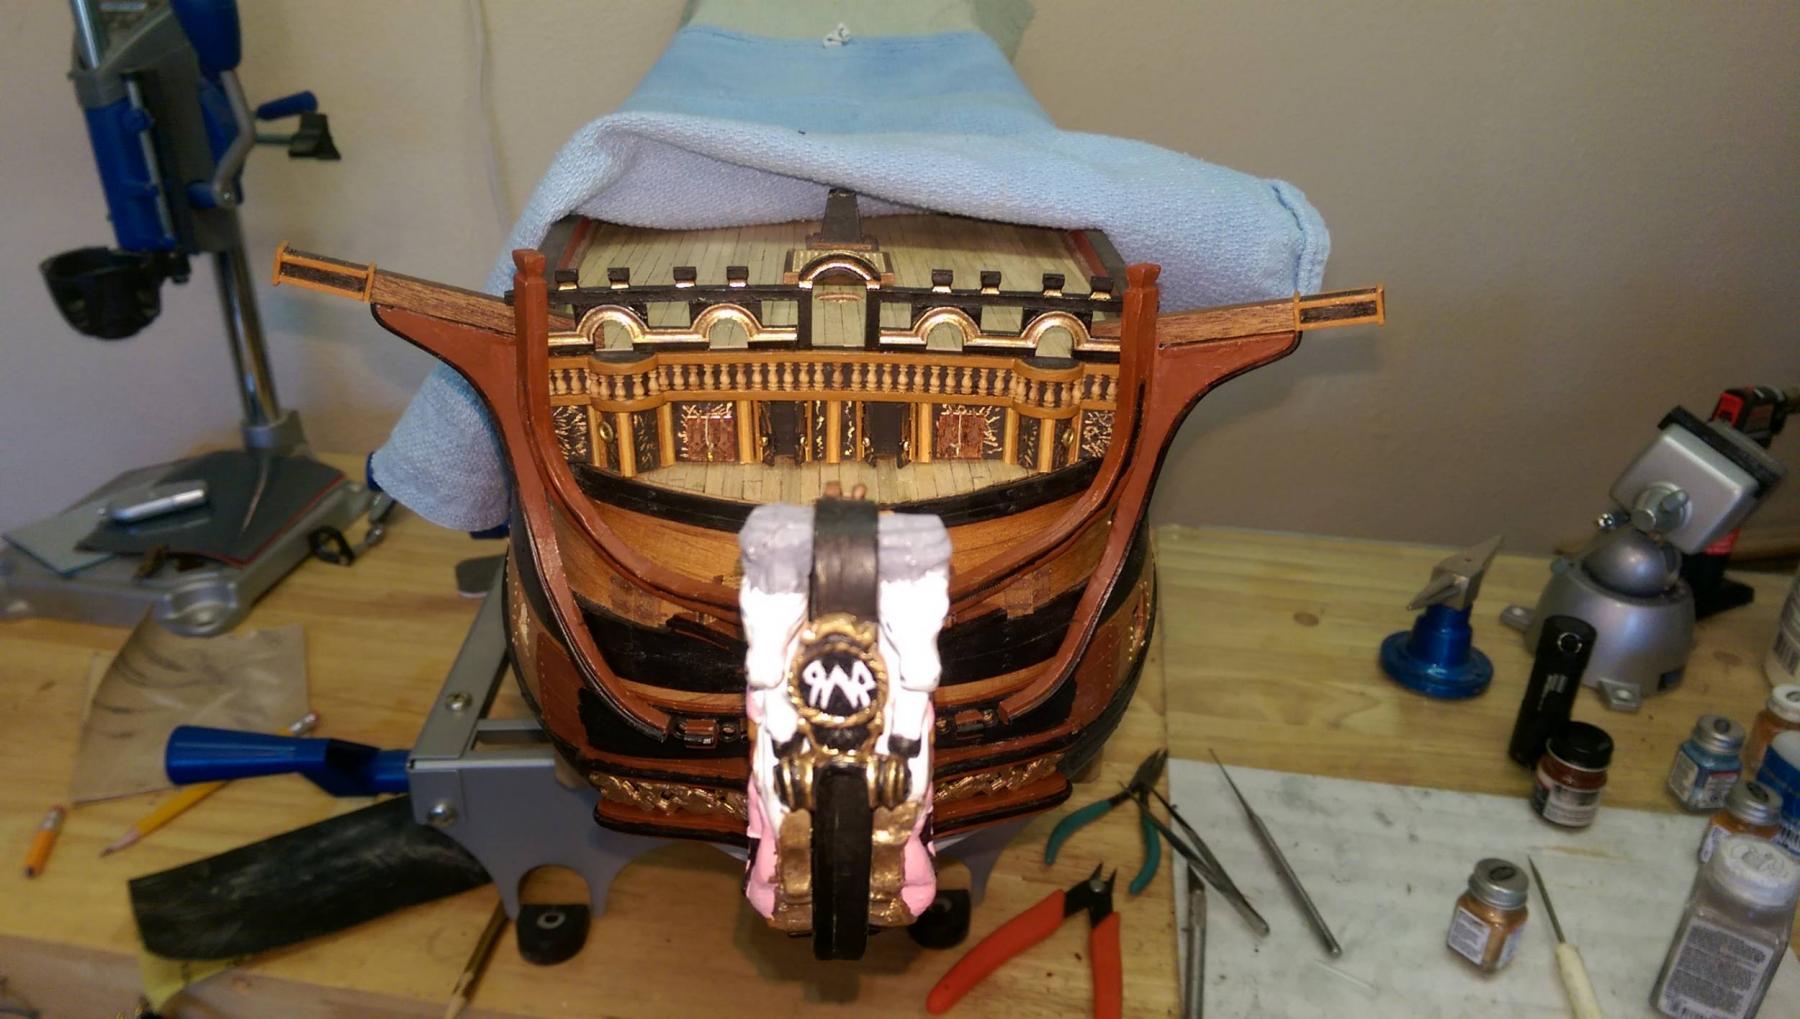
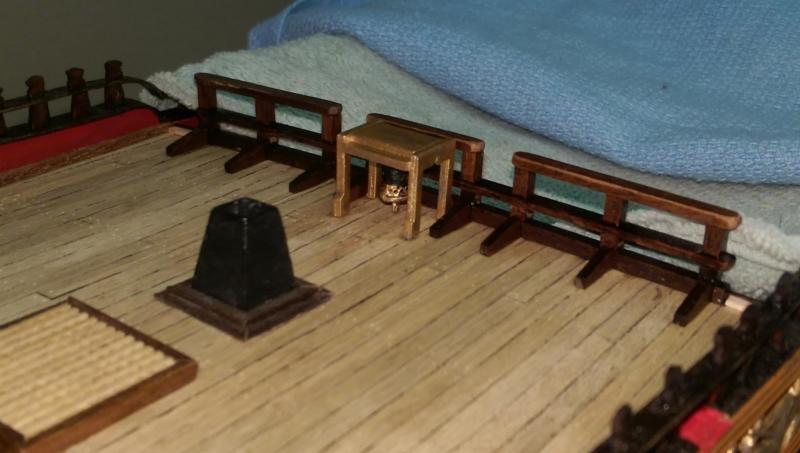
The forecastle breast rail constructed and installed. A big thanks to PiratePete of Euromodel for his photos and instructions. The plans are severely lacking in what this structure looks like or how to build it. I used his information and modified it slightly to come up with what I think the rail should look like. Vince P.


- 593 replies
-
- 9
-
-
- royal william
- euromodels
- (and 1 more)
-
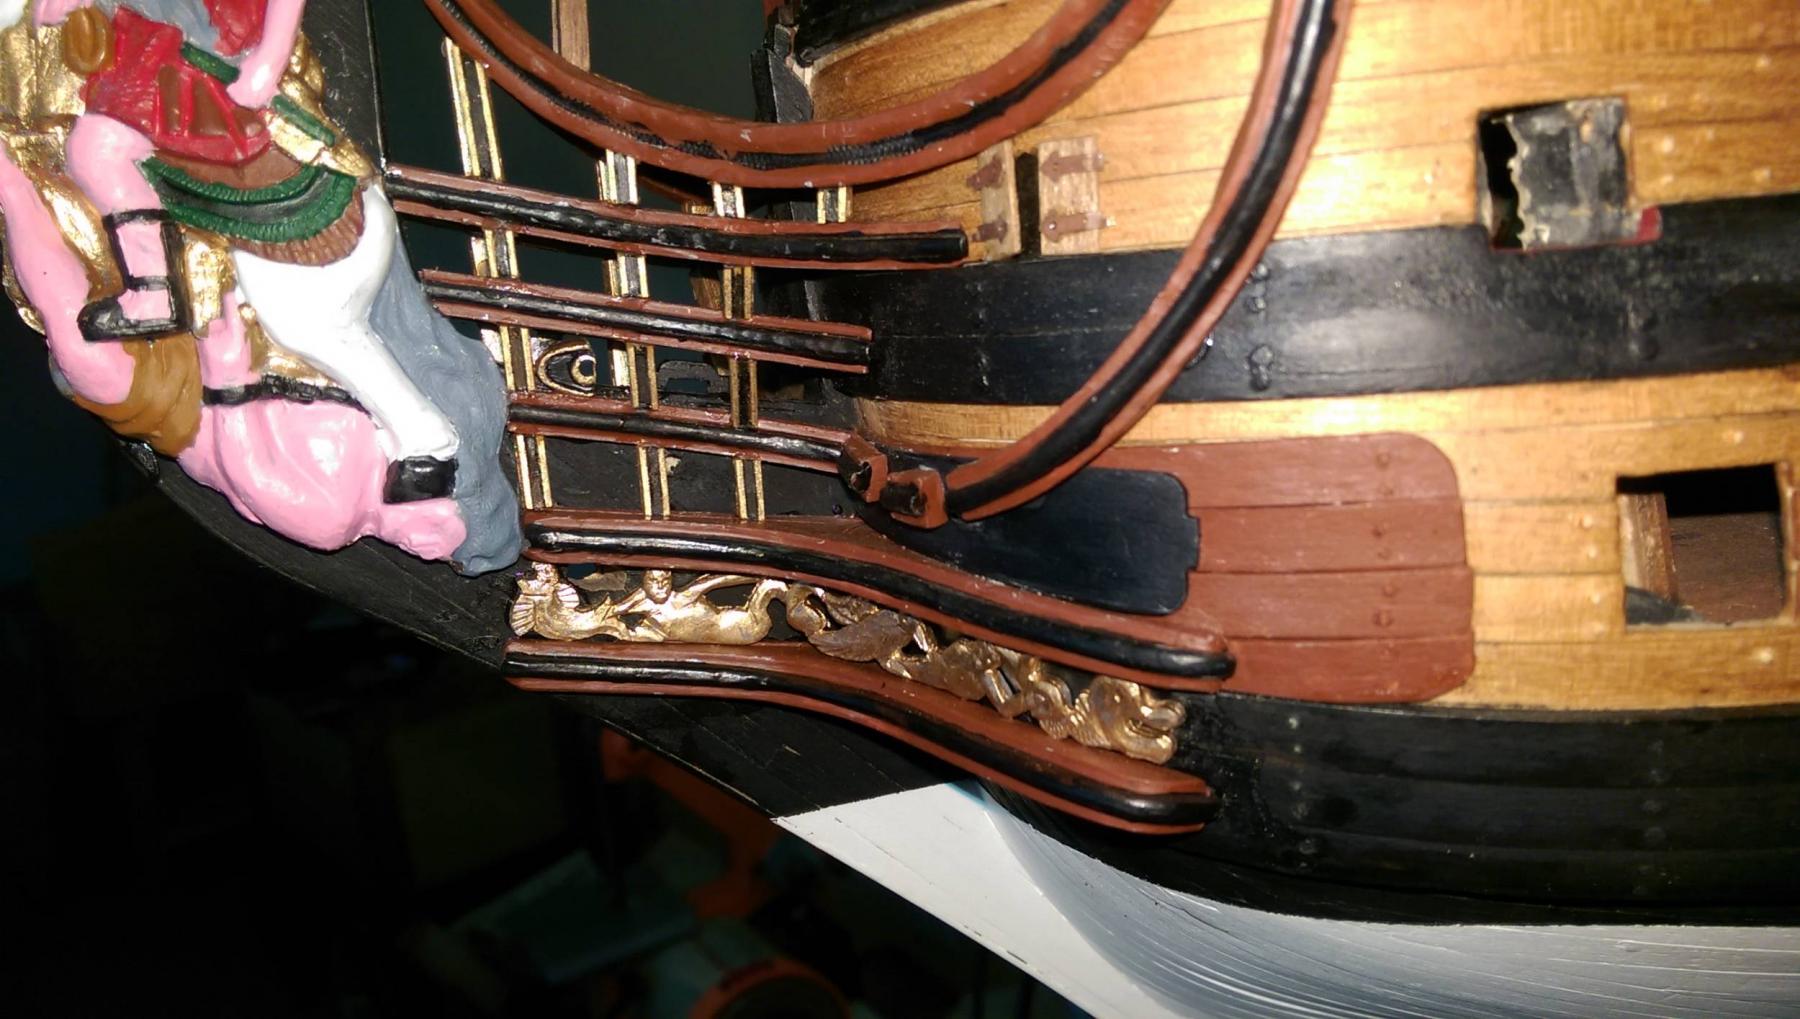
Some more little progress. 1. I added the little cleat to the stem for the first gammoning rope. I originally overlooked this and cut a hole in the stem for the rope. Once I saw my mistake, I filled in the hole and created the cleat. 2. The 2 knights are added to the prow deck. They are pinned in place. 3. The forecastle fife rail and knights around the foremast are added. They are also pinned in place. As mentioned before, I decided to add the belay pins to the rail. The original RW probably did not have them, but a later rebuild would have had them added. I am now proceeding to the breast rail for the forecastle deck. The plans do not show the rail or mention any dimensions. I asked Pete of Euromodel for some help here. His notes do show a diagram of the railing but no dimensions. He informed me that help is forthcoming. Vince P.

- 593 replies
-
- 7
-
-
- royal william
- euromodels
- (and 1 more)
-
Hi John, Just about any wood can be bent. On the harder woods like walnut and cherry, you can bend thinner strips and laminate them afterwards. It works for me. Vince P.
-
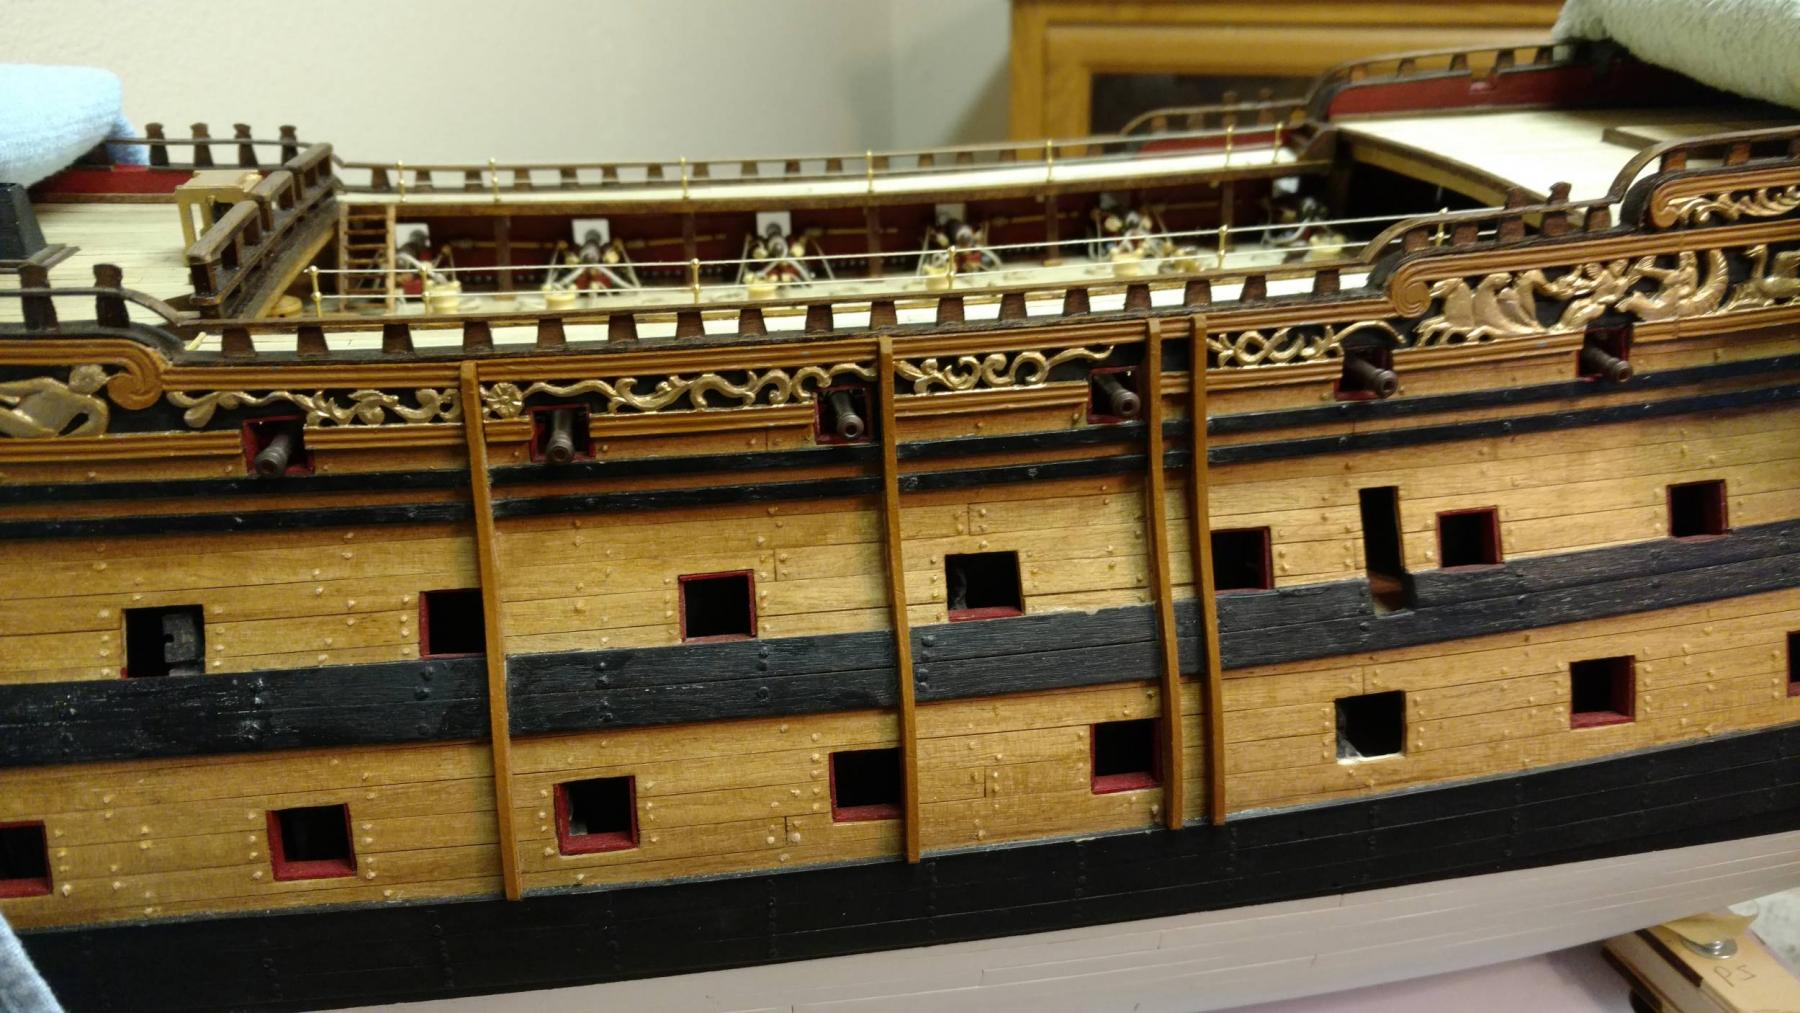
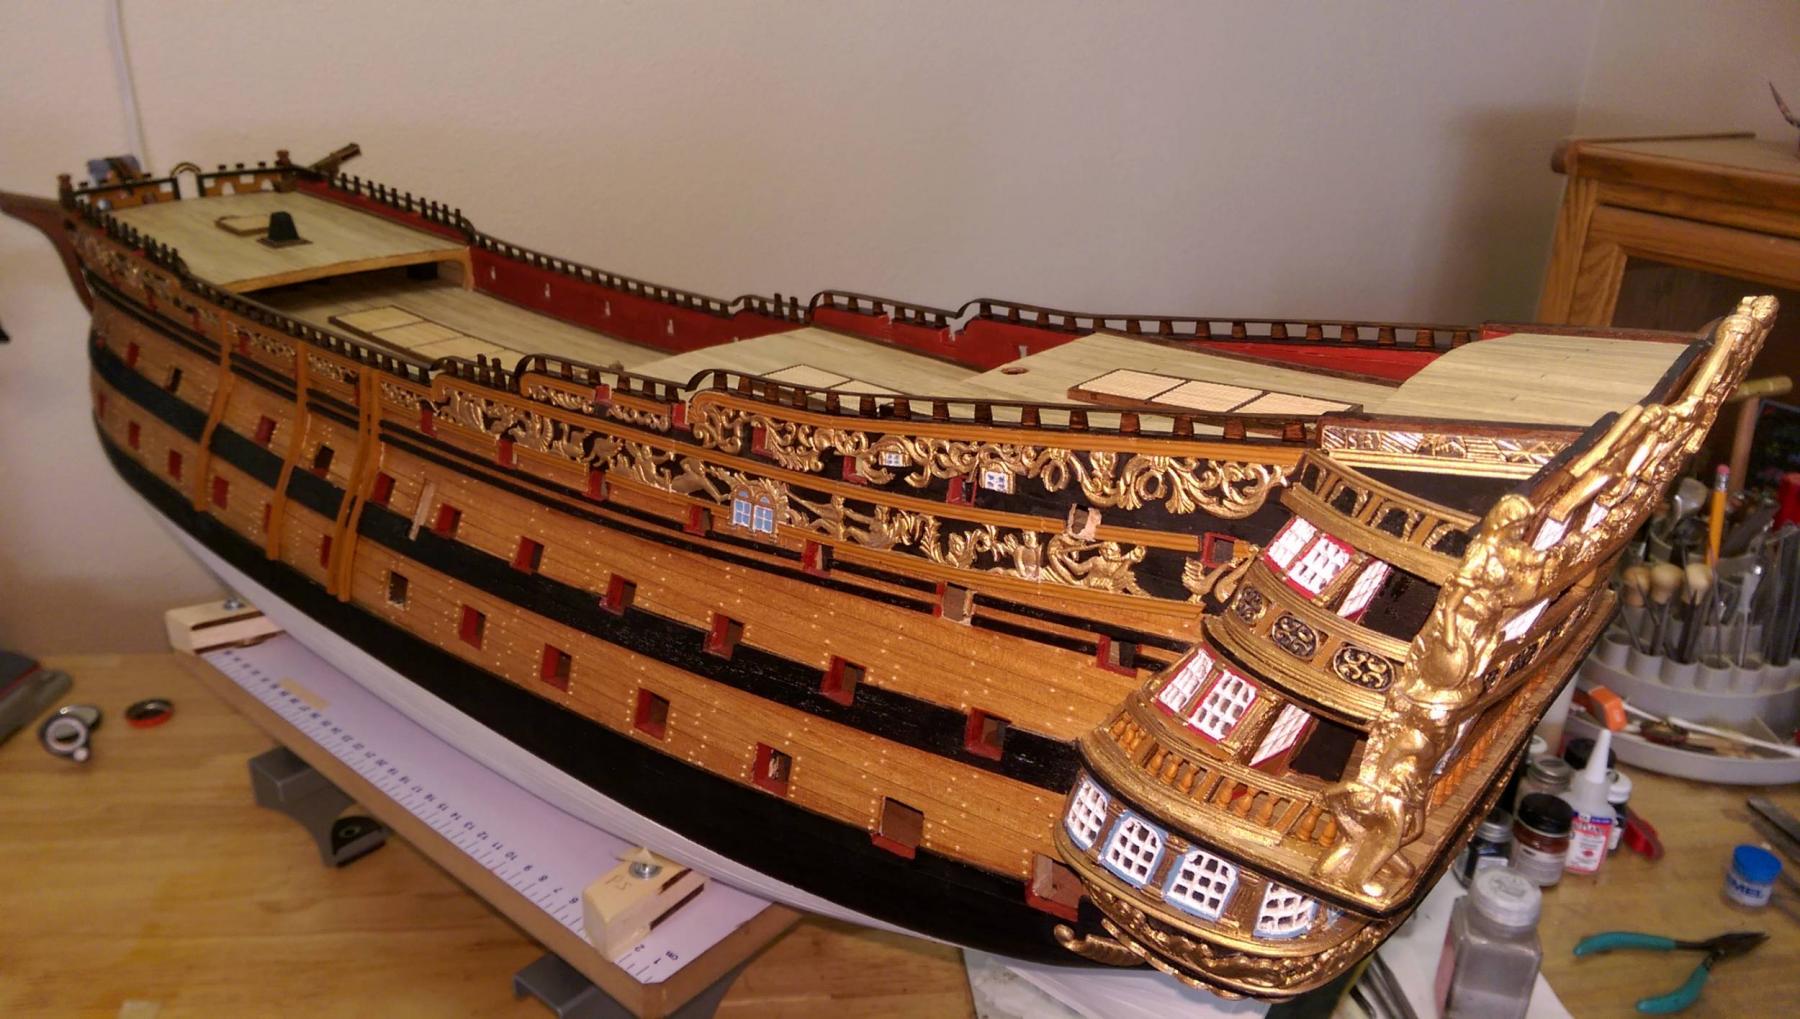
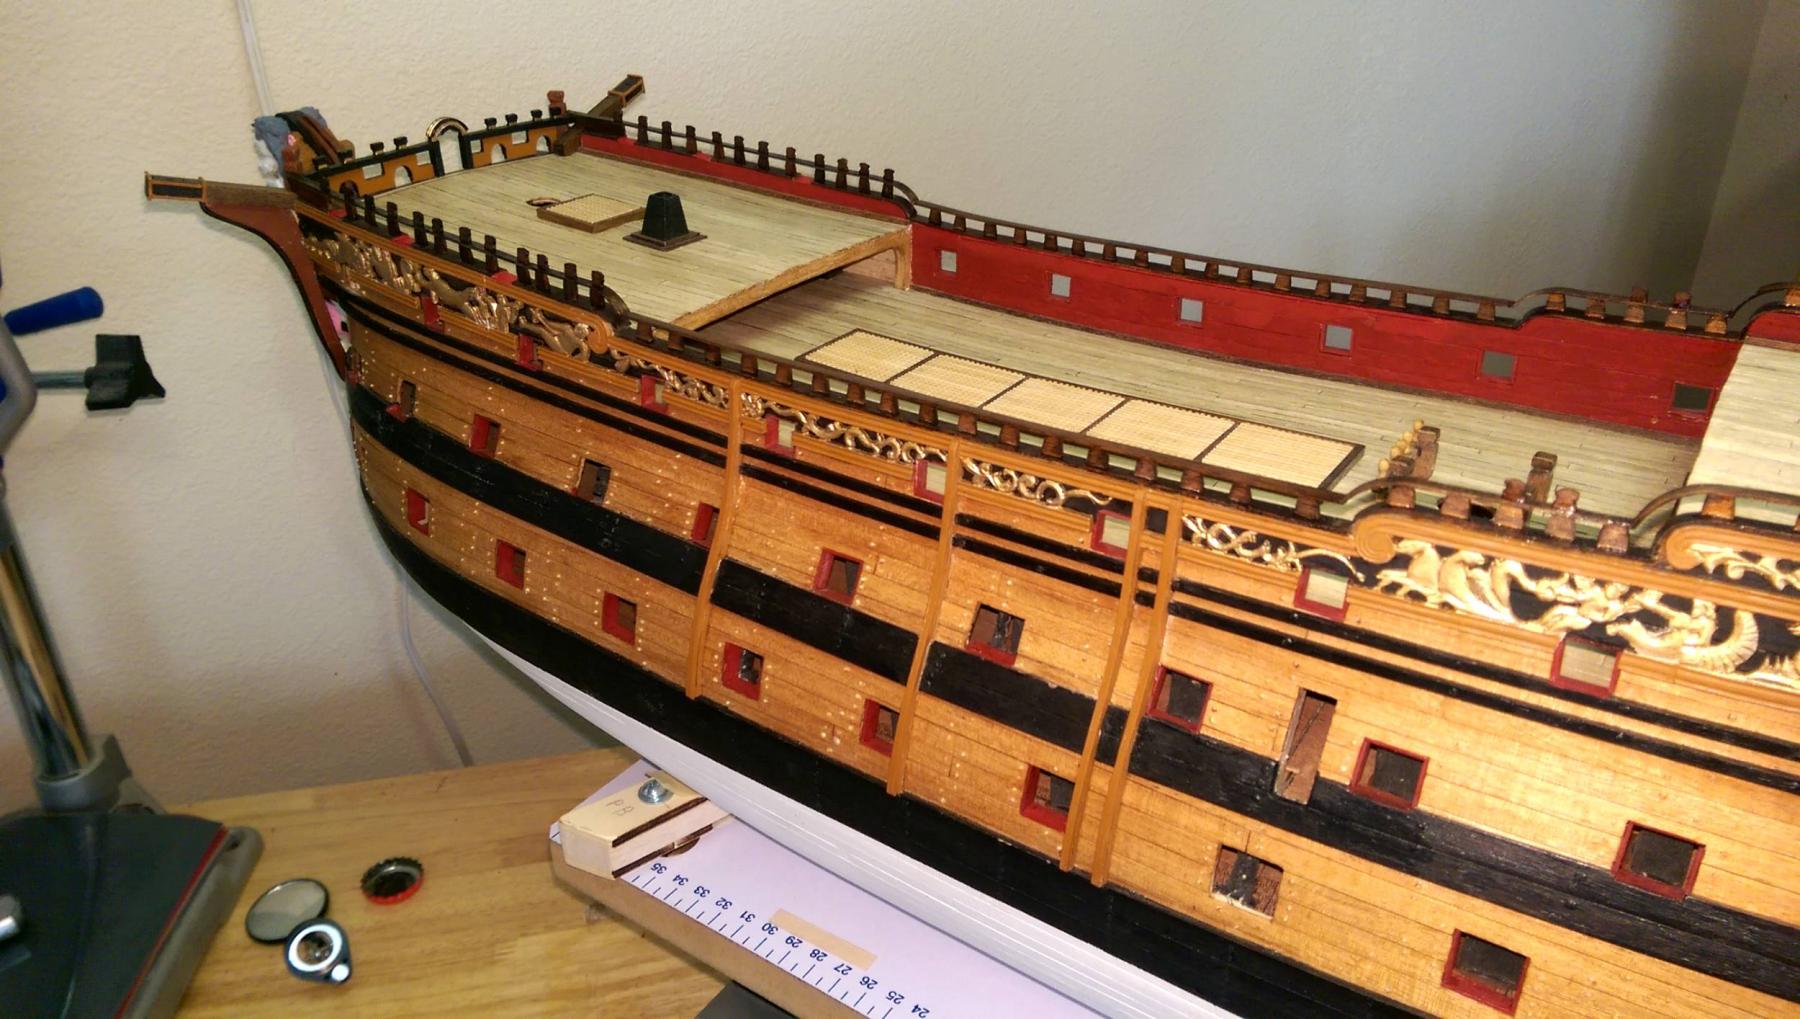
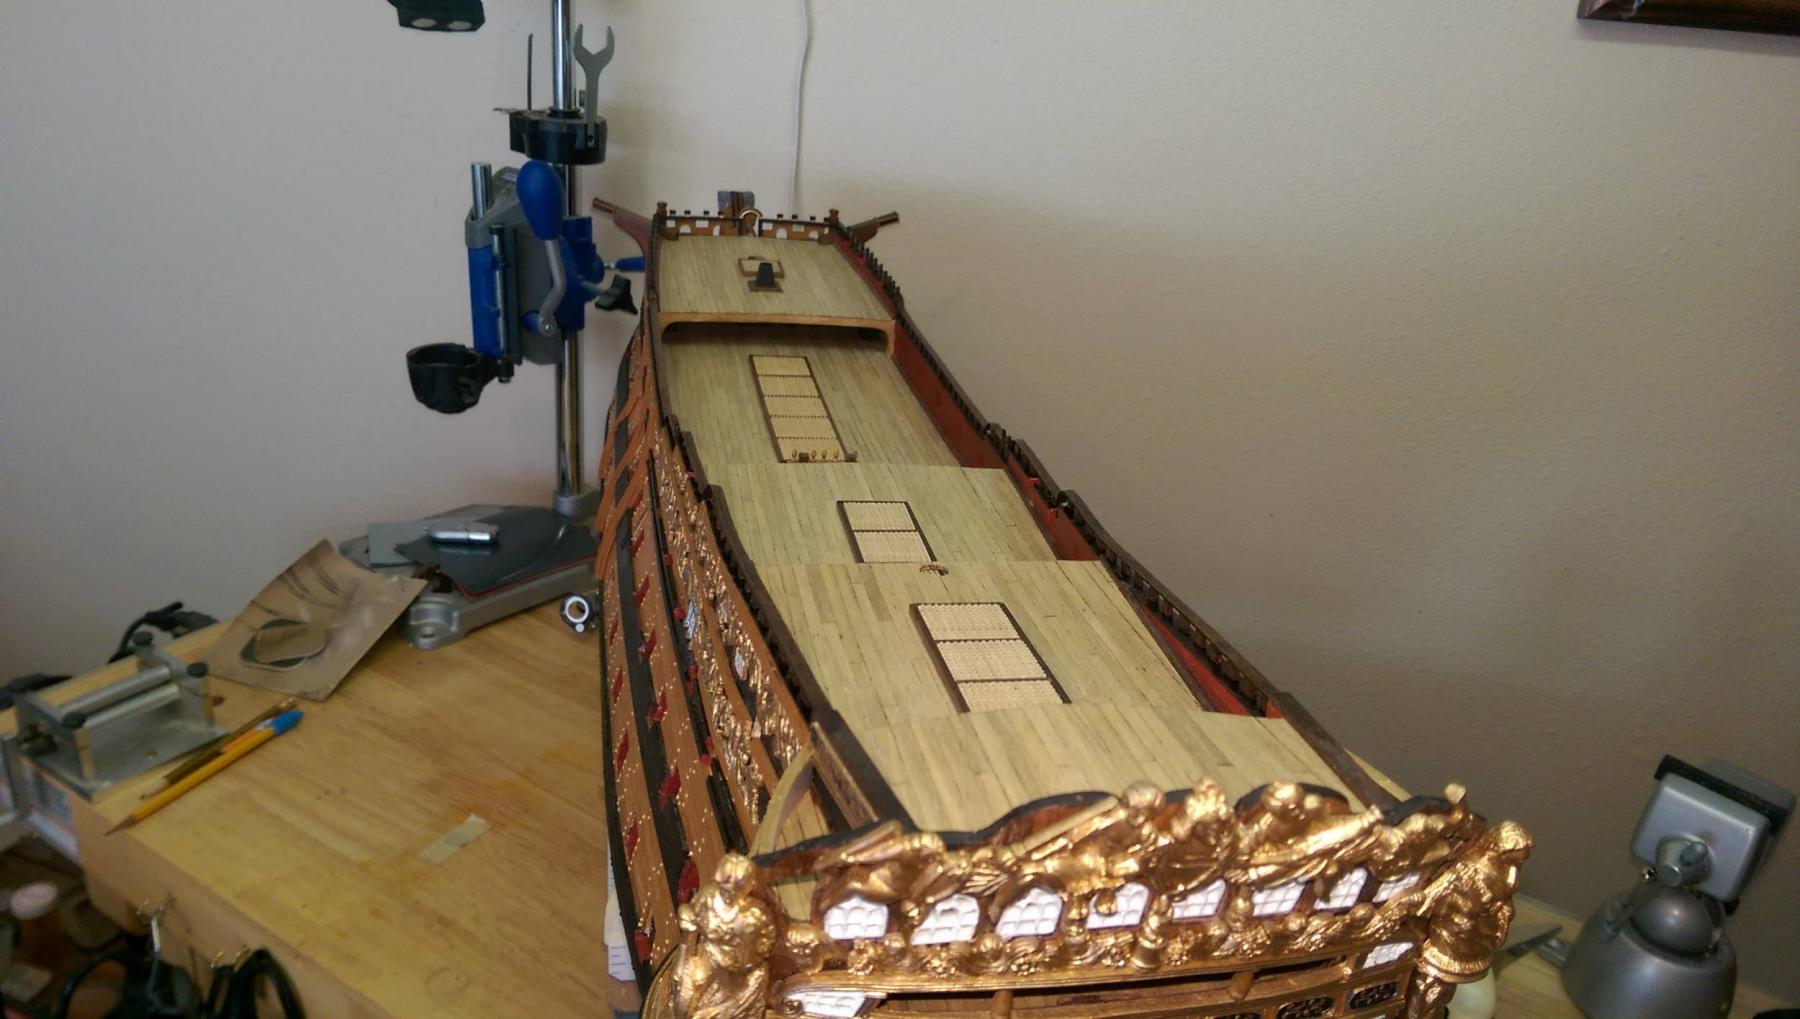
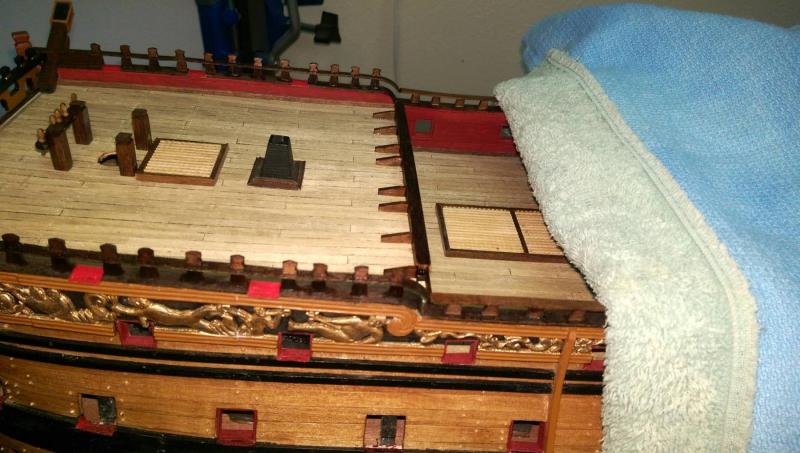
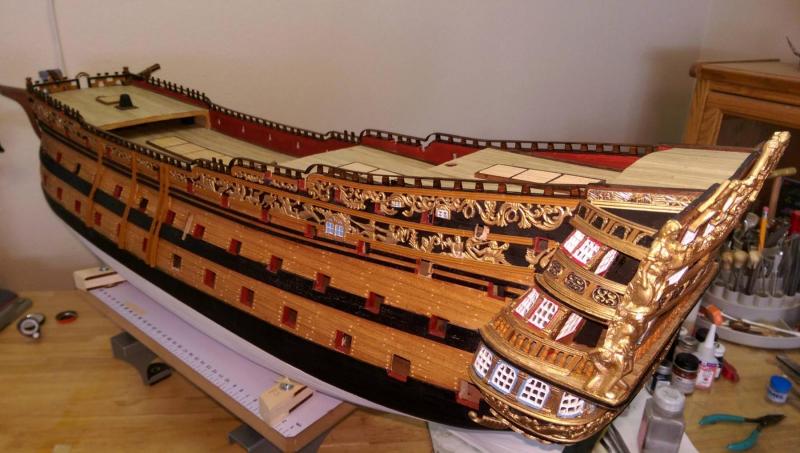
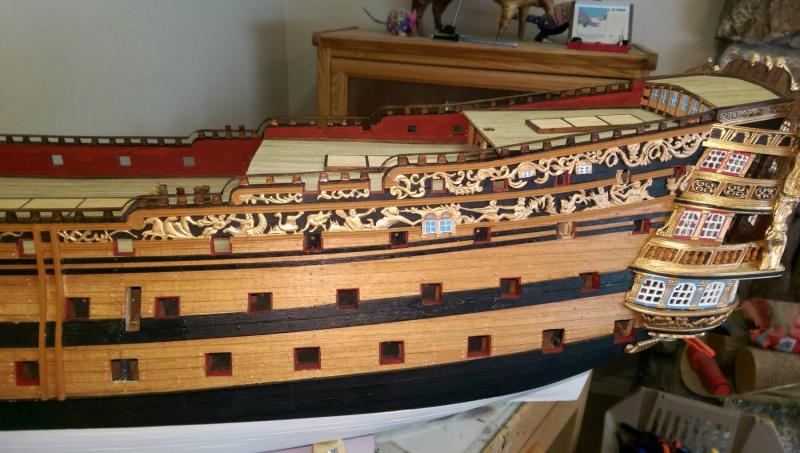
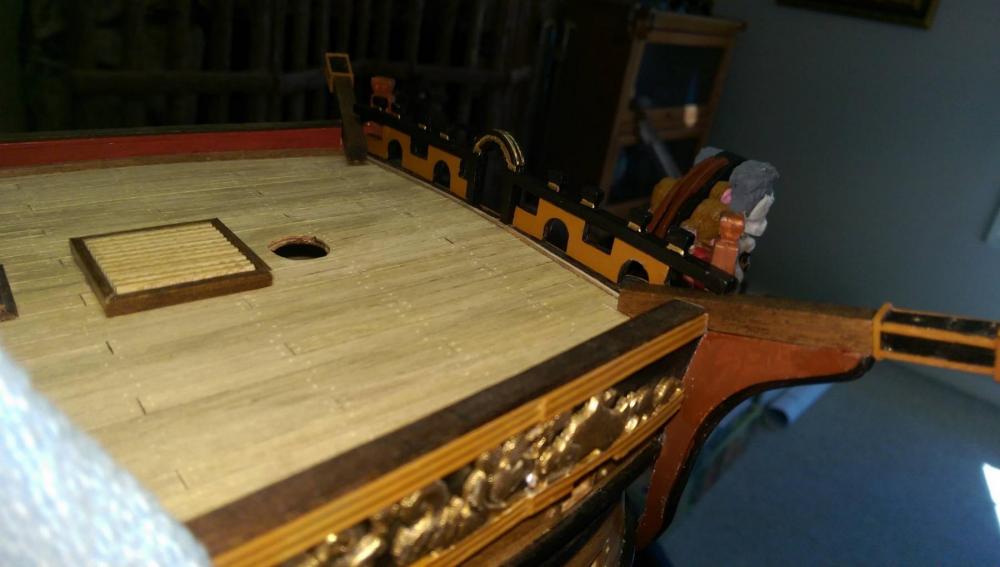
The cap rails on top of the bulwarks that run the length of the entire ship except the poop deck are completed. This was a tedious task since they are made from scratch with many little pieces. All of the parts including the little vertical support posts, the railings, and the bits on the forcastle are made from 4mm x 1mm walnut stock. The only exception are the railings that have the sharp curves at the ends. In order to make the bending easier, I used 2 strips of 4mm x 0.5mm walnut and laminated them on top of each other after bending, to form the 1mm thickness. Now I will start at the bow and work on all of the deck fixtures and structures from stem to stern. This part of the build will take a long time. Vince P.

- 593 replies
-
- 16
-
-
- royal william
- euromodels
- (and 1 more)
-
Nice work Ulises. Sorry about your sister. Hope she has a fast recovery. Vince P.
- 786 replies
-
- 3
-
-
- Royal Louis
- Finished
- (and 1 more)
-
Hi Ulises, I don't how you tried to bend those pieces, but if they are like other models they are made of a soft cast metal. On my Royal William there are dozens of parts made like that, most of which need some serious bending as well. I had good luck using a small butane torch and an anvil. Just be careful not to melt the parts with the torch. Pass the flame back and forth quickly over the parts only until they are just too hot to touch. Then place on the anvil and form the curves with a small plastic or nylon hammer. It worked for me and I never broke a single part. Just work slowly. You appear to be a skilled builder and will figure something out. Good luck. Vince P.
- 786 replies
-
- 4
-
-
- Royal Louis
- Finished
- (and 1 more)
-
Hi Cristi,I had the same problem and most of the metal decorative parts had to be cut down and adjusted to fit. Vince P.
-
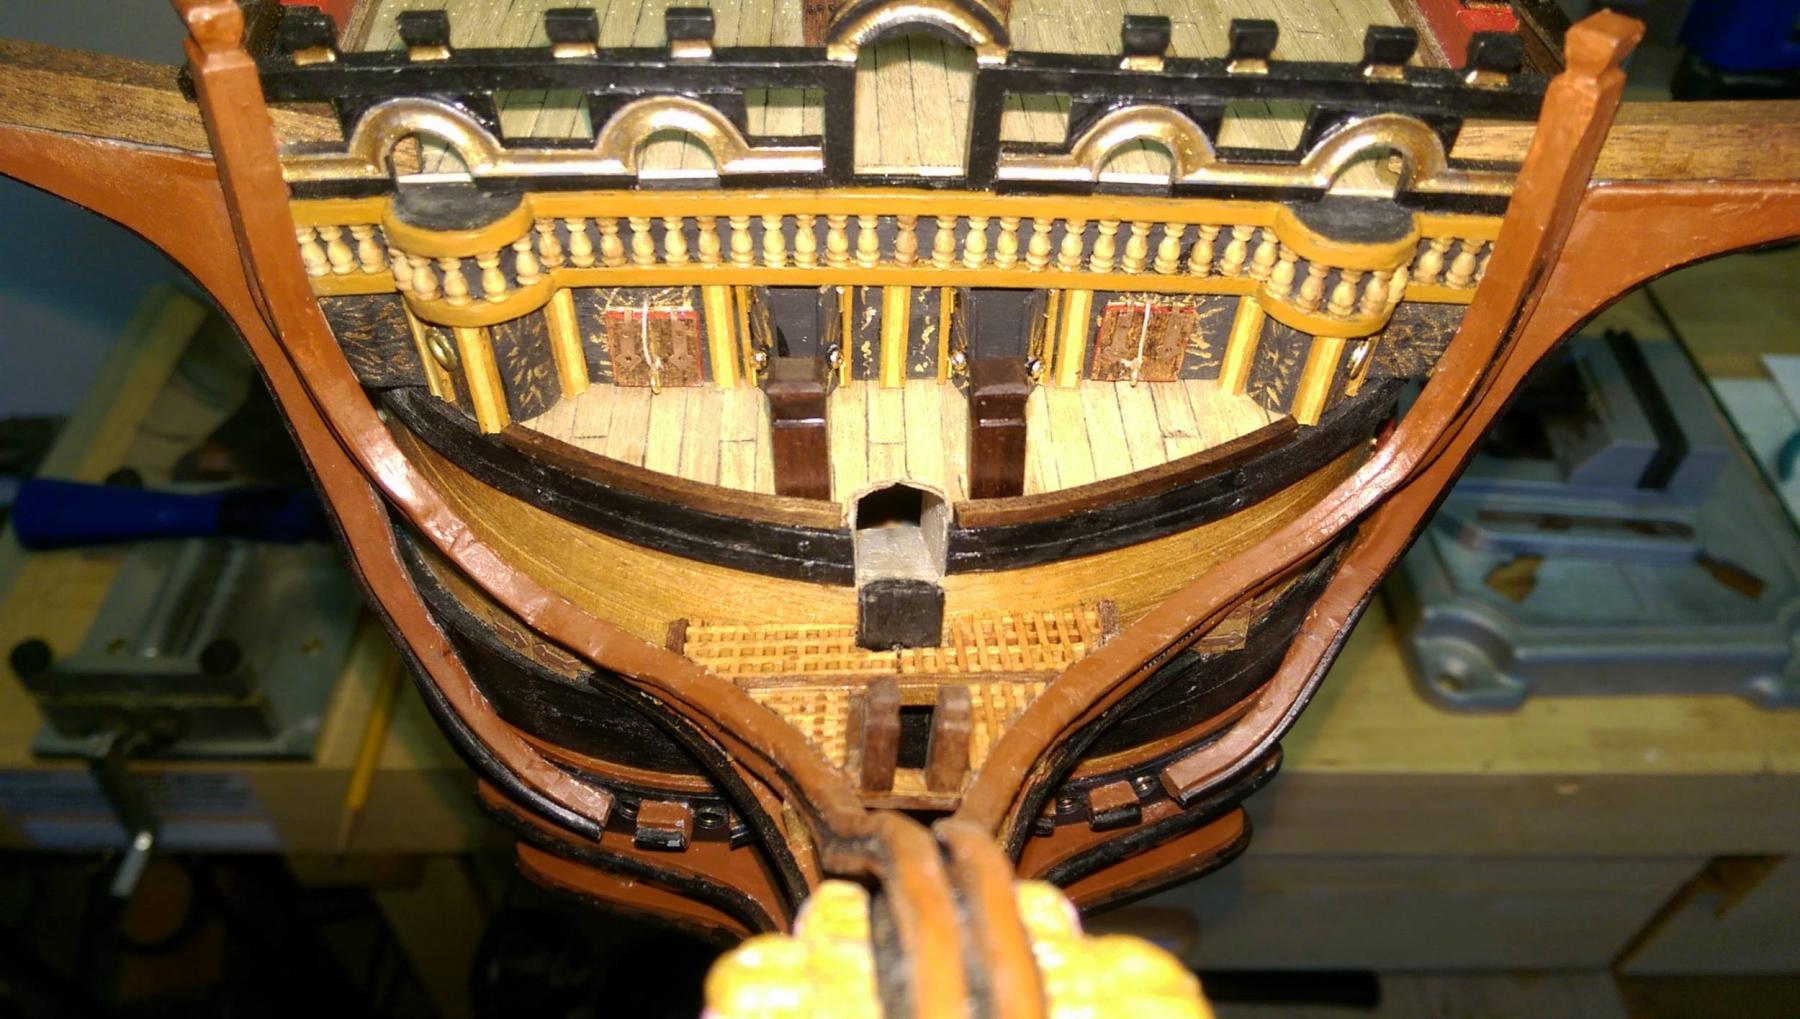
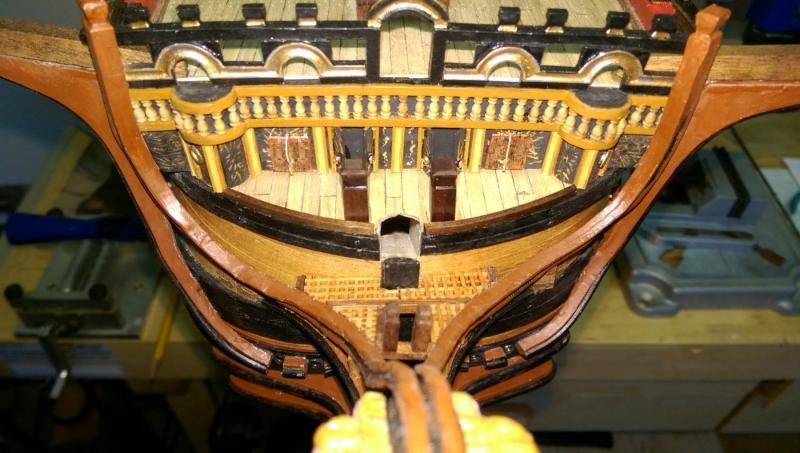
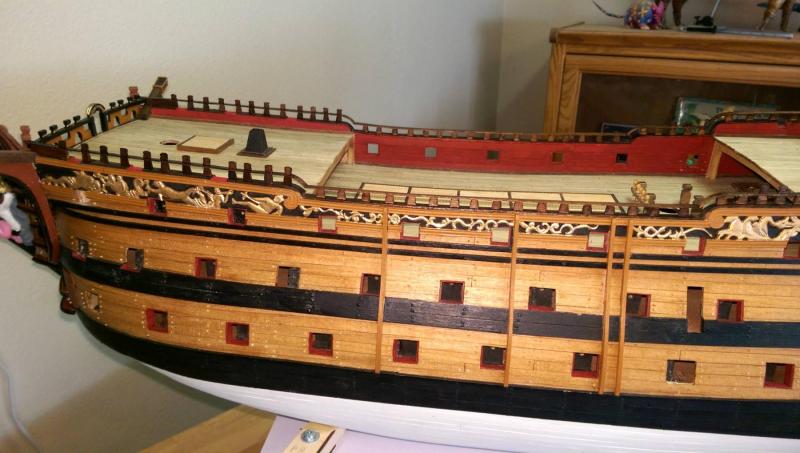
I have placed the forward forecastle bulwark and railing, as well as the catheads. The metal pieces supplied in the kit worked out fine. Once I join this railing with the forecastle side railings, it will look very nice. I will construct and place the side railings next. Vince P.


- 593 replies
-
- 12
-
-
- royal william
- euromodels
- (and 1 more)