pirozzi
-
Posts
843 -
Joined
-
Last visited
Content Type
Profiles
Forums
Gallery
Events
Everything posted by pirozzi
-
 The lower head rails need some severe shaping also and have to be shortened some to allow room for the hawse holes. Vince P.
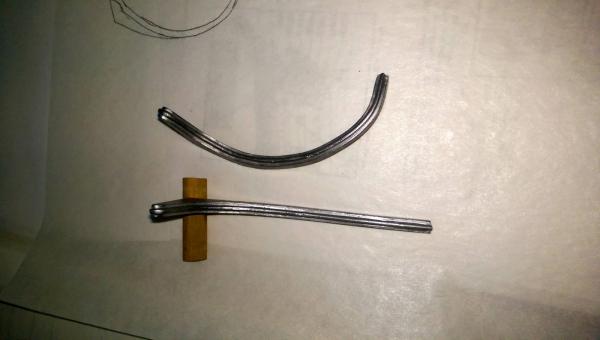
- 593 replies
-
- 3
-

-
- royal william
- euromodels
- (and 1 more)
-
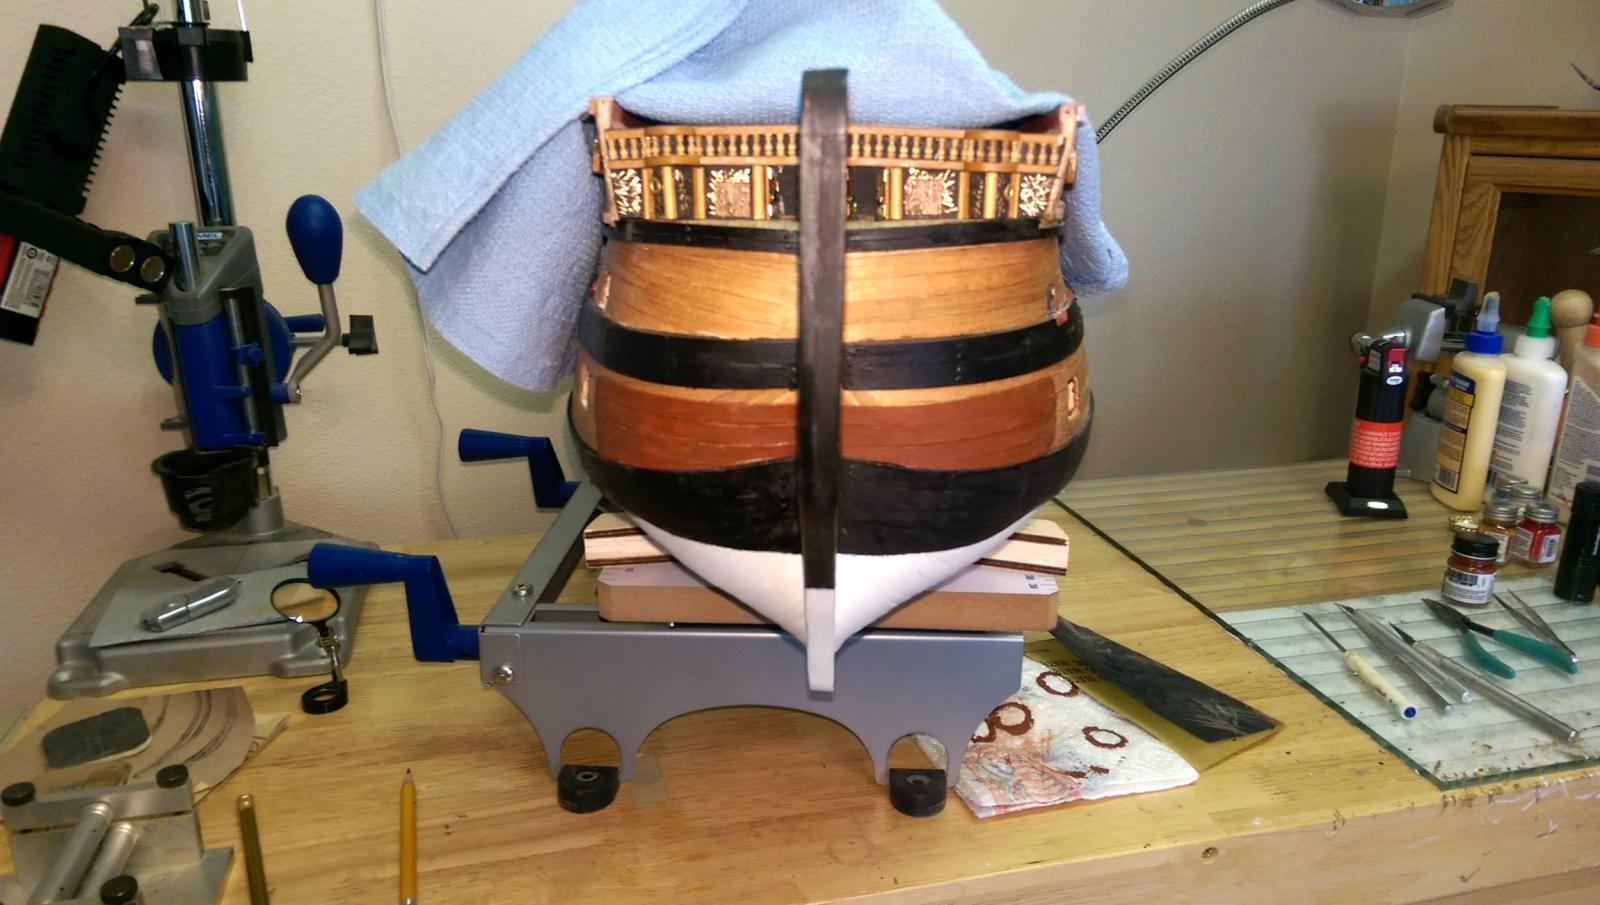
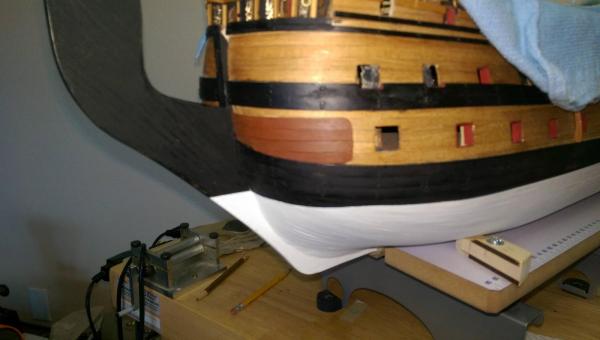
Working on the bow area. Reinforcement plates are needed on the bow planking for the heavy head rails and hawse holes for the anchor ropes. I just used some of the second planking strips to make the inner plates. Vince P.
- 593 replies
-
- 6
-
-
- royal william
- euromodels
- (and 1 more)
-
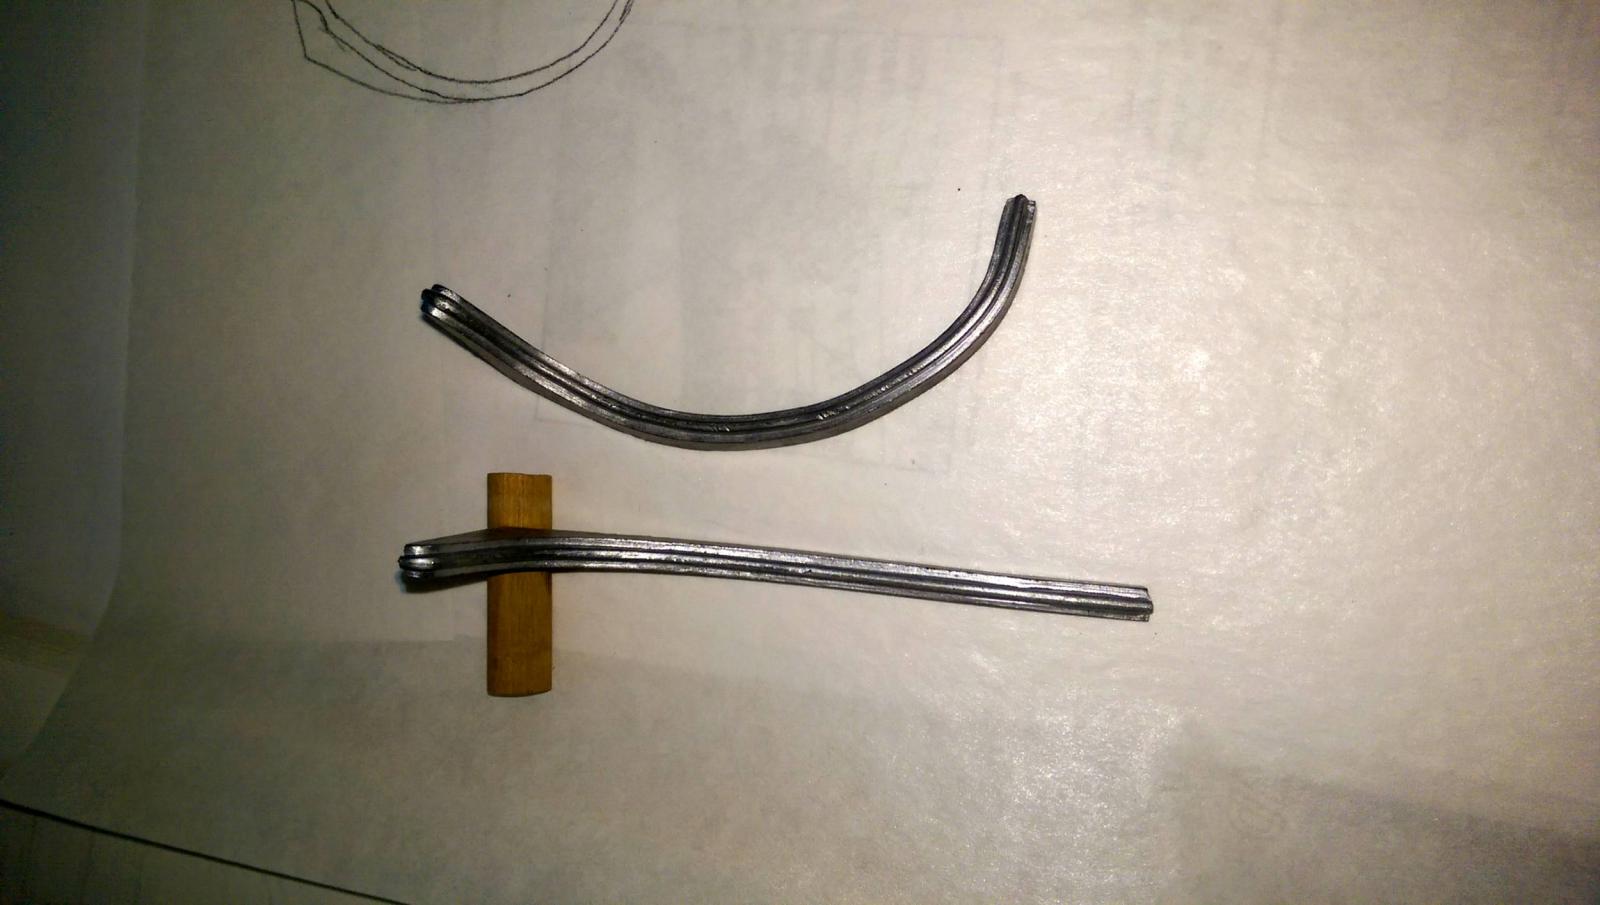
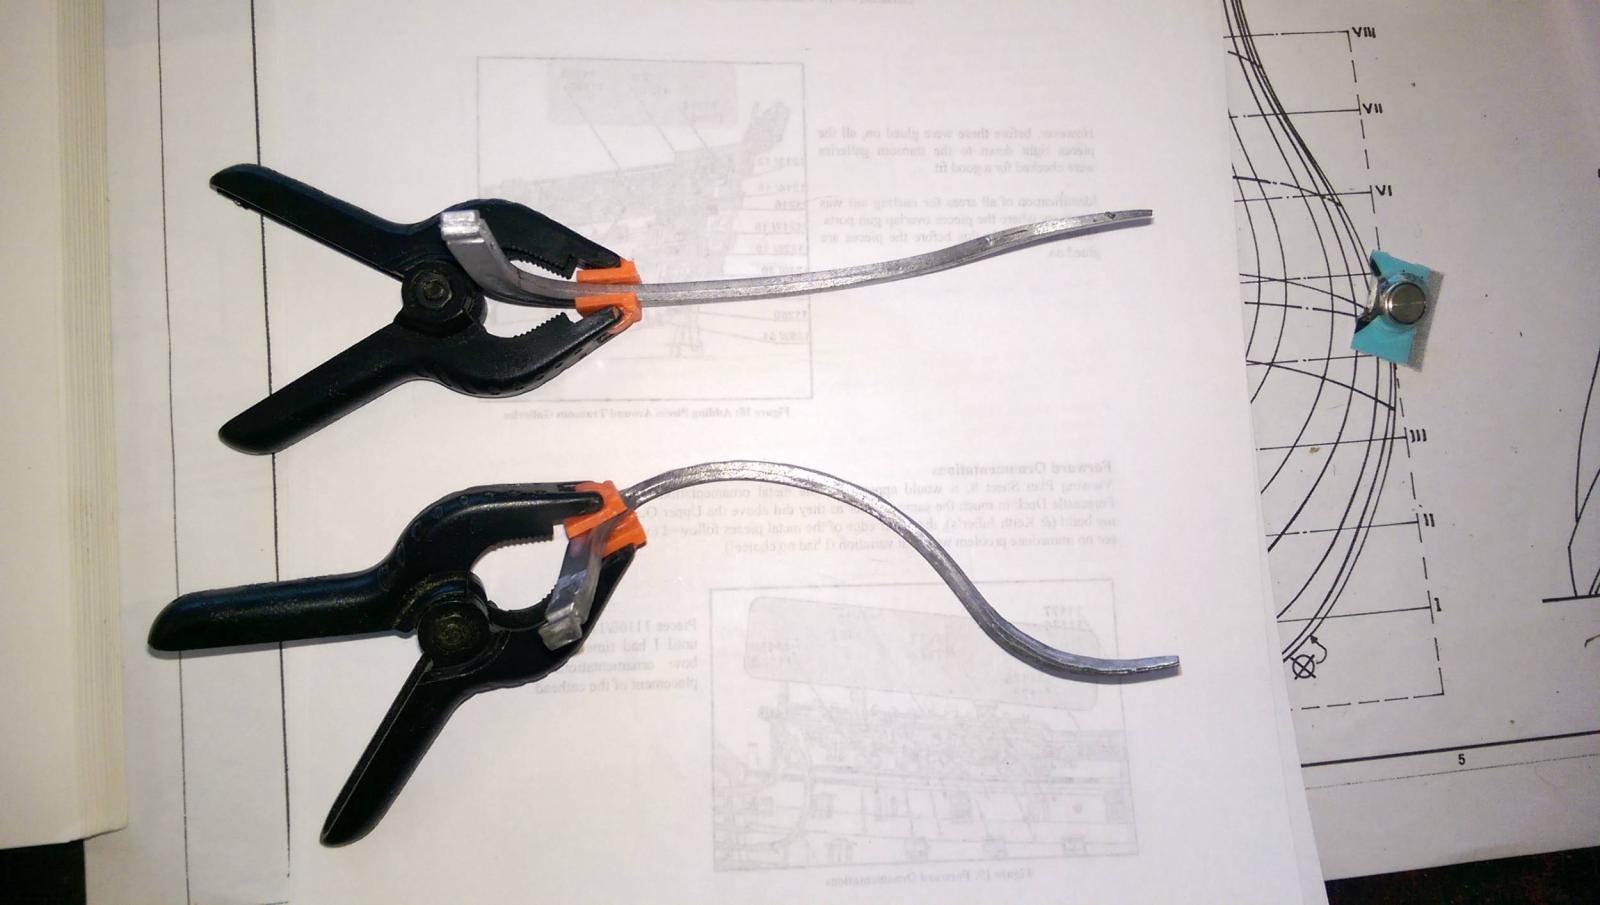
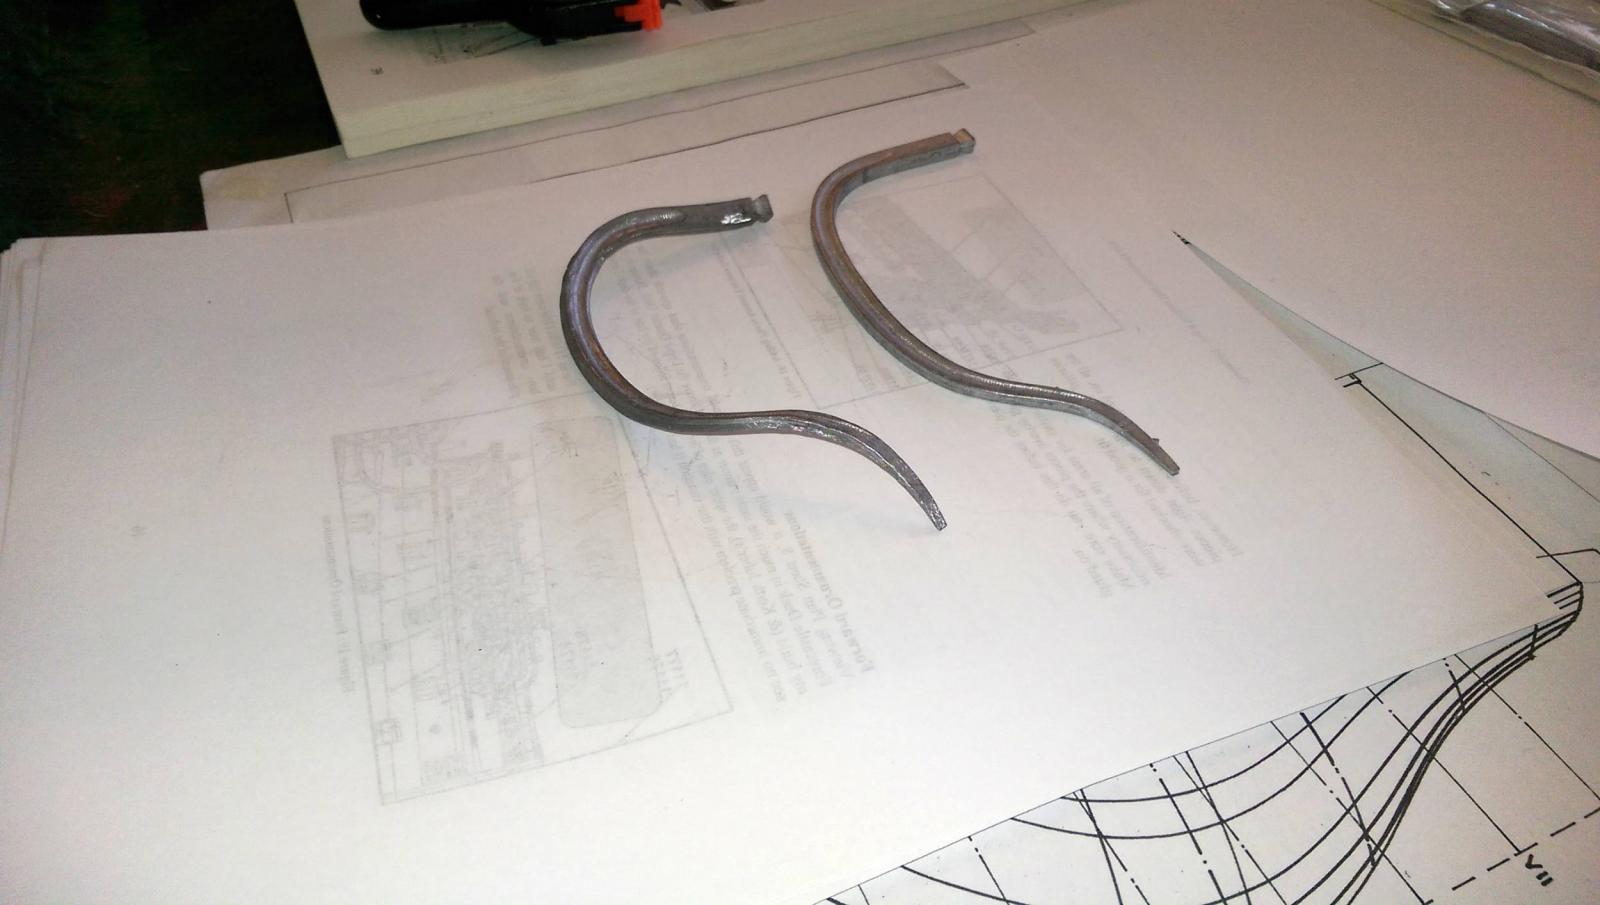
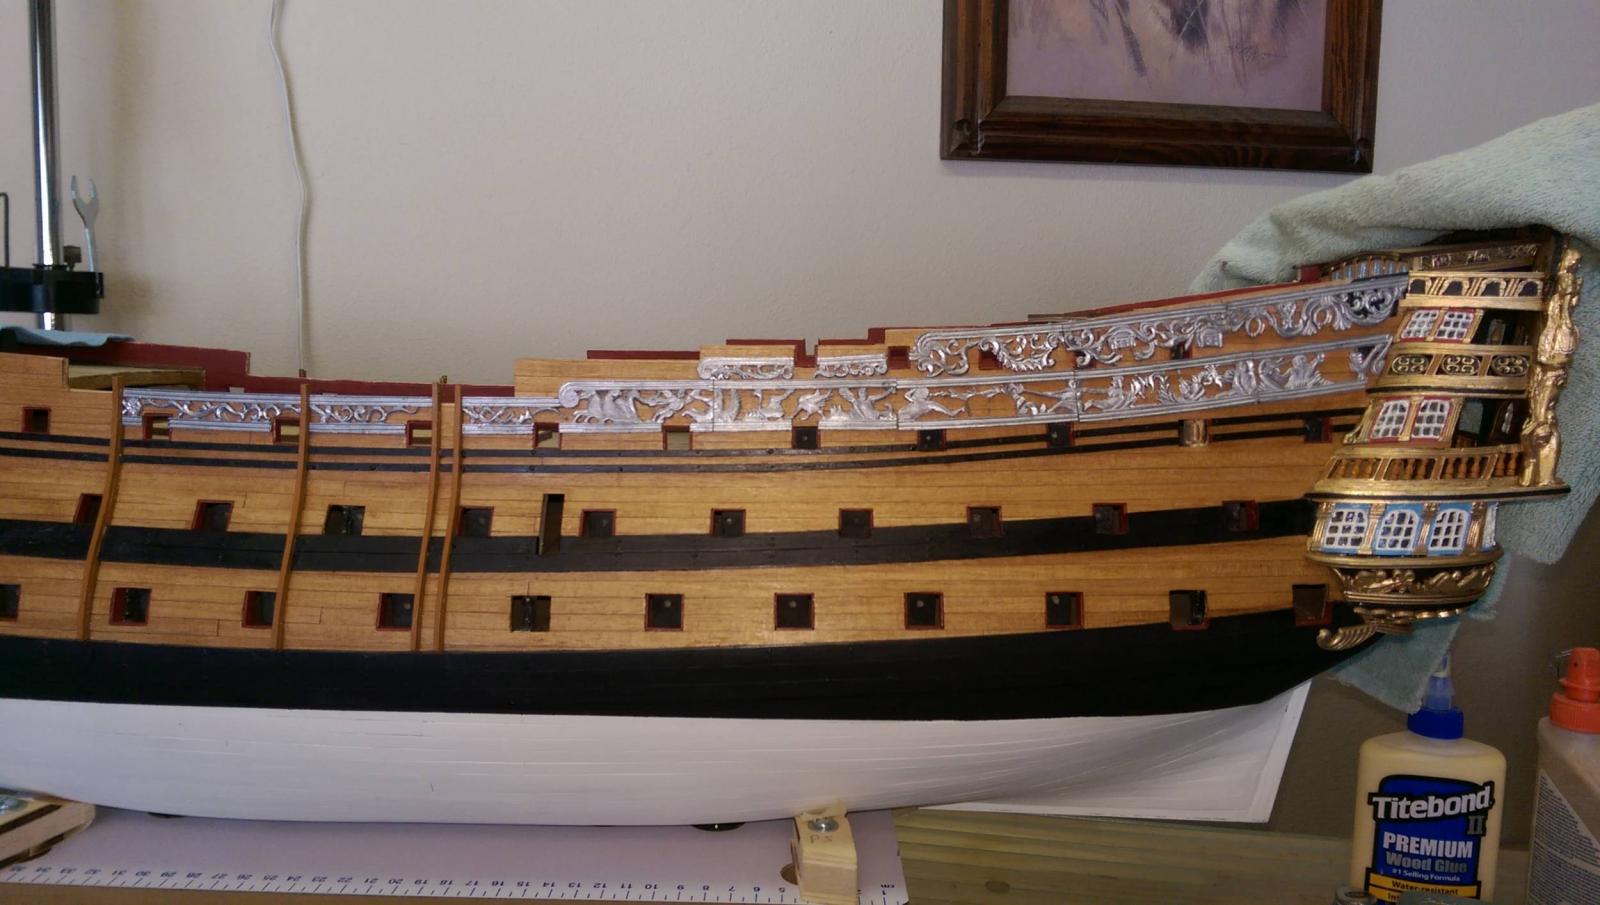
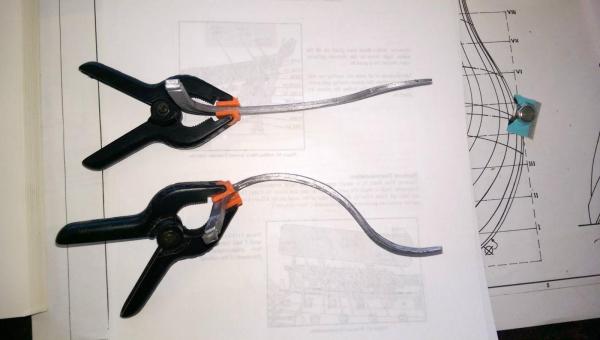
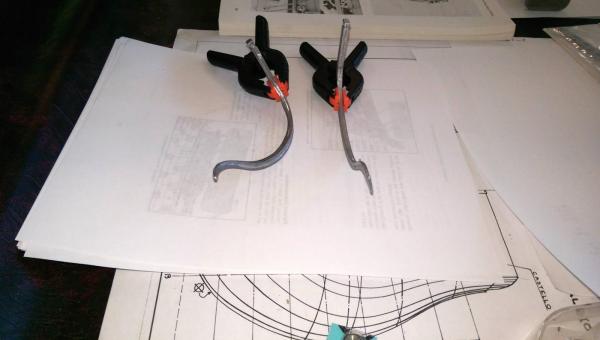
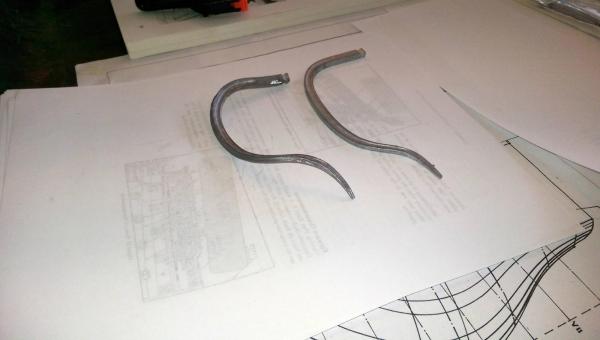
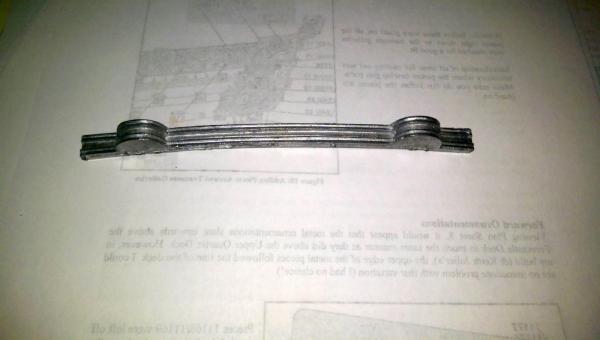
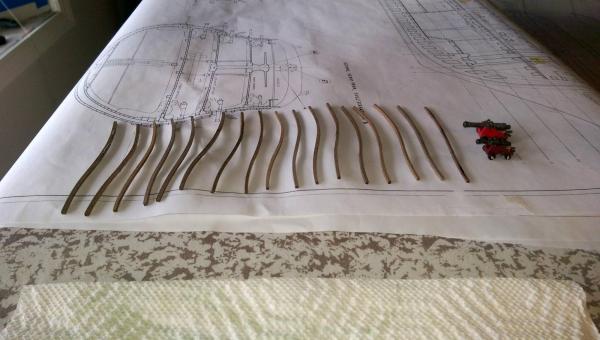
Working on the head rails. The metal pieces have to be bent severly in all directions to fit. Using a torch to heat and bend very slowly little by little is the only way. After each bend, the metal is dipped in water to cool and placed on the ship until it fits properly. It took about an hour just to bend one side of the top rail, which seems to require the most bending. The photos show the top rail before and after the finished bending. Vince P.
- 593 replies
-
- 8
-
-
- royal william
- euromodels
- (and 1 more)
-
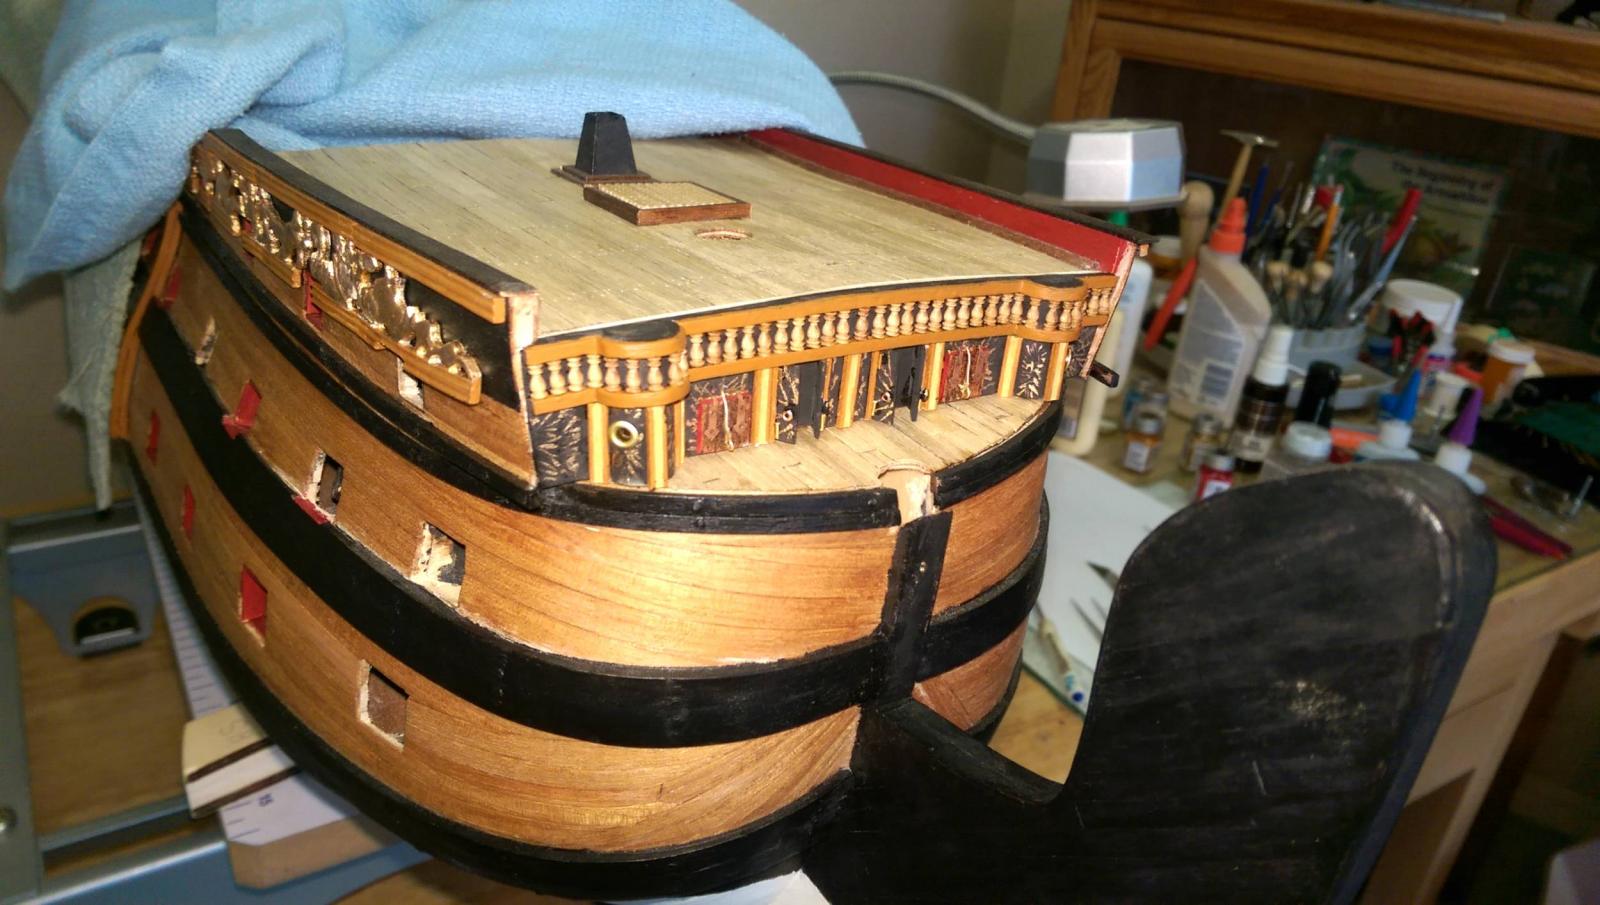
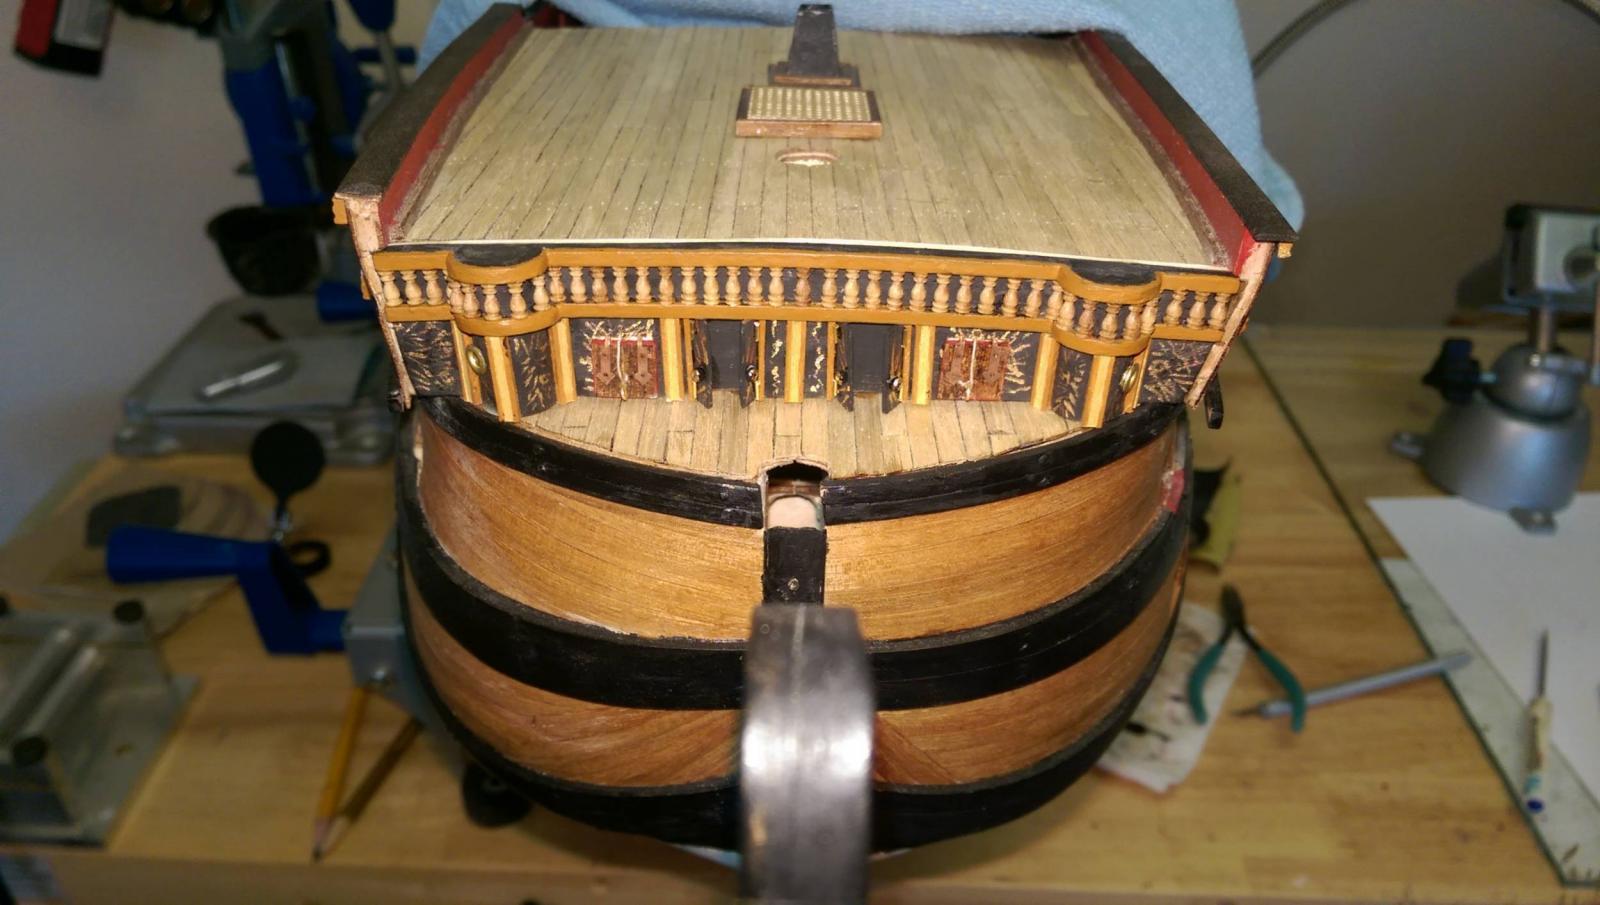
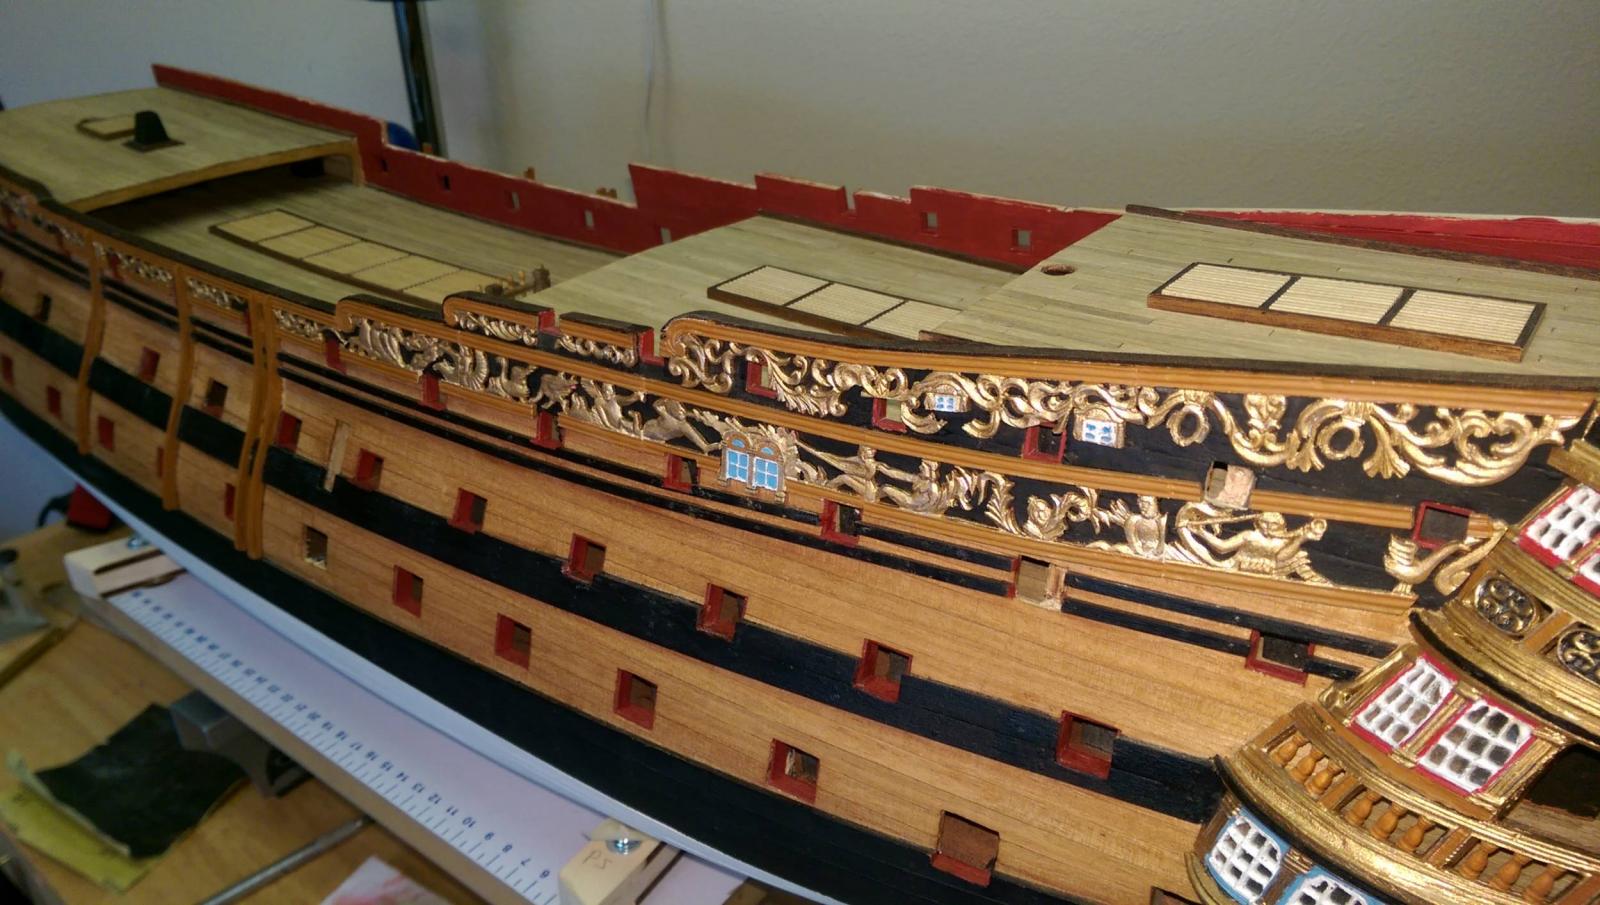
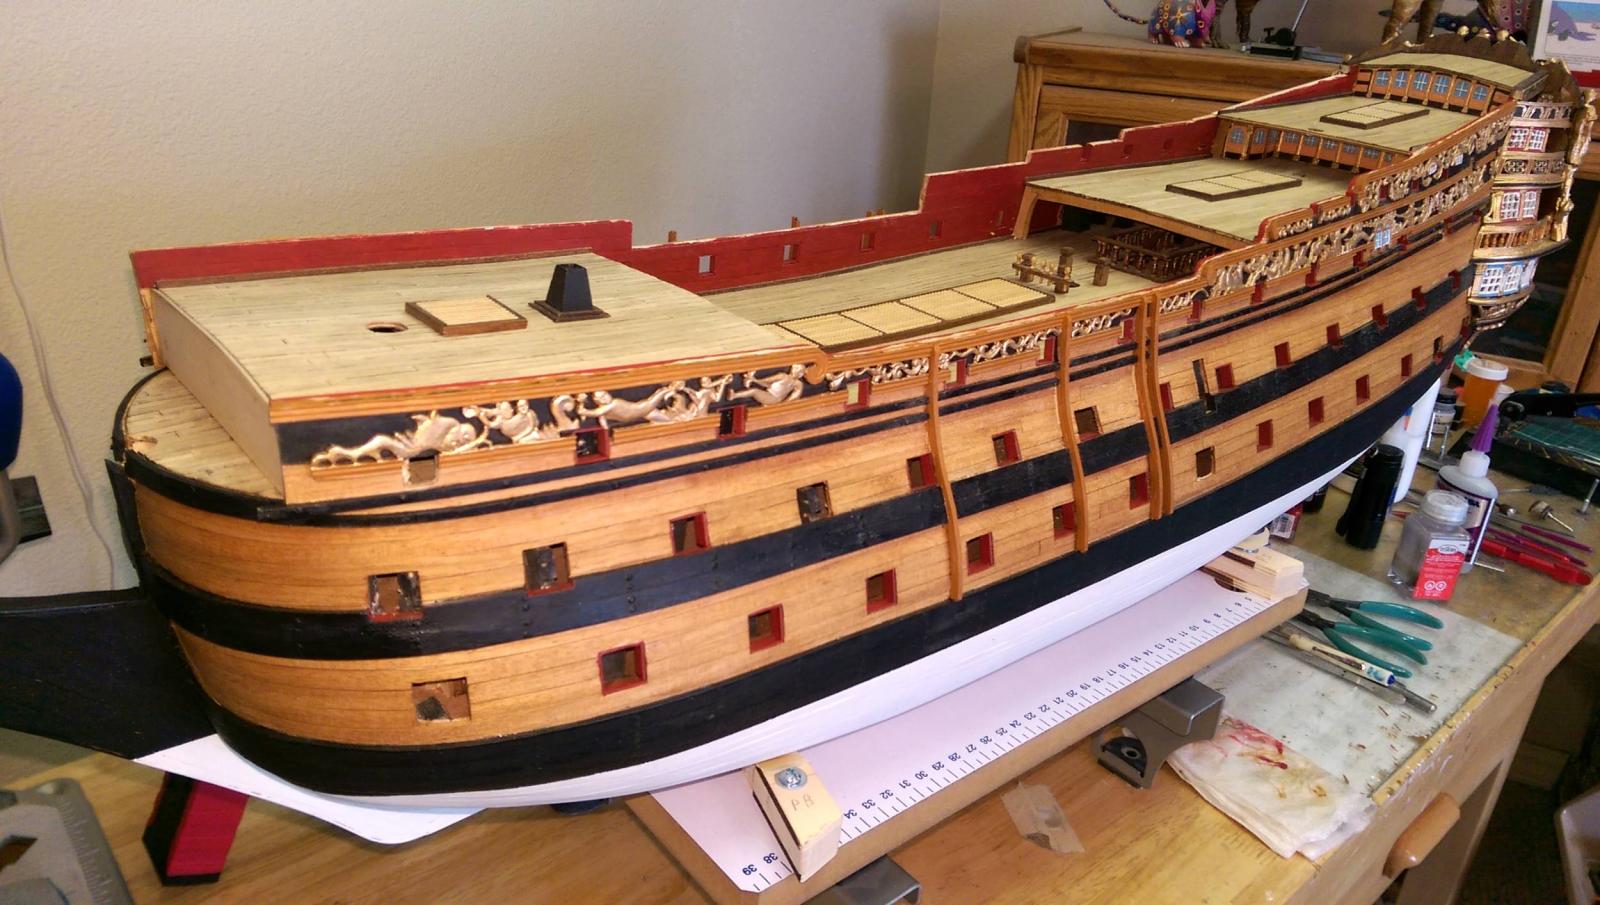
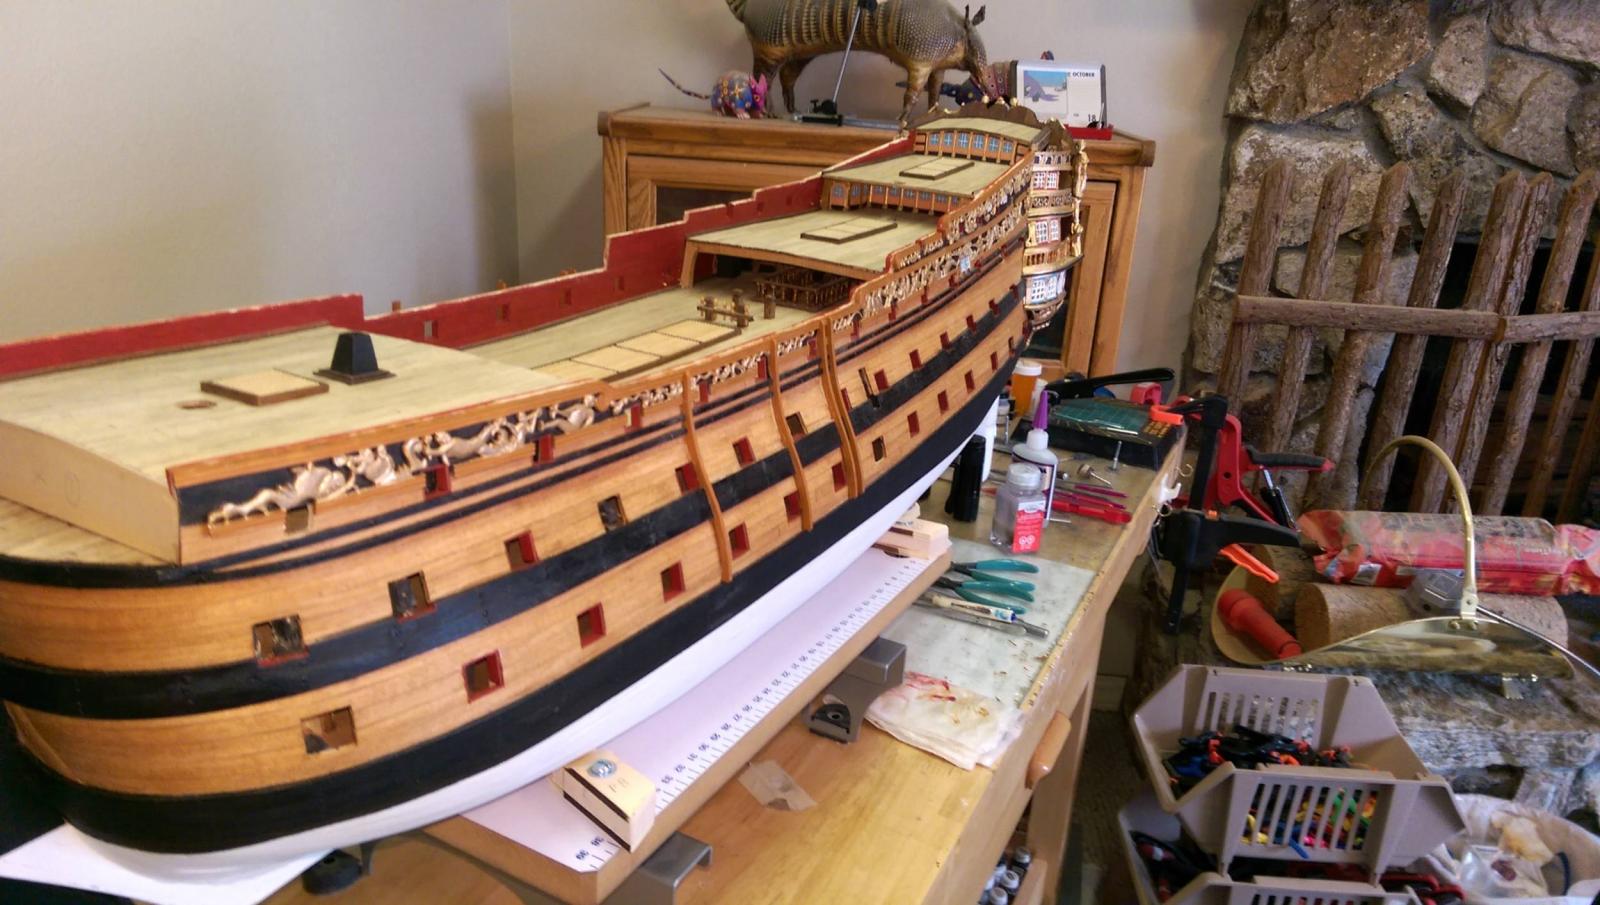
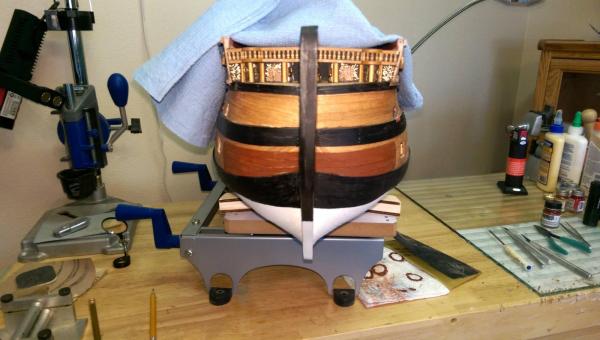
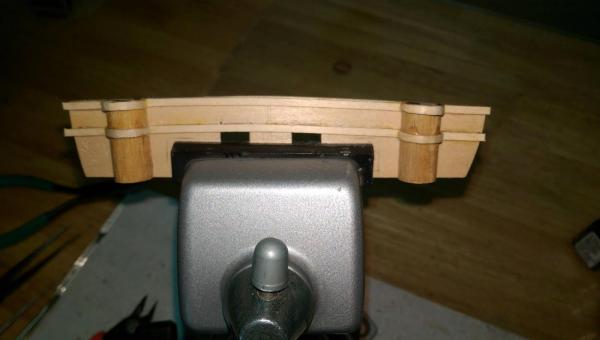
The finishing touches to the bulkhead and mounting on the ship. Vince P.


- 593 replies
-
- 12
-
-
- royal william
- euromodels
- (and 1 more)
-
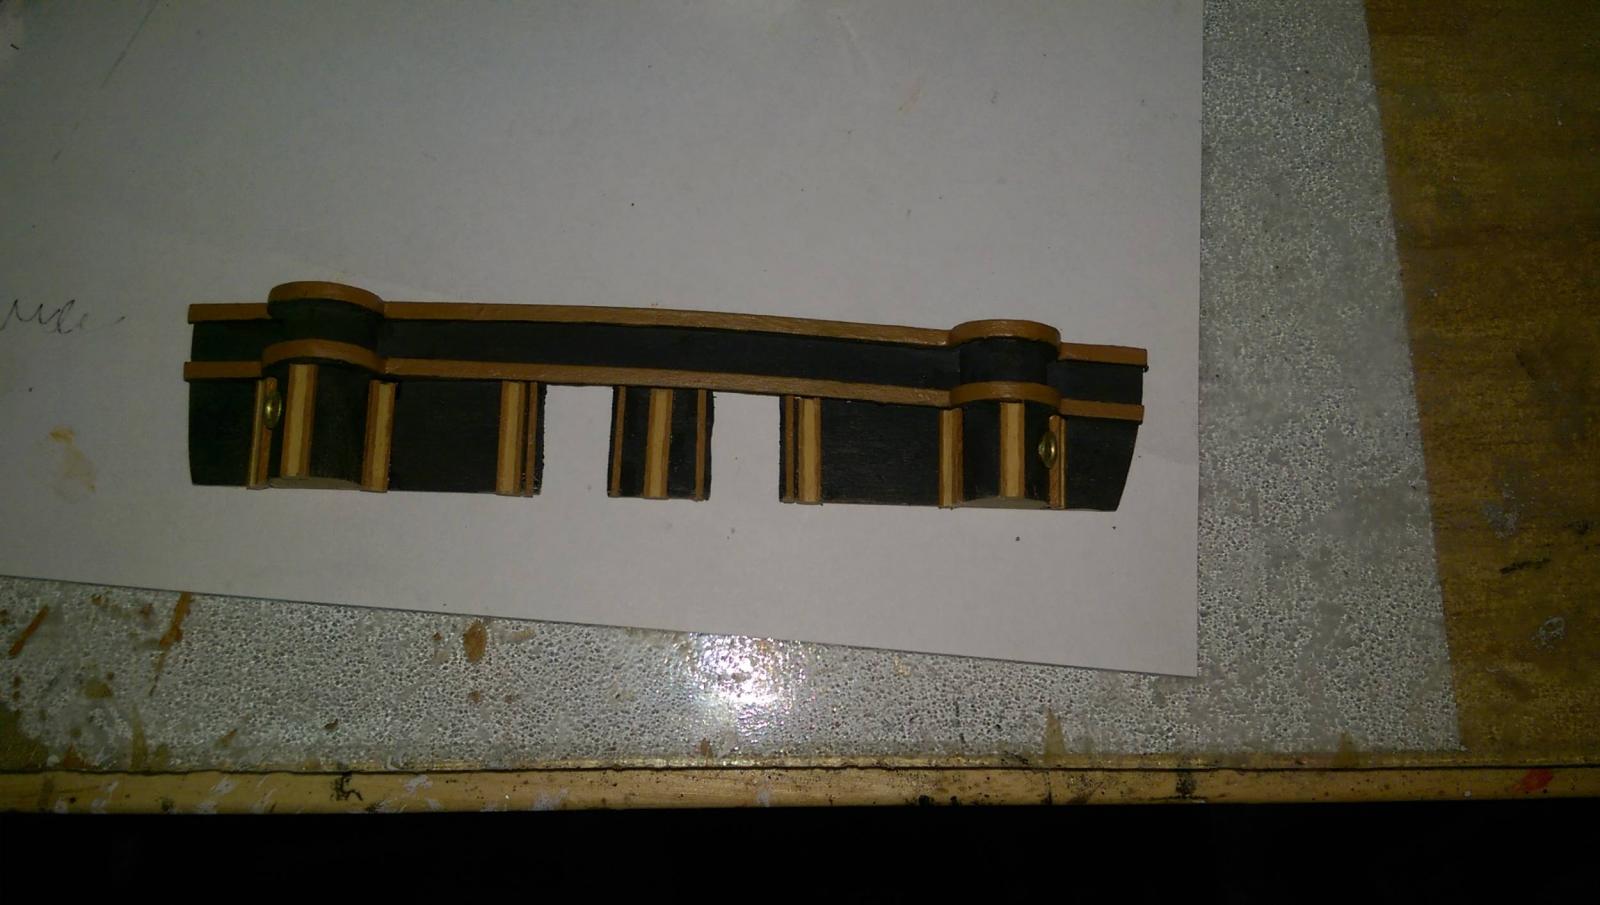
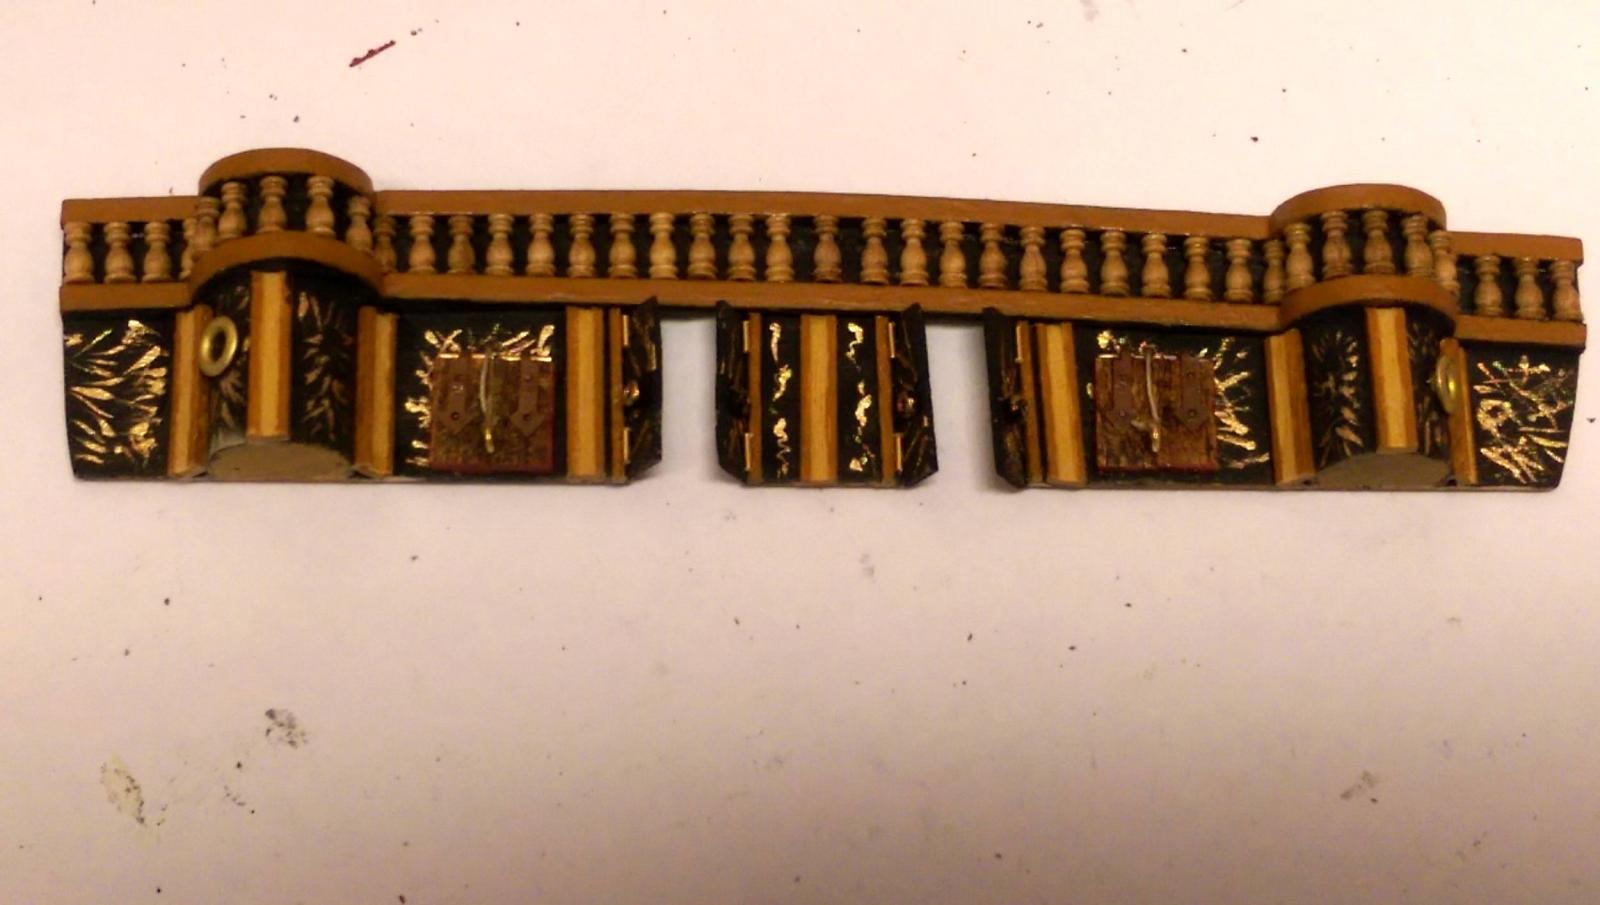
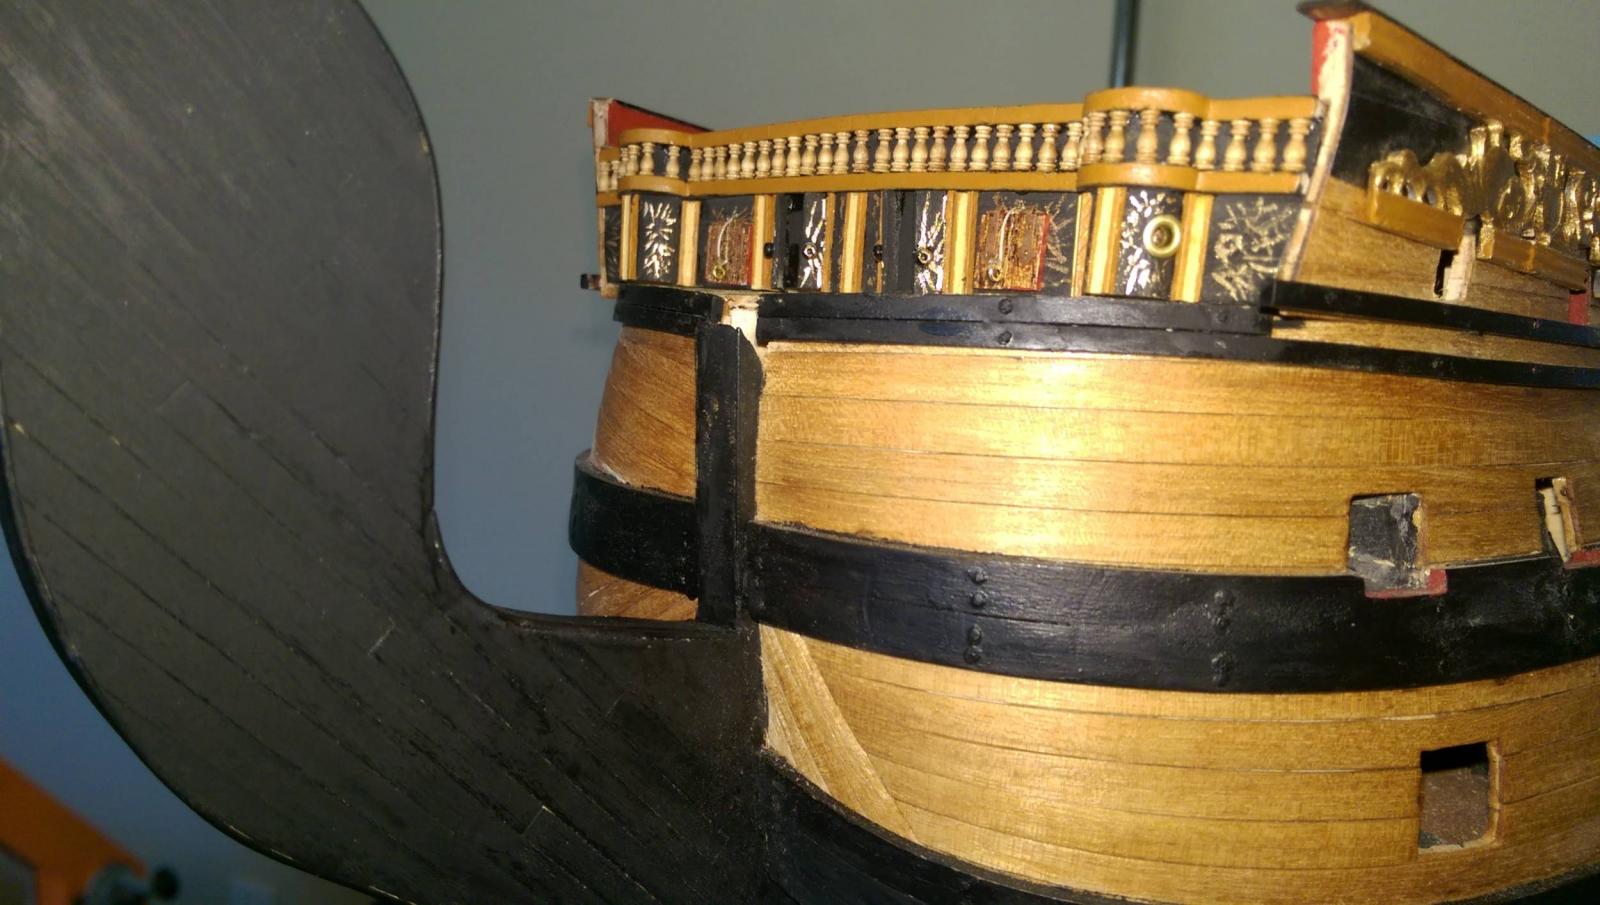
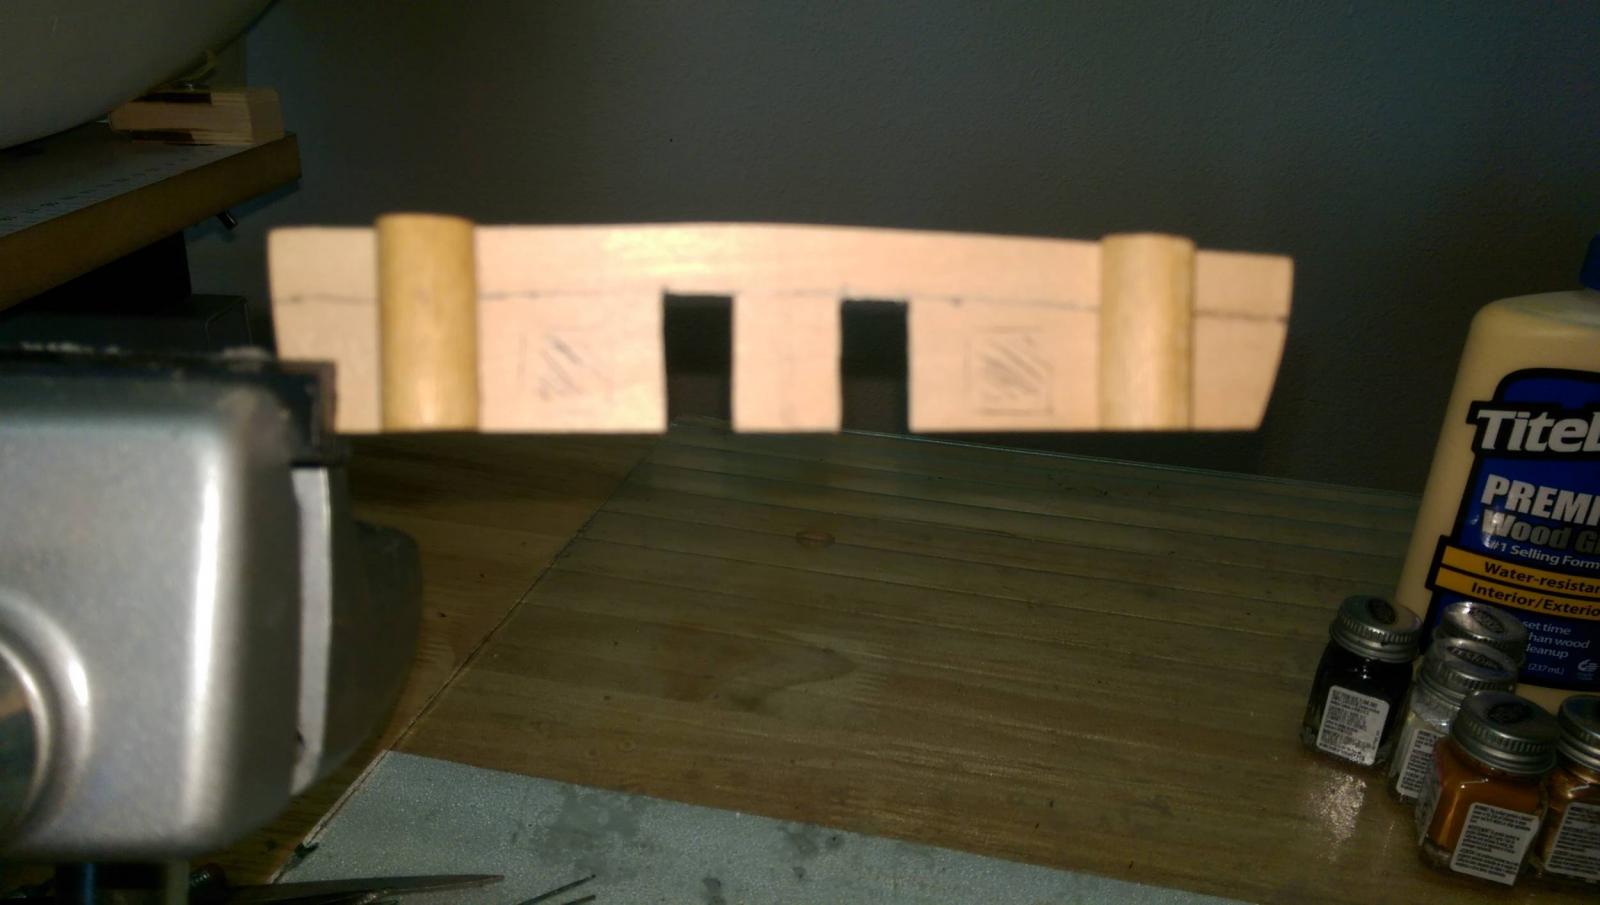
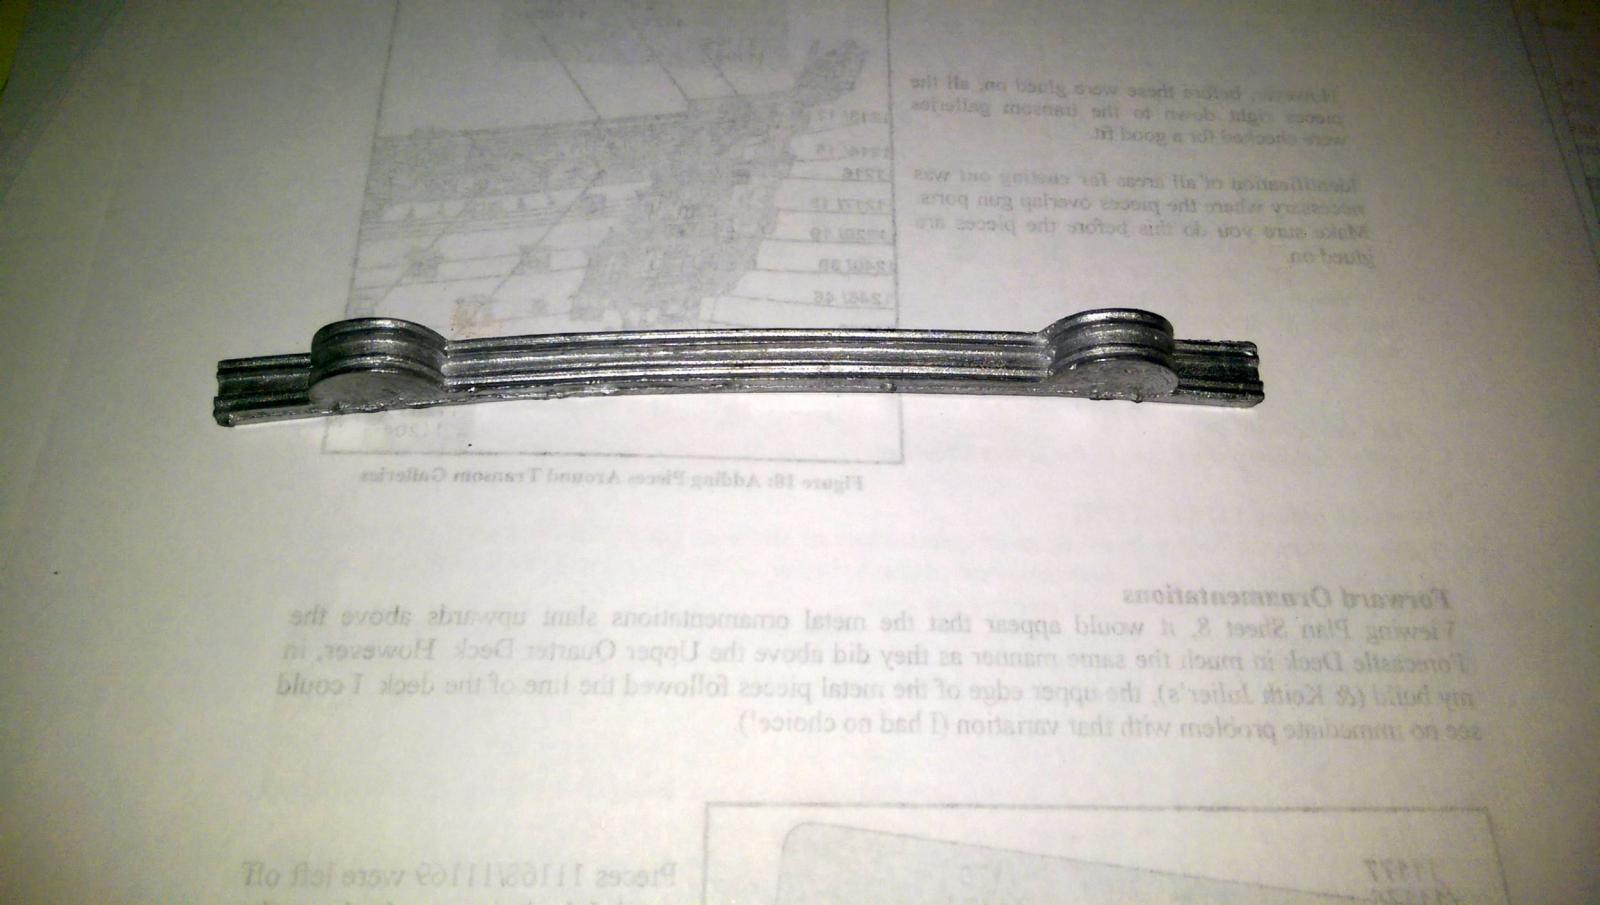
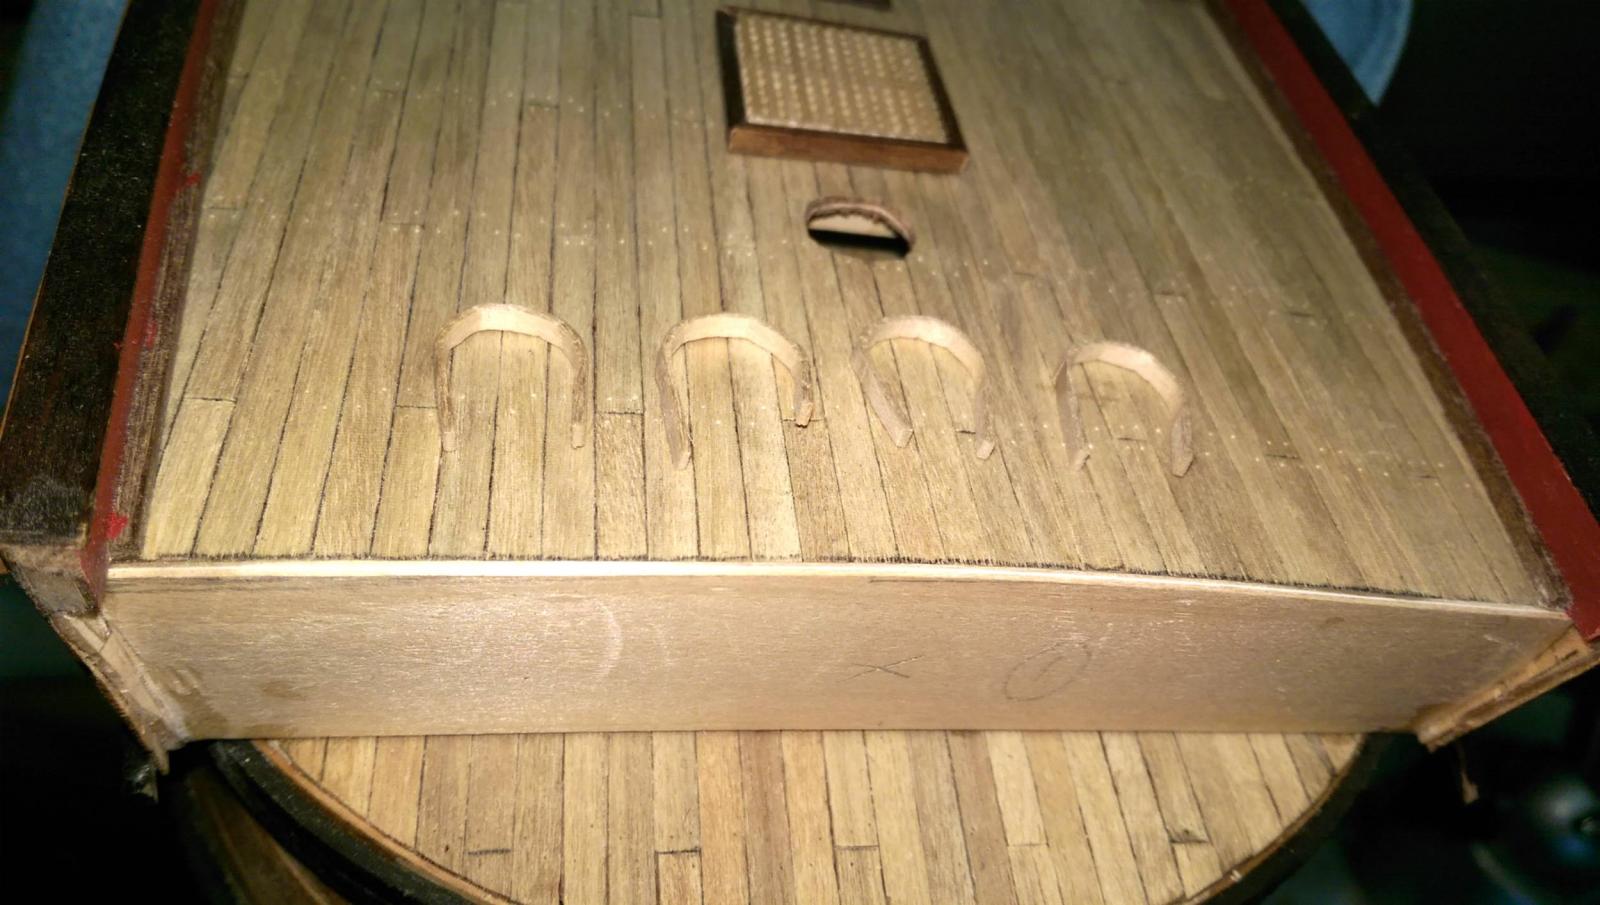
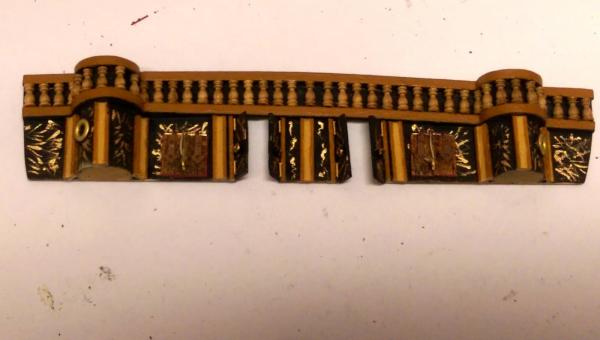
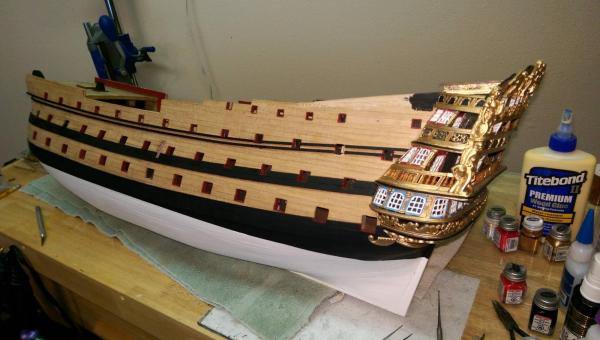
Next up was the forecastle bulkhead. This entire piece is not included in the kit and must be constructed entirely from scratch. The only part included is the ballestrade that runs across the upper half. It is a bulky metal casting which could be used if cleaned up considerably. I decided to make the ballestrade out of wood and use 6mm stantions for the face. There is enough scrap lumber in the kit to make the whole bulkhead with the exeption of the stantions. I bought those. I had previously made a false bulkhead to hold up the forward end of the forecastle. I then made the decorative bulkhead as a second layer. The frames for the ballestrade that curve around the roundhouses required a real intense tight curve. I had to do it in 2 layers of 1x2mm boxwood and boil them to make them real soft for the bend. The plans only give a black and white view of the features, which is not that good. I used photos from Keith Julier, Pete, Yankovich, and our own Keith W. I came up with my own version using this information. Vince P.


- 593 replies
-
- 6
-
-
- royal william
- euromodels
- (and 1 more)
-
Hi Mark, Sorry for the late reply. I did cut off the quarterdeck because it did not line up correctly. I added an extension at the correct height. Vince P.
- 593 replies
-
- 3
-
-
- royal william
- euromodels
- (and 1 more)
-
I have completed several complex models over the years. The last completed was the Sovereign of the Seas and that was the most intense and difficult up to that point. I am now working on the Royal William and this makes the SOS look like a piece of cake. The RW is extremely difficult because it leaves much of the build to the disgression of the builder. Most of it has to be created from scratch even though it is techically a kit. But I have to confess, I chose it for this exact reason. I wanted a real challenge, and it does not disappoint. I have made a lot of mistakes along the way, but I have learned a great deal, and have improved my skills considerably for the next model once she is completed. Vince P.
-
Hi Keith, The pieces were not only longer, but considerably wider. This created a wider strip of metal running down the sides of the hull. As an example, the width on average on the plans is about 18.5mm, and is actually 20.5mm. You can double that where there are 2 layers, so the actual width of the ornamentation is 4mm wider than the plans. Vince
- 593 replies
-
- 3
-
-
- royal william
- euromodels
- (and 1 more)
-
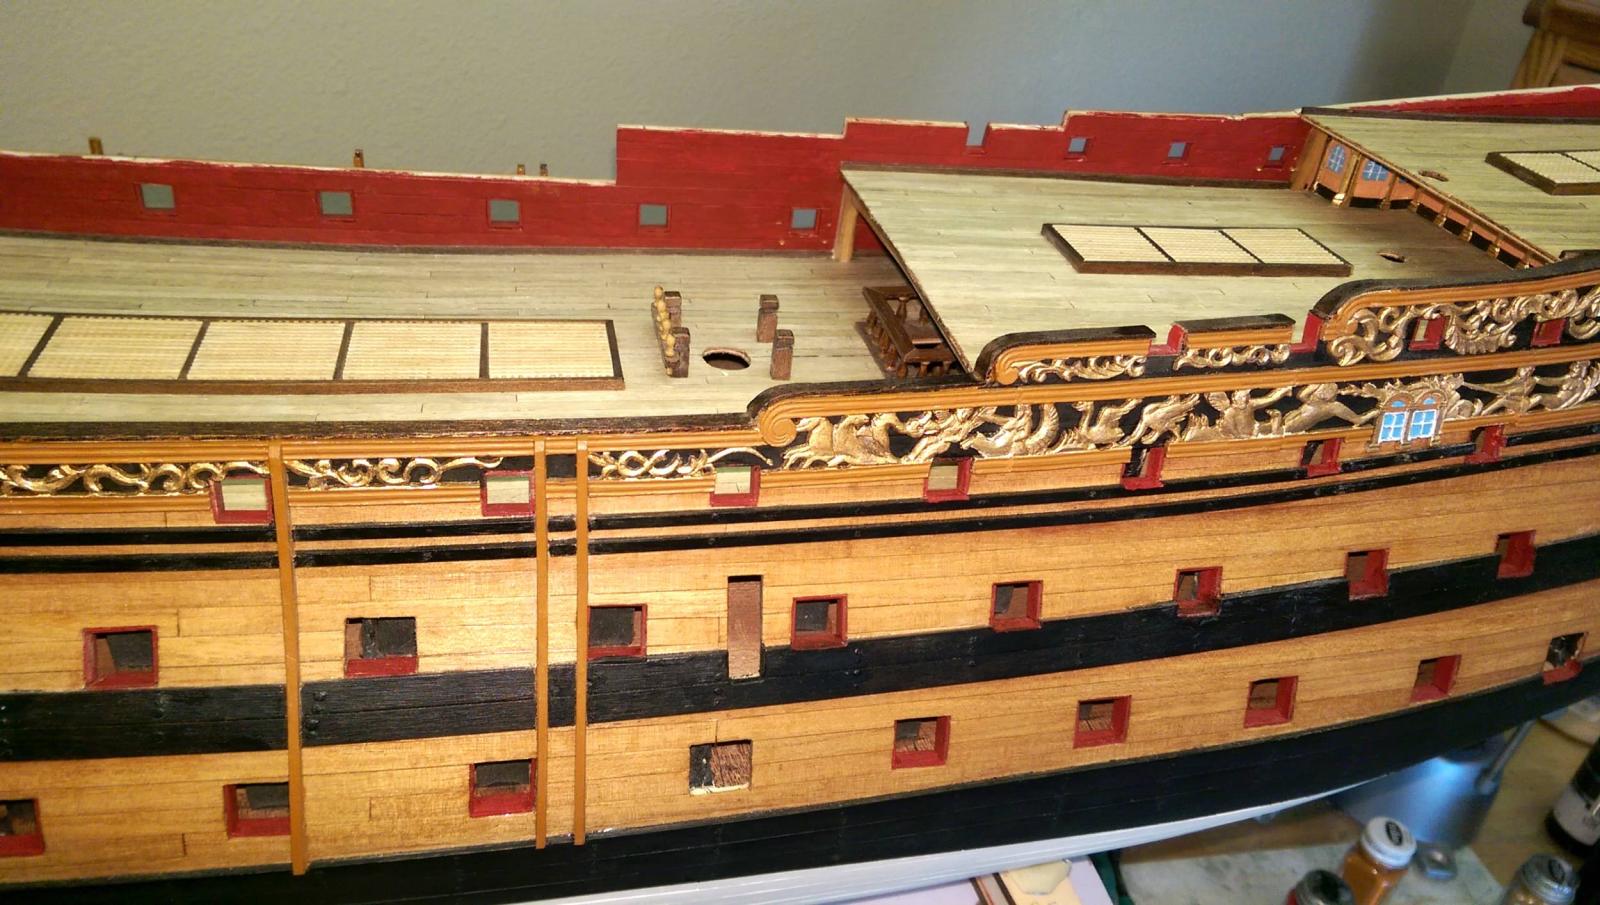
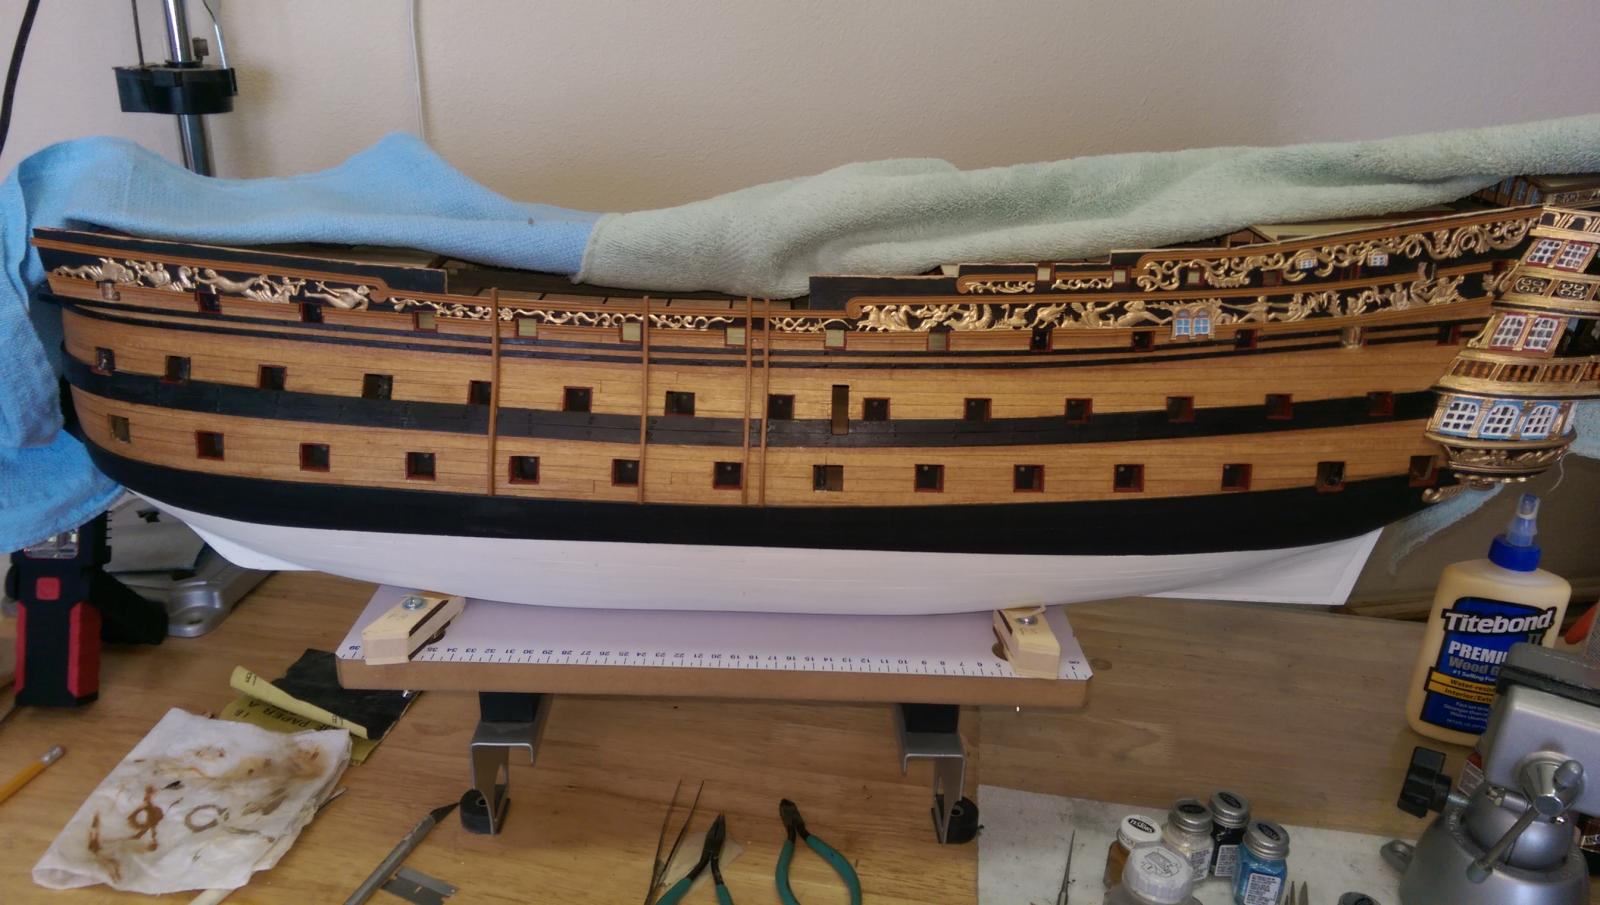
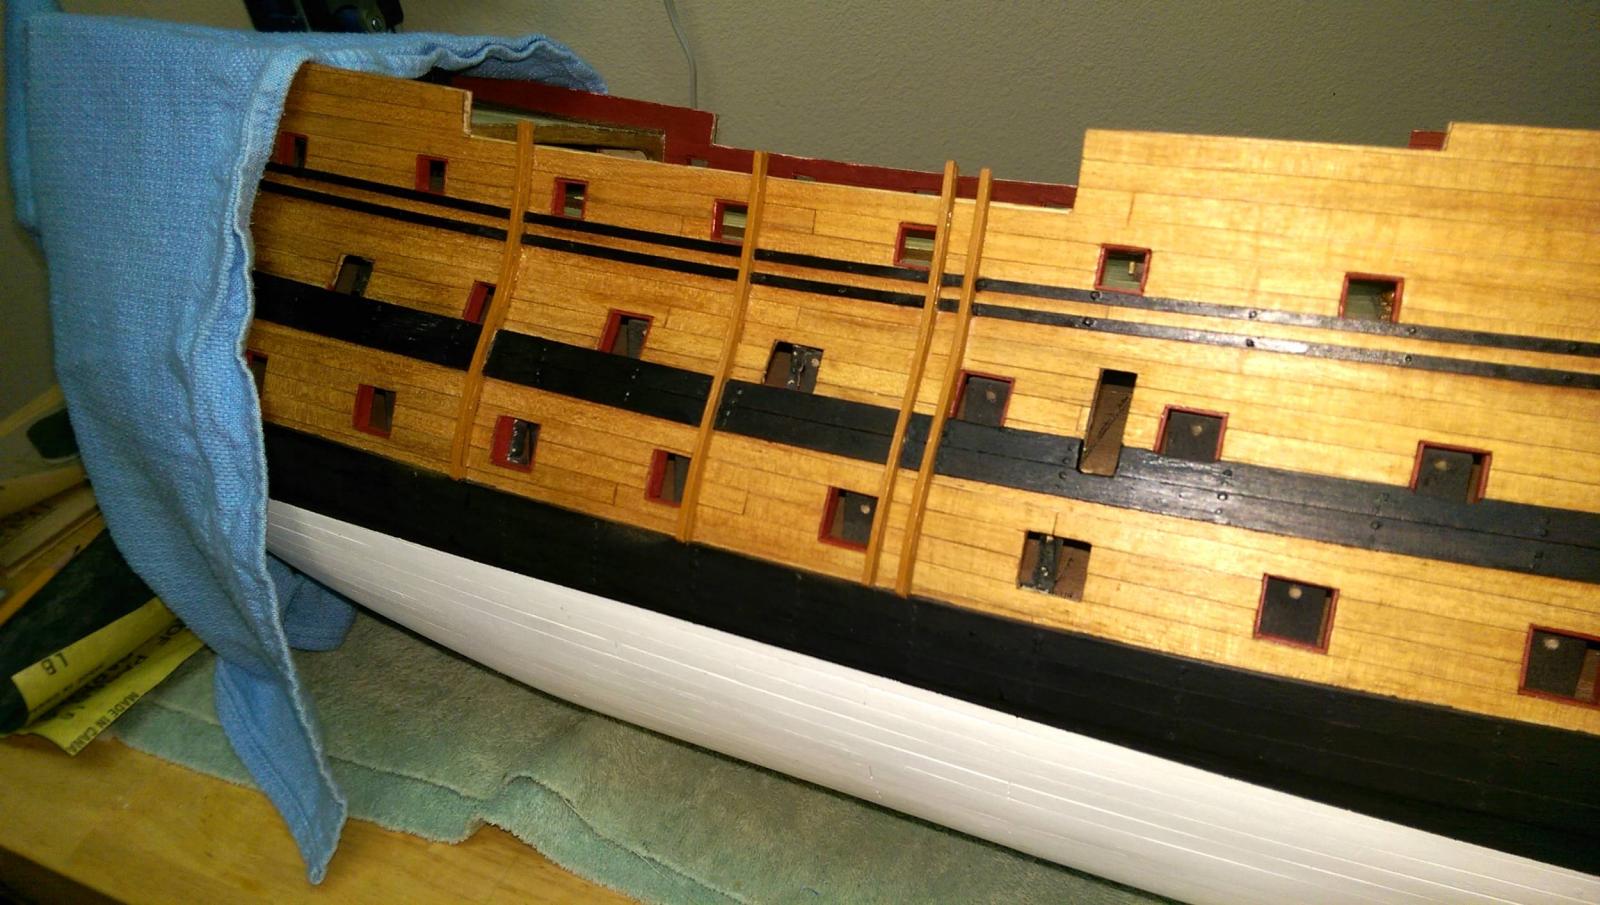
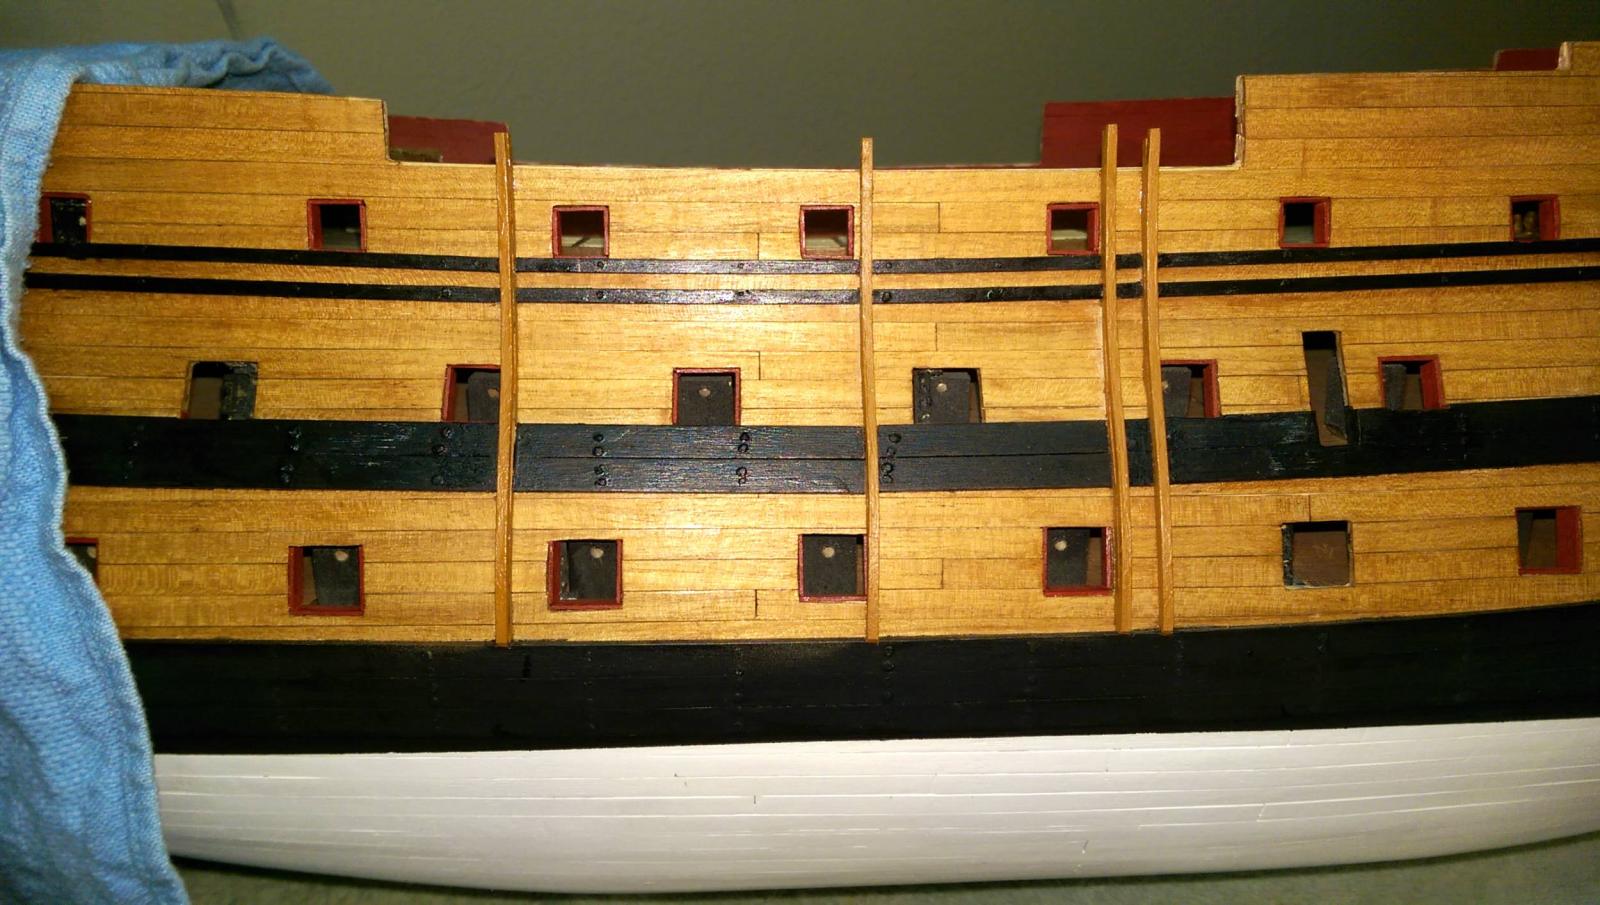
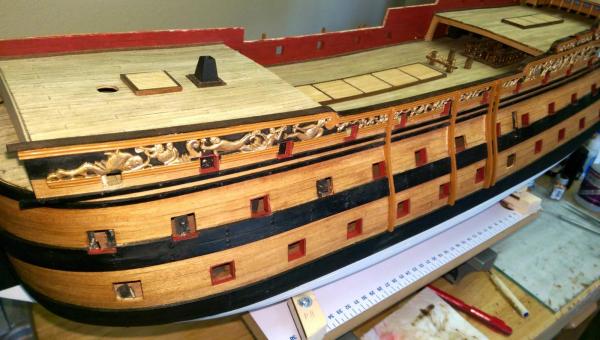
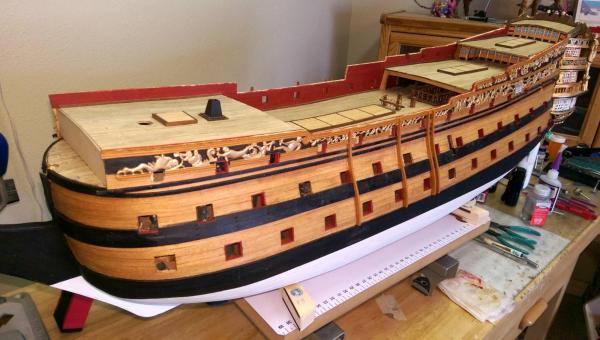
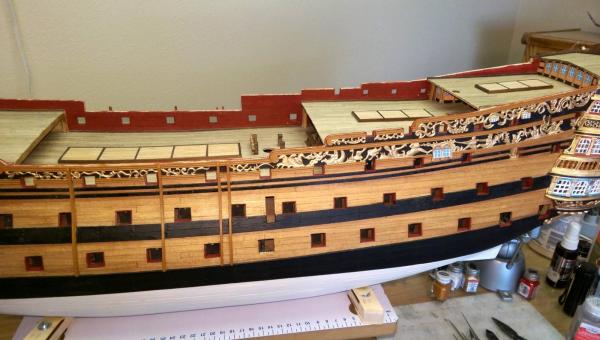
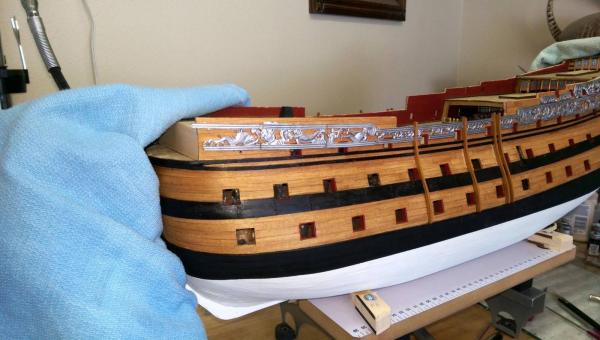
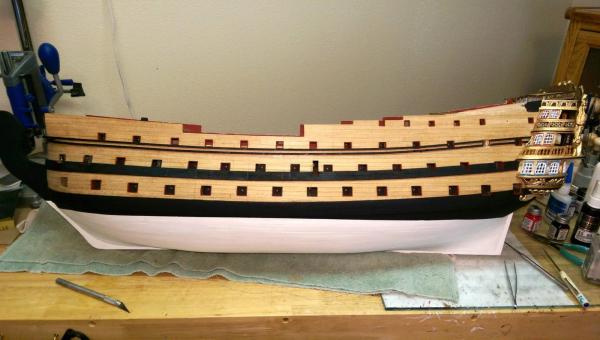
The wood cap has been added to the top of the bulwarks. This took quite a bit of bending on the ends and required letting the wood stock soak for a couple of days to get it soft enough. This cap will serve as the bottom for the side railings to be added later. Vince P.


- 593 replies
-
- 12
-
-
- royal william
- euromodels
- (and 1 more)
-
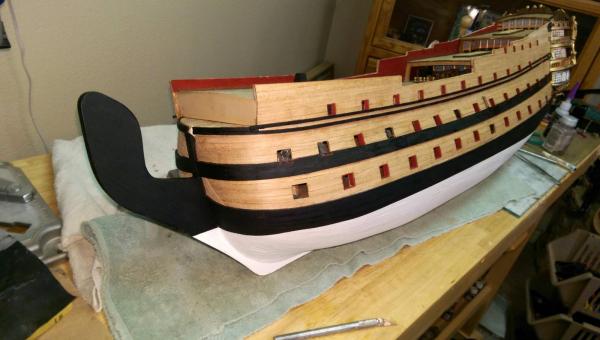
The bulwarks have been trimmed to match the height and contour of the metal trim edges. I also decided to cut the ends of the fenders to match the trim. It looks neater than bringing them up to the railings. Vince P.

- 593 replies
-
- 10
-
-
- royal william
- euromodels
- (and 1 more)
-
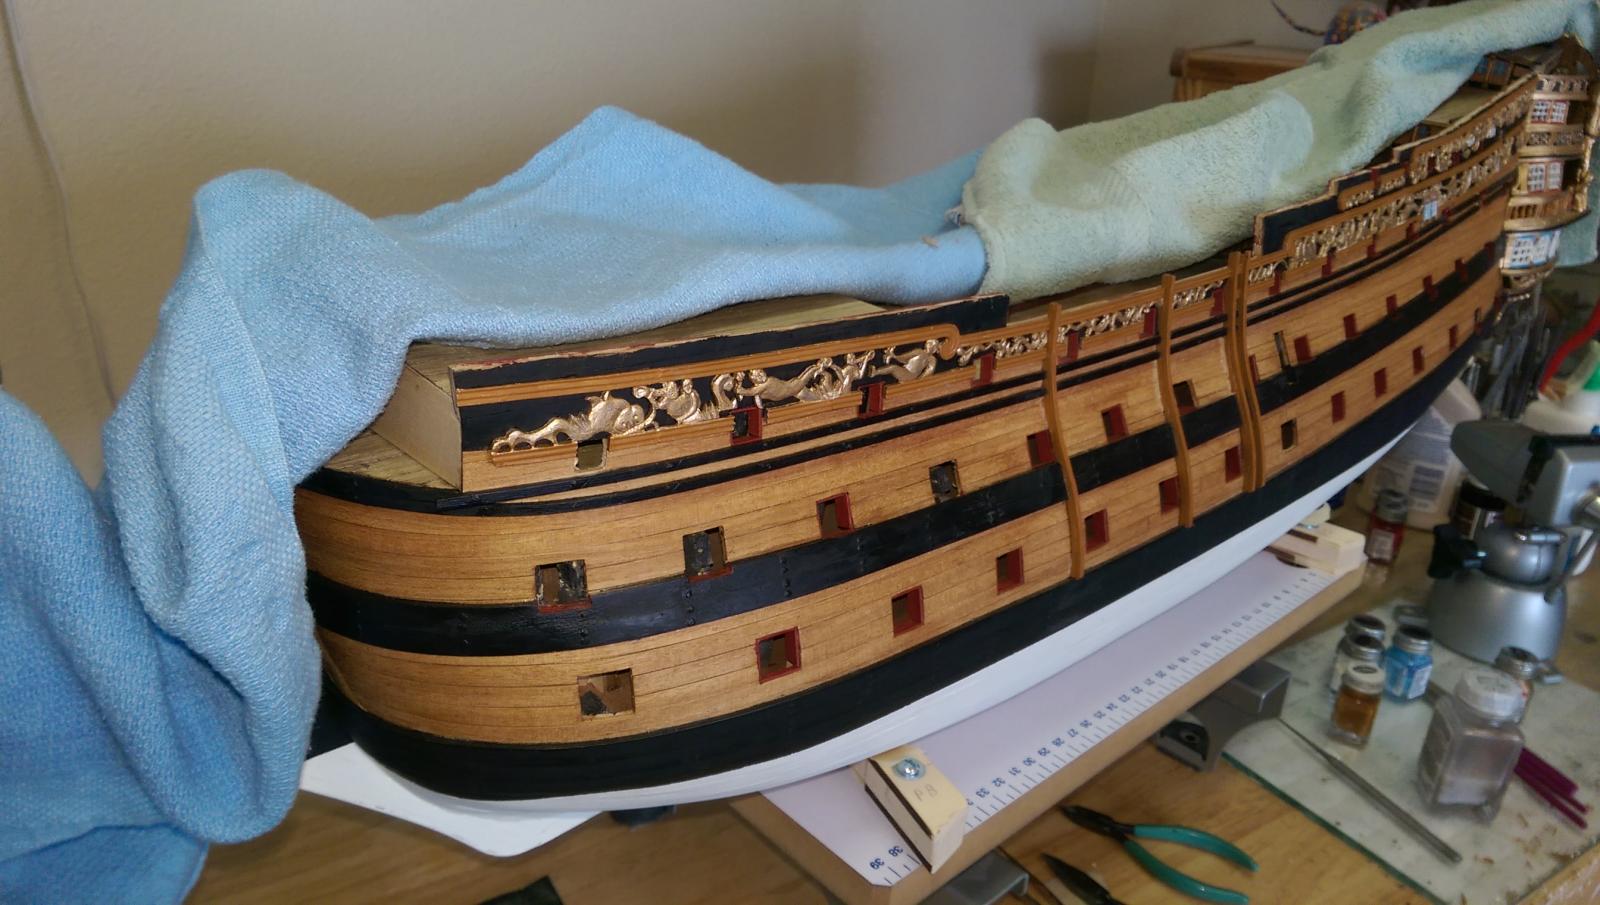
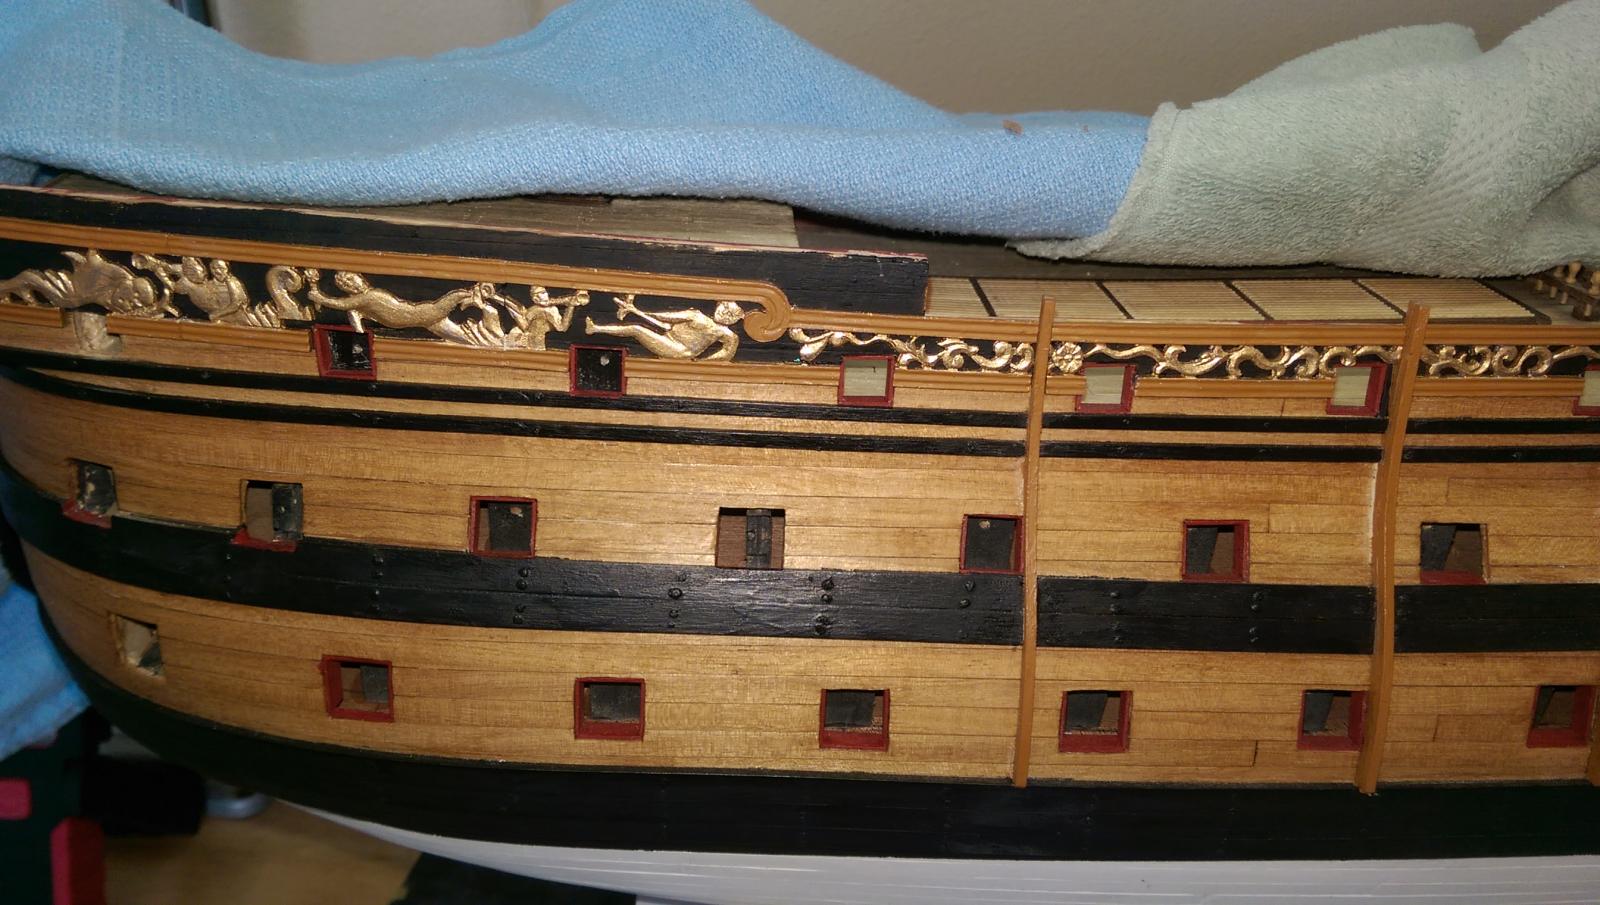
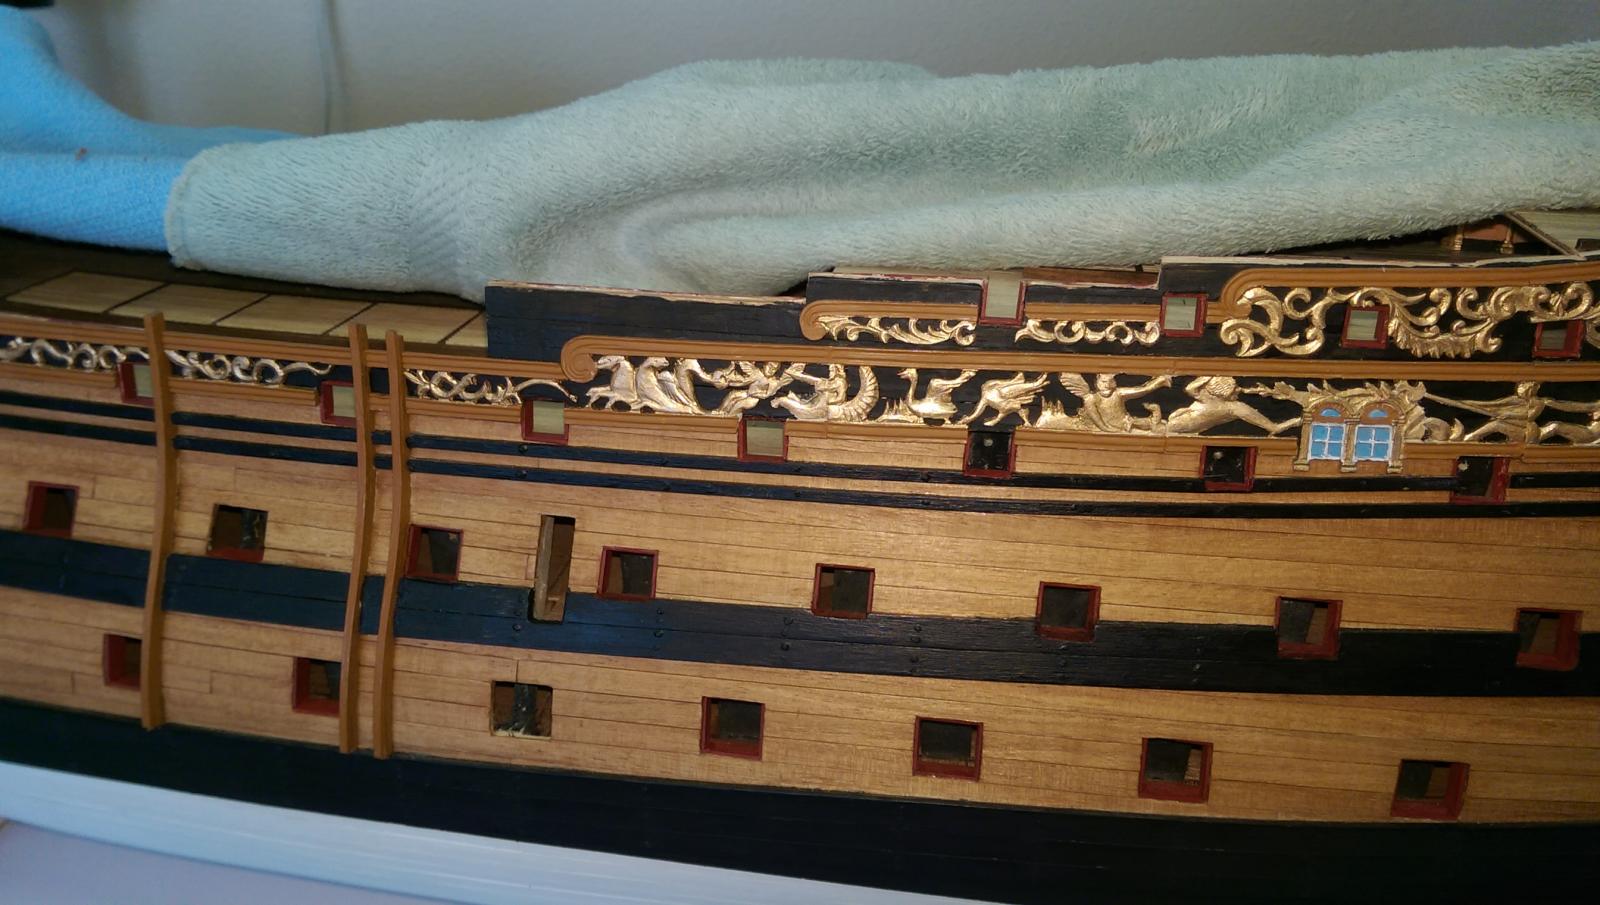
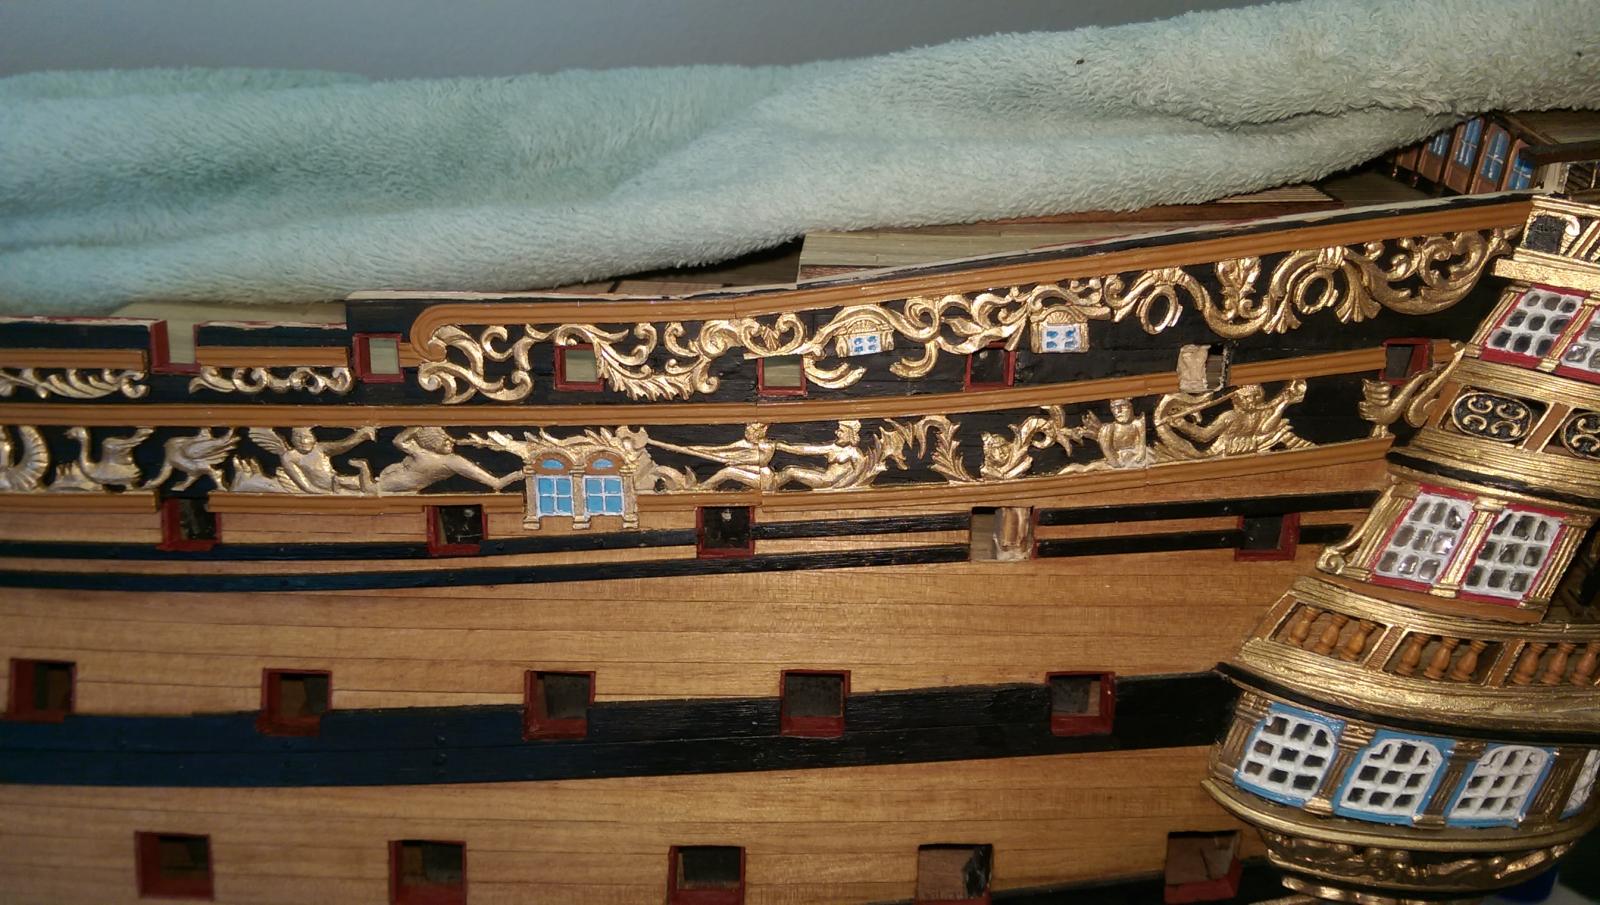
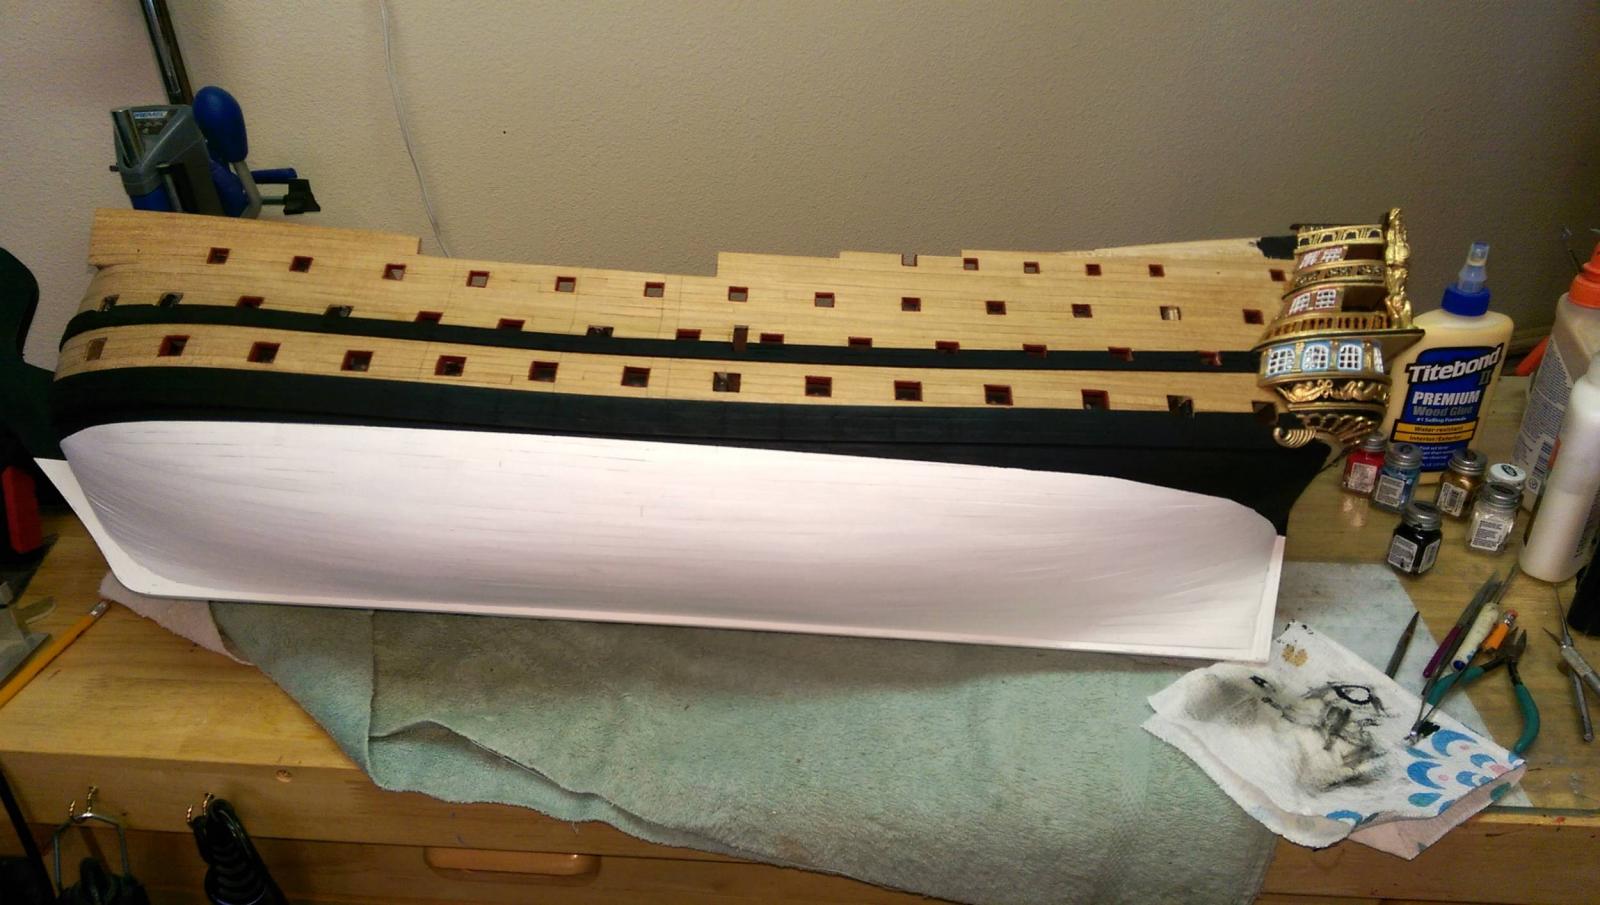
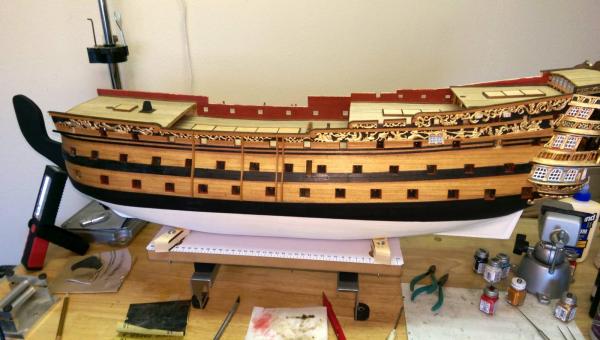
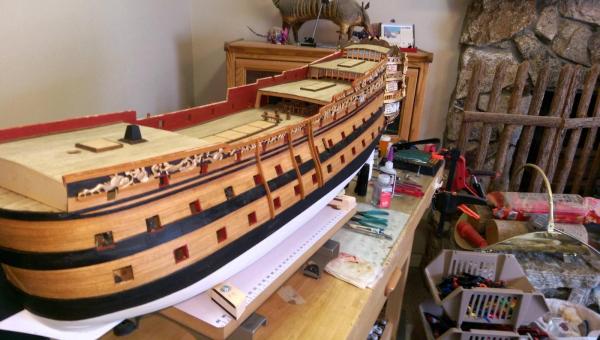
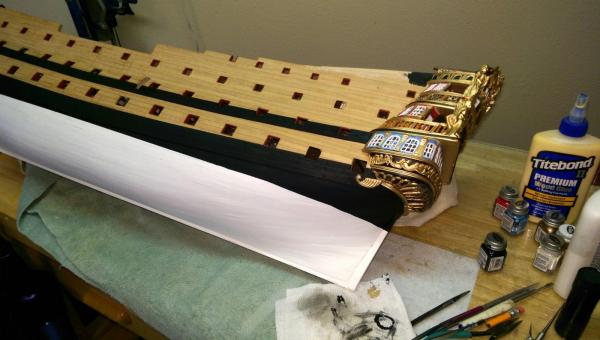
I have completed the port side with metal decorations. The pieces are of high quality, but still require quite a bit of cleaning up. They have to be bent, trimmed, and cut away for the gun ports as well. All in all it took quite a few hours to do this one side. A note of caution, the actual pieces are larger than the plans show and will not sit exactly as the drawnings indicate. Their positions in relation to the wales and the bulworks tops is quite different. I adusted them as best I could. Also, once they are all placed, the seams are closed with a little filler which is rubbed on with a finger and then painted over. Next up after completing the starboard side is to trim down the excess height of the bulwarks to the contour of the metal pieces and place a wood cap on top, which will be the base for the side railings later on. Vince P.


- 593 replies
-
- 11
-
-
- royal william
- euromodels
- (and 1 more)
-
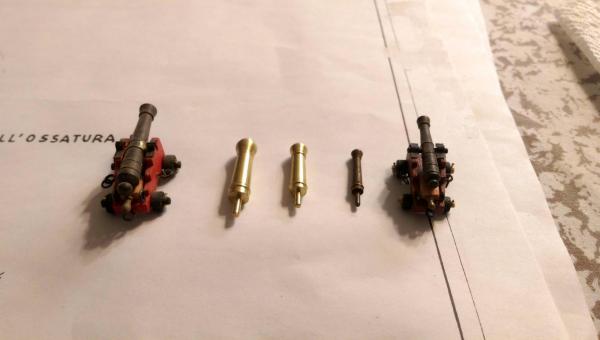
Hi Mark, Here is what I have. As you can see, the smallest dummy barrel is just about right for the quarterdeck. The smallest ones were not in with the larger brass ones, and were is a seperate package. I included all of the sizes plus a sample of a main deck and quarterdeck gun. Vince P.
- 652 replies
-
- 3
-
-
- royal william
- euromodel
- (and 1 more)
-
Hi Mark, I checked my kit and there are 3 sizes of dummy guns and the smallest are the same size as the quarterdeck guns. Vince P.
-
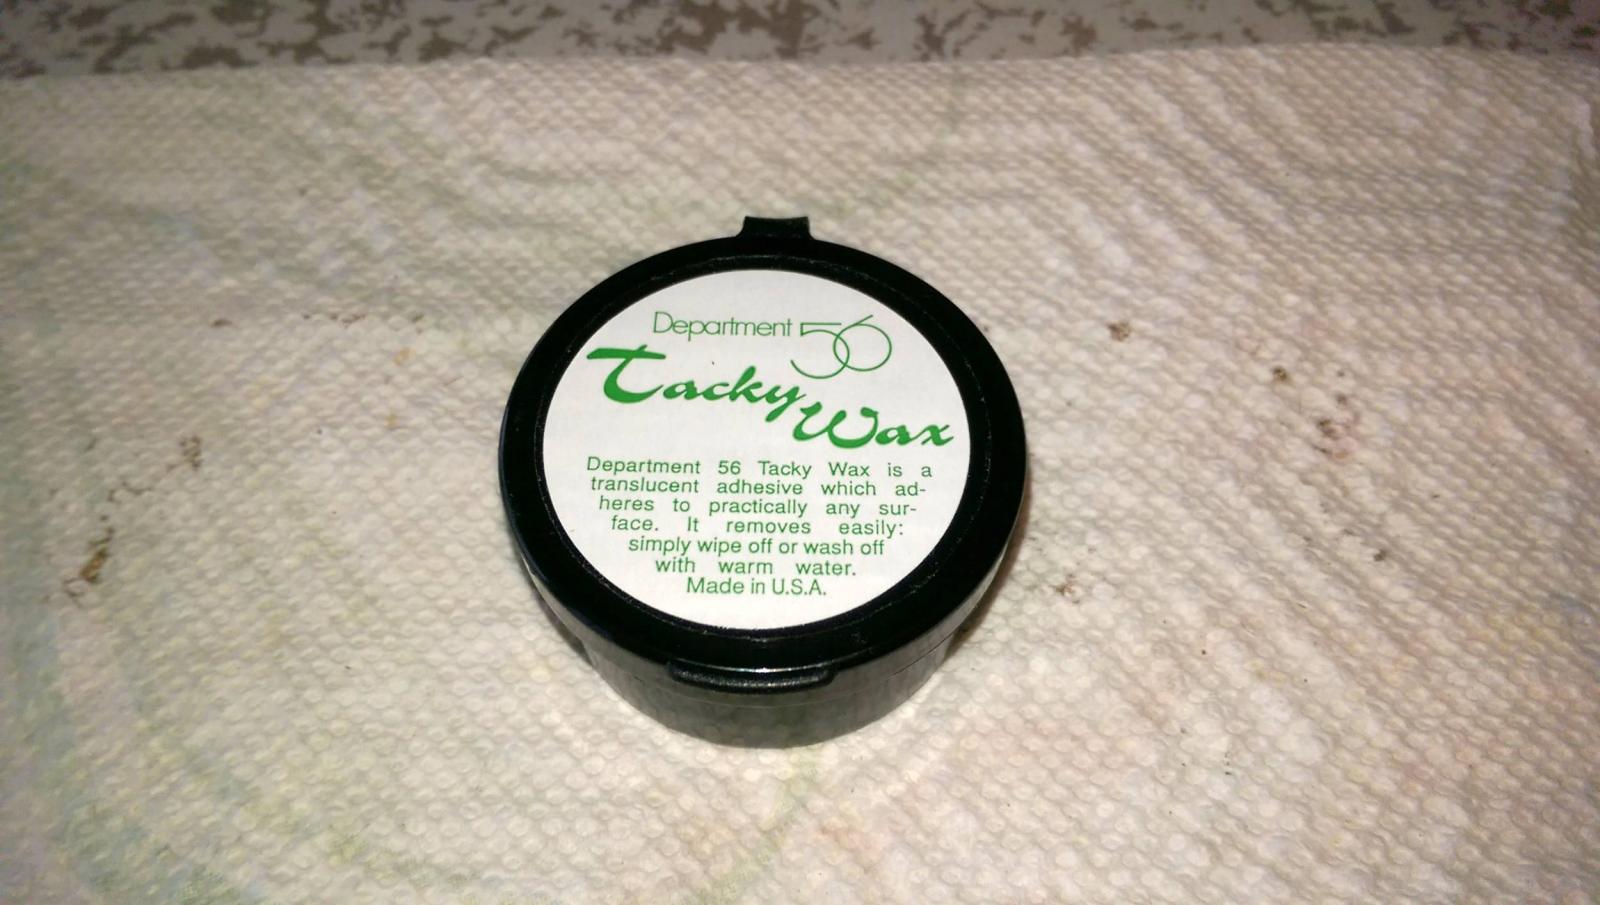
Starting to place the metal ornaments on the port side. This piece has been shortened, trimmed and cut away for the gunports. I said that they needed to be stuck on the hull until I could mark the bottom line and then removed. I found this stuff called "Tacky Wax" in a gift shop in Sacramento. You just spread a little on and it sticks to anything. Afterwards just peel it off and wash it off if necessary. I works great as a temporary glue. Vince P.

- 593 replies
-
- 8
-
-
- royal william
- euromodels
- (and 1 more)
-
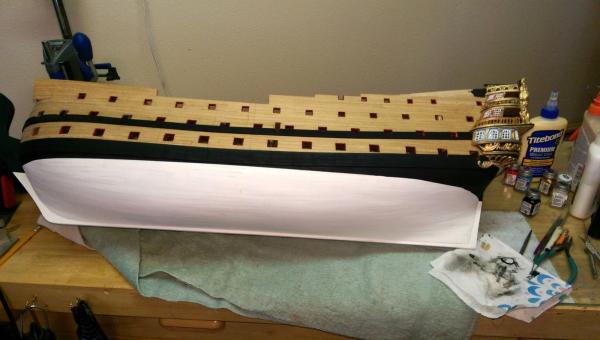
I have finished the fenders on both sides. Next up is to tackle the many metal pieces of ornamentation along both sides of the hull. Since the fenders are placed, starting with the pieces that butt up against the fenders makes sense. Then work out towards the bow and stern. One thing I have noticed right away is that the instructions are mismarked as to the numbers of the pieces. This is primarily so for the dupilcate pieces of port and starboard. Anyone building this model needs to be aware of this and carefully match the correct pieces. Each piece has a number stamped on it. Looking at the plan drawing sheet #2, you can clearly see the design patterns for all of the pieces on the starboard side. Use this sheet to select the pieces for placement and not the numbered diagram in the little instruction booklet. Each piece has to be cleaned, trimmed and sized to fit. Also parts have to be cut away where they overlay the gunport openings. All of the pieces need to be placed and temporarilly stuck to the hull so a line can be drawn on the bottom edge all along the hull. Then they are all removed and the space from this line to the top of the bulwarks needs to be painted black. Each of the pieces need to be painted before they are placed permanently. Trim on top and bottom are painted brown to match the hull, and the designs are painted gold. Then the pieces are placed permanently. Once I get started here, I will post some photos. Vince P.
- 593 replies
-
- 3
-
-
- royal william
- euromodels
- (and 1 more)
-
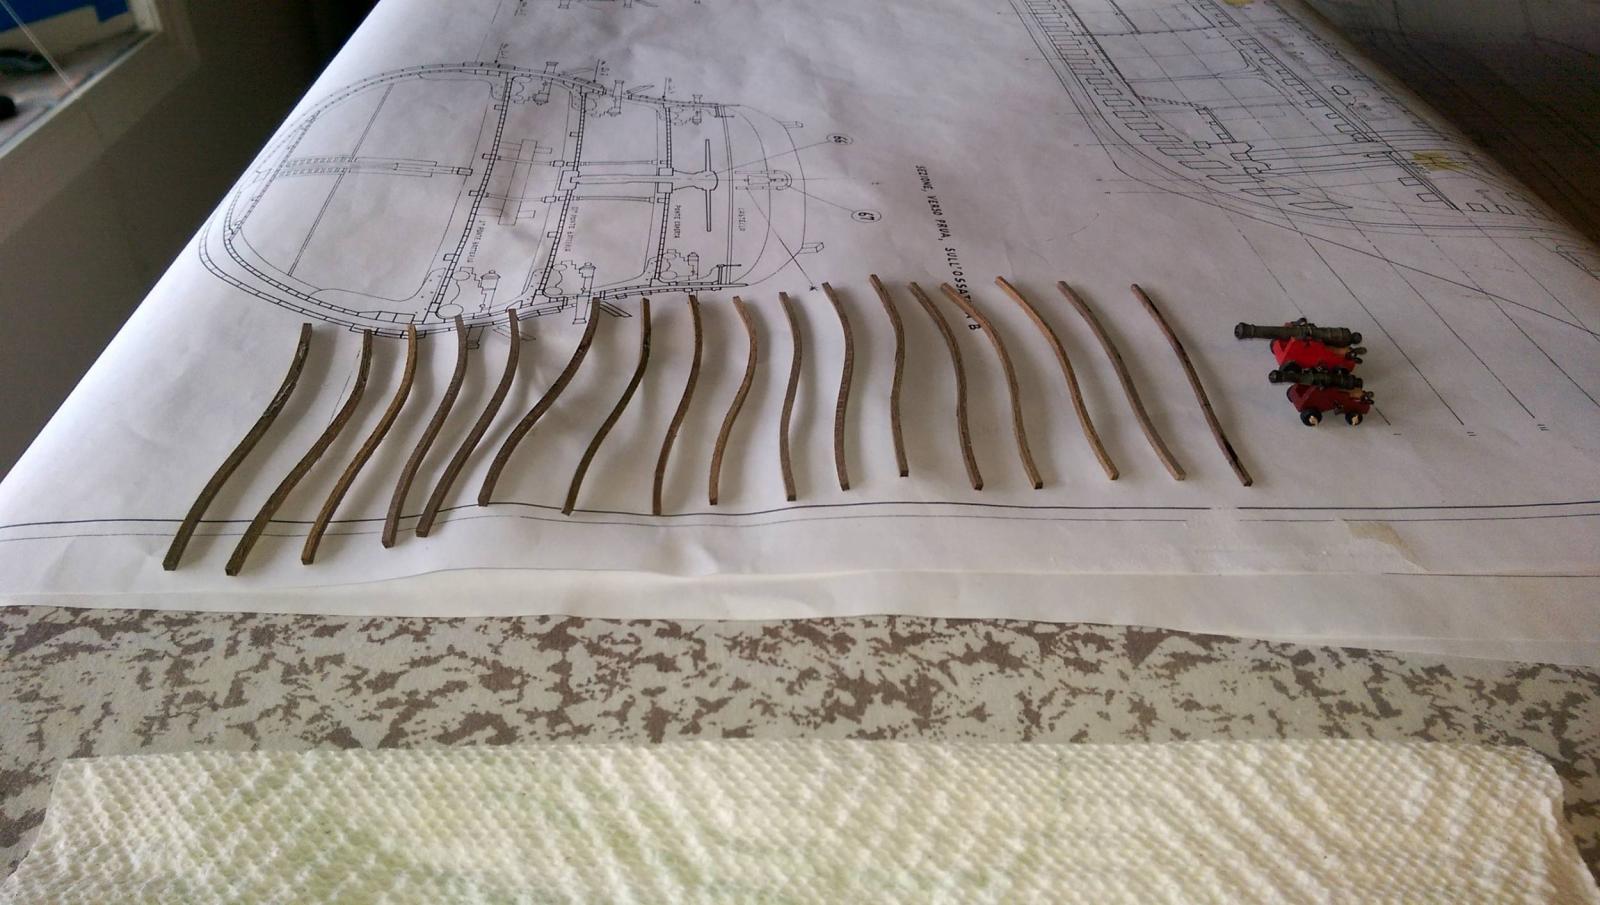
The fenders on the port side are done. Altough the plans are marked that the fenders are supposed to be 3mm wide by 5mm deep, on the drawings it is more like 2mm x 4mm. I decided to go with the later. Like I said before, because of the complex bending required, I made them out of 2 x 2mm stock and just glued 2 on top of each other after bending and placing on the hull. The bending can be done 2 ways; making a template and then bending around this, or using the hull to bend them. I chose to use the hull, and it was not too difficult. You also need to leave a little extra on the top to accomodate the bulwark railings later on. Vince P.


- 593 replies
-
- 5
-
-
- royal william
- euromodels
- (and 1 more)
-
Buying an Expensive Kit and throwing most of it away
pirozzi replied to pirozzi's topic in Wood ship model kits
ActuallyKeith, this post was not aimed at anyone in particular. While it is true that your build seems to fit, you answered my question with a logical answer. I only asked the question to find out why people do what they do, and not to criticize as some think. If I was in your position, I would probably do the same with my kit. I did not care for the quality of the window castings either, but chose to modify them. I do not have the skill or resources to create new ones. Vince P. -
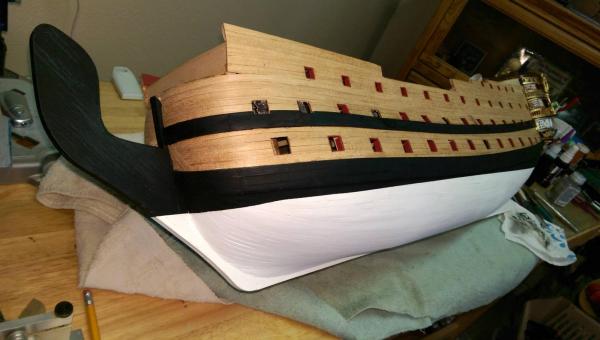
The 2 piece upper wales are in place. To keep the spacing even, I put another piece between them while gluing. This finishes the wales. Next up is to sand and finish the bare wood sides of the hull. The fenders come next. You can see in the last photo, I have marked the locations with a pencil line. They go from the lower wales up to the top of the bulwarks and cut through the middle and upper wales. Since the wales are 2mm thick and the fenders need to be 2mm beyond that, the fenders need to be 3mm widex4mm deep. They have to be bent into an "S" shape to match the contour of the hull sides. Bending a piece of walnut 4mm thick is a little much, so I am going to contruct the fenders from 2 pieces 2mm thick and place them on top of each other. Vince P.

- 593 replies
-
- 9
-
-
- royal william
- euromodels
- (and 1 more)
-
Buying an Expensive Kit and throwing most of it away
pirozzi replied to pirozzi's topic in Wood ship model kits
Ok everybody, I think this topic has gone off the subject. I have also noticed that it has ruffled some feathers. There are some that have taken offense and are claiming ridiculing and critisizing of their personal beliefs. I only posted this thread to ask a question and not judge anyone. The very first words posted were "I hope I don't offend anyone" If we can't all be friends here, I will ask the administrators to delete this thread so we can get on with building ships and be friends again. Vince P. -
Buying an Expensive Kit and throwing most of it away
pirozzi replied to pirozzi's topic in Wood ship model kits
Hi Don, I think you just made my point. If you replaced all of the parts and material you just listed, that would just about be the entire kit. Why not buy those better materials and a set of plans and build a better model basically from scratch. Please understand, I am fully in agreement with replacing some stuff that might be particularly bad, as most kits seem to need, but not find fault with just about everything in a kit. All you are doing here is paying good money to kit manufacturers and certainly not encouraging them to clean up their act. I have posted build logs here of kits I have completed or are in the process and you can see that I do replace, modify, or add parts. I would not however trash an entire set of expensive metal castings, a whole set of cannon carriages or all of the blocks etc. I use this forum to get info on the quality of various kits, and if they look that bad as to need most of them replaced, I would seek a better kit, or build from scratch. Vince P. -
I hope I don't offend some builders here, but I am confused about something. Some builders will buy a very expensive kit and then throw out most of the expensive parts and supplies to replace them with scratch built parts. If they have the talent and skills to build from scratch, and they obviously do, then why not save the kit expense and just buy the plans and scratch build. I can see replacing some parts in kits, as improvements can be made here and there, but not to discard most of the kit, like lumber, metal castings, fixtures etc. By the time they are finished, there is very little of the kit left. Vince P.
- 72 replies
-
- 25
-
-
Like Mark says, PVA is great for wood to wood bonding. Something like Elmers or Titebond. For metal to wood, CA is good and comes in 3 different thicknesses, thin, medium, and gap filling. Depending on what you are working on, choose the best thickness. Be careful with CA as it sticks to everything quickly, including skin. I have been glued to my model more than once and required debonder to get free. Also they make a spray liquid that bonds and dries the glue instantly. This is great for joints under stress that you want to hold quickly and where you can't really clamp it to hold it for you. Also, Epoxy is good for repairing metal parts and making metal to metal joints. Vince P.
-
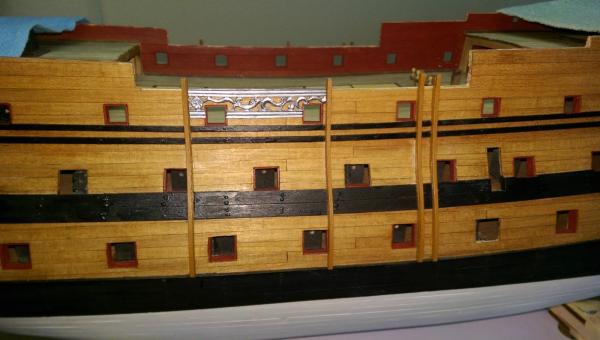
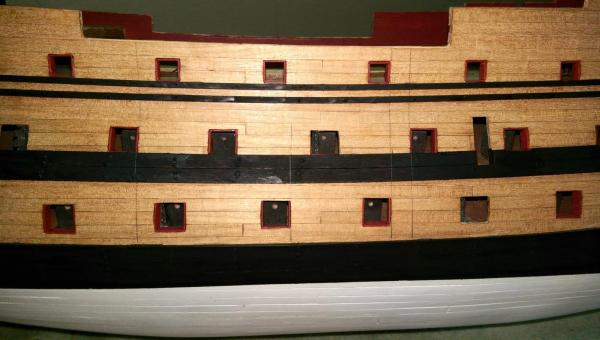
The middle wales are added. I have seen models with these wales both left unpainted and painted black. I decided to paint them black so all of the wales will stand out. Also, you can't really see the detail in the photos, but I used tooth picks to simulate the bolts that held the wales in place on actual ships. Next up are the upper wales which are also the chain wales. They consist of 2 seperate strips that will also be painted black. Vince P.
- 593 replies
-
- 11
-
-
- royal william
- euromodels
- (and 1 more)