HOLIDAY DONATION DRIVE - SUPPORT MSW - DO YOUR PART TO KEEP THIS GREAT FORUM GOING! (Only 20 donations so far - C'mon guys!)
×


egkb
-
Posts
1,632 -
Joined
-
Last visited
Content Type
Profiles
Forums
Gallery
Events
Everything posted by egkb
-
 A simple 'Like' is not enough to convey my admiration for your work Alex, truly inspirational stuff. Eamonn
- 227 replies
-
- 1
-

-
- cumberland
- 74 gun
- (and 1 more)
-
Thanks Andy, I haven't looked that far ahead yet (re planking inside the Bulwark) but I'm pretty sure there is. I have just put a couple more B/H's in place and they sit nicely with the deck so I think you've nailed it in that it isn't something to worry about. Besides a few delicate taps with a sledgehammer should cure it.. ahem Thanks for the advice and for looking in at the build. Eamonn Edit.. Hi Nigel, just spotted your post after I had done this one.. shouldn't be too hard to sand down if it proves to be an issue, we are only talking a mm or so, as Andy says, may be nothing to worry about!
- 1,039 replies
-
- 1
-
-
- ballahoo
- caldercraft
- (and 2 more)
-
You could always send them to me, I have loads of space, and I wouldn't even charge you or anything.. but then I'm nice like that Eamonn You could even save on postage by bundling them up with that order for Sjors...
- 274 replies
-
- 2
-
-
- Santa Maria
- Artesania Latina
- (and 2 more)
-
Hi Mobbsie, is it really bad that I take some comfort in the fact that even the best builders have 'snafu' moments too.. :) You've got one beautiful build going on there mate. Eamonn
- 1,279 replies
-
- 1
-
-
- agamemnon
- caldercraft
- (and 1 more)
-
I rather think that when the class takes a look inside the Captains Cabin you will have hooked your audience Bug. Keep up the brilliant work. Eamonn Failing that put a miniature One Direction poster or two up inside the cabin.. bound to get some interest then
- 274 replies
-
- 2
-
-
- Santa Maria
- Artesania Latina
- (and 2 more)
-
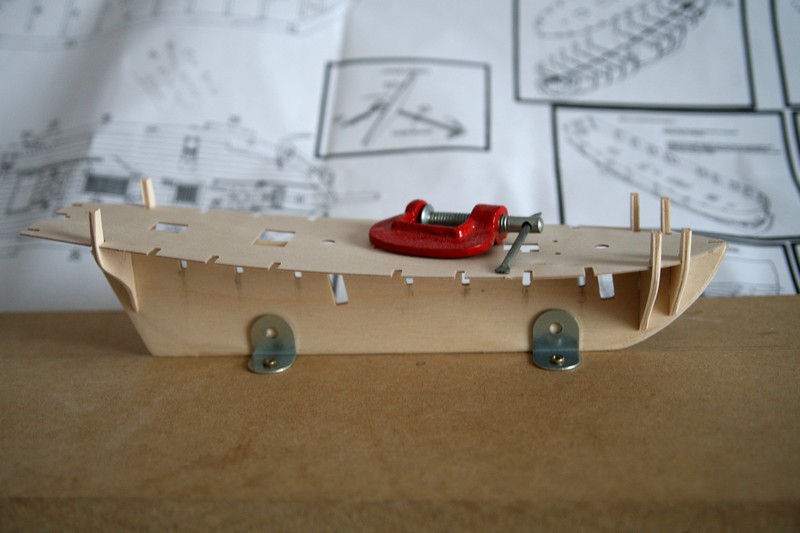
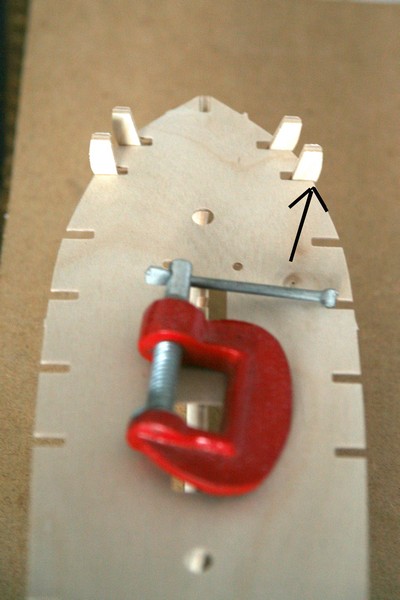
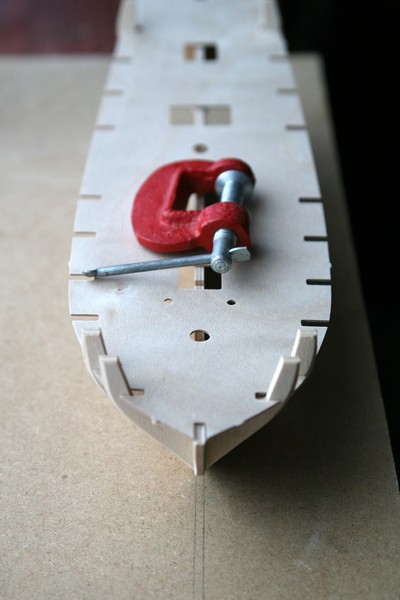
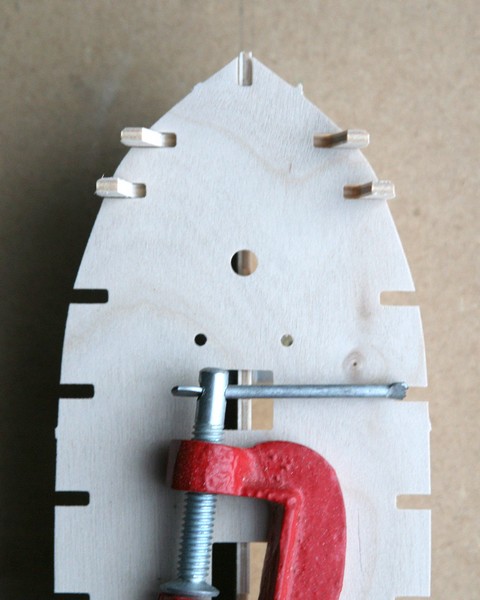
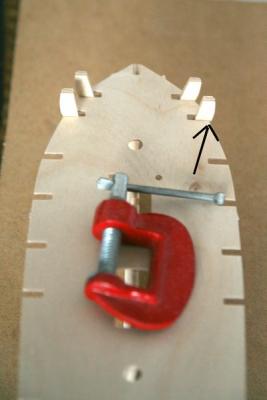
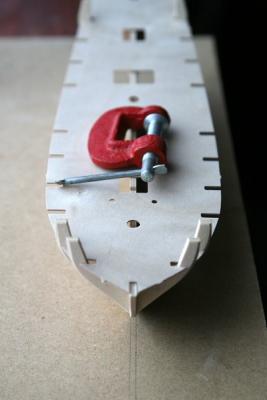
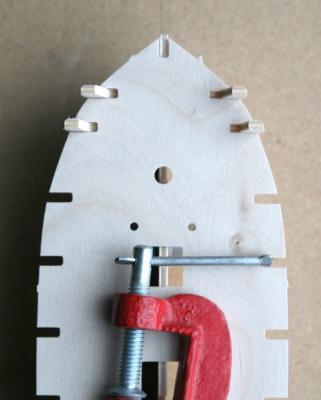
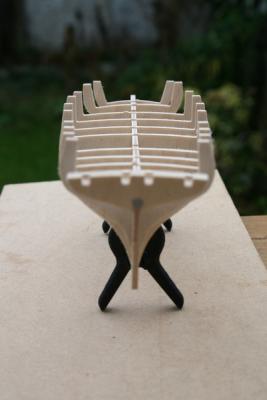
And Another Update, featuring Real Life Actual Photos This Time.. I'm really spoiling ye all Anyhoo.. I fixed up a building board and clamped the keel between two pair of 90 degree angles, would recommend getting these in line with each other least you induce a 'nice' bend in the keel!! This let me set the keel down Level and Perpendicular with the board and allowed me to glue fit two bulkheads in place. I dry fitted another Bulkhead at the stern (B/Head No. 10, I think) which enabled me to put the deck in place (centred) to help align the 2 glued B/H's (the Red Clamp is just to keep the deck piece flush with the Keel) I will let the glue set before continuing with the B/H's. Question Time (See Arrow on 2nd Image) I notice that the 'aft most' outside edges of the B/H's sit out from the Deck piece slightly by 1 or 2 mm (Remembering the 'fore' parts are only roughly bevelled at this stage) as things stand this would leave a gap where the Bulwarks will meet the deck at a later stage ! Deck planking would of course solve this, but my Question is.. Should I sand these bulkheads flush with the deck? I know that the 'fore' corner/edge of these B/H's is to be bevelled properly, but should I sand the rear corner/edges too (just the top 1 or 2 cm's where the Bulwarks would go, these 'Horns' are to be removed later anyhow) ? Hope that question makes sense. btw, the 2 bulkheads are fairly level with each other (perhaps 1mm or so out) it's just my photography that isn't 'level'.. Take Care Folks. Eamonn

- 1,039 replies
-
- 1
-
-
- ballahoo
- caldercraft
- (and 2 more)
-
Thanks for stopping by Lawrence, I figured the planks would be wafer thin without it, especially at the stern where there was only about .5mm per side difference between the 'false' keel former and the stern post ! (double planked into .5 mm hmmmm that is seriously thin ) Eamonn
-
Makes perfect sense Nigel, in fact I am at that point right now, I had marked in the Rabbet and was looking at where the Bulkheads lower parts sit in relation to where said Rabbet should go (along the join of the false keel former and the actual keel piece) compared to where it actually fits! (Parts of the Rabbet seem like it should be a few mill higher, particularly at the first 3 B/Heads near the bow) I'll follow your advice in this and leave off the Keel Pieces until later, then carve the Rabbet based on the result! I think I'm ok at the stern re Bearding Line and Rabbet there as it needed to be thinned regardless, the bow was the thing that made me stop and think (then up popped your advice .. result!) Eamonn
- 1,039 replies
-
- 2
-
-
- ballahoo
- caldercraft
- (and 2 more)
-
Thanks for stopping by Nigel and for the advice. Remember to shout out if you see me about to make gaff.. (unless of course I actually am making a Gaff for the boat! ) Eamonn
- 1,039 replies
-
- 1
-
-
- ballahoo
- caldercraft
- (and 2 more)
-
Thanks for the advice Tony.. They are back in the build plan ! Eamonn
-
Another small update: Bulkheads are now roughly bevelled to the correct shape. and I have the beginnings of a Rabbet in place and a Bearding line in place, am trying to decide whether Bow and Stern Filler Blocks will be needed (I had planned on putting them in but not so sure they are required now! will have to see) normal filler blocks filler blocks will be put in place between the B/Heads. That's All For Now Folks. Eamonn BTW.. Does anybody have any passing thoughts re the Bow & Stern Filler Blocks? (it is a very small area to fill on these boats!)
-
Looks grand to me Ollie but then again you would be more familiar with the 'original', perhaps you can rig up extensions if you are concerned? I really like what you are doing with this build! Eamonn
- 803 replies
-
- 2
-
-
- colonial cutter
- modellers shipyard
- (and 1 more)
-
Wow Tony, Sherbourne is really 'popping' with those upgrades.. really like the Glass Grating! (Capt Companionway) Eamonn
-
Small Update: I now have the Bulkheads sitting flush with the top of the 'False' keel (ie at their correct depth) and have begun to draw the Rabbet/Bearding line. Patrick (Ganymede) Bulkhead No 2 does indeed seen to sit a few mm higher than the others (at the bottom that is, nearest the Rabbet area) I cut out the 4 Plank Termination Patterns (part No's. 13 & 14) and dry fitted them, showing that B/Head 2 is higher, not sure yet what action I'll take as I haven't shaped that area yet ie bevelled the Bulk Heads, I'll ask Jim if he encountered any similar issues. Eamonn
-
Thanks Dee Dee and Jim for dropping by, remember if you have any advice then please don't hesitate to put me right (this goes for all ye folks out there too) Next up is a spot of bulkhead bevelling, then Rabbeting & Bearding (Then contacting Caldercraft for replacement parts 'cos I made a mess of things ) Eamonn
-
No worries Wayne, I've been following your Emma C.. Talk about pleasing lines on a boat!! I think there will be one in my future (hopefully a distributor will set up this side of the pond, unfortunately they are expensive to have shipped over !) Take Care Eamonn
-
Thanks for stopping by Glyn (perhaps I'll have the beginnings of a Convulsion in the coming weeks) Hi Patrick, My bulkheads were only dry-fitted and have been removed from the Ply Keel at present so that I can begin bevelling, they will be re-fitted (again 'Dry') to establish Bearding lines etc. It is too soon for me to notice any shortfalls in the bulkheads as this was purely a fit test, though I suspect I will fit the Walnut Keel (after cutting/filing a Rabbet) but will leave off the Rudder Post till much later. So she will be planked with the Keel in place! (I have just had a quick look at the photo (above) showing No.2 B/Head and it seems to be a little high also, will have to give this area a serious examining when they go back on!) Having said all that, I planked my Bounty (both layers) before fitting Keel, Rudder Post and 'Bow' Piece, I used walnut coloured filler to take care of any gaps and you would need to look very closely at these areas to spot the 'filler' (Bounty is coated using Danish Oil, put on with a cloth) If you plan on painting the Hull then you really shouldn't have a problem (besides you would probably have to turn her upside down to notice any filled errors, and even then it would be next to impossible Thanks again Guys Eamonn
-
Thanks for checking in guys and for the Likes, it really does give encouragement! Nigel, I will be attempting them all, but staggered by a few weeks or so. Admittedly there may be a bit of a gap at the beginning so that I can get my head around things (and it is a Cold Build Room too at this time of year ) Thanks Again Folks Eamonn
- 1,039 replies
-
- 1
-
-
- ballahoo
- caldercraft
- (and 2 more)
-
Thanks for that Lawrence, and the very best of luck finding Annie M Parker. Take Care Eamonn
- 1,039 replies
-
- 2
-
-
- ballahoo
- caldercraft
- (and 2 more)
-
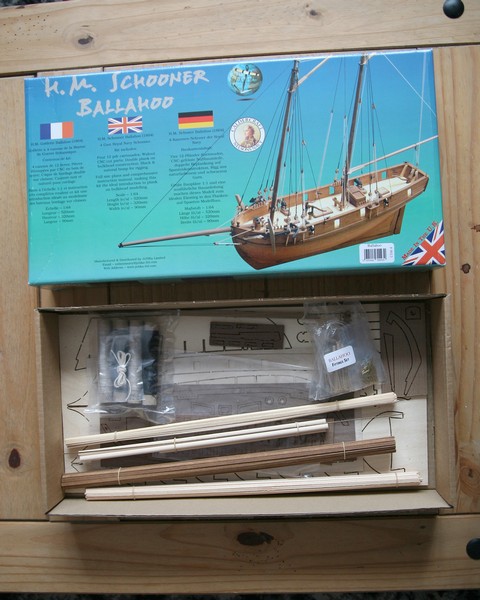
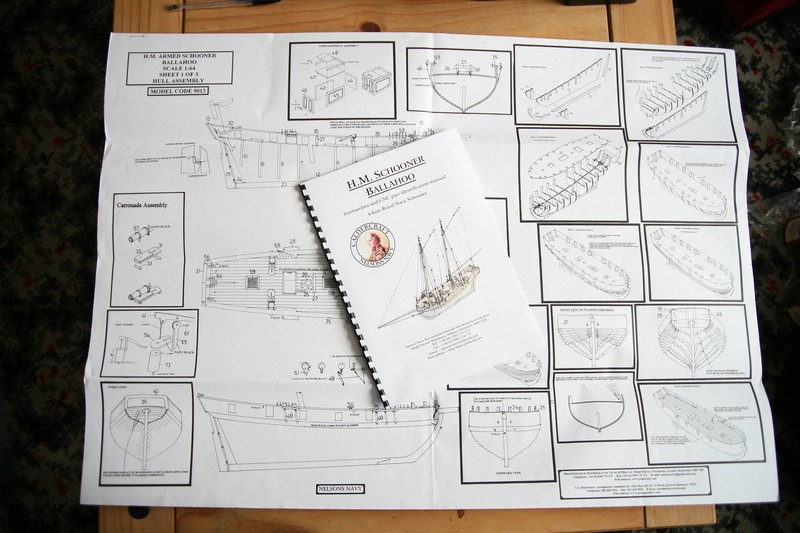
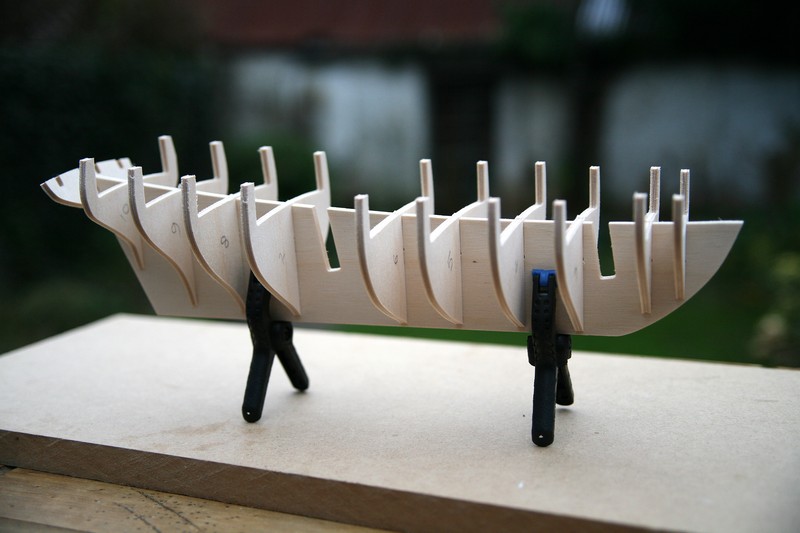
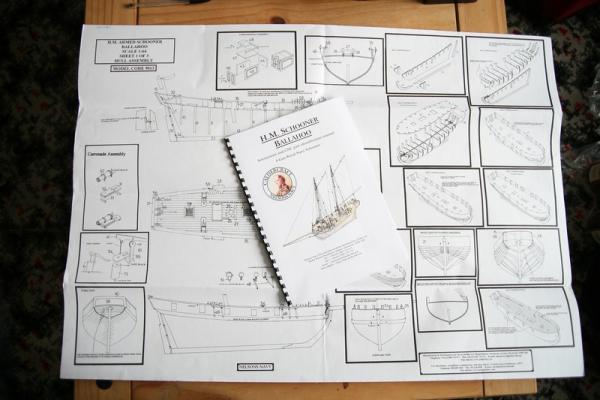
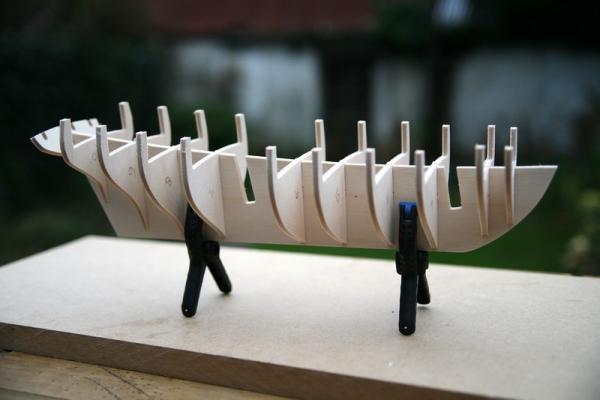
Hi All, This is my first proper wooden boat build, I say proper because some time ago I began building the Bounty from those magazines that came every week (you may be familiar with them) and though she turned out reasonable enough (I'm about 80% complete, just the Rigging to finish) the instructions (there was no 'plan', just text with photos) left a lot to be desired and makes even the simplest task awkward. Last Summer I came across MSW and having read and followed many build logs I decided to buy a proper kit, in fact I bought 3 over the past few months! Sherbourne, Convulsion & Ballahoo all at 1:64 and all Smallish Vessels (This is just a personal preference) Anyhoo, I have decided to do Ballahoo first, and possibly stagger the others over the coming months. (The first time I opened the box and was hit by that pleasant wood smell, reminded me of those old wooden pencil cases from school Oh! and it was great to unfold 'actual' plans too!) Right lets begin.. Whilst the Keel and Bulkheads were still in their 'Matrix' (or whatever the wooden surround is called) I oriented the Matrix to the appropriate instruction sheet (in the Booklet) and numbered each piece, as some of those bulkheads may end up in the wrong slots on the Plywood Keel (am sure it would be easy to spot, but why take the chance) I then removed the Ply Keel and all the Bulkheads using a Jewellers Saw (tried using a craft knife but ended up having to apply pressure, which didn't sound like a great idea) All items once freed got a light sanding and were then 'Dry' Fitted (see Photos) So Far So Good.. I shall cut a Rabbet and Bearding Line etc (as per Jim Smits and his Ballahoo) though the Plans/Instructions do not call for them, it seems logical when you take the Ply Keel dimensions and 2 layers of Planks into consideration. Should anyone wish to offer advice, please feel free to do so.. it all helps and I would be very grateful. Take Care Eamonn


- 1,039 replies
-
- 14
-
-
- ballahoo
- caldercraft
- (and 2 more)
-
Thanks Jim, that does indeed help I'll be following along in your footsteps as best I can. Take Care, Eamonn
-
Hi Jim, Ballahoo arrived at last! Hopefully a build log will be up by weeks end.. Quick question, Roughly how deep did you cut the Rabbet and the Bearding line? (I assume it didn't/won't compromise the gluing of the Keel, part no.23, onto the 'Former' Keel, part no. 12) My instruction sheet doesn't mention these (Rabbet/Bearding) but I feel they are a good move to make the planking sit better, especially at the stern. I suspect it doesn't need to be much more than 1mm each side. Thanks In Advance Jim. Eamonn
-
Morgan played for us for a short time before abandoning ship to England.. jeez ye guys gave them a fair drubbing over the past 8 weeks.. sorry to all England Cricket fan members but this gave myself and a cricketing friend a cause for much merriment (to be fair I can't really talk, as we aren't even a First Class side, best of the rest perhaps but the step up is immense) I think perhaps you are right in that I should just start the Log and ask questions (jim_smiths is building the same boat as me at present, HMS Ballahoo, and he has the Rabbet/Bearding line in so I shall do the same I expect, Jim is a super builder and I would defer to his knowledge, it is the sizes/amounts that I like you am questioning, might just take a nip over to his build and ask him, I'm sure his answer will serve us both!) Talk again soon Brett, Eamonn Edit, Jim just got back to me with what he had done.. he drilled and pinned the Keel to the 'Former'.. sounds like a perfect solution.
- 129 replies
-
- 1
-
-
- armed virginia sloop
- model shipways
- (and 1 more)
-
Hi Brett, am about to go through a similar process myself on a different but similar sized build and was wondering the exact same thing!! My instructions don't even call for a Rabbet/Bearding lines to be made.. (yet they seem to be needed if I do as you have done using maths, my actual Keel is 1mm wider than the 'Keel' Former, which makes for 0.5mm each side (not enough to 'sit' my 2 layers of planking into without either a Rabbet or some serious sanding!) Hopefully we can both learn from your question then I can begin my own Build Log! Eamonn
- 129 replies
-
- 1
-
-
- armed virginia sloop
- model shipways
- (and 1 more)