


keelhauled
-
Posts
788 -
Joined
-
Last visited
Content Type
Profiles
Forums
Gallery
Events
Posts posted by keelhauled
-
-
Hi Mark,
Yep, I had the same issue. Two ways to address it, cut new decks or take a rat tail file and go to work creating an oval then plank it. If you cut new decks you'll still have to shape the hole with the rat tail so that it fits nicely. Not a big issue to correct, the earlier the better. Without the rake the ship won't have the look of surging forward.
I've been working on this model for about 10 -15 years. I started with this kit and ended up kit bashing it - making most everything other than the frames from scratch. However, everyone is right that if you just built the model as she comes, you'll end up with a beautiful ship.
There are three of us, myself, Bob and Nenad, that are up to our necks in this ship and happy to answer any questions.
http://modelshipworld.com/index.php/topic/2501-cutty-sark-by-nenad-bashed-tehnodidakta/
http://modelshipworld.com/index.php/topic/2728-cutty-sark-by-rfolsom-billing-boats/
cheers
Marc
-
-
So after 3 months- maybe 4, the stirrups and footropes are finally finished. I realized I've been working on these yards for over a year. It took longer to make and outfit these yards than it took to assemble the frame and plank the hull! Crazy. Oh well.
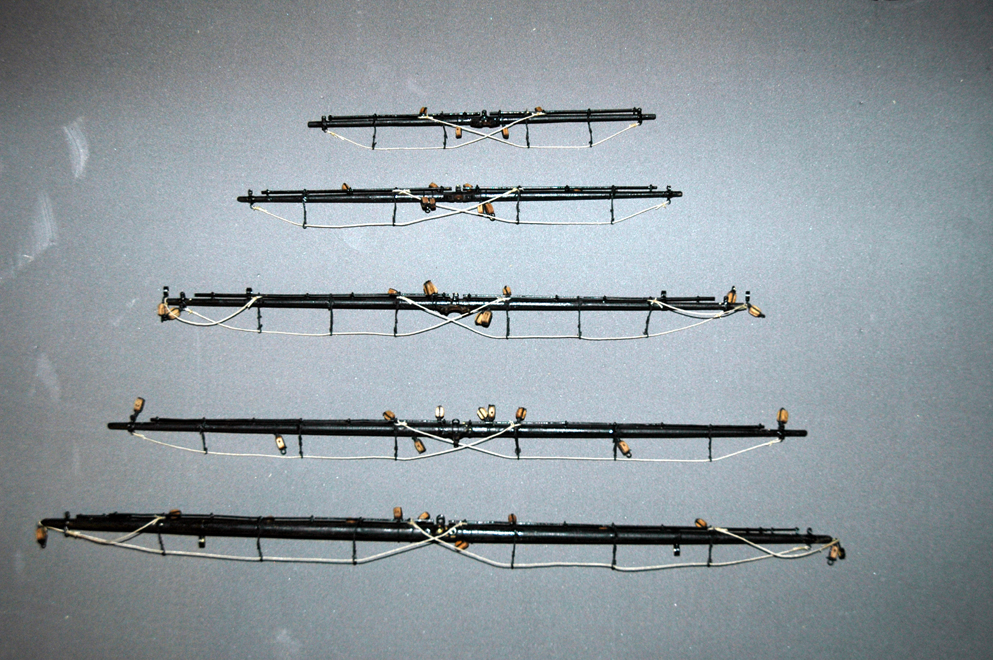
Here are the fore yards with stirrups and footropes
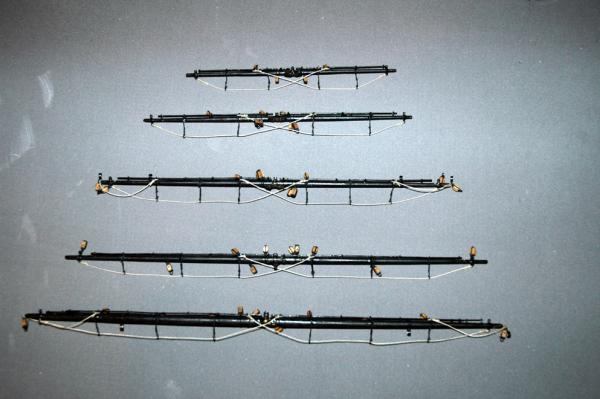
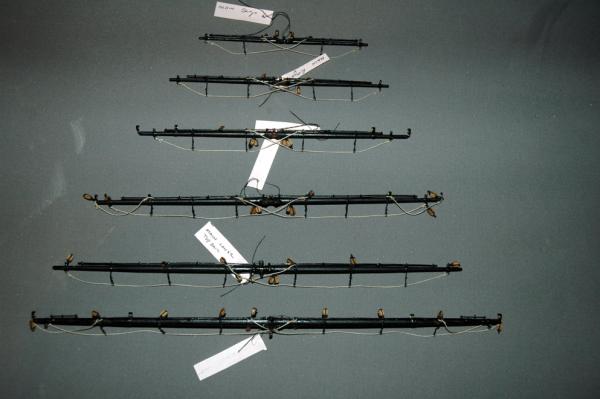
The main yards. The attached tags have the name of the yard. I'm getting old and can't tell the difference sometimes, especially since many of the fore and main yards have the same dimensions

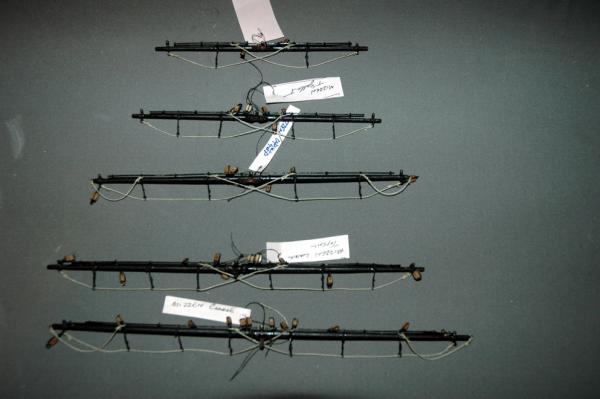
finally the mizzen
Here's my high tech storage apparatus. I spent quite a bit of time building this to protect the yards and the footropes.


-
Happy New Year! Hope you got some build time in!
-
-
-
She's looking beautiful! Very nice work, indeed!
- mort stoll and Kevin
-
 2
2
-
-
Nenad,
As to your brush problems-
The acrylic additive helps. But I've found Kolinsky Sable to be the best answer. I use these in my part-time profession, when I'm painting commissioned oil portraits. I use these brushes to paint the eyes, nose and mouth. Although I use these brushes for oil painting, they work fine with acrylics. Just make sure that you don't paint for more than a few minutes with the acrylics before rinsing the brush. Also never dip more than the tip into the paint (very important). The fibers are from the tip of the weasel's tail and naturally all curve towards each other forming a sharp tip. The finest brushes come from Russia. They are very expensive in the US, but worth the price if you really need a brush that stays sharp and doesn't have brush lines.
Also Never, Never, cut natural brush hairs. Each hair comes to a microscopic point which allows them to form a point in unison. If you trim the brush they will never come to that point again. If you have issues, clean the brush thoroughly with soapy water, by placing the soap in the palm of your hand with water flowing over the soap and move the brush over the soap like if it were paint and you were trying to load your brush. Then remove the soap and move the brush over the palm of your hand as if you were trying to paint it. Do this many times. Whatever you do, don't hold the brush upside down and squirt water into it - this drives wet paint up into the barrel of the brush and ruins it as well as weakens the glue and swells the wood handle. After the brush is clean you can put baby oil in the palm of your hand and allow the brush to soak it up. This will help if your brush needs natural oils back into the bristles (you can also use hair conditioner). This method will also work with dried paint on the brush. I've recovered paint brushes with both dried oil and acrylic paints.
Marc
-
-
stunning stern!
-
Nenad,
I love keeping up with your build and your creativity.
Hope the strike ends soon. I know it will cut into your ship building time, but I am sure that it causes unnecessary stress for you.
I wish all the best for you and your family for the holiday!
Marc
-
looking wonderful! It looks like we make our dead-eyes using the same method

We are doing well. Unfortunately, I've been on travel for the past month or so. I plan on being in the workshop this weekend!! (Admiral's Mother will be spending the holidays with us. I want to make sure that they have quality time together.

-
Looking good. Very exciting!!
-
-
Nenad,
I kind of like the idea of the CS with the Vic's guns. Think how much faster and sporty the VIC would look with the CS' sails!
We've got to talk Bob into stepping out of the box. He's already venturing into the dark side of scratch building!
Marc
-
Looks like I'm late to the party!
Nice build so far. At this time I think my next build is the Victory. I already bought the large Mamoli version 10 years ago. At the time I thought that I could bang the Cutty out in 3 or 4 years - HA, HA, HA! What a fool I was.
Maybe I'll go scratch built like you.Look forward to seeing your progression.
By the way, don't get the Cutty's pieces and the Victory's mixed.
Then again, I might make two very interesting ships! 
Marc
-
like the approach to the star of India! very creative!!
-
Nenad,
Thanks for the tutorial.
Also thanks for exposing me to that forum. I wasn't familiar with it. Lots of good information!
Marc
-
Back working on the stirrups and foot ropes. Nothing exciting to photo yet. Hopefully I get enough time this weekend to finish the foot ropes for either the main or the fore mast - I've been working back and forth from the bottom up on those two. Not sure why I didn't include the Mizzen on the rotation. Poor mizzen yards all left out until the end. That is the problem with repetitive rigging, lots of work and nothing much to show for it.
Also I mounted the name on the stern. Still have a few areas that need a little detail painted on the stern.
Marc
-
-
Thanks Bob, The feelings are mutual!!
I really appreciate your support!
Marc
-
Nenad,
Wonderful work! I'm amazed that your are able to make all of those loops in the wire. That would be a good tutorial! Although I agree that I wouldn't make it movable, I do think that the hinges were a great detail.
You drive me to work towards making a better model!

Keep up the wonderful work!
Marc
-
Nenad,
I think you should try sculpting. Nothing to loose and based on what I've seen of your build you'll do an awesome job, better than my attempt! As far as the detail, you're correct that the more detail you put into the model, the more opportunities you see to create more detail. I think that it's hard to find the balance. I've considered redoing several areas, but I don't want to end up rebuilding two thirds of the ship. I'd rather move on to another ship and use what I've learned.
Bob, thanks for the feedback! I used Elmer's stain-able wood filler. The pre-carved surface is fairly rough and gritty, but underneath it will be smooth. I didn't do anything to the jewelers screwdriver. Looking back, I should have sharpened them. Also when I looked back at the bow, I noticed that I was able to make more detailed work in the fine scrolls with a thinner layer. I didn't notice this until I had already hardened the stern, so I couldn't go back. However, if you make it too thin It may crack or break.
Grant, thanks again for the encouragement. And yes, I am glad that I went down this path.
Costarn, I'm not familiar with that kit. However, I don't think that it matter's who manufactured the kit. Bob, Nenad, Grant, and myself have built most of our ships from scratch, tossing aside the kit provided materials as we've become more sure of our building skills. You should look at Grant's build. He even made the blocks!
The next kit parts that I'm throwing away and rebuilding are the ships wheel and windlass.
CUTTY SARK by keelhauled - Mantua - kit bashed - First wooden ship build
in - Kit build logs for subjects built from 1851 - 1900
Posted
Thanks Grant. Now on to the sails, or maybe the upper shrouds, or the ships wheel. Haven't decided yet.