


keelhauled
-
Posts
788 -
Joined
-
Last visited
Content Type
Profiles
Forums
Gallery
Events
Posts posted by keelhauled
-
-
Figured it might just be the photo, but I wanted to make sure before you went too far. The scale is tricky. 2 pins between the deadeyes is pretty tight! Still working that out myself. I think that i might decrease the size of the pins, but worried that they might be too small in scale. The problem is that I plan on rigging sails, so I'll need to use those pins.
-
-
Nenad,
You always know how to make me feel good!
Bob,
I don't have any support for the other end. It probably would have made it easier.
I think that the wood was birch. I tried walnut, but was having issues. Probably the lack of skill and knowledge on my part.
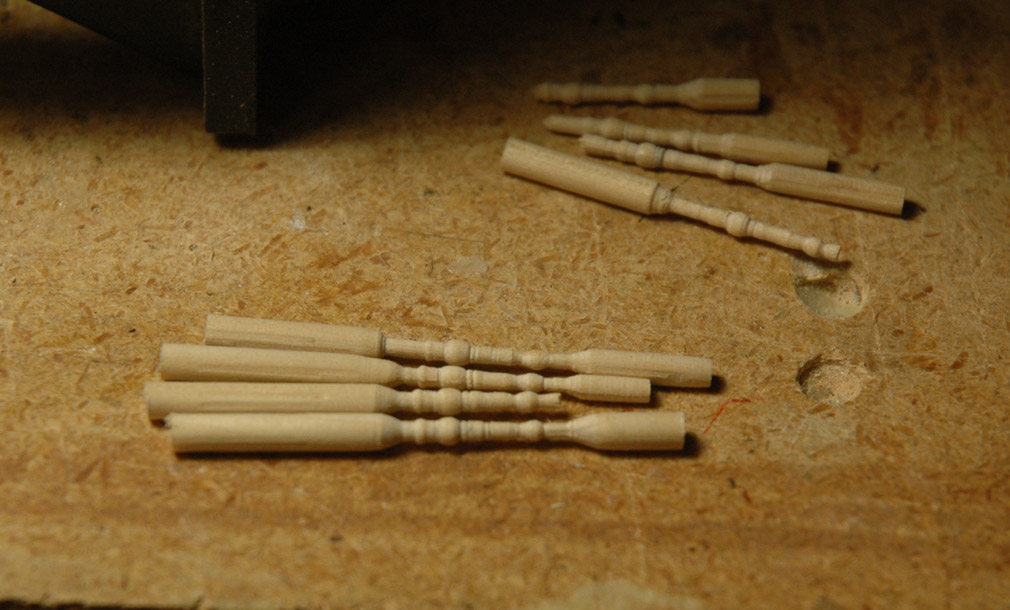
The diameter of the actual spoke is 3/32 inch for the the thickest part and about 3/64 inch for the thinner part and about 1/2 inch long. The dowel itself was 1/8 inch. 1/16 would have saved quite a bit of reduction in wood and saved time, but the 1/8 was all I had.
The speed was at a setting of 3 out of 6. Not sure of the RPM.
I think that the biggest issue was not having a hand or tool rest to help steady my chisel (sharpened precision screw driver).
These took a good part of Saturday and Sunday afternoon. Mainly because I kept stopping to check with calipers.
I was hoping to get some more work on it Monday and Tuesday, but had a headache. I didn't want to mess with these small parts when I'm having trouble concentrating. You know one second of lack of concentration and an hour of work destroyed.
thanks
Marc
.
-
Bob, what's a ship without sails? a raft? you have to have sails....so says my admiral , if I want it displayed in the living room

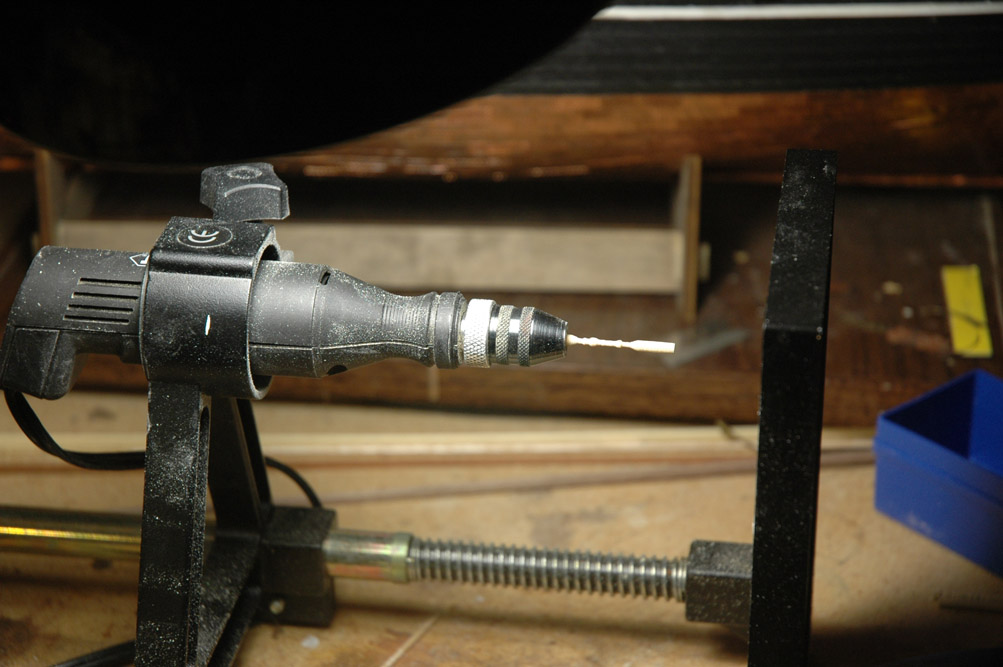
So I'm working on the ship's wheel. Trying to see if I can do better than what was supplied.
Here's the high tech micro lathe that I'm using on this project

... yes it's a rotary tool drill press laying on its side
Here are the spokes. I turned them free hand. They are laying with the handles to the right. Next it to finish off the handles and cut off the bottoms.
then figure out how to do the rim and drum.

- rfolsom, Mirabell61, bhermann and 7 others
-
 10
10
-
-
Campbell's plans are available at the Cutty Sark museum gift shop
Longridge's book (two volumes also available as one book with both volumes) is a great resource as well. Just be aware that Longridge documented the ship as she was early 1900's.
Marc
-
Wow! that is a great looking sail. I think that the shape of the sail looks great! I'm really looking forward to the step-by-step process!
-
sorry to hear about your hull. We've all done similar things. I've swung my ship around on the turn table and slammed the figure head's arm into my cement wall. Unfortunately more than once. I just broke chains and boomkins last week. Just finished remaking them. In fact, the more you scratch build items, the more confident you become that there isn't anything on the ship you can't make or make better the second time around. It's very liberating!
Marc
-
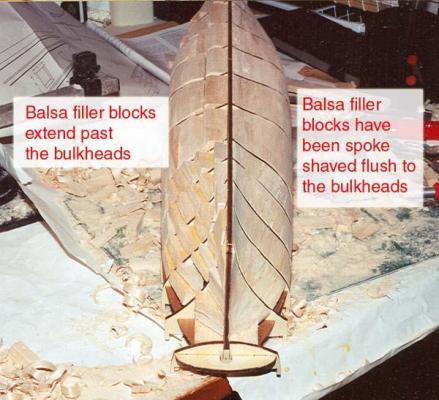
I started building the swift, which is like your kit. I used the same set up as captain Bob suggested. I used this same clamp.

I also used the stiffening blocks. I then planked on strip at a time alternating from one side to the next. No issues with warp. The keel is straight as an arrow.
Here's filler blocks taken to the extreme. It was a technique that professional Bob Evans used to use. I used it on my Cutty Sark
-
Hi Mark,
I did adjust the lower deck. If I remember correctly it didn't take much. I don't remember having to make any adjustments to the false keel, but I could be wrong....It's been close to 13 years ago.
I had the ship in a cradle and leveled her transverse as well as her keel. I then inserted a dowel, used a plum and protractor to check the angles and made adjustments with a rat tail file. I also used an incline level to double check the angle (since the dowel wasn't tapered this worked well to check the angle against the protractor. I also checked the angle between the deck and the dowel. I have a tendency to check angles and squareness several independent ways to make sure that I'm not getting false measurements.
take it slow and easy. It's not a difficult job, but you want to make sure that it is correct.
Good luck,
Marc
-
Thanks for the support Bob. I'll be excited to get to the rigging, when I finally get there. I need to do a million little things around the ship as well as deal with the sails. I bought the pre-sewn sails from Manuta, but I not happy with them as is. The bolt rope is a dark tan. I'll have to figure out what to do. Bought a sewing machine and played with it some. But I know that I'm not good enough to actually sew another set of sails.
-
-
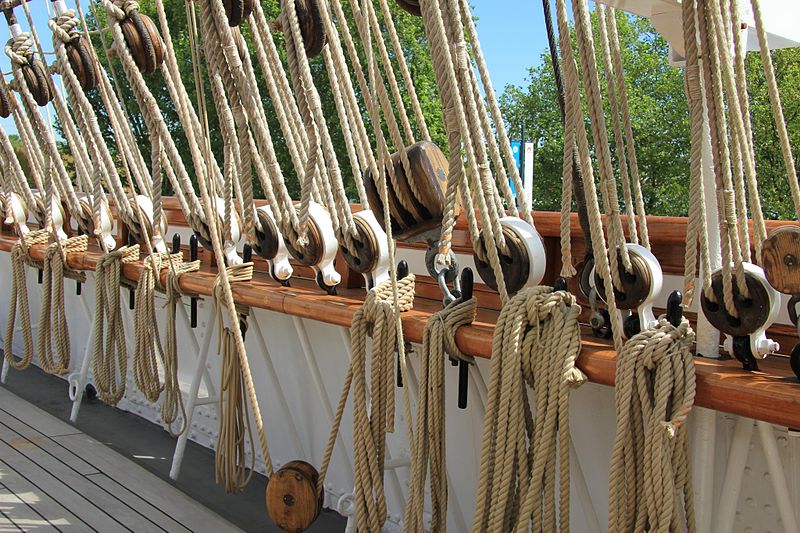
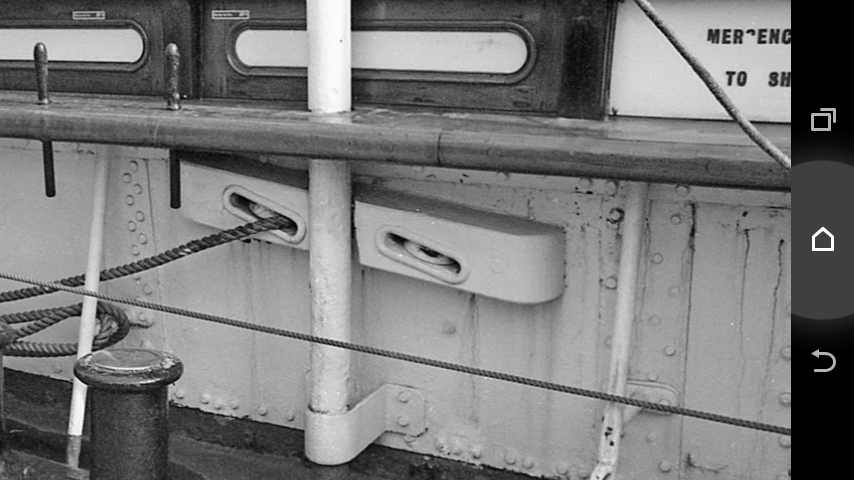
Hmmm.. thought I had pics posted of the sheaves..
Like a small child who gets a 'grape popsicle' and is happy with it, then sees sister with a 'cherry popsicle' he all of a sudden wants it....
This is how I feel about my chosen sheave color of black after seeing Marc and Nenad's white...
Ah, well..
Anyhow, broken drill bit shows where the boat davit crosses the aft sheave block, and all holes are pre-drilled, with a notch cut in the sheave block to provide clearance for the davit.
Funny, I like yours better than mine.

I guess we always want the other flavor Popsicle...
Good to see the piggies!
- popeye the sailor and GLakie
-
2
-
Bob,
where are the photos of your sheaves? Also where is the pig these days?
-
I debated on the color as well. The photos from my trip have them black. Then I saw some old photos and they were white.
Just like everything else, it depends upon the day. The heads are varnished teak..... then they are completely white, then they are white with black roofs. And the deck houses...first they are teak with white panels, then they are completely white, then they are completely teak. Anyone notice that the position/distance of where the bowsprit goes into the deck has changed through the decades as has the eye-bolt for the fish tackle.

In the end, I think you just have to pick what you like.

With the sheaves I actually like the black better. But didn't want to draw much attention to them. I could have done a better job, but if I'm not careful I'd remake the stupid things over and over and over. As it was I made eight and chose the last four. I didn't mind making them, enjoyed it. But the point is that I would never make any progress. Although I guess the real point is that I enjoy the journey.

Marc
-
-
Marc, take a look to Dan Vadas HMS Vulture, he gives me some bad ideas about wheel ...
Nenad, only trouble is that I'm not Dan (and I don't have a lathe, not that I think it would matter). Dan is truly one of the model ship building gods.

- CaptainSteve, mtaylor and GLakie
-
3
-
Nenad, my sheaves are made and in location. pics are over on my build
Thanks for the inspiration.
I started working on a new ship's wheel. I need you to build this so that I can see what creative way you have of building it!
 I'm trying to turn the spokes and not doing so well.
Thanks
Marc
- GLakie, 3qq and CaptainSteve
-
3
-
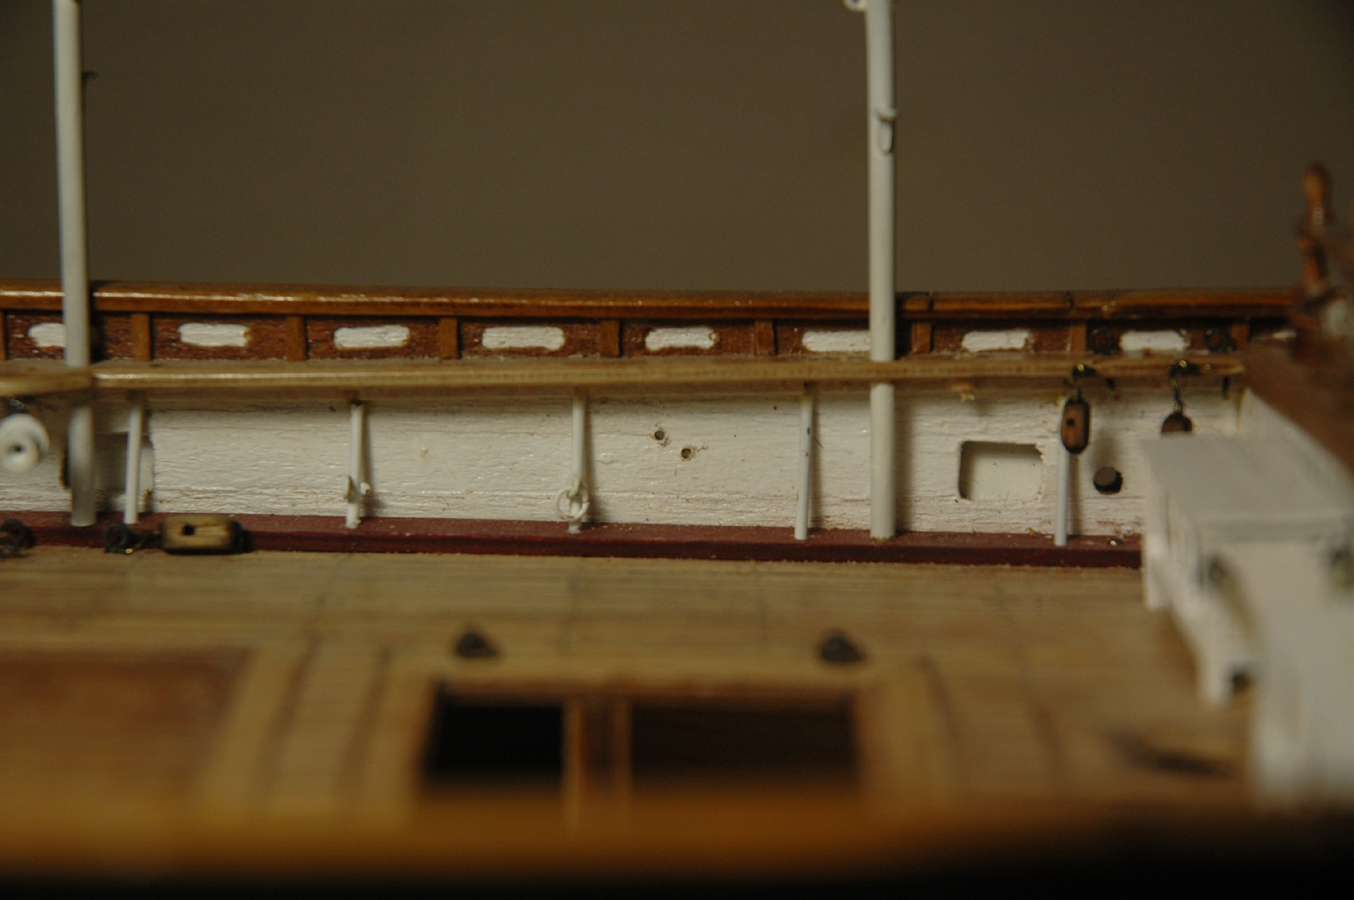
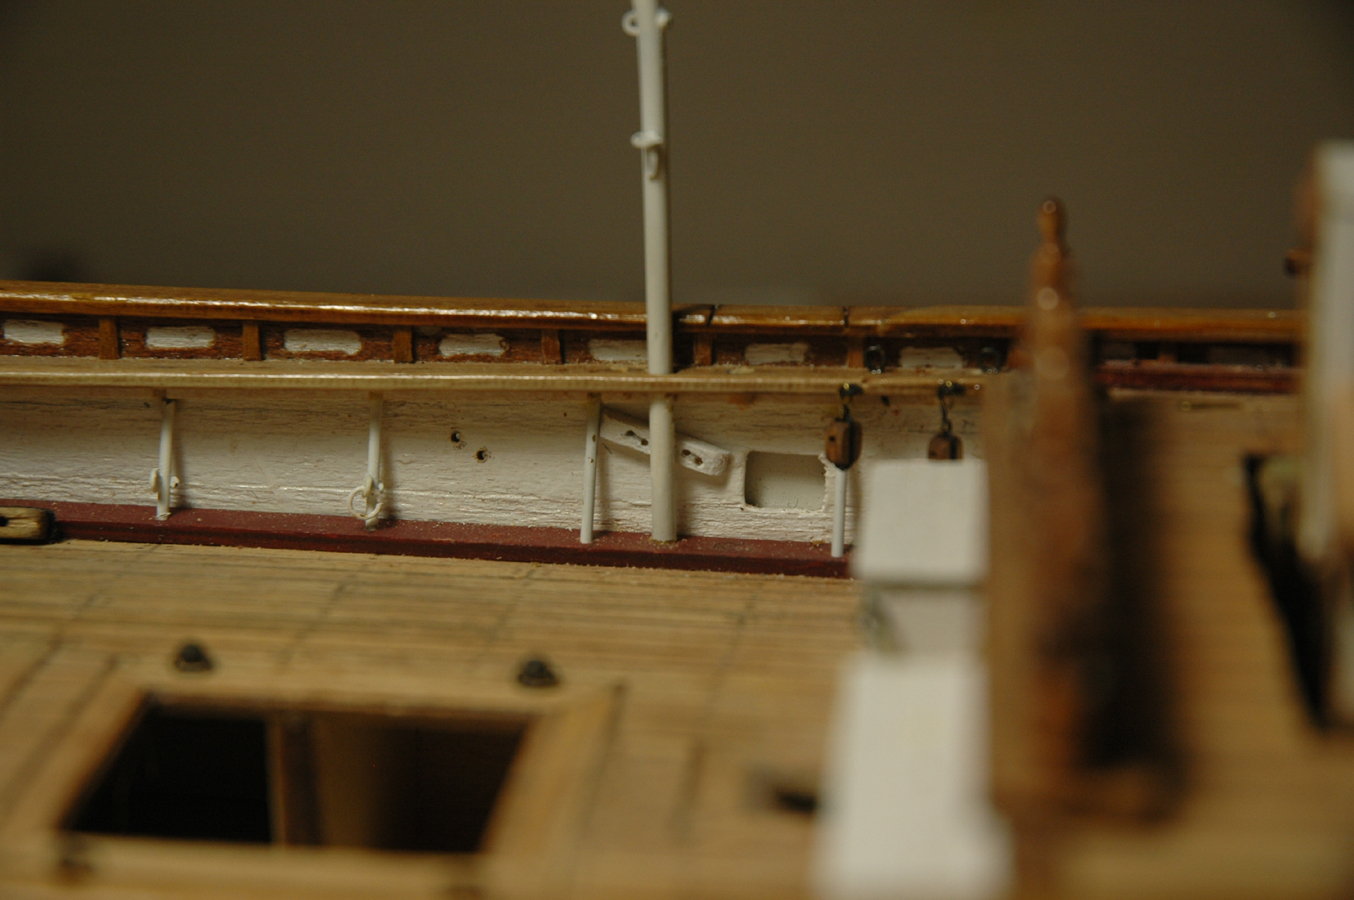
Here you go Nenad.
Before I just had these holes for the sheaves.
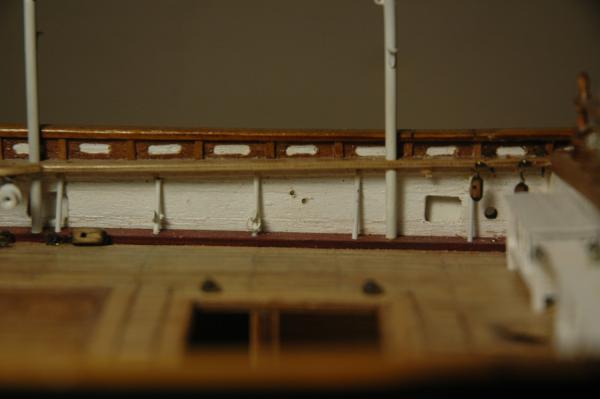
Then I saw Nenad's beautiful work...(Nenad, I hope that you don't mind me using your photo. If would like me to remove it, let me know and I'll take it down)
As usual, Nenad inspired and pushed me to do better! So I started to do better.

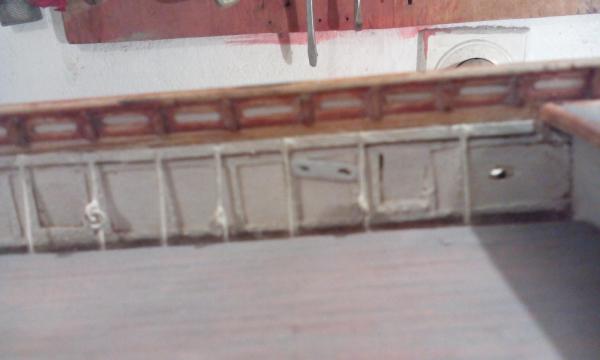
Then I ran into problems. Previously the kit had the davits in the wrong location, so I moved them. No issues until looking at including the sheaves, now I notice that the stanchions were now not correct becasue of moving the davits. Another issue.
 Oh well. I'll do the best to fit the sheaves in and no one will notice one the rigging is all in place.
The actual ship (Nenad's photo)

So here is my take on them. Now I just need to fill the old holes.
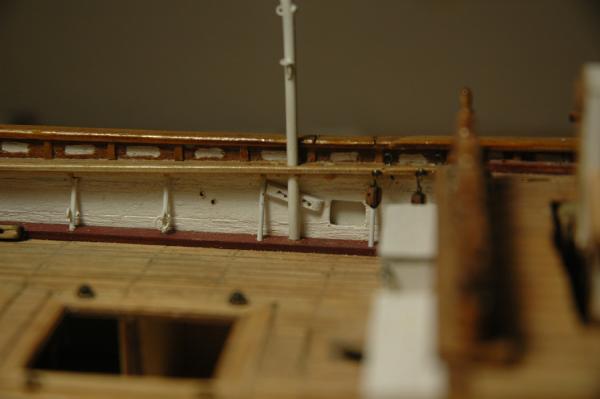
Nenad, I ended up drilling from the inside since I had to move the sheave holes anyway.
While I was working today, I thought that I would reattach the aft boomkin chains, which I had removed during reworking of the stern decoration. I put to much strain on the starboard chain and broke it. I decided to remove the eye of the boomkin to run the chain through the eyes for the ship and boomkin. As I tried to break the boomkin eye free it broke. I'd forgotten that I had attached it using epoxy. That epoxy is great if you want the part to never be removed. But if you need to remove that part your dead in the water.
Anyway I had to drill out the post of the old eye. (damaged part of the boomkin). Repaired the boomkin, drilled out the post and reattached the chain. Just one more minute mistake that took an hour to fix. (At least it was only an hour!!
) I took photos, but the turned out poorly and out of focus. -
-
Hi Nenad,
guess what I'm working on today? Bulwark Sheaves!
Why? because you are a bad influence!
I was happy enough just drilling a set of holes and working on other details. Then I saw your work and I felt shamed. So I started work and guess what? Because I had to move the boat davits due to the kit being wrong, they stanchions are off and well, now so are the sheave holes! So decisions about what to do. I'm taking the advice I gave you - no one will notice. They are close enough. Now the question is to re-drill holes from the inside or the outside of the bulwark. I'm guessing the inside to out is the way to go.
Thanks for the push!
-
Nenad,
Nice work as usual! I wouldn't worry too much about the port vs starboard side. Once it's rigged no one will notice - other than you. I guess the bigger question in alignment between the inside and outside of the bulwark.
Marc
- GLakie and popeye the sailor
-
2
-
Cool idea. I've been wondering how to do the name and scroll on the billboards. This looks like it might be a good way of going.
Thanks!!
-
Looking good! Nice cats

Mayflower by SawdustDave - Finished
in - Build logs for subjects built 1751 - 1800
Posted · Edited by keelhauled
Because everything related to ship modeling is more complicated and difficult than we estimate and takes 2 to 3 times longer than what we expect....If we're successful the first time! If not, all bets are off! It's the fun part of the hobby!