popeye the sailor
-
Posts
16,007 -
Joined
-
Last visited
Content Type
Profiles
Forums
Gallery
Events
Everything posted by popeye the sailor
-
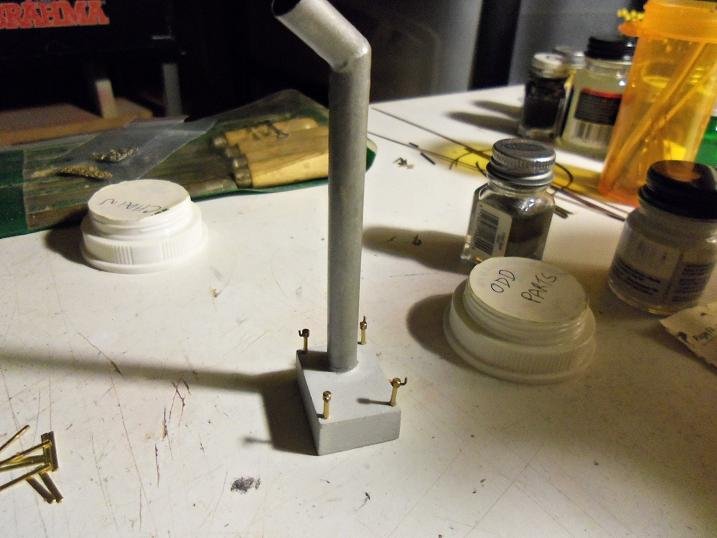
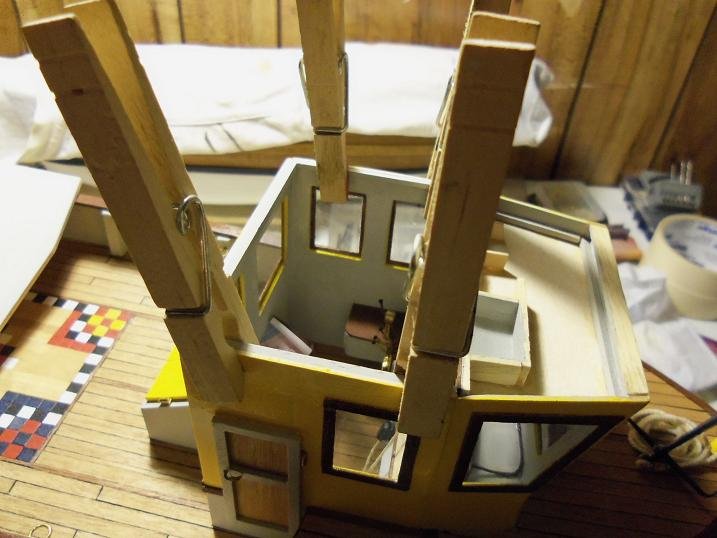
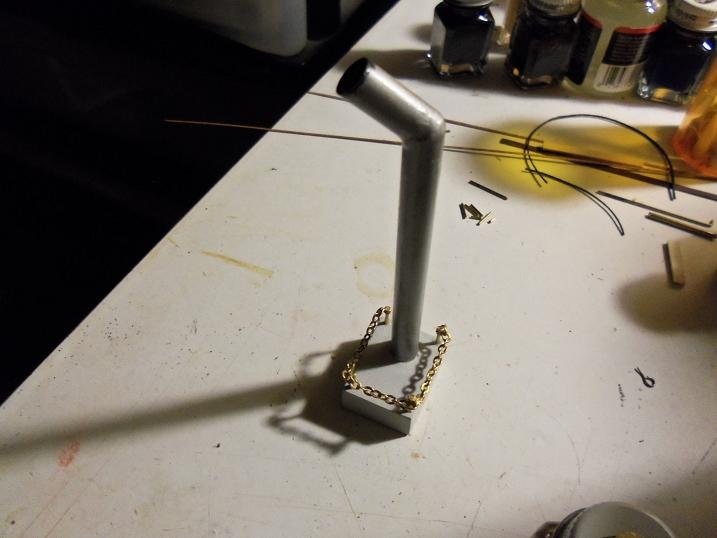
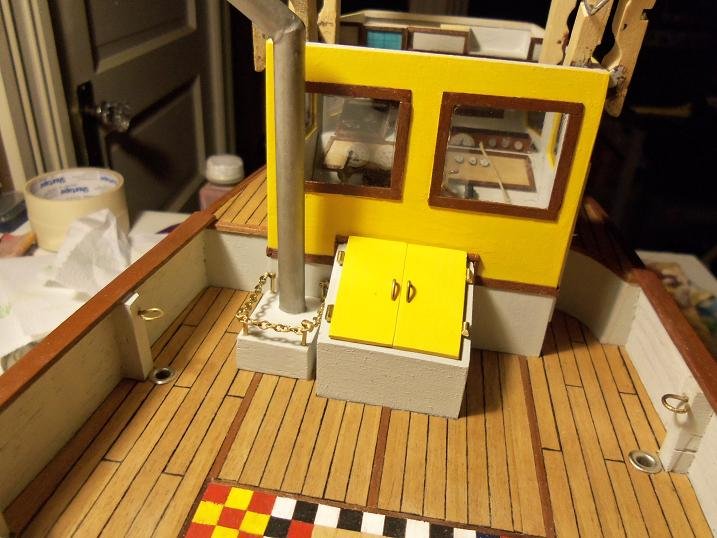
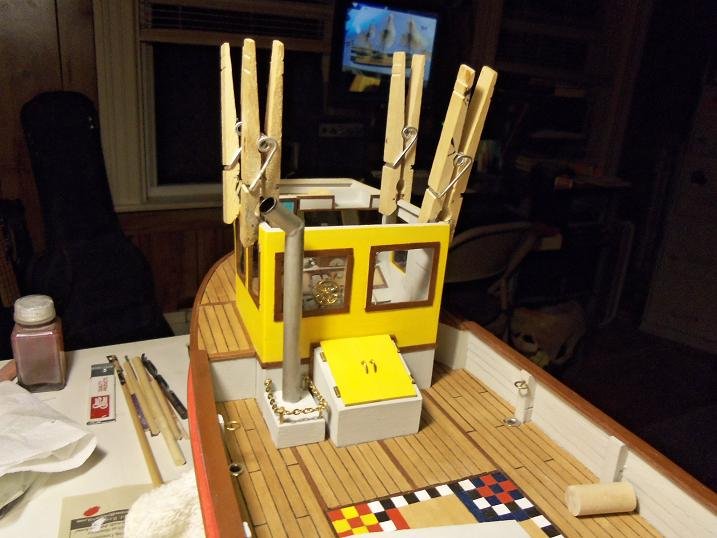
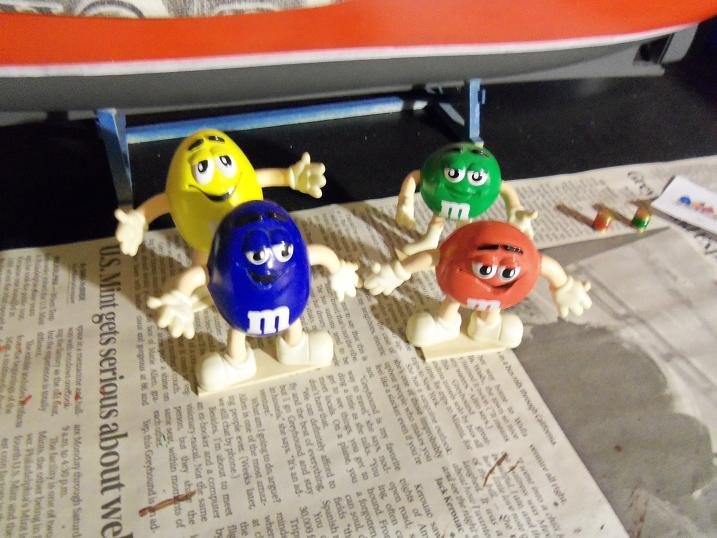
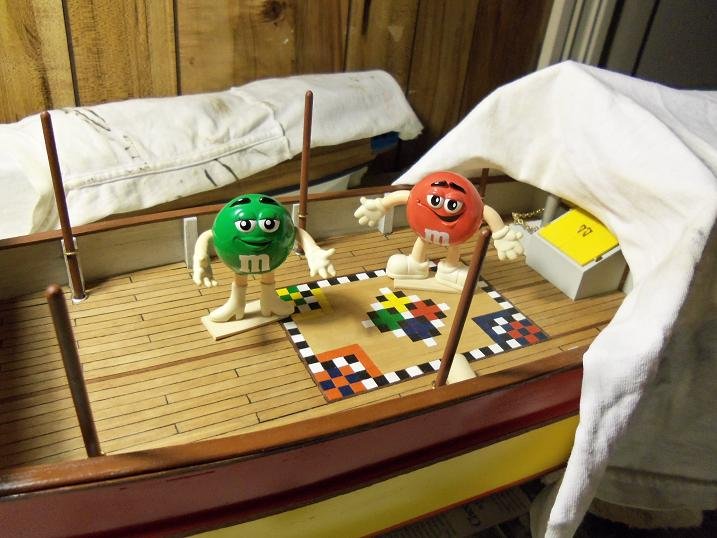
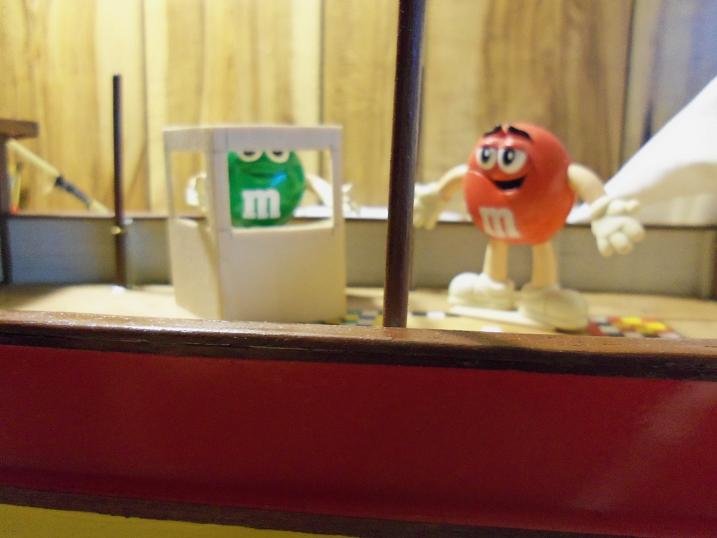
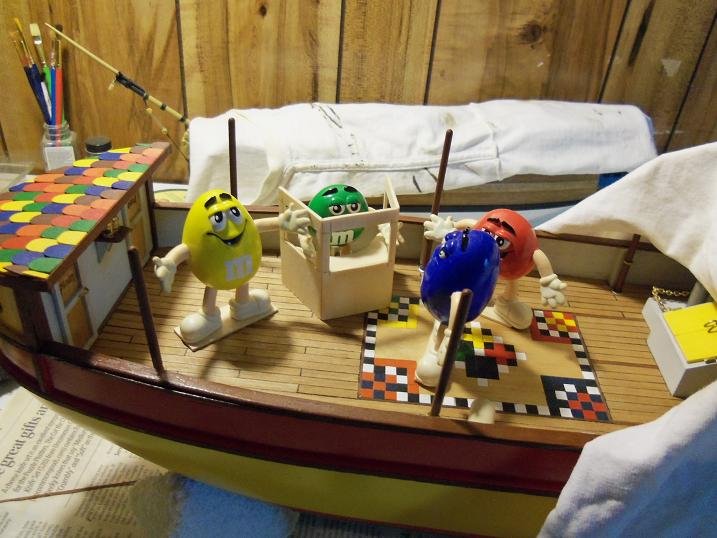
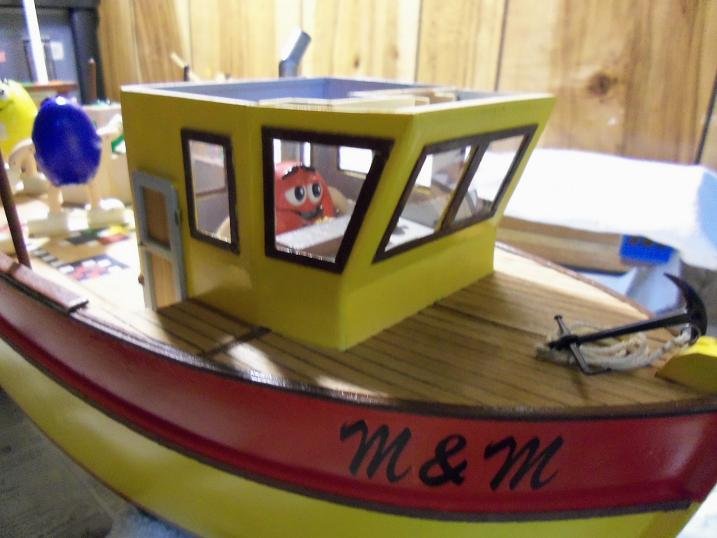
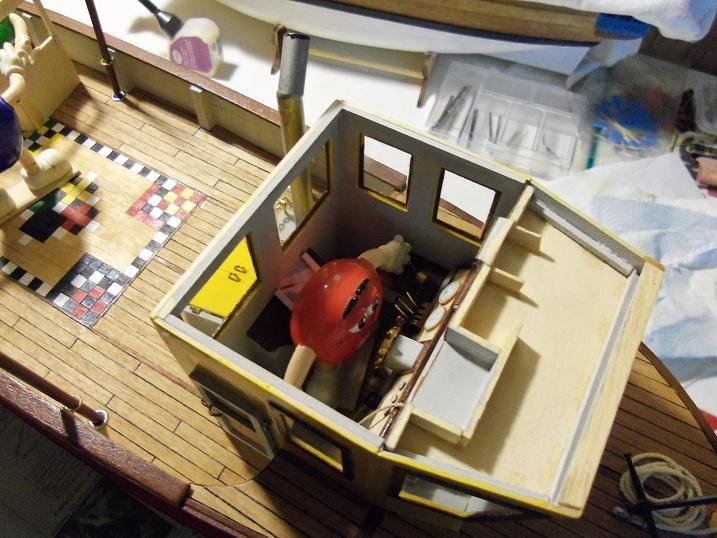
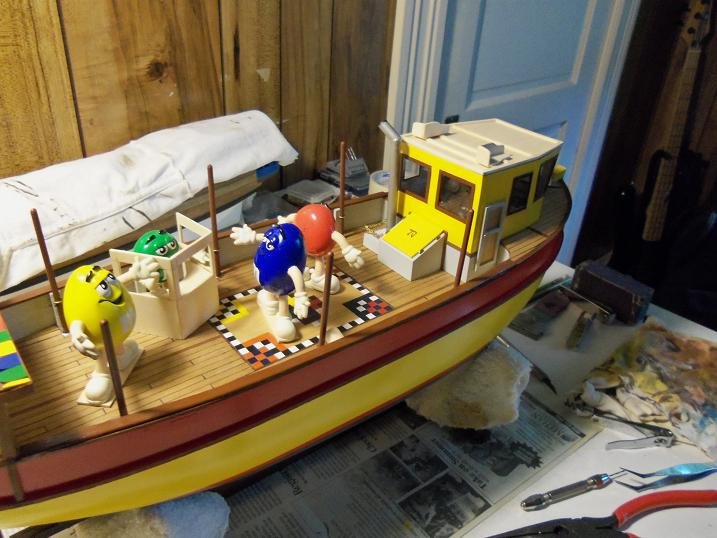
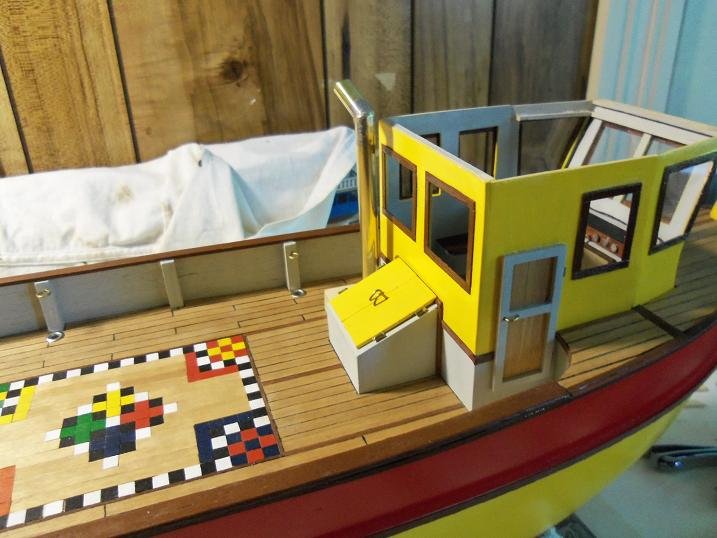
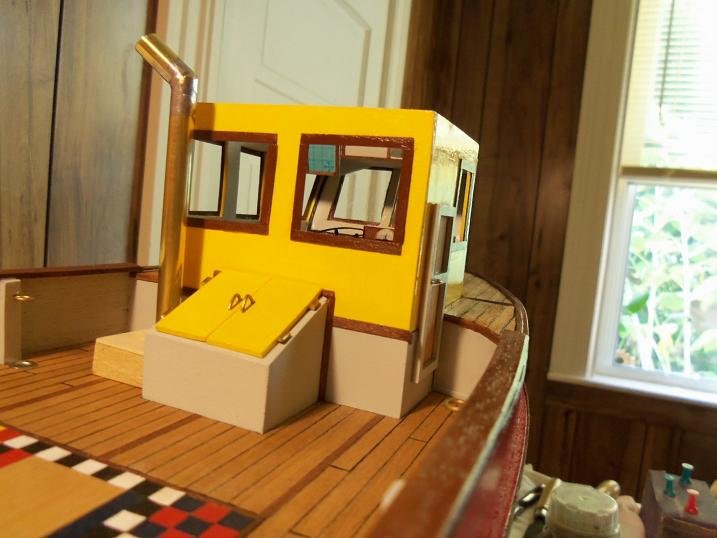
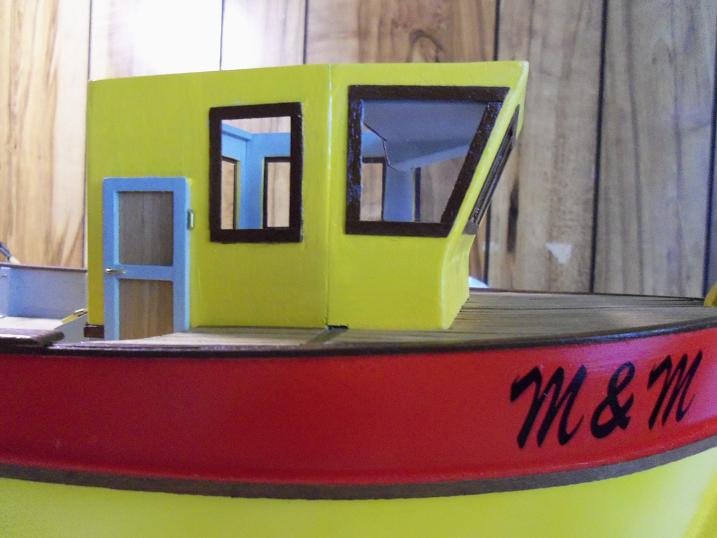
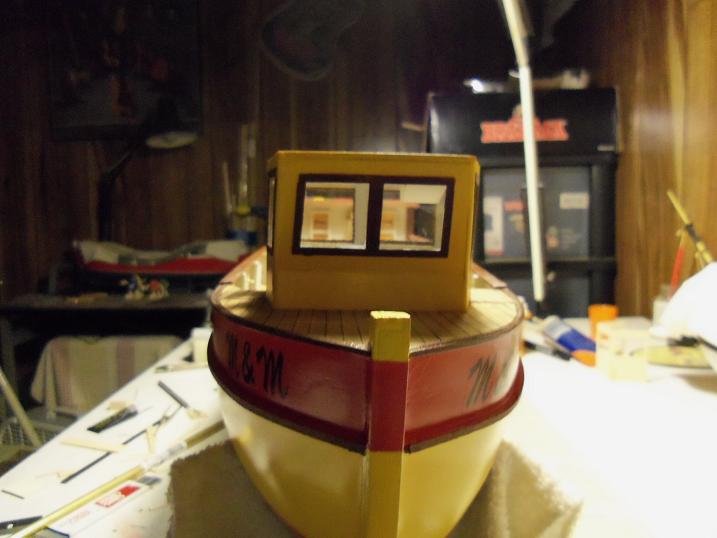
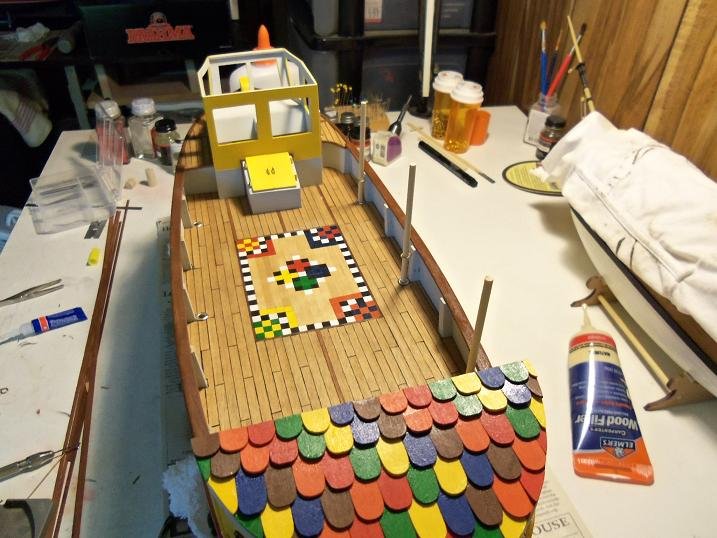
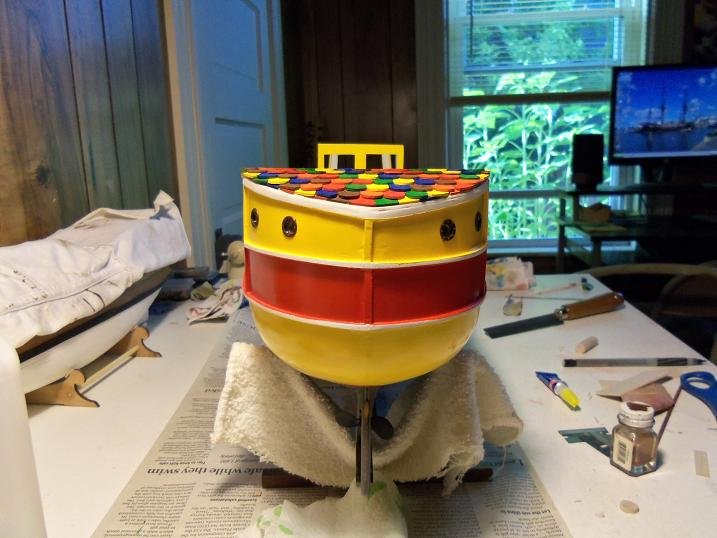
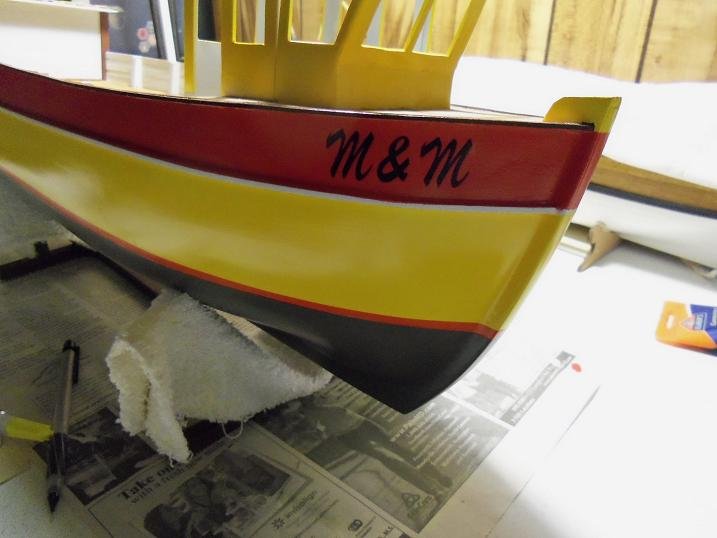
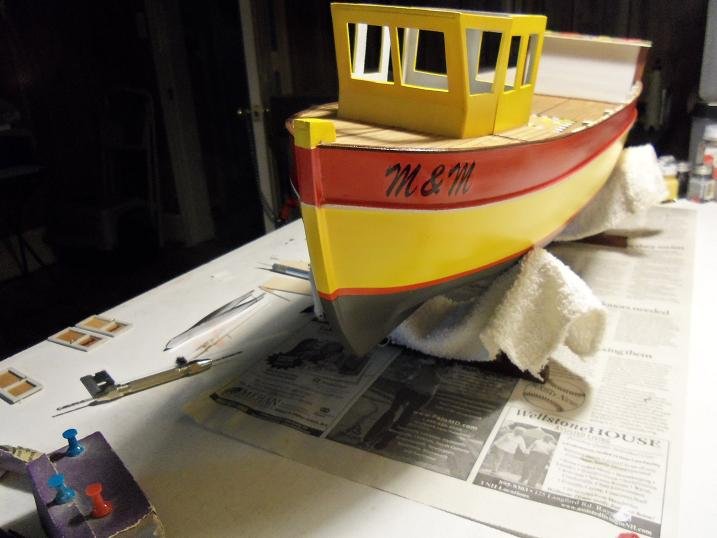
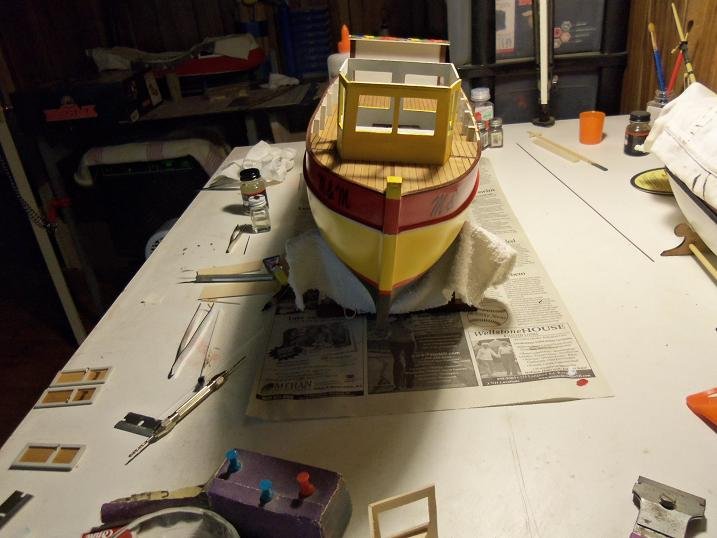
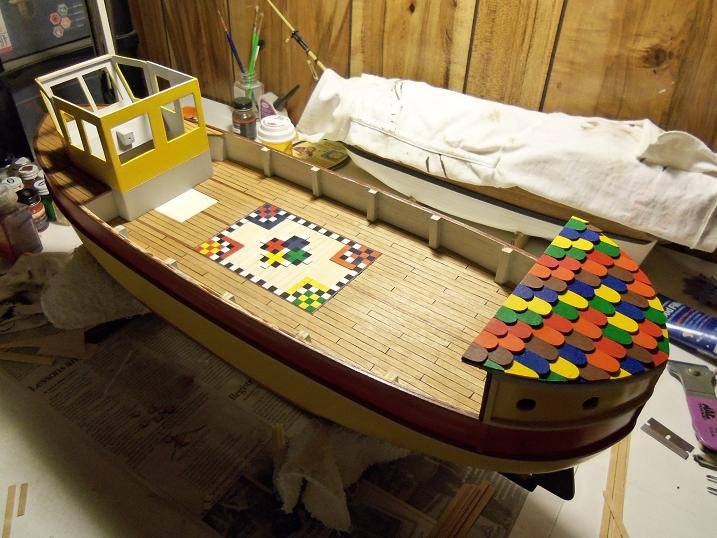
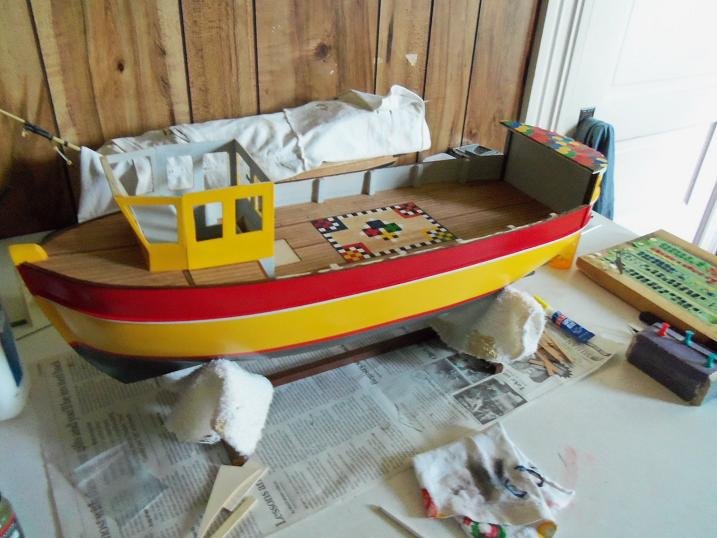
 9-13-2012 I had attached the anchor rope to an eye bolt that I installed on the stem. the anchor assembly is added to the model. I plan to have a railing around the funnel. I decided to use chain.....I installed the posts. the roof edge on both sides of the pilot house was beefed up a bit more, to give a better anchor for the glue. the funnel assembly with the chain added. the admiral and I went down to her stash of M&M stuff, it's quite a collection. unfortunately, there were no figures that were to scale, so we chose the best ones. for the time being, I gave them a base so they could stand up on their own. they seem to like it a lot.......red even got behind the wheel. in the interest of the model, I decided not to leave him there though.......I have a reason perhaps if I should do a Walking Dead boat.......maybe I can have Maggie or Darrel drive
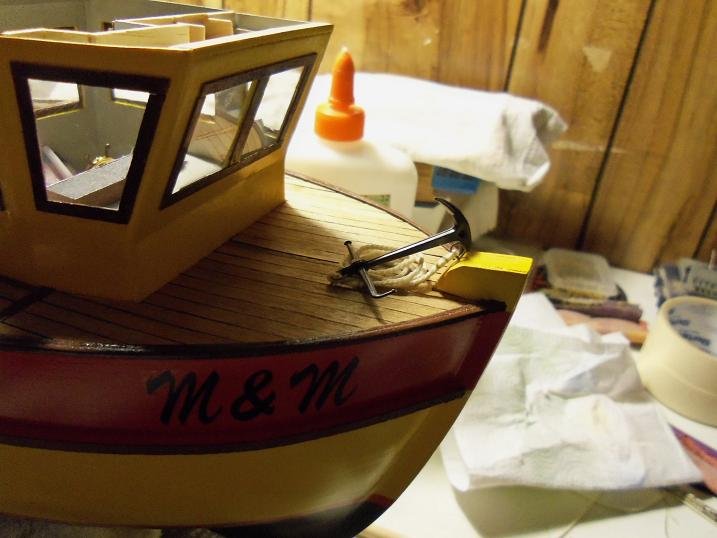
-
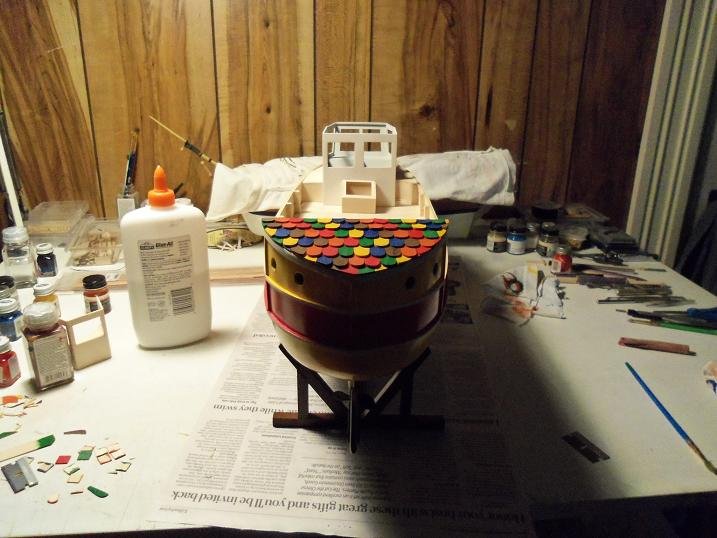
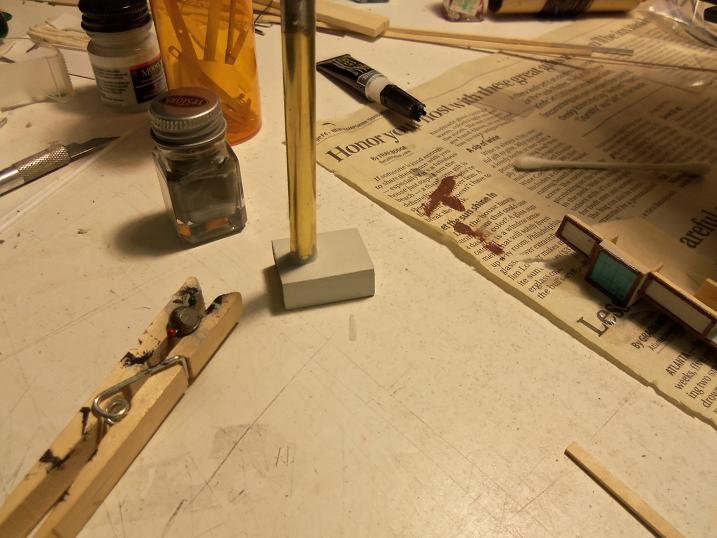
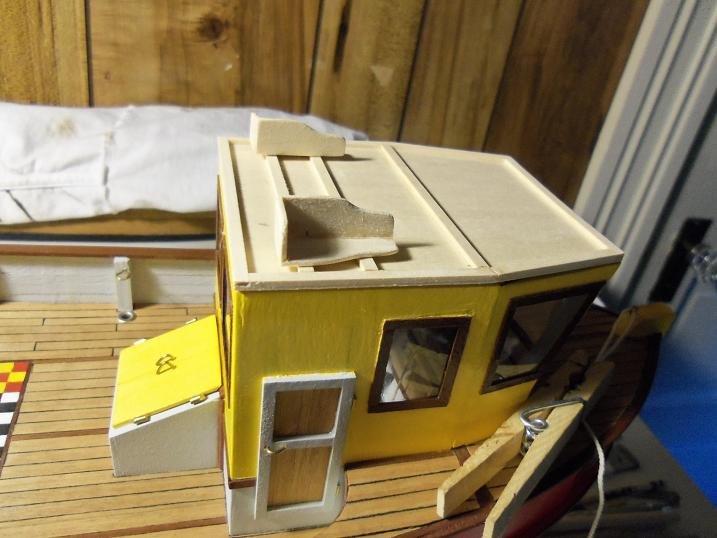
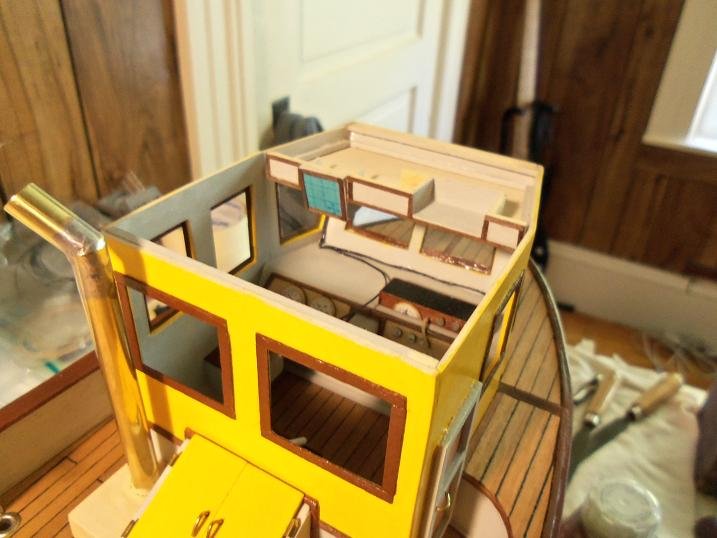
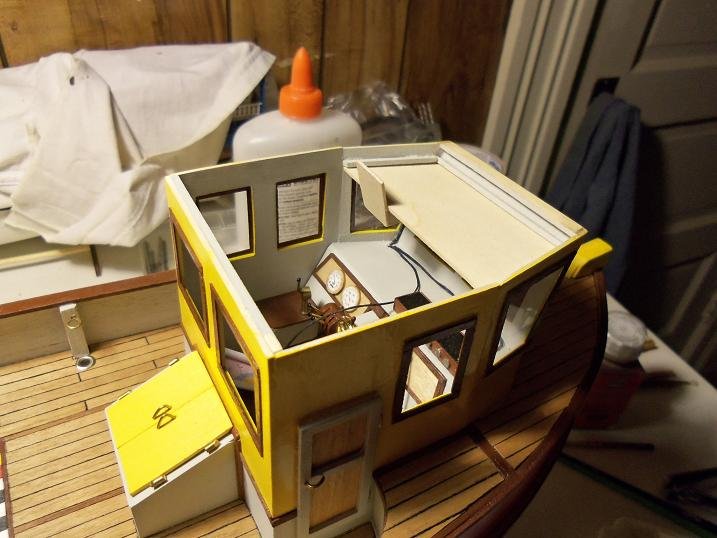
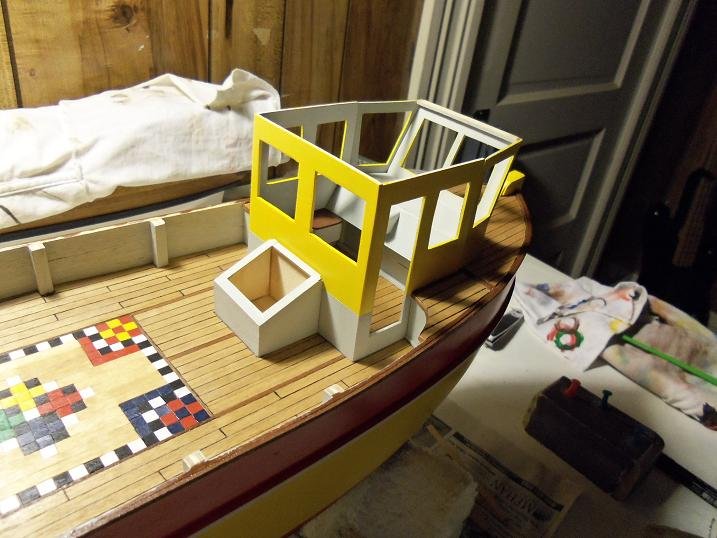
9-12-2012 the overhead and got a coat of semi gloss lacquer, along with the other radar part for the dash. the binnacle was painted as well framing for the roof was under way at this time the funnel base was painted the radar for the dash was cemented in place and hard wired in. more framing for the roof was taking place......then it will be painted. the overhead compartment was cemented in place. the rest of the windows were added to the pilot house. the nav light boxes were cemented to the roof

-
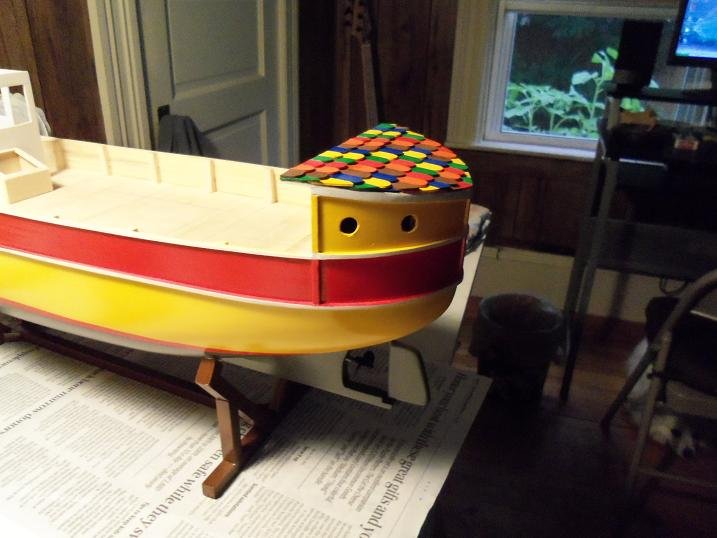
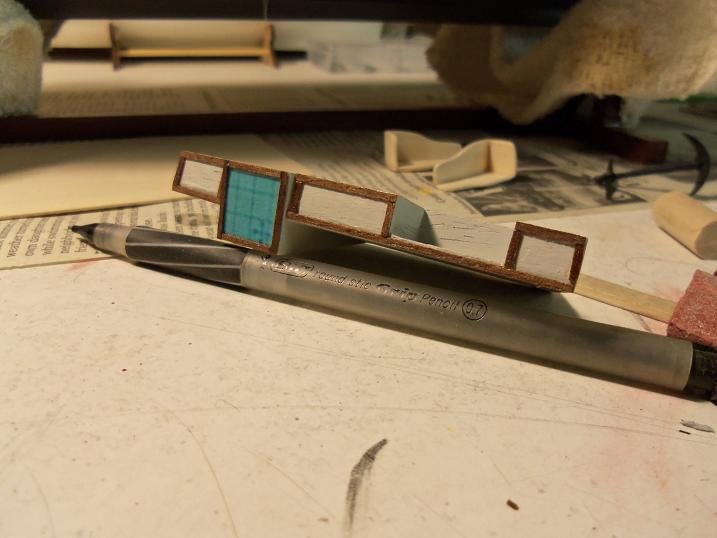
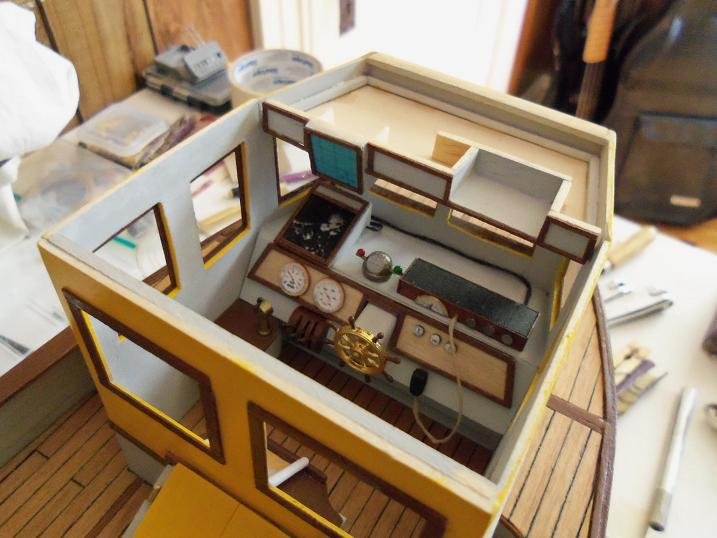
9-7-2012 radar screens and mahogany molding was added to the overhead the nav lights were painted.....why I did them this way....I dunno....bit I did. a base for the funnel was fleshed out. .....and then dry fitted in place with the funnel the completed overhead compartment
-
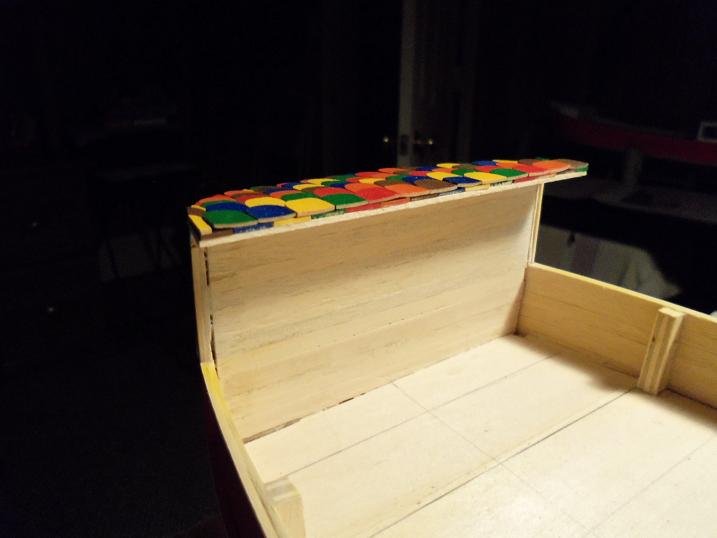
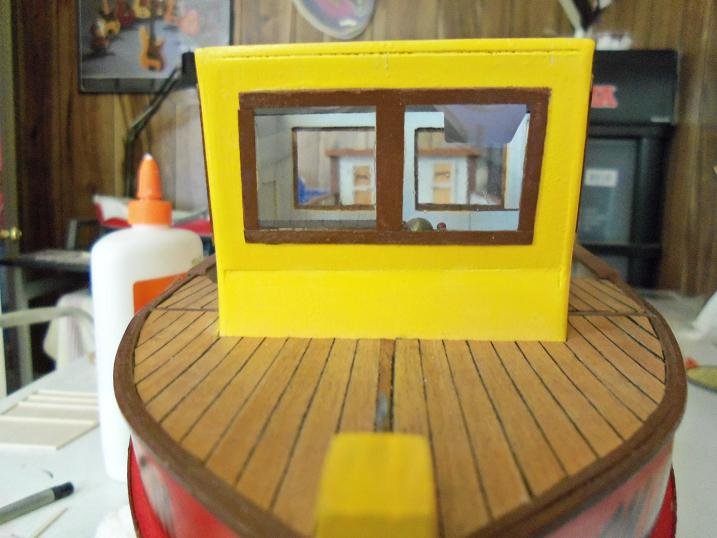
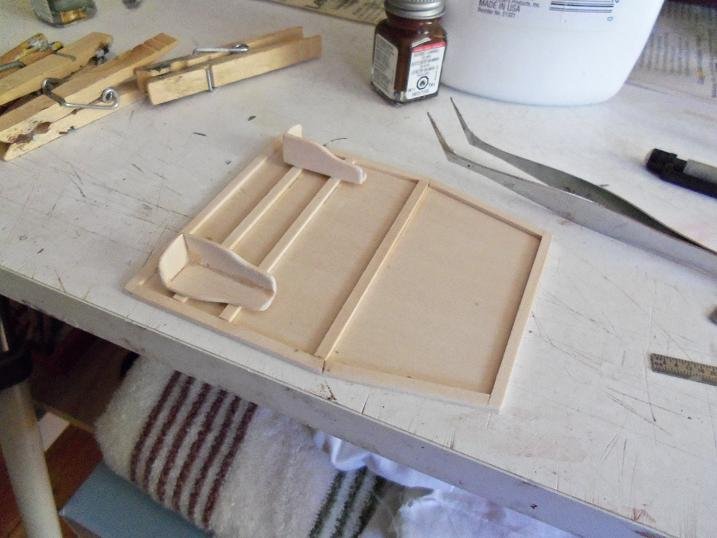
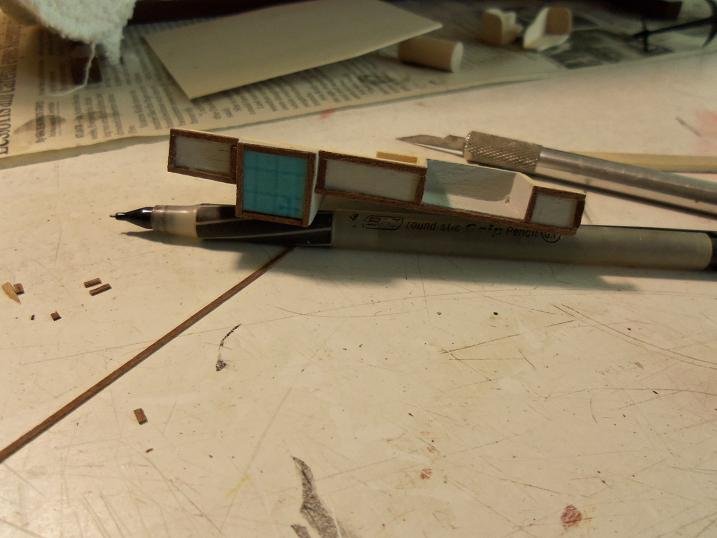
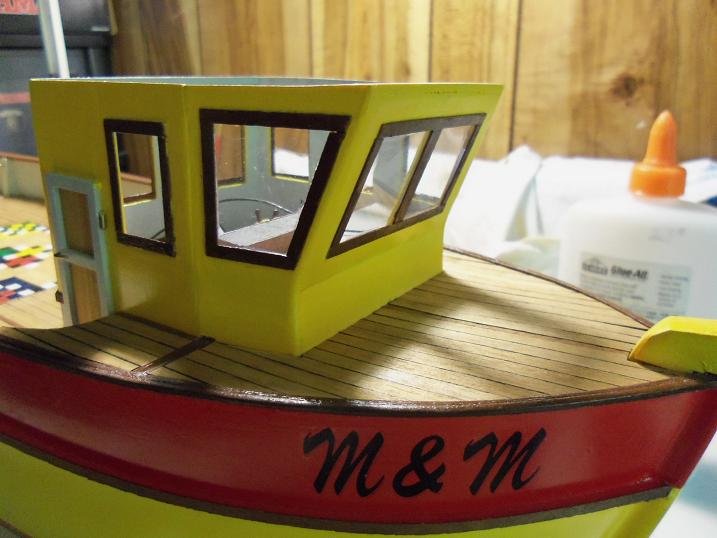
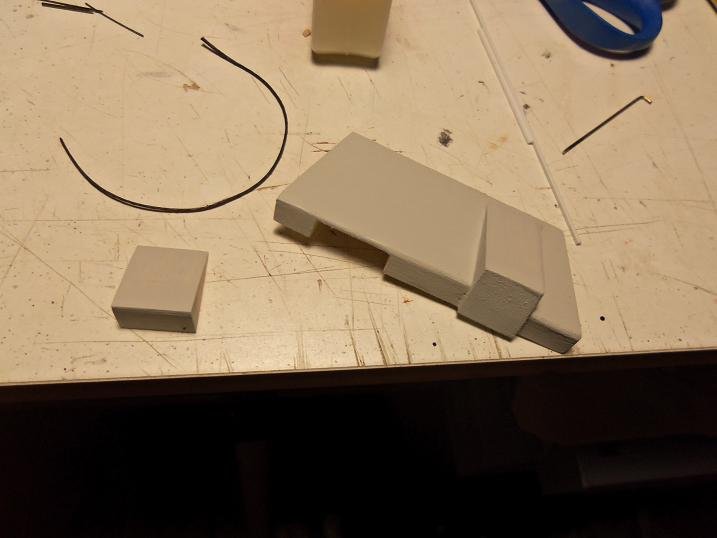
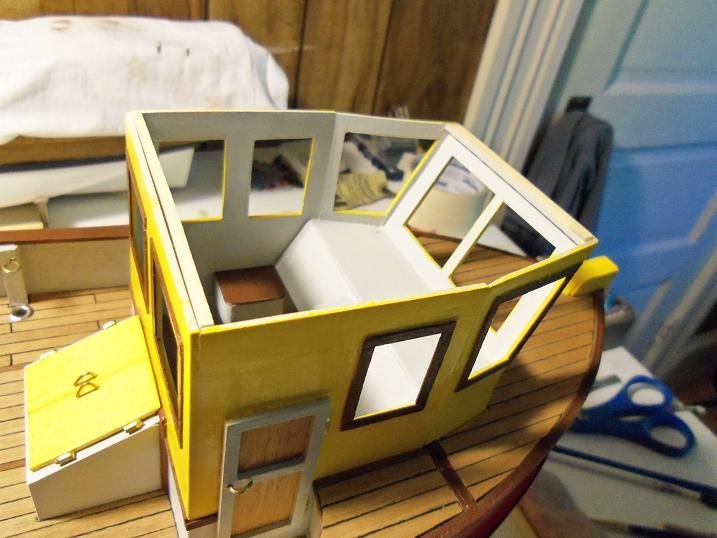
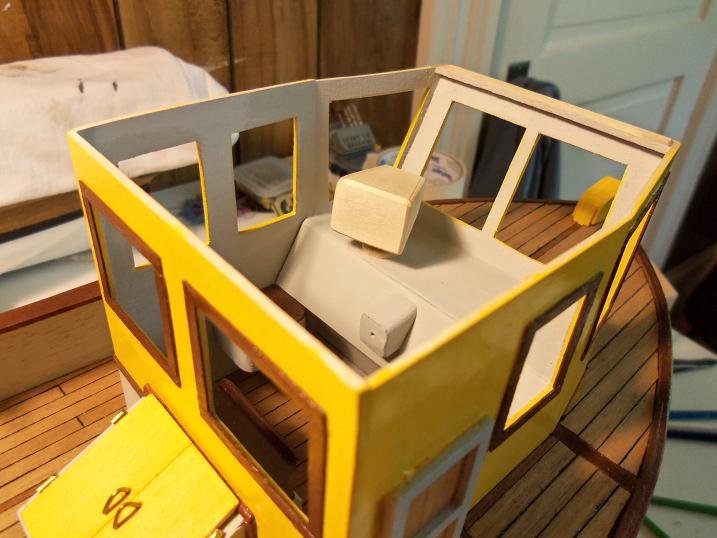
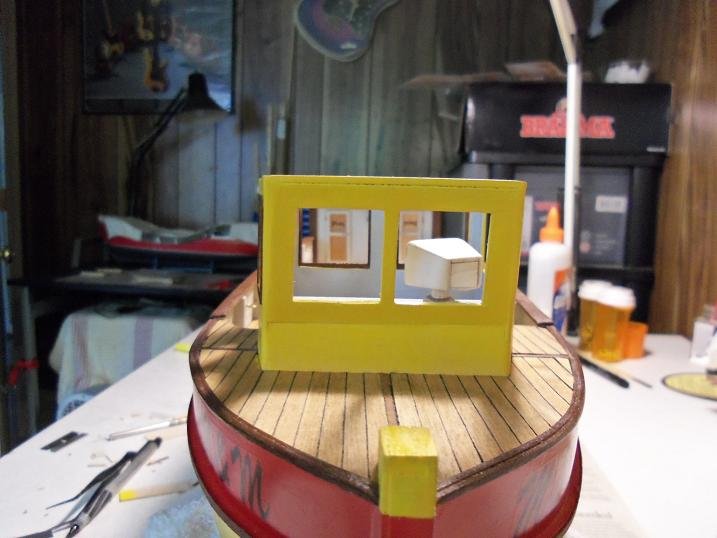
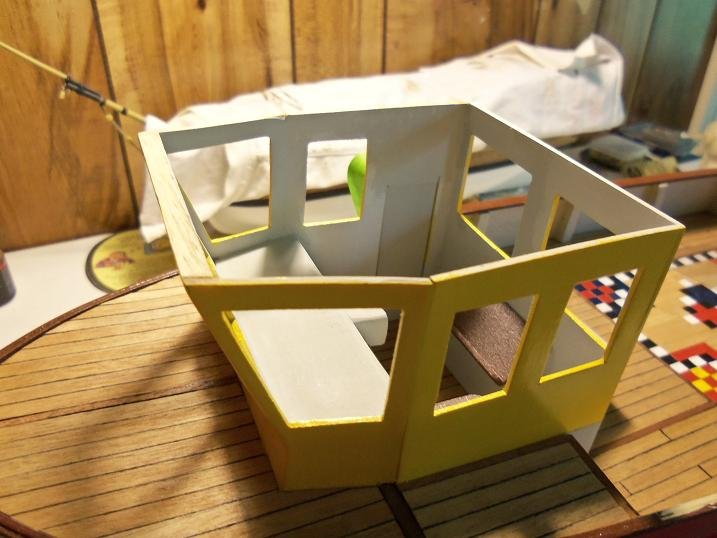
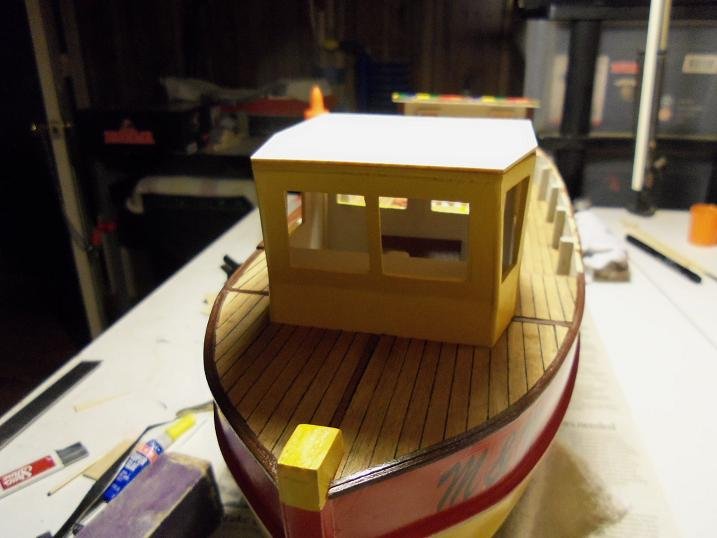
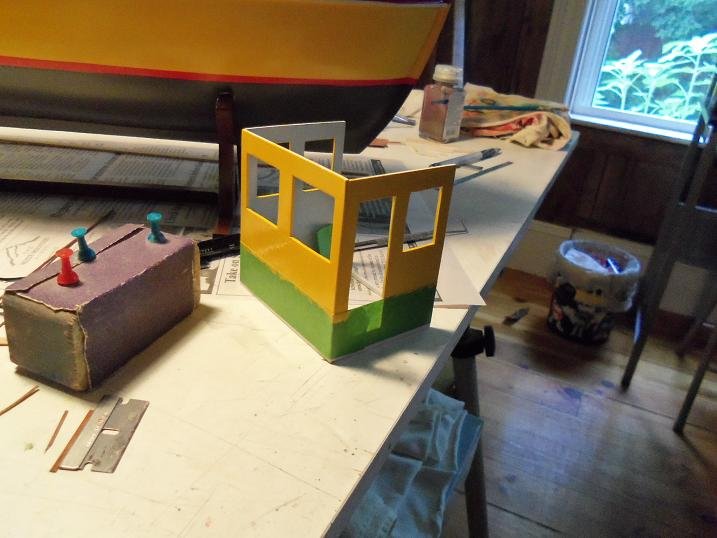
9-5-2012 I decided on an overhead compartment and additional radar above. the framework was added to attach it too. the overhead compartment was fleshed out. the windows were added at this time as well. clear cello was used. seeing this now.......I probably would have used the tinted glass {cello}. while it might have enhanced the looks, it might have obscured some of the detail...so I'm glad I didn't have it at that time I use the window maker to cement the cello in place. the overhead was put in place to see how it would look. the rest of the windows will be installed later. when I got it the way it should look, the overhead and the on dash part was painted. the funnel was soldered together at this time. I have the plastic nav light boxes from the Nordkap booty {that's another story long lost.....I'll tell ya about it sometime }. I didn't like them, so I made a pair of my own.

-
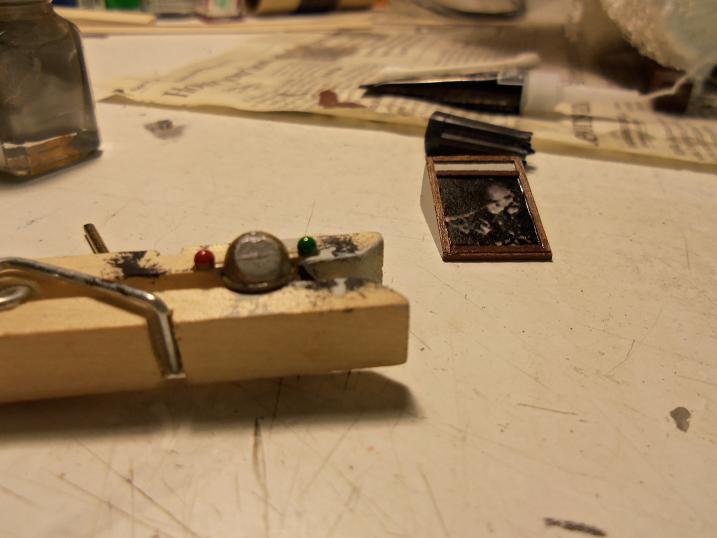
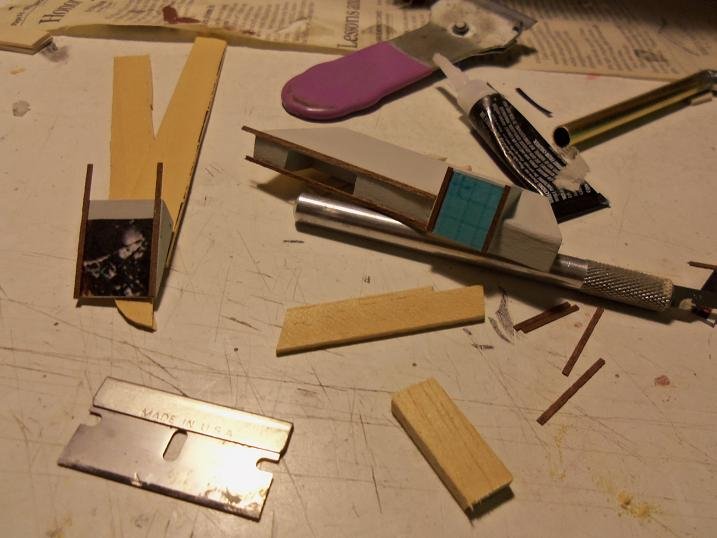
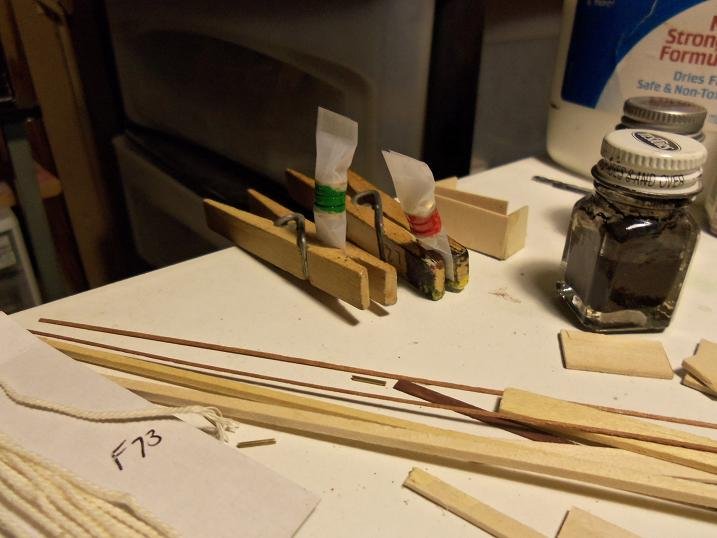
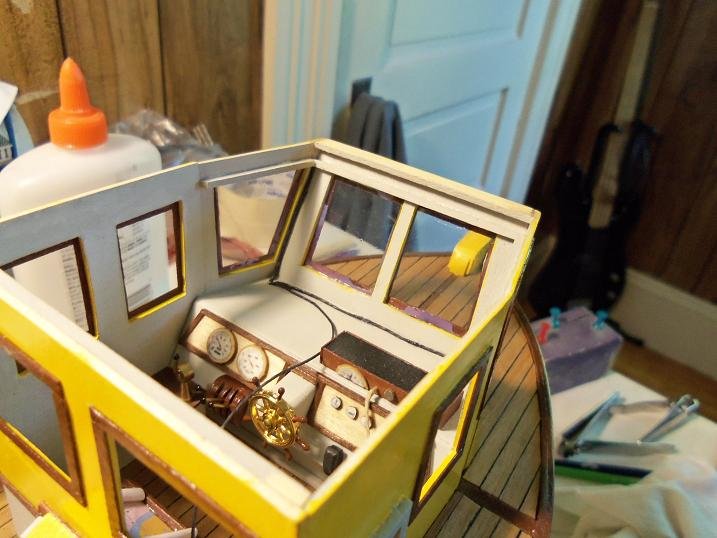
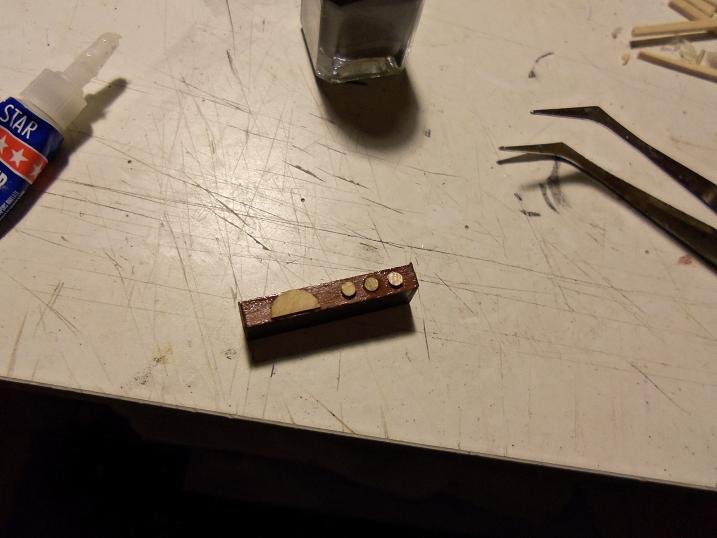
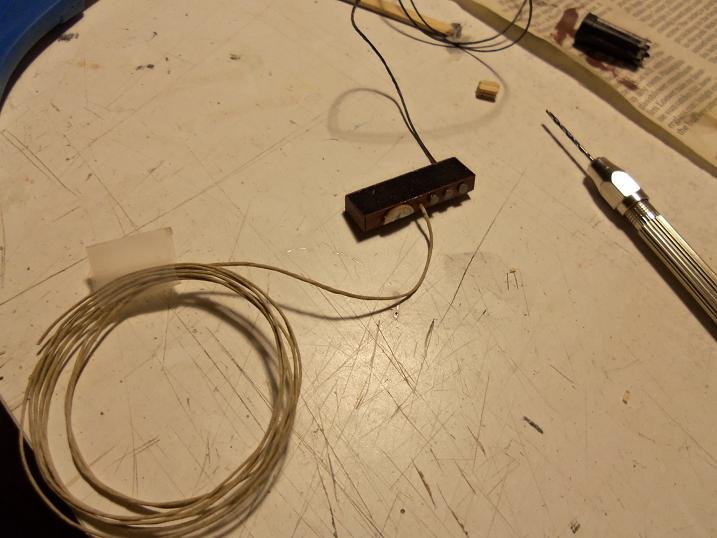
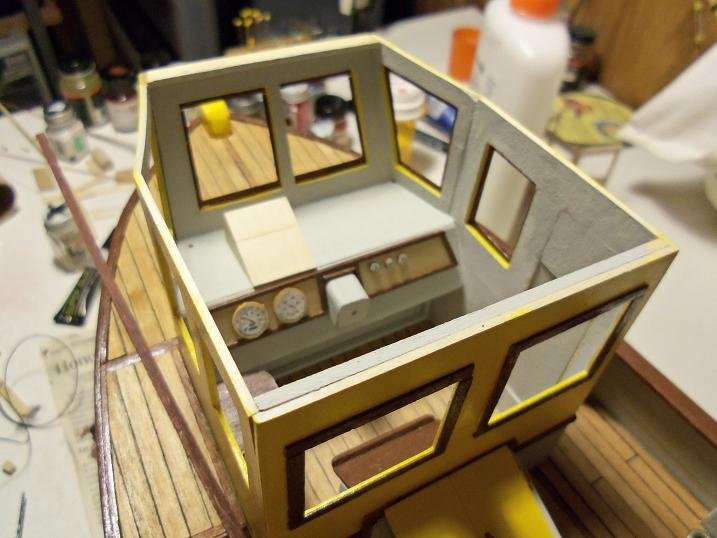
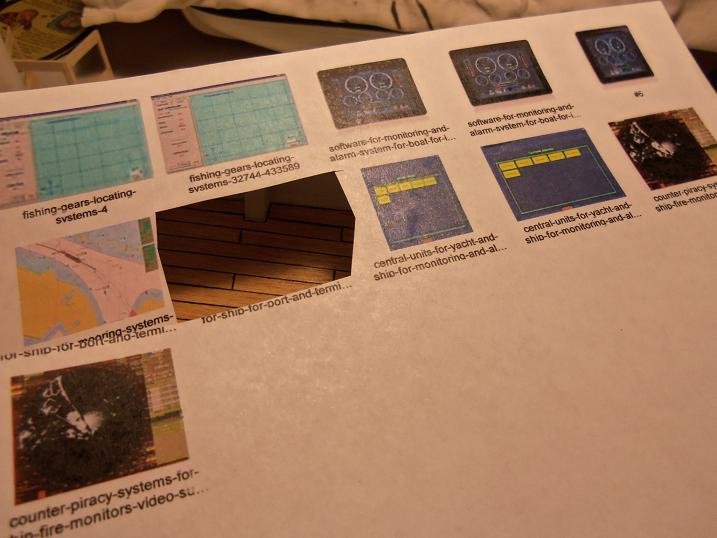
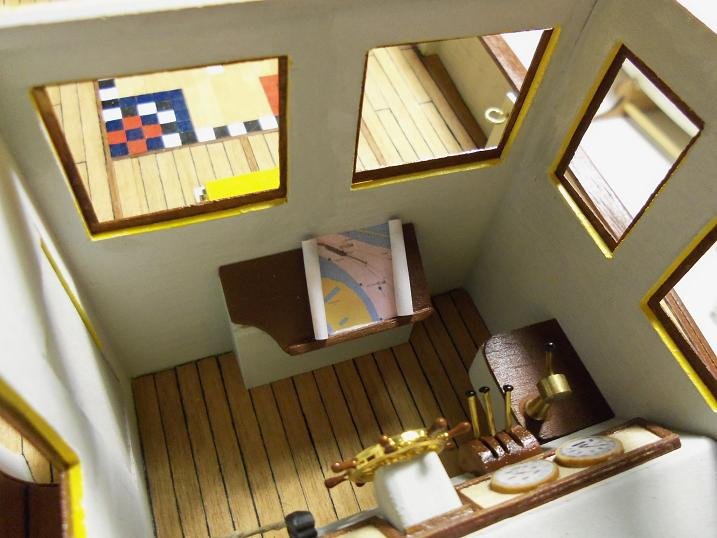
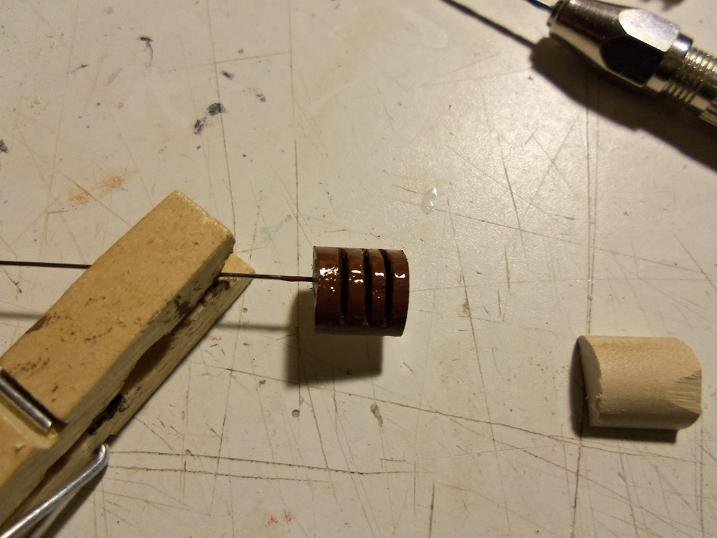
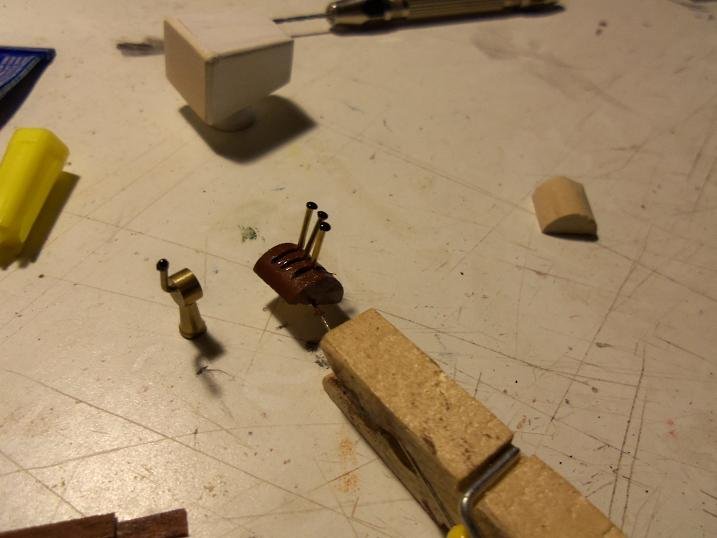
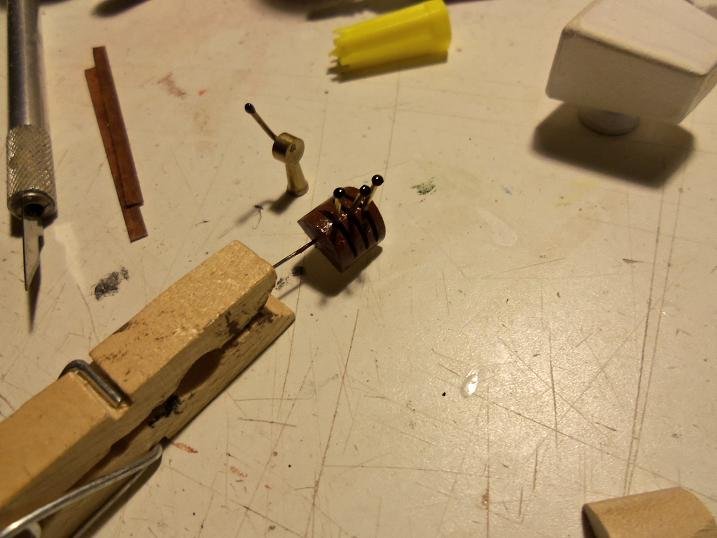
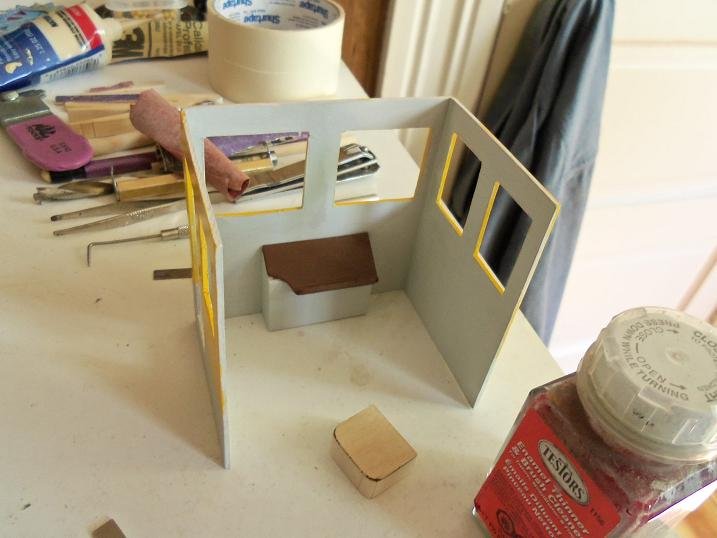
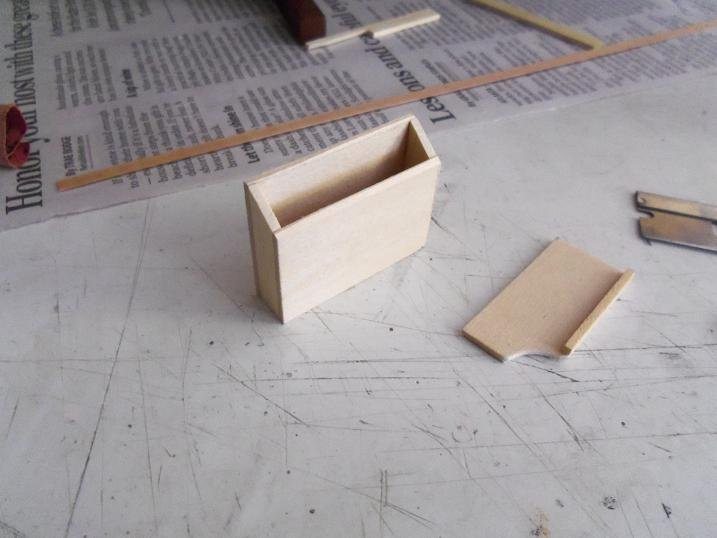
8-30-2012 continuing on with the pilot house interior.......we need a radio. here are the raw parts that will create it. adding some structure to the back wall along the roof edge. the radio was assembled..... making the rest of the window frames......and being more careful more done on the radio..... I came up with another idea concerning the radar screen I went online and found some images for ship components. they will be shrunk to a more usable size. more cemented in place inside.......the radio with wiring and mic, and map sprawled out on the easel other 'wires' were added to the interior. they will be routed elsewhere.
-
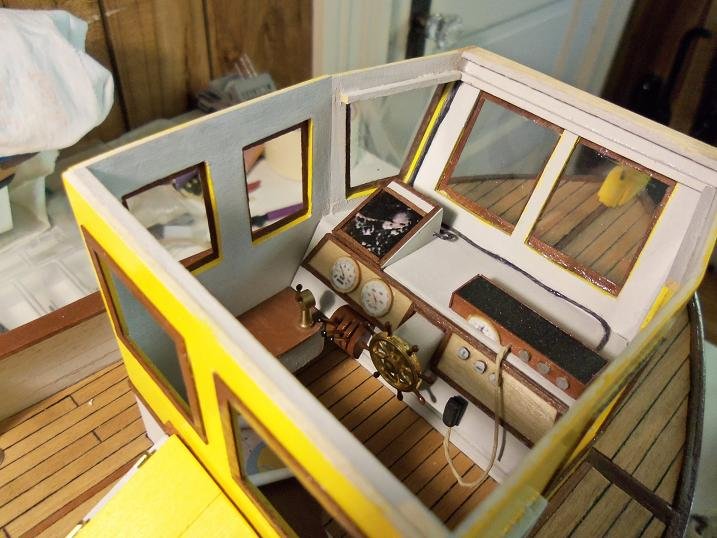
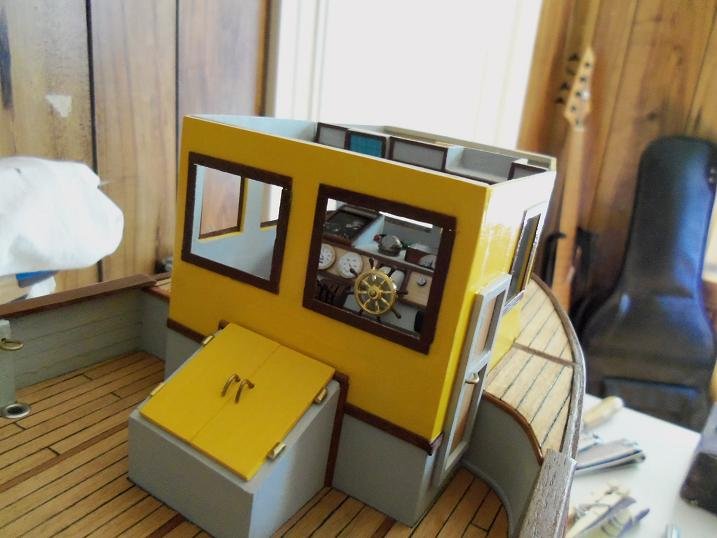
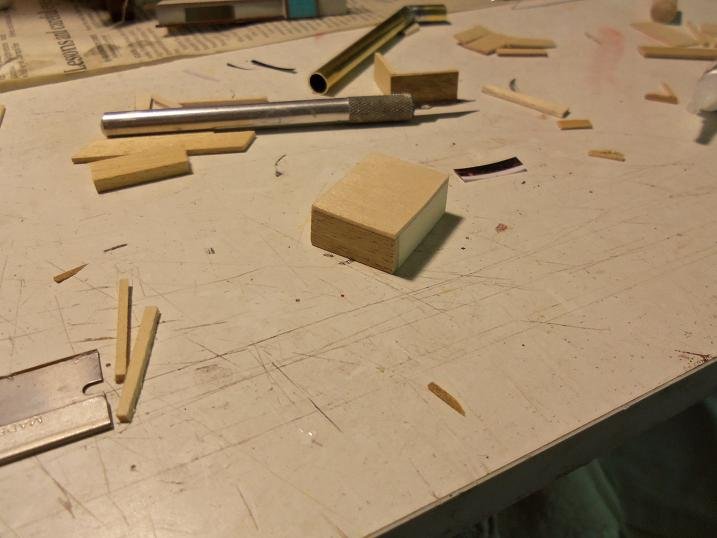
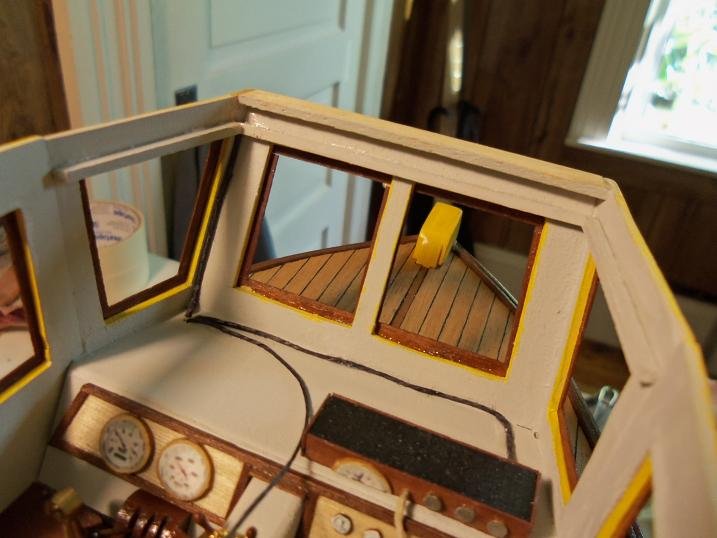
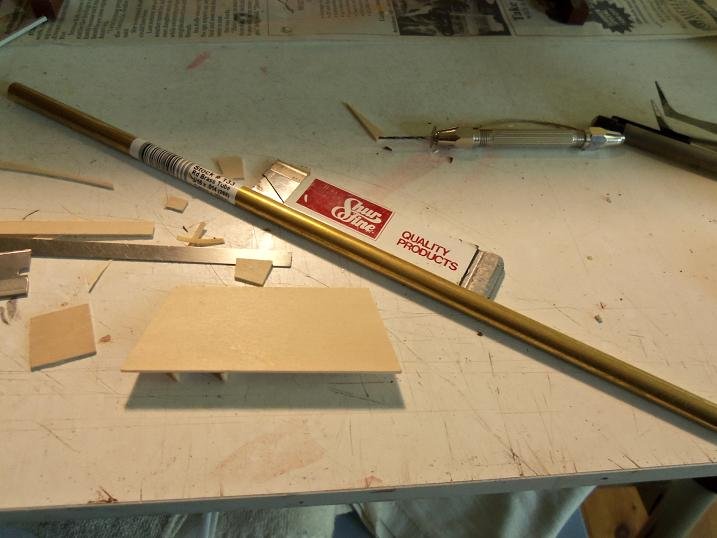
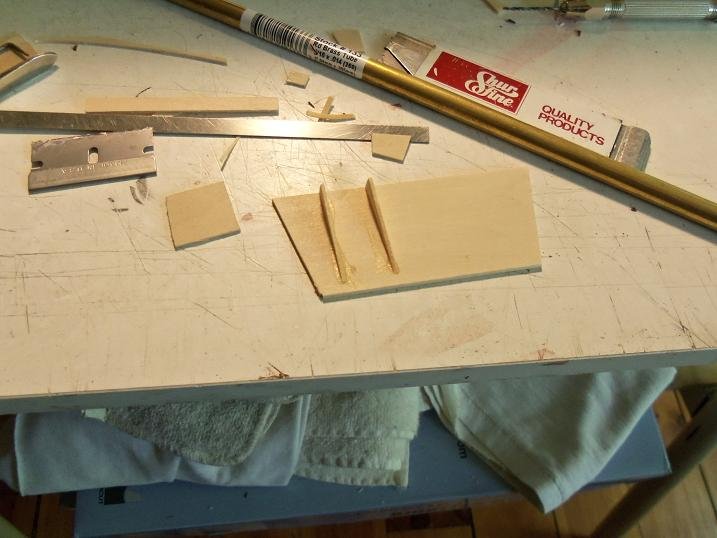
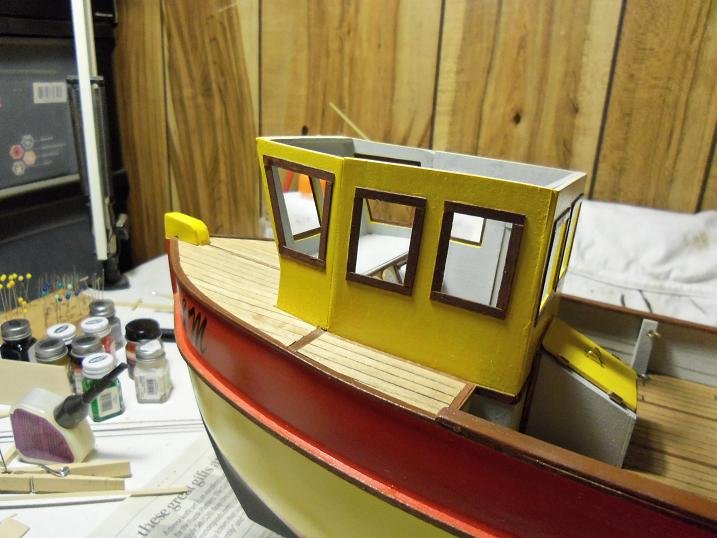
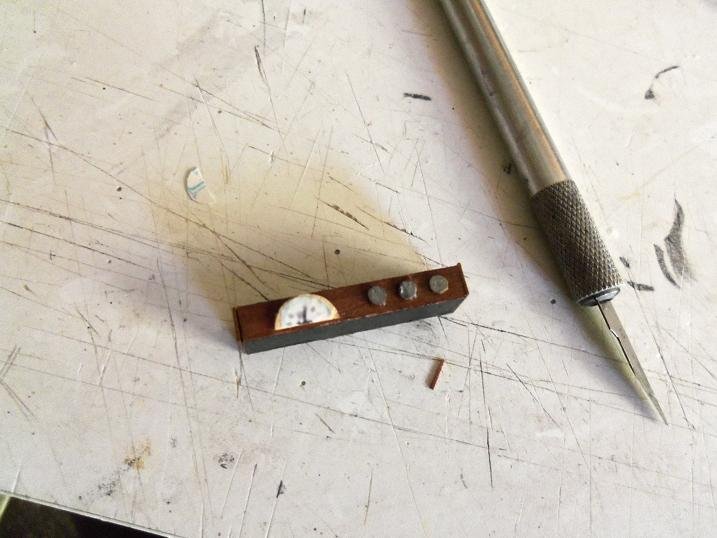
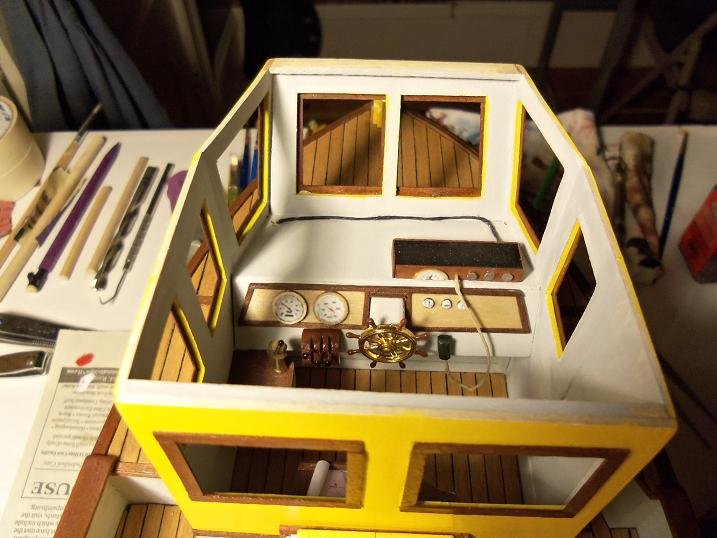
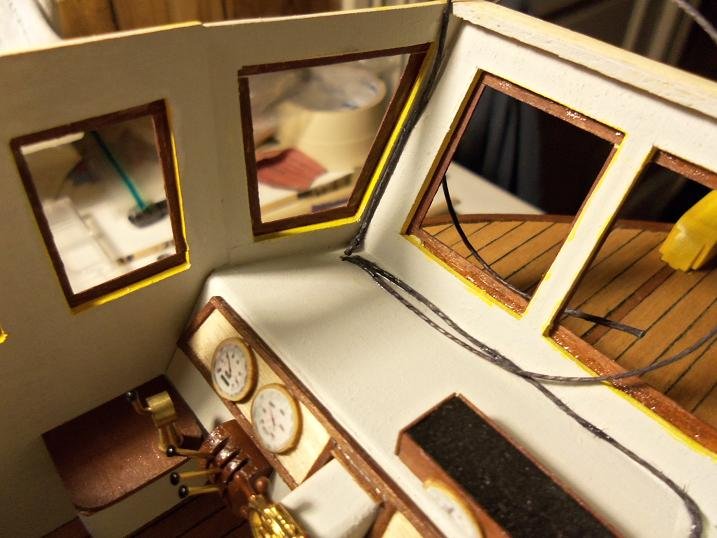
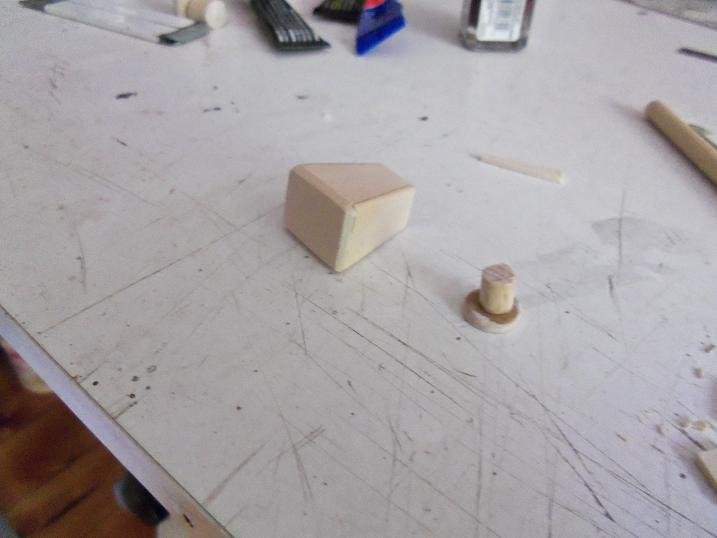
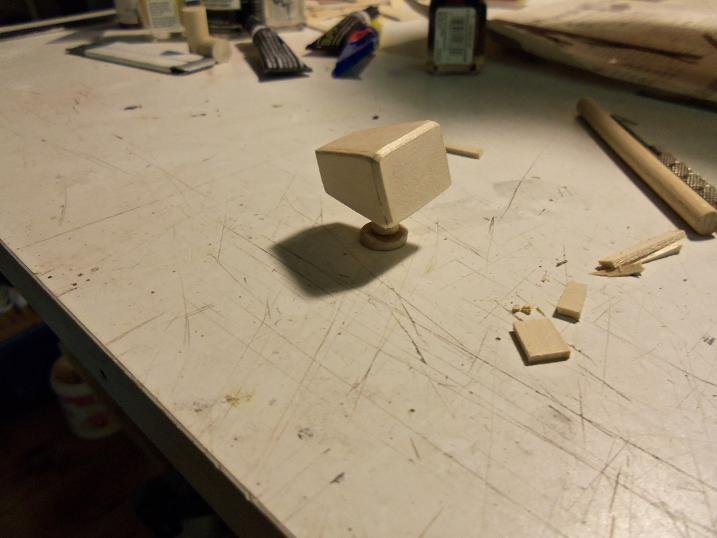
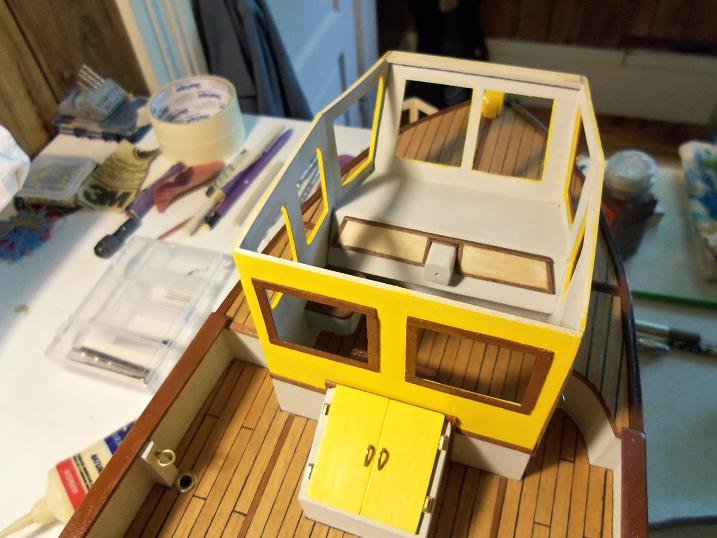
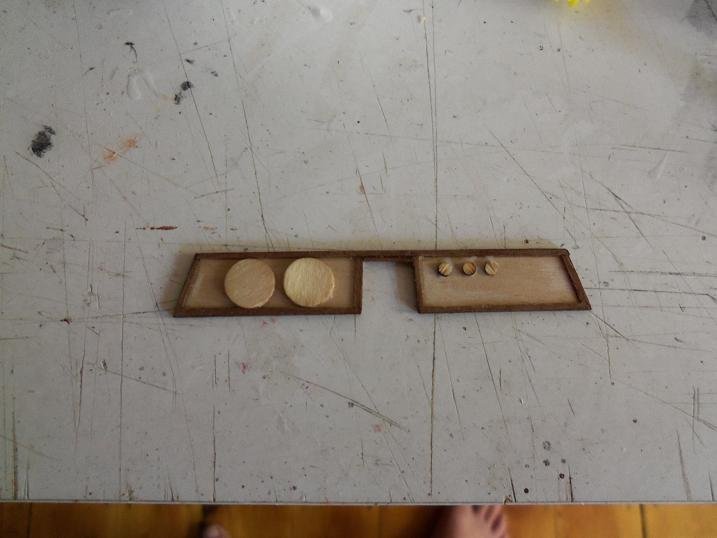
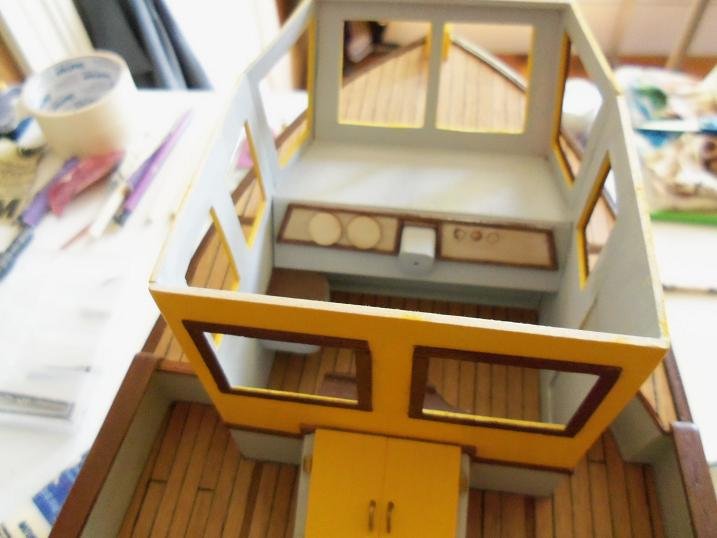
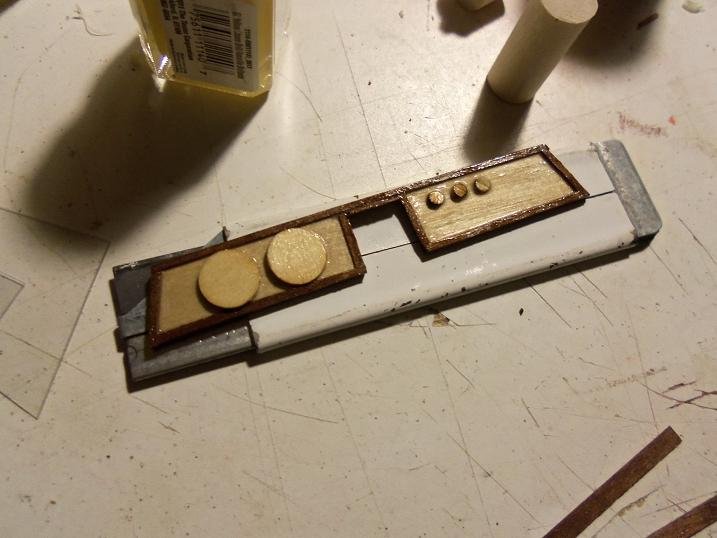
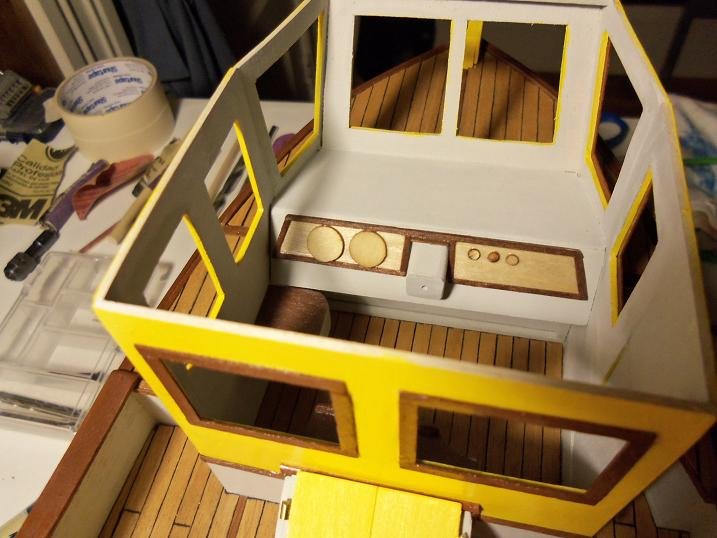
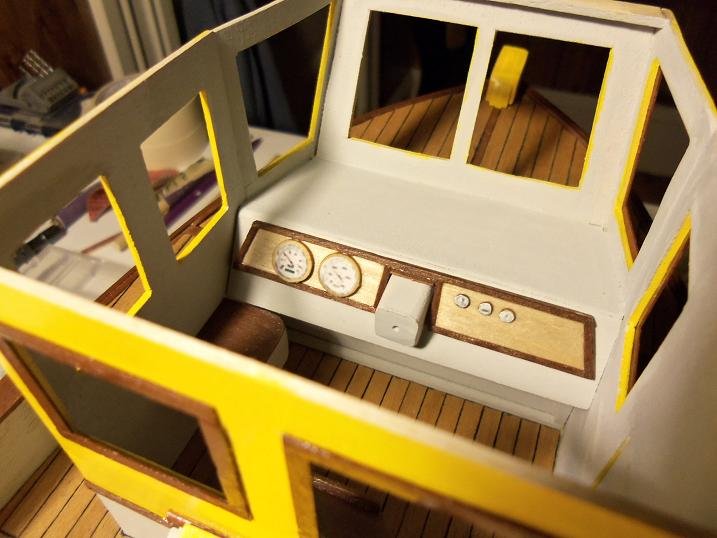
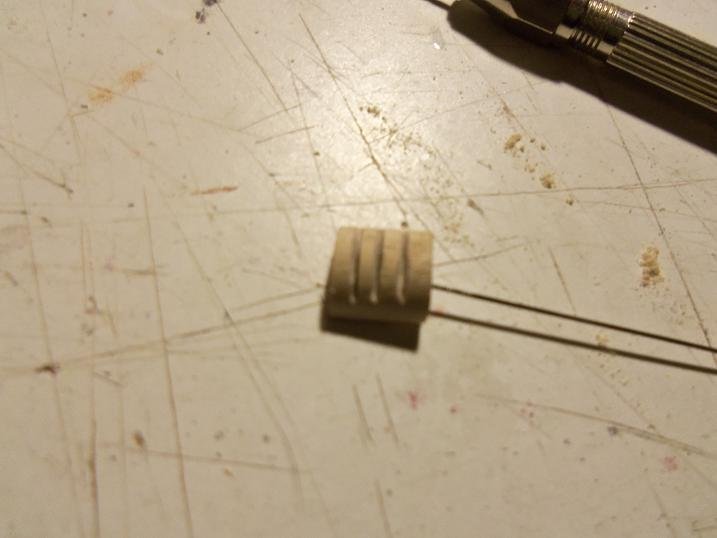
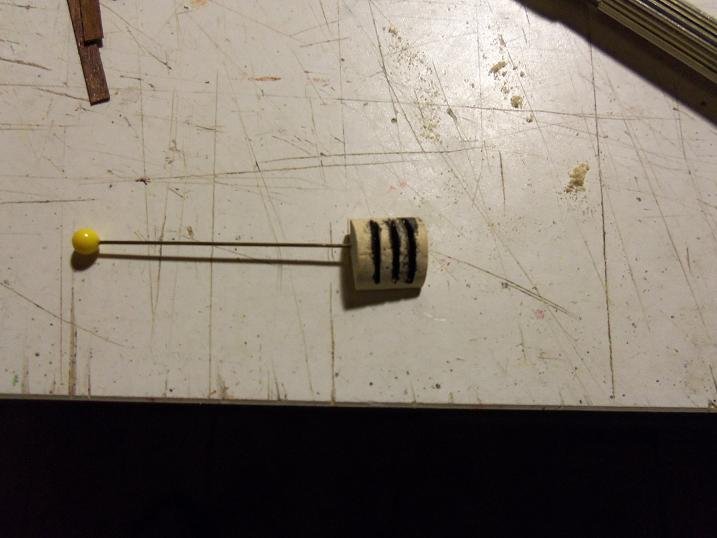
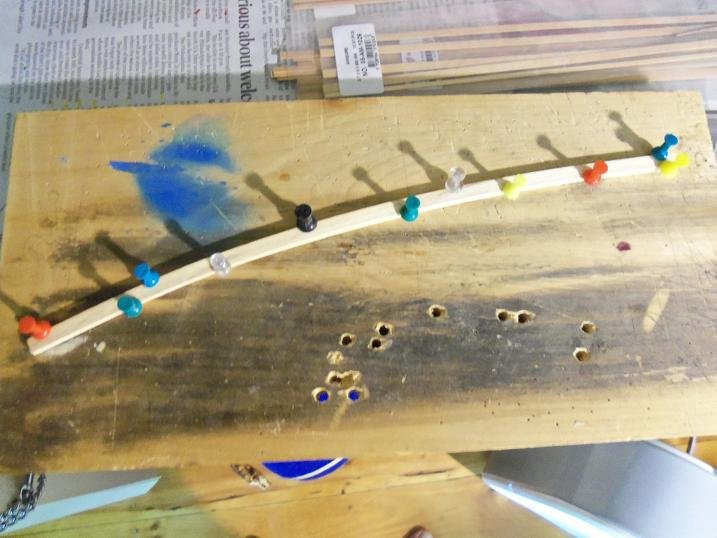
8-28-2012 continuing on with the pilot house, I concentrated on what was to go inside. wanting to add some instrumentation, I started off assembling a computer screen. it looked a bit too odd to be there..........hey Barbie........I made yas a computer! I'll think on this some more then I went on to flesh out the dash board and ship's wheel. this was actually a punch out from the Gothenborg kit...the center cut for the tunnel. I always save these cast off pieces. the ship's wheel was painted at this time. the telegraph was assembled too. molding was added to the dash... round bits of cast off material was used to make the gauge bezels. it was given a coat of semi gloss lacquer. I had copied an image of a gauge decal sheet.......I printed off a sheet of them that will last me quite a while. a column of levers was created using a 1/2 piece of dowel and brads for the levers

-
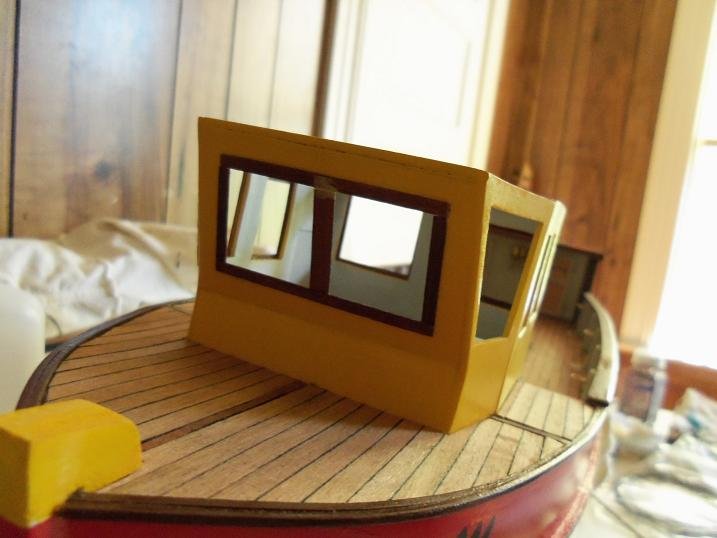
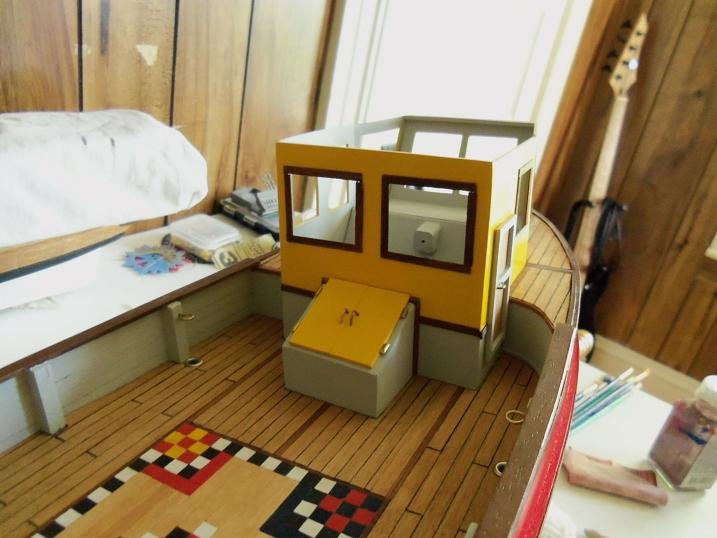
8-22-2012 mahogany was used to band the aft cabin roof edge. mahogany was also used to line the rub rails and additional hull moldings as well. the windows were also lined with mahogany frames.......it did come at a price though. I had a repair job to do. I now wish I had redone this particular part of the pilot house wall.......I was too geared into going forward {still am as a force of habit}. the best thing to do in my mind as this point was to touch it up with paint. getting it the best that I could........I left it at that.
-
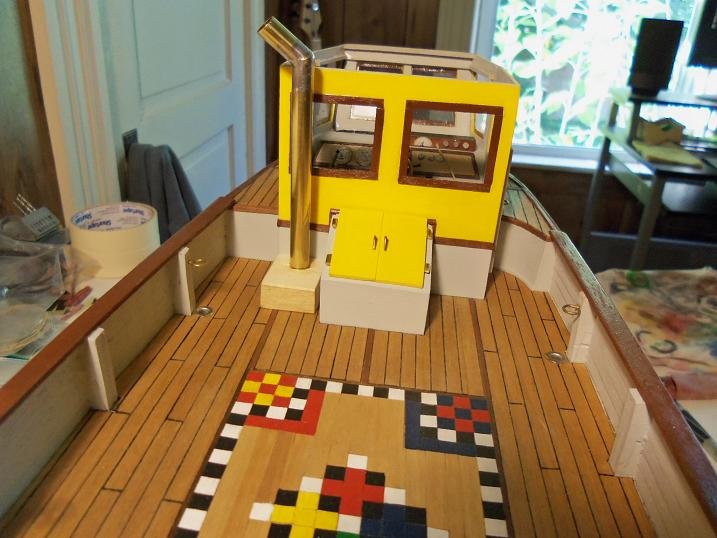
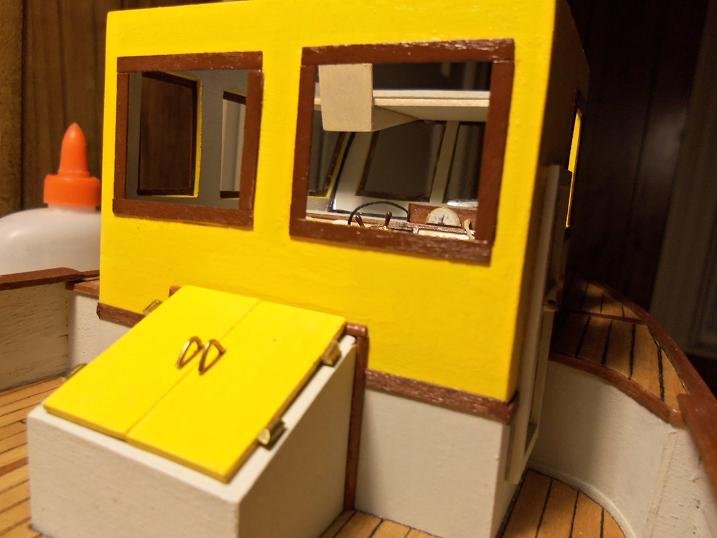
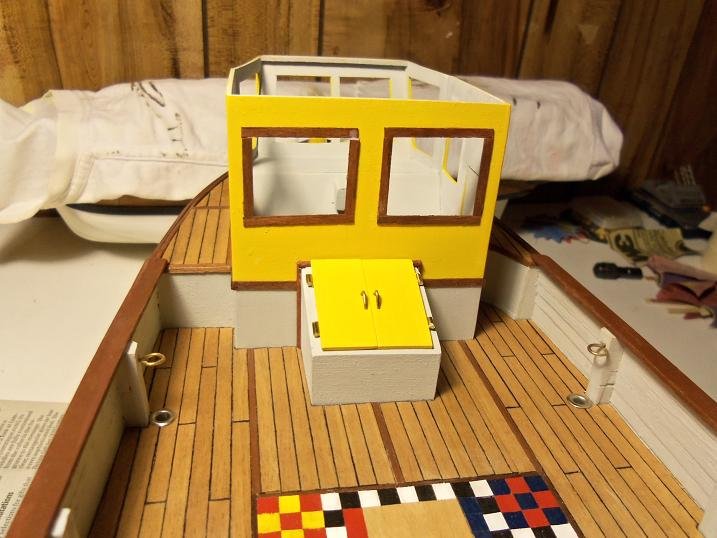
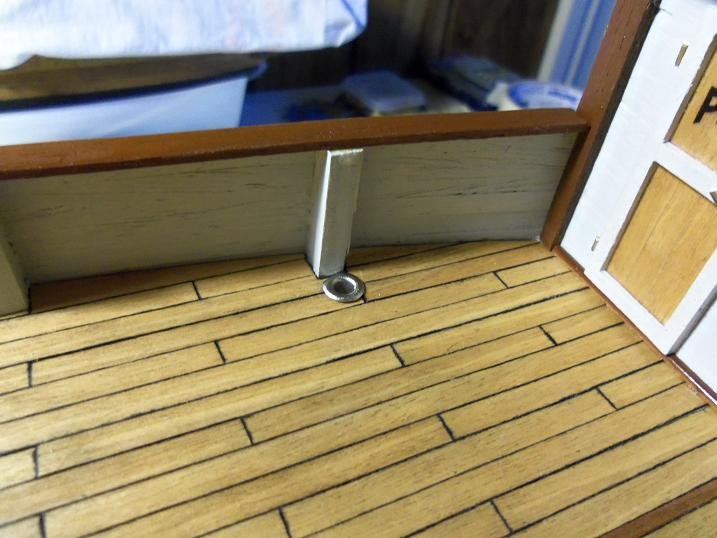
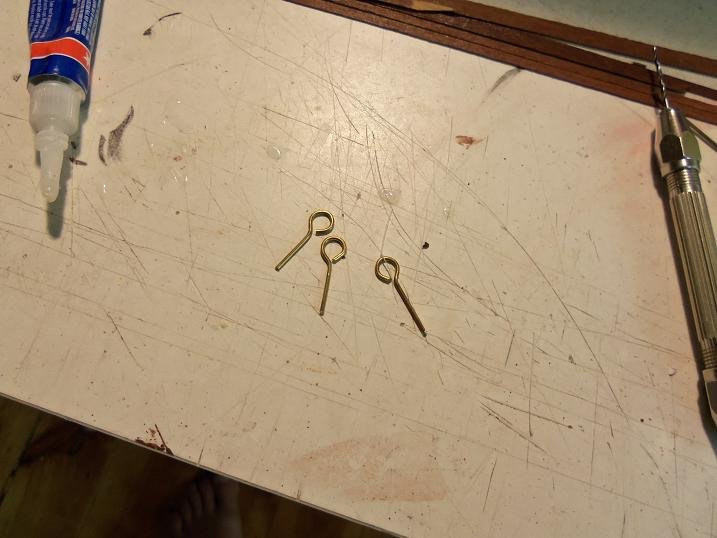
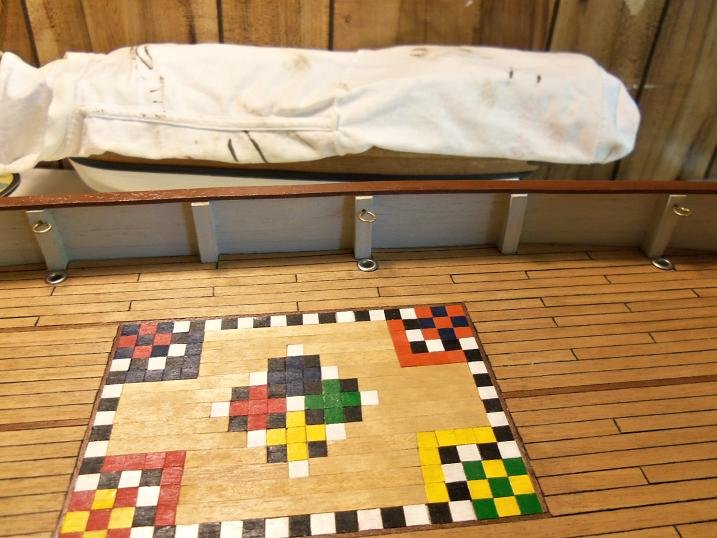
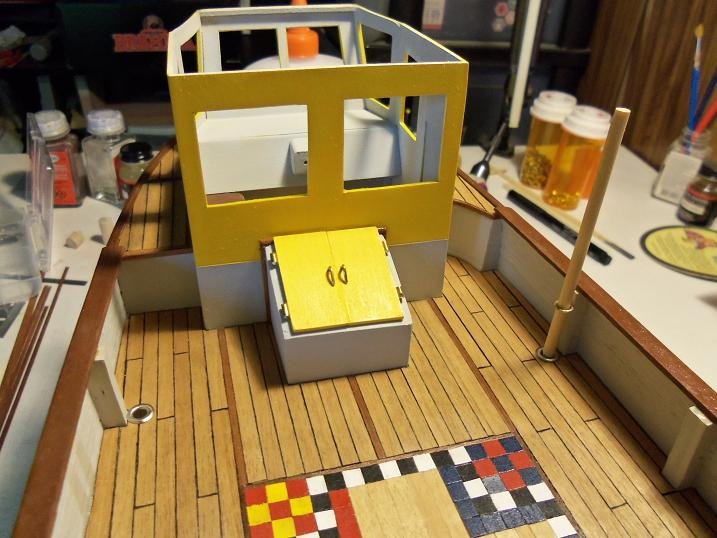
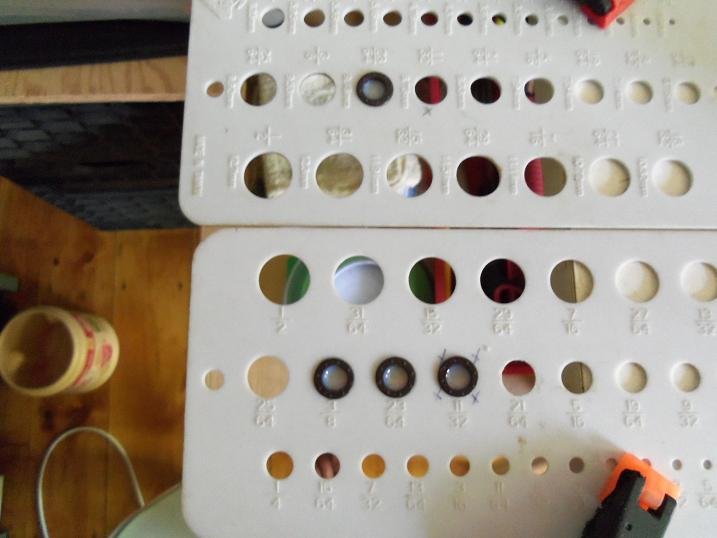
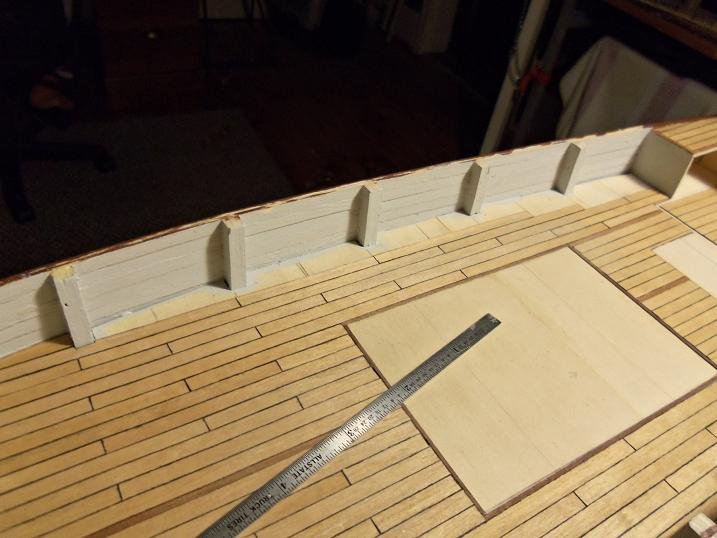
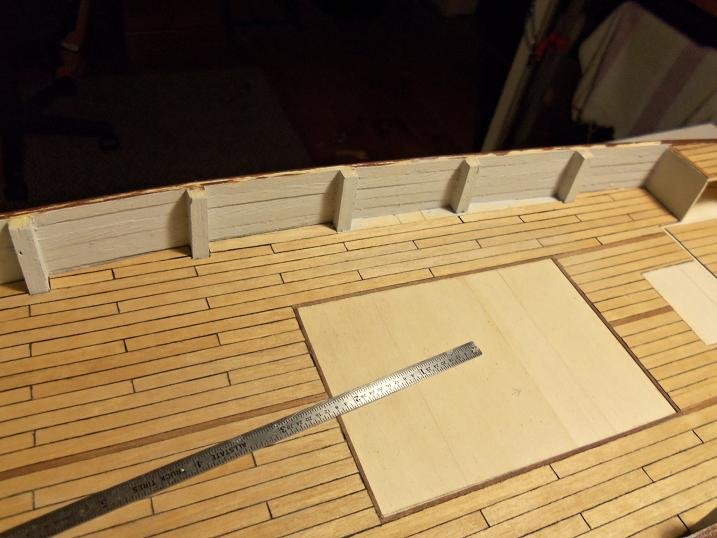
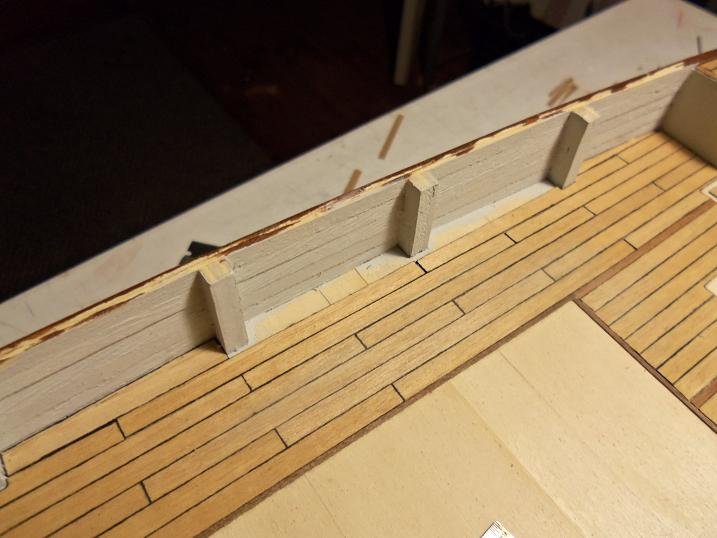
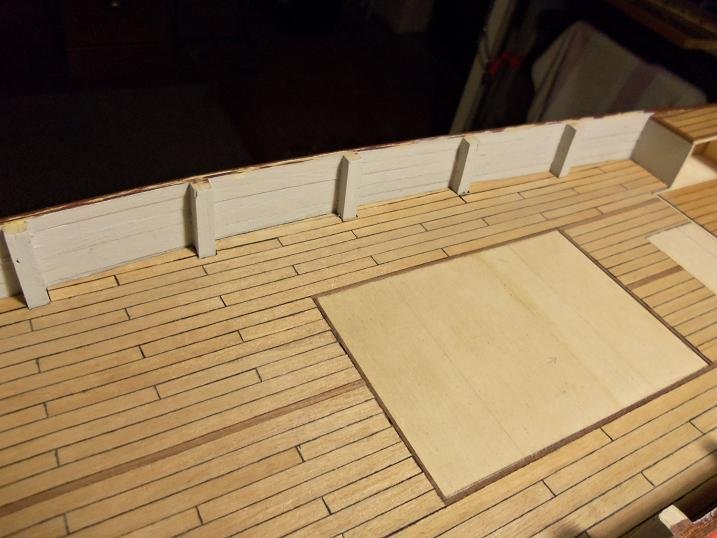
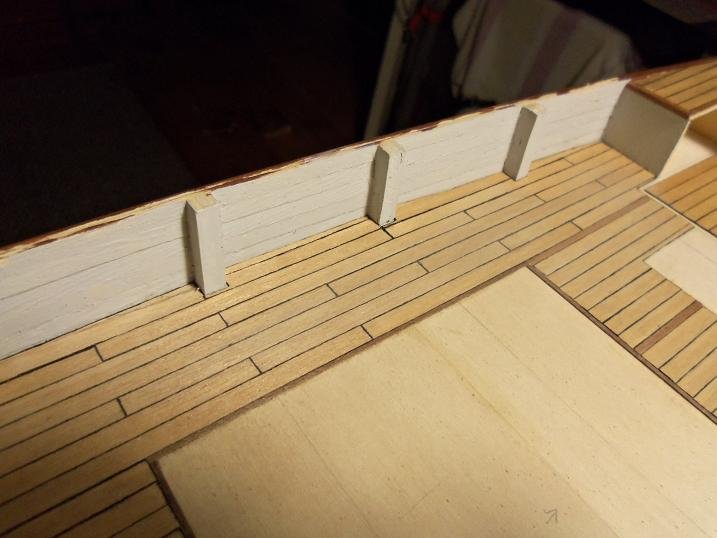
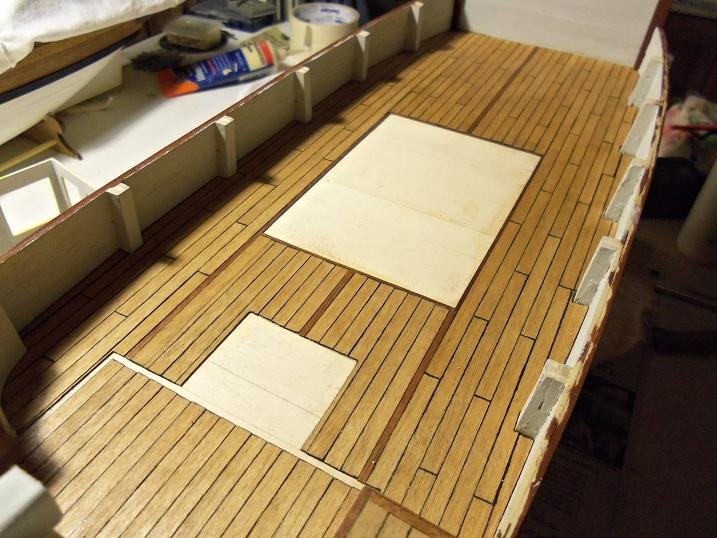
8-21-2012 there are to be six posts that will line the bulwarks, in which to run some festive lights. I had found a vast assortment of eyelets, used for belts, straps, and shoes. sorting some of them out {gonna be a huge task}, I chose some chrome ones to install in the deck at {as close to} equal spacing. the hatch covers for the engine companionway were created and painted. decorative molding was cemented around the companionway, wheere it mates to the back of the pilot house. to aide the posts, to stay upright and vertical, brackets {large eye bolts} were created and installed above the chrome post seats mahogany molding also lines the paint separation along the back of the pilot house


-
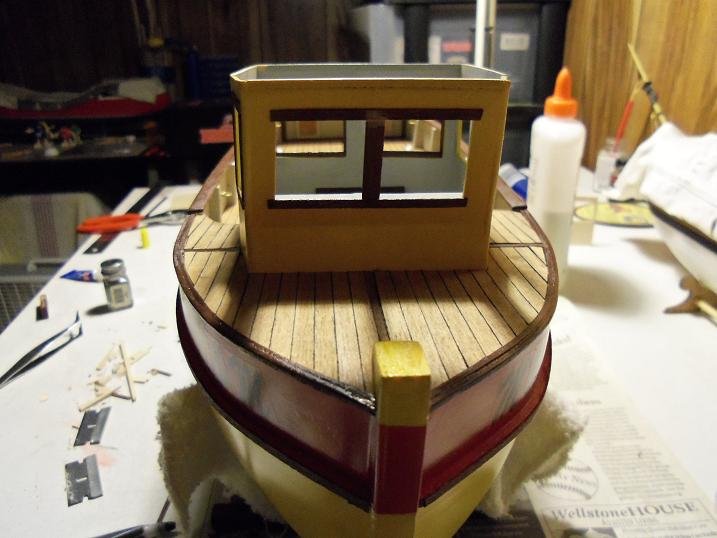
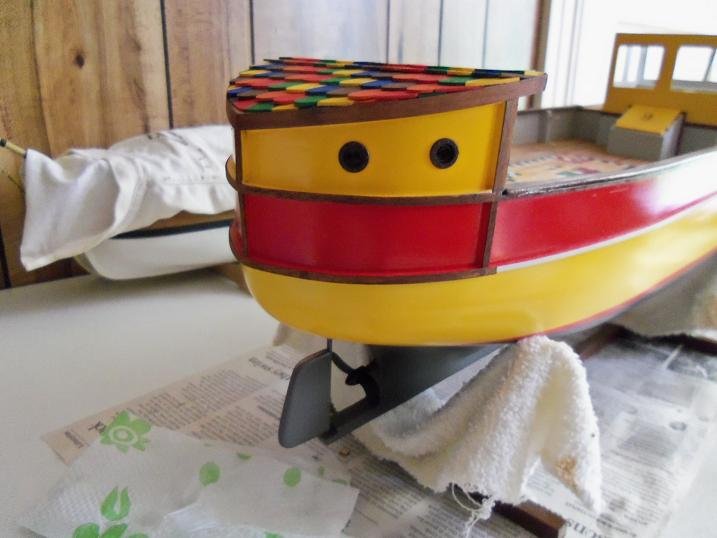
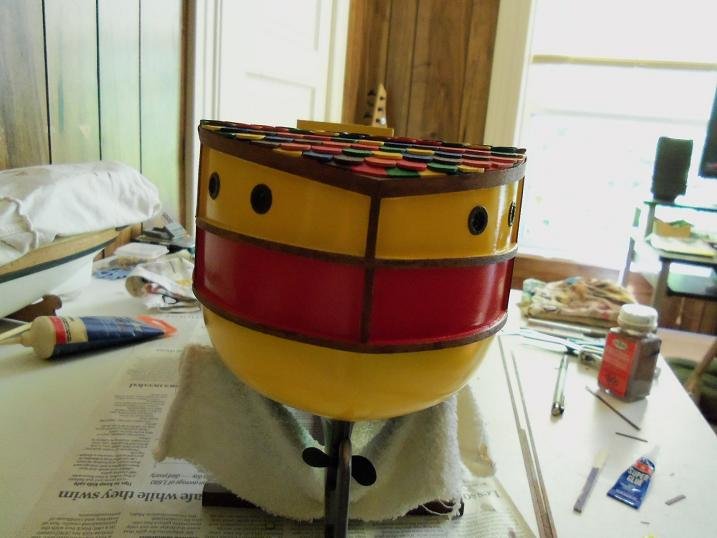
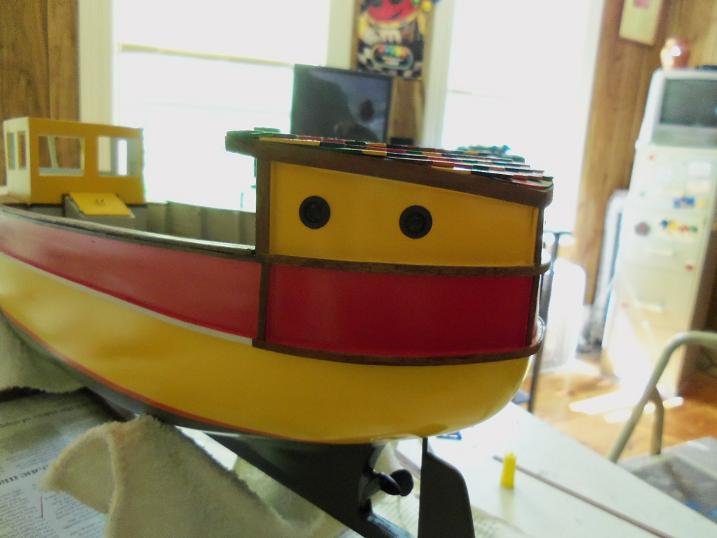
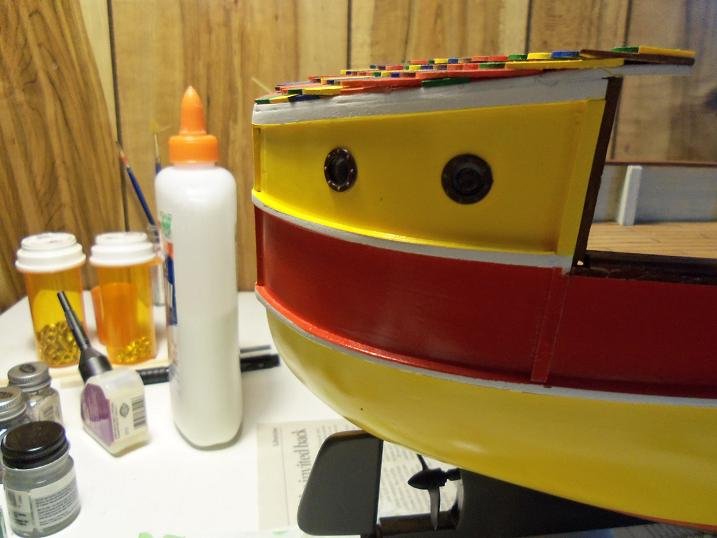
thank you very much for all the likes I got up very early this morning........I was hoping to get the log wrapped up today, now that I'm back on my weekend. 8-16-2012 the portholes were painted the chocolate brown, and filled with Testor's window maker........I think I've done this with earlier models. this product works amazingly well for creating small windows......especially in aircraft models. I can't count how many times I cemented in small windows, only to turn cloudy because of the glue. the cap rails were also cemented in place on the model. they stop at the fore deck, where railing will take over, running up to the stem. one side in place.. painting the fo-pah........making amends the window maker starts out as a milky fluid......it will dry clear. I've had the bottle for quite some time......haven't used it since I last was heavy into modeling. I can't say how many years. I believe the pilot house is assembled at this point. the mating lines have been touched up and some sanding has been done to get the mating surface for the roof flush. both cap rails are in place now there was still more to add to the wall of the aft cabin. added are a pair of lights that will illuminate, so that folks can find their way easily. they too are filled with the window maker.......I probably should have dabbed in some white or yellow paint inside to color the lenses. when dry, they can be painted on the inside......just carefully go in with a wet brush. here they are after an hour or so......the milky appearance is going away. they are in place now......hard to see, but the appearance of glass is there. still looks rather visible.........I'll touch it up again after the paint has cured.

-
well.....I am very sorry that I lost track of this project! I've been watching the show........darn good series! I can't wait till it comes out on DVD....definitely will be added to my collection superb modeling and intricate detail......very nice workmanship..and man!....I absolutely love that deck! very sorry to hear of what went down...glad that a compromise could be reached quite an accomplishment!
- 346 replies
-
- 3
-

-
- terror
- polar exploration
- (and 2 more)
-
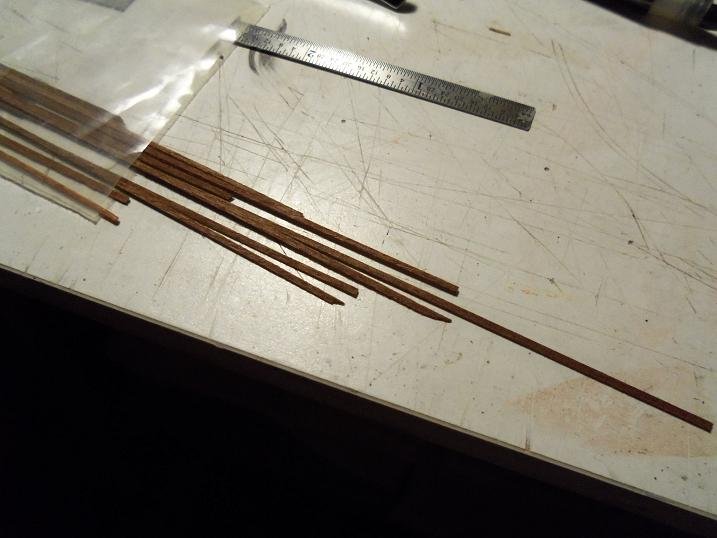
sometimes scratch building can be full of odds and ends........fits odd but everything ended well if you planned the floor as you went along, would that have made things go easier? looking very good.......lining up well too very nice!
-
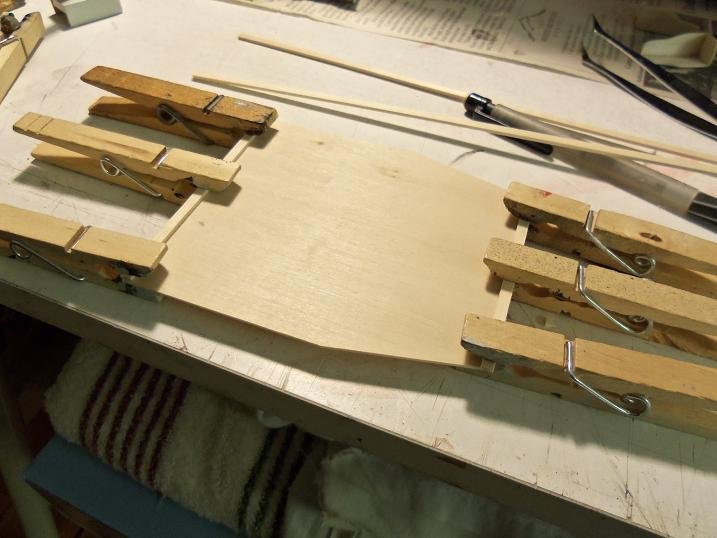
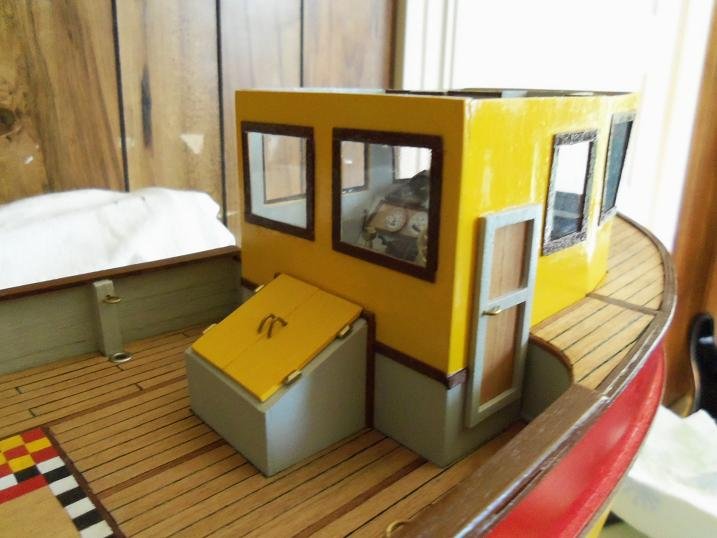
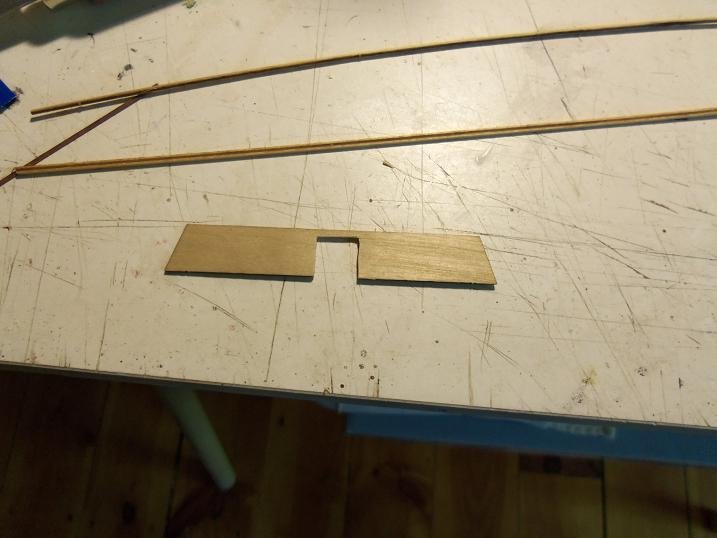
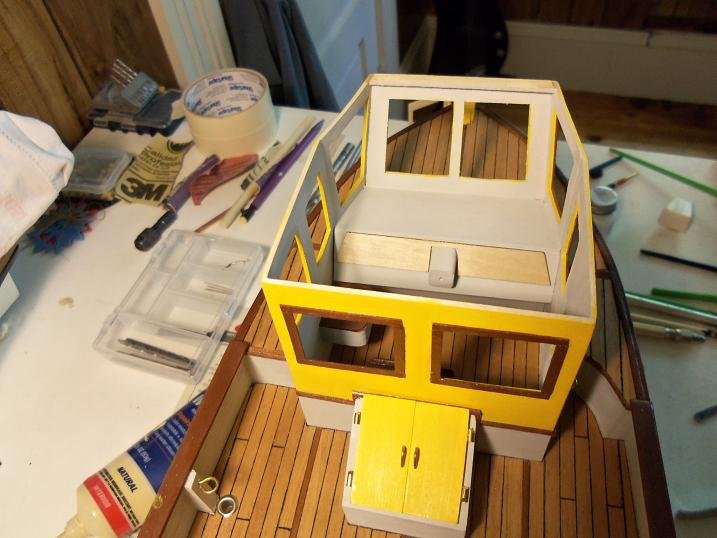
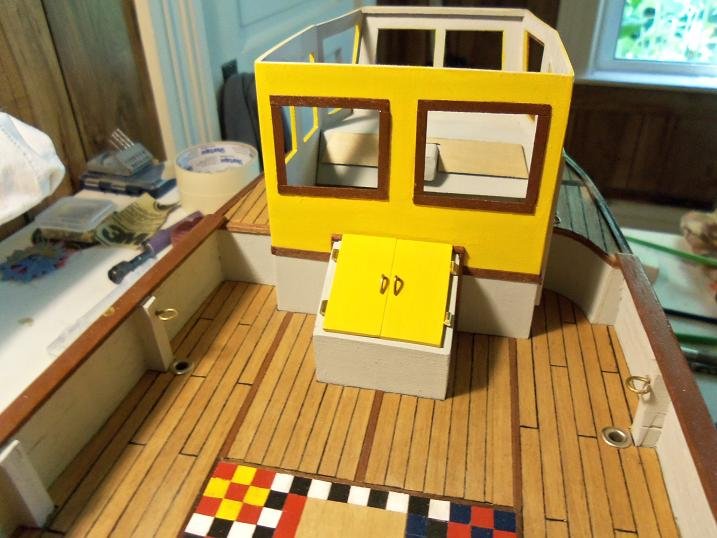
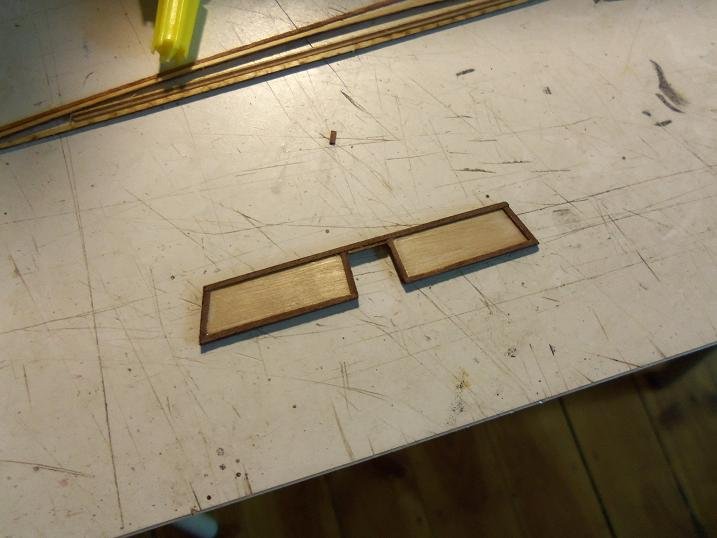
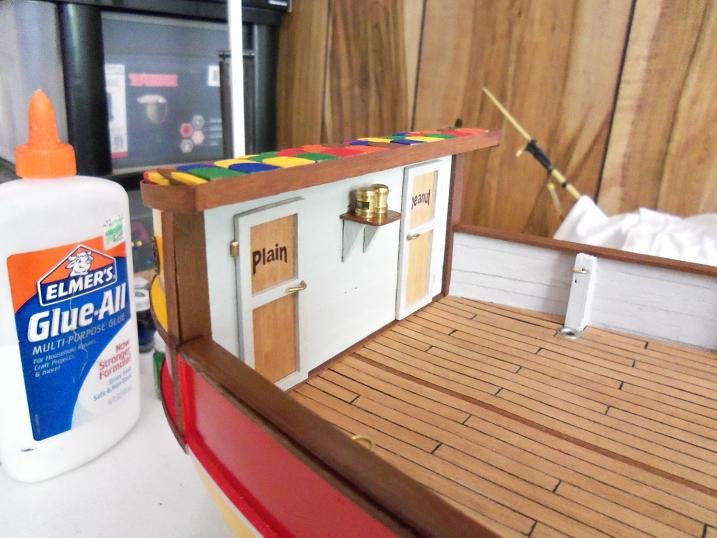
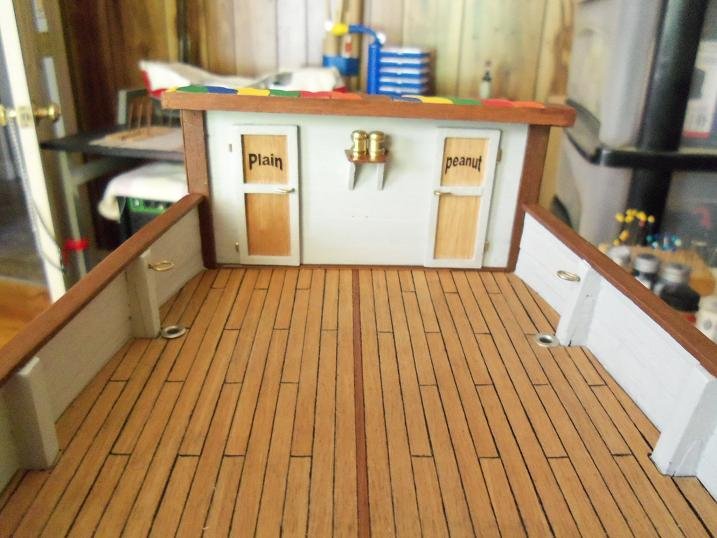
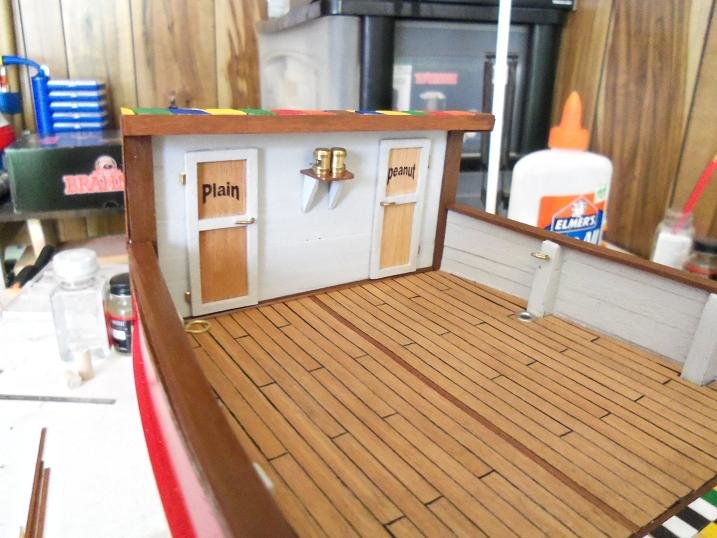
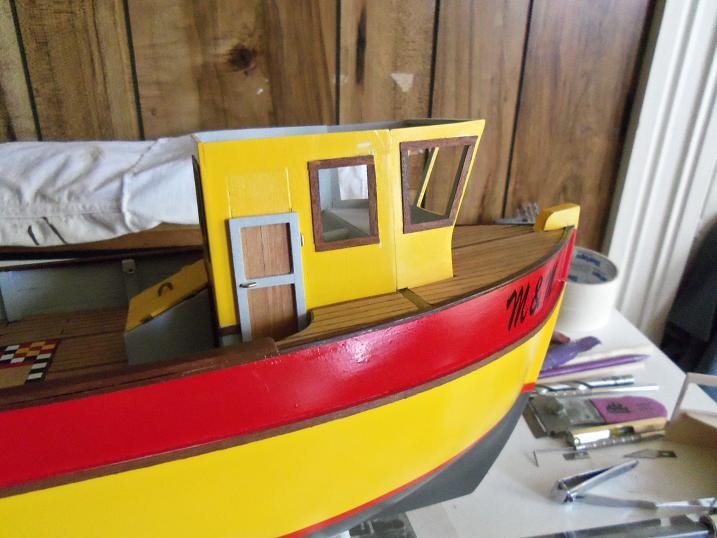
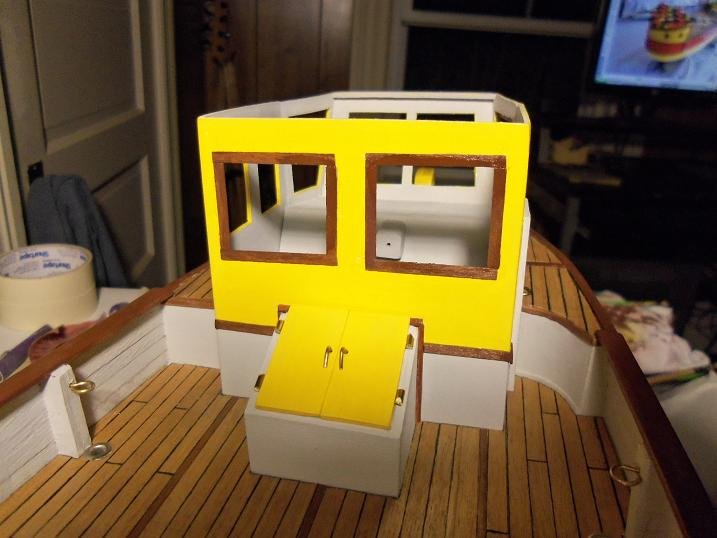
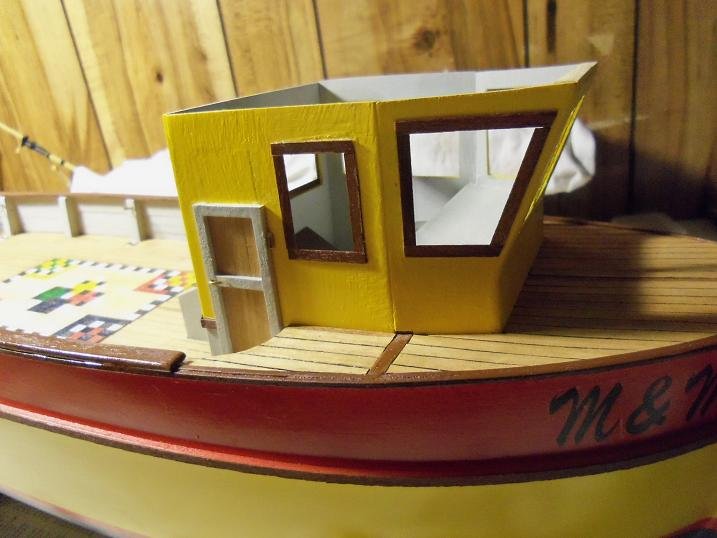
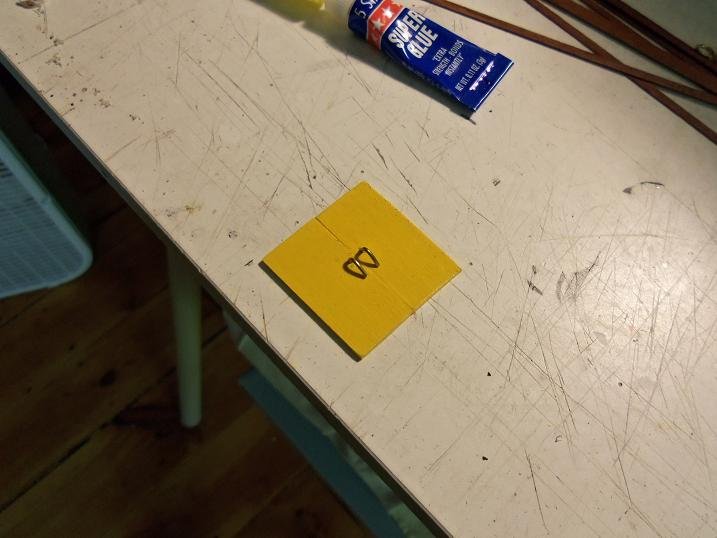
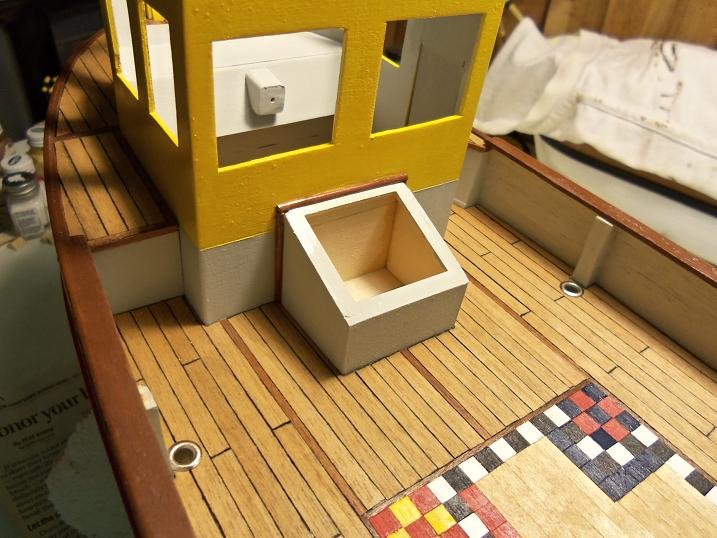
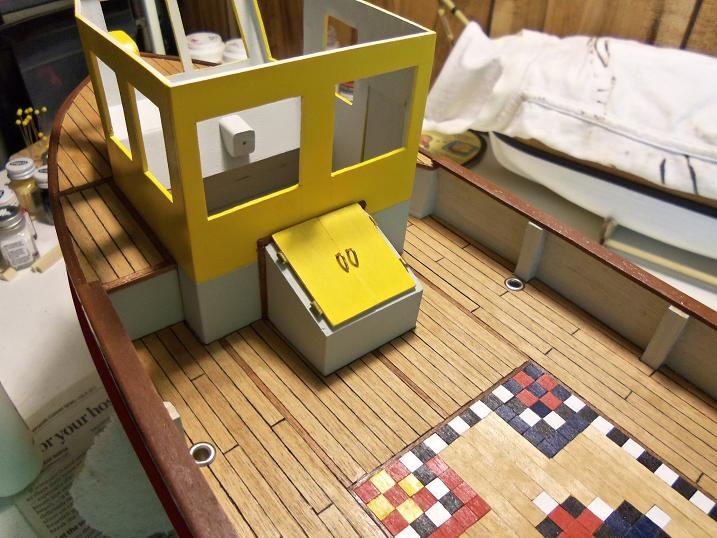
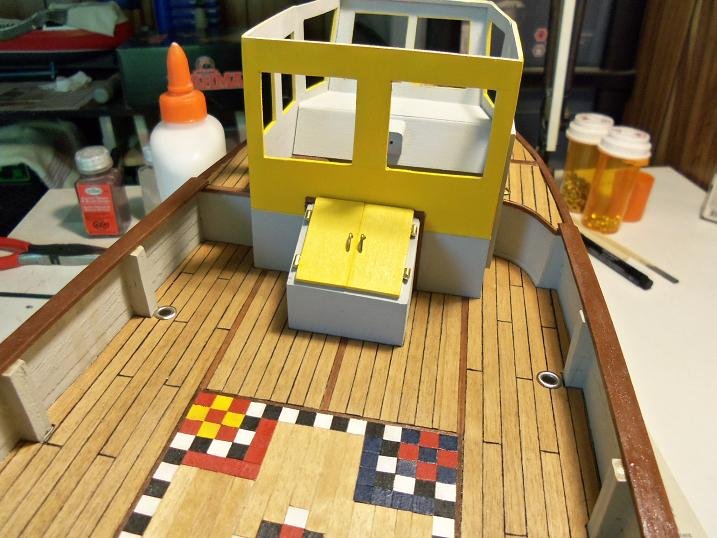
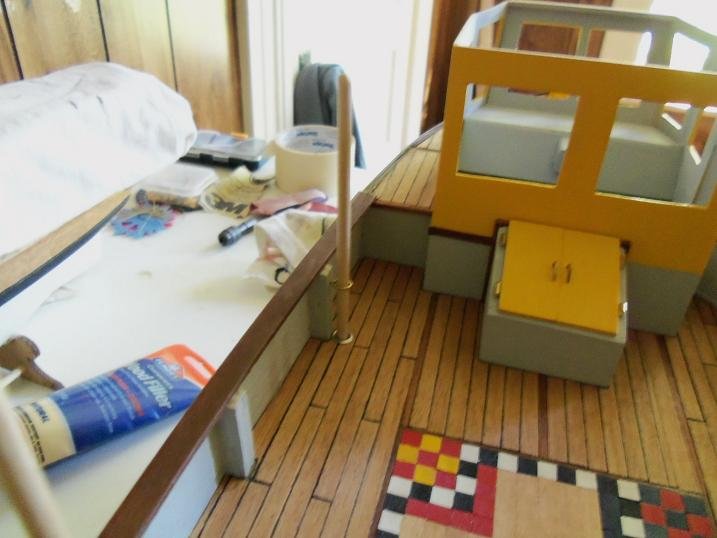
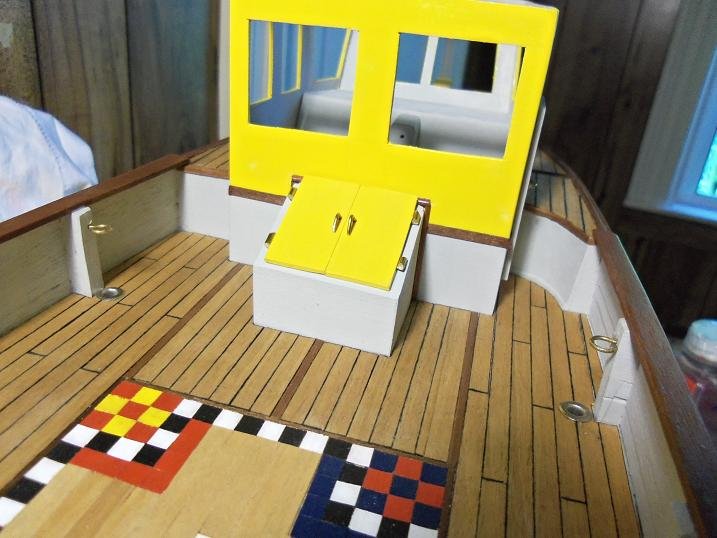
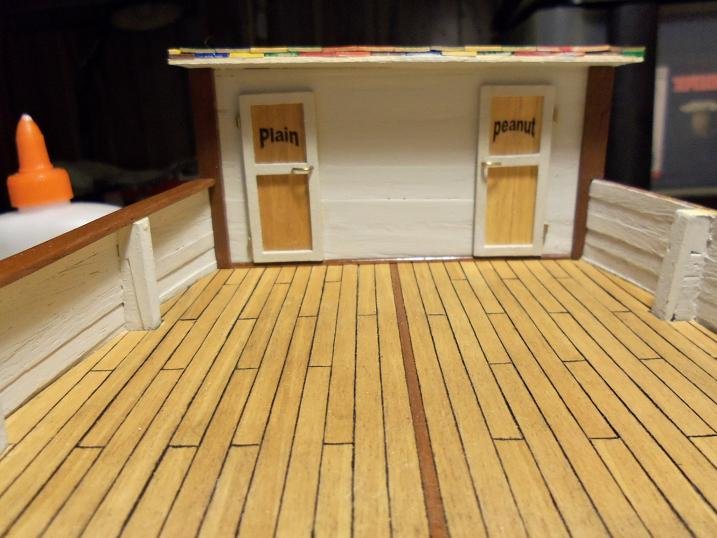
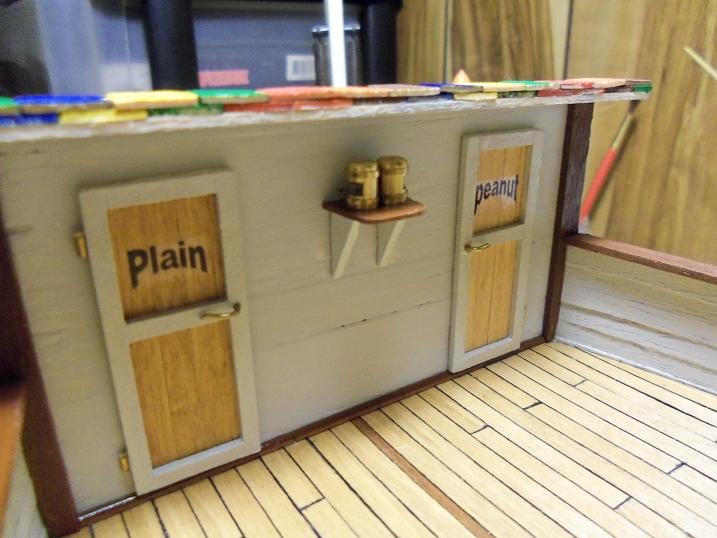
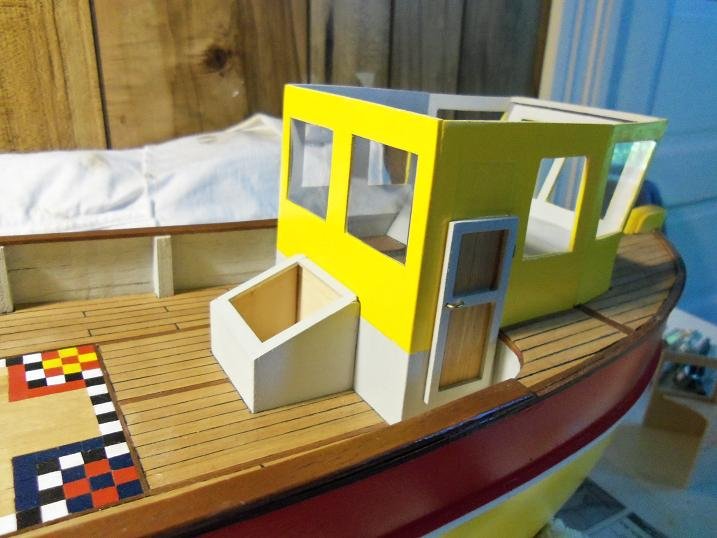
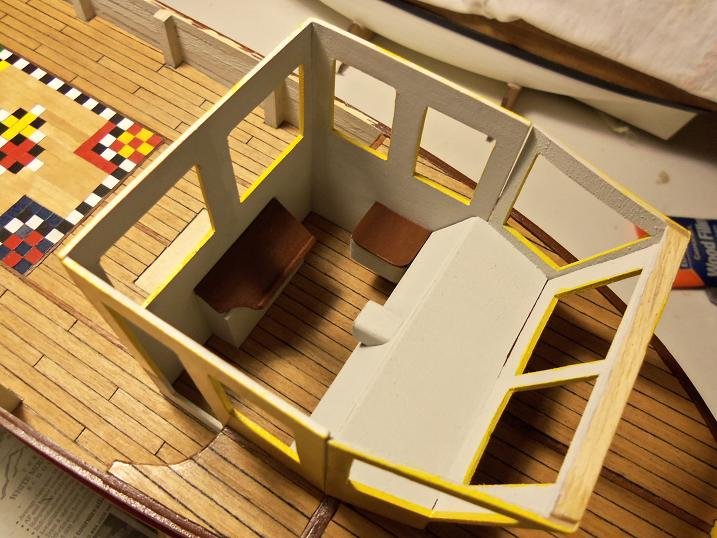
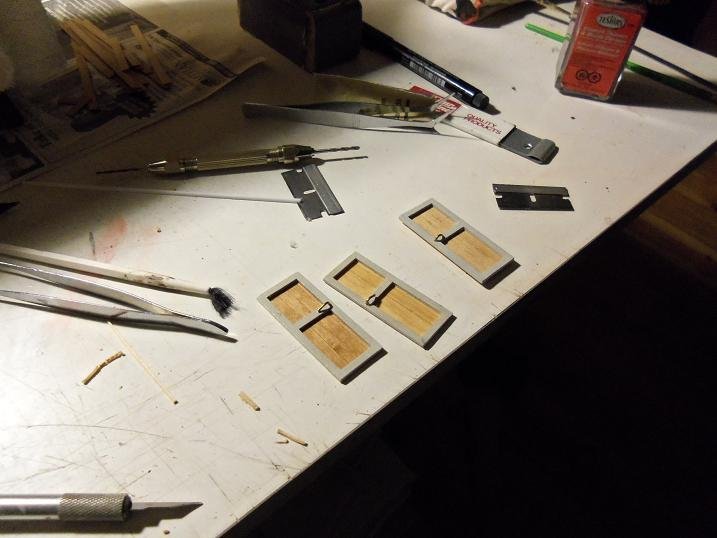
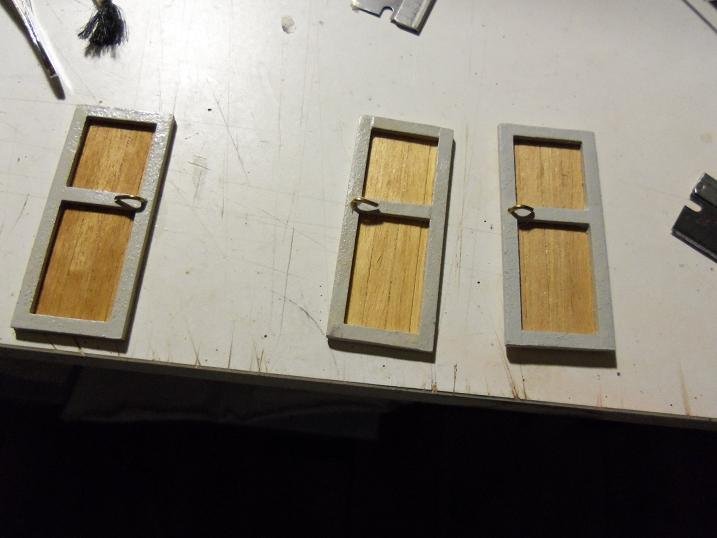
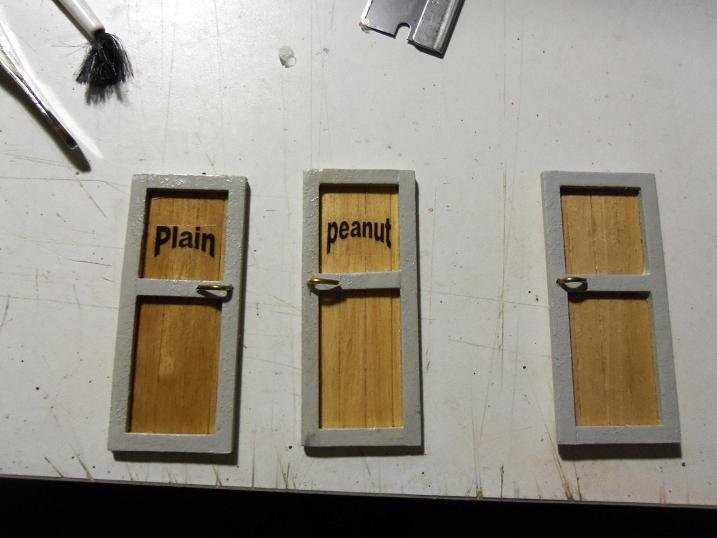
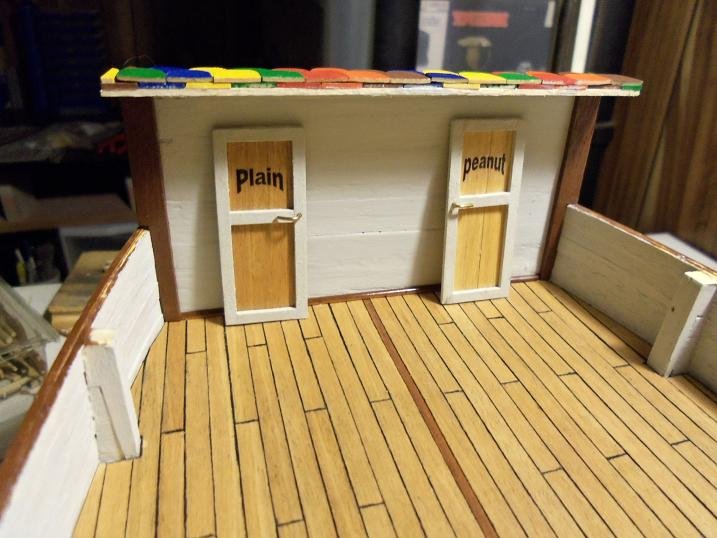
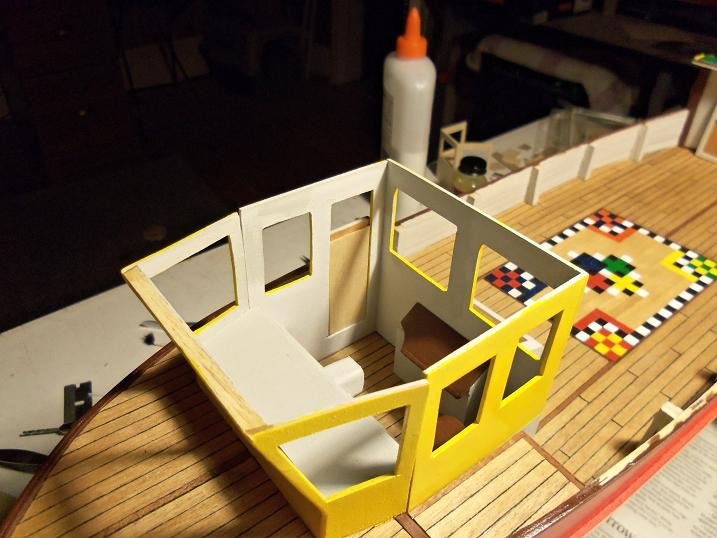
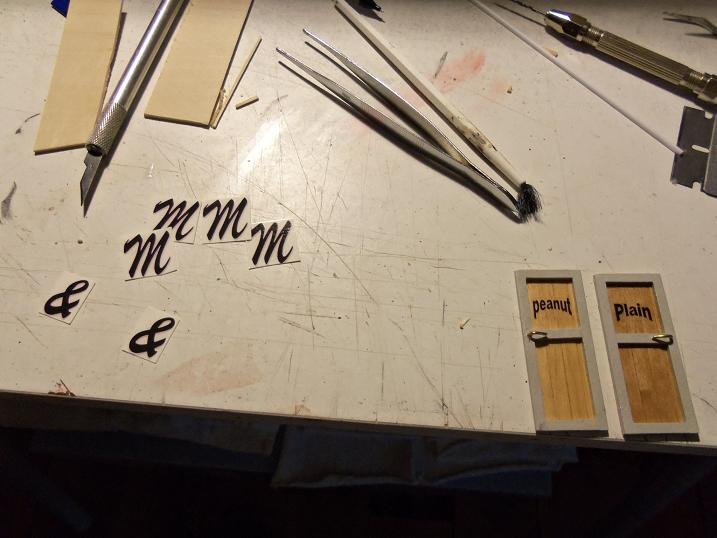
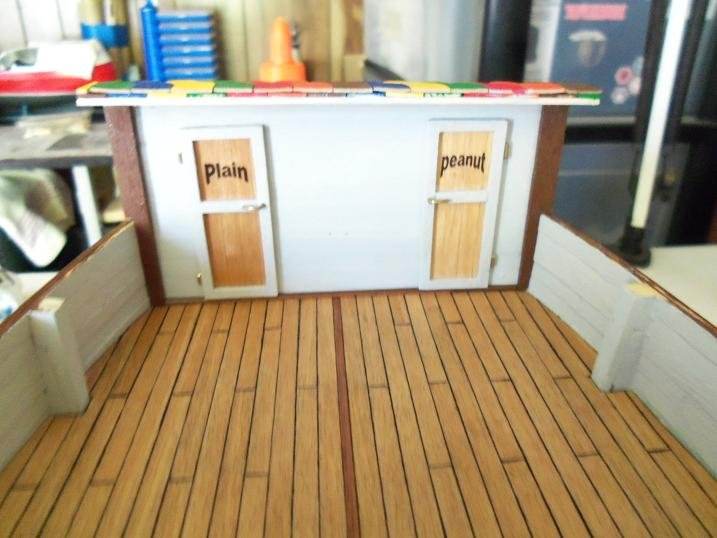
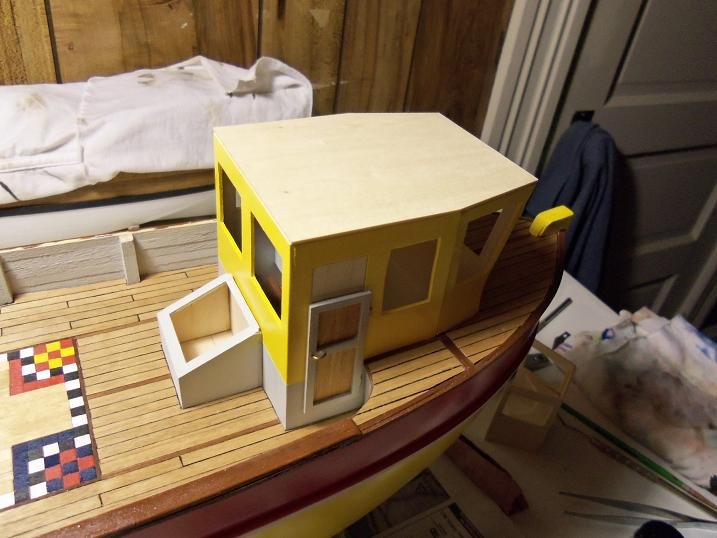
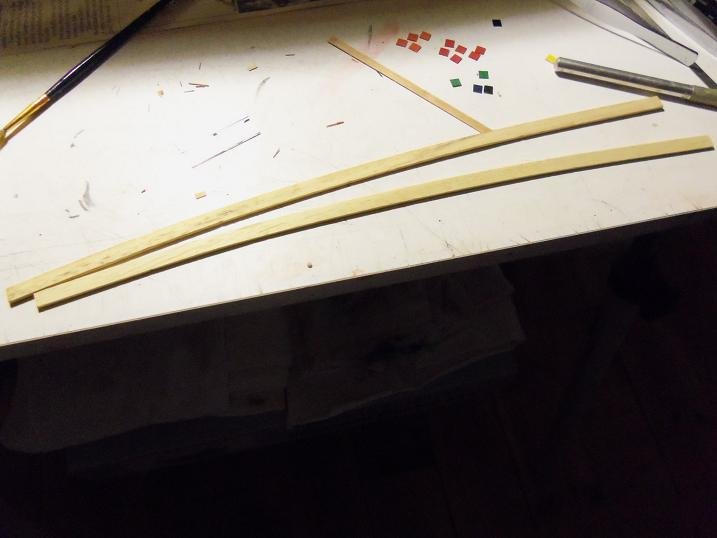
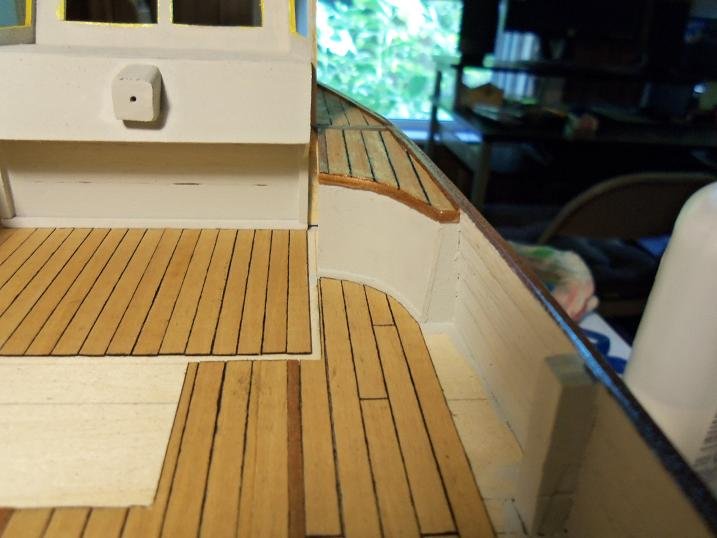
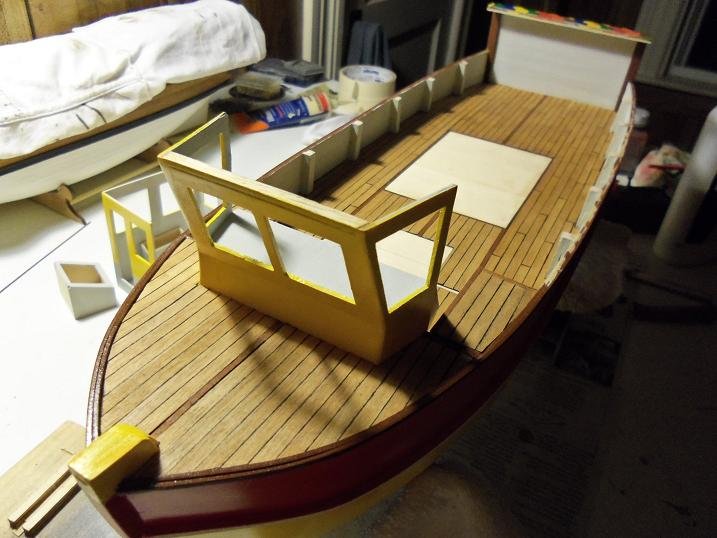
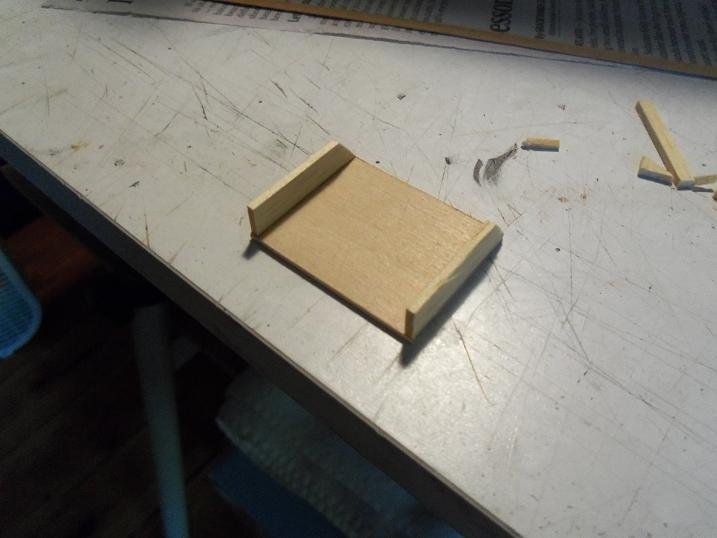
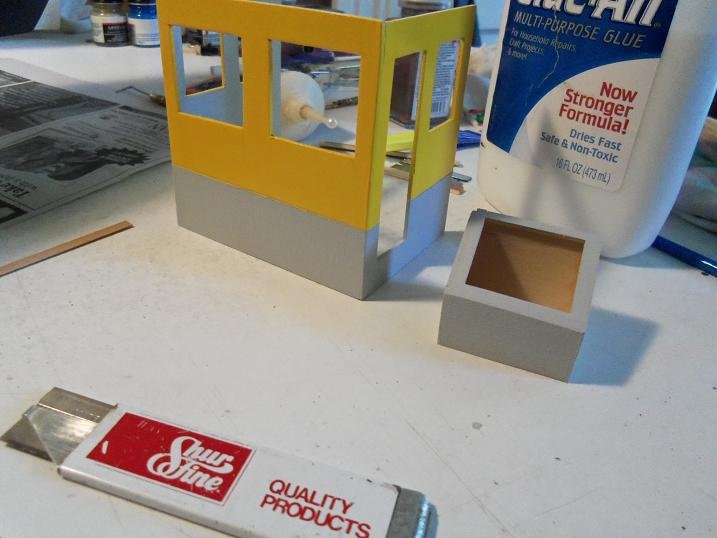
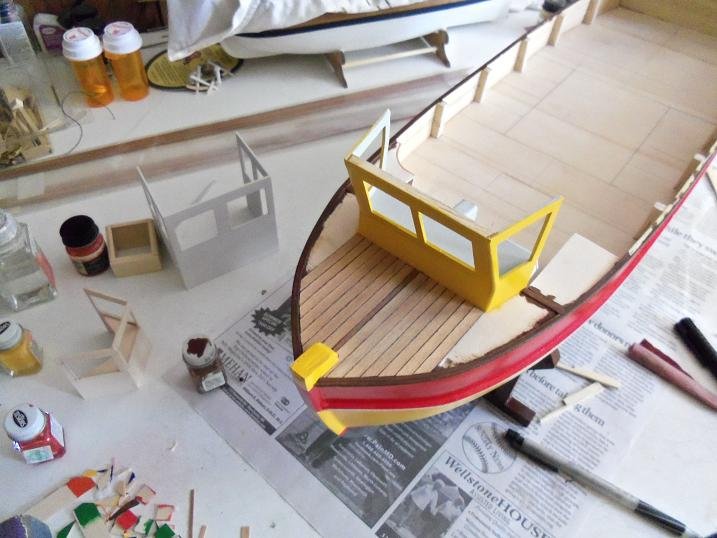
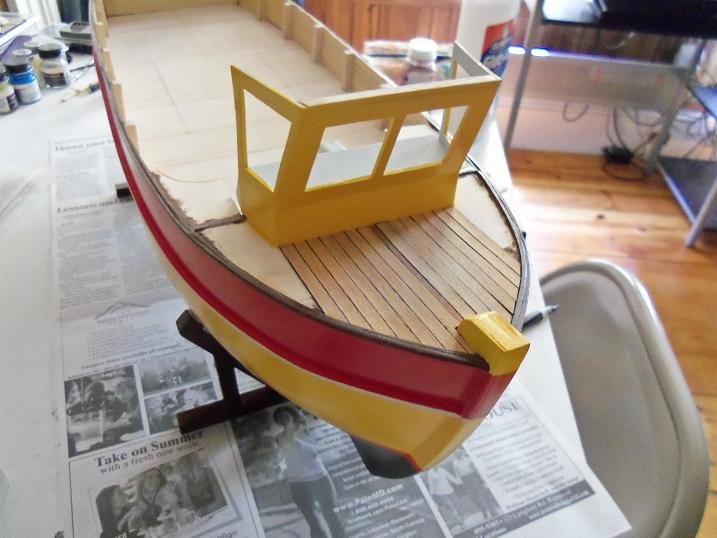
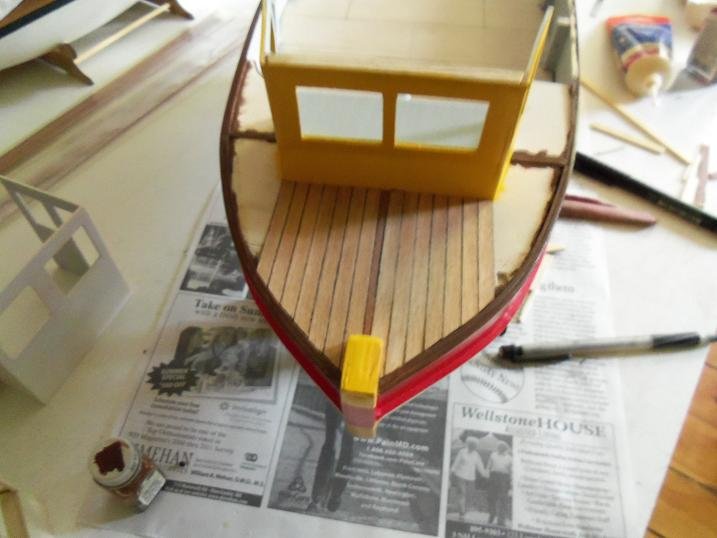
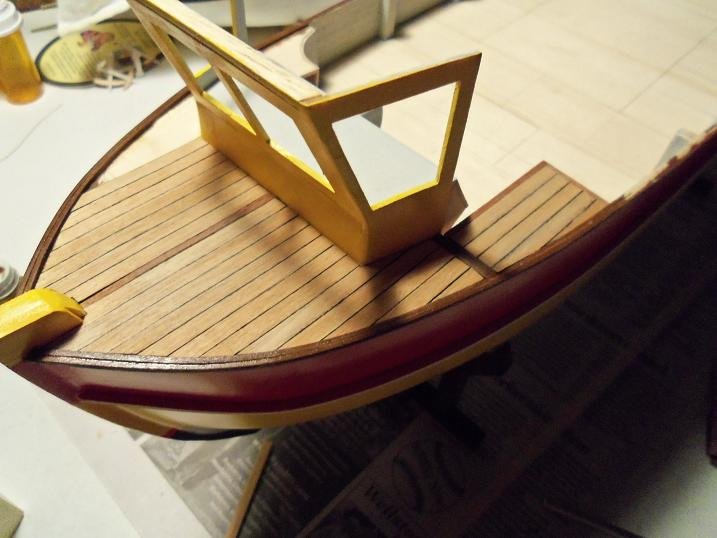
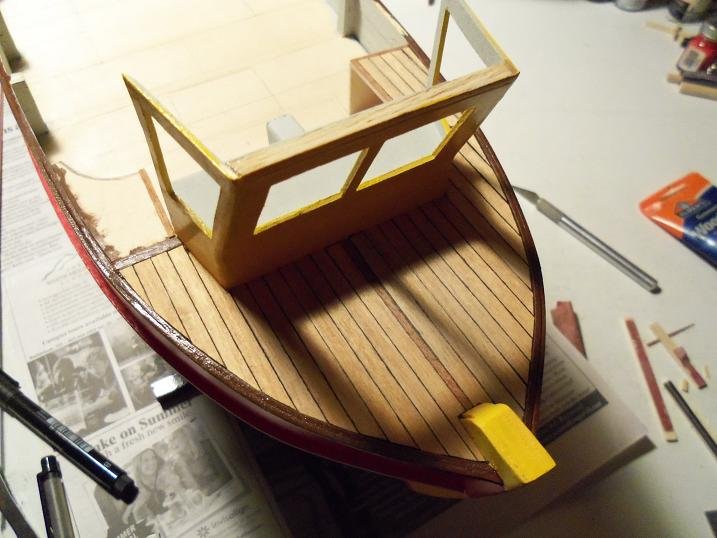
8-15-2012 along with the easel, I made a seat the moldings I had made were painted and cemented in place. I will need three doors......one for the pilot house, and two for the aft cabin, which is nothing more than a changing room for the guys and gals. the doors were assembled. with the handles, it gives me one left and two right handed doors. the two for the aft cabin needed some signage on then to denote the gender. I though this was kinda cute I like to think I meant to do this, but I had goofed. the opening was too tall. since I didn't plan it with any form of step up, I will close the open area with a piece of flat stock. I'll do that later........I was having more fun making a disco booth for the deck layout. I'll go with that for now........hmmmmmm decals are fun.........I'll do those next! the doors are in place now on the aft cabin. I did some simulated hinges to finish them off. along the bottom of the cabin, I painted some 1/4 round molding and ran it across the deck edge. the progress so far........... the cap railing is just dry fitted at the moment. I still need to make the rest of it. the opening above the pilot house door was closed up, and I began to shape the roof. I like the idea of the large windows......the interior can be seen quite well. I plan on adding a lot of detail....probably the most I've ever done. I hope I get to do all that I want to do more to add tomorrow


-
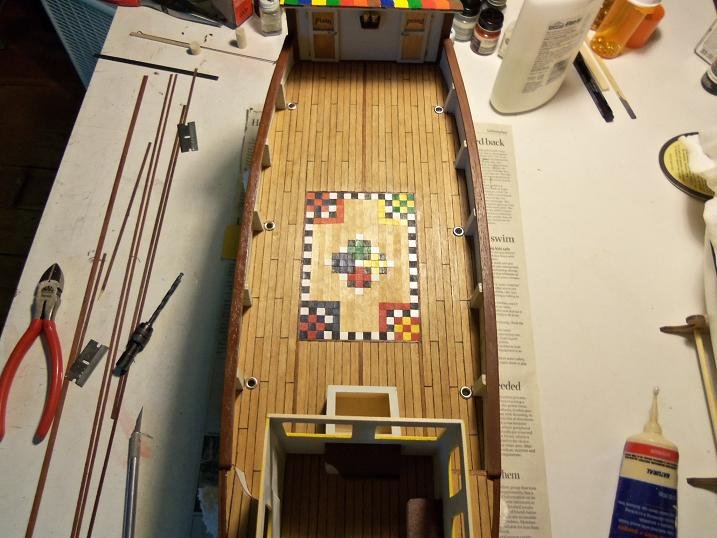
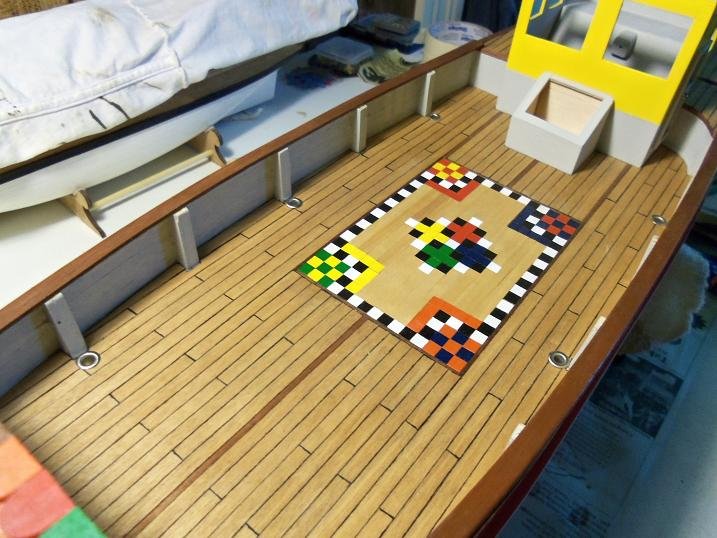
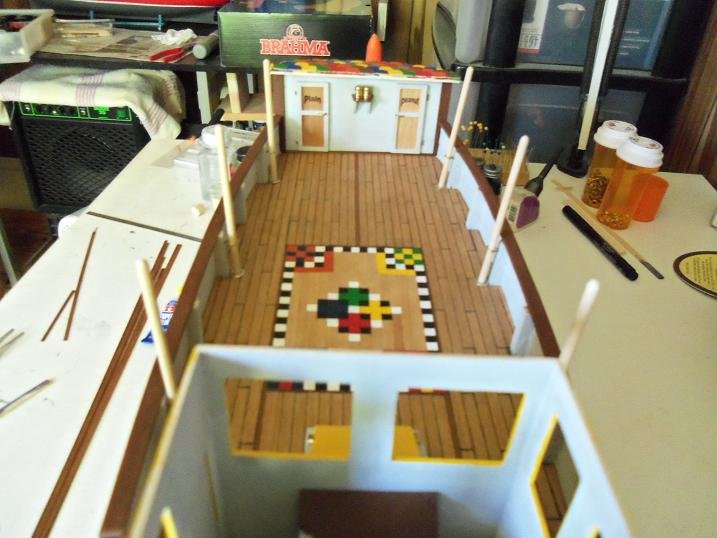
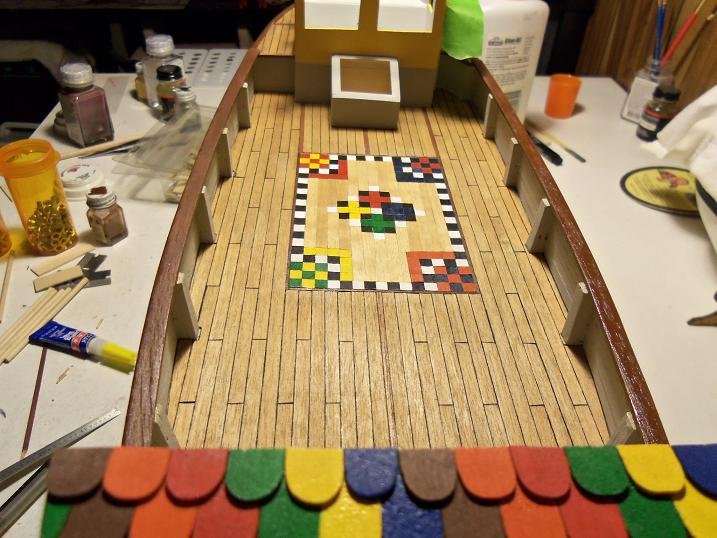
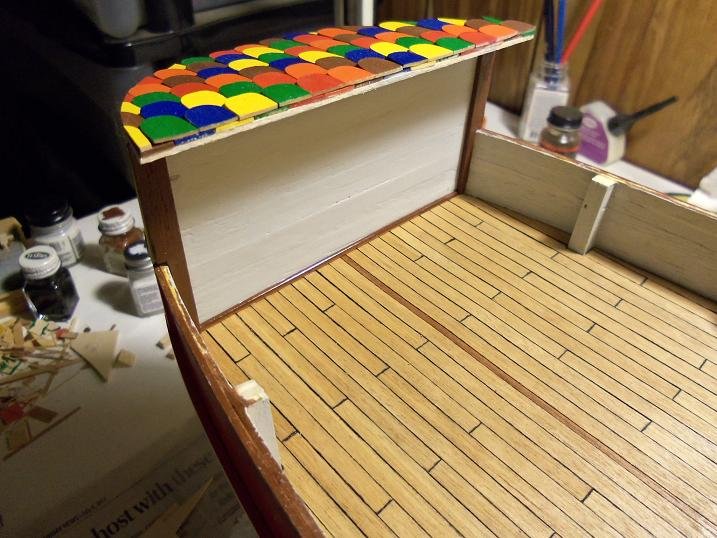
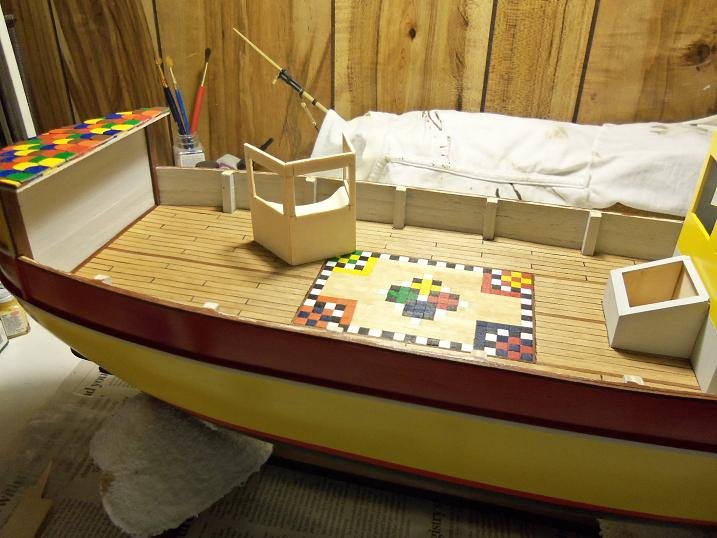
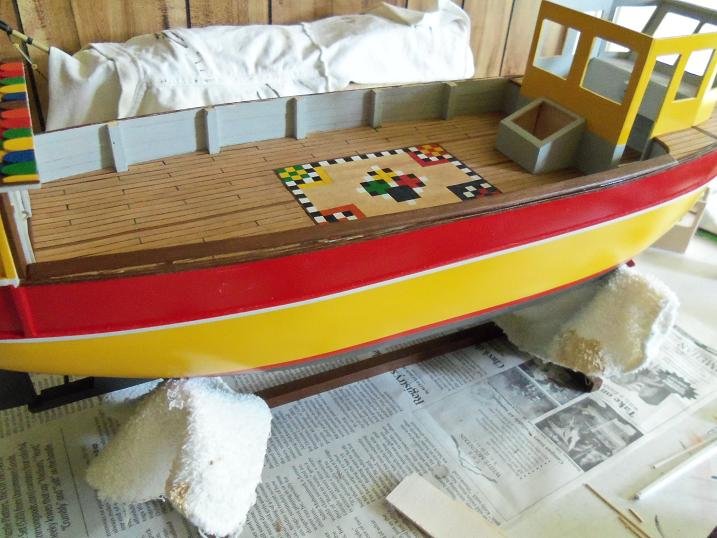
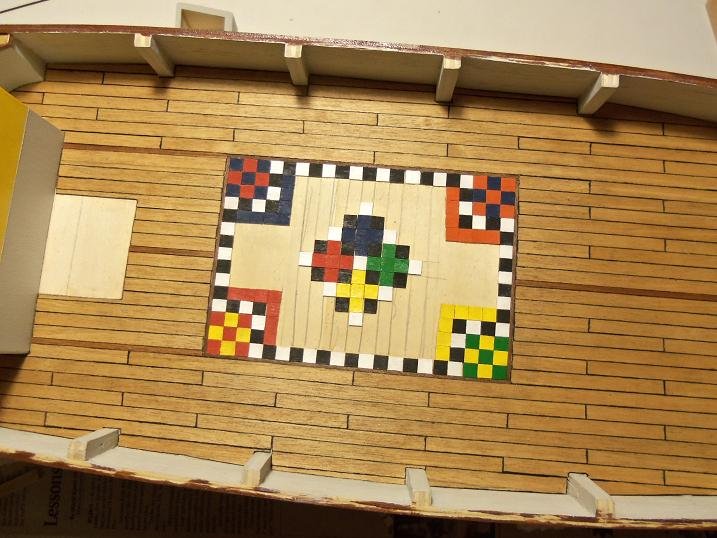
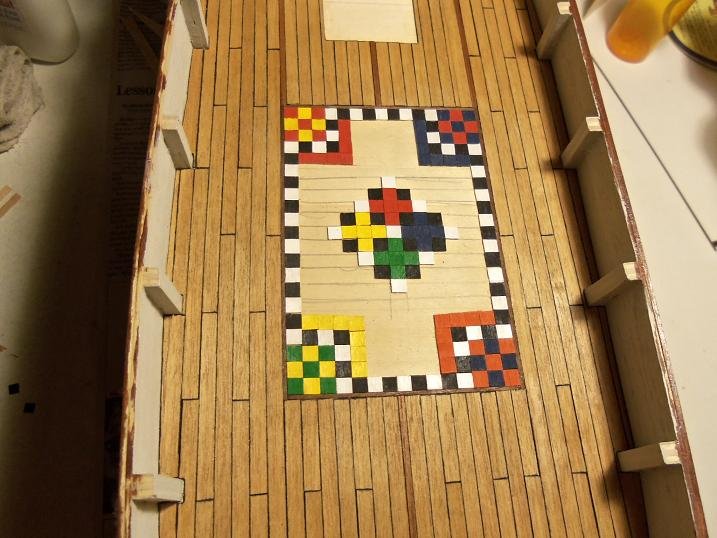
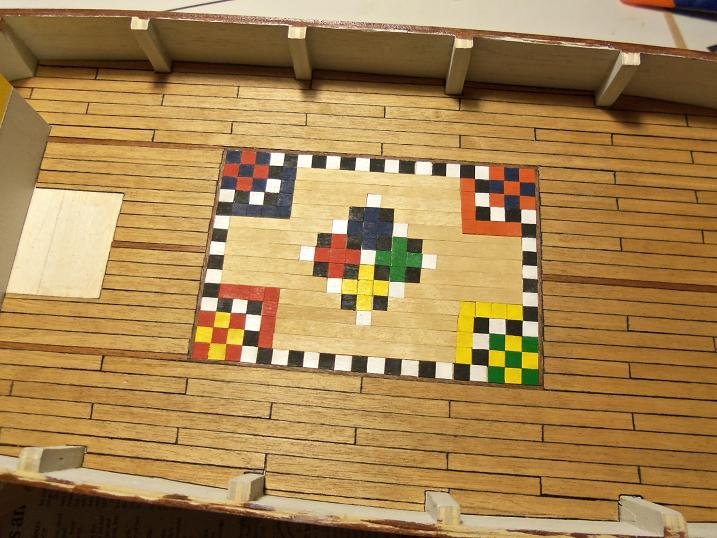
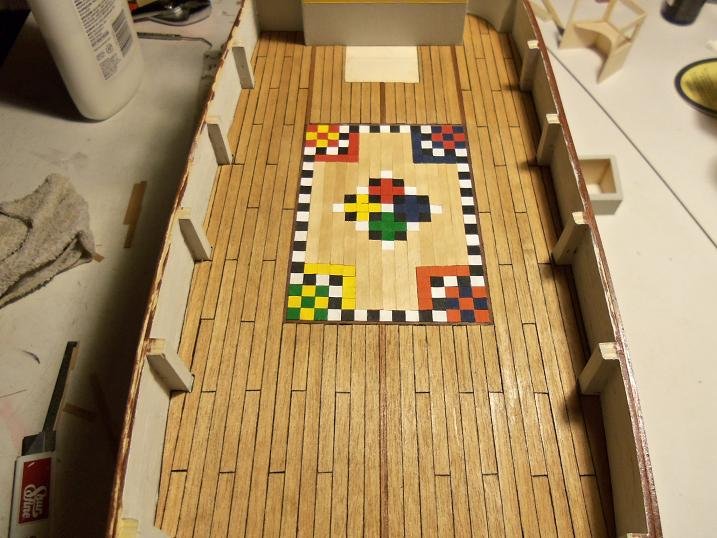
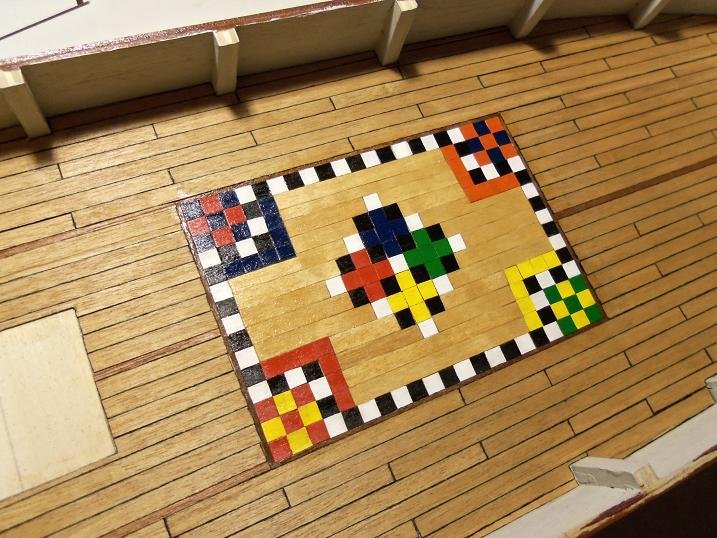
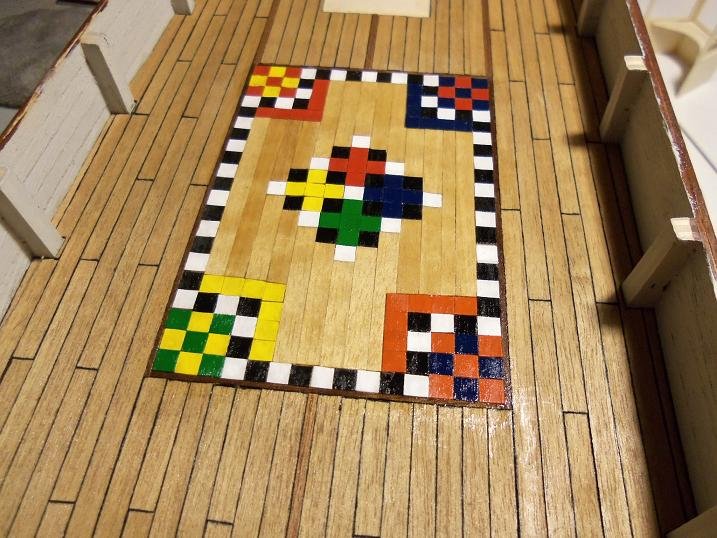
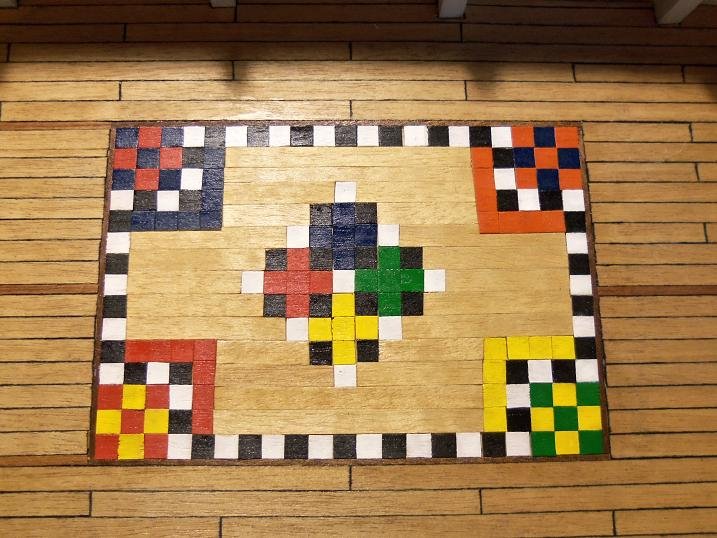
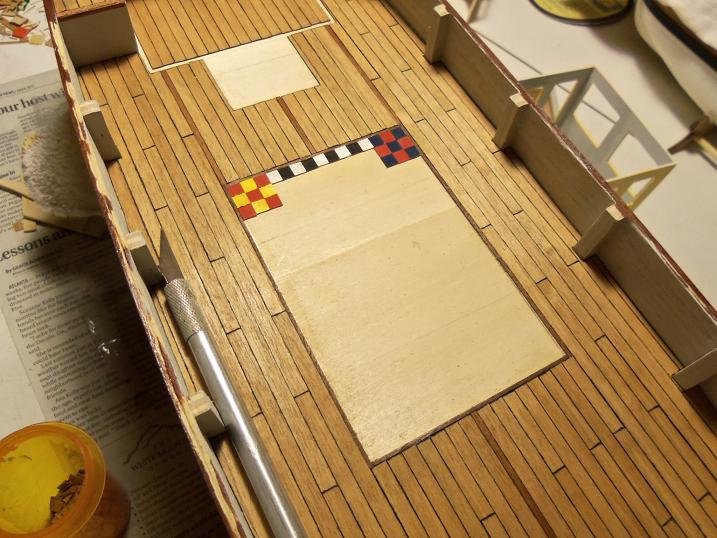
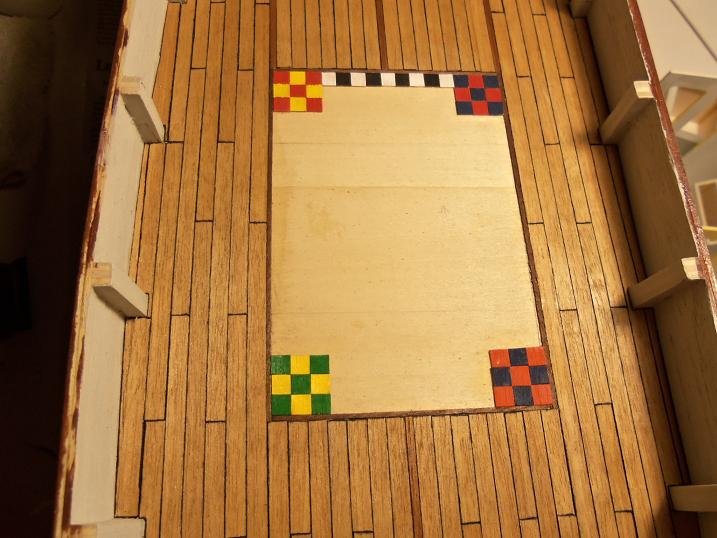
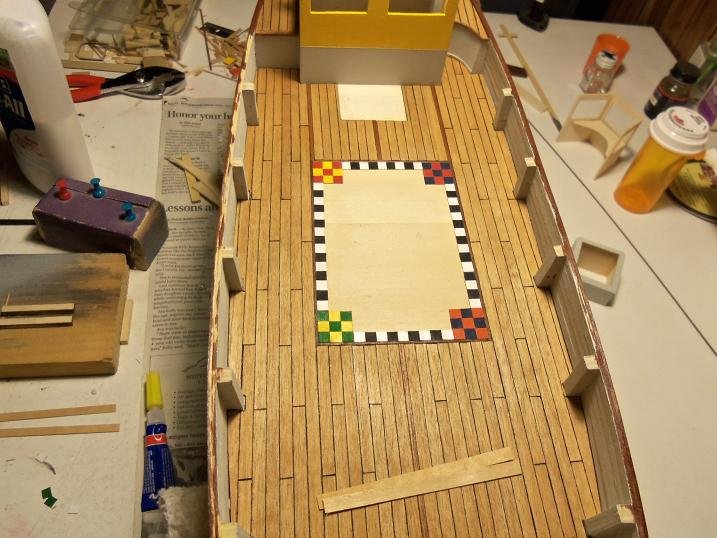
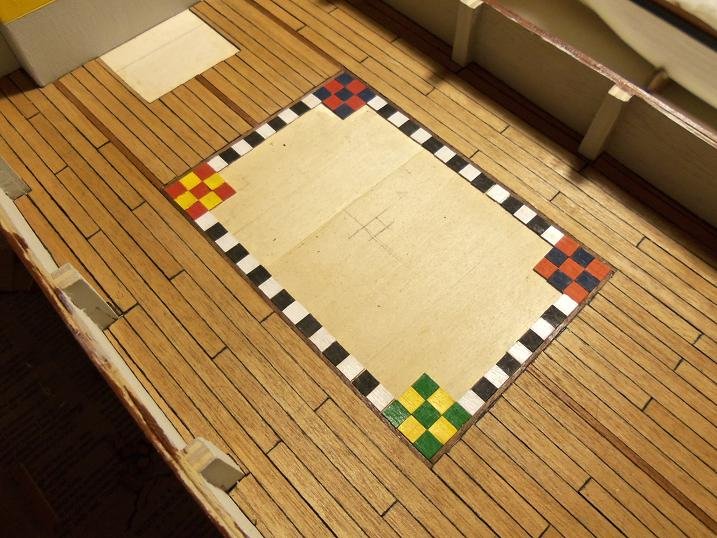
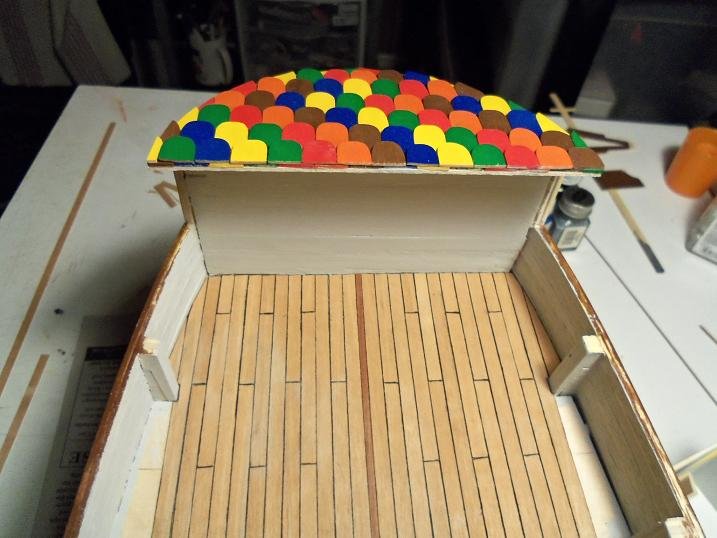
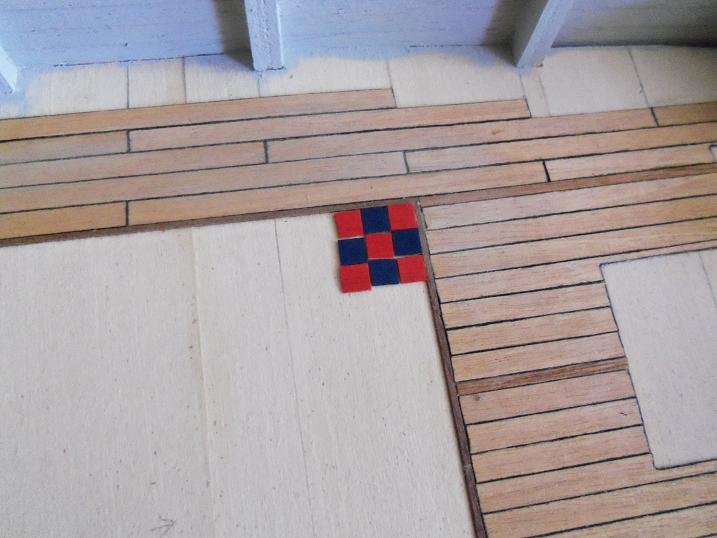
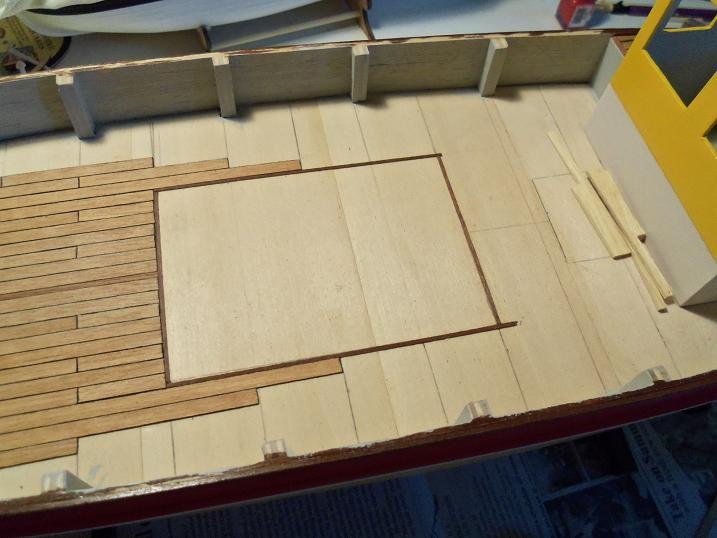
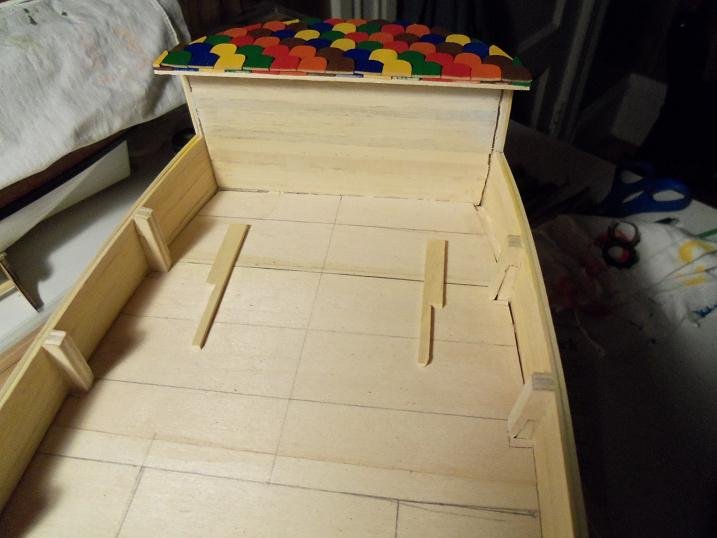
8-13-2012 enough time had past......I think the cap rails had their shape by now. time to cap off the corners the center was filled in with a collage of the corner designs. I really should have marked this out in the beginning........it would have made it a lot easier. from afar, it doesn't look too bad....... the rest was filled in with full strip planking.......in hindsight, it might have looked better, if I had done the calking. it was given a coat of semi gloss lacquer. I gave it one more light coat........ the dance floor is complete


-
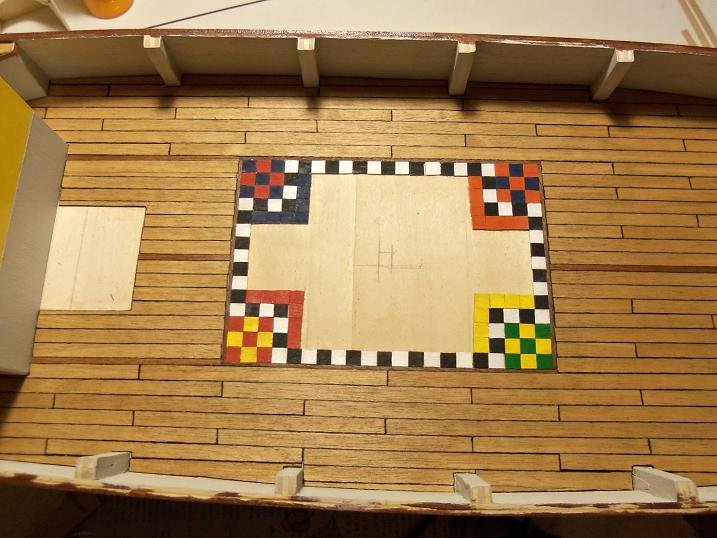
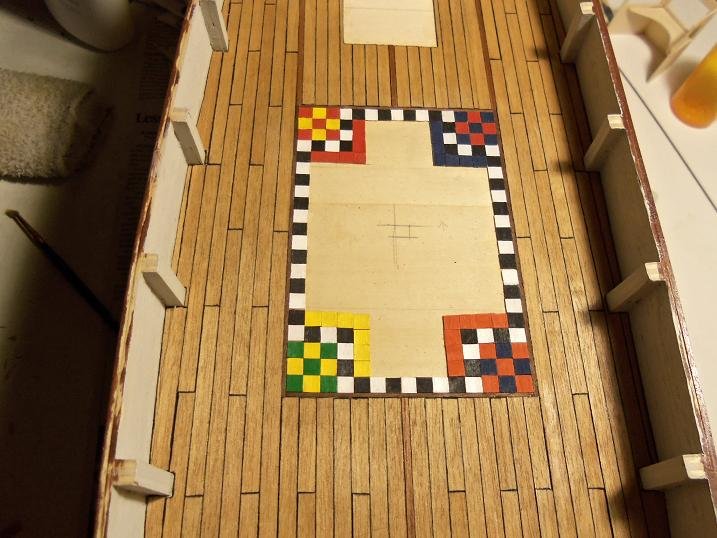
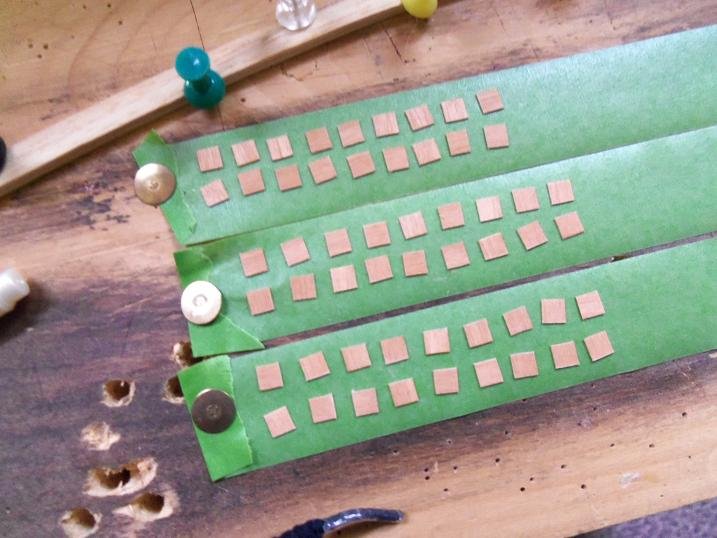
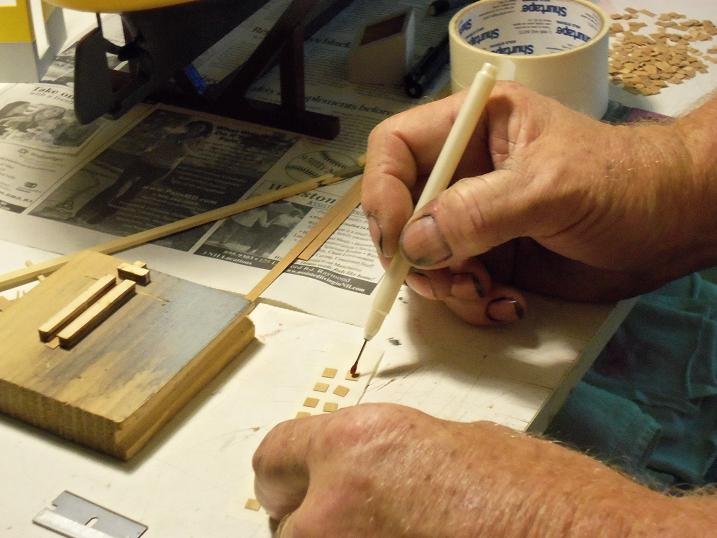
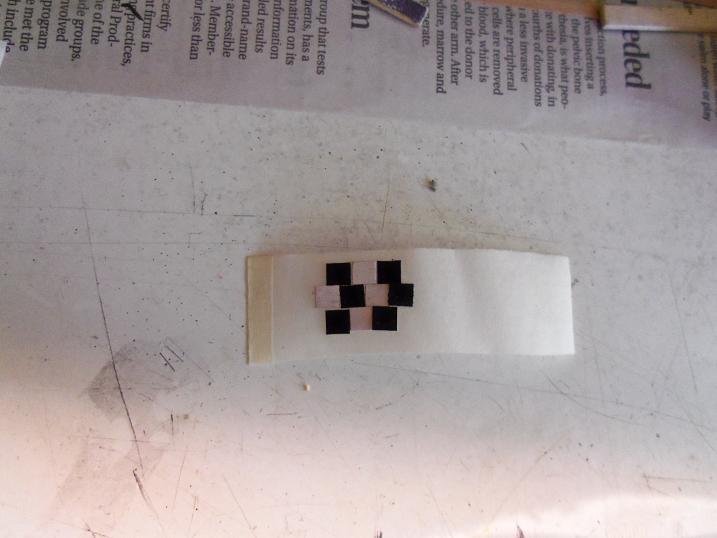
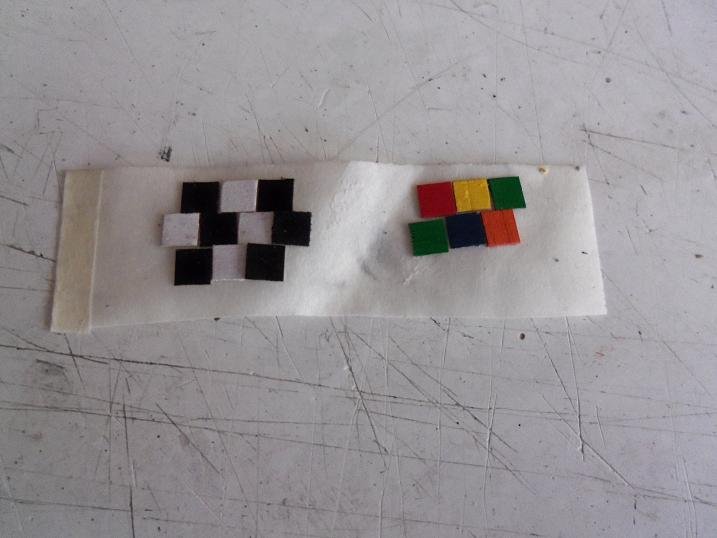
8-12-2012 I had done one end of the edging on the dance floor. the squares were a tiny bit off......it made it hard to fit them in place. to even them up, I used the jig in another way. they were all stacked inside the jig, an the exposed side was sanded flush to the jig. in a painstaking effort, they were turned to another side and sanded another batch was painted. I still ran into some difficulties here and there, but the borders were done measuring out the center, a central design was drawn....
-
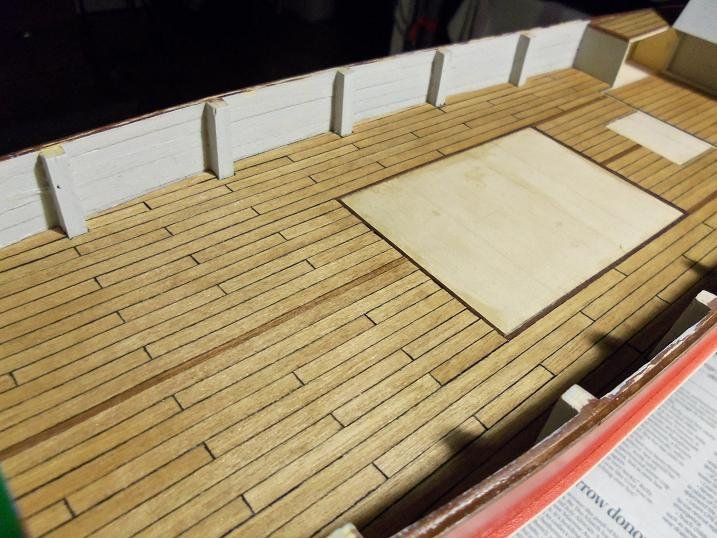
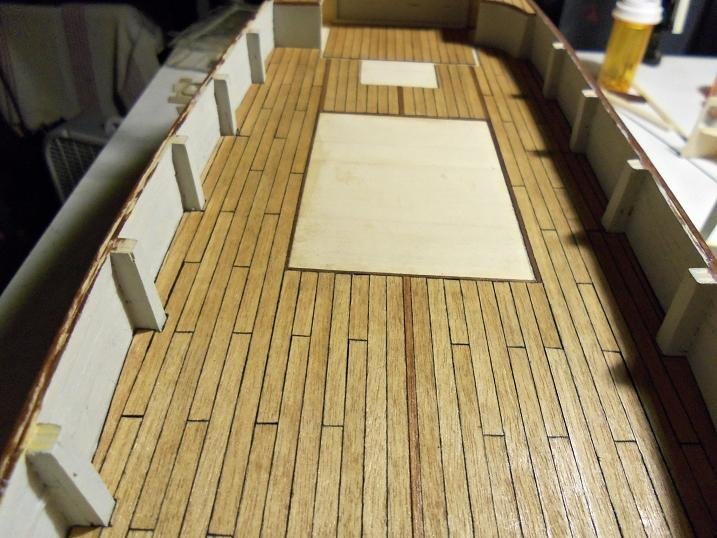
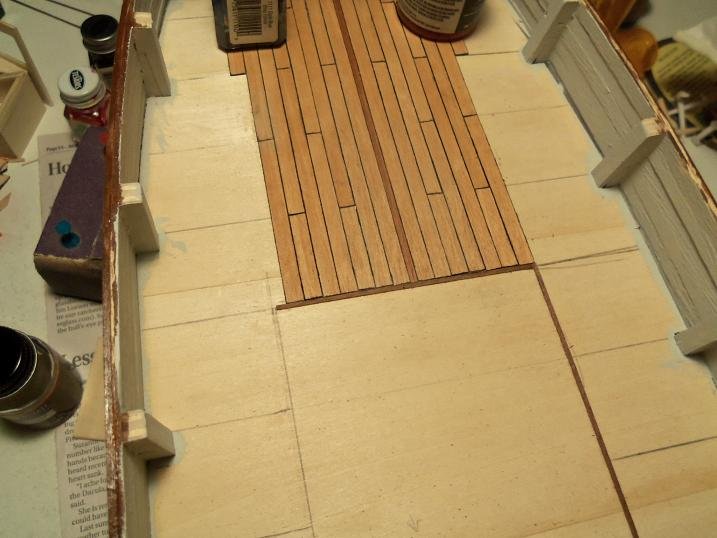
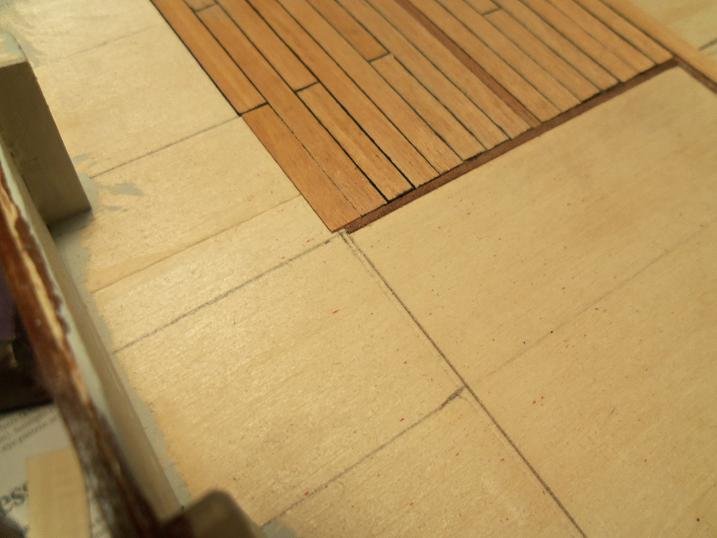
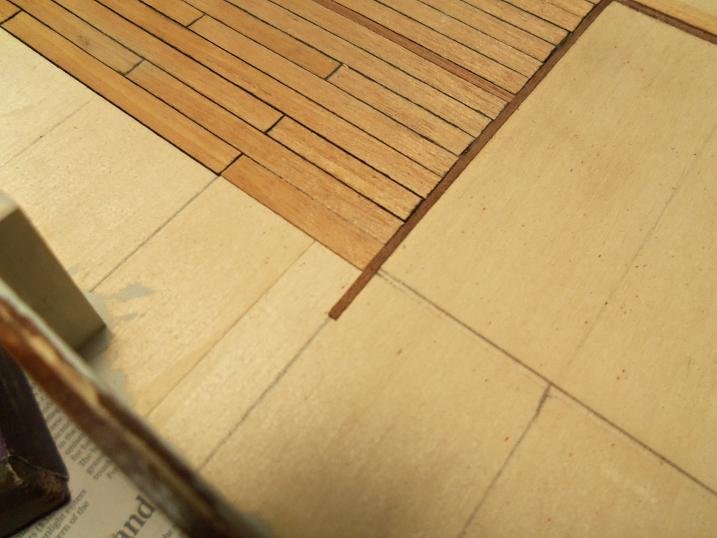
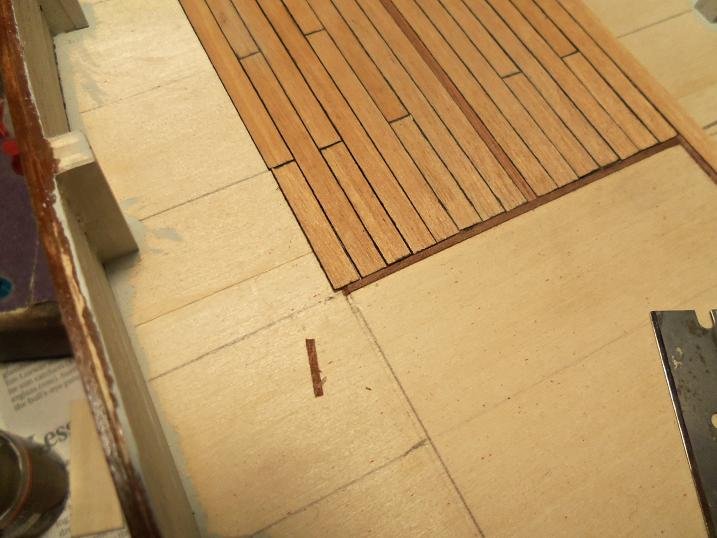
8-8-2012 the main deck planking continues...... it was sealed with semi gloss lacquer.
-
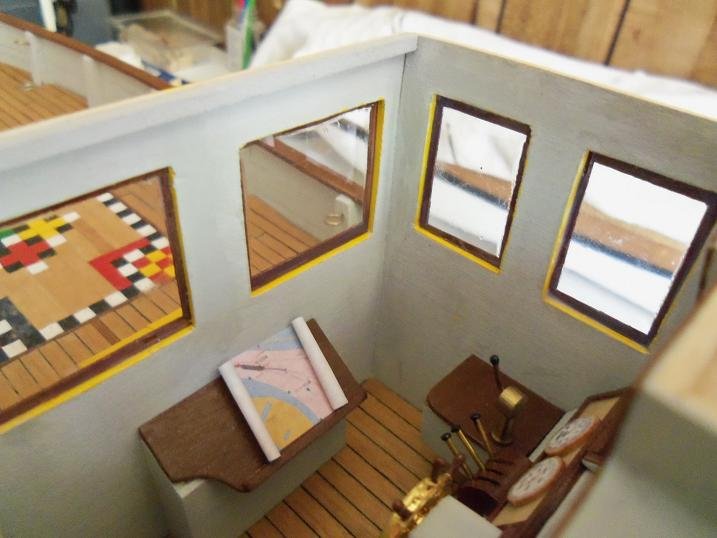
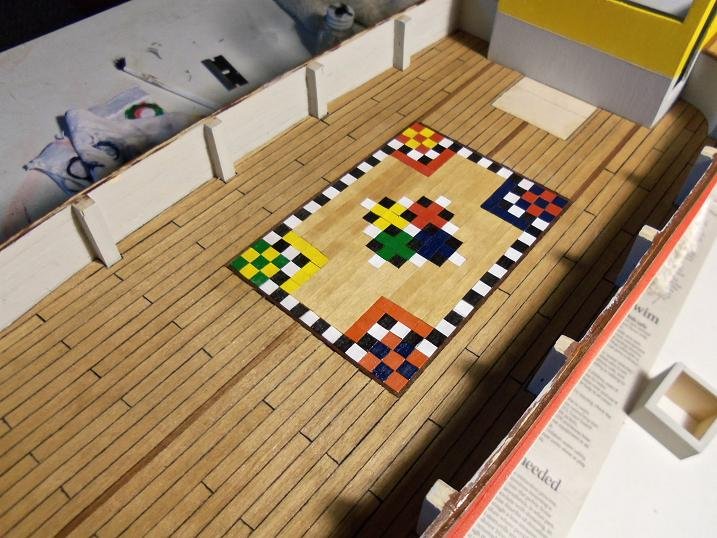
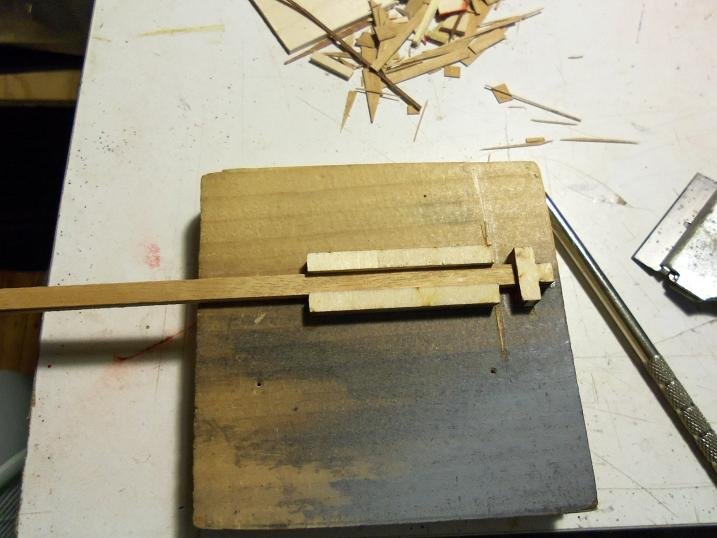
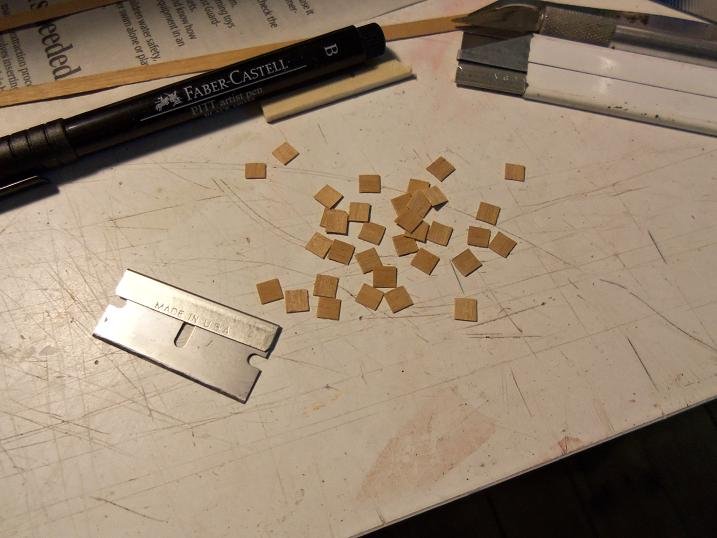
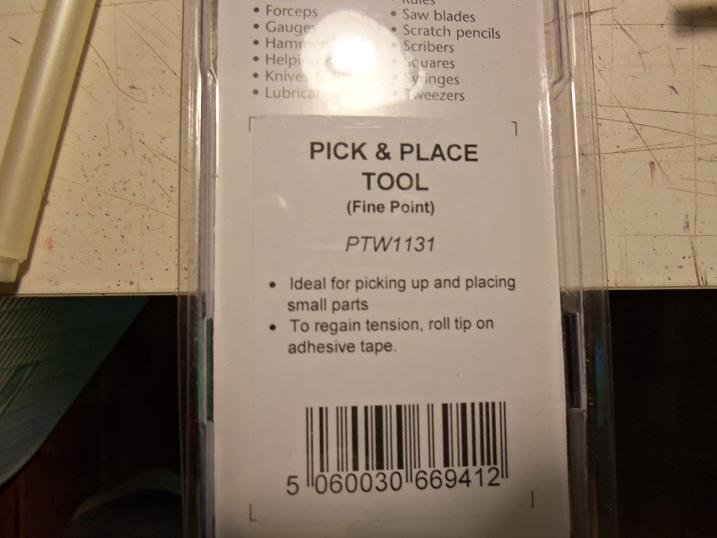
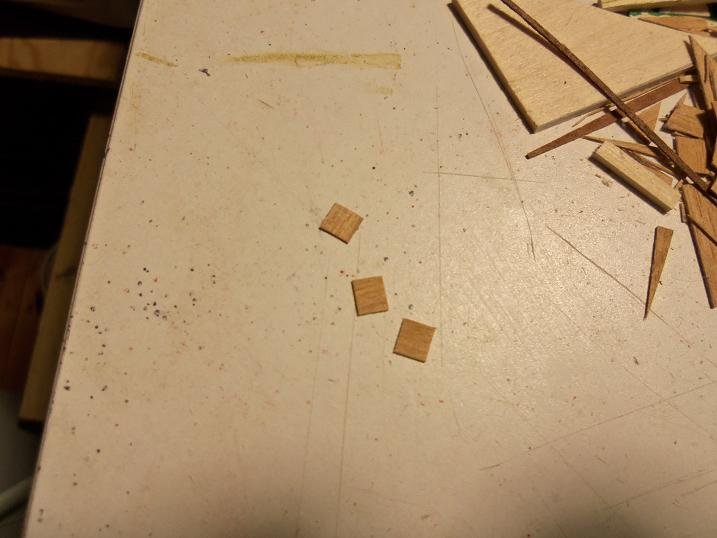
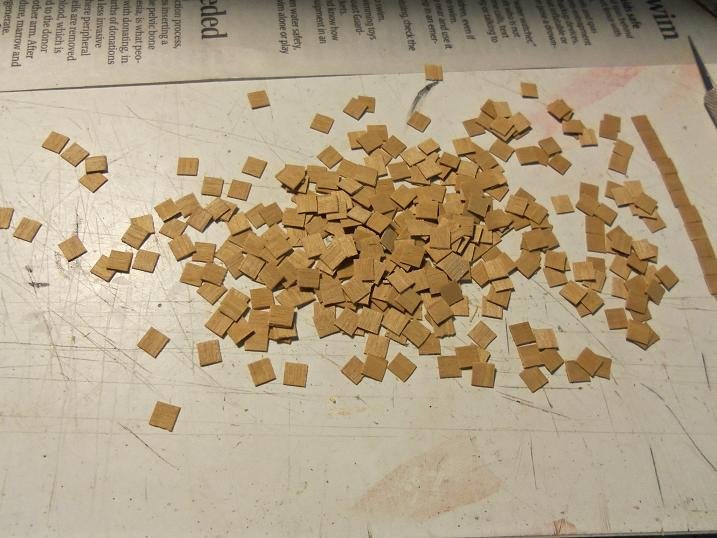
thank you Pat I've mentioned this model enough times. I wish a lot of my hull finishes came out as well as this one did. it's one of my better ones 8-7-2012 the planking progressed...... I added other strips of mahogany to accent the dance floor along the bulwarks were beginning to get filled in by this time.......it was almost to that point near the pilot house. I wasn't sure if I had cemented the pilot house together at this point........I see that I haven't yet. just as well, since it might have been a trial to fill in around it. I believe these are the aft cap rails. I was itching to get busy on the dance floor. I ran a few configurations through my head. I ended up taking a piece of graph paper, and drawing out the design. it's the only part of the project, that I drew a plan for. I still have it today measuring it out, I needed tiny squares 4 x 4 MM.......I started to cut them with this jig. this tool was somewhat helpful....it's a pickup pen. it has a sticky tip, that allows you to be able to pick up small parts....Tom sent me a couple to try out. there are a couple different size tips......they clean up relatively easy...just roll them on a piece of tape. they're better for plastic modeling though.......sawdust clogs it up too quickly. they did help here though....it made the task easier. of course there was a lot of checking to be sure that they were square........... GAAAAAAAAAA!!!!!!!!!!! HOLY QUALITY CONTROL!!!!!!!! it took a bit of time, but I managed to get them all stuck onto the sticky side of adhesive tape strips then the paint........ just the beginning.........


-
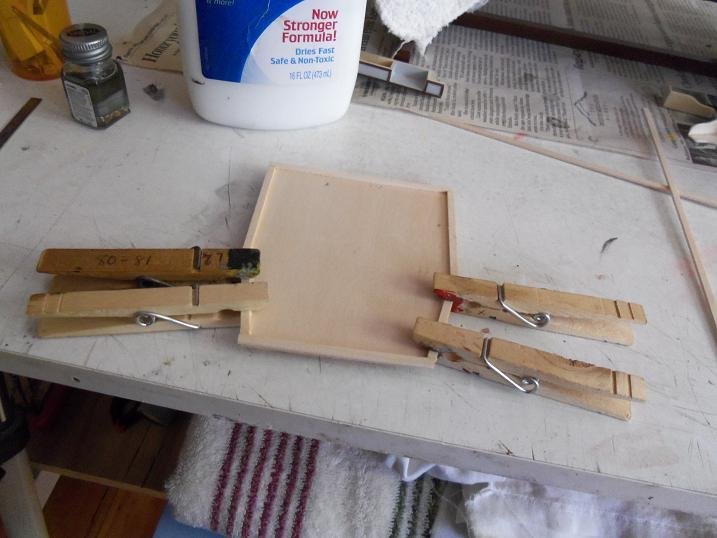
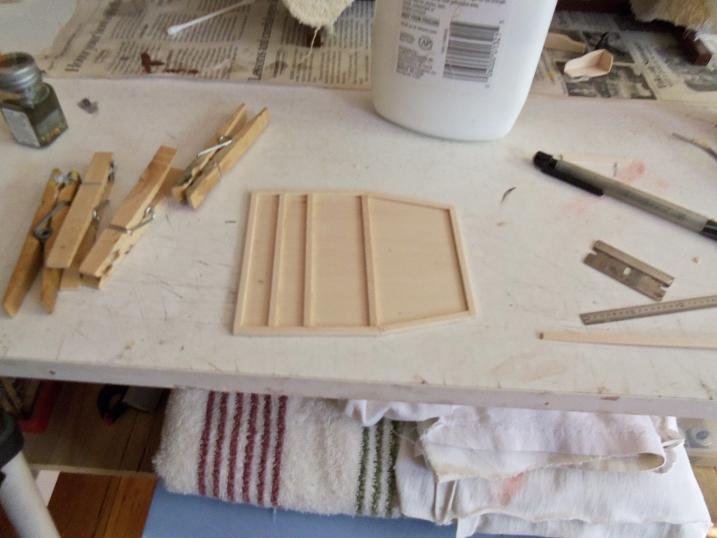
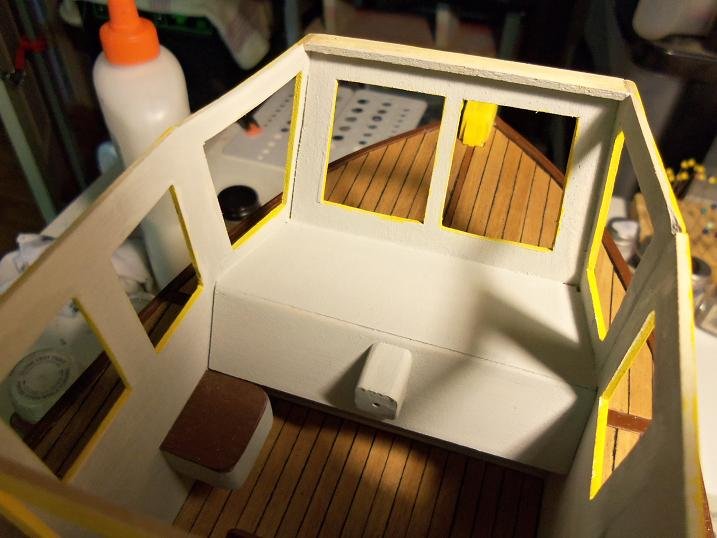
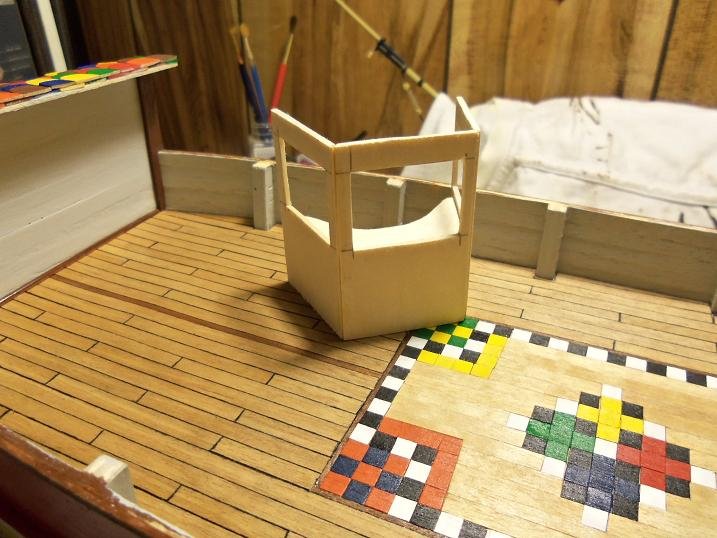
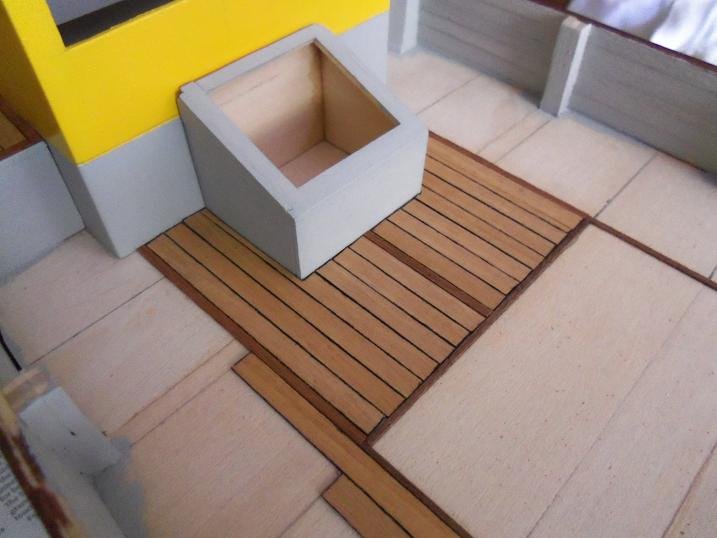
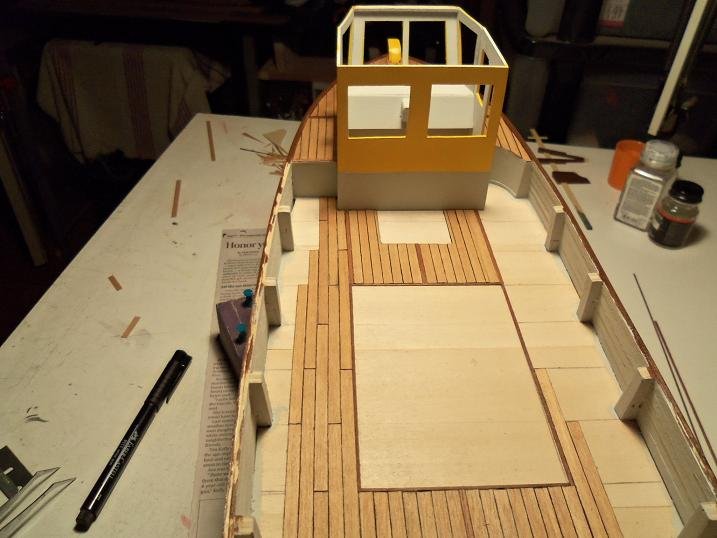
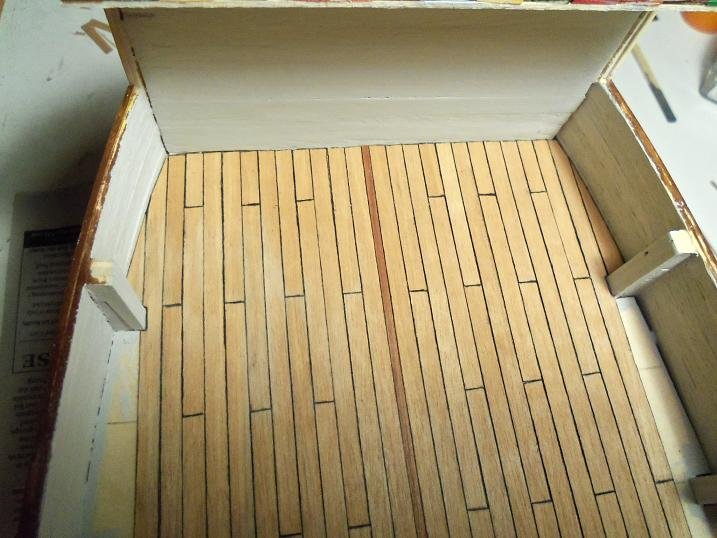
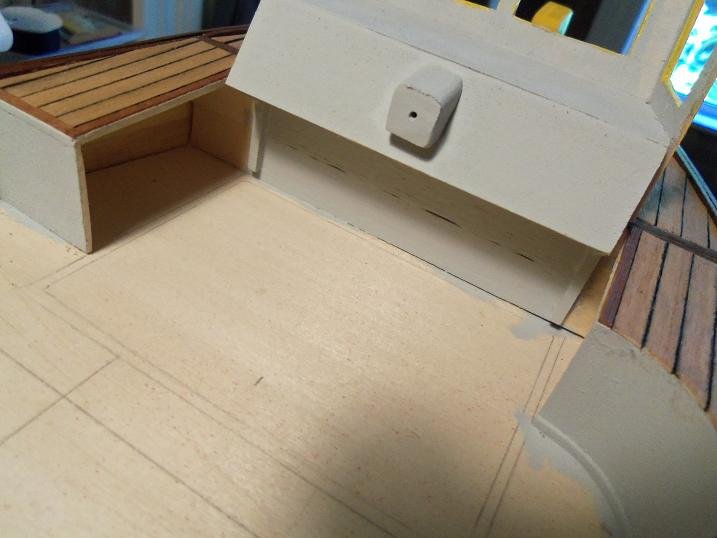
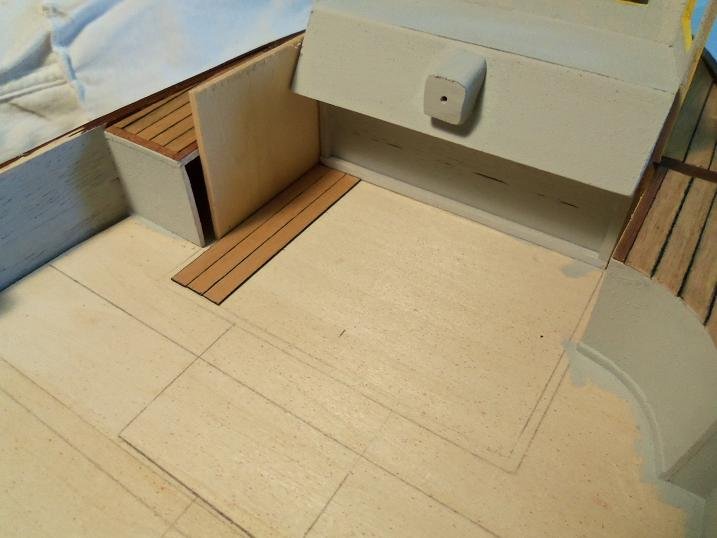
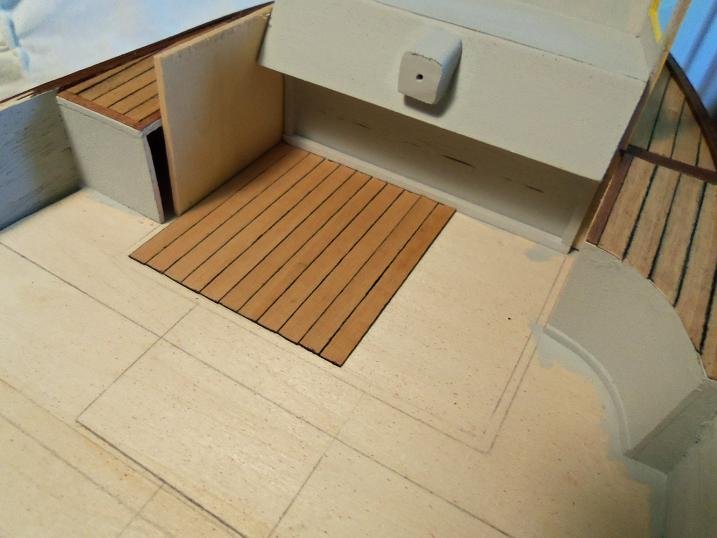
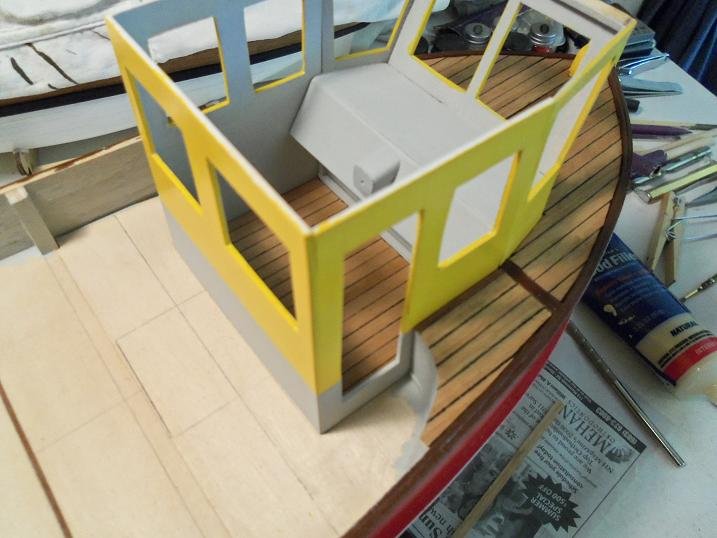
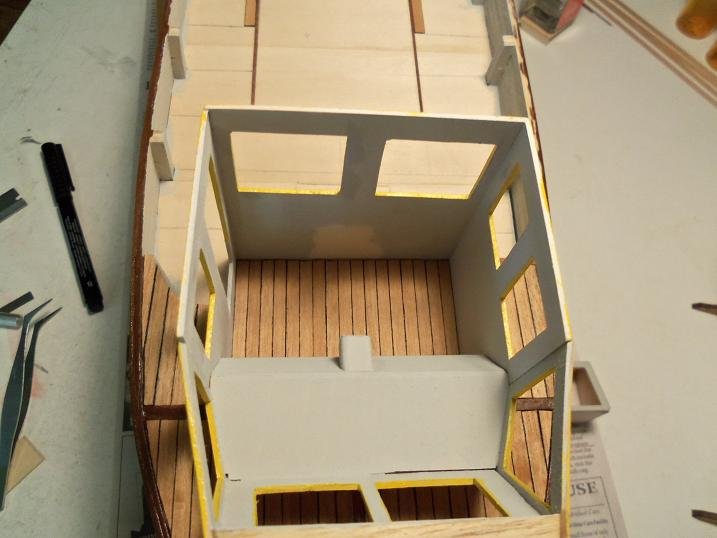
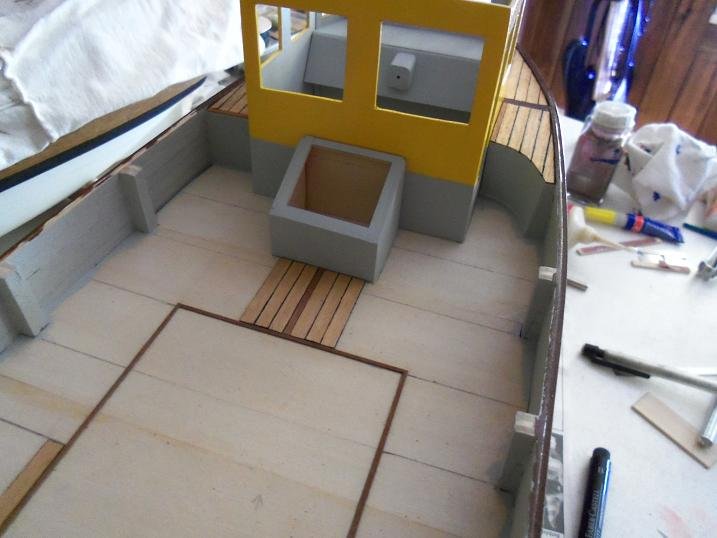
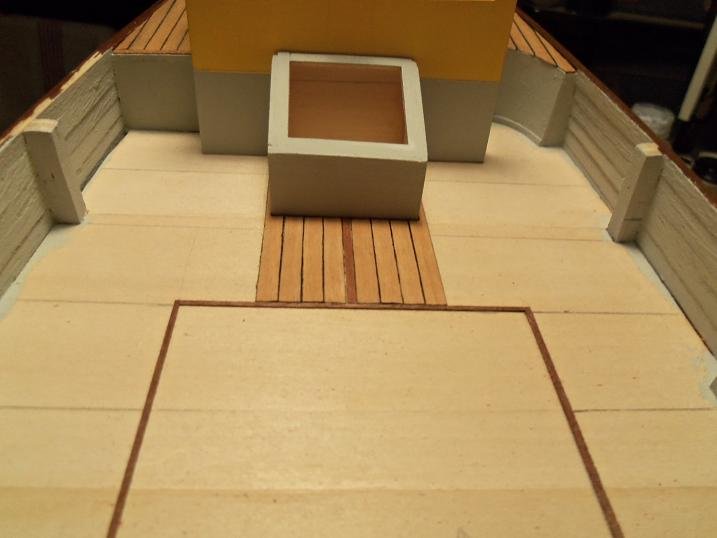
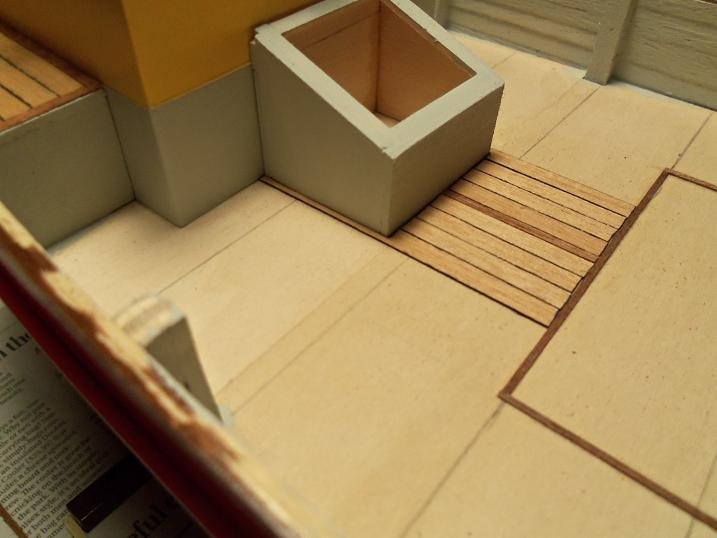
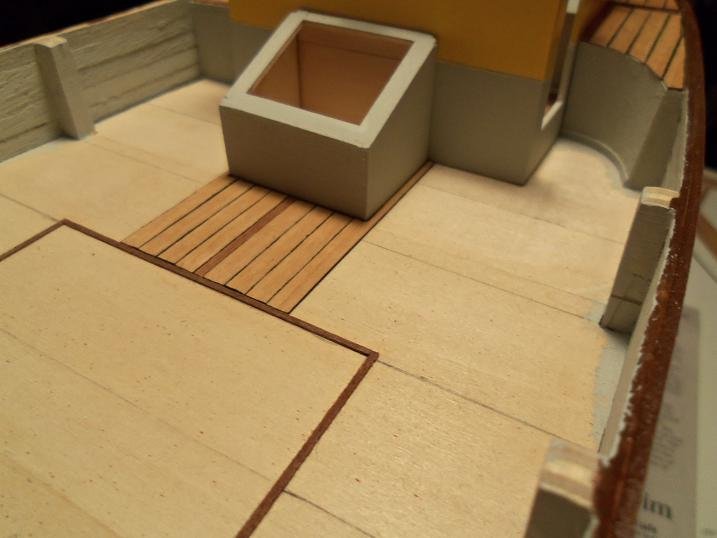
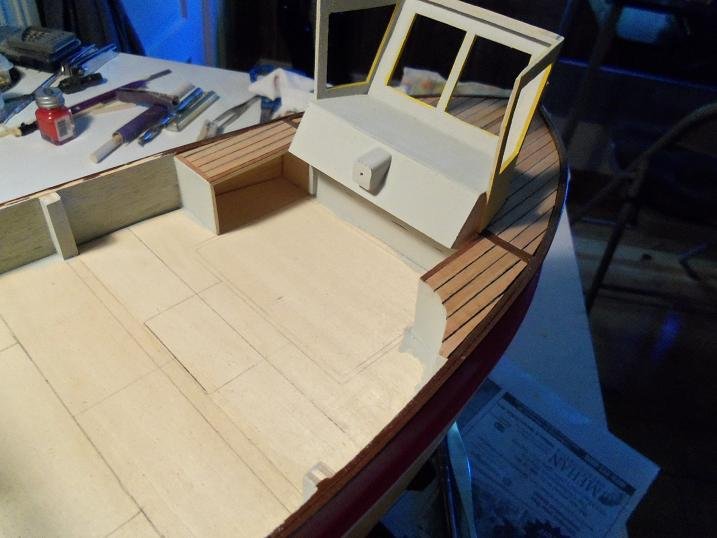
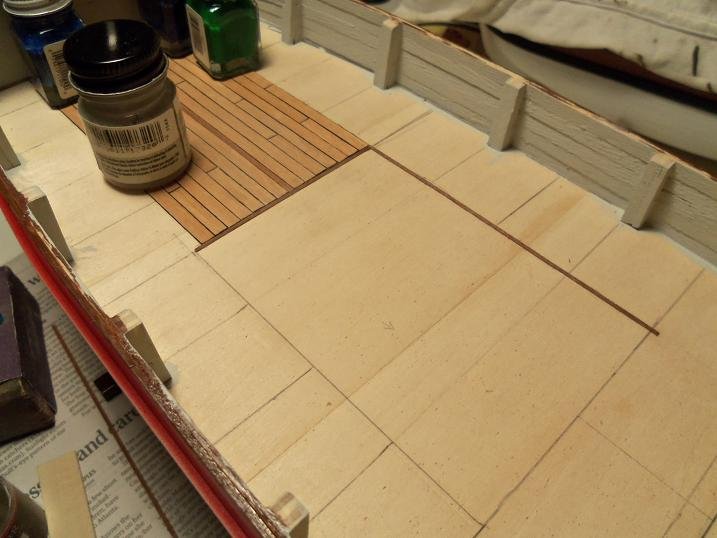
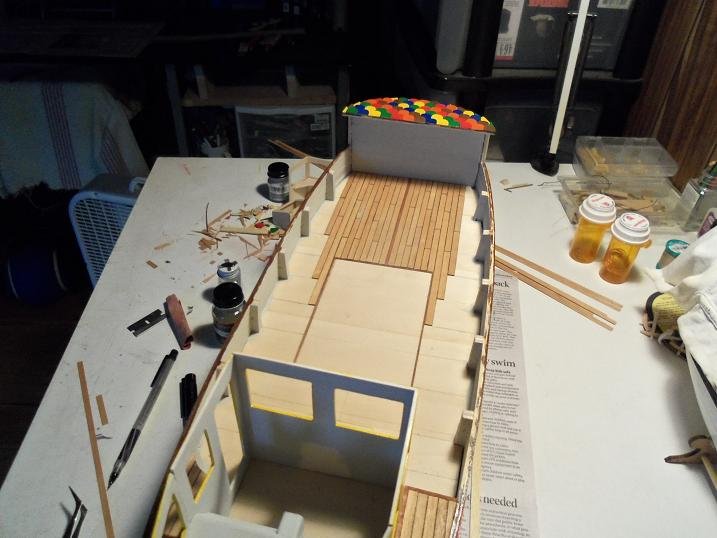
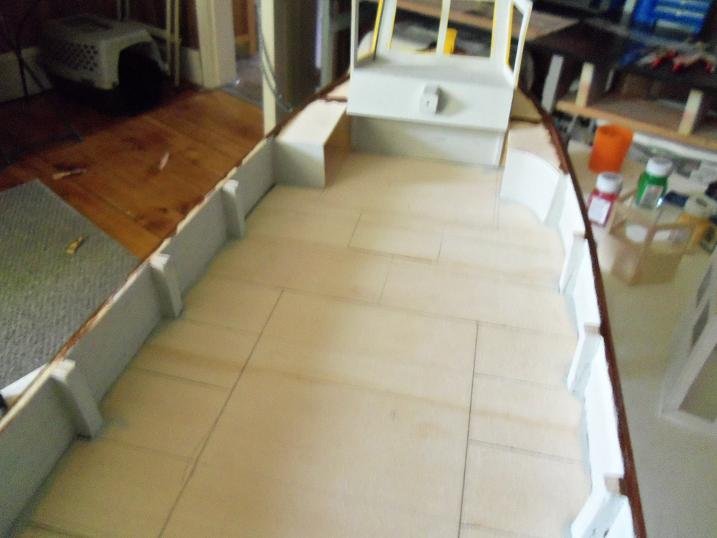
8-3-2012 the dance floor was totally bordered off by this time. I was also think about what I was going to plank the pilot house floor with. the interior of the pilot house was also on my mind......I continued with making a small table. on the model, it took on the shape of an easel, more than a table. the engine companionway and the bottom part of the pilot house were painted in the light gray. the pilot house floor planking was done........ more work on the pilot house table / easel. more main deck planking.........around the pilot house and engine companionway.
-
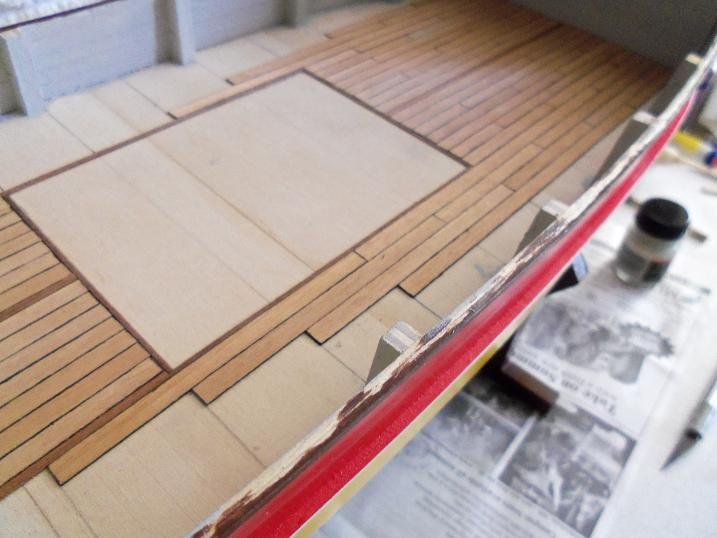
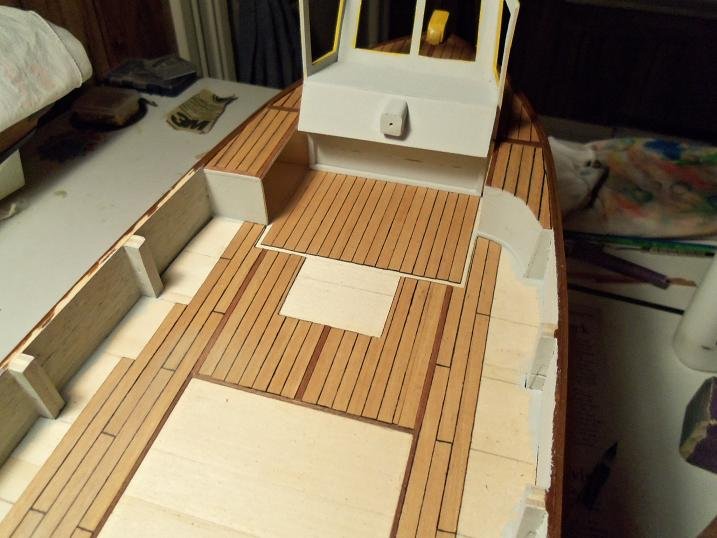
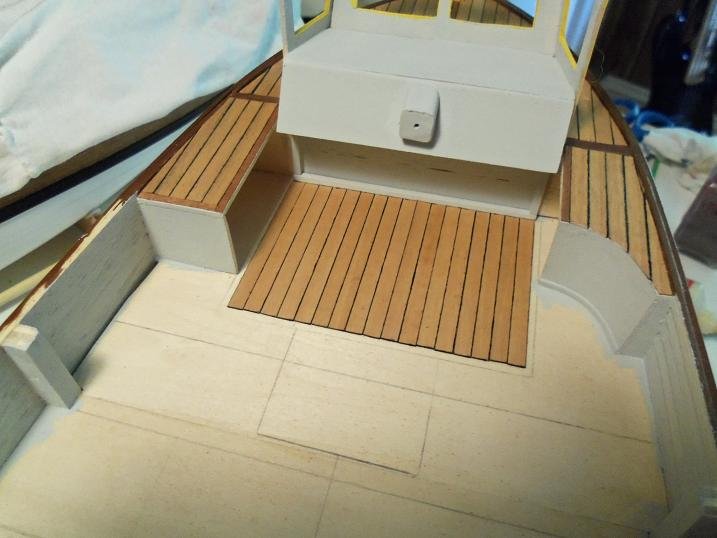
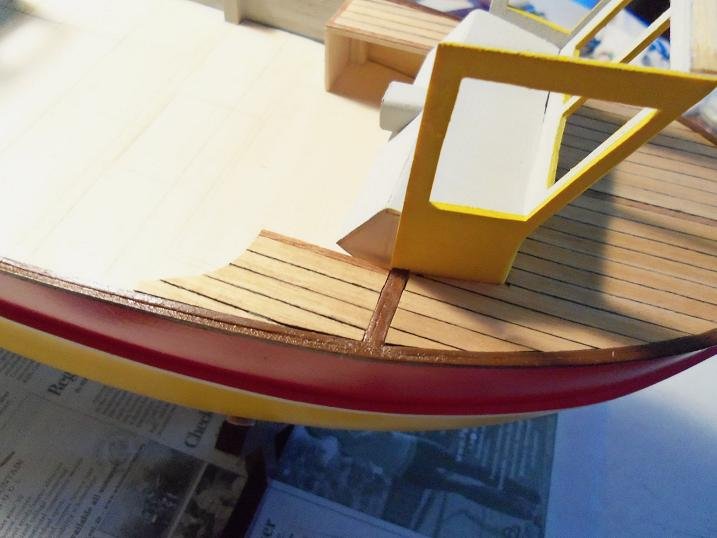
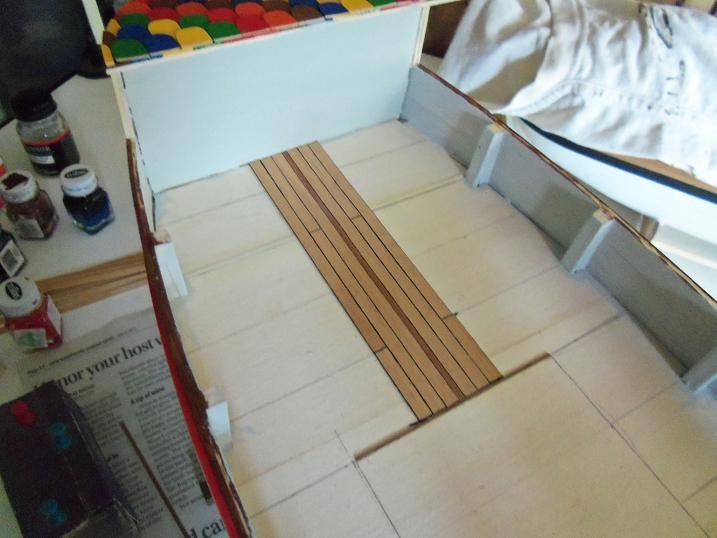
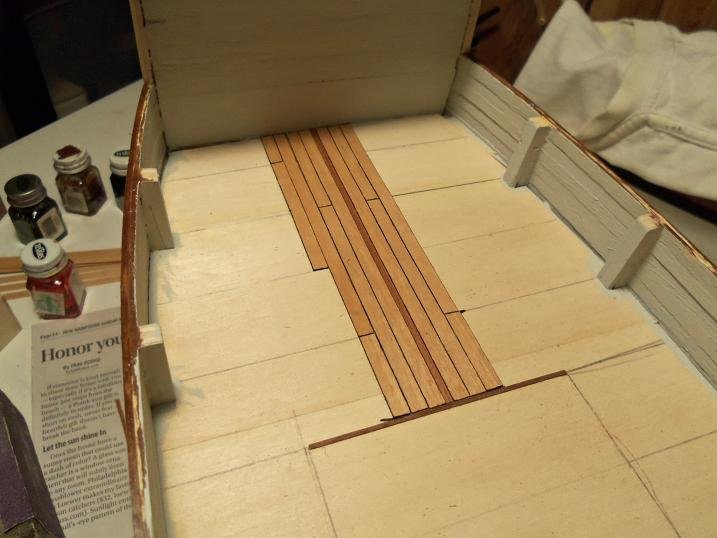
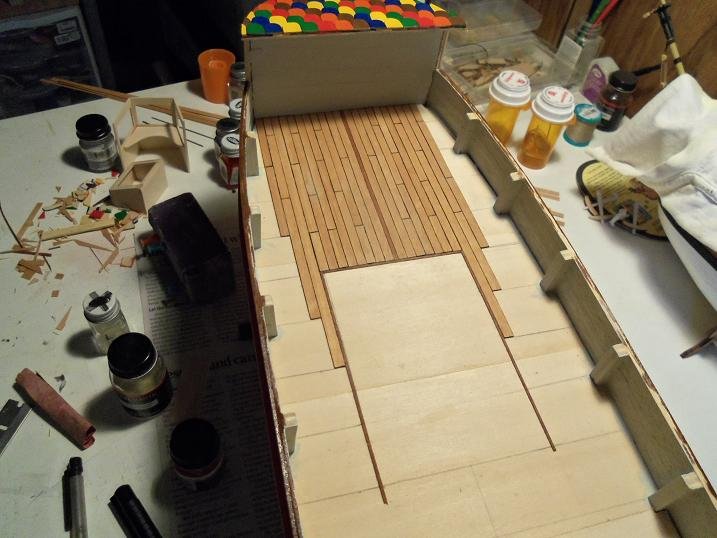
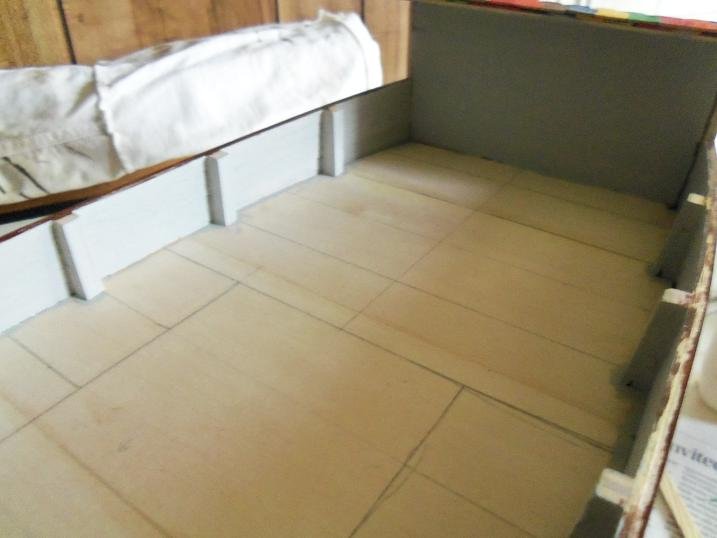
8-2-2012 the aft section of the pilot house was going through it's own changes as well the additions to the fore deck got some accents in mahogany then it was time for the main deck to get planked. the center mahogany strip continued there as well. as can be seen, the mahogany stripping bordered off the dance floor. the planking was finally reaching the pilot house........it stops leaving the structures a well to fit into.
-
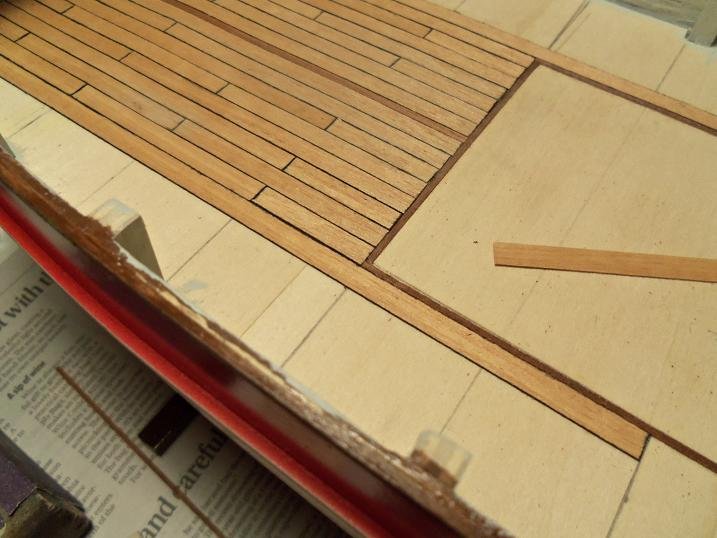
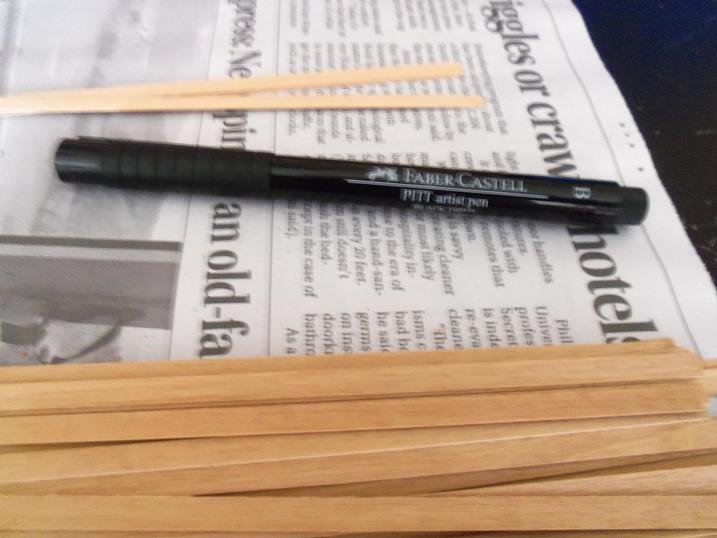
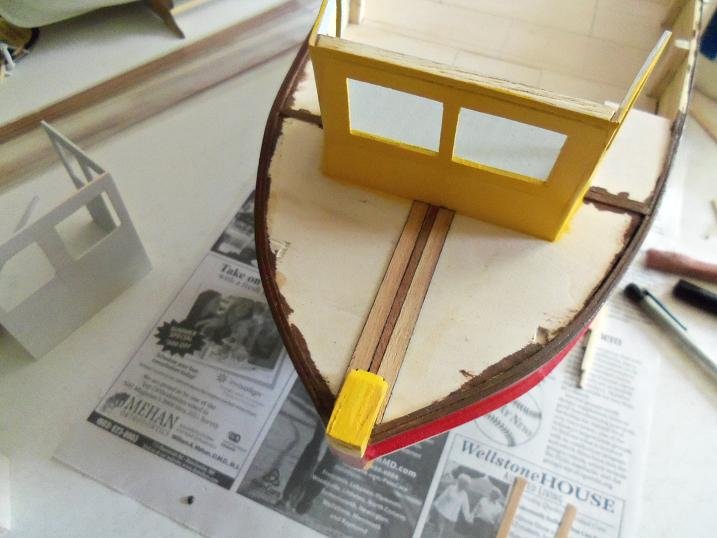
Ibanez SR...is that a guitar? I gotta get back to practicing one of these days modeling sucks up all my free time, since I left the band.......or did the band leave me.....I don't recall it was fun while it lasted. thanks for all the kind comments folks....there is so much more to come. it's hard to recall all that went into this project.......glad I have the pictures to show. I store all my picture on memory sticks......even if the model hits the end of it's life expectancy, I still have something to show that.....yes, I built it thanks as well for all the likes on with the planking........ 8-1-2012 the fore deck was the first area to be planked. as was seem earlier, I was experimenting with Annegre with a mahogany center strip. I used the archive pen to simulate the calking. the cap rail was painted a chocolate brown

-
I've heard of them........but I haven't book marked anything. I did do some looking......here is an article written by my friend Clare {catopower} https://shipmodeler.wordpress.com/tag/nordic-class-boats/ ....and here is a good place to get them http://www.agesofsail.com/ecommerce/nordic-class-boats.html
-
when you write your explanation.......hit enter......then picture......then enter again........more explanation......hit enter.......then picture.......hit enter....and so on. you'll get the hang of it. I felt my ear burning..........someone was talking about me in reality.......your PM alerted me that something was going on it's about time you started this project! I'm proud of you! as we discussed........there are plenty of folks that will help you fill in the blanks have fun and get this darn ball rolling! I can't wait to see what you do with this project
-
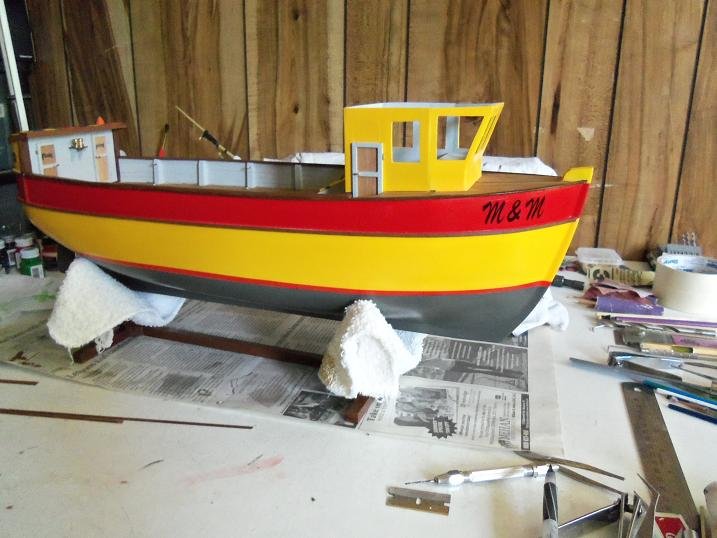
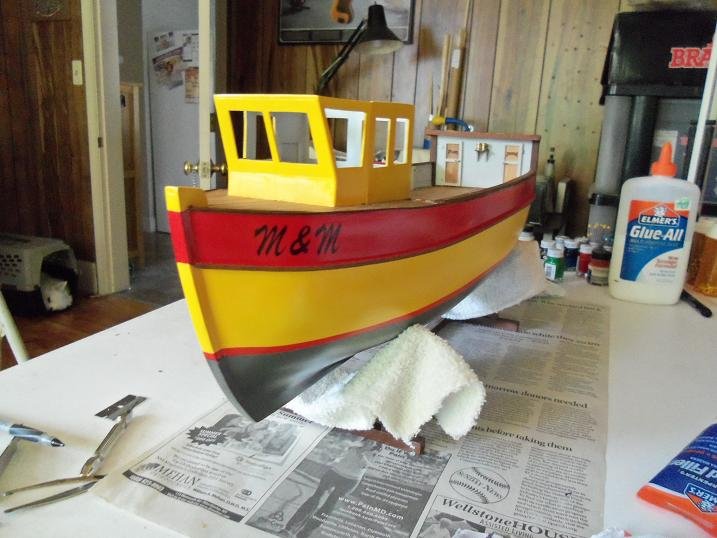
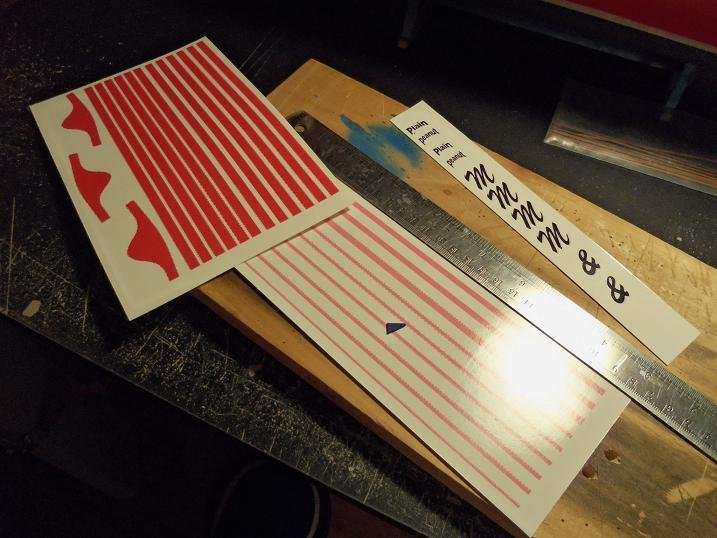
I did.......I missed 7-28 anyway, I made up some decal stripes {these are actually train decals} I don't think I used the pink-ish looking ones. here is how all the decal work was done. we'll be in August next.......and this time.......really planking the deck
-
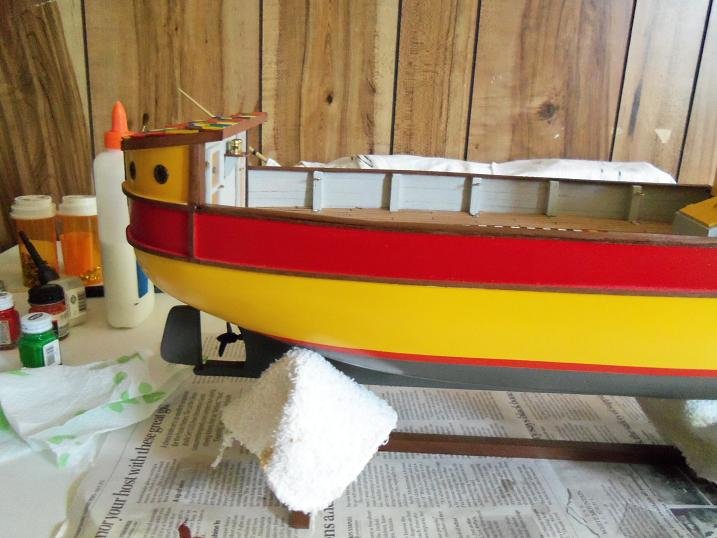
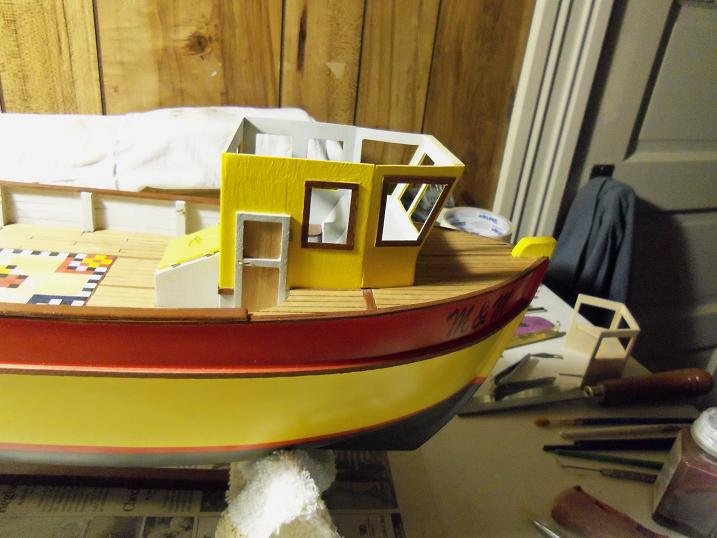
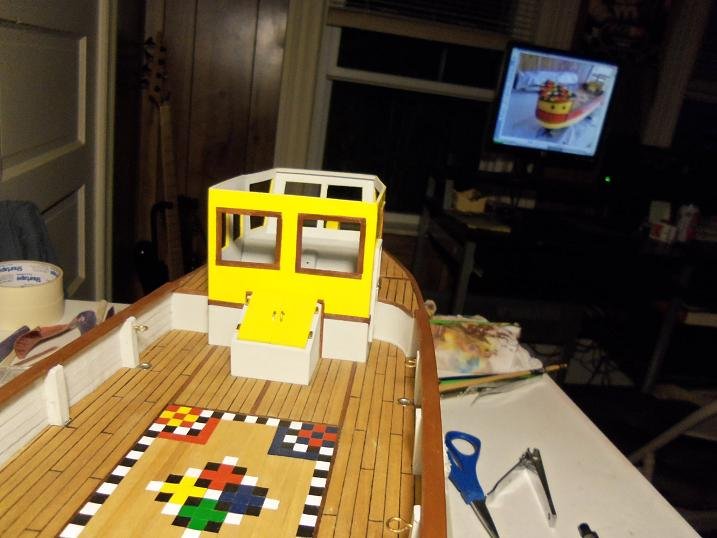
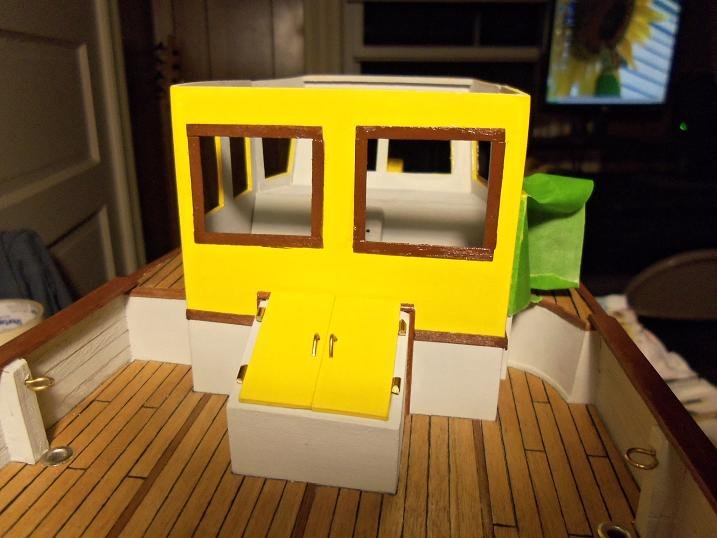
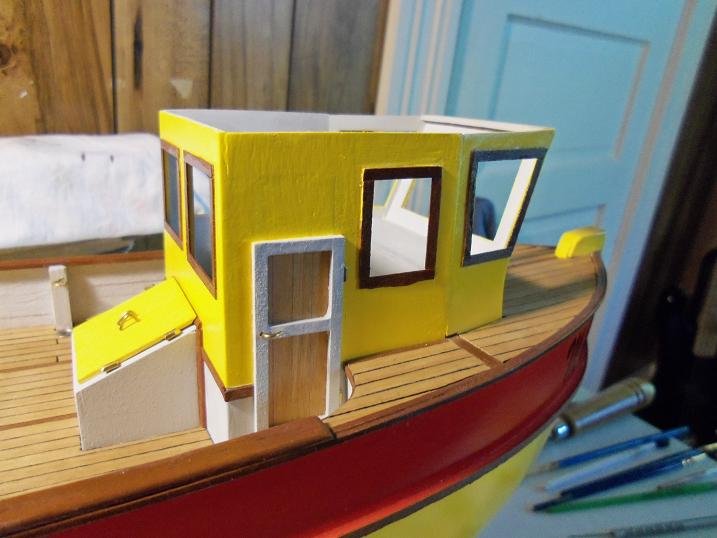
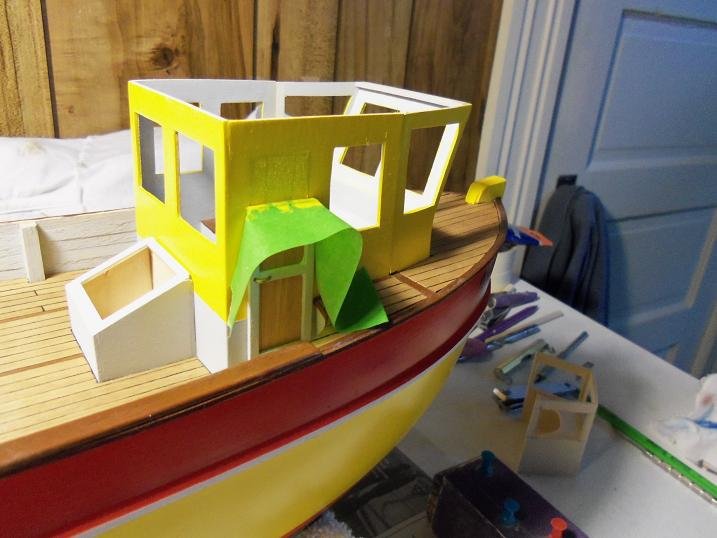
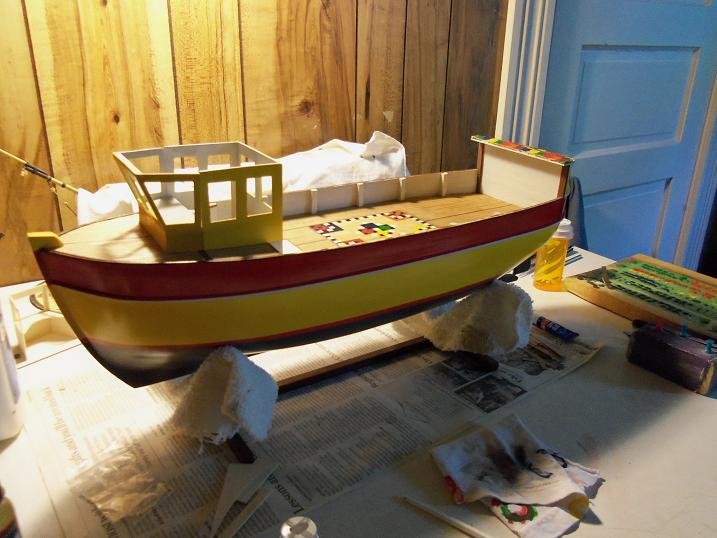
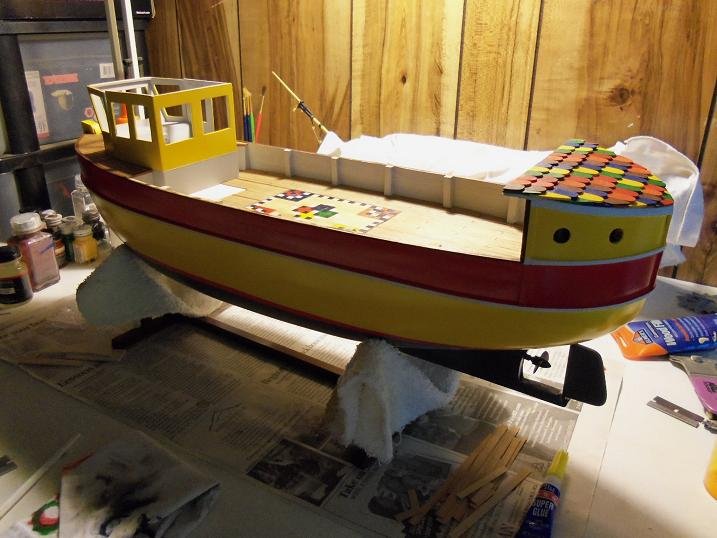
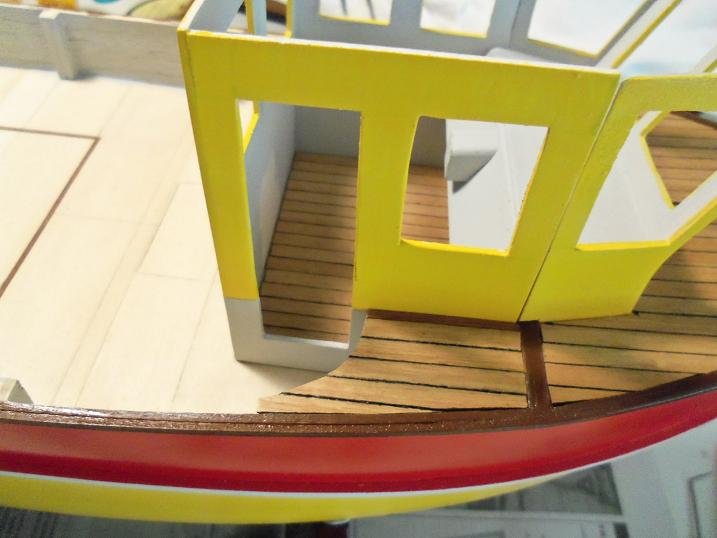
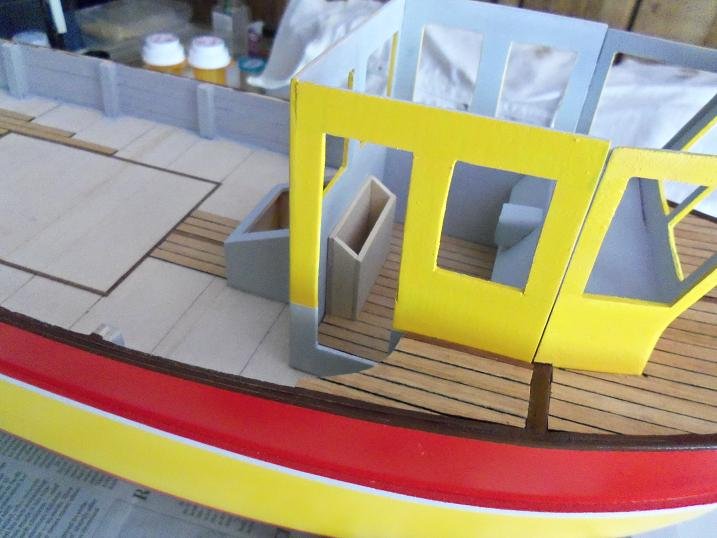
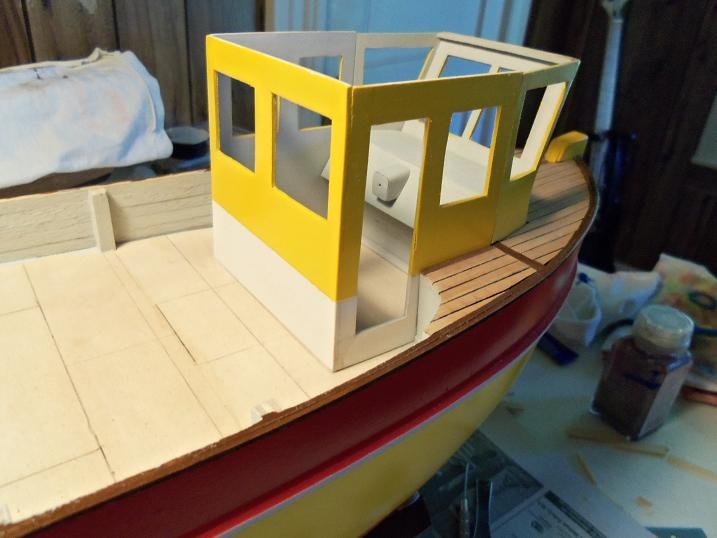
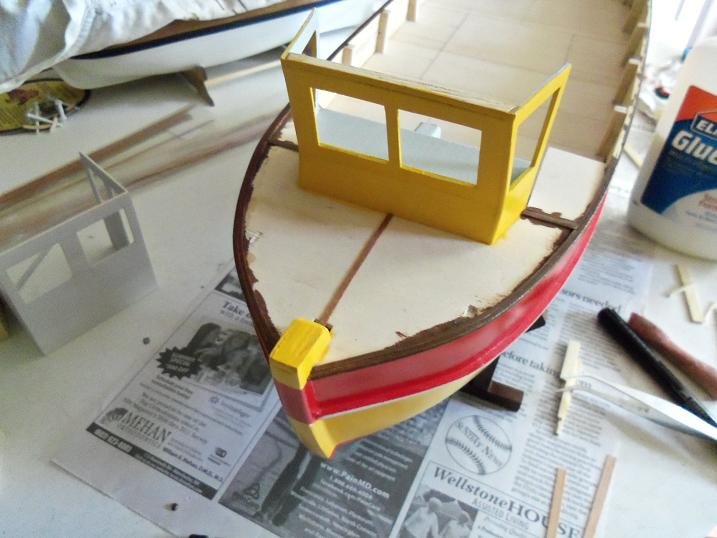
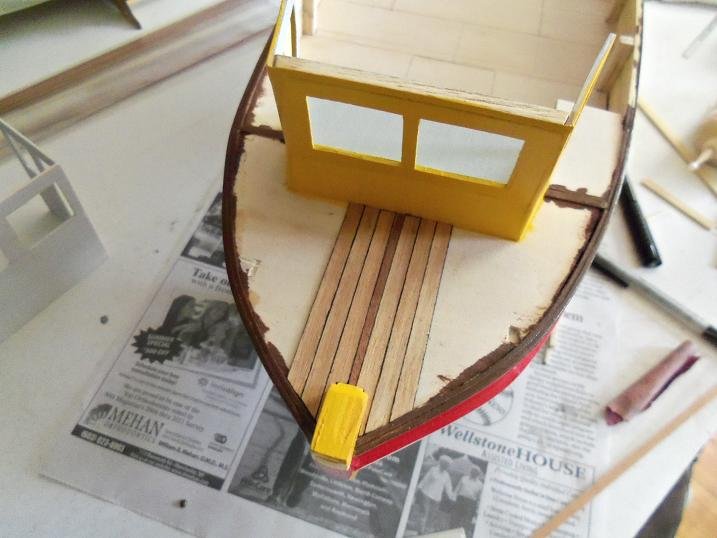
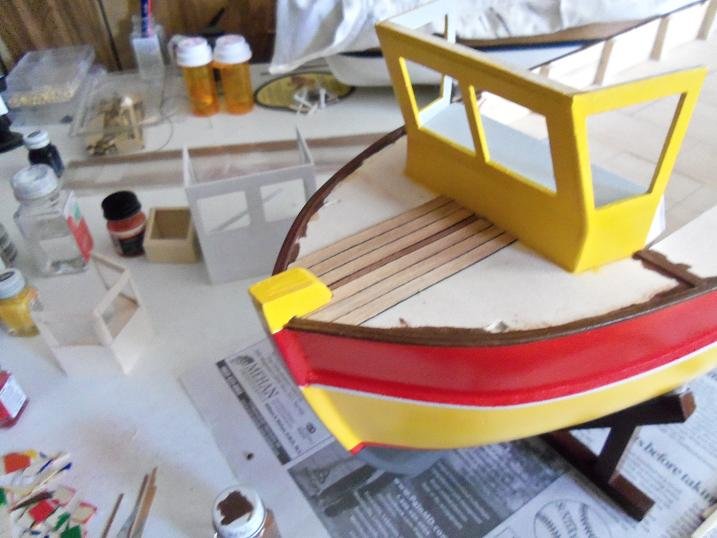
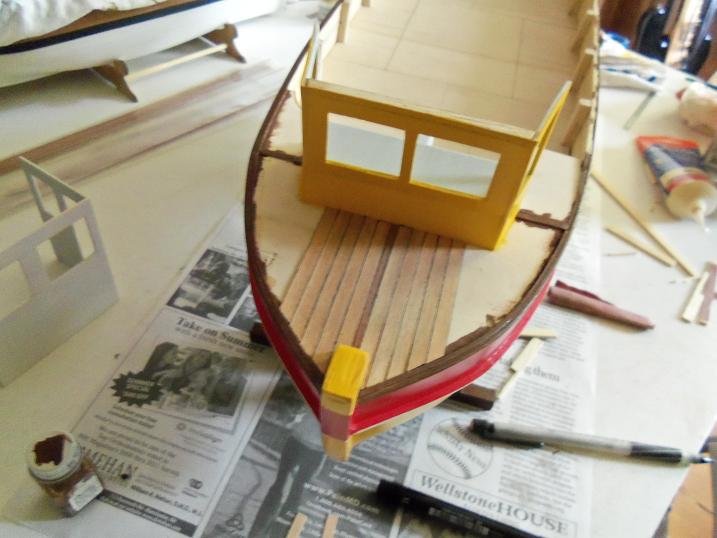
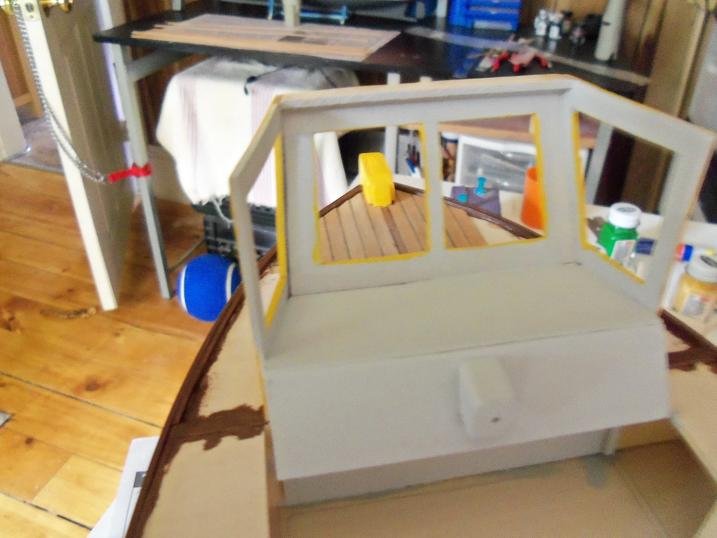
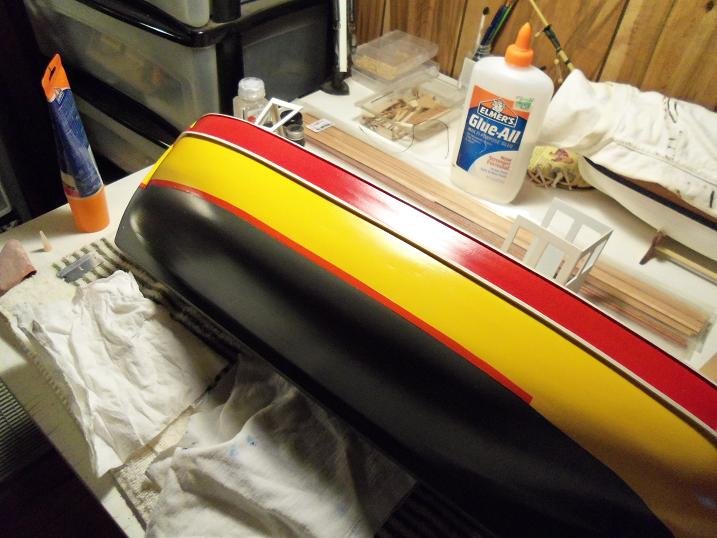
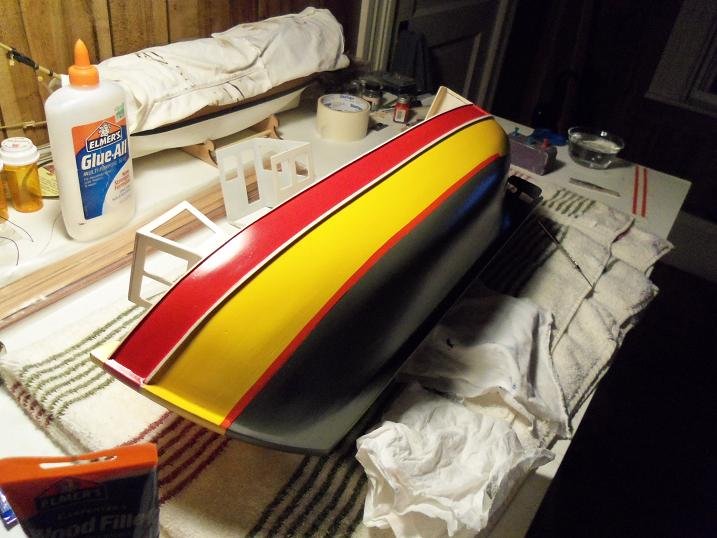
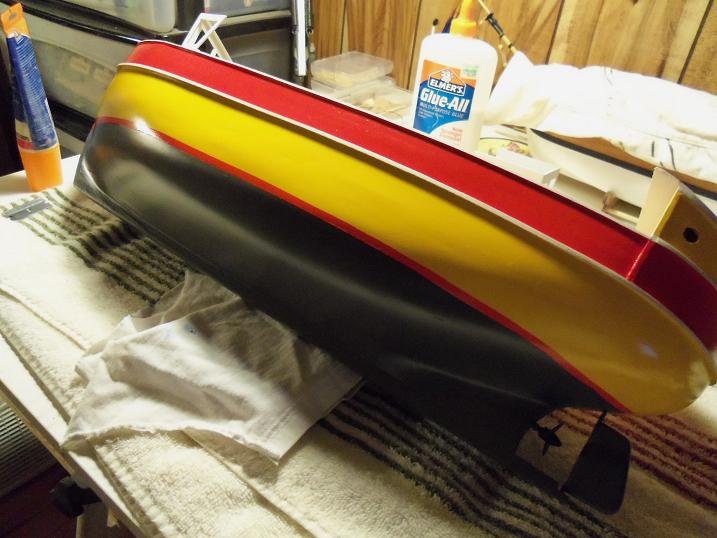
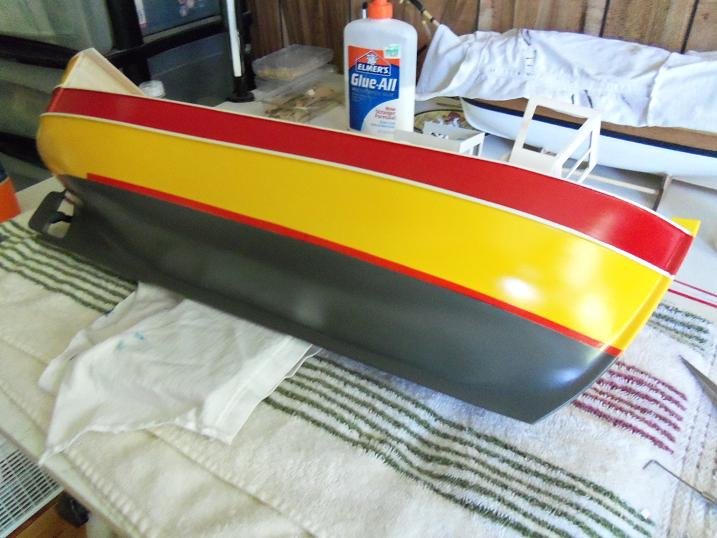
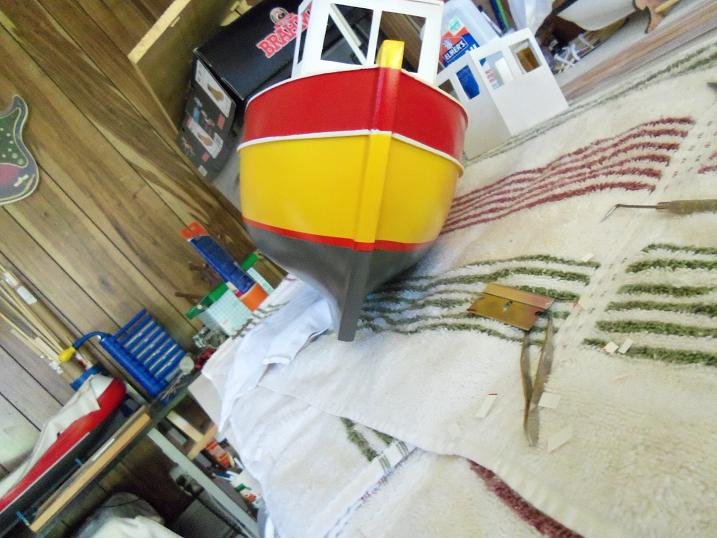
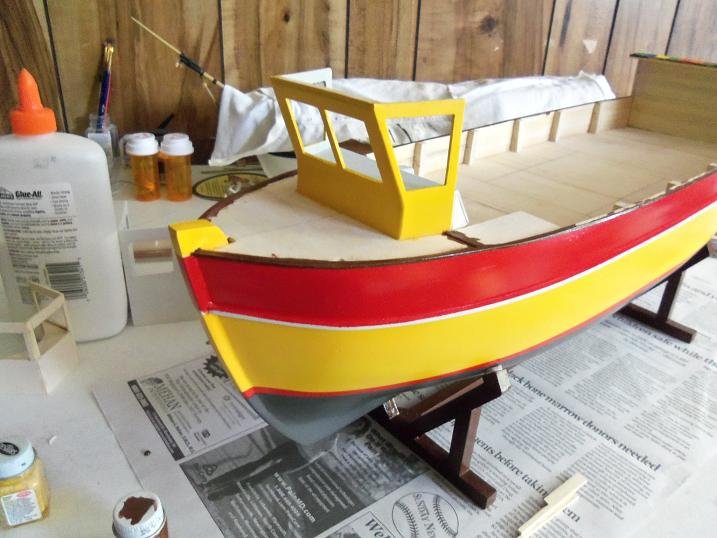
7-31-2012 this wasn't a big session........not like the others {I was a madman......} there was some fitting and painting. I made the molding to hide those gaps along the edges of the aft cabin. the exterior of the pilot house got a coat of paint... and the inner bulwarks and pilot house interior got painted too. darn it.......I think I missed a step! the strip around the waterline!....OK....where is it?
-
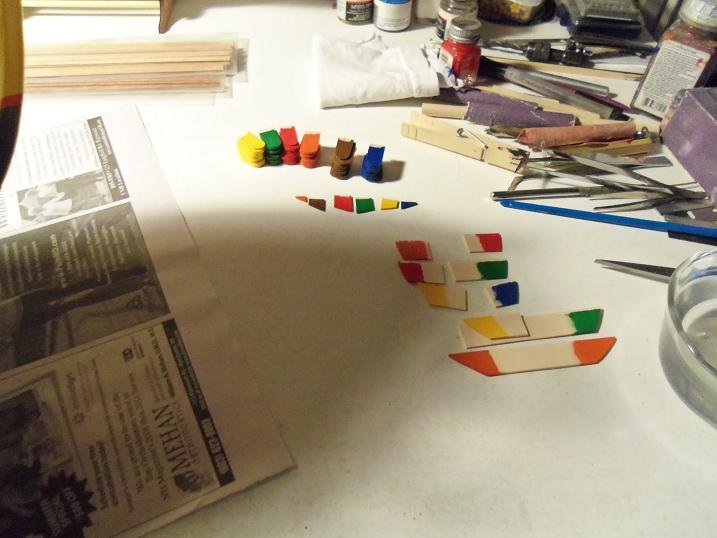
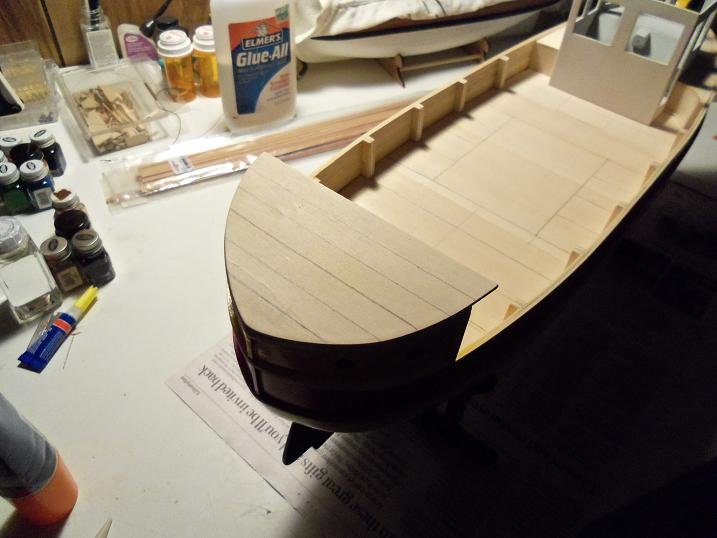
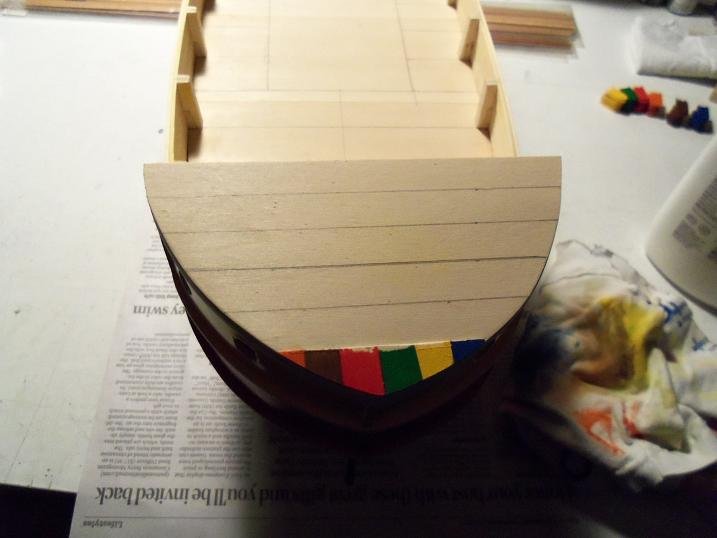
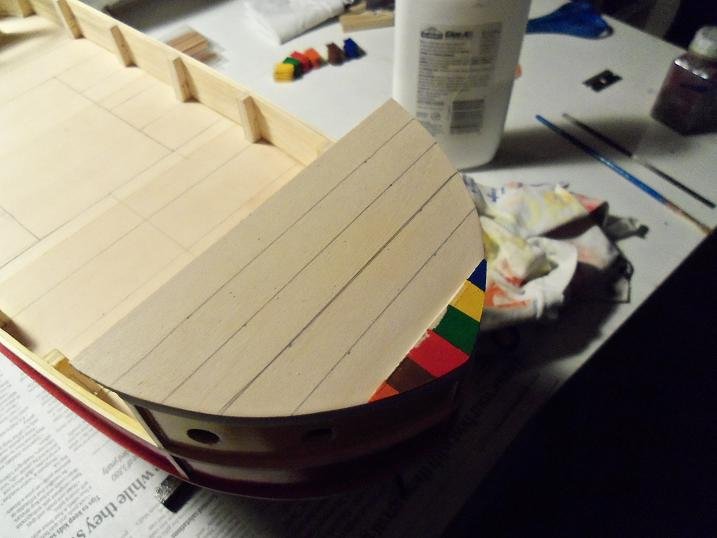
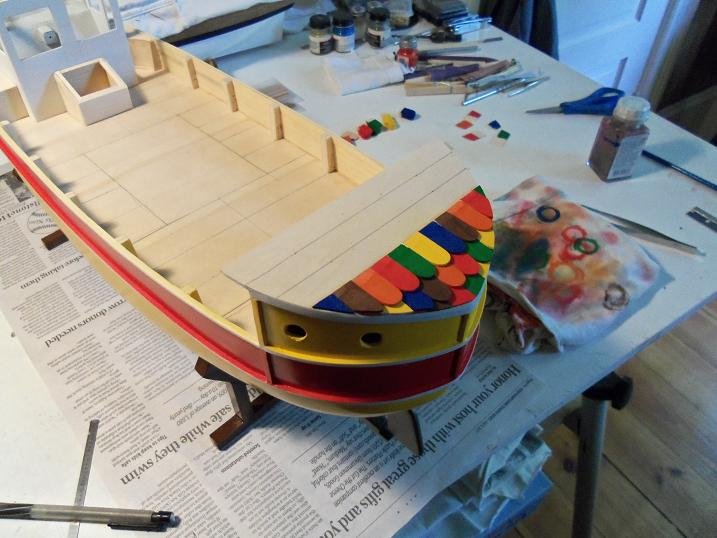
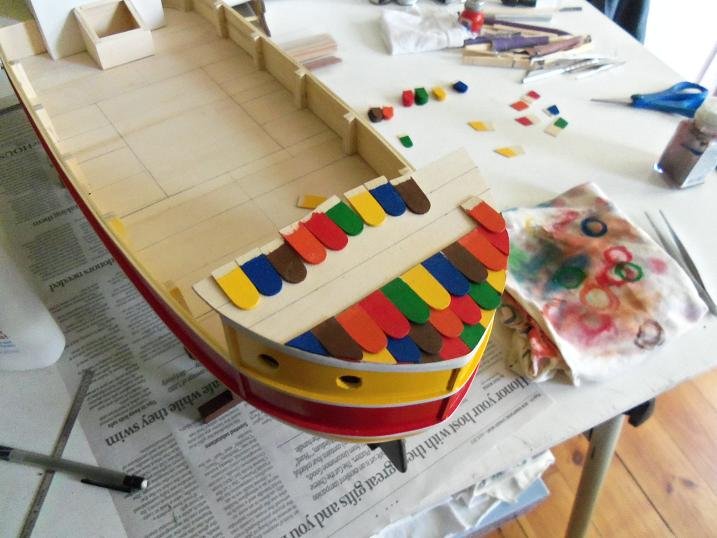
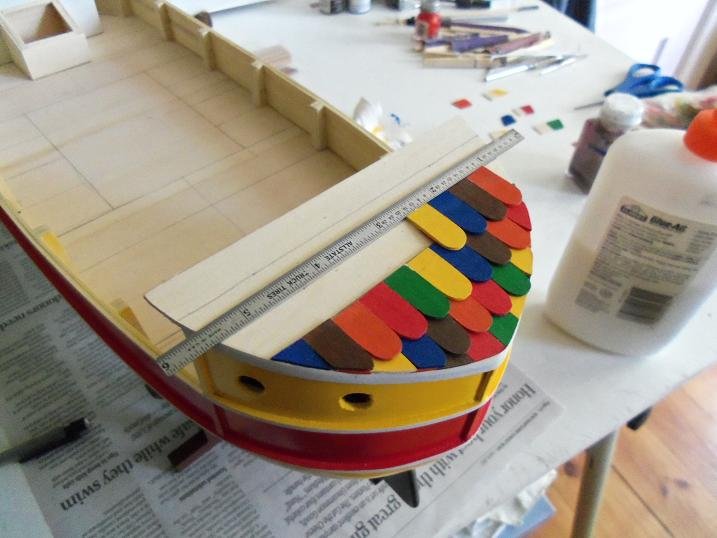
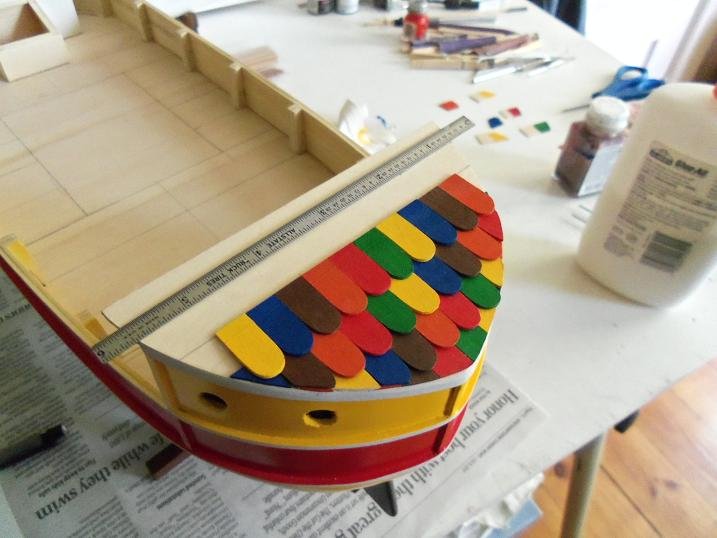
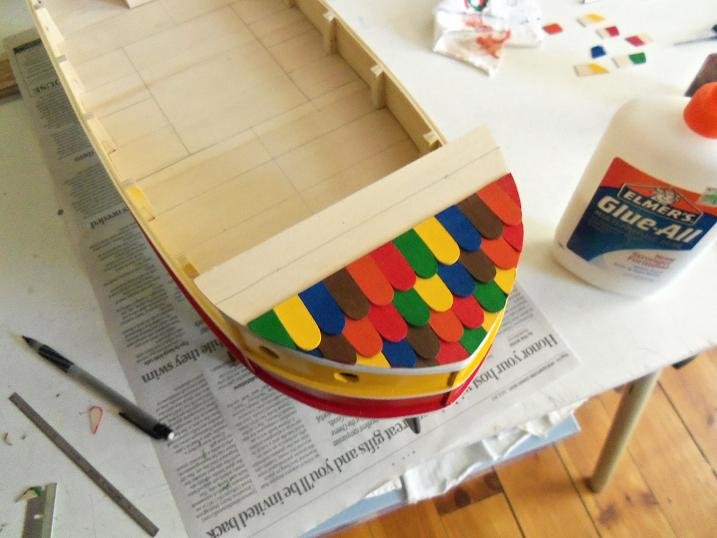
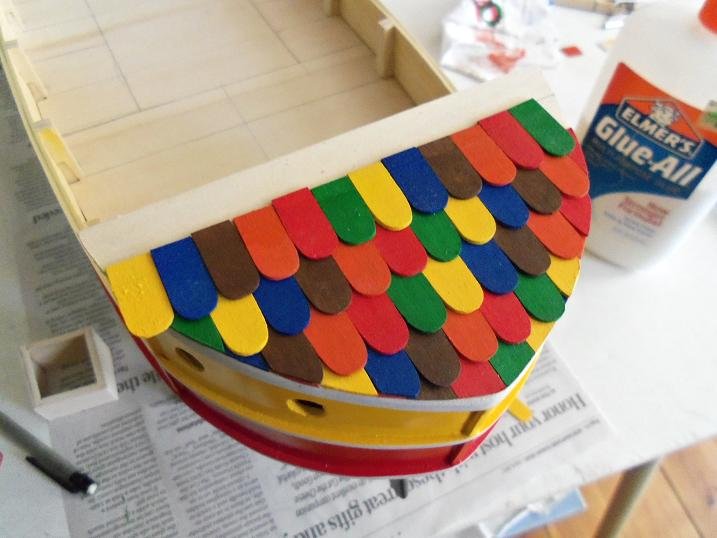
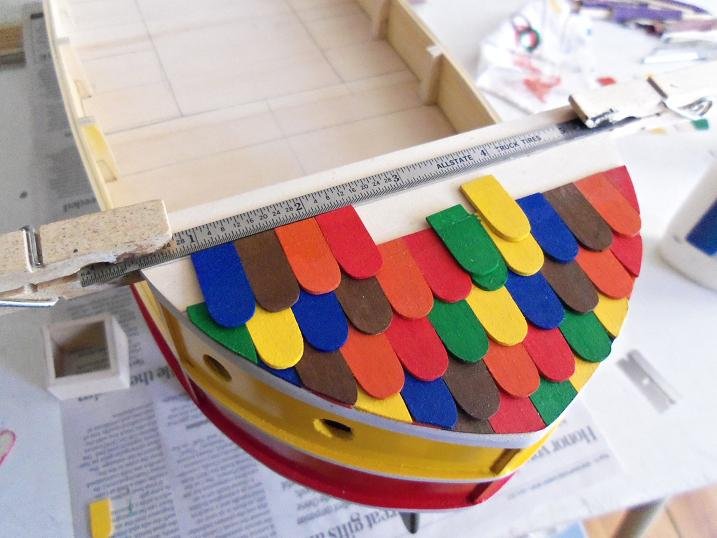
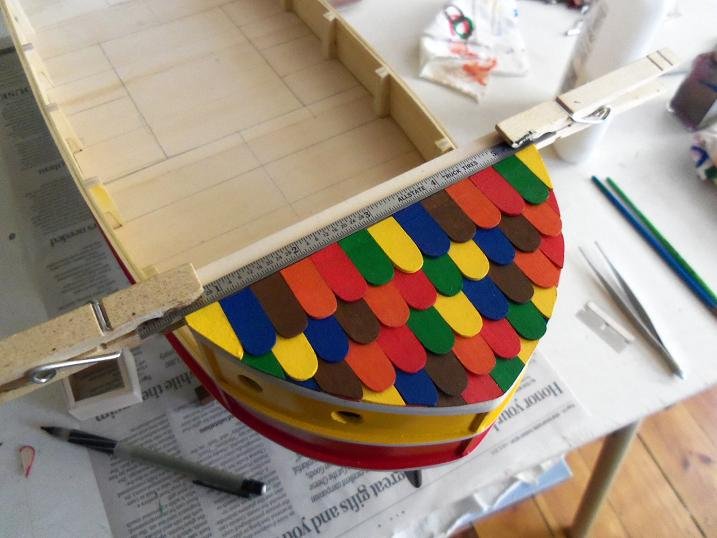
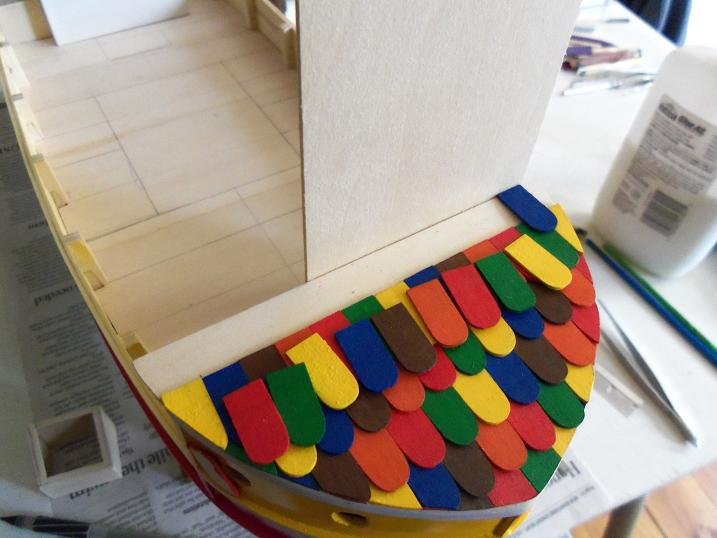
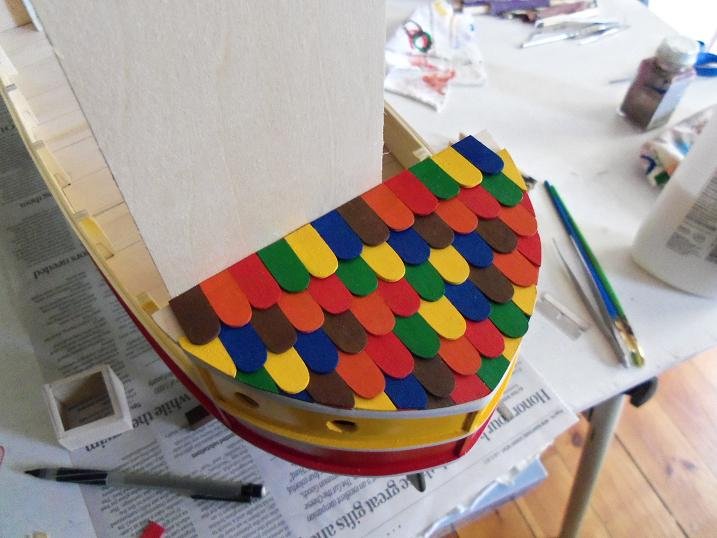
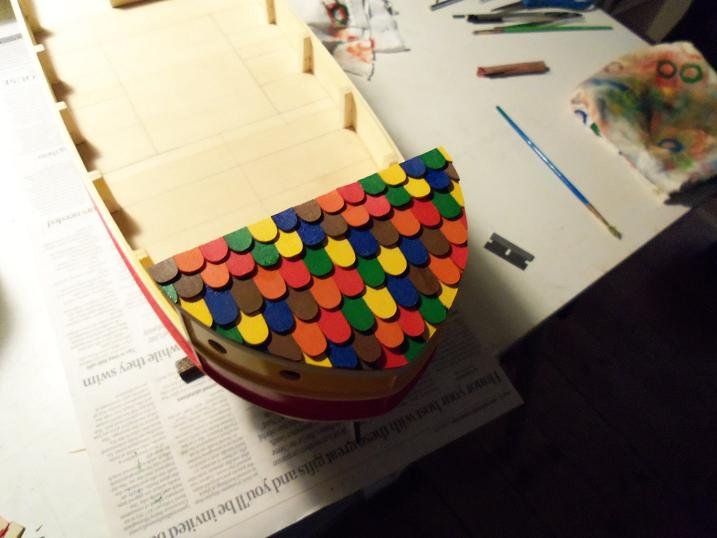
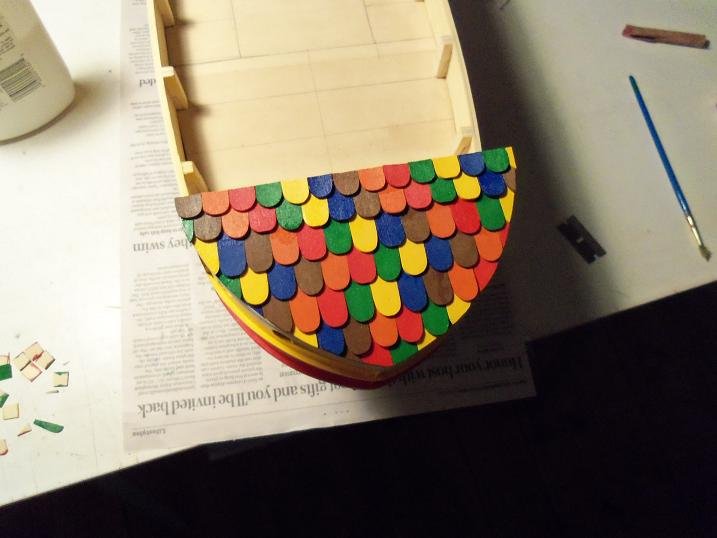
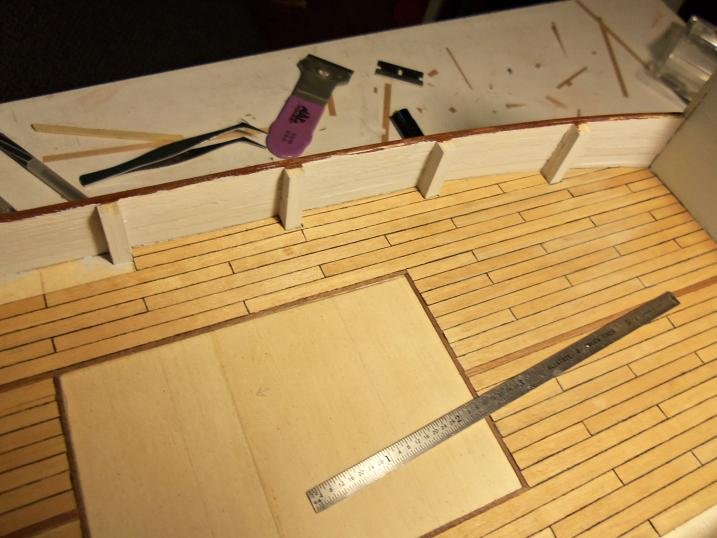
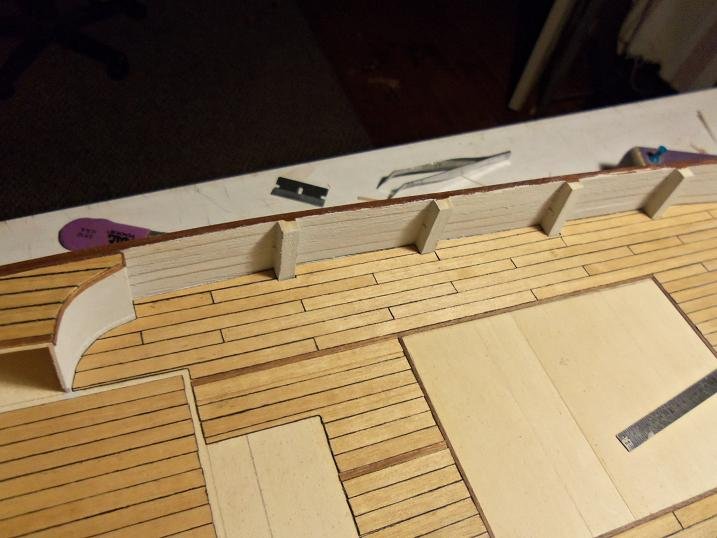
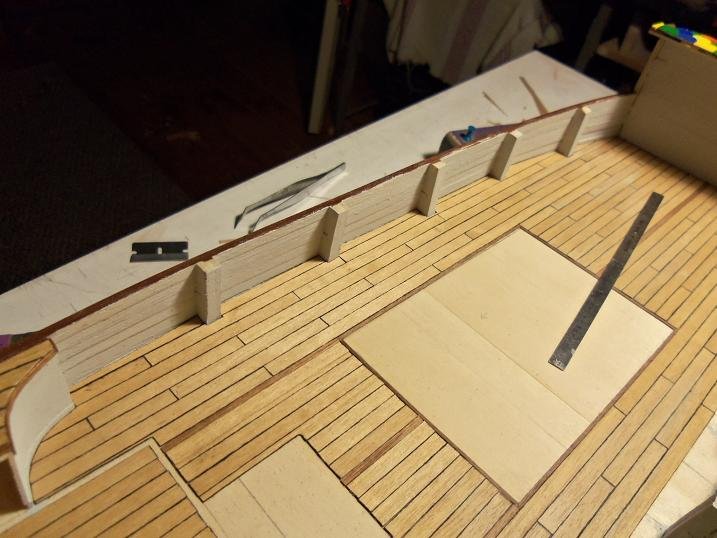
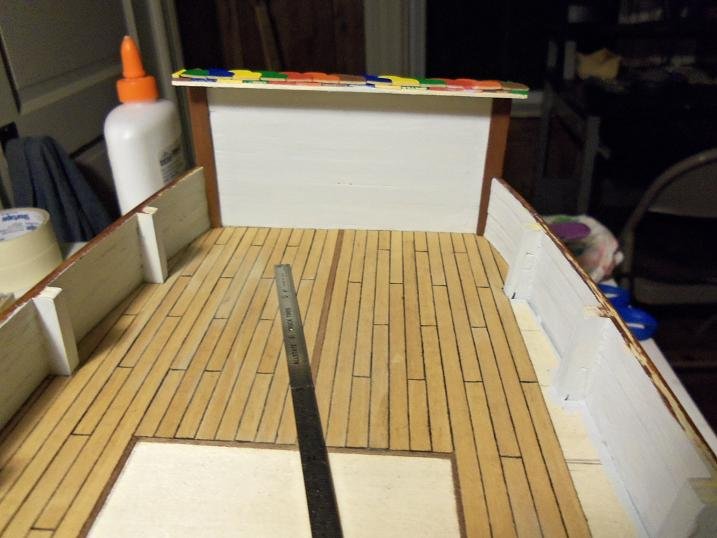
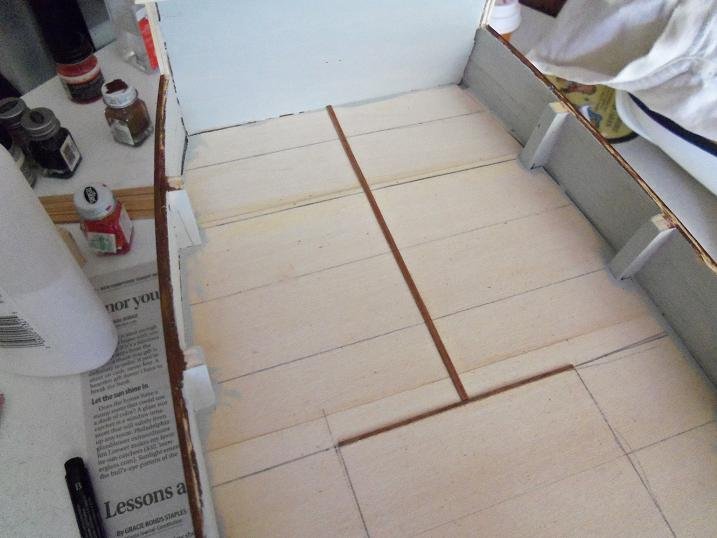
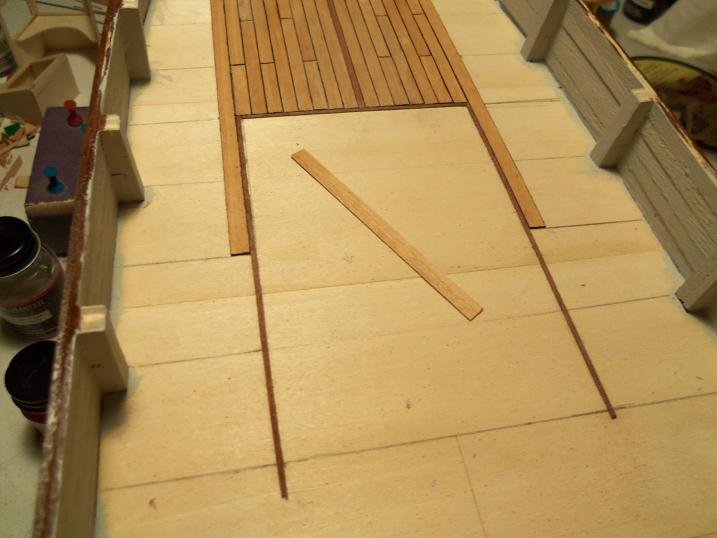
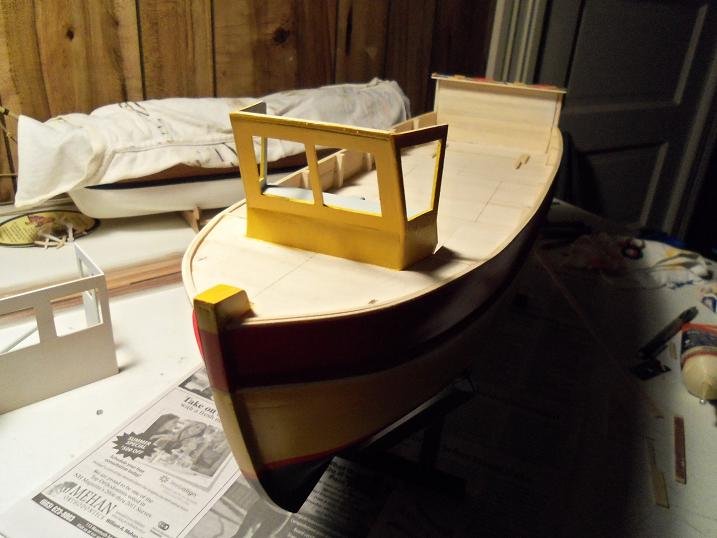
I guess I spoke too soon about the pages all these pictures are in about 54 folders....roughly 54 sessions working on the model. I wonder how many pages it will take to tell the tale 7-30-2012 those pieces of paper were used to form these singles for the edges. the fillers were stacked up according to color. all lined and ready to go! the edge will have a length of drip molding across the front. {I guess I was dry fitting the deck planking?!?!?!}