


popeye the sailor
-
Posts
16,007 -
Joined
-
Last visited
Content Type
Profiles
Forums
Gallery
Events
Everything posted by popeye the sailor
-
 looks really nice
 -
really nice job with fitting out the deck.......it's one of my more enjoyable parts of any build
-
a huge thanks for all the kind comments and the likes I'm sure I missed a couple of things, but I feel that I did succeed in trying to put some functionality into the model. I had a good time finding out how things worked.........thanks to those who helped out with that. it also helps to be in the company of so many like minded folks. I learn something new every day
- 378 replies
-
- 5
-

-
- t78 norden
- billing boats
- (and 1 more)
-
look'in good Doug.......what type of wood is the second planking?
-
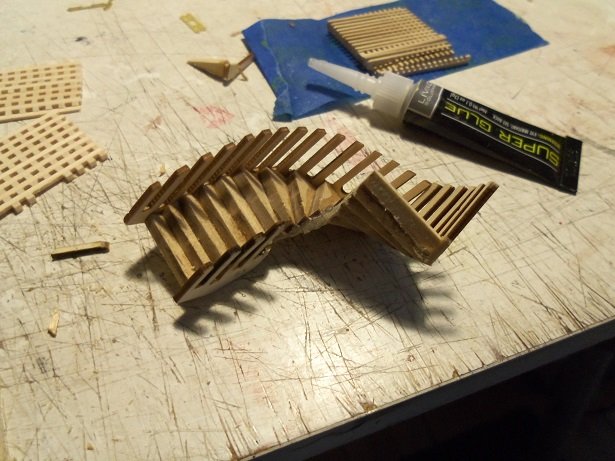
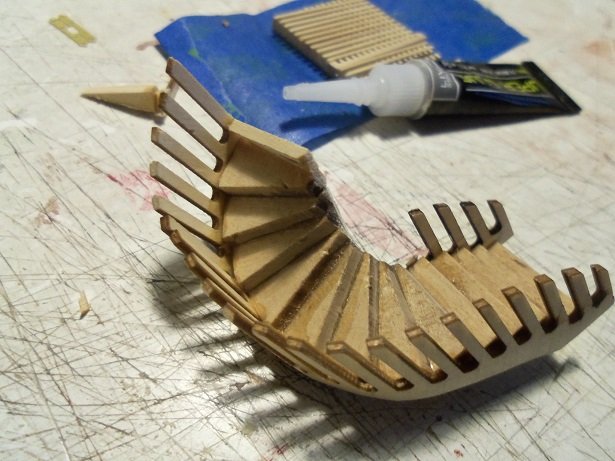
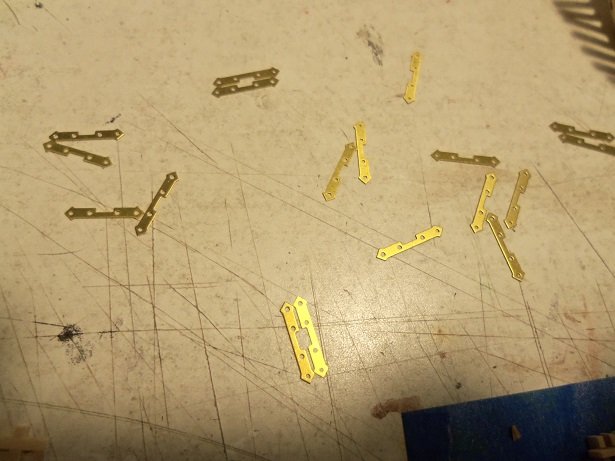
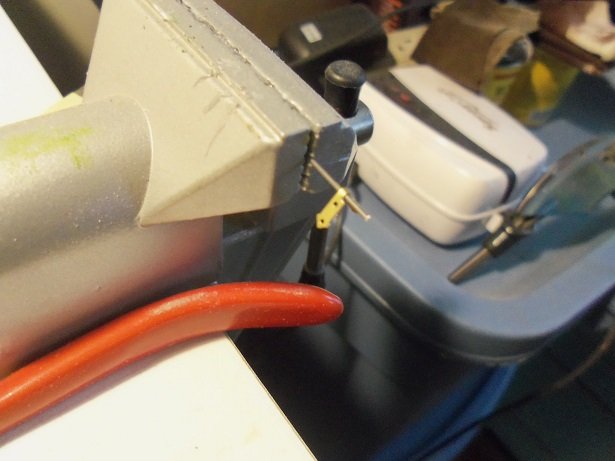
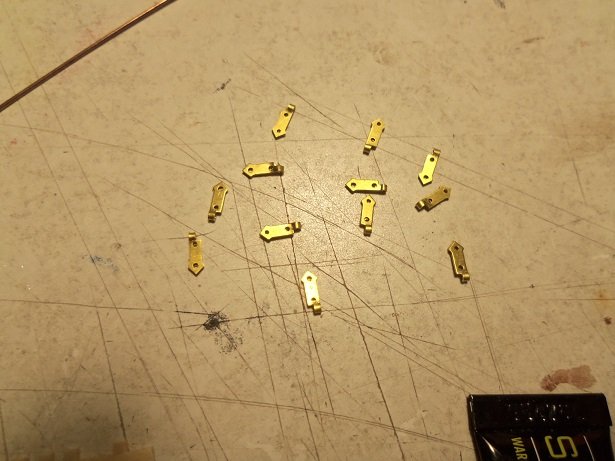
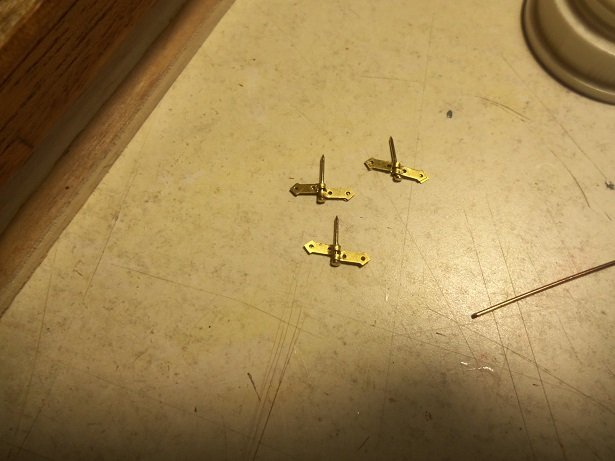
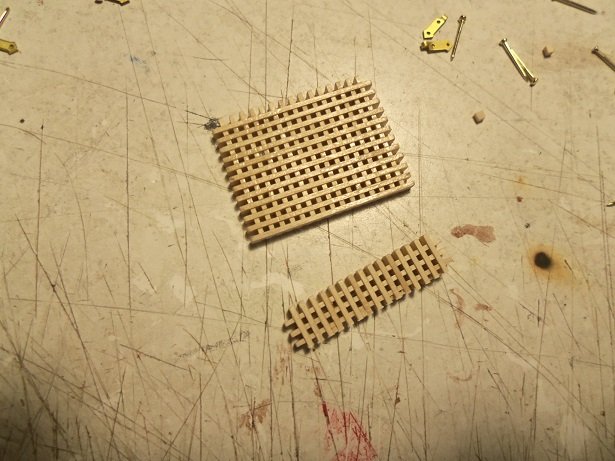
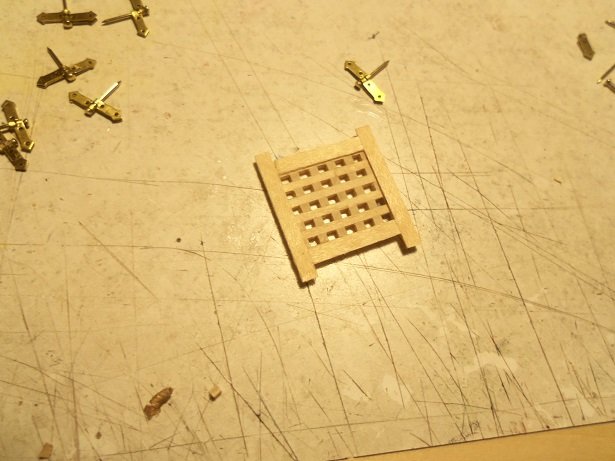
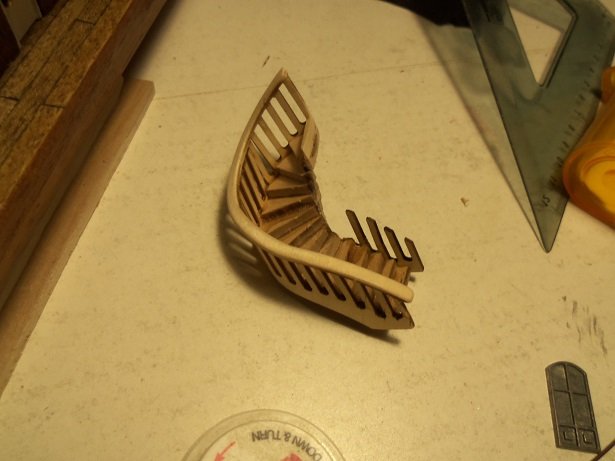
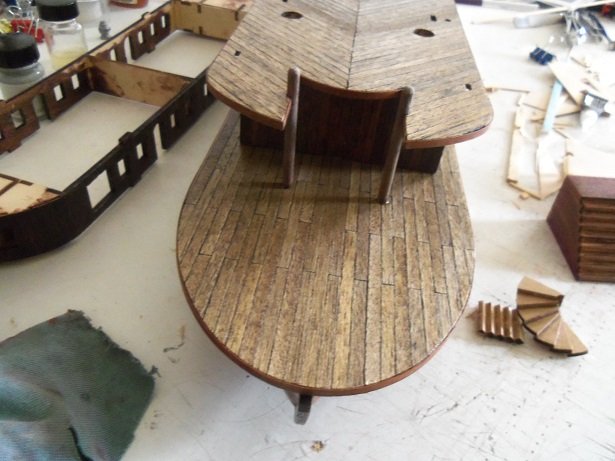
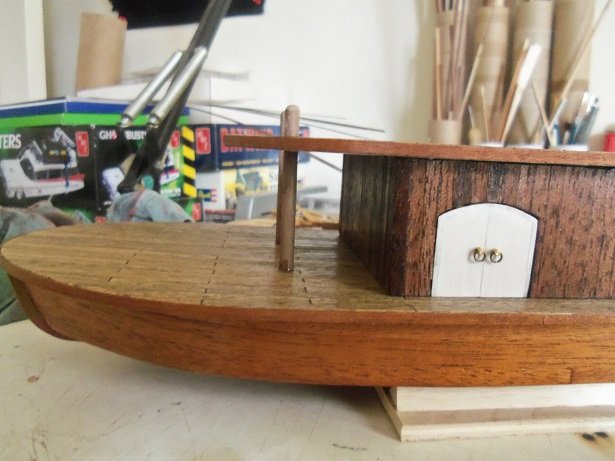
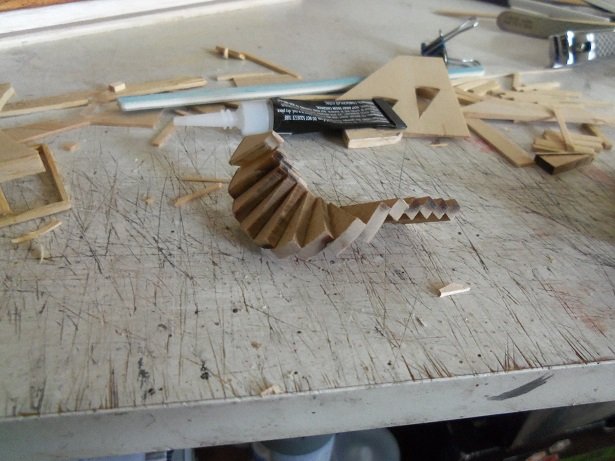
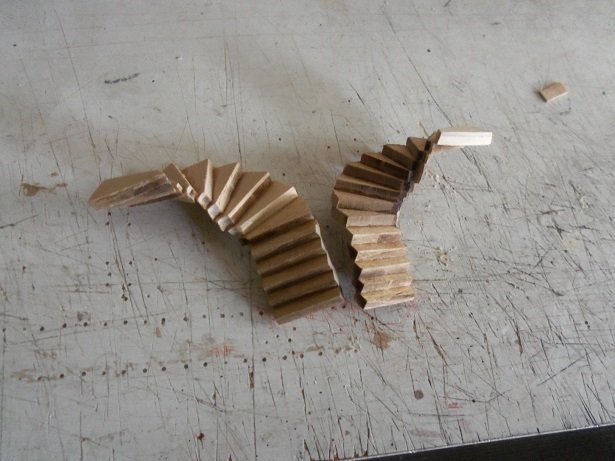
....more on my unconventional way to make spiral stair cases. the top step I added wasn't the best thing to do.......I ended cutting off most of it. having the step level with the second level, pushed the stair case away from the post. tough to get a step up in this hobby.......I'll never get a raise this way .....just thought I'd pun it up a little*** I have a gap at the bottom........do I dare?!?!?! why not! there's nothing like a happy landing while I play with this, I'll show you something else......the hinges for the first level doors seems to be an oddity too. I've seen them done in different ways......here's what I've derived from them. the way that they are made, suggests that they be folded over......the center part is to be wrapped around whatever is to be used as a hinge pin. this makes the hinges double thick, something I think is kinda weird. I first thought about folding them over, and then snip off the double part, making the hinge thin and not as bulky. it can be seen how the center part is thinned down......the holes are supposed to match the opposite part. I stuck a piece of that steel rod in my vise, in order to accomplish the bending process. but beware.........if you let go at an inopportune time, the part gets catapulted into god knows where! gentle pressure.....this way, it falls to the floor {this is the road I took}. just as much as a paint to locate them, even though I pushed the mat under the table {it suppresses bounce}. at this point, they are crimped with the needle nose pliers. the first couple, the holes didn't line up........this was corrected by inserting a pin through the outer holes, acting as a guide. it didn't take long to bend them all......I found that I have two extra pieces......not a boon bonanza, but if one is messed up, there is a replacement. see what I mean by them looking thick this would have been the best time to trim them, but I started to assemble them before I realized it. maybe later. this is what they will look like.......I will use CA when I get them set up. I'll chase out the holes with a drill....then drill them again when they are in place on the model. the brads are 10 mm, I'm guessing.........I should use the ones I got from Billing's {they might be a tad thicker}. I'll use 7 mm when I fill the holes. I also began plotting what to do about the metal doors and windows for the second level.......gonna scratch the doors from wood, and make frames for the windows. the first holes to fill on the second level will be gratings {on both sides}. assembling the supplied grating from the kit is a no go......the darn thing looks too big. holy visibility batman! yea.....not my cup of sassafras tea. I got out the grating kit I got from model shipways........had this darn thing for a while now.....I'll never order from the place I got it from again! >thump!< bad customer service.........>thump!<.....bad!.....BAD!!!.....>thump!<.....>thump!< it would have been a good fit.......except that there wasn't enough to make both of them I then though of the grate material I made for the United States build {look into that build to see how I made them......insanity at it's best}. "there, there....little fella.......I don't like to use helmets either ." so..........after cutting one of them to size {since I didn't have the sense to snap a picture of them}, it was fitted into position. now.....I need to make a frame for it. rather than muck it up by combining stain and paint....I'll just use paint. .......once I trim it up, of course then I can make the other side. I also set up another bow fender in the CORRECT template, {this time}......I'll do the trim and fit today. the last thing I did in this session, was to add the outer railing to the stairs I was working on. I figured it might safeguard the spindles from breakage.......still gotta cement one of them back on. I left it off for fitting purposes. with a little sanding, it doesn't look half bad. staining is out due to glue blotches.........still gonna be a pain to paint.


-
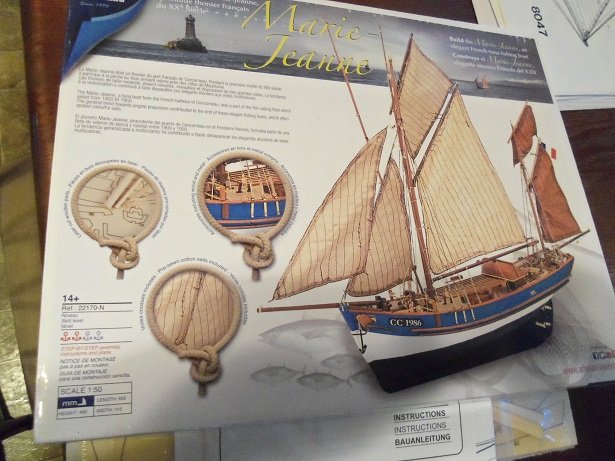
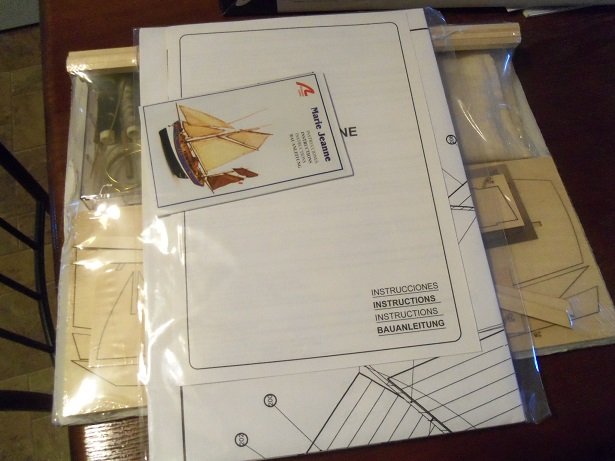
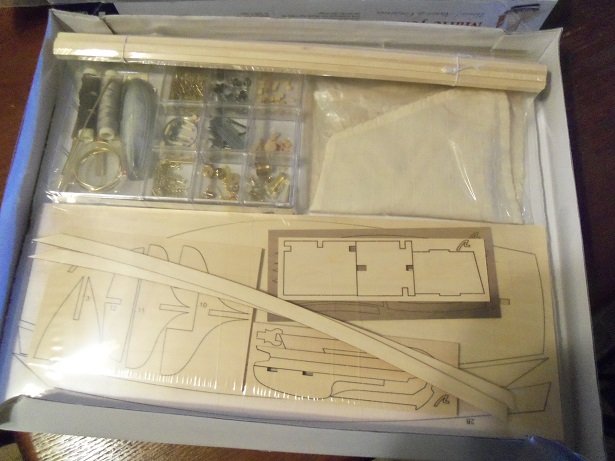
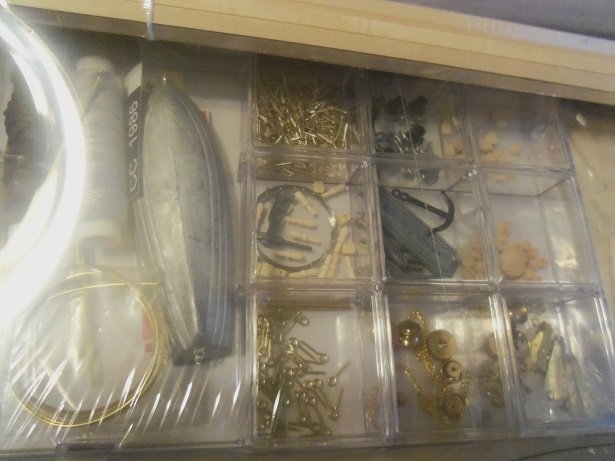
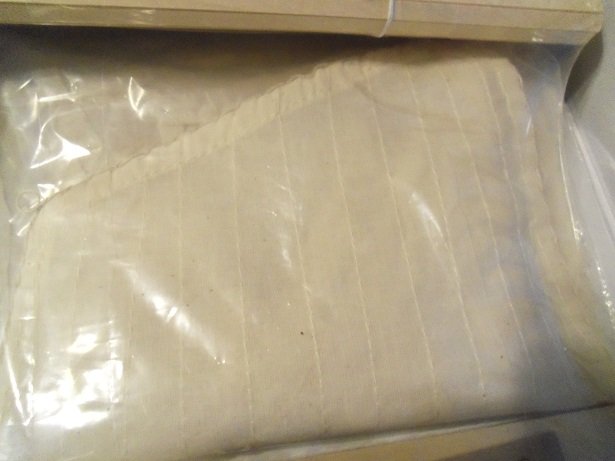
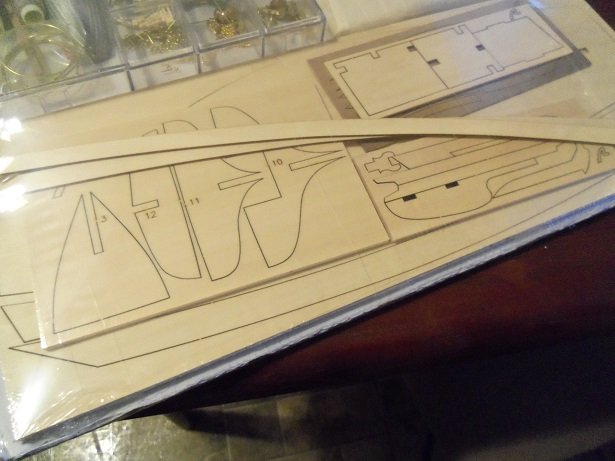
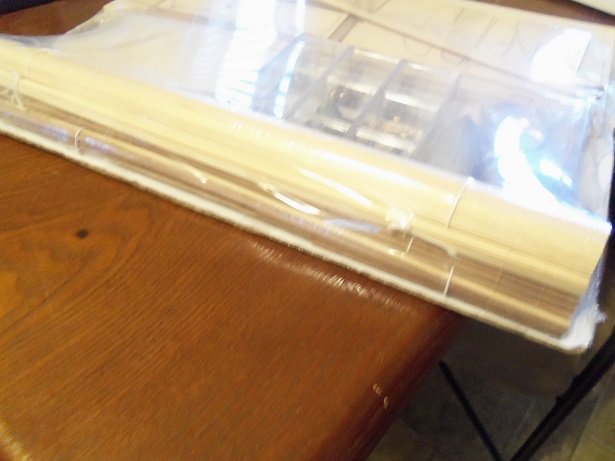
kind of a tough question........do you have a kit preference? I'm a confirmed Billing's fan......I think the kit itself would be very nice, as I've found all their kits....but the instruction are a bit vague. having built so many of their kits, I've gotten used to deciphering them. the wood is usually pretty good, and likely comes with a roll of cloth to make the sails. not having bought the kit, I really can't give a good description of the contents. I have the A.L. kit of the Marie Jeanne.....one big plus I saw right away, is that the sails are pre-assembled. the instructions are colorful....they have a booklet, a written text set of instructions, and a large diagram sheet {or sheets}. I haven't taken them out of their sleeve yet {usually, I already have looked at them.} here is a small look see the finished model measures {in inches}: 22" long, 19 1/2" tall, and 6 1/4" wide. the instruction bundle. how it is packed......plastic sealed with a cardboard backing, in an effort to prevent warpage. the fittings.....not keen on the metal boat, but I'll cross that road when I get to it. the sails are pre-made......not sure if they are prepped in other ways......color and such, but they are set up with bolt ropes, pleated and sewn along the edges. the wood parts.....I haven't read the particulars, but it looks like basswood and plywood framing. the wood strips may be Sapeli, Lime, walnut, and perhaps Beech. I wish I had the Billing's kit as well.......seems bias to only show one kit. Billing would likely offer the same in regards to the framing, but for the wood strip, they may offer Obechi, Basswood, Annegre, and mahogany. this doesn't knock down the quality.......pre-staining is a good option here, and if you like to paint, exotic woods might not be a good choice {I know I wouldn't paint over these woods}. as with most kits, the use of plastic and metal parts is common in these kits. folks will sometimes replace these parts with similar parts that fit the model better. the ship's boat is a good example......there are plenty of places where a wooden replacement can be purchased. having taken a quick look at the fittings... there are a few thing I will be replacing. if this was the Billing's kit, I would likely see some things in it to replace as well. I'm willing to say that these are both nice kits...I'm sure that each will present their own challenges. whichever you decide to pull the trigger on, I hope you'll do a build log.......I would find it interesting to see....especially if you chose the Billing's kit. one kit may include detail that the other kit does not.......it makes a model more interesting when combining different aspects hope this helps you out......it's a tough decision
-
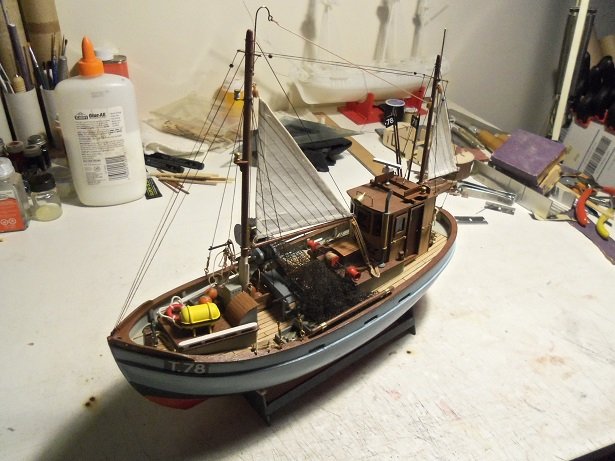
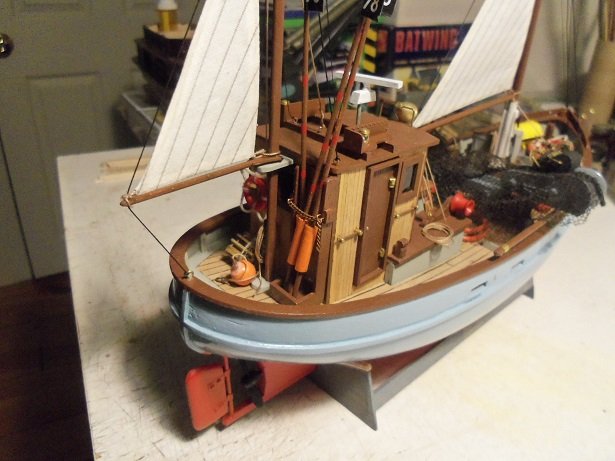
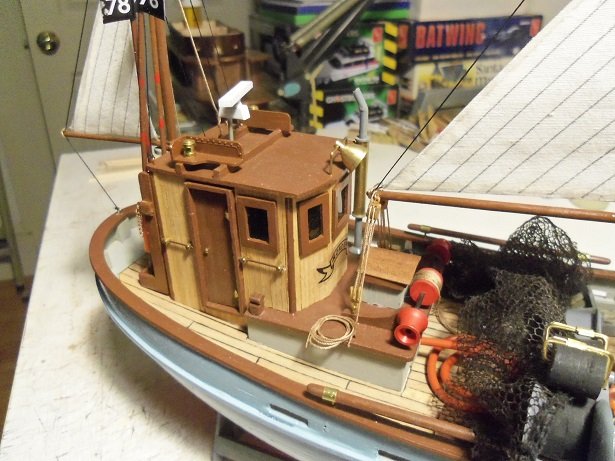
I finally got a chance to do the finish pictures on this model. the light on the main table isn't good enough.......I really need to set up a better lighting system. there basically isn't much more to add to the log, except that it was a fun build, and that the kit holds many opportunities to enhance the finished model. it was also very interesting to delve into the background of the coaster........I'm still not totally in the know, but it was neat to find out how the equipment worked. I did get to add somewhat of a sort table......but room on deck was getting tight and I didn't get to add the net un-raveller. I'm sure there was more that could be added; perhaps one day, I might clone one more hull from the Mary Ann templates, and semi-scratch another of these vessels. with a bit more consideration of the deck layout, I think more can be done. thanks to all of you who followed along, and liked this project....I appreciated all the kind comments and suggestions. there are a few other pictures........they can be seen in the gallery. thanks again for look'in in!
- 378 replies
-
- 22
-
-
- t78 norden
- billing boats
- (and 1 more)
-
thanks OC.......I might have made some headway. doing it this way though, the railing posts are taking a beating...but I suppose if I were to paint them brown, they won't be too noticeable more soon if it pans out
-
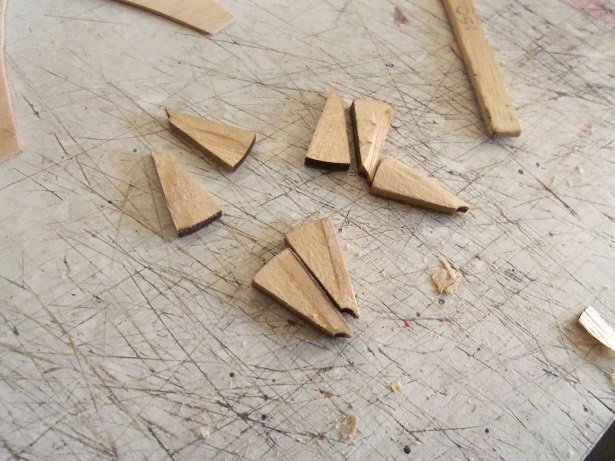
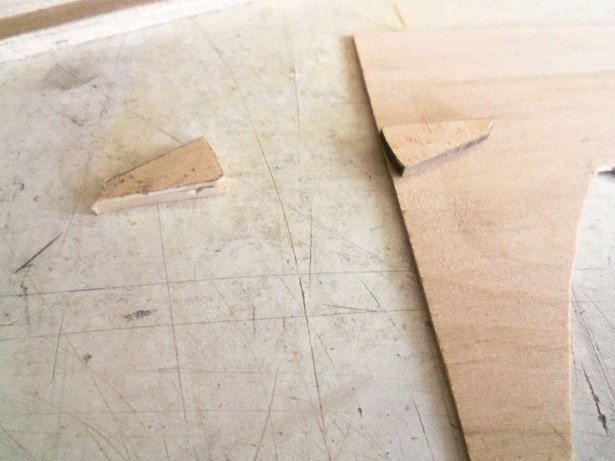
I looked up other logs for this model, and I came up with several others. each one had their take on the stairs......not the fun part of the model. I decided to take a different approach, which as I'm proceeding, might not have been a wise choice. I had assembled one already with the post, and it came out uneven.....part of what prompted me to try making straight stair flights. taking them back out, the posts were removed and cleaned up, later to be cemented on the model, to insure that they would be straight, the one that I removed the post from was sanded around the outer spiral, and I added another step to the top, seeing that the spiral itself wasn't achieving the 90 degrees it required to make the span the the second level. I noted that it wasn't a straight ascension either....I'll have to work on it. as for the other flight of stairs, I had to take it apart, which ended up badly for the parts..........everything from splintered cuts to the uneven. they will need to be sanded and corrected, in order to salvage them. instead of making new pieces, they were sanded down in thickness, and cemented on a small piece of 1/32 flat stock to make up for it. it was compared to one I did earlier to check the thickness. the end result is that I now have a left and a right flight of stairs. the next task will be to get them to fit. I haven't done them yet, but another thing that I find odd are the hinges for the doors on the first level. the way they are shaped, suggests that they need to be bent around a brass rod, to create the hinge pin eyelet. but in doing this, it creates a double thick hinge....not good in my opinion. when I create them, I will post a picture or two to show you what I mean.
-
we're gett'in pummeled by rain and freezing rain.....got an inch of this nasty precip. all part of what's going across the country of late to think....I took two days from work for this! are those dead eyes adjustable? think of the holes as a triangle.......two holes at the top, one on the bottom. nice adjustment to the guns....set her up the way you want to
- 258 replies
-
- 1
-
-
- harriet lane
- model shipways
- (and 1 more)
-
the inner bulwarks look super Bob........very clean and neat I notice that your hull planking and the bulwark strip weren't the same thickness. you could plank the bulwarks with 1 mm and the hull with .5 mm to even it out. it would also thicken the bulwarks. I've encountered this in the past......usually sanding the line flush with a lot of elbow grease. this may take a lot of extra work out of the equation. I'm sure you have a plan for this, but I thought I'd throw it out there, in case it's something you might not have considered.
- 359 replies
-
- 4
-
-
- prince de neufchatel
- model shipways
- (and 1 more)
-
I thin your decks look fine...the set up looks great! gonna be a sweet looking dio!
- 378 replies
-
- 5
-
-
- java
- pacific crossroads
- (and 2 more)
-
thank you Robert and Kevin......this model made me think quite a bit concerning the extra detail. I have always said that even Billing's beginner kits, has enough challenge, for experienced modelers {not that I hold that distinction} to me...any model kit that offers so many possibilities, is a good kit indeed. I still haven't taken any pictures yet, but I will. I appreciate everyone who followed along, I'm glad you enjoyed watching the project. thanks for all the likes as well
- 378 replies
-
- 7
-
-
- t78 norden
- billing boats
- (and 1 more)
-
as I mentioned earlier...congratz my friend! you put so much into this model.....amazes me how you can pull out each level, each displaying a world of it's own such a super looking model....may your next endeavor be equally as detailed as this one
-
thanks Bob for the kind word yes, this will definitely put the finish on this project....I haven't had the chance to post pictures on her yet. I want to put the Thermopylae back on the table, but I've been having thoughts on one of the other projects. flipp'in a coin
- 378 replies
-
- 5
-
-
- t78 norden
- billing boats
- (and 1 more)
-
I do Carl........I'll take a look at his log as well. I did look at Dave's log......he hit on some of the conclusions I have been thinking of. the curve of the decks is one of the problems. I added one more curved steps to the top, and even though I can get it to align to the second level, I see it's not even to the first level. it will probably need a straight step at the bottom, and it may need to be trimmed. one set is still intact.......while separating the other set, it didn't come apart too good, so I will need to make another whole set of stairs. I didn't get anything done yesterday.......ended up working on the car, getting it ready for state inspection. thanks for reminding me about Adrieke's build....I'll look at his as well
-
I bookmarked it thanks for the link. this site wasn't up for too long before I came here..........been here since 2009
-
looks like a very interesting kit Jim..........a four master! is this kit still around? look'in forward in tagg'in along
-
I hear ya Sam..........working on it as we speak! so I see Chris........I will have to look at Don's log...haven't done that yet. I'm going to try a different approach.......these darn instructions don't show very much. I should be used to it.......being a Billing Boats builder. I will have an update .....did a little yesterday. wrong in the assumption that I didn't go too far.....I did... now it's damage control time and it may include some scratch building anyway. so be it!
-
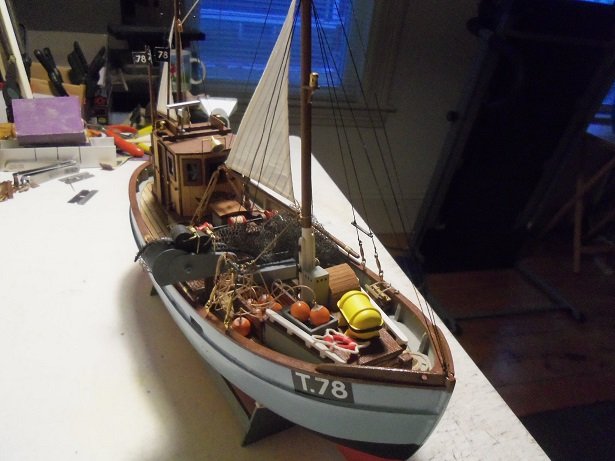
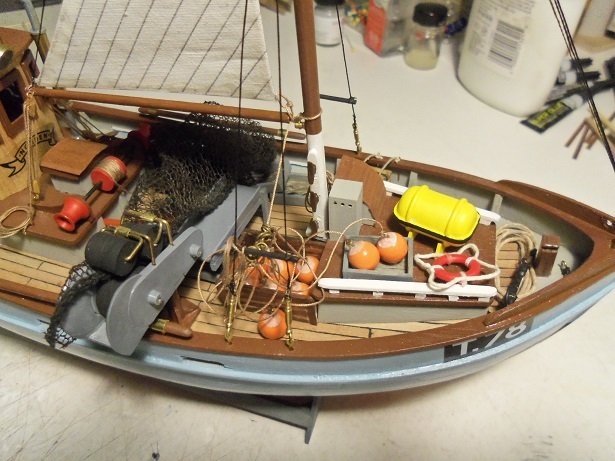
thanks gents......I really appreciate the feedback. I've seen a few of these types of ship models.......trawlers and such, that use a net to portray a sense of realism, and this is kind of a first for me. like I did on the Nordkap, I have it stowed along the starboard side of the ship, and not in any working capacity. I though that with a winch like this, I might want to try and do something to show how it worked. after all the testing on the other nets, I kept looking back at that old ratty hairnet.......it had the look I was after. I didn't forsake the holes either, knowing that after repeated use, it would have gotten damaged, needing repair. thank you Tom thank you Pat......it's alright, I've never worked on one either the hard part doing something like this, is at what point is the model to portray. Just as I've seen folks agonize on what period they want their model to portray, it's just as critical here with fishing vessels.........all aspects stowed, heading out to their fishing spot, or during the process, in the heat of action. as John Allen stated, the net is made of mono filament and impervious to water.....it won't lay limp on the deck. thanks John Allen....yea, what I chose here to portray, is the run is over, the net's in, and the fish are in the trays. they are about to move to another spot, plenty of time to reset the net, to be run our again when they get there. the net is bunched, but I didn't want it to pile too high and look out of scale. you summed it up quite well...I appreciate that thanks Sam, Piet and Lawrence! cutting the fish out from that square they were molded {printed} on was a good thing to do. it isolates the individual fish and allows the tray bottom to show around them.......not some plastic that I would have had to paint around. they are seen as they are....body, depth, and mass.....it's kinda like a 3d effect, rather than looking like they are on a card of sorts. I had these 'plates' on another Billing's model I did......I think it was the Mary Ann.....I threw them out. I wish I had thought of this back then. how they were painted......I'm not a weathering genius.......I sometimes wish I had 1/10th of the experience that I've seen some folks display....I guess I'm doomed to be old school. it is nice though, to go on the internet and look stuff like this up I got 'em close, and I'm happy with that I looked it over a couple of times since yesterday, seeing if I could adjust the netting to show the fish trays a bit better. it's not really possible......it's a 'detail layering' and as we all know, too much and it's overkill. I left it as it was there a re no more parts to be added........the model is finished I'll get the model out of this poor lighting and take some final pictures, for here and the gallery. thanks to all of you for look'in in and your kind coments!
- 378 replies
-
- 7
-
-
- t78 norden
- billing boats
- (and 1 more)
-
they came out well......yepper....tough carving to be sure the stern is looking better and better! the two end ones look especially nice.......jee, if you did all four like that, it would have looked just as good {just an observation}. it's not a crazy though either.......there are many models I've done in the past, that I wouldn't mind doing again. I'm hoping to start one in the near future.
-
August of 2017..........not a lot of time since you did it. bathroom calking.......yup, that's silicone
-
did you use a silicone calking for the water {not having looked back in the log}? it's age.........over time, it will turn color and attract major dust. it is also separating from the board along the edges too I've even seen some types gather mold. where I work on trailers, I've seen some really hideous repair work done on the outside walls.....peeling and separated as well. I clean them up, reseal them, smooth out the sealant I used {which is not silicone}, and then paint over it. silicone has oils in it that dust can stick to over time. sorry to see your having this problem....hope you can get it resolved without too much upheaval. I m gonna look back in the log to see what you used, perhaps something can be done.
-
I think he means...are you going to clear coat the stand. never though to use shoe polish for stain.........pine done in Angus beef........very original your minimalist approach is quite maximal.........you must be on the verge of calling it finished. for that, I say congratz on a super interesting project. you very well could put this one in the book of world's records, for the most stuff jammed into a small scale model. she displays nicely too....very well done!