


popeye the sailor
-
Posts
16,007 -
Joined
-
Last visited
Content Type
Profiles
Forums
Gallery
Events
Everything posted by popeye the sailor
-
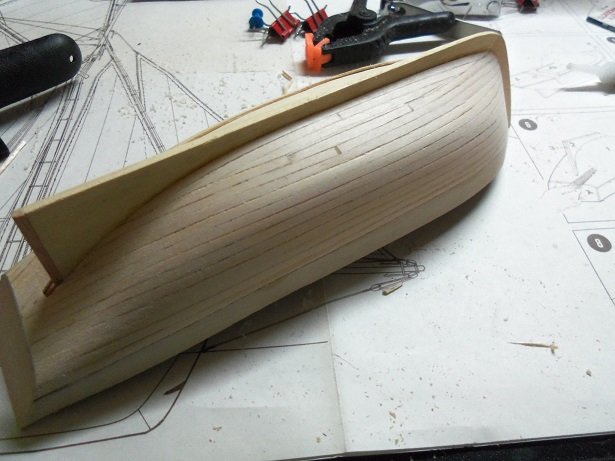
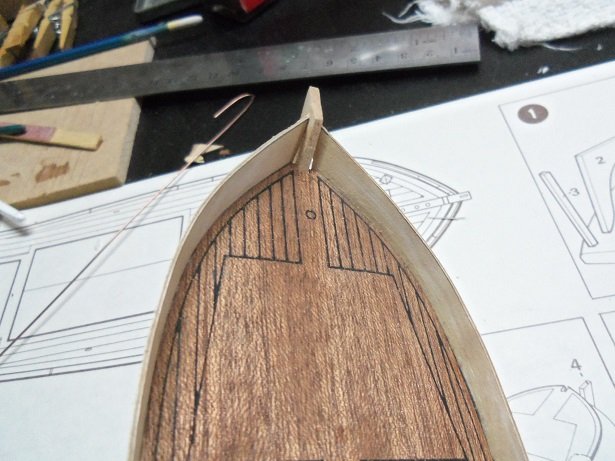
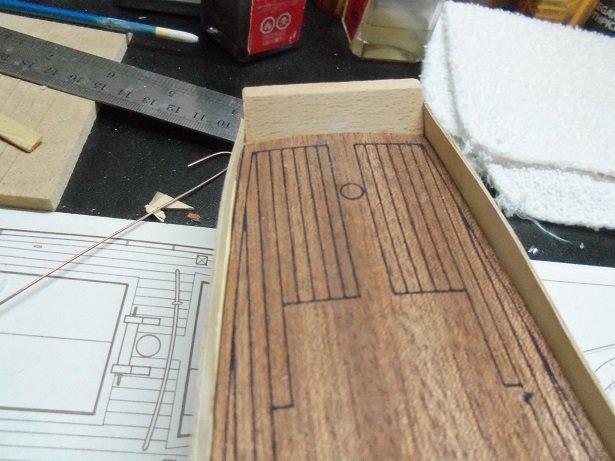
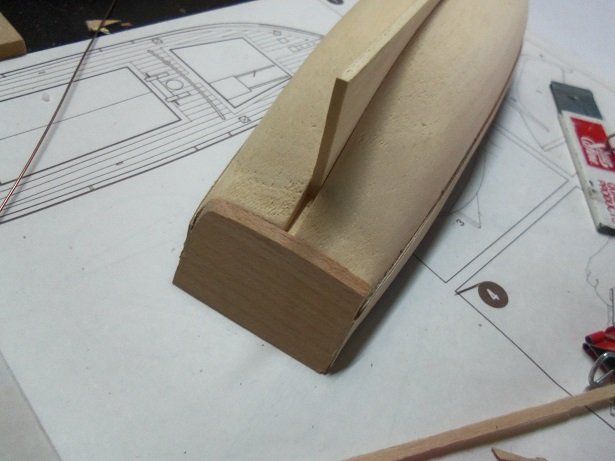
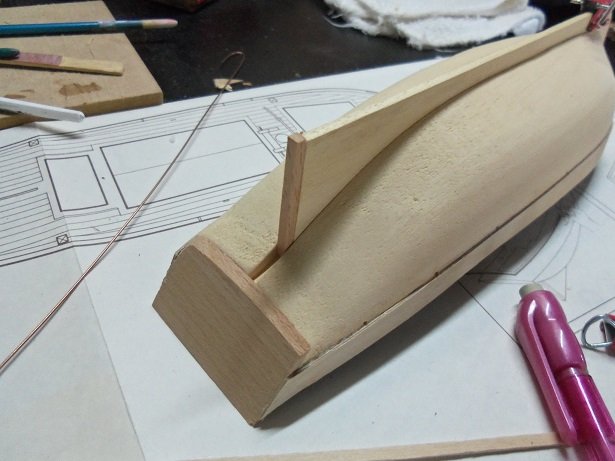
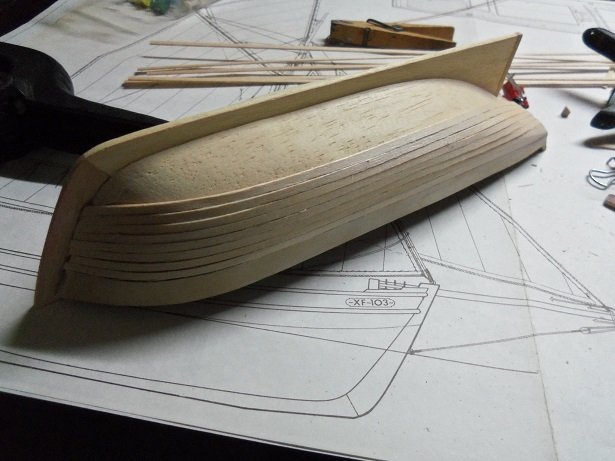
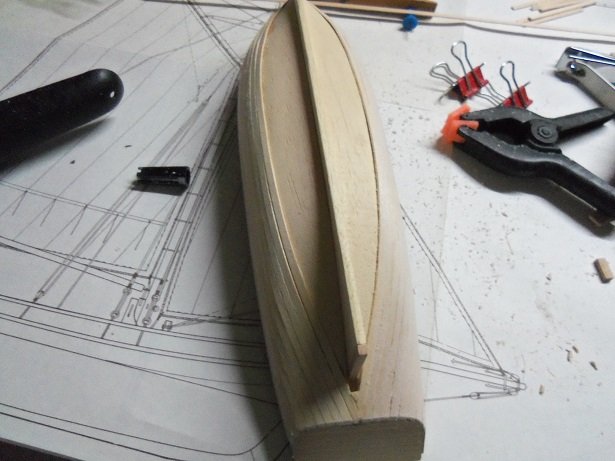
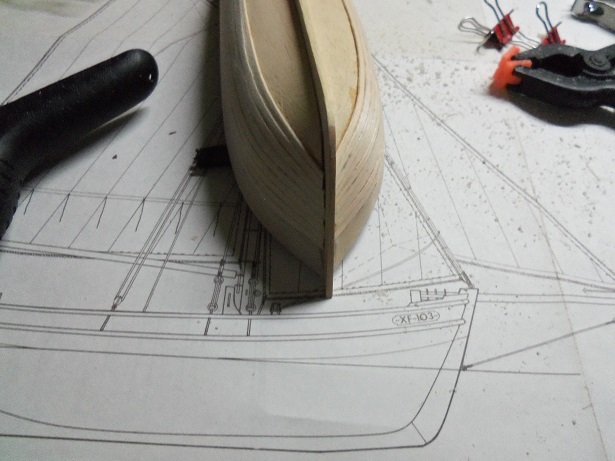
 thanks for the likes gents.....I know it looks a bit like a sow's ear right now, but after a little repair and some sanding, the bow looks a lot better. I added a sliver of wood to the starboard bulwark, here it failed to meet the stem. the port side is actually dried white glue, showing a bit of transparency there. when I do the filler along the stem, it should disappear. I evened out the bulwarks and sanded the tops to level them off. I was very careful not to get glue on the deck........I will be planking it over, using the print as a guide. as for the hull, the port side is fully planked. after a good sanding......I'm rather pleased with how it cane out. there are a couple of places where I will do some filling, but I think if I were to paint over the rest of it {the way it is}, the subtle plank lines would show, adding some overt detail. ...something I'd like to achieve. I was hoping to have the other side done......but the afternoon got hectic. I'll try and make an effort over the work week, with any luck.
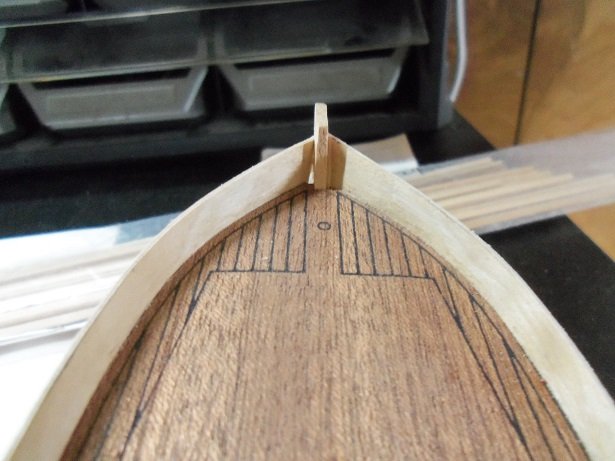
- 171 replies
-
- 15
-

-
- krabbenkutter
- authentic models
- (and 1 more)
-
gonna be 30 for us.......kidding aside.......for two people who aren't a good match according to the zodiac, we meld quite well together. we proved it on a trip out one day.........no music, but we both started sing'in the same song, same verse, at the same time. did it again at the grocery store the other day. as I told her the other day when we were just sitt'in 'round yesterday.......it's been a fun 30 years I keep her company she keeps me in line
-
yea...I know what you mean about the scale issue. I treat them as large eye bolts. I have a brass variety that are medium sized......and I have a smaller size that are a copper color. what I find neat about them, is that they come in different finishes......antique, blackened, copper, and a bare steel. I've also seen them in a pearlish chrome.......but they just don't have that 'ship' quality. me too.......I have to get permission from the budget director to take my ship for a spin too. if I don't she'll fit me with a bridle and reins.......and I don't like the 'bit' that she uses
-
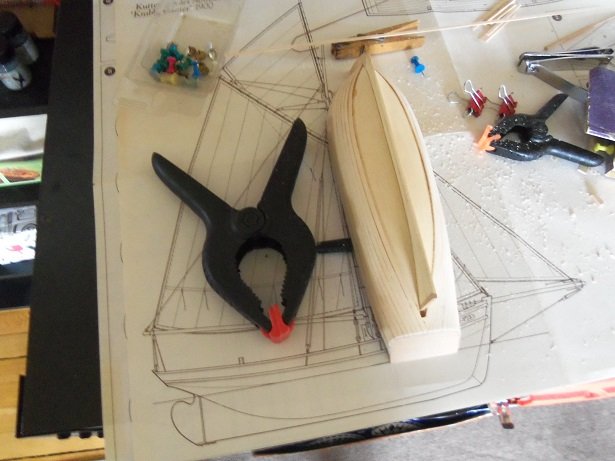
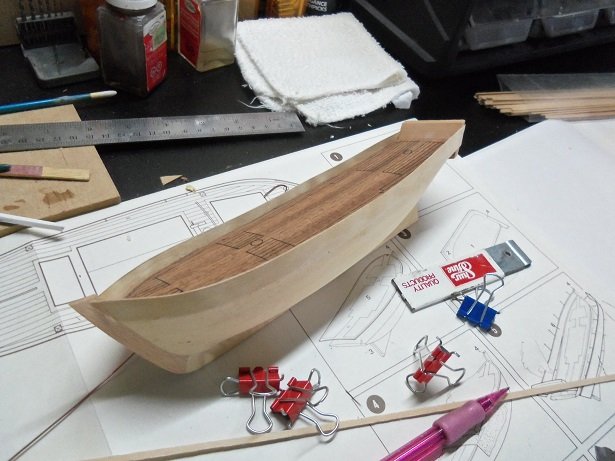
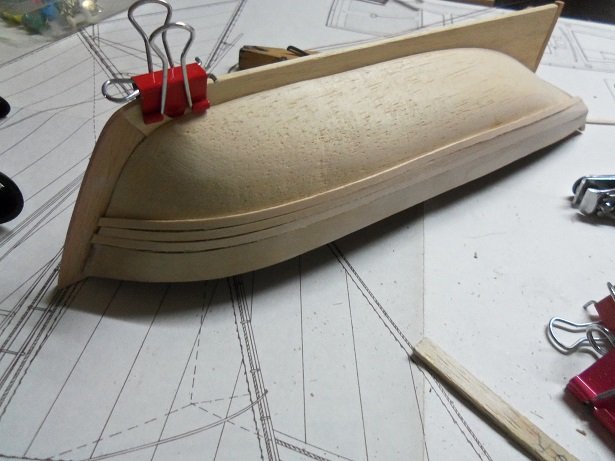
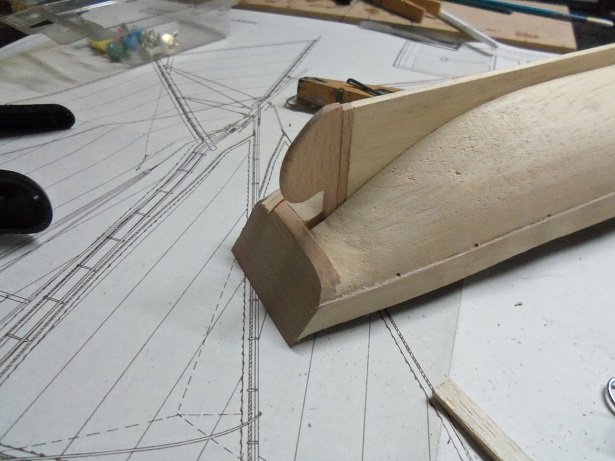
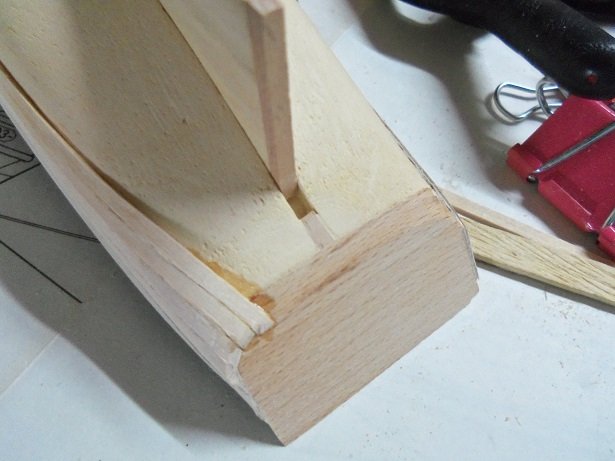
hello all...........is the model calmed down yet? .....new movie coming out........"when Models attack".........or......"attack of the Killer Model" cripes....the clamp was as big as the model........good thing it wasn't the larger one! I gotta get a new set of them......they are falling apart and or breaking through repeated use. yup......that the current state of the hull. Just gotta finish filling it in. the night before.......the bulwarks and transom were cemented on the model. of course, there were a couple "I should have's" in there, when O looked at it in the morning. I do have some repair work to do. I marked off the 2 mm instead of the 4 mm they wanted me to do, in gluing the bulwarks on....that worked just as good. I used thumb tacks to hold them in place......made me think of a Viking ship >mild chuckle here< I did note that the bulwarks were not equal.......the parts themselves, not the cementing part. one side at the bow is a little too tall........ .......as well as one side at the stern....... the damage control isn't too bad.........just a bit of shaving should do the trick. when I get to the deck, I'll deal with it then. first thing I want to do, is plank the hull. the transom part shifted a little during the drying process.......I started the process of evening it up. the stern post was added to the keel after the transom was sanded to shape, the planking started. I used CA to do this.......I got off to a bad start. I can fix it later with some filler....I'm not going to risk making a mess out it this early by trying to rip it up. I have those Testor's glue nozzles, that I fit into the opening of the tube of filler....I can just run some beads of filler, instead of slathering the hull with it. I don't want to lose the planked look. pulling the rudder off of the card......and cleaning up the spot glue mess on it, I fitted it into place. there are no gungeons and pintles in the kit.....I'll do something with it. I did some rounding and evened it off.......and put it back in the box, after I made up the filler plug for the rest of the slot. I left enough room for the G&P embellishment. you can see the planking rounding the transom. the planking was looking better....there is some minor clinkering.......it should sand down fairly well. I planked the other side to match the side I was working on. where the planking joined together at the stern, I made a filler piece to border off the rudder hole. the bow isn't too bad.......a bead of filler will take care of the gaps. I may have goofed up a bit more......I tapered the last plank on the port side, instead of evening it up to the starboard side. I hope to get the hull finished today.

- 171 replies
-
- 17
-
-
- krabbenkutter
- authentic models
- (and 1 more)
-
she's a tall model Tom........WOW....she look'in good though not too much more to go.......gotta feel good seeing the light at the end of the tunnel.
-
cannons look very nice EJ! that is a neat tool........they have eye bolts already made in the bead dept though. they are in there with all the little bobbles.....not sure what size they are though. they have an elongated shaft, in case you need it and can trim it off if you don't. what you cut off can be used to make more eye bolts, for which you'd need the tool. what a never ending circle.......huh?!?!?!
-
congratz on your wedding my friend! may you two prosper! one thing that always helped me along, is ya gotta have a sense of humor. but.....hold ye tongue, if ye has a quick wit I recall the time the admiral and I were having a rather heated debate. since it was late in the day, she decided to get into her lounge ware. walking off. she she stated that she was going to go change. my quick answer was "for the better, I hope!" yea.......did not go well.
-
super progress J........got most of your masting ready to go I have one of those helping hands......I've used it to some extent, but I need to fasten it to the table somehow, to be better effective. there are no holes provided. those little dead eyes are a bear aren't they ?!?!?!
- 258 replies
-
- 2
-
-
- harriet lane
- model shipways
- (and 1 more)
-
coming along splendidly Julian........ the overall picture of the ship looks really sweet!
-
fantastic update Chris.......the windows look really cool! third level is coming along in super fashion........you'll be finished before I get there
-
nice work on the dead eyes and straps
-
well done John.......the cannon looks fantastic. I like your eye bolts and rings too {saw your other thread}. your doing some really nice work there
-
amazing work Danny.......the guns....the platform.......so perfectly done! it's like you've done these for quite a while.......in reality, only a year and a half {or so}. glad to hear you recovered well.......the flu has been bad this past year
-
perhaps they are like an awning.......when the sun goes down, they roll up?!?! time zones......makes it all the tougher if you use a picture hosting site, this can happen as well. I used to use Photobucket......I had a problem with them, and now I store all my pictures on memory sticks. amazing what a 32 gig stick holds
- 122 replies
-
- 3
-
-
- tamiya
- King George V
- (and 2 more)
-
I've done the Connie and the United States already.........I have the two kit in cue for a second go around. Revell had....or still might have a problem with their plastic being too brittle at times. of course, age has a lot to do with it as well. I've read about the many instances where folks either reinforced their masts, or replaced the eye bolts with metal ones. at the time I built them, I was unaware of the problem.......and when I did read of the problems, I was scratching my head, because I had never experienced any of the problems. my two digs with these kits are the ratlines and the decks.
- 89 replies
-
- 2
-
-
- constitution
- revell
- (and 1 more)
-
thanks OC.......not to mention dangerous. I almost got a clamp in the face.....not one of the small ones either. I was adjusting the bulwarks when the big one let go..........hit the pegboard and knocked a few things down. no problem.......hobbicopational hazard
- 171 replies
-
- 8
-
-
- krabbenkutter
- authentic models
- (and 1 more)
-
I can see your point about not taking pictures.......but for someone who is trying to do something similar, pictures would be a big help. it may also give an idea to someone who can't figure out a certain problem with their projects. just putt'in it out there missing parts.......did ninja kitty strike again?!?!?!!
-
she's look'in super OC........ladder installs look great
- 455 replies
-
- 3
-
-
- slightly modified
- greyhound
- (and 1 more)
-
exactly......all that needed to do them, was do one side, cutting both of them from it alone. port...starboard, you simply reverse them. not like they were printed either. if the stiff stuff doesn't work out, I have some basswood I can make them from. that's what they tell ya to do though........4 mm down the side. I'm going to try only 2 mm, since I decided to plank the rest of the hull over. it will work out just as a well. the fact that it's a solid hull....there is no provision or supplied wood for planking. to butt it along the top edge of the deck, would make it too tall.......too high at the bow stem, and to high at the transom. this was an extreme waste of wood.....especially this type of plywood. I still can salvage some of it though.
- 171 replies
-
- 8
-
-
- krabbenkutter
- authentic models
- (and 1 more)
-
I've never used anything else......I've repaired most of my shortcomings. this model must be made with brittle plastic...I've experienced this with past builds. the ideas suggested sound like good alternatives, short of repairing the part, if it isn't beyond repair. looks like you've made great progress with the hammock nets.
-
those rocks are a big improvement.......OK just as they are they don't have a shine......and if you went smaller, you might as well use pebbles. they are a nice colorful mix....the ones at Home Depot are likely all one color. ...and you've decided to turn it up yet another notch........bravo! lighting is always nice......kinda dumb in that area myself. I'll look into one of those links thanks for posting them. wonderful progress
-
holy cow Piet........the sea came out looking great! and you even managed to paint the deck a darker color.........my good man, I am impressed! check your gun barrels though......a couple of them looked a bit tweaked. awaiting to see the white froth and water details. congratz piet.......it worked very nicely!
- 378 replies
-
- 7
-
-
- java
- pacific crossroads
- (and 2 more)