


popeye the sailor
-
Posts
16,007 -
Joined
-
Last visited
Content Type
Profiles
Forums
Gallery
Events
Everything posted by popeye the sailor
-
 hello Sam.......welcome to the log. I'm just getting started
- 171 replies
-
- 7
-

-
- krabbenkutter
- authentic models
- (and 1 more)
-
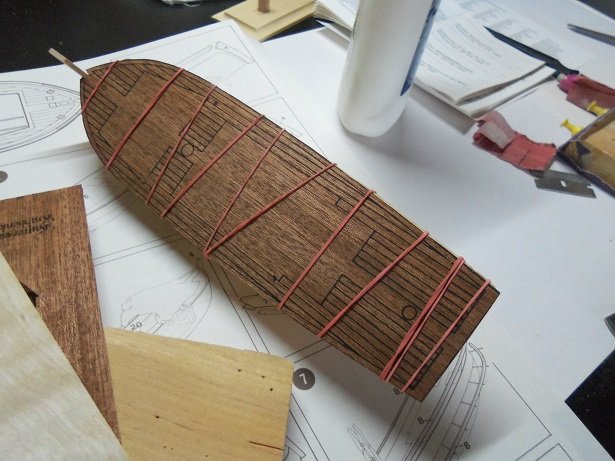
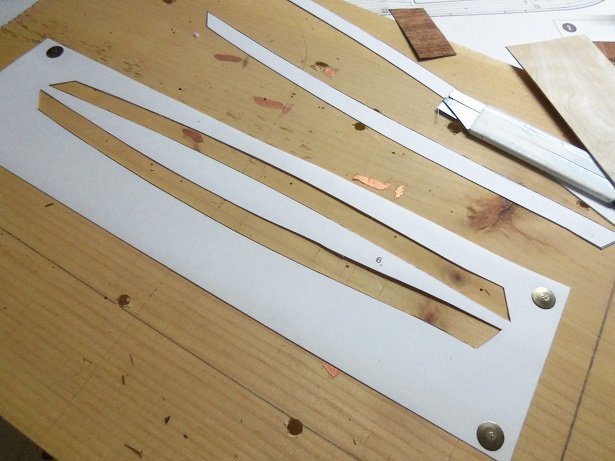
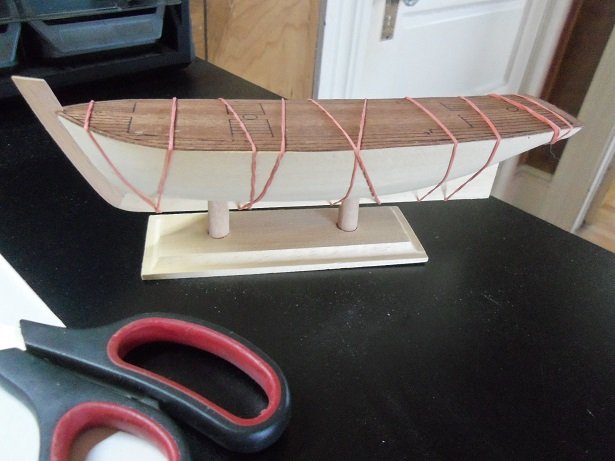
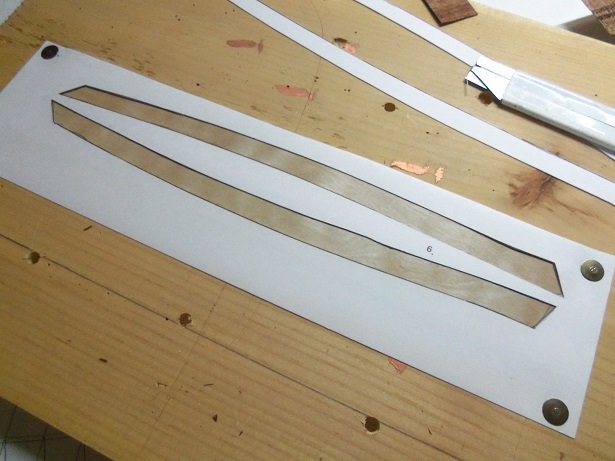
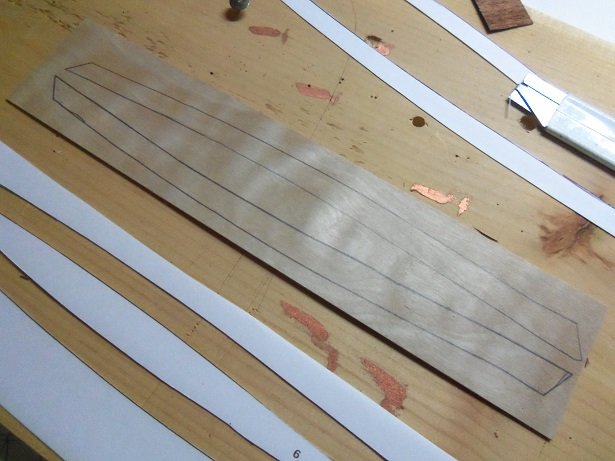
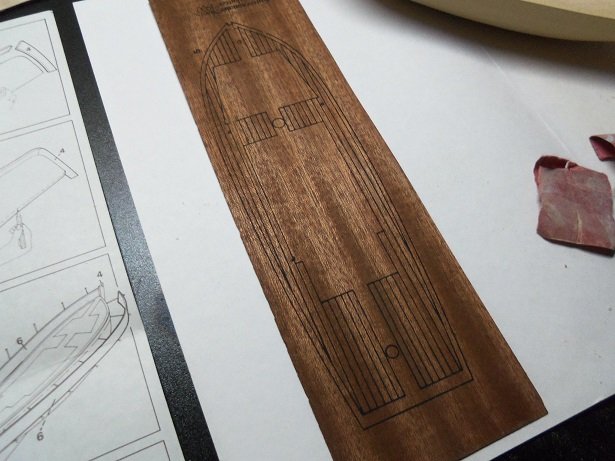
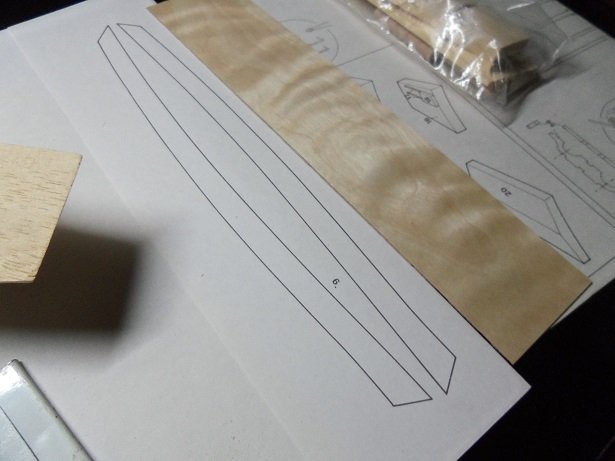
interruptions all afternoon....then had to man the grill......mot much more got accomplished. there is enough here though the deck was cut out of the mahogany sheet. I got a little sloppy, but nothing I can't fix . it was then cemented to the hull....wrapped in rubber bands. the bulwark templates were cut off of the folder and pinned to a pine board. the innards were then cut out.......the outer part will be the template. the stand is ready to be stained the hull was put on it until the deck dried. now, here the skinny on my concern. around the hull, about 4 mm down from the deck, a line must be drawn to where the bulwarks are cemented in place. I'm not all that warm and fuzzy about this jutting out from the hull. the instructions tell you to cement on the rub rails, draw the waterline, and have at it with paint or whatever suits your fancy. I'm going to check and see if I have planking that's 0.8 mm thick.......but I need to get the bulwarks and transom in place first. with the template cut out, a slight adjustment of the push pins, and I'm able to slide the sheet of thin stuff under it. the bulwarks were drawn out and removed from under the template. this stuff was a bear to cut with a box cutter......but I did it. I will sand them to even them up, before I cement them on. the check for the planking fared well......I think I have more than enough.........0,8 x 2 x 500 mm so that's the plan........hopefully I can do a good job on it
- 171 replies
-
- 15
-
-
- krabbenkutter
- authentic models
- (and 1 more)
-
hey Chris.......yea, Mike was ask'in the same thing nope........now that the car is done, the table is getting set back up again to continue. even if it's a small one, I'll try and get an update posted. thanks Bob......glad your look'in in yep....got one table going ........look'in to get the other one back on line.....then I'll be runn'in on two burners! only one way I'll stop modeling........and I ain't there yet hope your feeling better. hello Ben........yes sir.......you haven't missed much at all! glad ta have ya aboard!
- 171 replies
-
- 8
-
-
- krabbenkutter
- authentic models
- (and 1 more)
-
thanks Kevin I'll try to make it interesting. thanks Lou......in response...... you should have seen the admiral's eyes when she saw the R.E.L. at first I just guessed what it was......that is, until I found the instructions were in the box thanks for putt'in them in there. yea....this kit doesn't have too many parts......but I'll add some, I'm sure. I will try to do it justice thanks Tom...I'll see what I can do....this poor model doesn't know what's in store for it, you know?!?!?!? I got away without doing the rear brakes, but I have them, so I can do them later. thanks to all who hit the like button. I got whey-layed into planting strawberries and fixing the hose reel outside....but rest assured, there will still be an update.
- 171 replies
-
- 7
-
-
- krabbenkutter
- authentic models
- (and 1 more)
-
I'm sure he's got a game plan going......I saw what you are saying
-
but NO viking funerals....too much smoke look'in good my friend
-
the bow piece is likely 1 mm thick........will to bet the planking is about that thick too. 1.5 mm.........what a job that would be!
-
hey there Mike.........I gotta set that table back up. I used it to organize my parts bin. now that I have the car finished, I'll be getting back to that build as well.
- 171 replies
-
- 9
-
-
- krabbenkutter
- authentic models
- (and 1 more)
-
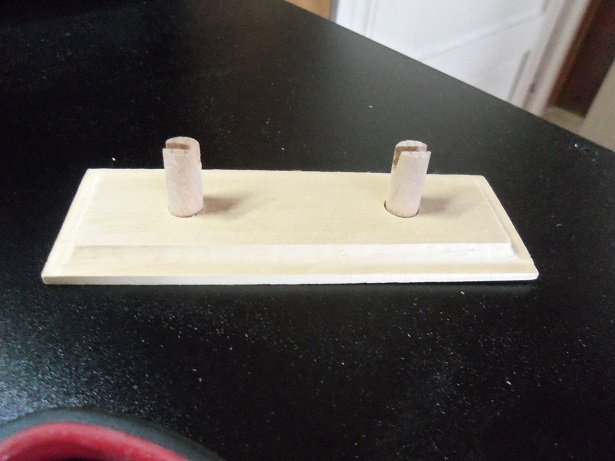
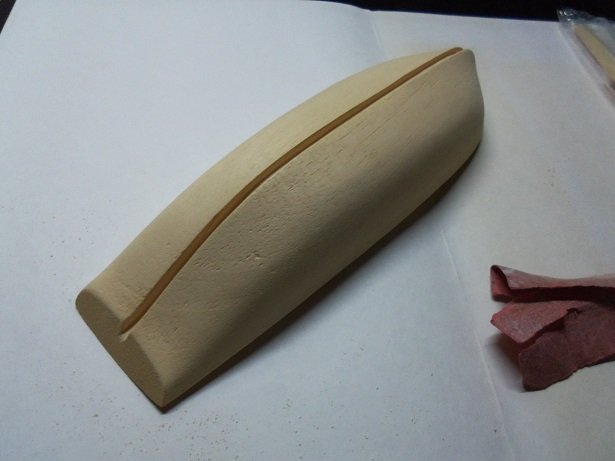
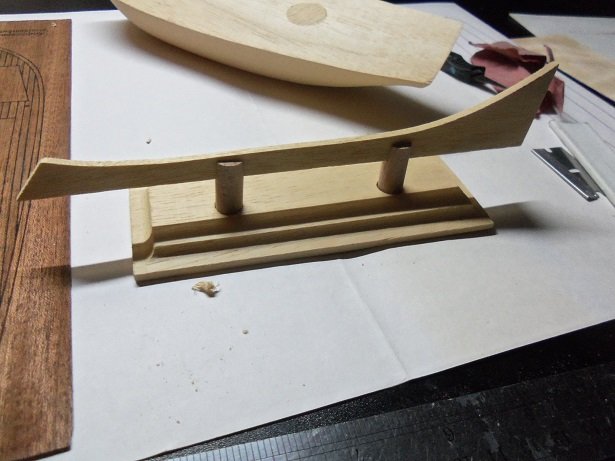
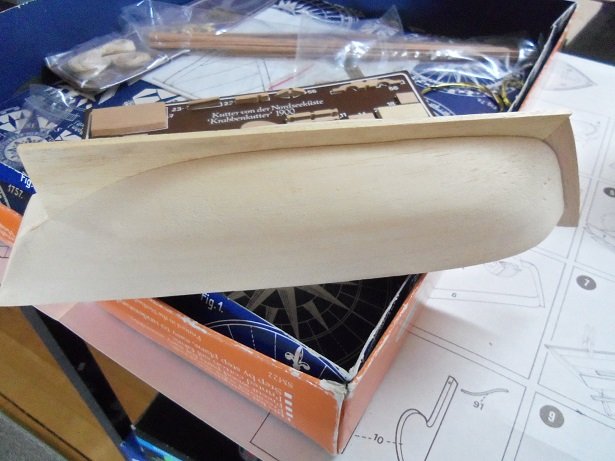
the instructions are yellowed in exposed areas, which suggests that this kit has been around for a while. how long is unknown.....there isn't anything that suggests a date...not even on the plans. first thing to do is sand the hull smooth. I did notice that the slot for the keel is a tiny bit off at the bow. since it is too deep to correct it, I just sand the bow to help compensate for it. the slot for the keel also had a lot of wood fiber in it.......like from a dull blade or something. I just ran some sandpaper through it, and it cleaned up well enough. I noticed a couple of small bumps on the starboard side.....like a knot or hard wood within the wood used to make the hull plug. not having a small plane, I took a razor blade and passed it over like a plane, until the lump was removed. if you've experienced stuff like this, it doesn't go away with mere sandpaper.....more times than not, it makes it worse and more pronounce. I did pretty good ........it isn't even noticeable anymore the deck is on 1 mm thick mahogany......printed........it has already start to split, but not in a critical area. the bulwarks is the concern I have......not so much for what they are, but how they are assembled on the model. the diagram for their assembly is to the left of the deck. they give you a sheet of that thin stiff 0.8 mm plywood to cut the bulwark panels from. the templates will need to be cut out. the stand was easy enough........they supply the base and the pedestals. the pedestals are routered in one small piece of dowel {at both ends}...you need to cut it equally in half. the dowel being 1 3/4 long........15/16 did the trick. the holes were cleaned out that were drilled into the base, and the pedestals were cemented in place. the keel part insured that they were even with one another. I was very careful not to get glue on the surface....I will stain it later and give it a couple coats of clear lacquer. there is a brass plaque that goes on it later on, in which I will drill holes for brads, that might give it some enhancement. it's better than just gluing it on. after a short time, I could remove the keel part and let the pedestals stand on their own until dry. I began to fit the keel in the slot of the hull. there will be a gap at the transom........once the stern post is in place, I can fill in the rest. I also need to make a hole for the rudder. the bow stem is on the long card.......in trying to remove it, I made another discovery...it is glued to the card in a couple of spots. it was made apparent when I had to rip it away from the card. again, I used the razor blade like a plane.......90 % of it came off without removing any wood. the rest I ended up sanding off....I made it a point to concentrate on just the glue......I didn't want to sand the entire part. this would cause a couple of problems.....make the part fit loose in the slot, or alter the part to render it useless. in doing a dry fit, it was confusing to center the main part of the keel with the bow stem. the slot for the stem wasn't routered correctly...too much curve in the hull for the stem........I flied some of the curve out of it. I also had to adjust the edge of the main part, so the two parts would join together. I'll round it off later, after it's dry. I've done a bit more today, but it's still in the camera. I'm sure more will be done, so until the next update.....thanks for look'in in.
- 171 replies
-
- 15
-
-
- krabbenkutter
- authentic models
- (and 1 more)
-
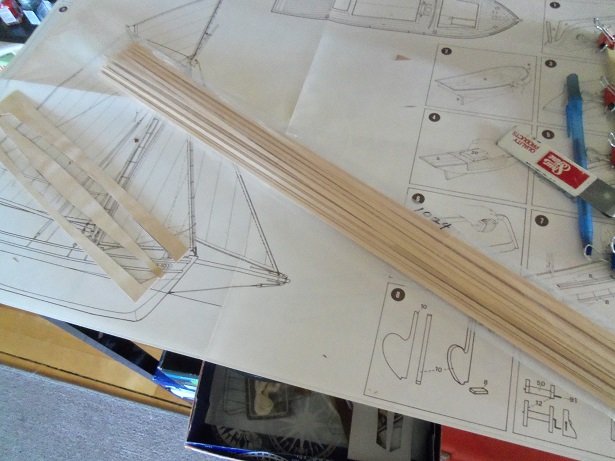
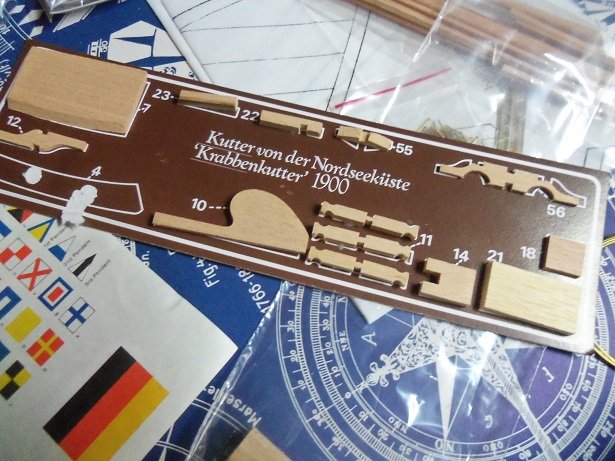
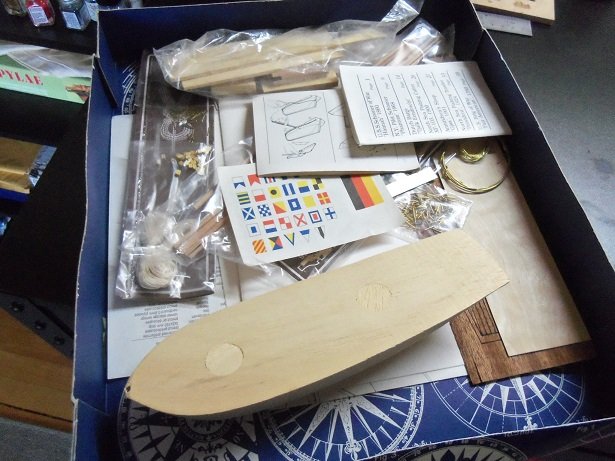
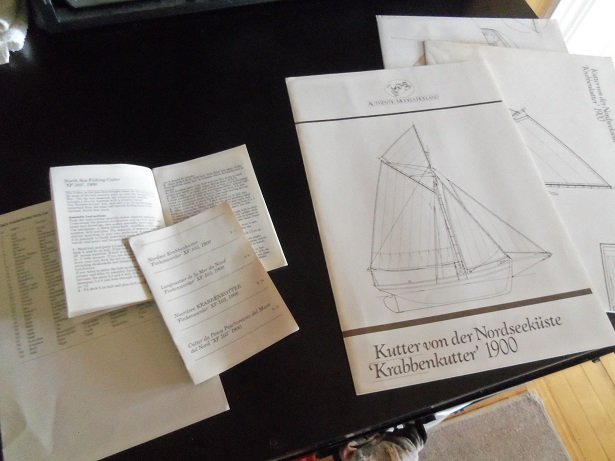
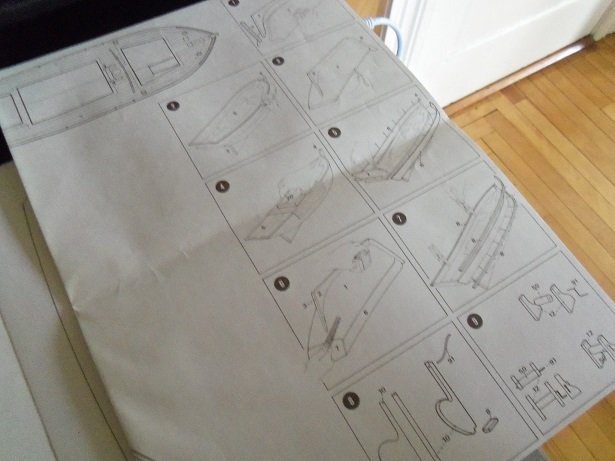
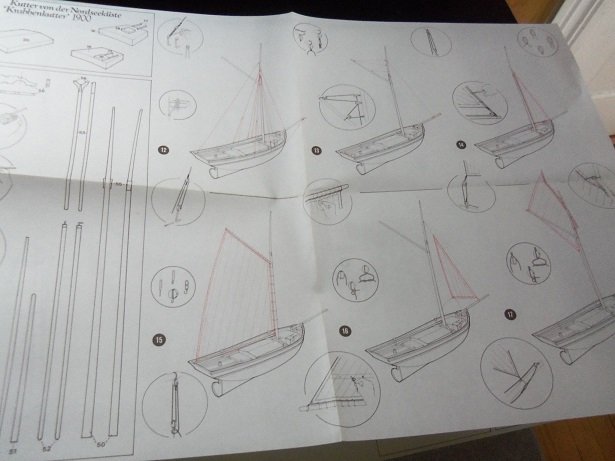
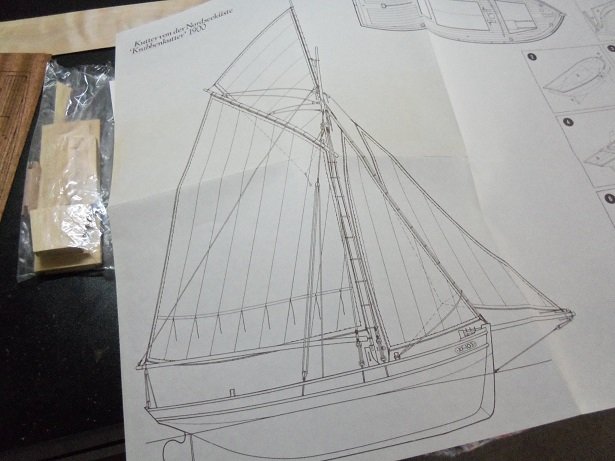
back from dunk'in the dog.......as I suspected, he didn't take to it very well. he was a trooper though.......didn't really start shak'in it off til he got out. of course that led to clean'in the bathroom. love the way he struts around the house anyway........it's a solid hull model. I've not done one before, so this should be fun. there's not a lot to the main part of the model......there is more in the way of the fittings though. the sails are cloth and the images are printed on both sides {thin enough, the ink bled through}.......all you is cut them out. the fold over flaps are a bit large......I may trim them down a little....I'll see how they look. it was set up in a clear plastic tray, but I took it out to get to the instructions. the instructions are split.......the two small booklets have the written text, in about five different languages. there are two large diagram sheets.....one for building the hull and deck layout, the other is devoted to the rigging. there is a parts list that is a bit more legible than the one in the little book.......and the one with the picture of the boat on id is merely a folder for the diagrams, and has a template for the bulwark panels. the two bigger sheets have the diagrams for the hull assembly..... and the other one...the rigging. they highlight in red the sequence shown, which I thought was kinda cool. there is also a side view of the boat as well. along side, that is the package of some of the wood parts......the rest are arranged on another long card, numbered so they can be found easily. the fittings are another long card, stapled to it in separate bags. the deck is printed to show the layout.......I may plank it over, since I have some 2 mm planking on hand, or if it doesn't look right {I've never been known to sport a printed deck.....so it's a good bet}. I have one other concern....but I'll wait till I get to that step to address it. I started right in.
- 171 replies
-
- 11
-
-
- krabbenkutter
- authentic models
- (and 1 more)
-
gee......I can just turn my chair where do you get the raw plastic for your machine?
- 132 replies
-
- 2
-
-
- charles martel
- battleship
- (and 1 more)
-
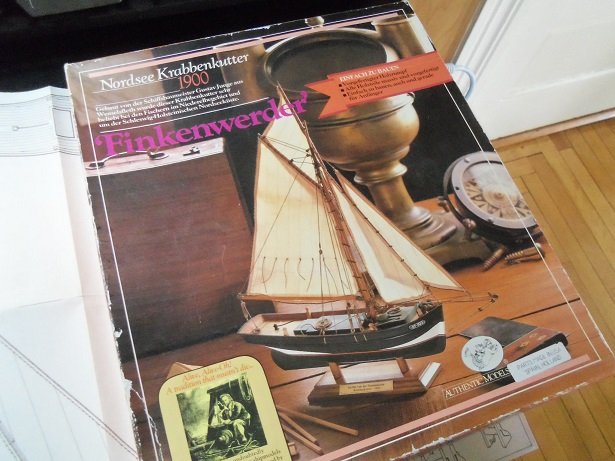
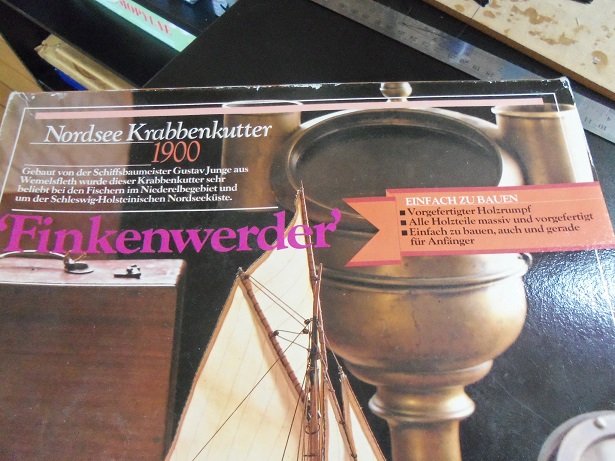
I finally got through the headaches of getting the family car inspected. after front brakes, and complete exhaust {from the manifold back}, I was able to get the car over to the garage for the sticker. in the meantime, through all this, I haven't had much time for modeling. I did get to reorganize the parts inventory bin and move a few things around. at least I still have MSW to keep me sane. I was surprised last week, by a package that came to my door. recognizing the sender as one of our own, I brought the package into the house....the admiral was puzzled to the max. of course I had to assure her that I didn't place any orders without her knowing opening it up, I saw the remnants of the Robert E. Lee......he had bought it off E-bay some time ago. let's put it this way.......it needs work we had an e-mail conversation about it in the past......he though I could do something with it...he felt that he'd never have the time. also, was this kit that he had sent me a picture of during the same conversation. I have never heard of the company........I thought it to be some defunct company, but it's actually still in business https://authenticmodels.com/nautical/sailing-ships/ Lou thought that this model would compliment the Norden.....he had no interest in building it. so he sent it to me...he figured I'd have more fun with it than he would. you really shouldn't have Lou, but I thank you very much for thinking of me thanks as well for the R.E.L. .....I'll put that with the other two derelict hulls you sent me....one of these days, I'll try and make head's or tail's out of it {and them}. perhaps I'll do as we discussed.........I still like the idea of the ferry I have more on the model.....I've already started it.....but Gibbs needs to go out, and he's going to get a BATH this will be a hoot!.......it's the first of the season! I'll be back!
- 171 replies
-
- 13
-
-
- krabbenkutter
- authentic models
- (and 1 more)
-
so much detail Greg! top notch model!..........looks life-like as she stands now.......even more so when she's weathered
-
your getting there..........looks great!
-
my last move was done in a car........I sat in the back seat with the Revell Cutty......the rest were in boxes in the trunk. the only real heart break was when my oldest son dropped one of my guitars {it doesn't have a case}. as for the Cutty......a few ropes came loose from the wind......this was in 2009, when I first started to build wooden models. it still waits for repair and her big finish. hope your move goes well........I'm sure you'll take every precaution remember.....the Bismark didn't sink until later, when she left the shipyard. yours is no where near completed yet....just a lightherted thought about logistics, dontcha know
-
the next time I'm at the fang tooth cobra........I'll have to take a couple pictures we'll have more than modeling in common Nils look'in great!
- 692 replies
-
- 5
-
-
- eagle of algier
- chebec
- (and 2 more)
-
sorry to hear of your knee problems Mario........I hope your recovery has you bee-bopp'in around in no time I like the way you made those cuts into the beams.....it'll keep the part from fall'in through.........happens to me from time to time look'in very good .......super nice progress!
-
you've made some great progress Pat.......the bulwarks are shaping up nicely. the added detail also enhances her looks too nice job on the stack and it's base!
- 1,018 replies
-
- 1
-
-
- gun dispatch vessel
- victoria
- (and 2 more)
-
I'm with Ed.....it's amazing the work you do.......very beautiful work!
- 1,035 replies
-
- 5
-
-
- royal katherine
- ship of the line
- (and 1 more)
-
amazing what there is out there now for the modeling community really cool process......although I got dizzy watching the head move around the part I did a quick search........there is a lot of articles out there about her.......book marked some for reading in my spare time following along with interest!
-
thanks Tom......sorry for the delay in replying. I have been caught up in getting our car ready for state inspection.....I so envy the states that don't have it. I still have to put up another shelf.....hopefully to have a place to put other boats I'll finish this year {wishful thinking}. the Norden was a fun little build....I also got to do a few additions to it, which made it a bit more of a challenge. very happy with the way she turned out worrying over the car.....it left me little time to get into anything else, except rearranging my parts inventory bin and a few work station adjustments. the table are now uncluttered.......and I can begin again I have also decided on the next project.....a little known company, and their model of a Krabbencutter. thanks again for the good word........and thanks to all who are still look'in in and hit'in the like button
- 378 replies
-
- 6
-
-
- t78 norden
- billing boats
- (and 1 more)
-
interesting way to make sails.......looks very good
- 692 replies
-
- 4
-
-
- eagle of algier
- chebec
- (and 2 more)
-
love you weights.......you can never have too many hammers the hard work is almost done........then you can get creative looks super!