
HOLIDAY DONATION DRIVE - SUPPORT MSW - DO YOUR PART TO KEEP THIS GREAT FORUM GOING! (Only 36 donations so far out of 49,000 members - C'mon guys!)
×


popeye the sailor
-
Posts
16,007 -
Joined
-
Last visited
Content Type
Profiles
Forums
Gallery
Events
Everything posted by popeye the sailor
-
 considering you've done far better than I ever could, I'm certain you'll come up with a really nice model. I have no doubt that you'll be able to fudge the oops and pho pars, and it will look just fine. don't give up on it
 -
I was play'in with the prospects of Christmas........if Santa thinks I've been good enough, I should be look'in at a whole lot of fire power did a bit more paint today, along with some of the glass......alas though, no pictures. I should have some soon when I reach where I'm try'in to get to. also got some sawdust under my fingernails....if I scratch, the itch goes away.....but the intervals seem to be getting shorter
-
how do they expect us to model, when they keep changing the playing field???
-
you doing alright there are very few kits out there that are perfect. please don't think that I'm critiquing ........just say'in that I do a lot of that stuff in the beginning........kinda like a 'get to know your model' kind of thing.
-
wouldn't have it any other way certified 'rib' man here..........and I wear it well too!
-
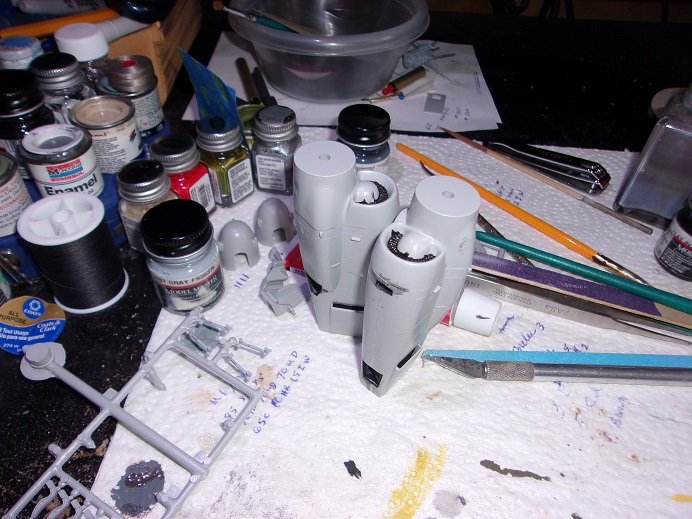
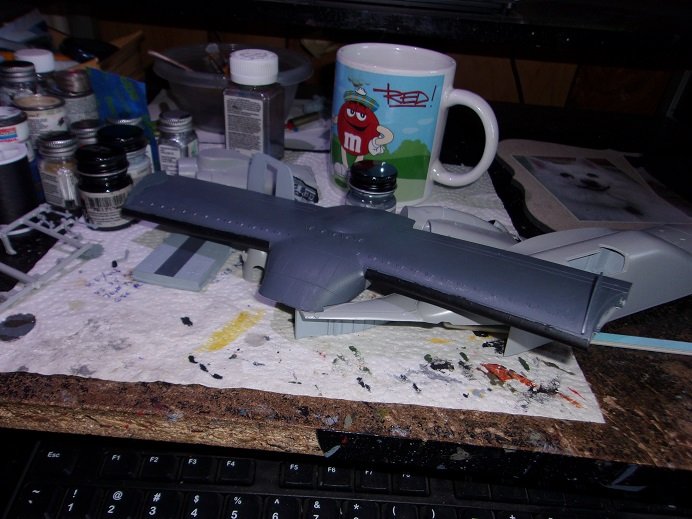
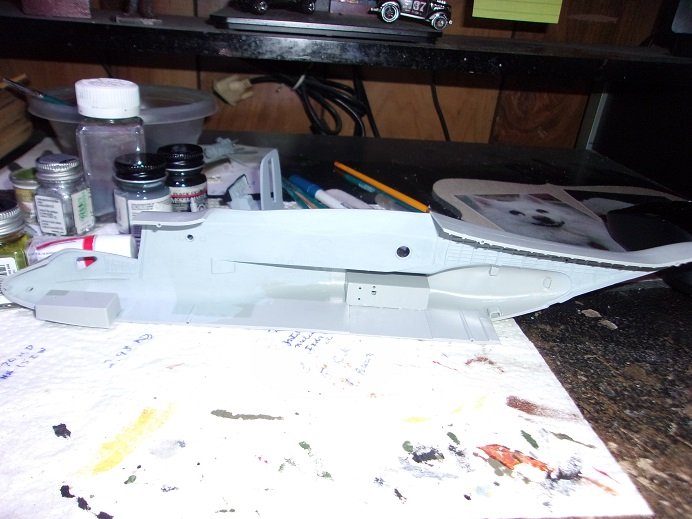
as mentioned........the rotors are huge! seeing them assembled......I can just imagine them on the finished model. the instructions direct you to paint the insides of the engine.......I did not. rather than do that, I just painted around the vent openings, and the insides of the vent parts. so that when the vents are added to the narcelles, they will appear darkened. I did paint the exhaust port in the rear of the narcelles. not sure what these parts are......they may be lights, but they were added to the spinners. I would have used some of the bomber instrument panel decals to add to the panel in the cockpit......but I noticed the absence of gauges. so I just painted the detail to the panel.......and the side panel on the starboard side. some touch up needed....not the best work. with the glass in place, this might be tougher to see. the cargo door(s) have been painted.....I did the bottom to look like the interior floor. I've been doing paint in other areas.......here is the beginning of the wing. still needs touching up.
- 96 replies
-
- 11
-

-
you see some of the panel lines deeper than others.......what I don't like is the raised flashing along the edges of parts. I tend to scrape the edges 'square' before I assemble.......most times I can get a flush joint. in some cases, I take my xactor and lightly scrape along the mating, turning it into another panel line. it does tend to hide and blend in the assembly, so it appears to be seamless. I trimmed a lot of this flash off around the cockpit on the Osprey so the dash would fit in there. a good example of what I'm referring to, can be seen in the starboard opening along the aft rotor tower on your Chinook. it may cause the part that locates there, not to be flush with the fuselage surface. for some folks, it's a weathering dream come true
-
hello Keith......sorry I haven't replied sooner. the wreckage of the clotilda was thought to have been discovered in March of 2018. study though, seem to point that it wasn't the clotilda, so the search continued. on April 19th, the first piece was brought to the surface. it was kept hush for about a year, until it was a verified find.........on May 22, 2019 it was official. she was a two masted schooner, 86 ft long with a bean of 23 ft. she had a copper hull. the info I have makes no mention of a center board. since the kit itself is the subject of a fictitious slave ship, the idea of the clotilda came to mind when I read the article in the Feb 20 edition of the National Geographic. the kit box art { to me} shows it to be more of a Brigg, than a schooner, so with the parts I had left over, I created another hull and named her the Agilis {good a name as any for a Brigg}. the kit has presented a little bit of a problem though.....the hull should be a little bit longer, to be able to depict a better looking Clotilda.........but it will pass muster.......not like it's going to be a museum piece
-
I'd get the jitters when I'd have to go up on the roof to shovel it off, as a youngster. given some time to get my 'legs'........then I'd be fine. do it on a daily basis though.......wouldn't be my first choice
-
Enzo Ferrari by CDW - FINISHED - Tamiya 1:24 Scale
popeye the sailor replied to CDW's topic in Non-ship/categorised builds
given any thought about doing this one in the carbon finish? the yellow looks great..........red would be awesome -
there are those vents again...........on both sides of where the wing mates the fuselage. I think that the ones where I didn't see these vents, were ones that weren't equipped with the folding wing......they were fixed. I should do it in the lighter gray.......it does look good. really neat to see one fold out....thanks for posting the videos
-
lining the windows and doors with wood will accent the building greatly.....it will look like a continual ......I'll go for the 'pulled boar'
-
...a glimpse of how good that's gonna look very nice.....
-
Enzo Ferrari by CDW - FINISHED - Tamiya 1:24 Scale
popeye the sailor replied to CDW's topic in Non-ship/categorised builds
oh yea!..........some sweet detail for that mill! following along! -
very glad that it all worked out for you! the graphics came out super! really nice racy look. I wonder how it would look if you were to change the wheel color to red? well done........stage that one for top shelf!
-
yea.....WOW....so you saw it! I was amazed to see how they accomplished this! there was extensive testing on carrier decks, as I mentioned starting with the Wasp. of course there is no information on how these two crashed.....there were two other crashes in 2000 that almost sidelined the whole project. I'm sure you might have read this. I took the model and tried to simise how to modify it, but I would need to cap the opening off, and create a pivot for the wings.......it would be an awesome mod if I could fold the wings too, but they are fixed on the rotor. Ken.....it would be something if Italeri came up with a kit......likely more expensive too that wouldn't be the case OC.......scroll down in the link and there is a diagram of the Osprey with wings fixed and in helicopter mode. with the height and the dehydral of the wings, it must make up for the size of the blades. planes are set up for thrust and lift.......to add in the helo equaison changes these numbers and factors in for gyro { whatever that is}. all have adjustable pitch for prop or rotor blades........I'm sure these are trimmed when changing to the different modes. they have tested the craft in both modes, so it must have the ability to take off in fixed wing mode. I just got home from work..........I took the rest of the week off {since I hate work}............I'll get to more later, if not tomorrow hope to have some pictures too!
-
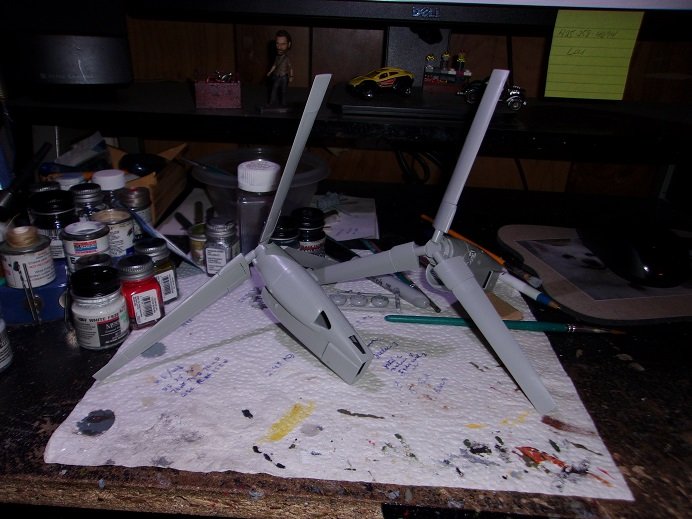
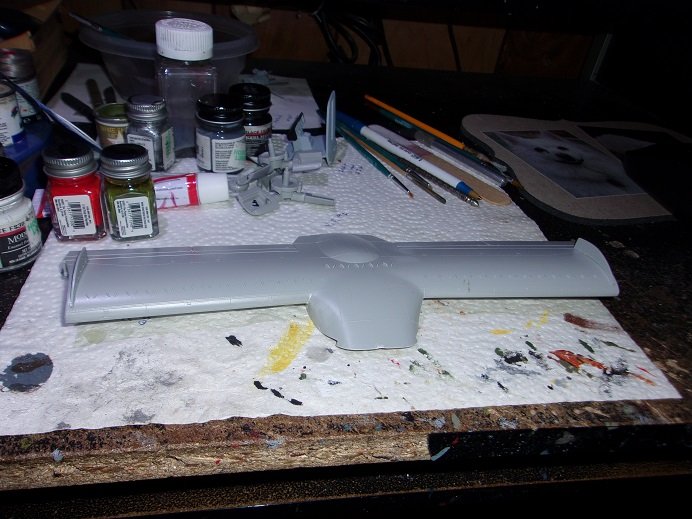
I just assembled the blades on the rotors.........they are massive! unless the wings were a significant height off the ground, it would be almost impossible to fly in fixed wing mode. the six initial prototypes flew trials in helicopter mode in March of 1989.........in September Of 1989 in fixed wing mode. looking at these blades.......you would think otherwise. two crashed between '91 and '92.......trials halted until '93. two completed successful sea trials aboard the U.S.S. Wasp in 1990. by this time modifications brought them up to the V22B standard variant. there is an image on the Wiki.........the wing does fold.....wait till you see how! Bell Boeing V-22 Osprey - Wikipedia
-
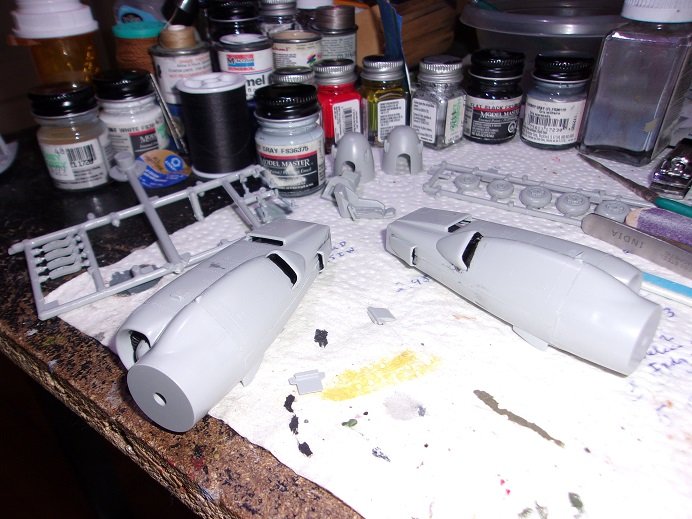
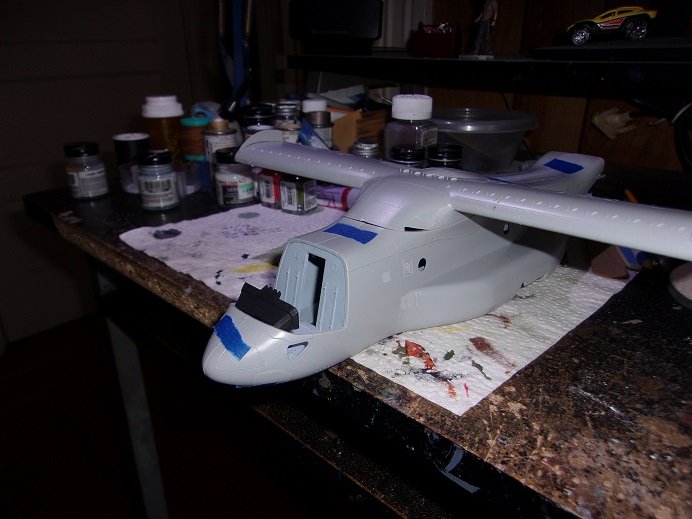
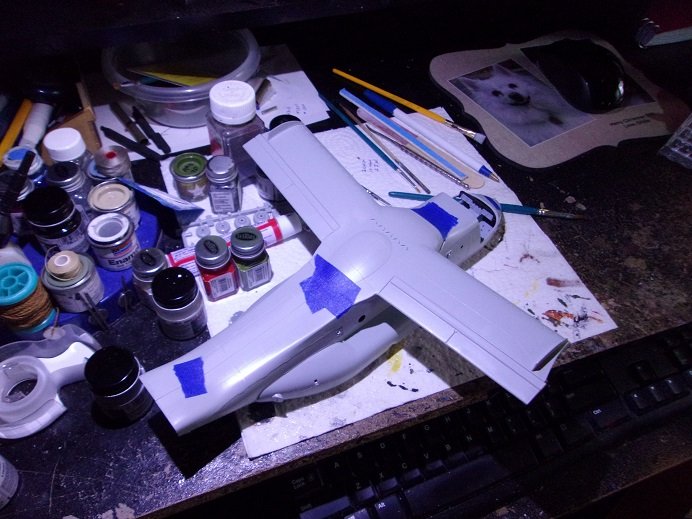
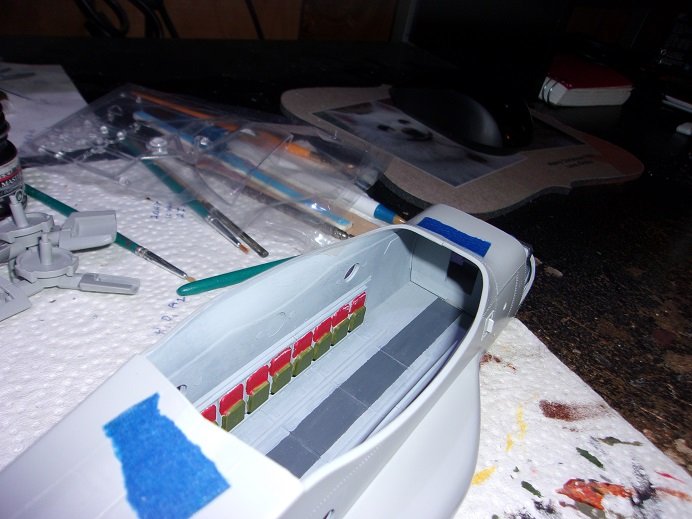
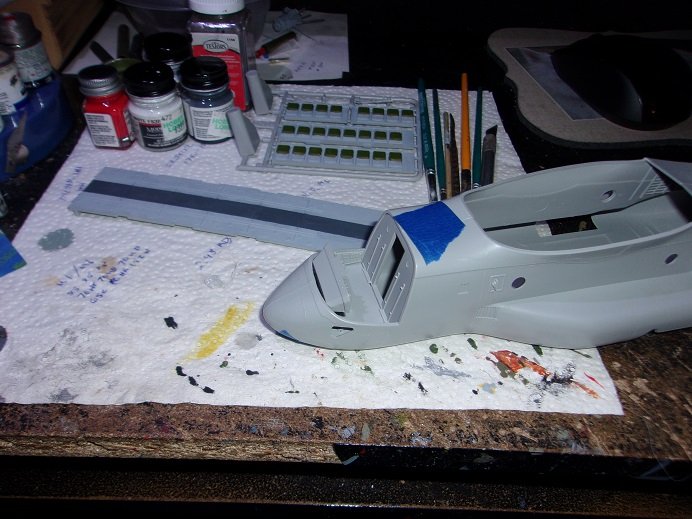
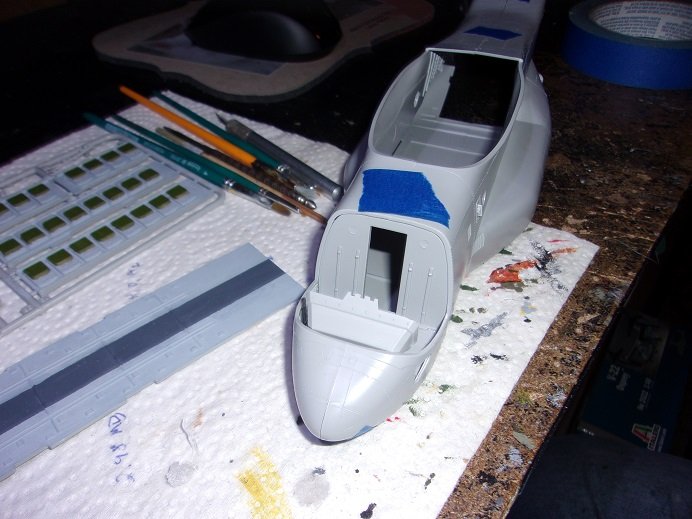
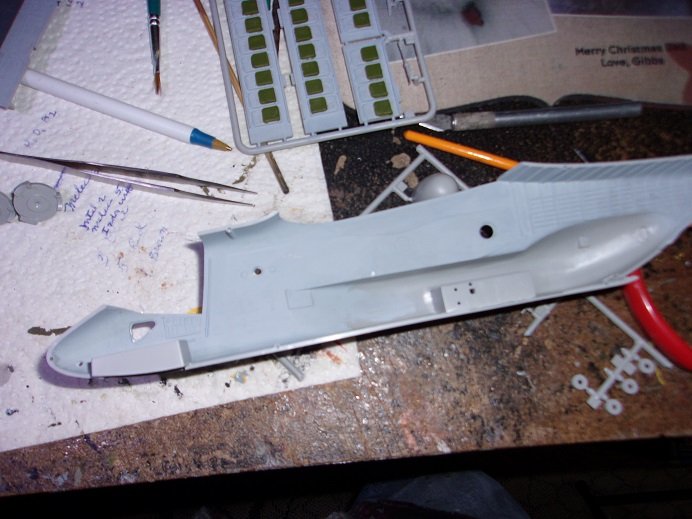
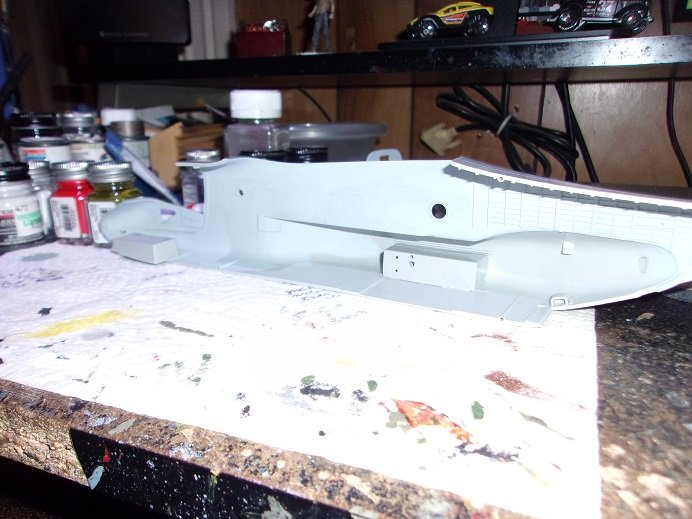
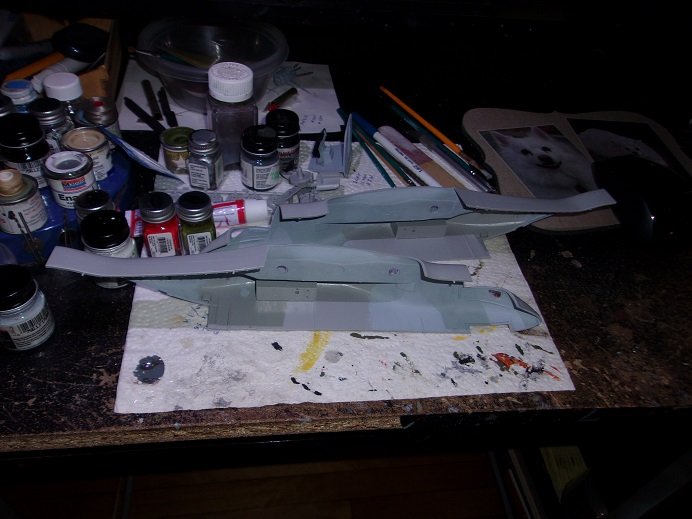
the narcelles have been started as well.......work in progress checking out the dry fit, I added the wing, and noticed the gaps on both sides in the front. in some of the images, they are there......in others they are not. I do have some sheet styrene.....I may patch them up. it doesn't mate up too good either......figures that I'm out of putty. this time I won't forget the interior dry fit.......please excuse the horrible paint work..... this shows the spacious area forward of the seats.......I think there should be a bulkhead here. looking on the starboard side, the main entrance door is located there. the cargo opening is forgiving.......once the wing is in place, it will be the only way to view the interior the flash can be annoying......... another thing I noticed is that they give you five round window inserts. not counting the little one in the main entrance door, there are only three round windows. if you look at the picture above {and others that show the interior surface, you can see the outline of additional windows. there are no signs or them on the outer surfaces. there's one on each side......makes one wonder what the tooling significance of this is. most interesting.
- 96 replies
-
- 10
-
-
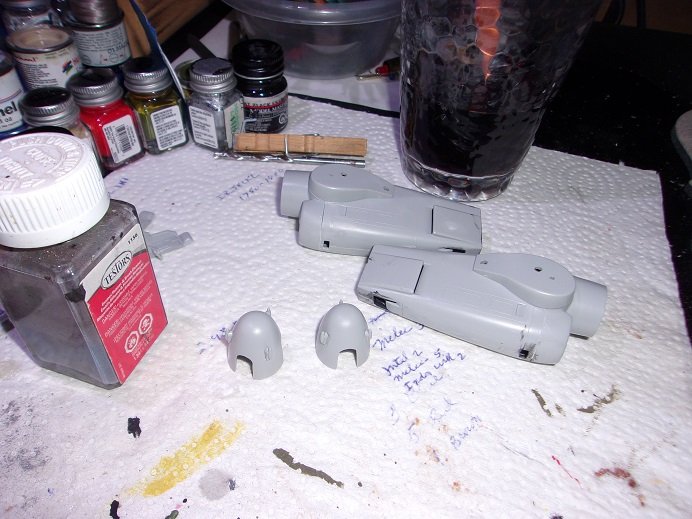
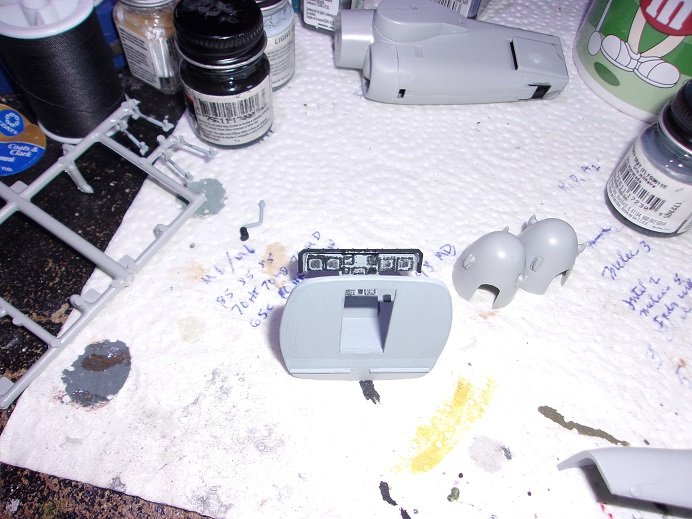
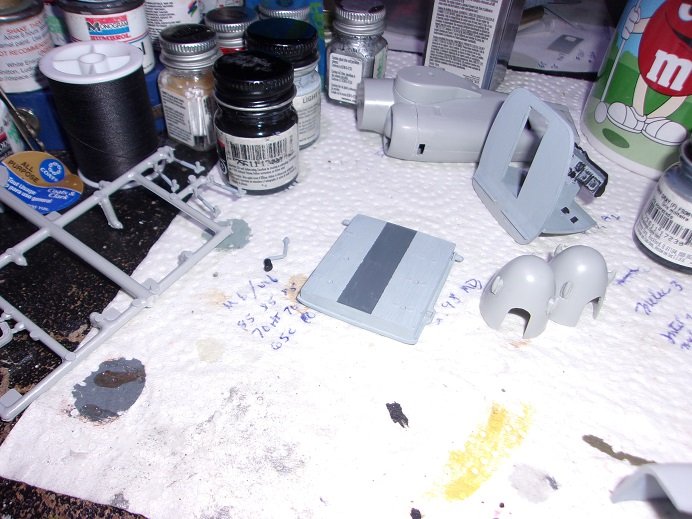
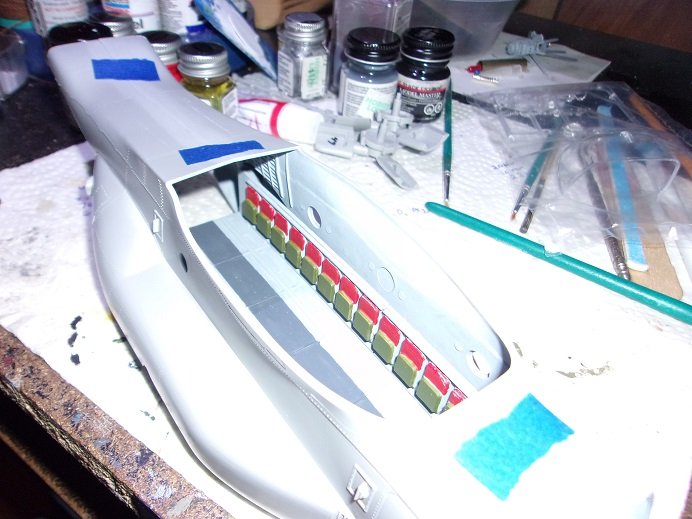
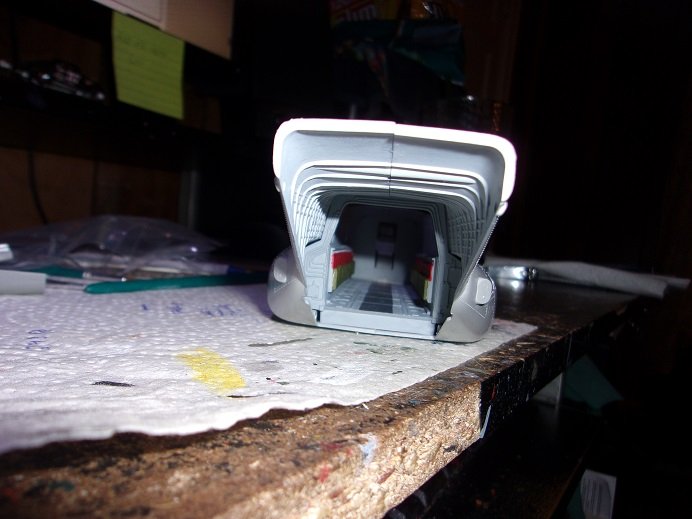
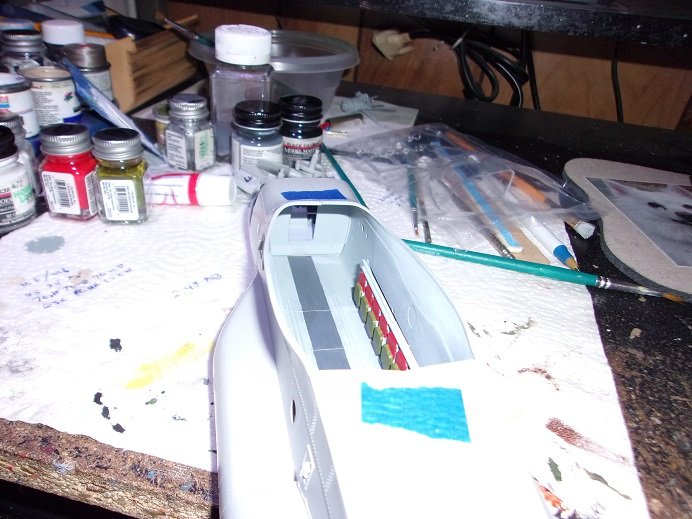
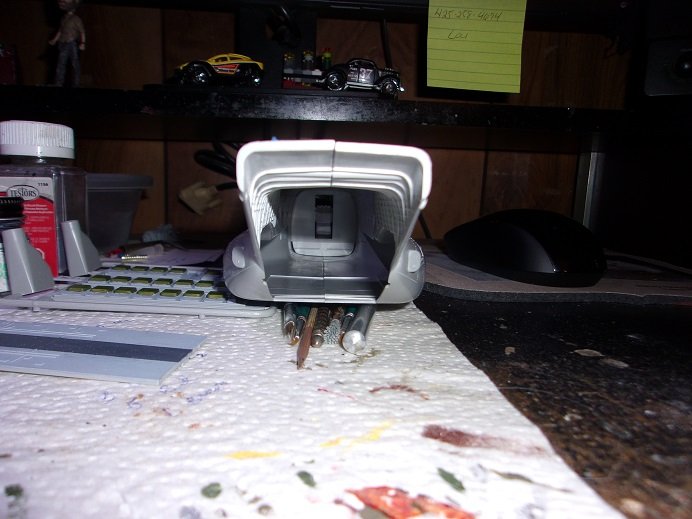
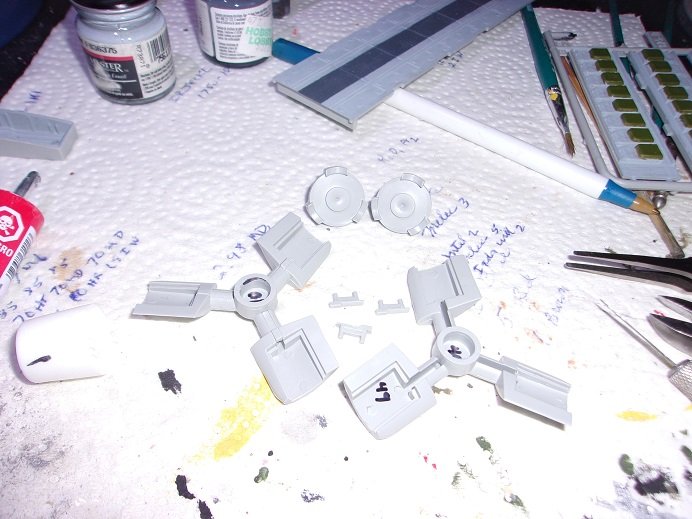
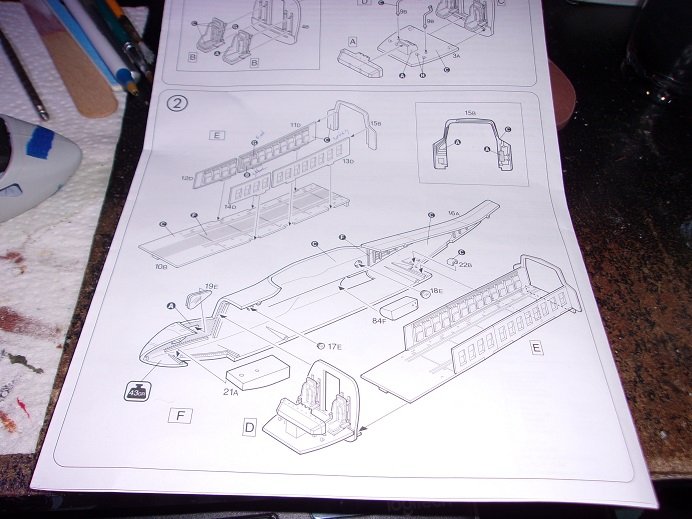
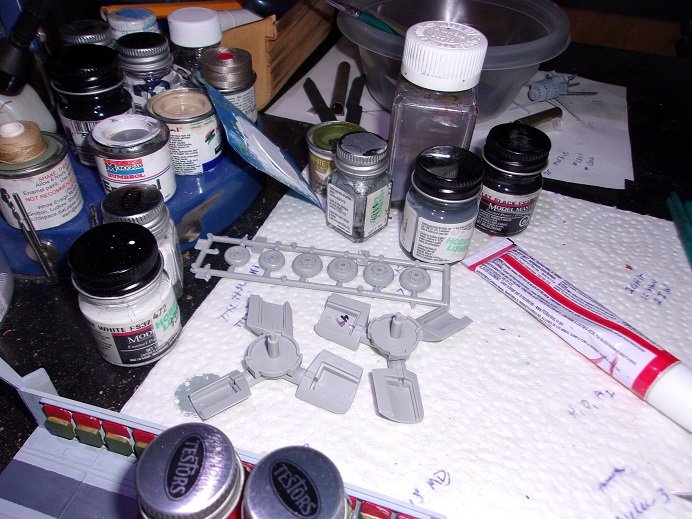
thanks gents........when I got back from shopping, I took some time to look at images. I'd better get on with the update though, before some other interruption happens. the images kinda go along with what I have to show. I did get a couple of pictures of the cockpit dry fit....it was still together anyway. the dash has enough room.....I don't need to make any more adjustments. here's a shot of the interior via the cargo opening...plenty of room in there. the rotors will be mainly the same color....so I started to assemble them......numbered so I can keep track which is which I did the interior paint which is a med gray......then added the gear buckets. the tabs for the cargo door added here. the images threw me somewhat......a couple of pictures showed the door as one long unit.....other pictures show it as split and in the positions shown in the kit. I'm allowing the flash....some come out good, others don't.... it can be seen that I added more paint to the cockpit insert....you'll see it better in further pictures more paint was added to the passenger area. the seats themselves are a red color. looks like a dog's breakfast, but I still need to touch them up. it did confuse me a little.....I goofed assembling it. I had to take it apart and redo it...that went better than I thought it would.....it was a mess. at one point I did a dry fit of both sections and I thought I had still goofed. the cockpit section would not fit into the fuselage half.......off about 1/8 of an inch. I later found that the passenger section bulkhead was in the wrong place......an adjustment later, and all was good. the rotor parts are assembled......along with the tires there are a pair of fins that locate near the ends of the wing.....they were cemented in place. the rotor blades have also been assembled and sanded....no picture yet.

- 96 replies
-
- 13
-
-
warm water softens the film..........look'in good
-
hi everyone........yea......there was a rush on the research here. the Truman reference was probably the the initial call for the need of such an aircraft, after the proposal of the Marshall plan. transport aircraft that could get into tight places where an airstrip wasn't an option. I did some looking in on this, but couldn't find any correlations either. there was The Berlin Airlift......that was quite an undertaking in his era I realize that there were quite a few variants of this aircraft .......and concept, through the years of its development. I really did focus on them, since this is the model I'm building. I'm sticking to that it doesn't say on the box, but from the decal sheet and the box art, it's Marine.....so if the abbreviations say anything more, it's an MV. the placement of the engines is exactly that.......a gyrocopter. the Marines needed an aircraft that could take off and land in tight places.....they also needed speed on their side as well.. after the Iran hostage crisis, this underscored the need for such an aircraft. with the narcelles fixed on the wing, the tiltrotor concept wouldn't work....it compromised the integrity of the wing and cramped the mechanism to operate it. I think the length of the props was another issue. as seen here, they are large and likely longer than a conventional fixed wing plane. being this large, I believe also negated the need for a tail rotor.....especially if the engines were lowered to the fixed wing position during flight. one drawback they found, was during operations in the middle east. as with helicopters, the downward air currents from the props brought up dust clouds, which clogged intakes and caused the plane to crash......I haven't read to find what the fix was.....but there were a few incidents caused by this phenomenon. gone shopping..........be back in a bit
-
noticed you painted the frames from the inside.......interesting. are you going to paint the outside too? what's with the gap at the top?
-
great look'in spit.........glad to hear your feeling better
-
the cockpit looks good I like the foil idea......will it be painted over?
-
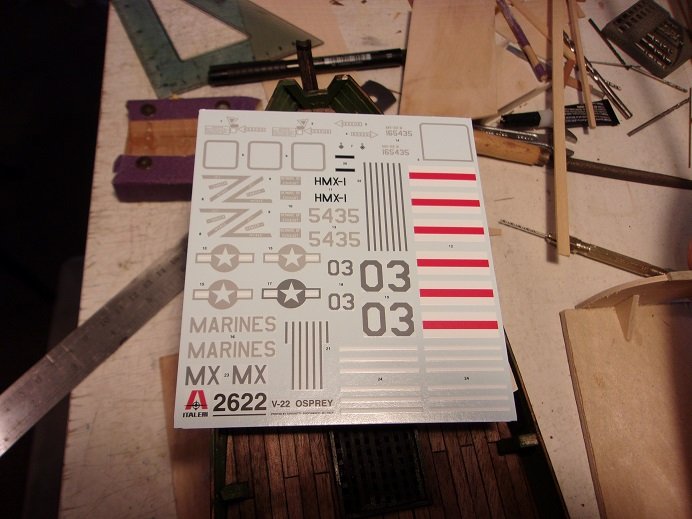
I've had fits with decals that large too. they never conform, and if you force them........well, then your dealing with two decals. I bought a Cutty kit from E-bay.......the decal sheet was trash, so I got another one from Revell. that one broke up into thousands of shards due to micro cracking.......so your assumption of decal age is true you might have done better to purchase a sheet from an outside source. Drag Racing Decals - Mike's Decals Archer Fine Transfers, Decals, Surface Details and Dry Transfers for model builders personally, with the masking ability that you have, I would think that paint might work better. decals can be the most discouraging thing about the car model medium I hope you can fix it. root'in for ya good buddy. I've even thought about pull'in out the decorations myself...........we all need something to smile about

