
HOLIDAY DONATION DRIVE - SUPPORT MSW - DO YOUR PART TO KEEP THIS GREAT FORUM GOING! (Only 20 donations so far - C'mon guys!)
×


popeye the sailor
-
Posts
16,007 -
Joined
-
Last visited
Content Type
Profiles
Forums
Gallery
Events
Everything posted by popeye the sailor
-
 when I first got the car.......the bracket for the left side traction bar had rotted out. my dad and I measured and welded a new box in there.....bolted up like a charm the right side went bad some time later......we just welded some metal in there to hold it. I lost the gas tank in it one winter morning......I had just filled it up. the last hurrah was getting pulled over in Derry N.H. by the police........the smoke was a little too much for them
 -
superb car.......very sporty look to her very nice show rod!
-
you've made some great progress since I last looked in Kevin........your plans seem to be growing too you got bit!
-
there are quite a few places to find aftermarket....even some of the main stream outlets are beginning to stock it. S q u a d r o n . c o m - Squadron Savings Scalehobbyist.com: Model airplanes, ships, military vehicles and modeling supplies Gold Medal Models Home Page I got others..........the cockpit looks really good
-
agreed......it would be interesting how you lay the paint stellar look'in plane you have there!
-
I have an order that I'm waiting on.......the witcher, season 1, DVD........one of the admiral's Christmas presents. I ordered it back at the beginning of Nov.....heard nothing until the other day, when I sent an email to the guy asking if it had been shipped. took him a day, but he replied, supplying a tracking number and the date he mailed it. for now, it is in transit from N.Y.. I had another one......a conversion set for the B 25 {to replace the piece I lost}, that Lou had suggested to me. it was coming from China.......they cancelled the order and put the money back into my account, stating that they cannot ship due to covid, at this point in time. I tried to fins another place to get the part, but I wasn't successful. I'll look into when things get better I guess. I had a Ford Galaxy 500 convertible, when I was a young lad. the rag was pretty worn and the rear window was all cloudy and fogged. I had a bumper sticker on the back that said " don't laugh mister, your daughter might be in here!" it had a 289 with auto trans. the valve seals were worn, so it smoked a bit.......brought it back from the dead a couple of times
-
your really getting along with this model Greg..........some very fine workmanship the PE work is awesome!
-
nice progress Mike.........gonna be a cool display base
-
look'in forward to it...........wow! .....a two-fer
-
1/48 Italeri Hawk T.1A (On Hold)
popeye the sailor replied to Old Collingwood's topic in Non-ship/categorised builds
natural casing, brats and sausages are for me!.........bring on the onions and green peppers! ;) look'in in my friend! -
sorry to hear as well......either you have a model that is of poor design, or one that is so ridiculous, that it becomes a chore to build. perhaps one day you'll bring it back out
-
I really didn't have the thought in mind Paul, but yes, it's Pearl Harbor's anniversary. I work on whatever comes to mind.......and believe me, I have plenty of active projects to think about it was some time ago.......too many situation comedies i've modified my watching to dramas she still loves her Popeye.......
-
the hull looks really good here are some of the articles I found. Lady Grace also gets harbor berth | Archives | gloucestertimes.com HANNAH BODEN | Eastern Shipbuilding I must have tossed the other articles, but I do have a PDF of the search for the A.G. there was a person where I work that knows the family, but I have yet to meet her. the Billing kit that your building does show the elongated stern. that was one of the aspects that, considering how I built mine, that I didn't add to her. my log should have the links that I seemed to have dumped .
-
sorry John.........afraid I don't have that date marked we really have to get on the same page........ I had been thinking of her these past few weeks.......all that work into something that just sits on the table. I thought of the mistake I made on the stern rigging I started to do. the fore mast with the two PE arms on it has been sitting on my desk all this time........haunting the bejeebers out of me. next thing you know, she was on my desk.......not much more to finish her. thanks no....she doesn't say that OC.........she says something like....."you wanted to do it...." she happier though when I'm working on a wooden boat.....she's not to big on the plastic stuff. she is to the point though, that whenever I need anything..." well, scratch built it......you can scratch build anything!" we had a 12 foot tall snowman inflatable on the front lawn.........I say 'had', because the upper blower motor crapped out and it won't fully inflate. she thinks I can fix anything.......mainly because I hate tossing things out if I can fix it. I still need to look at it...might be a power issue. what not to say to start a war.......that's not too tough. man had always had the ability to literally hang himself at the worst moments case in point of this one episode we had. we usually don't argue....we debate. during one of our 'heated debates' {in the evening, she get into what I call lounge wear}, she looked at me and told me she was going in the bedroom to change. being dubbed with the gift of wit was a detriment to me here...'cuz I replied "for the better I hope!" needless to say, the doghouse was the warmest place in the house that evening thanks Mike
-
off to a good start! I did a scratch build using both of the billing kit's instructions. I still have some of the info I dug up.......the kit is based on the Movie 'the Perfect Storm'. the boat used in the movie as the Andrea Gail is called the Lady Grace. you can see where they painted over the name. the HAnna Borden was another ship as well.....I haven't been able to find out what ship they used for her. I want to do another scratch build.......but so far, I only have one picture of the actual Andrea Gail one day........perhaps


-
looks a whole lot better than mine..........I can't even recall if I ever finished it she looks awesome Jonathan!
-
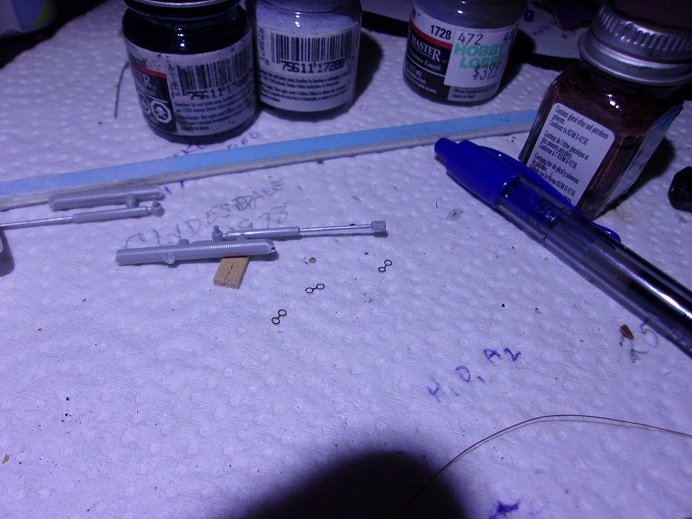
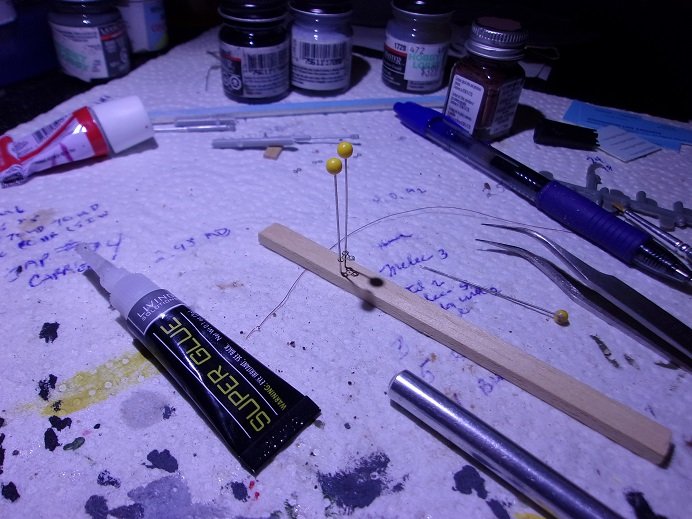
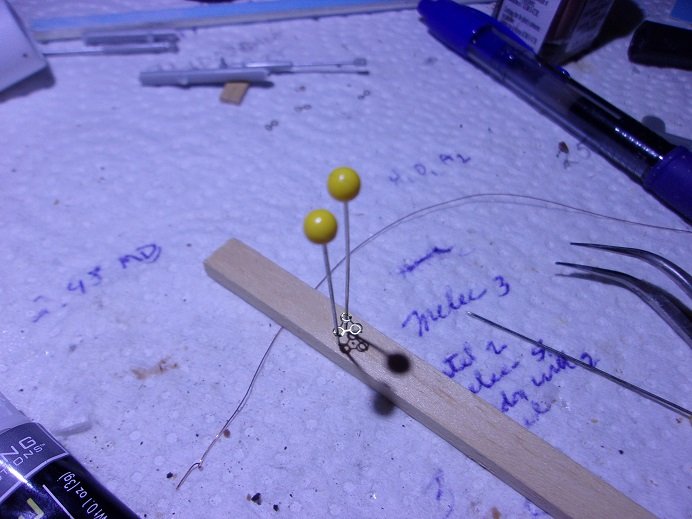
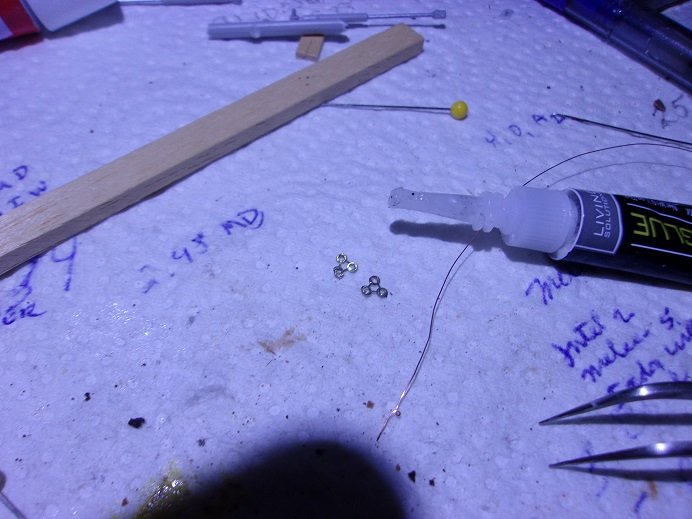
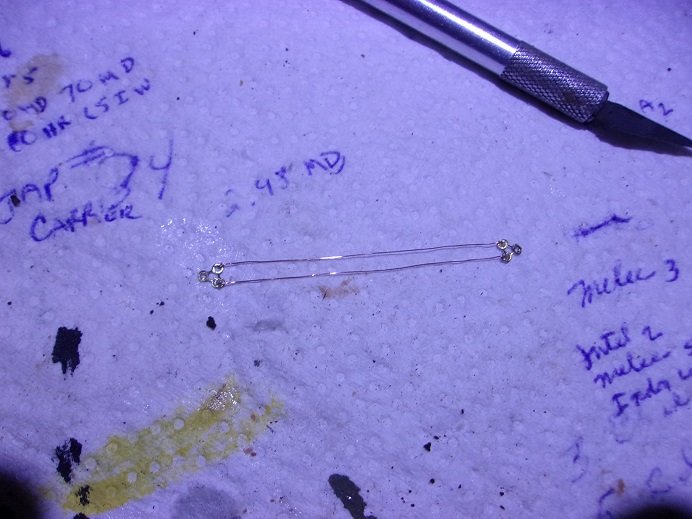
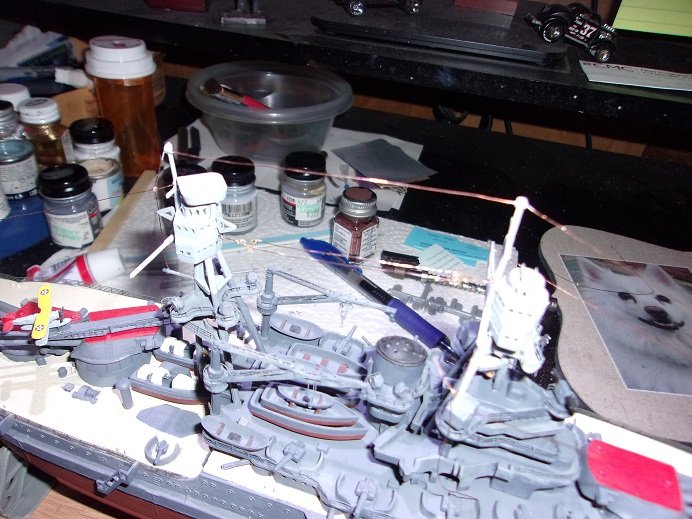
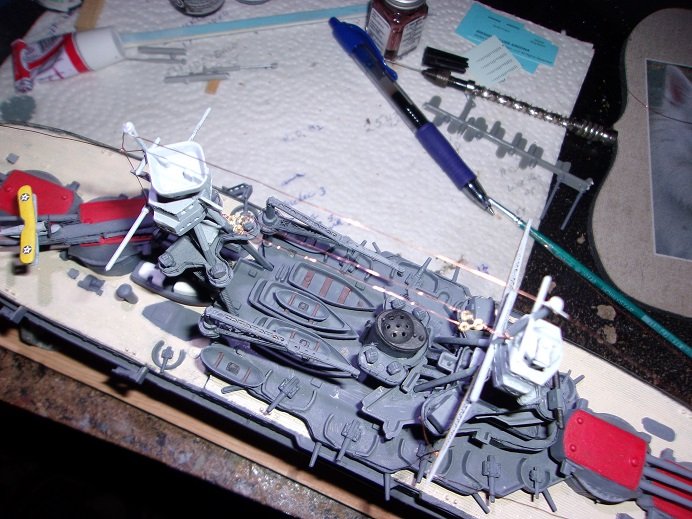
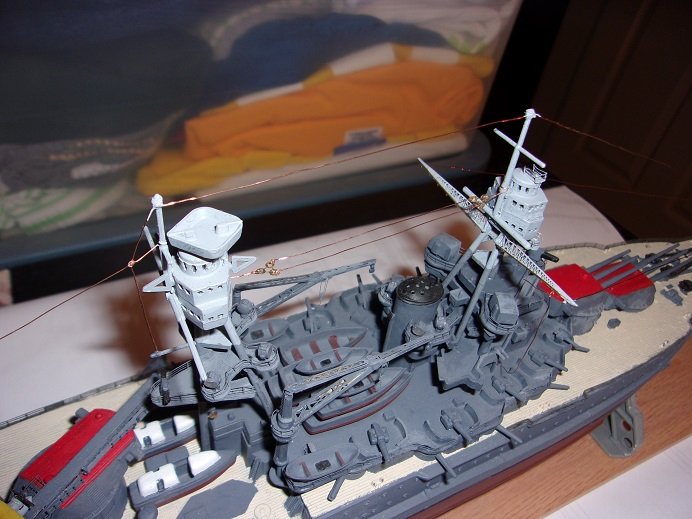
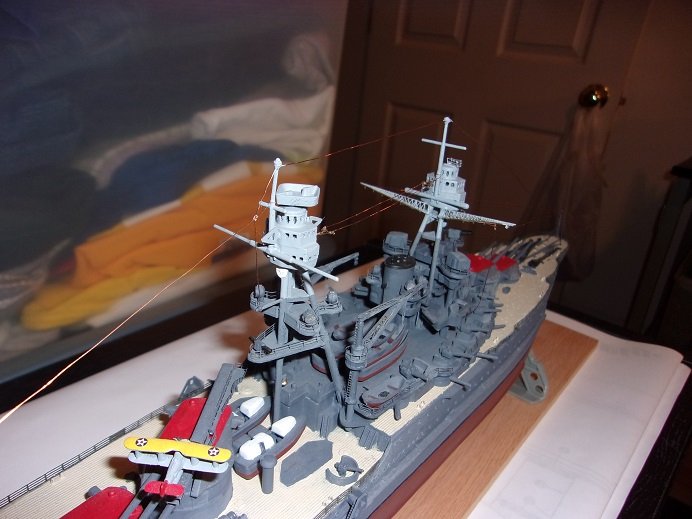
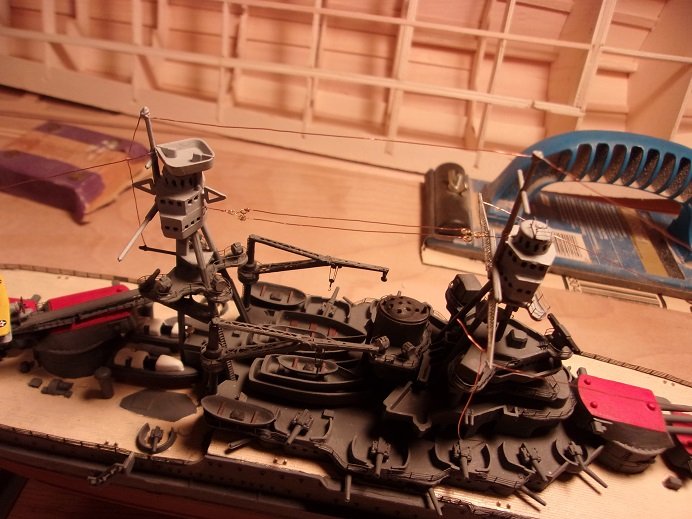
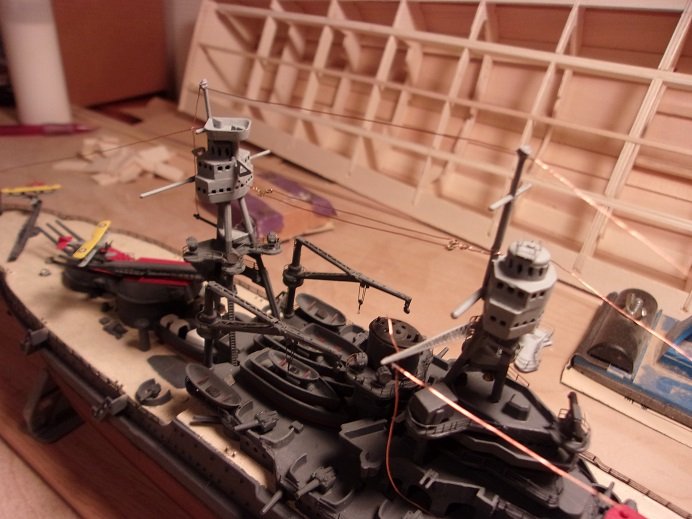
this was a tedious task.......there were many cuss words uttered. I have a flashlight on my desk.......dropping this thing to the floor.....well, I can safely say I got my exercises at the same time! as mentioned, I had a pair of plastic triangular pieces, but even if I knew where they were, they'd likely be out of scale. so I have these six pieces of PE......I will have tie them together. I'm trying to use macro with the new camera....this is how they come out with poor lighting and flash. after trying a few times to join them with tweezers and the wire........I even tried my 'helping hands', it was to no avail. I needed to try the jig method. so with three long pins and a piece of wood, I was able to capture all three in the configuration I needed. teasing them up the pins and away from the wood, I was able to give each joint a jot of CA. joining these two together with equal lengths of wire was another source of aggravation...a lot more discouraging words.......trying to keep the 'wrapping' down to a minimum {I didn't want it to look gaudy}. it was frustrating to say the least, and I managed to come up with this. I took into account, the length between the towers, it was made short enough to add some wire at both ends. now I needed to drill a hole in the aft tower......my short pin vise wasn't going to cut it. I have a couple of spiral push drill {pin vise}...I hardly use them.......I found it long enough to do the job for all the aggravation and bad language, and the time it took to make this thing........it took less than ten mins to install it! after trimming the excess, I took these pictures. I wasn't happy with these pictures, so I took a couple more in the spare room, where there is more light. still using macro. to see what the pictures would look like with some real illumination, I moved a side project I'm doing over and took pictures on the table. this is my third table by the way.......I wasn't satisfied having two. I didn't have to do too much primping either....... to be honest, I don't believe I've ever made one like this before. kinda neat I was able to pull it off
- 259 replies
-
- 12
-

-
Holy cow Yves.......the sub looks awesome! .......and a great log to follow to boot! very well done on both counts so much detail......you've really outdone yourself superb job my friend ...and congratz!
-
I never learned to play the piano......could have been cool, I suppose. I do have a couple of music creator programs for the computer......haven't messed with them in quite some time either........the playbacks were too scary
-
I have yet to see the movie.......but the baby Yoda is very cute good to see your making progress...looks really good
-
looks great!.........I like the way you mix the wood and mortar balance...... 👍
-
I have a couple guitars as well......one is an old 'flying V' student bought at a Western auto in Florida. I don't bring it out......every time I go to tune it, Gibbs howls I have another that is small......I bought it for our oldest granddaughter. she didn't do anything with it, so she gave it back to me. I have NO claim to fame with a guitar except one time {lasted for only one song) of course, I was drunk at the time.....could've accounted for it I'm not bad with the bass, but I'm not a virtuoso. kinda like Jack Benny.......he always said that he practiced to be lousy
-
that was the initial aim of colored plastic.....a fair number of ship kits were even done in multi colored plastic. it's not a bad thing, but folks found that they had to prime their model before paint them the color they actually wanted. I kinda like that color......rather close to a Brunswick Green. hard to see the imperfection in the early pictures......the big thing I usually see are mould lines and pin marks {usually in all the critical places}. I know that price tag.....just can't place it.........HobbyTown perhaps
