
HOLIDAY DONATION DRIVE - SUPPORT MSW - DO YOUR PART TO KEEP THIS GREAT FORUM GOING! (Only 36 donations so far out of 49,000 members - C'mon guys!)
×


popeye the sailor
-
Posts
16,007 -
Joined
-
Last visited
Content Type
Profiles
Forums
Gallery
Events
Everything posted by popeye the sailor
-

1/48 Italeri Hawk T.1A (On Hold)
popeye the sailor replied to Old Collingwood's topic in Non-ship/categorised builds
are you referring to regular Revell model cement? to me it appears that you not tabling the build.......your simply gonna take your time it might be an opportunity to check and see if they sell a resin conversion kit for this one, especially if the damage is severe -
hey there CW.......glad to have ya look'in in there's a bit more to go before I'm caught up with what I've already done. I'm much happier to be doing this with wood, rather than the plastic sheeting. I can just imagine what trimming and sanding I'd be doing, if I had used it. I replaced a water heater when I owned my house years ago. it was in a bad place, right in line with the doorway to the cellar under the addition that was done before I bought the place. I moved it under the stairway and tore out quite a bit of copper pipe, rerouting it and plumbing it in. my dad taught me quite a bit...I owe everything I know to him my older son Brandon is my carpenter......my younger son Kevin is my automotive nut....I'm passing it forward in every apartment we've lived in, I've done some degree of maintenance for the landlord....even this knucklehead. he's the kind of guy you really hate to volunteer.....well........long story. he's the landlord, let him figure this out
-
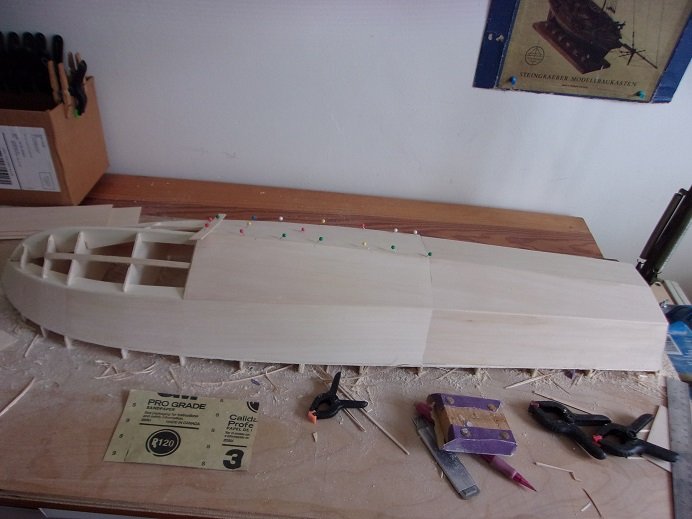
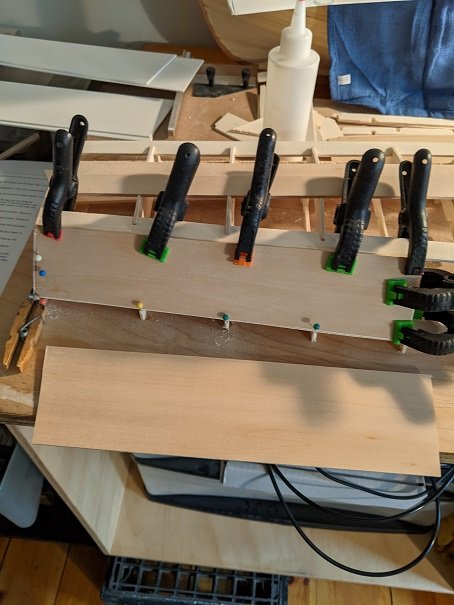
here is the imperfection I was talking about...... cement filled it nicely.........sanding smoothed it out. onward with the starboard side sheeting! I cheated a little here.......I'm overlapping the port bow cap. it won't happen again....promise the new stuff need to be trimmed and sanded to accept the bottom sheeting. it continued where it left off........ the curvature of the breakwater starts here at the front.......I used a piece of basswood to help create the curvature. it gets more pronounce as it runs to the bow. I left a little excess for sanding purposes. I use a box cutter to whittle it down closer to the edge. careful not to gouge it! a small plane would do wonders here......think I saw them at Model Expo. the pins are pulled and the trimming and sanding done..........what am I say'in.........it's NEVER done! time for the other side....... .......didn't turn it around..........I'll never learn it wasn't bad......beveled the panels along the keel and it fit OK. more sanding.......keeps me occupied
- 221 replies
-
- 14
-

-
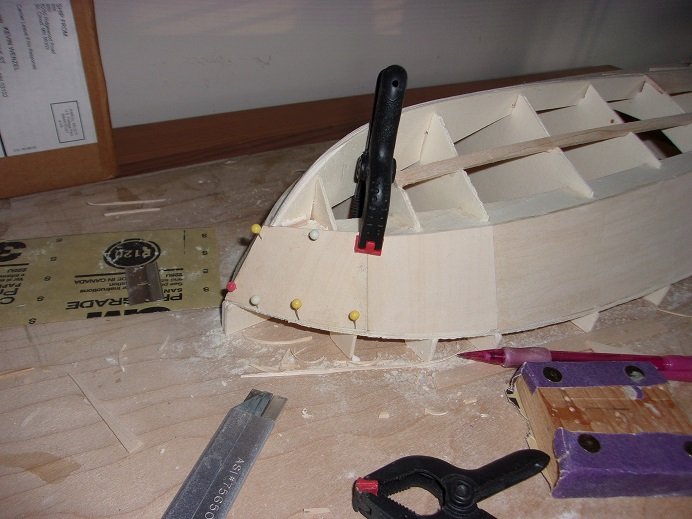
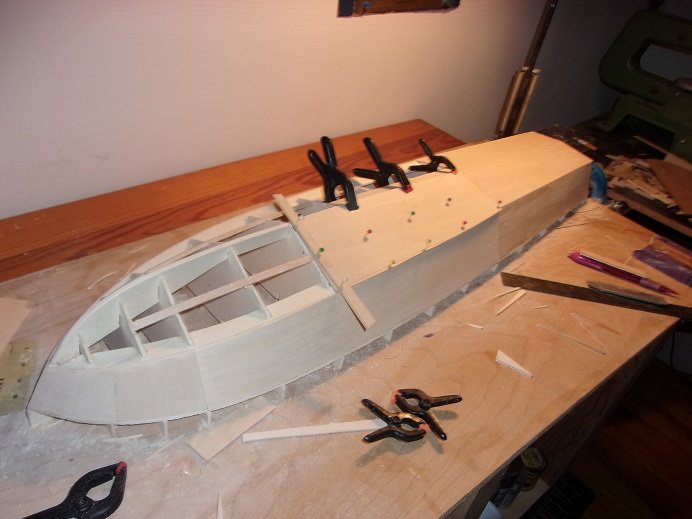
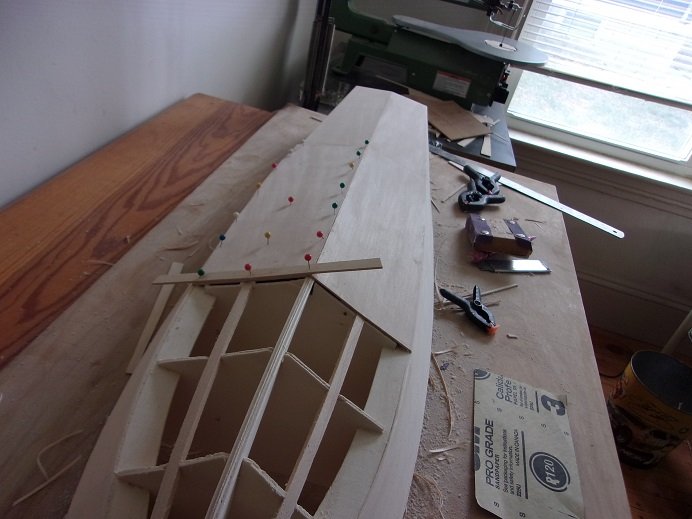
I decided that for this session, I would continue sheeting the sides.....starting with the port side. I did nothing for under the sheer stringer.......I just laid a bead of cement and let the chine stringer do the rest. my hunch worked {also helps when you have Murphy locked in the closet} trimming the excess was the thing to do here......creating the beveled edge at the chine. I had sanded the bevel at the bow stem in doing this......I will need to sand the bevel on the starboard side of the stem, when I do the other side. it can be seen that I had done some of the sanding along the keel....I'll get a better picture for you, so you can see how acute it is. along the sheer stringer, it looks strange, but that will be gone when the gunwale and clamp is added. I'm also working the section joints out too. I wimped out........so far I have done the sheeting of the starboard side, without turning the board around. a small imperfection can be seen along the sheer stringer towards the stern.......it did seal itself though. again, the gunwale and clamp rails will cover it and no one will be the wiser more sanding and the same trouble points.......

- 221 replies
-
- 10
-
-
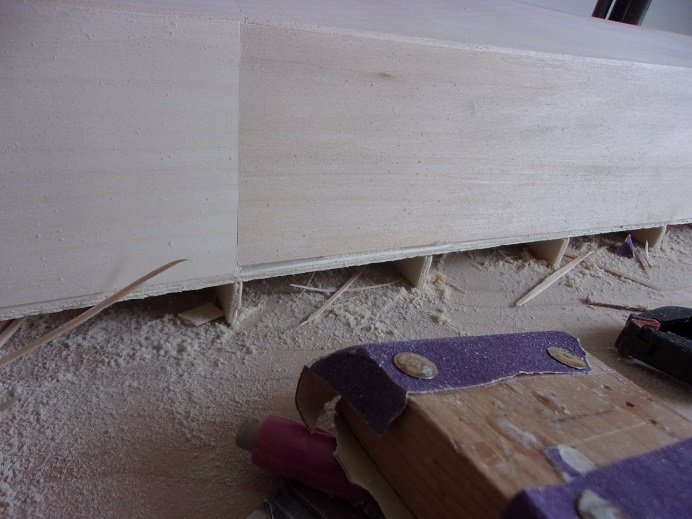
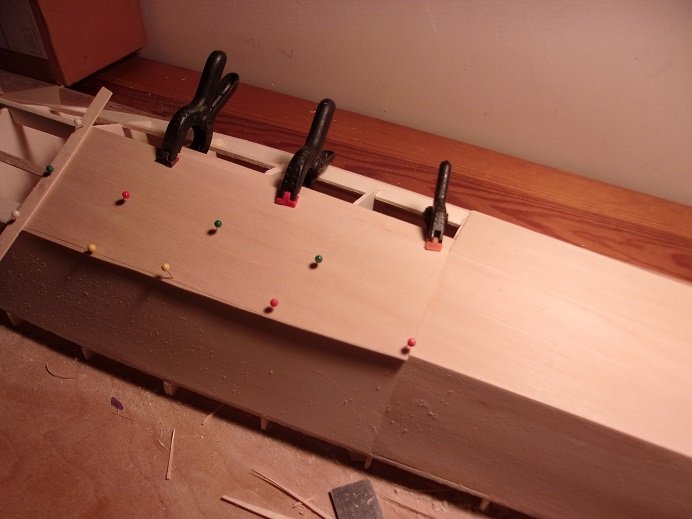
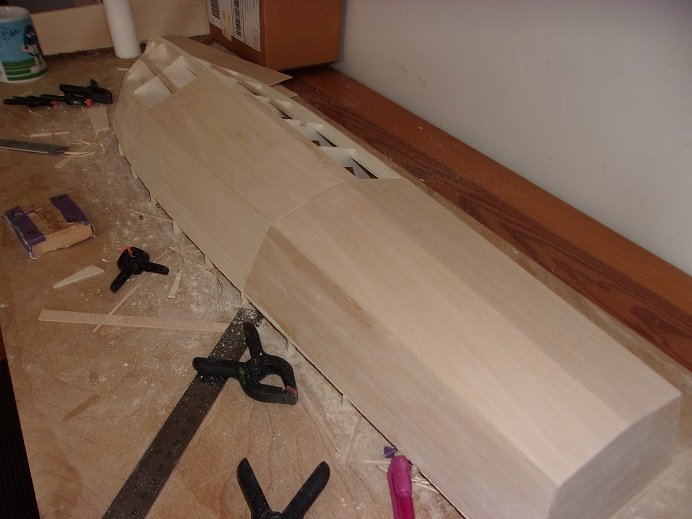
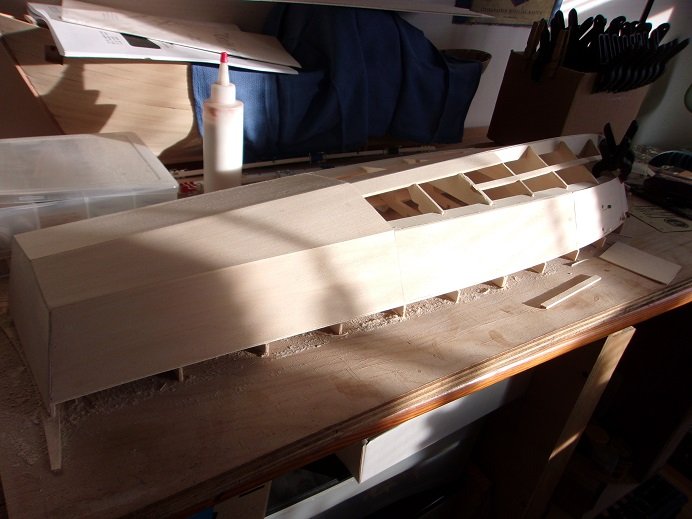
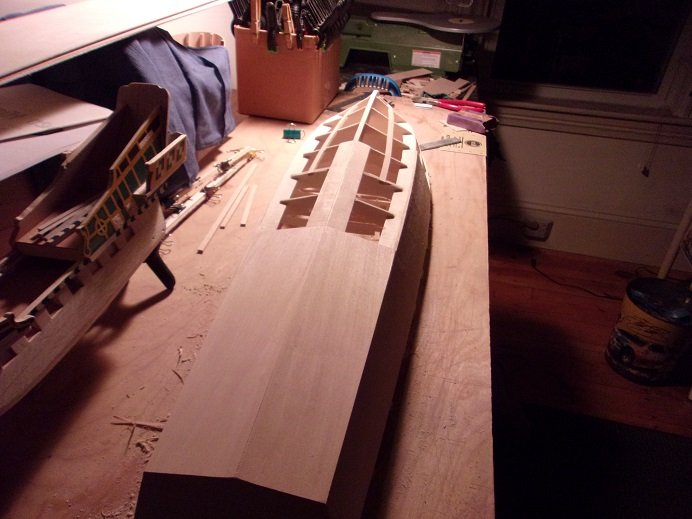
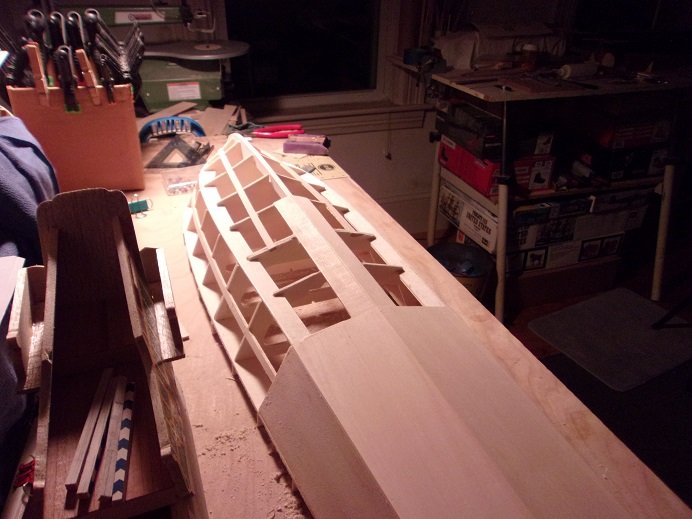
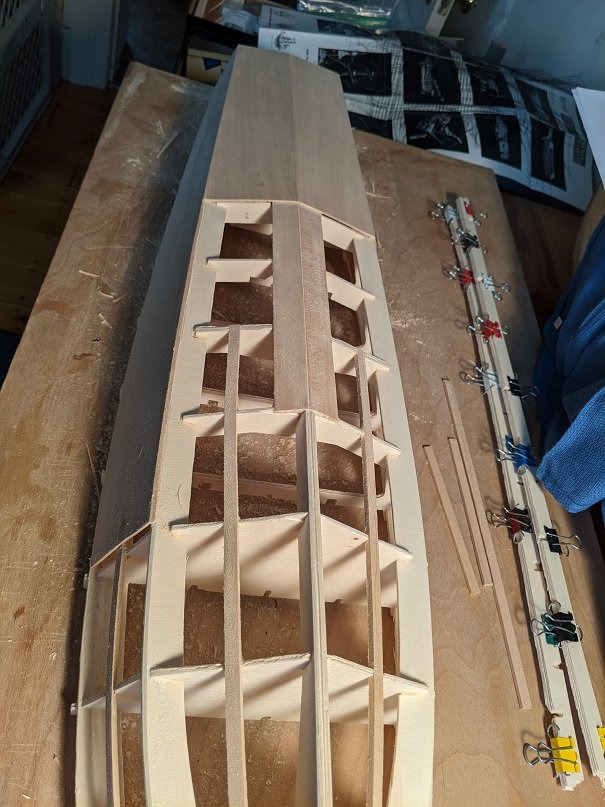
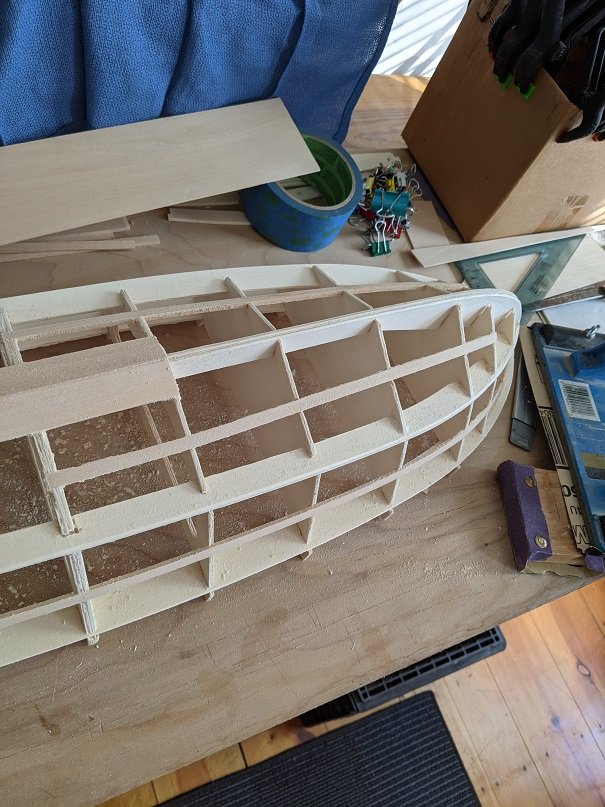
this next session is the continuation of the sheeting. the starboard side received its section. again, the beveled edge along the chine stringer, to accept the bottom section sheeting. at this point, I need to shape the keel......it need to be beveled on both sides, forming an apex. the mating of the two sections.....sanded to the point where it can barely be felt........the chine edge is totally flush on both planes, coming to a crisp edge. when the spray rail is added, it will lay flush. the apex running forward from the stern will need to compound as it runs to the bow. where this joint is, is the starting point. it will continue shallow here, and become more acute as it runs 'round the bow stem. this area still bothers me........run a 'rabbit' under the sheer stringer? 1/16 strip? for now, I'm just running a bead of cement along the underside of the sheer stringer.....I left it jutting out for that reason. so far, so good
-
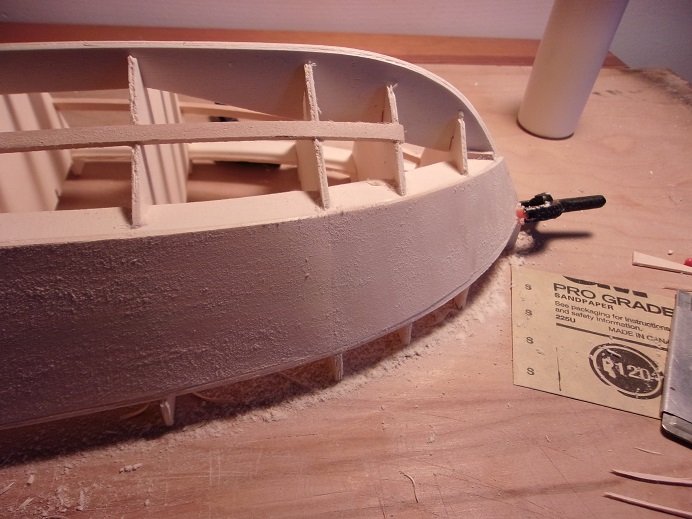
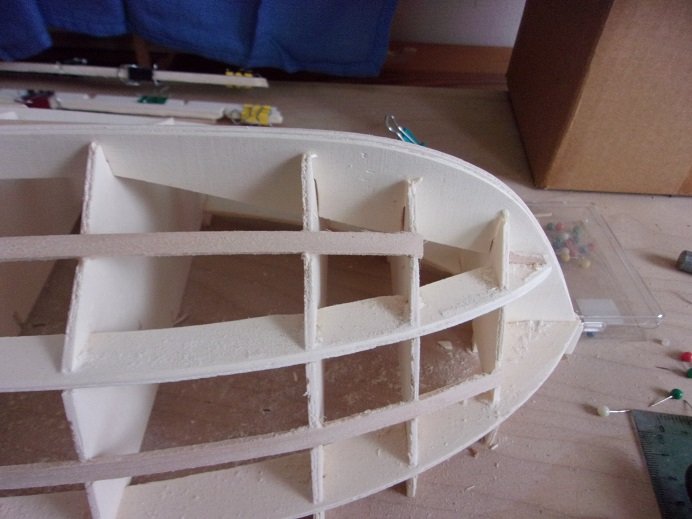
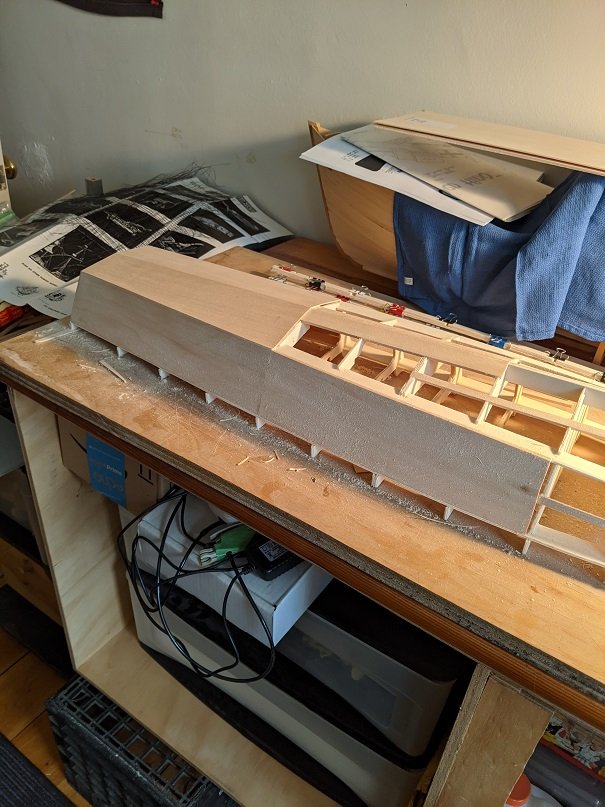
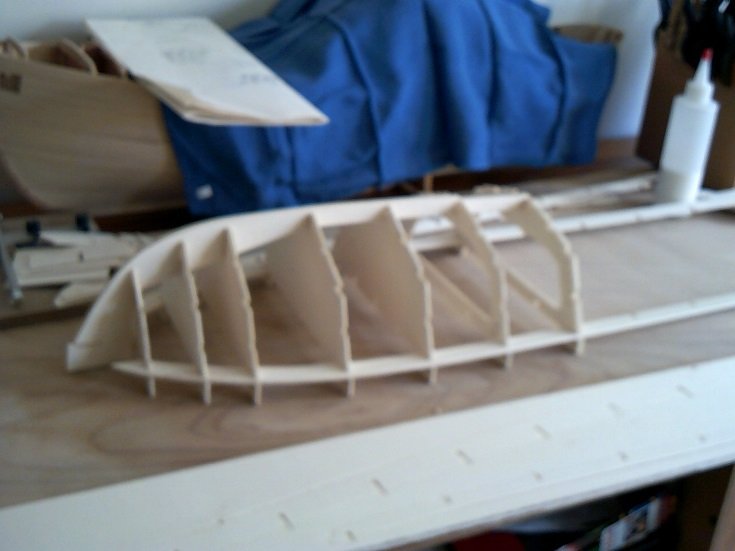
Christmas shopping went well, I think..........had my wallet cry'in UNCLE within a couple of hours! we had talked about capping how many gifts to buy each other......in our younger days, we didn't buy for ourselves.......it was for the two boys. now that they're gone, we kinda spoil each other had a start today as well.......the fellow on the second floor knocked on our door tell'in us that our water heater was leaking all over the cellar floor. I went down there......saw the water and the trail, and showed him where the real leak was......it was the third floor water heater! I know the kid isn't up on his science, but some one needs to tell him that water flows away from the epicenter....... had to tell the landlord about it......Merry Christmas Gary! now.....on with the show. I took some evening shots of the hull as it stood at the moment....10/23/20 basically, more sanding to set the frame up for more sheeting. the chine at the bow stem has been reinforced because of a small gap there. also note the #1 bulkhead and the shortcoming on the sheer stringer. I may need to get creative there. sanding plays a big part during the sheeting process, fitting the panels as I go along.
- 221 replies
-
- 10
-
-
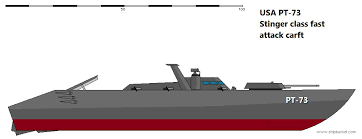
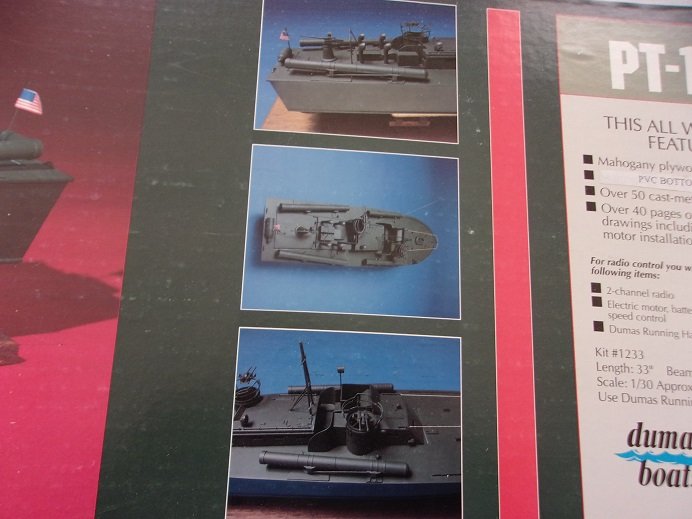
hey there Egilman .........I was going to mention this earlier, but I wanted to get the show on the road. I may not emulate the 109........this is her early version. later versions of the PT boat had the tubes removed, adding a gun placement, and {or} depth charges I even found this 'what if'......I think this would be an interesting combination......however unlikely. I haven't looked to see if this was an actual vessel, but it does look kinda cool with the turret I kinda laughed when I saw that they even had a wooden deck for these models........later I figured that it was just a diagram on how to plank them. these can be planked in a number of ways...they were constantly under repair. the most common was planked at the bow and sheeted plywood from the mid section back...some were planked at the bow and stern, with sheeting in the mid section. for the time being, I will assemble the 'bare' PT boat, and then figure where I want it to go from there.
-
there's a kit here Lou.......any given kit you can scratch as much as you want to I've had some that it was the only way to save it I done it to plastic as well as wood......to be honest, it depends on the subject really, and how far you want to go with it. this particular kit is great, because you can go with either the early or late configuration without much fuss. the reason why I ask about the date, is that they speak of updates in the kit. Mog's 50 cal frames look like resin.......mine are metal, along with many other parts.
-
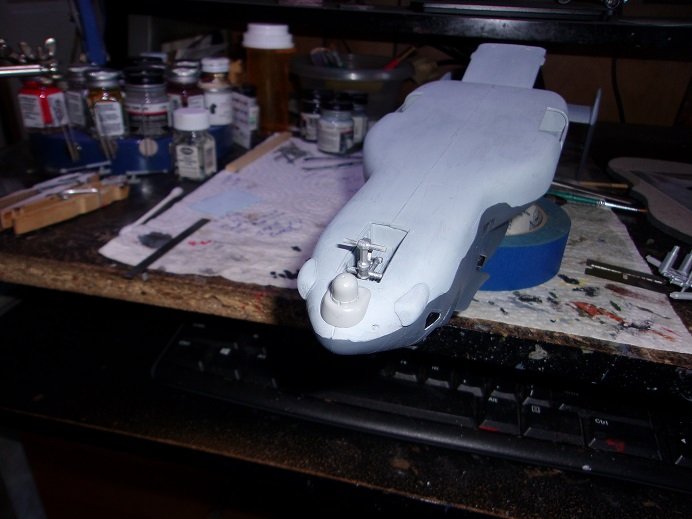
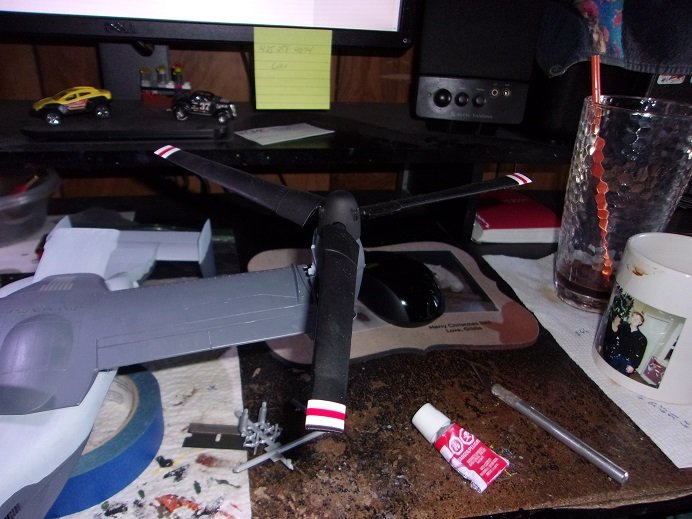
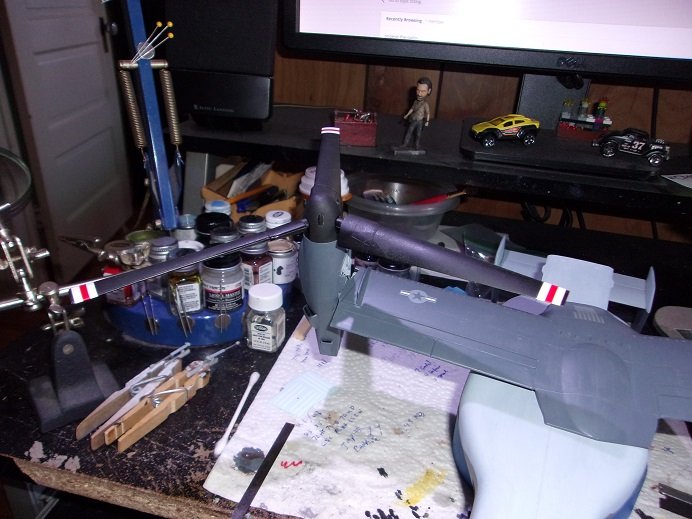
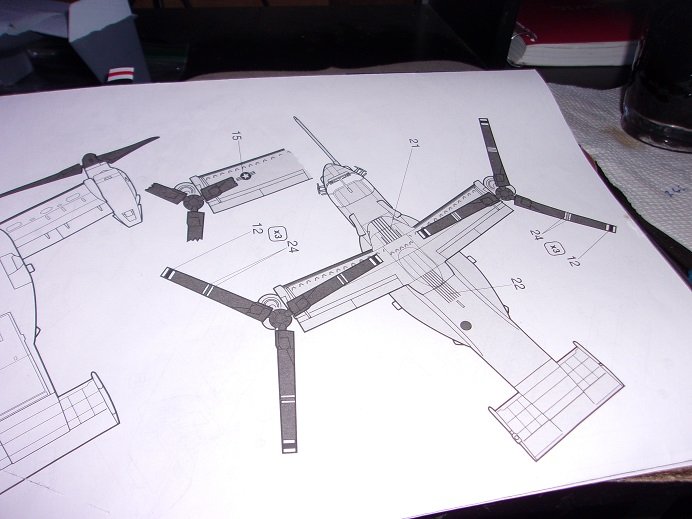
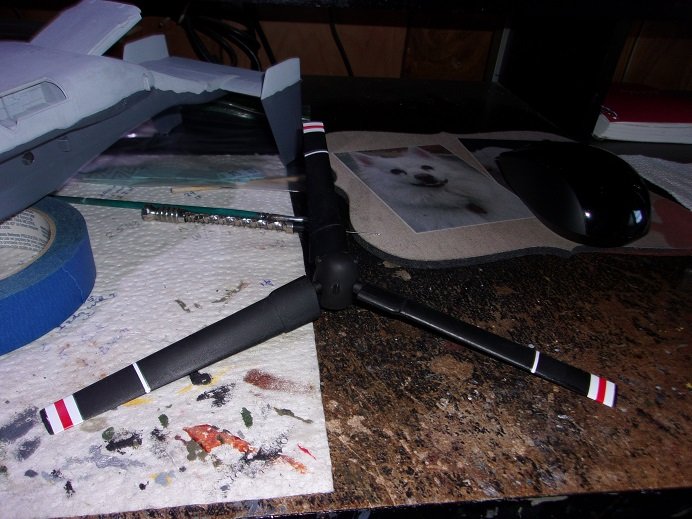
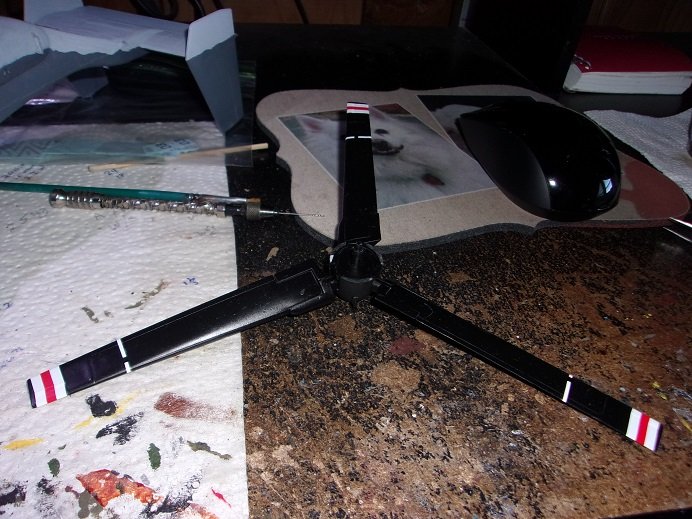
I got some time in on her today......mostly painting and some decaling. added a few parts to the nose as well..... I also added some {what look like} lights here too......but the pictures were too blurry and I chucked them. for decaling, I added the insignias to the wing and started to add the stripes on the rotor. there is a bit of a snag here........on the rotors are some white stripes. here is what the decal detail looks like for the rotors..... it is a bit of a crap shoot how far to place them.....did it with a ruler.......look good on the top......... but underneath is another story.......they kinda fall short.... here I have two options.......I can leave them as a single stripe and patch them up with the second set, or I can bridge them with some paint and do the second stripe. had to go Christmas shopping for the admiral, so I left it here to ponder over.
-
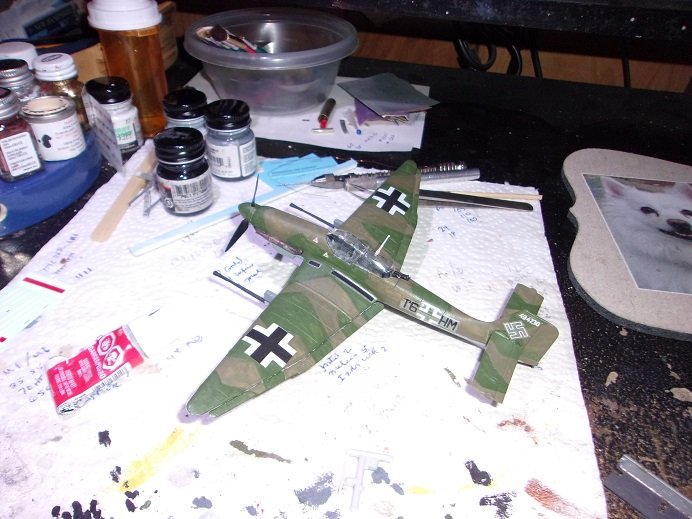
I have a little bit more to do on her, but the stuka is almost finished. the canopy didn't fit exactly right, but after some time under tape, it seems to have kept the shape. I forgot to glue in the machine guns in the aft canopy......luckily for me they still fit in there the antenna is glued on......just the pilot tube left to do. then touch up paint. the prop and tires turn.....things I'm not usually concerned with. if I do another one {which I would like to}, it definitely will be a larger scale.

-
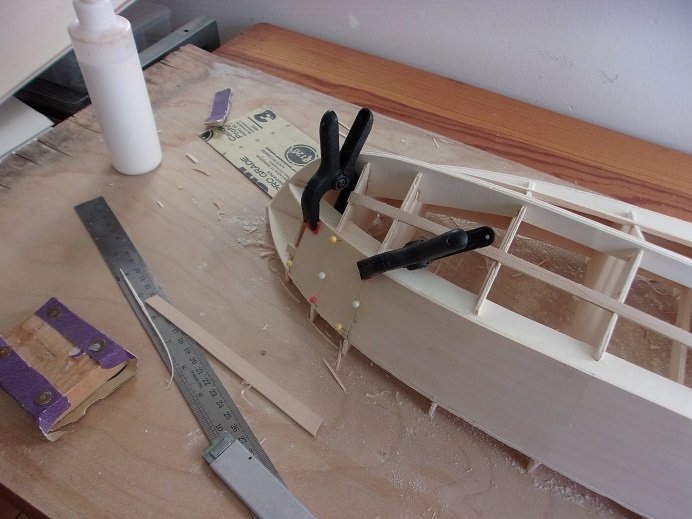
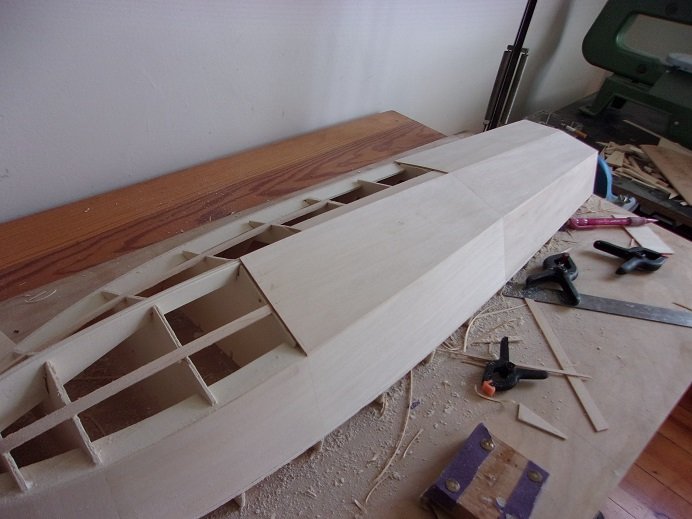
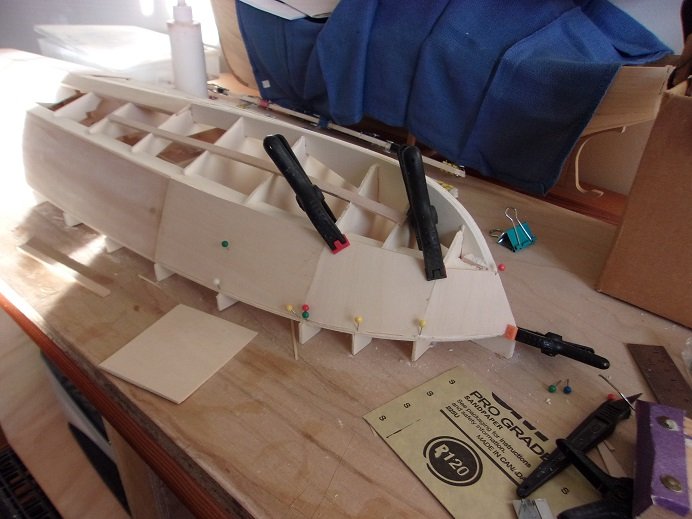
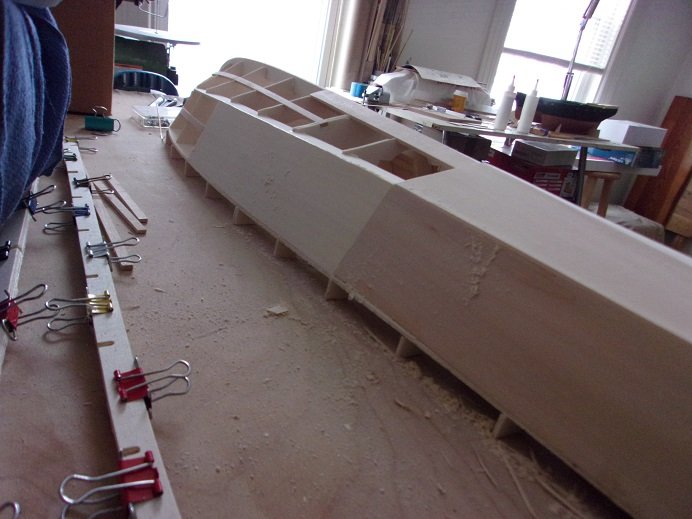
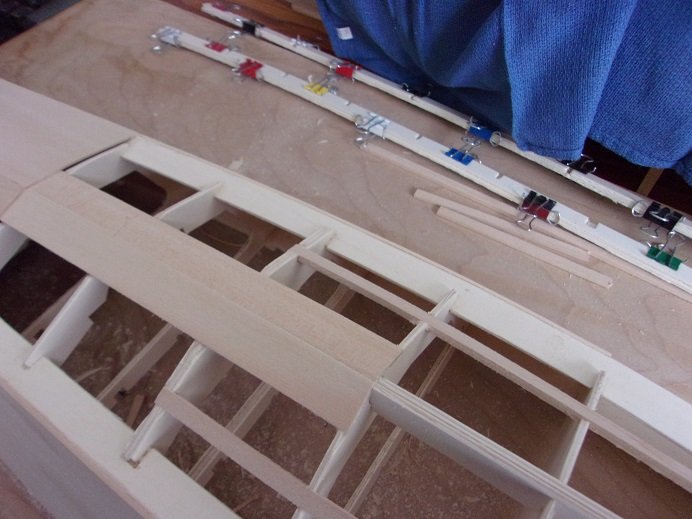
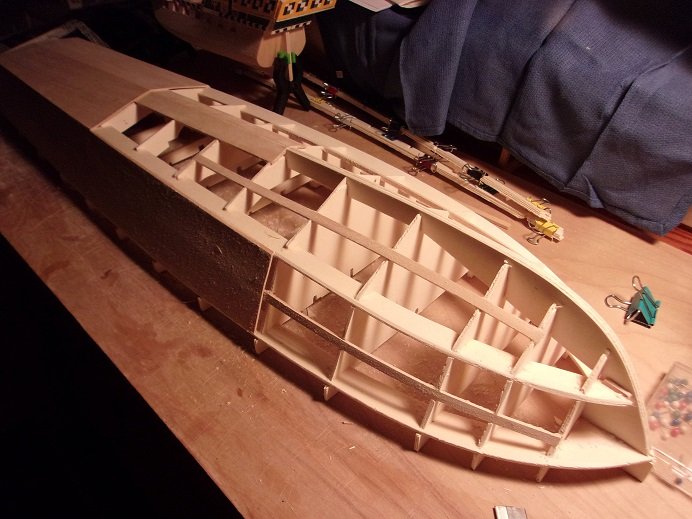
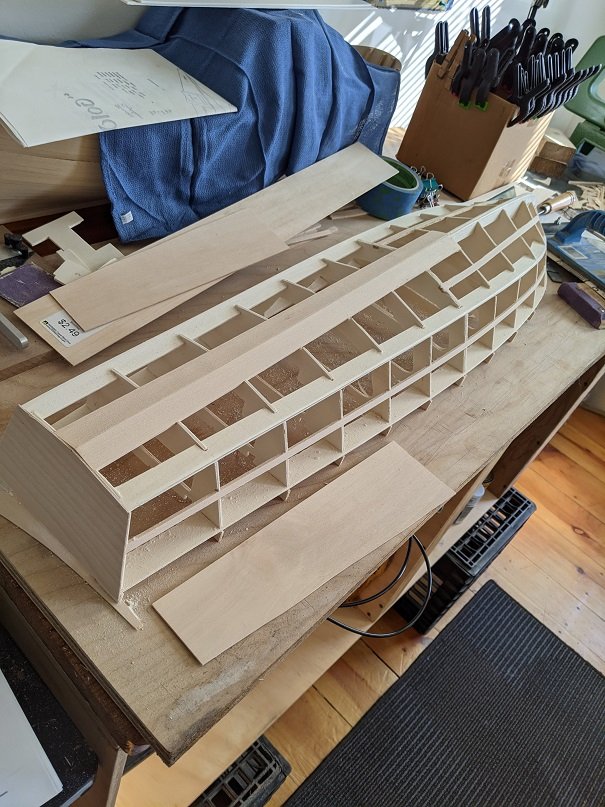
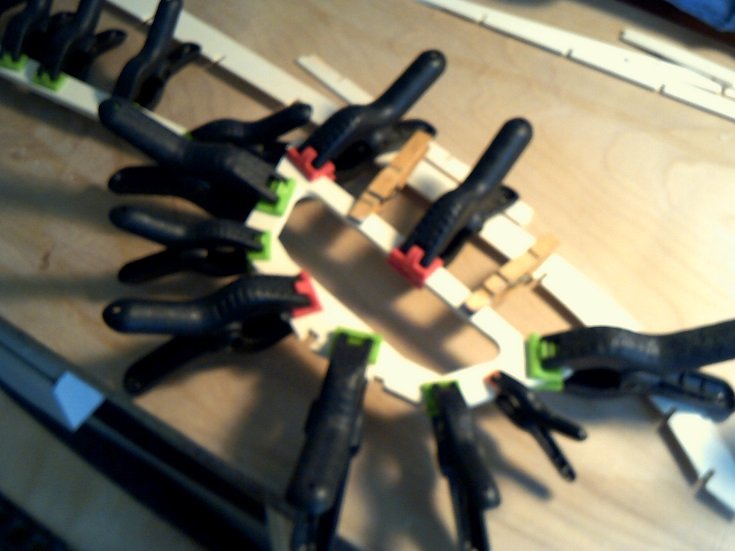
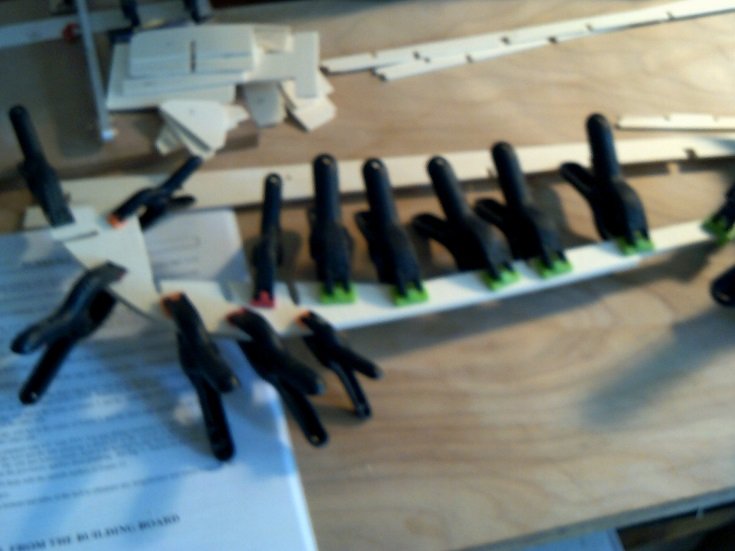
thanks Ed.......I picked at it in the beginning, but now it's me VS the hull I hope you get some kind of entertainment value out of it in spite of some of my observations, this kit is pretty good so......being on a big beech sheet, it does make it interesting turning it around. I took to doing it due to a small misplacement on the starboard side. I'll show you it in a bit {there is a picture of it}. the key is to stay flush to the sheer stringer........the line for the chine stringer will be beveled to the angle of the bottom sheeting. the joint at this line will be covered by the spray rail and won't be seen. good planning will produce a decent hull when dry, the starboard side was cemented on.......later to have the bottom covered on both sides. I might have other pictures of this, but I have all the pictures organized in separate files and they should be in order. with all the lines sanded....this is what the stern section looks like. the parts you see clamped are the deck stringers......that's a later story the next section began, starting port.......another was shaped for the starboard side. I just removed all the pins when this was taken. keen to note that I didn't go all the way to the bulkhead......the center stringer helps to keep it flat to the side......the next section will mate to it fine. I went one bulkhead further from those two wide stern keel strips, because I felt that leading onto the K1 keel, would give it a strength advantage. not that I plan to make it R/C, but I always tend to assemble hulls with strength in mind. the Gothenborg hit the floor twice..........only the stern suffered the most damage {one day I'll get back to her}. sanding brought the edge flush to the chine stringer, and next will be the starboard's turn. I'd continue......there a lot more.......but I've got to go do some Christmas shopping.......I'll add more when I return

- 221 replies
-
- 11
-
-
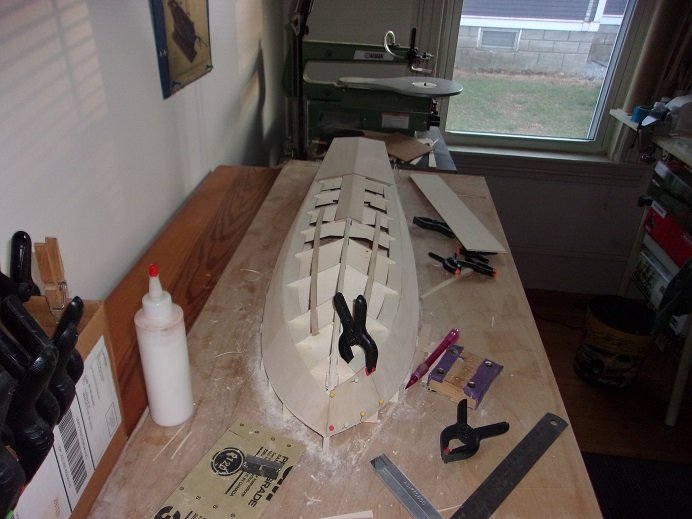
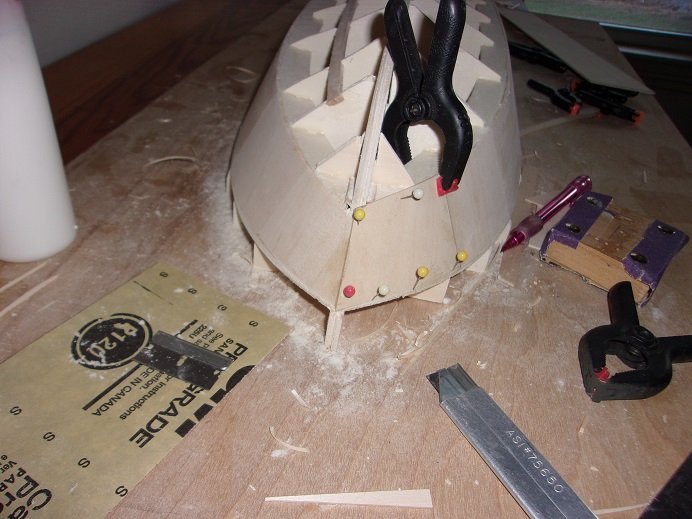
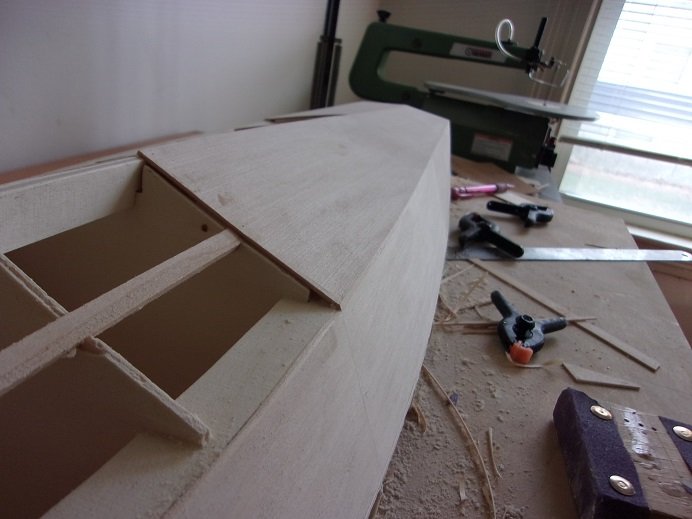
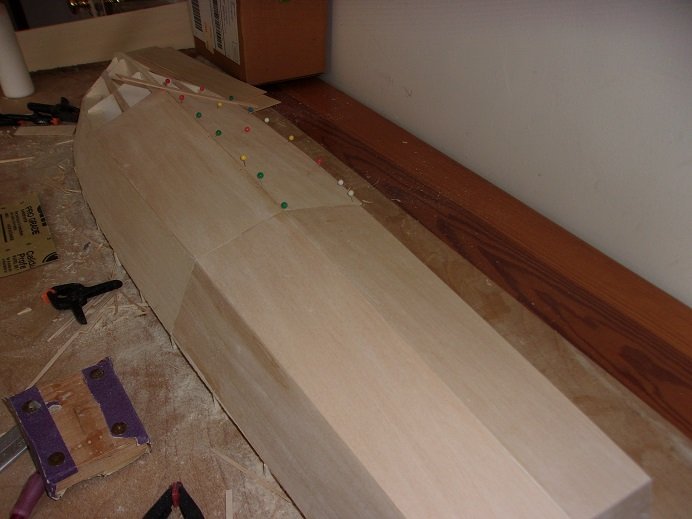
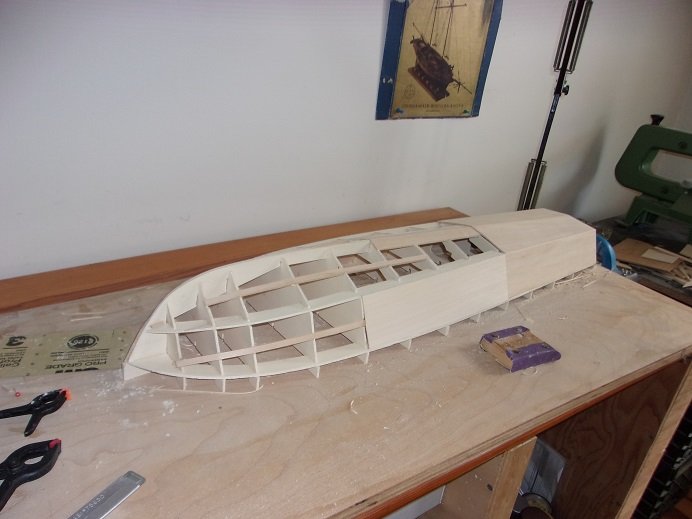
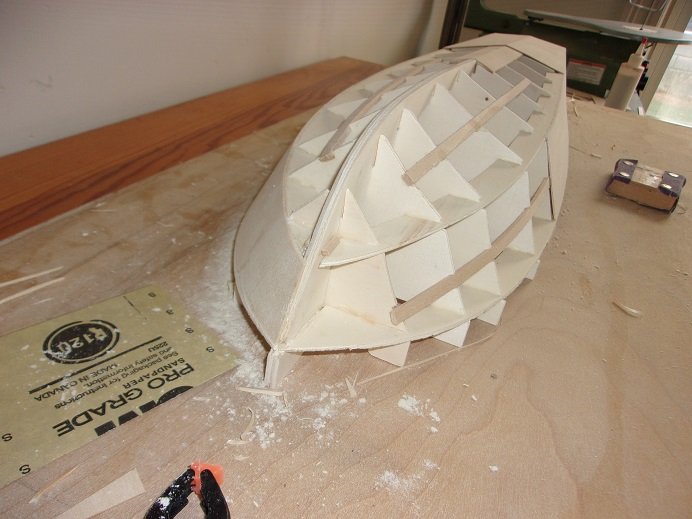
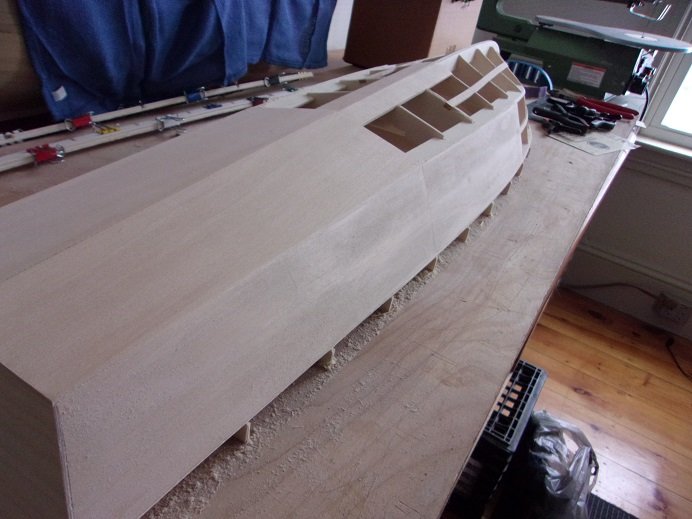
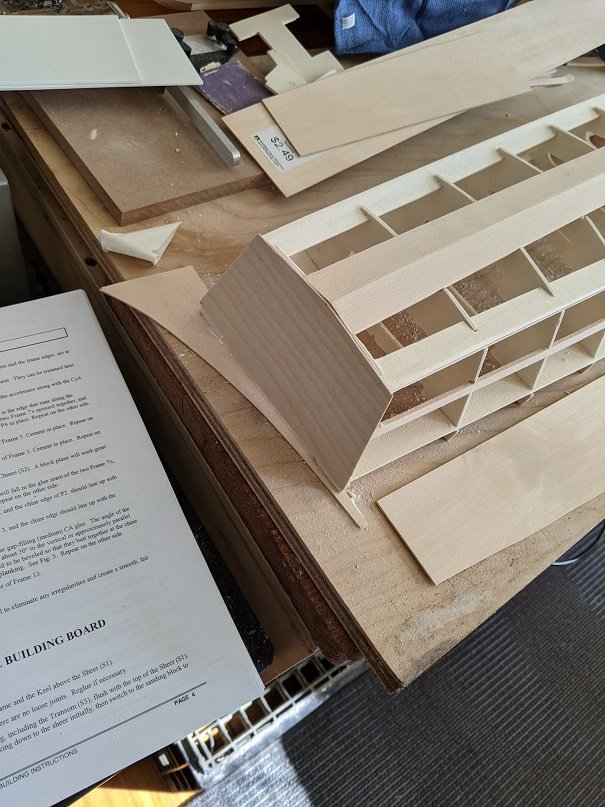
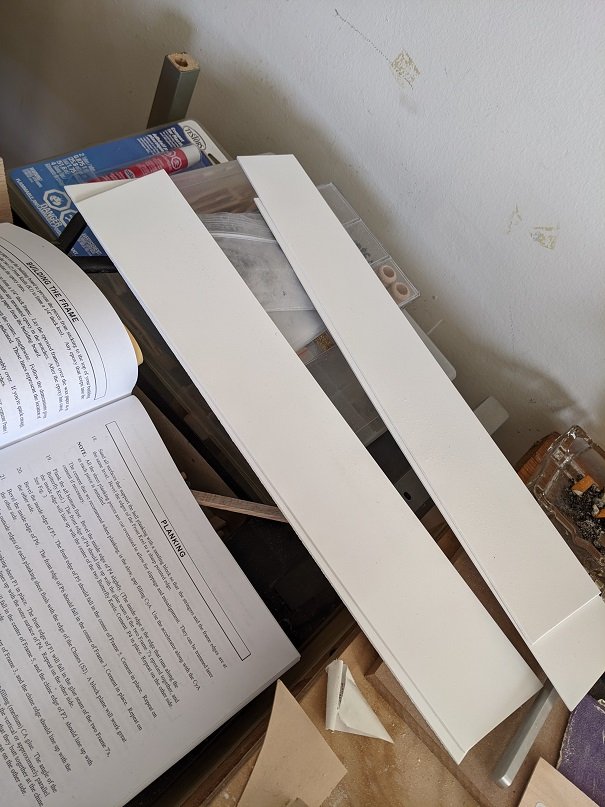
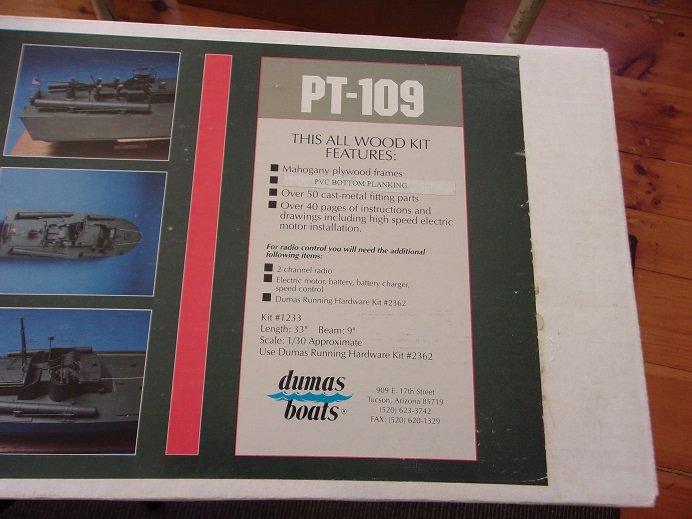
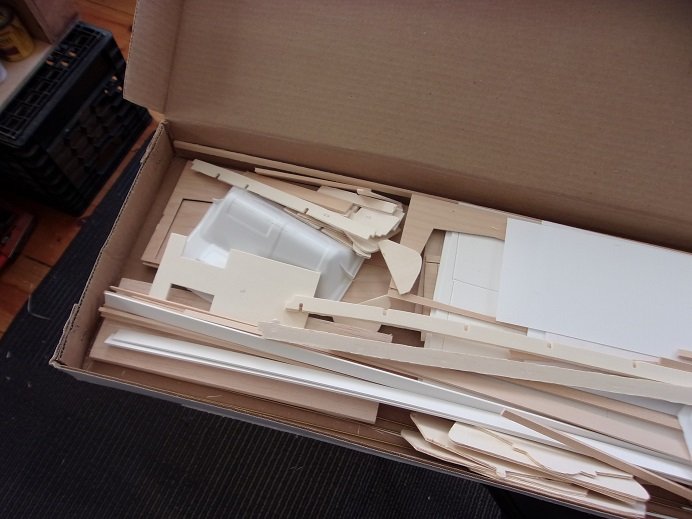
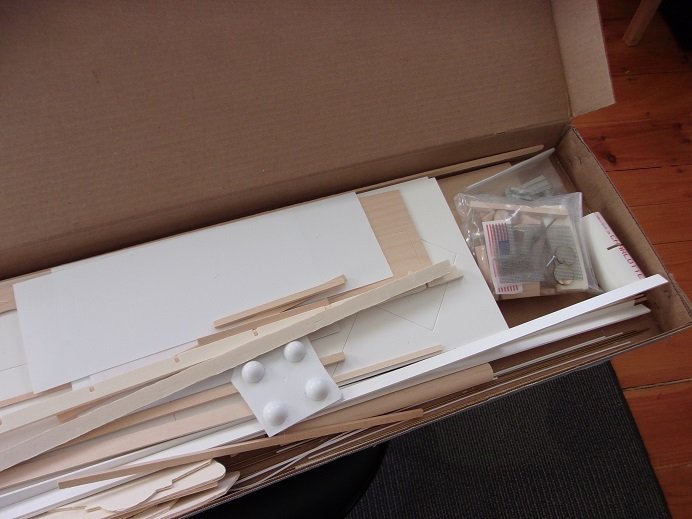
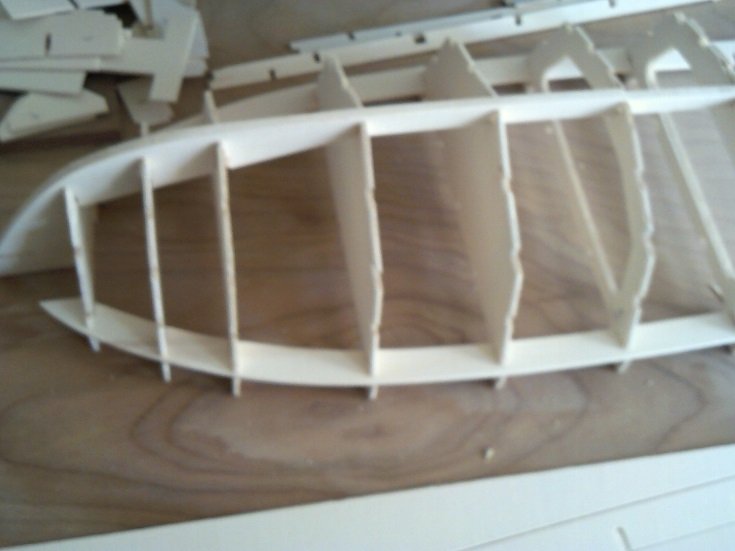
second thing....there is no mahogany plywood......the outer skin is plastic sheeting. I'm not going to use it........I'm going to sheet it in 1/16 basswood. the sheer looks to be basswood. I read that there were some changes with the kit......how many is unknown, but I will point them out as I go along. as with any kit, there are parts that one may want to change......directions that one may want to deviate from. this kit is no different.....I've encountered a few already. the hull frame wasn't terribly hard to build......it does suggest to cement the frame to a large board to keep it level and straight. I wasn't going to, but I did notice some slight warping, and the frame was cemented down in key places. the stern bulkhead did not make contact with the board though, having a 1/16 gap......simply slipping a piece under the contact points was remedy enough. the outer skin for the stern was cemented in place.... I can start the covering of the stern end of the frame. these are the plastic sheets that I'm not going to use.......there are a few others. thinking that these part may be oversized, I decided to trace out the parts I need as I go along, cutting down on how much trimming I would have to do. as far as fairing the frame, there wasn't too much.....knocking down the high spots and keeping with the contours of the hull bottom {especially at the bow}. the bow is a question as to how the panels will meet at the keel. it looks to me that the keel will need to be sanded to a point, if the seam is to follow down the length of the hull frame. a curvature can also be seen here.......it disappears at the bow stem. this is the breakwater for the bow.........the upper section breaks the water, and the curvature give it the lift it needs at higher speeds. there was more sanding to get the parameters in shape. think that the other side would be equal, a second sheet was cut. I have it on a large beech plywood sheet, 5/8 thick. it wasn't until October 16th, that the first panel was cemented into place. the sides of the hull spans from the S2 {chine stringer}, to the S1 {sheer stringer}. these will run all the way to the bow in sections, so the mating joints will need to be sanded flush to one another. I do plan on giving the hull a resin coat, so in the end they should be invisible.

- 221 replies
-
- 12
-
-
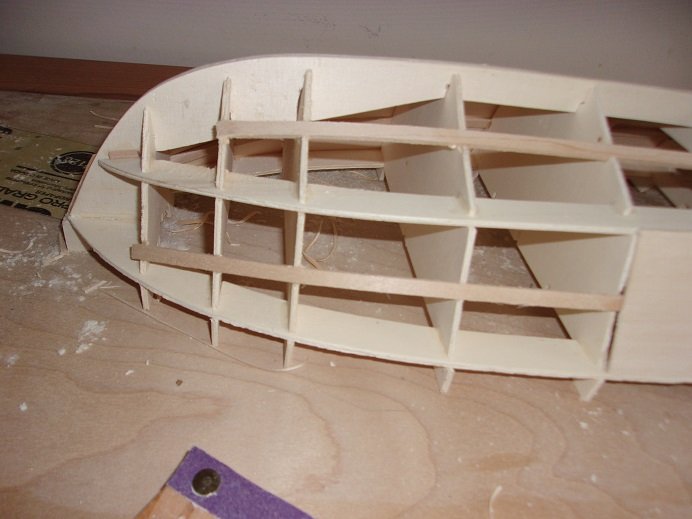
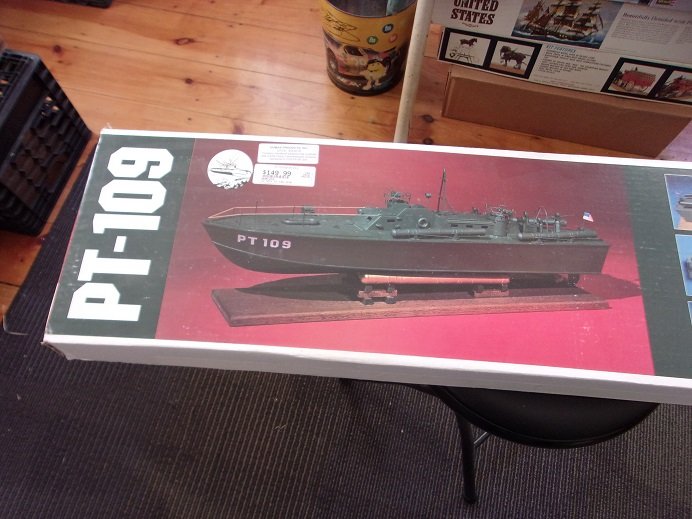
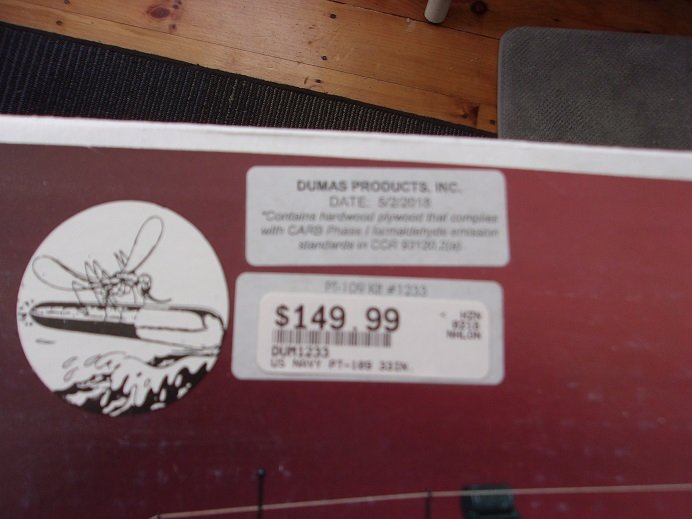
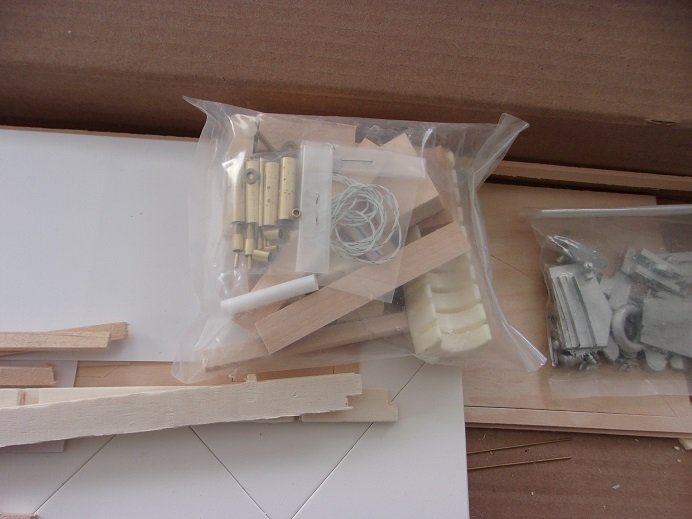
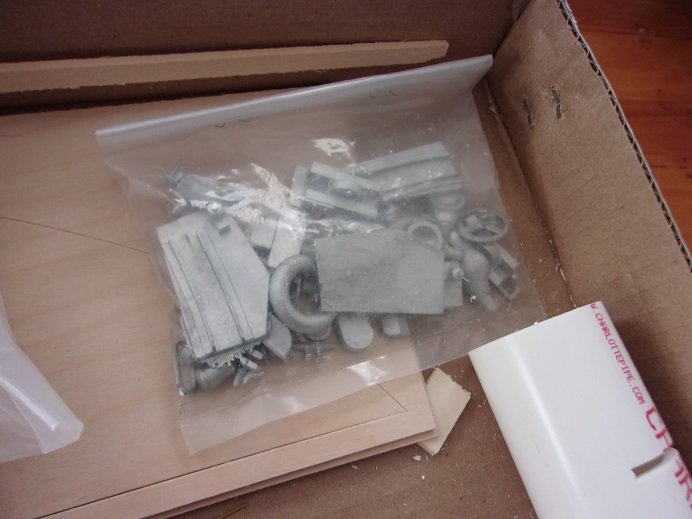
I've always wanted to try my hand at a Dumas kit. I've seen projects in the past, and I liked what I saw Mog's PT boat project definitely put me over the edge... I had a coincidence of sorts occur. I was at Hobby Town one day........late last year or early this year { I can't recall which}, when I first came in contact with this kit. it was in a long brown cardboard box and it looked quite old.......I know that Hobby Town {at least the one in my area} had a policy that they would take complete kits in trade for other kits {mostly R/C stuff}. since $159.00 seemed a bit steep, and I didn't want to get killed by the Admiral, I passed on it and settled on a couple of plastic kits. Telling the admiral about it, I was surprised to hear that she wouldn't have killed me if I bought it. none the less......I didn't go back to get it. a few months passed.......I did little more than talk about it...I think it was the size of the model that intrigued me the most. come June of this year, my son came over, and out of the blue, asked me if I still wanted the PT boat. bewildered as to why he would ask, I looked at the admiral.......she just shrugged her shoulders, "if you want it, go get it.......early birthday present." she added to get any paints that I wanted as well........they used to be the best place to get paints and wood, but since they moved, they've gone more towards R/C than the model kits. so.......off we went! looking on the shelf, I didn't see the long brown cardboard box......there was a long white cardboard box with a huge picture label on it. I was impressed to see a production date on it.......5/2/2018. the other kit had a note on it about the hardware......I was going to ask about that, but this new kit, the question disappeared. it does resurface though......something I didn't pay any heed to or take into account. I didn't even have to stoop to pick it up.......Kevin snatched it up....."is this it?" we browsed a bit before heading to check out. getting it home, I did the ceremonial contents check....... things are jumbled in the box.......I used the other camera to take the initial pictures and they came out blurry. when I got this new camera, I retook these pictures.....they are not the complete bunch I took, but they give you an idea about the kit. a few weeks did pass before I started to pop out the parts.....mainly to do a dry fit, look'in on Mog's build and getting curious. we did PM each other for a short time to share ideas. the dry fit was comical at the start.......I had the stringers mixed up, making it look rather odd this is the other camera.......these are the better blurry pictures that I could use this is the doubling of the #7 bulkhead and the K1 keel { the main part of the keel} note that the stringer doesn't mate with the bow stem....that was my first clue. these instruction sheets are quite large and I had to use the dining table to view them. one thing that would have benefited this model, would be that the parts were laser cut, instead of die cut. the big problem with die cutting, is that the die blades become dull after a few production runs. this has the consequence of a lot of chipping and splitting, resulting in some really rough edges. from what I can gather, this is a Spruce plywood. as much as I tried to finish cut the parts, these abnormalities still occurred.....good that all this will be on the inside I didn't really get into building the hull, until October........that's when the fun began
- 221 replies
-
- 10
-
-
puzzling.........mine aren't assembled like that........not even close. I think I should start my log, so you can see what they look like. do you know what the production date is for your kit?
-
I believe it was back in the 80's, that Ford had a problem with their truck line. trucks painted in Canada suffered from peeling paint on the hoods and roofs, due to the paint not adhering properly to the primer base coat. odd that those areas were the worst affected areas.
-
we sunk 'er huh..........must have sunk like a rock! I'm here my friend......interesting history
-
it's still on my 'to do' list.... after I cleaned up the main table, I put the rest of the parts together instead of the way I left them. I also found my package of small shrink tubes, rather than use those caps they supply. hope to put more progress on it soon.......it is to the point that I can put the light in it
-
they look fantastic OC.......you really have the knack of painting them! got some cool detail there!
-
coming along nicely! the village really looks superb............simply awesome!
-
you've made some great progress ..........looks more like it great job!
-
superb progress James.........beautiful model!
-
oh....forgot to mention the tack line decorations........yours look nice I saw a log on the Corel kit that made me request their fittings of these tack decorations......it's in the log too
- 135 replies
-
- 1
-
-
- billing boats
- half moon
- (and 1 more)
-
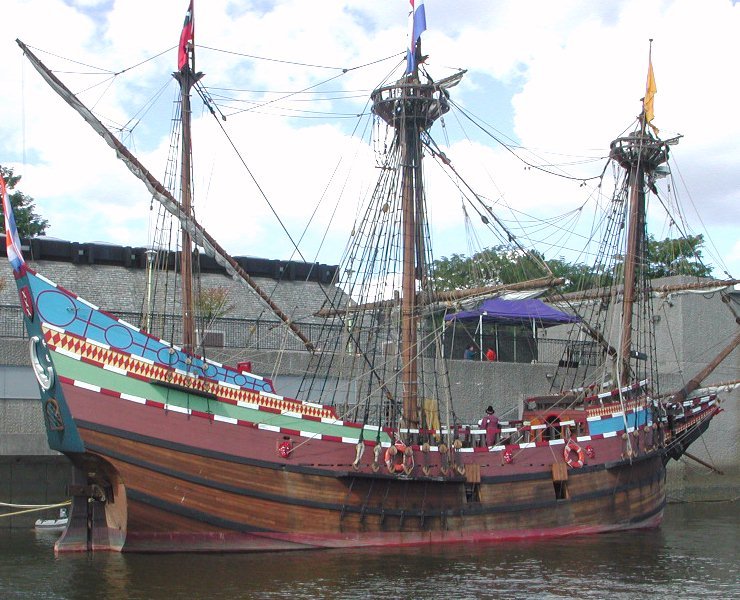
hi Tom......I finally caught up toy you still getting use to this new format.......sorry it took me so long. the whip staff is covered with a canopy.....there should be a diagram of it in the instructions. the bulwark posts look great......I made mine from odd cuts from the parts panels, sanded to fit along the inside. yours are very uniform......nice you didn't say if you had any paint bleed through........the colors I chose for mine are from the rebuild of the vessel. I worked with paint shop to make up the decals for the decorations. the red and white was prominent in the pictures, but a member on the site told me that those colors were seen as either a war ship, or a pirated ship.......he couldn't understand why I did them like that. you must be going by this picture a lot less red......reddish........ it's a very nice look, whatever the case....it's not really know how she was decorated back then...mostly theory. what I did for the paint work was to seal the areas to be painted.....if you didn't cement between the planking as you did it, is you can give the areas a couple coats of diluted white glue. this will get into the gaps and cracks and seal them when it dries. you can also use a flat lacquer. refer to my log to see more.....the diamond strips and such. they are images of playing card diamonds....copied to paint shop, replicated and joined together. one drawback with this model, is that the mast roots aren't that well done. I've made up some templates that will be used to set the rake when I get to the point of masting.......she's looking really good my friend. I'll try not to be such a stranger


- 135 replies
-
- 1
-
-
- billing boats
- half moon
- (and 1 more)
-
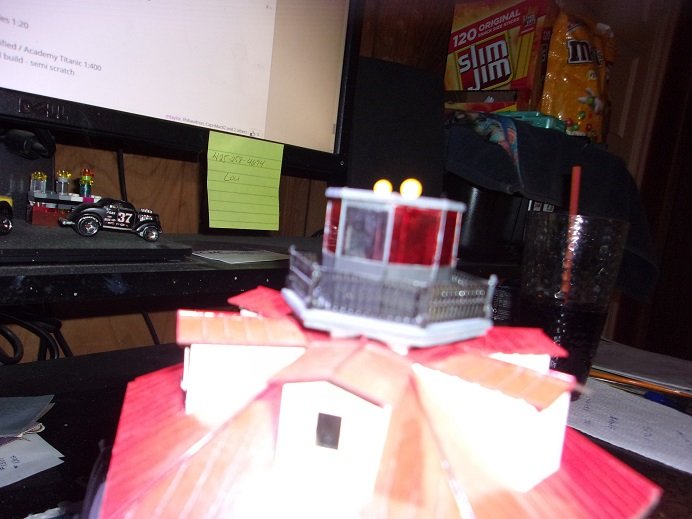
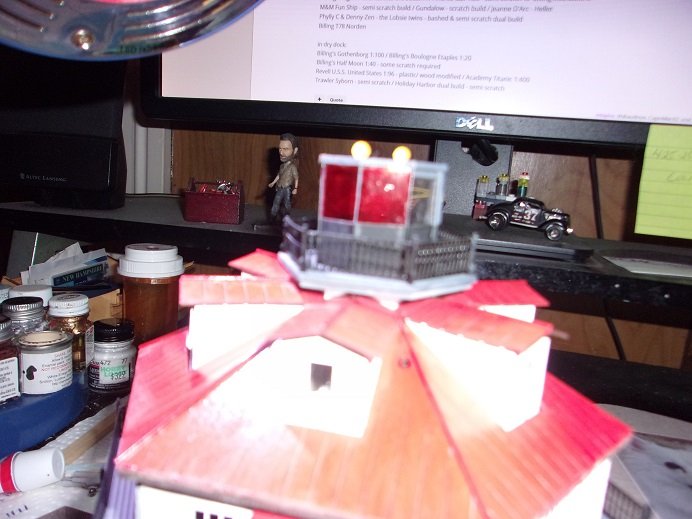
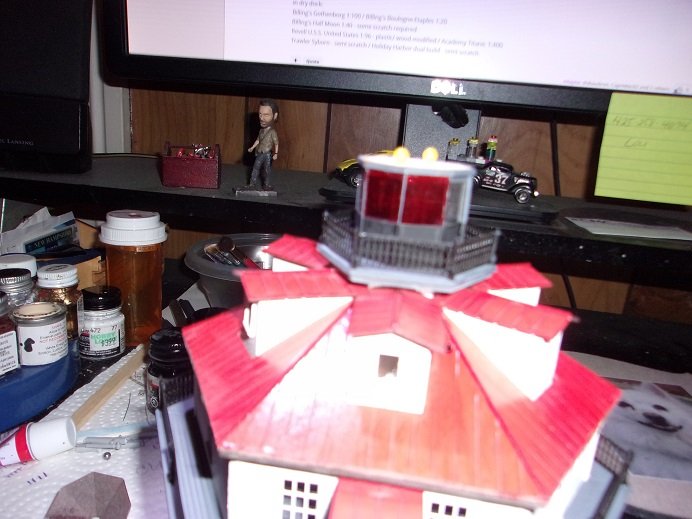
did you feel the earth shake? I had to go back quite a ways to find this log........ I was cleaning the main table, where these projects were languishing...it was getting really dusty. I even found Gibb's hair on there! a while back.......you pick the month....any guess is a good guess, I had bought a couple of red marker pens...Jack had mentioned that three of the panes of glass was red colored. well.......I finally tried it out, and it worked great the pictures are a little blurry {my current light issue}, but there ya go............ perhaps I can get back to this one soon.......before another year slips away
- 97 replies
-
- 11
-

